by Steve Laug
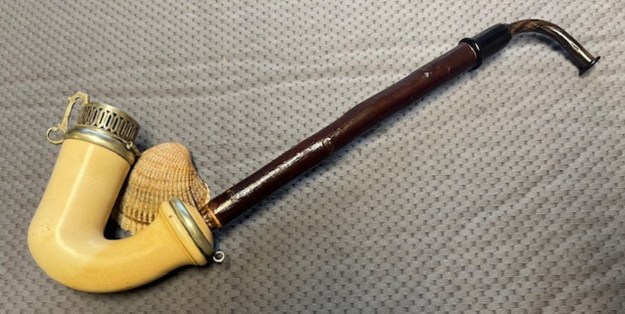
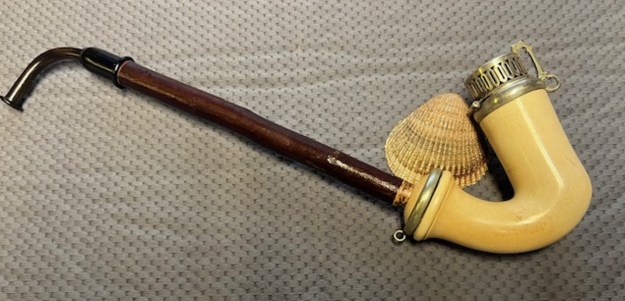
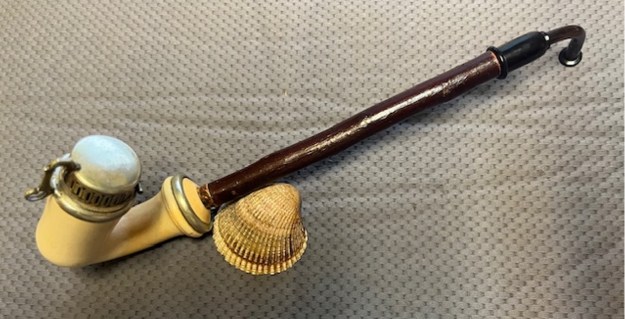
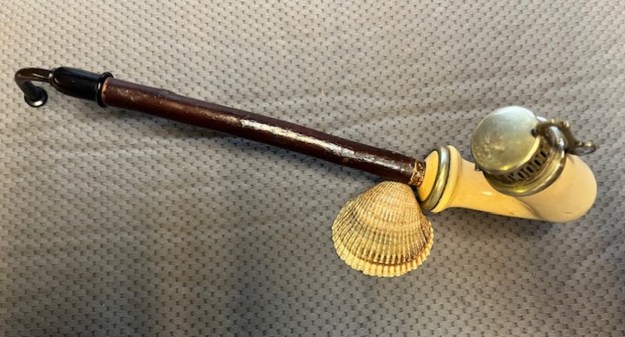
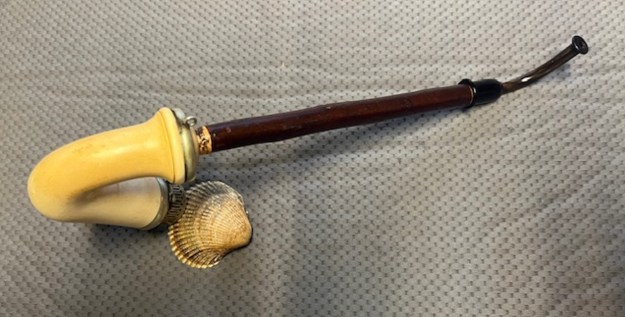
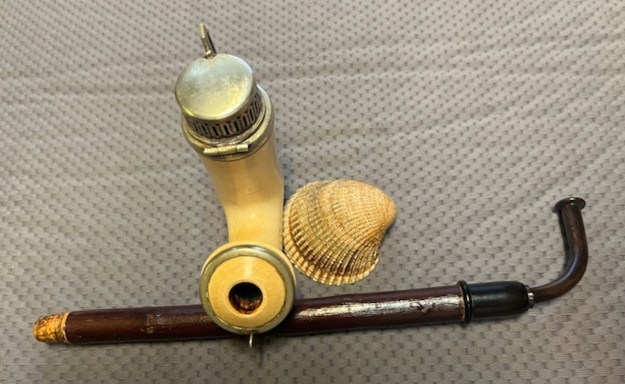
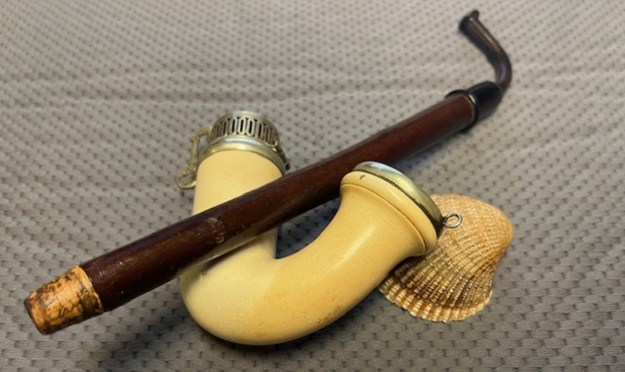
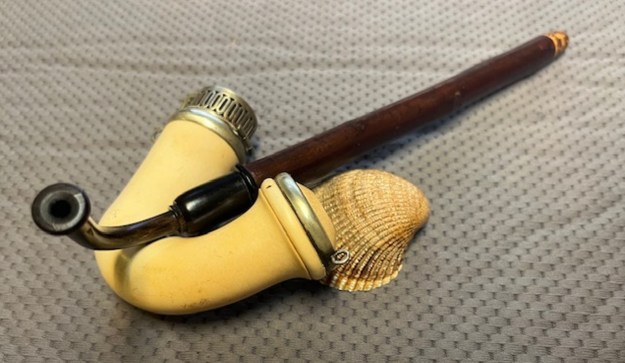
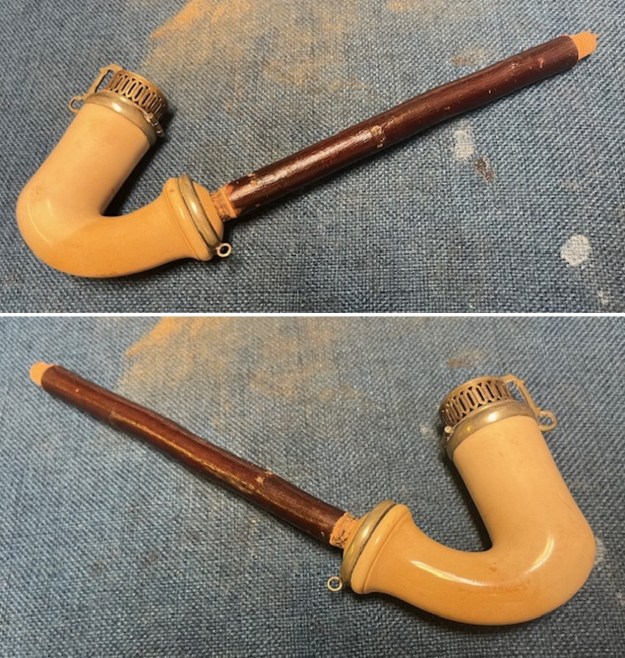
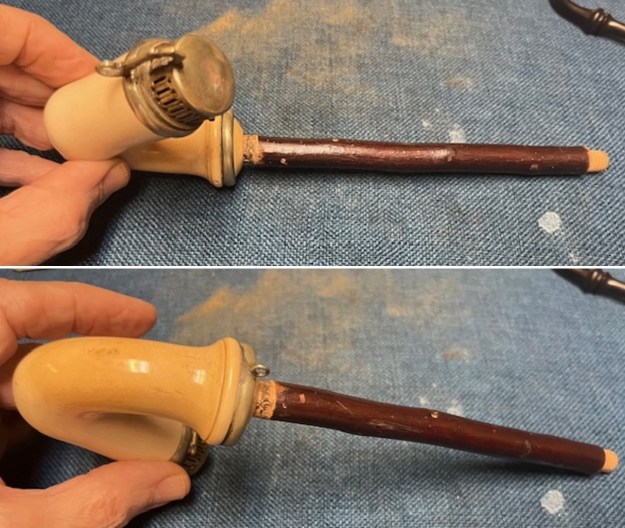
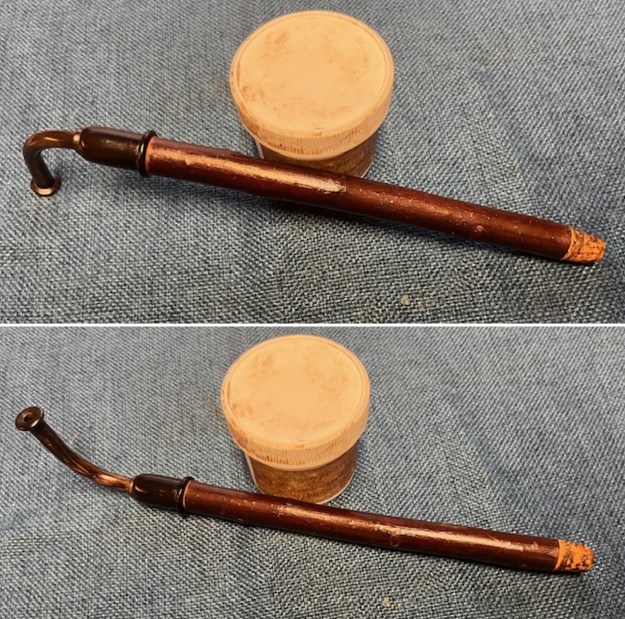
The next pipe on the worktable is an old timer. I am uncertain of what the shape is called. Perhaps it is a Debrecen but I am uncertain. I wrote Ben Rapaport for his help on the shape and he confirmed that it looks like a Debrecen to him. It has a tall meerschaum bowl with a gentle curve to the shank. The meer has taken on a nice patina particularly on the shank and other than being slightly dirty from sitting in a box for years is quite pretty. The rim top and shank end have sterling silver rings or caps. There is also a lattice, tall wind cap on the bowl that is quite stunning. It is hinged at the back and has a small catch that holds it closed. There is a small ring on the shank band that a cord could be attached to that links the shank to the bowl. The shank is cherrywood – basically a branch that has been drilled out with an airway. The mouthpiece is attached by a threaded cap on the end of the shank that it screws into. The shank cap and mouthpiece are both horn and quite nice. They are both in good condition. The bowl has a thick cake in it that lines the walls and carbon darkens the inside of the wind cap. The silver is all slightly oxidized and dirty. The stem is held I the shank with a cork in the shank. The previous owner had wrapped the end of the cherrywood shank with cellotape to hold it in place. I will have to remove that and see what I have to do to restore the cork. I have taken photos and included them below.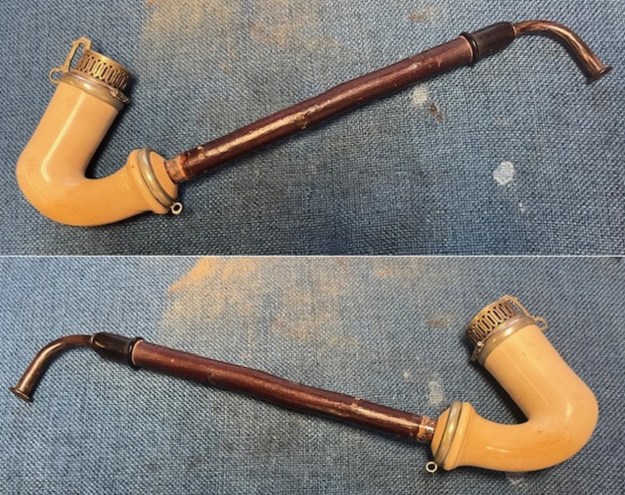
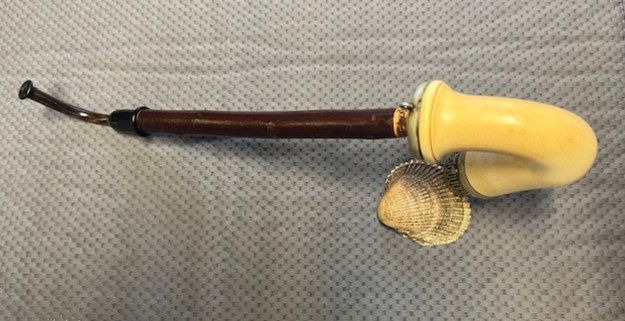
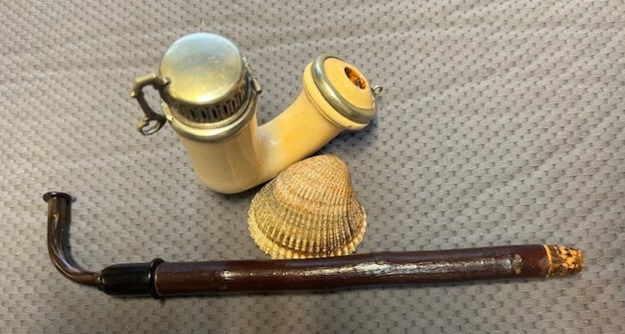
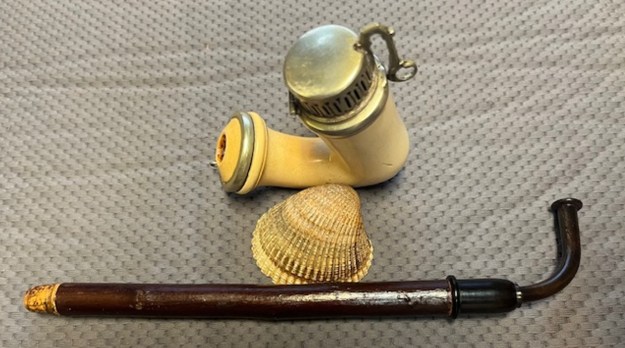
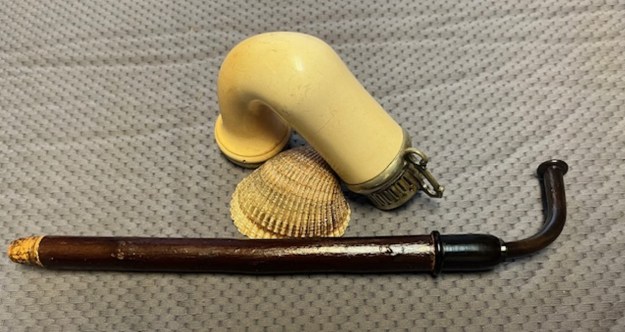
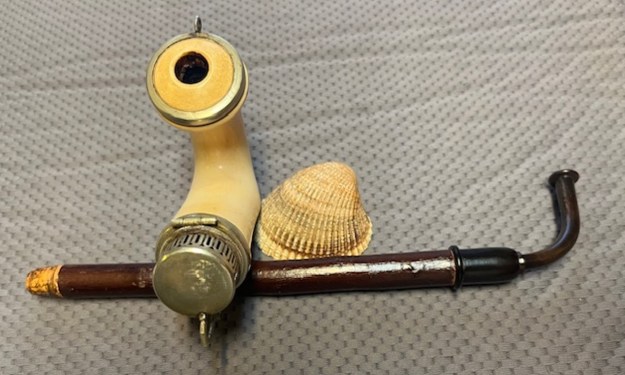
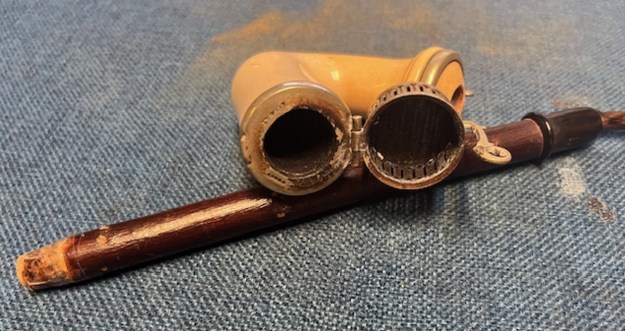
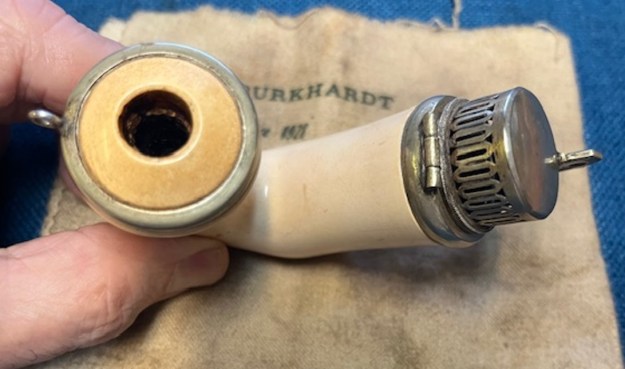
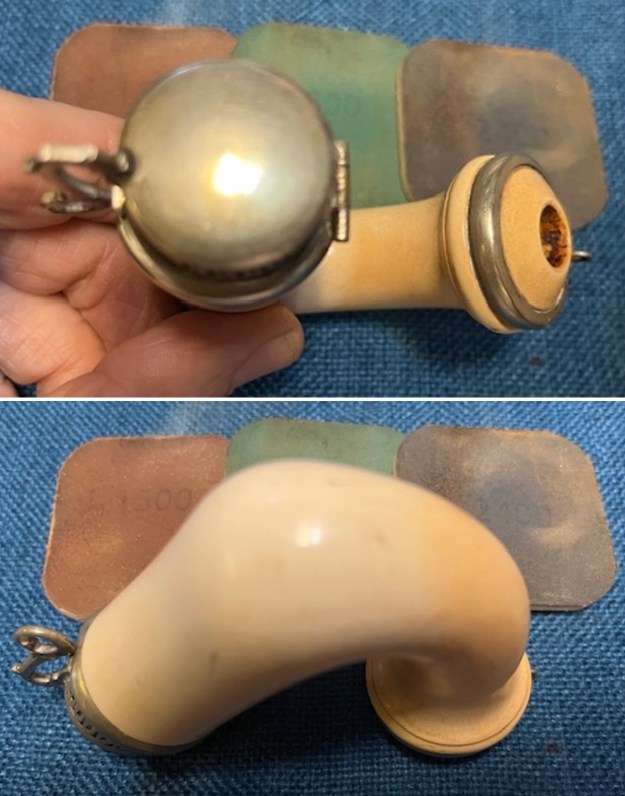
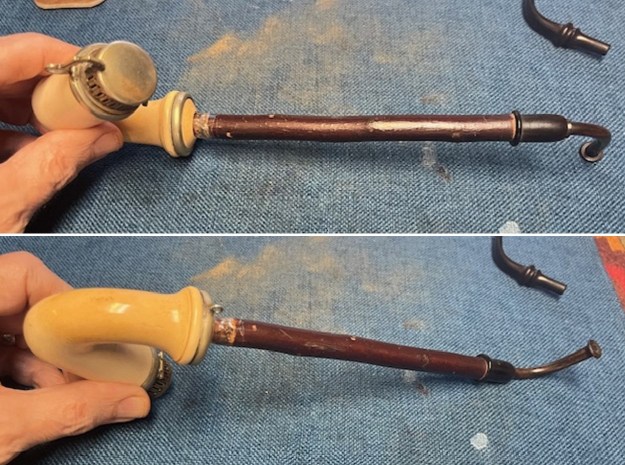 I removed the long cherrywood shank from the bowl/shank unity. I took photos of the bowl and shank apart to give a sense of what the parts look like and give a sense of the size. The photos show the bowl from the side, the top and with the silver cap opened. You can see the dirtiness of the bowl and the carbon coat on the inside of the cap. There are some kind of hallmarks in the grime on the rim top once the cap is open. Once clean I may be able to discern what they say. It is a dirty pipe internally. Look closely at the shank end to see the tape wrapping on the end. I am uncertain what is under that.
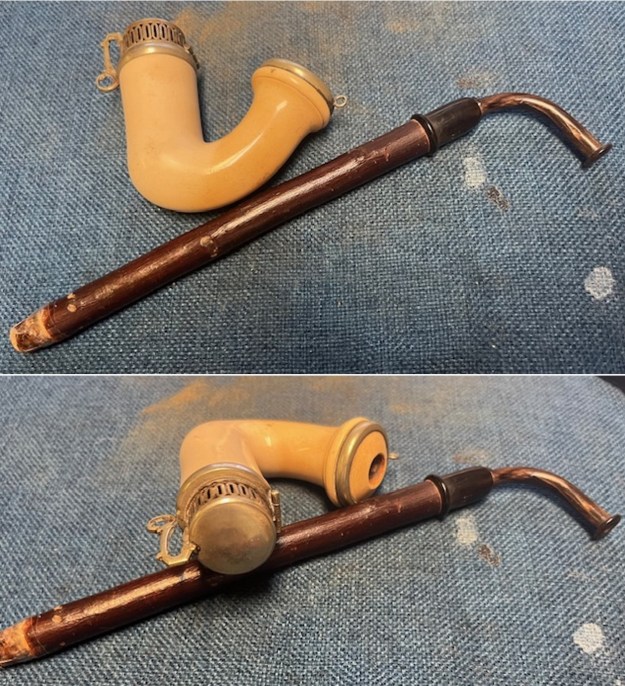
 I removed the horn stem from the top end of the cherrywood and the cellotape from the bottom end of the cherrywood shank. The end is tapered to fit well in the meerschaum shank. Under the cellotape was still cork. It was dry but not crumbling. I gave it a rub down with Vaseline to soften and enliven the cork. I used a qtip to rub the cork down inside the meerschaum. Once it had absorbed some I rechecked the fit in the meerschaum and was pleased to see that the fit is snug.
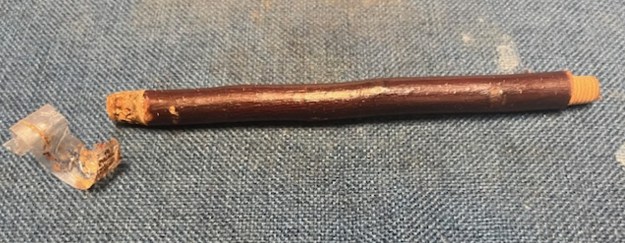
 I set the cherrywood shank aside and turned my attention to the bowl. I carefully cleaned off the cake on the bowl walls and bottom with a Savinelli Fitsall Pipe Knife. It removed the cake well and left the walls quite smooth. Once finished I sanded the walls with a piece of dowel wrapped in 220 grit sandpaper. The walls were smooth so I could move to further cleaning.
 I cleaned out the internals of the bowl and the airway into the bowl as best as possible with pipe cleaners – normal and bristle and alcohol. I used the pipe cleaners and alcohol to also clean up the heavy carbon buildup on the inside of the wind cap. I cleaned the airway and threaded cap on the stem with pipe cleaners and alcohol and also cleaned out the inside of the cherrywood shank with the same. The pipe smelled clean.
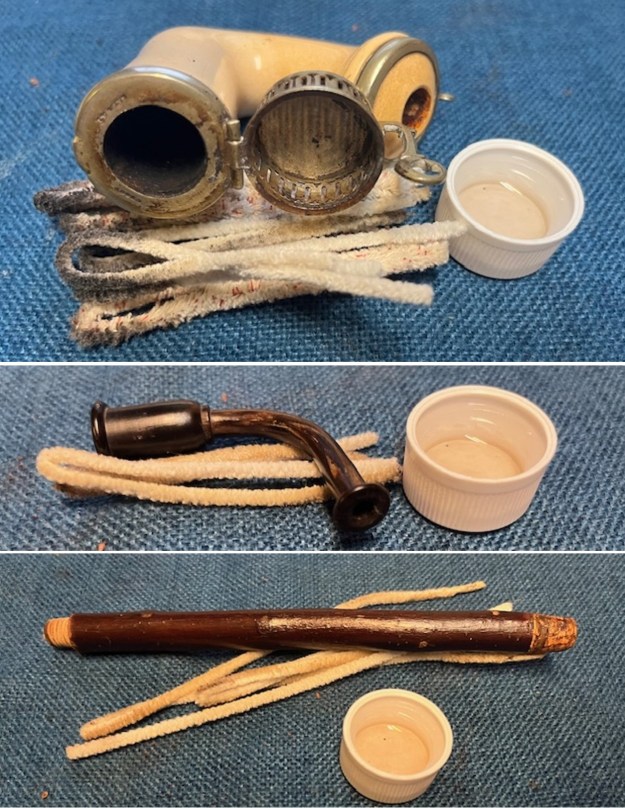 I used a piece of fine XXXX steel wool to carefully further clean the inside of the windcap and carefully work on the rim top. I wanted to clean up the hallmarks to see if I could read them.
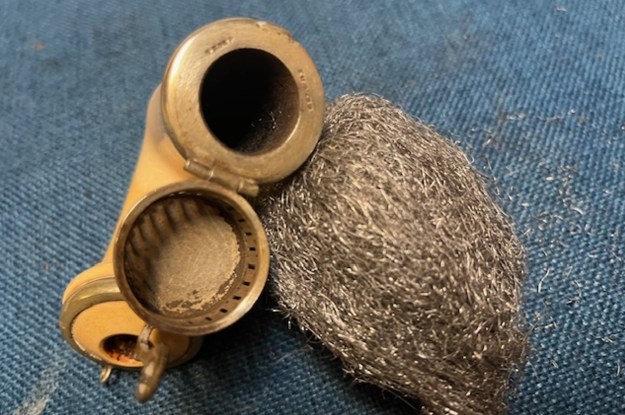 I further cleaned up the inside of the cap and the rim top around the hallmarks with a cotton pad and alcohol first. Then, I used a fine dental pick to try and remove more grime in the letters. I cleaned out that with a cotton swab and alcohol and was able to read the stamping a bit more. The pipe is definitely Weis pipe according to the stamping on the right side of the rim top. There appears to be a letter ahead of Weis and it is perhaps a C or possibly an L.W. I am unfamiliar with the maker so I will need to do some research on that further clarify the maker’s name. The other side has some letters which are a bit hard to discern but it appears to be stamped PROMP or something like that. Not sure on those are the are worn.
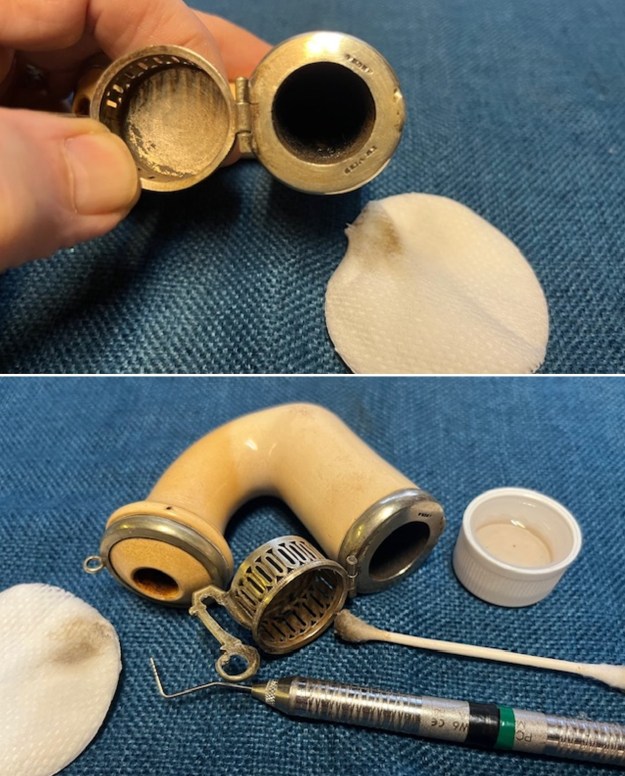 Before continuing the clean up I thought it would be interesting to do a bit of digging online regarding the L.W. Weis company or carver. I googled and the first thing that came up was an AI link to a wiki on LW Weis Meerschaum pipes that connects the LW to a Carl Weis so perhaps it is LW that is stamped on the hallmark. I quote from that below.
AI Overview
LW Weis is a brand of antique meerschaum pipes, specifically known for those crafted by Carl Weis, a late 19th-century manufacturer. These pipes are made from the mineral sepiolite, commonly called meerschaum, and are highly valued for their intricate carvings and the way they change color with use.
Key Features of LW Weis Meerschaum Pipes:
Material: Made from meerschaum (sepiolite), a mineral known for its porousness and ability to absorb oils from tobacco smoke, leading to a unique color change over time.
Carvings: Often feature elaborate carvings, showcasing the material’s suitability for detailed designs.
Color Change: The natural white color of meerschaum gradually transforms into a range of warm hues (browns, yellows, oranges, etc.) as it’s used, a characteristic highly prized by collectors.
Manufacturer: Carl Weis was a late 19th-century manufacturer with a retail store at 399 Broadway, NY, and factories at 69 Walker St., NY, and elsewhere.
To me it is interesting that the LW Weis pipes were done by Carl Weis, a late 19th century manufacturer who sold his pipes out of a retail store on Broadway in New York, NY. Now to dig further.
I turned to Pipedia and was also taken to the page for Carl Weis. The article there confirmed the information on the New York Store and Factory as well as clearly connecting it to manufacture in Vienna, Austria (https://pipedia.org/wiki/Carl_Weis_Meerschaum_Pipes). I quote article in full below.
Carl Weis – Late 19th century manufacturer of meerschaum pipes and smoking articles.
Retail store was at 399 Broadway St., NY; factories were at 69 Walker St., NY and in Vienna, Austria.
From the Internal Revenue Record and Customs Journal, Volume 26 (October 4, 1880):
1st Prize Medal Vienna, 1873 CARL WEIS, Manufacturer of Meerschaum Pies, and holders, Wholesale and Retail. Finest Goods at lowest prices. Send for circular. STORE – 399 Broadway, New York. Factories – 69 Walker St; and Vienna, Austria.
I also searched further and found an advertising piece on the First Prize Medal won at the Vienna Exhibition in 1878. Here is the link (https://www.etsy.com/ca/listing/1853287006/c-weis-pollak-co-meerschaum-pipes-vienna). The photo from the etsy shop is shown below.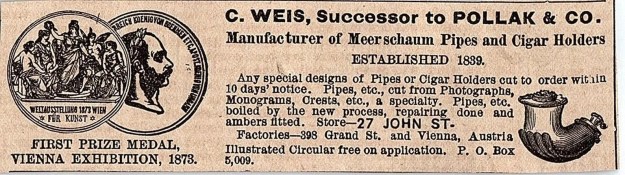 I also wanted to look up information on the Debrecen shape. It appears that the shape is Hungarian and is made in one of three famous workshops in Eger, Buda and Debrecen. In the early years of Hungarian production, three bowl shapes prevailed: Debrecen, Kalmasch, and Ragoczy. The Debrecen shape seems to have been carved in Debrecen, Hungary with the silver work being done in Vienna, Austria. The connection of the Austrian Hungarian Empire it seems is seen in the pipe. Thus, from what I can find the pipe is an 1890s (late 19th Century) pipe so it has some considerable age.
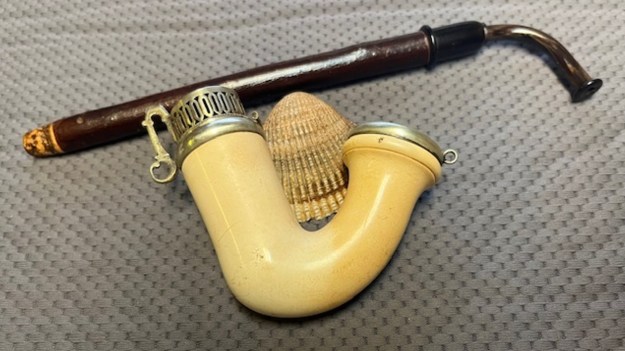
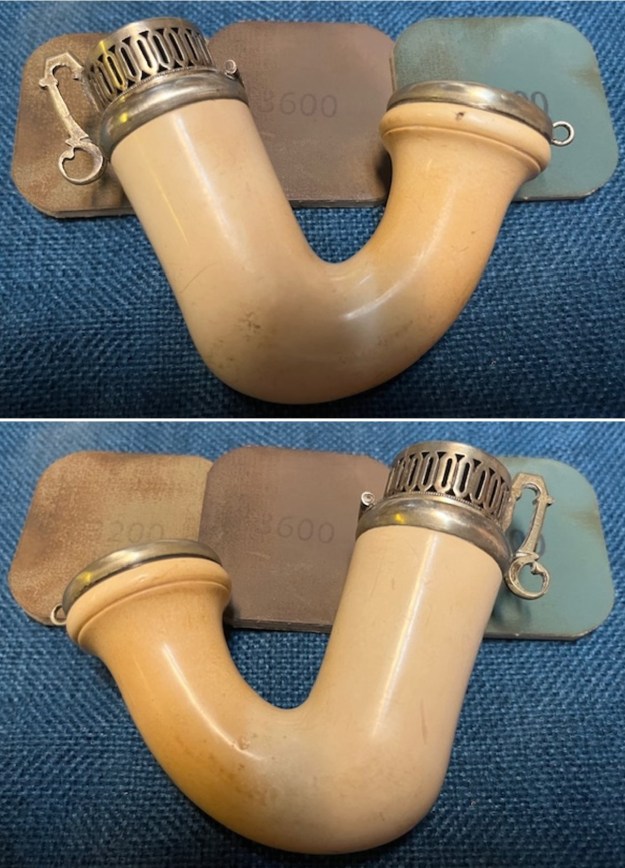
Now it was time to get back to the pipe. With the shank and stem cleaned I put them back together. The stem had no tooth marks or damage on it. The fitting to the cherrywood was perfect. I was missing the cord that would have held the bowl and shank together but I would keep and eye out for one. I rubbed the stem and shank down with Before & After Restoration Balm. I have found it works well not just on wood but also on horn. I rubbed it on with my fingertips and it works to deep clean, rejuvenate and restore the shine to wood and horn. It looked very good at this point.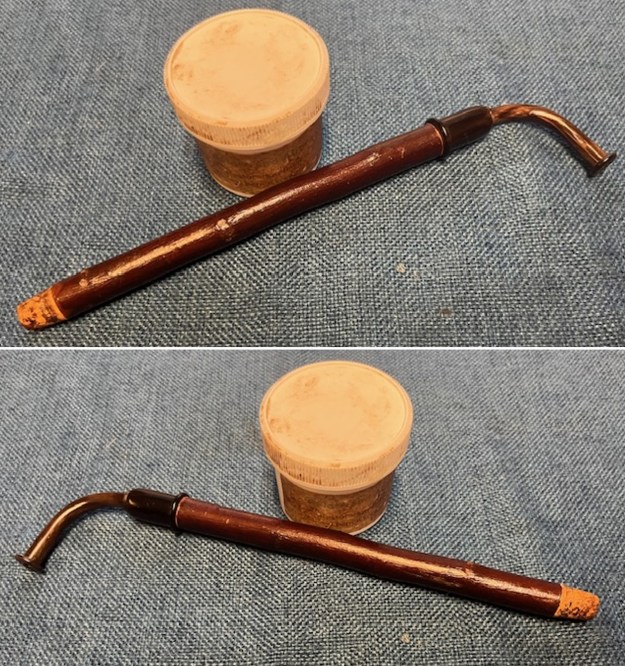
 I rubbed the cork on the shank end with Vaseline and set it aside to have the cork absorb the product. It works to soften and preserve the cork making it more pliable when inserted in the shank.
 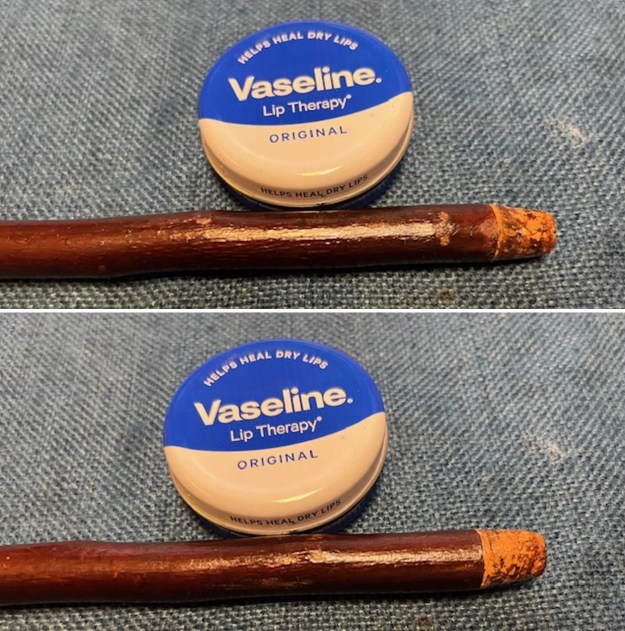 I set the cherrywood aside to let the Vaseline absorb in the cork and turned my attention to the bowl. I polished the silver on the rim top, shank end and rim cap with a jeweller’s cloth. It works to polish and protect the silver from oxidation. It looks very good.
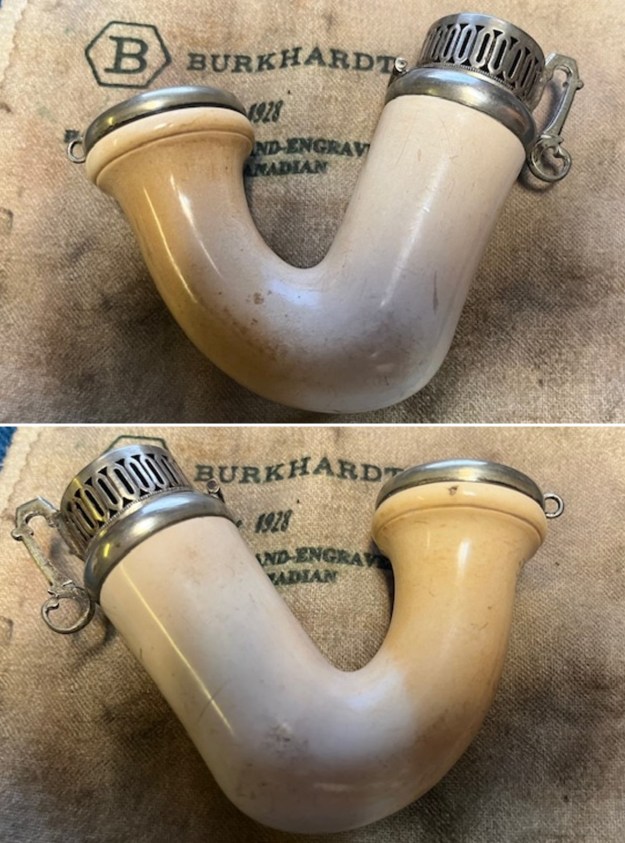
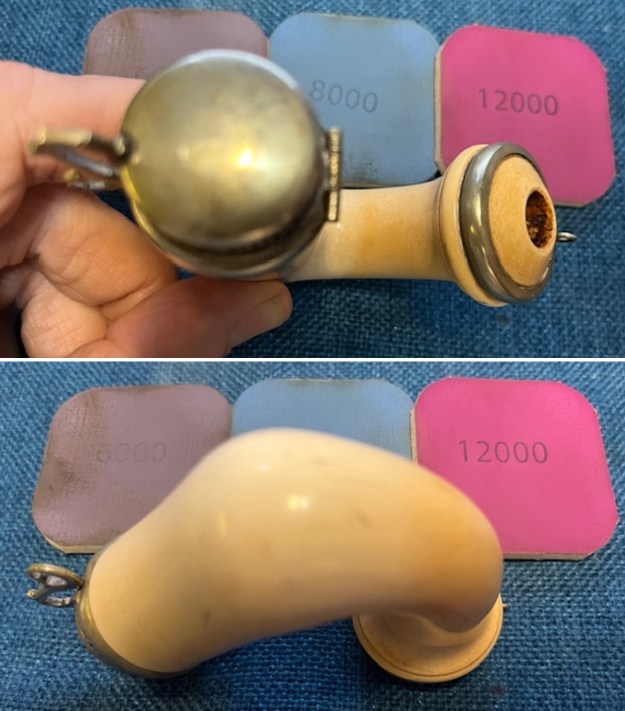
 I polished the meerschaum with micromesh sanding pads – dry sanding with 1500-12000 grit pads. I wiped the bowl down after each pad with a damp cotton cloth. The bowl took on a shine by the last pads.
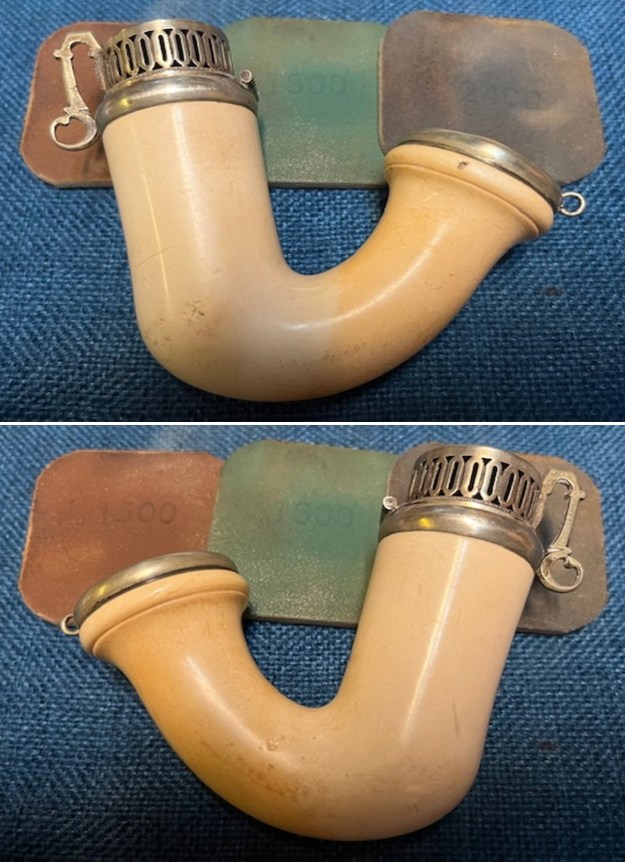
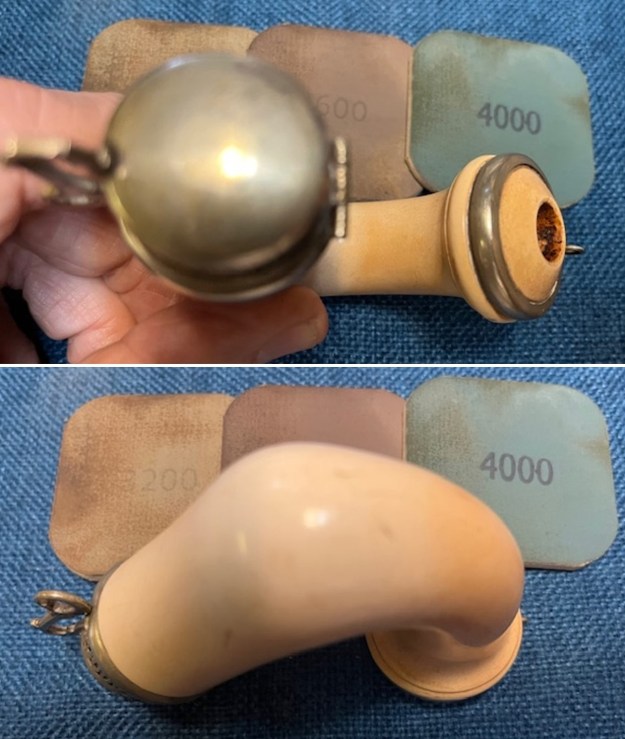

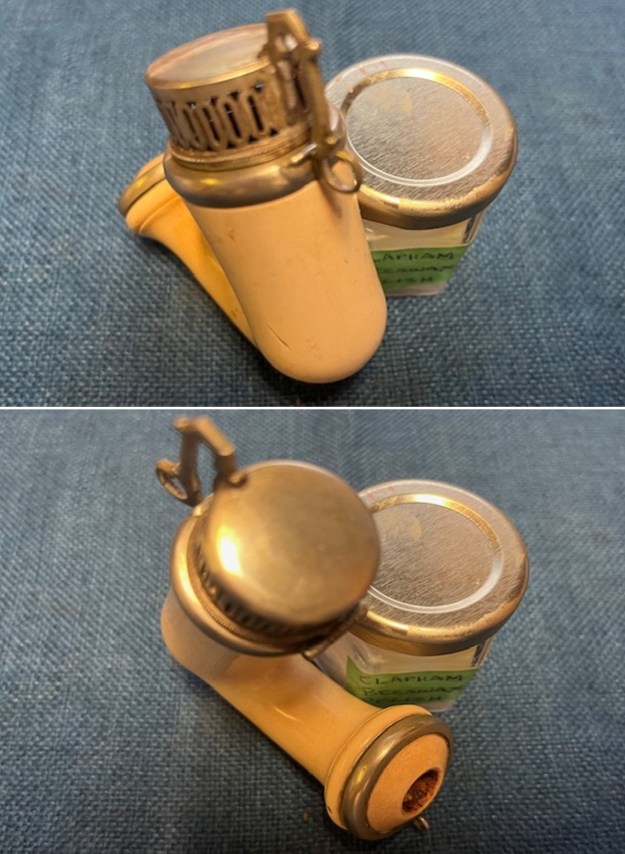
 I polished the bowl with Clapham’s Beeswax Polish. I rubbed it on the meerschaum and let it dry. Once dried I buffed it off with a clean buffing pad on my buffing wheel. I hand buffed the bowl with a microfibre cloth to deepen the shine.
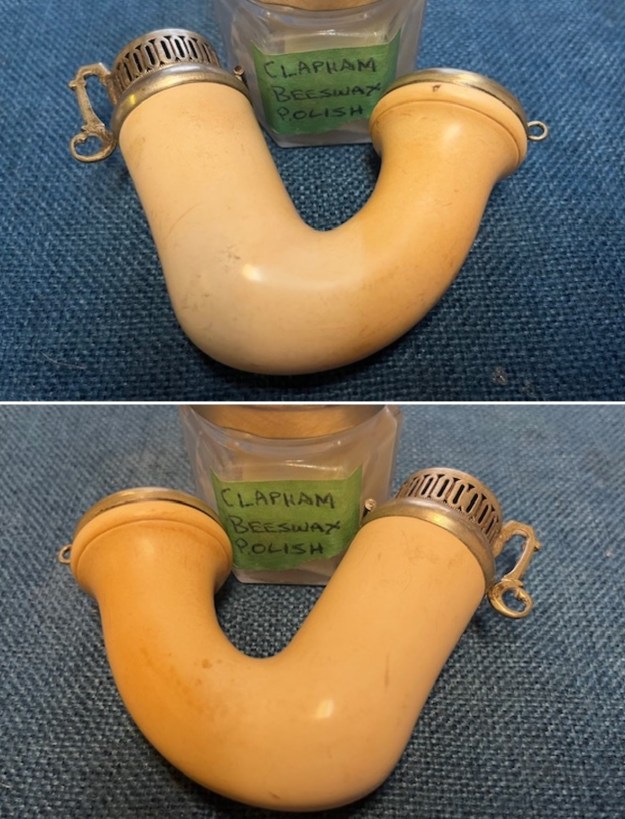

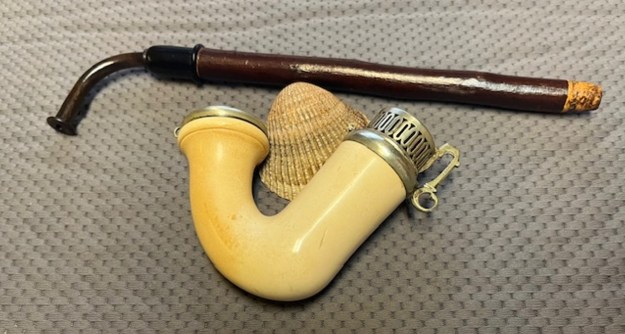
 I am really happy with the way that this Late 19th Century Meerschaum Debrecen with Cherrywood shank and horn stem turned out. It really is a beautiful looking pipe with a unique shape and smooth meerschaum bowl, silver rim cap, windcap and shank band. The cherrywood shank and the horn stem are really nice. The patina on the meerschaum came alive with waxing and buffing. The rich patina on the finish gave the pipe a sense of depth with the polishing and waxing. I buffed the bowl with Blue Diamond and hand buffed it. I put the stem back on the bowl and carefully buffed the pipe with multiple coats of beeswax and buffed the pipe with a clean buffing pad to raise the shine. I hand buffed the pipe with a microfiber cloth to deepen the shine. The finished Old Time Meerschaum Debrecen really is a beauty and feels great in the hand and looks very good. Give the finished pipe a look in the photos below. The dimensions of the pipe are Length: 11 inches, Height: 3 inches, Outside diameter of the bowl: 1 ¼ inches, Chamber diameter: ¾ of an inch. The weight of the pipe is 79 grams/2.79 ounces. The pipe will be staying with me for awhile as it is a beauty that I will enjoy smoking one day soon. Thanks for reading this blog and my reflections on the pipe while I worked on it. It was a fun one to work on!