Blog by Steve Laug
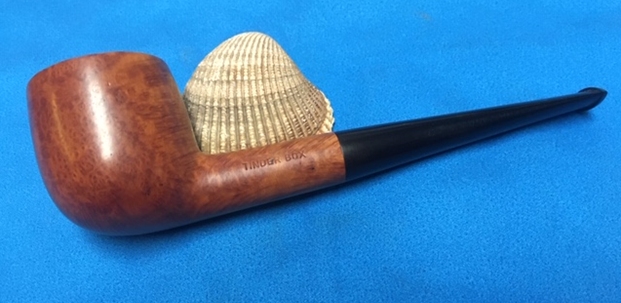
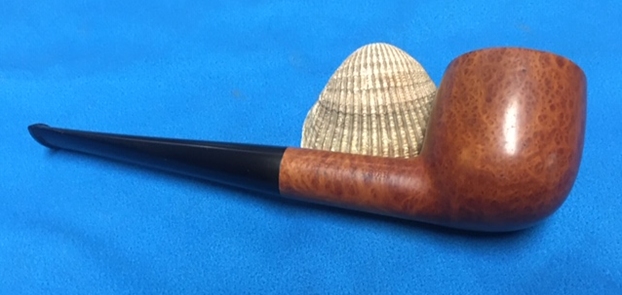
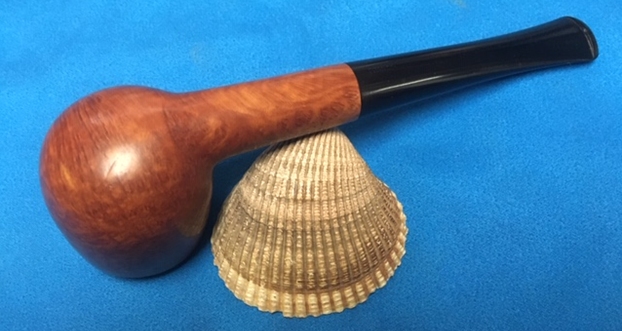
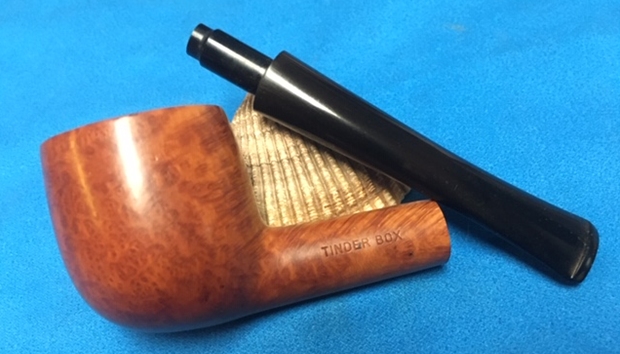
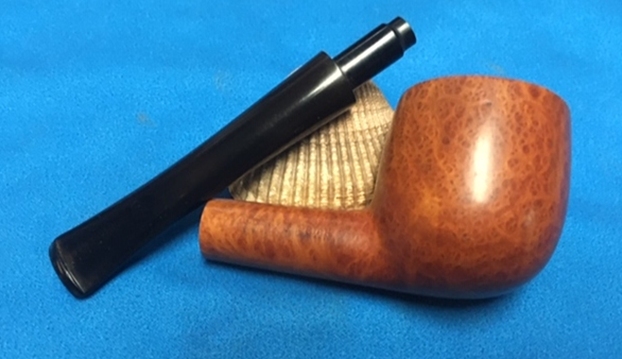
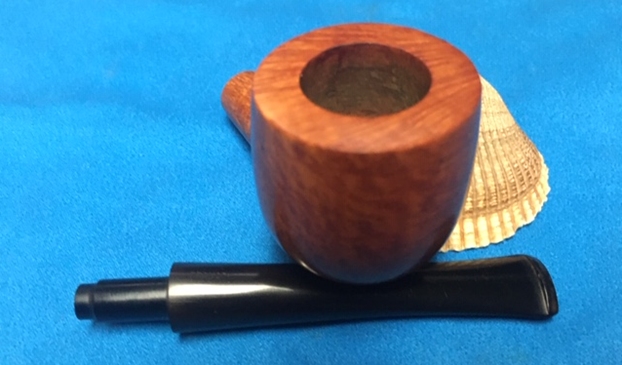
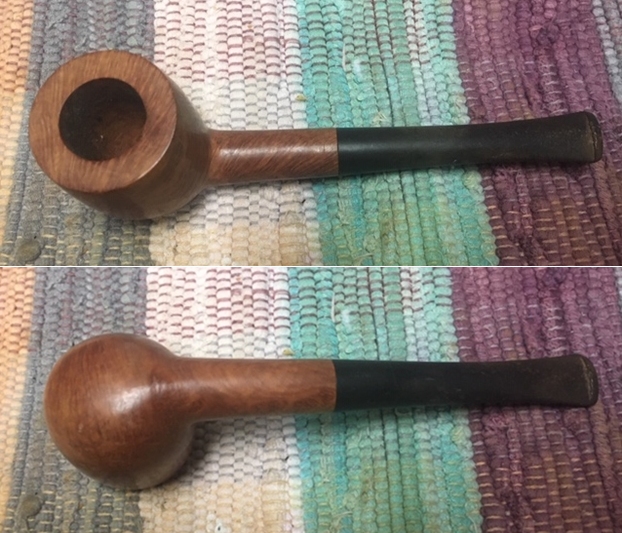
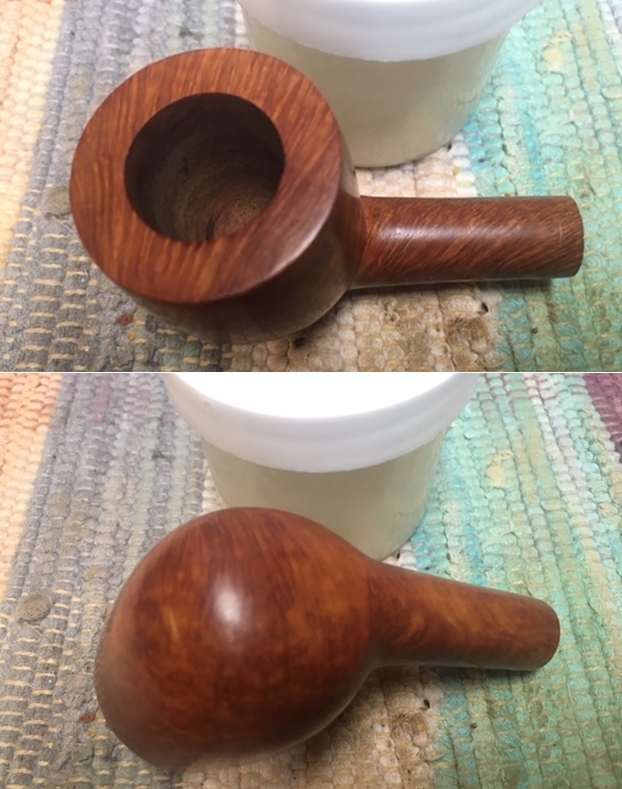
On a recent trip that Irene and I took with Jeff and his wife to the Oregon Coast we managed to do some pipe hunting. We found a few interesting pipes. I was in the mood today to work on a couple of them as a break from the restorations I am doing for others. The first of these is a pipe marked Tinderbox on the left side of the shank and Algerian Briar on the right side of the shank. It is a pot shaped piece with some great grain around the bowl – lots of birdseye. The bowl was not even broken in. At first glance we thought it was unsmoked but in looking at it at home I think it may have been smoked at least once as there is some darkening around the top 1/3 of the bowl. The rest of the bowl is pristine. The natural finish is dirty from sitting around but otherwise quite nice. The stem has some tooth chatter and oxidation but is otherwise quite clean. I took this one home as it did not need a lot of work to bring it back to life. I took photos of the pipe before starting my cleanup work.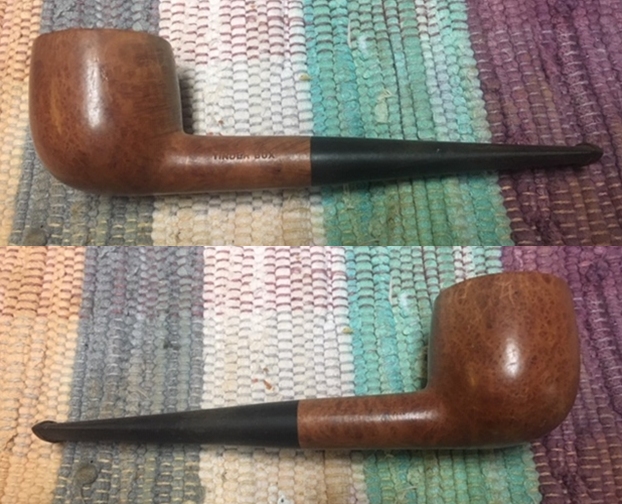
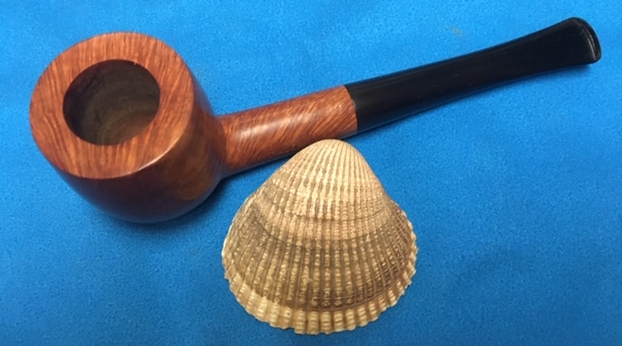
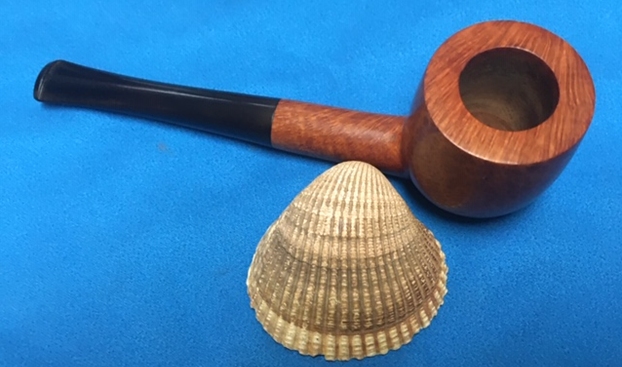
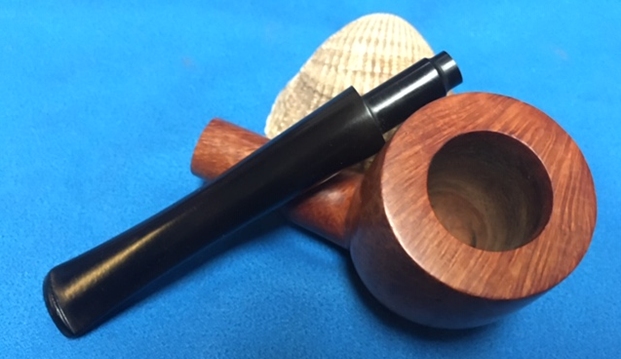
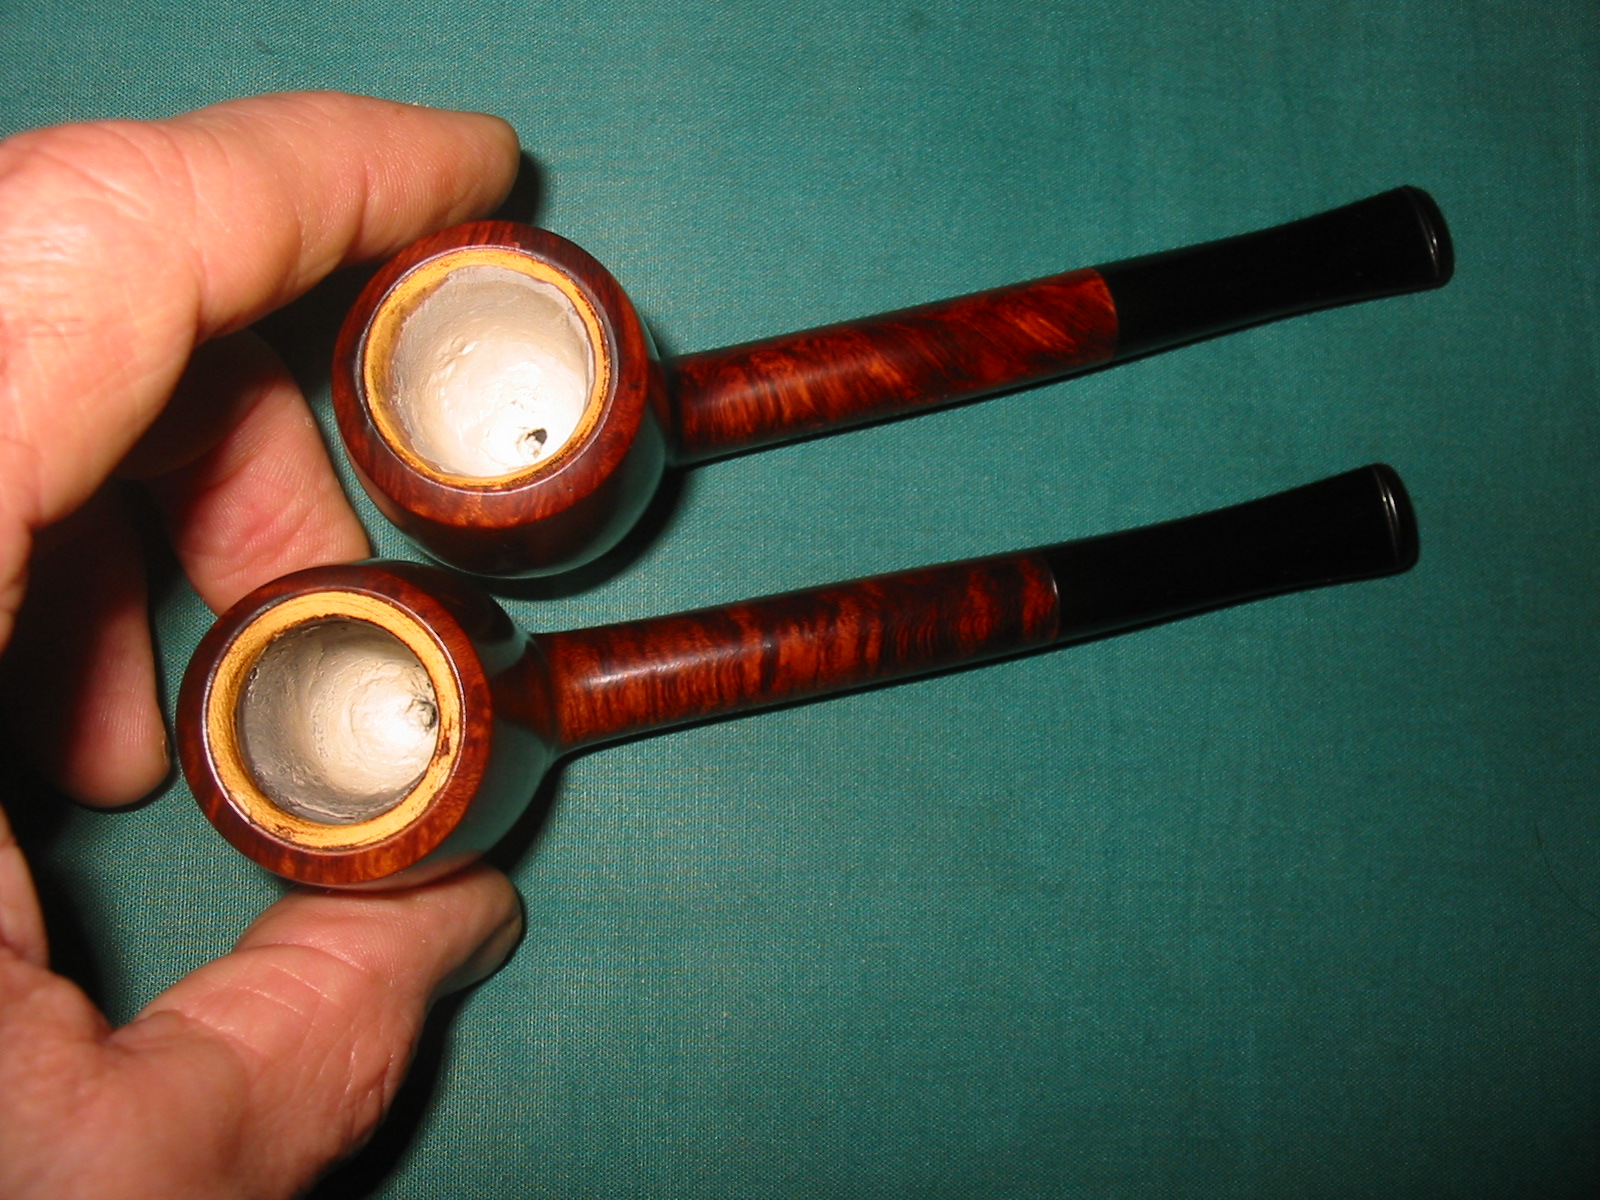
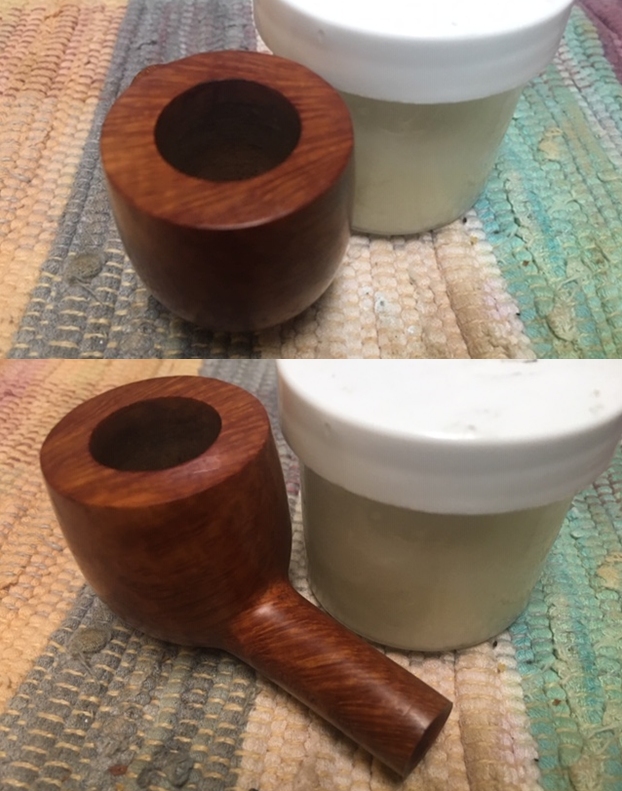
 I took close up photos of the rim top and bowl to show how clean it was. There is some nice cross grain on the rim top. I also took photos of the stem to show their condition. You can see the oxidation and tooth chatter on it but otherwise it is a pretty straight forward cleanup.
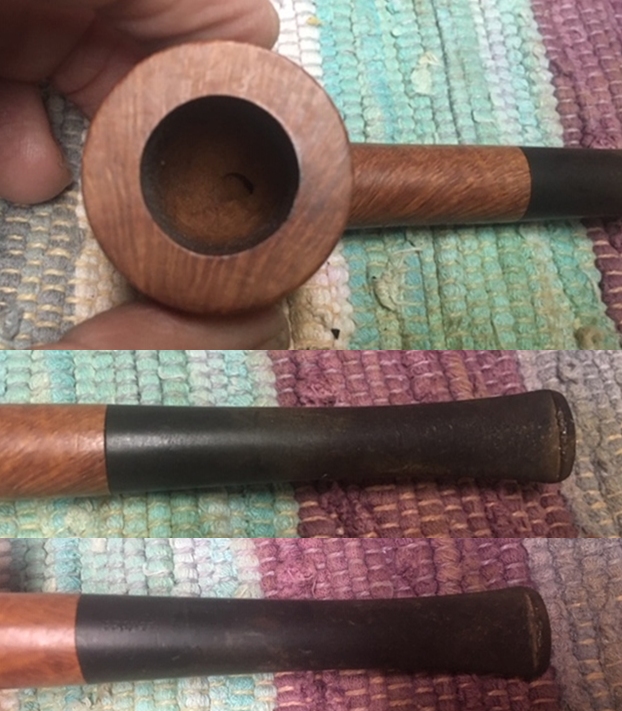 I took photos of the stamping on the sides of the shank. You can see them below and they read as noted above. I also noticed that the stem was stamped on the underside and read France.
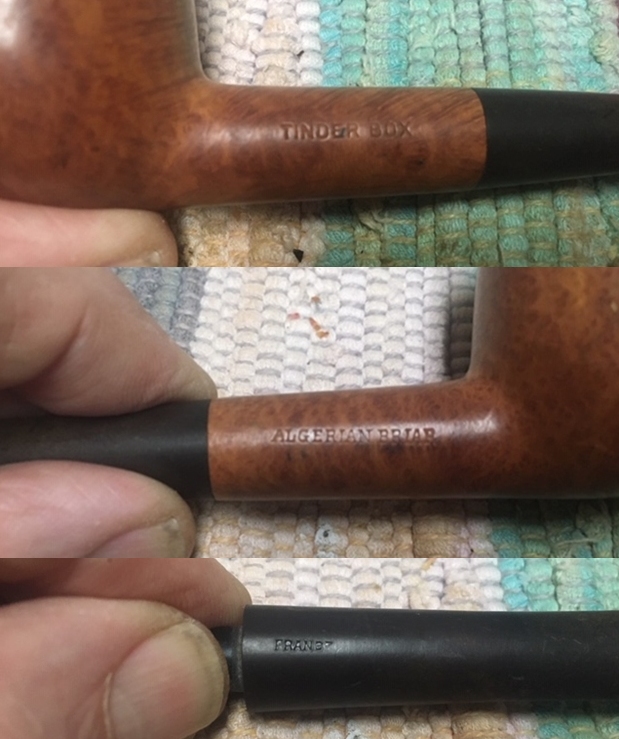 I have seen the France stamp on vulcanite before and I believe it is not the provenance of the pipe as a whole but of the rubber stem. In this case I am pretty sure that the pipe was made for Tinder Box by an English pipe maker as the shape matches the Pot shapes of several of the English makers. I looked up Tinder Box on Pipedia to see if I could get a lead. I have included the link to that article (https://pipedia.org/wiki/The_Tinder_Box). I quote in full:
The Tinder Box was the chain of tobacco stores started by Edward Kolpin, Sr., who carved Ed’s Hand Made pipes. The store, eventually sold to a Canadian conglomerate, eventually reached 200 retail outlets by 2007, and in the 40 years it operated on a large scale a great number of pipes were made for The Tinder Box by well respected makers. A few include the Tinder Box Unique, made by Charatan, Christmas Pipes by Ascorti, and the Tinder Box Noble and Exotica, made by Shalom Pipe Factory, Mauro Armellini did make the Verona and Napoli lines.
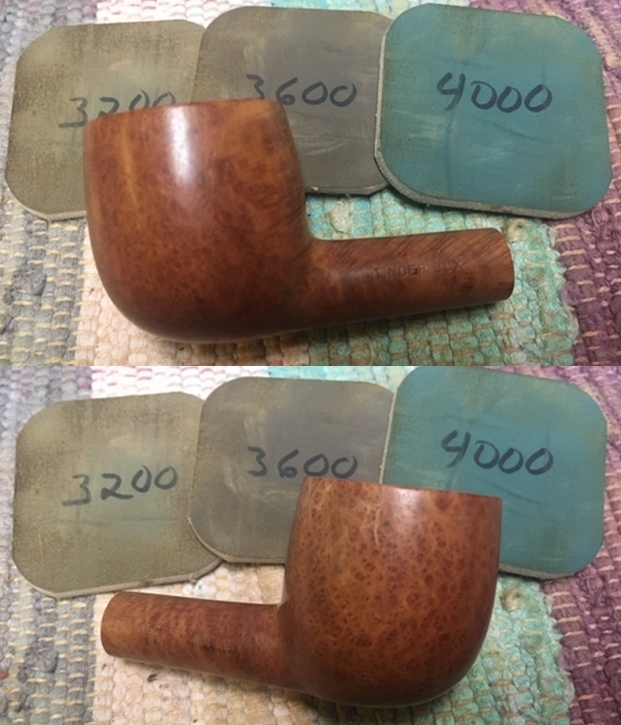
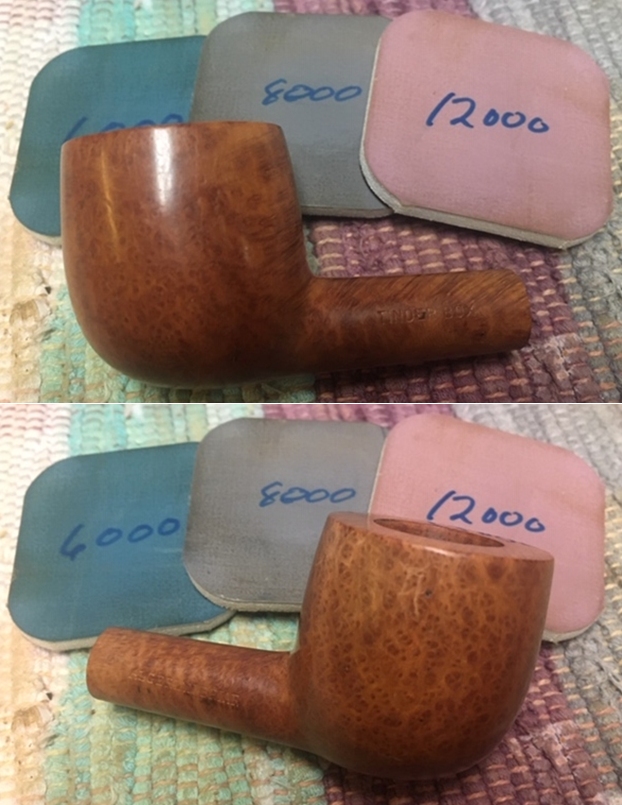
With that information and really not being much clearer on the maker of the pipe I turned to work on the pipe itself. I sanded out the darkened area of the bowl with a piece of 220 grit sandpaper wrapped around a dowel. I took off much of the darkening as it was only on the surface of the briar. I ran a pipe cleaner and a cotton swab and alcohol through the shank and it came out spotless. The pipe was very clean.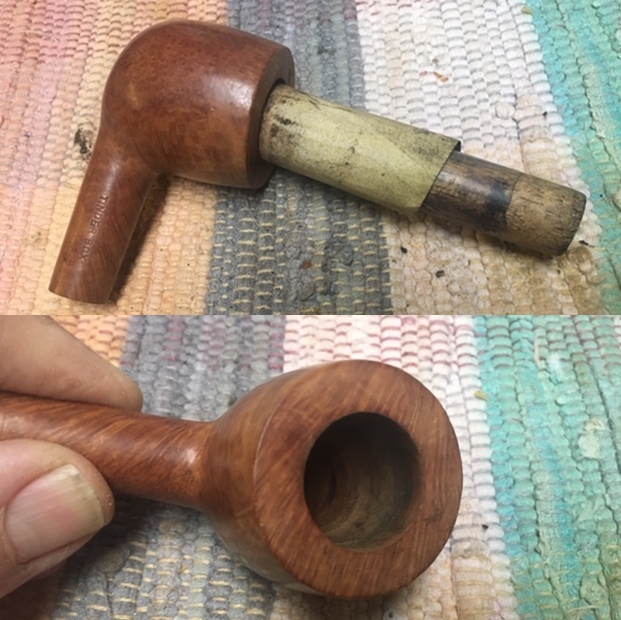 I polished the bowl and rim top with micromesh sanding pads – wet sanding with 1500-12000 grit sanding pads. I wiped down the bowl after each sanding pad to remove the sanding debris. The natural finish on the bowl began to have a rich shine.
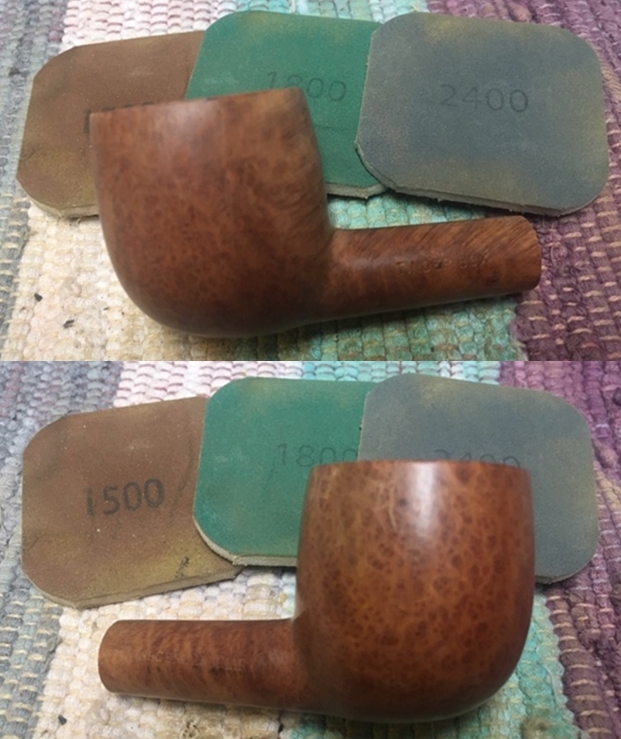


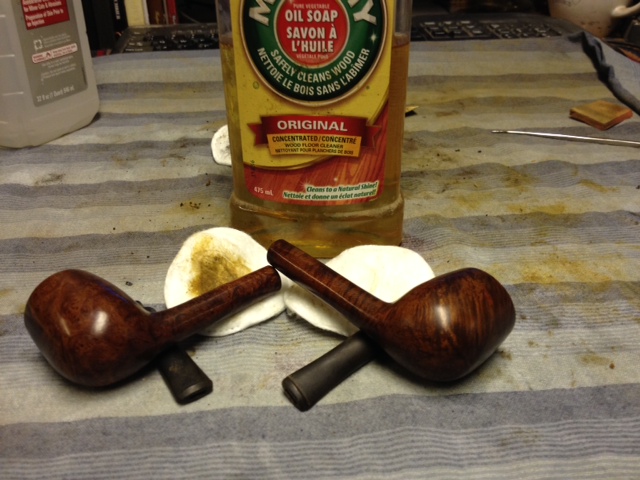
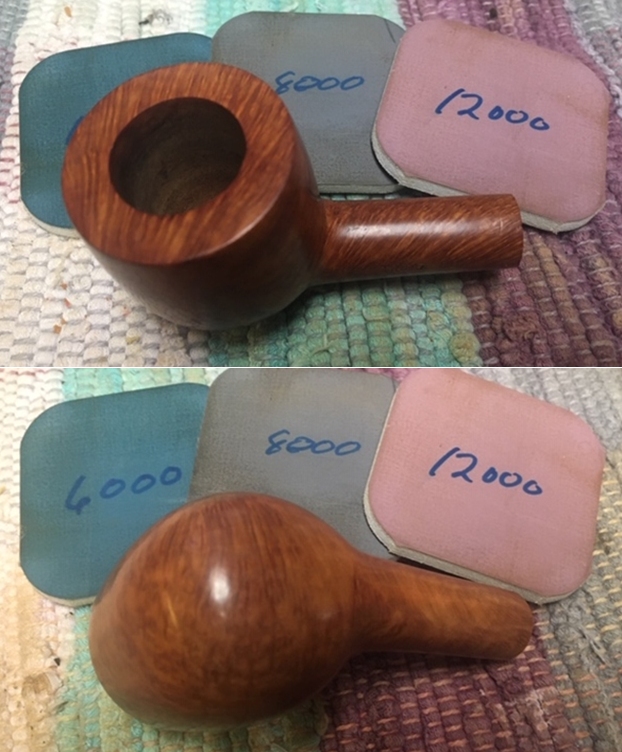 I was finished polishing the bowl so it was time to rub the briar down with Before & After Restoration Balm. I worked it into the surface of the briar with my fingertips and let it sit for about 10 minutes. I buffed it off with a cotton cloth. You can see how well the product works to clean and enliven the briar and as a bonus it protects it as well.
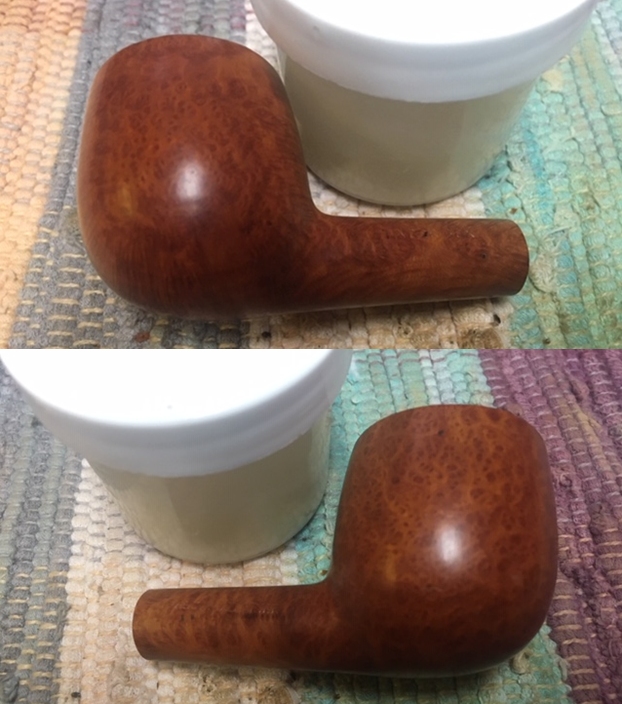
 I set the bowl aside and turned my attention to the stem. While I was with Jeff in Oregon I picked up some of the Soft Scrub that he has found very useful in removing oxidation and calcification. I rubbed down the stem with it on a cotton pad. You can see the results on the pads in the photo below.
 I sanded out the tooth chatter and the remaining oxidation with 220 grit sandpaper and started the polishing with 400 grit wet dry sandpaper.
 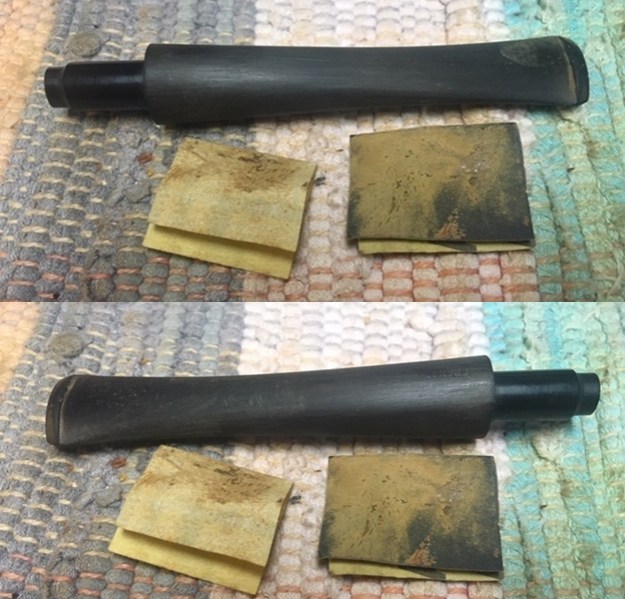 I rubbed down the stem with Denicare Mouthpiece Polish and a cotton pad to remove the remnants of oxidation and to blend in the sanding. The stem shows promise at this point in the process.
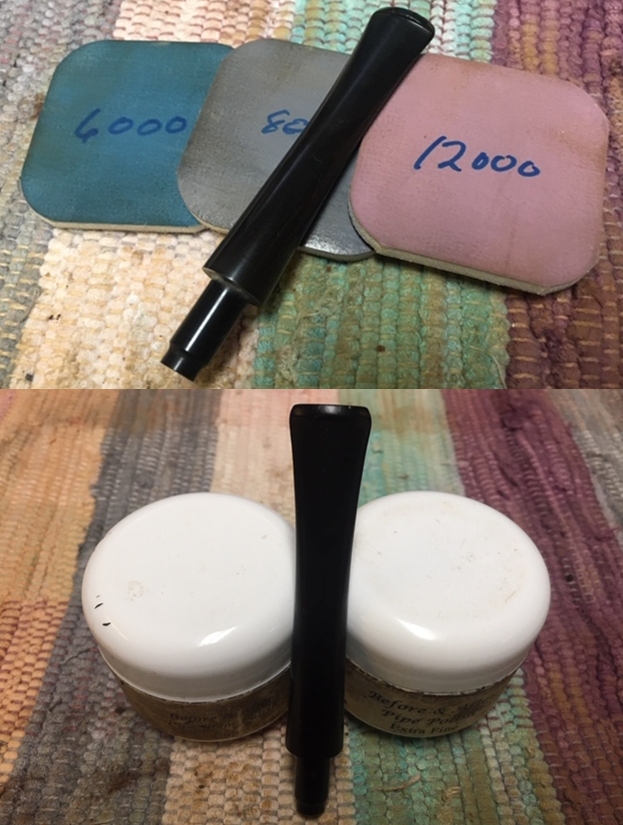
 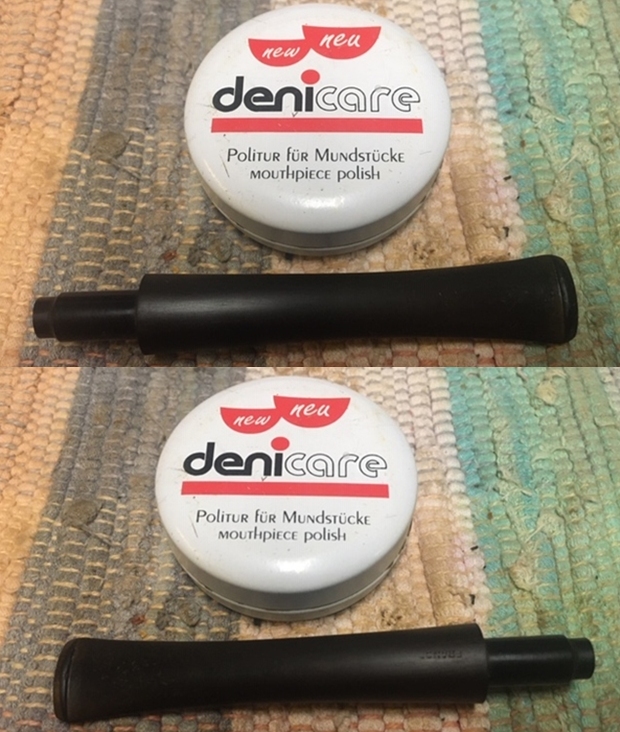 I polished the stem with micromesh sanding pads – wet sanding it with 1500-12000 grit pads. I wiped the stem down after each sanding pad with a cotton pad to remove the sanding debris. I finished polishing the stem with Before & After Pipe Stem Polish – both fine and extra fine. I finished by wiping it down with Briarville’s No Oxy Oil and buffing it to a shine.
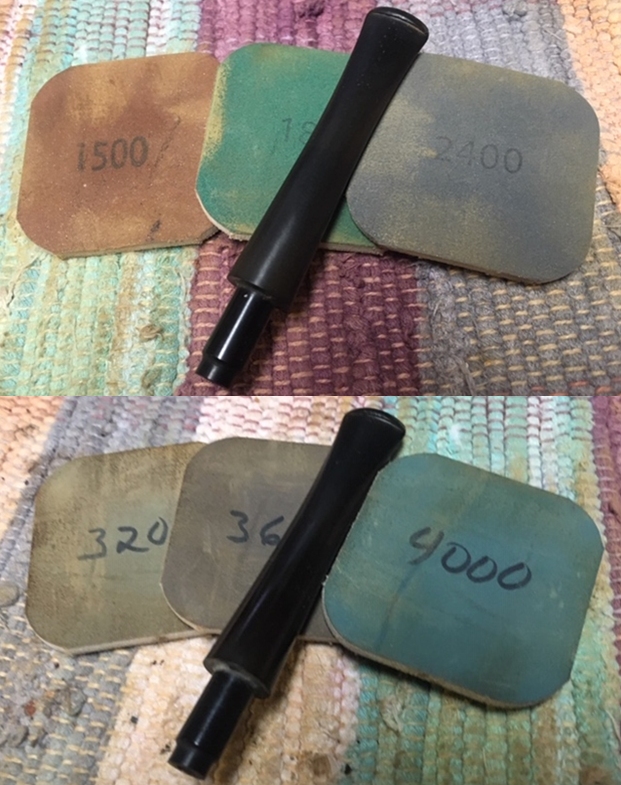
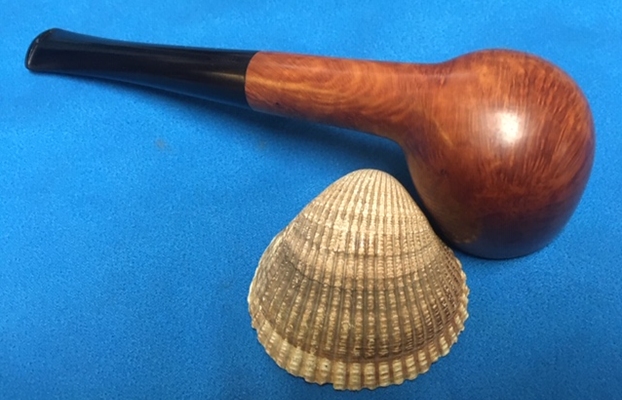
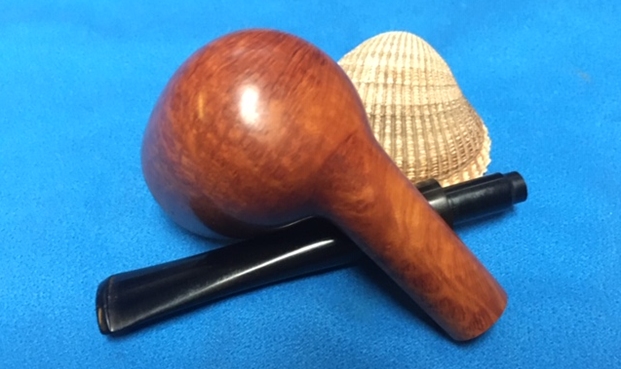
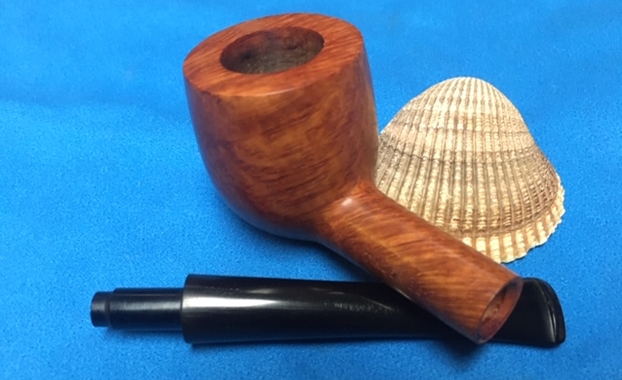
 Once again I am my favourite part of the restoration when all the pieces are put back together. I put the pipe back together and buffed it with Blue Diamond on the buffing wheel. I gave the bowl and the stem multiple coats of carnauba wax. I hand buffed the pipe with a clean buffing pad to raise the shine. It is fun to see what the polished bowl and stem look like in comparison to what it looked like before I started. This Tinder Box Algerian Briar Pot is nice looking and feels great in my hand. The pipe is another light weight that could be clenched and smoked while doing other things as it is very well balanced. Have a look at it with the photos below. The dimensions are Length: 5 ¾ inches, Height: 1 ¾ inches, Outside diameter of the bowl: 1 ½ inches, Chamber diameter: ¾ of an inch. This is the first of the restorations of the pipes we picked up along the Oregon Coast. It will be going on the rebornpipes store shortly. If you are interested in adding this older Algerian Briar pipe to your collection let me know. Lots more to do in this lot! Thanks to each of you who are reading this blog.