Tag Archives: Reworking the button

Giving New Life to a Barling’s 2729 Fancy Bent Dublin from 1962


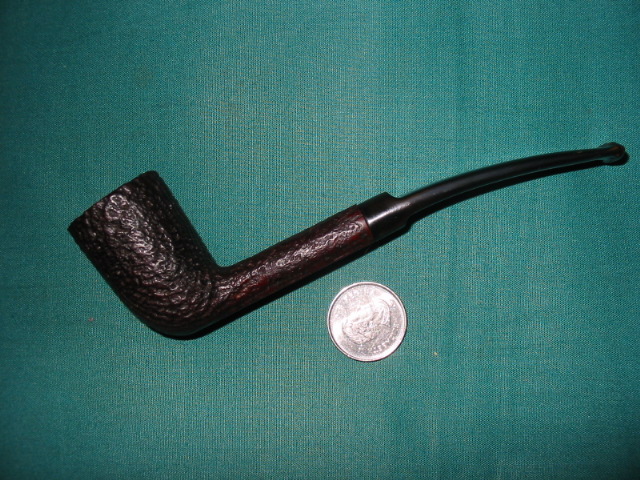
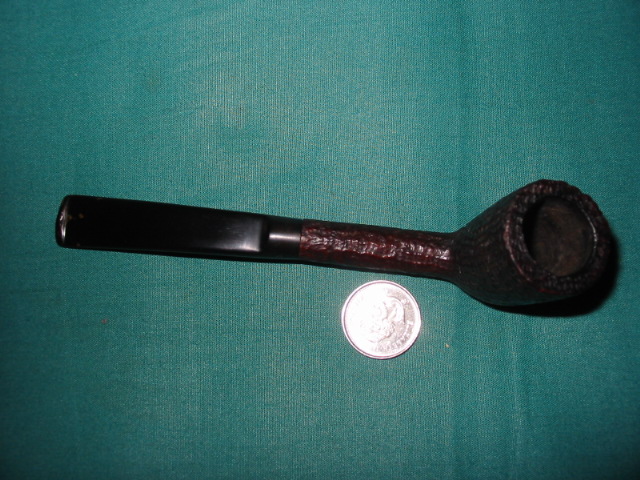
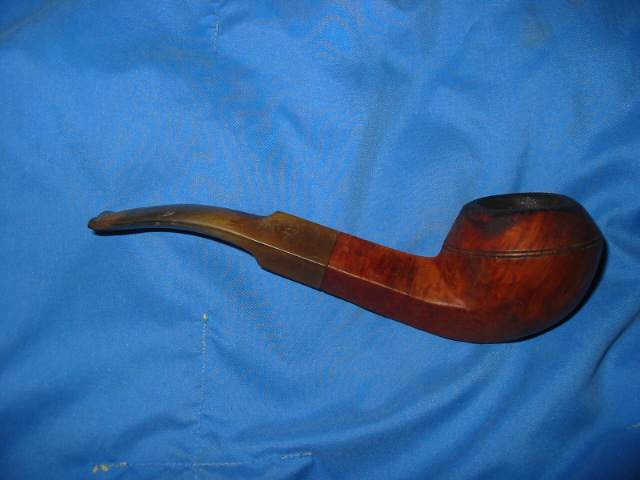
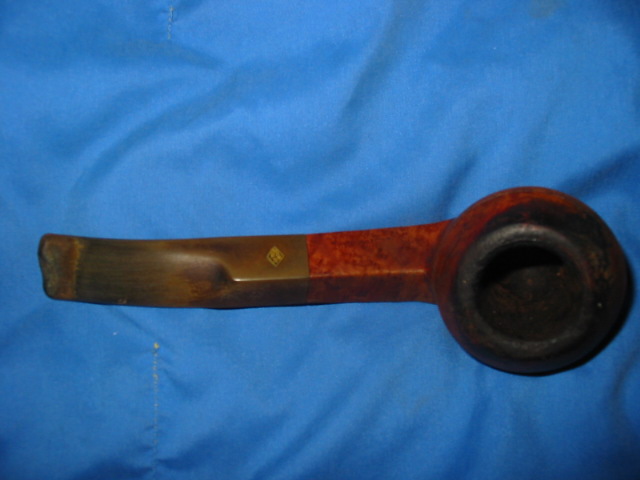
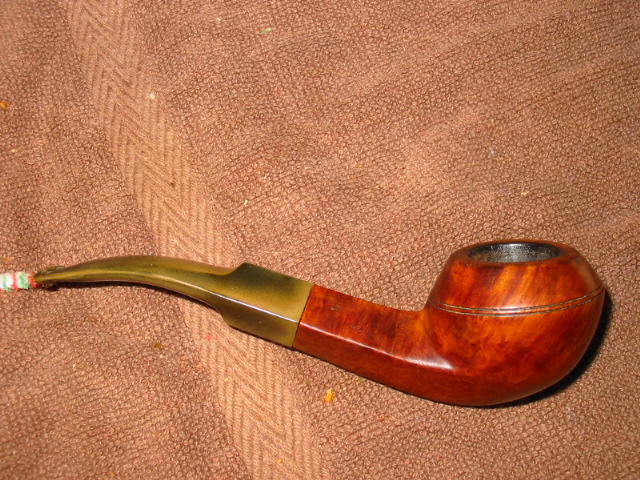
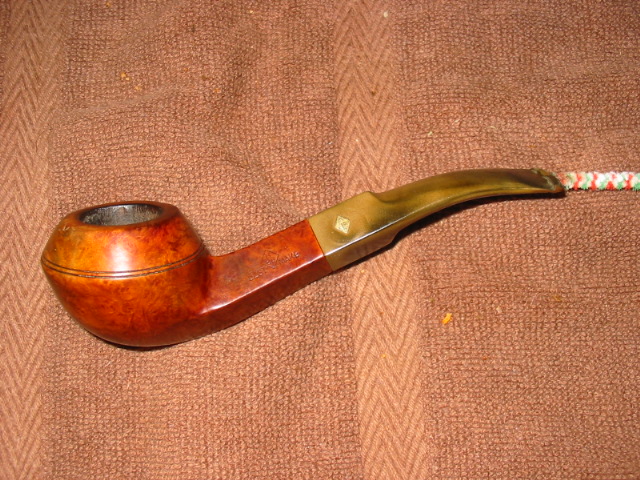
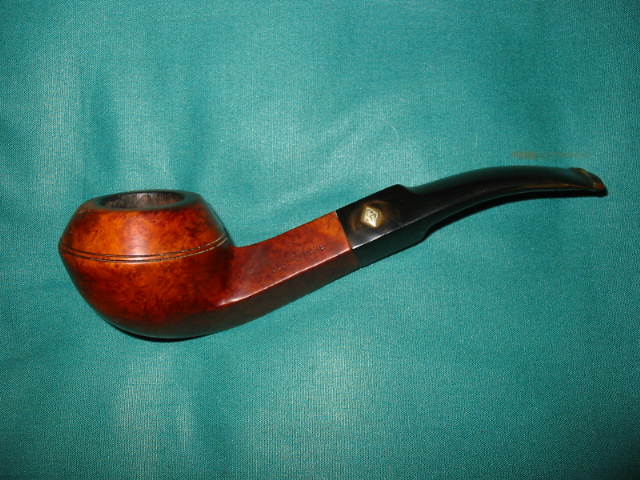
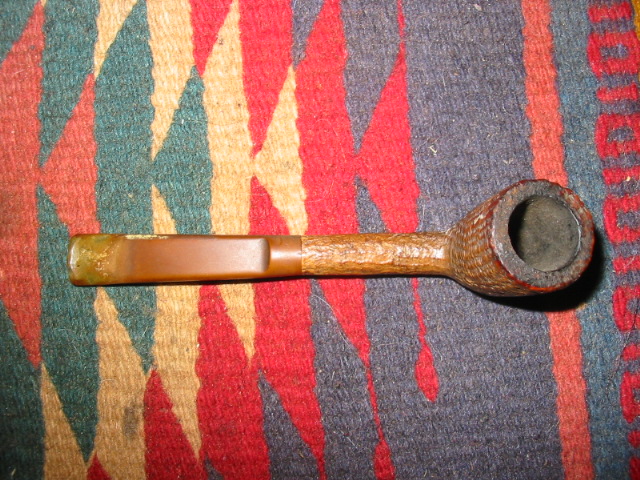
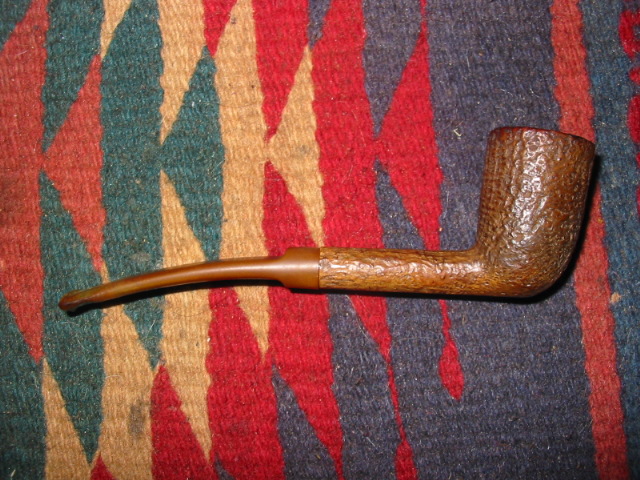
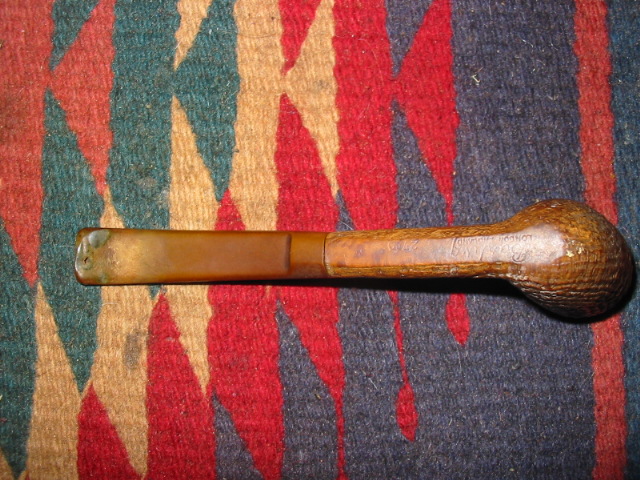
I picked up this old Barling’s shape 2729 in a lot I bought on EBay. From what I could find out about it on the internet it came out in 1962. You can see from the pictures the state it was in when it arrived. It was the kind of challenge I like to work on in these old estate pipes. There is a deep satisfaction in bringing them back to life and restoring them to a spot on the pipe rack and the weekly rotation. The finish was gone, though in the grooves of the blast there was some darker brown/red stain. The blast was obscured on the sides and rim by the grime that filled the valleys in it. The rim was intact and not beat up at all – just incredible dirty. The bowl had been lightly reamed and was still round!! The stem was well chewed with deep dents on the edges of the stem and deep dents in the top and bottom. There were also holes chewed through the stem on both the top and bottom as well. The oxidation was very heavy and deep. The Barling’s Cross was all but gone on the stem but under a bright light it was faintly visible so the stem was clearly the original.

ImageImageImage

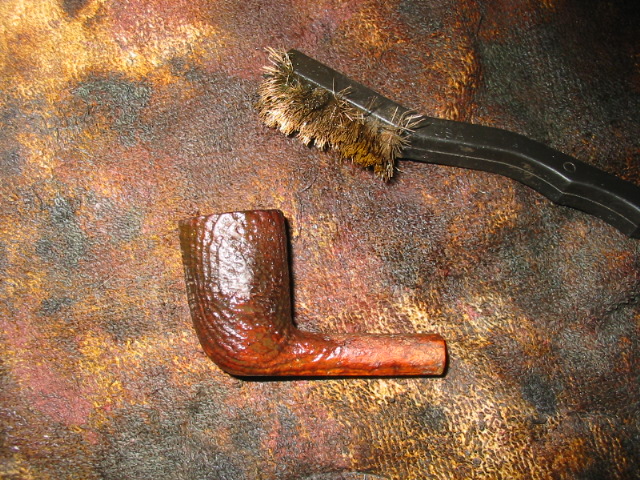
I took the stem off the pipe to work on and placed the bowl in my alcohol bath for overnight. Before submerging it in the bath I wet it with alcohol and scrubbed it with a small brass tire brush that is readily available at most Wal-Mart stores or online through Amazon. I find that the soft brass does not damage the ridges and valleys on the blast finish but really loosens the grime when used with Isopropyl alcohol. I generally dip the bowl and then scrub it before leaving it to soak. When I remove it from the bath I scrub it once again and wash off the bowl with some fresh alcohol to remove any residual grime. Once the bowl was dry it was utterly lacking any finish. It was ready to restain. I set it aside and turned my attention to the stem.

Image

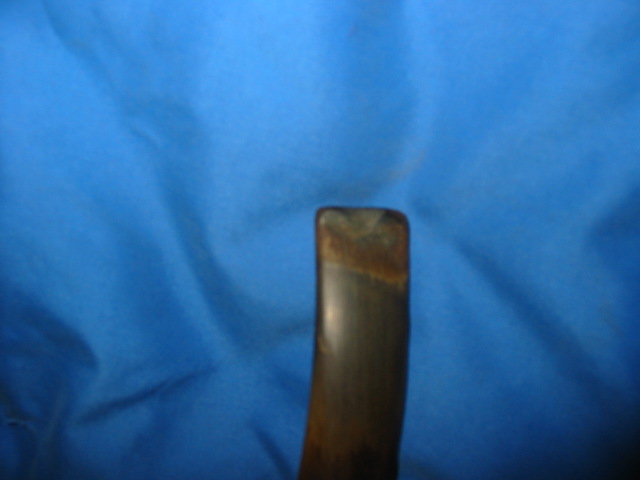
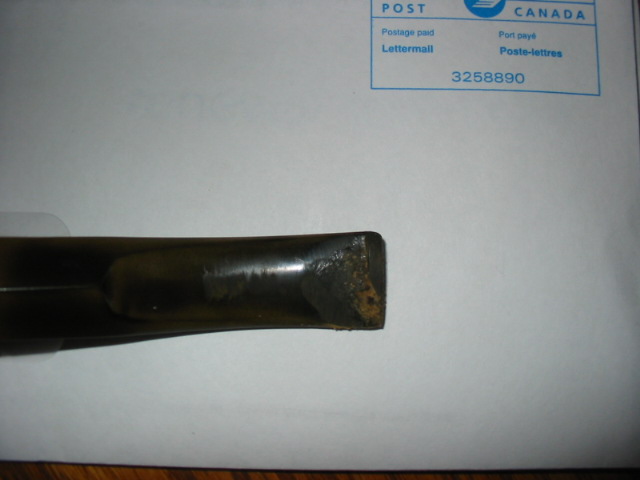
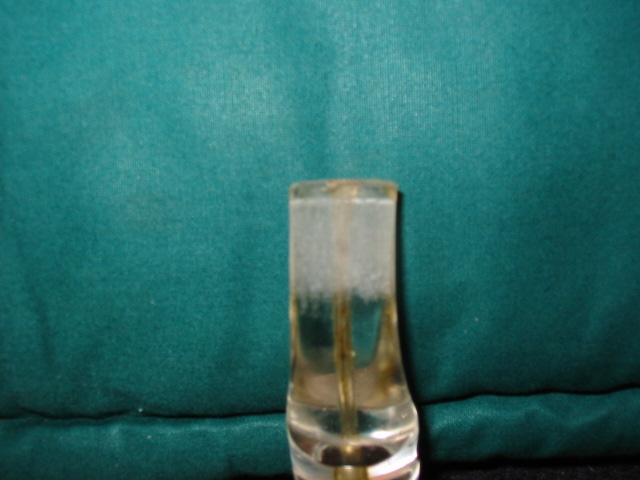
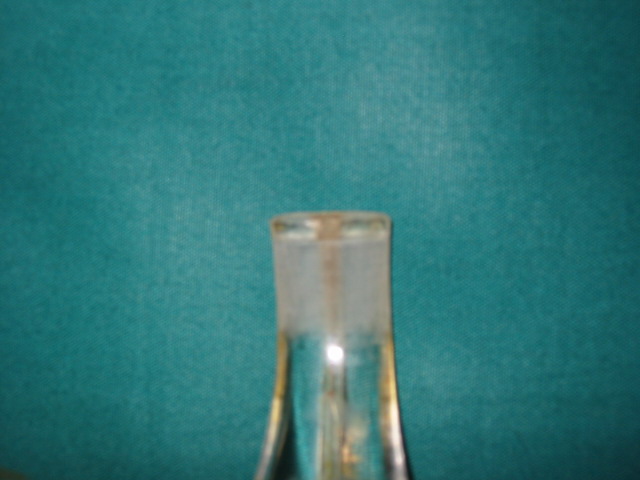
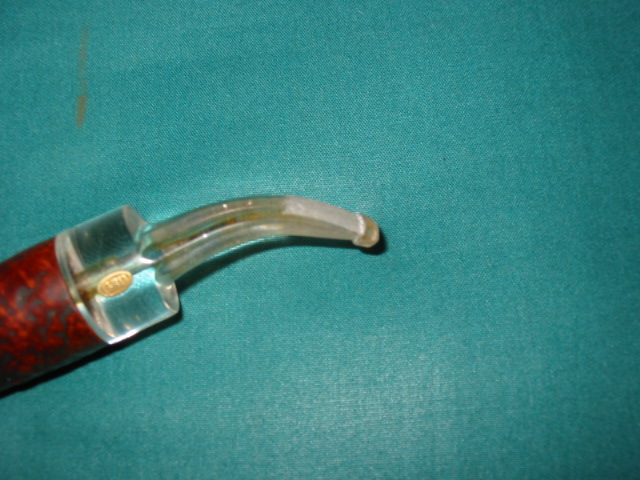
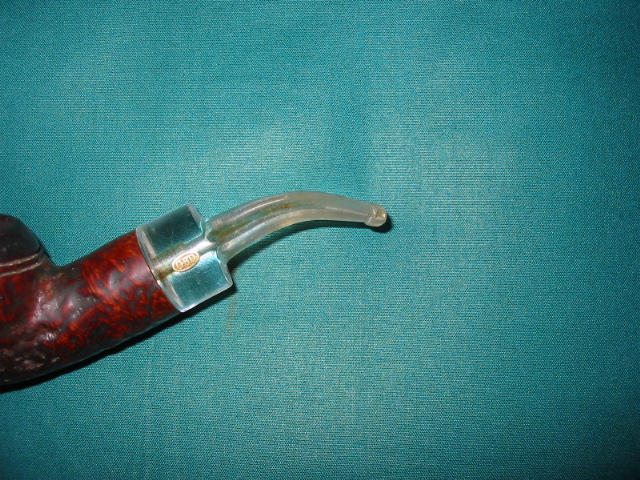
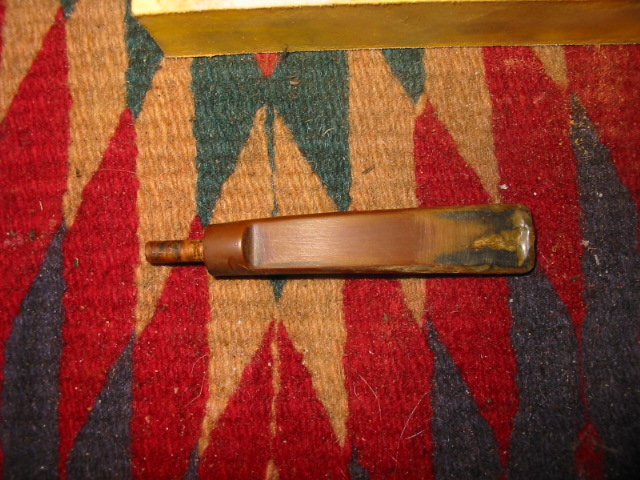
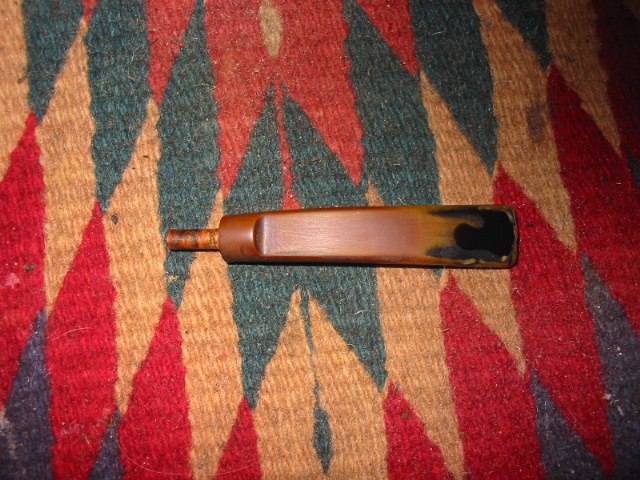
The stem was a mess on this pipe as I mentioned above. Below are four pictures of it after I soaked it in Oxyclean to soften the oxidation on the surface. The pictures show how reddish brown that oxidation was when I started. I sanded the surface to highlight the bite marks and holes in the stem. The stem was badly chewed and could have been a candidate for replacement but it was an original Barling’s stem so I wanted to see if I could save it and reuse it. I cleaned the surface and picked the grit and grime out of the holes with a dental pick. I washed the surface down with Isopropyl to give a good clean surface. The button was virtually chewed away and there was a fair sized hole on the underside of the stem. The tooth marks were very deep and there was not much to work with in lifting them with heat. This made them a candidate for a patch with black super glue.

ImageImageImageImage

The picture below shows the top of the stem with the black super glue fill in the bite marks and holes. The idea is to slowly fill them and build up the surface of the stem. I also continued to fill them until there was a good slope from the stem surface to the top of the button. Once it was dry my plan was to use needle files to recut the button.

Image

The next picture shows the glue after it has dried and I have done the initial sanding to smooth out the surface of the stem. I still have not recut the button at this point.

Image

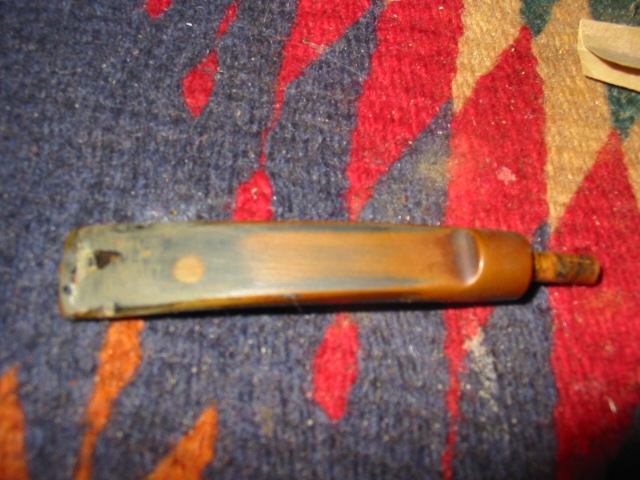
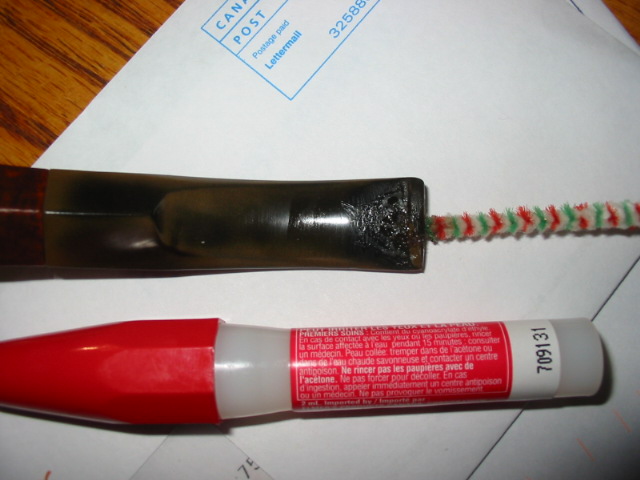
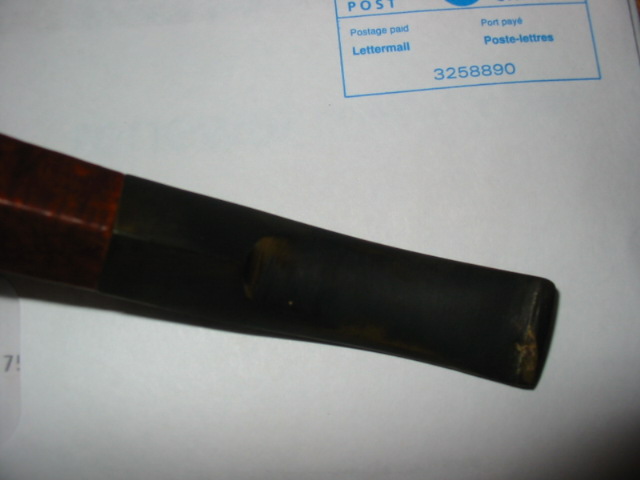
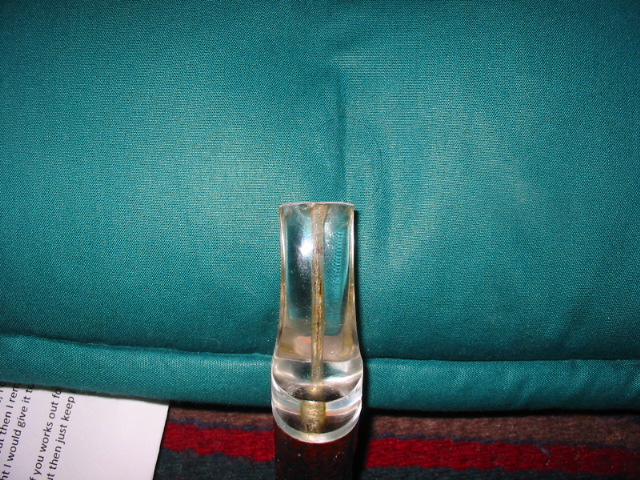
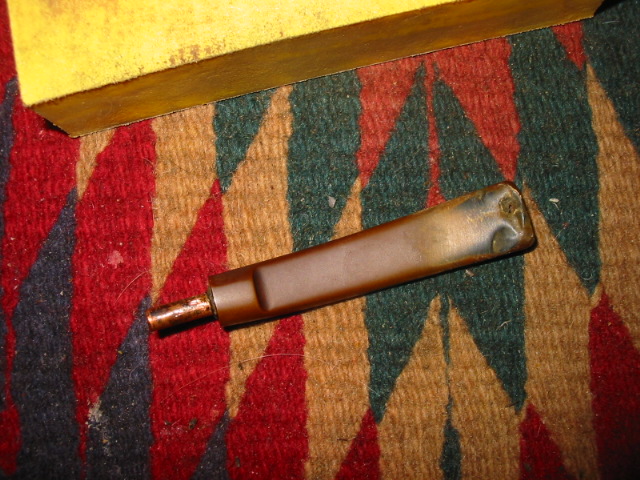
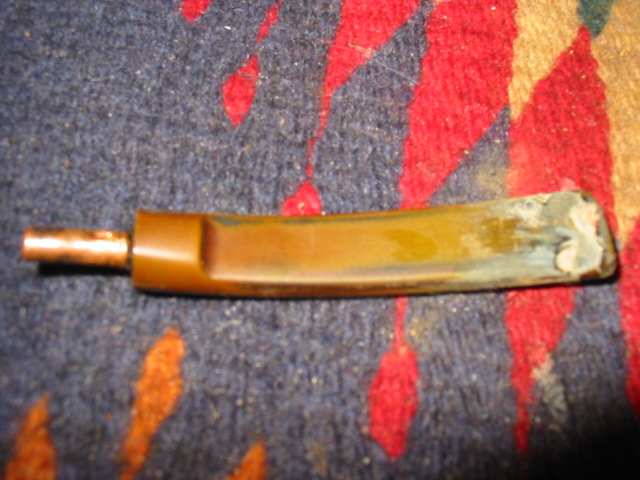
The picture below shows the underside of the stem after the glue has dried and I have done the initial sanding on the stem. It is still pretty rough but the holes are filled and the button is built up. Note in this picture the very visible copper tenon on the stem. The previous owner must have broken the tenon and had it replace with this thin copper tubing. The tenon is very delicate on this stem so the copper is actually an interesting fix in terms of durability. I have never seen a repair like that. The tubing was scored and inserted into the stem and held with an epoxy. After the soak in Oxyclean it was loose so I removed it, cleaned it and since it was a good tight fitting tenon/mortise union so I decided to reuse it. It is a wonder that he did not put a copper band around the button end of the stem as well to repair the bite through and tooth marks.

Image

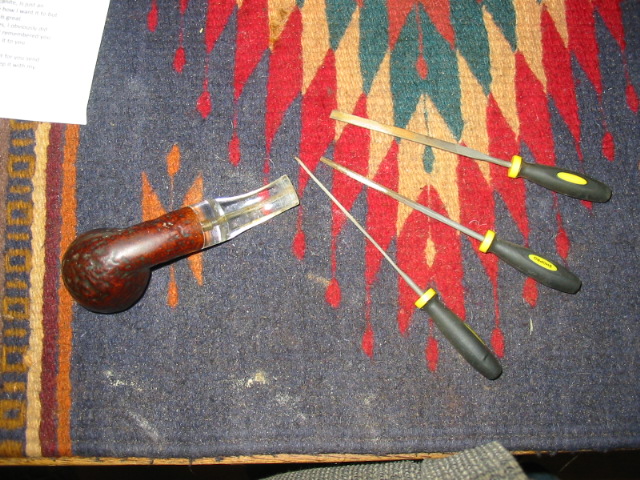
The next two pictures show the stem after sanding the stem surface smooth with 240 grit sandpaper. My purpose in using that grit is to get a clean surface to work with as I move to rework the button on the top and bottom of the stem. I had yet to work on the saddle of the stem in these pictures. I will often save that until the rest is finished.ImageImage

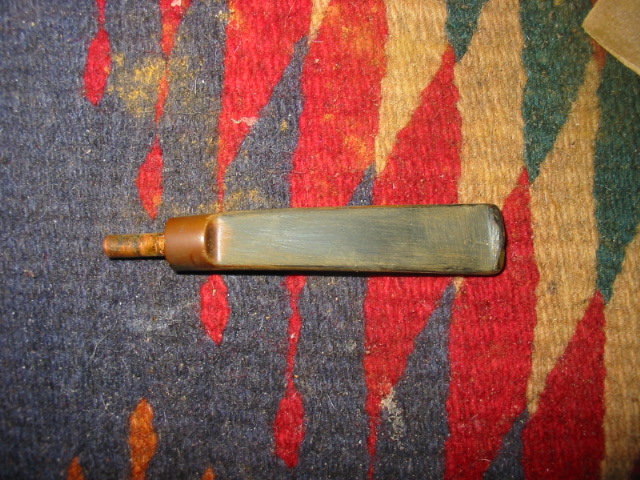
I failed to take pictures of recutting the button on the stem but you can see the new button in the finished pictures below. I cut and shaped it with a flat needle file and a wedge needle file. I like the clean angles of a new button so I was aiming for that with just a little wear to match the age of the pipe. I finished the sanding and polishing of the stem using 400 and 600 grit wet dry sandpaper and then used the normal list of micromesh sanding pads from 1500-6000 grit. I keep a bowl of water close by to dip both the paper and the pads in as I sand as I find it more effective in removing the scratches and remaining oxidation. Once the stem was finished I put it on the pipe bowl and gave it a buff with Tripoli and White Diamond to get a good sheen to the surface. I never buff a stem apart from a pipe as I do not want to damage the stem shank junction by rounding the clean edge of the stem. Once I finished I set it aside and went back to restain the bowl.

I did a bit of research (that is a part of the process I really like) to find out about the original finish and colour of stain used on this particular pipe. I learned that it was more of a reddish tone and really wanted to get close to that reddish brown colour on the finished pipe. I used some oxblood stain and a bit of medium brown stain (both aniline stains) and gave the bowl a coat of the brown first and then flamed it and buffed it. After that I gave it a coat of the oxblood stain and flamed it. I reinserted the stem and took it to the buffer and with a light touch buffed it with Tripoli and White Diamond. I did not want to soften the ridges of the blast but wanted to buff it enough to get a contrast in the stain.

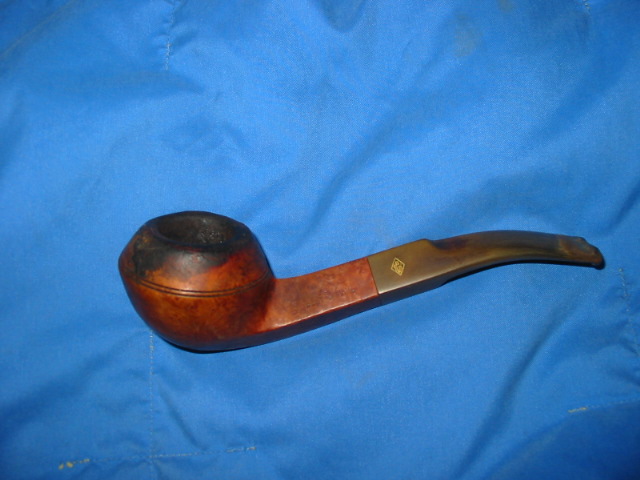
I used some Obsidian Oil on the stem and then Halcyon II wax on the bowl. Once they dried I hand buffed the stem and the bowl with a soft cotton cloth. I added a coat of wax to the stem when it was finished as well. In the pictures below you can have a look at the finished pipe. I took pictures with a .10 cent piece/dime below the pipe to give an idea of the size. It is a dainty little pipe with a pencil shank. I hope to smoke it this week end and enjoy a nice bowl of aged 5100 in it.

ImageImageImageImage

Rebuilding a Button on a BBB Bulldog


Blog by Steve Laug

I picked up this older BBB Bulldog on EBay because I liked the shape of it. The bowl definitely needed some work as the lava had erupted over the front rim and down the contours of the pipe. The pictures below show the state of the bowl when it arrived. But that was not why I am writing about this pipe. That kind of refurbishing is part and parcel of buying older pipes on EBay. They always are pretty much in the state that this one was in. All of them require the same kind of procedures to clean them up and return them to a state of readiness for the new owner. But have a look at the button on the last three pictures below. It was virtually gone. I could have fit a new stem on the pipe but I wanted to retain the brass BBB logo and did not want to move it to a new stem. I also wanted to try to build up the button and see what I could do with it.

ImageImageImageImage

I have used Super Glue or Krazy Glue to repair bite throughs in the stem but had not use it to do repairs this extensive. I love the process of trying to devise a workable fix and so I decided to give it a go. I greased a fluffy pipe cleaner with olive oil and inserted it in the airway at the button. I do this so that the glue does not fill the airway and grease it so that the pipe cleaner is not a permanent feature of the stem as the super glue will stick to anything including your fingers if you get it on them. (By the way there is a solvent that is available should that happen to you.) The surface of the button was dirty and oxidized so I cleaned that with my dental pick and some acetone. I clean the surface before putting in the glue. I also sanded it to roughen the surface so the glue would bond well. In the top picture of the stem you can see that the top of the button is indented and the lip is worn smooth. The second stem photo shows the underside and you can see the major dent that needed work and the lip that was pretty well gone. I filled the hole on the underside first so that it would bond. Then I gradually built up the dent, letting it dry between applications of the glue. I believe it took 5 or 6 applications of the glue. Once it was filled I added more to build it up so that I could re-cut the button. In the picture below the patch is clear. It is a very rough surface but it is ready for the sanding and filing that will go into restoring the stem to normal. I built up the deep dent and also built up the missing portion of the button. On the top side of the stem I also built up the button in the same fashion.

Image

I set the stem aside to dry until the glue patch was very hard and turned my attention to the bowl. You can see in the pictures below that I took off the lava and tars on the top and cleaned the inside and outside of the entire bowl. By the time I was finished with the exterior of the bowl and shank and cleaned out the bowl and the inside of the shank with pipe cleaners and a reamer the stem was ready to work on. I reassembled it for the picture below.

ImageImage

You can see from the two profile pictures above that the button is present once again. The idea is to build up the end of the stem to the degree that the profile shows the button as it would have been on a pipe of this age. It took a layering process with the super glue to get it to the point it is in the above pictures.

The two photos below show the bottom of the stem as I worked on it with the files and the sandpapers. I used my small files, both the flat and the wedge file to cut away the material that I had built up to give a sharp button edge as differentiated from the surface of the stem. In the first picture you can see the initial cuts and the smoothing that I did to the surface of the stem with the files. I used 220 and 240 grit sandpaper to remove the rough surface of the glue on the stem and bring it to the right profile. The glue is very hard and it takes quite a bit of sanding to smooth it out. In the second picture you can see the final shaping that was done to the button and the surface of the stem is once again smooth. From this point all that remained was to sand it with 400 and 600 grit wet dry sand paper and then use the micro-mesh pads 1500, 1800, 2400, 3200, 4000 and 6000 grit on the stem. As usual I kept a bowl of water next to me to keep the pads wet as I sanded the stems. Each progressive grit polished the stem and button to a more clean and shiny stage. I also reworked the surface of the entire stem. Once that was done I took it to the buffer and used the Tripoli buff followed by the White Diamond buff to bring it to a sheen.

ImageImage

The last three pictures show the finished pipe – both the bowl which had been cleaned and polished with White Diamond and a light touch and then finished with some carnauba wax to complete it. The stem is completed in terms of bringing back the button and the stem profile. The area around the logo on the stem will need to be worked on with the edges of the micro-mesh pads to get in close and remove the remaining oxidation. Then the entirety will need to be lightly buffed and waxed. The main reason I posted these pictures is to show that the profile is now clear and the new button is clearly visible. The last picture shows the top of the stem and the button is clearly visible. There is a bit of oxidation in the button that I will need to work on with the pads as well but at least the old BBB Bulldog is now very smokable.

ImageImageImage

Reworking the button on a Perspex Stem on a GBD Prehistoric


I was gifted this older GBD Prehistoric by a good friend who knows I like working on seeming irreparable pipes.  He knows that I enjoy the challenge and that I work to get them back to a workable condition. The stem was truly a mess as can be seen from the photos below. It had bite through holes on both the top and the bottom of the stem. The button was destroyed by the bite marks. This one would prove to be a bit of a challenge. My usual method of repairing bite throughs with Super Glue would not work as the hole was on both sides of the stem. You can tell by the three pictures below the size of the hole. I included even the blurry ones to show the extent of the problem that needed to be addressed.

ImageImageImage

After carefully picking at the holes with my dental pick I could tell that the surrounding Perspex material around the holes was compromised and pieces continued to come off with very little pressure on the dental pick. It was clear then that I would have to shorten the stem back to the point on the stem where there was solid material to work with. To do this involved cutting off almost a ¼ inch of the stem. The two photos below show the stem after the material has been removed. I used my Dremel with a sanding drum on it to take back the stem to this point. Care must be exercised to keep the finished surface straight and level. But I have found that this is fairly easy to do with the Dremel set at the lowest speed.

ImageImage

Once the stem is cut back to the solid material a new button has to be carved. I use a series of needle files to do this. Note in the picture below the three files that I used the most. The top one is a flat rectangular one that does a great job on the top and bottom of the stem to cut a straight 90 degree edge into the Perspex. The oval and the round file I used to open the slot in the button to match the shape of the one I cut off. Once the stem has been cut the airway at the end is merely a round hole or as in this case was barely flared. I like an oval slot in the button and the files do a great job in that process. I have two sets of needle files that I use. I clean the teeth on the files with Isopropyl alcohol and a brass tire brush. It keeps them from getting clogged with the Perspex dust.

Image

In the three pictures below you can see the button that has been cut in the stem. I also used sandpaper to thin the stem profile forward of the button to give it the proper slope and give the button some depth. Note the rough surface of the stem is caused by the use of 240 grit sandpaper to accomplish this task. The top photo is the top side of the stem at the button, the second is the underside of the stem and the bottom photo is a profile shot to show the look of the button. When the stem was at this point it still needed quite a bit of sanding to smooth out the new button and shape the stem. The edges in the profile are a bit sharp and needed to be rounded to match the part of the stem that remained untouched. I rounded the edges with the 240 grit sand paper to match the shape of the stem.

ImageImageImage

The next two photos below show the stem after that reshaping has been done. I then had to polish the stem to get it back to it clear sheen. I started that with some 400 and 600 grit wet dry sandpaper that was used with water to give it the bite to cut through the scratches of the files and the sandpaper. The first photo shows the pipe next to another GBD Rhodesian for comparison sake. You can see in that photo how much of the Perspex stem I removed to cut the new button. The second photo shows the shaping and flow of the stem once I have finished with the polishing with the wet dry sandpaper.

ImageImage

The last three photos show the finished pipe. The bowl was polished and the polishing on the stem was done with the micromesh pads through the 1500, 1800, 2400, 3200, 4000 and 6000 grits soaked in water to facilitate a good polish. Each grit level of micromesh took out more of the scratching that remained after the sanding. By the 3200 grit the surface was smooth and shiny. The last two grits gave it a thorough polishing and then I finished it on the buffer with White Diamond and carnauba wax.