Blog by Steve Laug
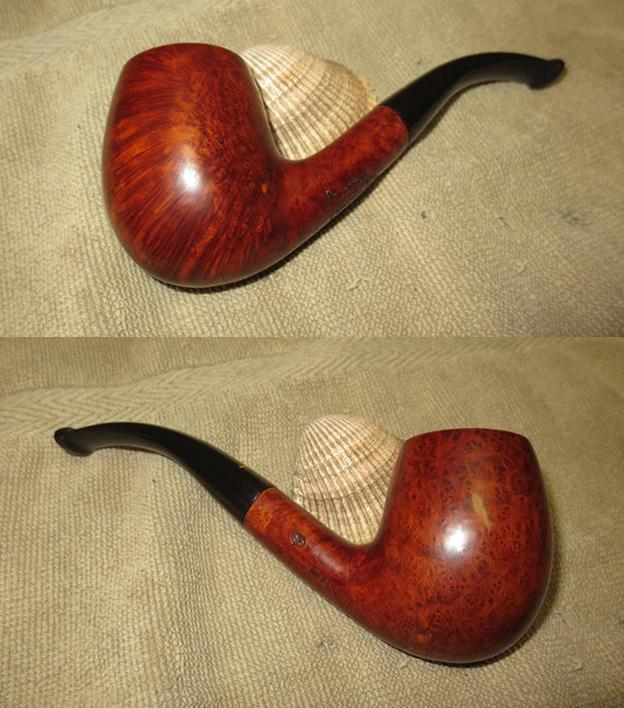
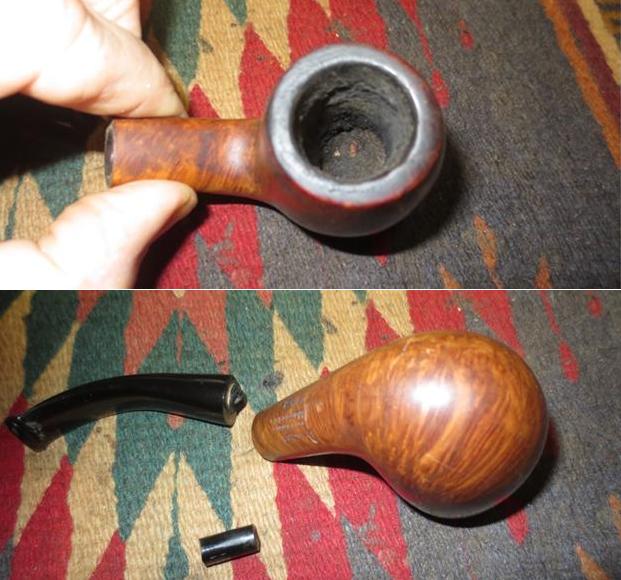
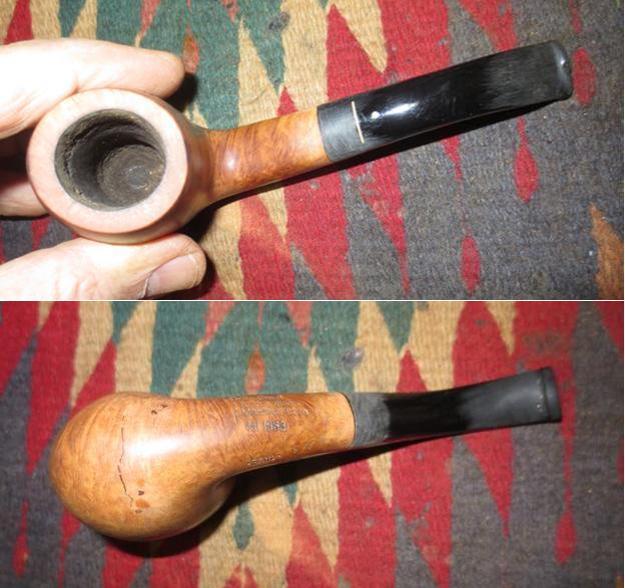
The next pipe up for repairs and restoration (from nine from the fellow who brought them for repair) is a Hand Made Pipa Croci. It is stamped on the left side and continuing to the underside of the shank with the words Pipa Croci (long-tailed P) over fatta a mano over Mantova, Italia and dal 1983. On the right side is stamped PC in a circle with a tail over A3 (shape number for a bent billiard). Next to that is stamped *True*. Fatta a mano means Hand Made. It would have been a great looking pipe when purchased. I am pretty sure that it is the nicest one that he left for me to work on and the one with the most issues. Somewhere along the way he dropped the pipe on concrete and the tenon snapped. If that had been all then that was a simple fix. It was not all! The bowl cracked two places on the bottom, not deep cracks but cracks nonetheless. There was a crack on the left side mid bowl that ran from close to the bottom up to a ½ inch below the rim and a small one on the top of the rim on the left toward the front of the bowl.
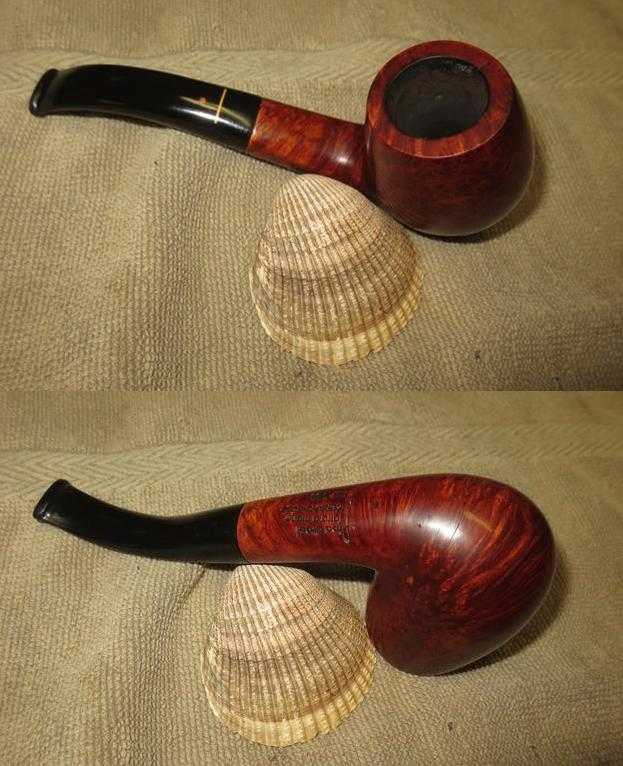
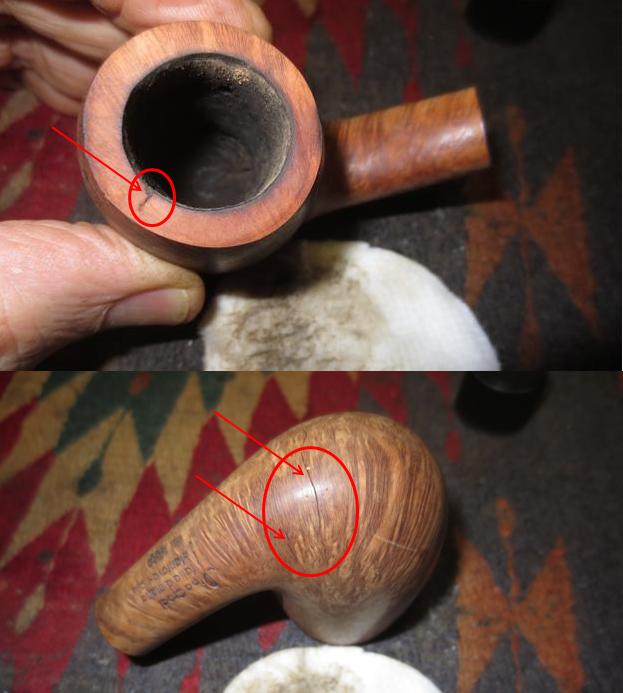
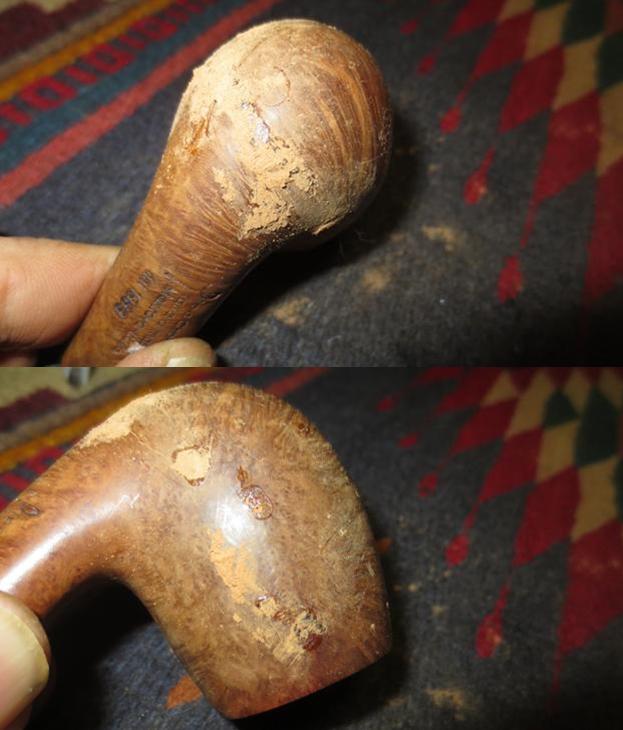
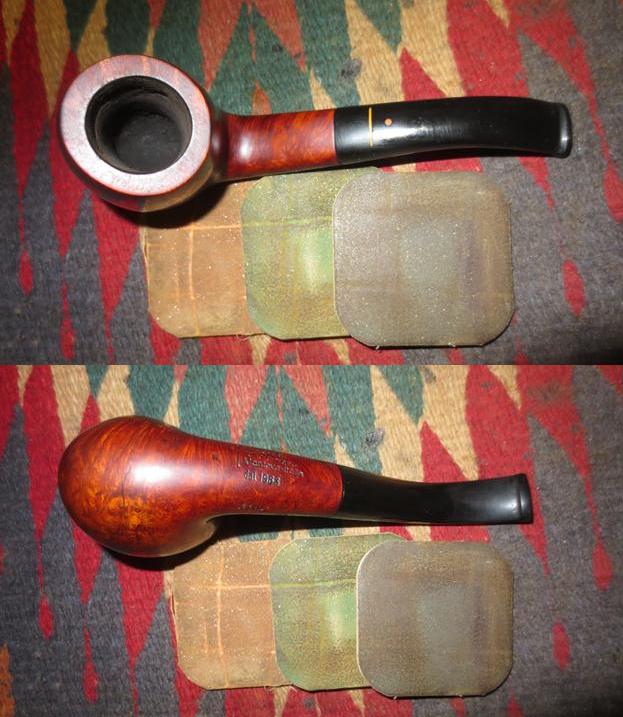
 I took a close up photo of the rim and bowl to show the condition. The cake is thick and the rim has a lava overflow from the bowl and some damage on the outer edge near the front.
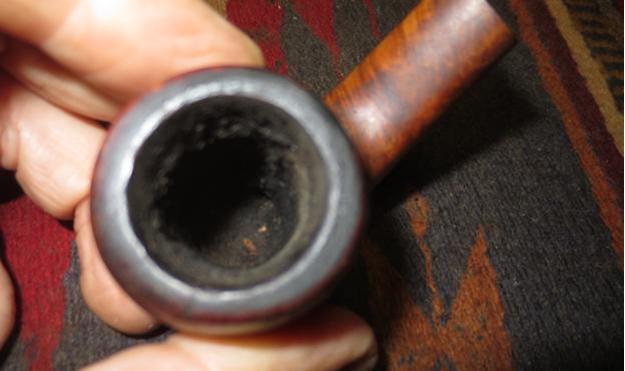 The next two photos, though a little out of focus show the crack in the bowl bottom circled in red. I will continue to show them in the photos as I clean up the bowl.
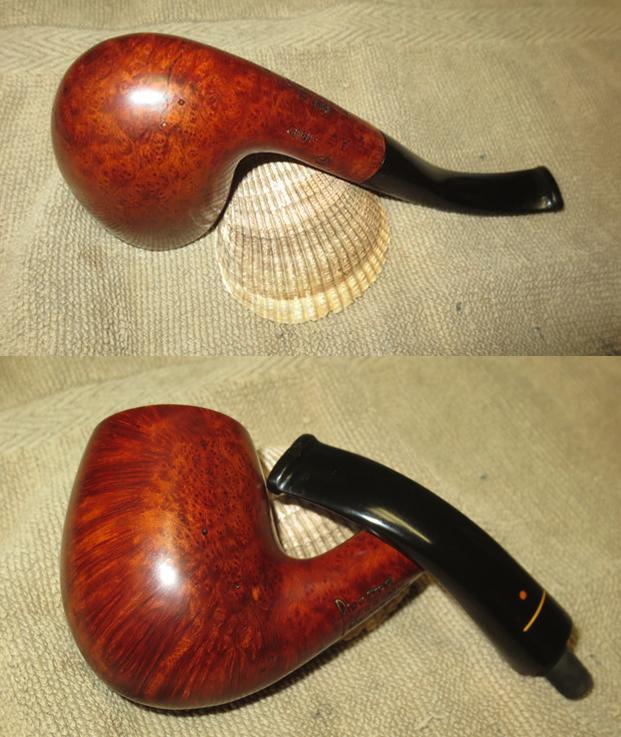
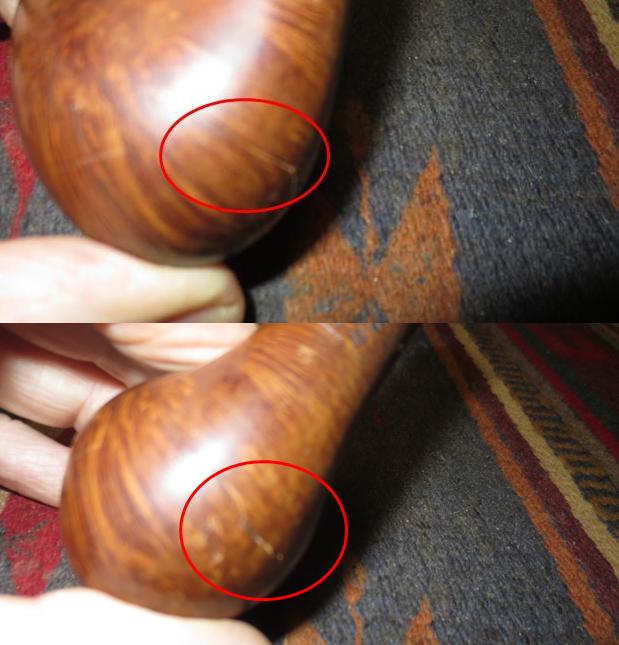 The Lucite/acrylic stem was rough. There were tooth marks on both the top and underside of the stem in front of the button and a deep bit mark on the top of the button. The broken tenon would need to be replaced and there were some nicks in the sides of the stem close to the button end.
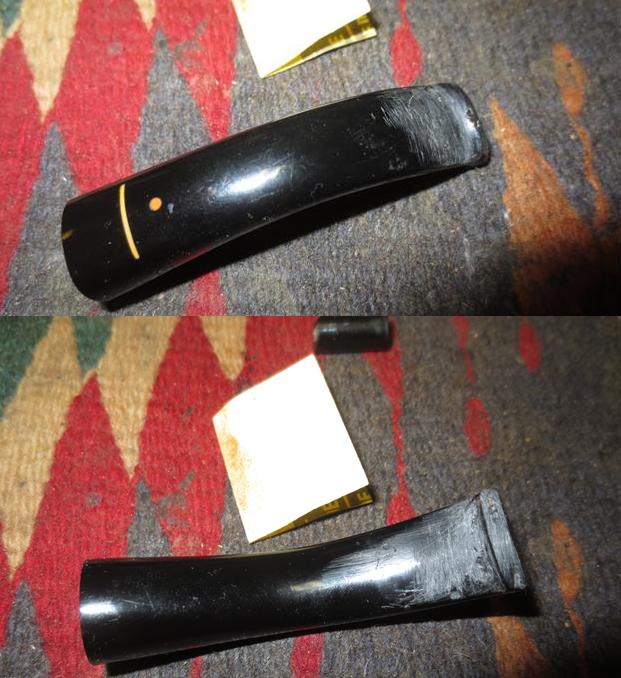 I reamed the bowl with a PipNet pipe reamer and took the cake back to bare briar. I cleaned up the reaming with a Savinelli Fitsall Pipe Knife. There would still need to be more work done to smooth things out but the bowl was clean and I could see that the cracks did not go all the way through to the inside walls.
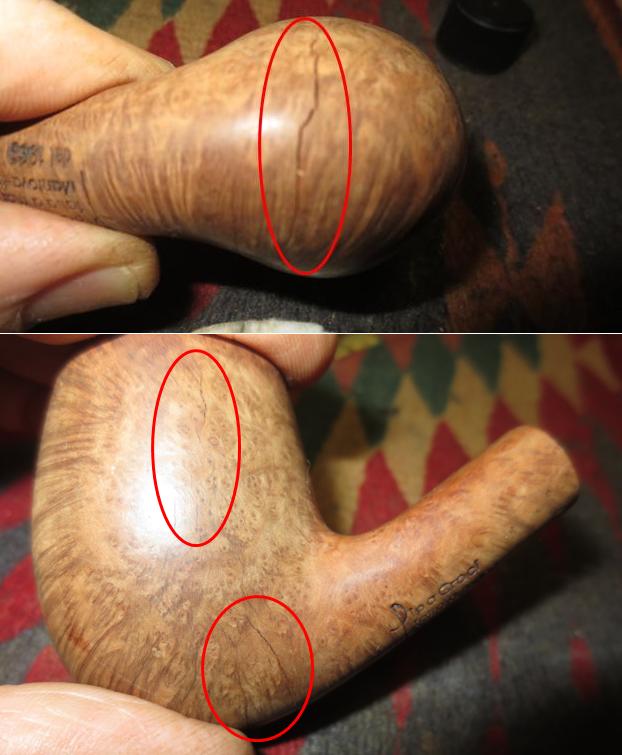
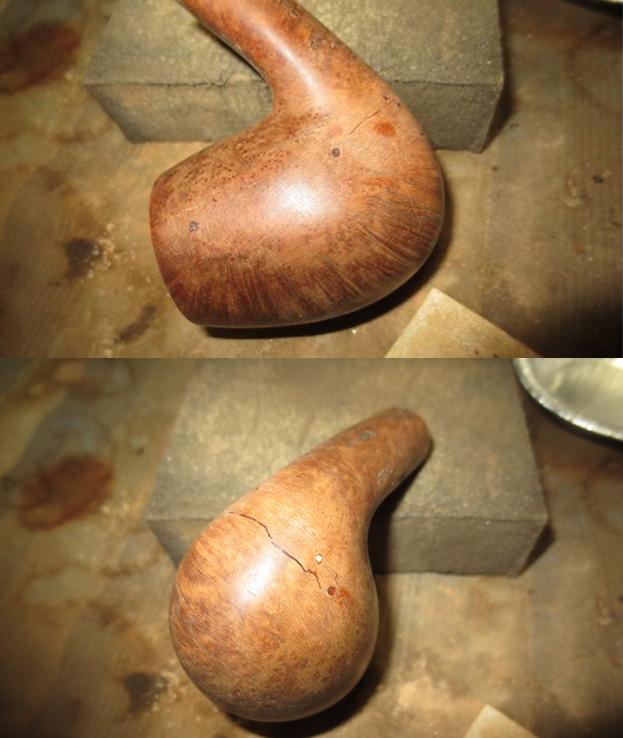
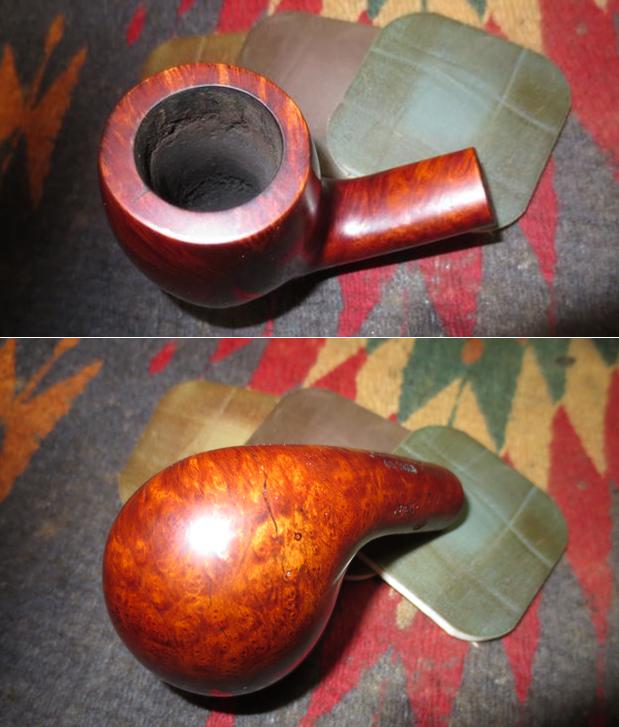
 I topped the bowl to remove the rim damage, particularly that on the outer edge. I also wanted to expose the crack on the rim top and see how bad it was. This pipe really took a beating when it was dropped – fissures all over the place in the briar. I have circled the crack on the bottom to show the largest one. There is a small one next to it that is hard to see in this picture though it will show in later pictures.
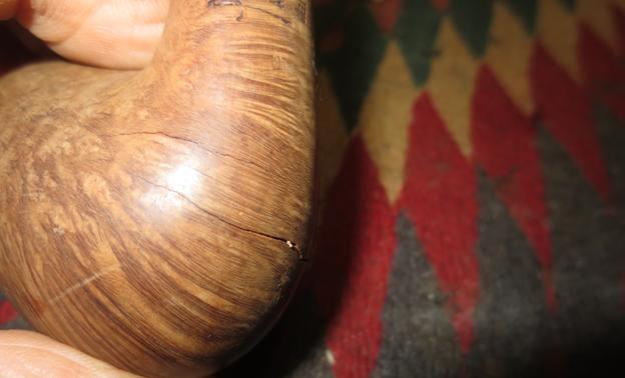
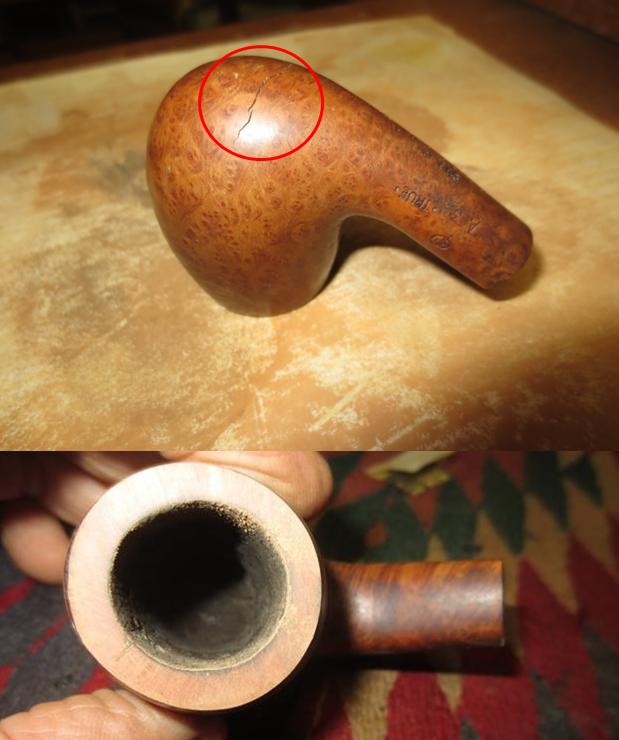 I scrubbed the bowl down with acetone to remove the finish and reveal more clearly the cracks on the bowl. I have circled them in the next set of photos and drawn arrows to the points of origin that will need to be drilled. The number of cracks is amazing to me – all from a drop on concrete. This briar is quite stunning with some birdseye and cross grain.
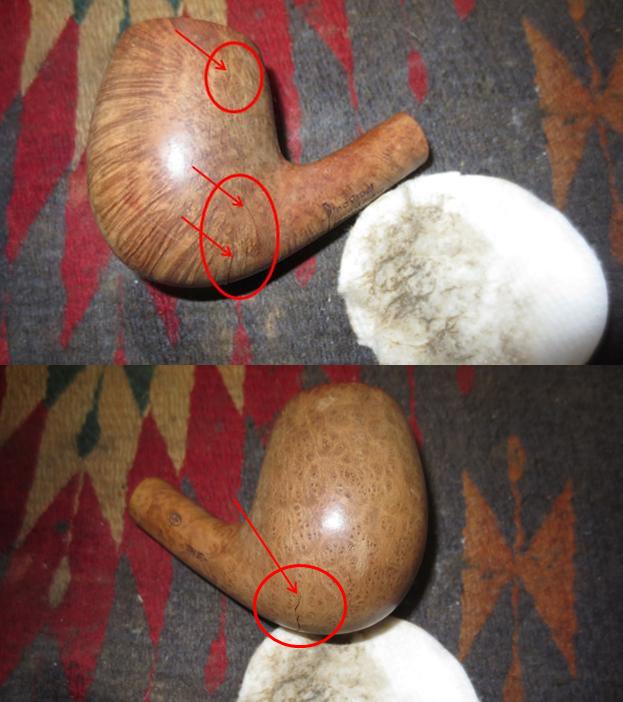
 I drilled with a microdrill bit in the Dremel at each terminus of the cracks. Some of them had spidered a bit so they took multiple holes. I clean out the cracks with a dental pick and wiped the bowl down with alcohol on a cotton pad. I filled in the holes with briar dust and clear super glue. I sanded the repairs with 220 grit sandpaper to blend the repairs into the rest of the bowl. I sanded them with a medium and fine grit sanding sponge to polish the scratches away.
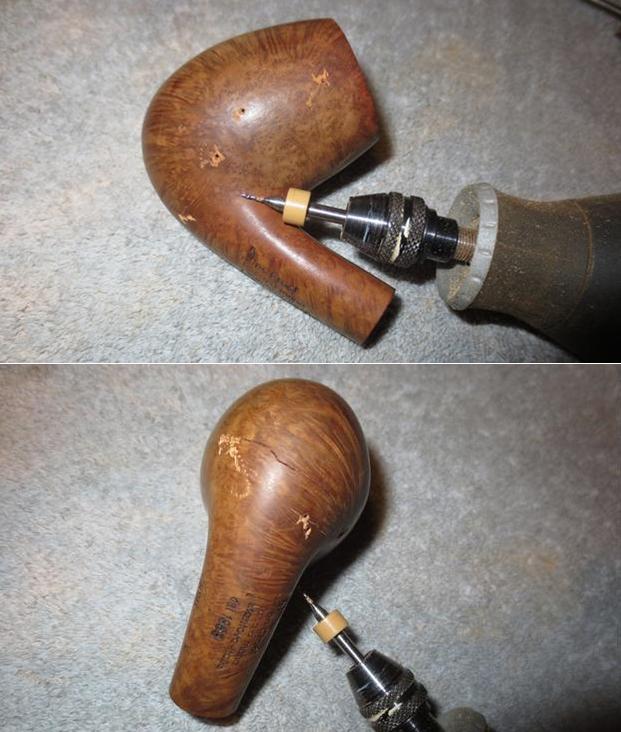
 I set the bowl aside for a while and worked on the stem. I flattened out the broken tenon on the face of the stem with a Dremel and sanding drum. Once it was smooth I used a drill bit about the same size as the airway in the stem to start the process of opening the airway to take the new tenon. I put the drill bit in a stationary drill and turned the stem on to the bit by hand. I increased the size of the bit incrementally so as not to split the stem and to keep things aligned. I put a tape on the bit that marked the depth of the threaded tenon. Once the airway was opened to the diameter of the tenon I used a tap to thread the inside walls of the newly drilled opening. I turned the stem onto the tap carefully to keep it straight and aligned.
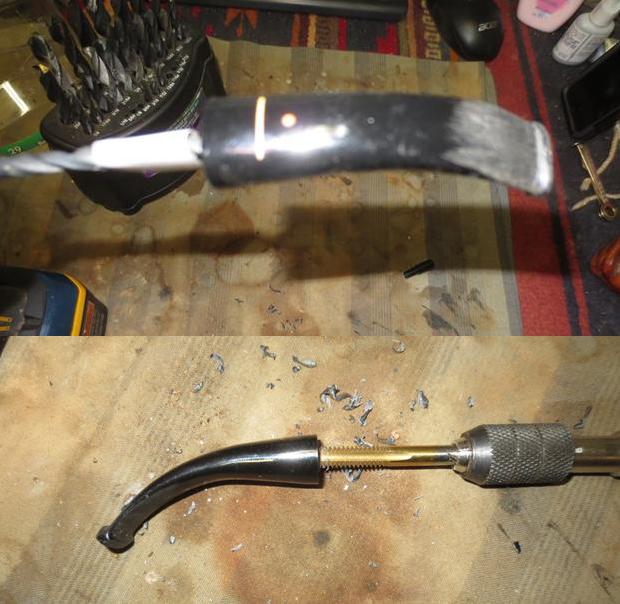 The next two photos show the newly tapped stem and the new tenon that was going to be turned into the stem. The tenon was slightly larger than the mortise so I used the Dremel and sanding drum to take it down to the right size. I dabbed some slow drying glue on the threads of the new tenon and turned it into the stem until it sat tight against the face of the stem. With that done the stem repair was complete. There were some nicks and scratches in the stem around the junction area with the shank that needed to be sanded and cleaned up. I used some 220 grit sandpaper to do that. The stem was ready for the fit and all that remained was to push it into the mortise and check it out once the glue set.
 I put the stem in place in the mortise to check the alignment and was happy with the overall results. As normal there were some slight adjustments that needed to make to the stem and shank but nothing radical so I was happy with the fit. Now all I had to do was finish the fit and repair the stem. I noticed in the photos below that there was some roughness to the inside of the bowl so I would also need to sand that smooth.
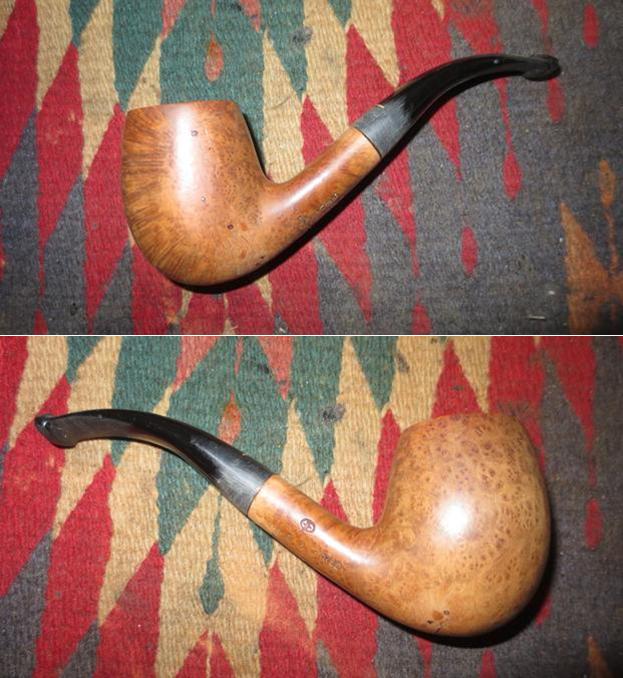
 I wrapped a piece of 220 sandpaper around my finger and sanded the inside walls of the bowl until I had smoothed them out.
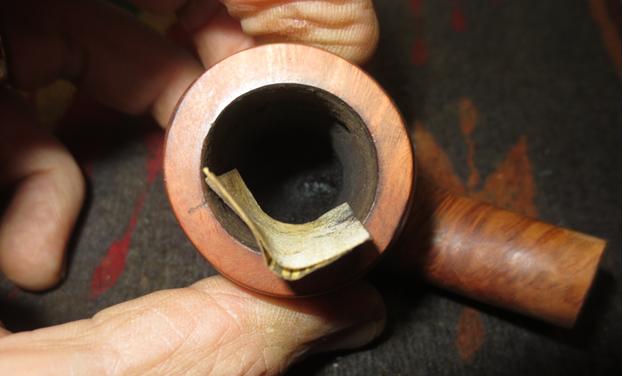 I cleaned out the airway in the stem and the bowl as well as the mortise with pipe cleaners, cotton swabs and alcohol until they were all clean. I also scrubbed the darkened end of the shank to remove the stain that was there.
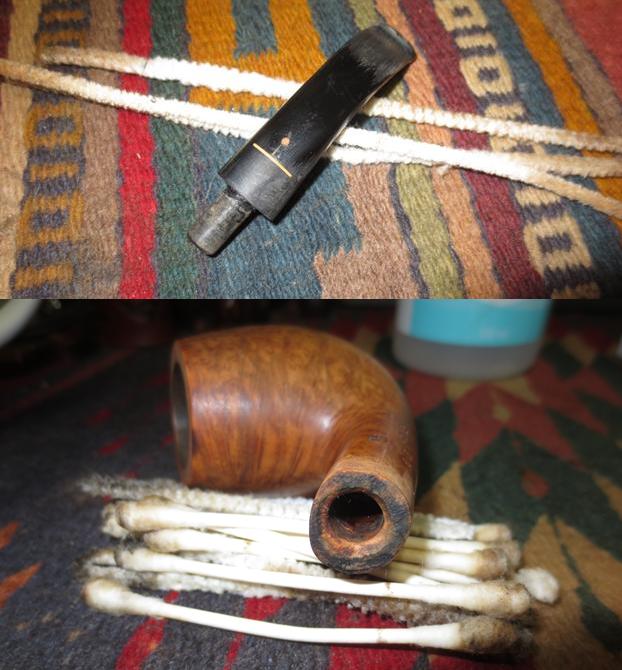 I stained the bowl with a dark brown aniline stain thinned 50/50 with alcohol and flamed it to set it in the grain. I repeated the process until the coverage was even around the bowl. I wanted it to be dark enough to blend the repairs into the sides and bottom of the bowl and hide the drill holes and cracks. I set the bowl aside to let the stain dry overnight and called it a day.
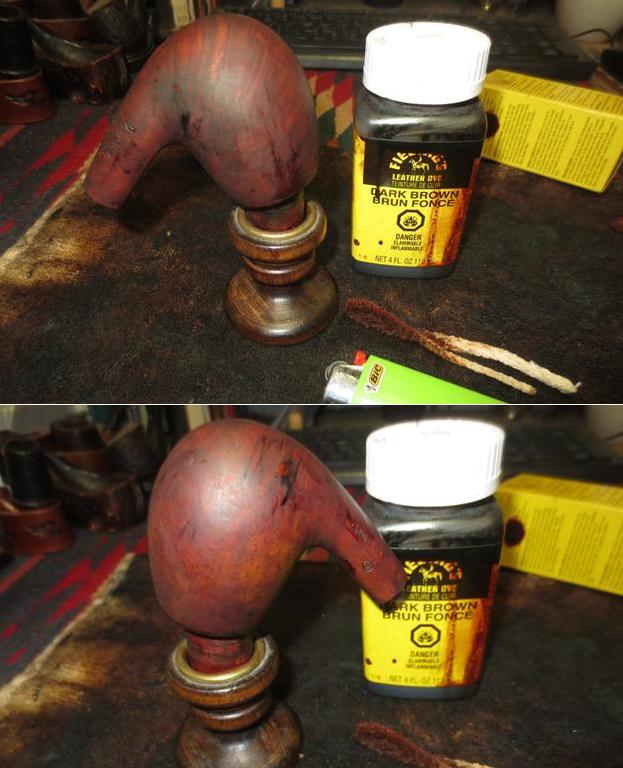 In the morning I started the polishing process on the bowl. I sanded it with 1500-2400 grit micromesh and a small amount of olive oil to help the grit cut into the briar. I wiped it down afterwards and inserted the stem to see what was happening. The alignment of the stem was slightly off to the left in the photos so it appears not to fit. However, the fit is actually quite good. I still need to polish and clean up the stem.
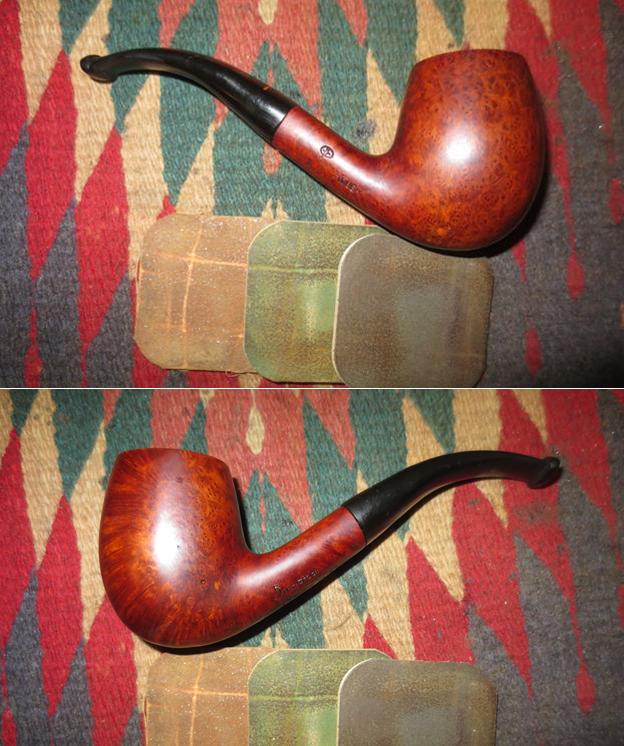
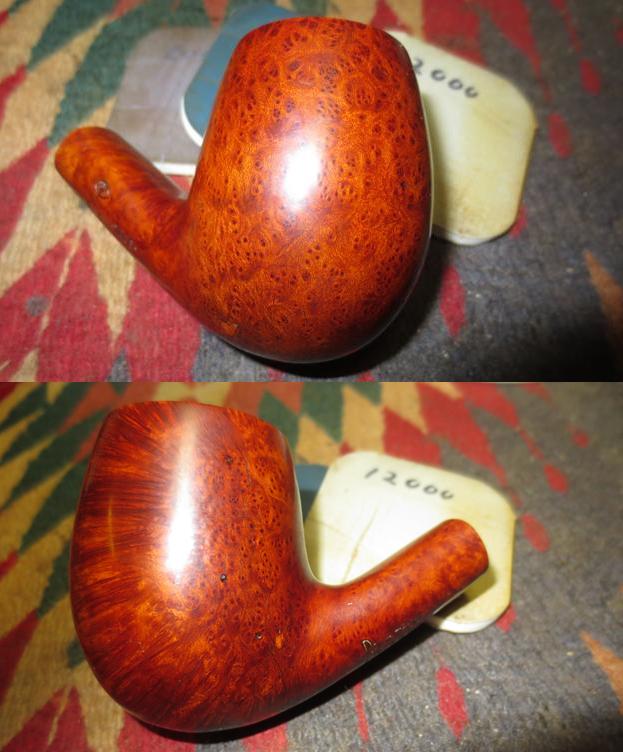
 I continued polishing the bowl with the micromesh pads using 3200-12000 grit pads to really add to the shine of the briar. Each successive grit of micromesh raised the shine more on the briar. The grain really pops on this one…
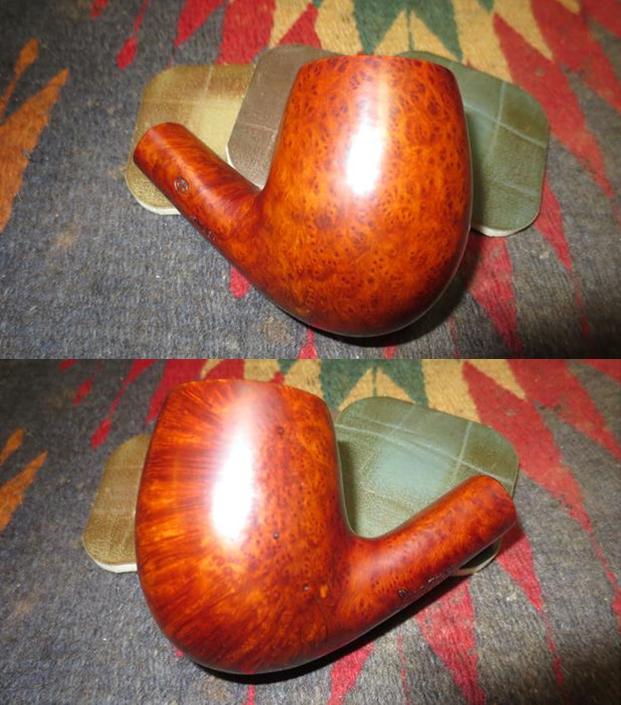
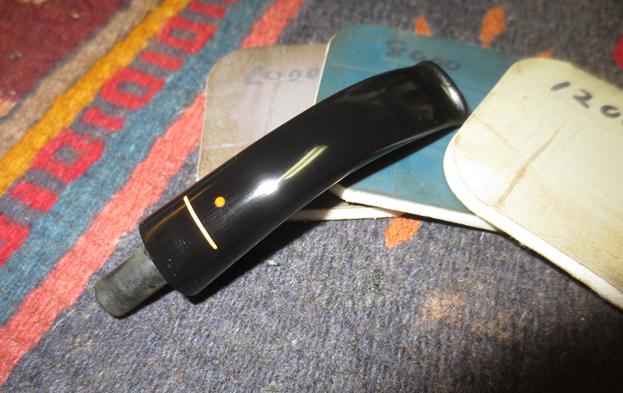
 I turned back to the stem. I adjusted the fit with 220 grit sandpaper until the transition was smooth. When the fit was correct I polished the stem with micromesh sanding pads – wet sanding with 1500-2400 grit pads and dry sanding with 3200-12000 grit pads. I wiped the stem down after each grit of pad to clean off the sanding debris and gave it a final wiped down after the 12000 grit pad.
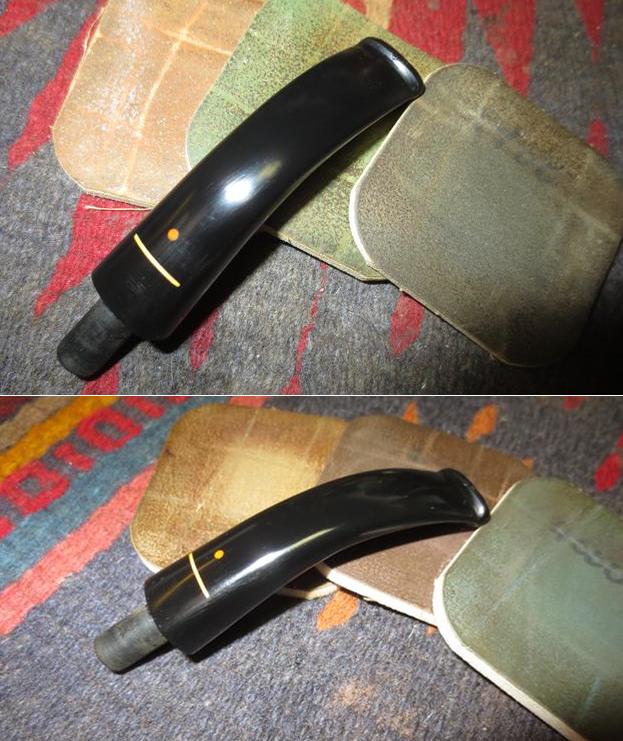
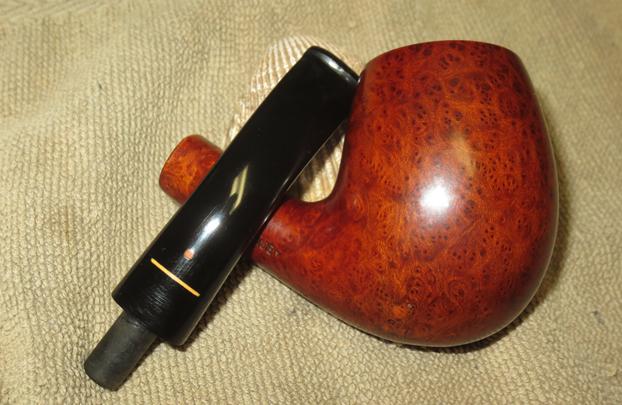
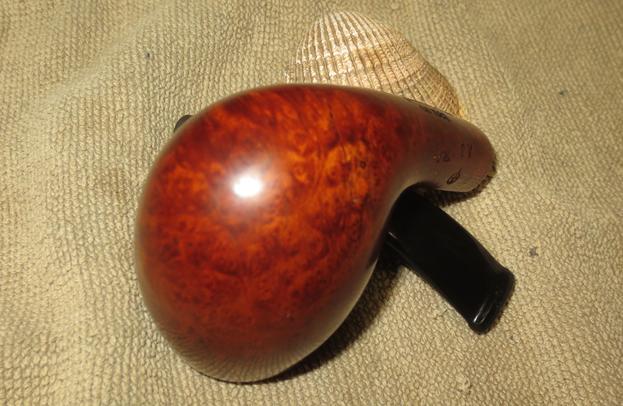
 I buffed the pipe and stem with Blue Diamond on the buffing wheel to remove any remaining scratches or marks and raise a shine. I gave the bowl and stem multiple coats of carnauba wax and buffed the pipe with a clean buffing pad. I hand buffed it with a microfibre cloth to deepen the shine. The finished pipe is shown in the photos below. The cracks are all sealed and since they do not go all the way through into the interior of the bowl I think that they will hold up well. The pipe has a lot of life in it still and I know that the owner will be glad to get it back in far better nick than it was when he left it here. Thanks for journeying with me on this resurrection.