by Steve Laug
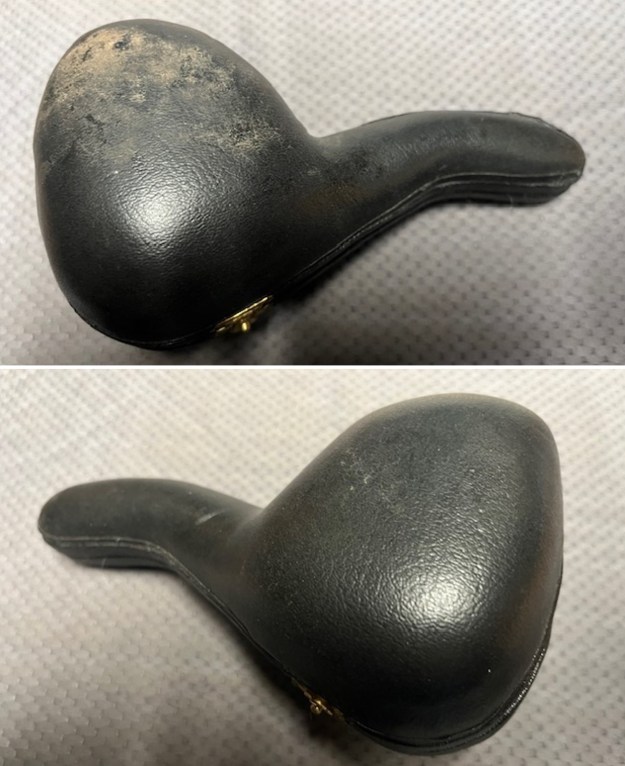
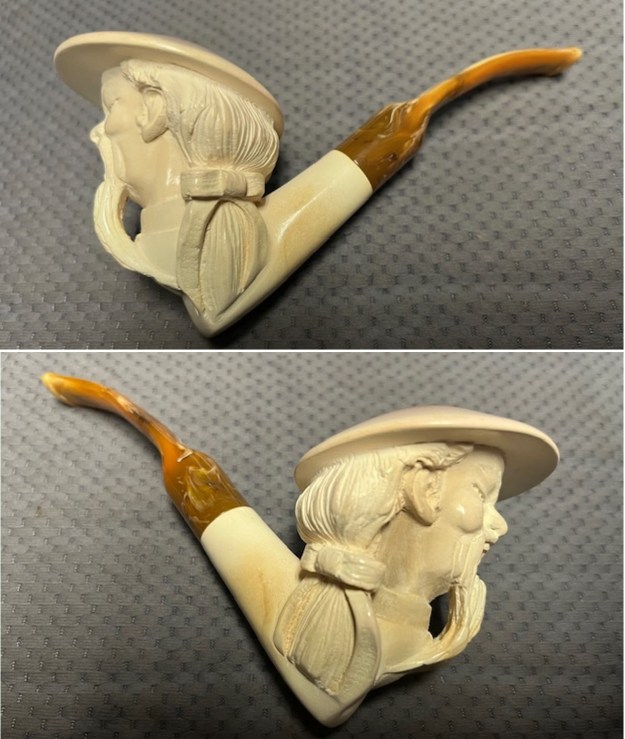
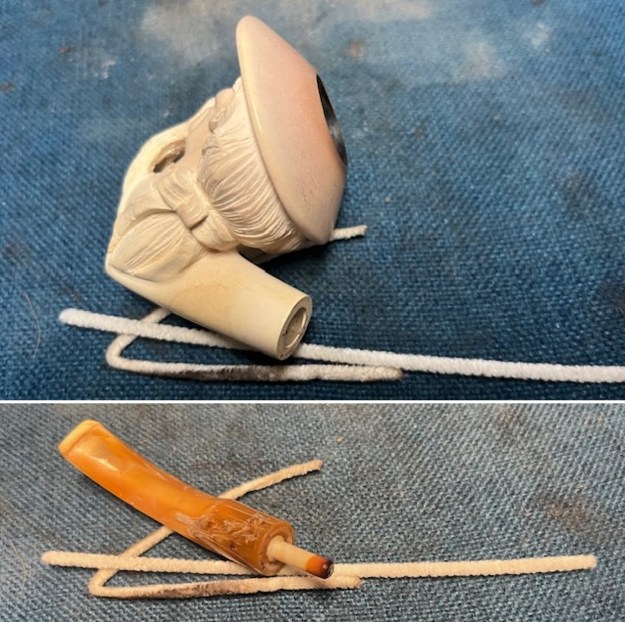
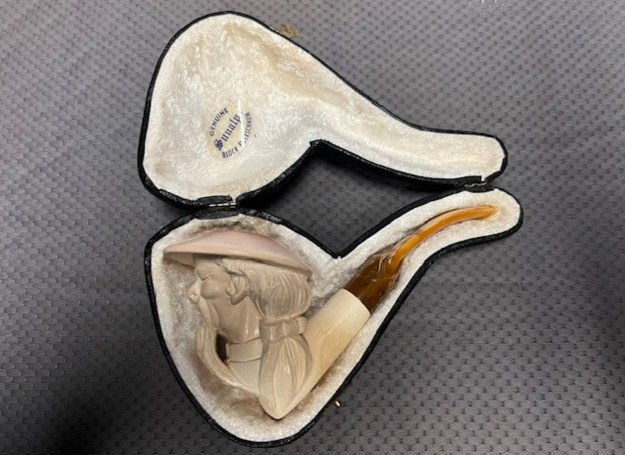
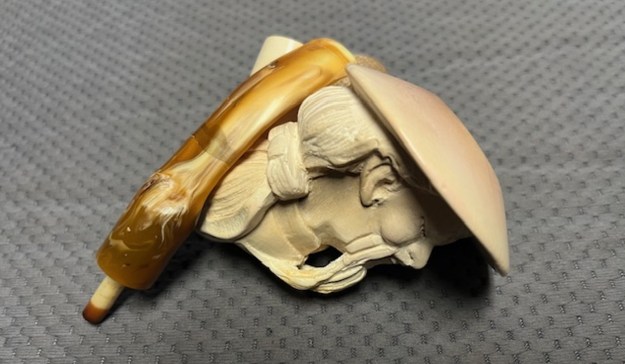
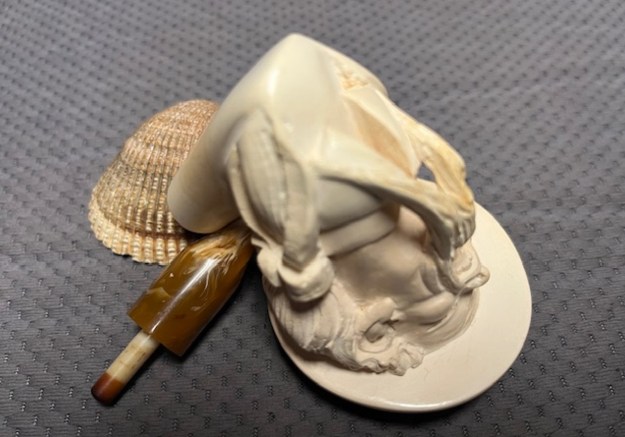
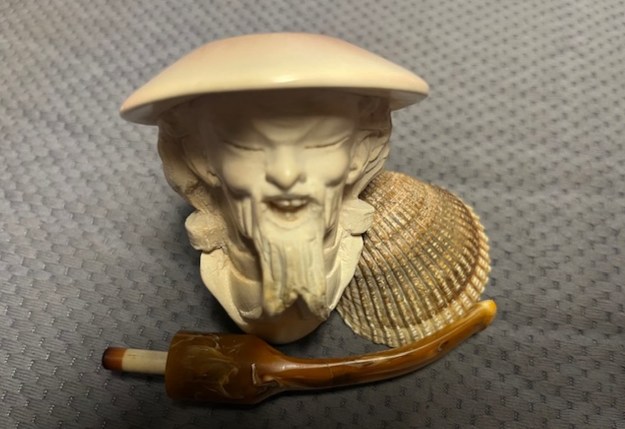
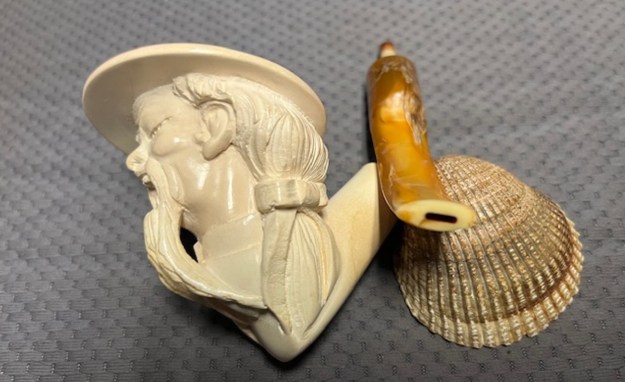
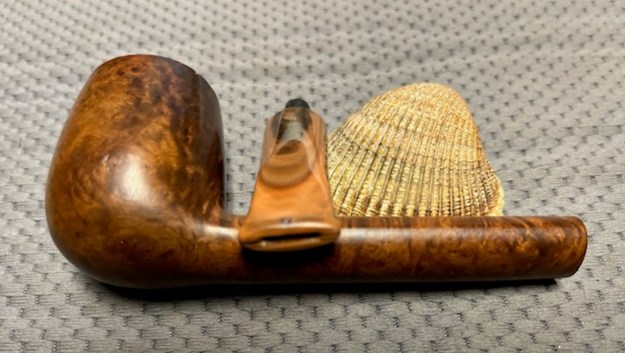
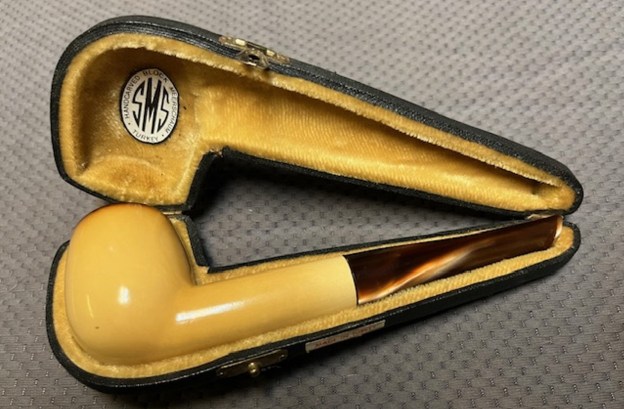
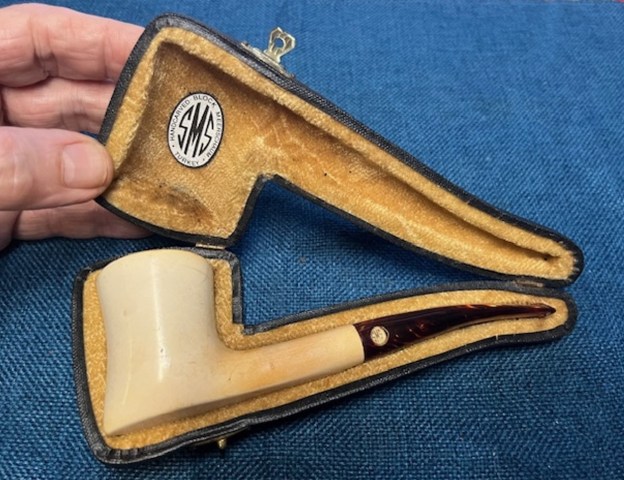
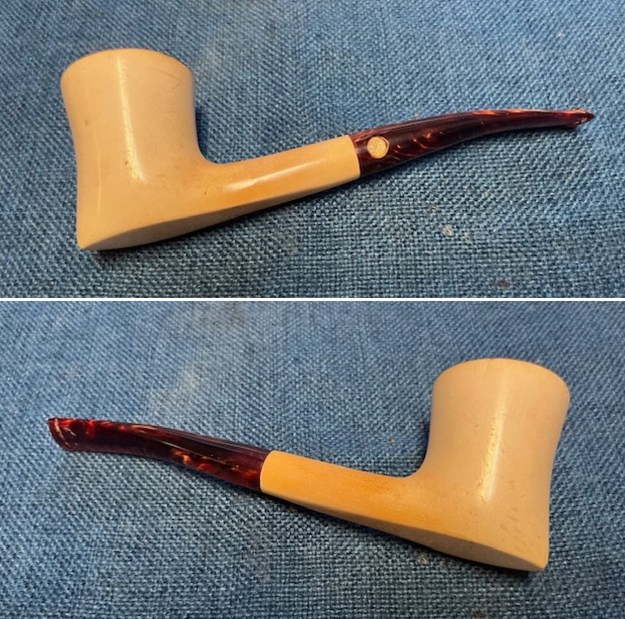
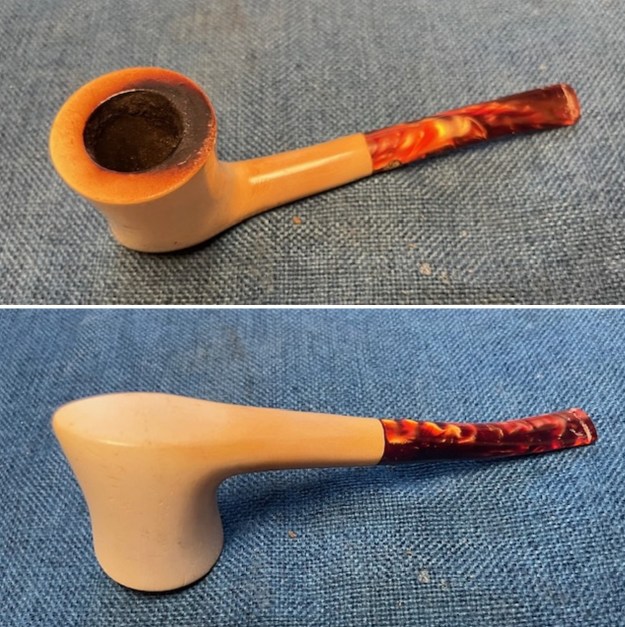
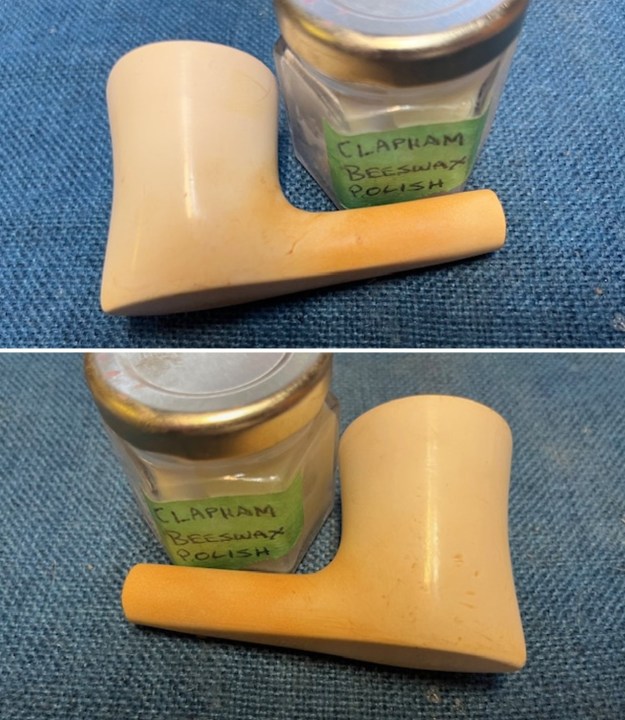
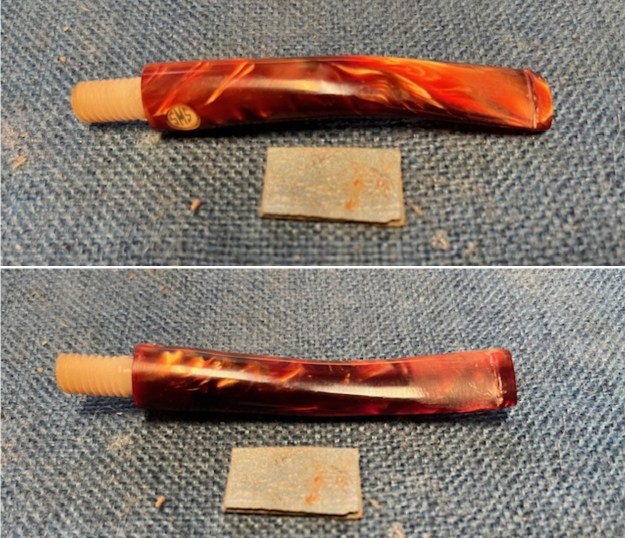
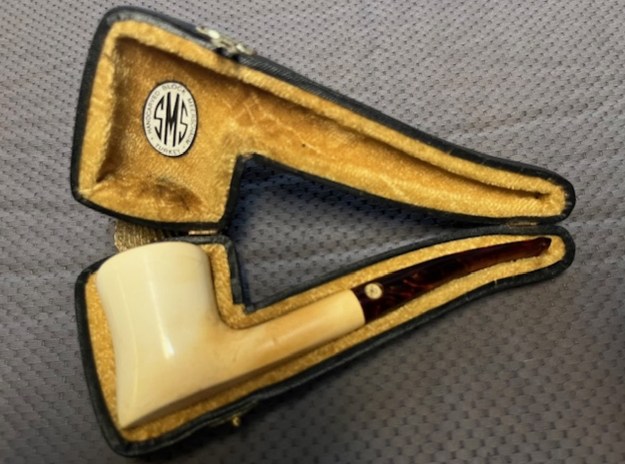
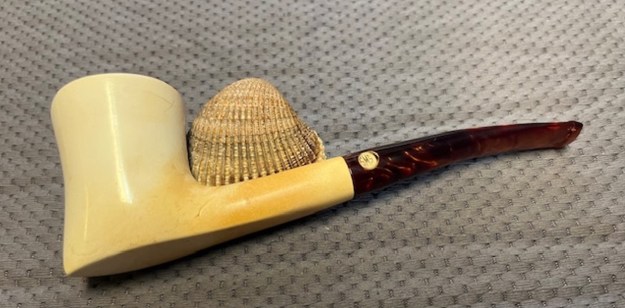
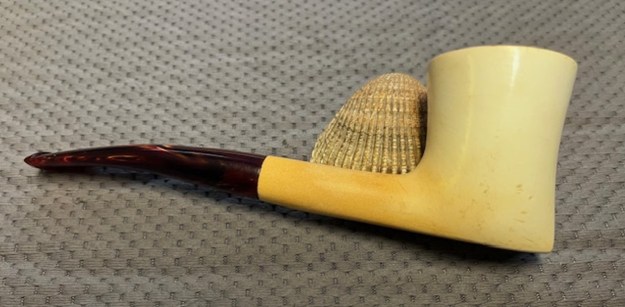
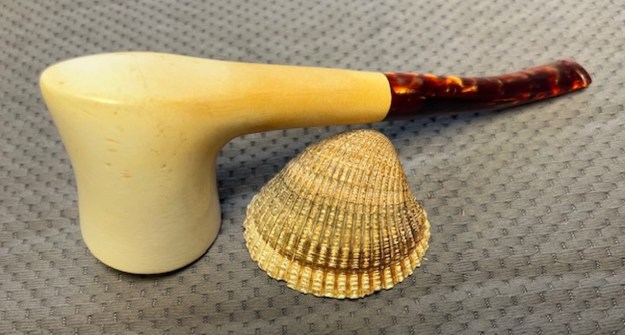
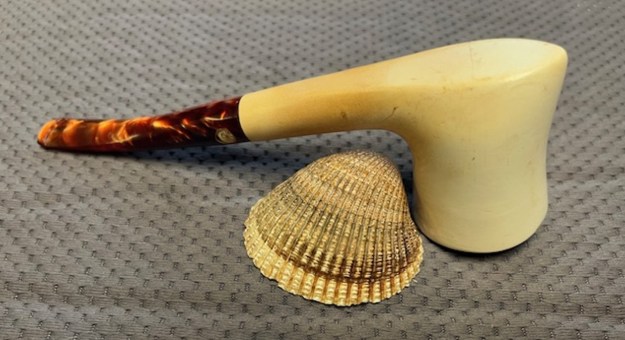
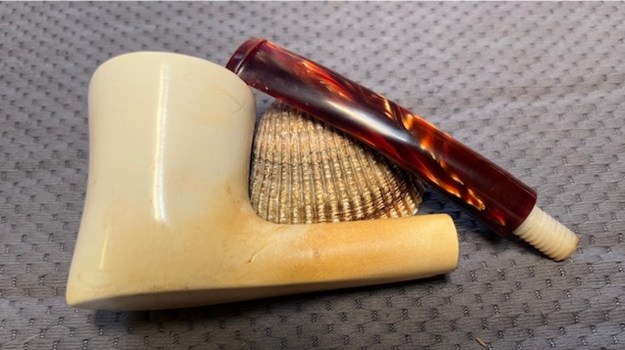
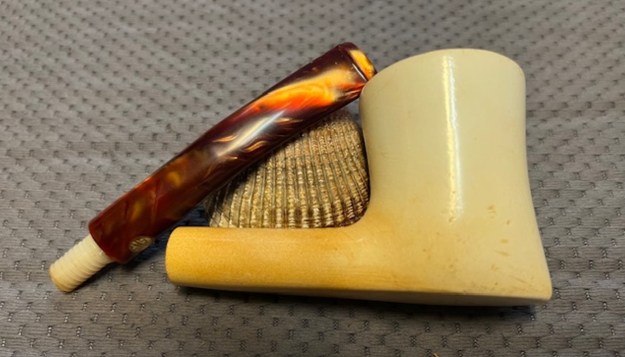
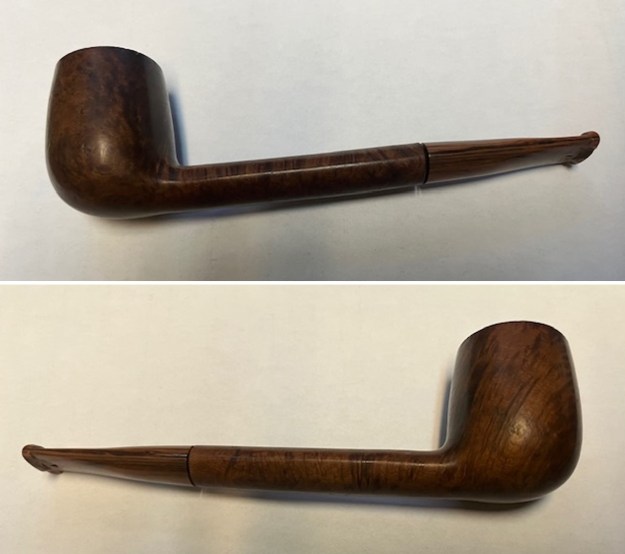
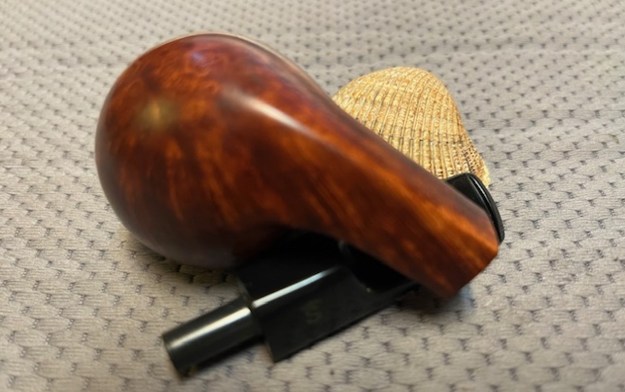
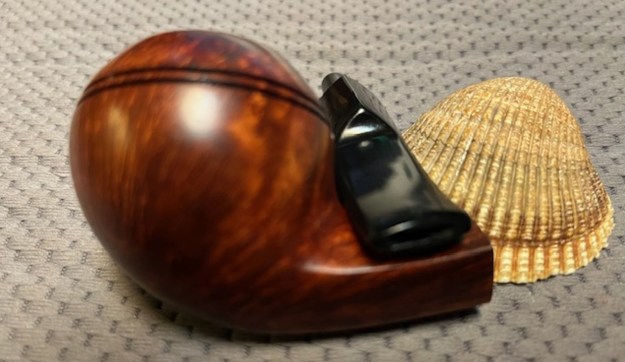
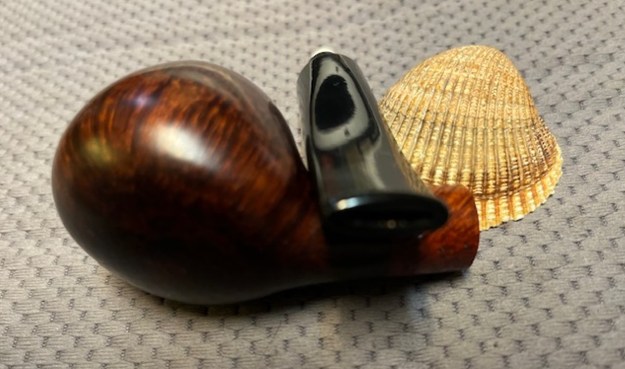
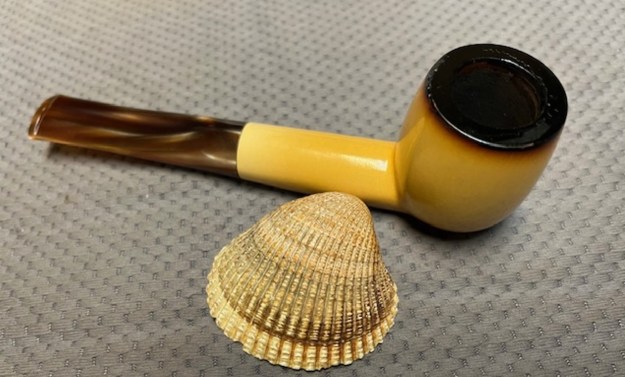
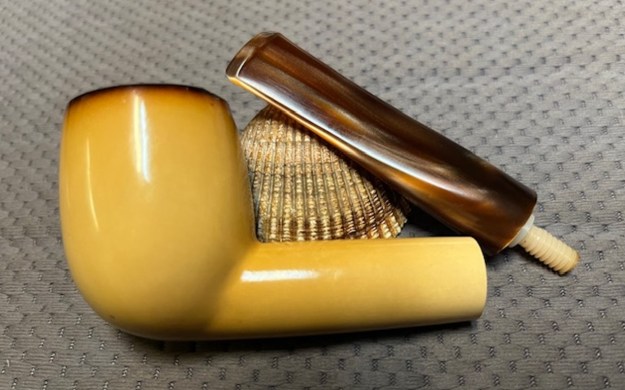
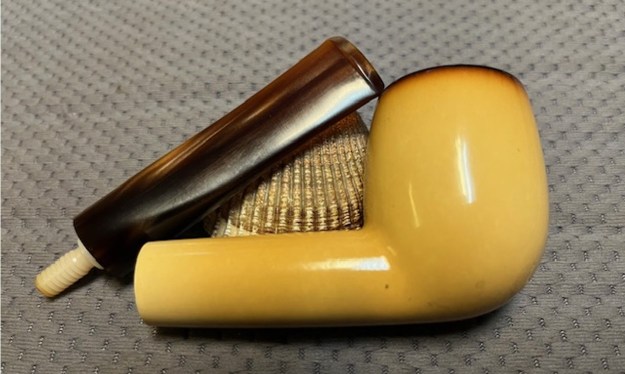
This afternoon I decided to work on another pipe that I no longer know where or when we purchase it. I have a large box of Meerschaum pipes that is sitting in my storage that I need to clean up and restore. I have honestly avoided them for years but now was the time to start my work on some of them. Today I chose another cased one. It is a black cased pipe and when opened it held a Billiard shaped meerschaum. The case is lined with golden soft fabric that protected the bowl. The case bears an SMS logo and there is no logo on the taper stem. It is a beautifully shaped Billiard shaped meer with a dark flumed top on the bowl and some scratches from its journey and some nice patina around the shank and sides. The meer is dirty from use with a thick cake in the bowl and a light overflow of lava on the inner edge and rim top, heavier on the back side. There is some chips or nicks on the back outer edge of the bowl. The variegated rose acrylic threaded tenon stem fit well against the shank end and was slightly dirty and had tooth marks and chatter on both sides ahead of the button. I took photos of the case and the pipe before I started my clean up work on it. 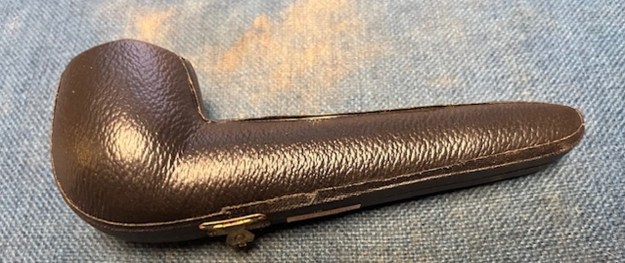

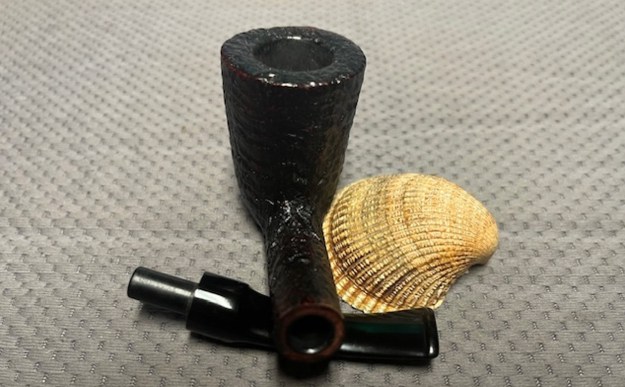
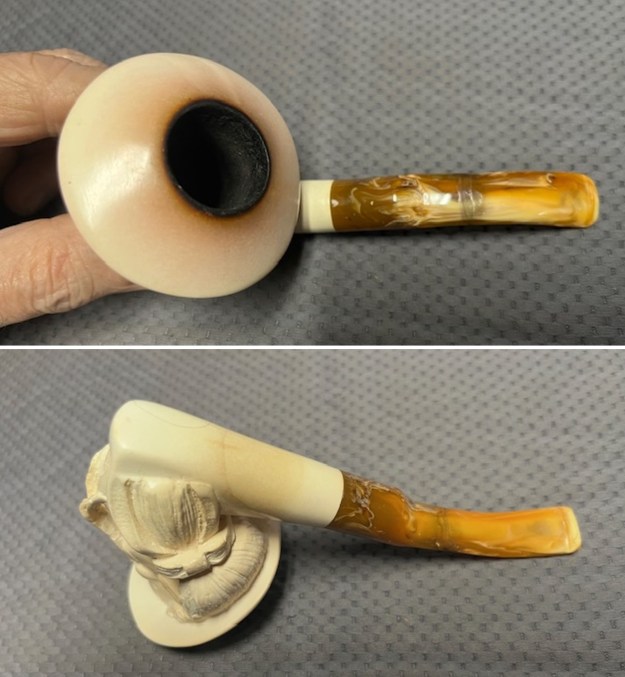
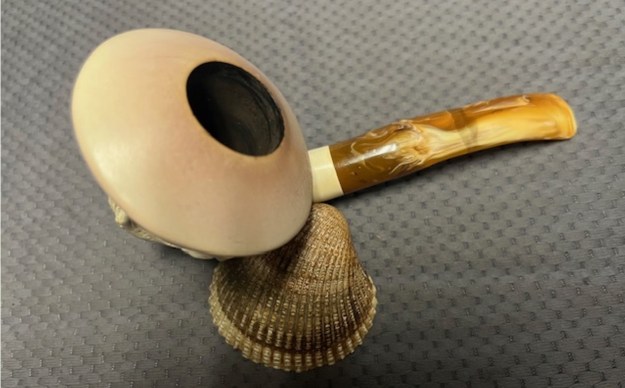
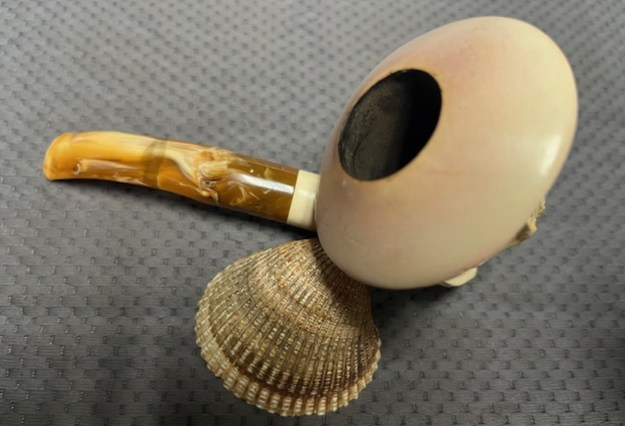
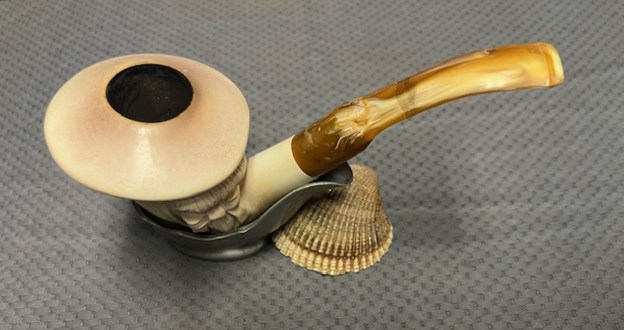
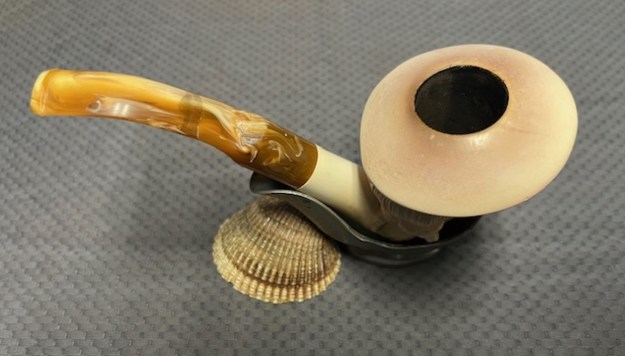
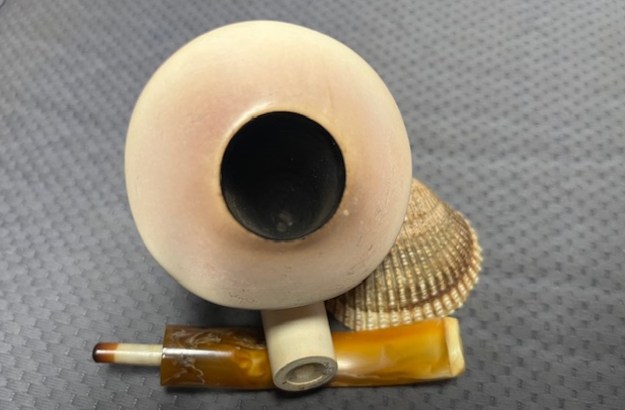
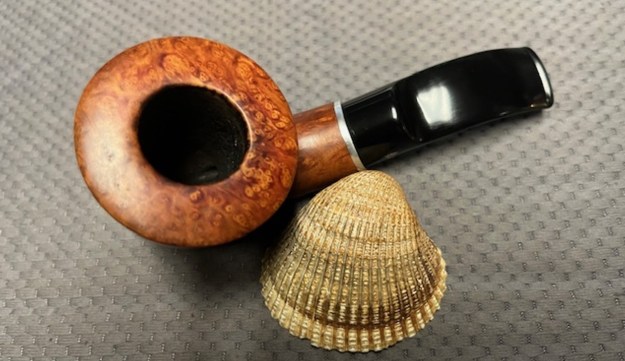
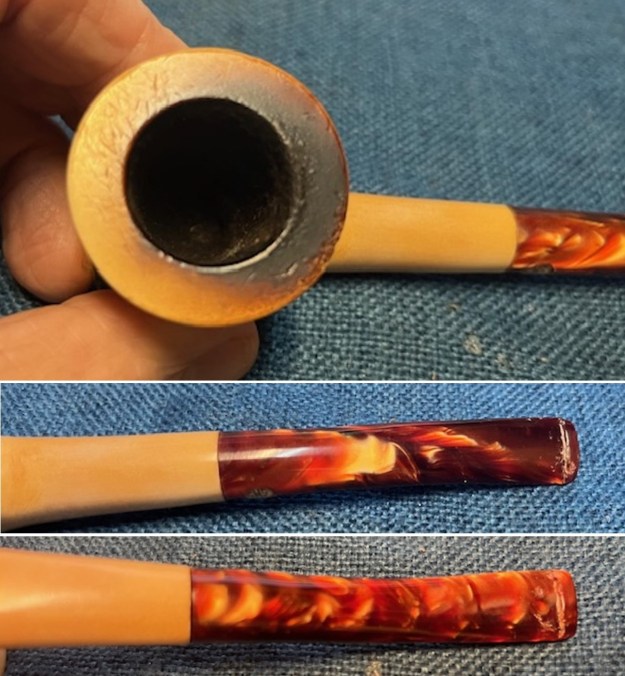
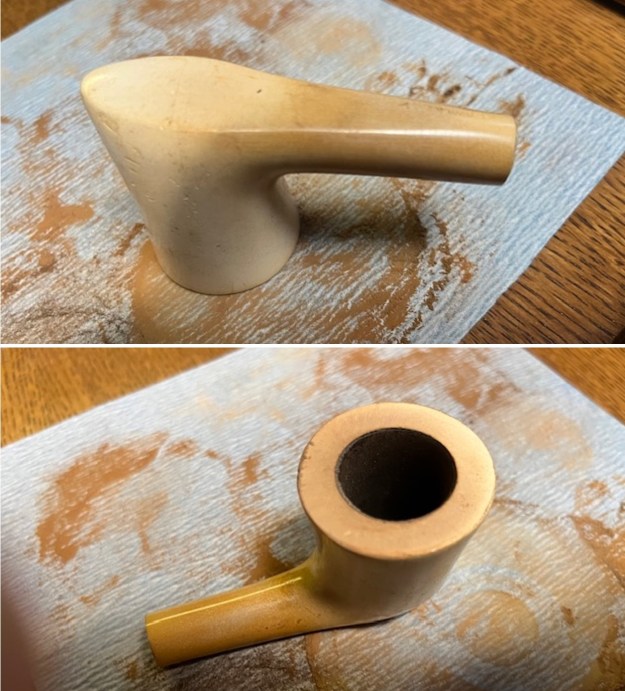
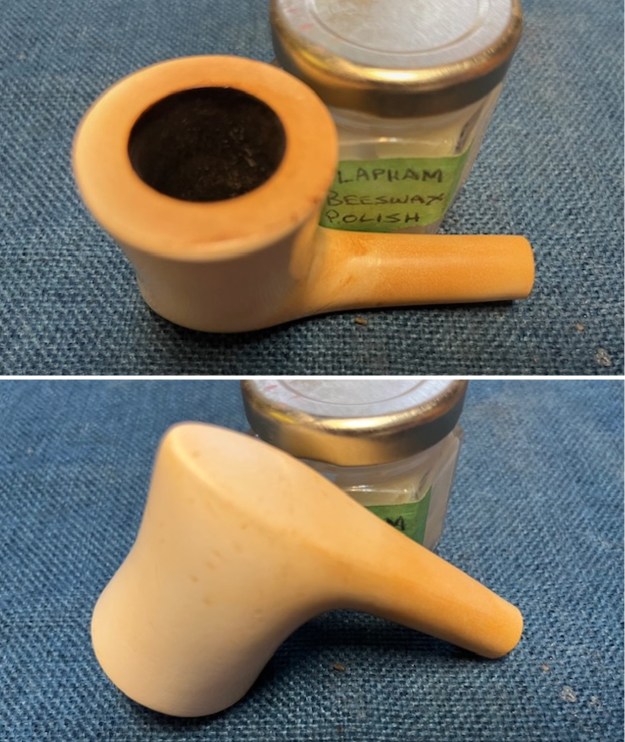
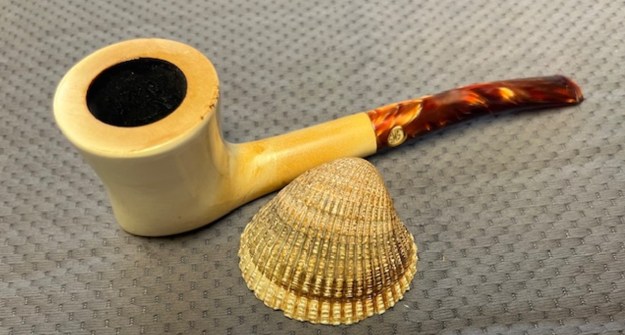
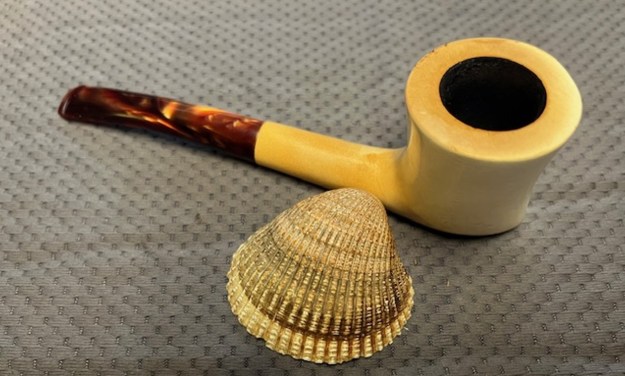
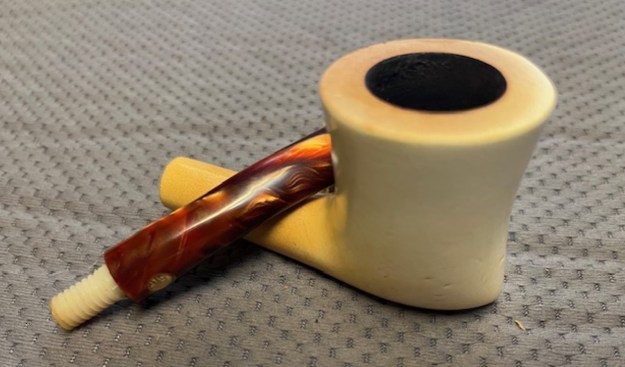
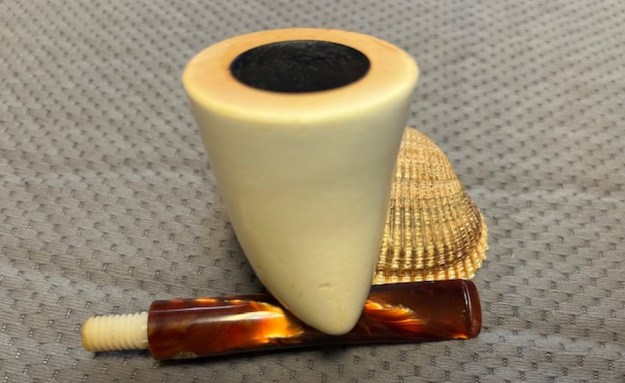
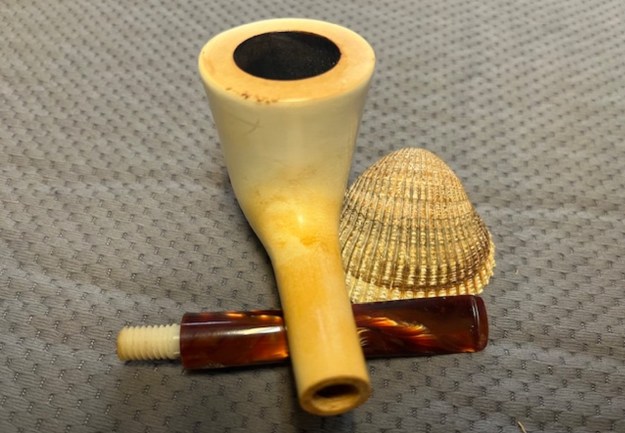
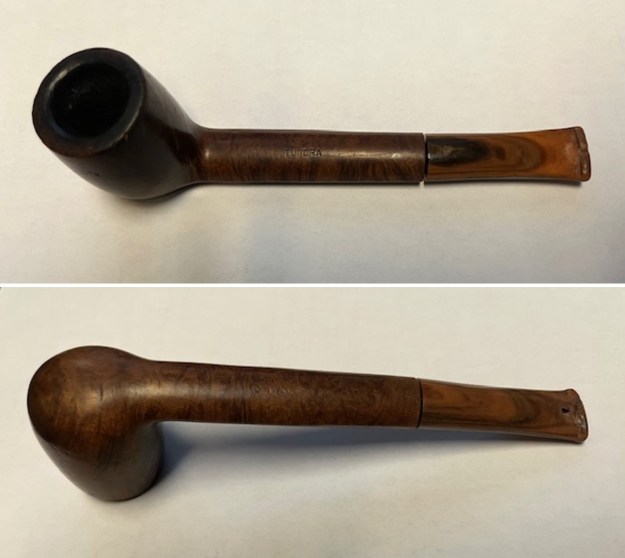
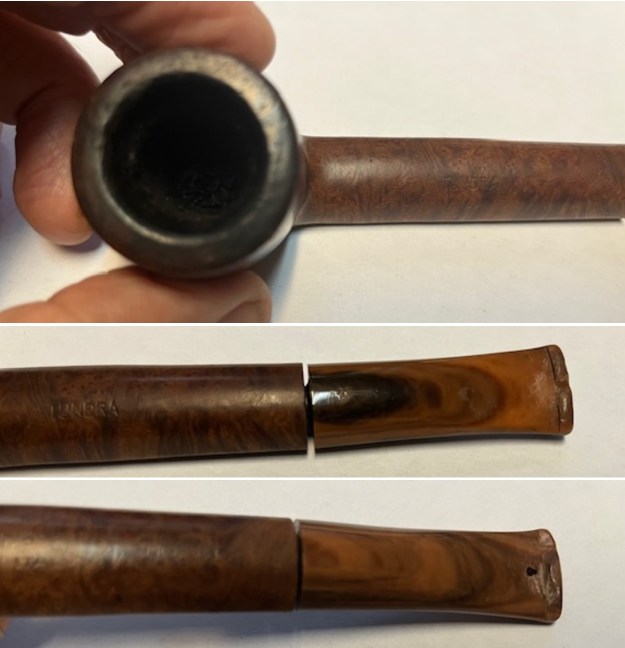
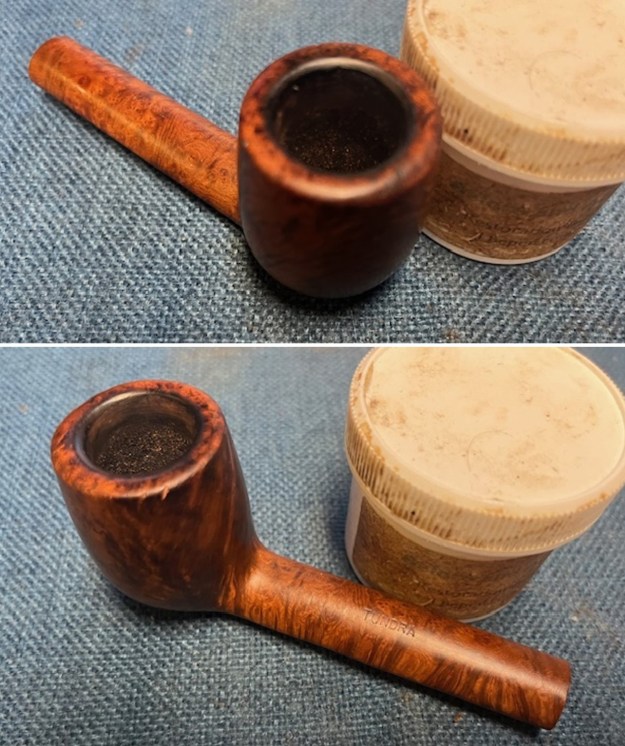
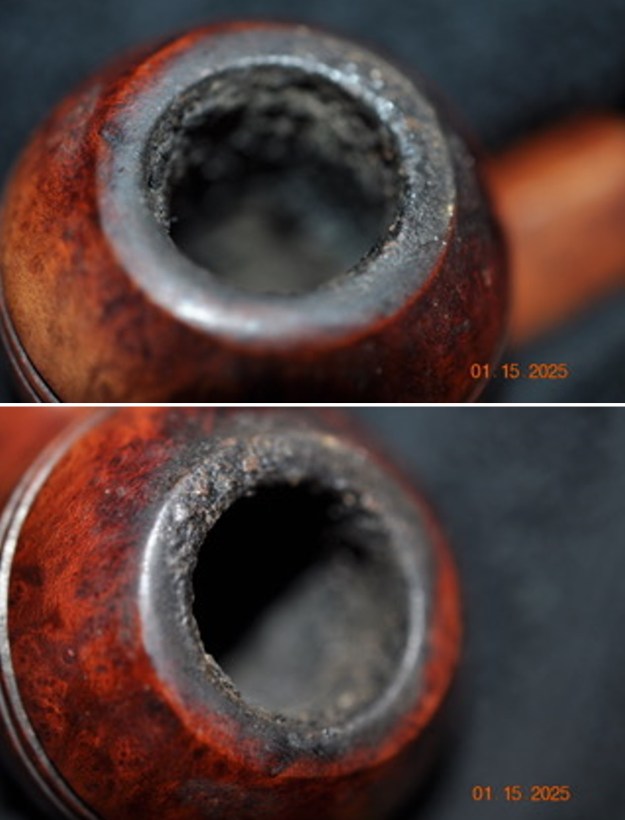
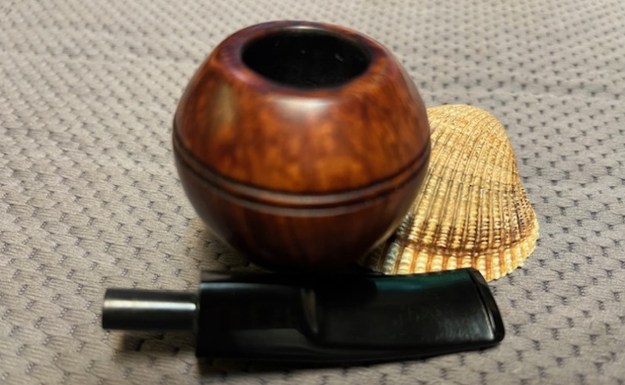
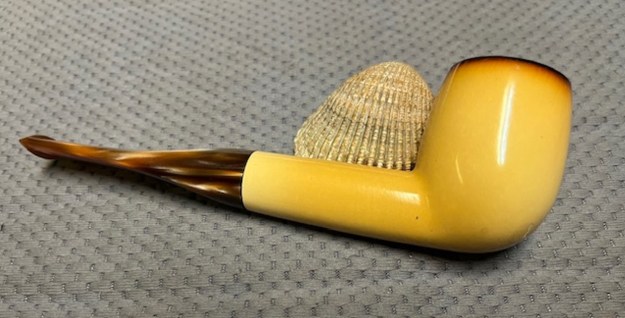
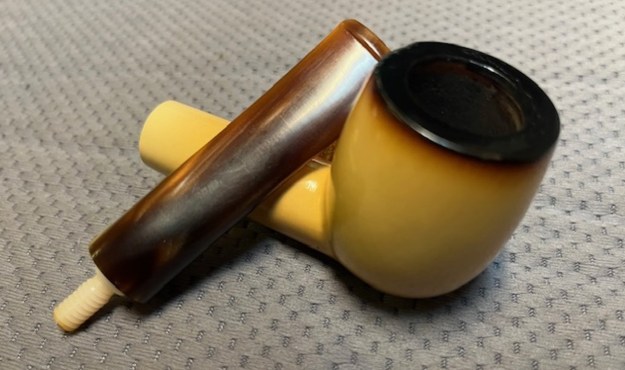
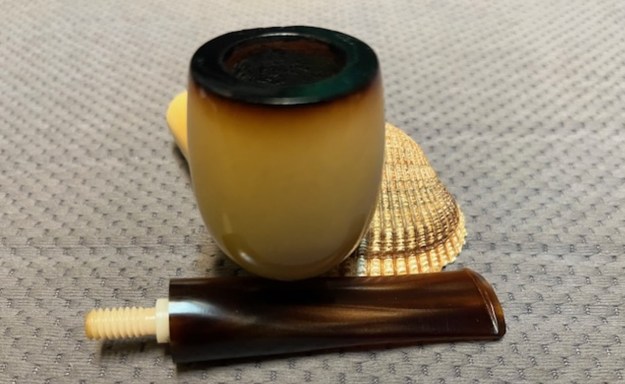
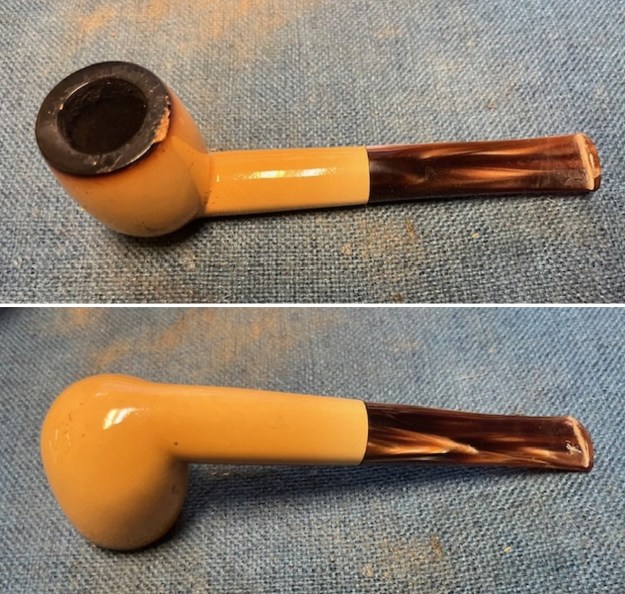 I took photos of the rim top and the stem to show the condition of the pipe when I brought it to the worktable. You can see the cake in the bowl and the build up of lava and debris on the edge and top of the rim. It is another dirty pipe but still a charmer. The variegated rose acrylic stem has chatter and deep tooth marks on both sides near the button.
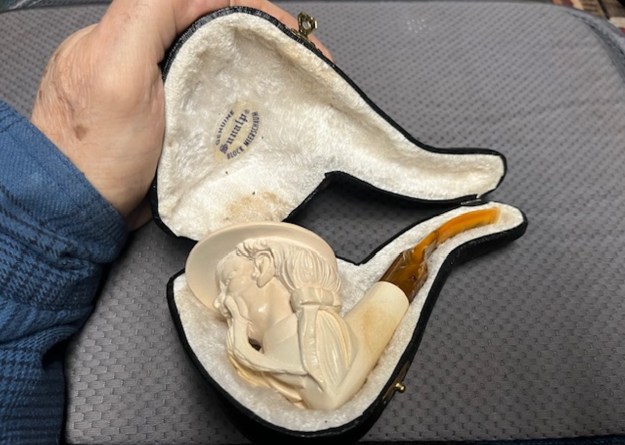
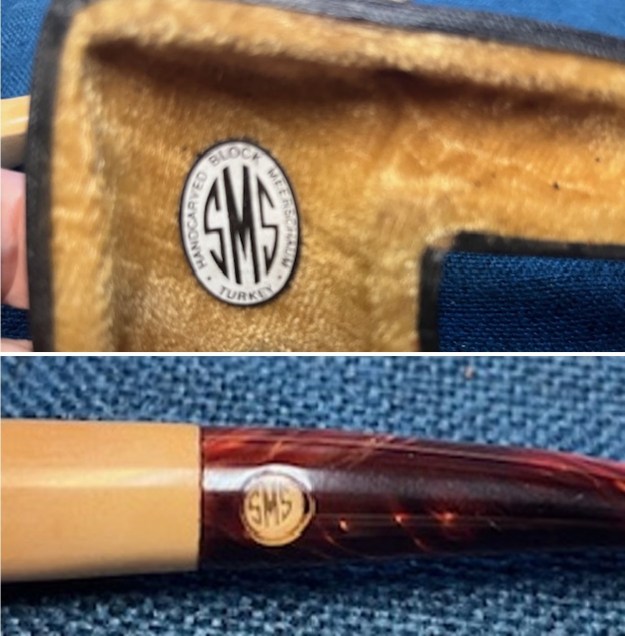
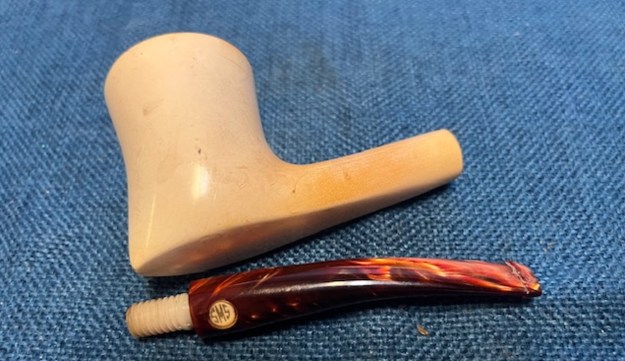
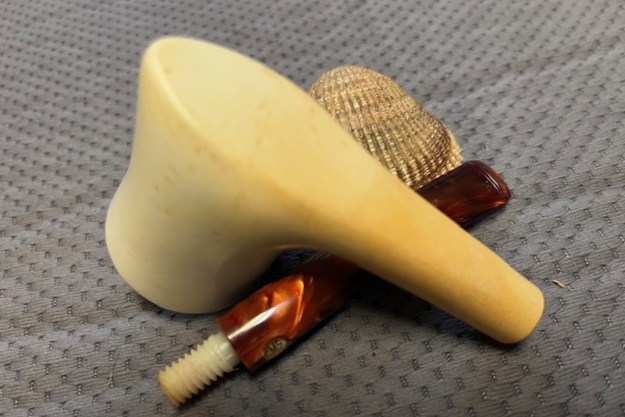
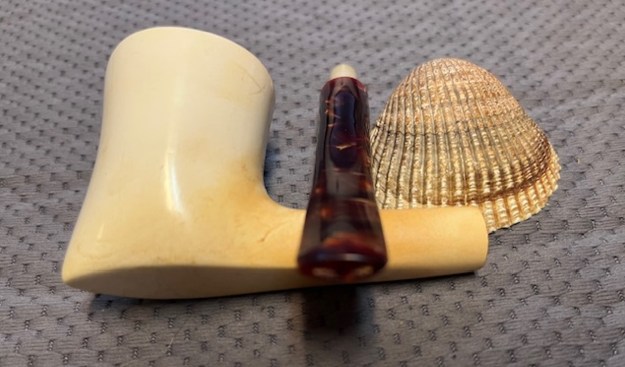
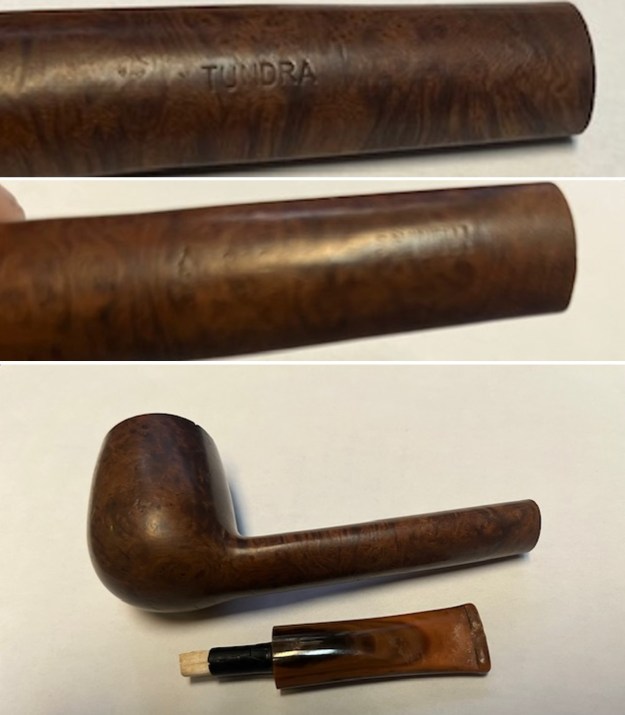
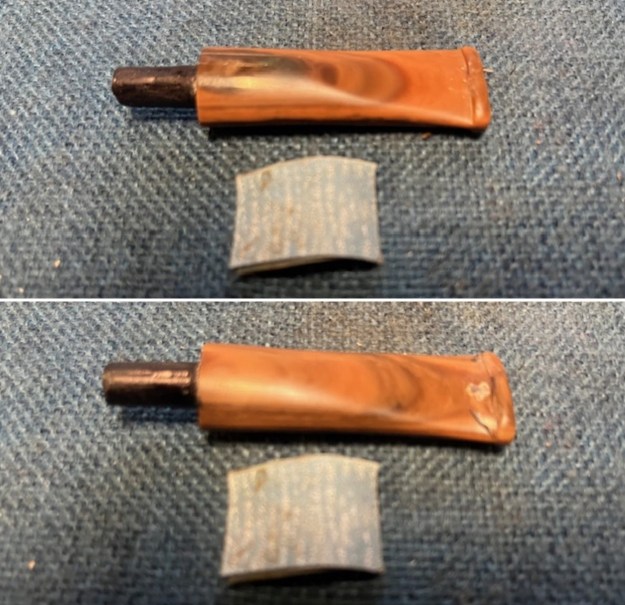
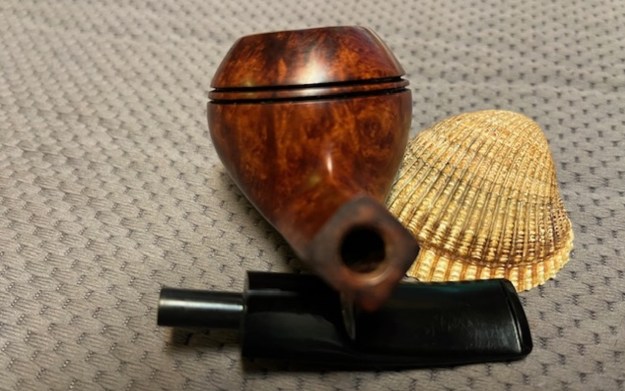
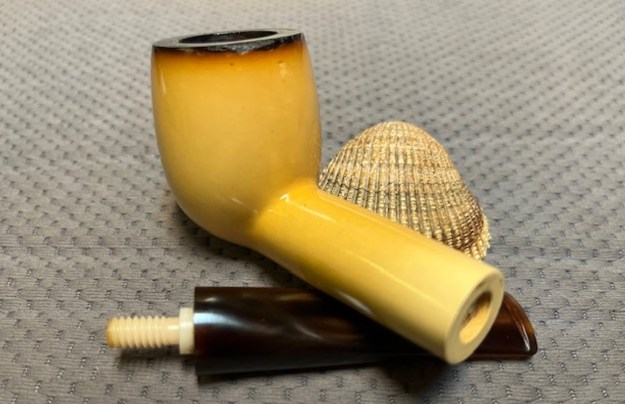
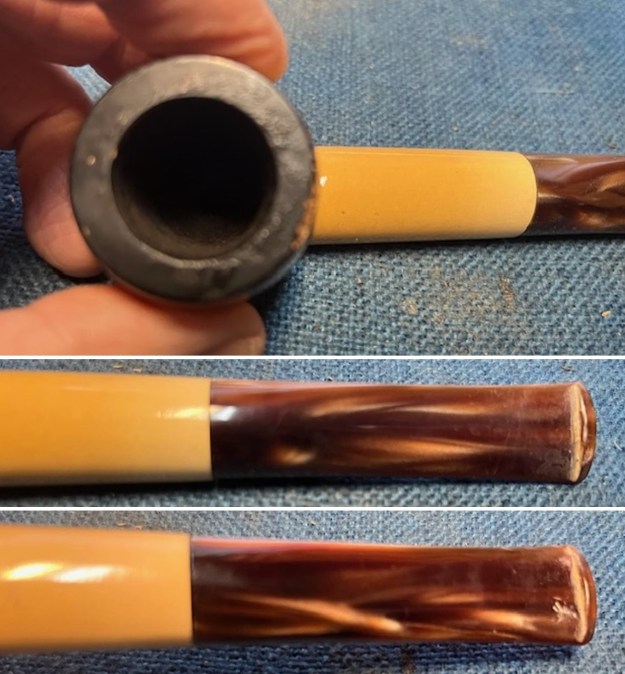 I took a photo of the logo stamp on the inside of the case. It is clear and readable. The label in the case reads SMS in the centre and around the outside of the circle it read Handcarved Block Meerschaum Turkey. I removed the stem from the shank and took a photo of the parts.
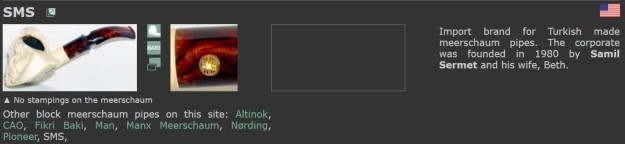
 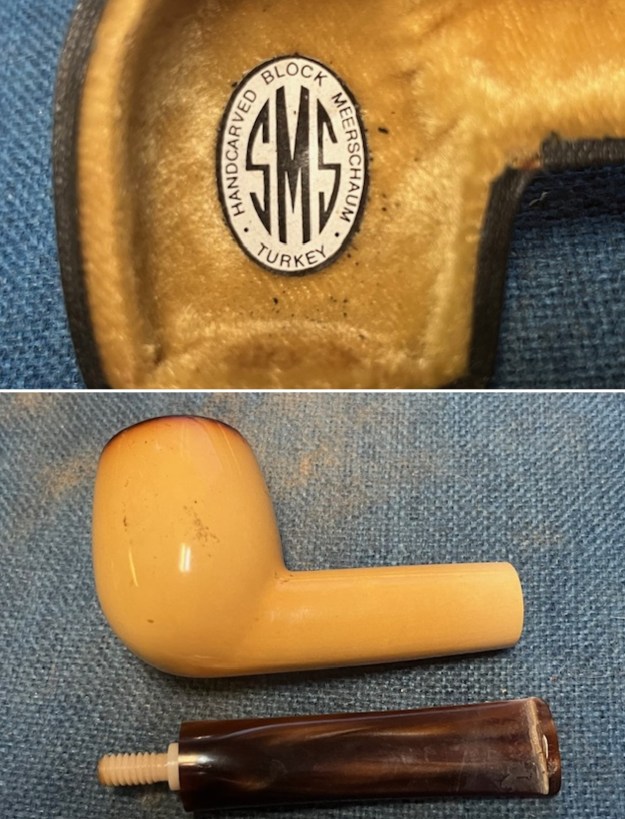 I had some faint recall of the make but could not remember his name so I turned to pipephil’s site (http://www.pipephil.eu/logos/en/logo-s9.html) for some help. I found a quick note on the founding of the SMS brand which was the USA import brand for pipes made by Samil Sermet and his wife Beth. There was also a link there to the company website.
 I clicked on the site link (http://www.smspipes.com/) to get a bigger picture of the brand and the makers. I quote the section of the site marked “About Us” and quote the following:
Welcome to SMS Pipes!!
We are proud to present a wide selection of premium smoking pipes. SMS Pipes features Turkish Block Meerschaum, supplied exclusively by SMS Meerschaums, and Italian Briar, supplied by Lorenzo of Italy. All the pipes offered by SMS Pipes meet or surpass our exacting “Standard of Excellence.”
Samil & Beth Sermet – SMS Pipes is family owned and operated extension of SMS Meerschaums, founded in 1980 by Samil Sermet and his wife, Beth. SMS Meerschaums is recognized nationwide as a trusted supplier by nearly 500 retail tobacconists. SMS Pipes promises to continue the philosophy embraced by SMS Meerschaums and provide premium smoking pipes that are:
Distinctive… each pipe is carefully selected for its uniqueness, quality and reliability.
Affordable… a wide range of prices makes owning a fine pipe possible for everyone.
Collectible… the timeless beauty of each pipe will be treasured for generations.
 Key to the success of SMS Pipes is our dedicated staff. Based in the USA and Turkey, they maintain contact with our exceptionally talented pipe carvers and case makers and perform all the daily business activities described below:
Samil Sermet, a native of Turkey, is the buyer for SMS Meerschaums. His hometown is Eskisehir, Turkey, where a majority of the meerschaum pipe carvers live and have their shops. Samil makes a buying trip to Turkey each year and has a close working relationship with all the carvers. He is responsible for sales analysis and placing the orders necessary to maintain adequate stock in the warehouse. (samil@smspipes.com)
Beth Sermet, office manager of SMS Meerschaums, processes all orders. Even though Beth was born in Iowa, she is fluent in Turkish after living in Turkey for several years and knows all the carvers. The owners of Lorenzo Briars work closely with Beth to assure ample supply of their premium pipes. Beth also personally selects and photographs all the pipes shown on SMS Pipes. (beth@smspipes.com)
Mert Sermet, son of Samil and Beth, manages the daily operations of SMS Pipes. He is in charge of processing and shipping all orders. Mert has in-depth knowledge of every aspect of pipe manufacturing both in Turkey and Italy. He will personally respond to any comments, questions or concerns you may have about SMS Pipes by e-mail. (mert@smspipes.com)
Emel Sagtekin, Samil’s sister, is responsible for quality control and shipments of pipes to SMS Meerschaums from Turkey. Since 1988, Emel has personally checked thousands of pipes. She evaluates each pipe based on strict criteria set by SMS Meerschaums and selects only the pipes that meet or surpass our high standards.
SMS Pipes provides a wide variety of services for our customers. Although the inventory on SMS Pipes is reserved for Internet sale only, it is possible to have a selection of similar pipes sent “On Approval” to any tobacconist listed on the site. Membership in the SMS Collectors Society provides additional amenities for those interested in collecting our pipes. Our Master Carvers can be commissioned to carve custom pipe designs by special arrangement. We also offer repair and re-waxing services for all SMS Pipes.”
We are happy to have the opportunity to serve you. We hope your time spent with SMS Pipes is enjoyable and worthwhile.
Now I had a clearer picture of the brand and the makers. I knew that pipe was made after 1980 when the company began. Now it was time to work on the pipe itself.
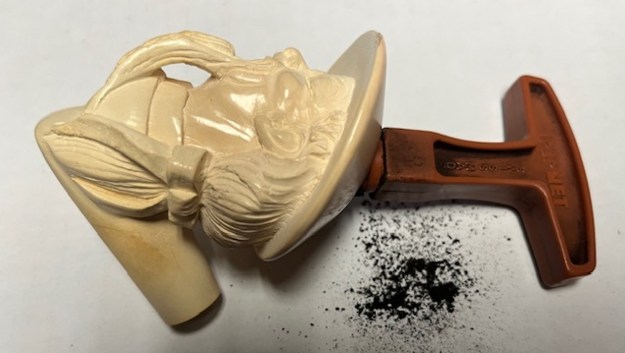
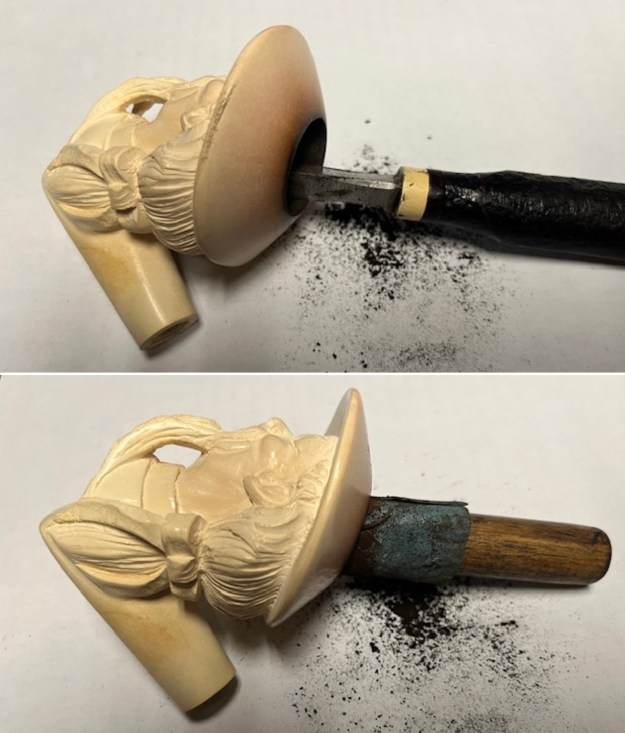
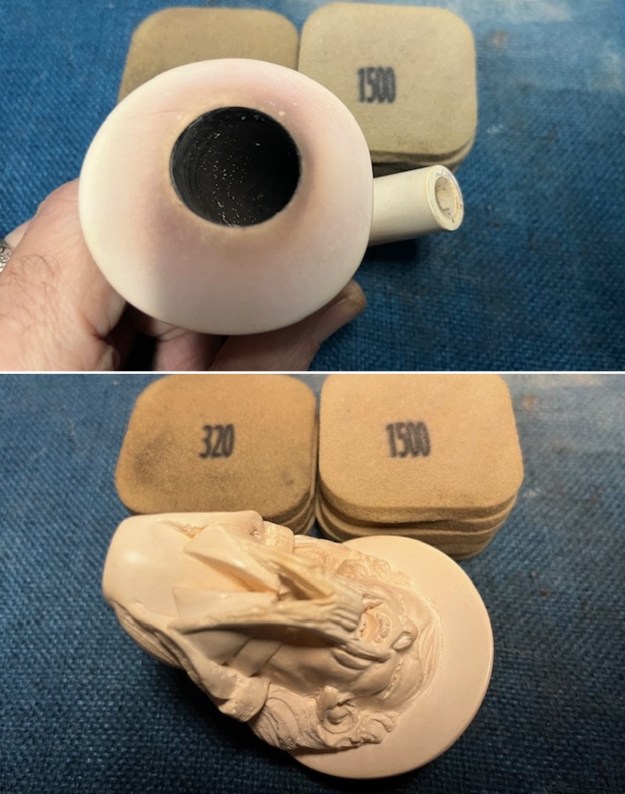
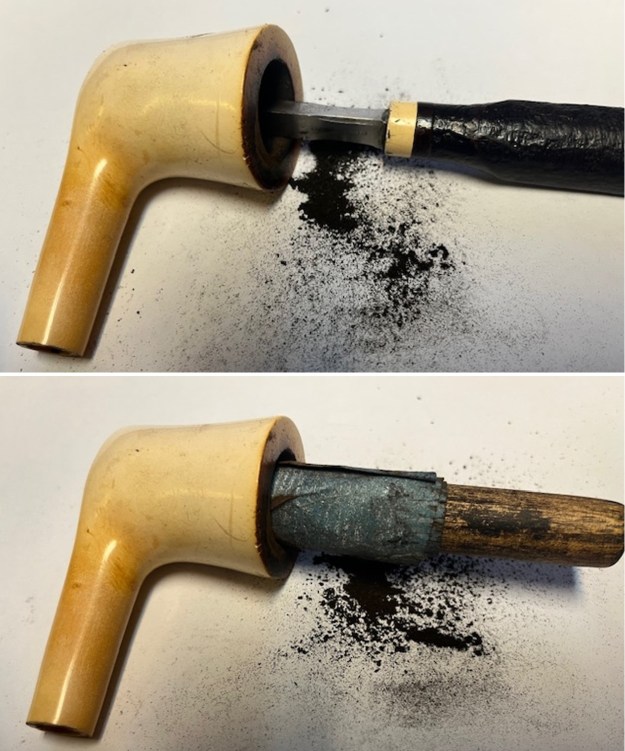
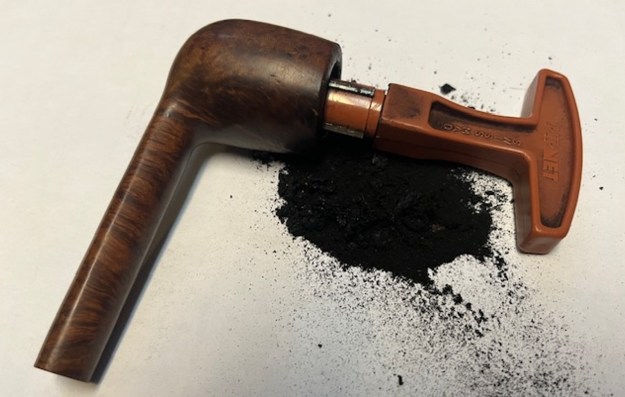
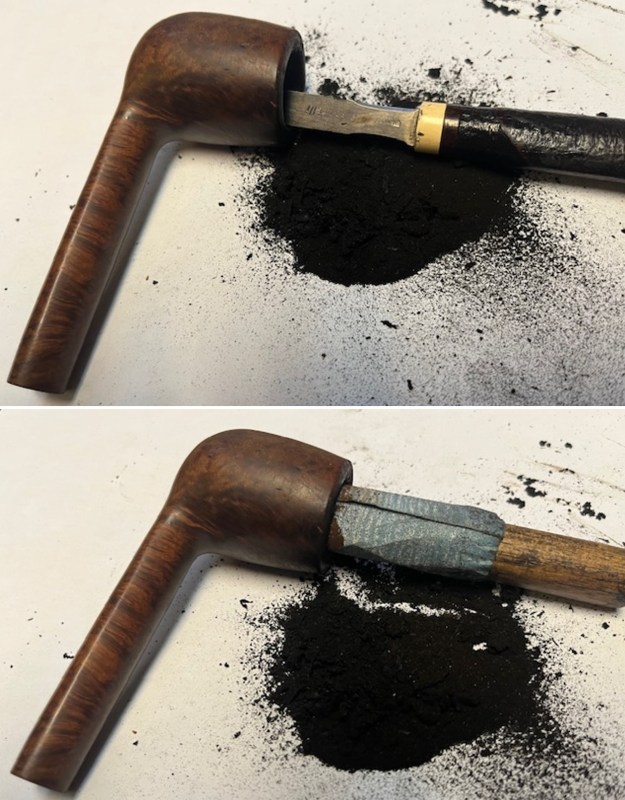
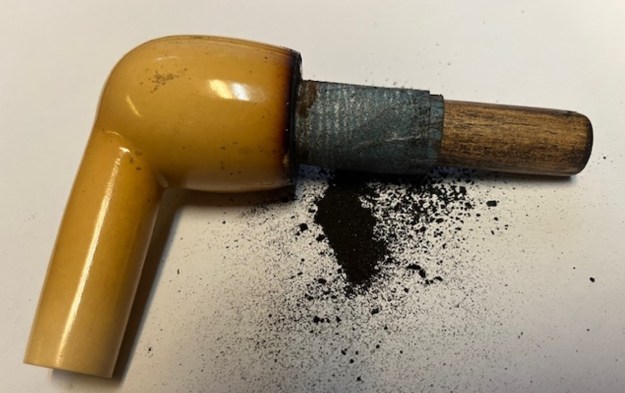
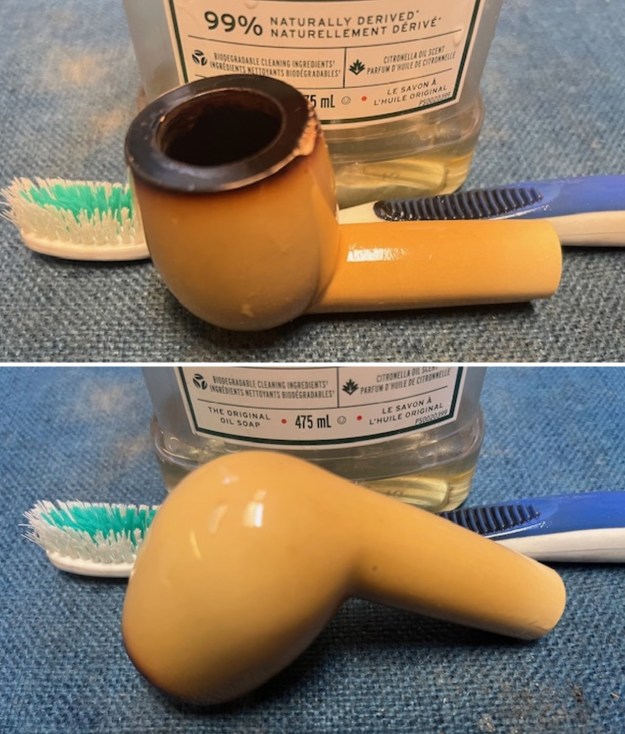
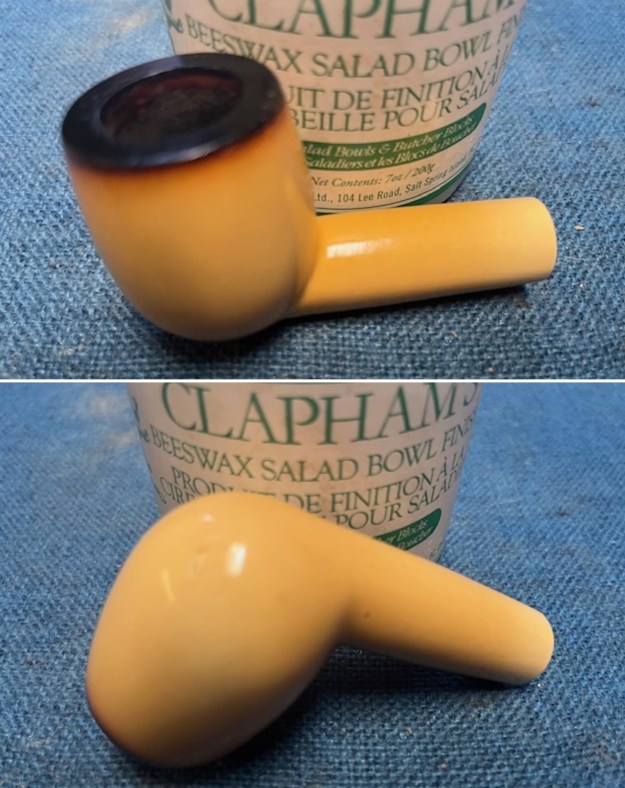
I started my work on the bowl by reaming the thick cake out of the bowl. I started with a PipNet reamer and the 2nd and 3rd cutting heads to take back the cake to the walls of the bowl. I cleaned up the reaming with a Savinelli Fitsall Pipe Knife. I sanded the bowl walls with a piece of dowel wrapped with 220 grit sandpaper. Once finished it looked very good.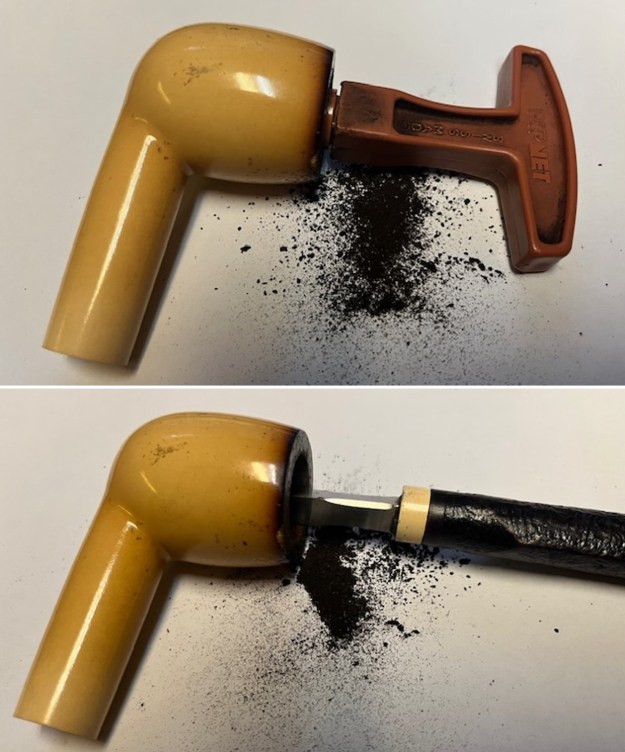
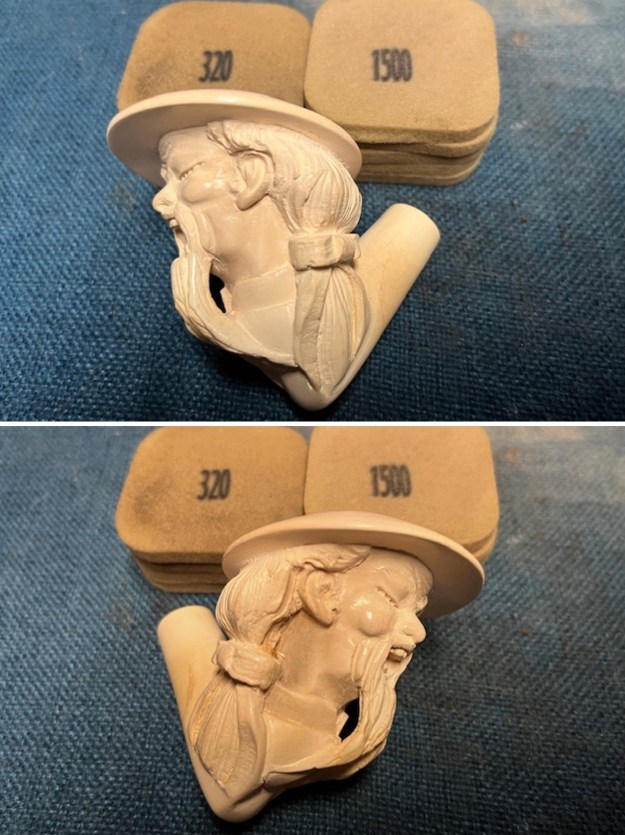
 I scraped off some of the lava coat on the rim top. I used a 320 grit sanding pad to remove the build up on the rim top. It looked much better once I finished.
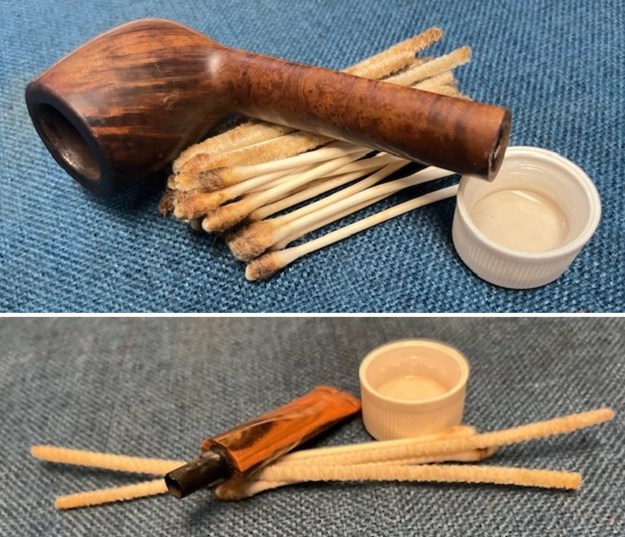
 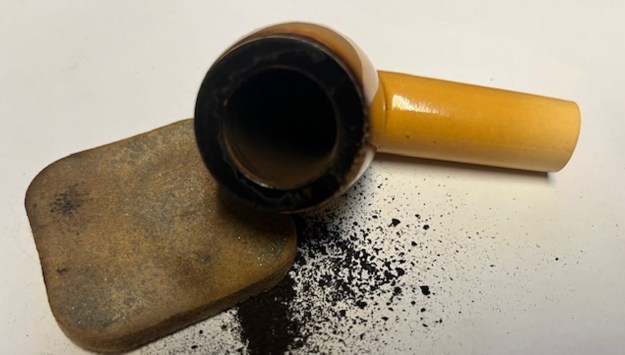 I cleaned out the airway in the shank and mortise as well as in the new stem with pipe cleaners (both bristle and regular). It was much better.
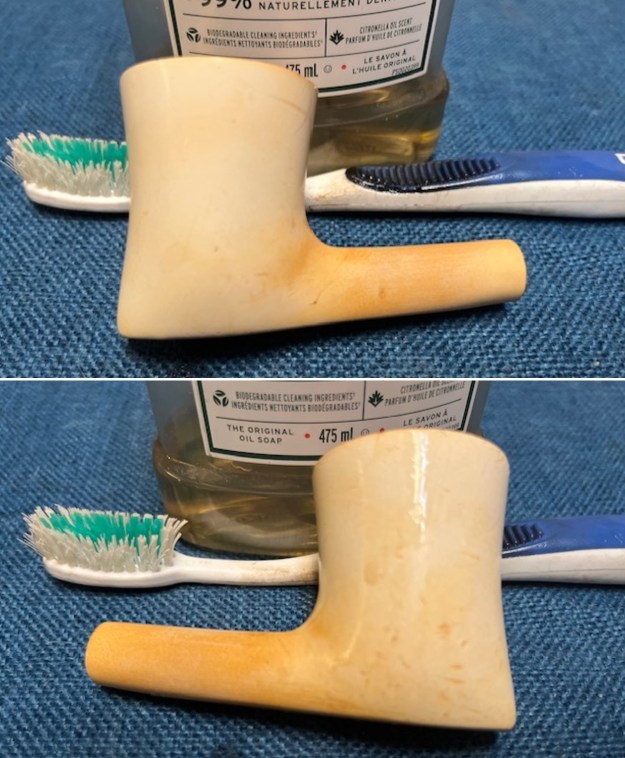
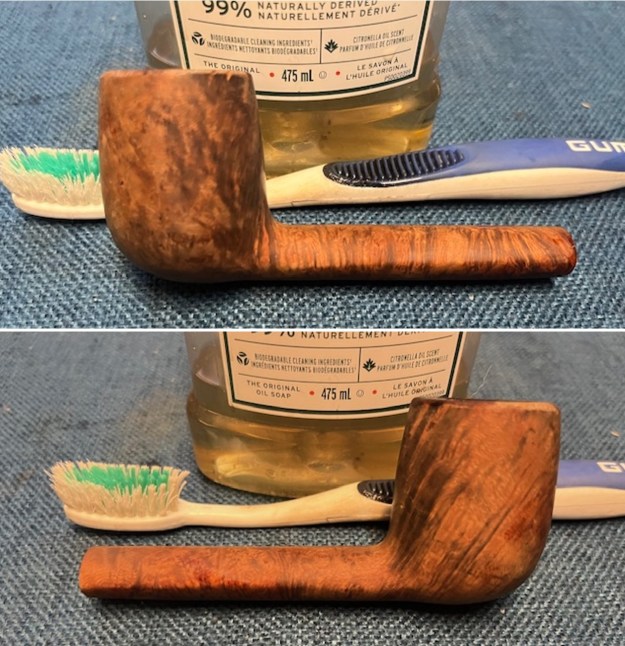
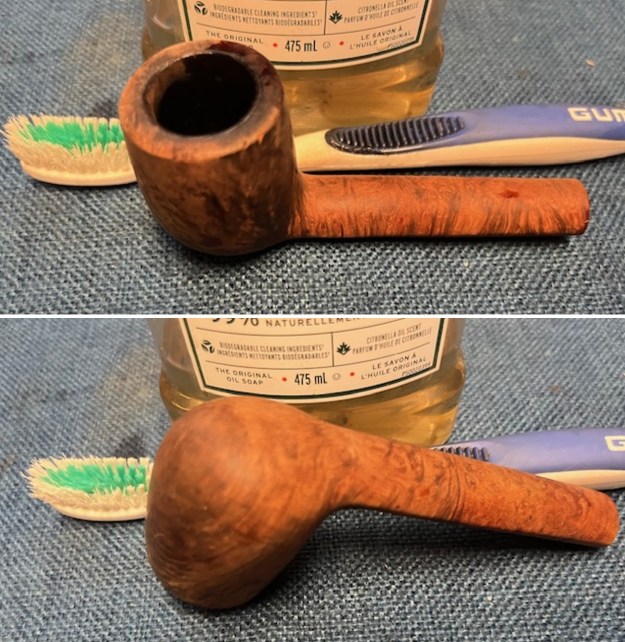
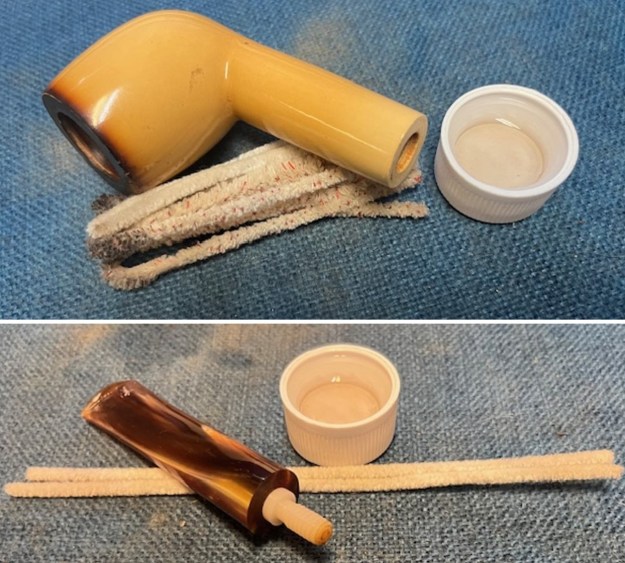 I scrubbed the bowl surface with a tooth brush and undiluted Murphy’s Oil Soap. I rinsed the bowl with warm running water to wash off the dirt and the soap. It looked much better at this point.
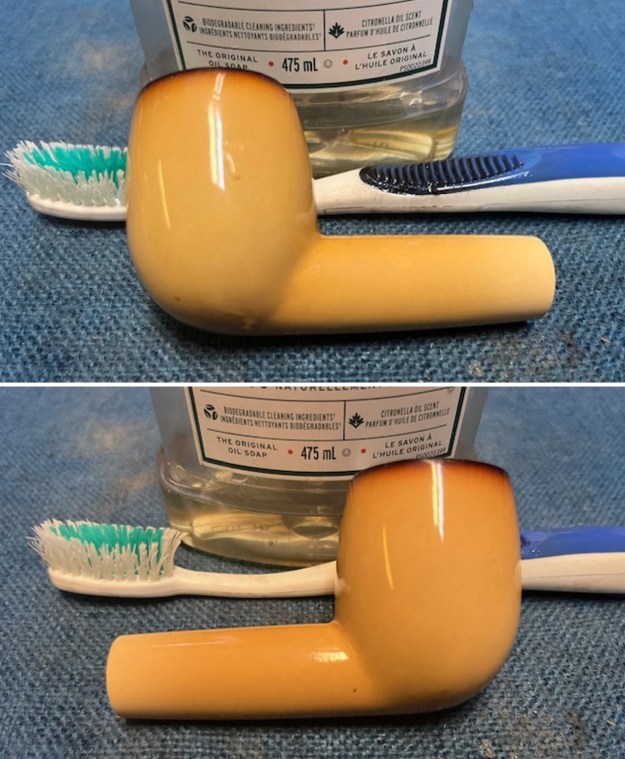
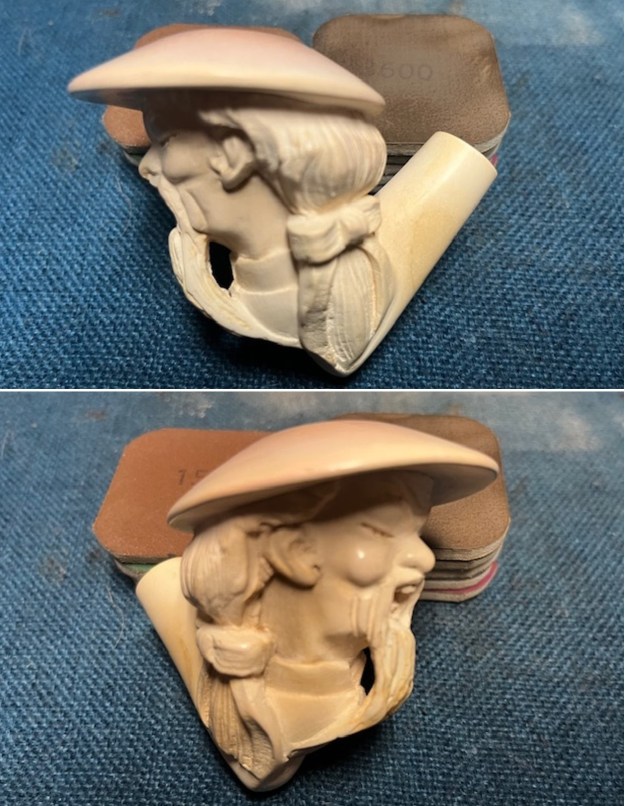
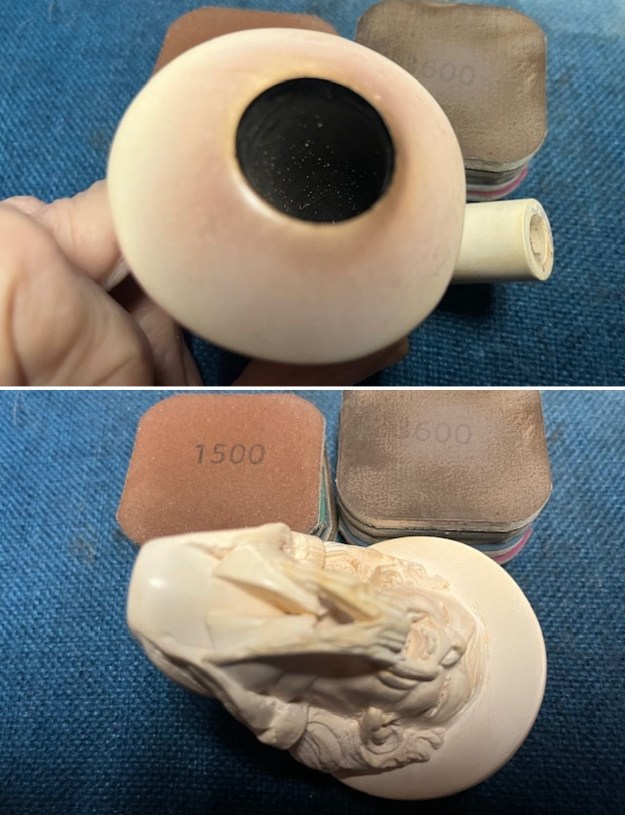
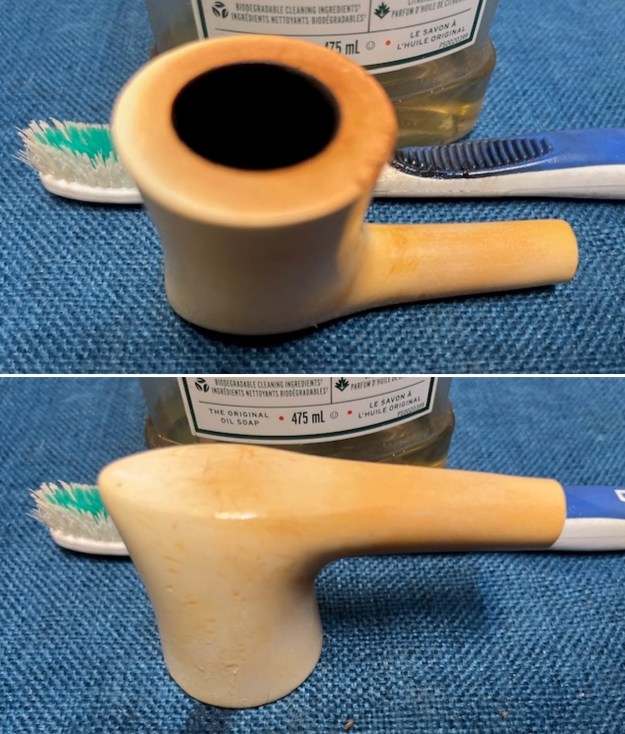
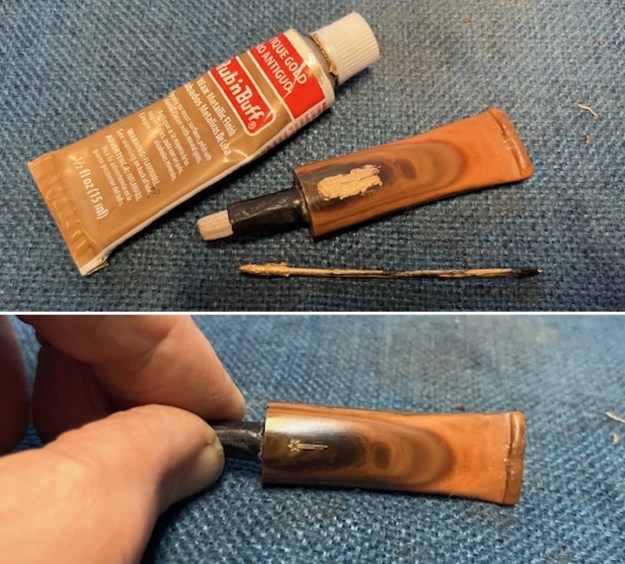
 The surface of the bowl was clean and the meerschaum was very shiny with the exception of the rough edge on the back of the bowl which was chipped and lost its colour. I used a black stain pen to touch up the chip on the rim top and the inner and outer edges of the bowl.
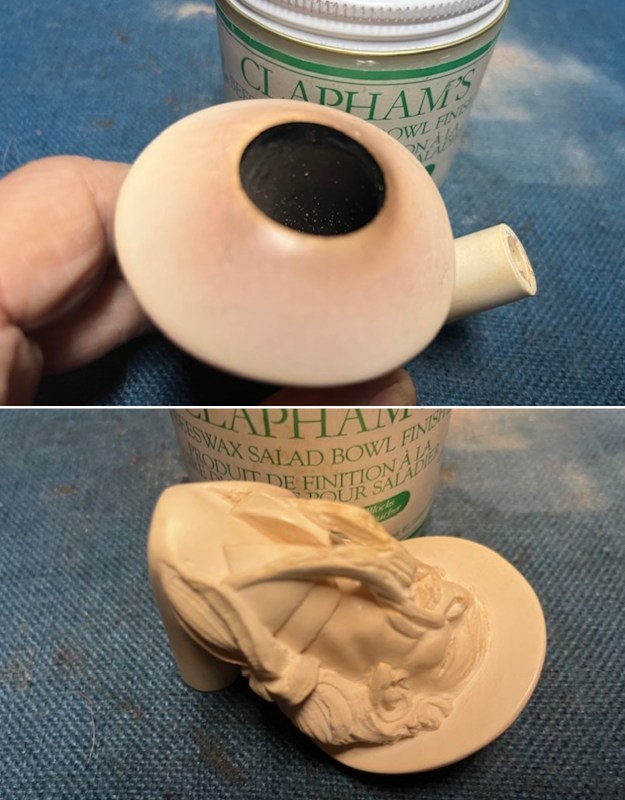
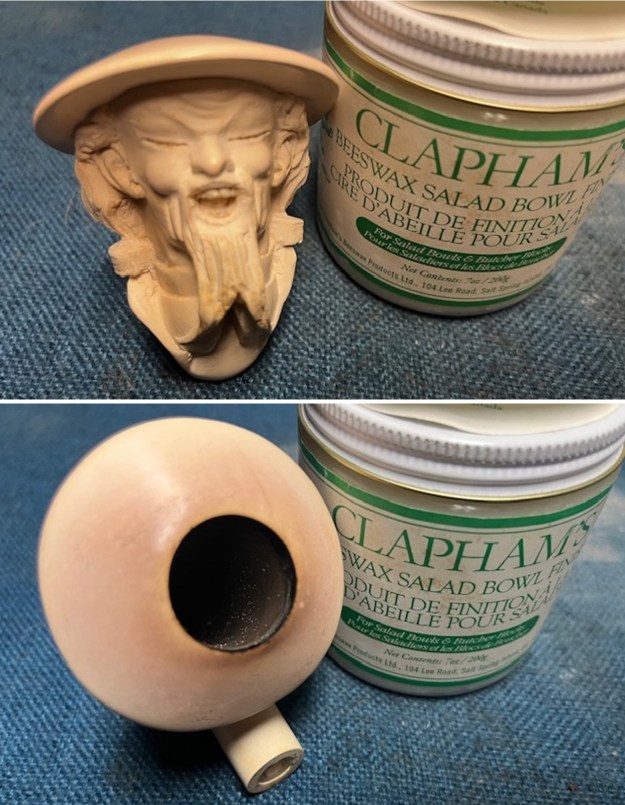
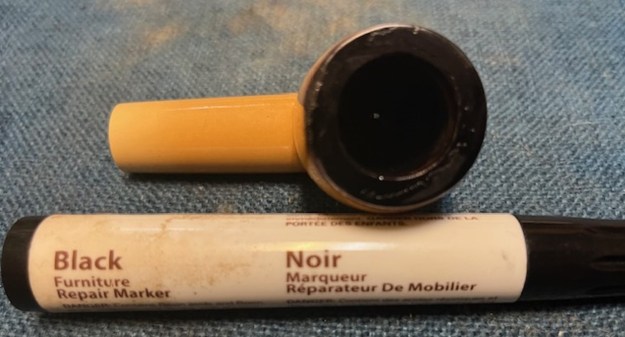 I gave the bowl multiple coats of Clapham’s Beeswax/Carnuba Wax Polish which is a soft wax. I rubbed the wax on the bowl sides and the shank end with my finger tips and set it aside to dry. Once the wax cured I buffed the bowl with a microfibre cloth. The bowl has a rich glow.
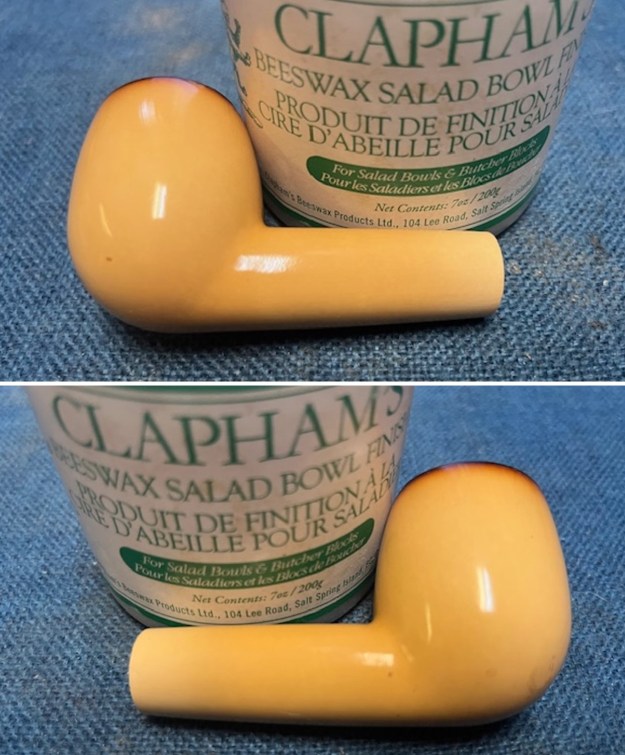
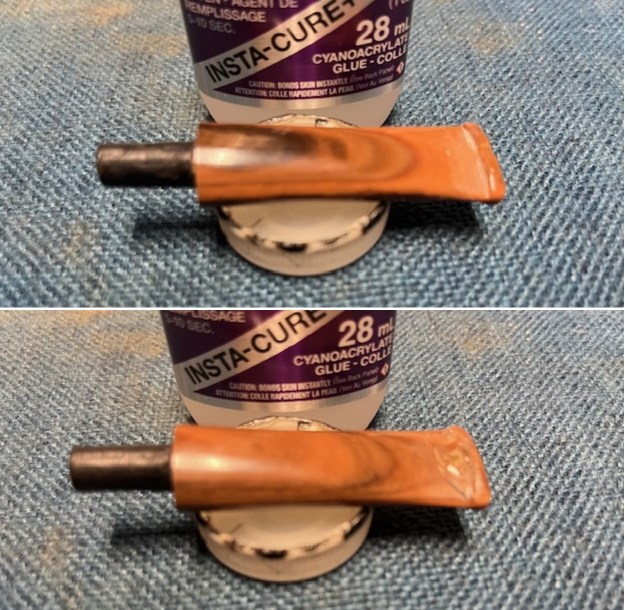
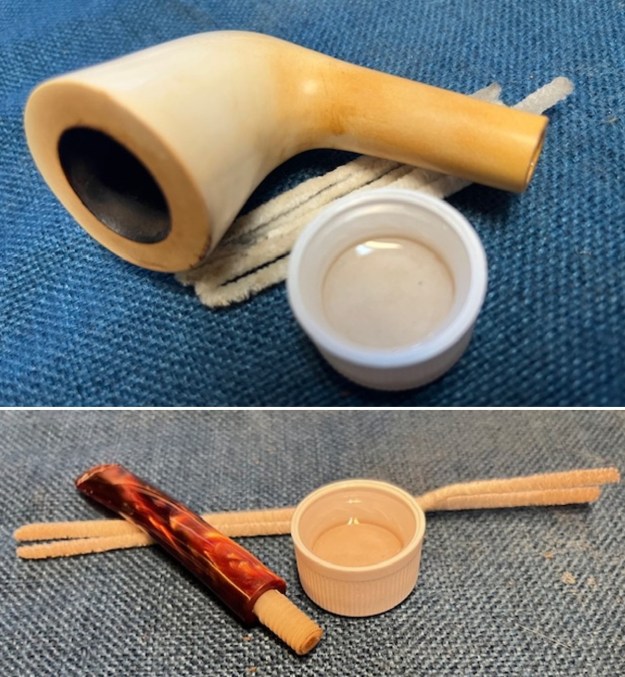
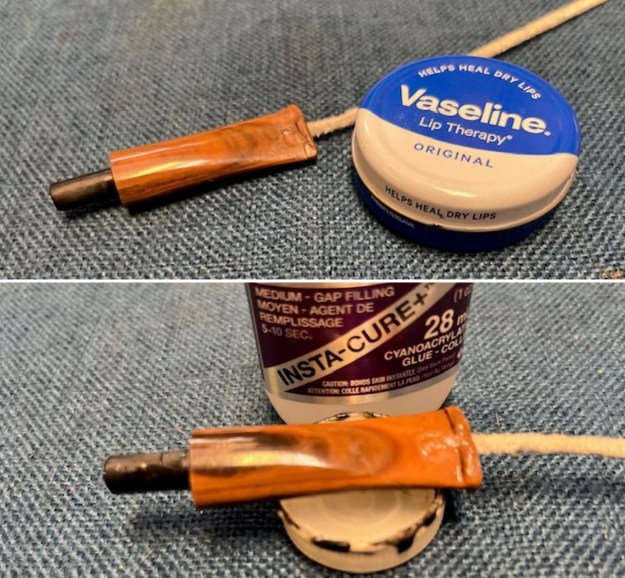
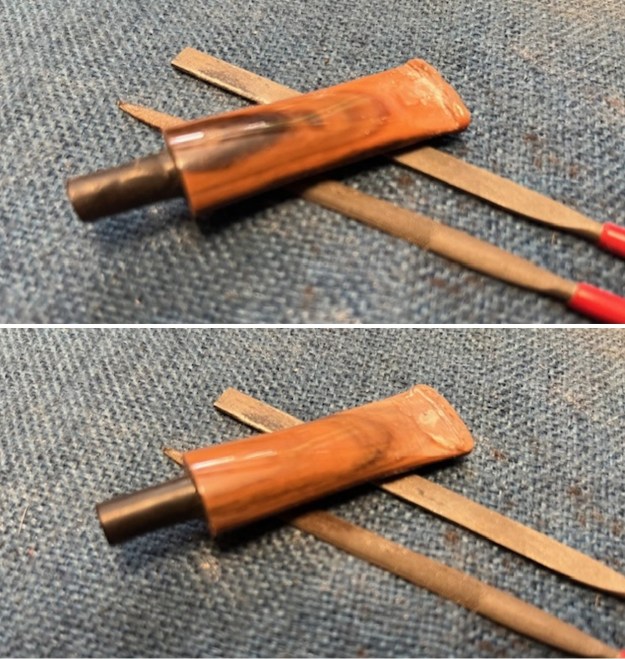
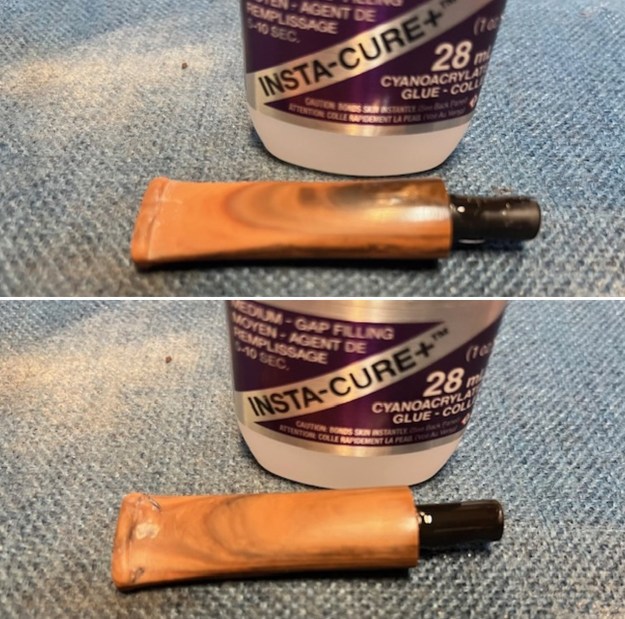
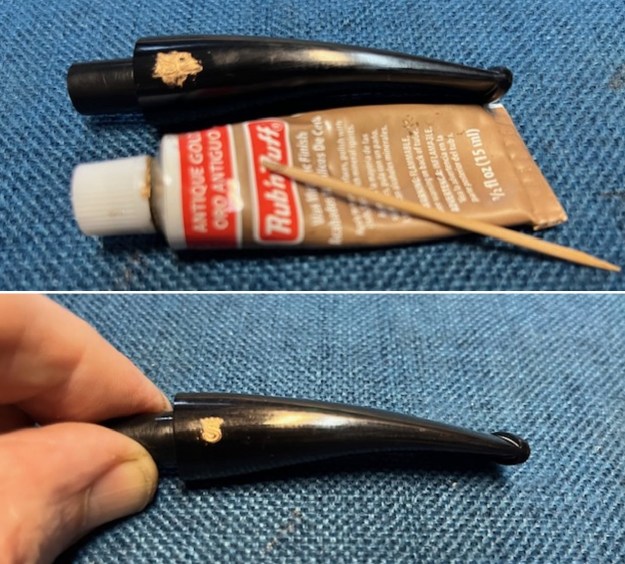
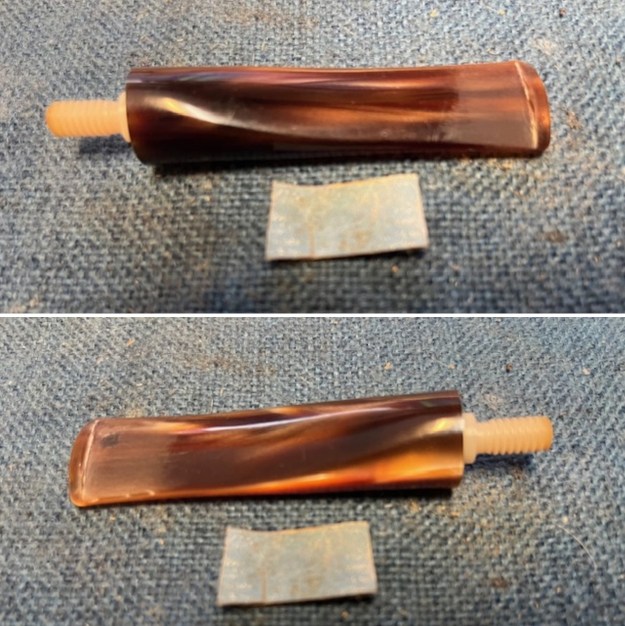
 I set the bowl aside and turned my attention to the stem. There was a deep tooth mark on the underside of the stem ahead of the button. I filled it in with some clear CA glue and when it cured I flattened the repair with a small file. I sanded it with 220 grit sandpaper to smooth the chatter on topside and the repair on the underside of the stem surface. It looked much better when I finished sanding.
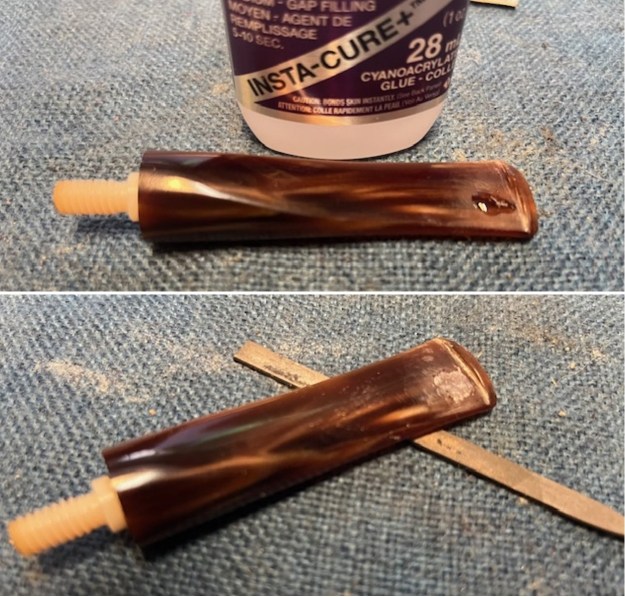
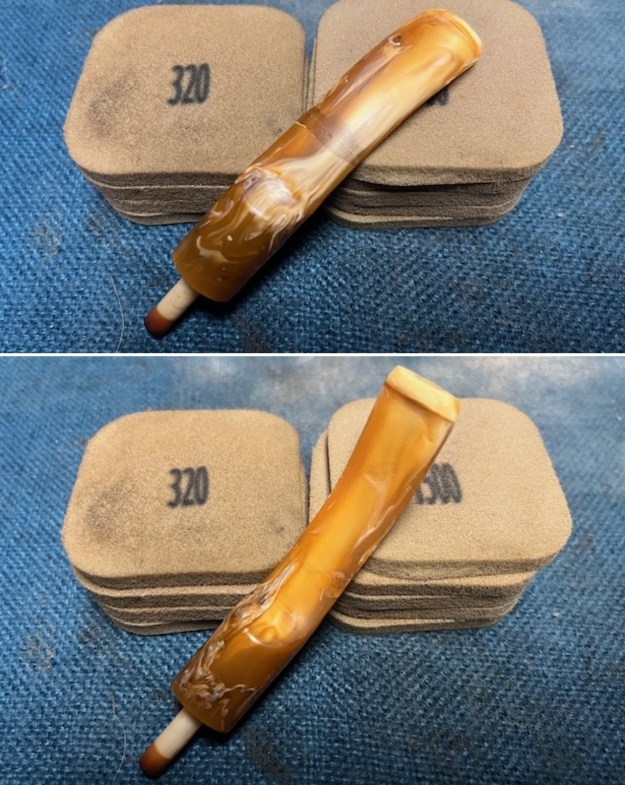
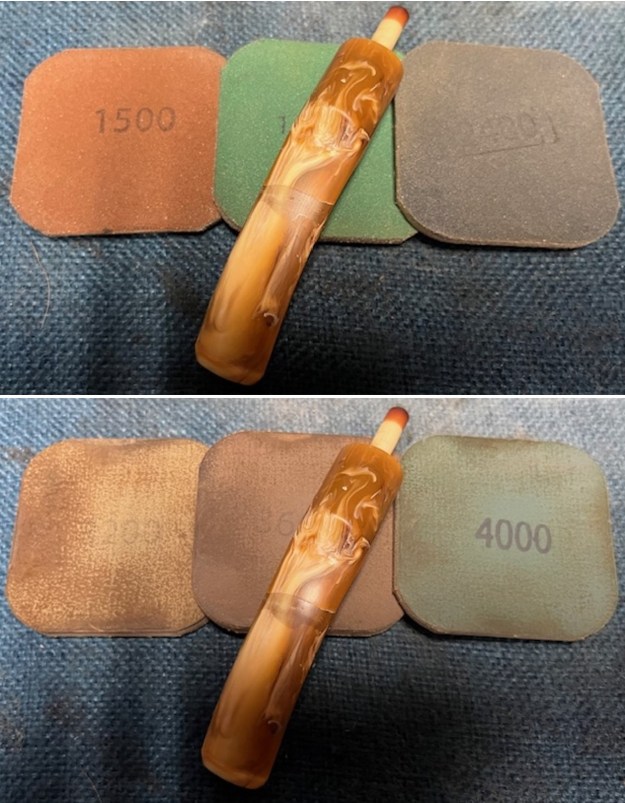
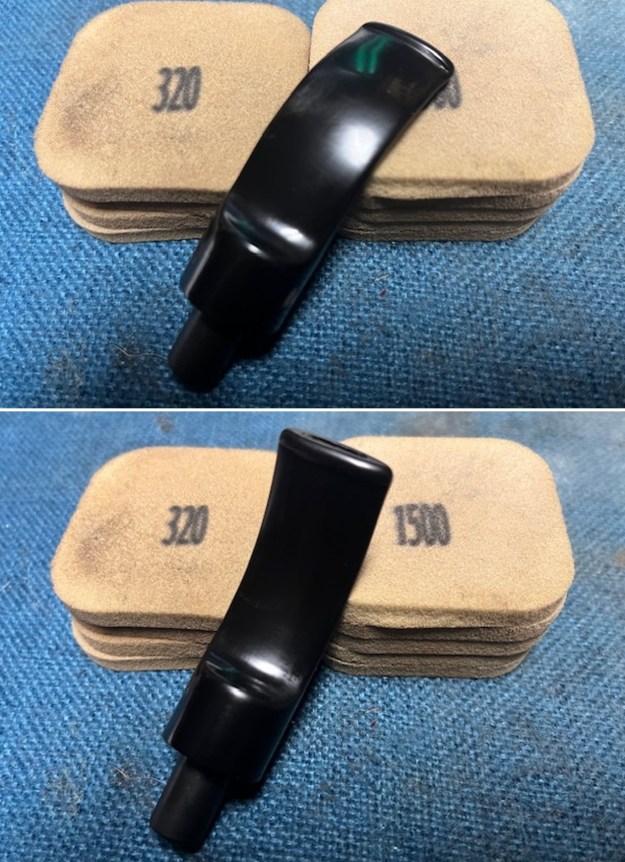
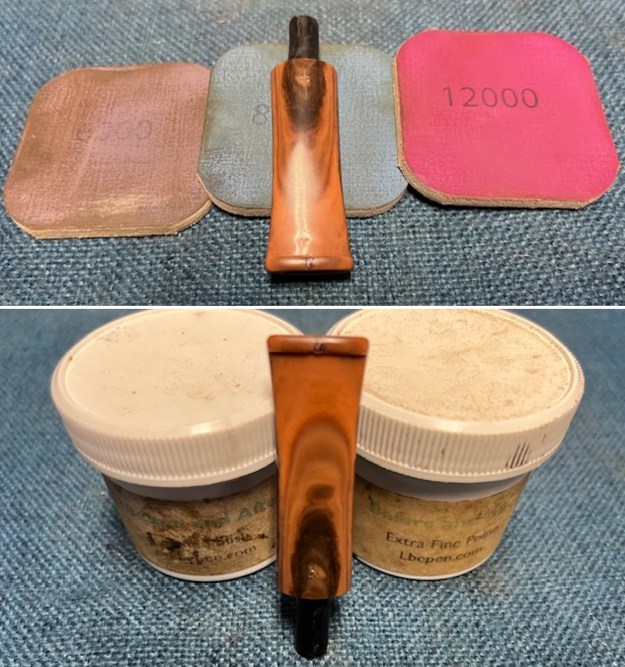
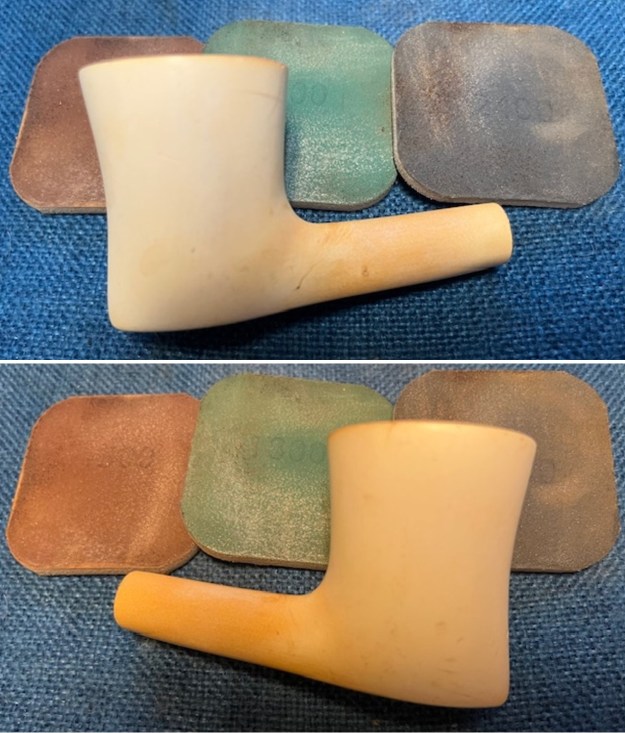
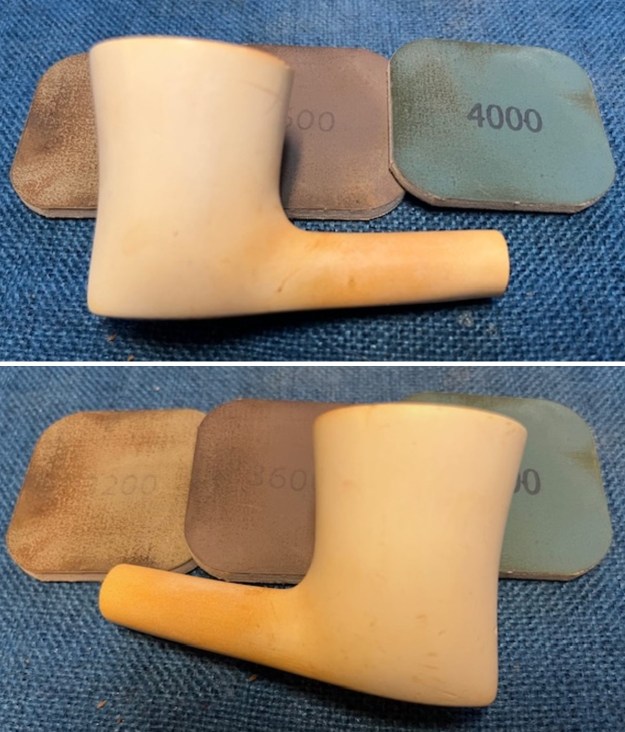
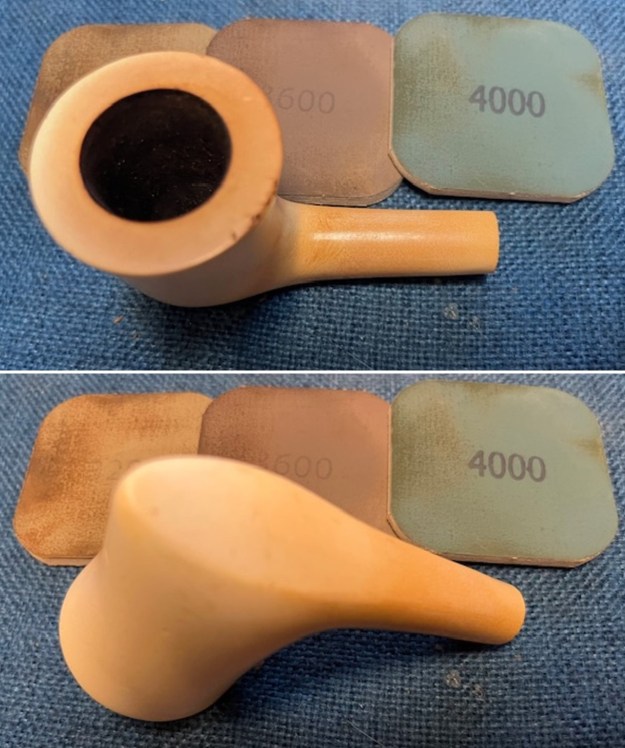
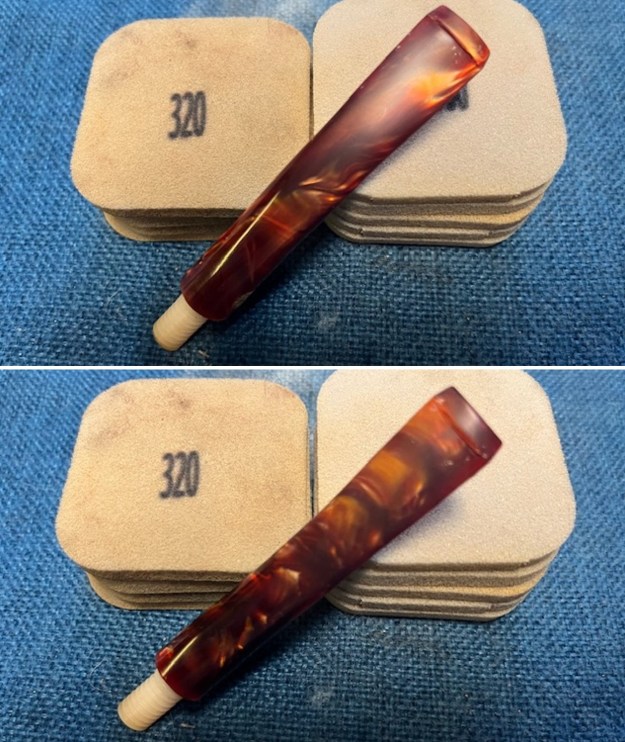
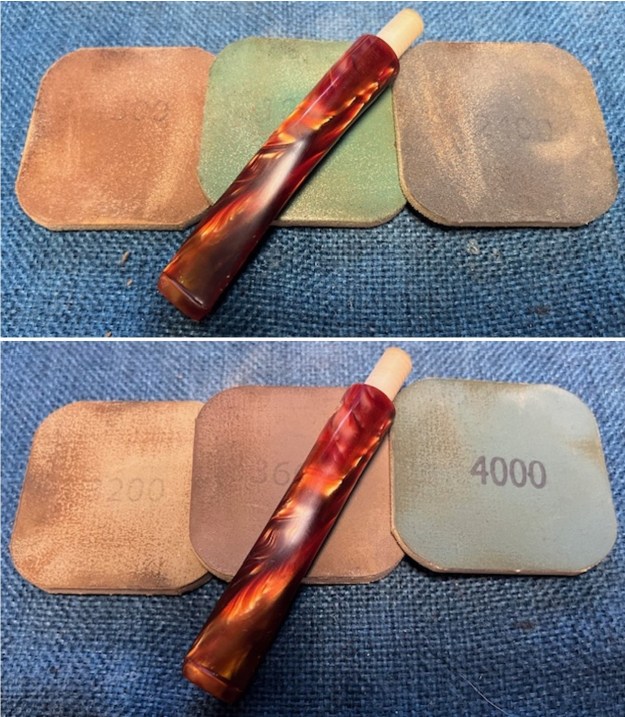
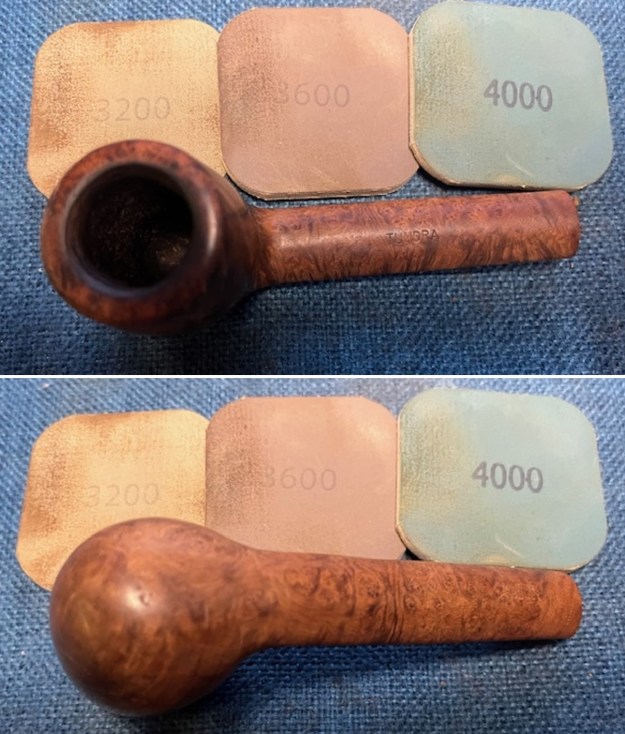
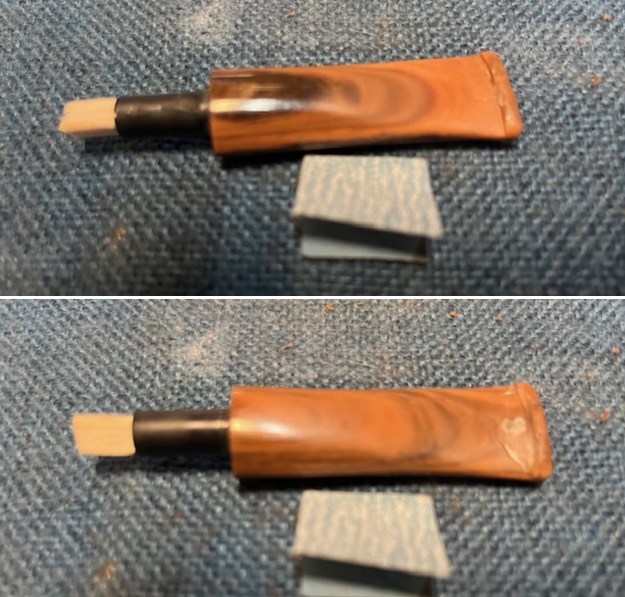
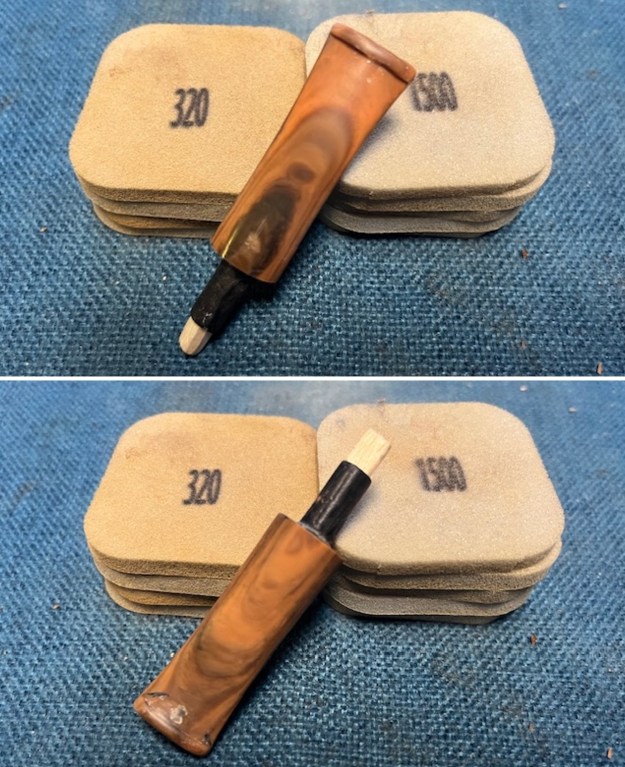
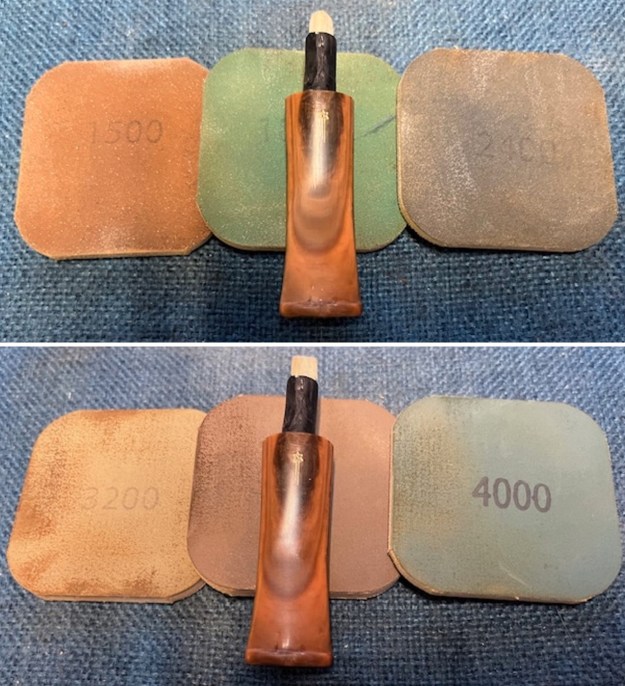
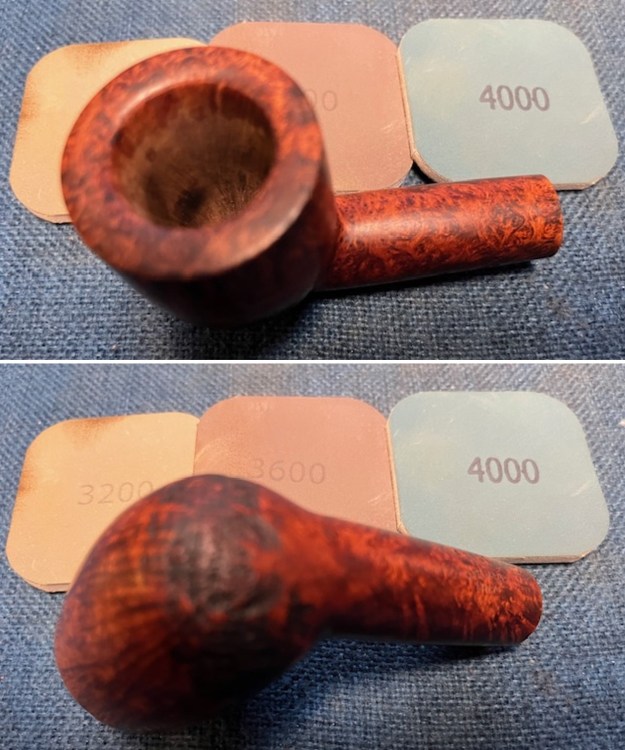
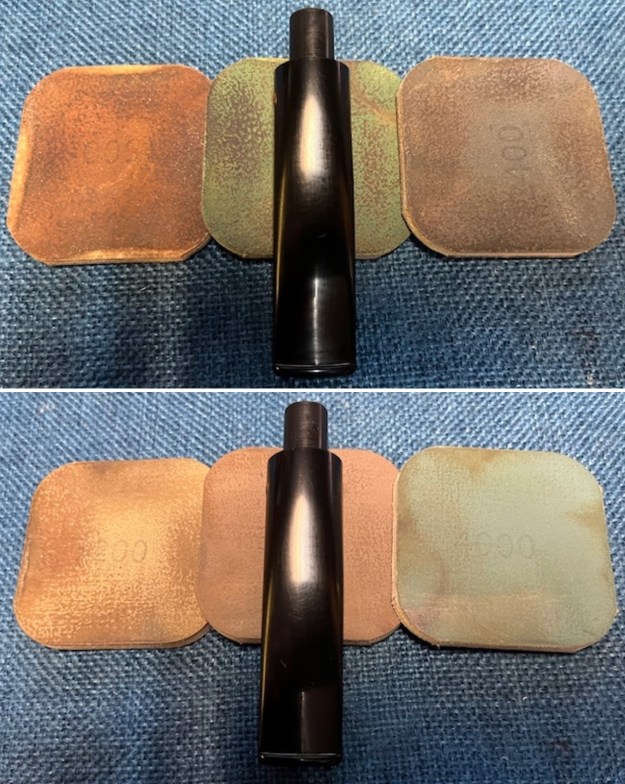
 I continued sanding the stem surface with 320-3500 grit 2×2 inch sanding pads. I wiped the stem down after each pad with a damp pad to remove the debris. By the end it was quite shiny and ready for polishing.
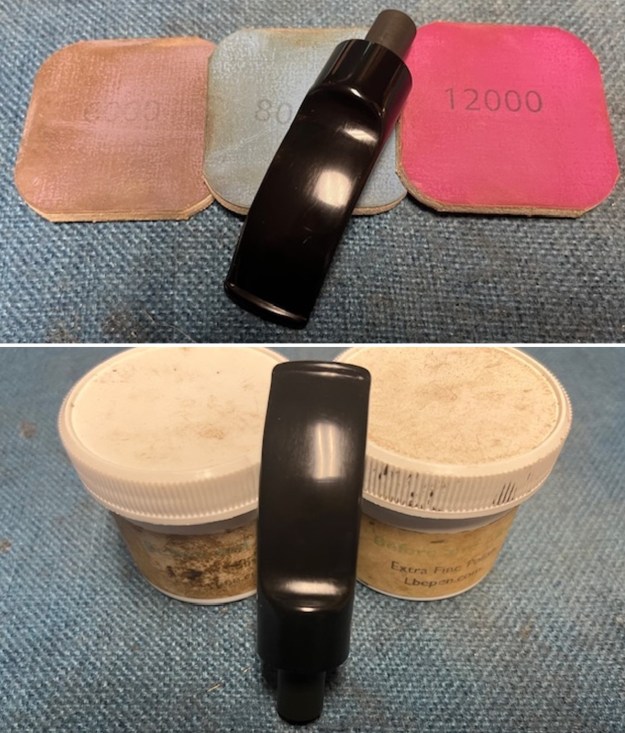
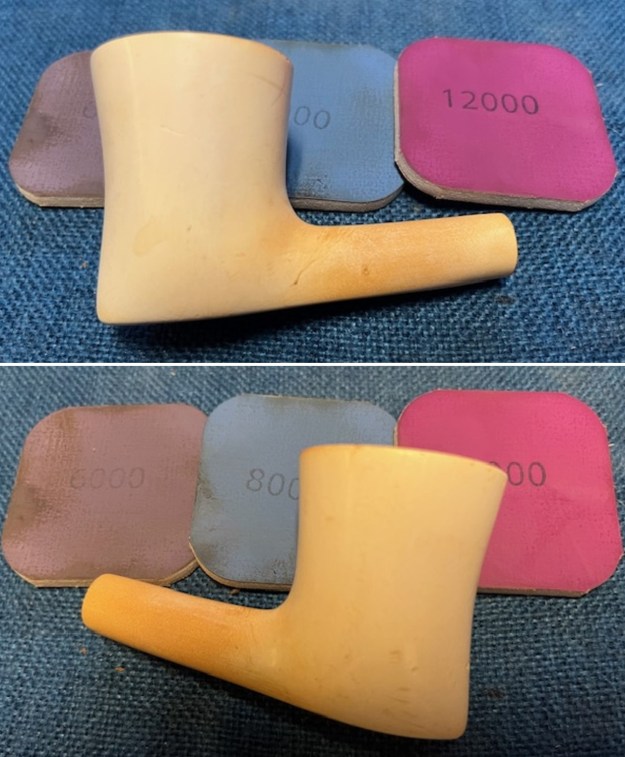
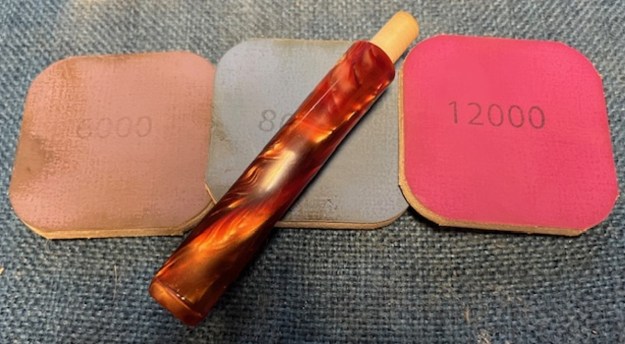
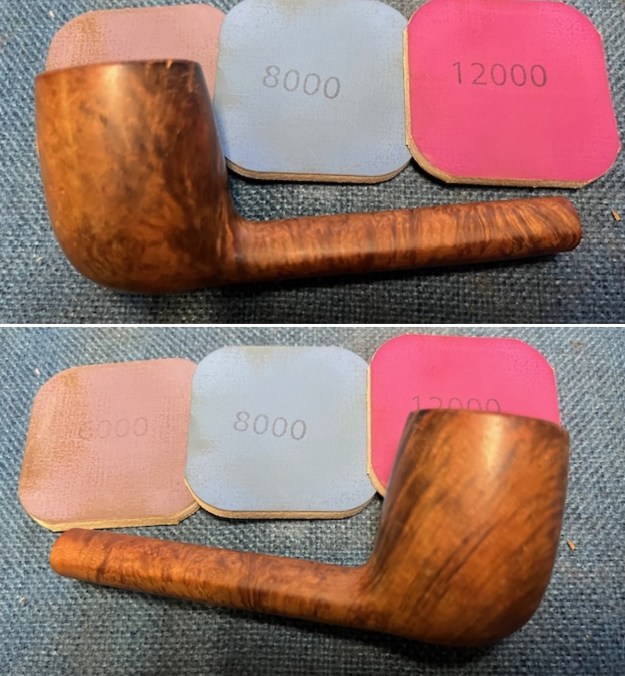
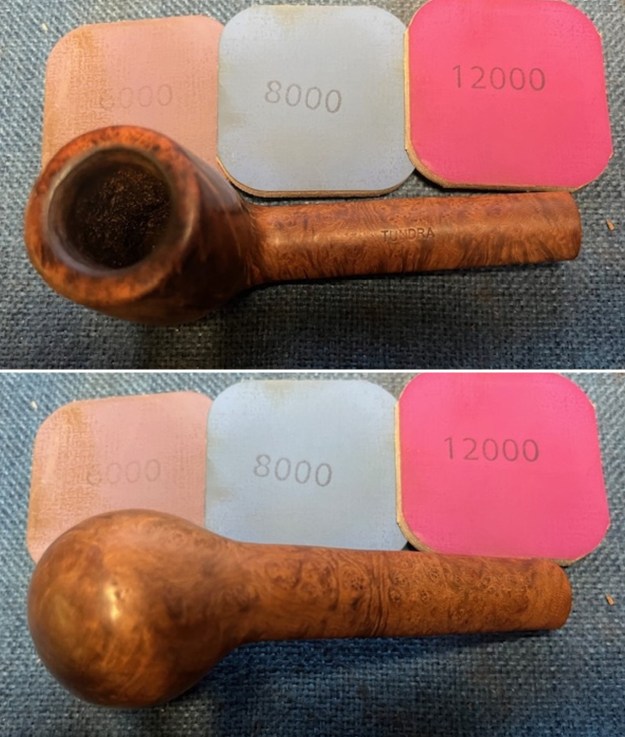
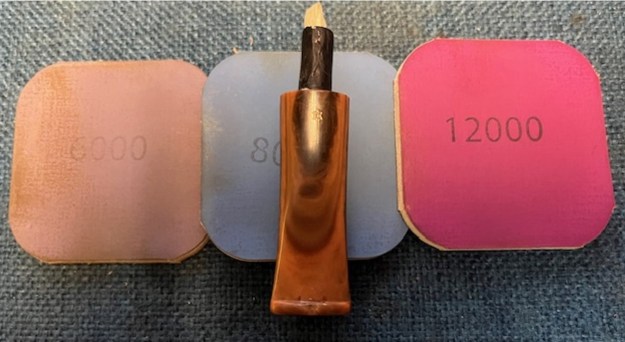
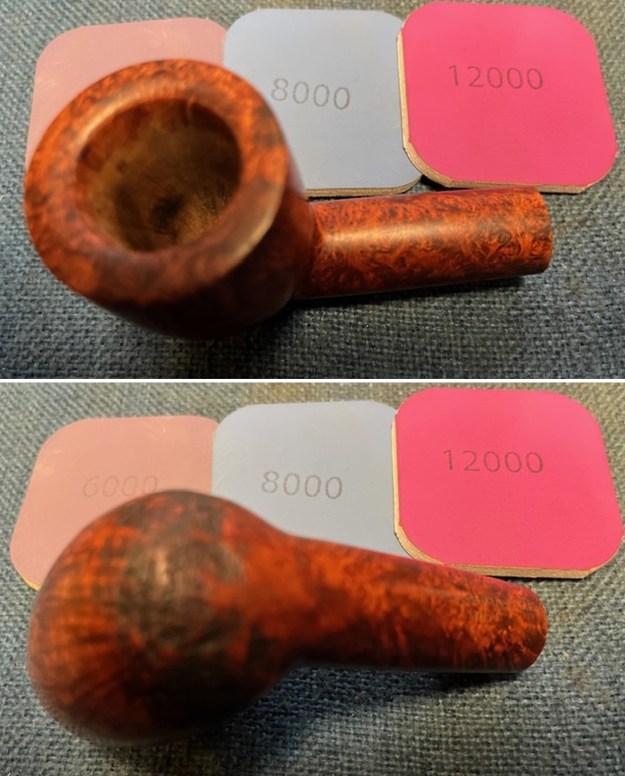
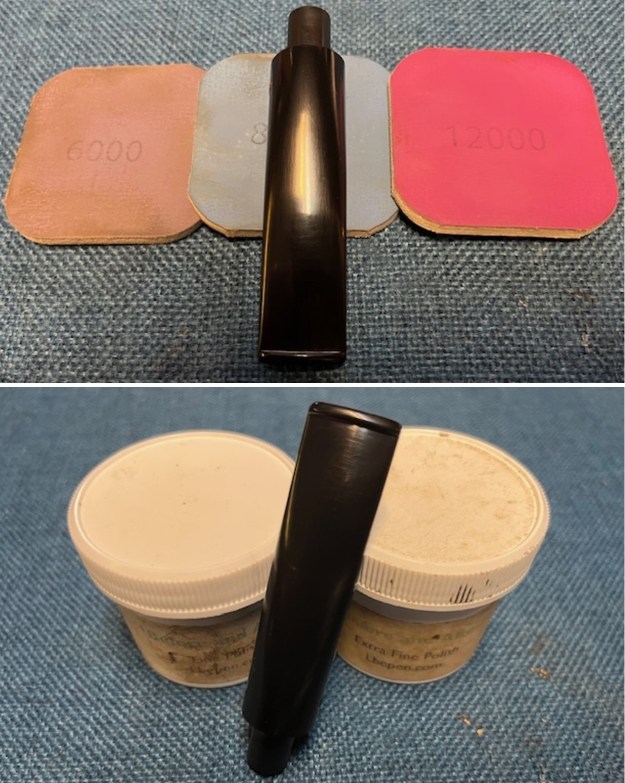
 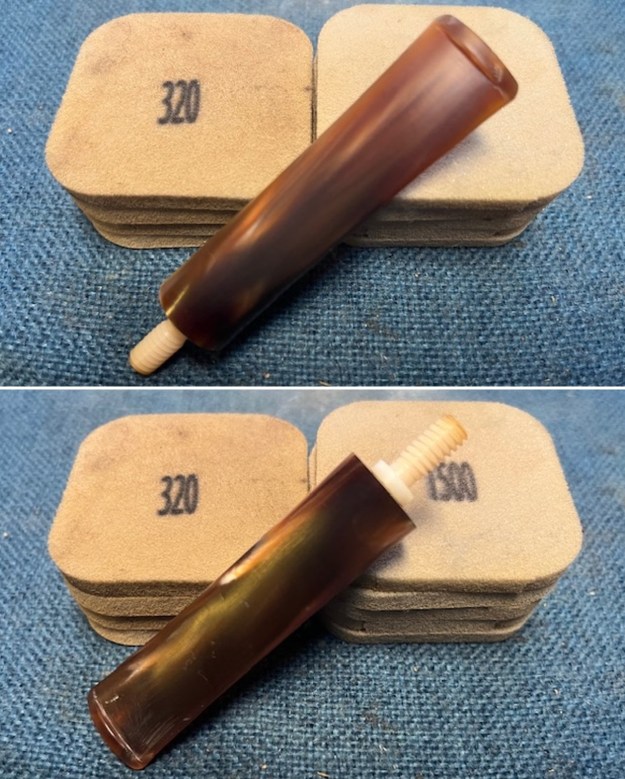 I polished the stem with micromesh sanding pads – wet sanding it 1500-12000 pads. I wiped it down with a damp cloth after each pad to protect it and preserve it. it with Before After Pipe Polish – both Fine and Extra Fine. I polished the stem on the buffer with Blue Diamond.
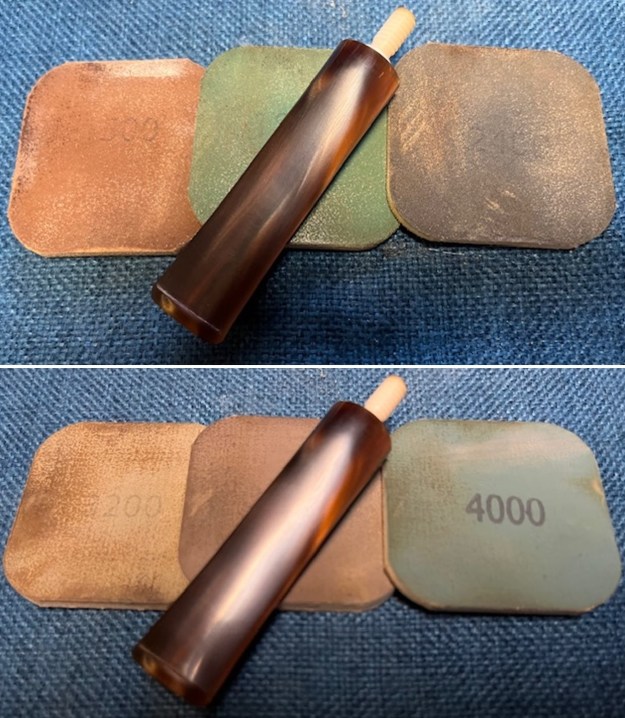
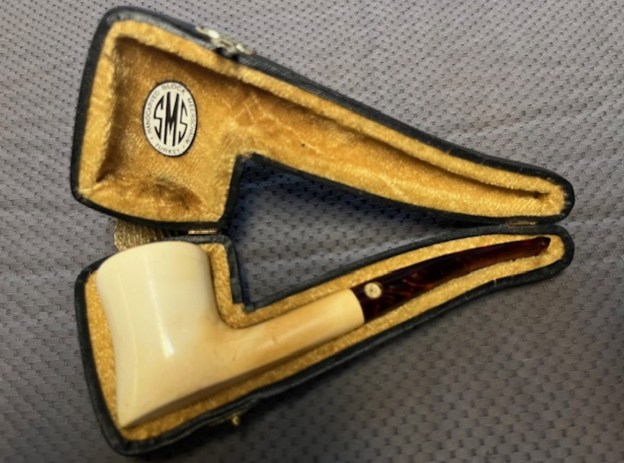
 I put the pipe back together and gave it a buff on the wheel with Blue Diamond polish. I use a light touch on the acrylic as too heavy a touch can cause the heat to damage to acrylic. I gave the stem multiple coats of carnauba wax and buffed the pipe with a clean buffing pad to raise the shine. I hand buffed it with a soft cloth to deepen the shine. I put it back in the case and took a photo of the pipe in case.
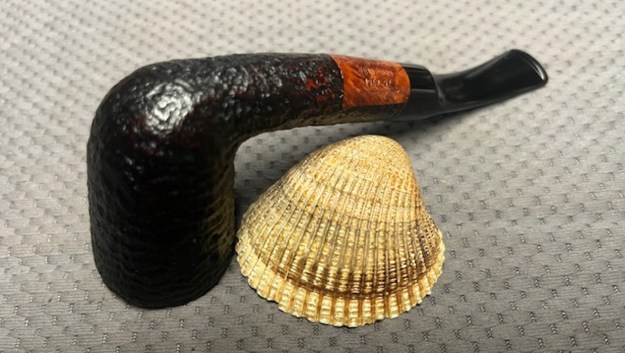
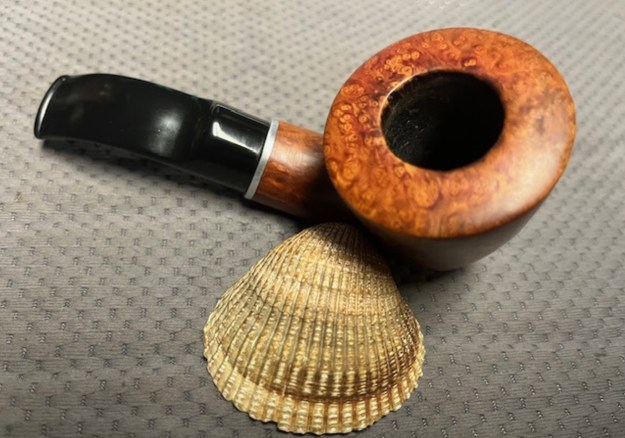
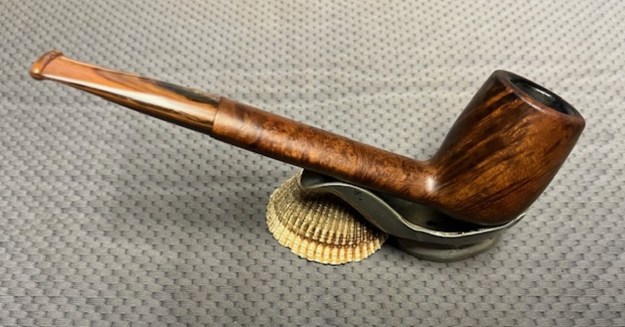
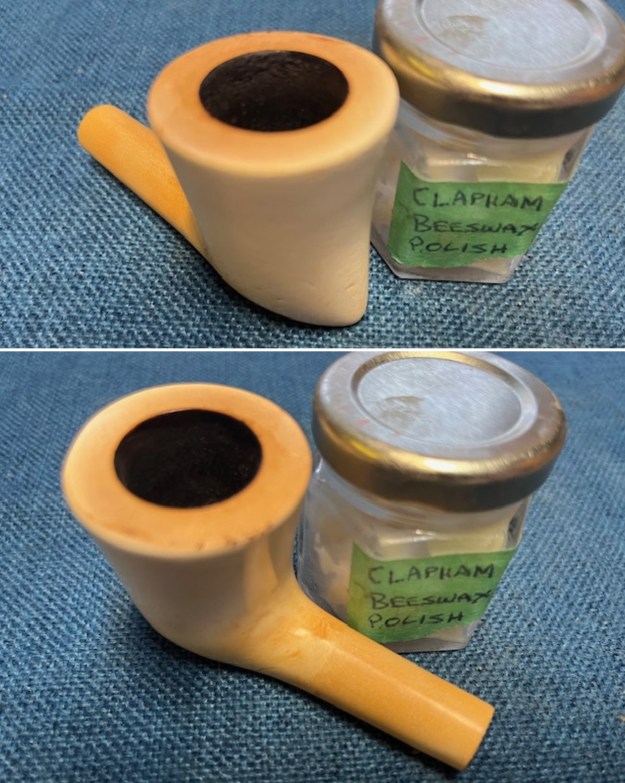
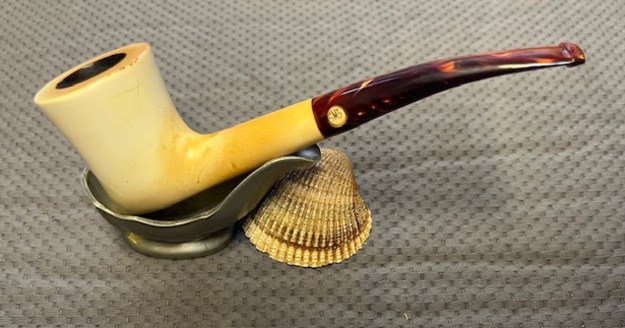
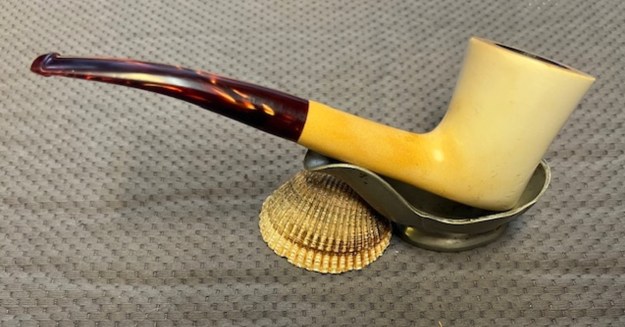
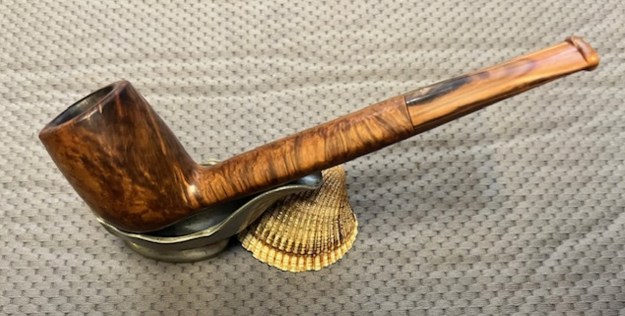
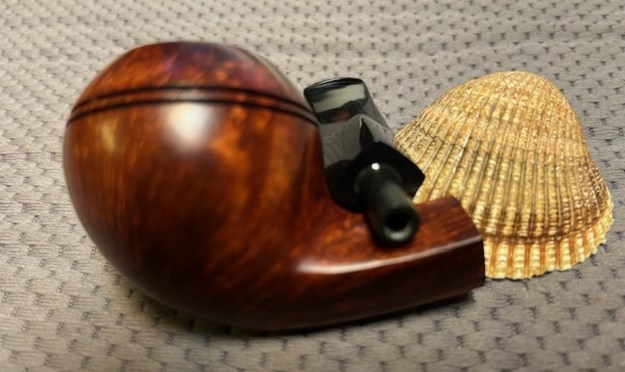
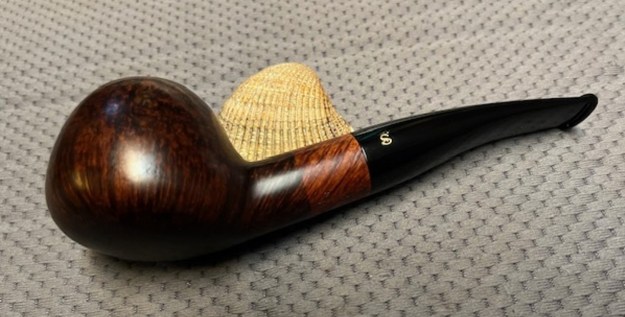
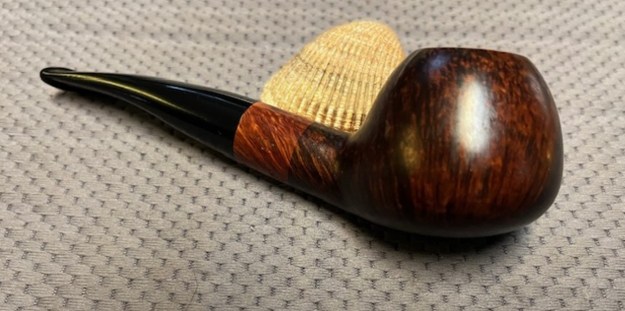
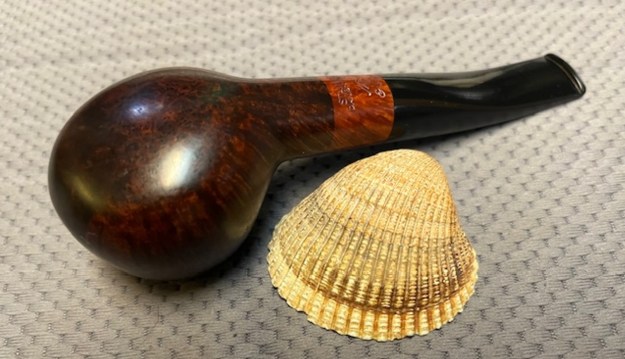
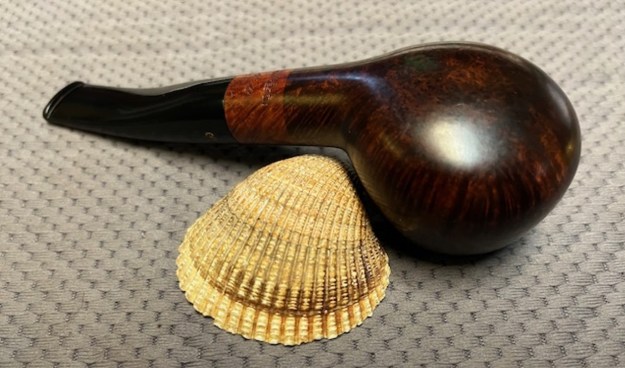
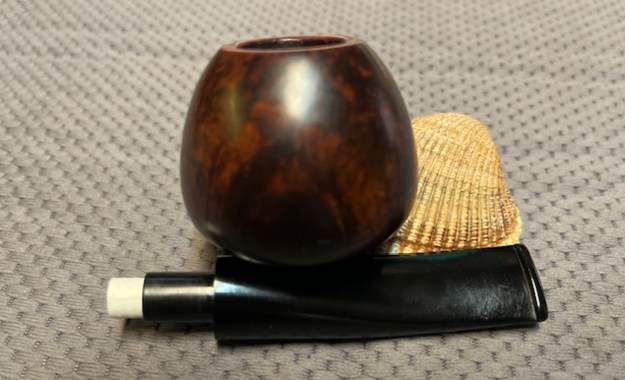
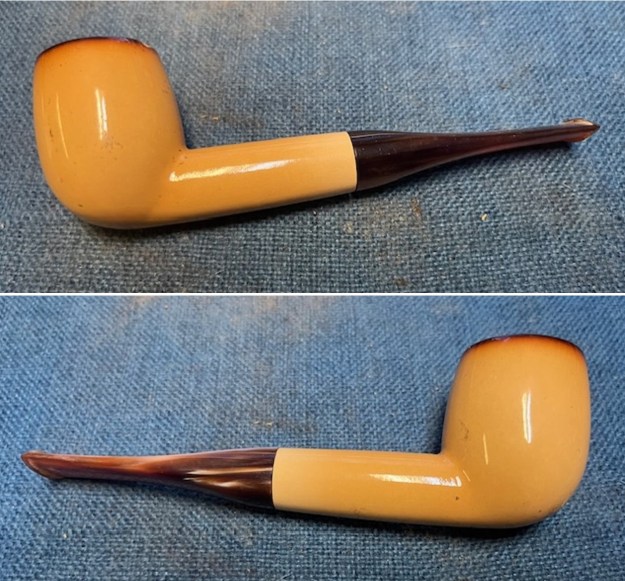
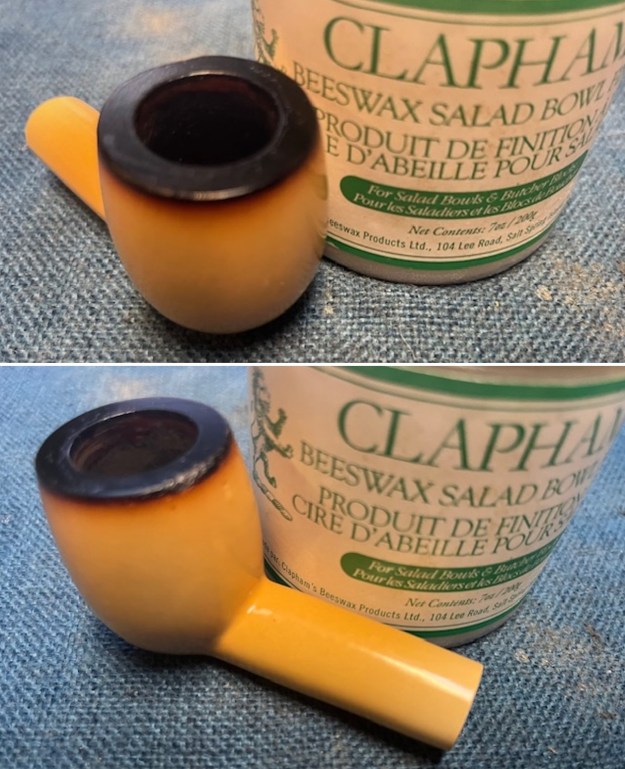
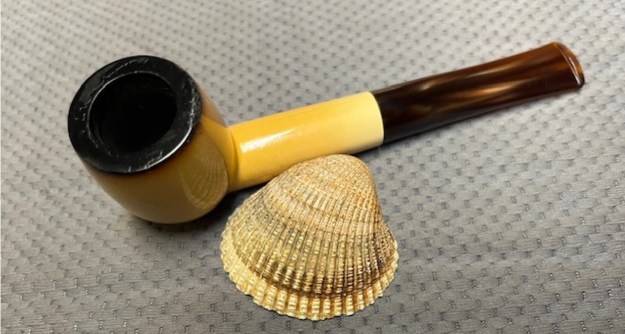
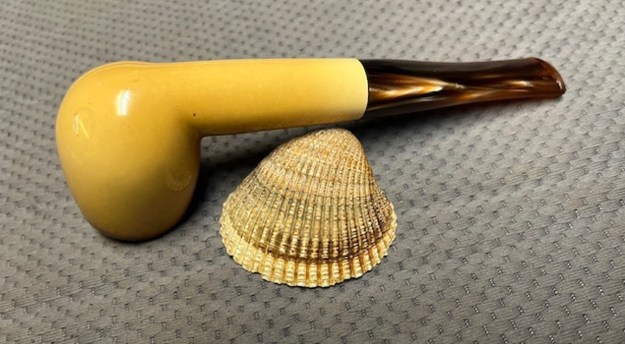
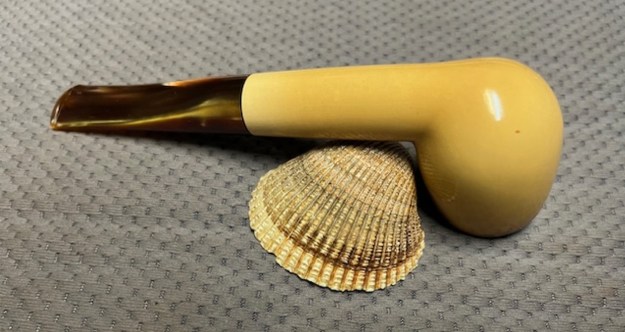
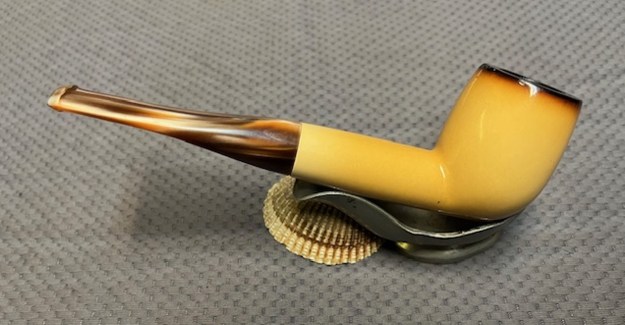
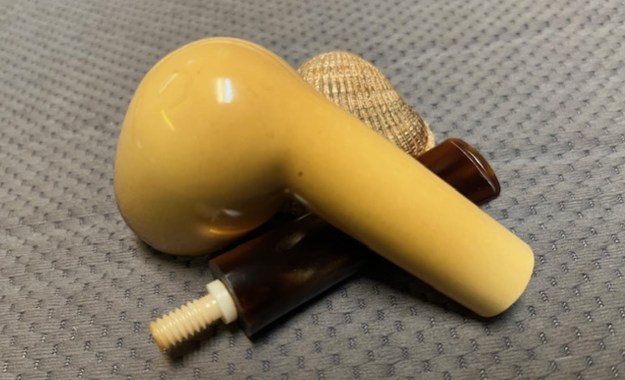
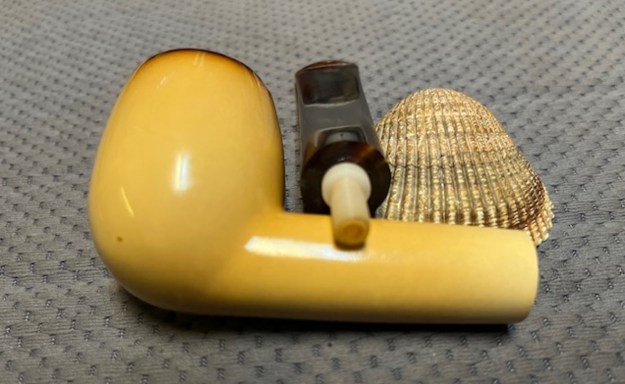
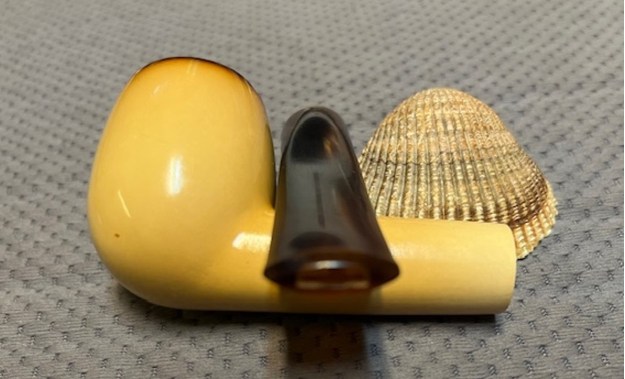
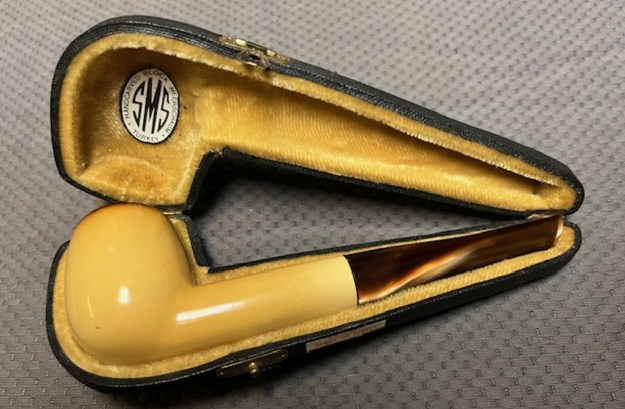 I took photos of the finished SMS Billiard with a variegated rose acrylic stem to show the shine and the patina around the bowl. The acrylic stem looks very good with the warm glow on the shank and the bowl. With time the contrast will grow richer and deeper to a thing of beauty. The finished SMS Billiard fits nicely in the hand and I think it will feel great as it heats up with a good tobacco. Give the finished pipe a look in the photos below. The dimensions of the pipe are Length: 6 inches, Height: 1 ¾ inches, Outside diameter of the bowl: 1 ¼ inches, Chamber diameter: ¾ of an inch. The weight of the pipe is 1.45 ounces/41 grams. If you are interested in carrying on the legacy of this pipe it will be going on the rebornpipes store shortly. It is listed in the Ceramic and Meerschaum Section. You can send me a message or an email to let know you are interested. Thanks for reading this blog and my reflections on the pipe while I worked on it. This is an interesting estate to bring back to life.
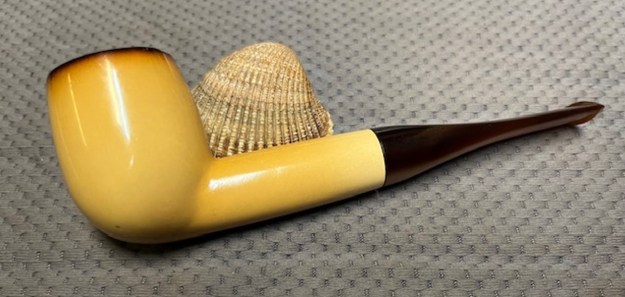


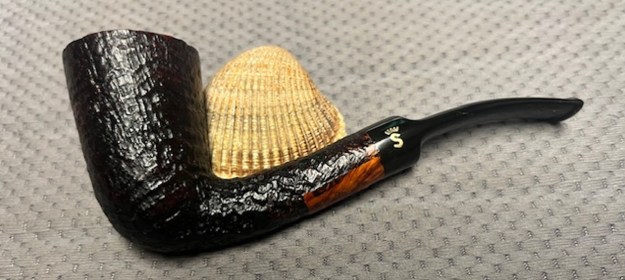
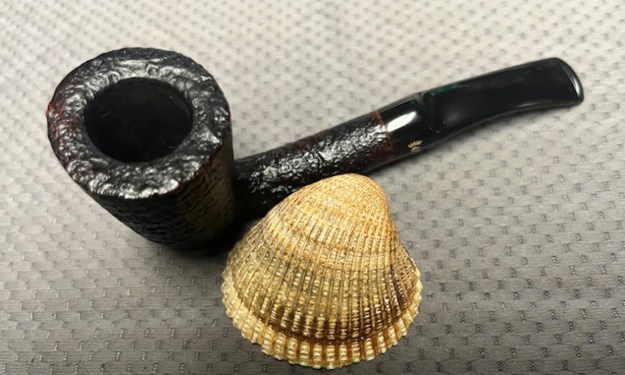
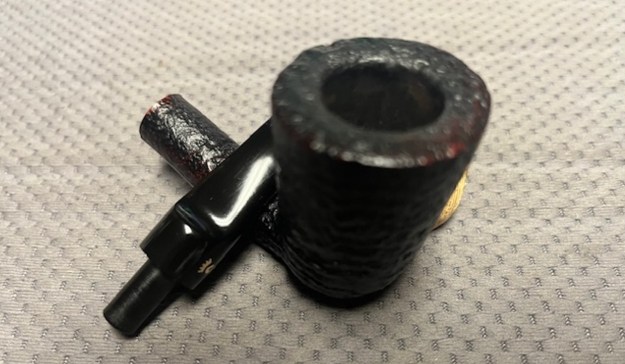
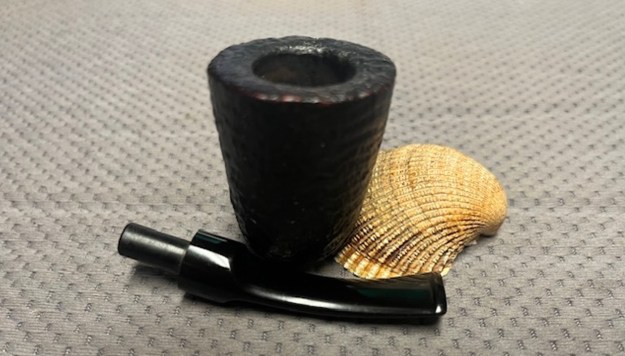
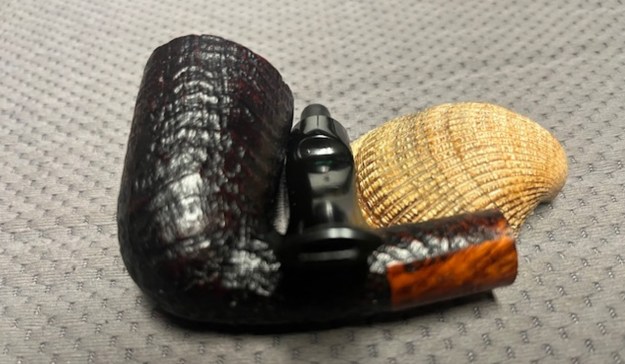
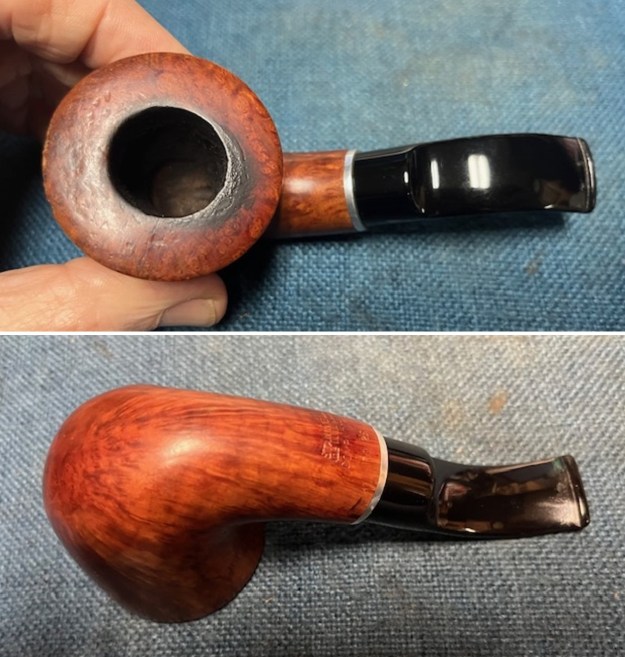
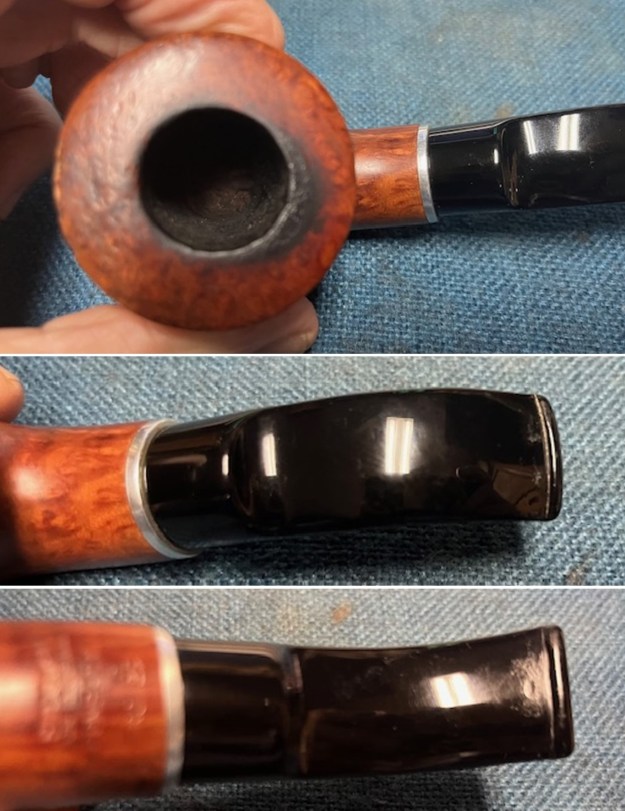
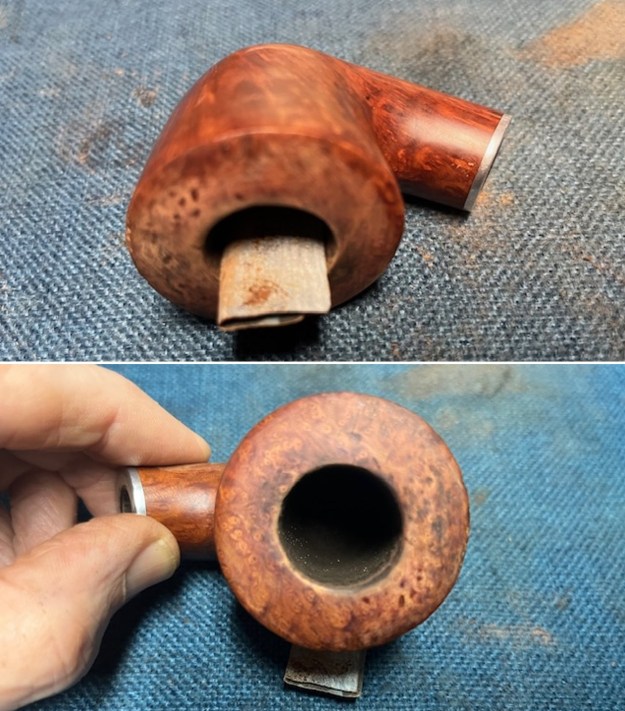
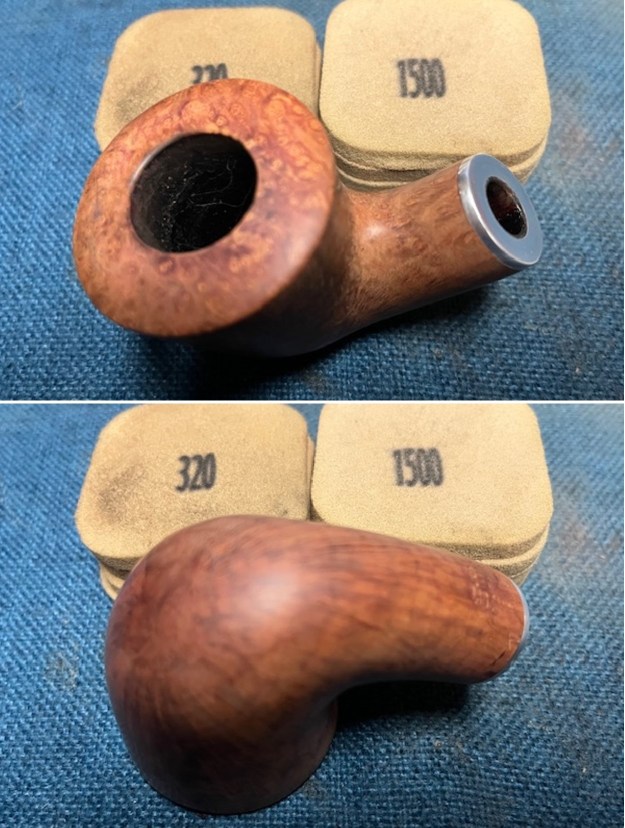
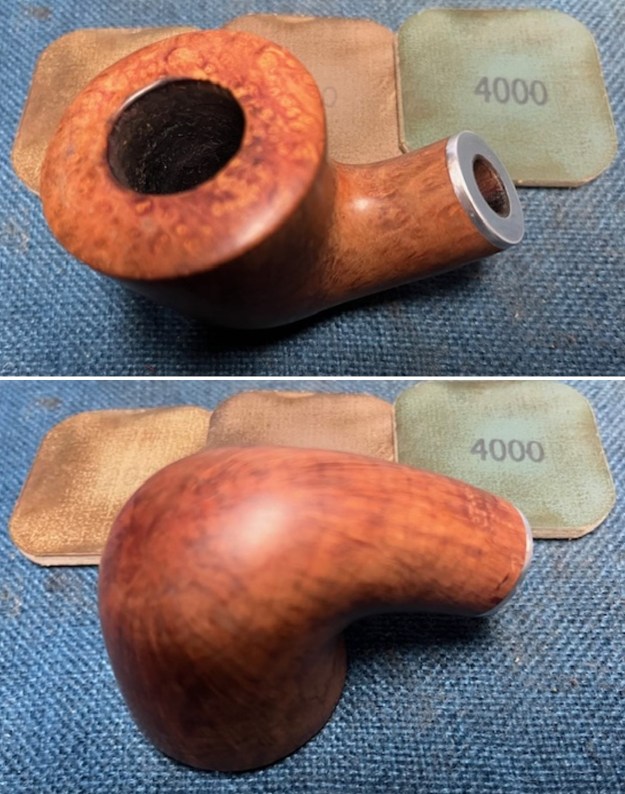
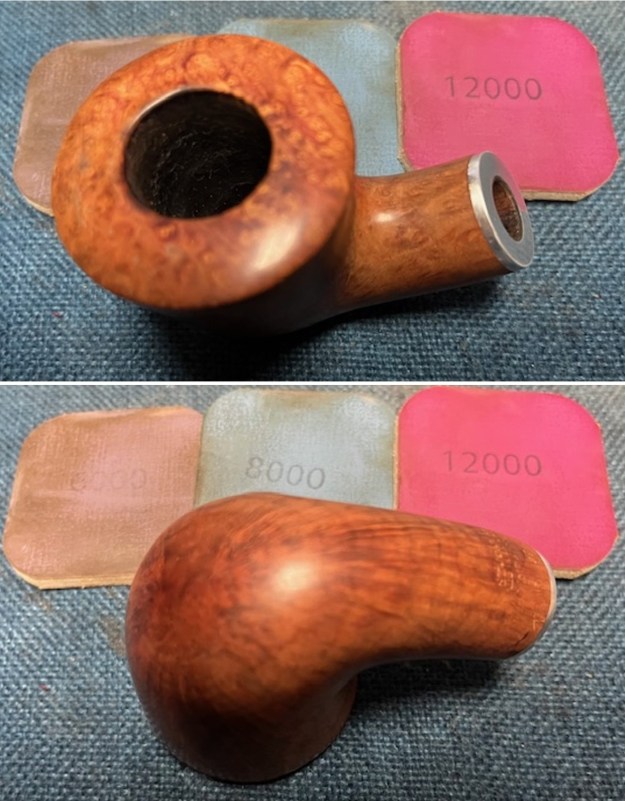
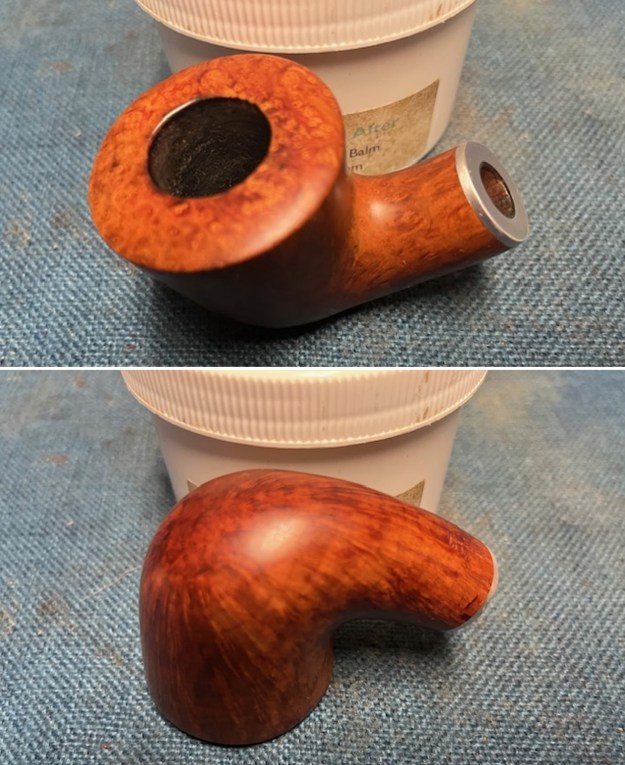
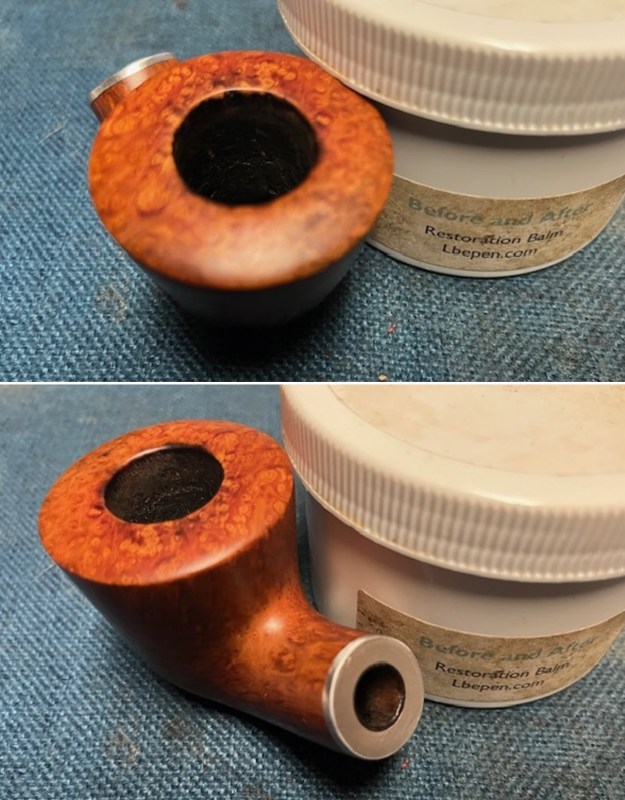
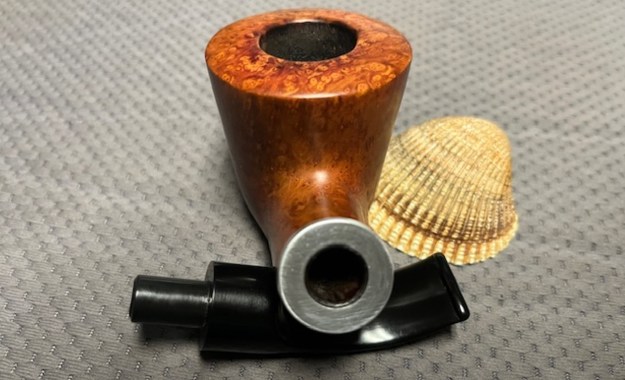
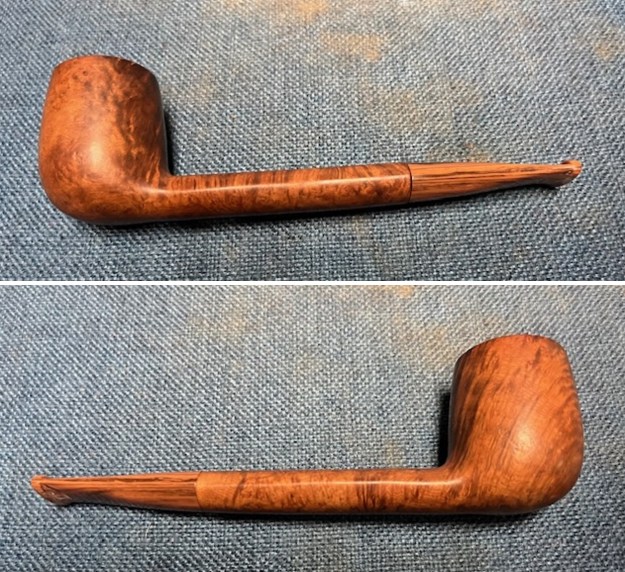
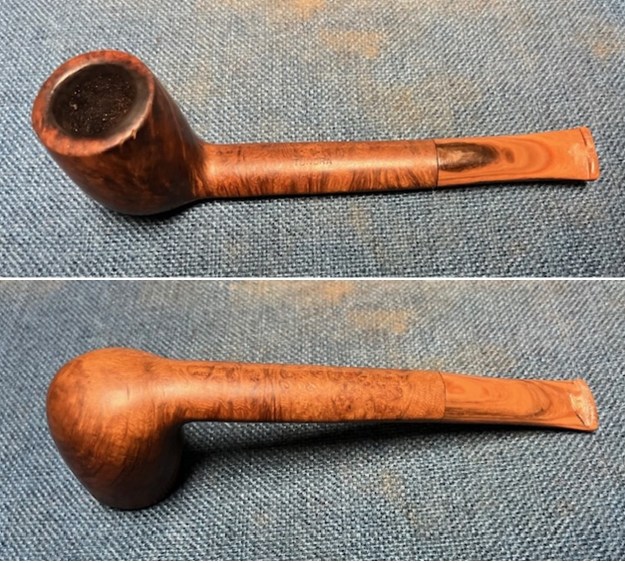
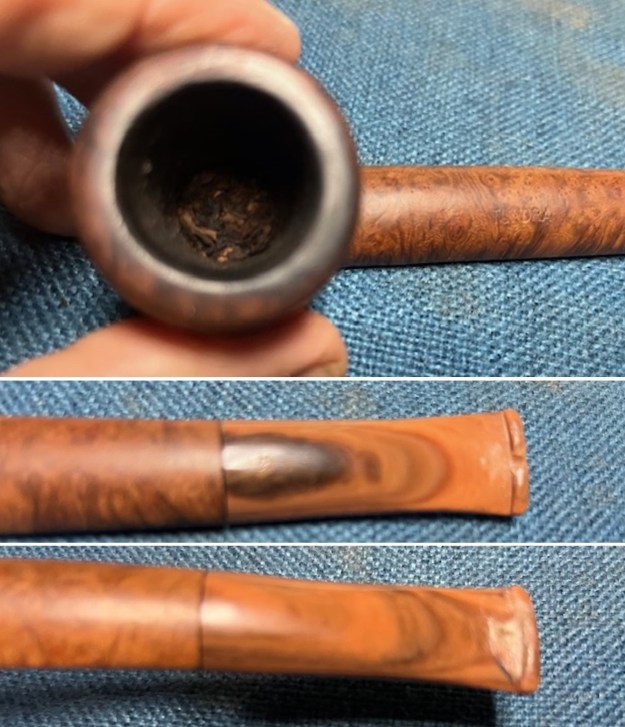
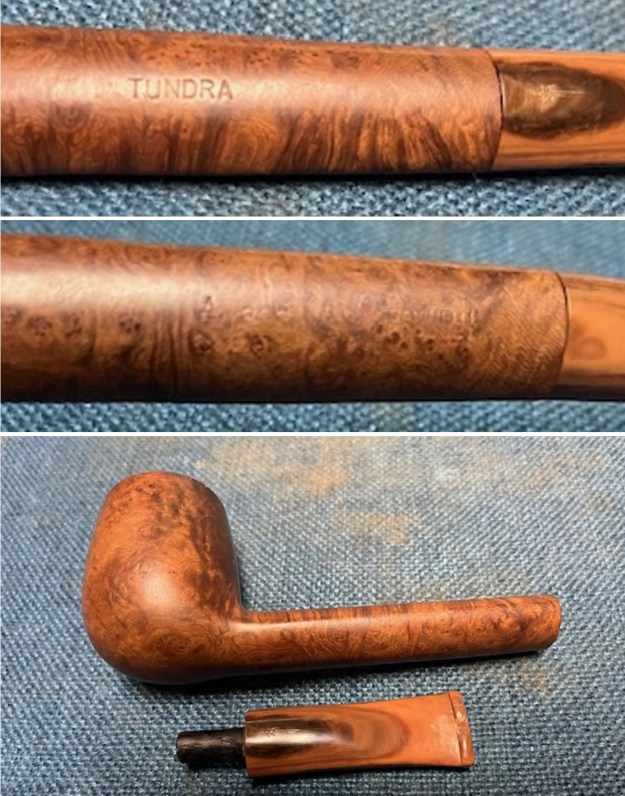
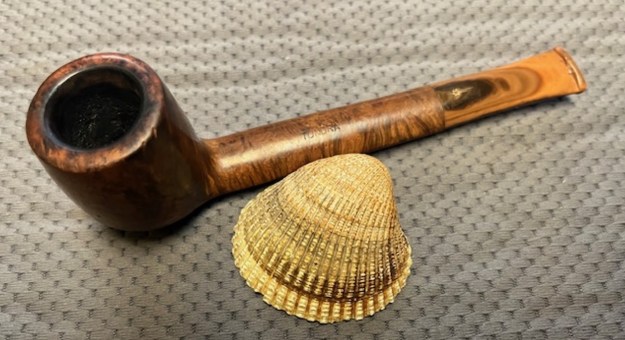
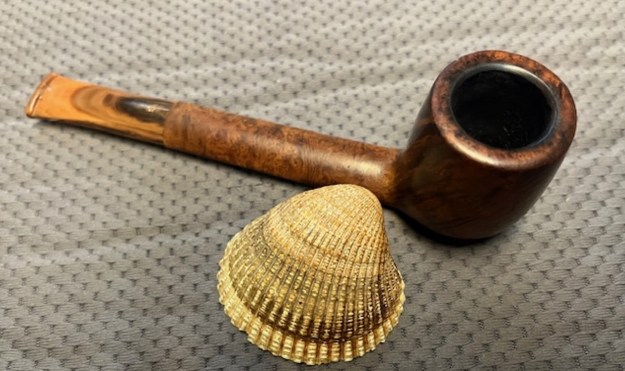
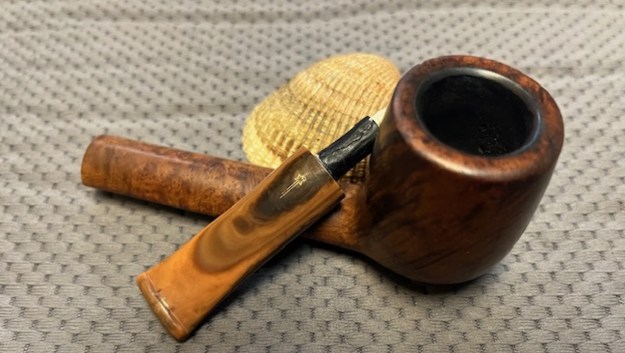
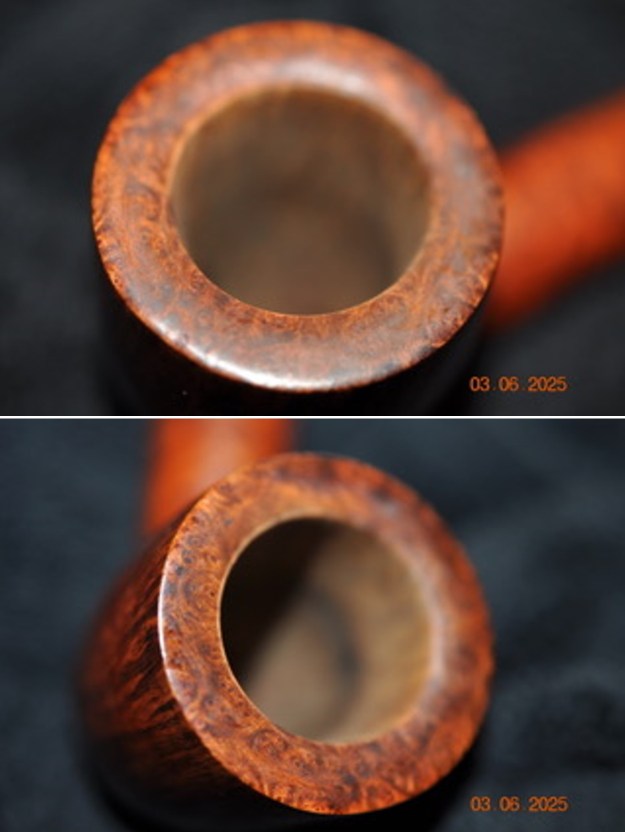
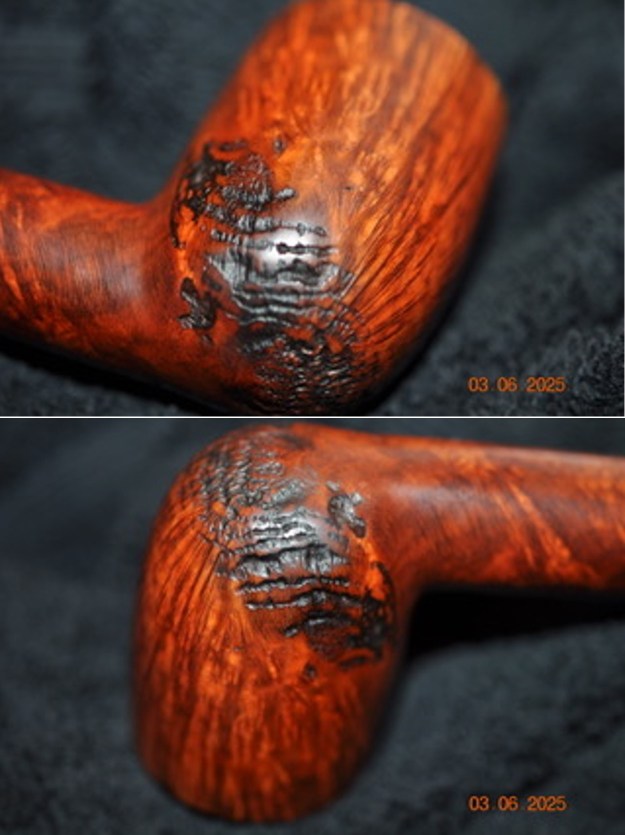
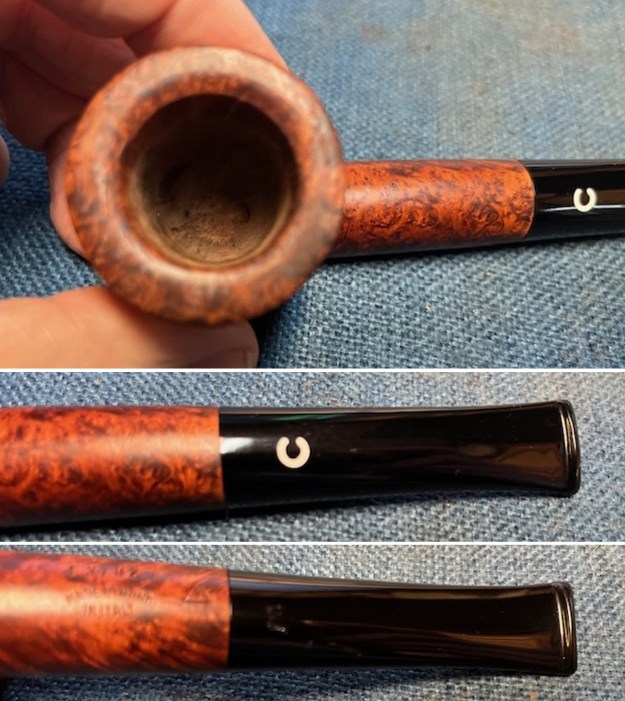
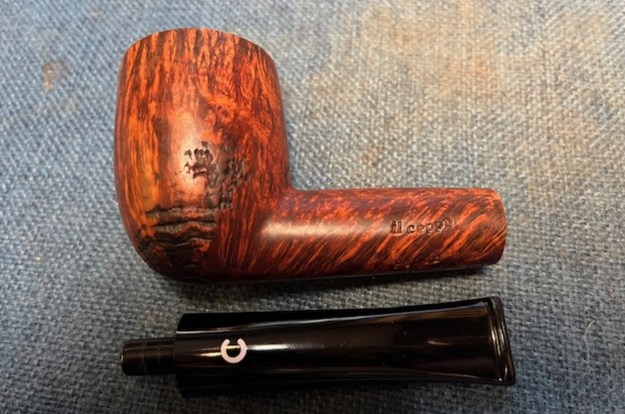
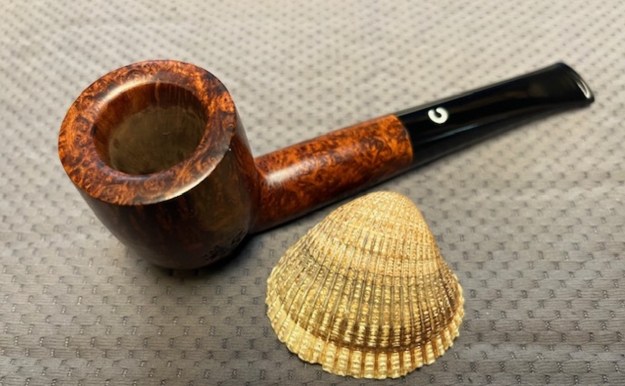
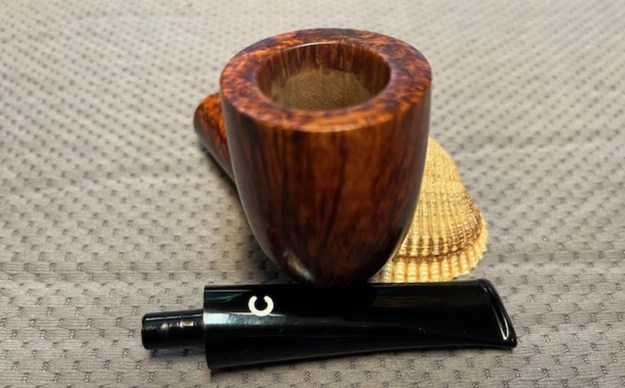
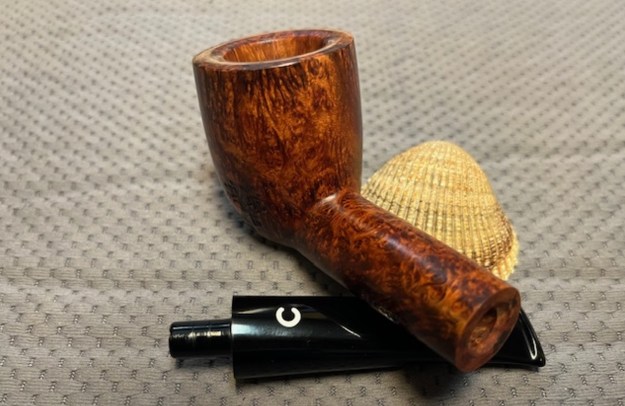
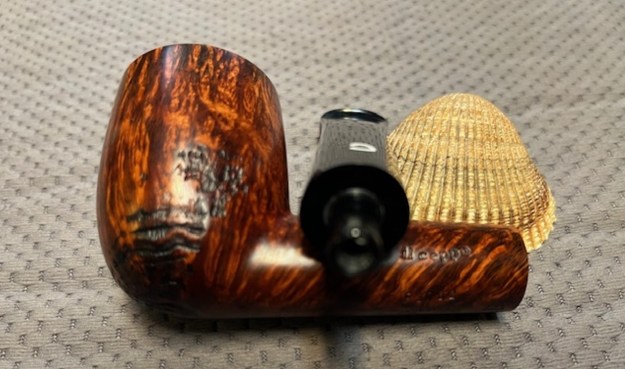
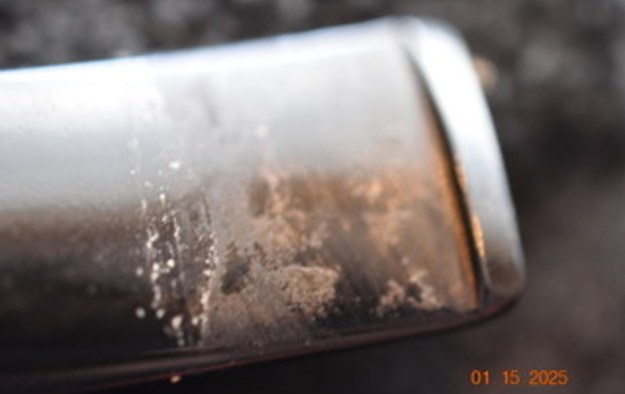
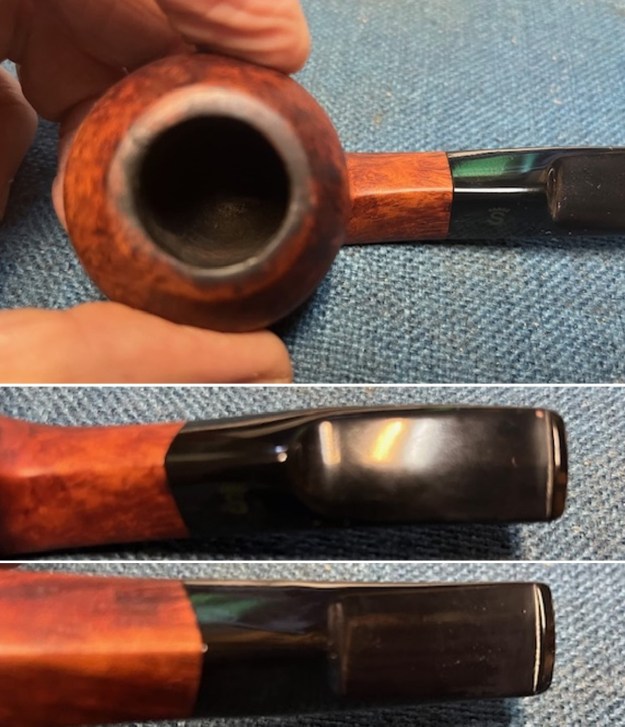
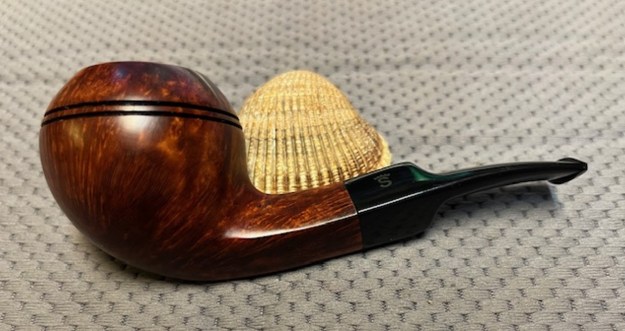
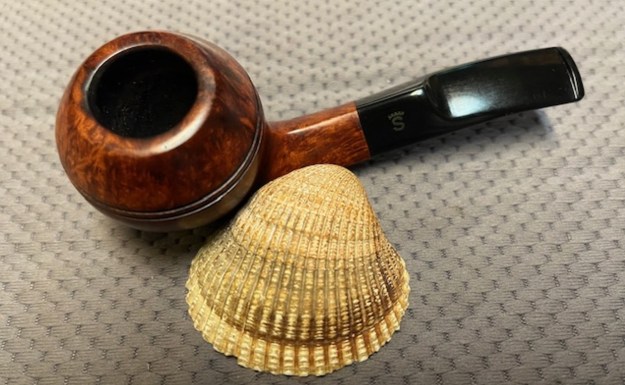
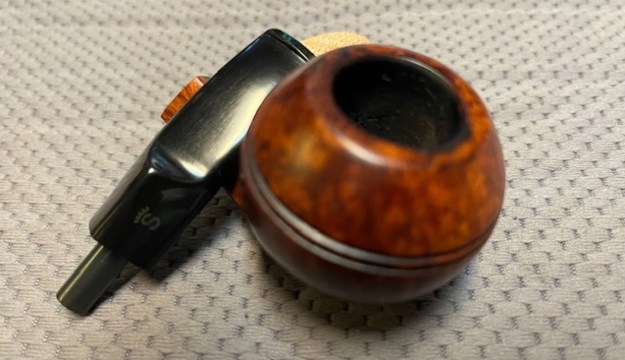
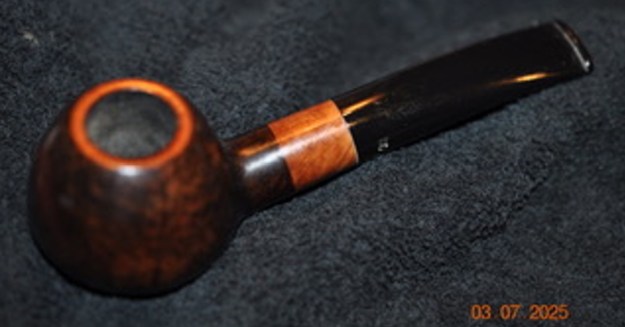
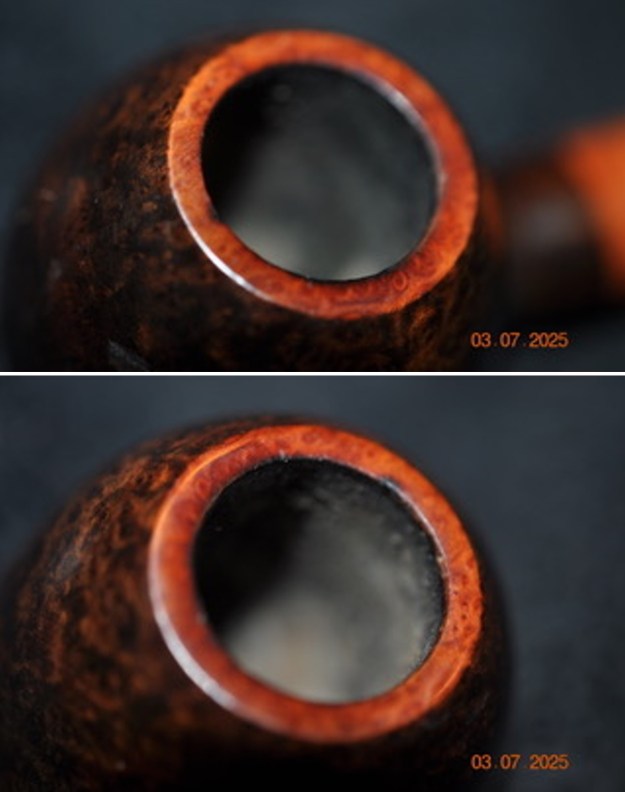
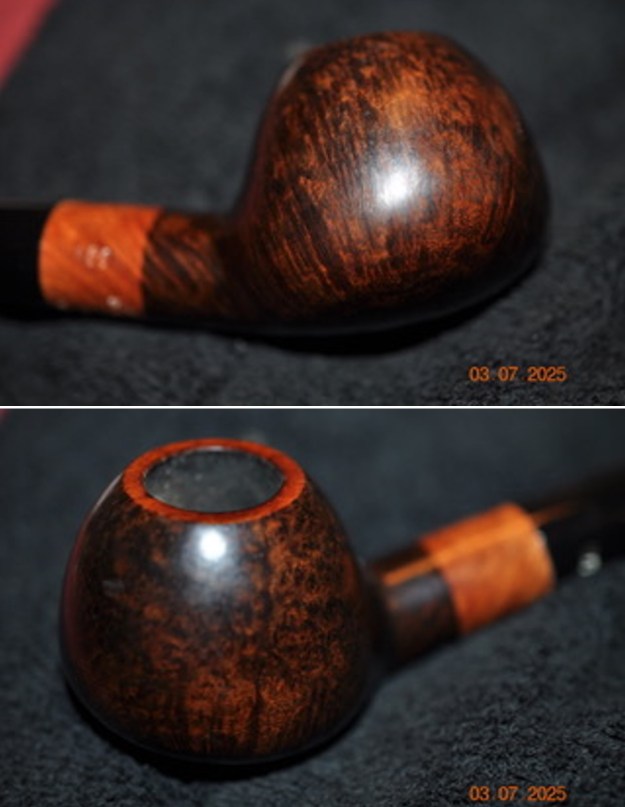
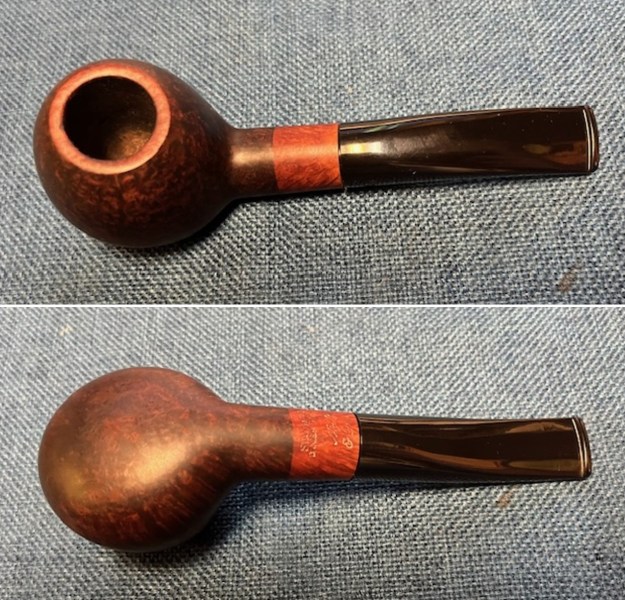
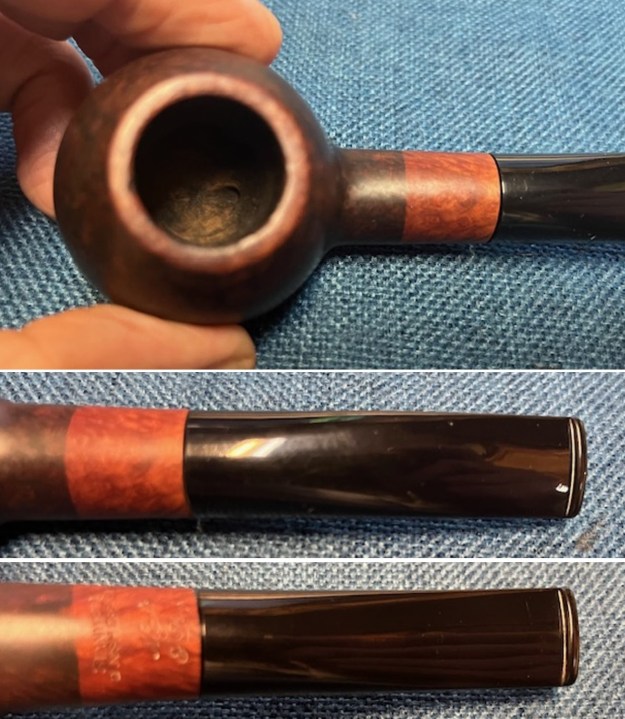
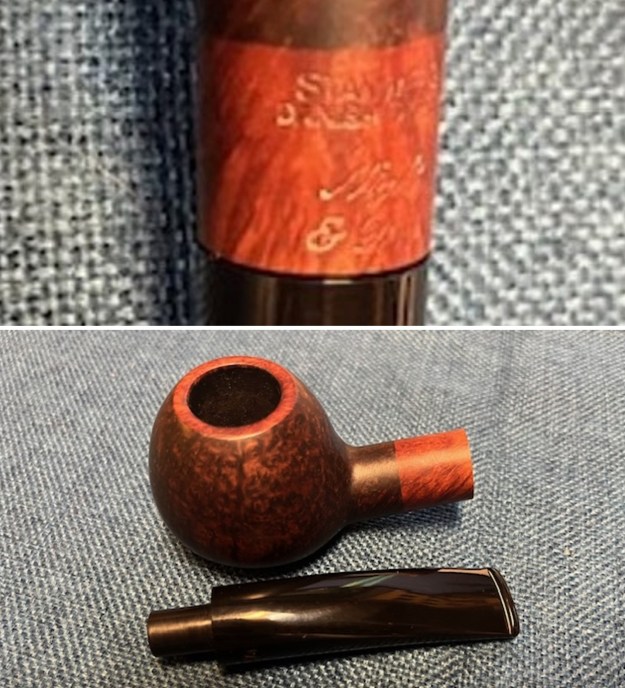
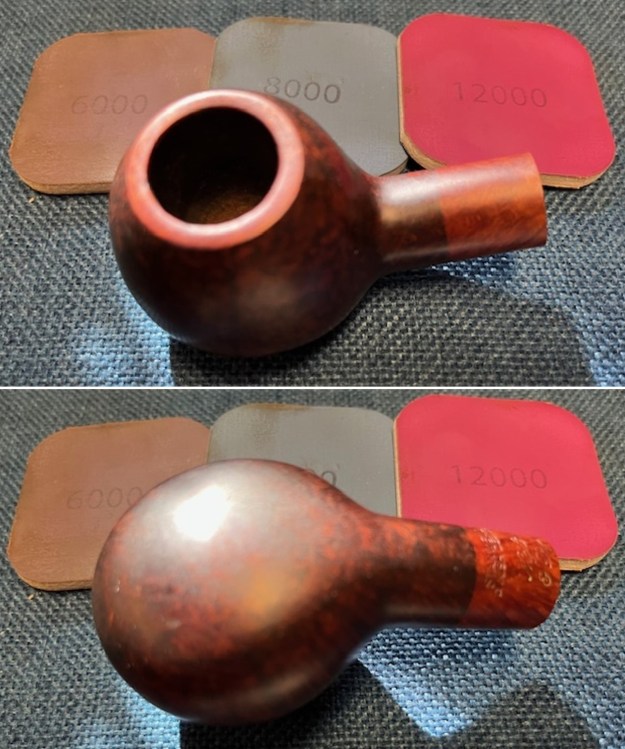
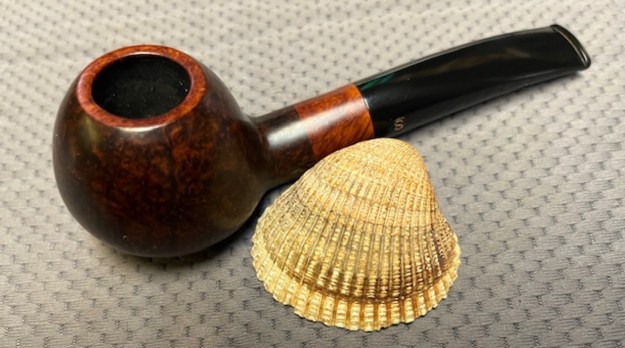
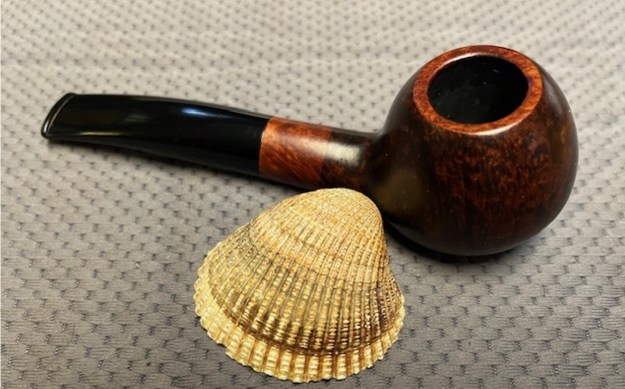
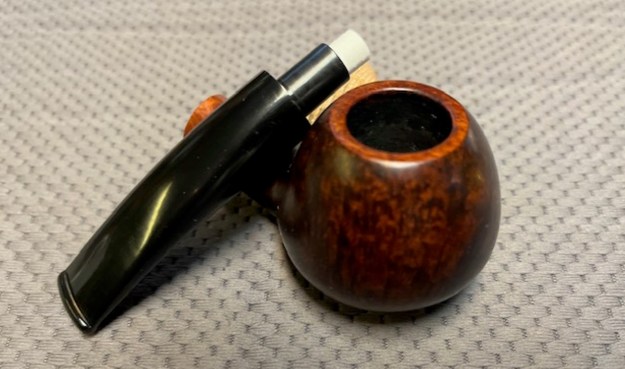
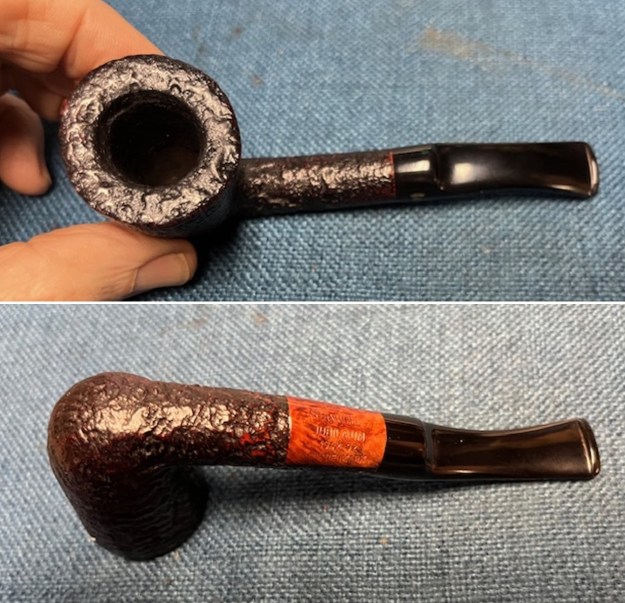 I took photos of the bowl and rim top to show the thickness of the cake and the clean rim top. The stem photos show the condition of the acrylic saddle stem ahead of the button.
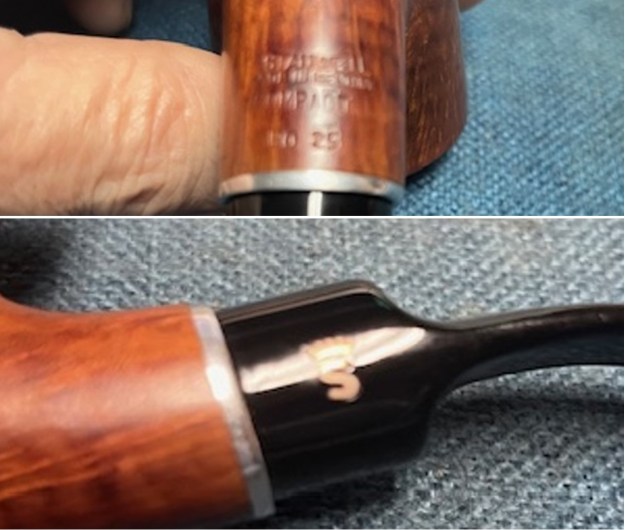
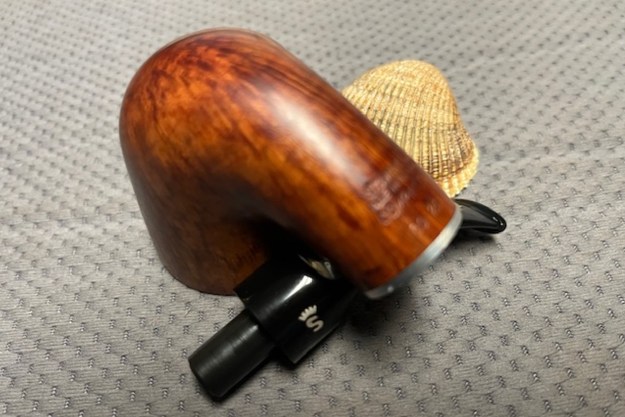
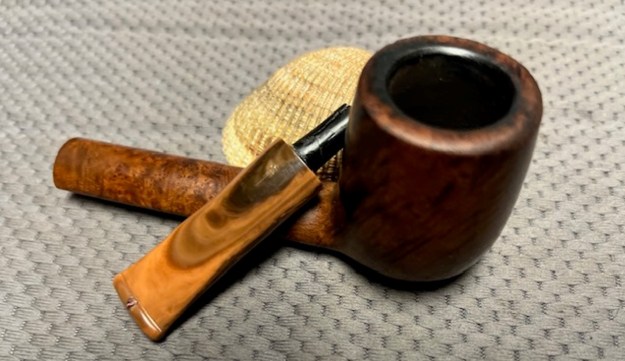
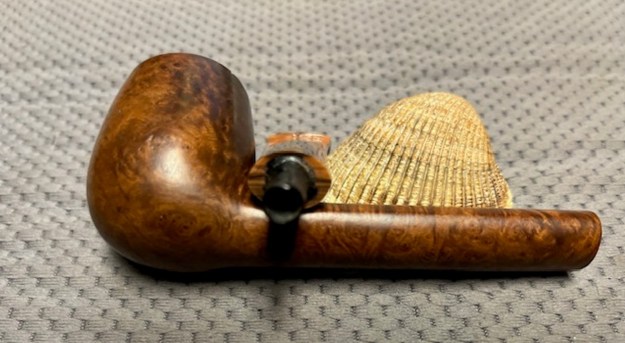
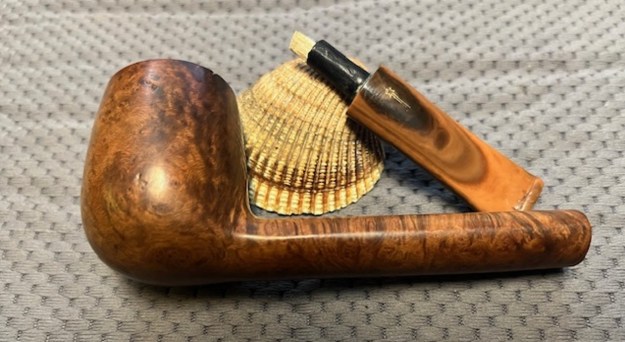
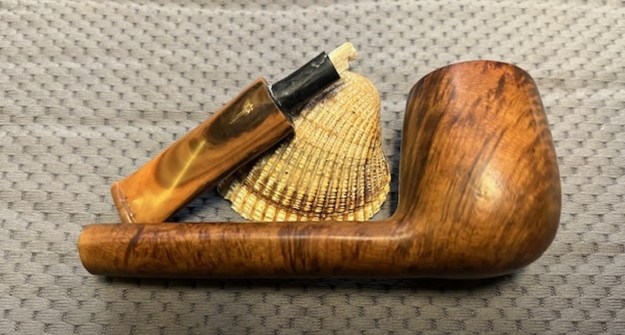
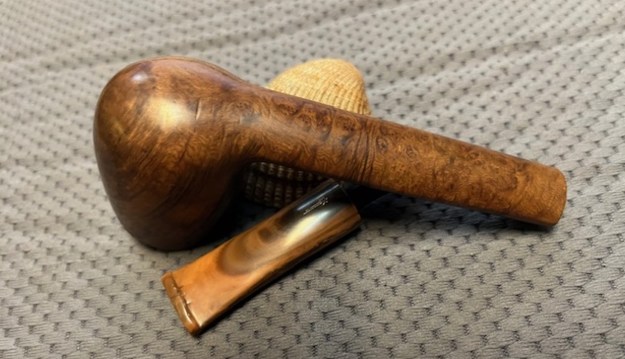
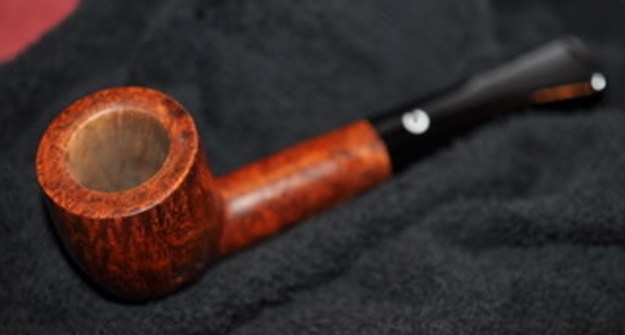
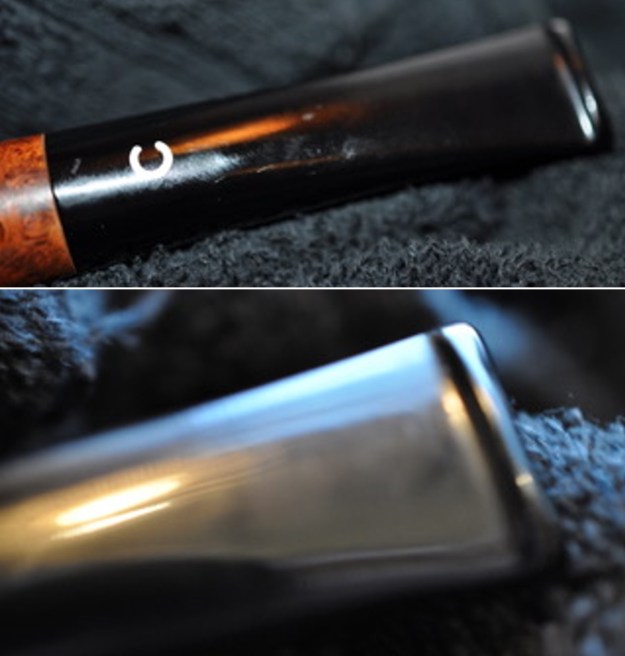
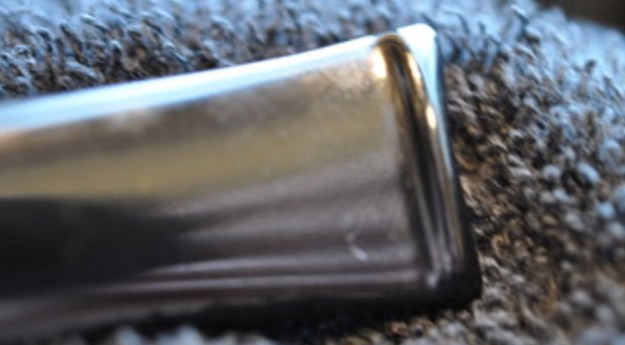
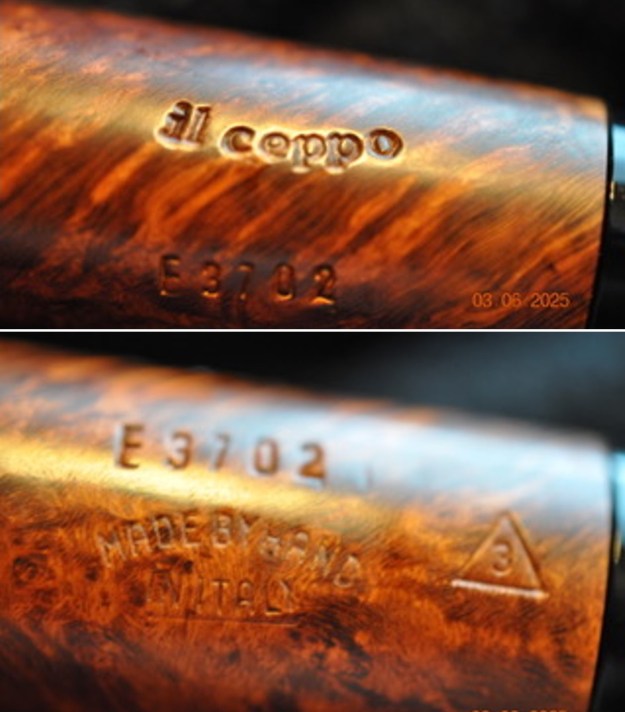
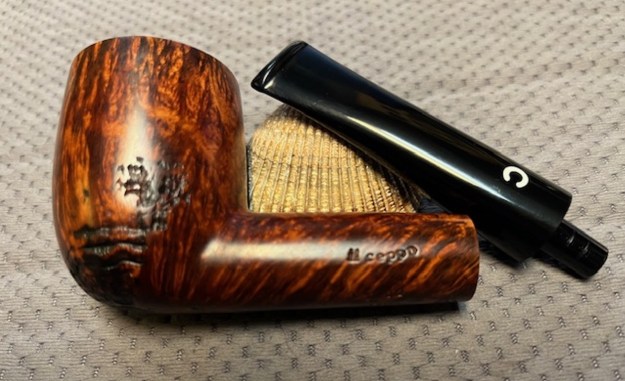
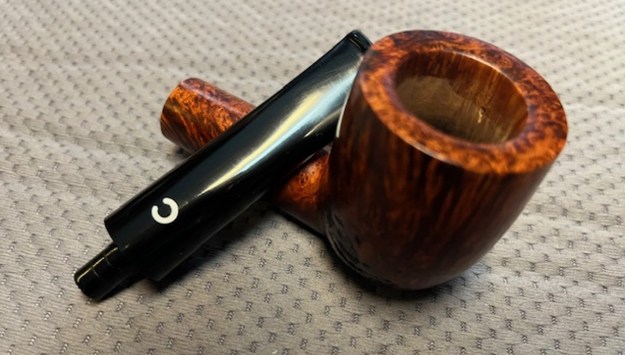
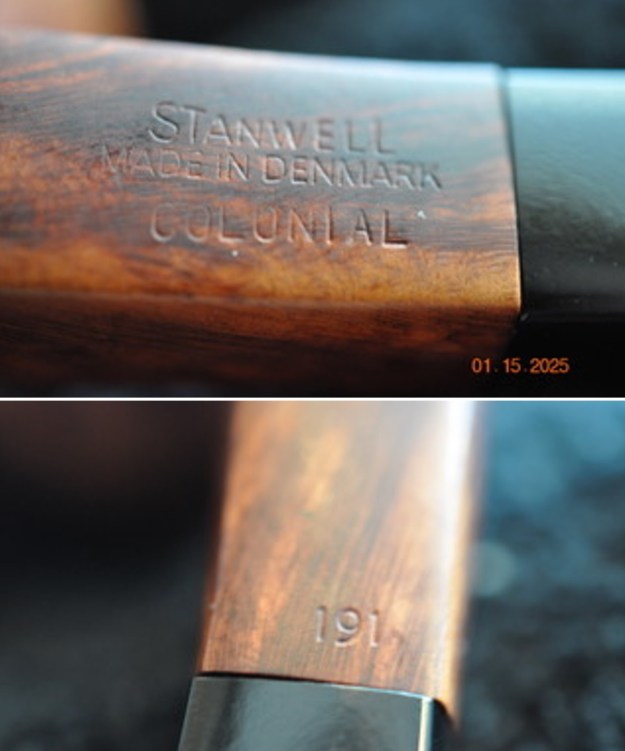
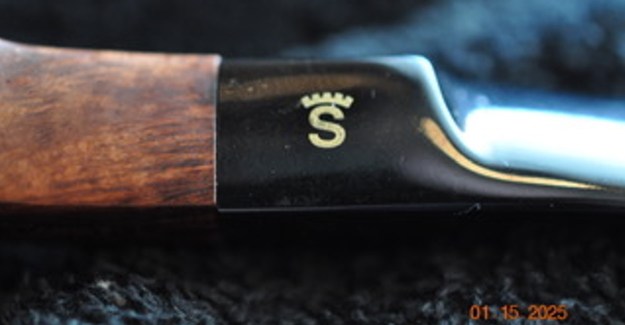
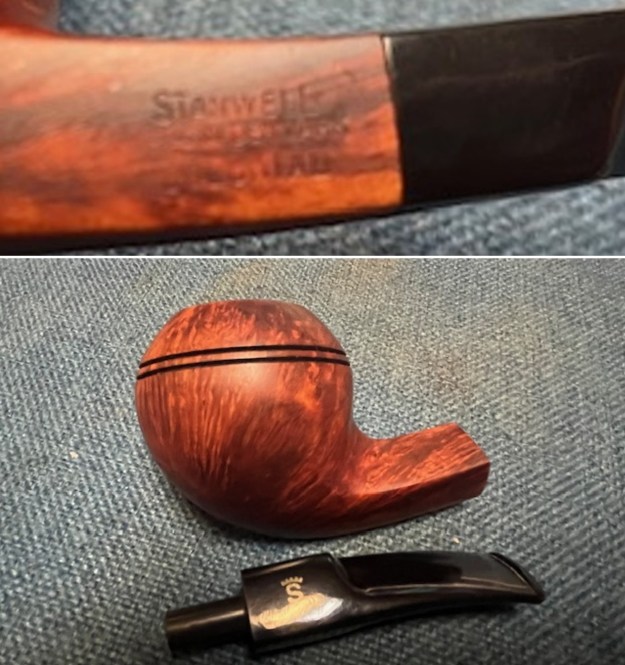
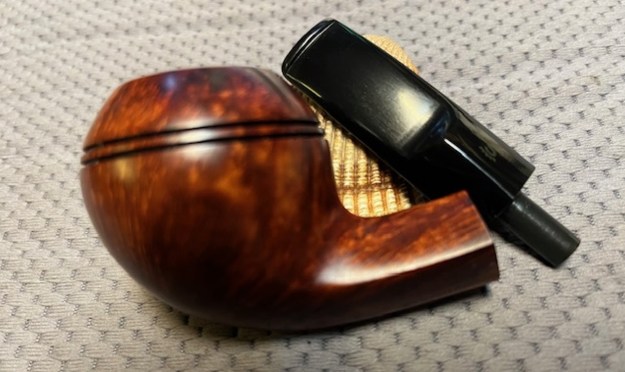
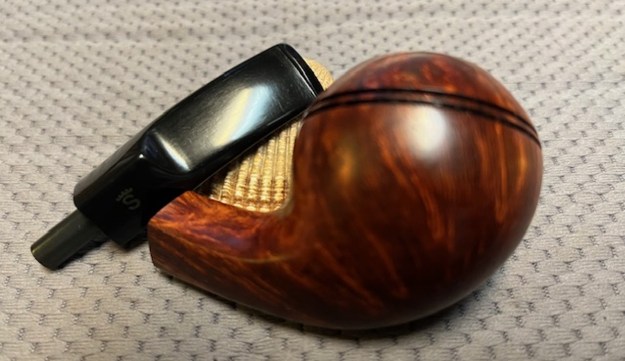
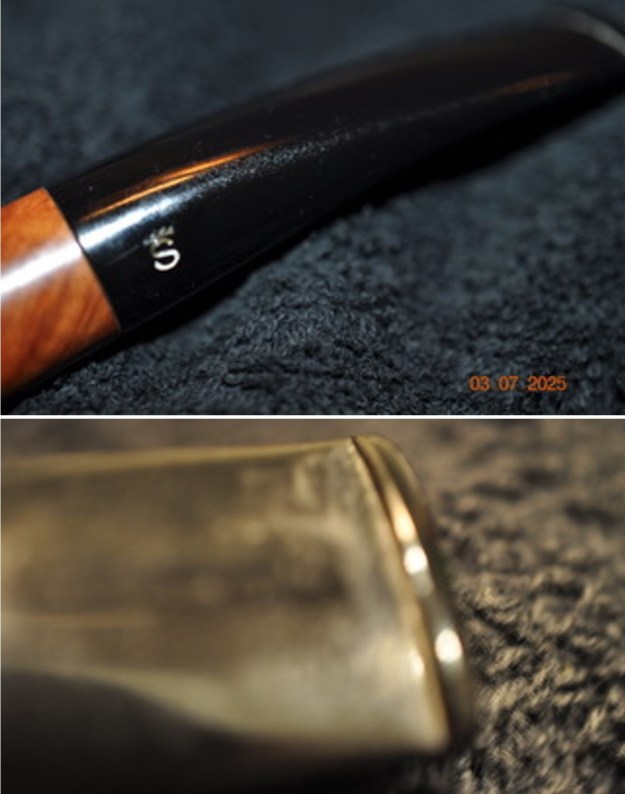
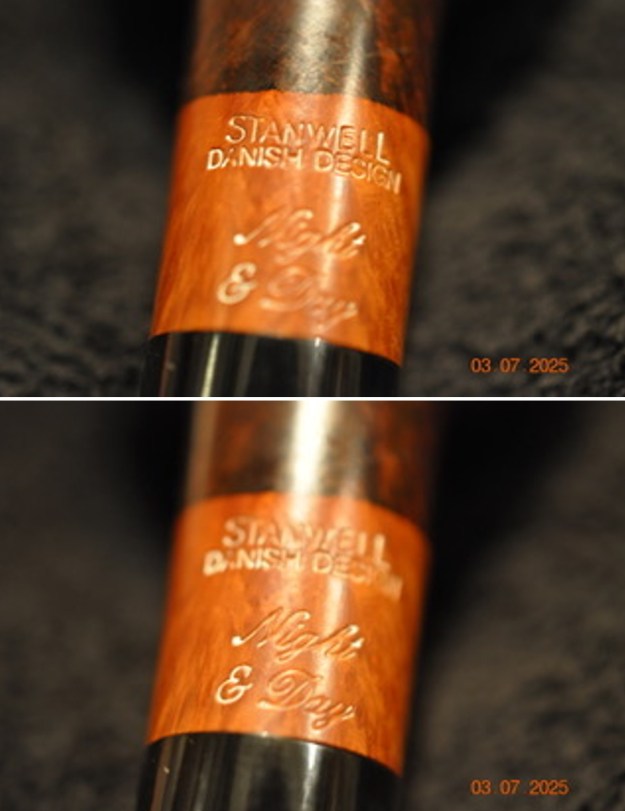
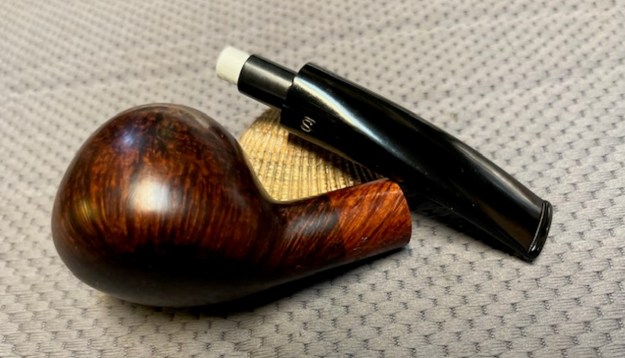
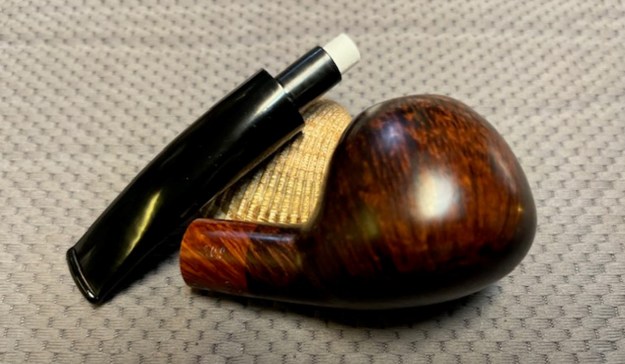
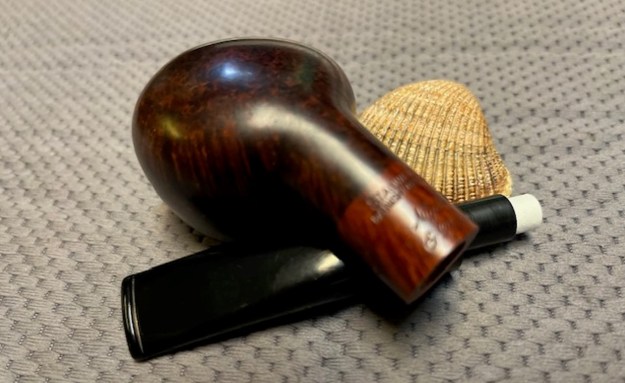
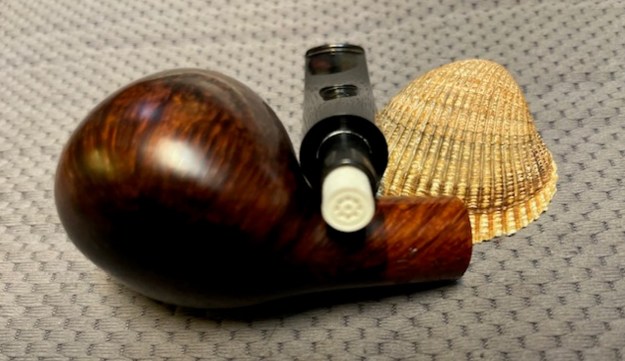
 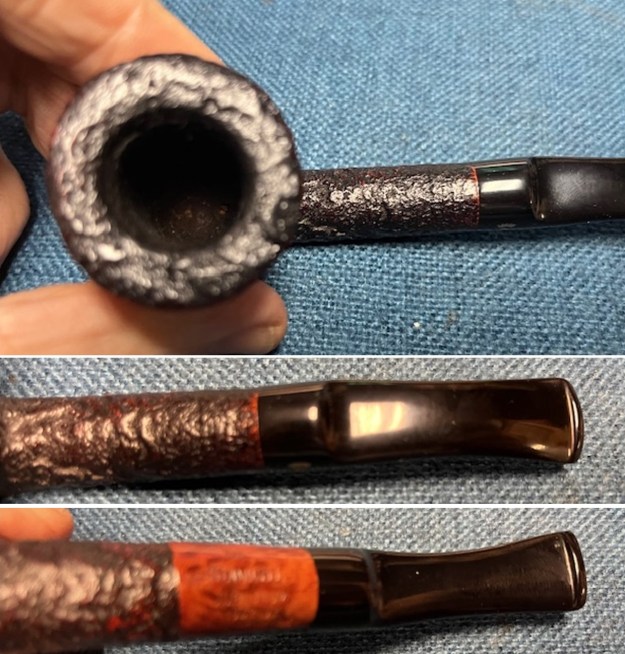 The stamping on the underside of the shank is clear and readable as noted above. I also took a photo of the gold Crown S on the left side of the stem. I took a photo of the pipe with the stem removed to give a sense of the proportions of the pipe. The mortise is lined with a nylon liner that makes for a snug and smooth fit in the shank.
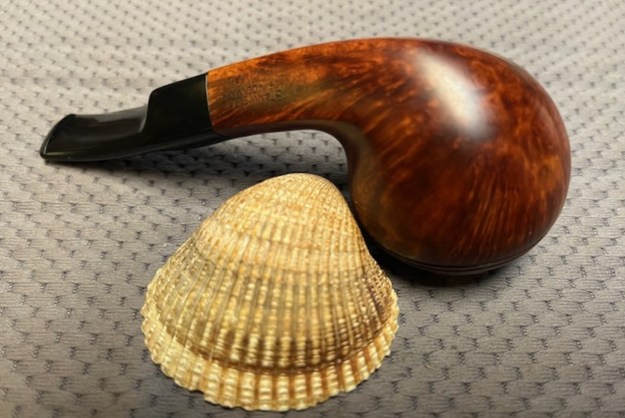
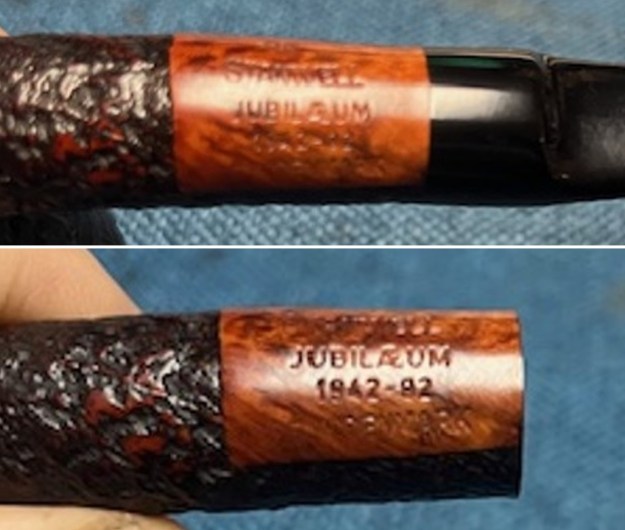
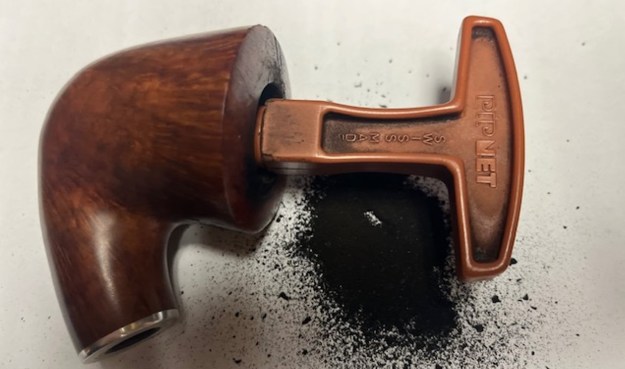
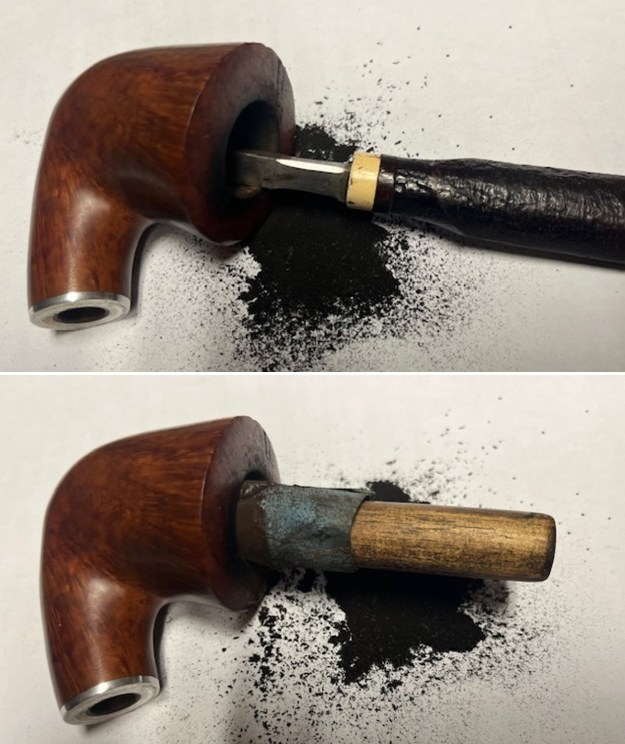
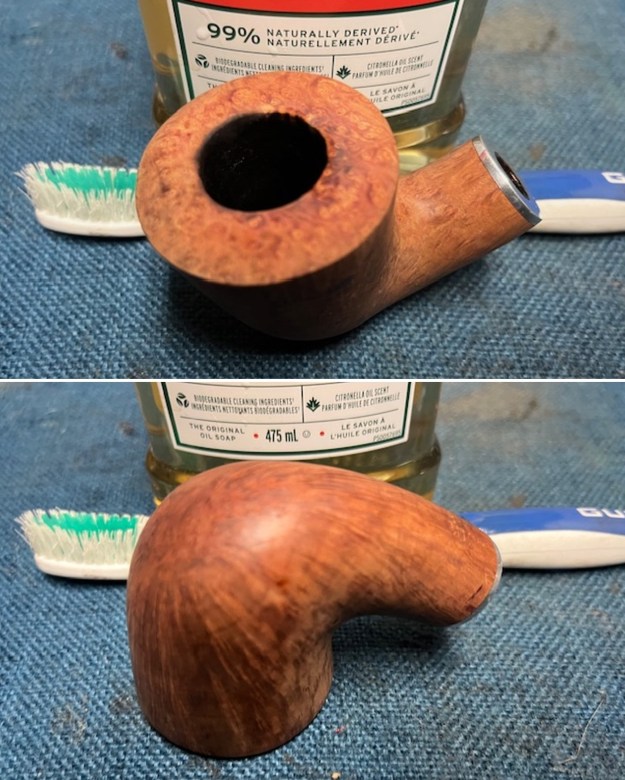
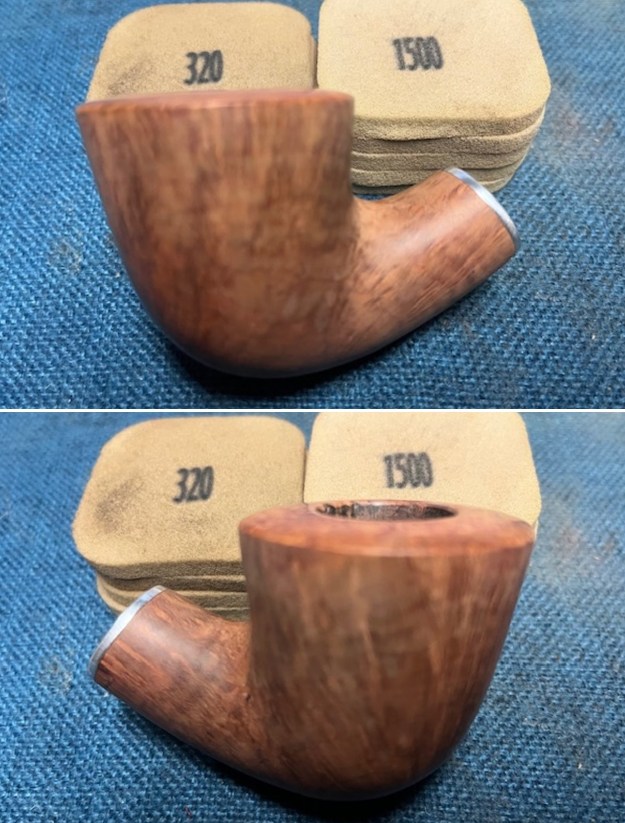
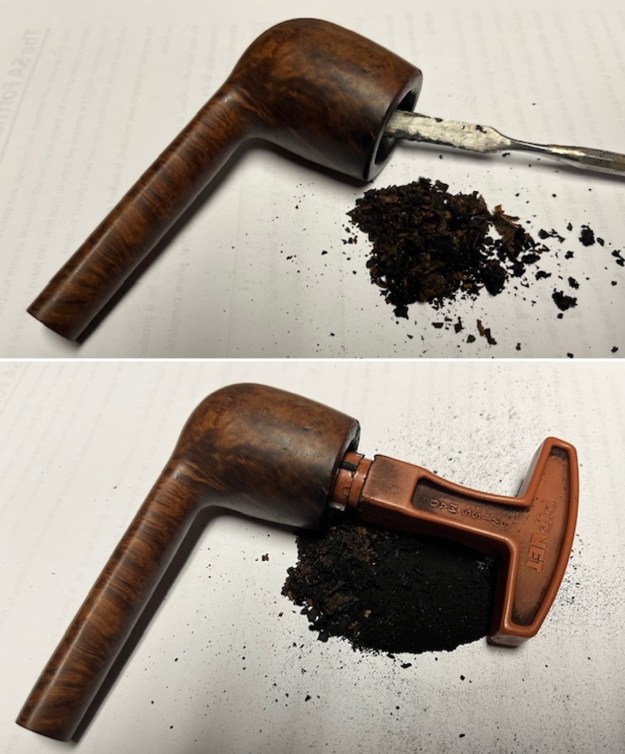
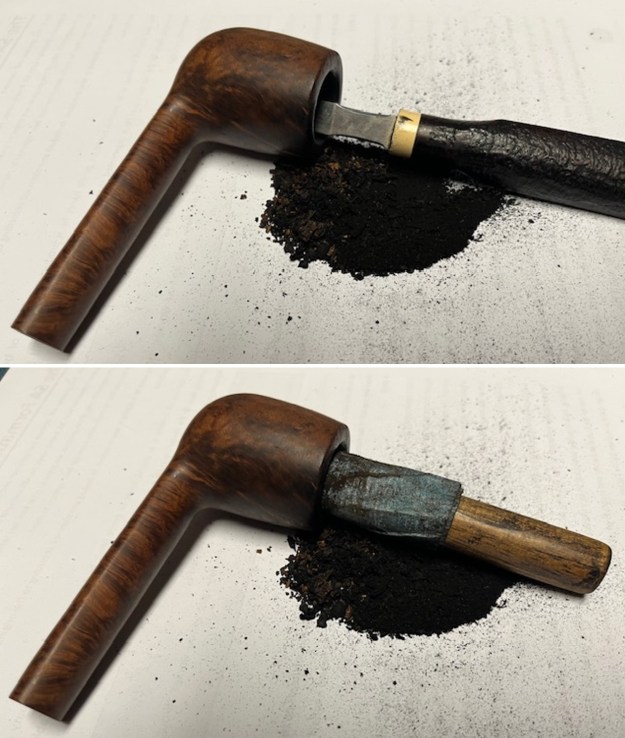
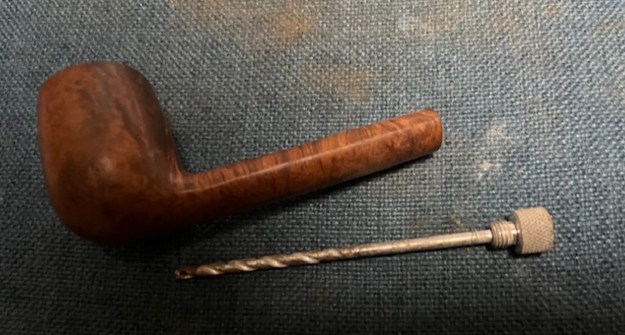
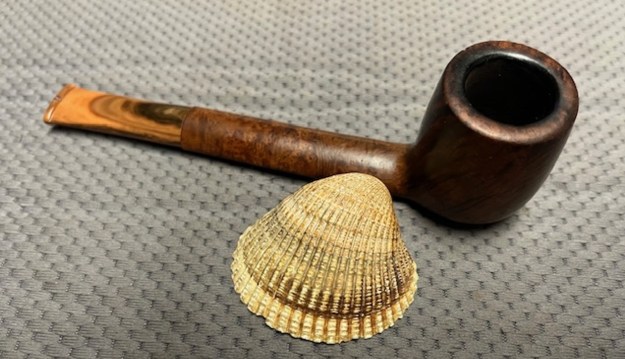
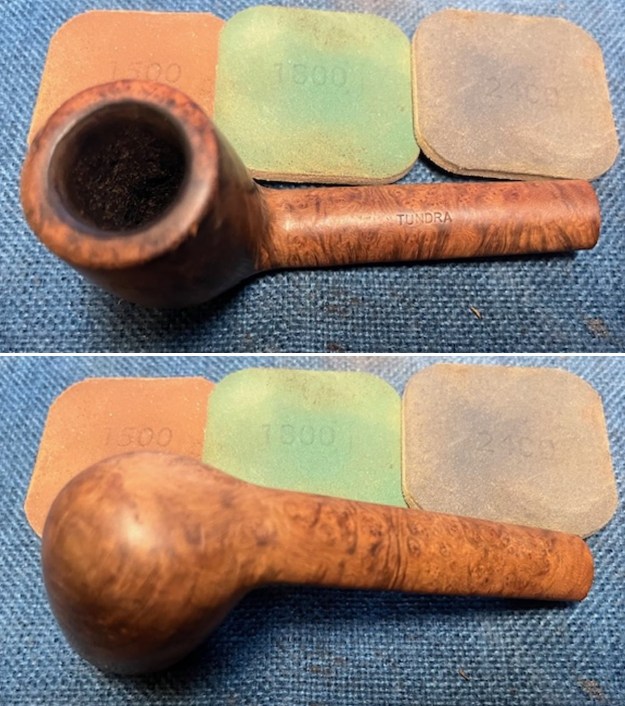
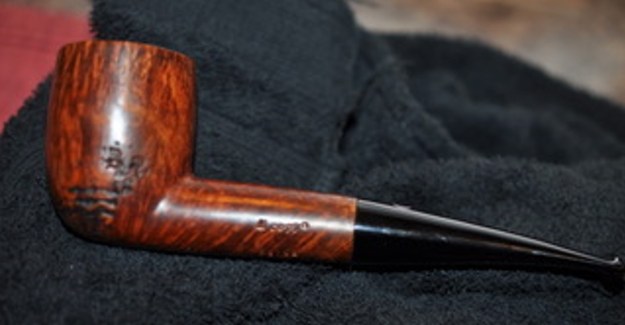
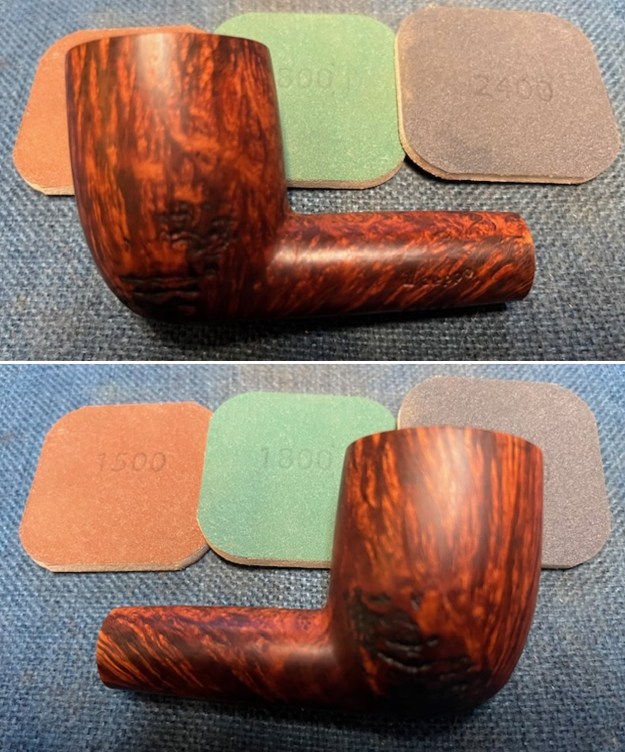
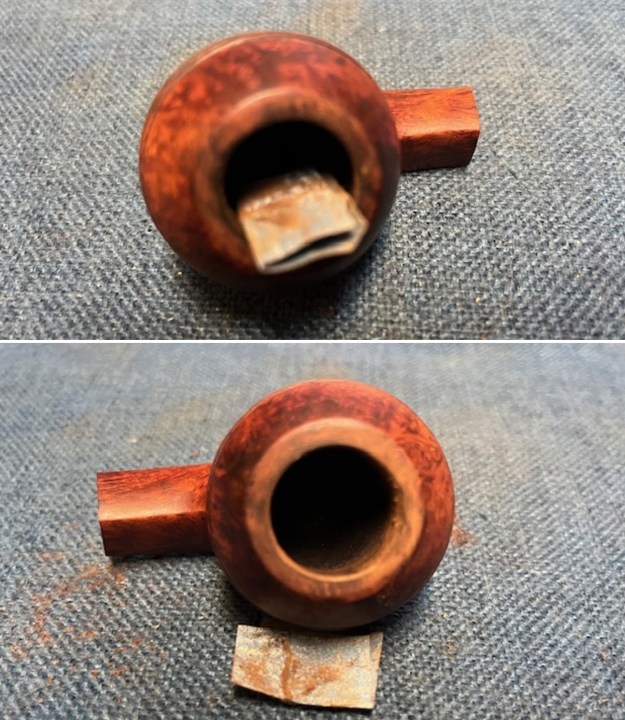
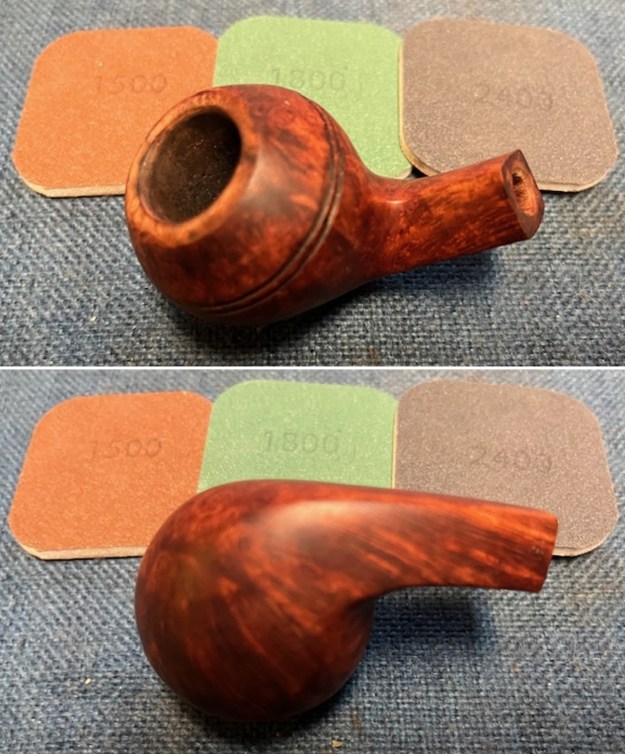
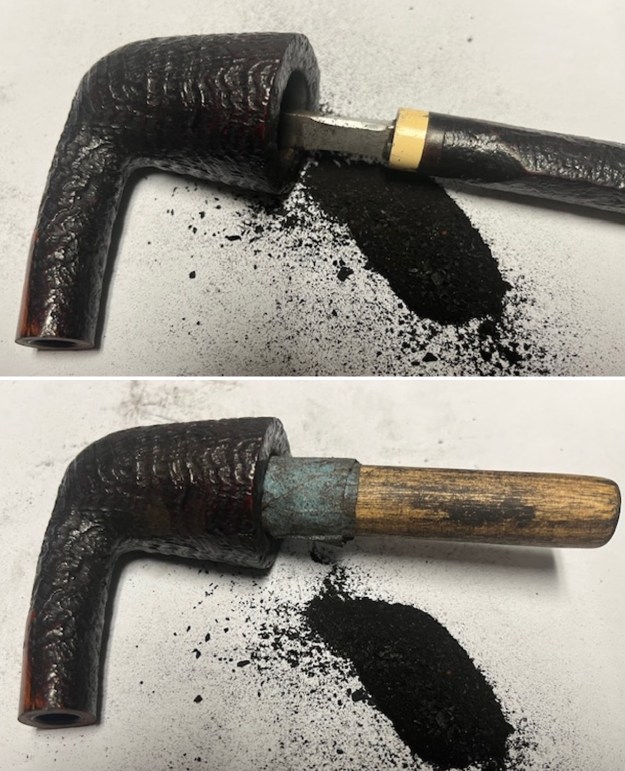
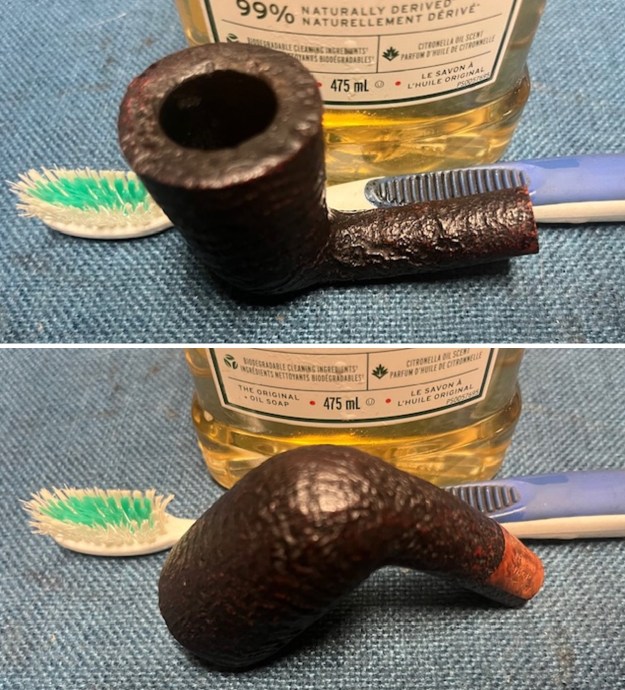
 I started my work on the pipe. I reamed the bowl with a PipNet pipe reamer using the cutting heads 2 and 3. I finished the reaming with a Savinelli Fitsall Pipe Knife. I sanded the walls of the bowl with 220 grit sandpaper wrapped around a piece of dowel.
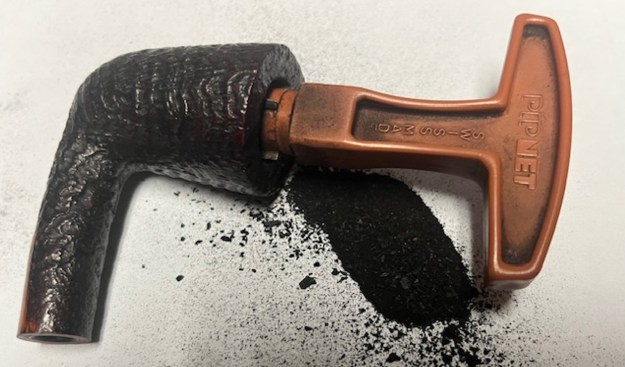
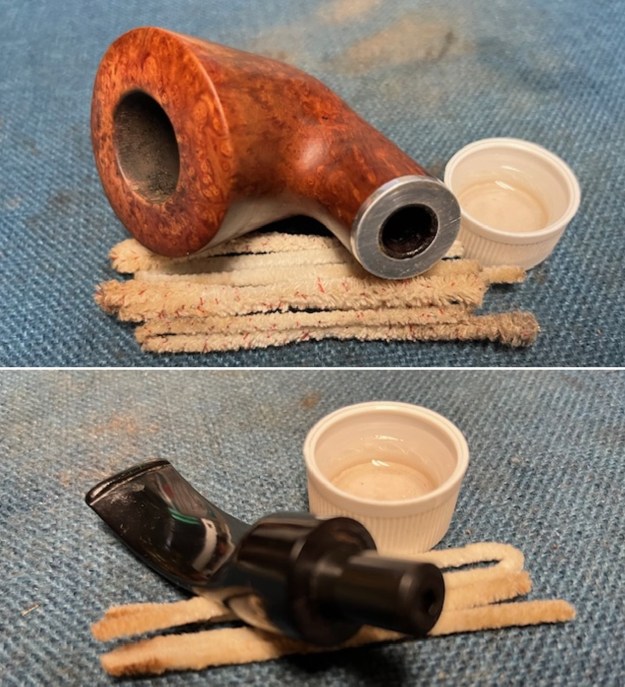
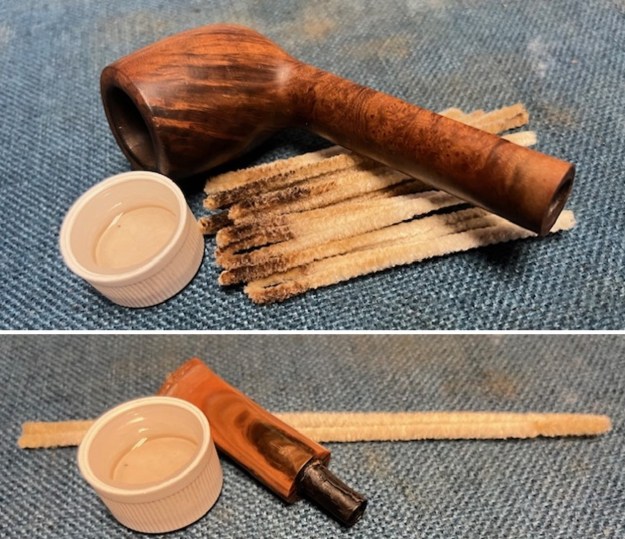
 I cleaned out the inside of the shank and the airway in the stem with alcohol, cotton swabs and both bristle and regular pipe cleaners.
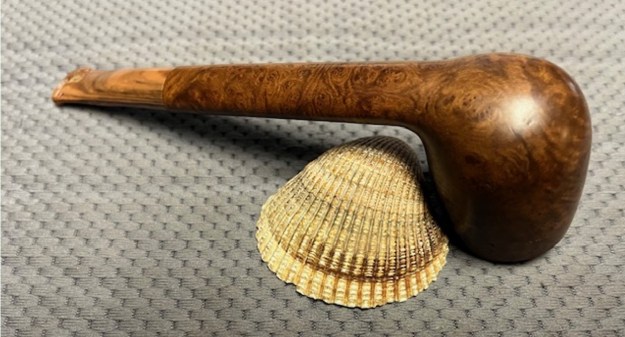
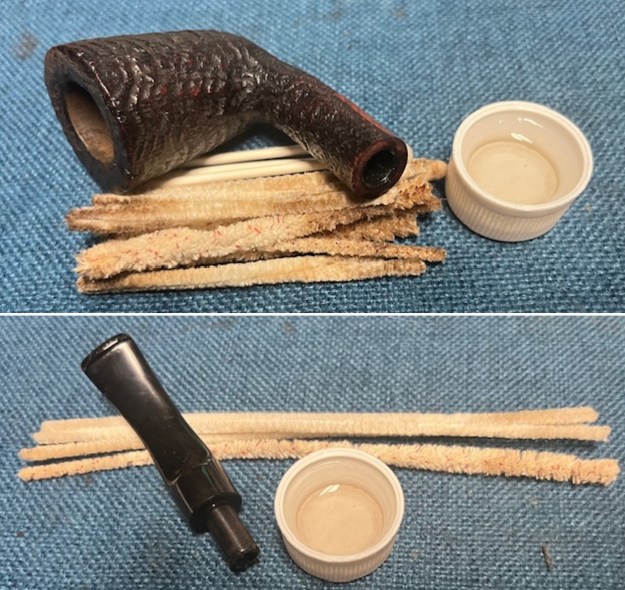 I scrubbed the bowl and shank with a tooth brush and some undiluted Murphy’s Oil Soap. I also worked it over with a brass bristle wire brush and the soap. I rinsed it off with warm water to remove the dust and soap from the finish. I dried it off with a soft cloth and it looked much better.
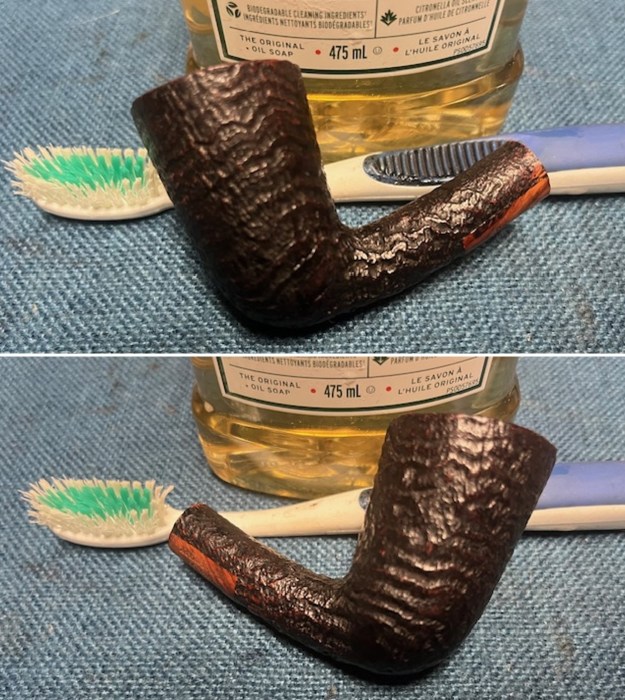
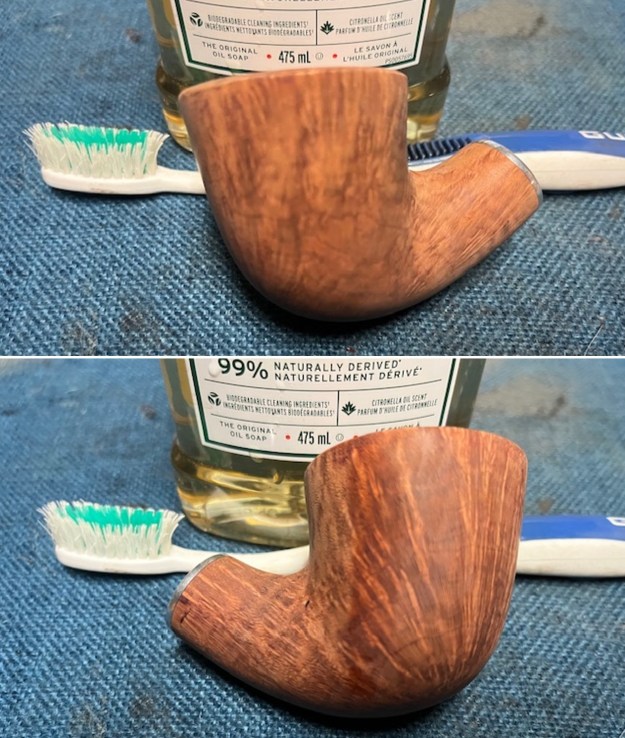
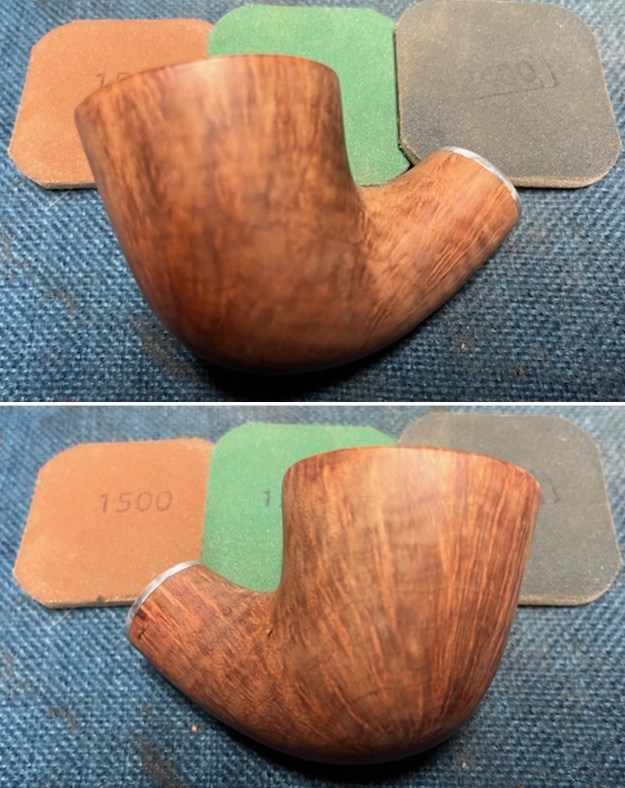
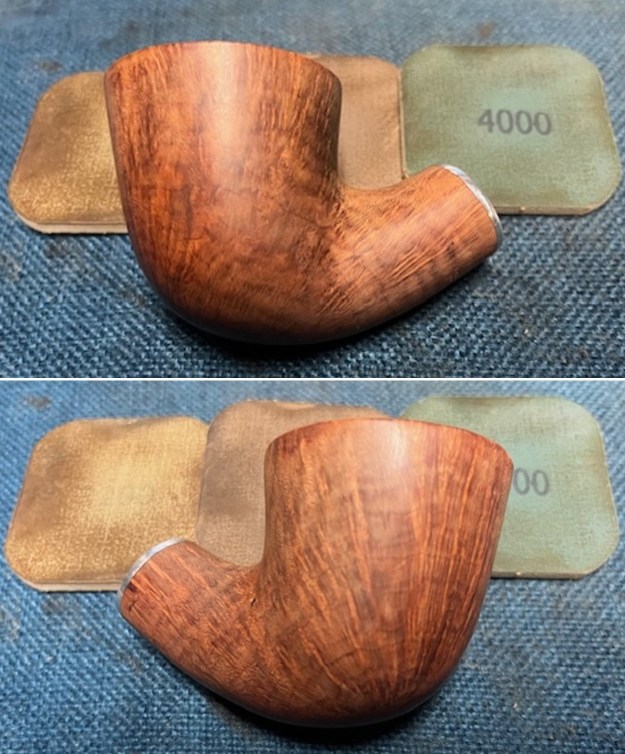
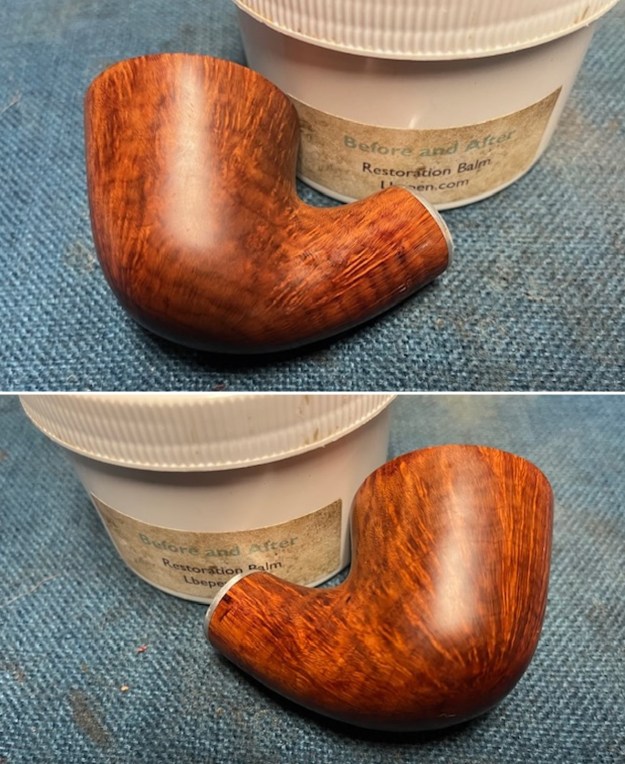
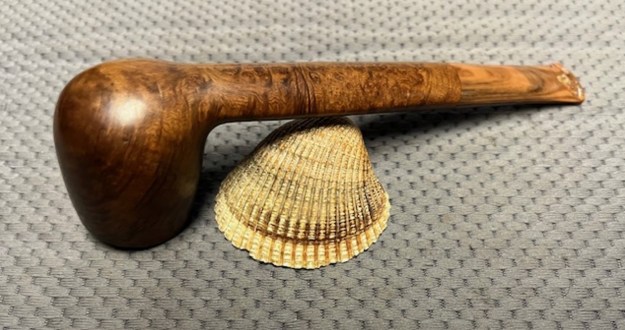
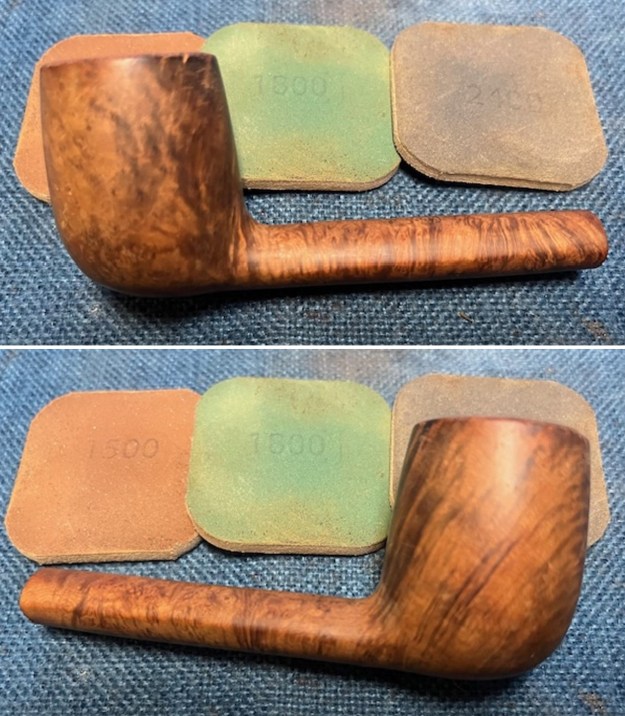
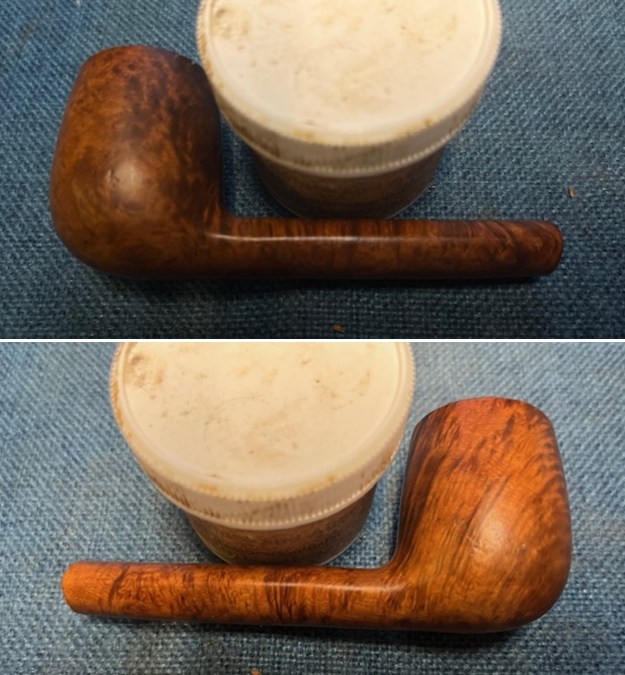
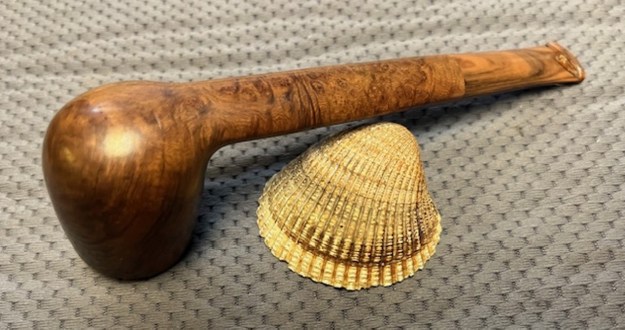
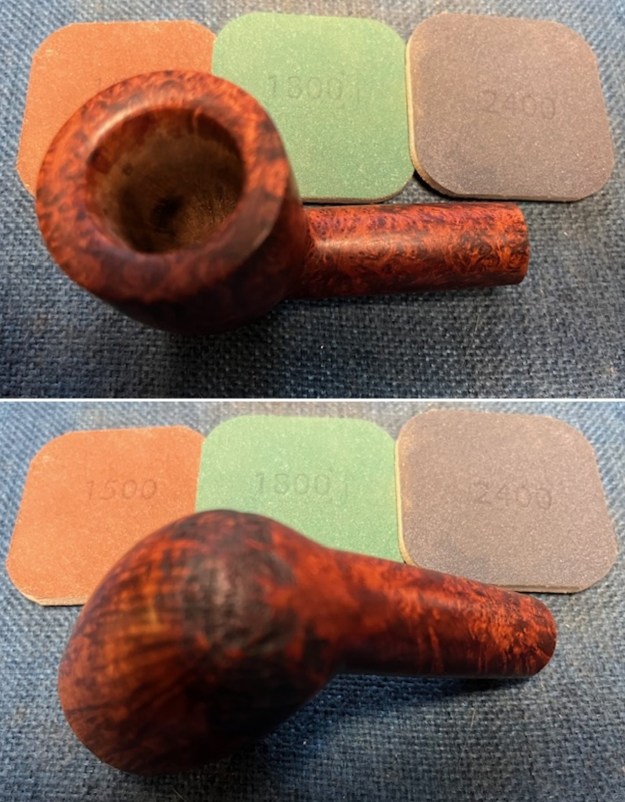
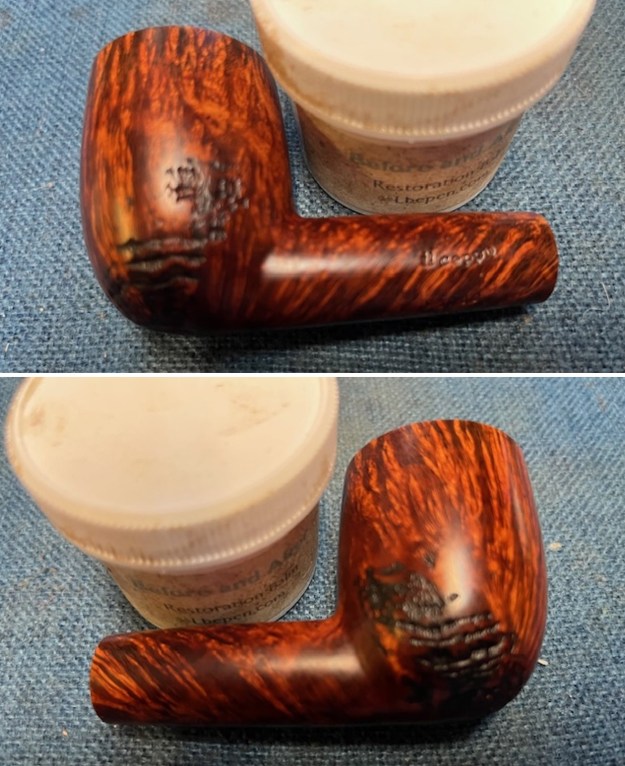
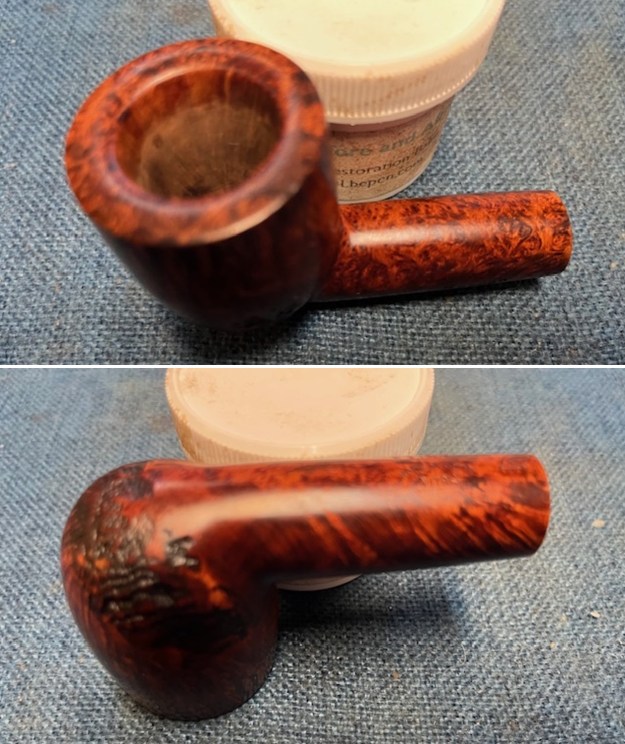
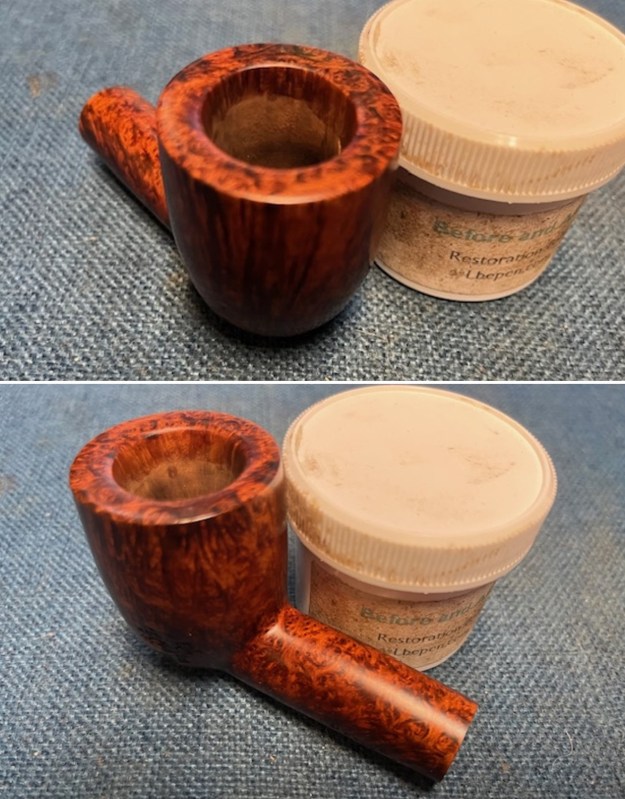
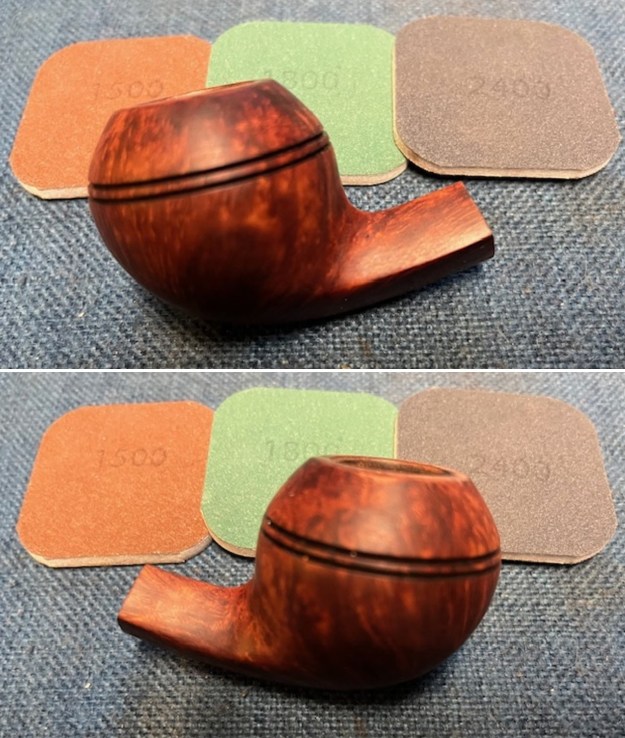
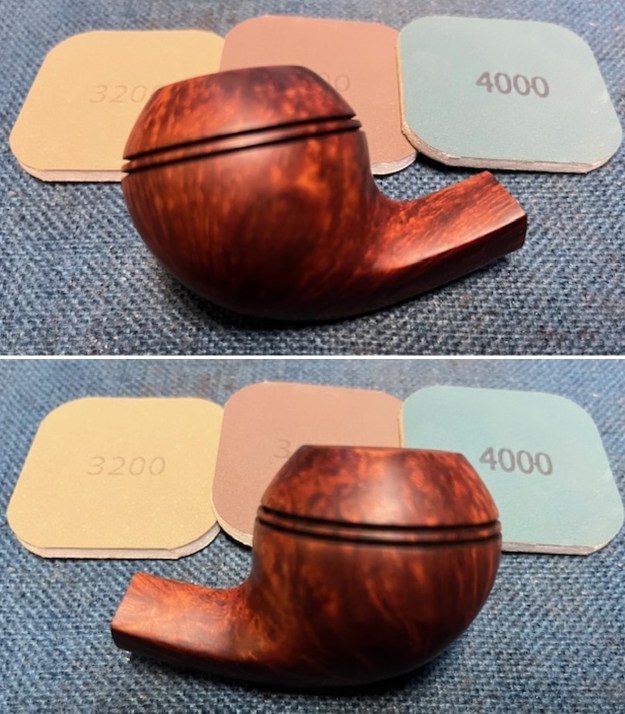
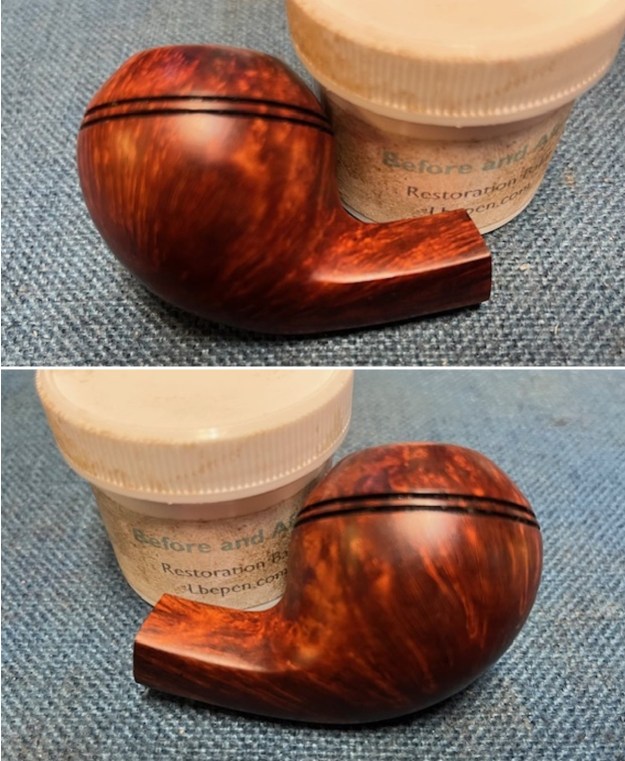
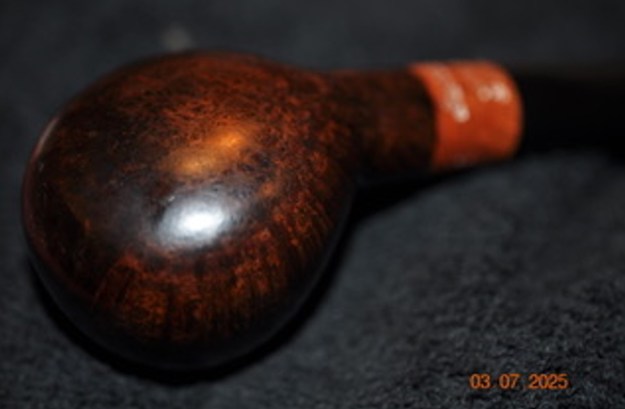
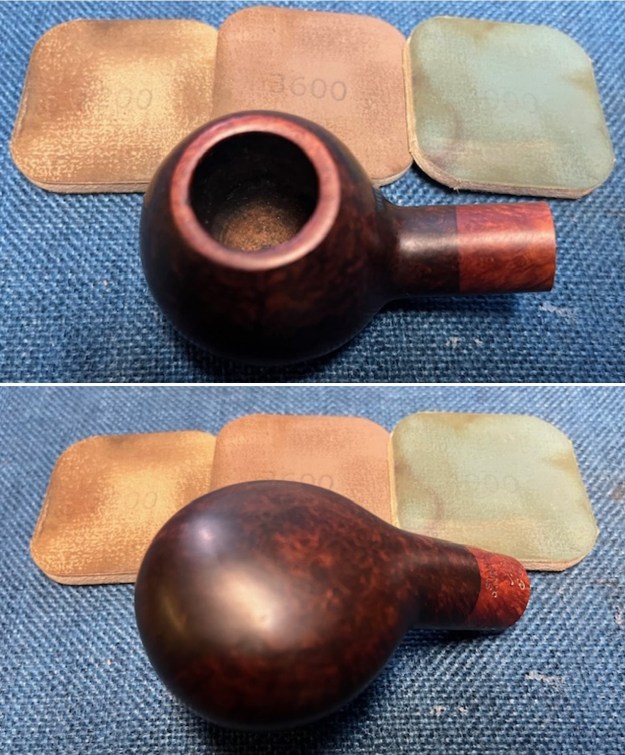
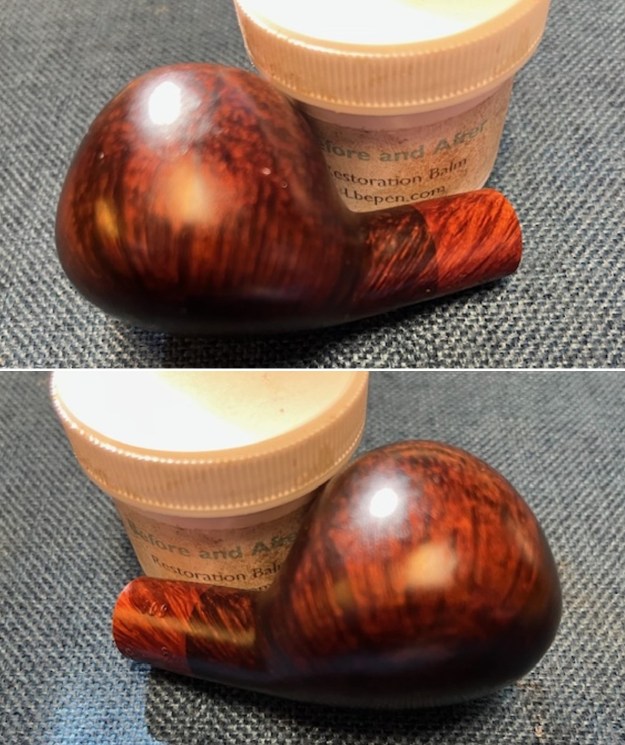
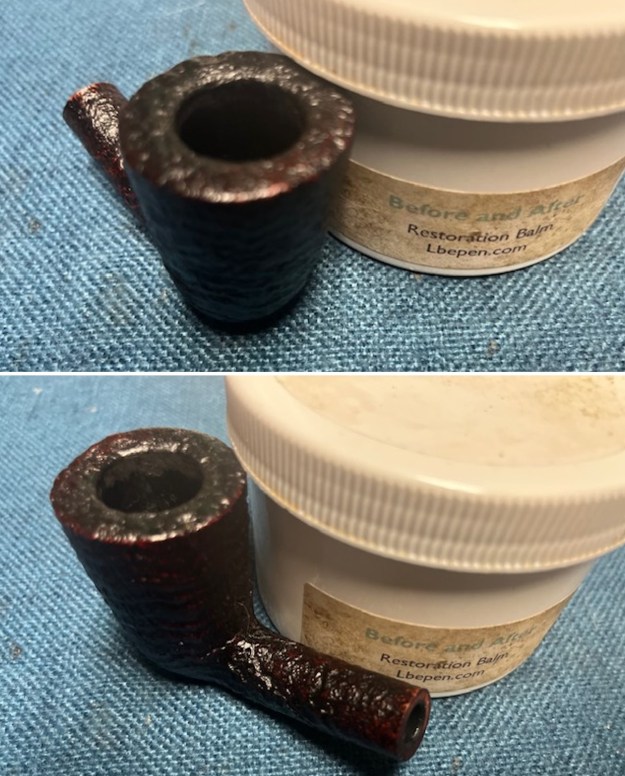
 I rubbed the briar down with Before & After Restoration Balm. I worked it into the briar with my fingertips. The product works to clean, enliven and preserve the briar. I let it sit for 10 minutes while I worked on the stem. After the time passed I buffed it with a cotton cloth to deepen the shine. The briar really comes alive with the balm.

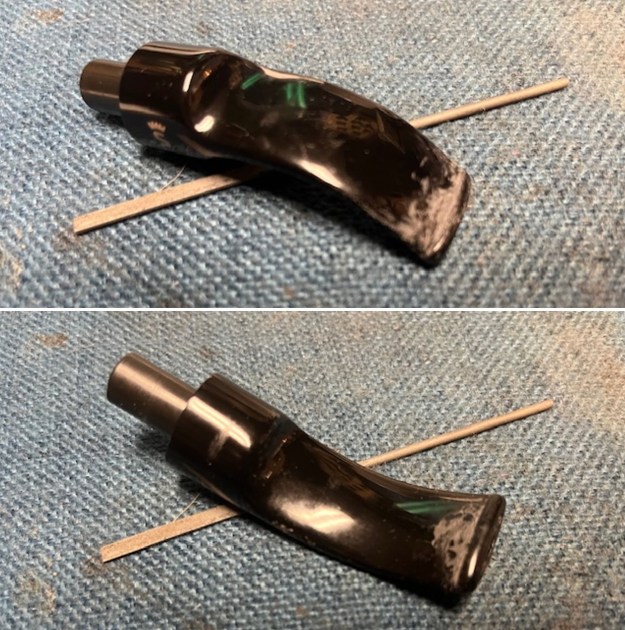
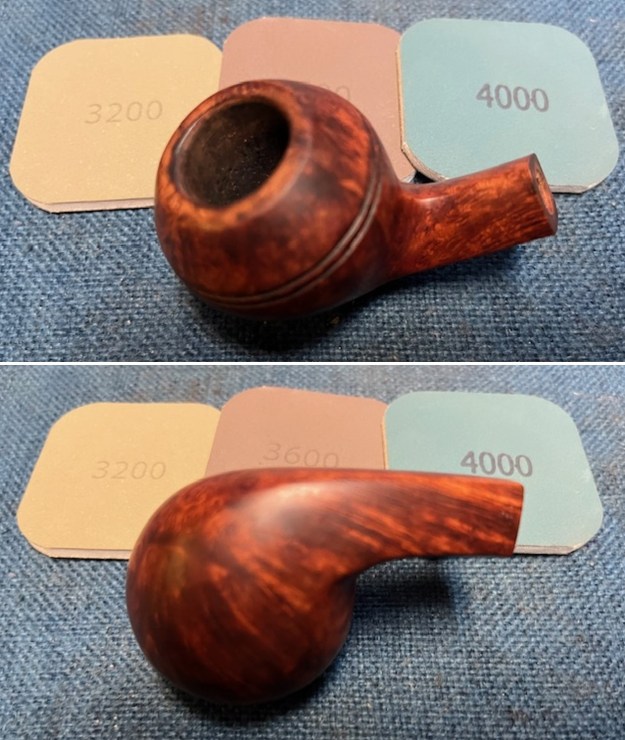
 I set the bowl aside and turned my attention to the stem. I sanded the stem with 220 grit sandpaper to remove the tooth chatter and light marks on the top and underside of the stem ahead of the button.
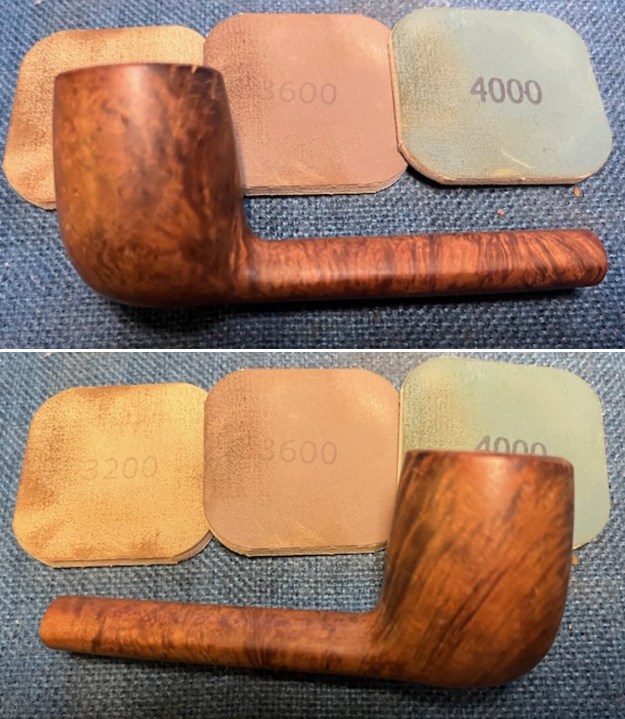
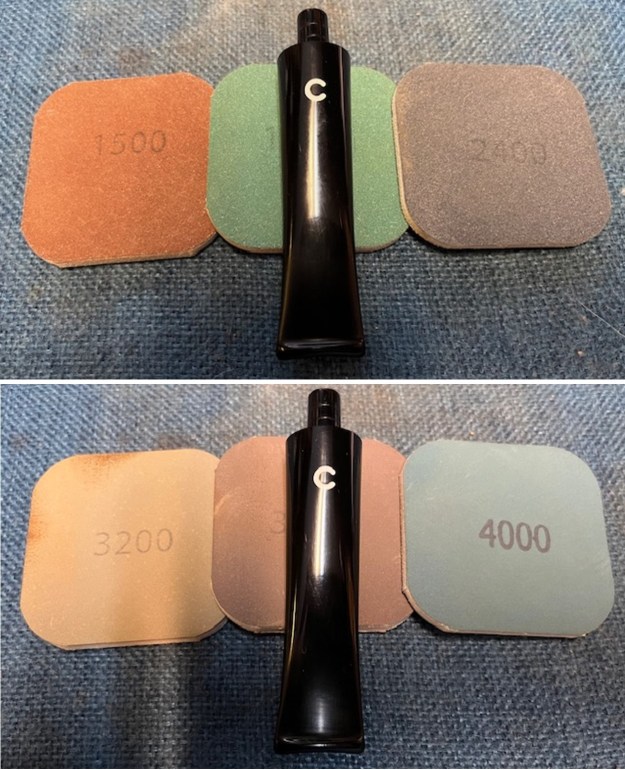
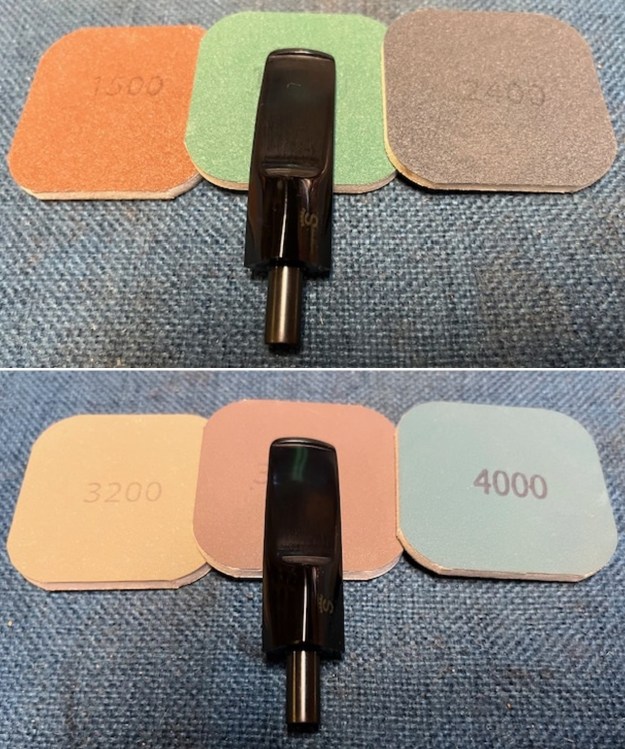
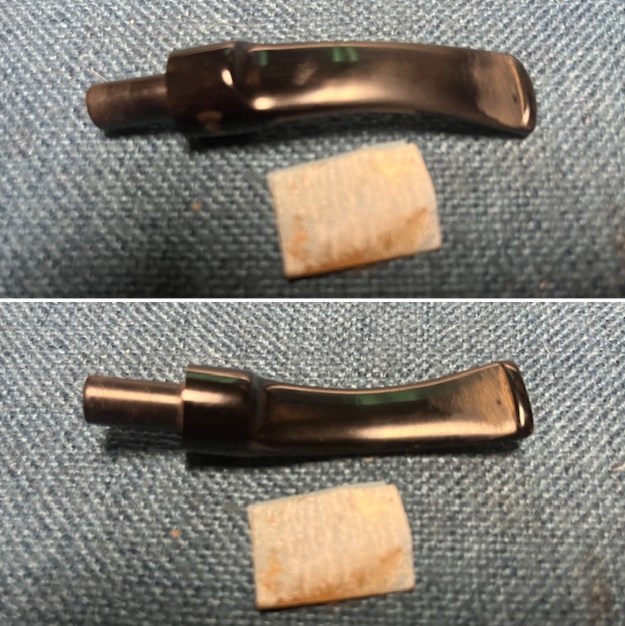 I sanded the stem surface with 320-3500 grit 2×2 inch pads to further blend in the repairs to the acrylic surface. I wiped the stem down with an Obsidian Oil cloth after each sanding pad.
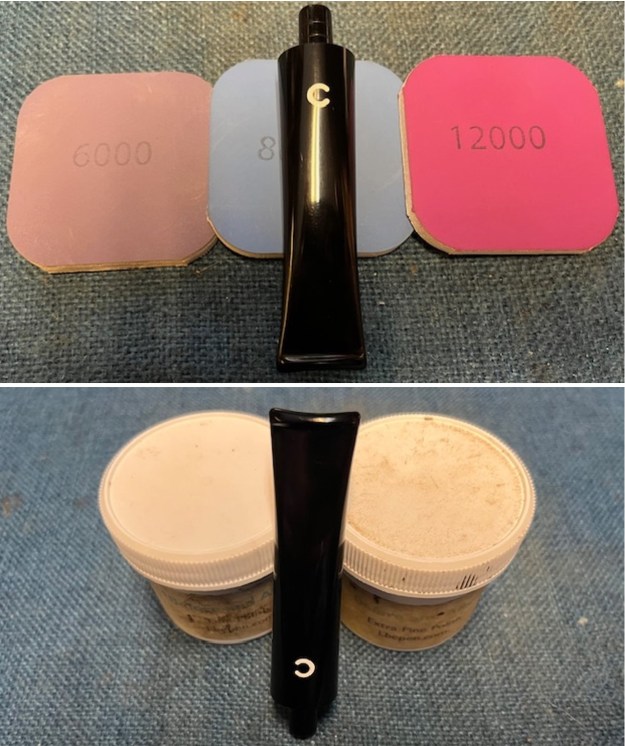
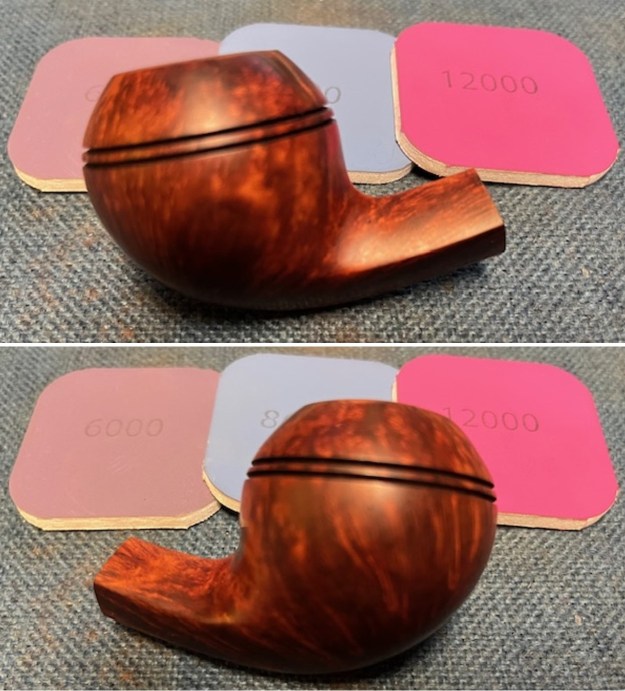
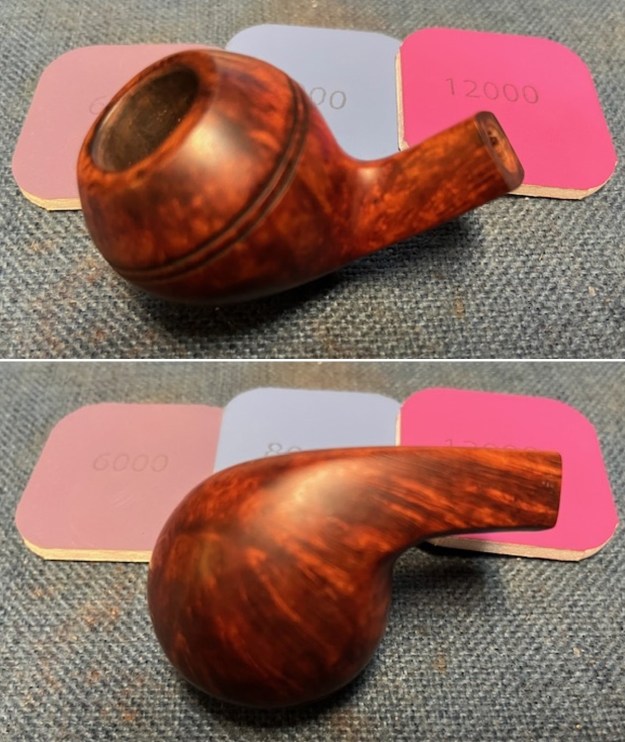
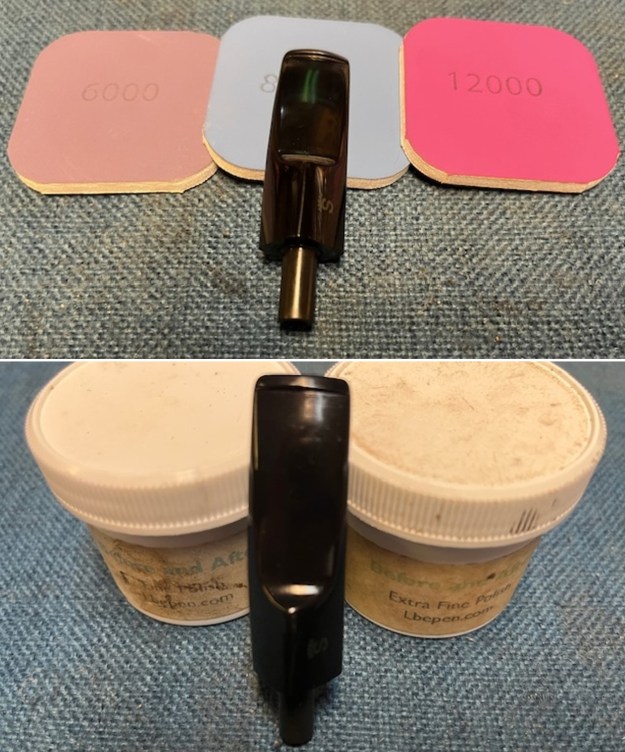
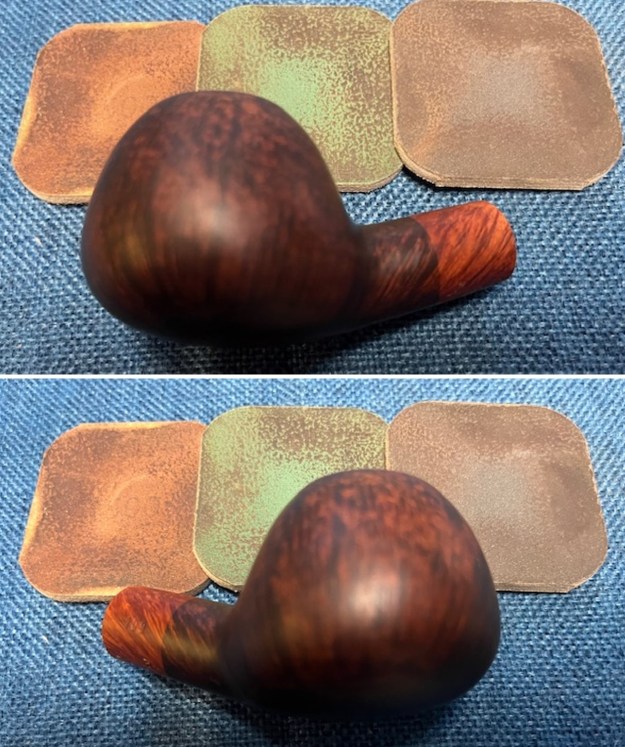
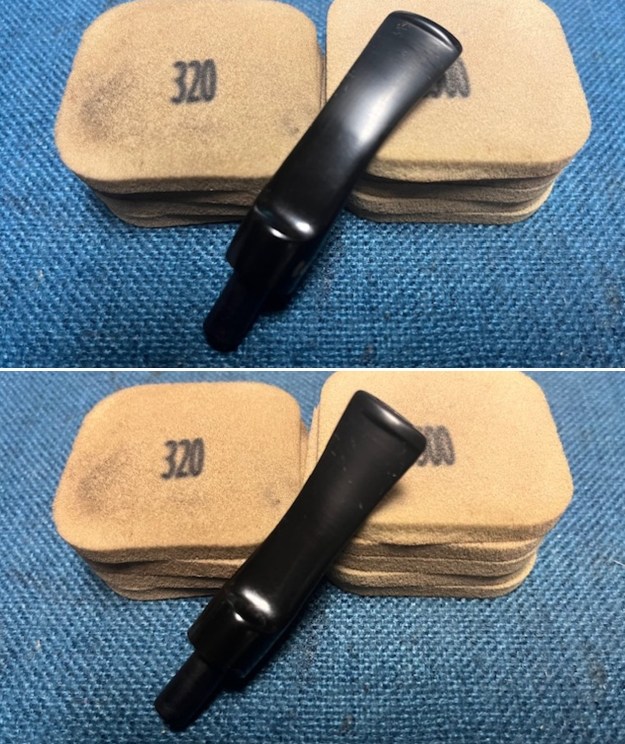 I polished the stem with micromesh sanding pads – dry sanding with 1500-12000 grit pads. I wiped the stem down after each sanding pad with Obsidian Oil. I polished it with Before & After Pipe Stem Polish – both Fine and Extra Fine. I gave it a coat of Obsidian Pipe Stem Oil. It works to protect the stem from oxidizing. I set it aside to dry.
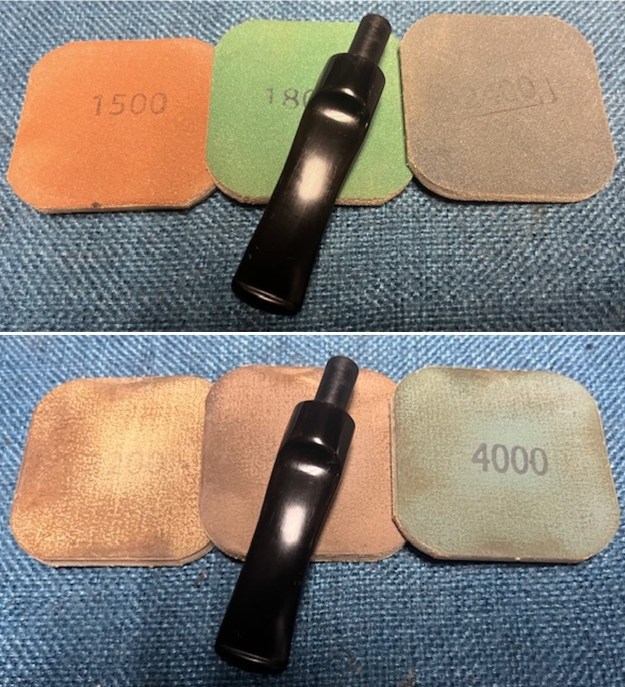
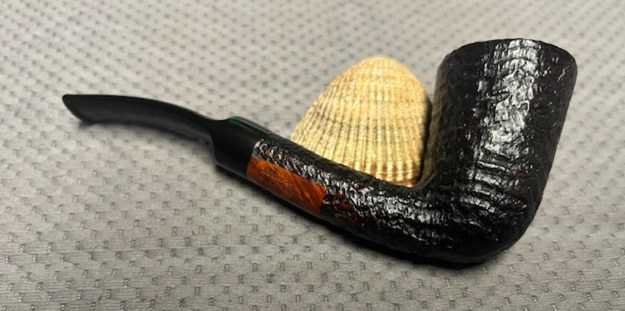
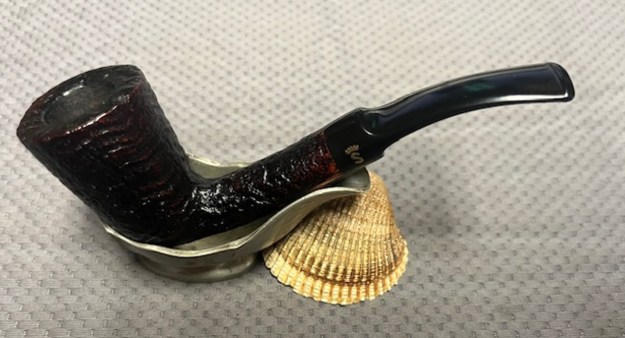
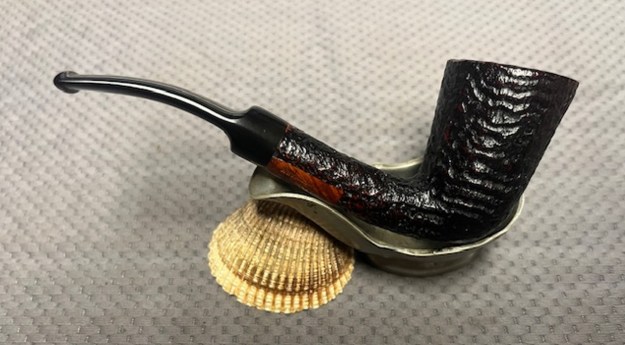
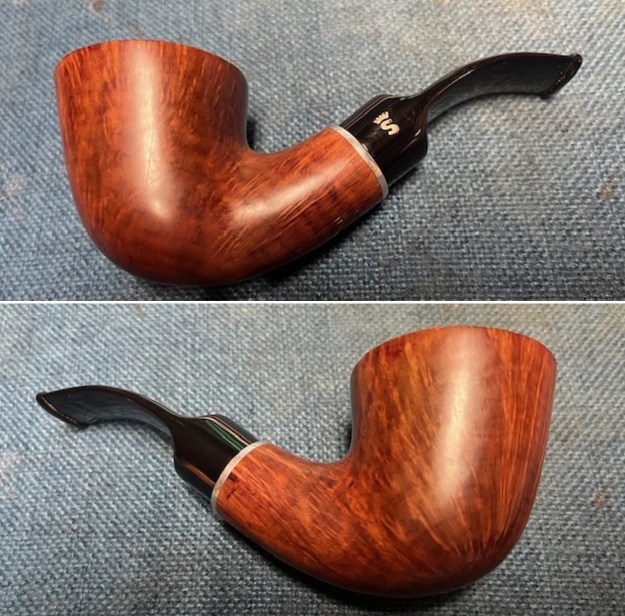
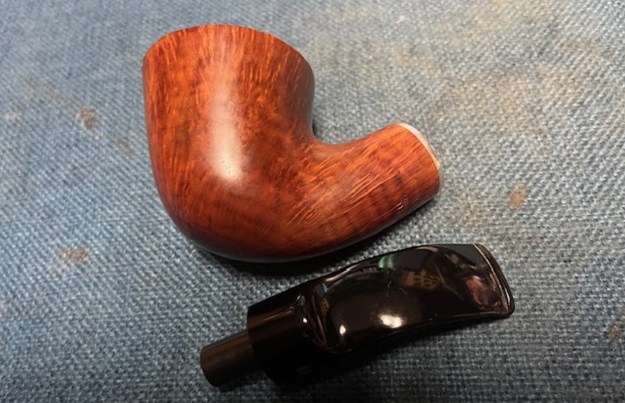
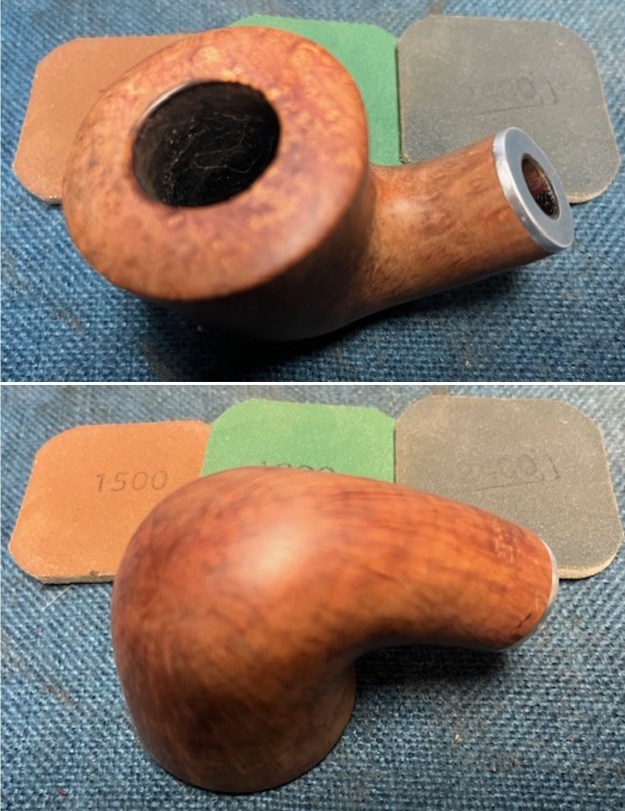
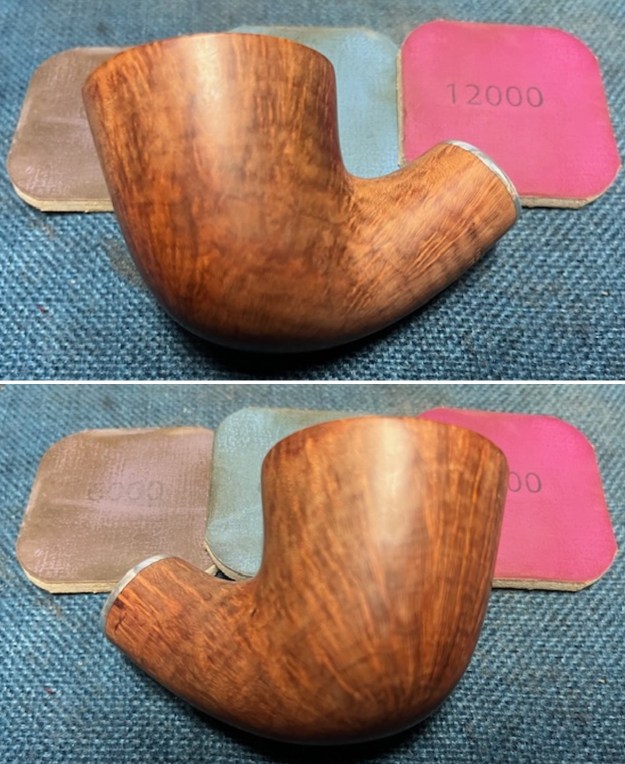
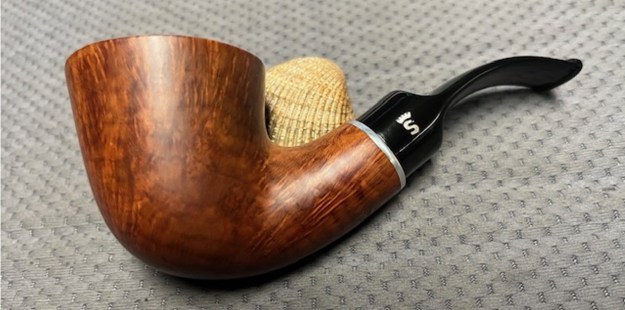
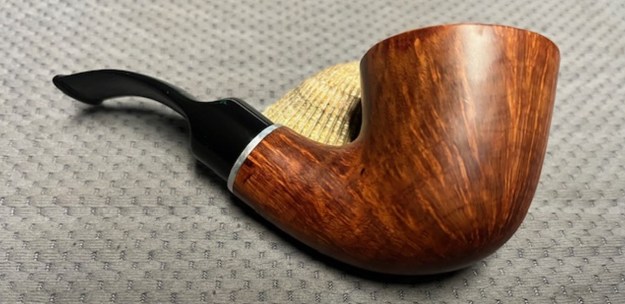
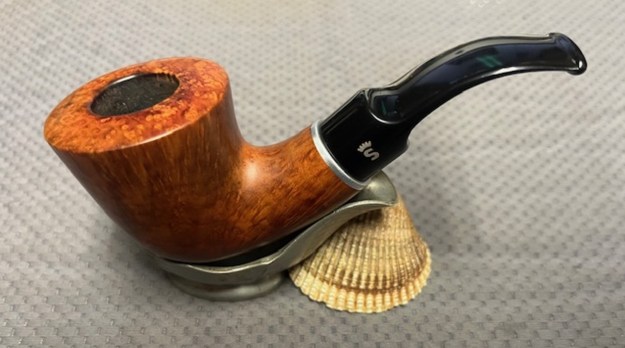
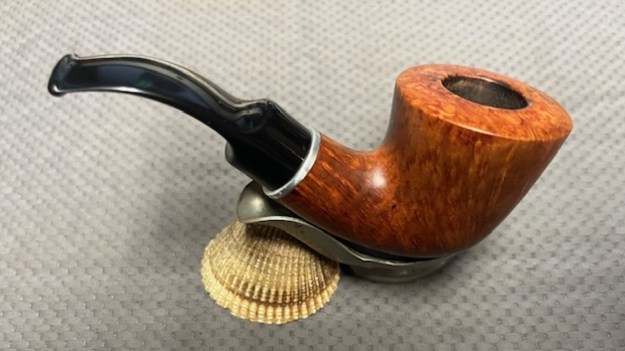
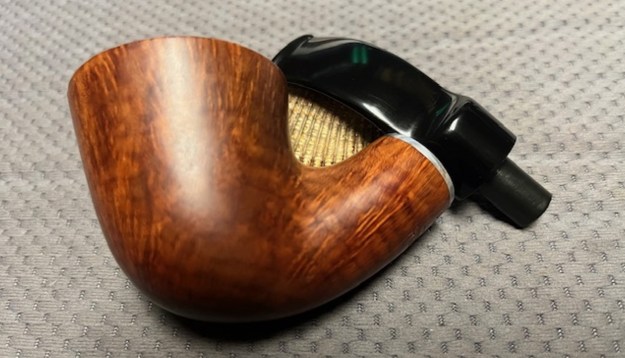
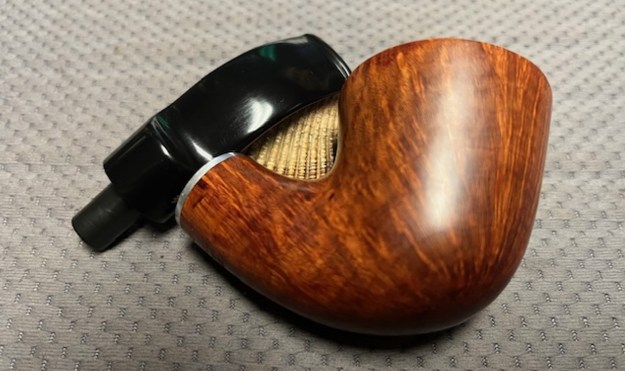
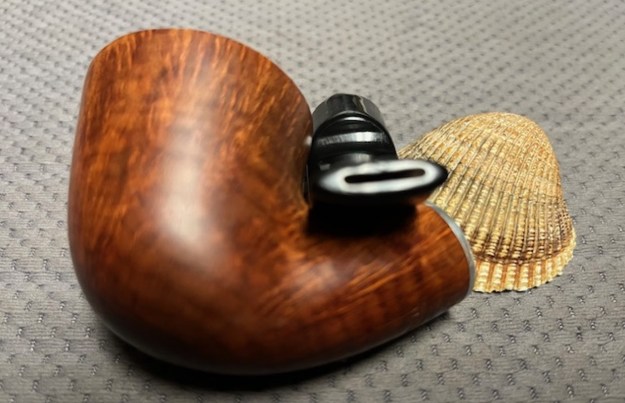
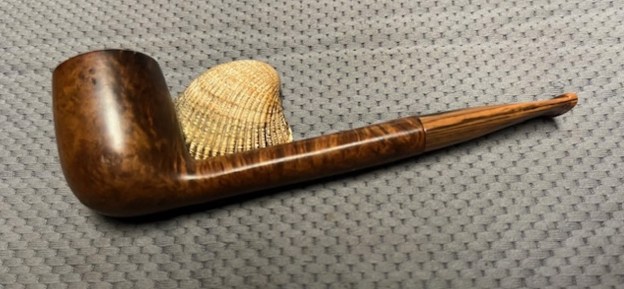
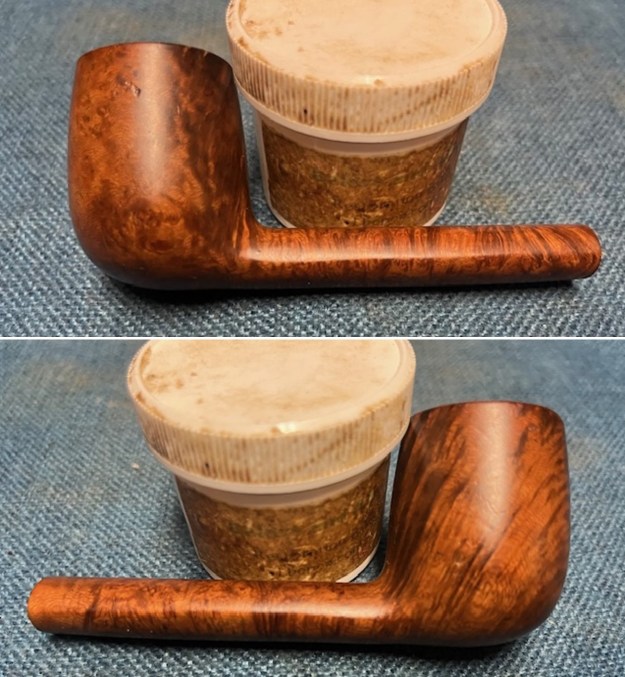
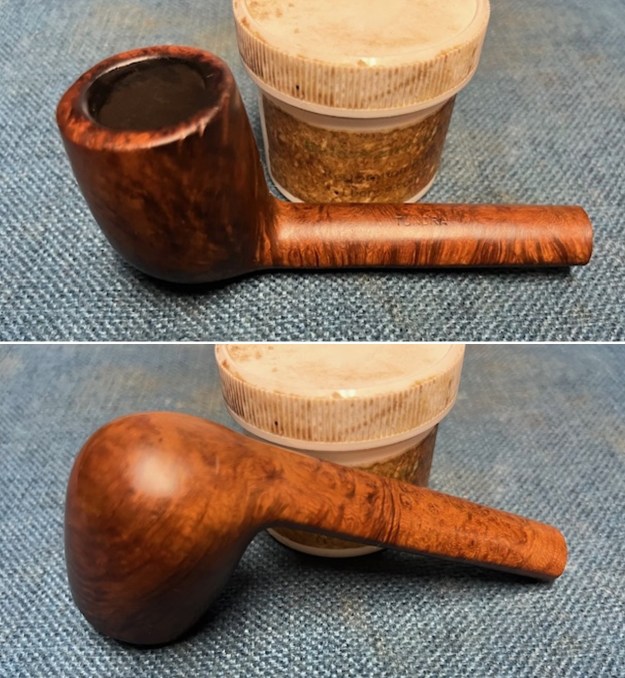
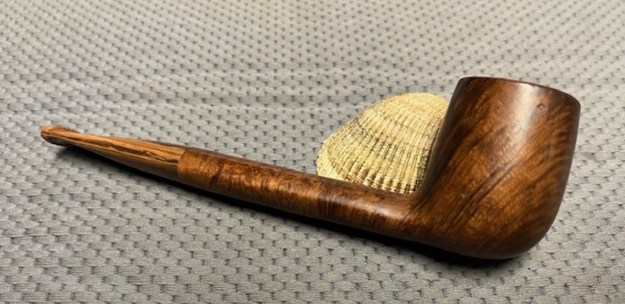
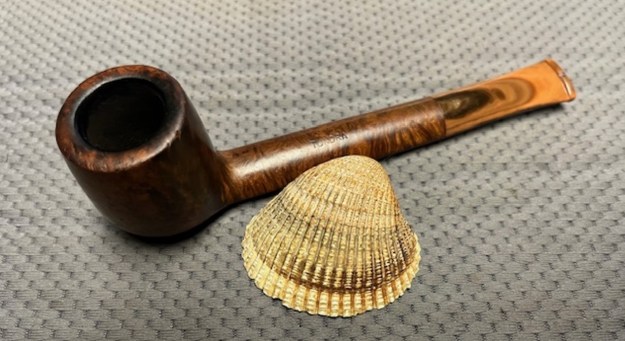
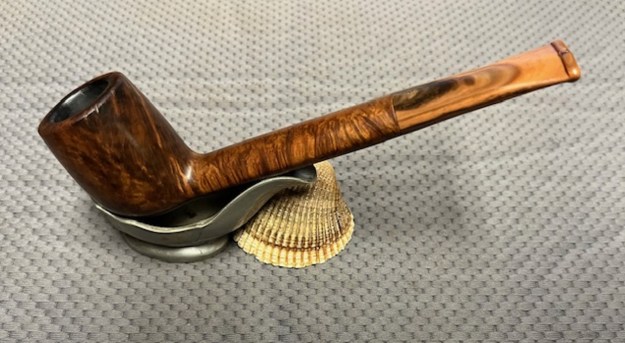
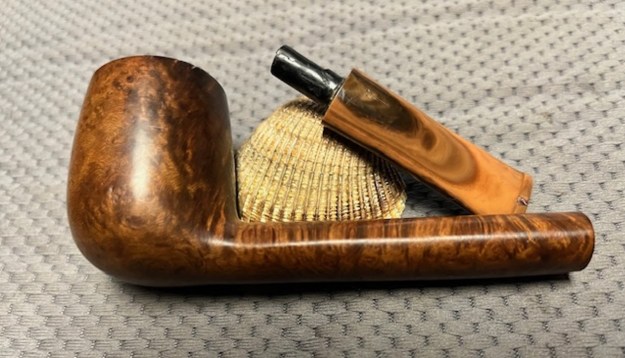
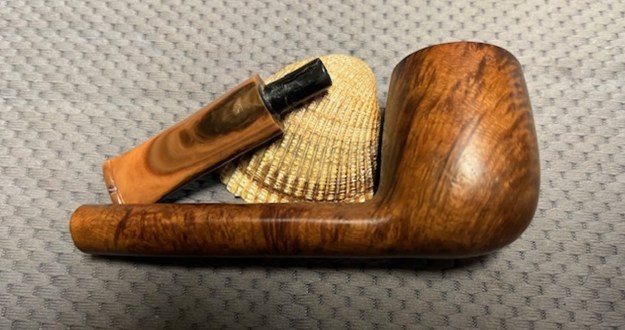
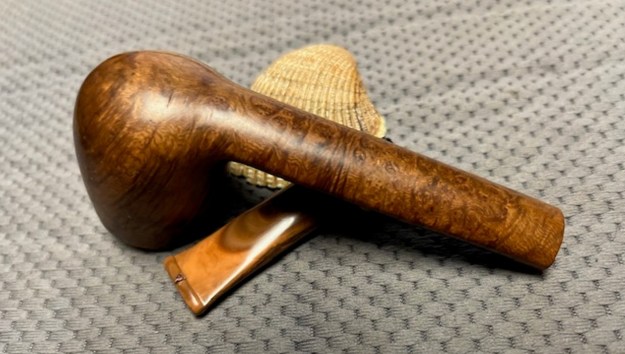
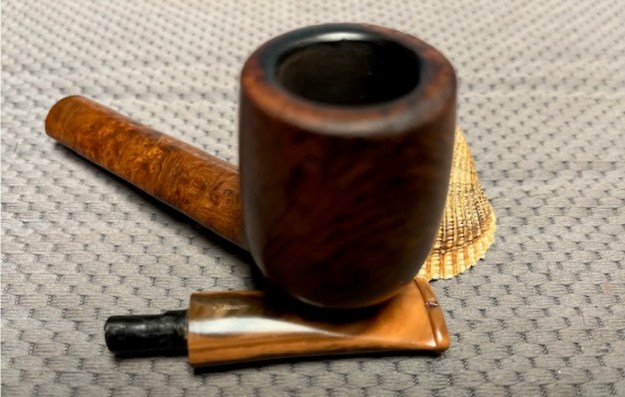
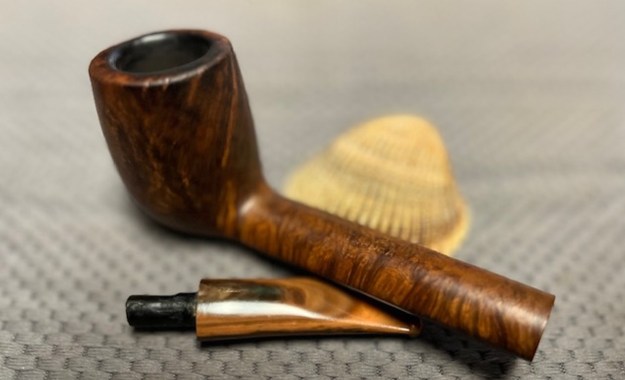
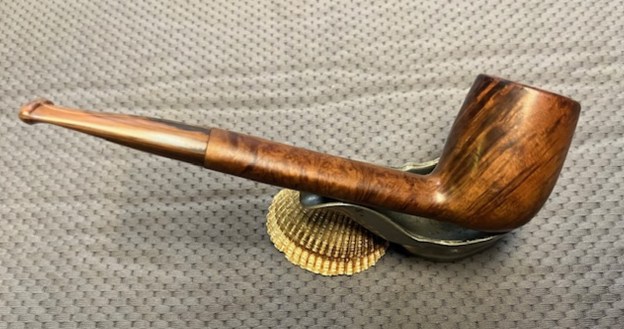
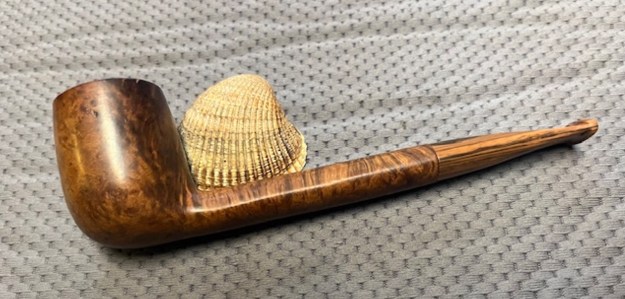
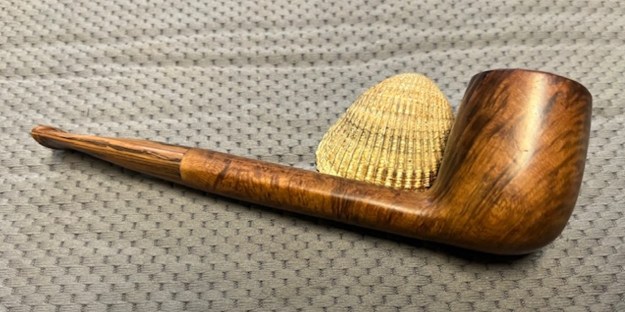
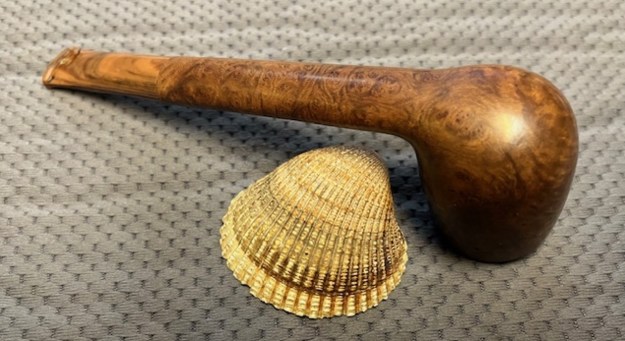
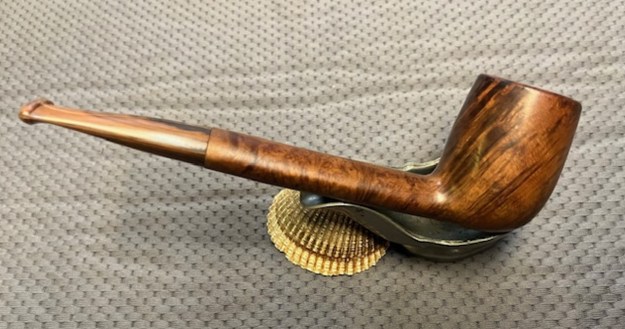
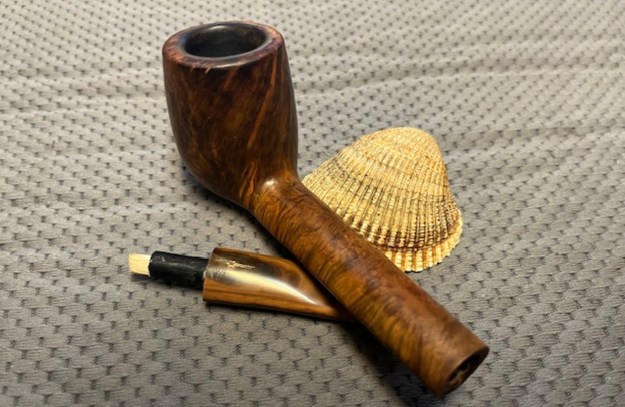
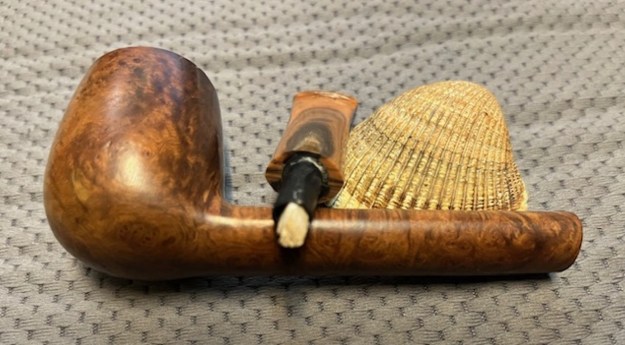
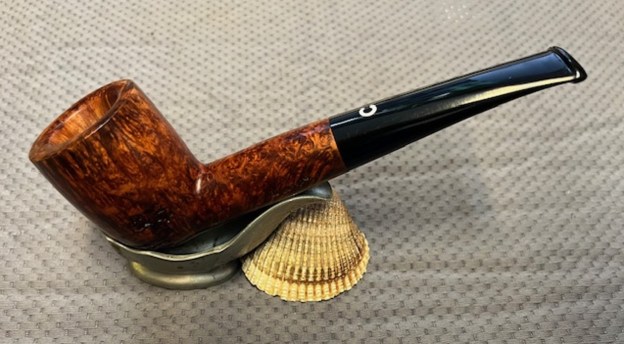
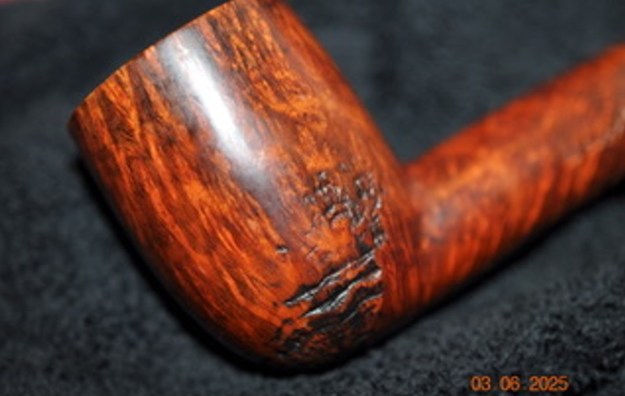
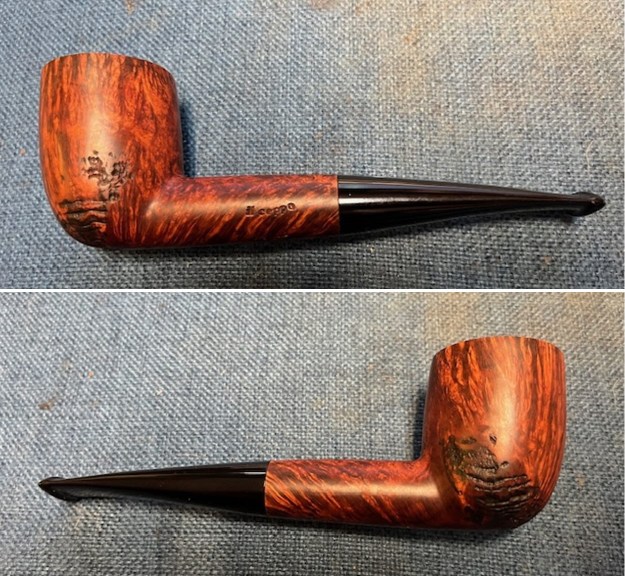
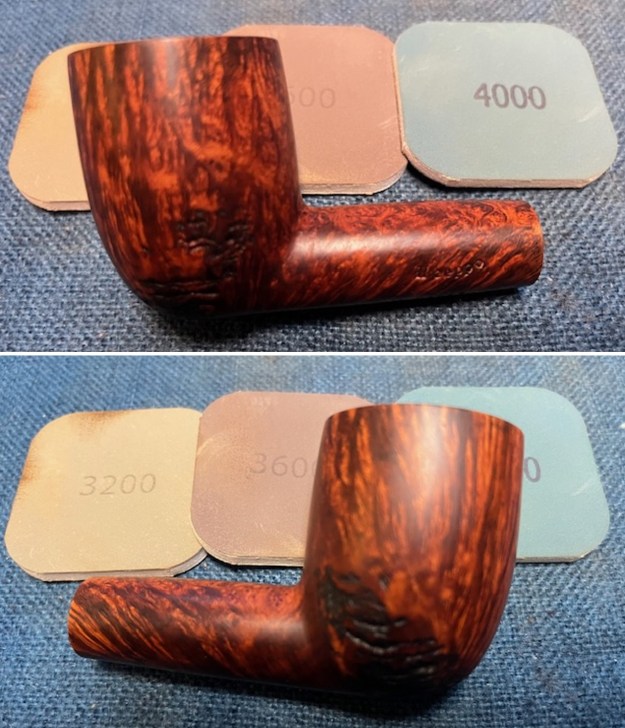
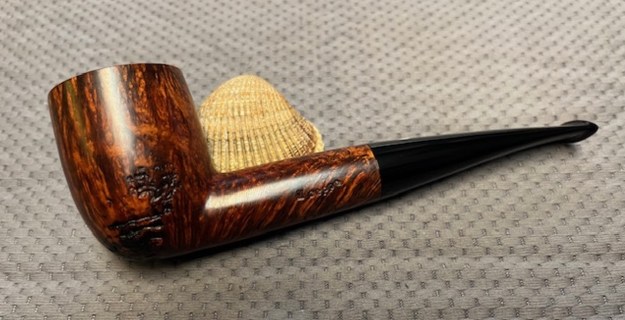
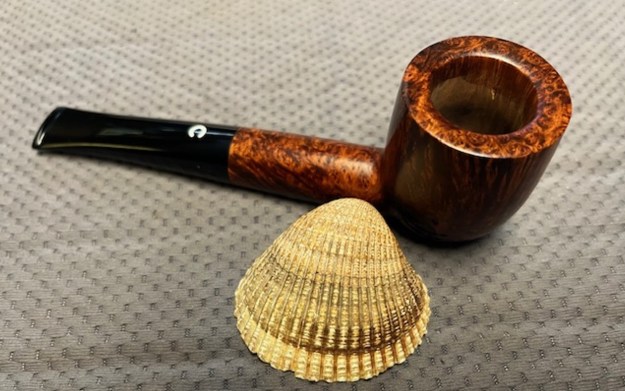
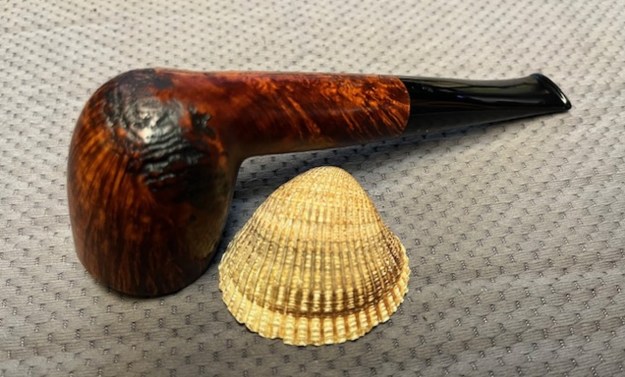
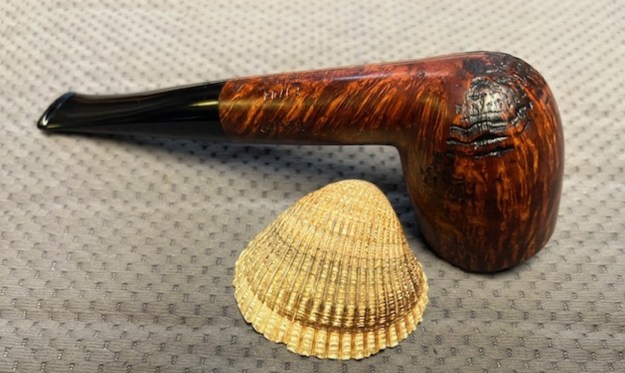
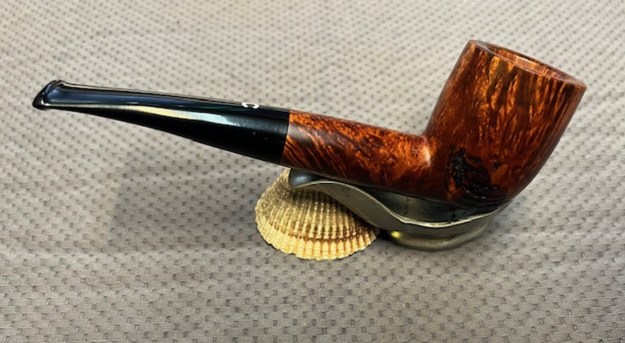
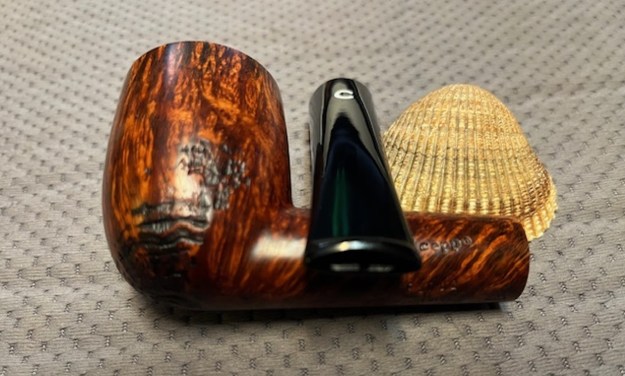
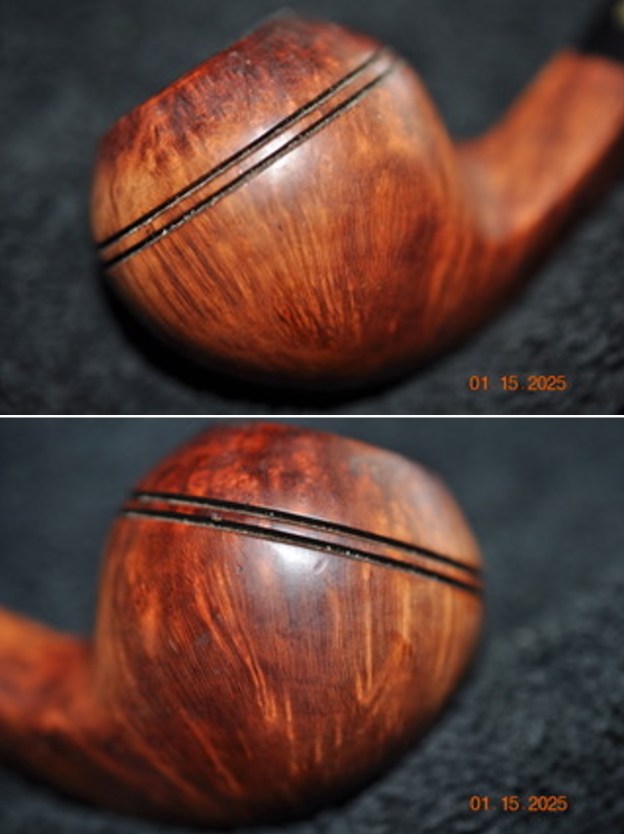
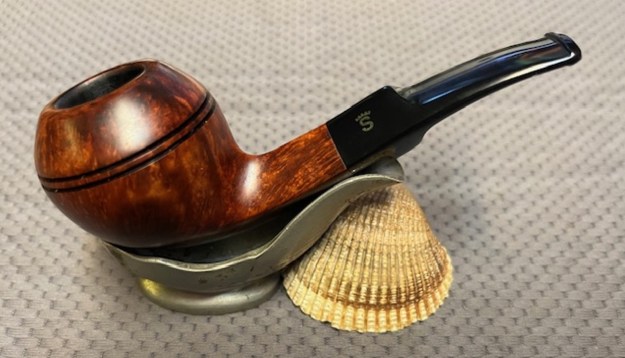
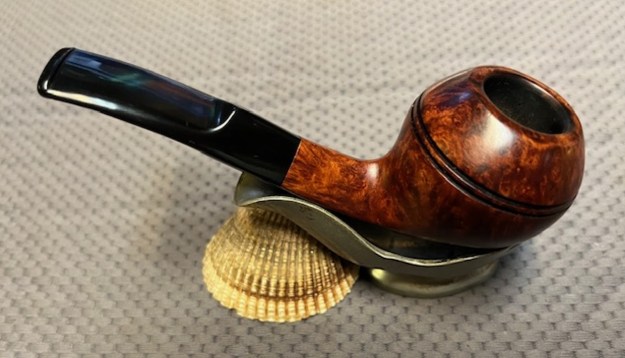
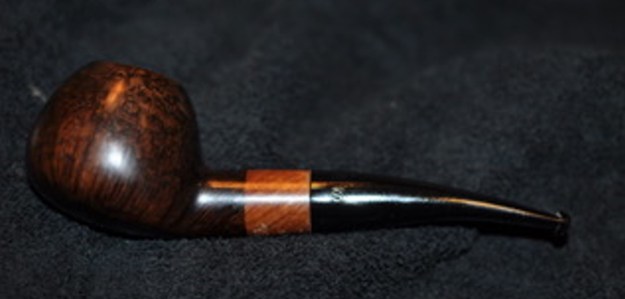
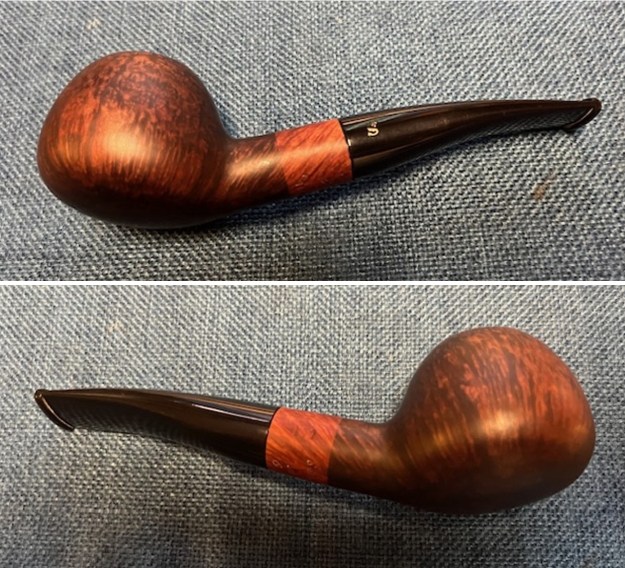
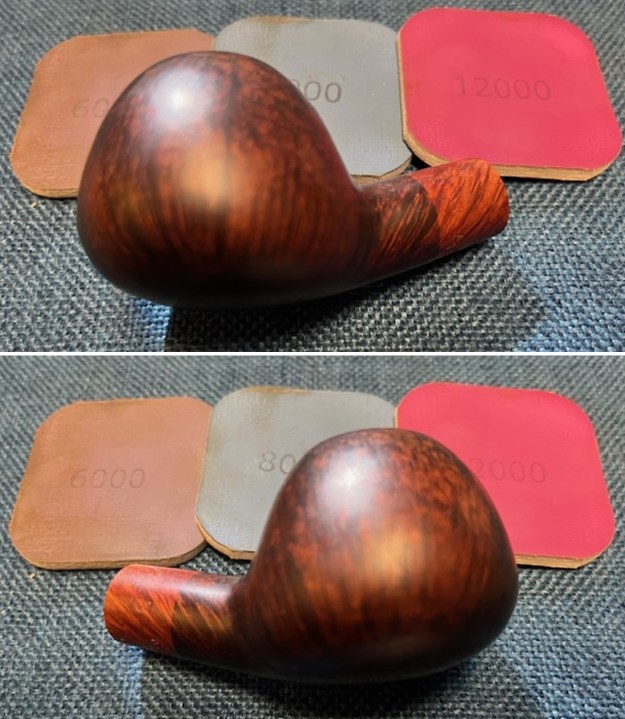
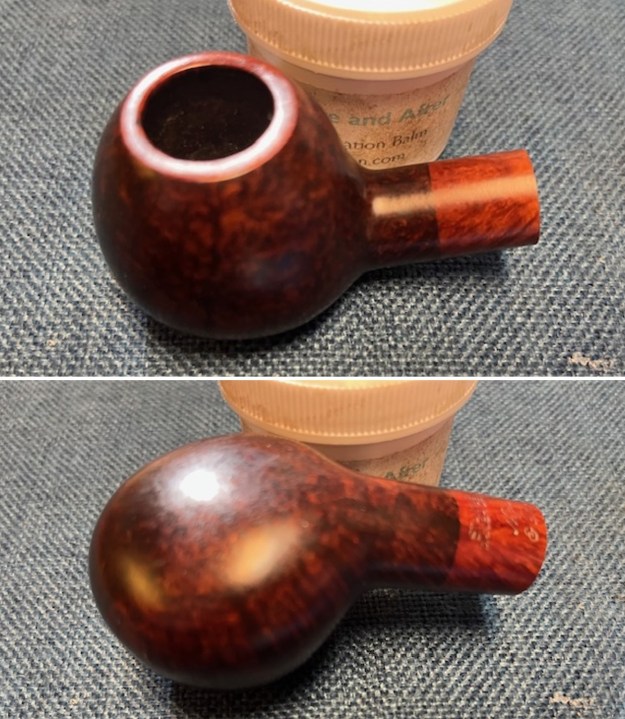
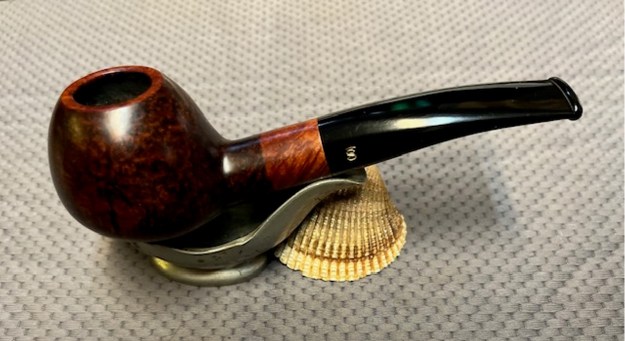
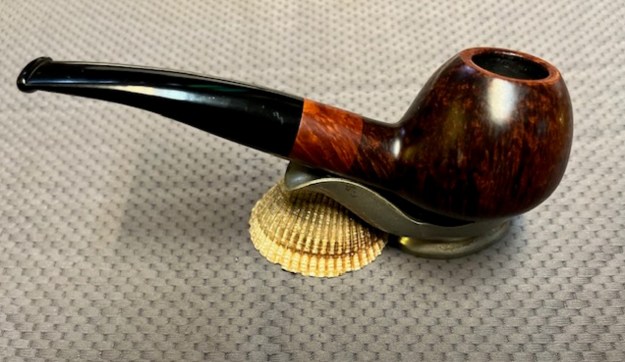
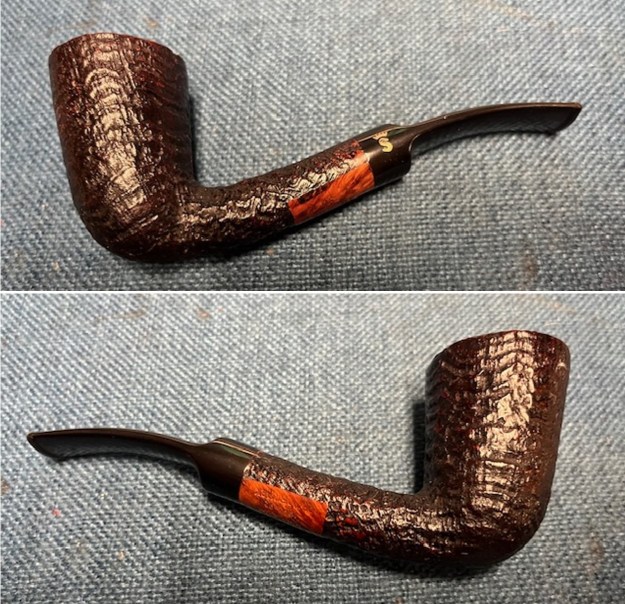
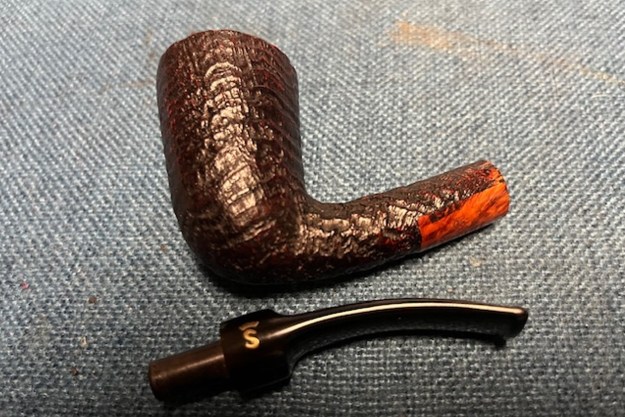
 I am excited to put the finishing touches on this S. Ivarrson Design Stanwell Jubilaeum 1942-92 ¼ Bent 06 Dublin. I put the pipe back together and buffed it with Blue Diamond on the buffing wheel. I gave the bowl and the stem multiple coats of carnauba wax. I buffed the pipe with a clean buffing pad to raise the shine and hand buffed it with microfiber cloth to deepen the shine. It is fun to see what the polished bowl looks like with the polished black, fancy turned vulcanite stem was beautiful. This Stanwell Jubilaeum 1942-92 Dublin is nice looking and the pipe feels great in my hand. It is light and well balanced. Have a look at it with the photos below. The dimensions are Length: 5 inches, Height: 2 inches, Outside diameter of the bowl: 1 ¼ inches, Chamber diameter: ¾ of an inch. The weight of the pipe is 1.13 ounces/33 grams. It is a beautiful pipe and one that I will be putting in the Danish Pipemakers Section on the rebornpipes store. Thanks for walking through the cleanup with me as I worked over this pipe.