by Steve Laug
On November 29 I received an email from a fellow regarding a Moretti that came to him from a dear friend. He stated that it had a burnout and that he had someone ream it for him. I have included his first email below.
Steve, I have a Moretti pipe that belonged to a dear friend. It had a burnout and I had the bowl reamed, but I’m afraid to smoke it. Can you offer a suggestion of how the inside of the bowl can be treated against possible future burnout, or can you fit the bowl with either a meerschaum or graphite liner? – Michael
We talked back and forth regarding the pipe and various options for repair. I agreed to work on them and told him to mail it to me. Once he packed it he added another three pipes to the box that he was sure had the same issues. He mailed them to me on December 8 and sent me another email.
You have convinced me that you’re the person who can help restore my pipes! I shipped 4 pipes to you today by USPS, and declared their value at $5 each for a total of $20 as you requested. I’m embarrassed to admit it, but all four have had burnout issues and I’m hoping that you can clean them out and coat the inside of the bowls as you described. If you feel that more effort is needed, please let me know.
On December 28th I received the package from Michael. I opened the box and inside there were four beautiful Italian Made pipes. I have listed them below and included photos of the pipes.
Savinelli Autograph Sandblast Bent Cherrywood
2008 Ardor DR bent Dublin
Mastro Beraldi 2 Bent Dublin
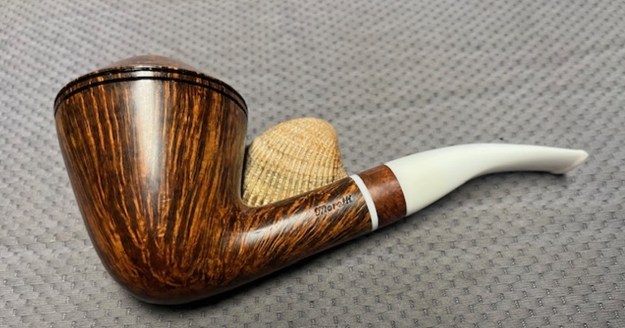
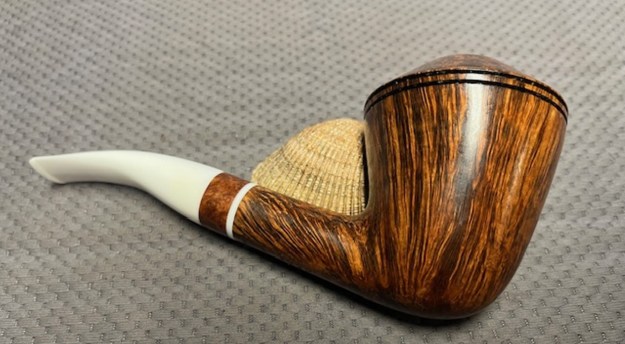
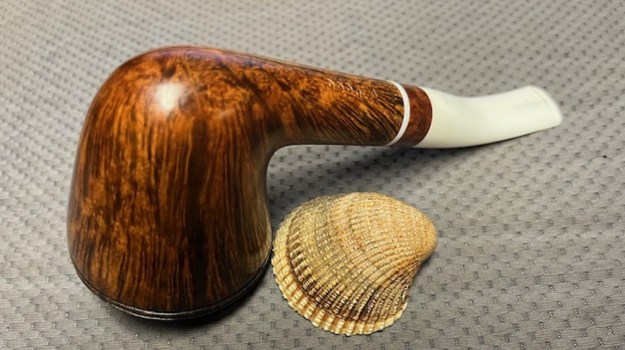
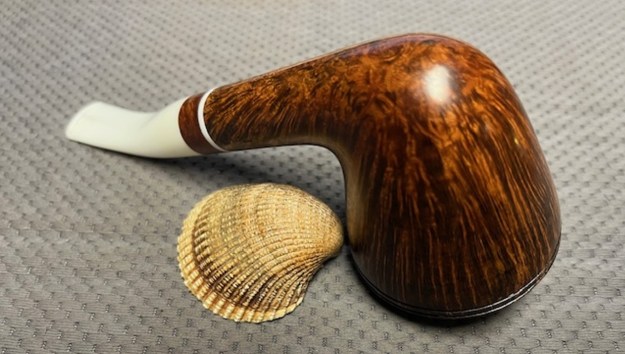
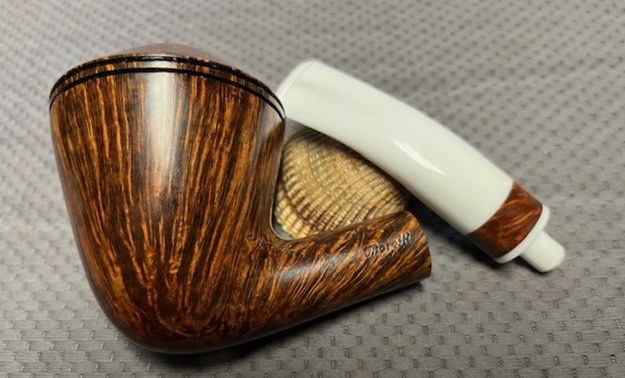
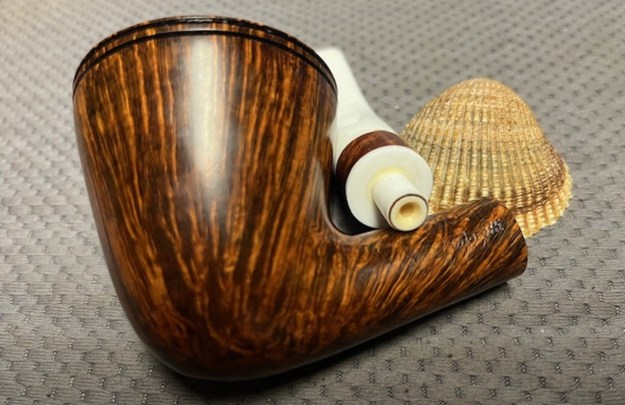
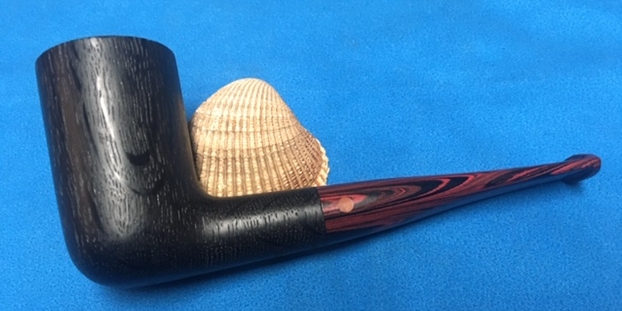
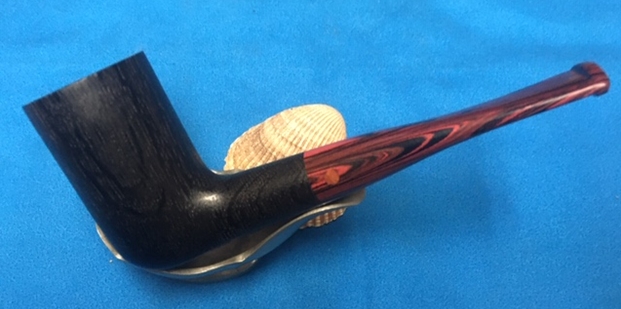
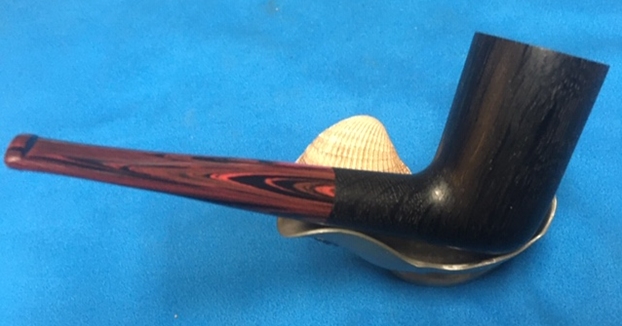
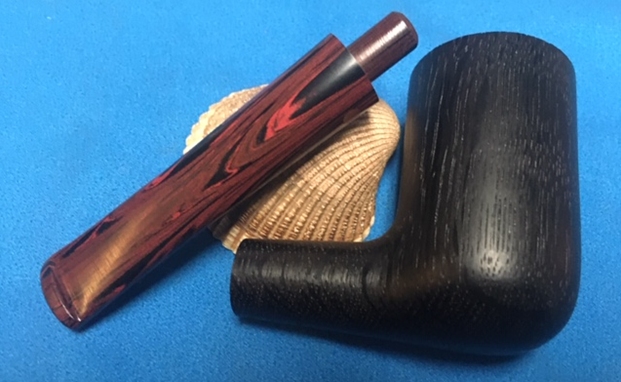
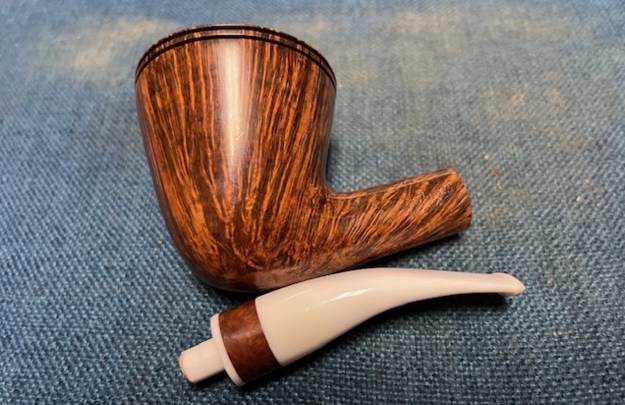
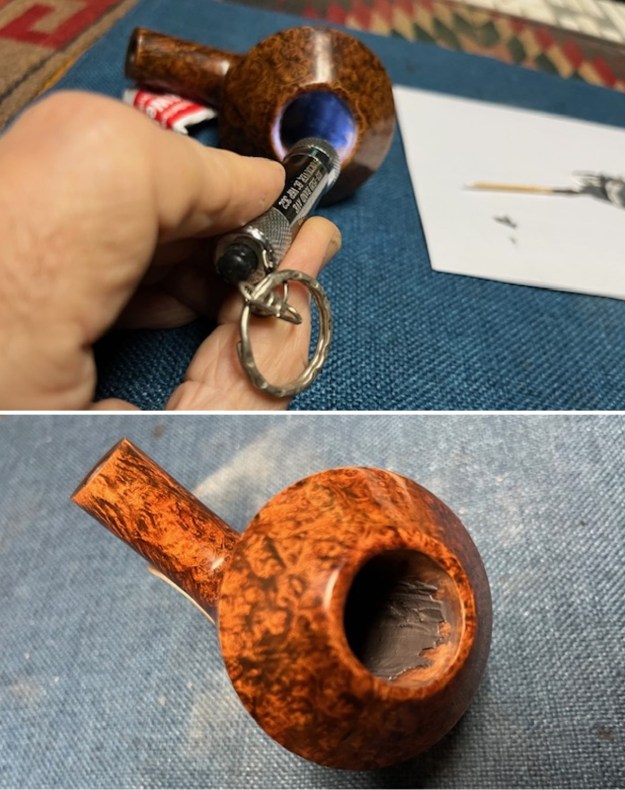
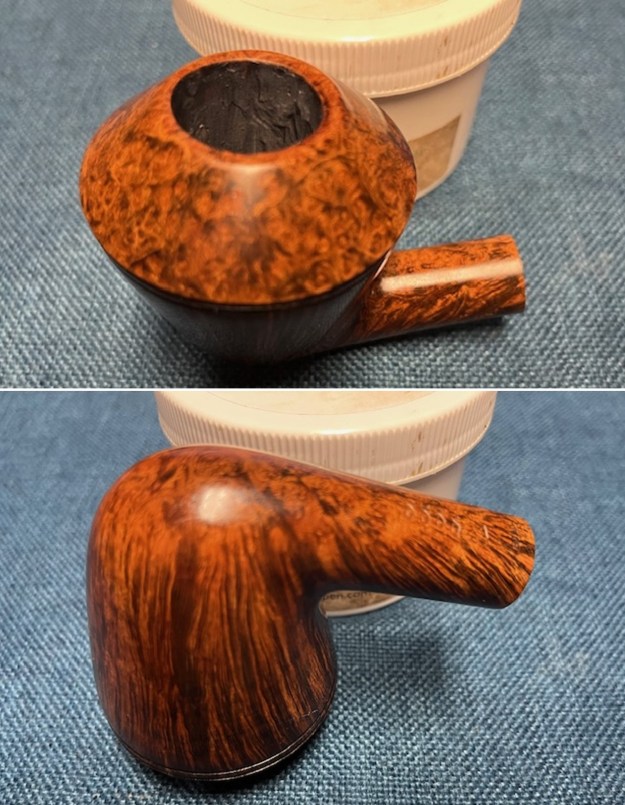
2005 Moretti 1 Bent Rhodesian  The first one I have brought to the table is a large Moretti Rhodesian. Overall it looks very good. It is stamped on left side of the shank and reads Moretti in script. On the underside of the shank it is stamped with what looks like four Greek Deltas [followed by] the number 1. Running around the shank/stem union it is stamped with the date 2005. The stamping is clear and very readable. The pipe has a mix of black and brown stains on smooth finish and some amazing grain that the shape follows well. The rim cap is covered with great birdseye while the bowl and shank sides have some beautiful straight grain. The finish was very clean and the bowl had been reamed and cleaned. There was a divot in the front bowl wall about the size of my thumb that is not terribly deep but is nonetheless very present to the touch. It is 1 inch tall and 1 ¼ wide and roughly 1/8th of an inch deep at the deepest point mid divot. Initial inspection reveals that the charred briar had been removed with the reaming and the walls were solid to touch with some darkening to the in that area. The white original stem is on the pipe and has tooth chatter and marks on both sides ahead of the button. There is and inlaid briar band on the stem with a B on the underside. Behind the band on the underside of the white stem it is stamped but the two lines are not clear or readable. [Michael wrote me and informed me that the stem was stamped Alberto [over] Bonfiglioli of Bologna who made stems for Moretti at times.] I took photos of the pipe to show what it looked like before I started working on it.
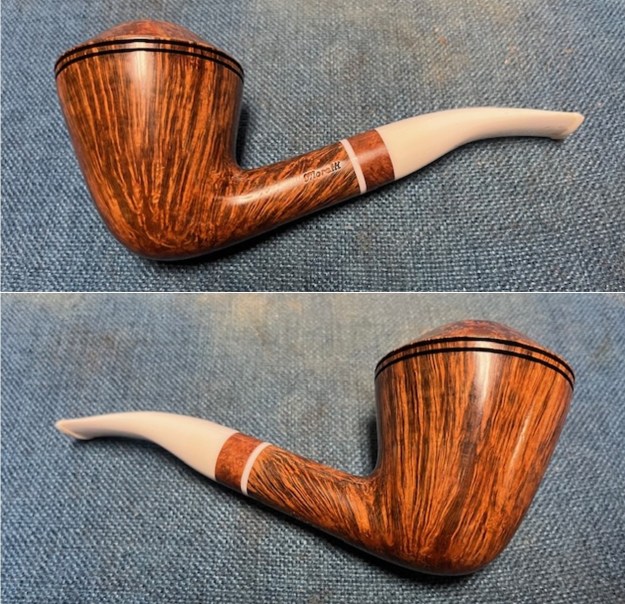
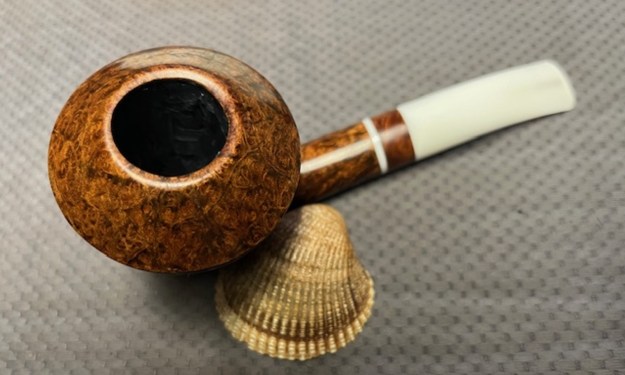
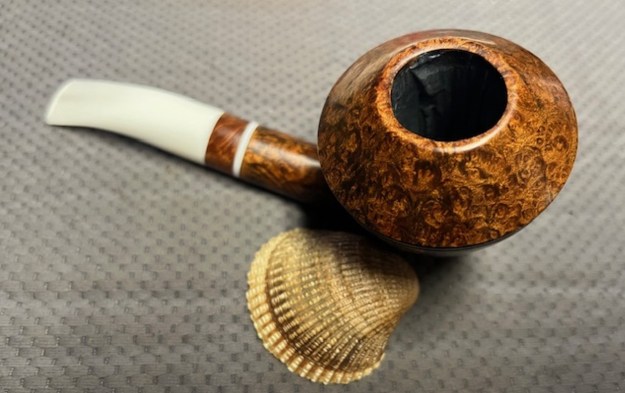
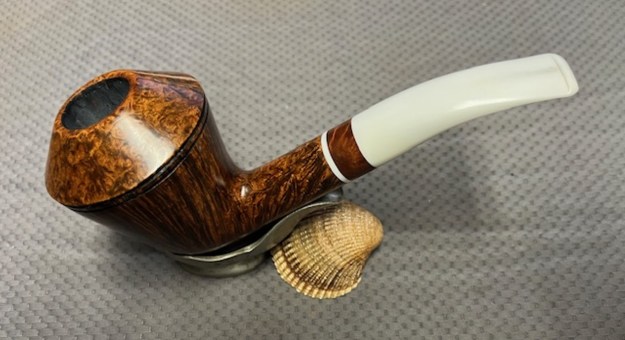
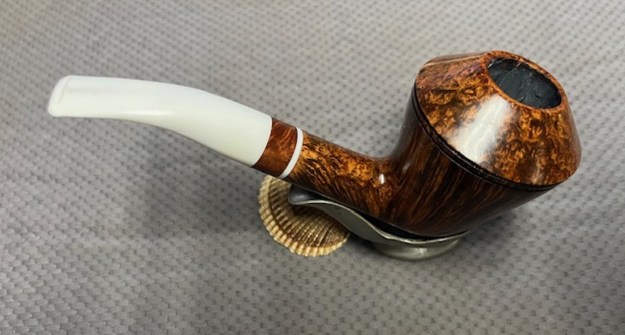
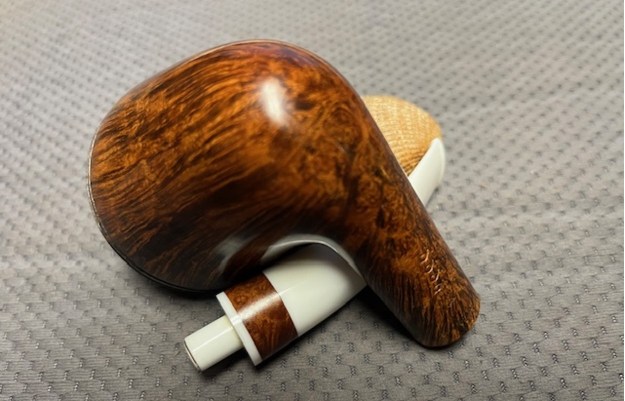
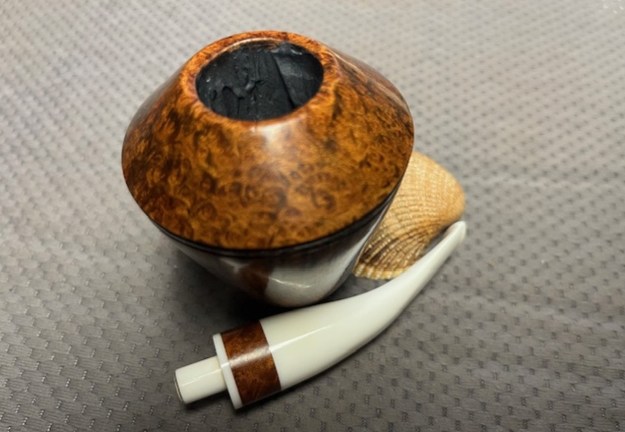
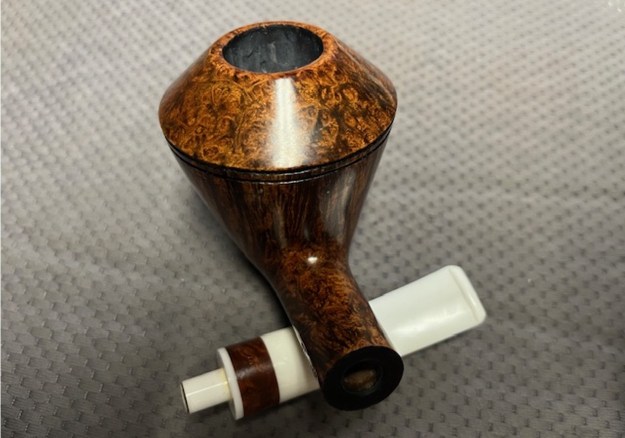
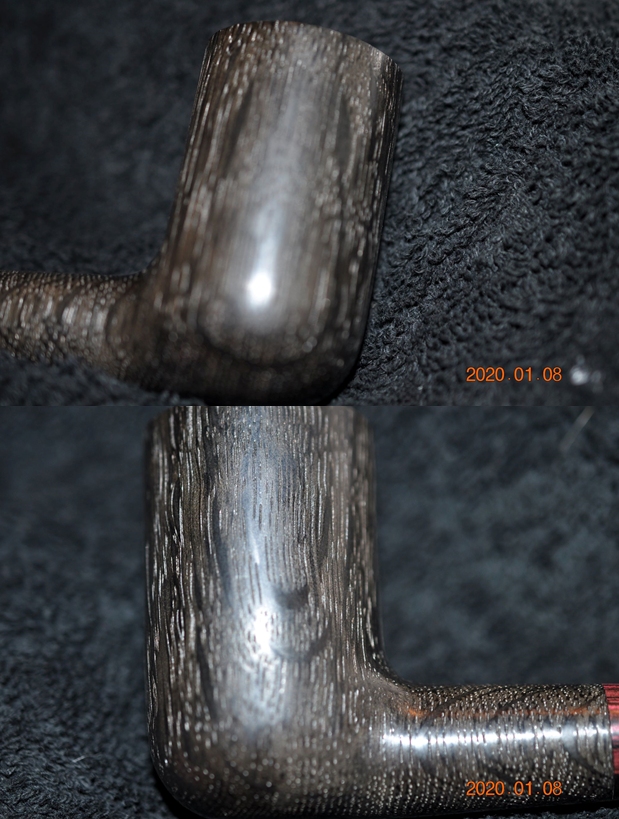
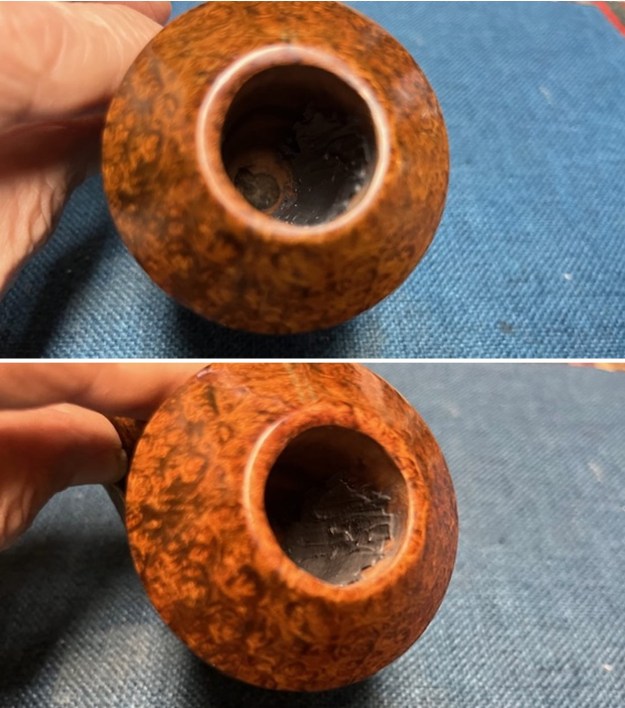
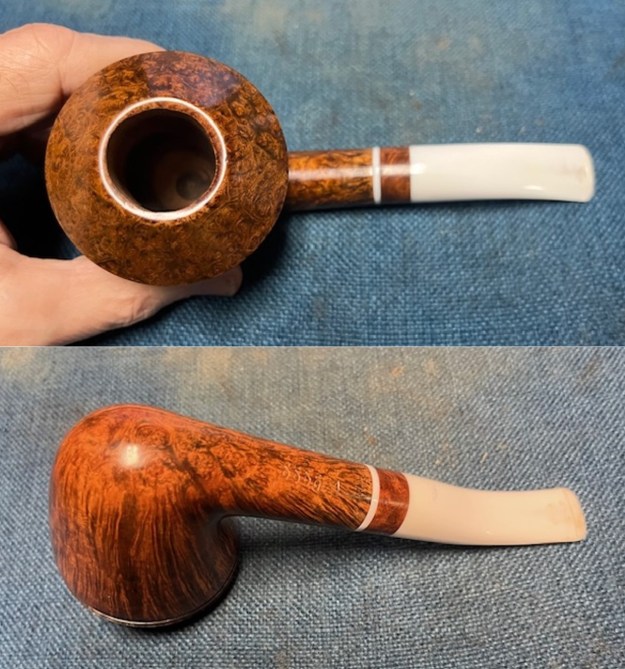 I took photos of the bowl and rim top to show the clean finish on the bowl. It is hard to tell from the photos but the is freshly reamed and very cleaned. The stem photos show the condition of the taper stem ahead of the button.
  I took photos of the stamping on the left and underside of the shank. It is clear and readable as noted above. I removed the stem and took a photo of the pipe to give a sense of the proportions of the pipe.
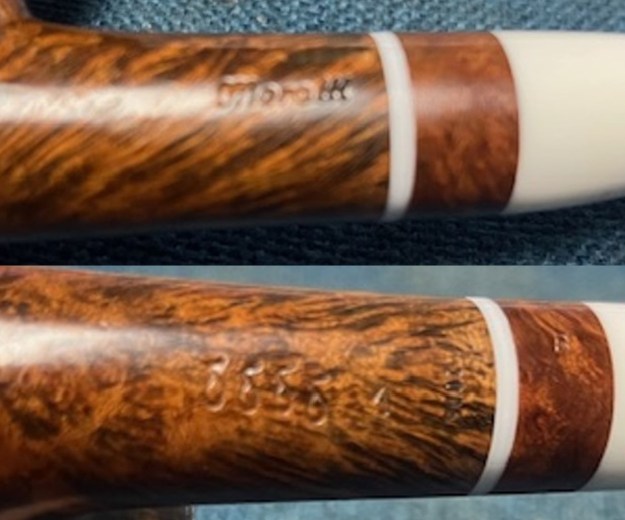
 I turned to Pipephil’s site to see if I could find out information on the Moretti brand and specifically this pipe (http://www.pipephil.eu/logos/en/logo-m7.html#moretti). The listing included the name of the pipe maker, Marco Biagini. The brand is named after his father-in-law, Igino Moretti. This pipe was carved in 2005 and does not bear the Recanati stamping that was on his pipe until 2005. The screen capture below shows the Gradings (ascending) stamps. It shows the four Delta stamp that identifies the pipe as a Collection.
 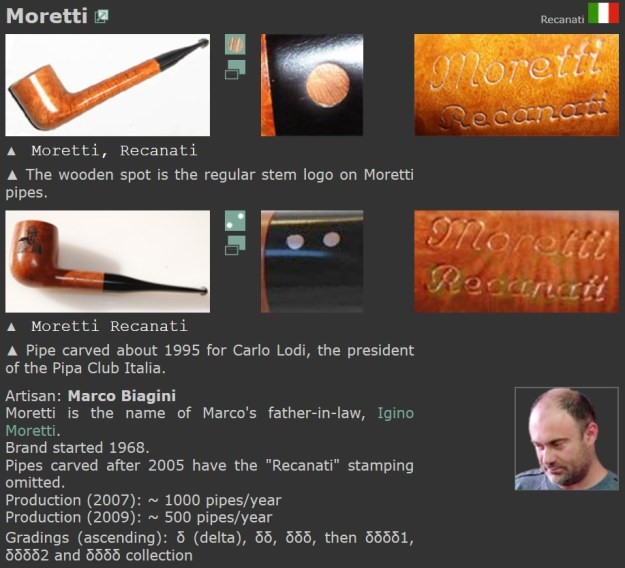 I turned to Pipedia to gain additional information on the brand. (https://pipedia.org/wiki/Moretti). There were some informative articles written by Joseph Hornsby and Fred Hanna. They are worth the read if you want some background and gain appreciation for the carver.
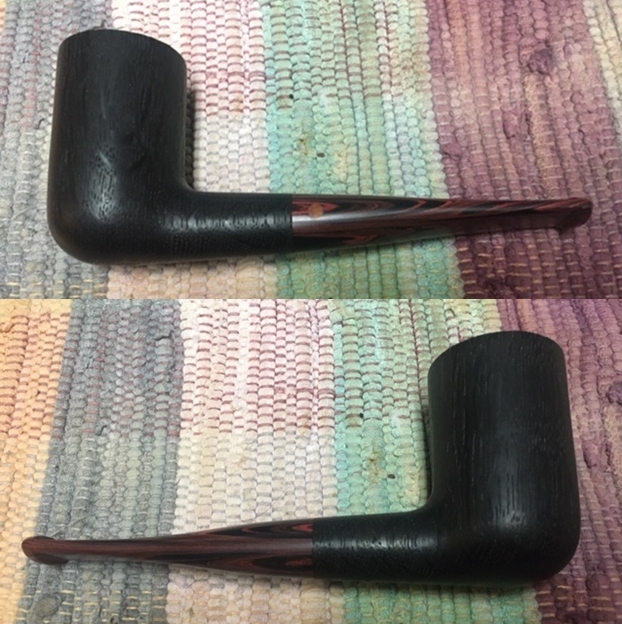
With a clearer picture of the pipe maker in mind I turned to work on this pipe. I began my work on the pipe by thoroughly cleaning the bowl walls, shank and the airway in the stem. I used cotton swabs, pipe cleaners (both bristle and regular) and Isopropyl alcohol.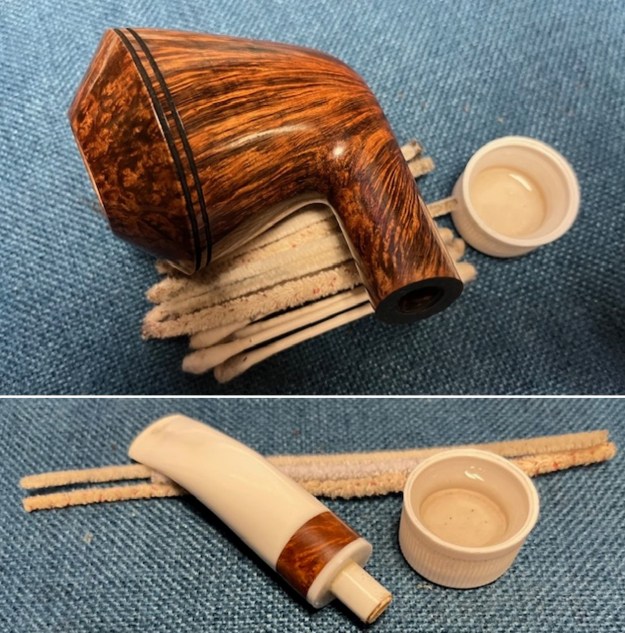 I sanded the stem with 220 grit sandpaper to remove the tooth chatter and marks on the surface. I was able to smooth out the chatter and marks. There is still some darkening in the airway and button slot but it was clean. Overall the stem looked better.
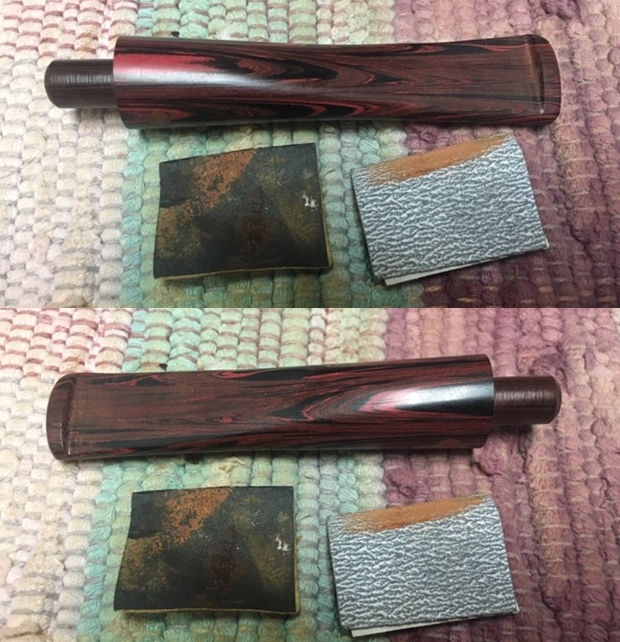
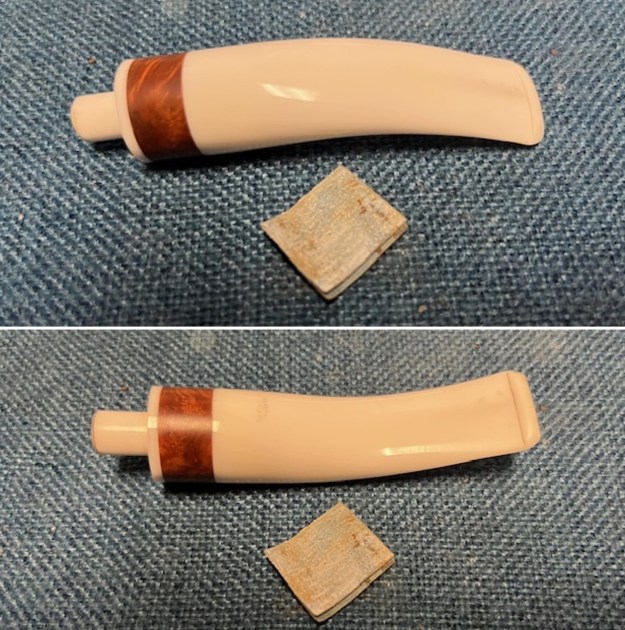 I sanded the stem and tenon surface with 320-3500 grit 2×2 inch pads. I wiped the stem down with an Obsidian Oil cloth after each sanding pad.
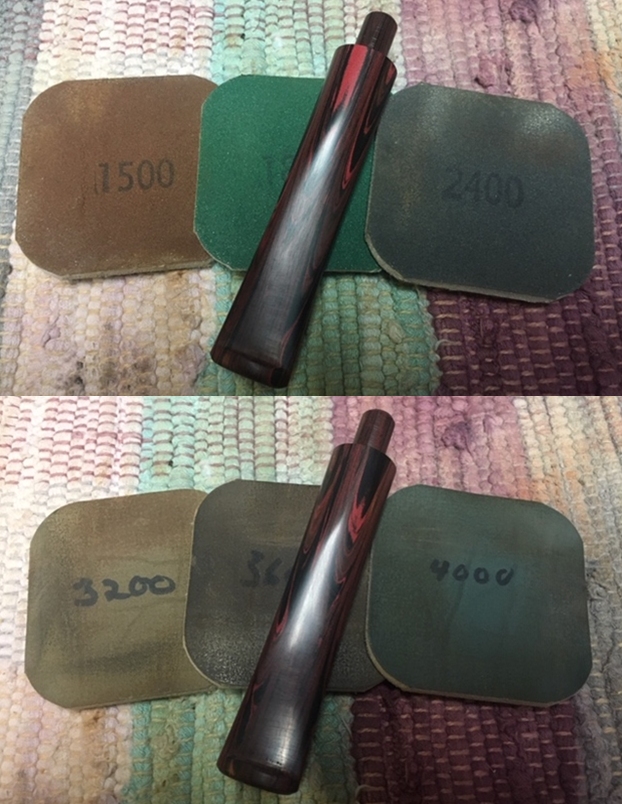
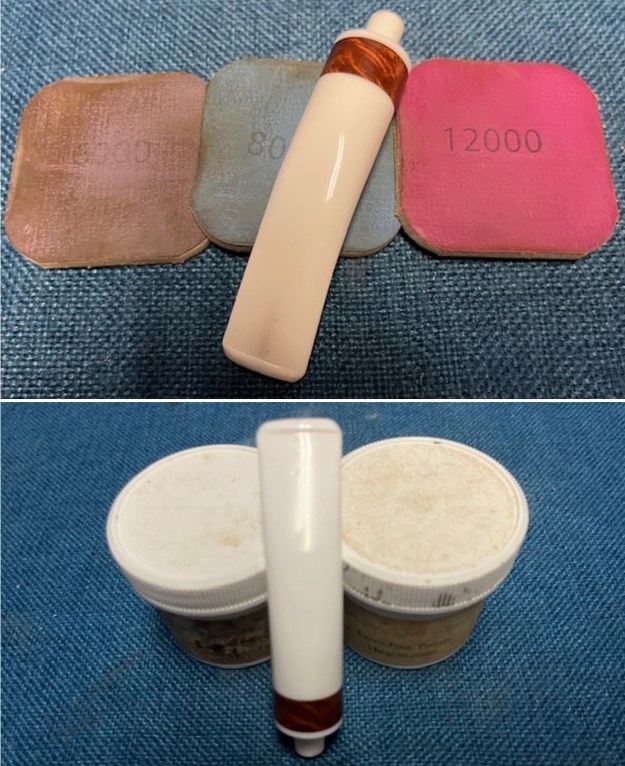
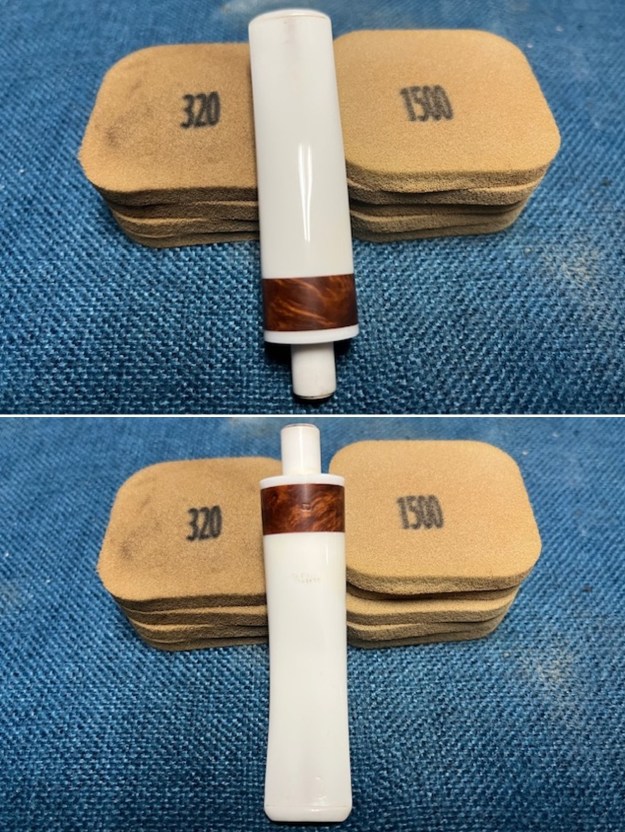 I polished the vulcanite with micromesh sanding pads – 1500-12000 grit pads. I wiped it down with Obsidian Oil after each sanding pad. I used Before & After Pipe Polish – both Fine and Extra Fine to further polish the stem.
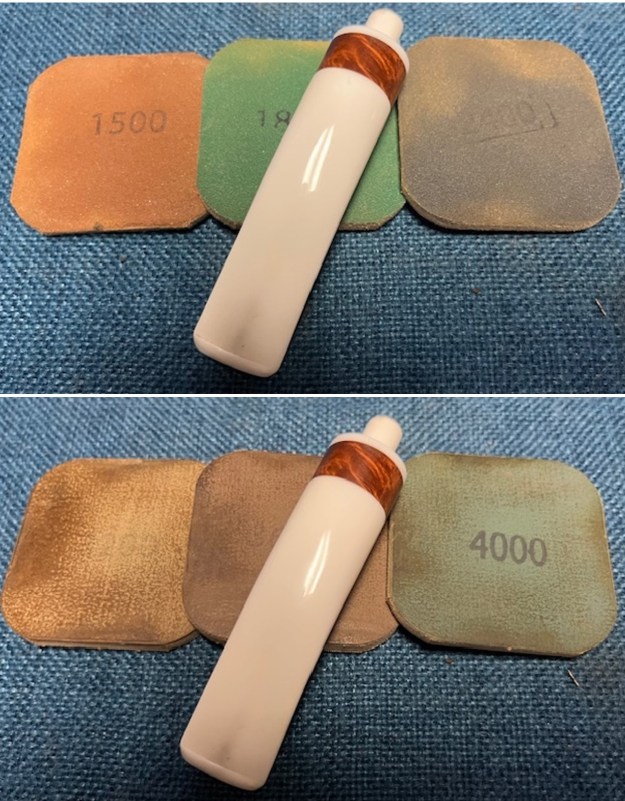
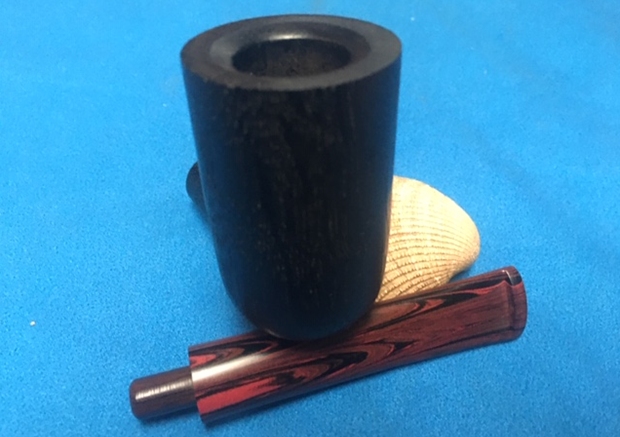
 I set the stem aside and turned to address the divot on the inner wall on the front of the bowl. I wiped it clean with a cotton pad and alcohol to remove any debris on the surface. I mixed a batch of JB Weld to repair the divot on the bowl wall. I pressed it into the damaged area with a dental spatula. I set the bowl aside for the repair to cure.
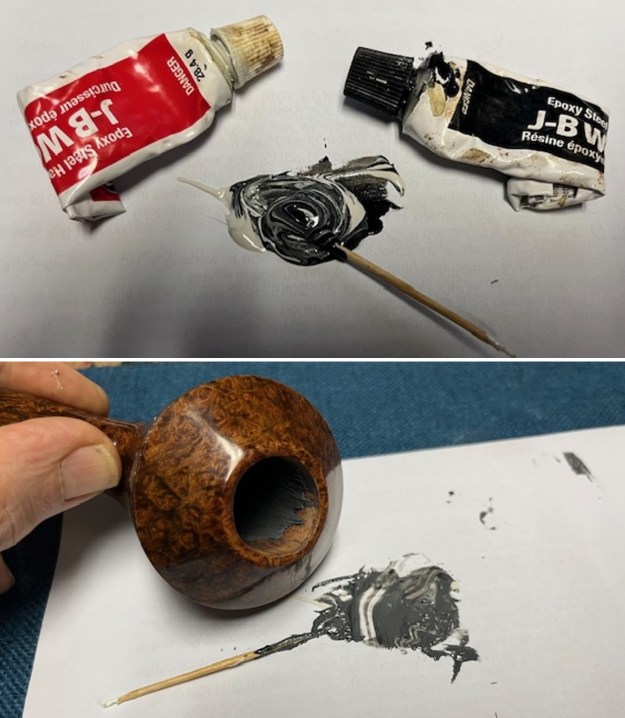
 Once it cured I sanded it smooth with a piece of 220 grit sandpaper wrapped around a piece of dowel to smooth out the repair. I wiped it down with a damp pad to remove the sanding debris.
 I mixed a batch of bowl coating composed of sour cream and activated charcoal powder to give the bowl a thin coat of the mixture. I used a folded pipe cleaner to paint the walls and heel of the bowl with the mixture. I set it aside to cure.
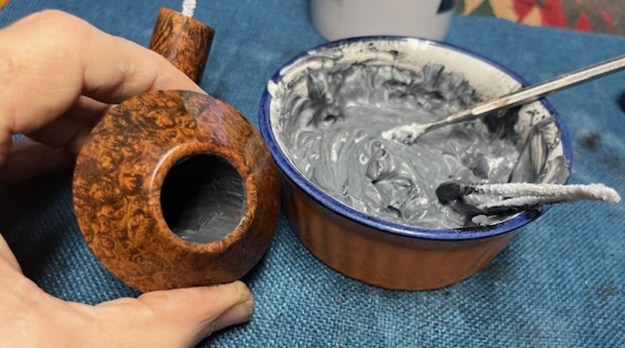
 Once the interior of the bowl had cured I turned my attention to the exterior. I rubbed the briar down with some Before & After Restoration Balm. I worked it into the grain and let it sit for 10 minutes while the product did its work. The Balm deeply cleans the briar, preserves and protects the finish. It is a beautiful pipe.
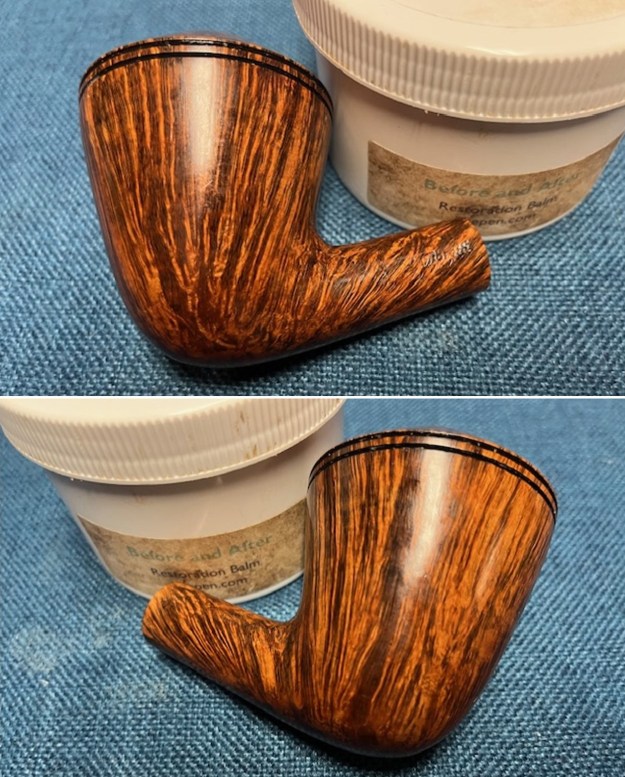
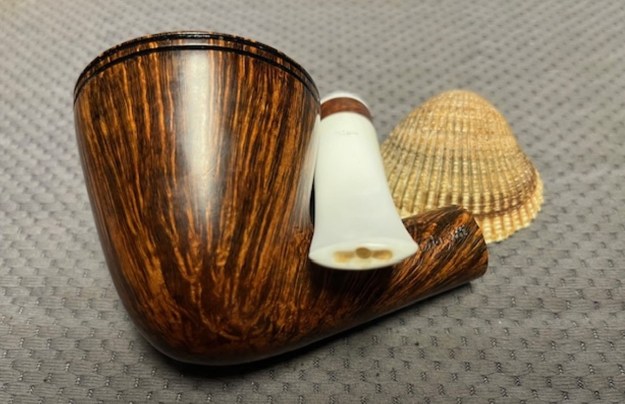
 I the polished white acrylic taper stem and the Moretti 4 Deltas Collection Rhodesian bowl with Blue Diamond to polish out the remaining small scratches and raise the shine. I gave the stem and the bowl several coats of Carnauba Wax then buffed the pipe with a clean buffing pad to raise the shine. I hand buffed it with a microfiber cloth to deepen the shine. The pipe polished up pretty nicely. This turned out to be a beautiful Moretti 4 Deltas 1 Straight Grain Rhodesian with a white acrylic taper stem. The finished pipe is shown in the photos below. The dimensions are Length: 6 ½ inches, Height: 3 inches, Outside diameter of the bowl: 2 ½ inches, Chamber diameter: 7/8 of an inch. The weight of the pipe is 3.28 ounces/94 grams. Thanks for walking through the restoration with me as I worked this beautiful Moretti Rhodesian. This one will await my completion of the work on the other three pipes Michael sent me. Thanks for looking.