by Steve Laug
The next pipe on the table was one I received from a reader of the blog, Emil who wanted me to fit it with a new stem and clean and restore it for him. I asked Emil for photos of the pipe before he sent it to me so I could have a look at it. Emil gladly sent the following photos. The pipe was in rough shape with a nicked outer edge, thick cake and heavy lava coat. The aluminum shank end/mortise was oxidized and very dirty. The stem was oxidized, calcified and chipped on the underside of the button forward. Once I saw them I was ready to take on the pipe. 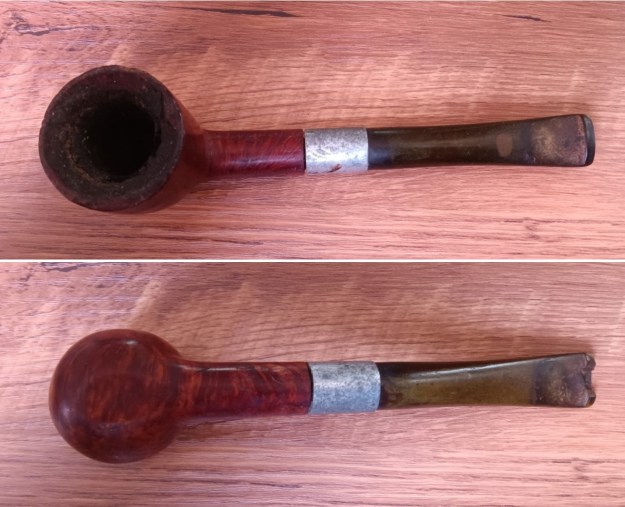
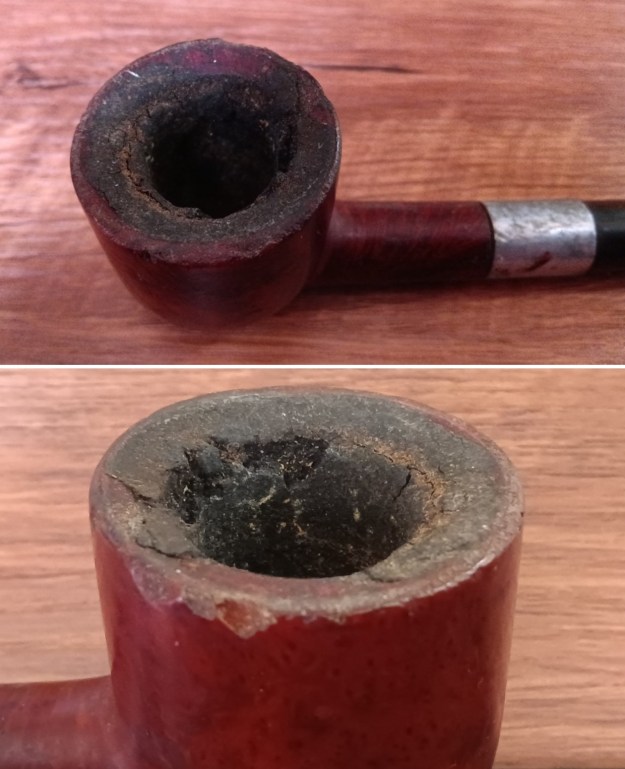
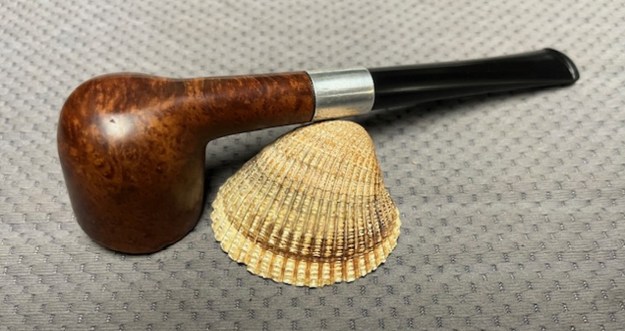
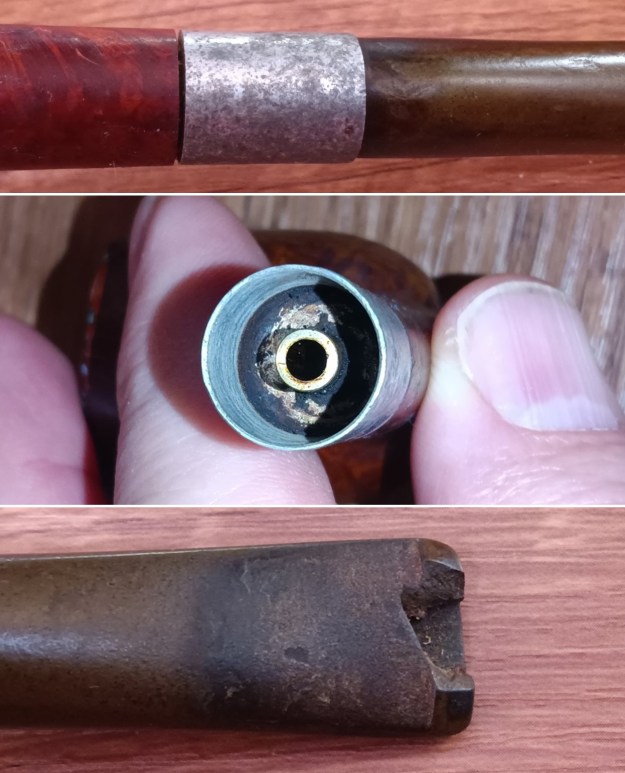 From the photos and now that I have it in hand I have to say that it reminds me of a Keyser Hygienic pipe in terms of the tubes and plumbing in the stem and mortise. This one has some nice grain around the bowl and what I can see showing through on the inwardly beveled rim top. The rim top is thick with lava and the outer edge has some damage. The bowl has a thick cake and is very dirty. The shank end is polished aluminum and has a tube in the center of what acts as a condenser compartment. The aluminum has been damaged by what appears to be marks from pliers. The vulcanite stem is inserted in the shank end and also has a tube in the center. The swirling smoke in the chamber leaves the moisture on the sides of the aluminum shank extension. The stem was oxidized and calcified and has a large chunk of vulcanite out of the button on what appears to be the top but easily could be the bottom. I took photos of the pipe before I started his cleanup work.
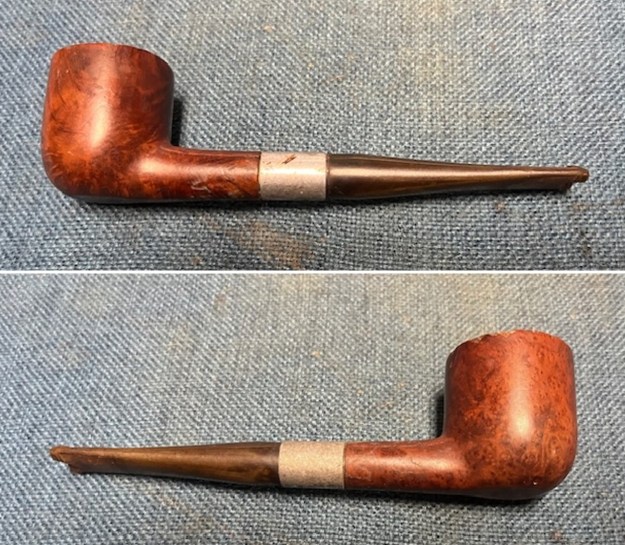
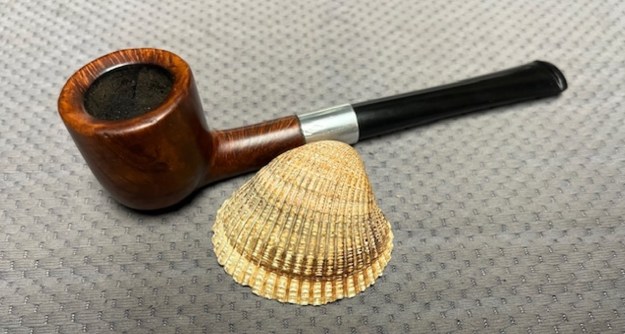
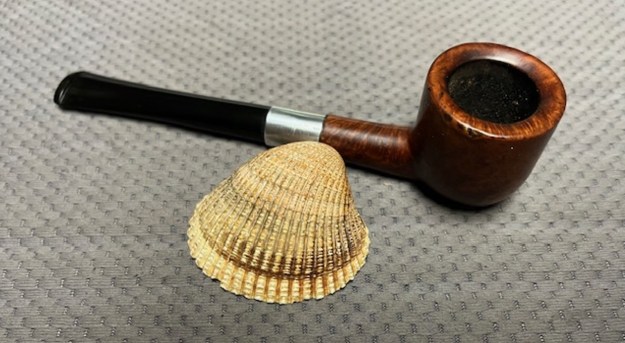
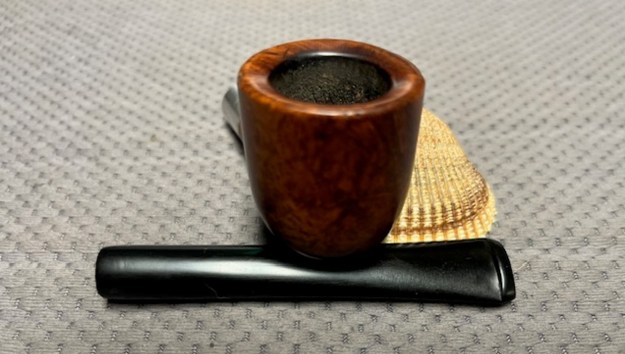
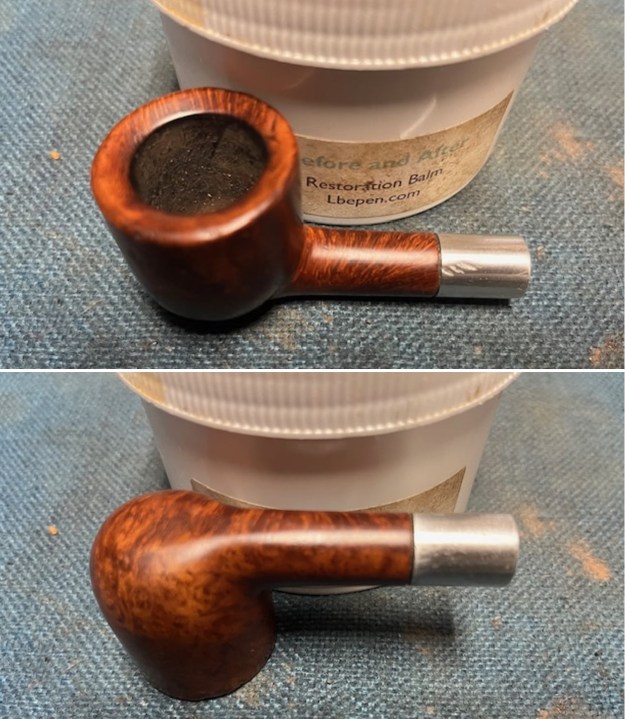
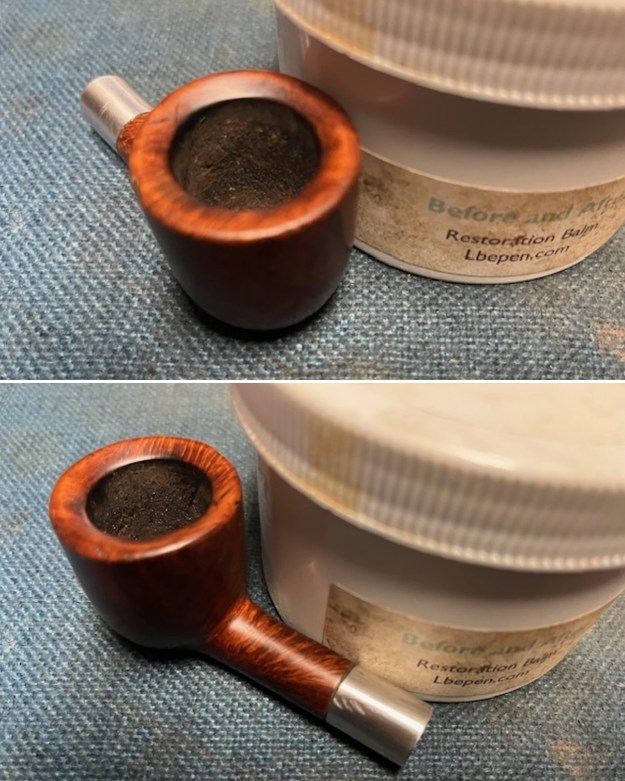
 I took photos of the bowl and rim top and both the top and underside of the stem. You can see the thickness of the cake in the bowl and the lava on the rim top. The outer edges of the bowl show some damage but the inner edge seems protected by the lava coat. The stem photos show the missing damage to the button and stem surface.
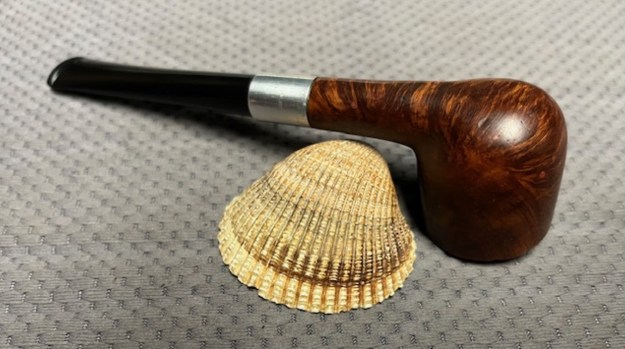
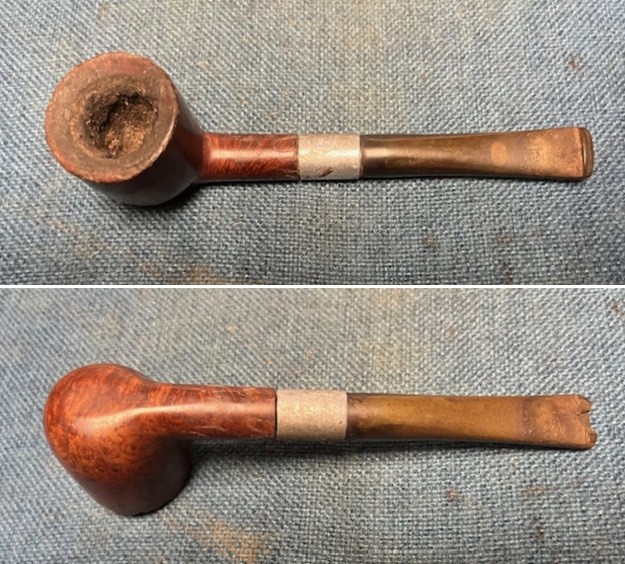
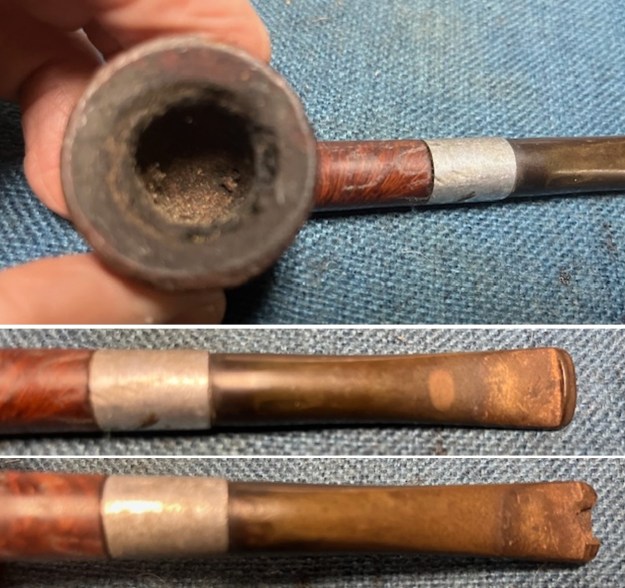 The pipe was stamped on the left side of the shank and it read Millard [over] Imported Briar. There was no stamping on the right side of the shank. I took a photo of the bowl with the stem removed to give a sense of the shape of the pipe.
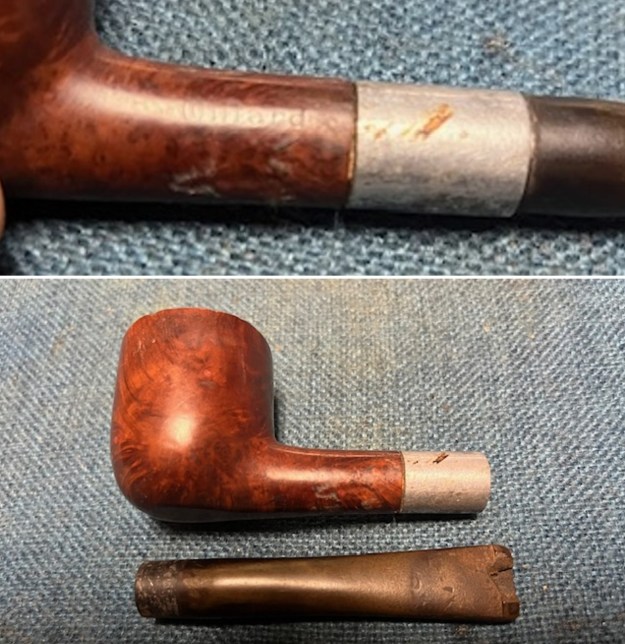 As I studied it, I also remembered that I have worked on several Millard pipes over the past years. I turned to one of the write ups on rebornpipes on a pair of Millard pipes. Here is the link https://rebornpipes.com/2015/12/11/a-pair-of-millard-perfect-pipes-a-sandblast-apple-and-dublin/. I am including a picture of a flyer that I showed in the blog and I am quoting the section that gives the background on the brand. I quote:
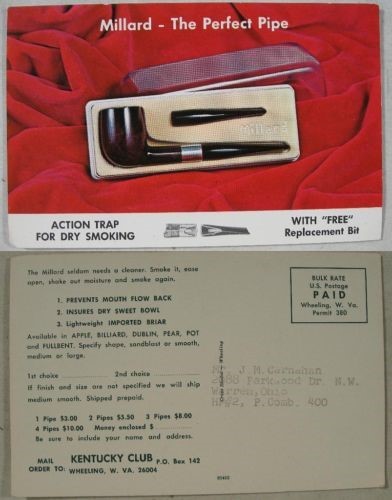 When I came across the Millard – the Perfect Pipe coupon in the two boxes of Kentucky Club that I found I was fascinated with the look of the pipe. It reminded me of the Keyser Hygienic pipes that I had restored over the years. The stem that fit into the metal mortise shank insert and the tubes on the inside of the stem and the shank were similar. While the Keyser tubing in the shank looked identical the one in the stem was different. Keyser was directed downward while the Millard was two straight tubes that met in the mortise. They did not touch but the metal chamber became a condensing chamber, or as they call it an Action Trap, for the smoke and collected the moisture before it continued through the tube in the stem. I looked up the brand online and found the following advertisement postcard that shows the way the system works. I found that the stems were interchangeable between the shapes that the pipe came in. The straight stems could be easily transferred from pipe to pipe. In fact the pipe originally came with an extra or replacement stem. The pipe came in a sandblast and a smooth finish in six shapes – apple, Dublin, billiard, pear, pot and bent. It came in two sizes: medium or large. In the advertisement below you can see that the pipe cost $3. I also found that Mastercraft supplied the pipes through the coupon sales. Knowing a bit of history about the company I know that they did not make pipe so they were sourced from the original manufacturer.
Before I worked on the pipe I took the box of Kentucky Club that I had on the shelf and opened it and took out the coupon. It actually was a coupon for The Millard pipe. It read as follows:
Looking for the Ideal Pipe? The Millard is often regarded as the answer. Its complete action trap keeps the pipe dry in any position and prevents mouth flow back. Se it in our new Premium Catalog. It will delight and intrigue you. We feel sure.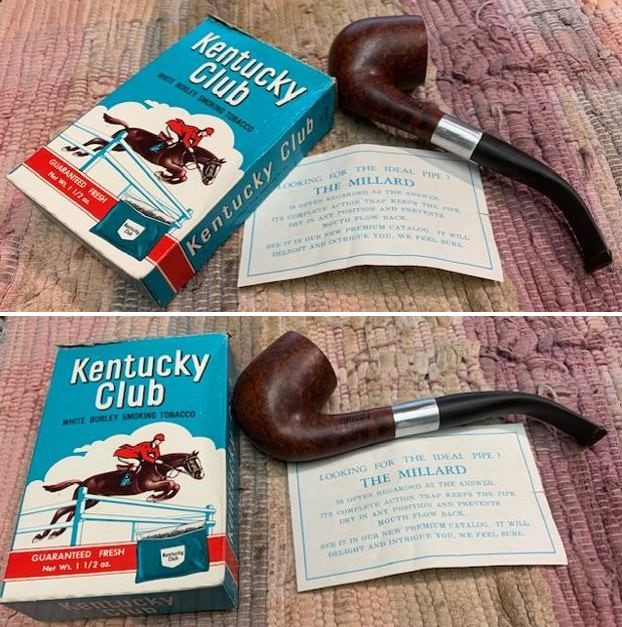 Now it was time to work on the pipe. I went through my can of stems and found one that would work quite well with a bit of work reshaping the shank end of the stem and opening the airway to slip over the tube in the mortise of the shank. The shape was correct and it had a couple of light tooth mark on the top and underside of the stem ahead of the button. I used a drill to open the airway in the stem to slide over the tube in the shank. I started with a bit slightly smaller than the airway and worked up to the correct dimensions.
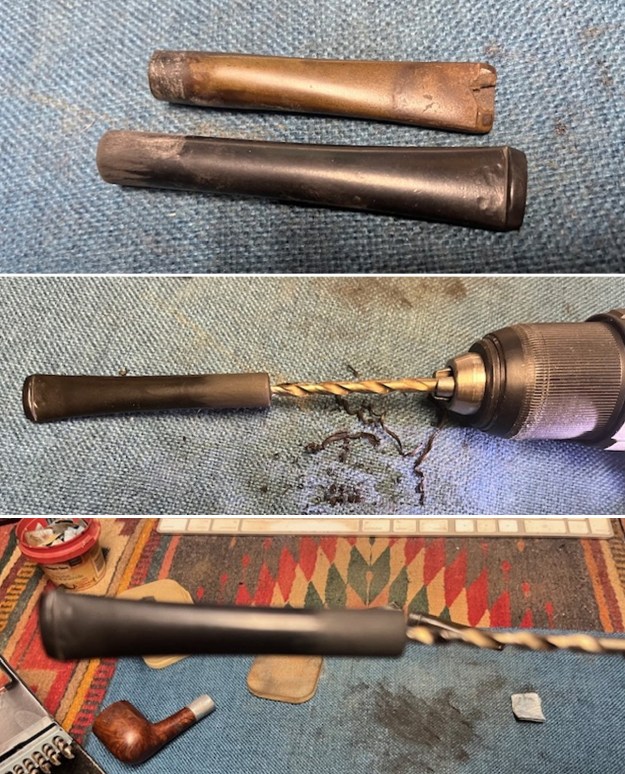 I worked on giving the shank end of the stem the same diameter and taper as the inside of the aluminum mortise. I used 220 grit sandpaper to shape and fit it to the shank.
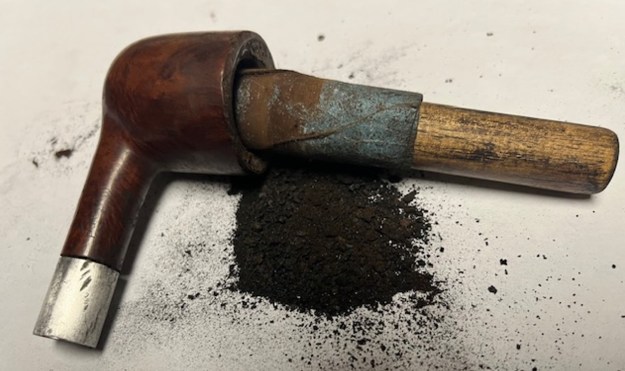
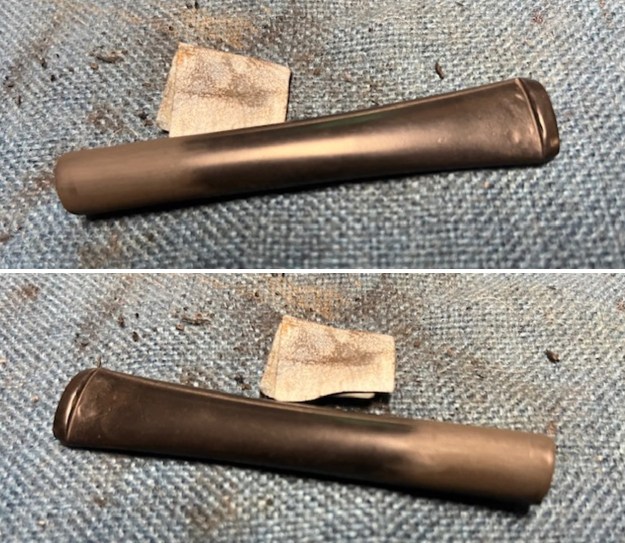 I set the stem aside and worked on the bowl. I reamed the bowl with a PipNet Pipe Reamer using the 2nd and 3rd cutting heads. I cleaned up the reaming with a Savinelli Fitsall Pipe Knife and took the cake back to bare briar. I sanded the inside bowl walls with a piece of dowel wrapped in 220 grit sandpaper.
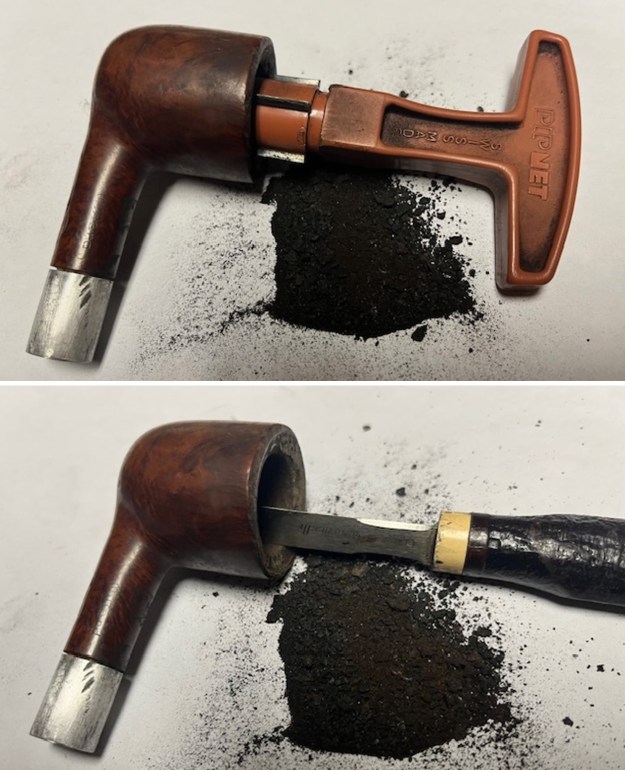
 I cleaned out the airway into the bowl – and the inside of the aluminum mortise and plumbing with pipe cleaners – both bristle and regular with alcohol. I was able to remove the grime and the tars in the shank and mortise area. I repeated the process on the new stem. It looked much better and smelled great.
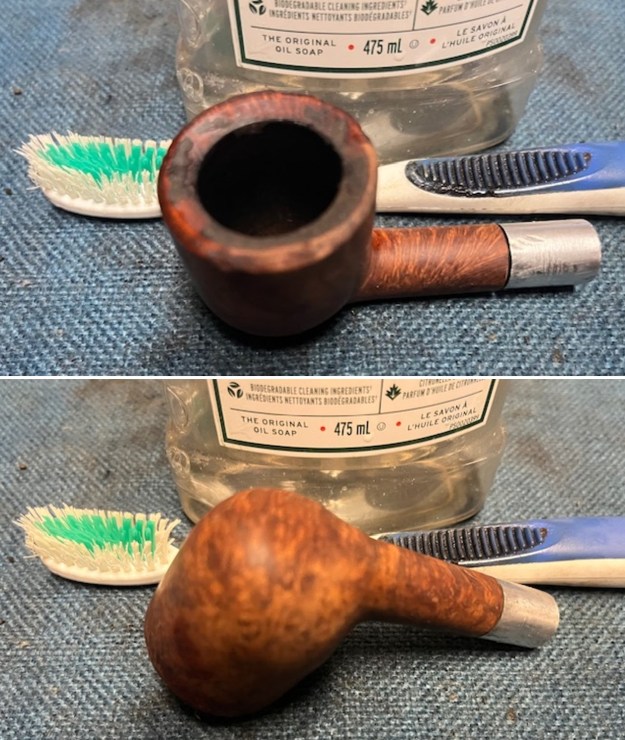
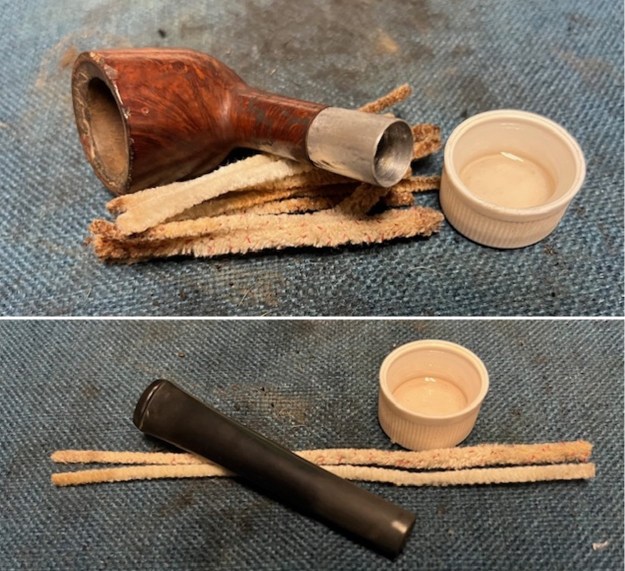 I scrubbed the bowl and rim with undiluted Murphy’s Oil Soap and a tooth brush to remove the debris and grime on the bowl sides. It looked much better.
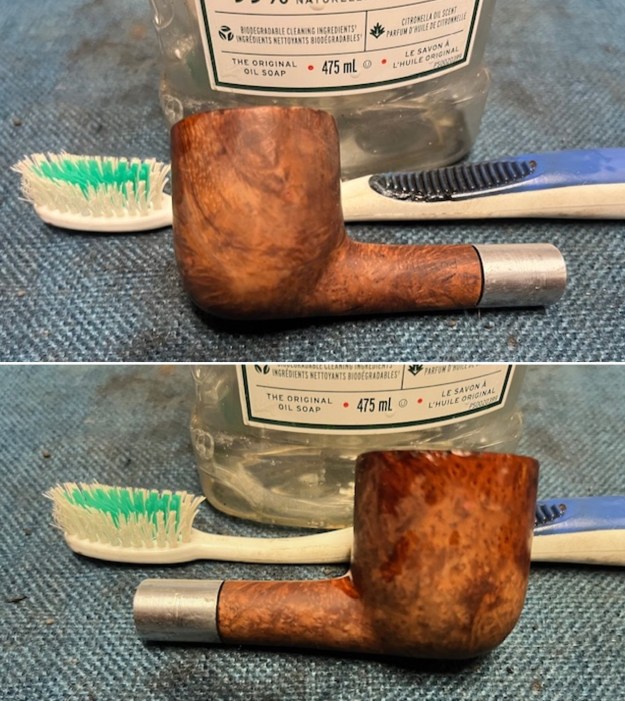
 I set the bowl aside and went back to the stem. I filled in the tooth dents in the stem on the top and underside ahead of the button with rubberized black CA glue. Once the repairs cured I used small files to flatten the repairs. I sanded it with 220 grit sandpaper to smooth out the repairs.
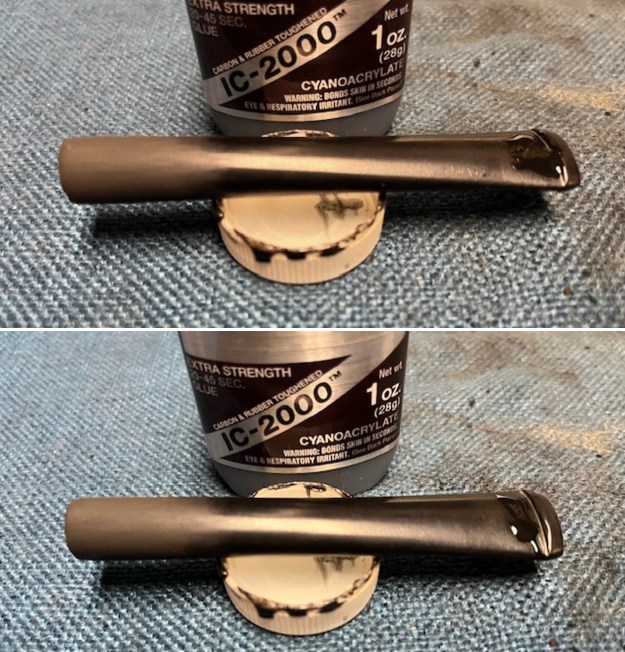
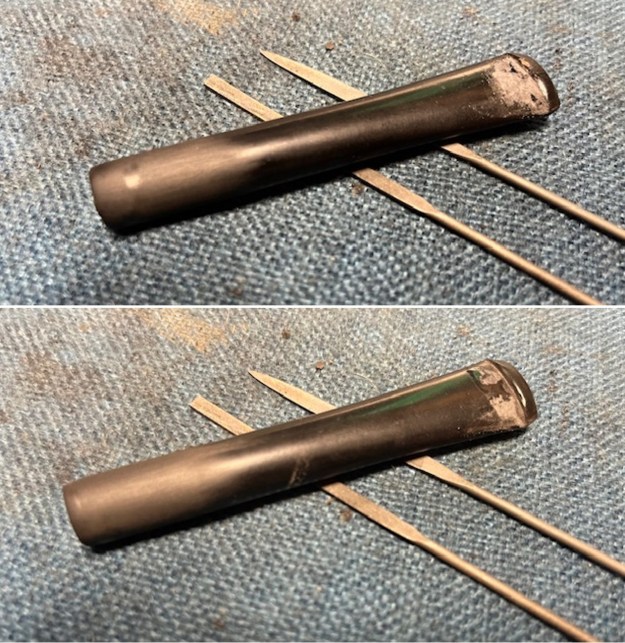
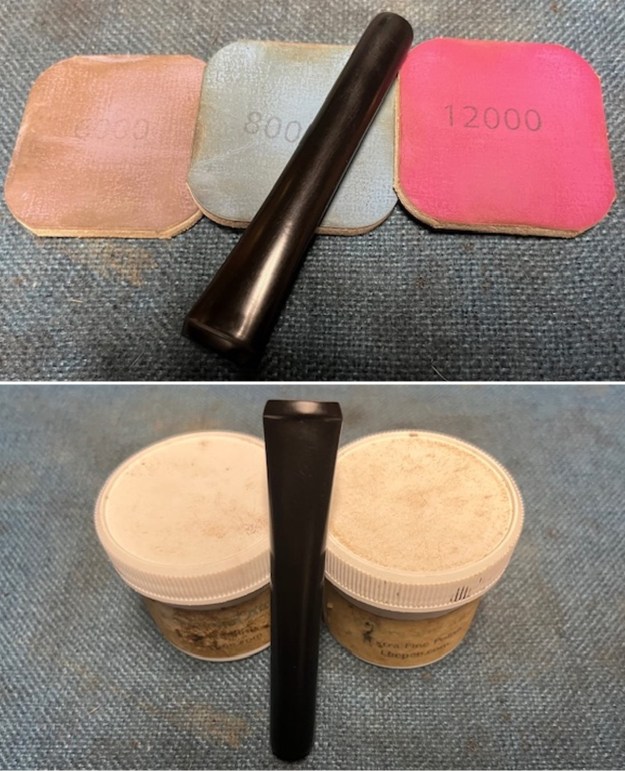
 I dry sanded the stem with 320-3500 grit 2×2 inch sanding pads. I was able to clean up the scratches in the vulcanite and give the new stem a proper shape. It was looking very good.
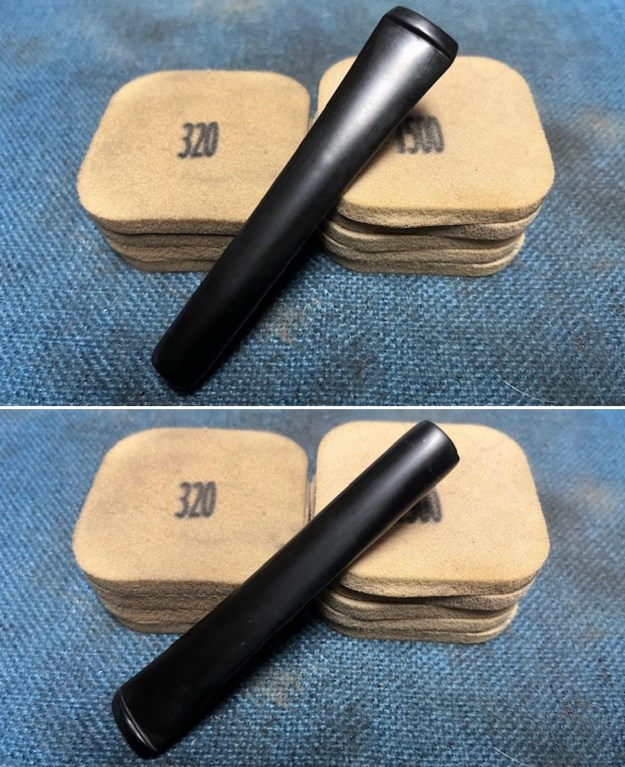 I polished the stem with micromesh sanding pads – dry sanding it with 1500-12000 grit pads. I wiped the stem down after each pad with a cloth and Obsidian Oil. I finished the polishing with Before & After Pipe Stem Polish – both Fine and Extra Fine. I gave it a final coat of Obsidian Oil.
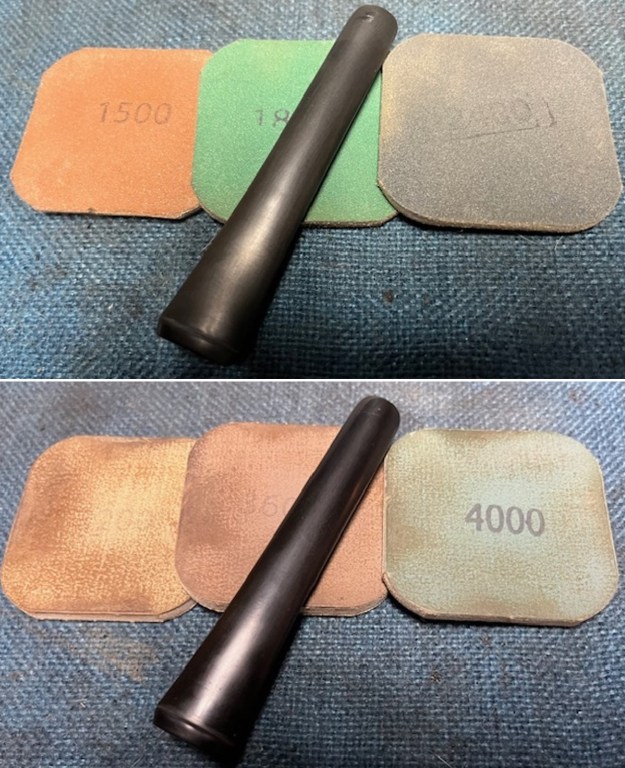
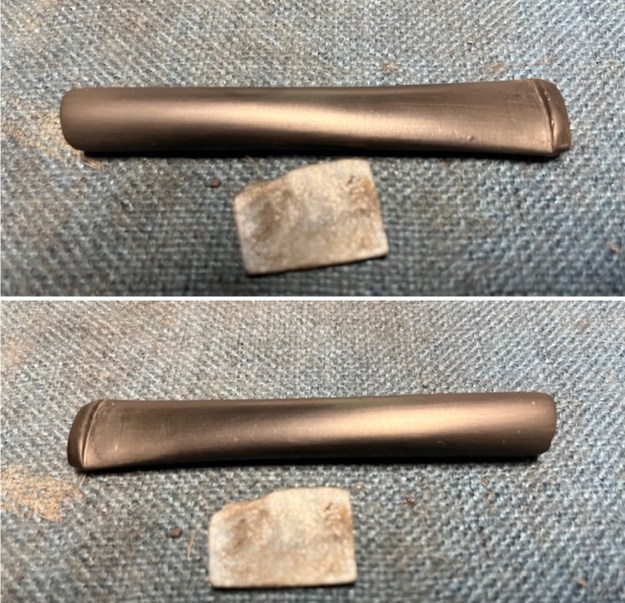
 I set the stem aside and used some clear CA glue and briar dust to fill in the deep chips in the right side of the rim top.
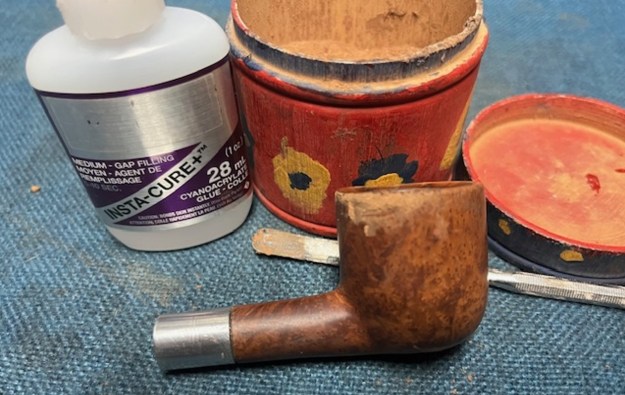 I sanded the bowl and aluminum shank with 320-3500 grit 2×2 inch sanding pads. I polished out the scratches in the aluminum as much as possible and the scratches and repairs in the briar. The bowl and shank began to look much better.
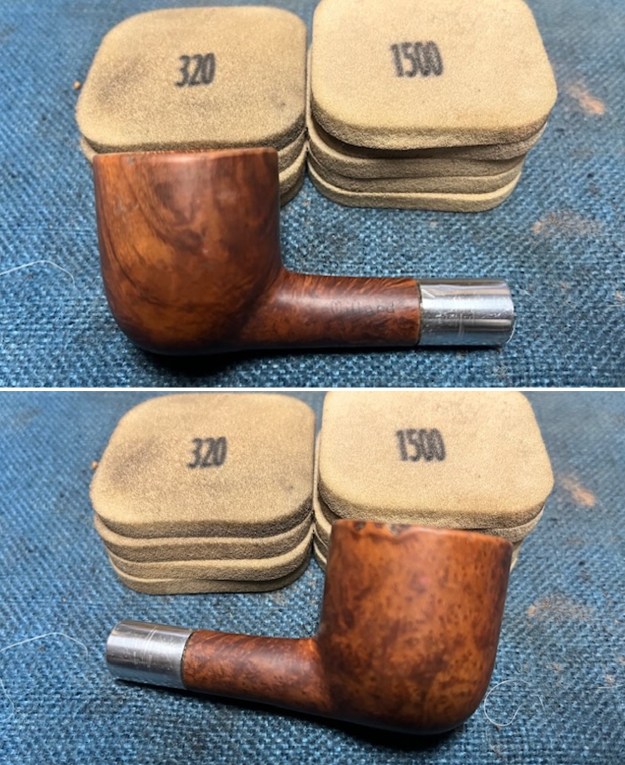
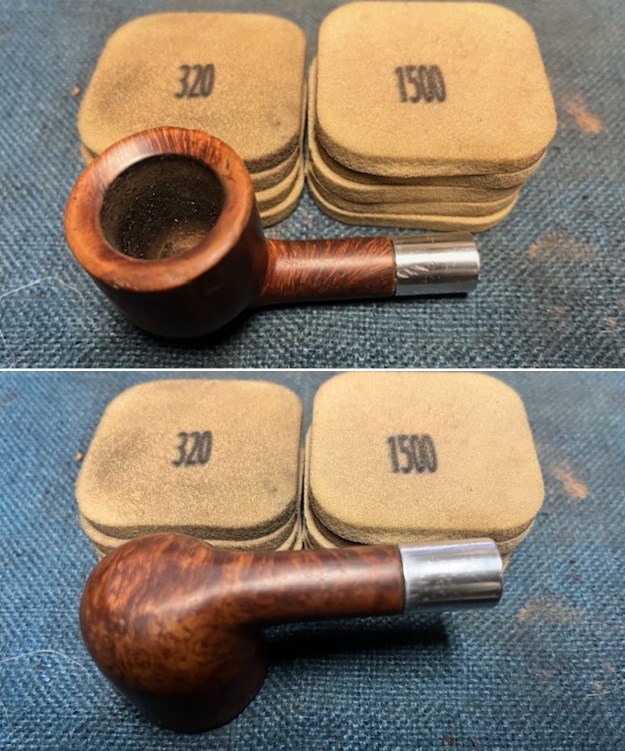 I polished the briar and aluminum with micromesh sanding pads – dry sanding with 1500-12000 grit pads. I wiped the bowl down with a damp cloth after each sanding pad. It really began to take on a rich shine.
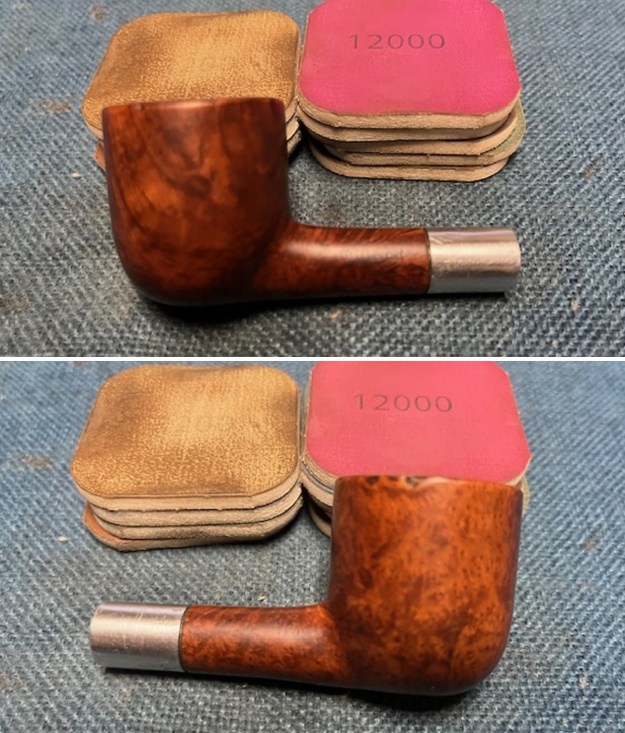
 I rubbed the briar down with Before & After Restoration Balm. I worked it into the briar with my fingertips. The product works to clean, enliven and preserve the briar. I let it sit for 10 minutes then I buffed it with a cotton cloth to deepen the shine. The briar really comes alive with the balm.
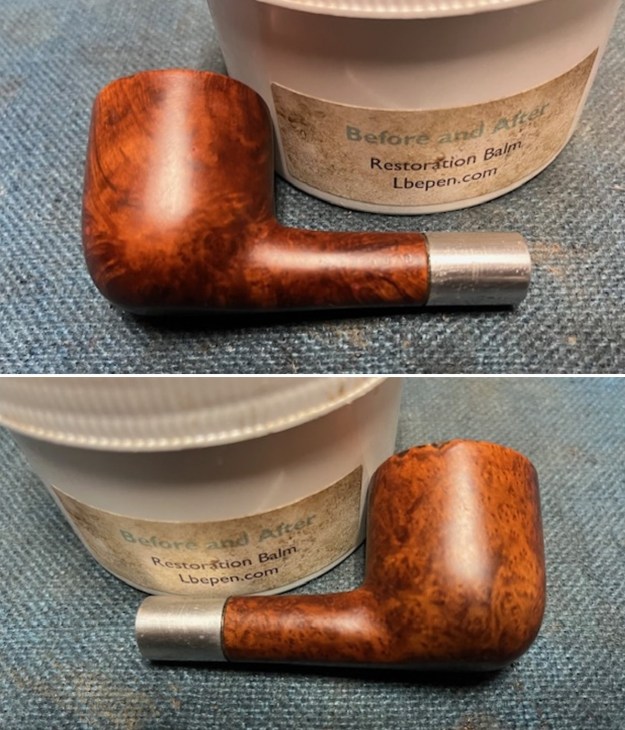
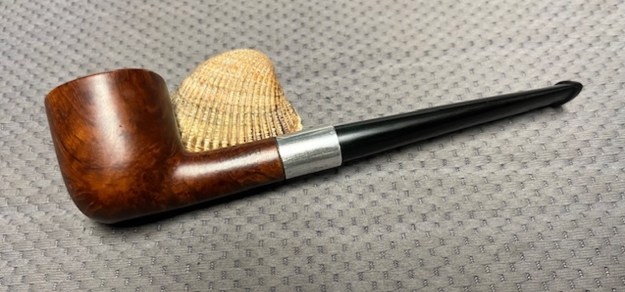
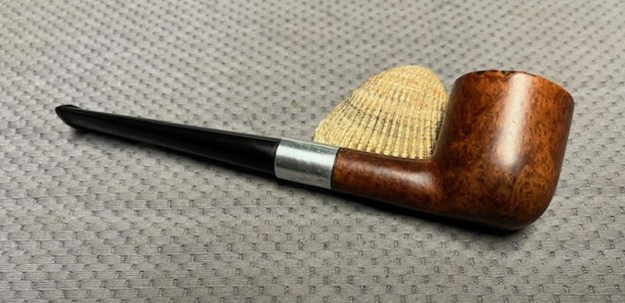
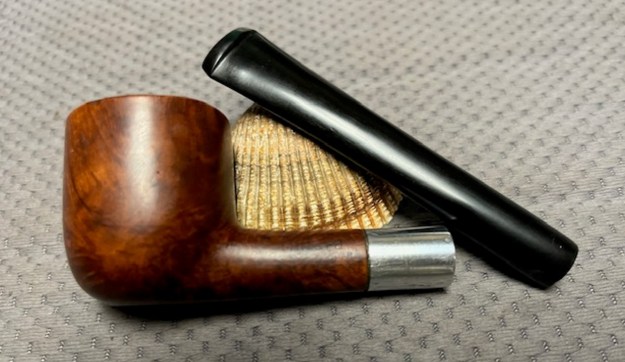
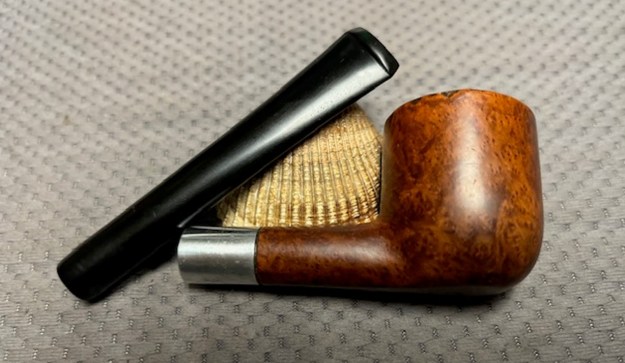
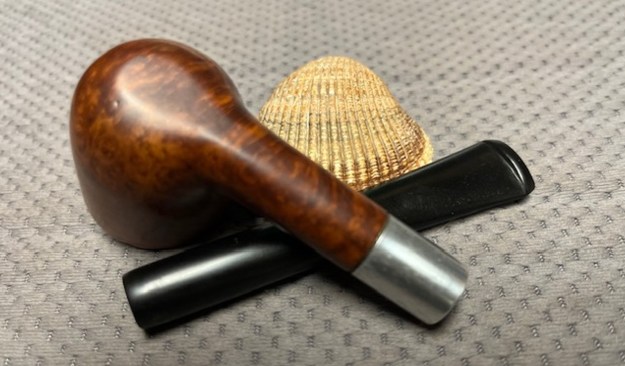
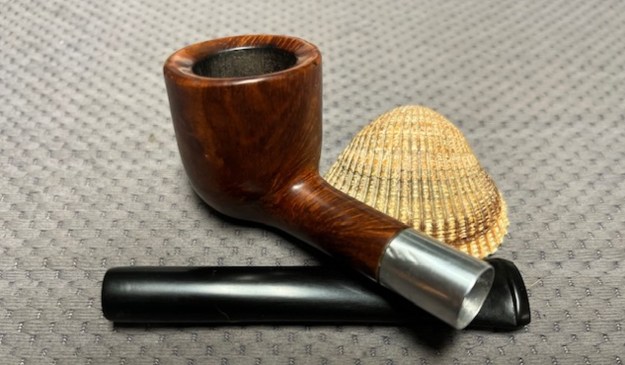
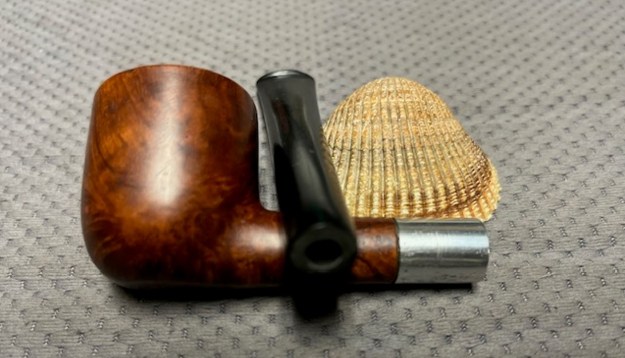
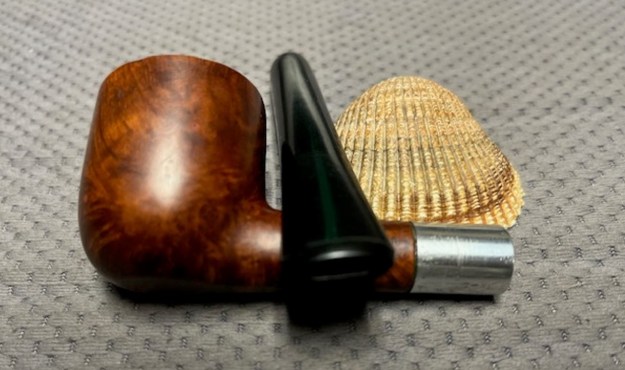
 I put the pipe back together – the bowl with its new stem. This restored Millard Imported Briar System Straight Pot is a real beauty and I think the polished aluminum shank extension (condensation chamber) and the new black vulcanite stem work well together. The grain on the bowl came alive with the buffing. I used Blue Diamond on the buffing wheel on both the bowl and stem. I gave both multiple coats of carnauba wax on the wheel then buffed it with a clean buffing pad to raise the shine. I hand buffed it with a microfibre cloth to deepen the shine. The Millard Straight Pot feels great in the hand. It is lightweight and the contrast in the browns of the briar, the polished aluminum and the vulcanite stem is quite amazing. The dimensions of the pipe are Length: 6 inches, Height: 1 ½ inches, Outer diameter of the bowl: 1 ¼ inches, Chamber diameter: 7/8 of an inch. The weight of the pipe is 1.34 ounces/38 grams. It really is a beauty. I will be sending it back to Emil this week. I am hoping that he enjoys it as much as I enjoyed working on it. Thanks for walking through the restemming and the restoration with me. Cheers.