Blog by Steve Laug
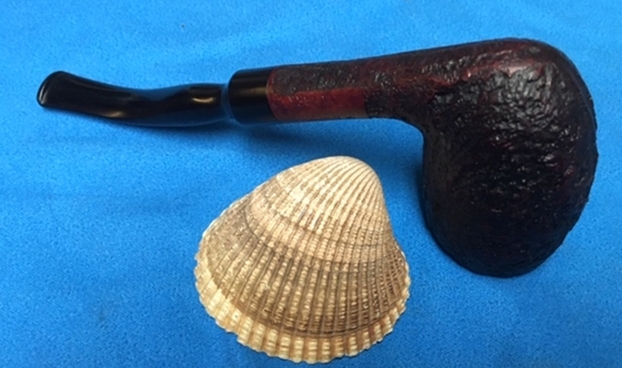
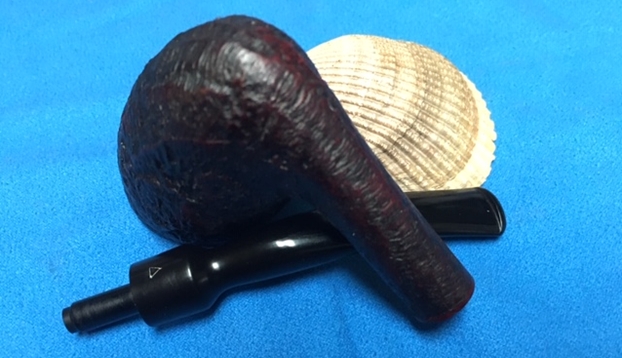
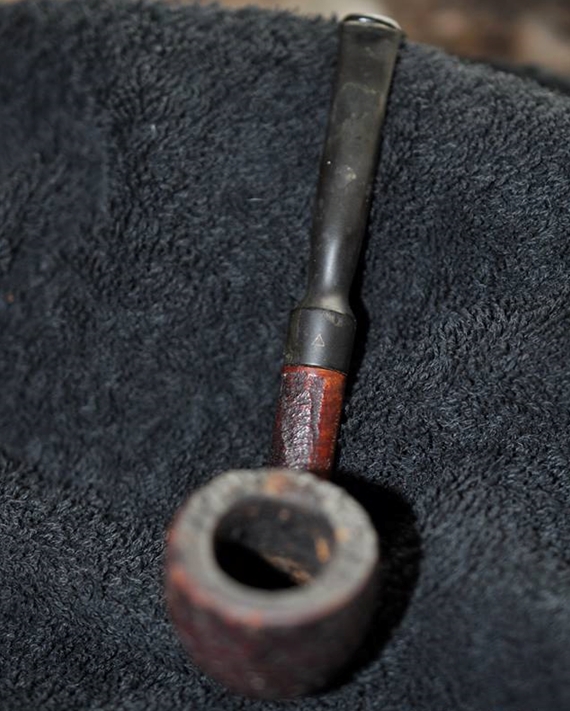
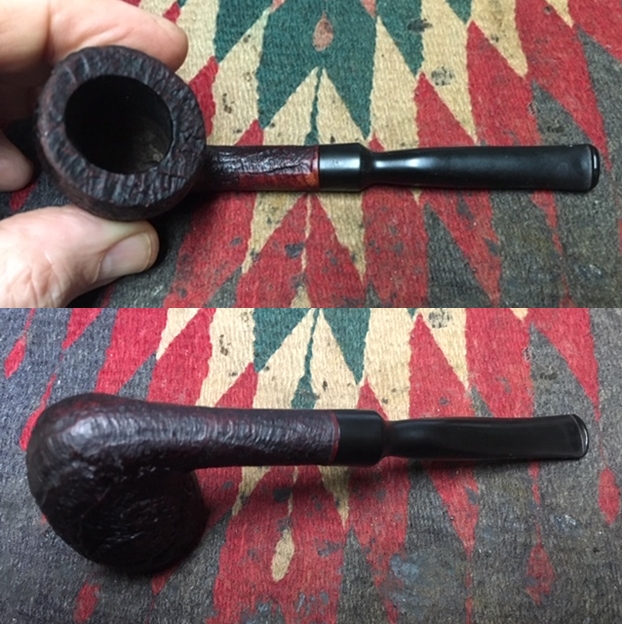
The next pipe on the table came to Jeff and me from a fellow in Michigan who picks up pipes he thinks we would be interested in and sells them to us. This one is a sandblast pickaxe shaped pipe that reminds me a lot of different Stanwell shapes that I have worked on. It has a definite Danish flair to it. As I look at it I have to admit that I have no idea about the brand or where it came from other than Denmark but I am sure I will figure it out when I do a bit of research on the brand. The pipe is stamped on a smooth panel on the left side of the shank and reads Tabago over Handmade in Denmark. It has a really nice sandblast finish around the bowl but the finish is very dirty and dusty. The rim top is covered in a thick coat of lava that almost fills in the grooves of the blast. The bowl has a thick cake and a lot of tobacco debris stuck in the cake. It is hard to know if the inner edge of the rim is in good condition because of the lava and cake. The outer edge looks very good. The stem is lightly oxidized but it has straightened out over time. There are tooth marks on both sides near the thin button. There are also nicks and marks on the top and underside near the middle of the stem. The saddle portion looks good. There is a triangle logo on the top of the saddle. Jeff took the following photos before he started his clean up.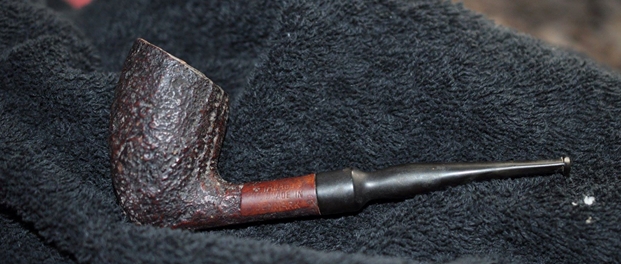
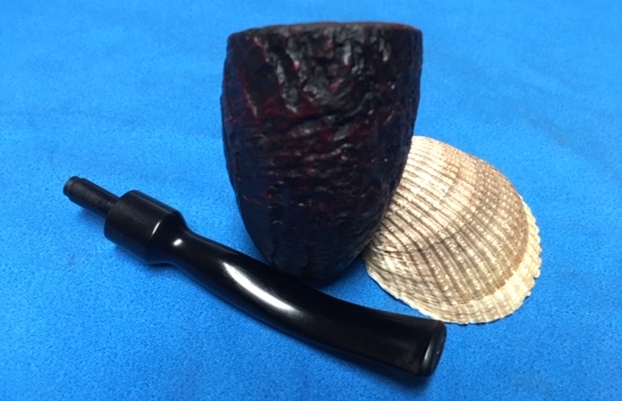
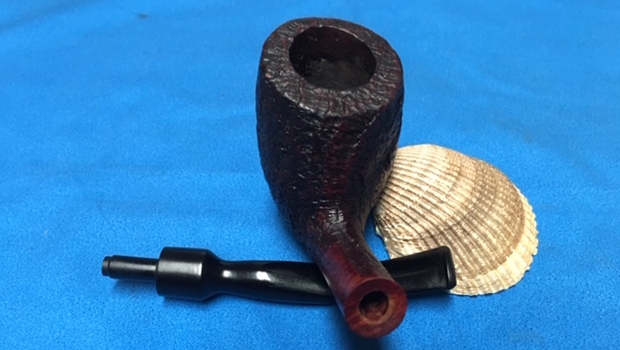
 Jeff took a photo of the rim top and bowl to show the condition of the pipe. It must be an amazing smoker with a thick cake and buildup of lava like that. It was definitely someone’s favourite pipe!
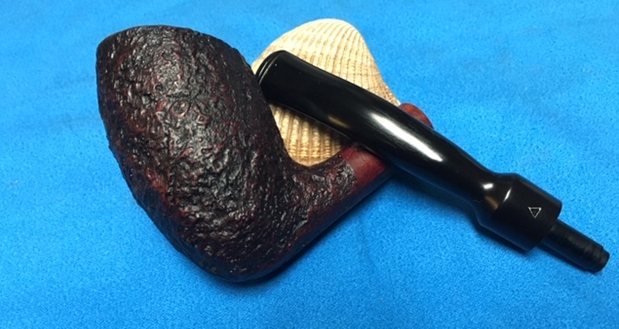
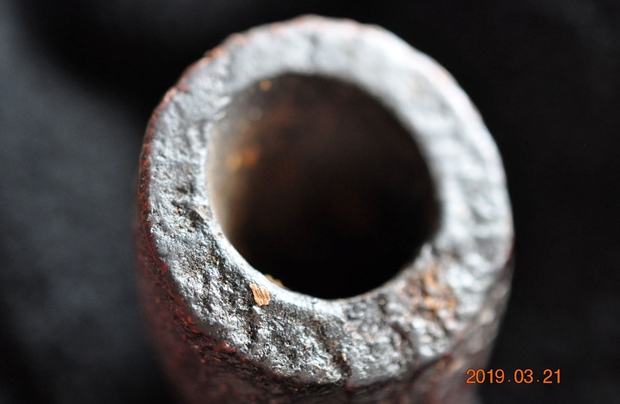 He took photos of the heel and the sides of the bowl to give a clear picture of the remarkable sandblast finish on the pipe.
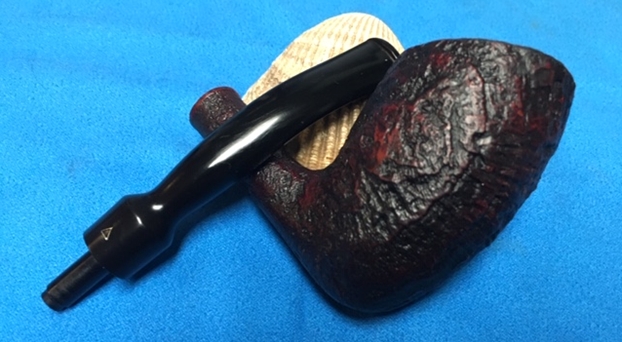
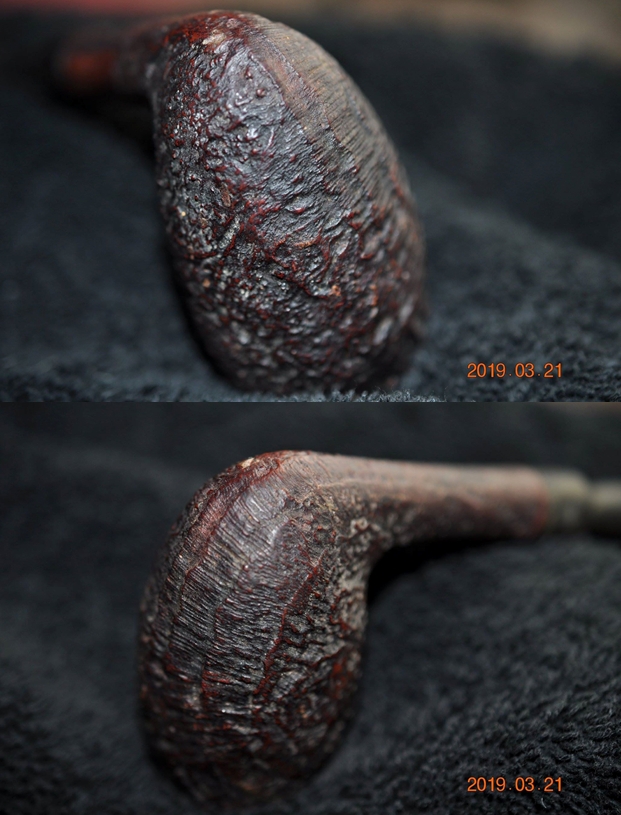 The next two photos try to capture the stamping on the shank and the logo on the stem. The stamping on the shank curves around the shank a bit so it is hard to capture all of it. The first photo shows the last line of the stamp. Above that are two more lines curved on the shank – Tabago over Handmade in… The second photo captures the gold triangle logo.
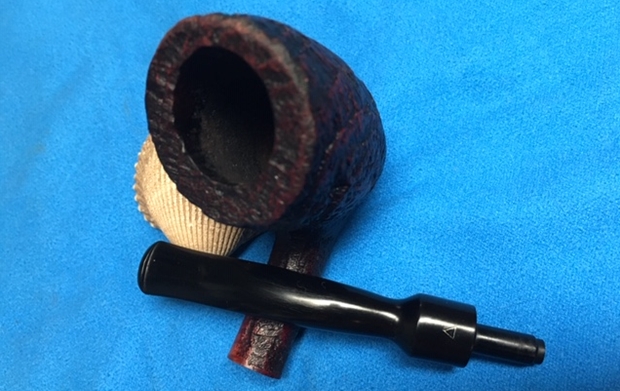
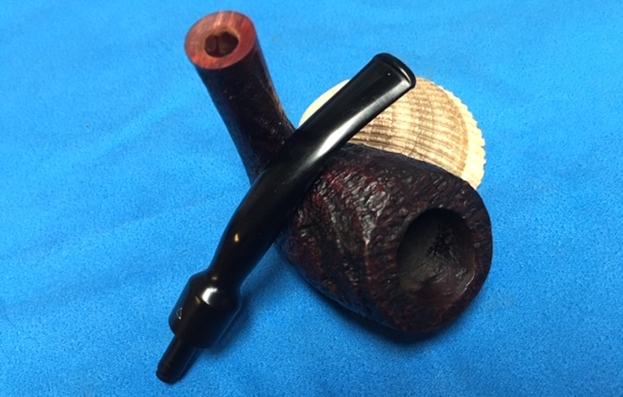
 The last two before photos show the condition of the stem. You can see the tooth marks on both sides of the stem near the button. You can also see the light oxidation on the stem. It is dirty but very repairable.
 I decided to do some research on the brand before I did my part on the restoration work. This is the first Tabago pipe I have worked on so I wanted to find out about the brand. I turned to the pipephil site on logos and stamping to get an overview on the brand. The site always gives a quick synopsis of a brand if it included in the list (http://www.pipephil.eu/logos/en/logo-t2.html). I have included a screen capture of the section on the site about the brand. From there I learned that there were two carvers that used the brand name. The first was a Norwegian carver named Bard Hansen who created from his shop in Norway and did not include a logo on his pipes. The second one was a former Stanwell employee who stamped his pipes Tabago Handmade in Denmark. He carved for a short period in the 1970s and his pipes always had a triangle logo on the stem. I had found the first clue to this pipe’s origin. I now knew it was carved by a “former Stanwell employee” (no name is given) and it was carved in the 1970s. That was progress.
  I turned then to Pipedia (https://pipedia.org/wiki/Tabago) to see if they included more information about the brand. Fortunately they did. They confirmed that the brand name had been used two times – once by Bard Hansen and once by the Stanwell employee. I quote the text in full below:
The name Tabago has been used twice:
1 Torben Hetler, a former Stanwell employee who first produced the Torben Dansk line of pipes, is credited with also producing a line of Tabago pipes stamped “Handmade in Denmark” in the early 1970’s. These pipes were sold next to other manufacturers brands (Danmore, Torben Dansk e.a.) in the 1972 cataloge of Dan Pipe (originally named “Danske Pibe”), a pipe and tobacco mailing enterprise established by Heiko Behrens. Among other lines Tabago produced a pipe stamped “Cap Belton” and another stamped “Gigant”. Little is known about Tabago pipes, which were produced for only a few years, but Dan Pipe even today refers to the Tabago and Torben Dansk lines as connected (Torben Dansk/Tabago) so at least this much is known.
Tabago’s logo is an outlined equilateral triangle on the stem. Often the pipes sport very tall bowls, fitting with the Dan pipes of that era, and some were marked with shape numbers.
2 Tabago is the more recent brand of Bård Hansen, Norway’s sole contemporary pipemaker. He learned his craft for a while at G. Larsen’s pipe factory Lillehammer in Lillehammer and is working now from his workshop situated at Bryggen in the centre of Bergen.
Now I knew what I was dealing with. The pipe was made by Torben Hetler (the former Stanwell employee of pipephil’s site). They were made in Denmark by a carver who first made the Torben Dansk line of pipes. The pipe I had in hand was made in the early 1970s and the brand was included in a 1972 Dan Pipe Catalogue. Tabago also produced the Cap Belton and the Gigant pipes. Dan Pipe links the Tabago and Torben Dansk lines. I did a few more searches based on the name Torben Hetler and the Torben Dansk pipe lines but there was little information to add to the above summaries.
Armed with that information I turned to the bowl that Jeff had prepared for me. He had reamed the bowl with a PipNet pipe reamer and followed up with a Savinelli Fitsall pipe knife to remove the cake. He scrubbed out the mortise and the airway in the shank and the stem with alcohol, cotton swabs and pipe cleaners. He scrubbed the exterior of the bowl, rim, shank and stem with a tooth brush and Murphy’s Oil Soap to remove the oils and tars on the rim and the grime on the finish of the bowl. He rinsed it under running water. He dried it off with a soft cloth. He was able to remove lava build up on the rim top and you could see the great condition of the bowl top and edges of the rim. There was still some darkening to the rim top toward the back of the bowl. He soaked the stem in Before & After Deoxidizer to remove the oxidation. I took photos of the pipe before I started my work on it.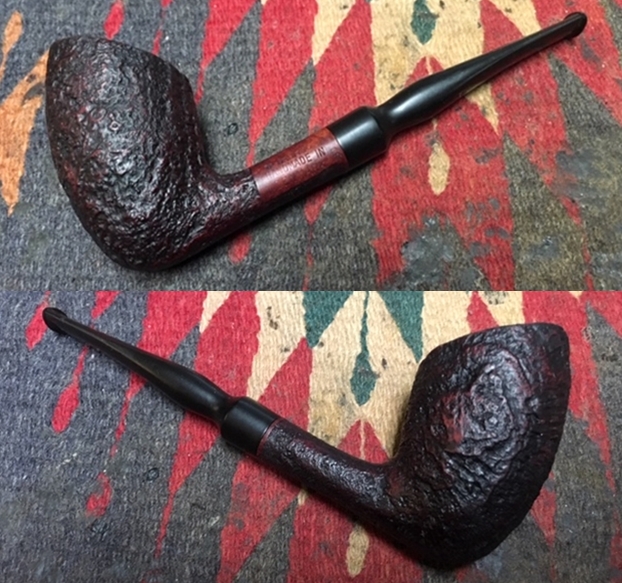
 I took a close up photo of the rim top to show the condition of the bowl and rim after Jeff had cleaned up the grime and lava. Both the inner edge and the outer edge of the rim look good. The stem photos show that the oxidation is gone. The light tooth chatter is hard to see but I should be able to sand it out quite easily. The tooth marks on the top and underside will take a little more work to remove.
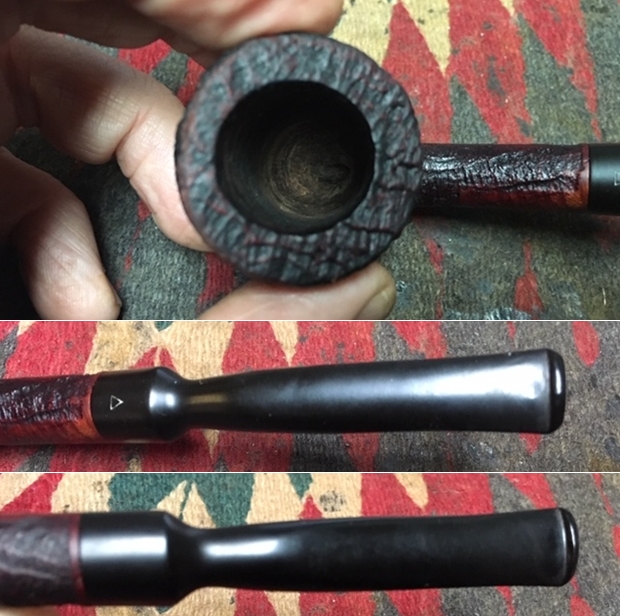 I also took a photo of the stamping on the left side of the shank showing how the stamping was laid out. I too was unable to capture the entire stamp around the curve.
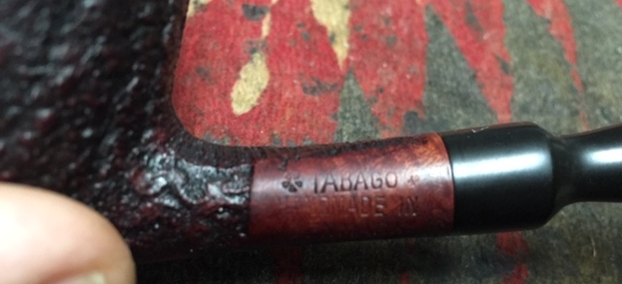 I decided to take care of the tooth marks and the bend in the stem first. I decided to do it with a candle instead of my heat gun. I am in the process of getting ready for a trip so I did not want to take the gun out and set it up. I went with the candle as the heat source. It works well but you just have to be careful not to burn the vulcanite. I painted the tooth marks on both sides of the stem with the flame and was able to raise them quite a bit. The ones on the top side disappeared and the ones on the underside were significantly shallower. I put a pipe cleaner in the airway and held the stem over the votive candle to soften the vulcanite. Once it was soft I bent the stem over a small jar to give it the curve I wanted so that it was level with the rim top when held in the mouth.
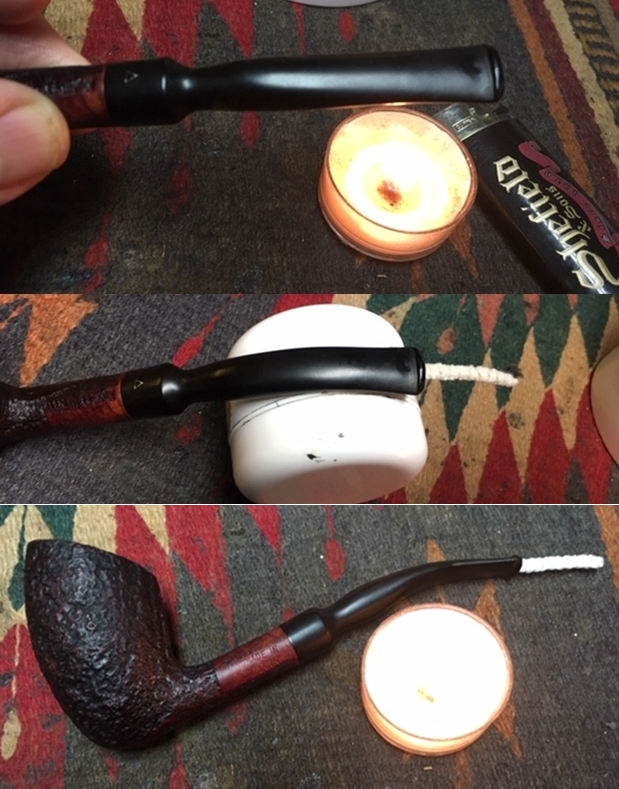 I have really come to appreciate many of Mark Hoover’s Before & After Products. One of my favourites is his Restoration Balm. I worked some of the Balm into the sandblast finish of the briar with my fingertips to clean, enliven and protect it. I further worked it in with a horsehair shoe brush to make sure all the crevices of the blast received the benefit of the balm. Once I was happy with the coverage of the balm I let it sit for a little while and then buffed with a cotton cloth to raise the shine. The Restoration Balm really makes the pipe take on a rich glow.
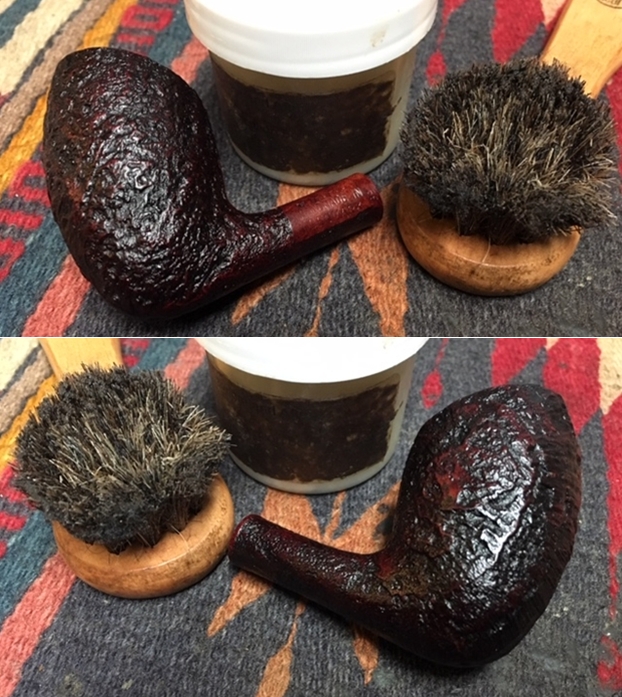
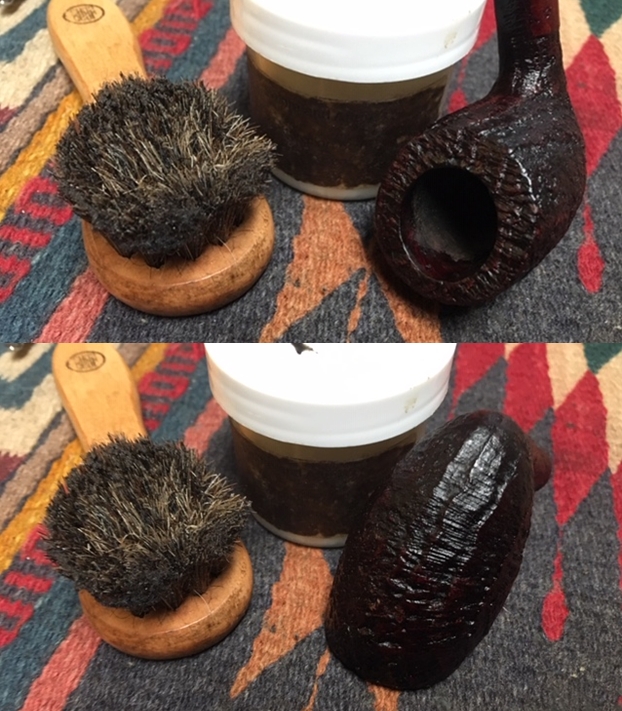
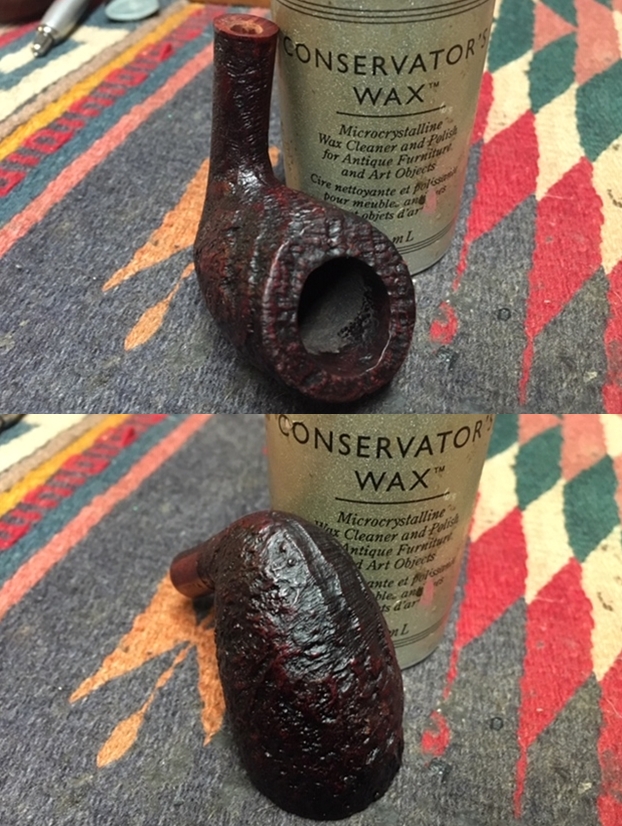
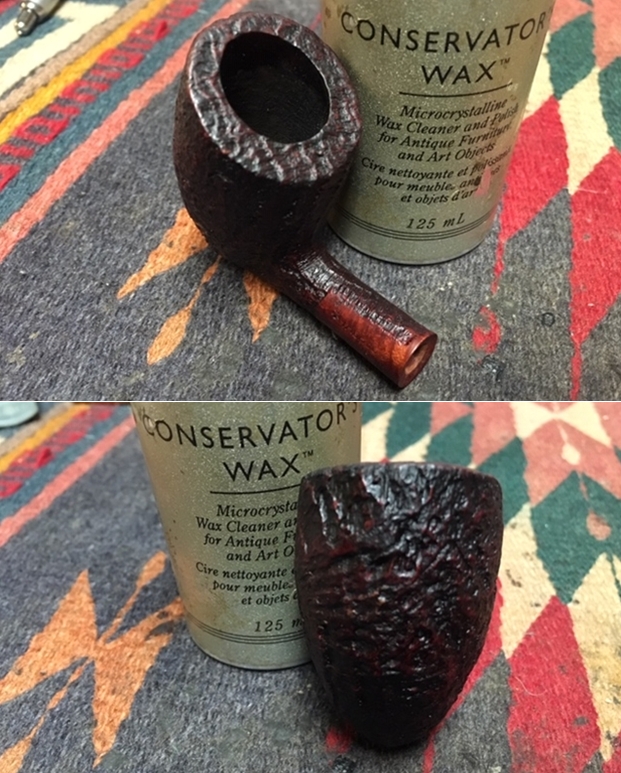
 I gave the sandblast finish several coats of Conservator’s Wax and buffed it off with a clean cotton buffing pad. The next photos show the bowl at this point in the process.
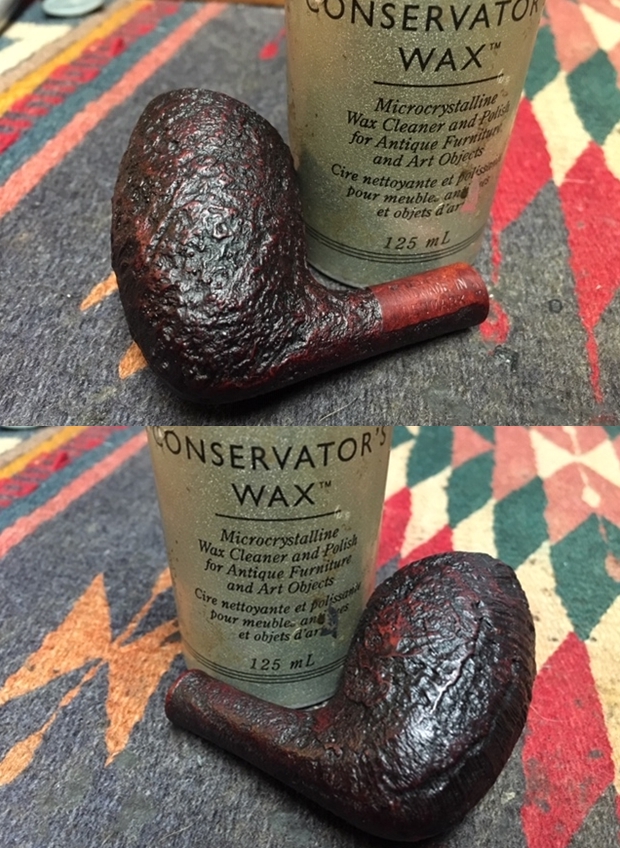
 I set the finished bowl aside and turned to address the issues with the stem. I used a folded piece of 240 grit sandpaper to blend the tooth marks and chatter into the surface of the stem. Once the surface was smooth I sanded out the scratch marks and started the polishing of the stem with a folded piece of 400 grit sandpaper. I wiped the stem down with Obsidian Oil.
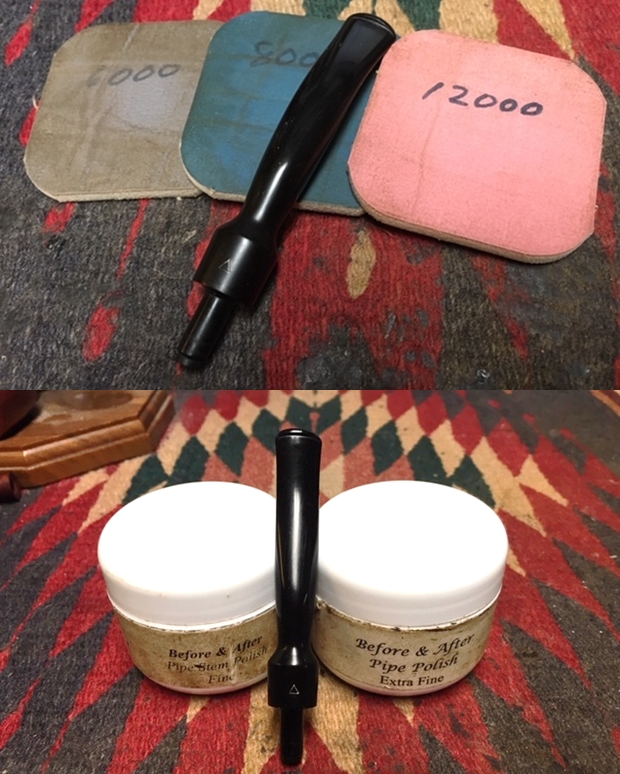
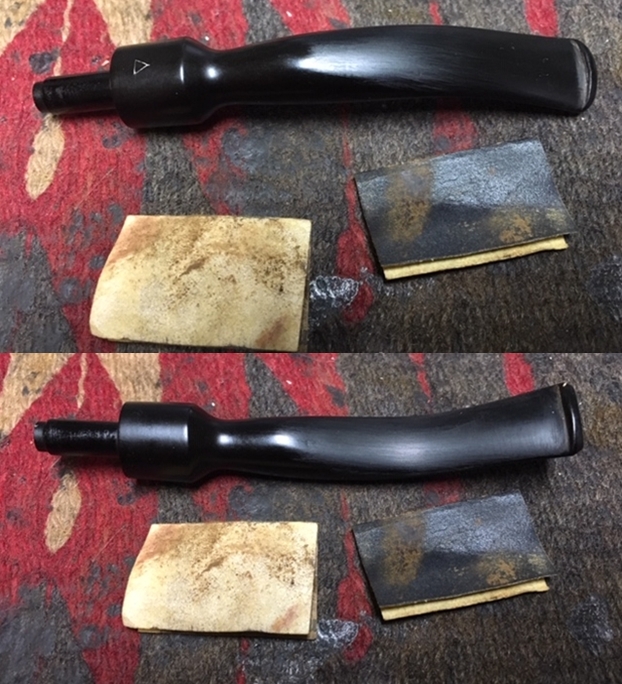 I polished the stem with micromesh sanding pads – wet sanding it with 1500-2400 grit pads and dry sanding it with 3200-12000 grit pads. I wiped the stem down with Obsidian Oil after each pad. I polished it with Before & After Pipe Polish – both Fine and Extra Fine and gave it a final coat and set it aside to dry.
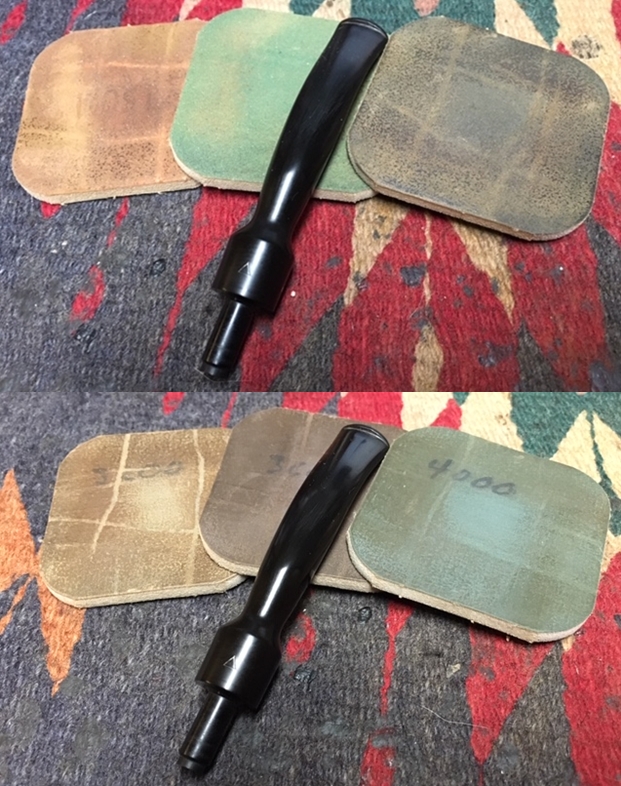
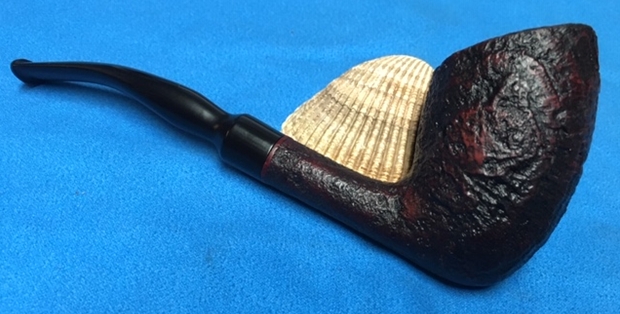
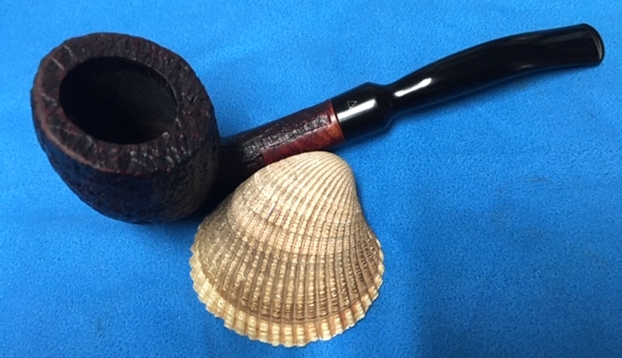
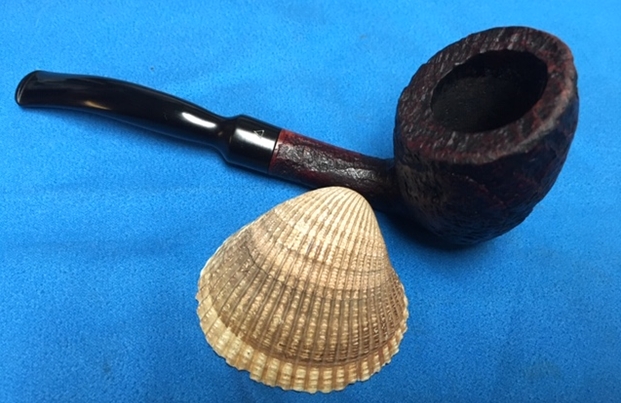
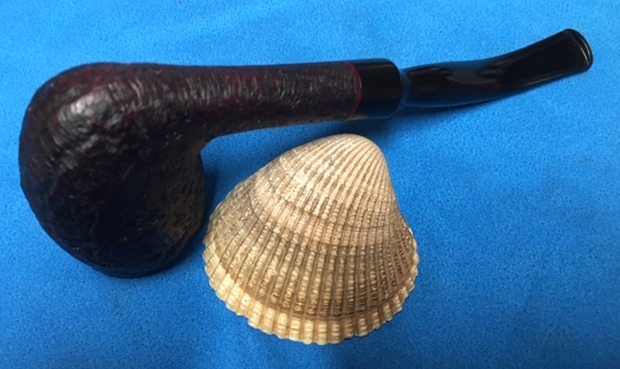
 I put the stem and bowl back together and buffed the stem with Blue Diamond on the buffing wheel. I gave the bowl several more coats of Conservator’s Wax and buffed the stem with multiple coats of Carnauba Wax. I buffed the bowl and stem with a clean buffing pad until there was a rich shine then hand buffed it with a microfiber cloth to deepen the shine. This Tabago Pickaxe sports a classic Danish shape that combines elements that I have seen in Kriswill and Stanwell pipe. The rich contrasting brown stains makes the grain stand out through the sandblast finish. It is a proportionally well carved pipe. The polished black vulcanite stem had a rich glow. The finished pipe is a beautiful pickaxe that feels good in the hand and the mouth. Have a look at it with the photos below. The dimensions are Length: 5 1/2 inches, Height: 2 inches, Outside diameter of the bowl: 1 7/16 inches, Chamber diameter: ¾ of an inch. Since I am traveling for a bit for the next three weeks this one will go on the store once I return. If you are interested let me know. Thanks for walking through the restoration with me as it was a pleasure to work on.