Blog by Steve Laug
Once I finished working on those Ehrlich meerschaum pipes for my friend I was wondering what I wanted to work on. You may not have that issue but you have to remember that I probably have over 500 pipes to choose from. I went through some of the boxes of pipes – British wood? No! Irish pipes? No! I have been pretty well cured of Irish seconds so I have culled the few of those out of the boxes. I looked at a bunch of meerschaum pipes that I have to work on and just shook my head. What was I going to choose and what caught my eye? In one of my drawers of pipes to work on I found a bag of older briar from all over the world. Some American, some French, some English and a few unsmoked pipes. Some of those caught my eye. I walked away and worked on some wall repairs in upstairs bathroom. I have been chipping away at the honey do list! While I worked I mentally went through the boxes.
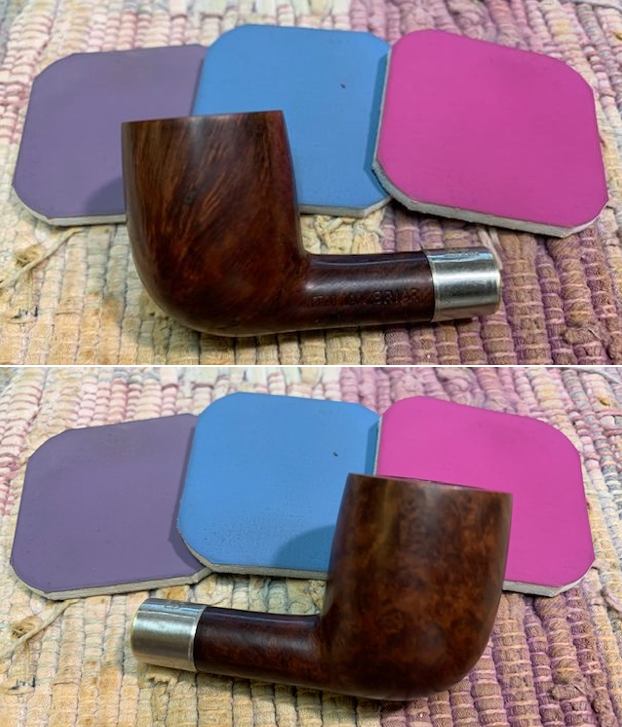
This morning while I watered the garden and sat on the porch with a hot coffee I made up my mind. What lot do you think I chose? I think you already know. It would be the bag of older pipes. That bag held a lot of mysterious and interesting older pipes. 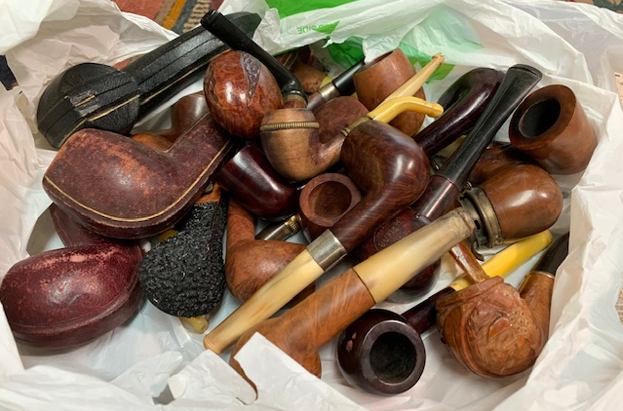 I poured the bag out on my desk top and took a photo. You can see the options that were on the desk before me. I picked through them all and looked them over. There are a fair number of French pipes and even two or more C.P.F. pipes. If you have followed rebornpipes long you know how much I like C.P.F. pipes so you may well think I would choose one of those to work on next. There were smoked and New Old Stock Pipes. There were older American made pipes and British made pipes. All in all it was a very unique lot of pipes that gave me a world of choices. So I ask you which would you choose next? What do you think I chose next? I am curious to know what you think. Certainly you can’t read my mind but you may have an inkling.
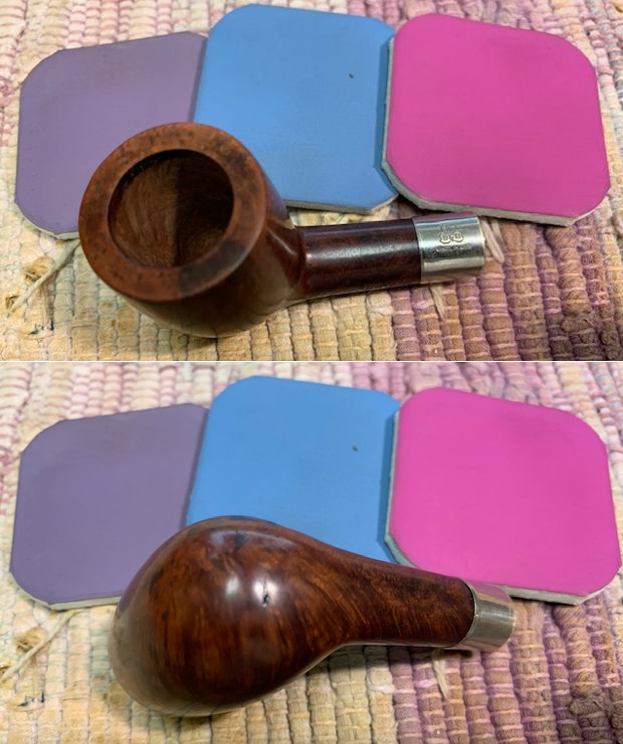
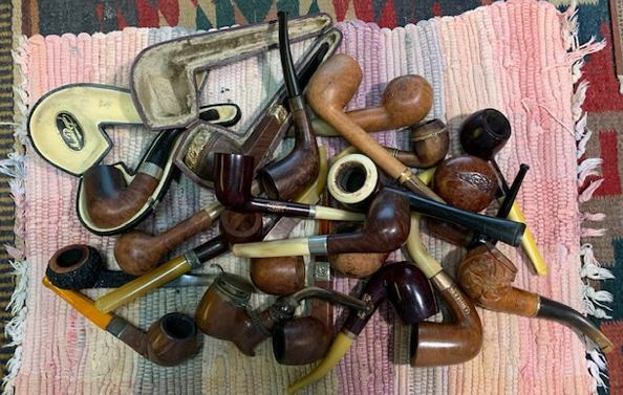 The first thing I did was separate out the NOS and unsmoked pipes from the lot. This included four different French Made pipes and one that was stamped KB&B on the nickel band. All had horn stems and all were well worth working on. All were shelf worn from sitting around for many years but all had clean bowls. All had some nicks and scratches in the bowls but all spoke to me. So which one should I work on? That is where my mind went. At least the number was less than the whole pile shown above.
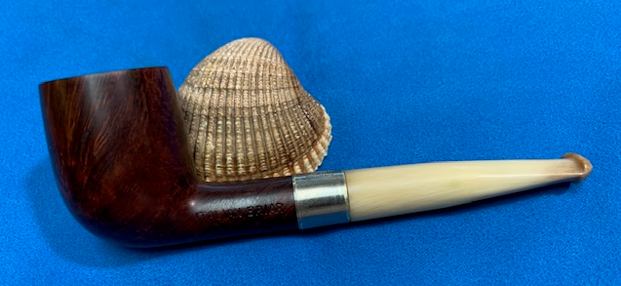
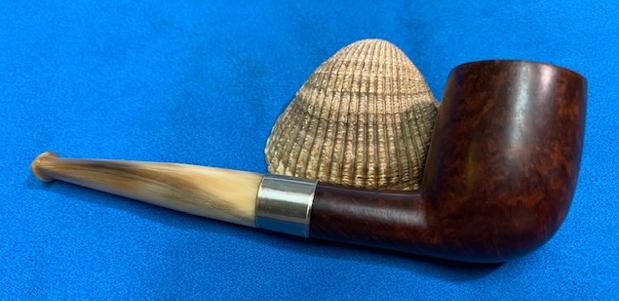
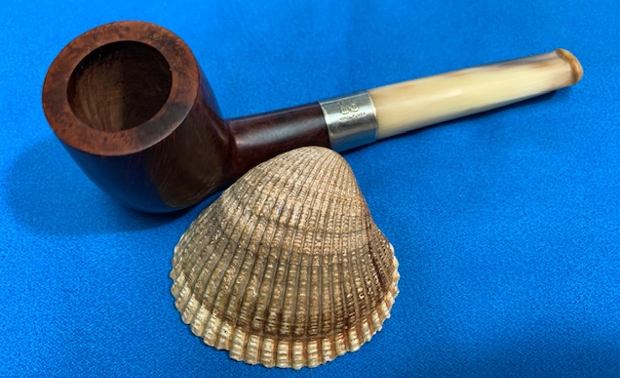
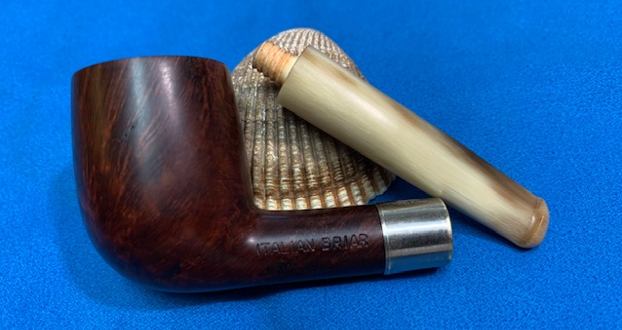
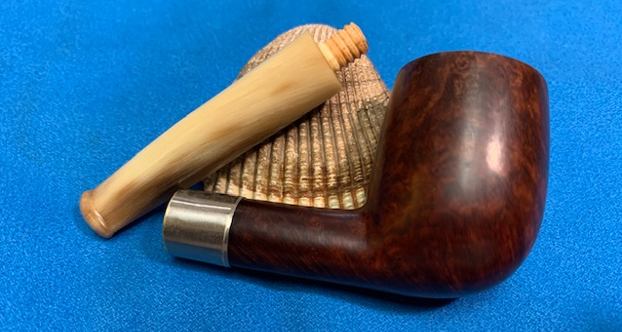
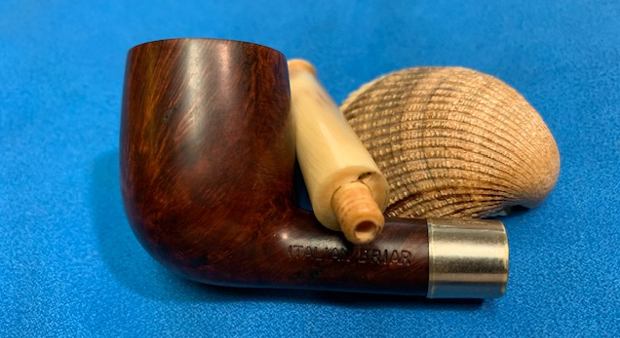
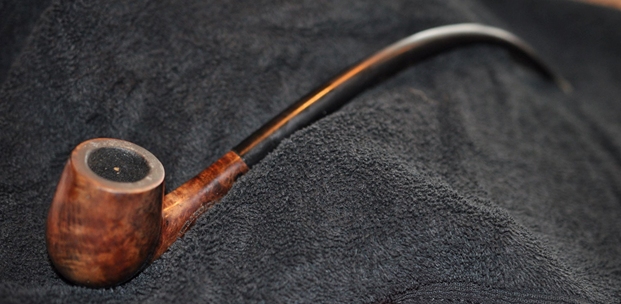
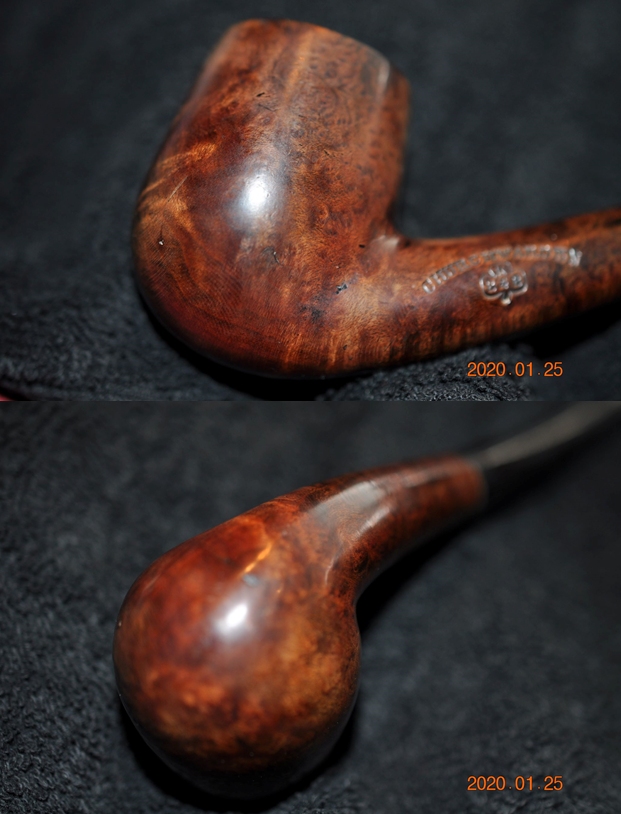
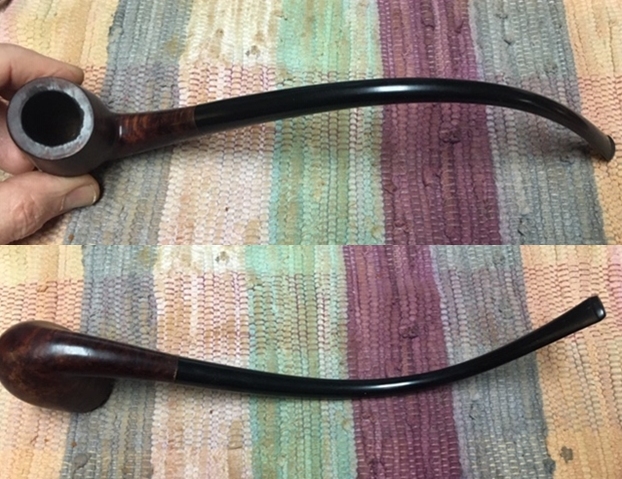
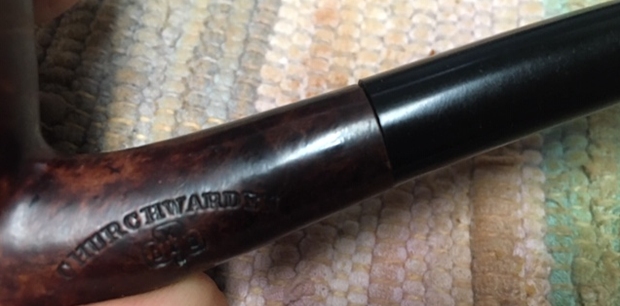
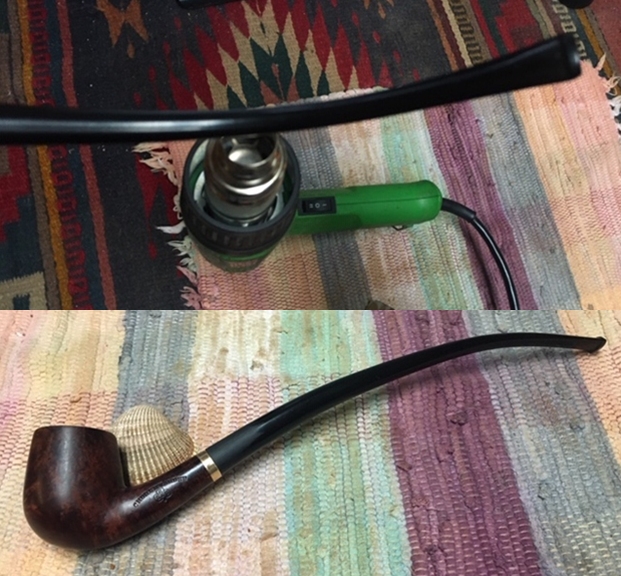
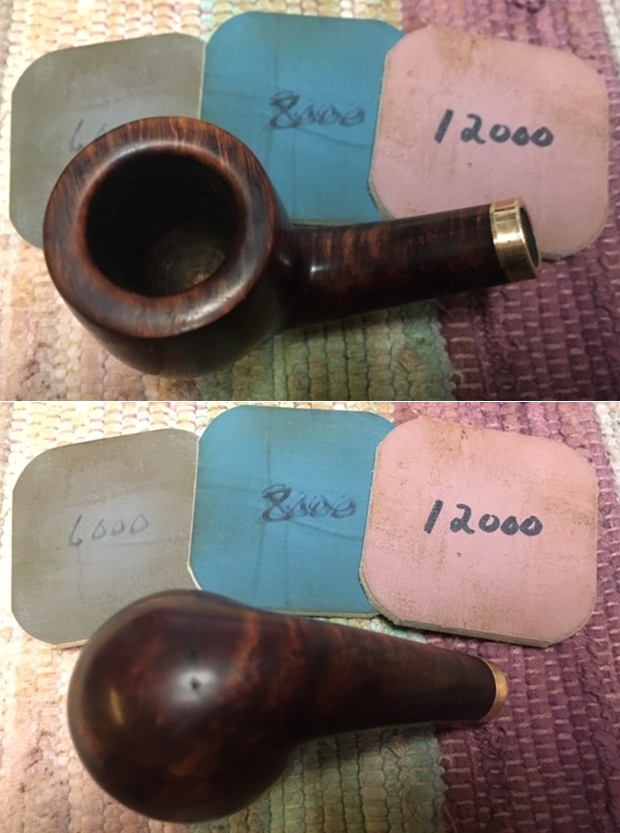
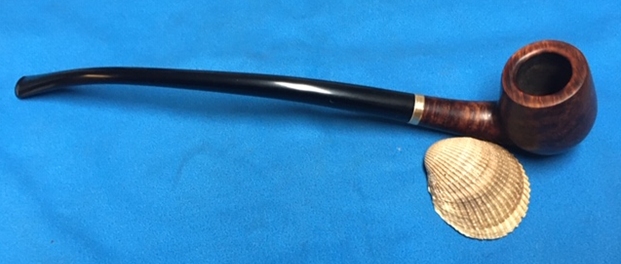
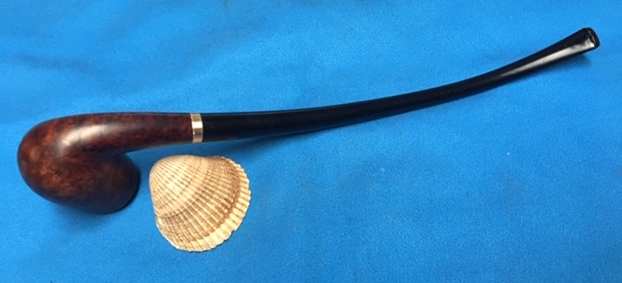
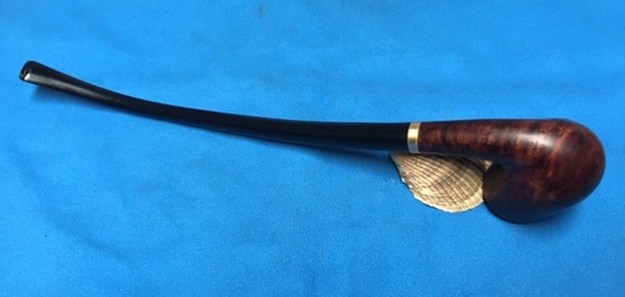
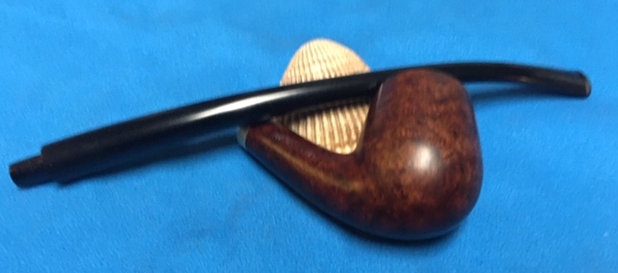
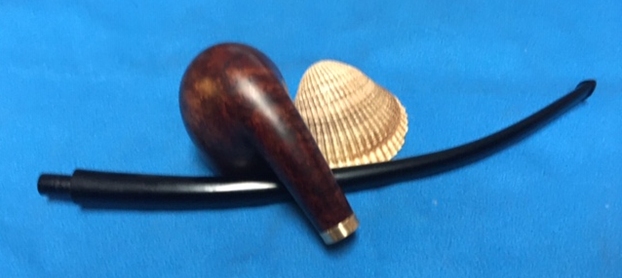
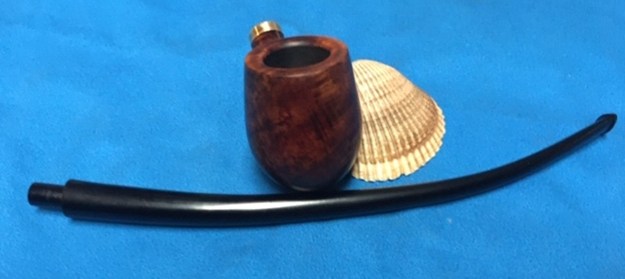
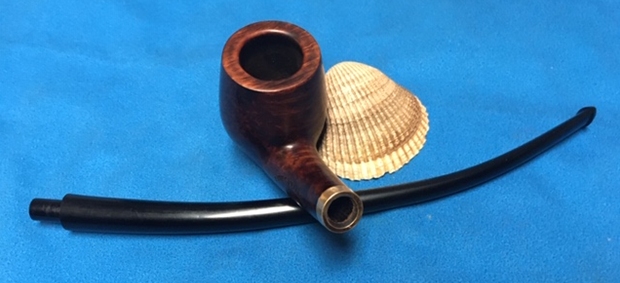
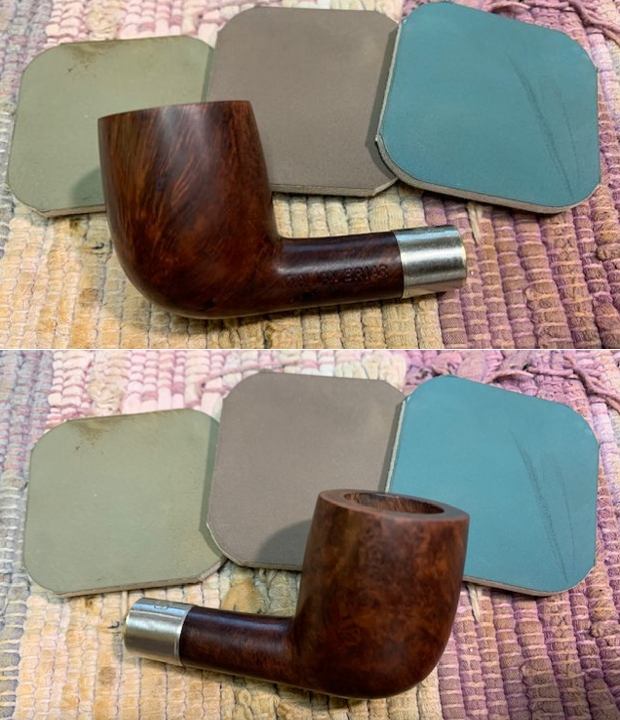
I sat at my desk and went through them all again. I finally made up my mind and chose the older KB&B pipe that probably came from the early 1900s by the look of it. It is an unsmoked, new old stock (NOS) Billiard that is stamped on the left side of the shank and reads ITALIAN BRIAR. There is no other stamping on the shank of the pipe. There is an oxidized silver coloured band that stamped with the KB&B cloverleaf [over] Nickel Plated. The finish is dark and dirty with some nicks on the heel of the bowl and left side of the heel. It was tired looking but under the dark and debris it was quite stunning. The stem is horn and the tenon is threaded bone. It is anchored in the stem and screws into a threaded mortise, strengthen by the band/ferrule. It is a beauty that I want to refresh and probably add to my own collection. Here are a few photos of the pipe before I did anything to it.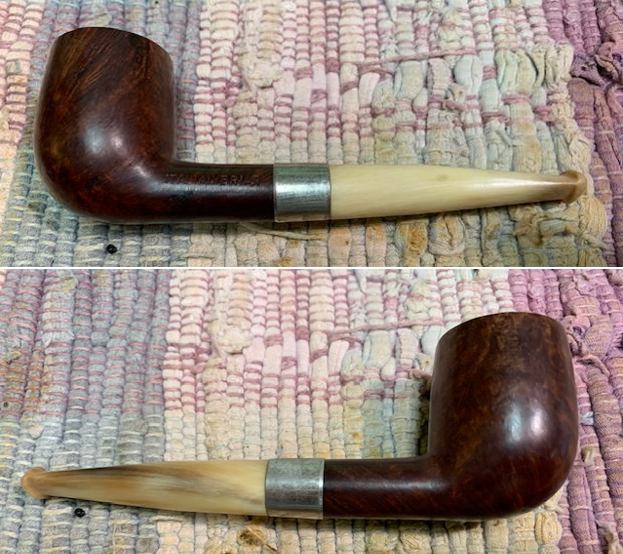
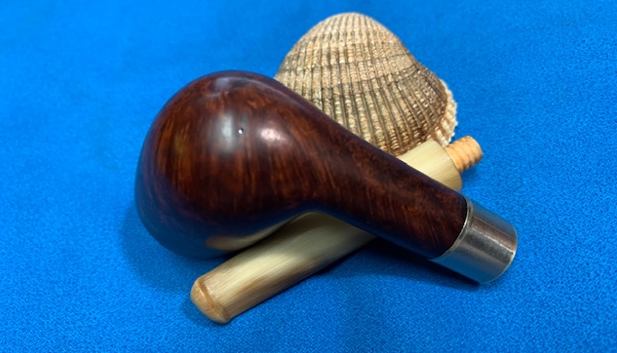
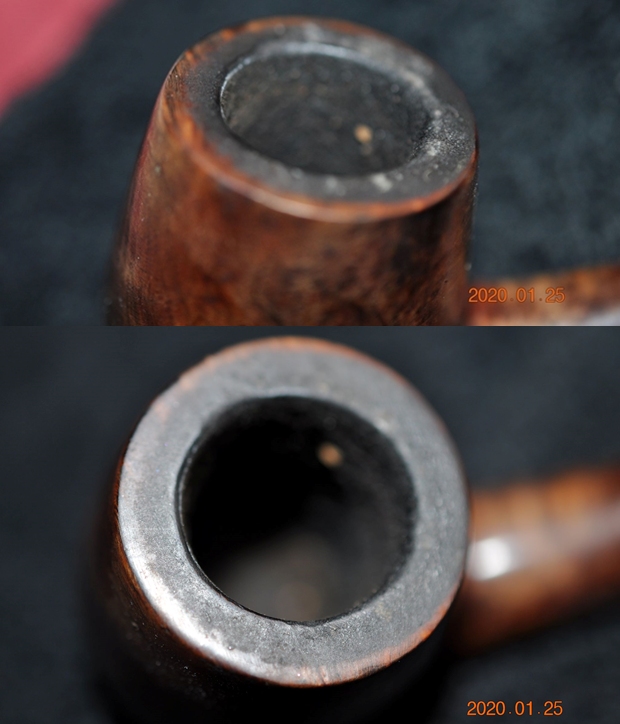
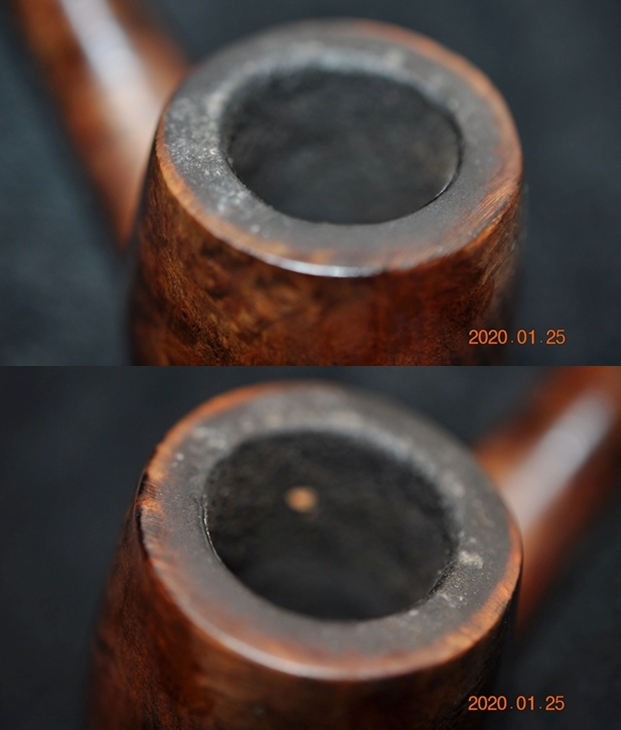
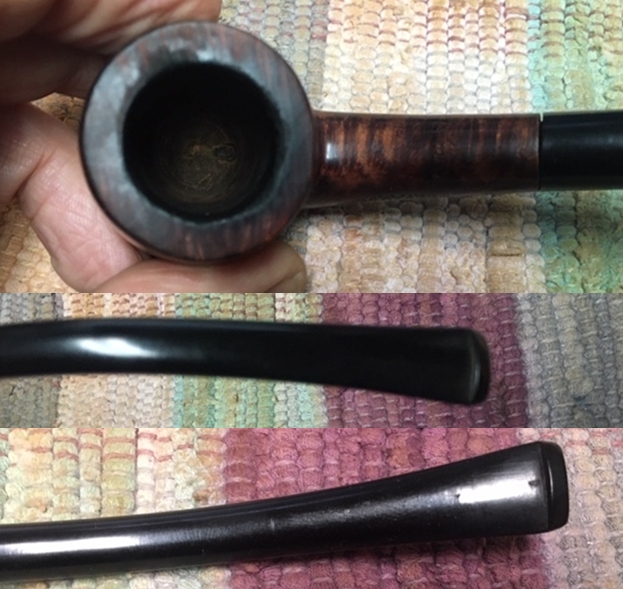
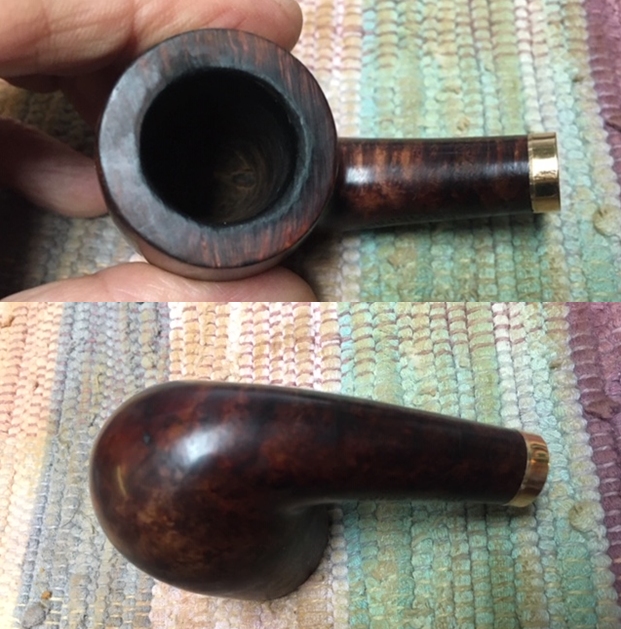
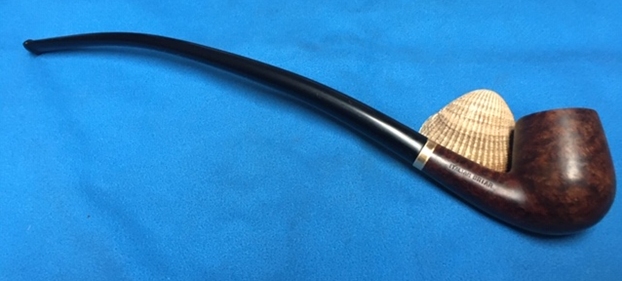
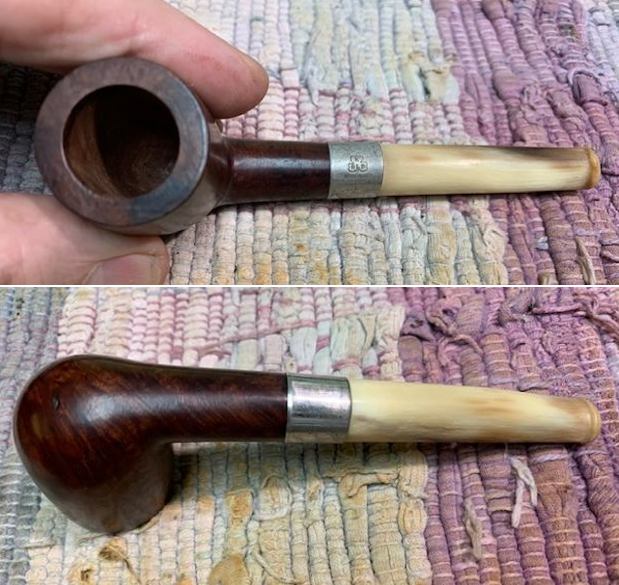 I took photos of the bowl and stem. You can see the unused condition of the bowl and the clean rim top and edges. The drilling is centered in the bottom of the bowl. It is a good sized bowl. The interior walls of the pipe are smooth and do not have drilling marks or checks or chips. The horn stem is in excellent condition and has a orific button.
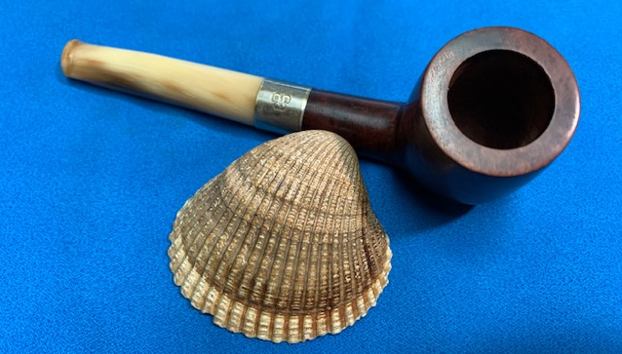
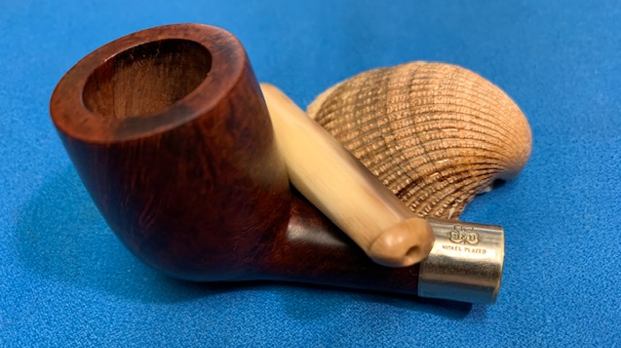
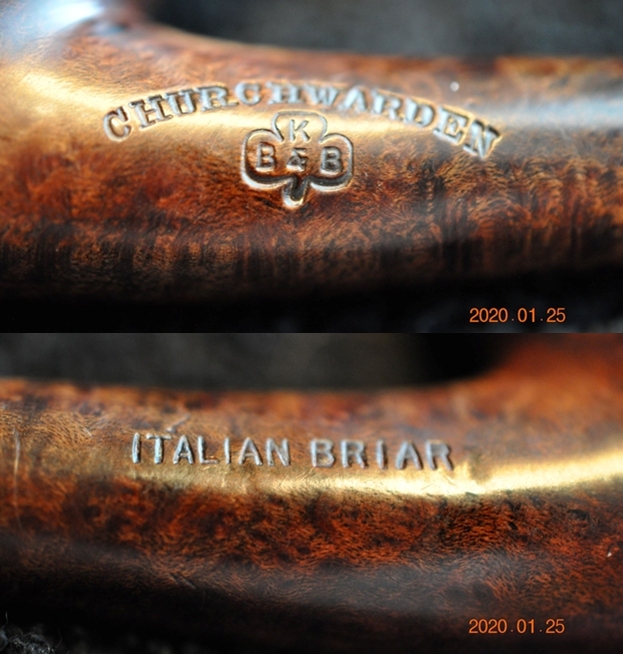
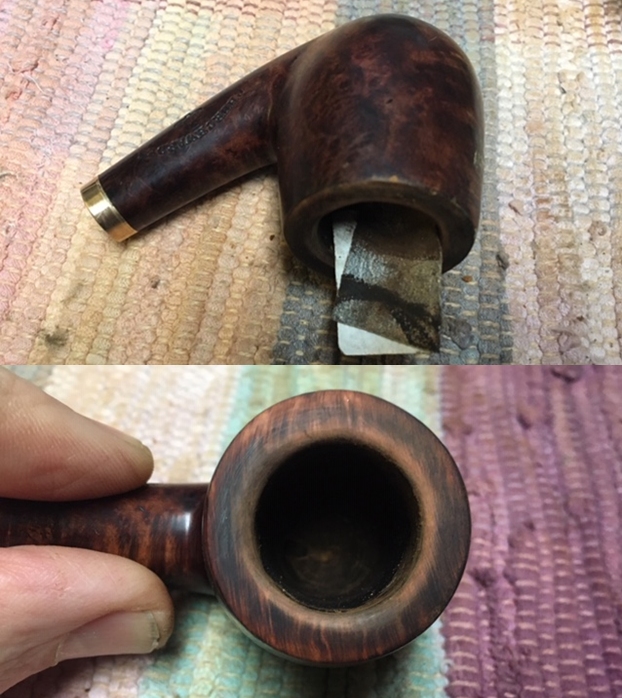
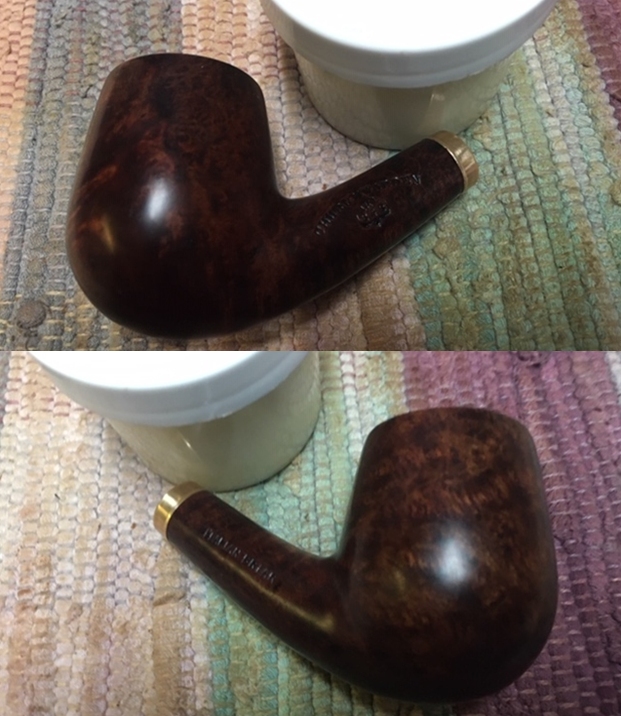
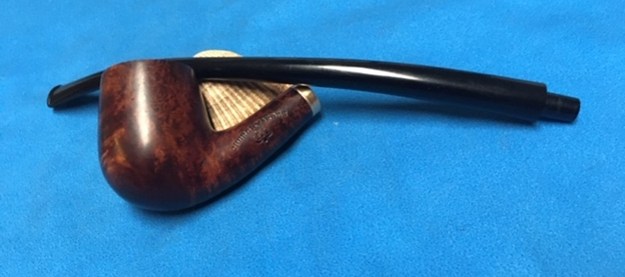
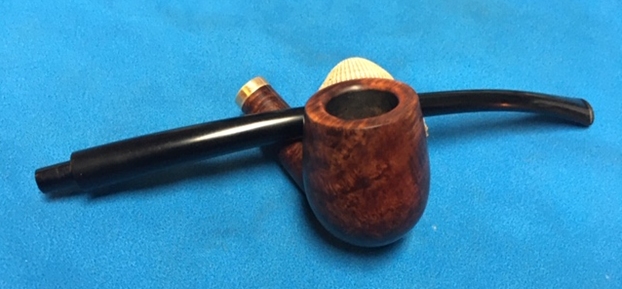
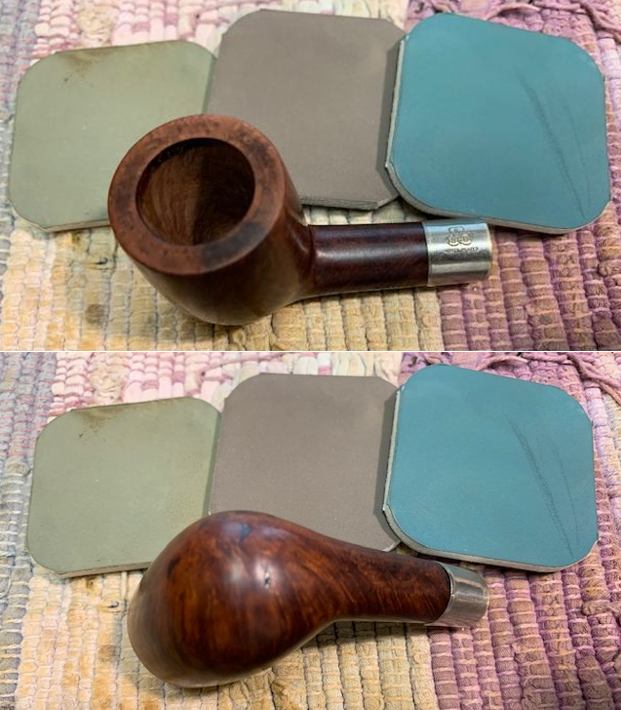
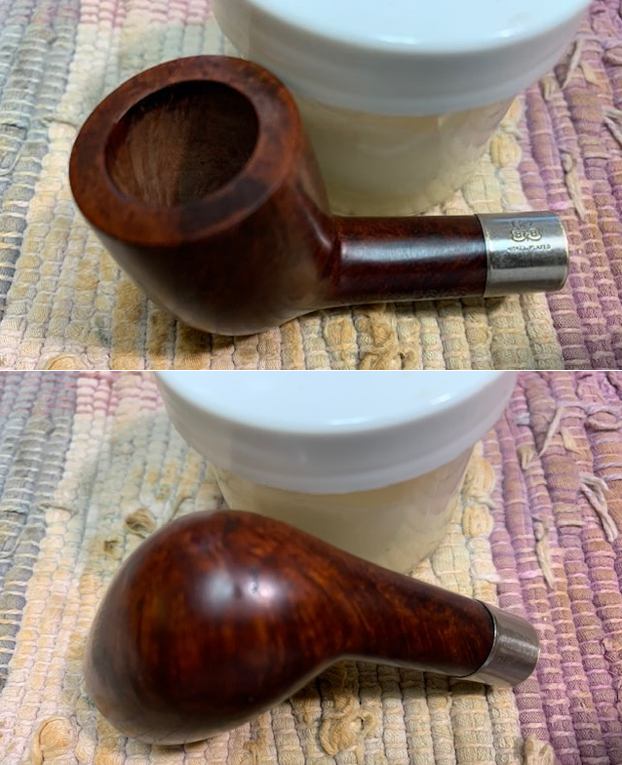
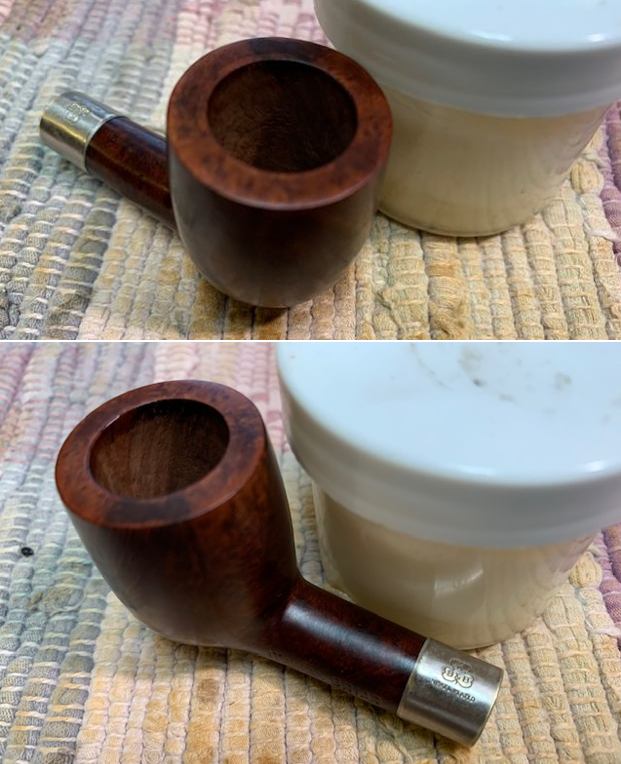
 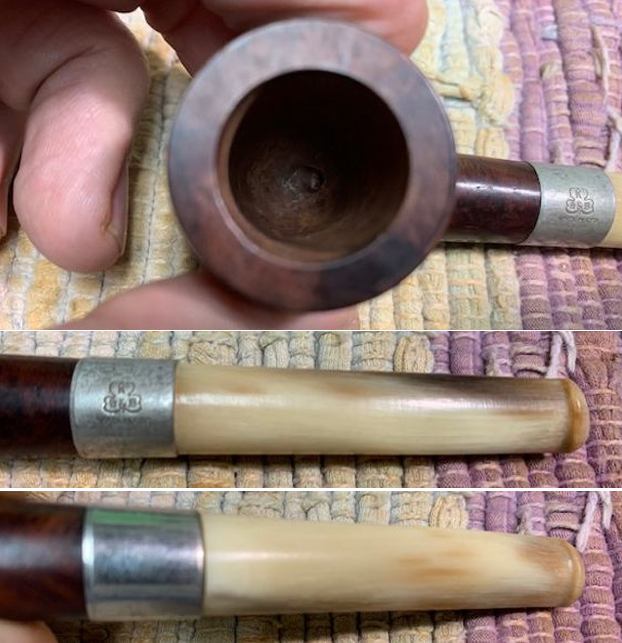 I took a photo of the stamping on the left side of the shank. It reads as noted above. You can see the stamping on the top of the band – the KB&B cloverleaf is clear and readable with the Nickel Plated stamp below.
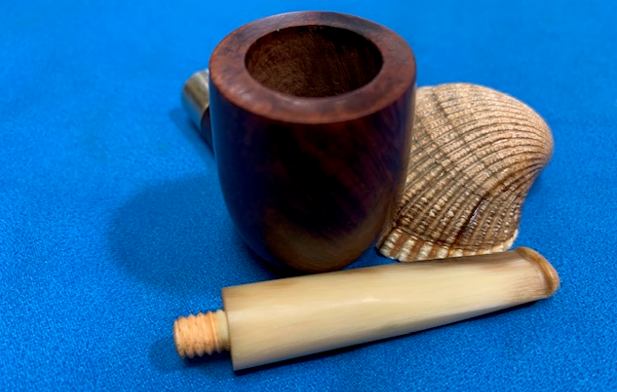
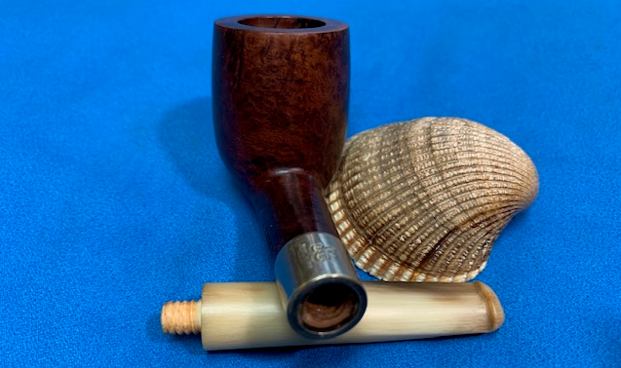
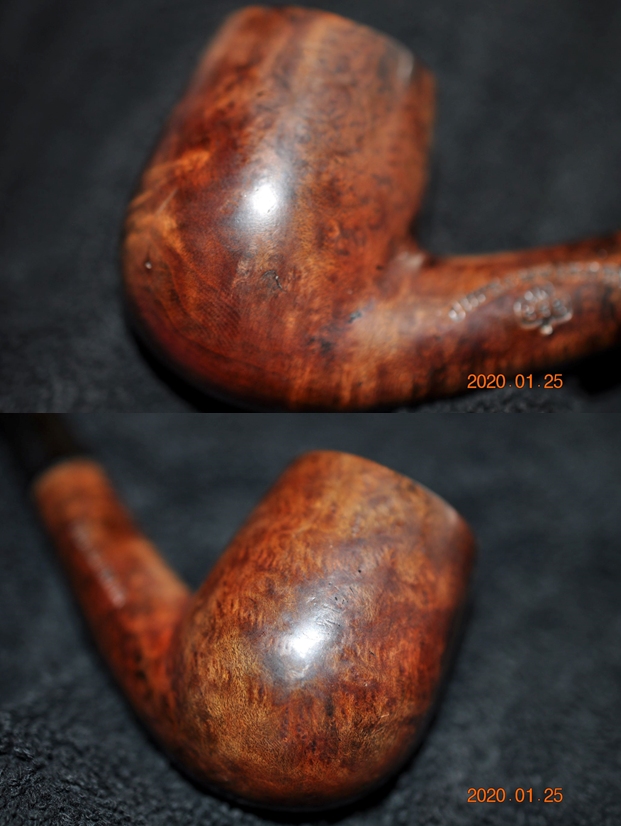
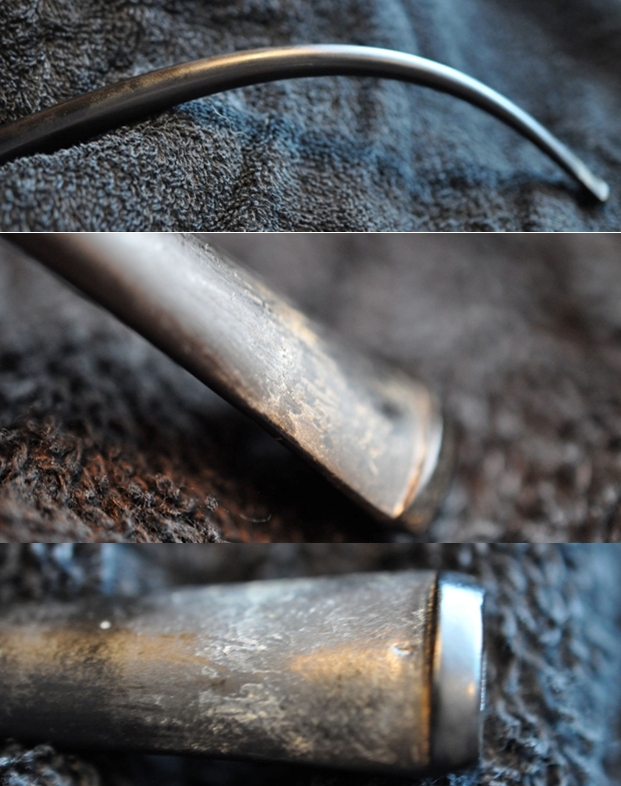
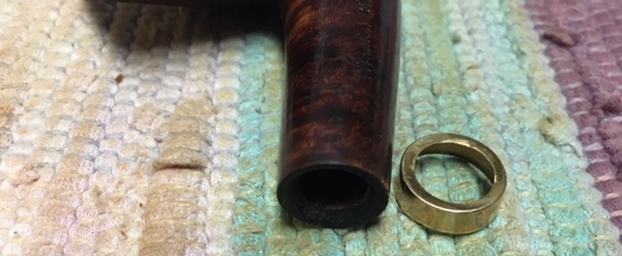
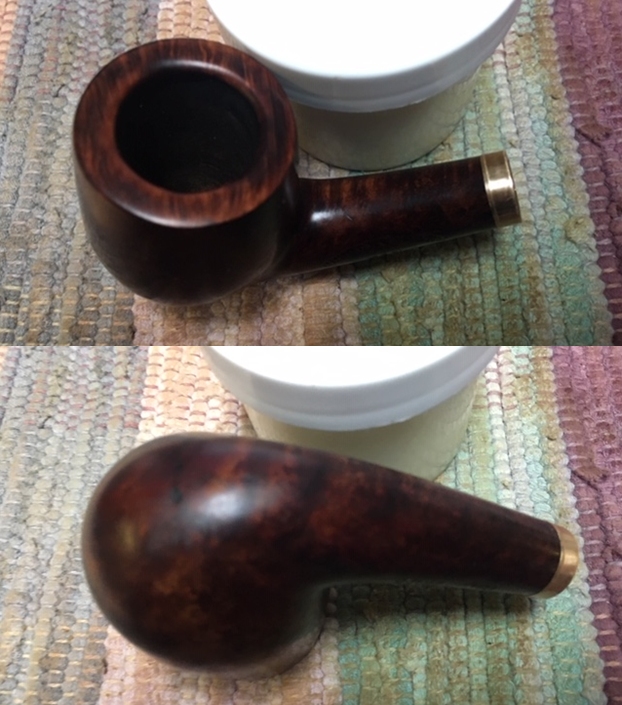
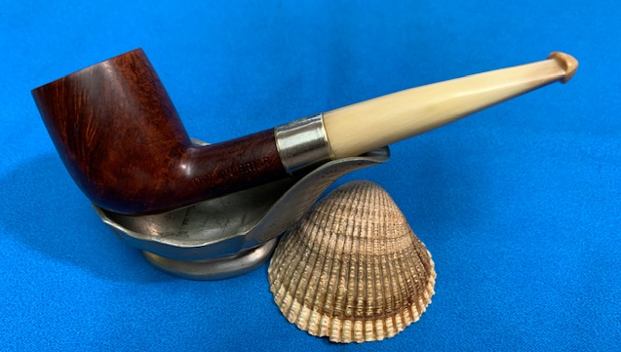
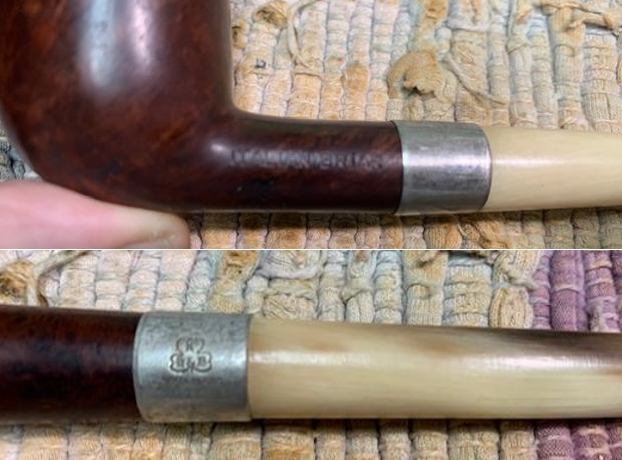 I removed the stem from the shank. You can see the brand new threaded bone tenon in the photo below. The proportions of this pipe are well done. The grain around the bowl is very nice.
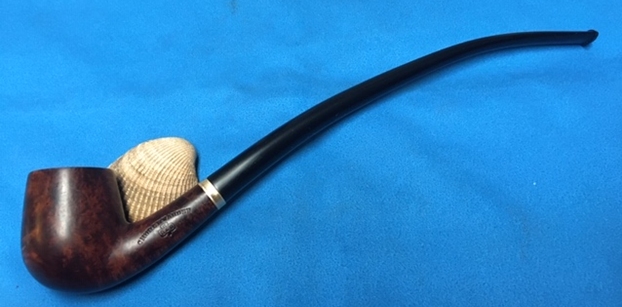
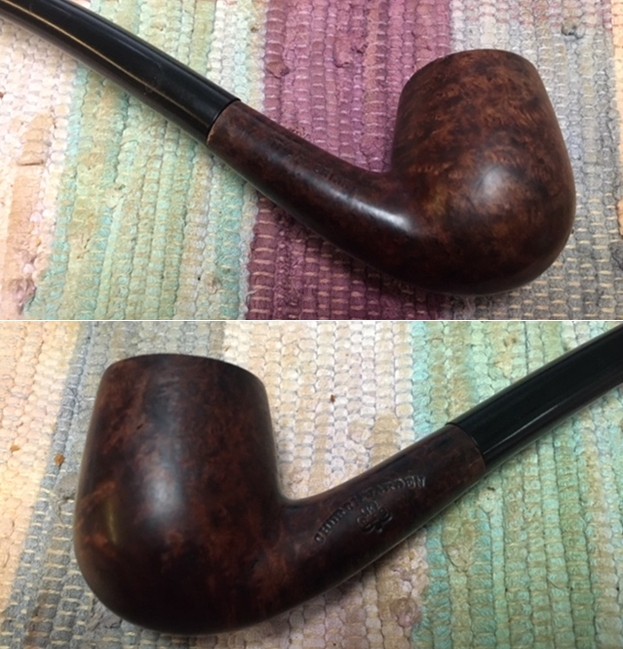
 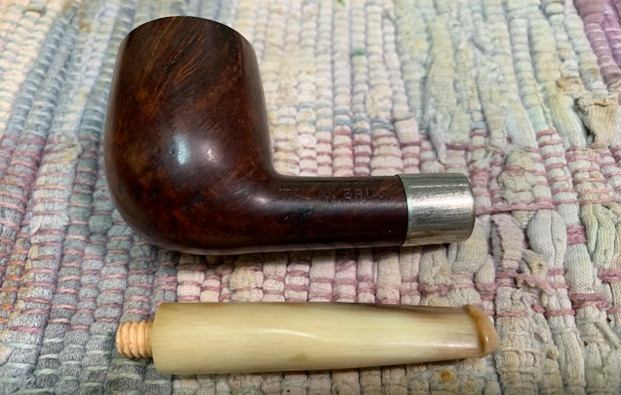 I turned to Pipedia for a review of the history of the brand and to try and pin down a date for this pipe (https://pipedia.org/wiki/Kaufmann_Bros._%26_Bondy). There is a great historical article there that is worth the read. I quote portions of that below.
Early History
Kaufmann Bros. & Bondy (KB&B), Kaywoodie has been making pipes since well before the Civil War – around 1851. They peaked in the late 1950’s along with most American Briar works. In the early 20th century, their pipes were the standard others were measured by, along with Sasieni, Charatan and Comoy’s. There were few other world-class American pipe-crafters (William Demuth Company, early L & H Stern). Their pipes were as good as any of the renowned British firms. Kaywoodie just did not merely produce quantity, they provided quality: in the 1920’s they bought the exclusive rights to some of the choicest briar fields in history, hauling out 250 year-old roots the size of 27″ TVs and fashioning masterpieces out of this spectacular-grained ancient briar…
Early KB&B (non Kaywoodie)
Kaywoodie was the name a pipe offered by Kaufmann Bros. & Bondy Company (KB&B), first appearing in February of 1919. The Dinwoodie pipe, also by KB&B, appeared in November of 1919. Other KB&B brandings included Ambassador, Heatherby, Kingston, Langley, Melrose, Hollywood, Paragon, Borlum, Sicilla, Cadillac, Capitol Extra, Times Square and Kamello. Sometime before 1924, the Dinwoodie had been discontinued and the Kaywoodie name was beginning to be used on an extensive line of pipes that ultimately would be the name of the company. The origin of the name Kaywoodie is a combination of the K from Kaufmann and wood, as in briar. Not much is known of the original KB&B company other than it was started in 1851 by the German born Kaufmann brothers when they opened a small pipe shop in the Bowery section of New York City. In the back room of this shop, they made their first pipes. From this meager beginning, the Kaywoodie name and organization was to emerge…
…Hacker concludes his history of Kaywoodie Pipes by noting that: “The KB&B briar pipe brand existed from 1900 until just after World War I (with some overlapping with the Kaywoodie from 1915 — 1917), and collectors refer to the KB&B as a Kaywoodie transition pipe. During the early years of the 20th century a number of filter systems were designed by the KB&B firm and incorporated into their Kaywoodie Pipes under the names of Synchro-Stem and Kaywoodie Drinkless filters. During the late 1920’s and throughout the 30’s the Kaywoodie became a highly respected pipe in spite of its filter system (which was popular among many smokers of the era) primarily due to the fine quality of the straight grain and the flame grain models. Unfortunately, the hard-to-get-briar years of World War II marked the decline of the Kaywoodie Pipe, a plummet from which it has never recovered as far as collectors are concerned….”
…The pre-Kaywoodie KB&B pipes were marked on the shank with a cloverleaf around KB&B. Some early Kaywoodies had this same marking on the shank, but the practice was dropped sometime prior to 1936. Yello-Boles also had KB&B in the leaf on the shanks, but did not have the ampersand found on Kaywoodies.
From that I knew that the pipe I was working on was made between 1900 and 1917 because of the KBB Clowerleaf. Now it was time to work on the pipe.
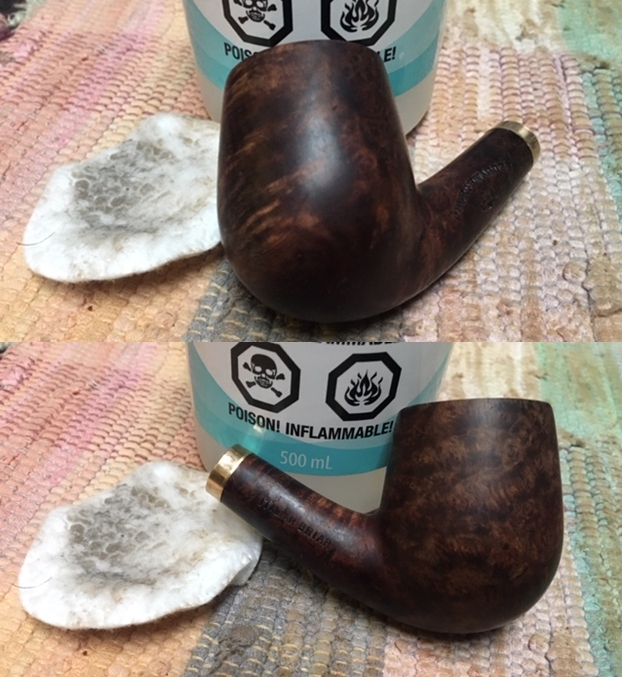
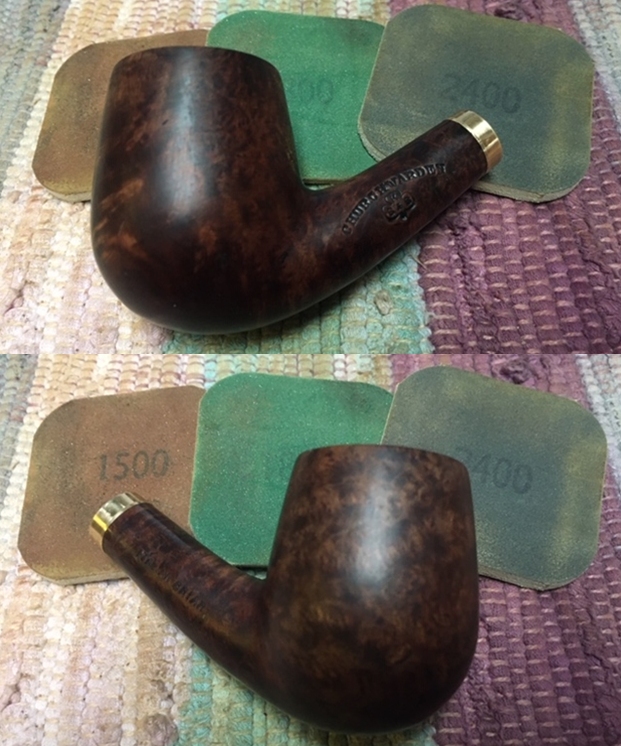
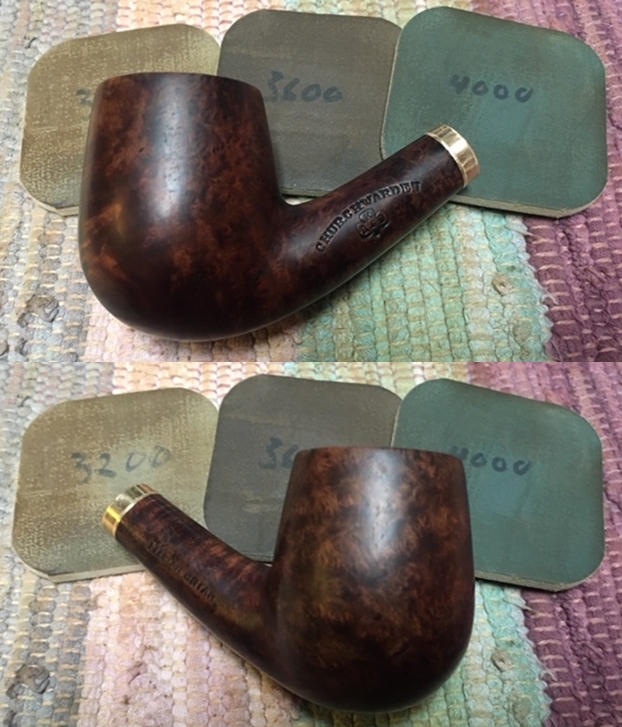
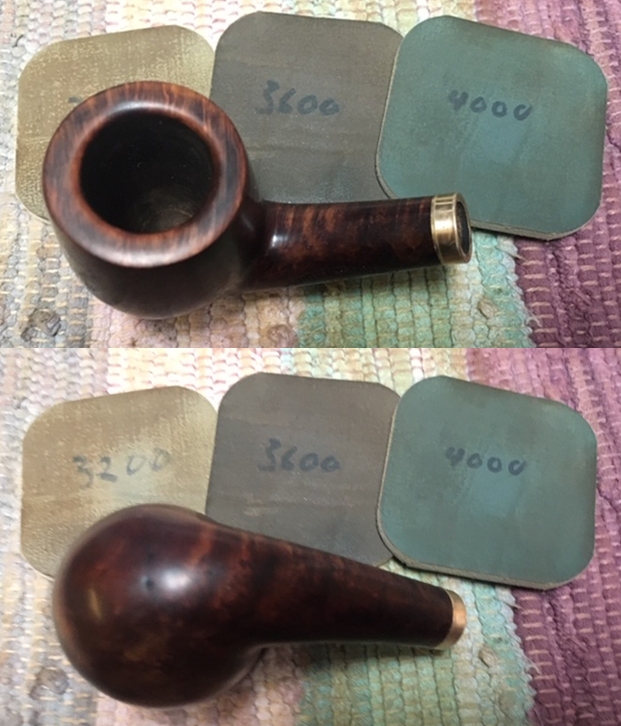
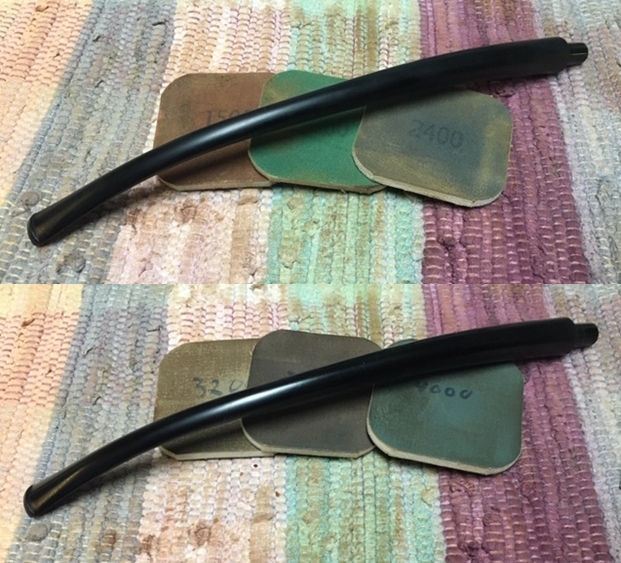
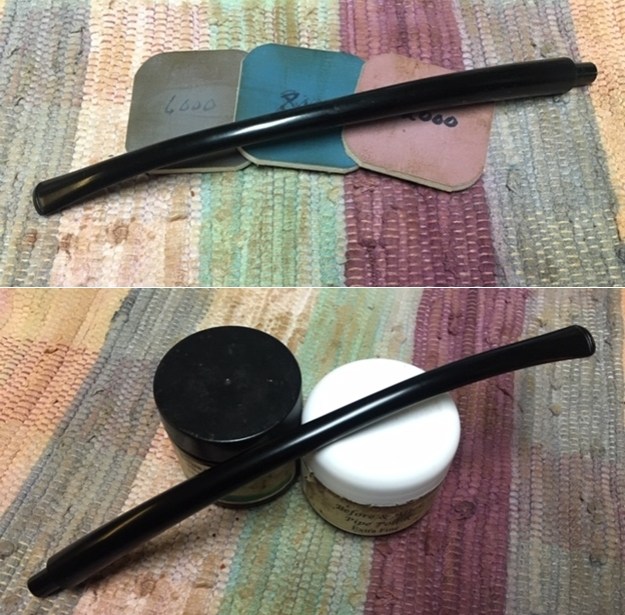
While the stem was removed I used a heated knife and wet cloth to steam out the dents in the briar. I found as I worked on them that they were quite deep. I was able to raise them a bit with multiple steaming but not completely. They were dark spots already so I figured a spot of clear CA glue would level things out.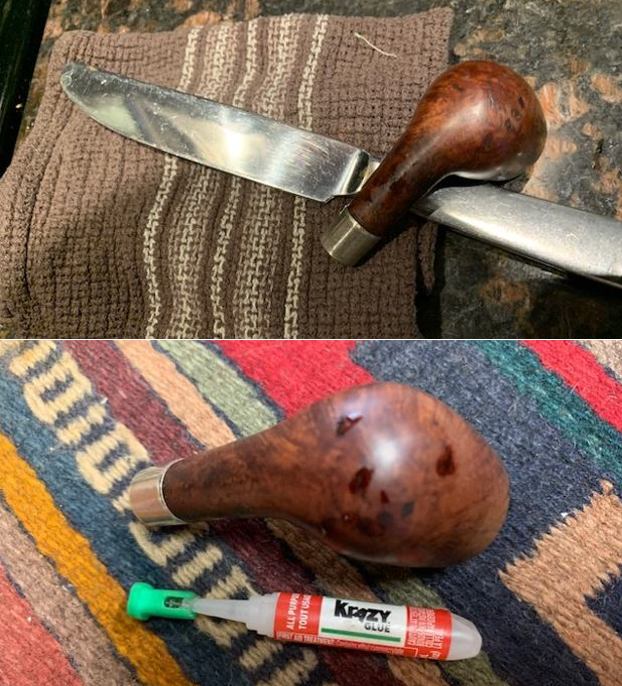 I polished the briar and smoothed out the repairs with micromesh sanding pads. I dry sanded with 1500-12000 grit pads and wiped the bowl down with a damp cloth after each sanding pad. It began to really come alive.
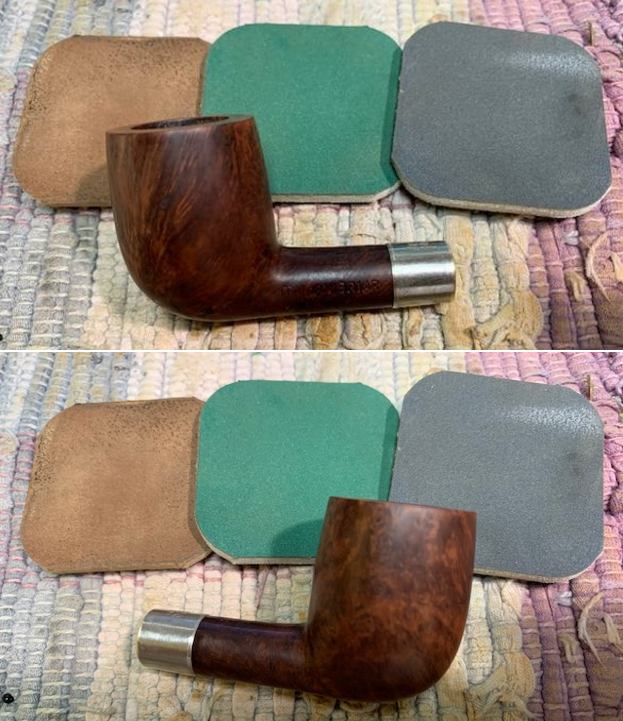
 I rubbed the briar down with Before & After Restoration Balm. I worked it into the finish with my fingertips. The product works to clean, enliven and protect briar finished. I let it sit for 10 minutes then buffed it off with a cotton cloth. The grain on the bowl really came alive with the buffing. It is really a beautiful pipe.
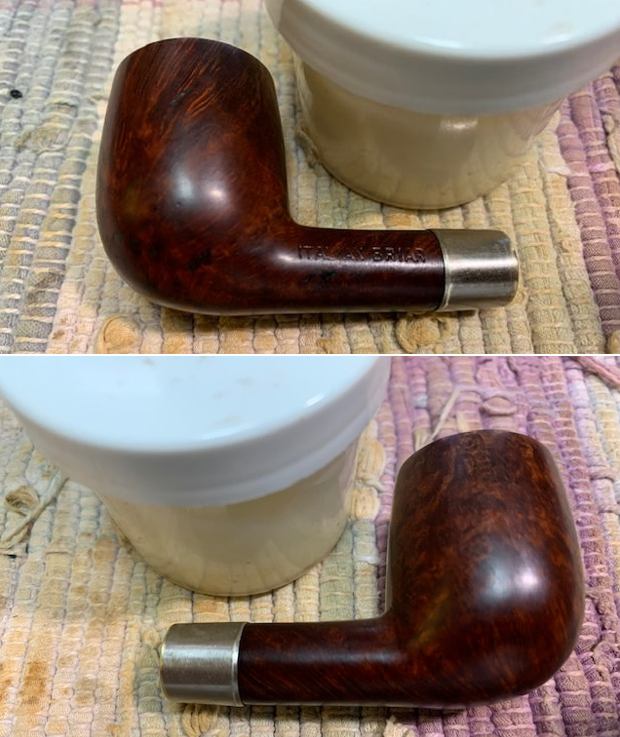
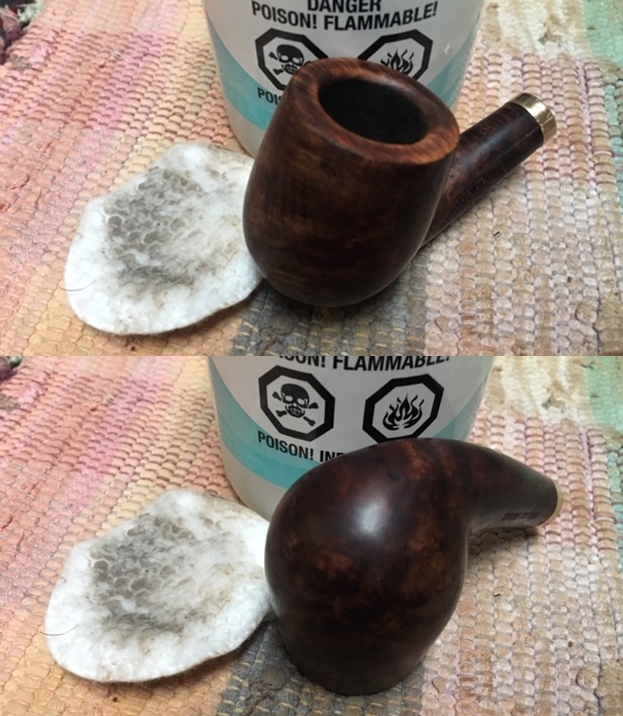
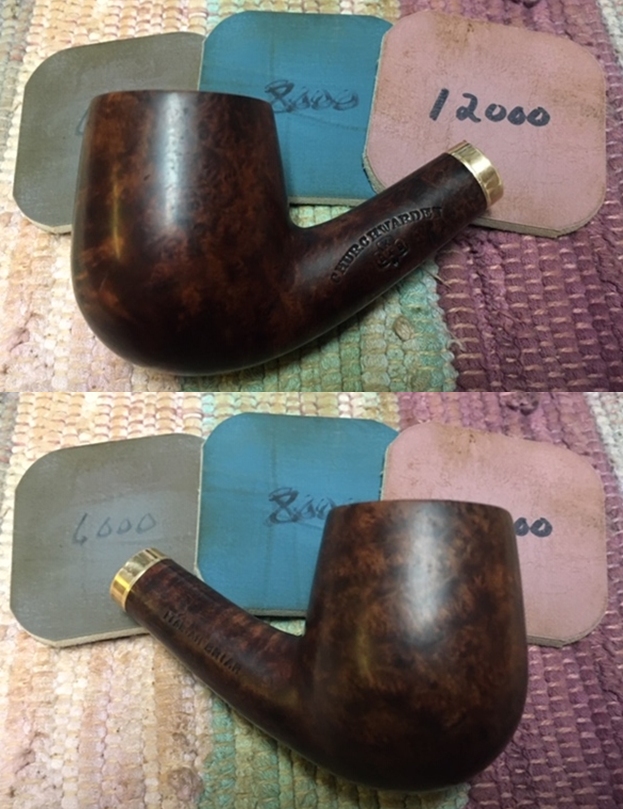
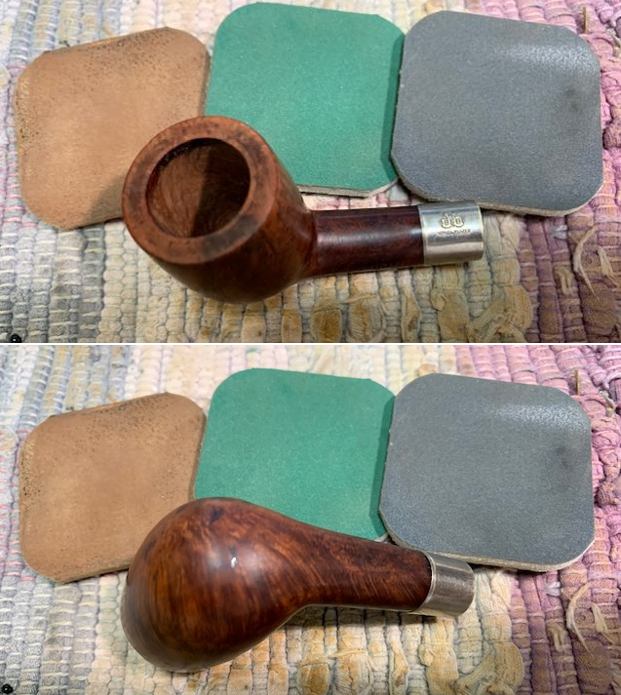
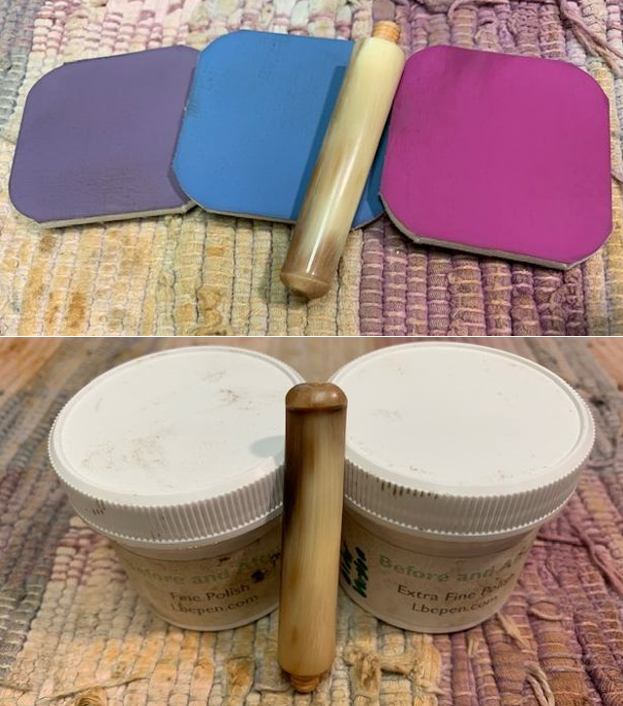
 I did a quick polish on the horn stem with micromesh sanding pads – 1500-12000 grit pads. I wiped the stem down after each pad with Obsidian Oil to protect and enliven the horn. It came out looking very good.
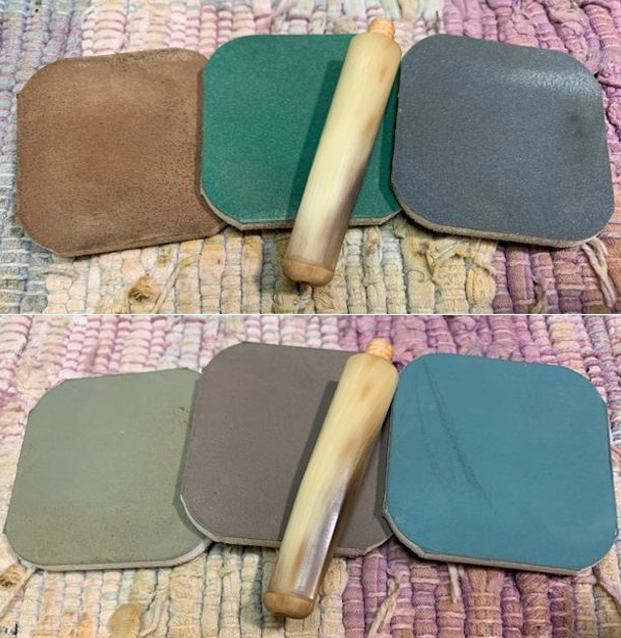
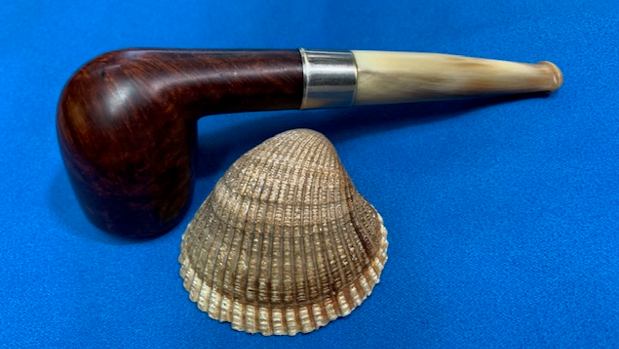
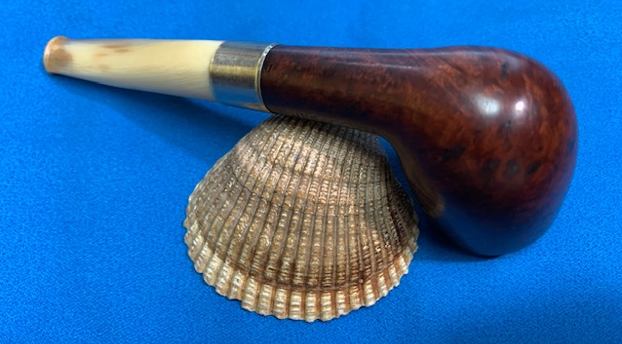
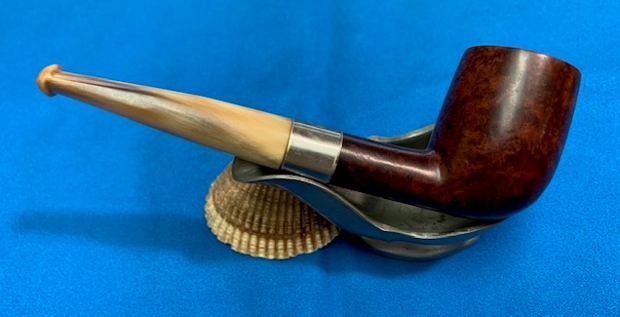
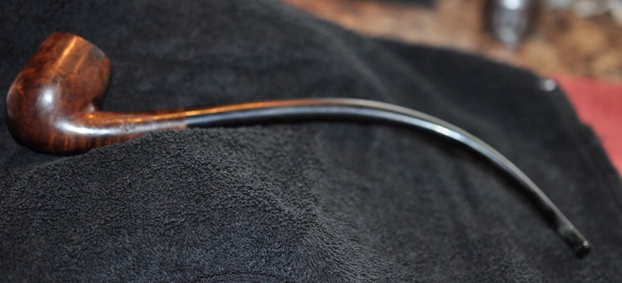
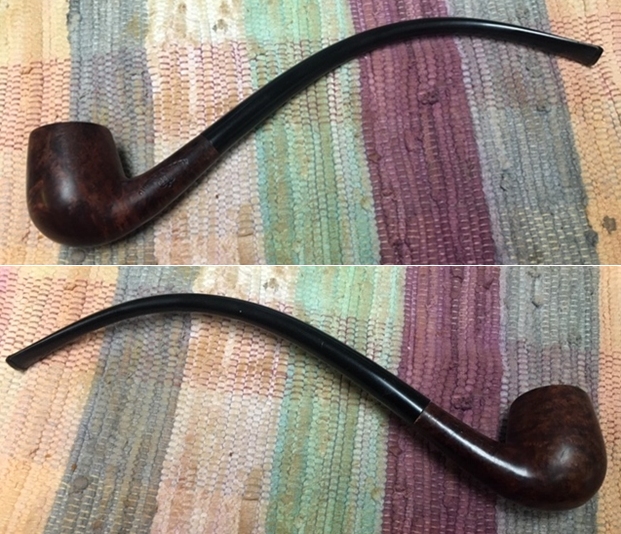
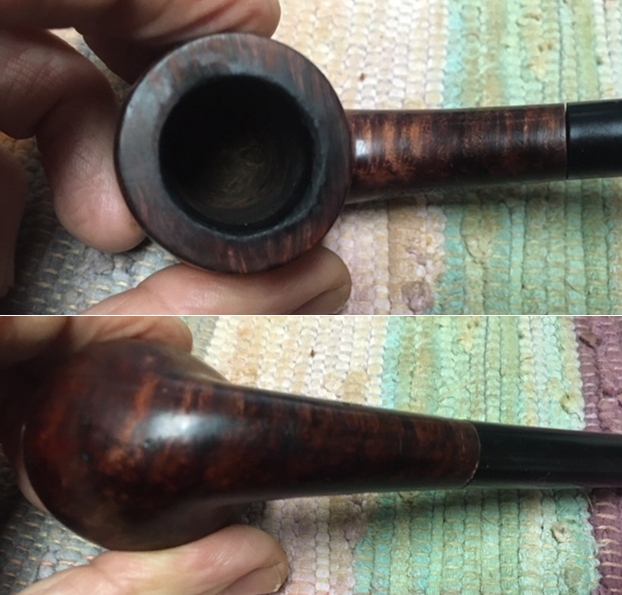
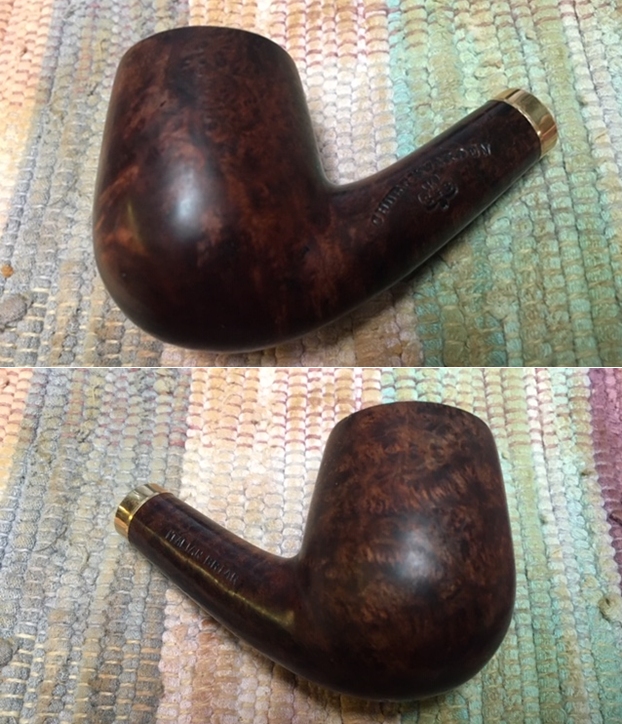
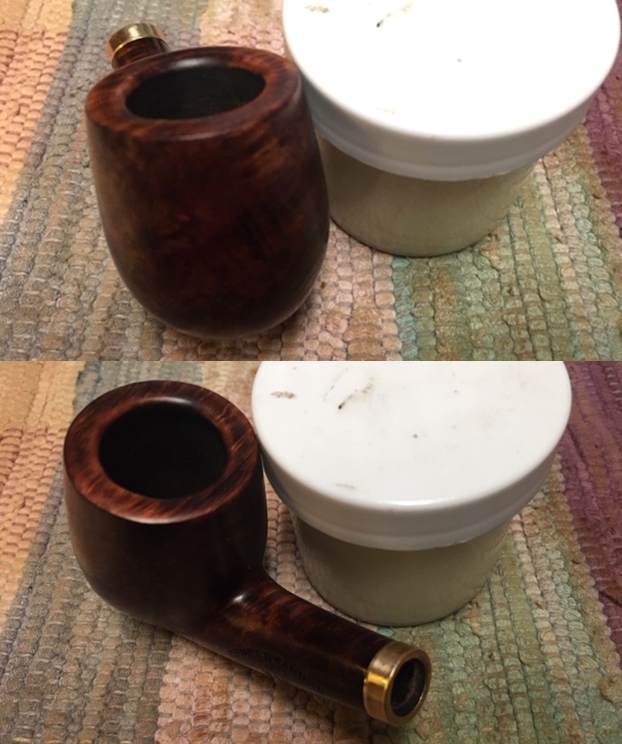
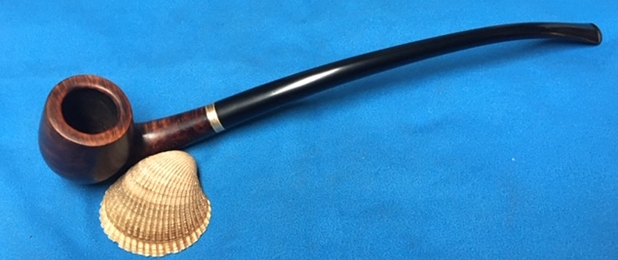
 This interesting 1900-1917 KB&B Italian Horn stem Billiard turned out really well and it is a great looking pipe with a great shape to it. The fact that it is New Old Stock (NOS)/ unsmoked is an additional bonus. The grain on the briar and the sheen on the horn stem really popped when the pipe was buffed with blue diamond on the buffing wheel. The nickel band also took on a sheen. I gave the bowl and stem multiple coats of carnauba wax and buffed it with a clean buffing pad. I hand buffed the pipe with a microfiber cloth to deepen the shine. The finished KB&B Italian Briar Billiard is comfortable to hold and is quite distinguished looking. Give the finished pipe a look in the photos below. The dimensions of the pipe are Length: 5 inches, Height: 1 ½ inches, Outside diameter of the bowl: 1 1/8 inches, Chamber diameter: ¾ of an inch. The weight of the pipe is 29 grams/1.02 ounces. This is a beautiful pipe that will fit nicely into my older American pipe collection. Thanks for reading this blog and my reflections on the pipe while I worked on it. Keep an eye out on the blog as I have several other older horn stemmed pipes that will be coming up soon.