Blog by Steve Laug
I decided to change things up a bit and work on another of Jennifer’s Dad’s pipes. For the next pipe from the estate of George Rex Leghorn I have chosen a shape I would call a Churchwarden. You may not have read about this estate before, so I will retell the story. I received an email from Jennifer about whether I would be interested in her Dad’s pipes. My brother Jeff and I have been picking up a few estates here and there, so I was interested. Here is the catch – she did not want to sell them to me but to give them to me to clean up, restore and resell. The only requirement she had was that we give a portion of the sales of the pipes to a charity serving women and children. We talked about the organization I work for that deals with trafficking and sexual exploitation of women and their children and she decided that would be a great way to carry on the charitable aspect of her Dad’s character. With some great conversation back and forth she sent the pipes to Jeff and he started the cleanup process on them. Once he had finished cleaning them all he sent them to me to do my work on them.
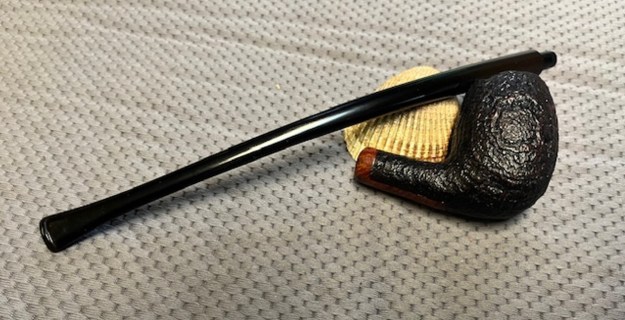
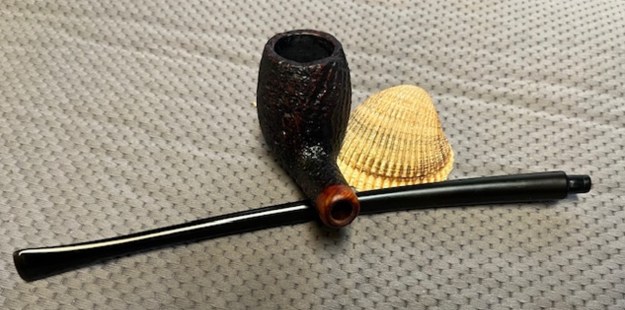
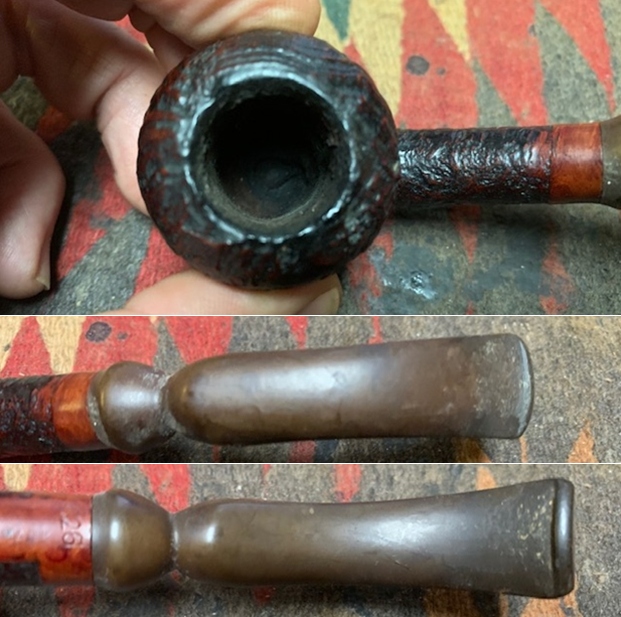
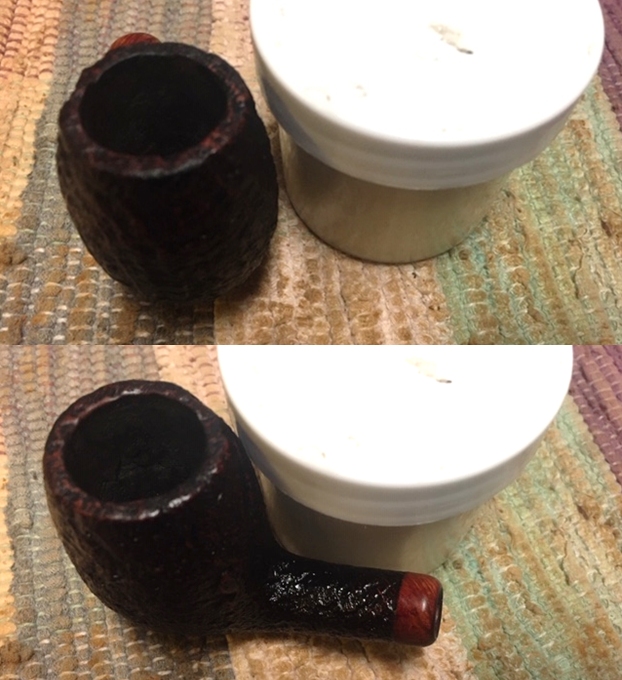
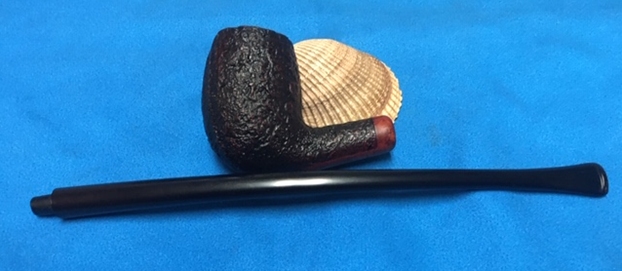
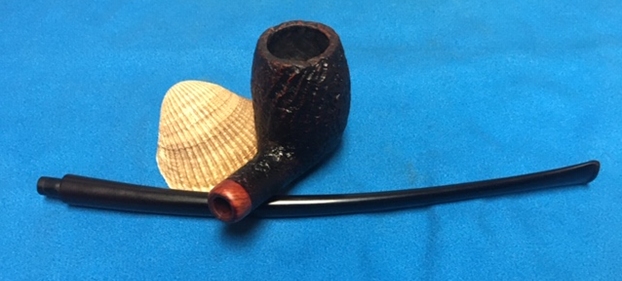
The pipe on the table is stamped on a smooth panel on the underside Jarl Made in Denmark T.V. The bowl is sandblasted with a smooth band on the rounded shank end and panel underneath for the stamping. The finish was very dirty, making it hard to see beyond that to the nice grain underneath that. There was a thick cake in the bowl and it had overflowed with lava onto the rim top. It was hard to know at this point the condition of the rim edges. The pipe was a dirty and tired looking old pipe. The stem was badly oxidized and there were George’s usual tooth marks and chatter on both sides just ahead of the button. Due to the dirtiness of the pipe the stem did not seat in the shank. It had been sitting in boxes for a lot of years and it was time to move ahead with the restoration. Jennifer took photos of the pipes she was sending. I have included the two photos of this pipe below. 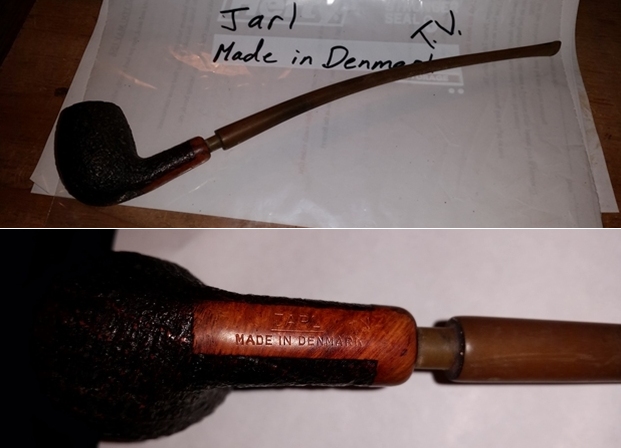 When the box arrived from Jennifer, Jeff opened it and took photos of each pipe before he started his cleanup work on them. This Jarl T.V.pipe was a nicely shaped pipe. The shape was interesting and though I have worked on quite a few Jarl pipes over the years this is the first one that I have seen marked T.V. pipe. It is really a nice little Churchwarden. This was going to be an interesting restoration. Jarl pipes are well made and I have found that they not mentioned much in the online pipe communities that I frequent. I enjoy working on them. The sandblast finish on the pipe looks really good on this piece of briar. The shank end is rounded and the stem is smaller and sits against the end of the shank. The briar appeared to be in good condition underneath the grime. The finish looked intact under the grime and oils on the bowl sides from George’s hands. The bowl had a thick cake that had hardened with time. The lava overflow on the rim top filled in much of the sand blast. It was very thick but it could very well have protected the rim from damage. We won’t know what is under it until Jeff had cleaned it off. The stem was heavily oxidized and there were deep tooth marks on both sides just ahead of the button. Jeff took photos of the pipe before he started working on it. I include those below.
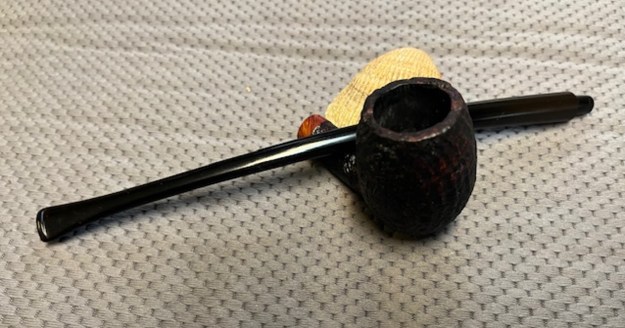
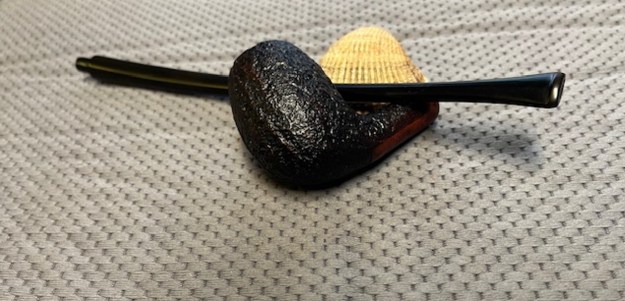
 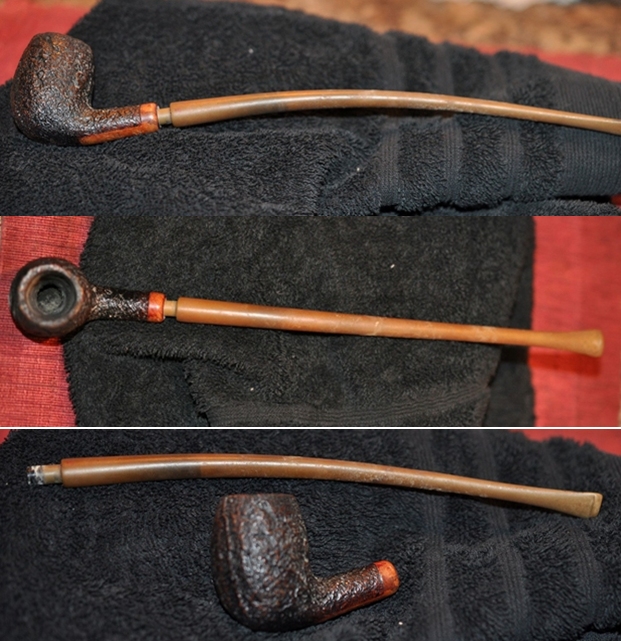 Jeff took photos of the bowl and rim top to show the cake in the bowl and the lava build up on the rim top and dust and grime on the bowl. It was thick and hard but hopefully it had protected the rim and edges from damage. The lava coat looks horrible but it points to a well-used, favourite smoking pipe. George must have enjoyed this old timer a lot judging from the condition of the pipe.
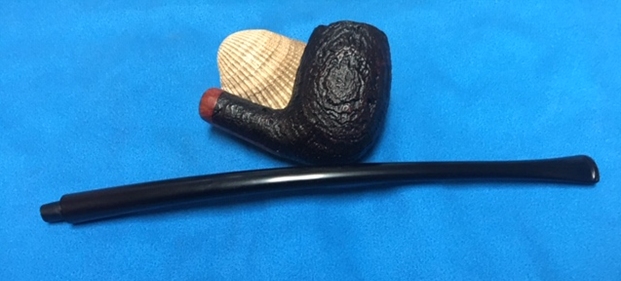
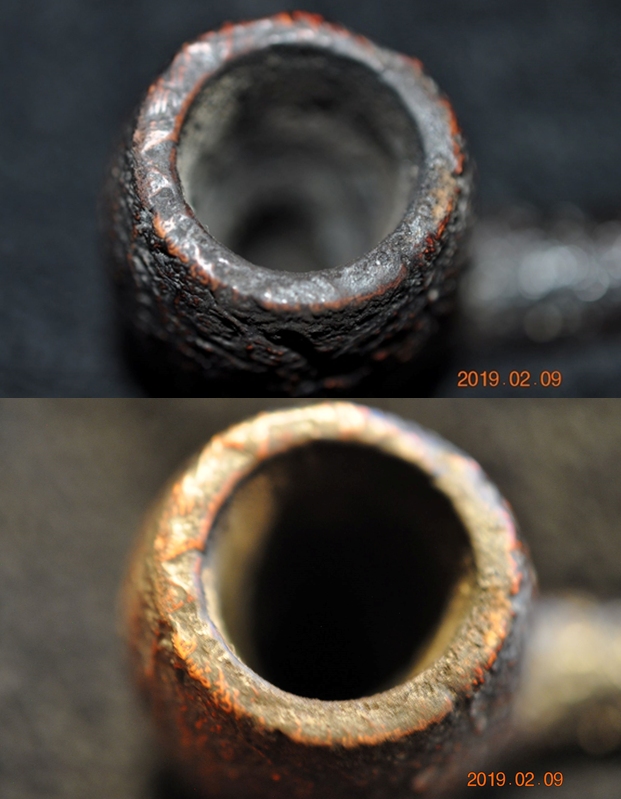
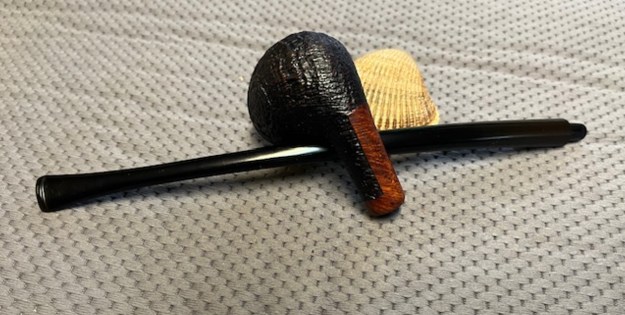
 Jeff took a photo of the side and heel of the bowl to show the condition of the finish – the grime and grit all over the sides and bottom of the bowl. The sand blast is deep and dirty but it is interesting.
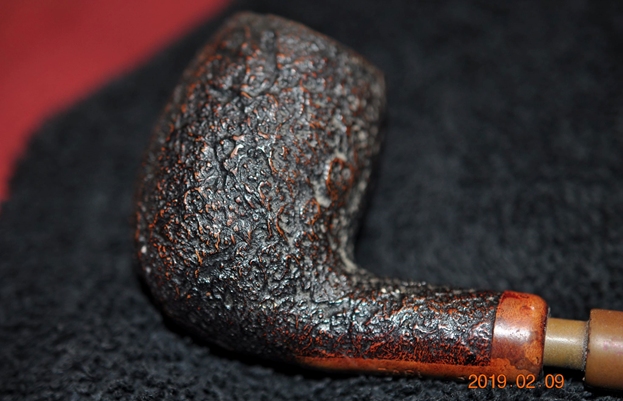
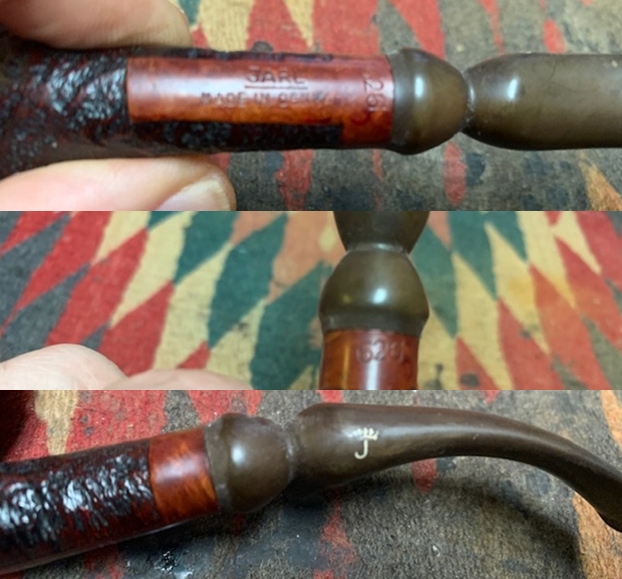
 Jeff took a photo of the stamping on the left side of the shank. It is very clear and readable. It reads Jarl Made in Denmark T.V.
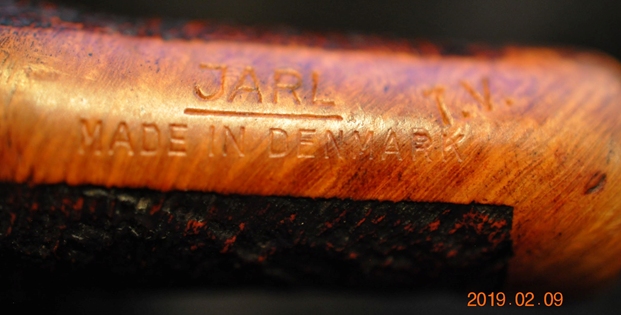 Jeff took photos of the top and underside of the stem showing the scratching, oxidation and tooth marks on the stem surface and button. The tooth marks are quite deep on both sides of the stem.
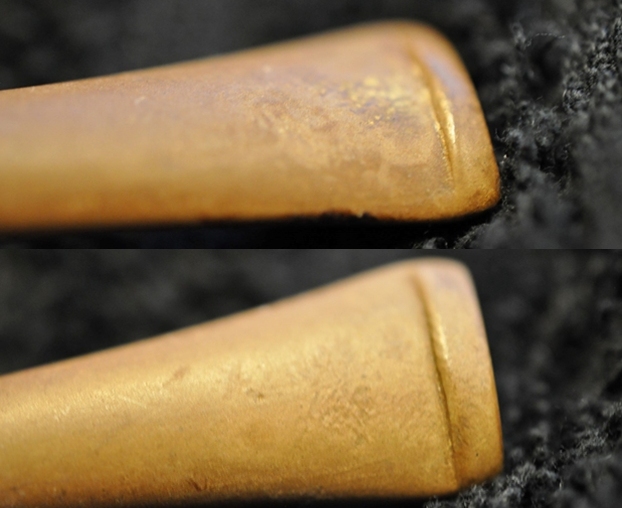 I turned to Pipephil’s site for a quick review of the brand (http://www.pipephil.eu/logos/en/logo-j1.html). I did a screen capture of the section of the site that showed the Jarl T.V. pipe. It says that the brand was carved by Jorgen Larsen.
  I turned then to Pipedia to gather further information regarding the brand (https://pipedia.org/wiki/Jarl). :
In December of 2010 Ellen Jarl wrote that Jarl pipes were made by her grandfather, Niels Mogens Jørgensen in a little factory in the town of Bramdrupdam, just outside Kolding, Denmark. We have no reason to doubt that Niels Mogens Jørgensen is the maker of these pipes.
There was a difference regarding the maker of the pipes. Pipephil identified the maker as Jorgen Larsen and Pipedia says it is Niels Mogens Jorgensen. It appears that the information on Pipedia has more proof that the maker is Niels Mogens Jorgensen. I am proceeding with that information in this restoration.
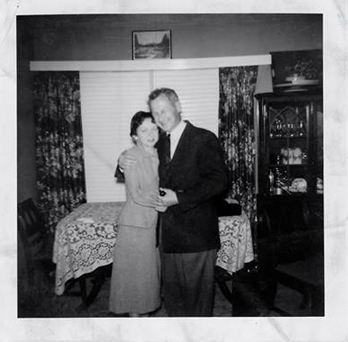
Before I get on to cleaning up the pipe I thought I would once again include the tribute that Jennifer wrote to her Dad for the blog. She also sent some photos and an article that her Dad wrote for Jeff and me to be able to get a feel for him. I have included those below. Note in each of them that he is holding a pipe in his left hand. I asked her to also send me an email with a brief tribute to her Dad. Here is her tribute from an email to me.
 Steve, I want to thank you again for accepting my dad’s pipes. They were so much a part of my dad’s life that I could not simply discard them. But as his daughter, I was not about to take up smoking them either. *laughing* I think my dad would like knowing that they will bring pleasure to others. I know that I do.
I’m not sure what to say about his pipes. I always remember Daddy smoking pipes and cigars.
First a bit about my dad. Though my father, George Rex Leghorn, was American (growing up in Alaska), he managed to join the Canadian Army at the beginning of WWII, but in doing so lost his American citizenship. He was fortunate to meet a Canadian recruiting officer who told him the alphabet began with “A” and ended with “Zed” not “Zee”, and also told him to say that he was born in a specific town that had all its records destroyed in a fire. When the US joined the war my dad, and thousands of other Americans who had made the same choice*(see the link below for the article), were given the opportunity to transfer to the US military, and regain their citizenship.
After WWII, my dad, earned his degree at the University of California Berkeley and became a metallurgist. There is even a bit about him on the internet.
He loved taking the family out for a drive, and he smoked his cigars on those trips. (As a child, those were troubling times for my stomach.)
I most remember my father relaxing in his favorite chair with a science fiction book in one hand and a pipe in the other… Sir Walter Raleigh being his favorite tobacco… and the pipes themselves remind me of him in that contented way. If I interrupted his repose, he’d look up, with a smile on his face, to answer me.
It seemed he smoked his Briarwood pipes the most, though he had others. At the time, it was only the Briarwood I knew by name because of its distinctive rough shaped bowl. And it was the Anderson Free Hand Burl Briar, made in Israel, which I chose for his birthday one year, because I thought he might like that particular texture in his hand.
At least two of his pipes, he inherited from his son-in-law, 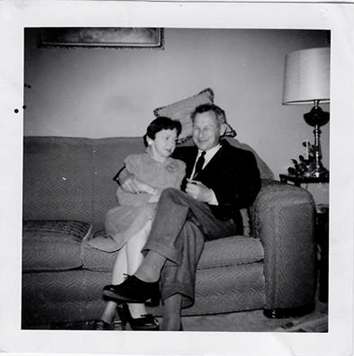 Joe Marino, a retired medical laboratory researcher (my sister Lesley’s late husband)… the long stemmed Jarl (made in Denmark), and the large, white-bowled, Sherlock Holmes style pipe. I believe Joe had others that went to my dad, but Lesley was only sure about those two.
The Buescher, corncob pipe my older sister Lesley bought for Daddy while on one of her travels around the States.
A note on the spelling of my sister’s name…
My dad met my mother, Regina, during WWII and they married in Omagh, Ireland. My mother was English and in the military herself. The English spelling of Lesley is feminine, and Leslie masculine, in the UK… just the opposite of here in the United States. I guess my mom won out when it came to the spelling of the name…
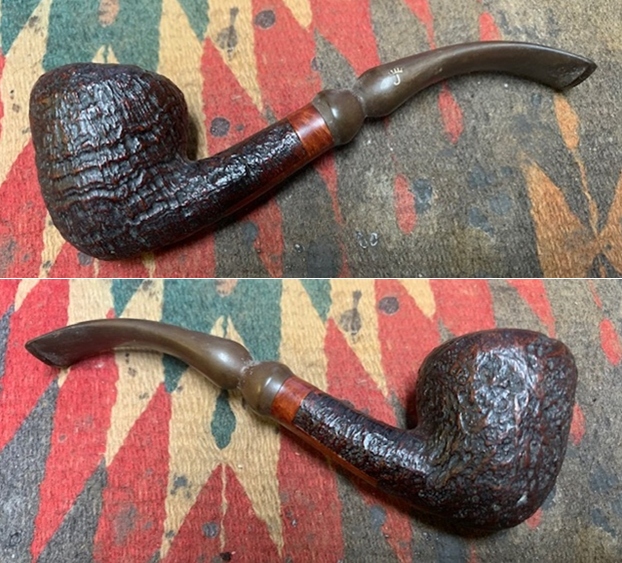
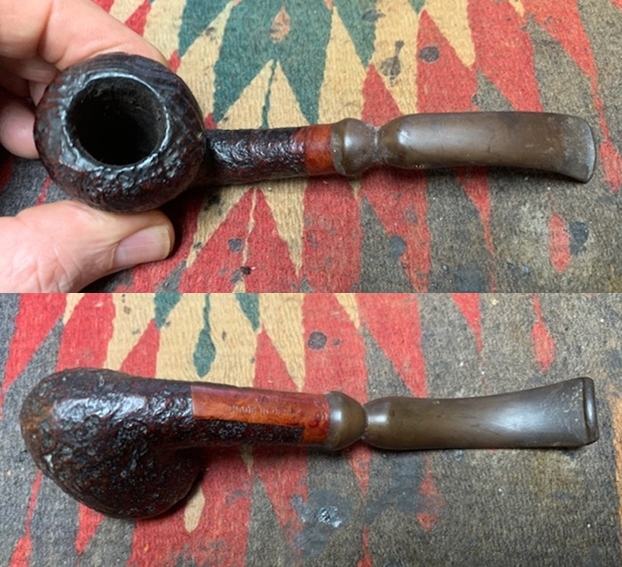
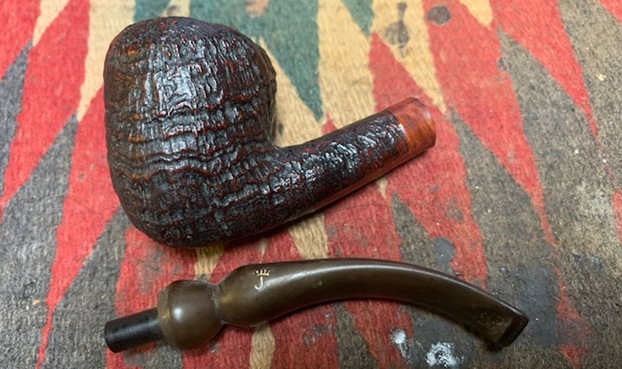
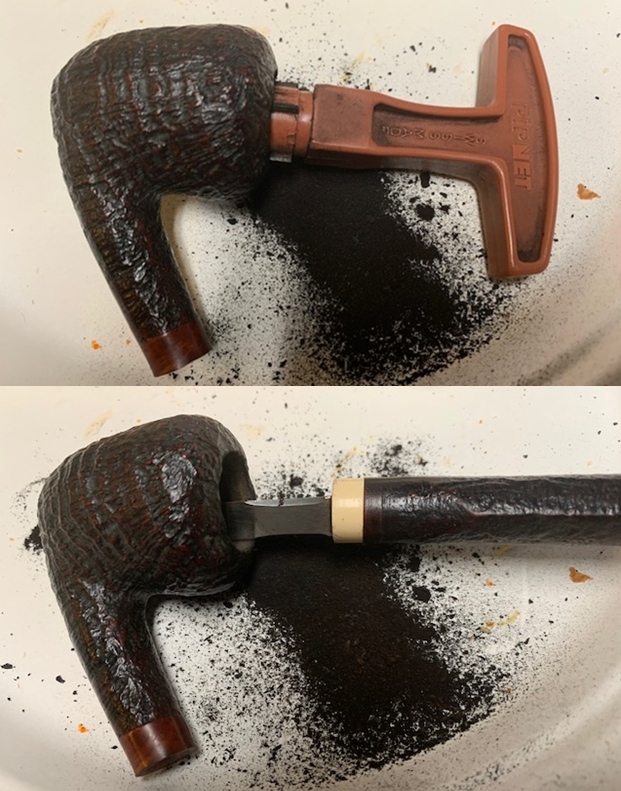
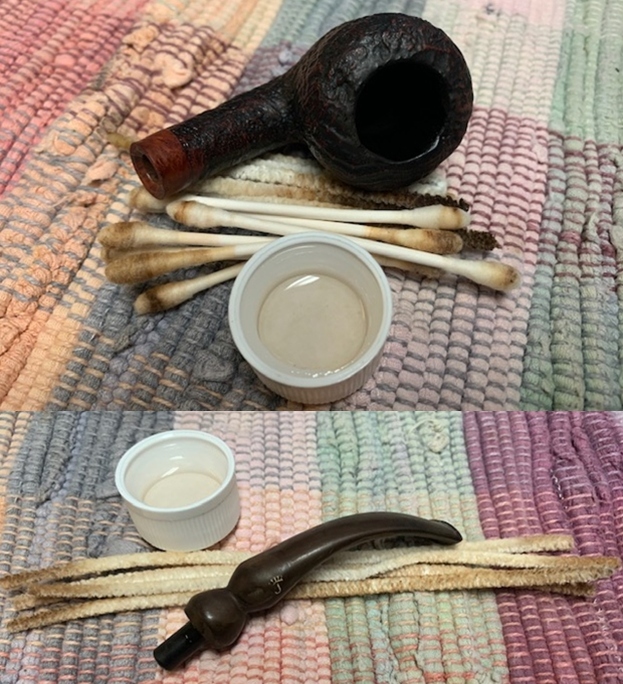
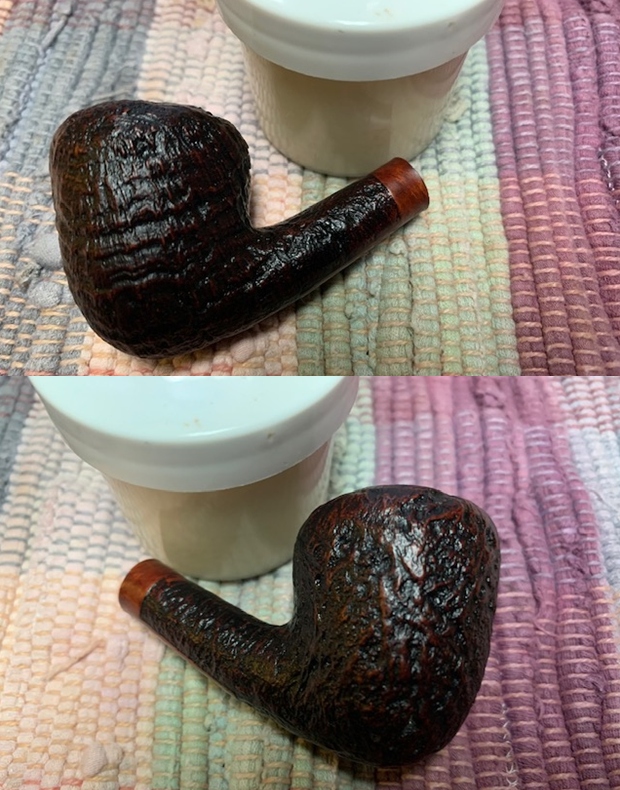
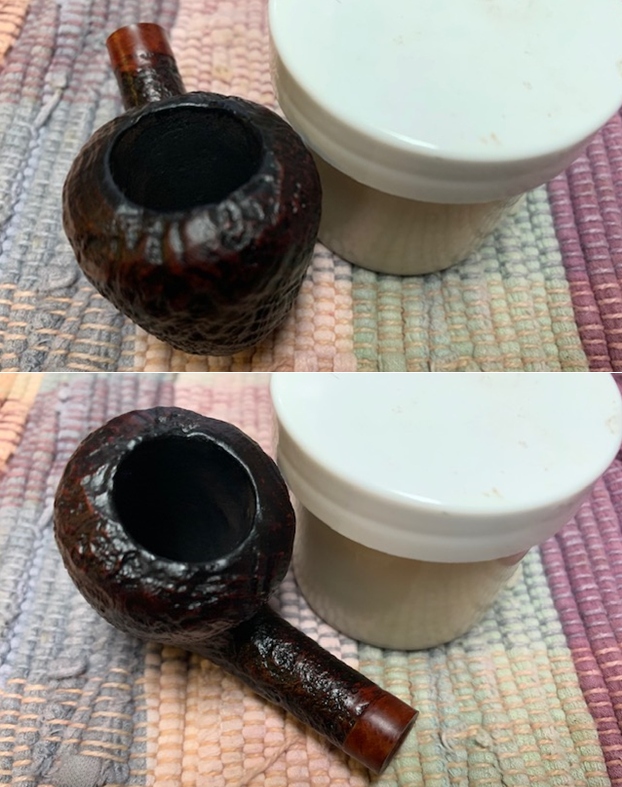
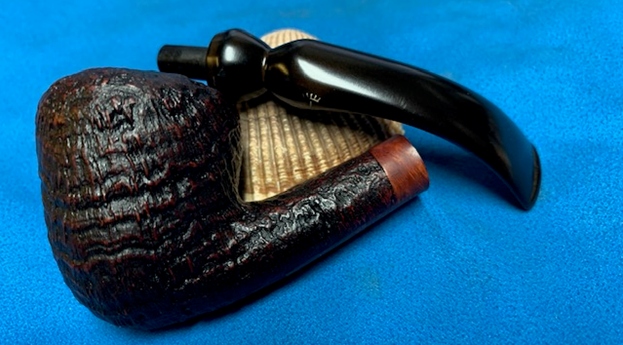
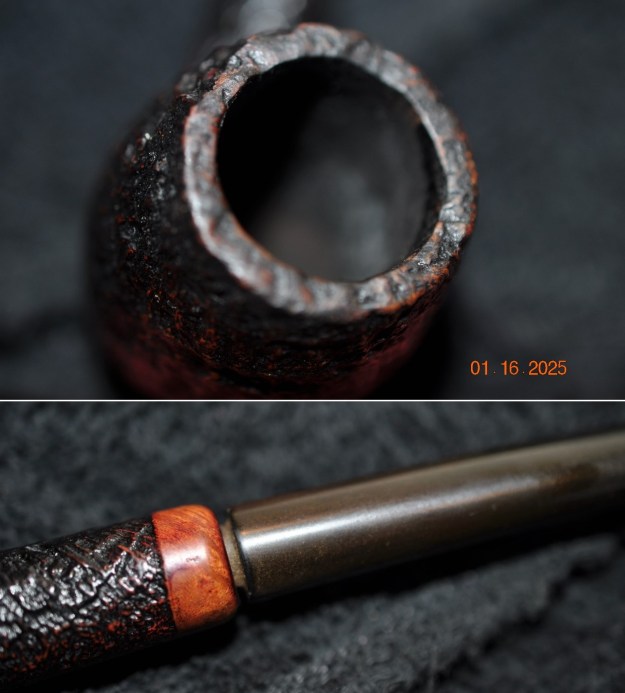
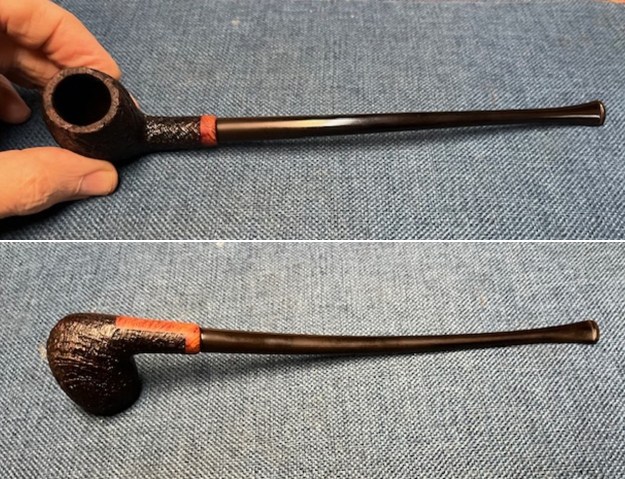
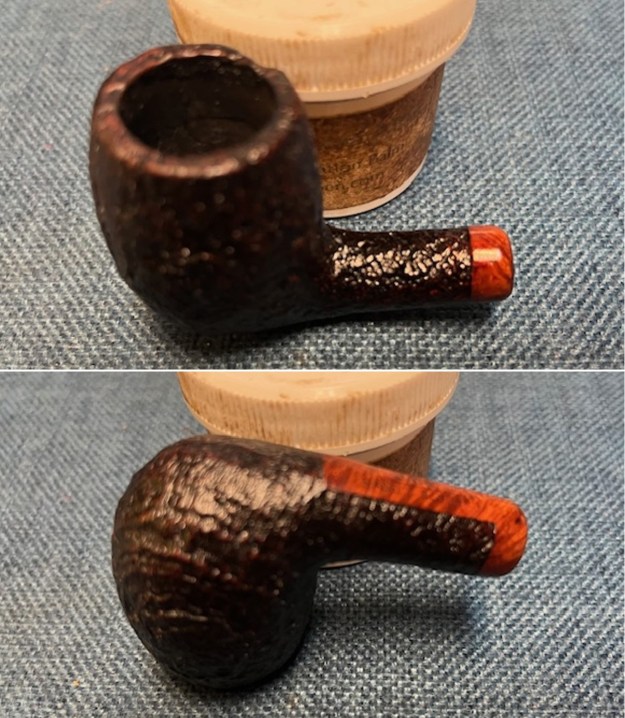
This pipe was a real mess just like the other ones in the collection. Somewhere in the process of cleaning it the tenon snapped off in the shank of the pipe. I remember Jeff telling me when it happened but don’t remember the circumstances. Needless to say that will need to be addressed in the restoration of this pipe. Other than that I did not know what to expect when I unwrapped it from his box. He reamed it with a PipNet pipe reamer and cleaned up the reaming with a Savinelli Fitsall Pipe Knife. He scrubbed out the internals with alcohol, pipe cleaners and cotton swabs until the pipe was clean. He scrubbed the exterior of the bowl with Murphy’s Oil Soap and a tooth brush to remove the grime and grit on the briar and the lava on the rim top. The finish on the bowl looked really good when I got it. The rim top looked much better and the inner and outer edges were flawless. Jeff had cleaned the internals and scrubbed the exterior of the stem and soaked them in Before & After Deoxidizer bath to remove the oxidation. The stem looked very good other than a few tooth marks and chatter in the surface. When the pipe arrived here in Vancouver for the second stop of its restoration tour it looked very good. I took photos of the pipe before I started my part of the restoration. 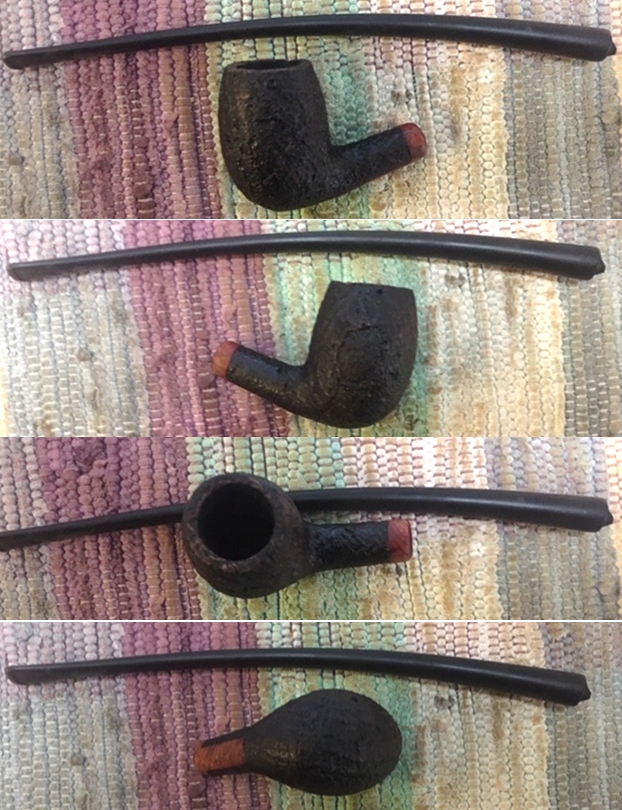 I took photos of the bowl and rim top to show how well it had cleaned up. The edges and top were very clean and in excellent condition. The stem had some tooth chatter and light marks just ahead of the button.
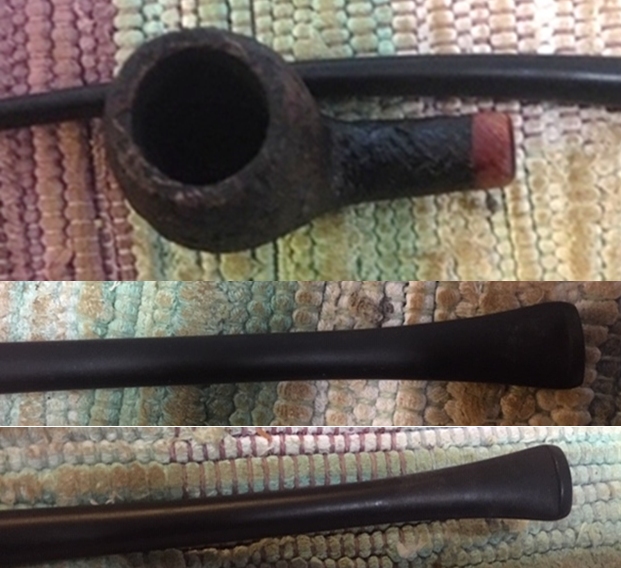 I decided to address the broken tenon first. The first photo below shows the shank end with the broken tenon in place. The broken tenon was pretty close to the end of the stem. I used a Dremel and sanding drum to smooth out the sharp edges of the tenon on the stem end.
 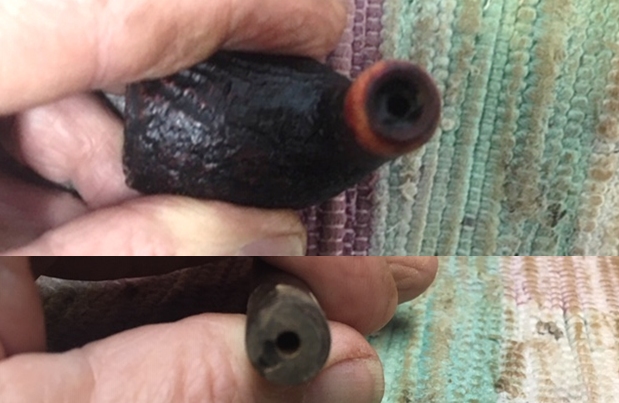 I put the bowl in the freezer and let it sit for 30 minutes. When I took it out of the freezer I turned a drywall screw into the airway on the tenon in the shank and wiggled it free of the shank.
 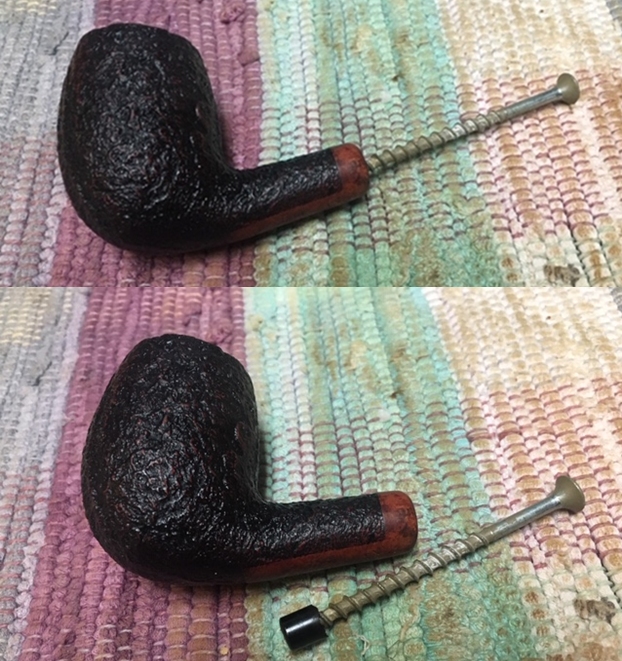 You can see from the broken tenon that it was quite short. I decided that rather than drilling out the stem and inserting a replacement tenon I would just turn the stem end a create an integral tenon. I set up the PIMO tenon turning tool and slowly cut back the diameter of the end of the stem to create a tenon. I adjusted the cutting head on the tool to take back the first cut. The second photo shows the stem after that cut. I adjusted the cutting head again and took the cut back to as close to the diameter of the tenon as I could. The third photo shows the tenon after that cut. The rest would be hand fitting.
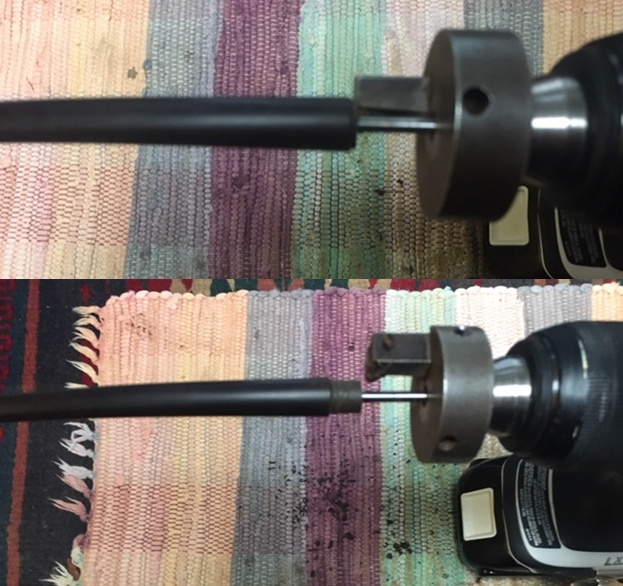
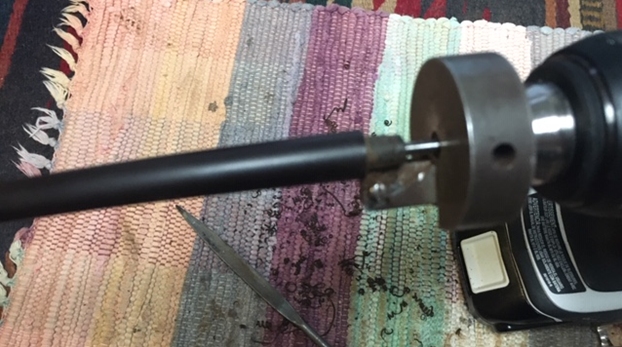 I fine tuned the fit of the tenon in the shank with a needle file. I carefully took an equal amount of material all the way around the new tenon. It is getting close at this point.
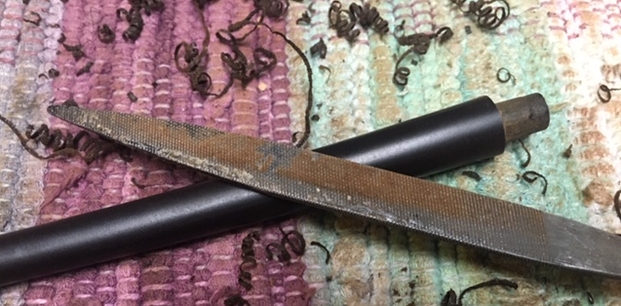 I sanded the tenon with a rolled piece of 220 grit sandpaper to smooth it out. Once I had it adjusted the fit in the shank was perfect. The first photo shows the tenon. The following photos show the stem in place on the shank. The fit of the tenon in the mortise is perfect. The pipe looks pretty good at this point.
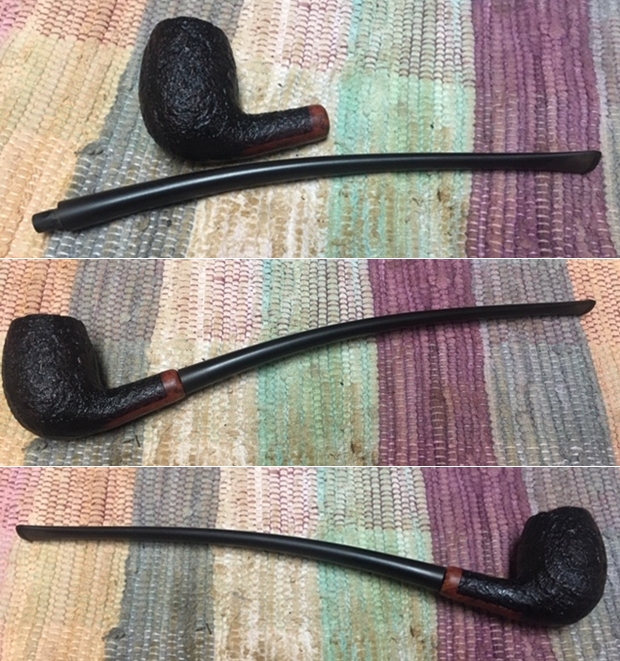
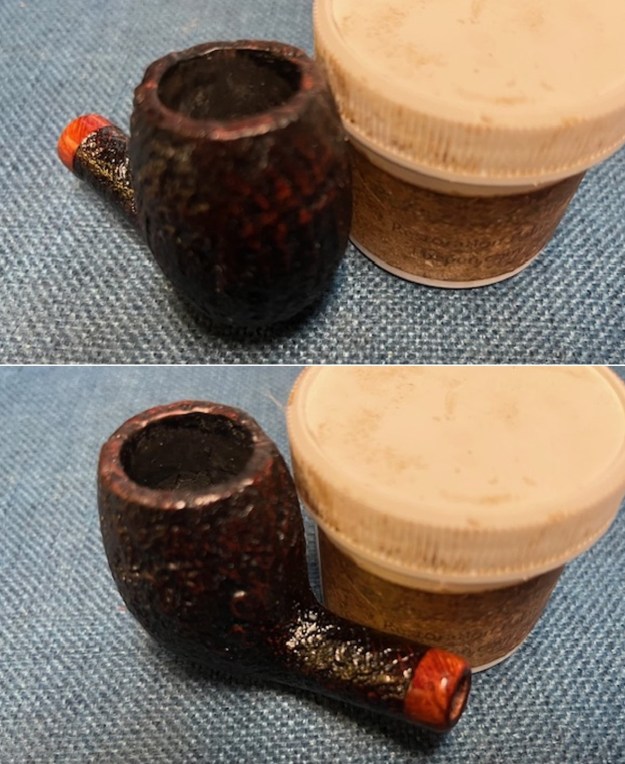
 With the tenon turned I set the stem aside and directed my attention to the bowl. Since it was clean and in good condition I worked some Before & After Restoration Balm into the finish of the bowl and the rim top and shank with my fingertips and a horsehair shoe brush to clean, enliven and protect it. I find that the balm really makes the briar come alive again. The contrasts in the layers of stain really made the grain stand out. I let the balm sit for a little while and then buffed with a cotton cloth to raise the shine. The bowl really looks good at this point.
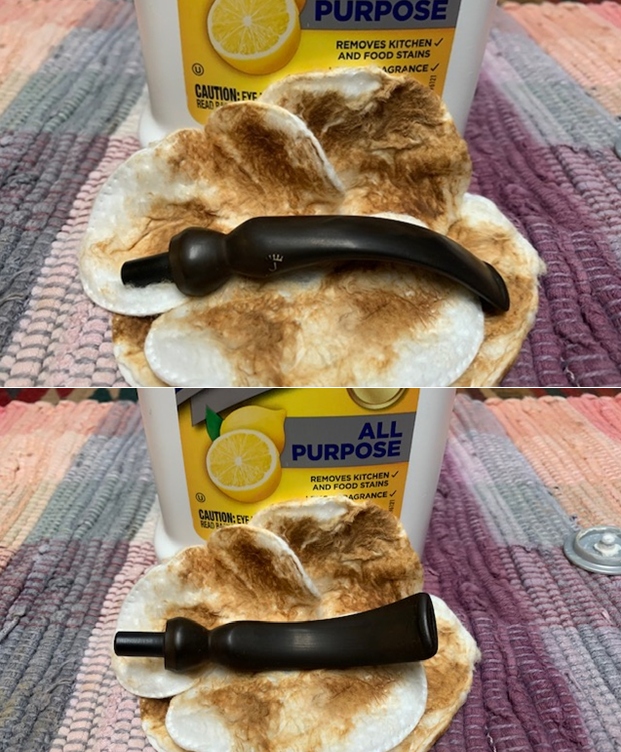
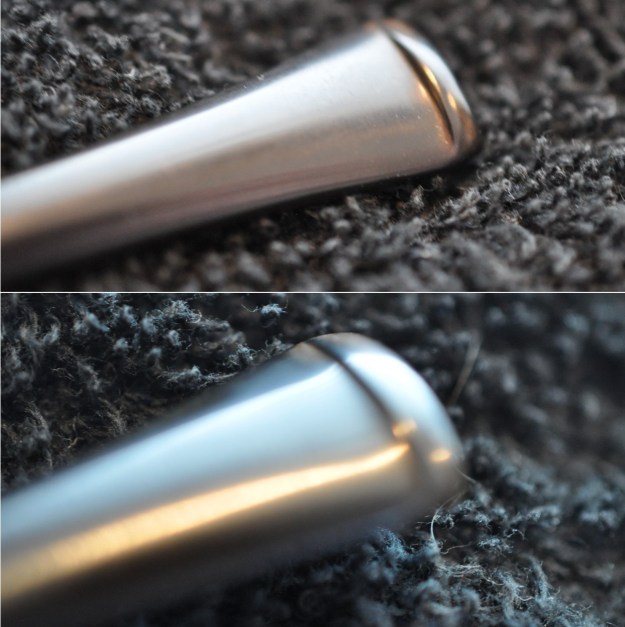
 I set the bowl aside and went back to the stem. I sanded the stem to remove the oxidation that was on the surface and the tooth marks and chatter neat the button. I used a folded piece of 220 grit sandpaper and a piece of 400 grit wet dry sandpaper. At this point the stem is looking better and the tooth marks are gone.
 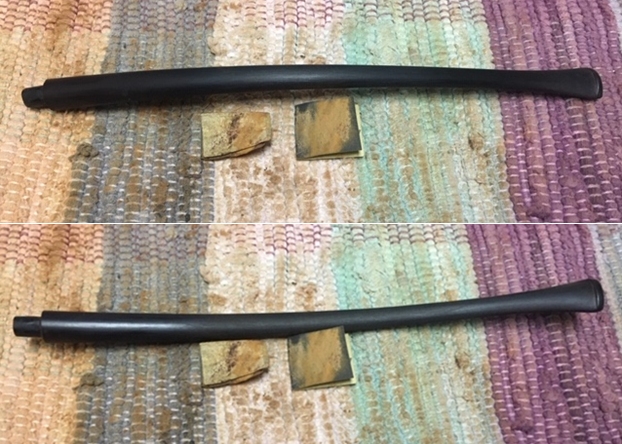 I rubbed the stem down with Denicare Mouthpiece Polish and a cotton pad to remove remnants of oxidation and to further blend in the sanding. The stem was showing some promise at this point in the process.
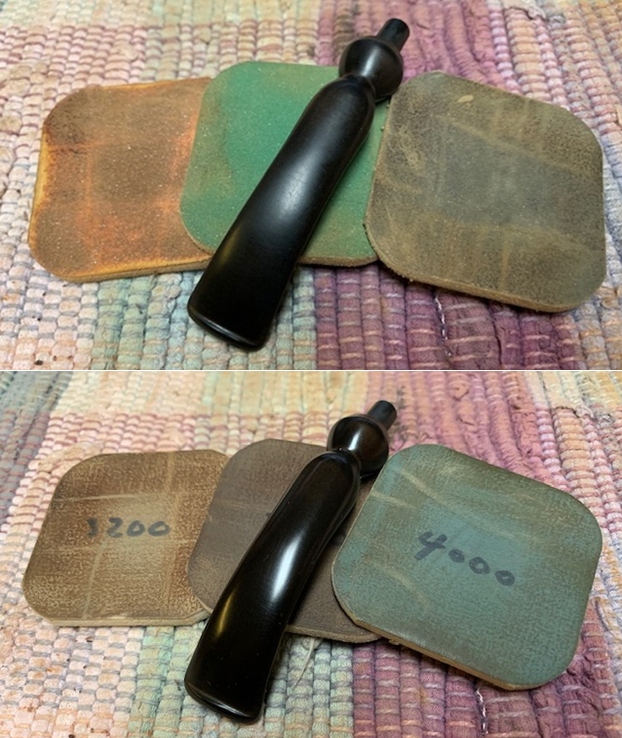
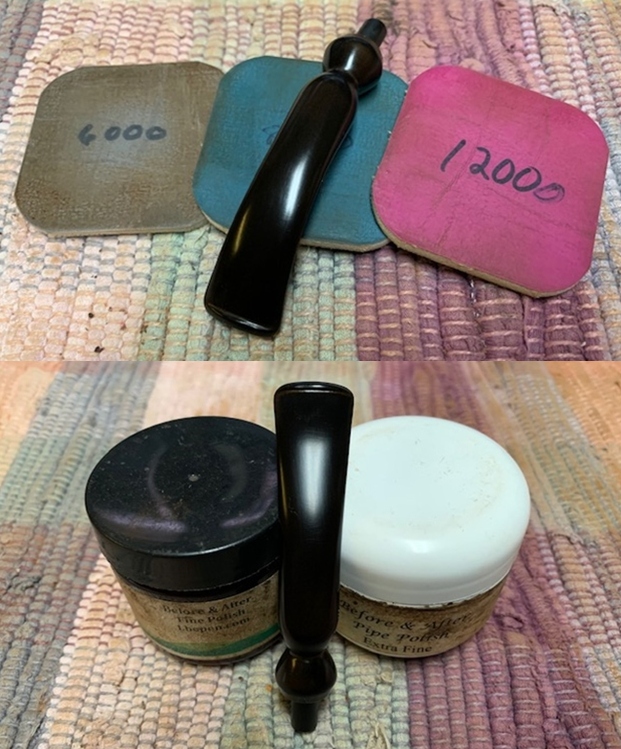
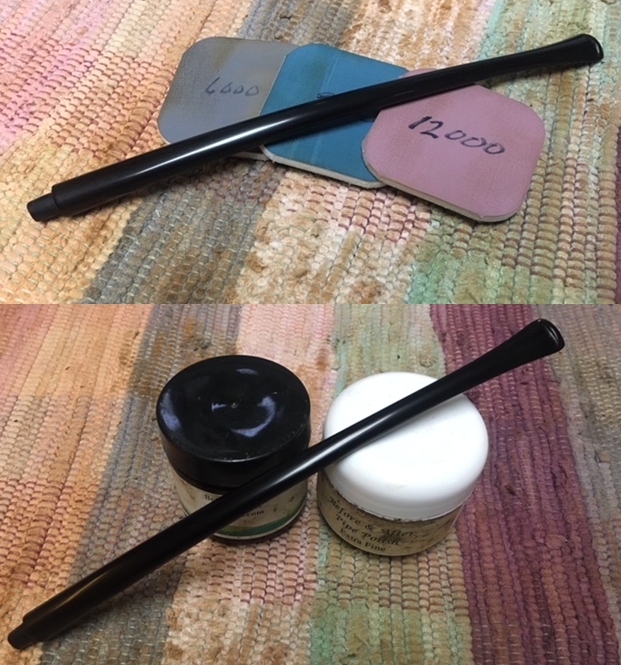
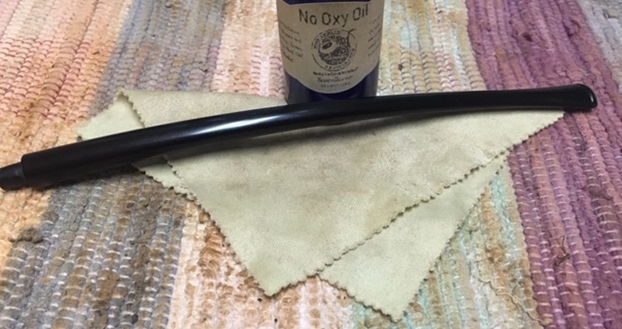
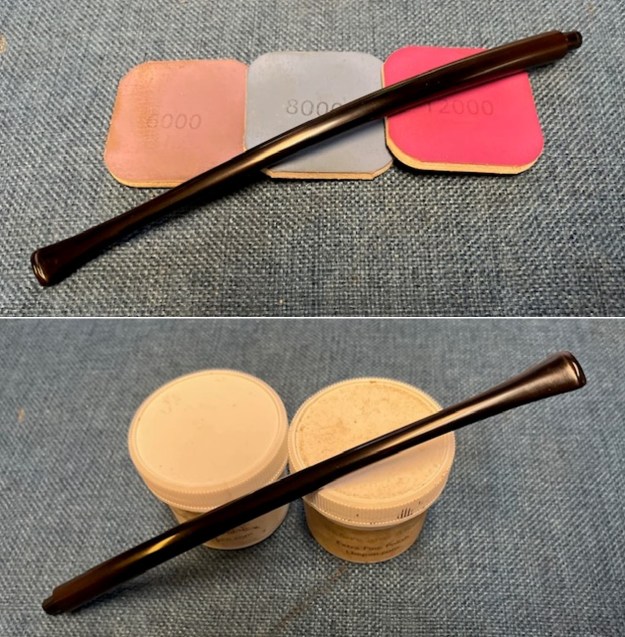
 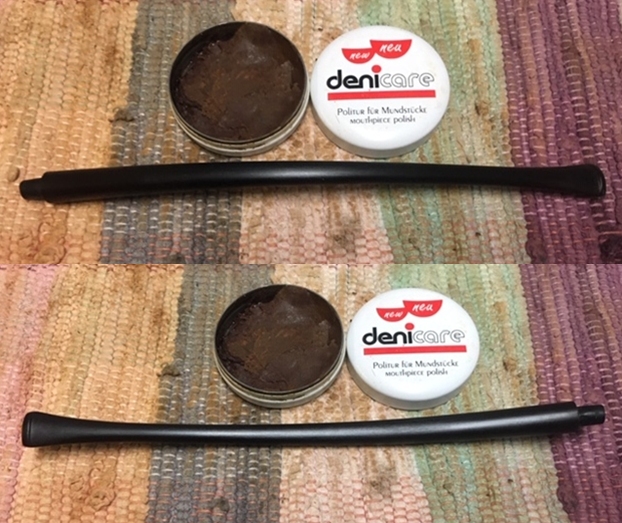 I polished the stem with micromesh sanding pads – wet sanding it with 1500-12000 grit pads. I polished it further with Before & After Pipe Stem Polish – both fine and extra fine. I finished by wiping it down with Briarville’s No Oxy Oil and buffing it to a shine.
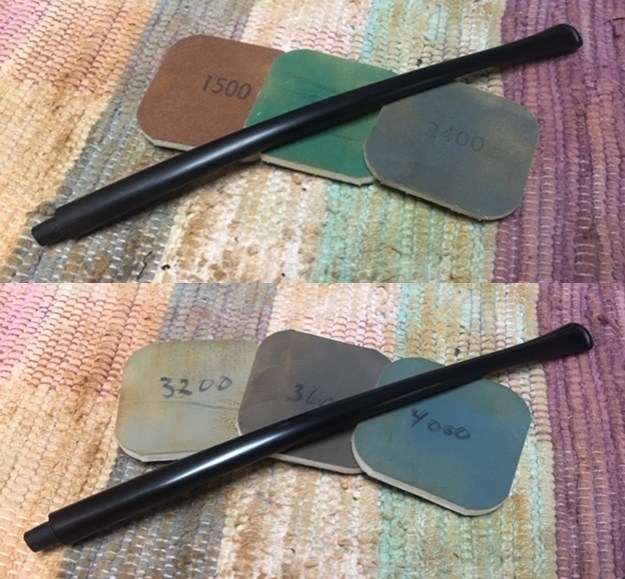
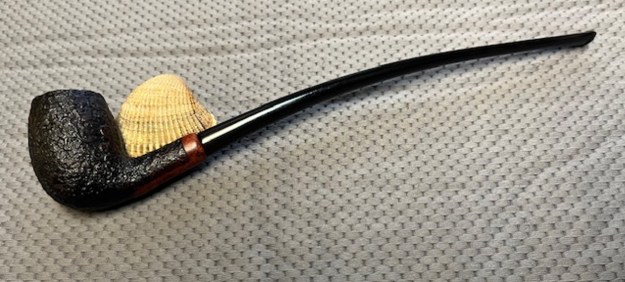
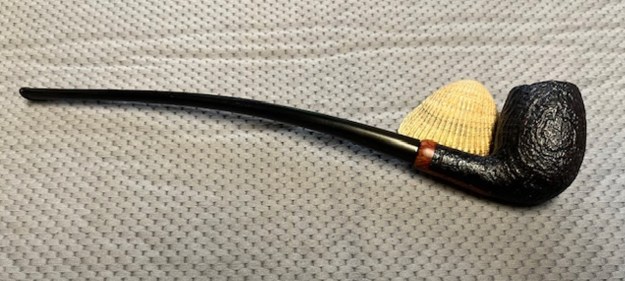
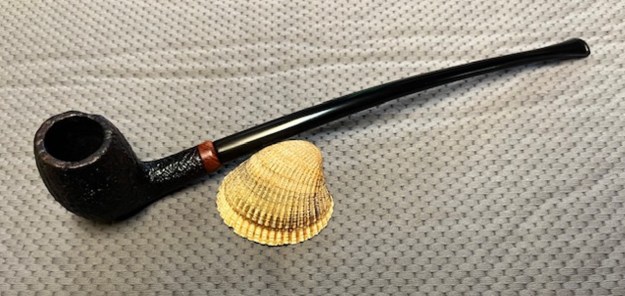
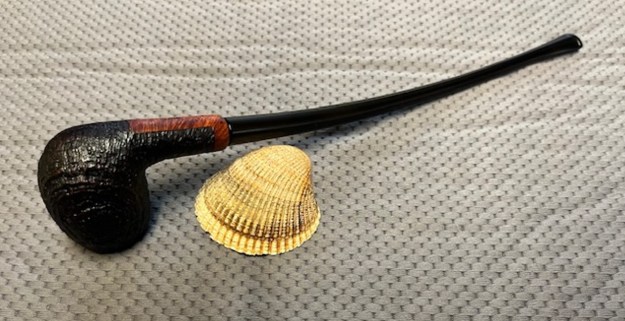
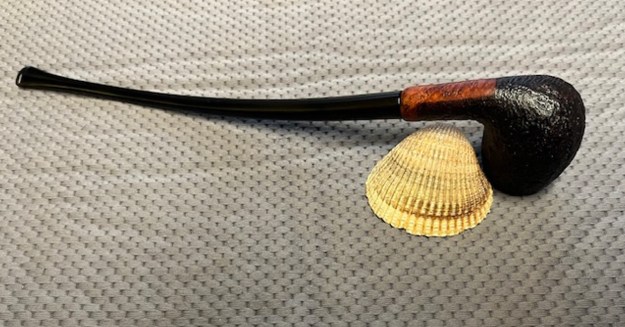
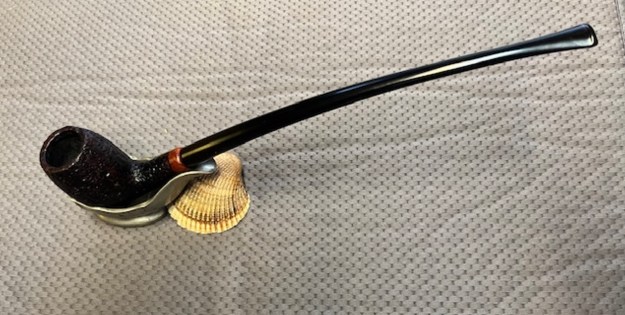
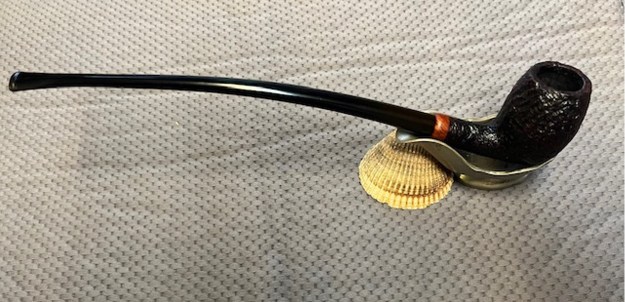
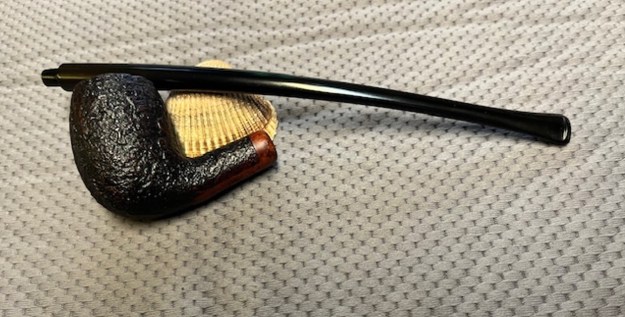
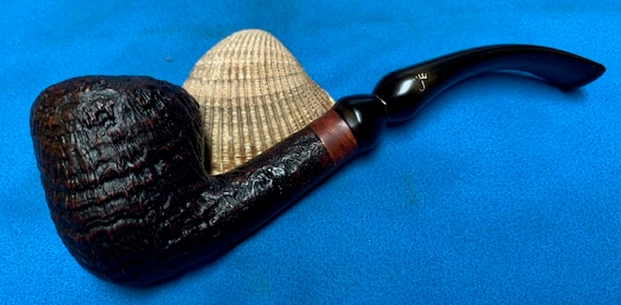
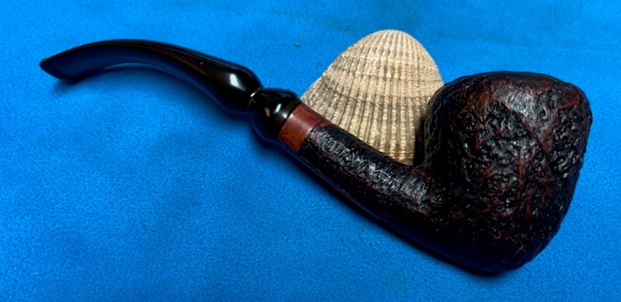
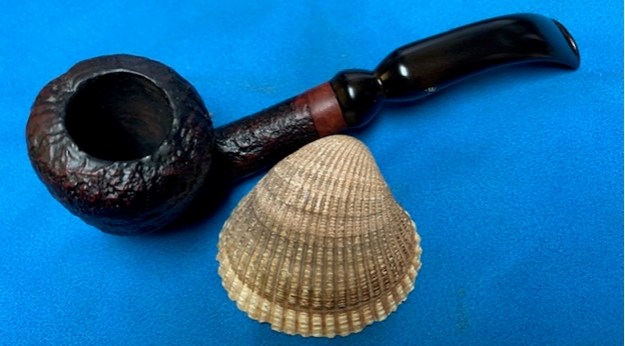
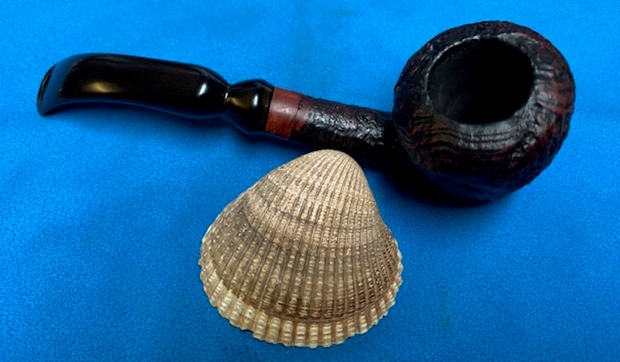
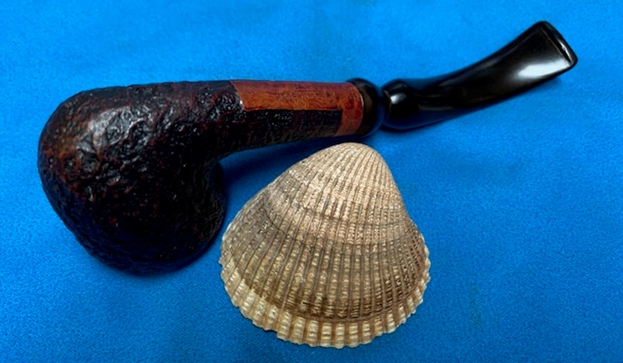
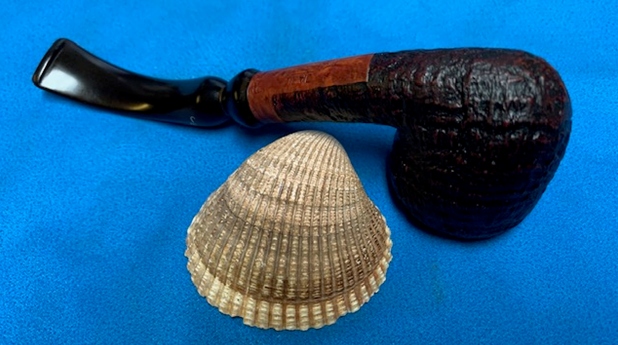
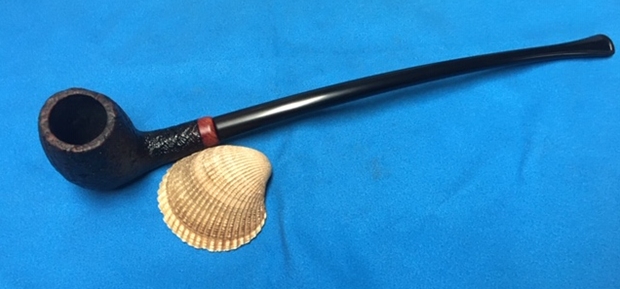
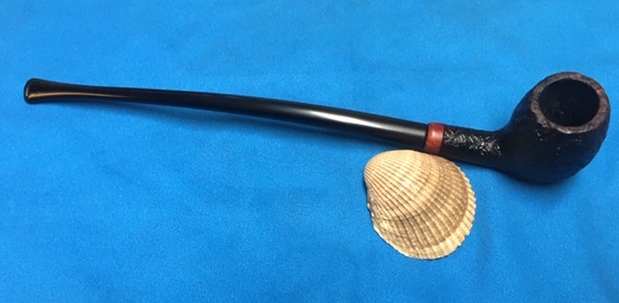
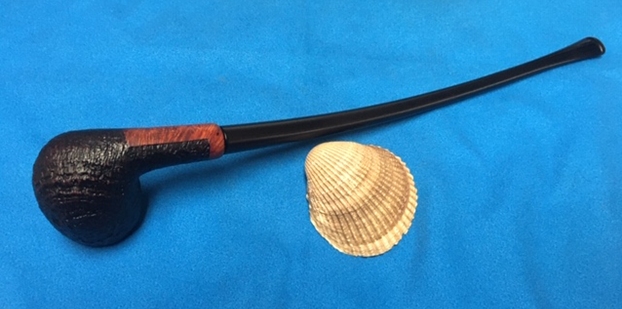
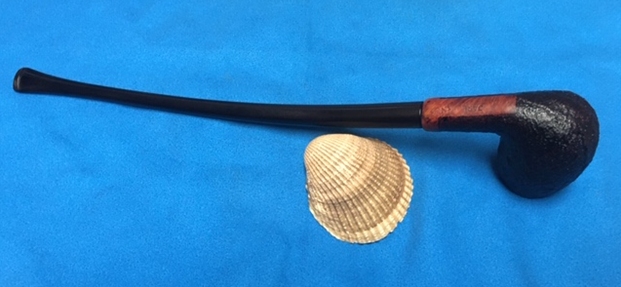
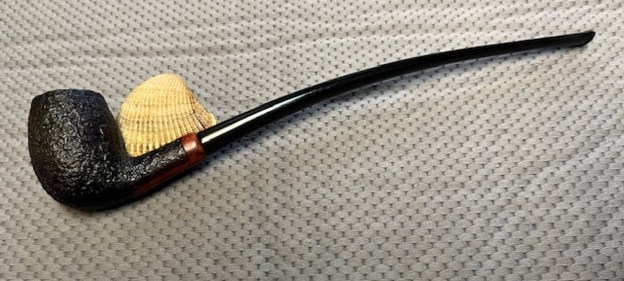
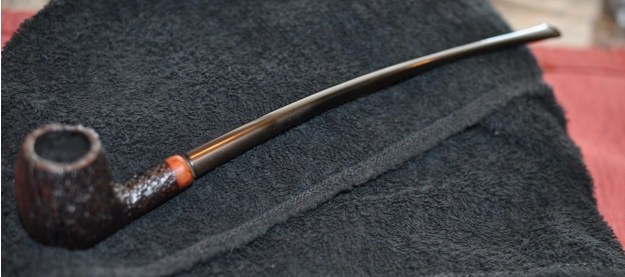
 I always look forward to this part of the restoration when all the pieces are put back together. I put the pipe back together and buffed the bowl and stem with Blue Diamond on the buffing
 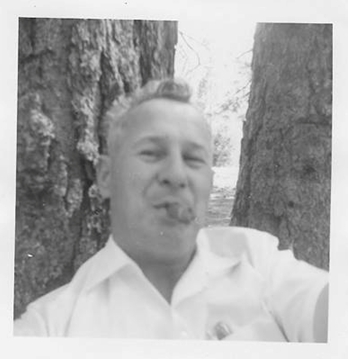 wheel. I gave the bowl multiple coats of Conservator’s Wax and the stem multiple coats of carnauba wax. I buffed the pipe with a clean buffing pad to raise the shine. I hand buffed it with a microfiber cloth to deepen the shine. It is fun to see what the polished bowl looks like with the sandblast standing out clearly and the smooth rounded shank end contrasting well. The newly fitted black vulcanite stem stands out as a shiny black contrast to the colours of the bowl. This Jarl T.V. pipe or Churchwarden is beautiful and feels great in my hand. It is one that could be clenched and smoked while doing other things as it is very light weight and well balanced. It must have been a fine smoking pipe judging from the condition it was when we received it from Jennifer. Have a look at it with the photos below. The dimensions are Length: 10 inches, Height: 2 inches, Outside diameter of the bowl: 1 1/8 inches, Chamber diameter: ¾ of an inch. This is one that will go on the rebornpipes online store shortly. If you want to carry on the pipe trust of George Rex Leghorn let me know. Thank you Jennifer for trusting us with his pipes. Thanks to each of you who are reading this blog. Remember we are not pipe owners; we are pipemen and women who hold our pipes in trust until they pass on into the trust of the next pipeman or woman.
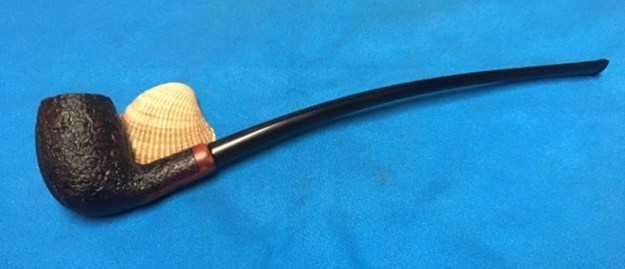

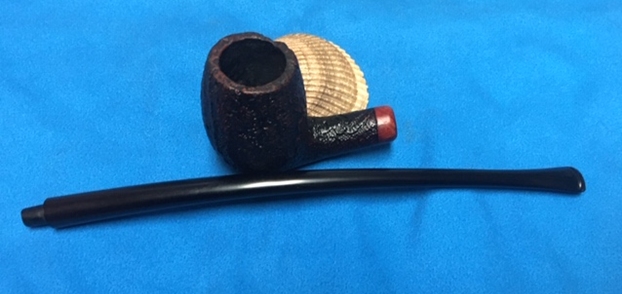

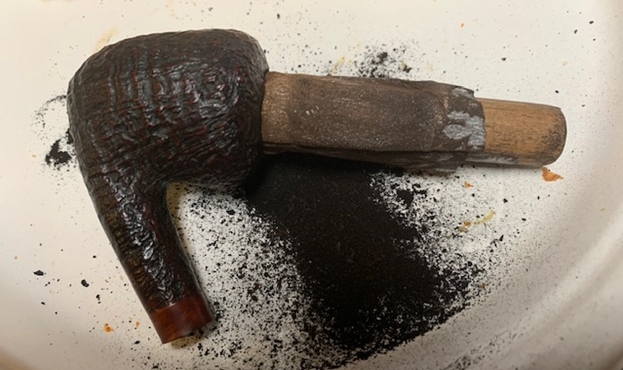
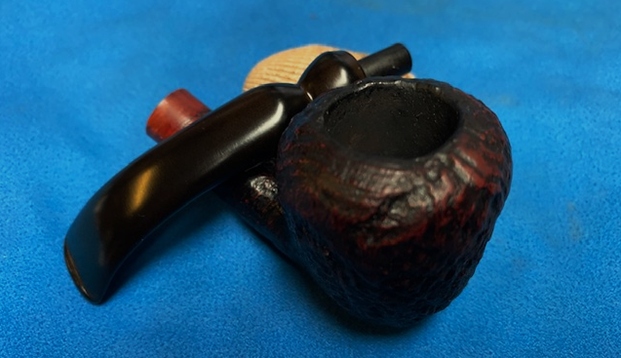
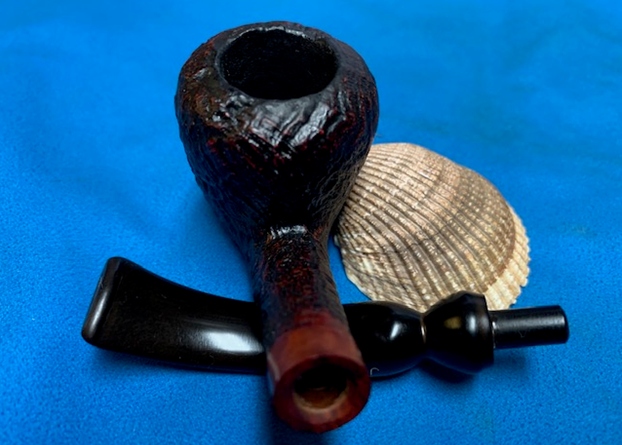
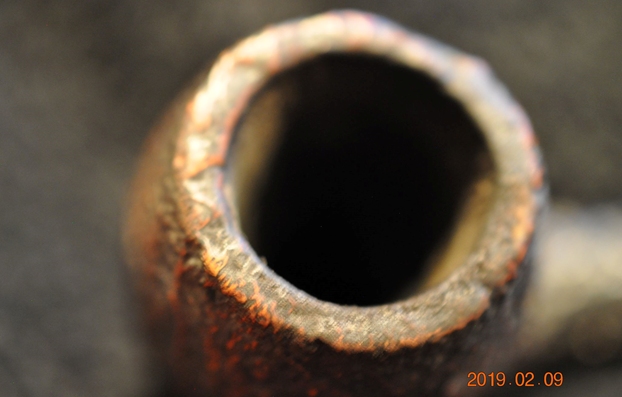
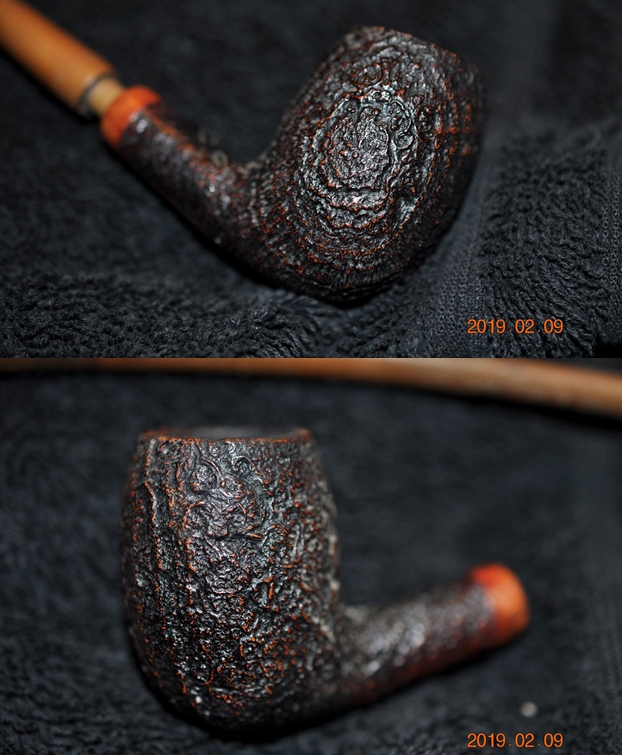
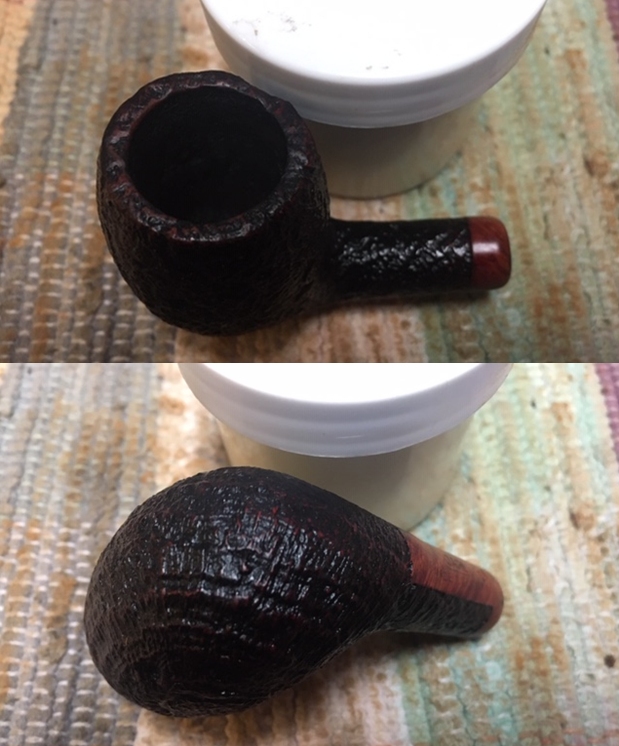
 Jeff took photos of the rim top and stem to show the general condition of the pipe. The bowl is heavily caked and there was lava on the rim top and the inner edge. The stem was lightly oxidized, calcified and had some tooth marks and chatter. It should cleanup very well.
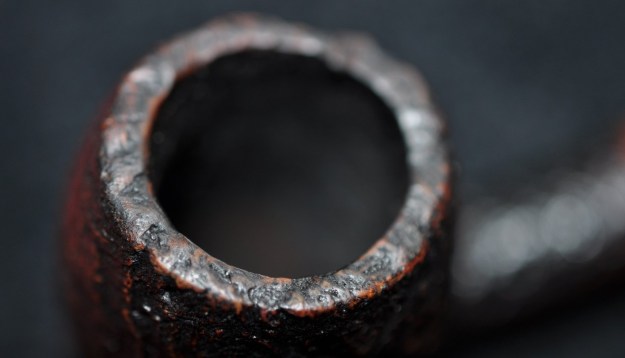
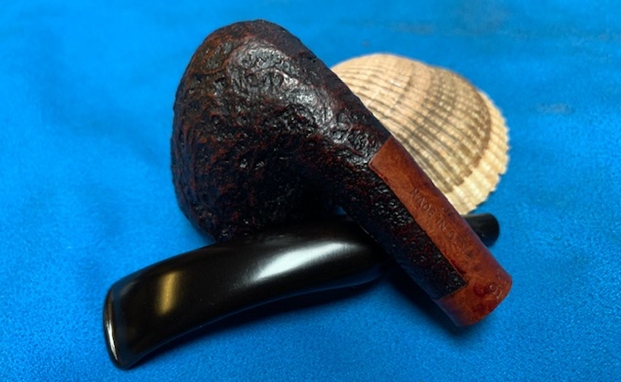
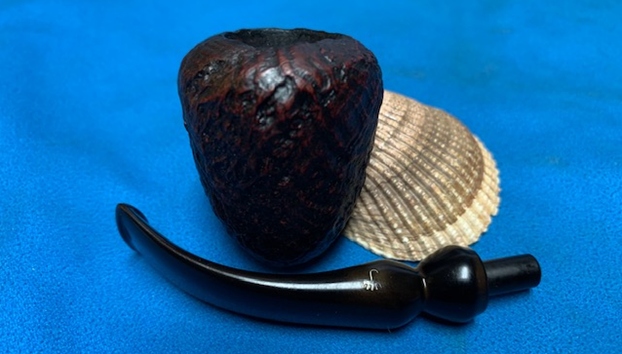
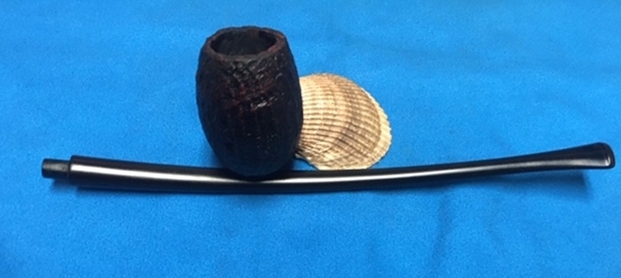
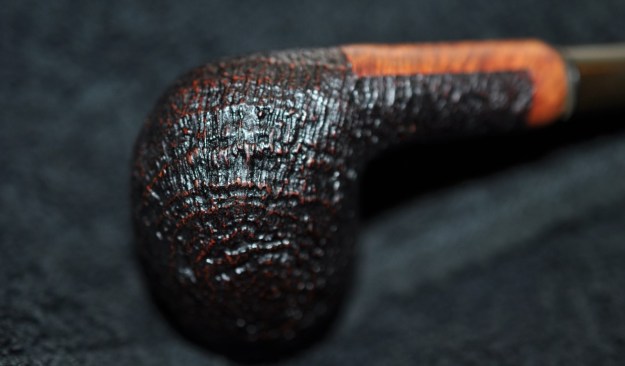
 Jeff took photos of the bowl sides and heel to show the smooth rim top, left and right bowl sides along with the beautiful blast that was around this bowl even though the grime on the finish hides it some. The pipe had obviously been well loved and cared for by the previous pipeman.
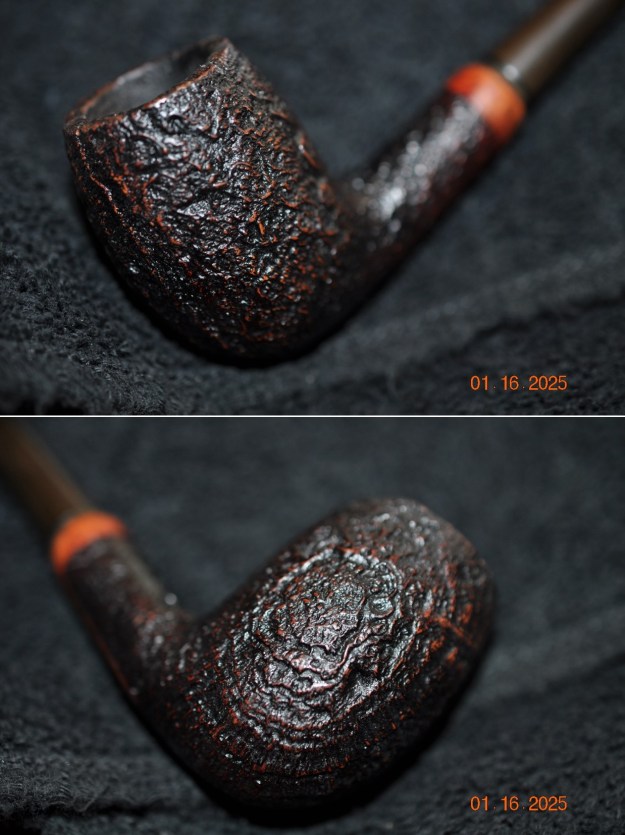
 He took photos of the sides of the shank to show the stamping. The stamping is clear and readable in the photos below as noted above.
 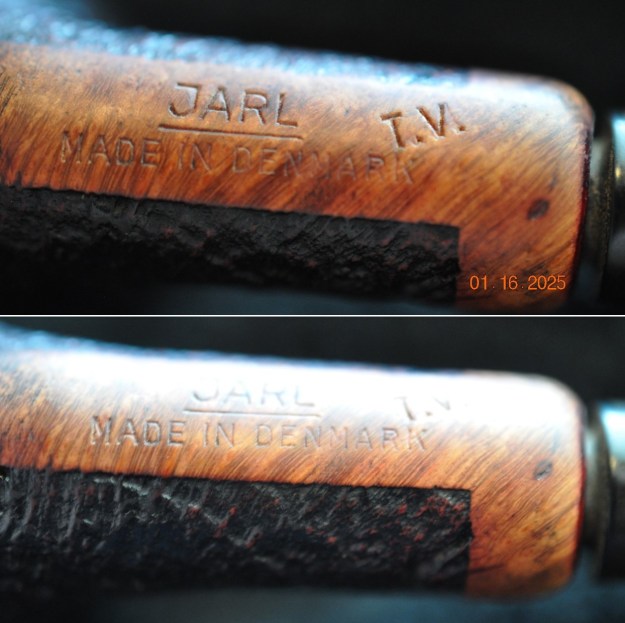 I turned to Pipephil for a review of the brand (http://www.pipephil.eu/logos/en/logo-j1.html). I did a screen capture of the section of the site that showed the Jarl T.V. pipe. It says that the brand was carved by Jorgen Larsen.
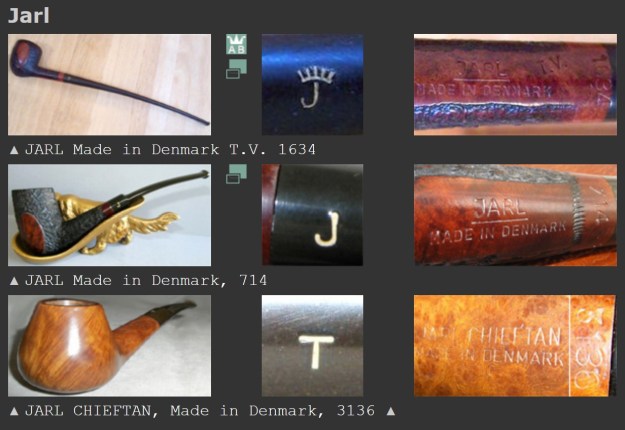 I turned to Pipedia for further information regarding the brand (https://pipedia.org/wiki/Jarl). I quote below:
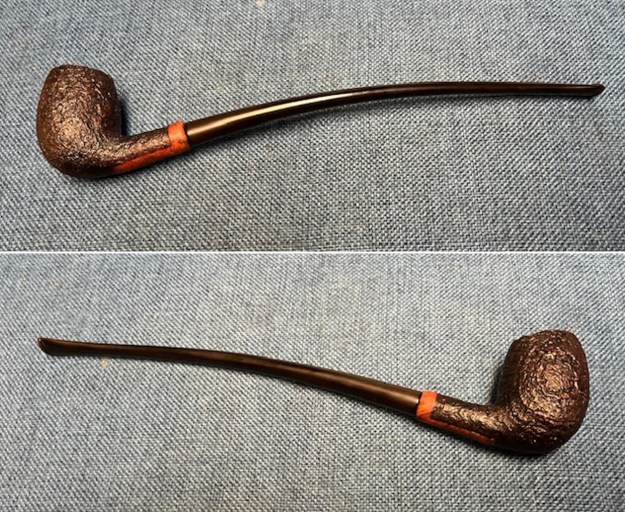
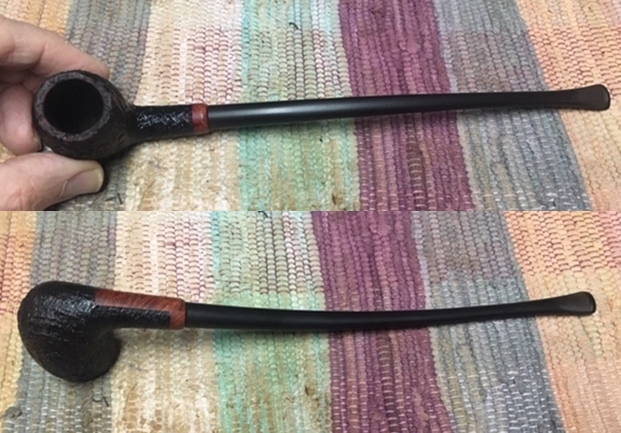
 I took photos of the bowl and rim top to show how well it had cleaned up. The edges and top were very clean and in excellent condition. The stem had some tooth chatter and light marks just ahead of the button.
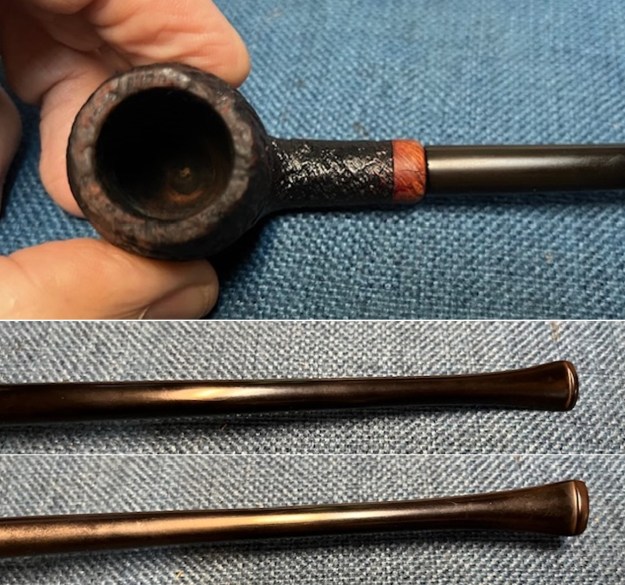 I took photos of the stamping on the smooth panel on the underside of the shank. They are readable as noted above. I took the stem out of the shank and took a photo of the overall look of the pipe.
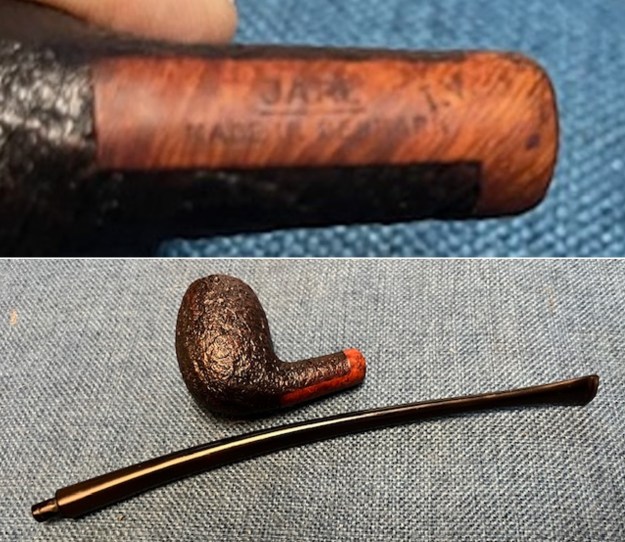 I started my work on the pipe by rubbing the bowl down with Before & After Restoration Balm. I worked it into the surface of the bowl sides and shank with my fingertips. The product works to clean, enliven and protect the briar. I let the balm sit for a little while and then buffed with a cotton cloth to raise the shine.
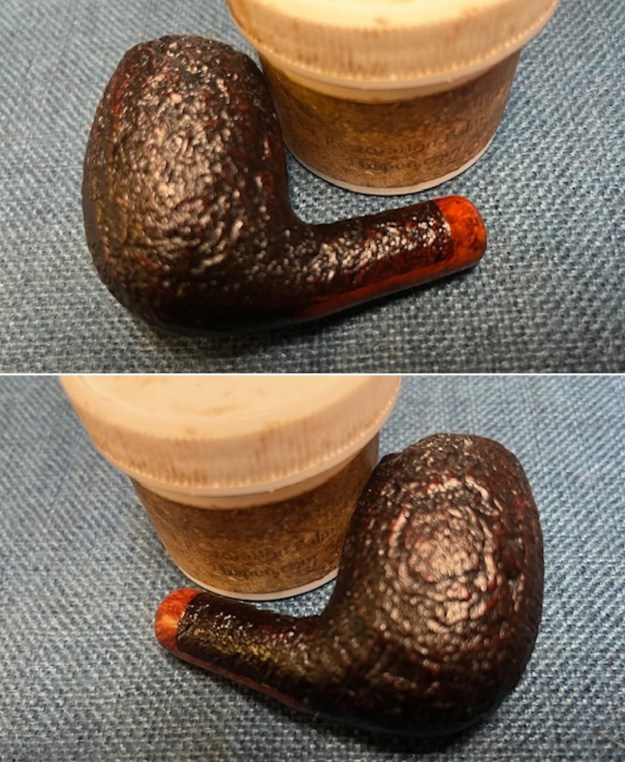
 I set the bowl aside and turned my attention to the stem. The stem was in good condition and I was able to start sanding out the chatter and marks with 1500-12000 micromesh sanding pads. I wiped the stem down after each pad with an Obsidian Oil impregnated cloth. I polished it with Before & After Pipe Stem Polish – both Fine and Extra Fine and gave it another coat of Obsidian Oil.
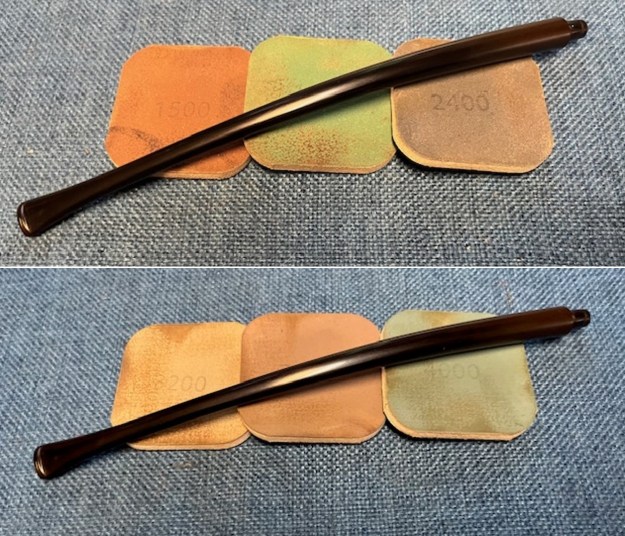
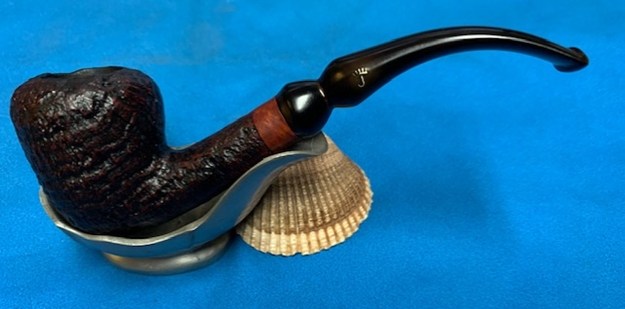
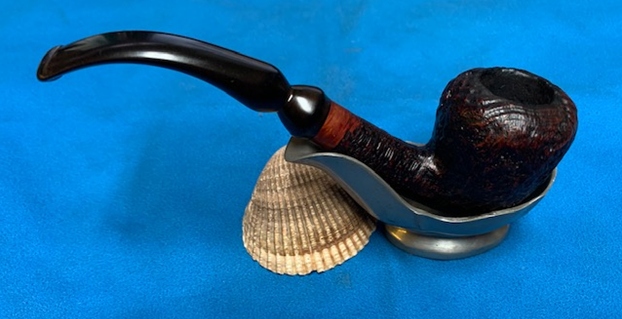
 I always look forward to this part of the restoration when all the pieces are put back together. I put the pipe back together and buffed the bowl and stem with Blue Diamond on the buffing wheel. I gave the bowl multiple coats of Conservator’s Wax and the stem multiple coats of carnauba wax. I buffed the pipe with a clean buffing pad to raise the shine. I hand buffed it with a microfiber cloth to deepen the shine. It is fun to see what the polished bowl looks like with the sandblast standing out clearly and the smooth rounded shank end contrasting well. The black vulcanite stem stands out as a shiny black contrast to the colours of the bowl. This Jarl T.V. pipe or Churchwarden is beautiful and feels great in my hand. It is one that could be clenched and smoked while doing other things as it is very light weight and well balanced. It must have been a fine smoking pipe judging from the condition it was when we received it. Have a look at it with the photos below. The dimensions are Length: 10 inches, Height: 2 inches, Outside diameter of the bowl: 1 1/8 inches, Chamber diameter: ¾ of an inch. The weight of the pipe is 1.09 ounces/32 grams. This is one that will go on the rebornpipes online store in the Danish Pipe Makers Section shortly. If you want to carry on the legacy of the previous pipe man let me know. Thanks to each of you who are reading this blog. Remember we are not pipe owners; we are pipemen and women who hold our pipes in trust until they pass on into the trust of the next pipeman or woman.