By Steve Laug
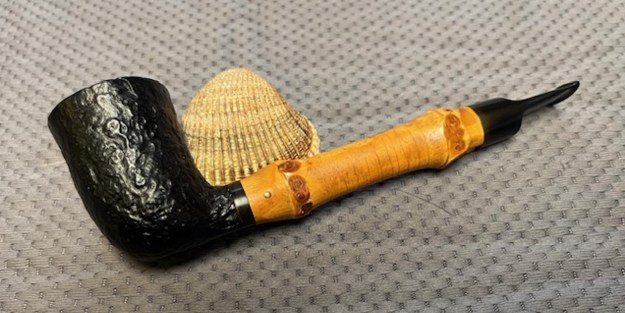
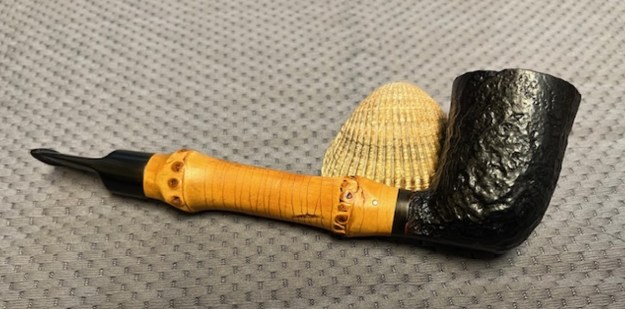
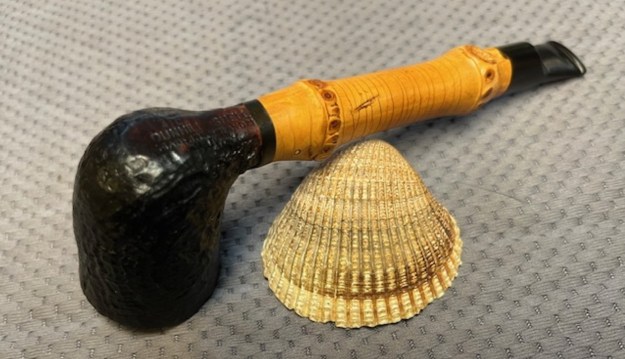
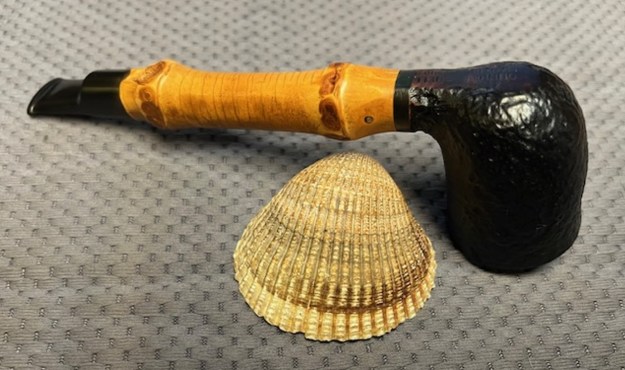
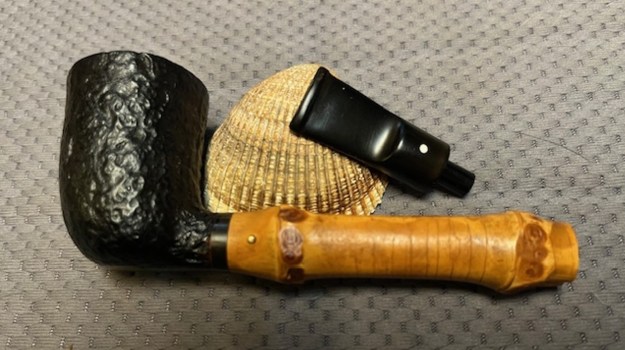
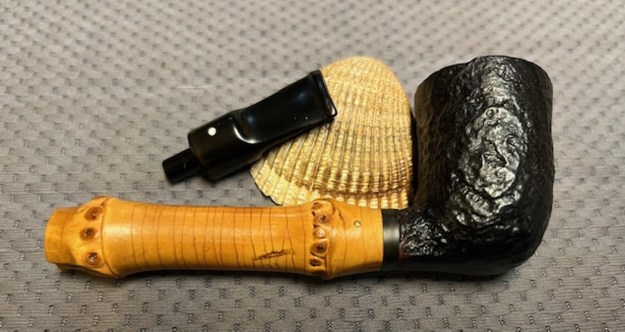
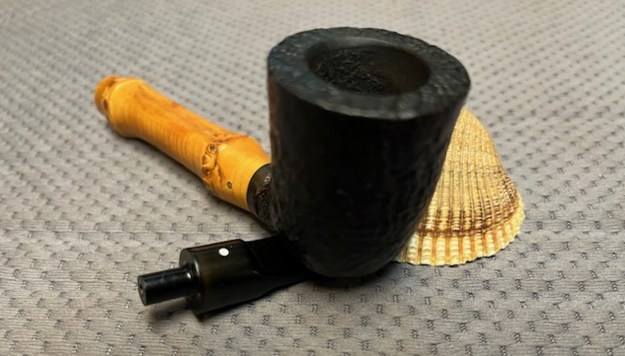
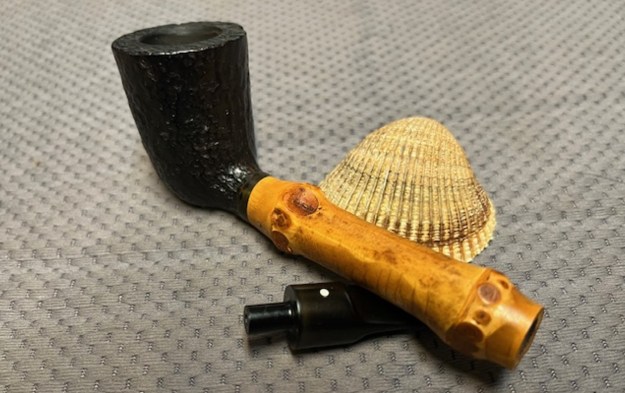
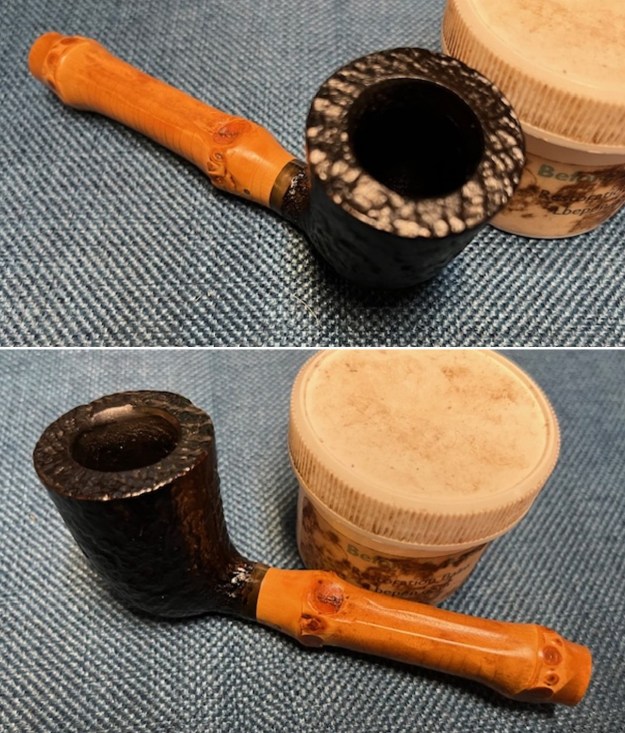
This is another of the four pipes that Sonny in Salmon Arm, BC sent to me for refurbishing. He put them in the mail and I received them on Monday this week. I took a photo of the box of four pipes once I unwrapped them. There were 4 interesting and very unique pipes – a Vauen Solitaire 148 Freehand Filter Pipe that is huge, an older case meerschaum with an overclocked stem, a Dunhill Wanghee Sandblast Dublin with a Bamboo shank and short saddle stem and finally an Anima wax drip sand blast Billiard carved by Brian McNulty. All needed varying degrees of restoration.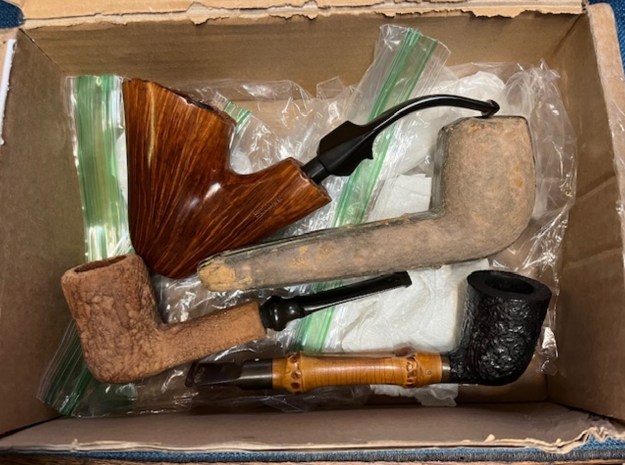 I chose to work on the Dunhill Shell with the Bamboo Shank and short saddle stem. It is stamped on the underside and reads 41051 [over] Dunhill Shell [over] Made in England21. There was a vulcanite spacer between the bamboo shank and the short briar shank on the bowl. It was oxidized. The bamboo shank had some crackling and a rich patina on the surface that would continue to deepen with age. The sandblast finish was dirty but had some nice grain showing through. The bowl was slightly out of round with a moderate cake in the bowl. There was some light lava on the rim top. The short saddle stem was oxidized, calcified and there were tooth marks and chatter ahead of the button. The top of the saddle also bore the Dunhill white. I took these photos before I started my work on the pipe.
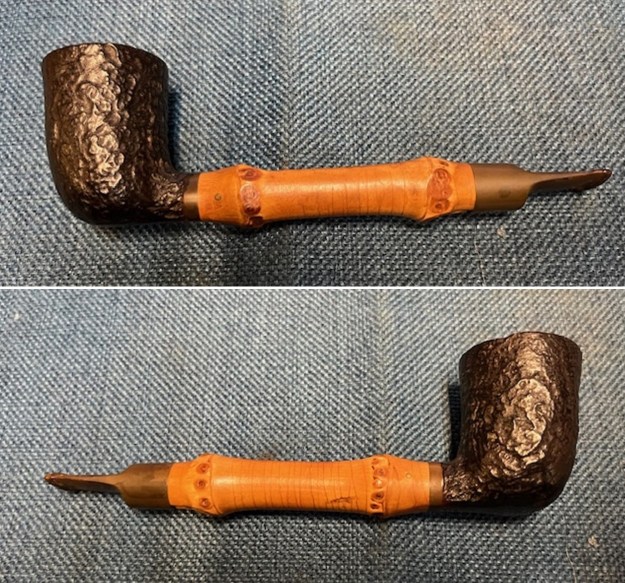
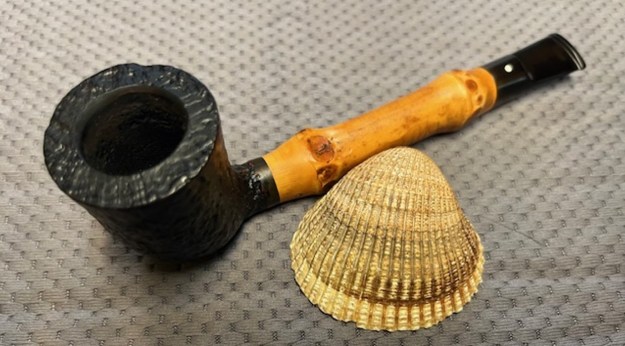
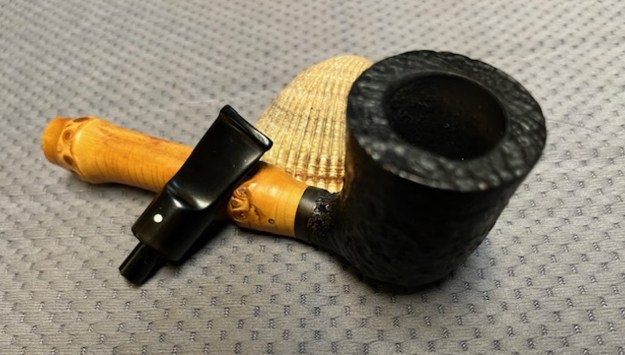
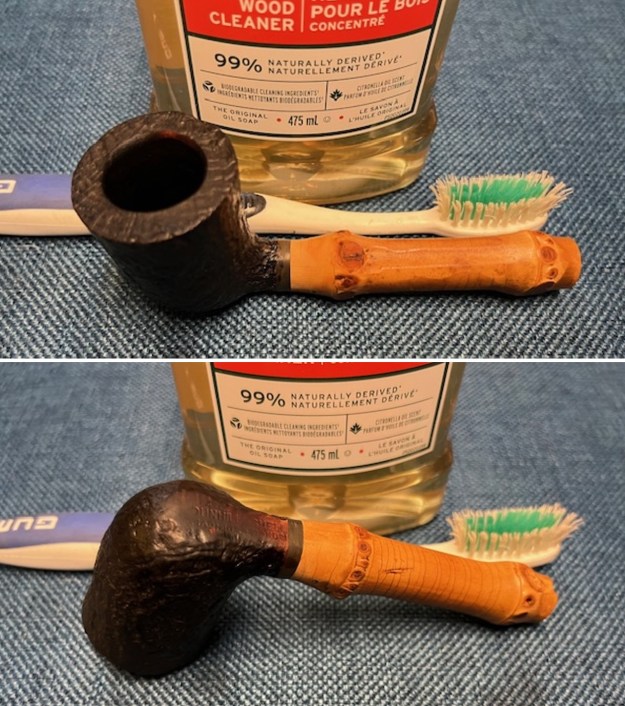
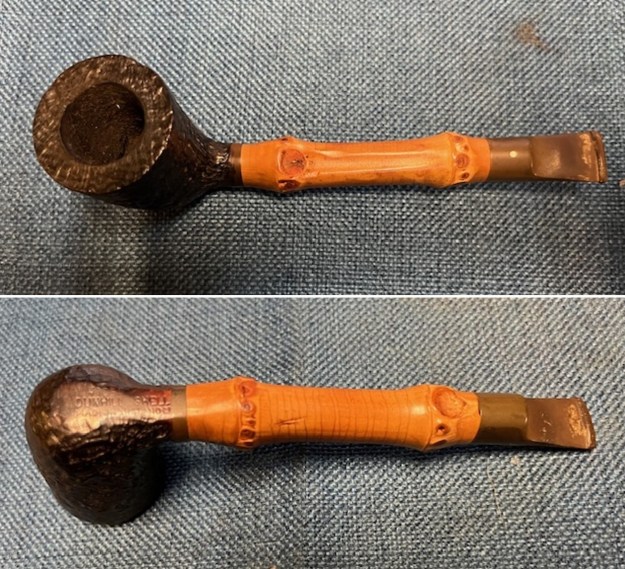 I took a photo of the rim top and bowl to show the condition of both of them. There is a moderate cake in the bowl. The rim top has some light lava and some damage on the right side of the inner edge. The photos of the stem show the oxidation and tooth marks/chatter on both sides ahead of the button.
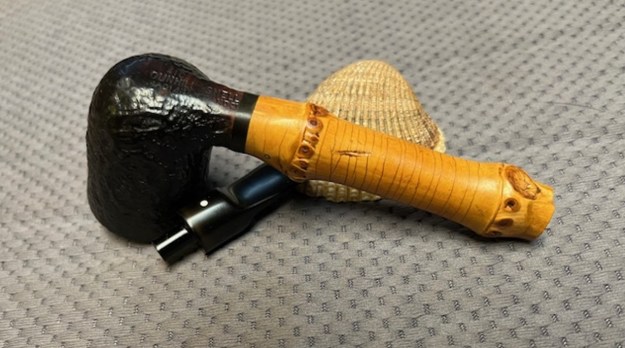
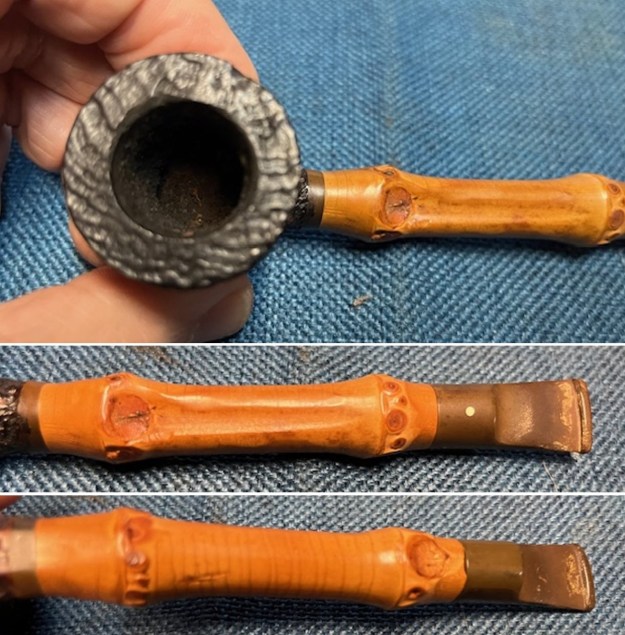 I took photos of the stamping on the sides of the shank. The stamping was clear and readable as noted above. I removed the stem from the shank and took a photo to show the beauty of the pipe.
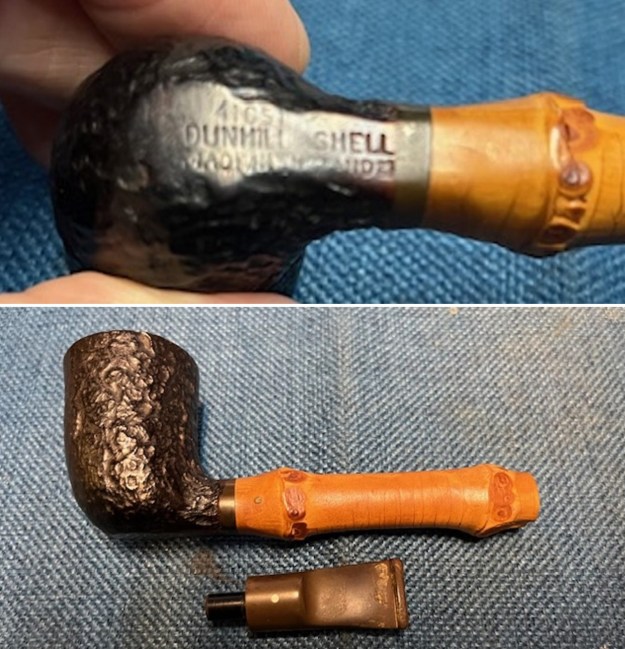 This morning I went back to the original blog describing the restoration of the previous Whangee pipe. I am including the link to the blog (https://rebornpipes.com/2020/01/08/refreshing-a-dunhill-tanshell-w60-t-1962bamboo-lovat-for-alex/). Give it a read. I am quoting my introductory comments in that blog below because they capture well the feelings I had when I first saw this bamboo shank pipe in Sonny’s box.
I carefully took it in my hands and examined it. While I have several Stanwell Bamboo pipes and older KBB Yello Bole Bamboos this is the first Dunhill that I had seen up close and personal. Alex told me that these bamboo-adorned pieces were referred to as “Whangee” pipes. I learned later that the term comes from the Mandarin word for bamboo, huáng lí and was used to describe canes and umbrellas with bamboo handles throughout the early to mid-1900s before being attributed to pipes — Dunhill’s in particular. I learned from reading on line that bamboo came to into use in pipemaking during the briar shortage that accompanied and followed WWII. As a means of saving on briar, pipemakers would extend the shank with bamboo.
The pipe was stamped on the heel of the bowl with the following nomenclature: 45051 over Dunhill Shell over Made in England. Next to that is an underlined 21which I believe designates the year of manufacture – 1981. So now I knew the date on this interesting Bamboo it is a newer Bamboo than others I have worked on.
One of the first things I like to do is to unpack the stamping and understand each element in it. I turned to Pipephil’s helpful site (http://pipephil.eu/logos/en/dunhill/shapes-l.html). I am using the illustration below to interpret the stamping.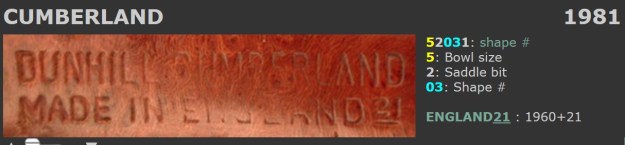 The 45051 stamp includes the shape code 05 for a Dublin. The 4 is the bowl size the other digits 5 and 1 are a bit harder to interpret. The fifth digit 1 is not needed. The 5 may refer to the shape of the stem (in this case a saddle stem) but I ma not sure. Pipephil also has some helpful dating keys on the site that are basically flow charts that you can walk through to date your pipe (http://pipephil.eu/logos/en/dunhill/cledat-en1.html). I turned to Part 1 of the Dating Key and followed the chart. This pipe has a 21 following the England stamp. That took me to the section on the chart below (column one) which instructed me that the pipe could be dated as being made posterior to 1954.
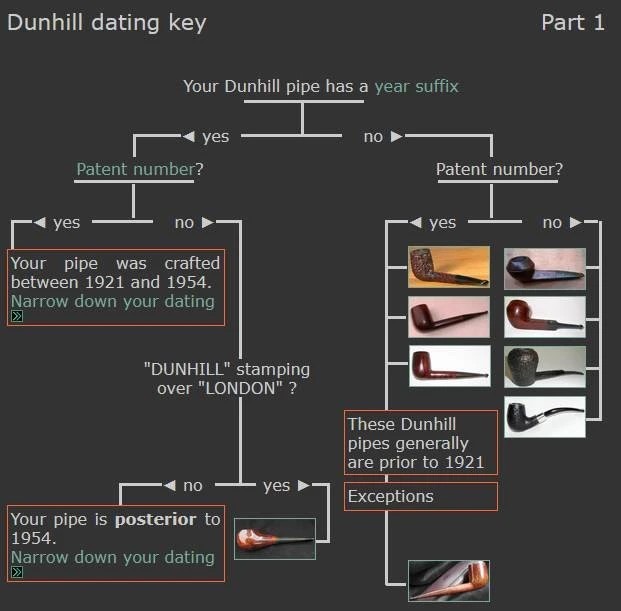 I followed the link following the “Your pipe is posterior to 1954. Narrow down your dating”. That took me to Page 2 of the dating key (http://pipephil.eu/logos/en/dunhill/cledat-en1a.html). The second column (suffix [1…4] or [11…39]) led me to the section with a 2 after the D in England. There was a directive for dating the pipe spelled out as follows: 1960 + suffix 21 which gives the pipe a date of 1981.
 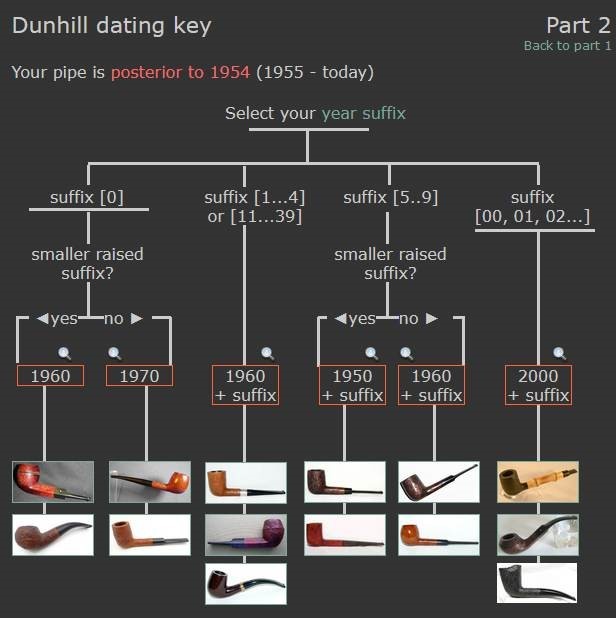 Even though this bamboo shank Dunhill was not stamped Whangee it had all the parts that make up a Whangee. So, I googled Dunhill Bamboo Wanghee to get a bit of background on the that brand and found a link on Smoking Pipes that had some helpful information that I will quote below the link (https://www.smokingpipes.com/pipes/estate/england/moreinfo.cfm?product_id=235695).
It’s not everyday you come across a Dunhill Whangee, the marque’s classic bamboo-shanked pipe. Though originally incorporated into Dunhill’s lineup several decades back, when briar was in short supply, these eccentric designs caught on, and many collectors have even built entire rotations around them. You will occasionally find one on the estate market, as we do here, but they tend to sell quickly, especially if it is an older example like this ’62 edition — in part due to their general rarity, but also because of their overall unique aesthetic. You can’t find classic English designs fitted with oversized bamboo extensions everywhere, after all…
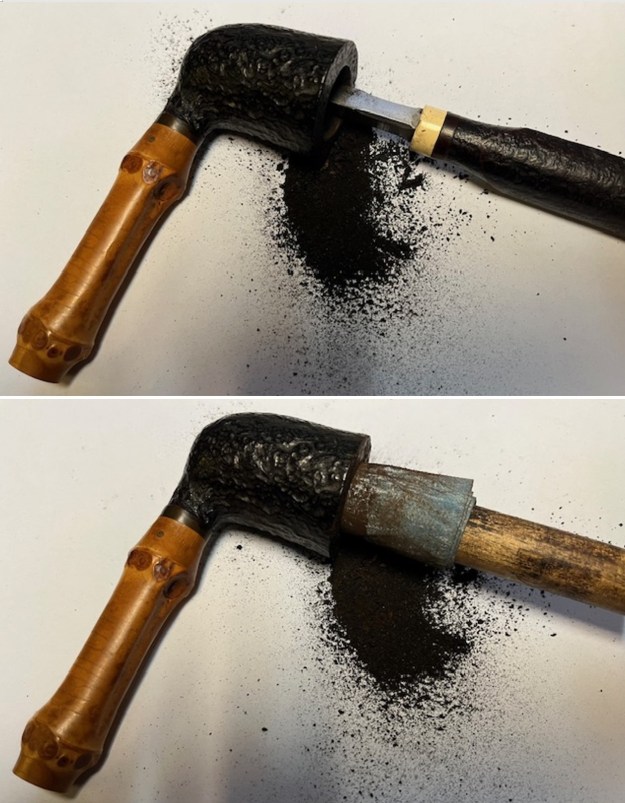
I turned to work on the pipe itself. I reamed the cake with a PipNet pipe reamer using the second cutting head to cut back the cake to bare briar. I used a Savinelli Fitsall Pipe Knife to clean up the remnants on the bowl walls. I sanded the walls of the bowl with a piece of 220 grit sandpaper wrapped around a piece of dowel. The walls of the bowl are undamaged and smooth. 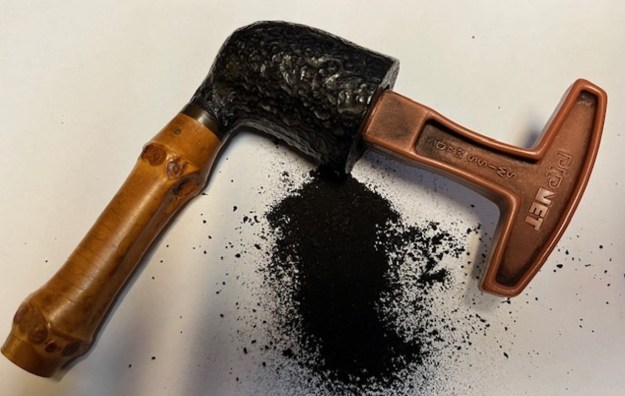
 The shank was clogged and I could not get air to flow well through it. I pushed a wire through the shank to open it up. Then I scrubbed the inside of the bamboo shank and the mortise with alcohol and pipe cleaners. I also cleaned out the airway in the stem the same way.
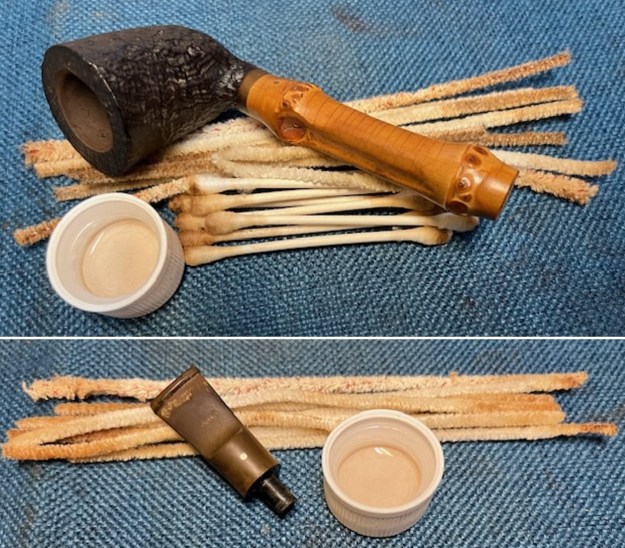 I cleaned up the inner edge of the rim and brought the bowl back to round with a folded piece of 220 grit sandpaper. It looked much better once I had finished the reshaping.
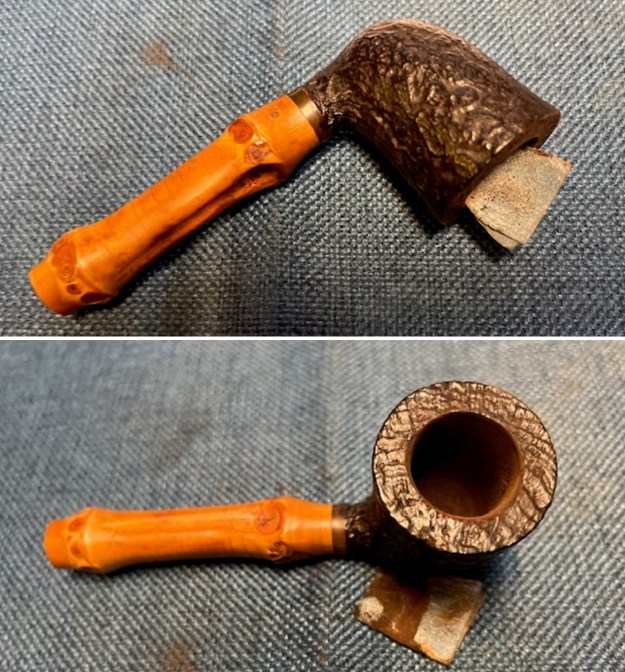 I scrubbed externals of the bowl with a tooth brush and undiluted Murphy’s Oil Soap. I rinsed off the grime and debris that came off in the scrubbing with warm water. I dried it off once it was clean. It looks very good!
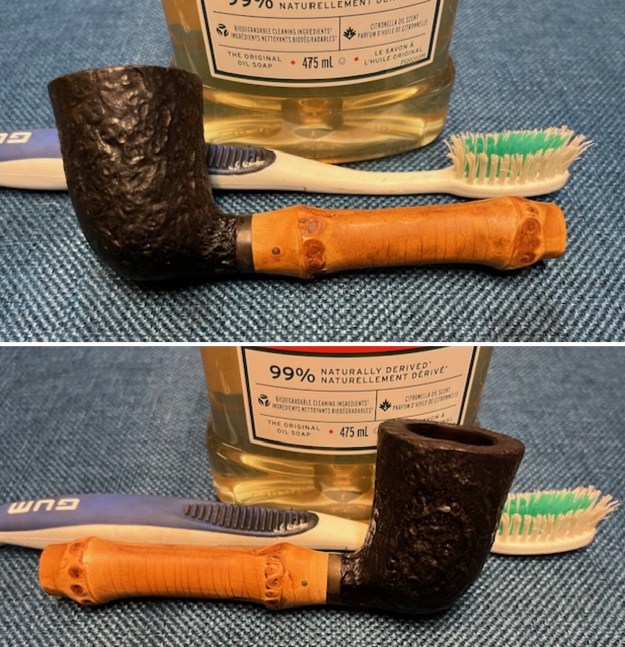
 I rubbed the briar down with Before & After Restoration Balm. I worked it into the briar and the bamboo with my fingertips and a shoe brush. The product works to clean, enliven and preserve the briar. I let it sit for 10 minutes then I buffed it with a cotton cloth to deepen the shine. The briar comes alive with the balm.
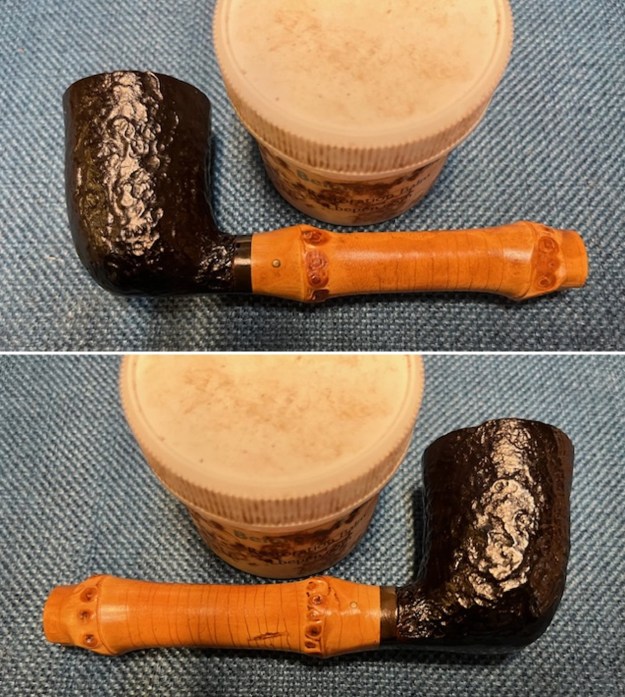
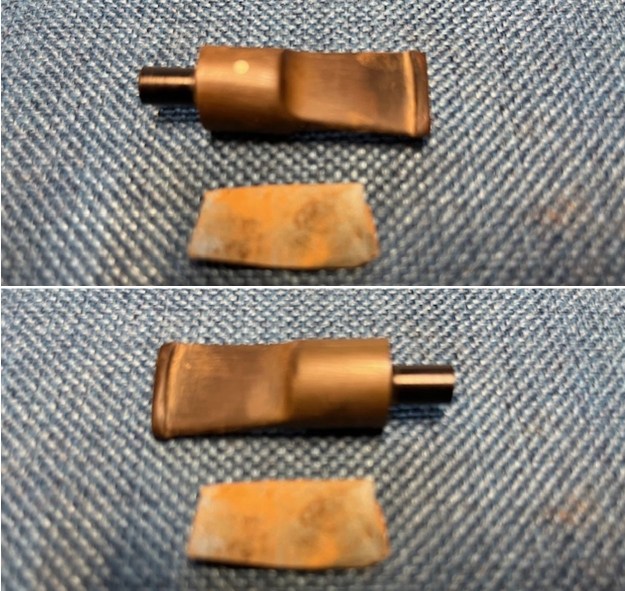
 I set the bowl aside and turned to address the tooth marks and chatter in the stem surface. I “painted” the tooth marks on the stem with the flame of a Bic lighter. I was able to lift the tooth marks to the place where I could sand out what remained. I sanded them with 220 grit sandpaper to blend them into the surface of the stem.
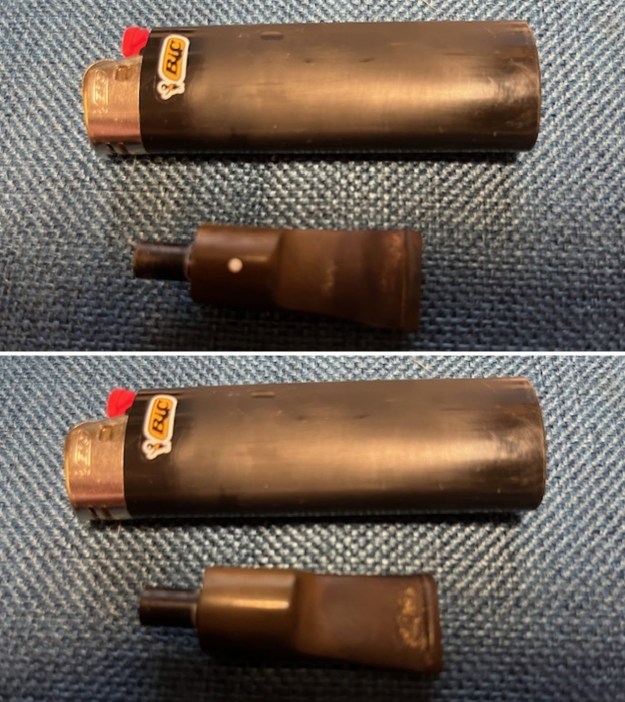
 I sanded the stem surface with 320-3500 grit sanding pads. I dry sanded with each pad and wiped the stem down after each pad with a Obsidian Oil impregnated cloth.
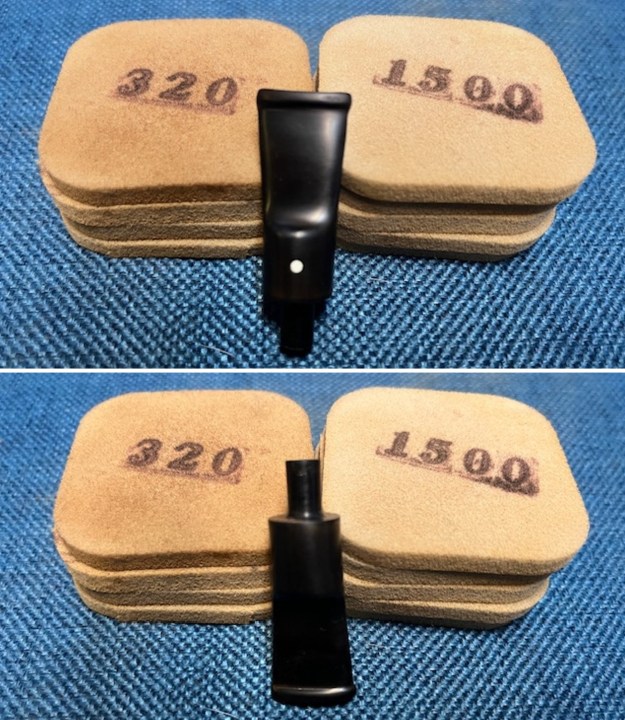 I polished the vulcanite with micromesh sanding pads – 1500-12000 grit pads. I wiped it down with Obsidian Oil after each sanding pad. I used Before & After Pipe Polish – both Fine and Extra Fine to further polish the stem. I gave it another coat of Obsidian Oil and set it aside.
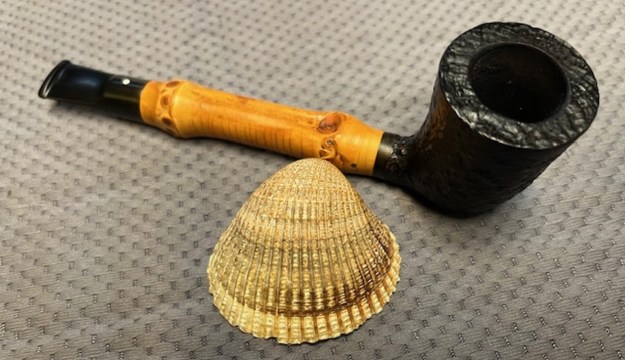
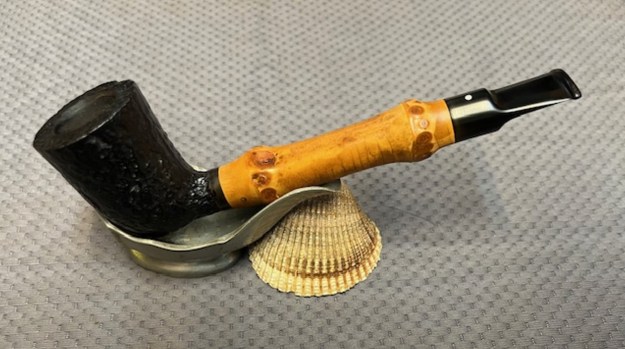
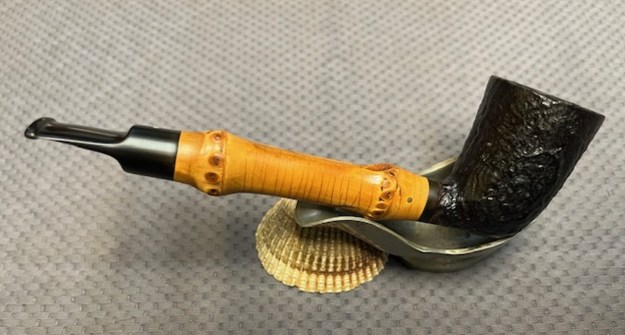
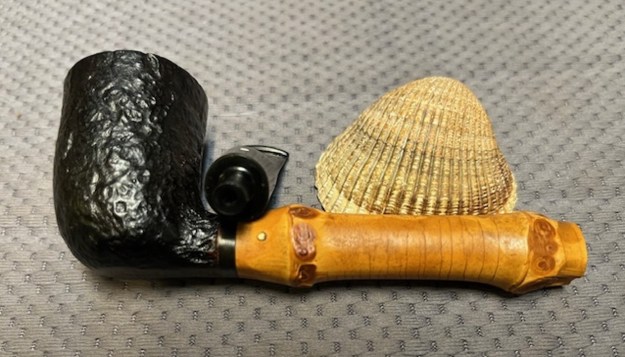
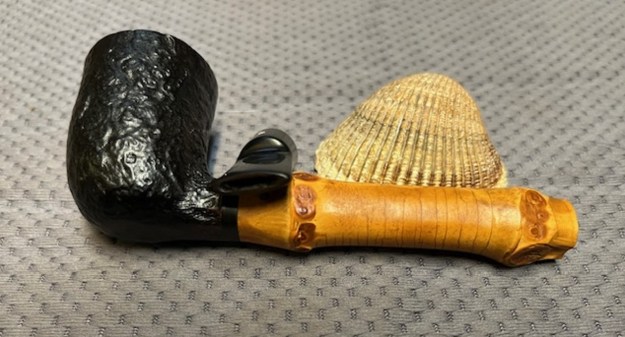
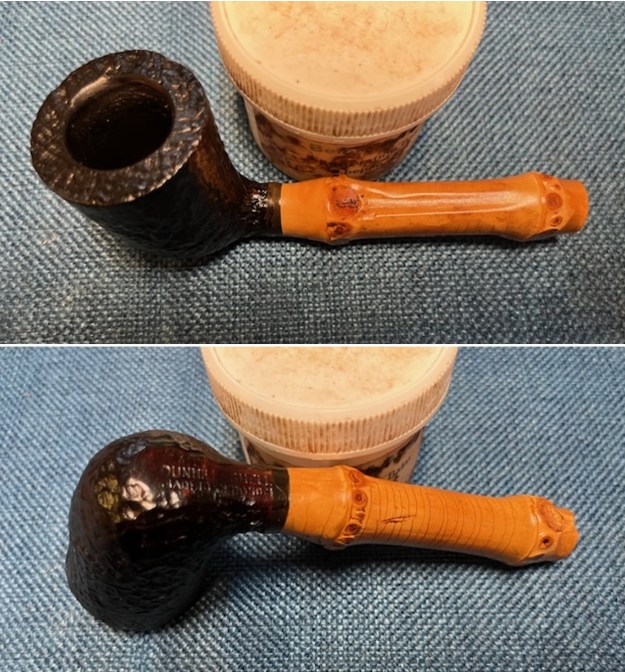
 Once I finished with the 1981 Dunhill Shell Bamboo 41051 I put the stem back on the shank and carefully buffed the pipe with Blue Diamond polish using a lightly loaded pad and a soft touch. I wanted the shine but not the grit filling in the crevices of the sandblast bowl. I used even a gentler touch on the bamboo. I gave the stem a vigorous polish being careful around the white spot. I gave the bowl and bamboo several coats of Conservator’s Wax and the stem several coats of carnauba. I buffed the pipe with a clean buffing pad and hand buffed it with a microfiber cloth. The finished pipe is shown in the photos below. It is a great piece of pipe history and looks better than when I began the process. The dimensions of the pipe are Length: 6 inches, Height: 1 ¾ inches, Outer Bowl Diameter: 1 ¼ inches, Chamber Diameter: ¾ of an inch. The weight of the pipe is 1.16 ounces/ 33grams. Two more of Sonny’s pipes to work on before I send them all back to him. Thanks for reading this blog and my reflections on the pipe while I working on it. As always, I encourage your questions and comments as you read the blog. Thanks to each of you who are reading this blog. Remember we are not pipe owners; we are pipemen and women who hold our pipes in trust until they pass on into the trust of those who follow us.