
Blog by Steve Laug
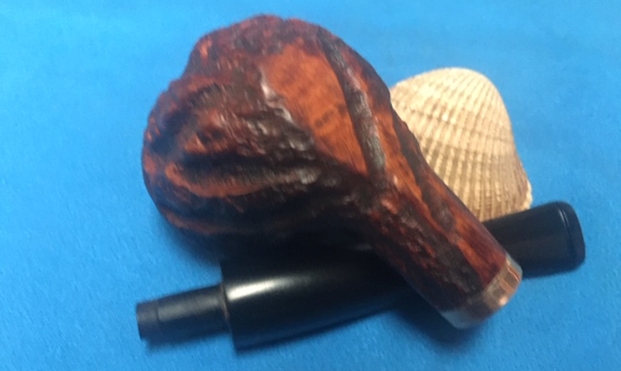
Sometimes when we are caught up in the Adrenalin of a pipe hunt often sympathy for an old pipe surpasses logic. That was certainly the case with this tired and damaged old Custom-Bilt Billiard. We just picked it up and said it was going with us. Later in looking at it I wondered what we had done. The thick cake in the bowl and the fact that the pipe was filthy were not huge problems for us so ignore those. Here are just a few of the issues with the pipe. There appeared to be serious burn damage to the rim top and inner edge of the bowl. The stem was an obvious replacement which is not a problem but it appeared to be crooked. Was the issue the stem or the shank? Taking it out of the shank it was clear that the issue was both. The stem was too large and the tenon was off centre. However it was also clear that the shank had been hacked off at an angle and was not straight. There were chips of briar missing on the shank end. Fortunately it appeared that the mortise was straight and still functional. Those were just the issues I saw without spending a lot of time looking. But there was still some charm in the old pipe that made me want to try. Jeff took the pipe home with him to do his work on it. He took the following photos of the pipe before he started his cleanup.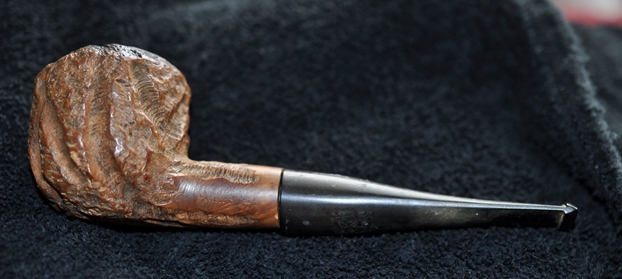
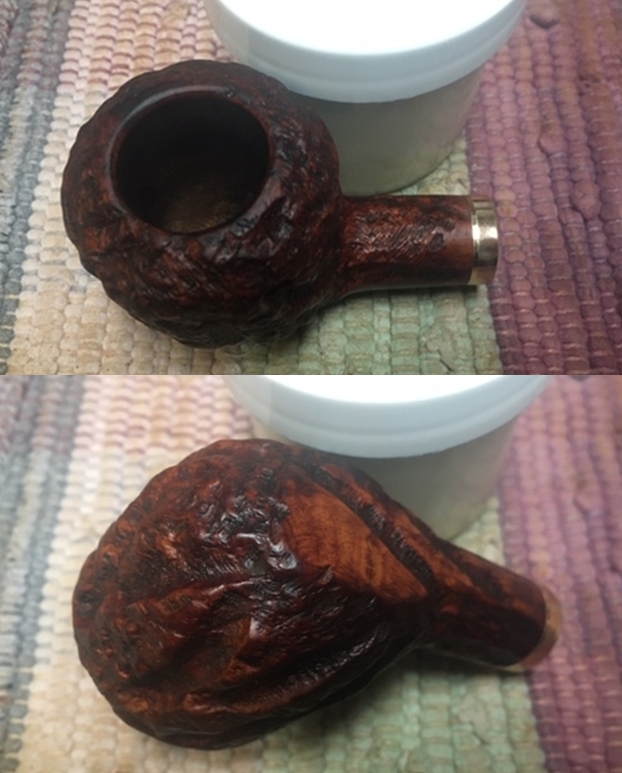
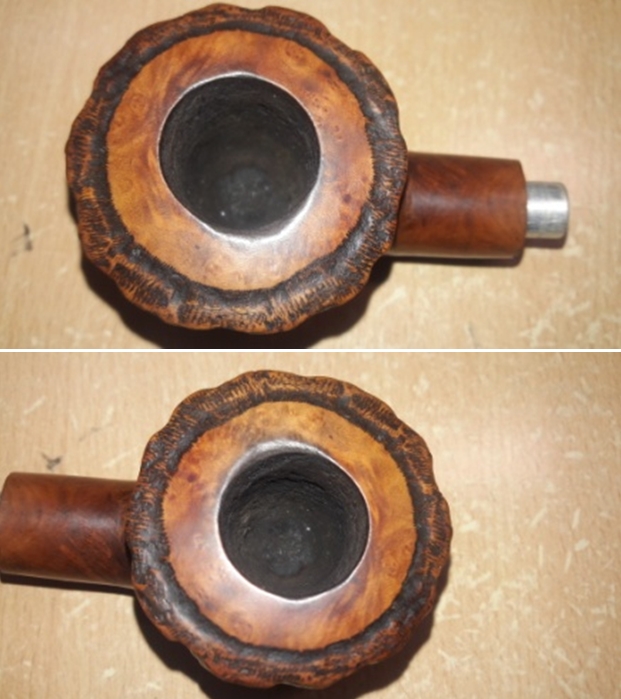
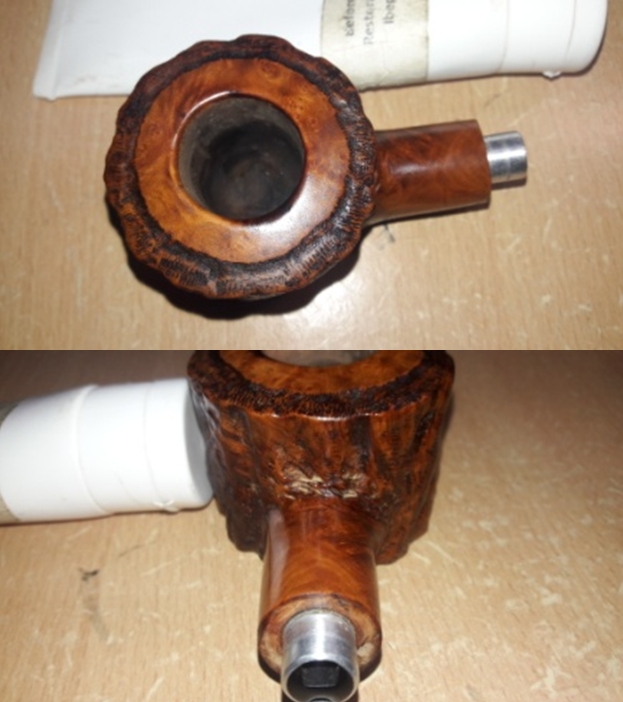
 Jeff took photos of the damage to the rim top. You can see the damage on the inner edge of the bowl where there is some serious burn damage. There is also damage on the rim top itself. The rustication is filled in with lava and it is hard to see the extent of the damage.
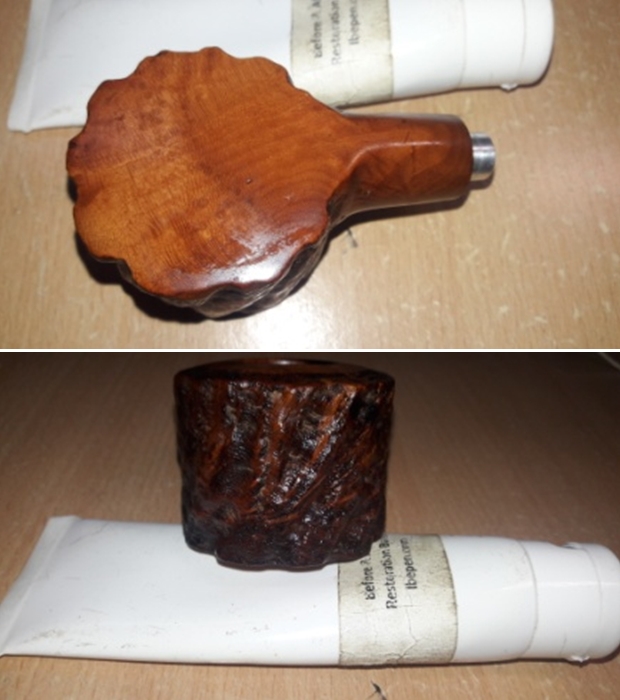
 He took photo of the rustication around the sides and heel of the bowl to show both the damage and the grime ground into the bowl sides.
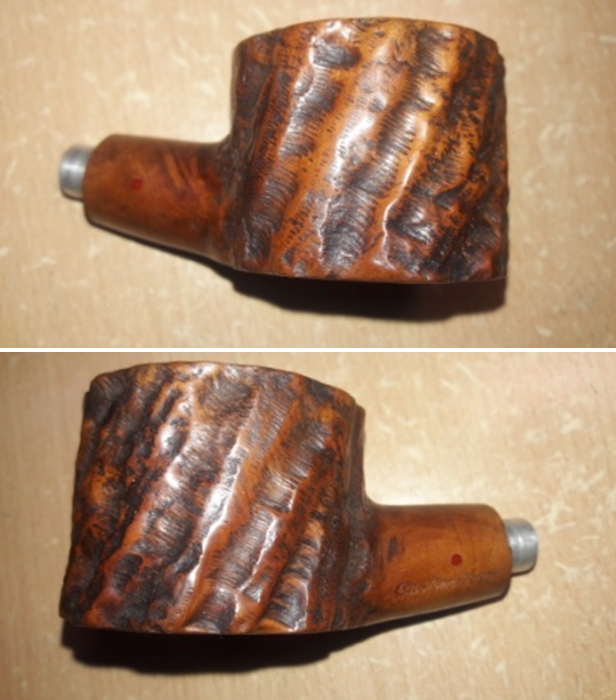
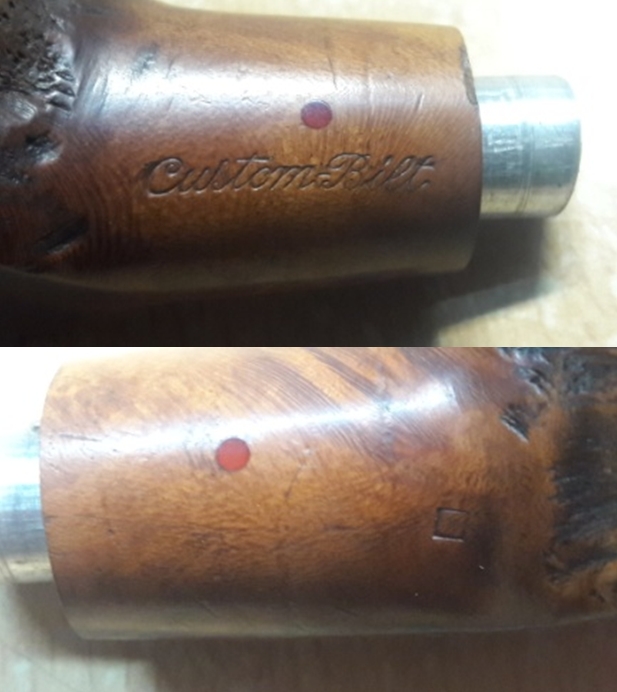
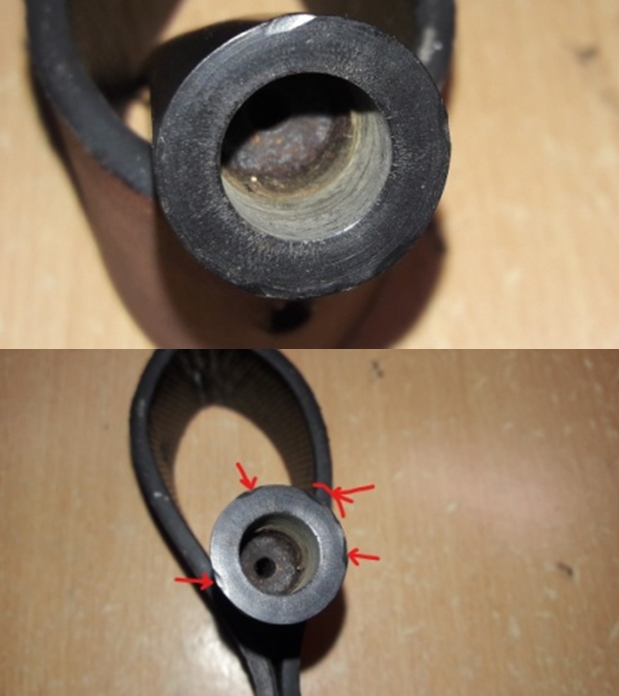
 He took a photo of the stamping on the shank side showing the Custom-Bilt stamp. It is readable but fainter toward the bottom of the stamp. The second photo below shows the fit of the stem to the shank and it is clear how it is both larger and off in terms of the fit.
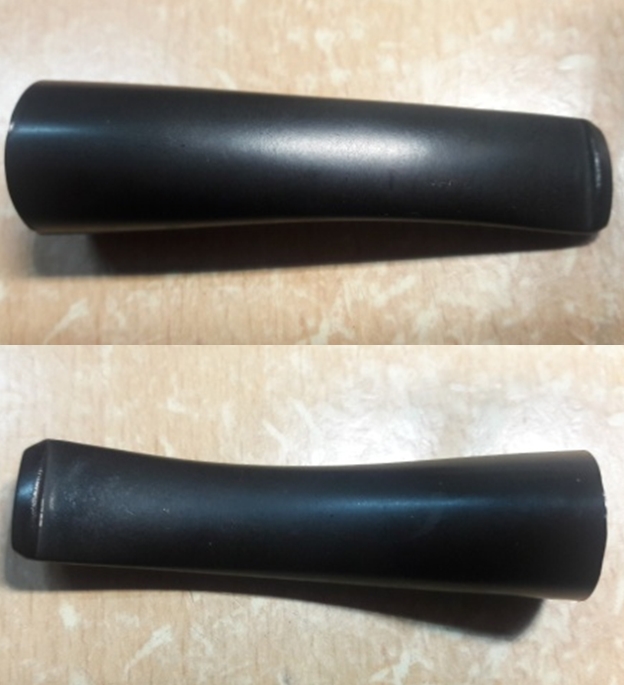
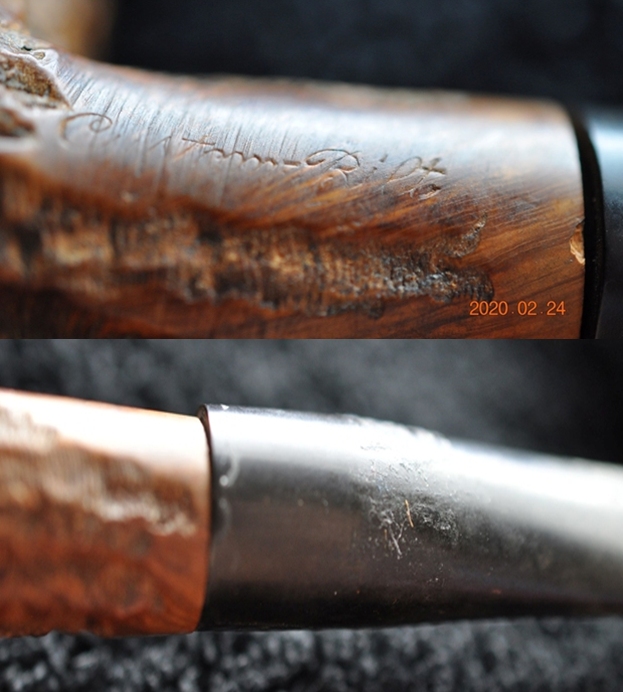 The next photos show the condition of the stem. I am not too concerned with it because it will need to be replaced.
 I turned to Pipephil (http://www.pipephil.eu/logos/en/logo-c8.html) to get a quick view of the brand once again. I knew that I was working with one of the older pipes and probably made by Tracy Mincer himself. He stopped making the Custom-Bilt pipes in the early 1950s. The screen capture I included below shows a brief history of the brand.
 I turned to Pipedia (https://pipedia.org/wiki/File:CustomBilt_Stamp1.jpg) for a quick read. The majority of the information there was two book reviews of the Custom-Bilt Story by Bill Unger. The one line I culled was the following: “Tracy Mincer started the original Custom-Bilt pipes it appears in 1934”.
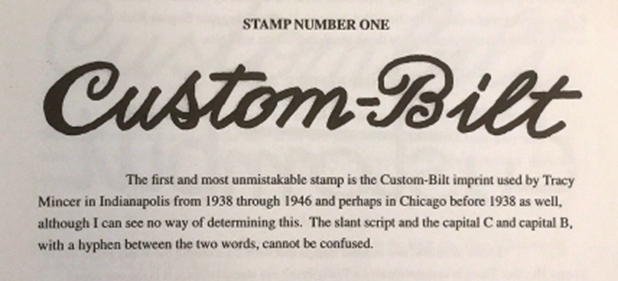
I did a screen capture of the stamping that matched the stamping on the pipe that I am working on. What I learned from that is that the stamp was used by Tracy Mincer in Indianapolis in the US from 1938-1946 and possibly in Chicago before 1938 as well. So now I had a possible date for this pipe. It was an old timer and it was well worth working on.
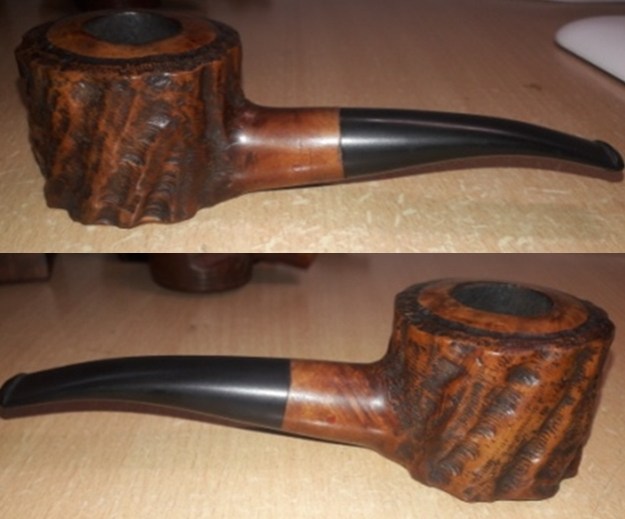
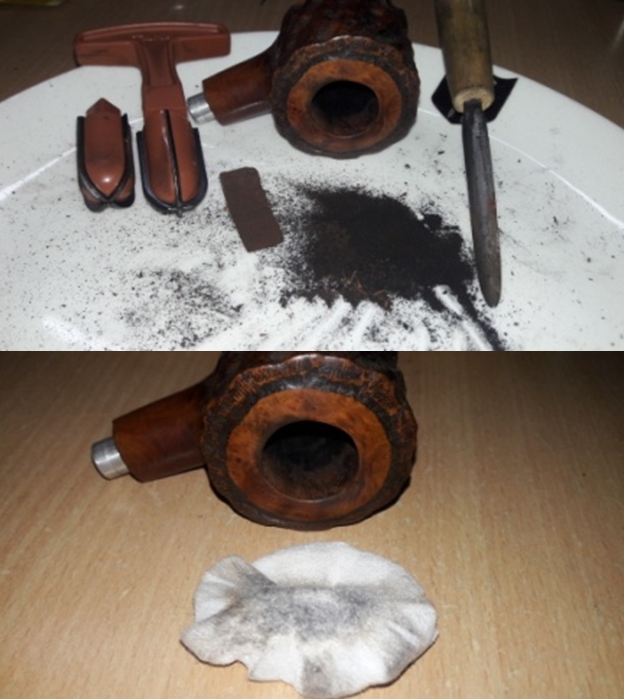
Armed with that information I turned to work on the pipe itself. Jeff had done a great job cleaning up the pipe as usual. He reamed the pipe with a PipNet reamer and cut back the cake back to the bare briar. He cleaned up the walls with a Savinelli Fitsall Pipe Knife. He scrubbed the interior of the bowl and shank with pipe cleaners, cotton swabs and alcohol to remove the tars and oils. He scrubbed the exterior of the pipe with Murphy’s Oil Soap and a tooth brush to remove the grime from the finish. Jeff cleaned up this stem even though it would probably be replaced. He scrubbed the inside of the stem with alcohol and pipe cleaners. He scrubbed the exterior with Soft Scrub and then soaked it in Before & After Deoxidizer. He washed it off with warm water to remove the deoxidizer. The pipe looked far better. I took photos of the pipe when I received it before I started working on it. You can see the misfit stem. 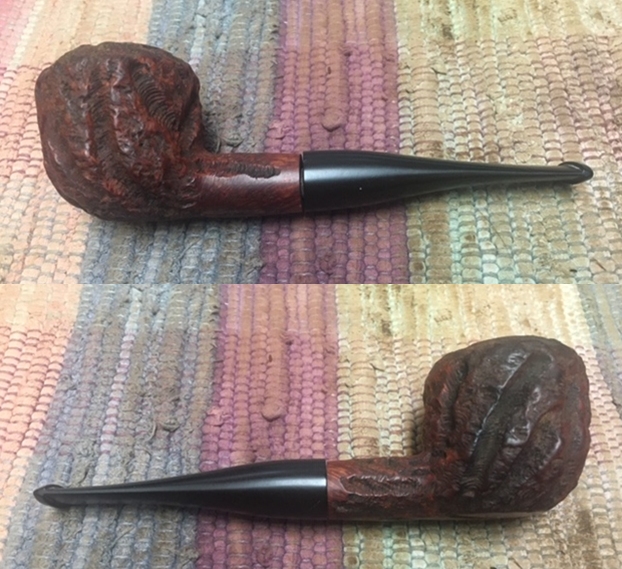
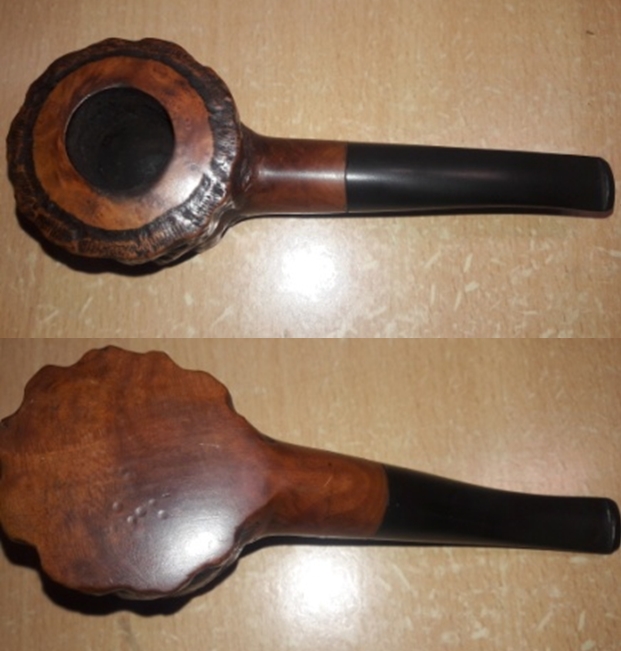
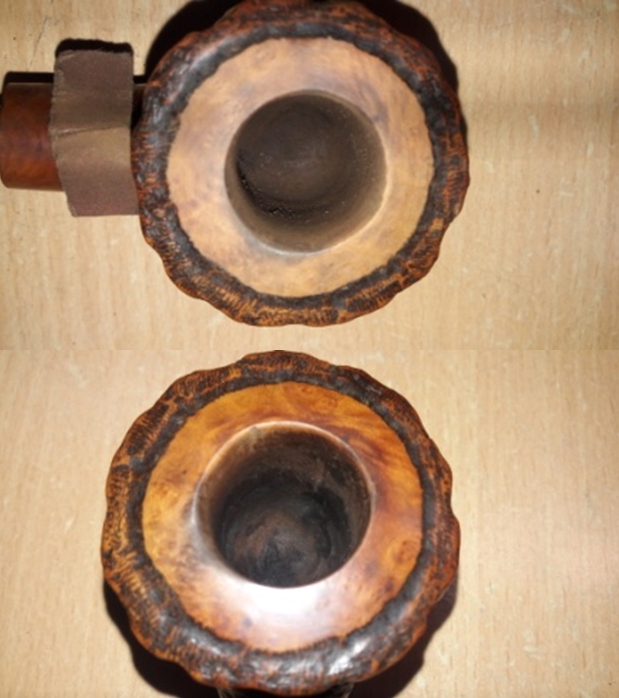
 I took a photo of the rim top to show how well it cleaned up and the damage on the front and rim top. I also took a series of photos to show the angles of the misfit stem. You can see that the fit is at an angle. The shank end is also not straight.
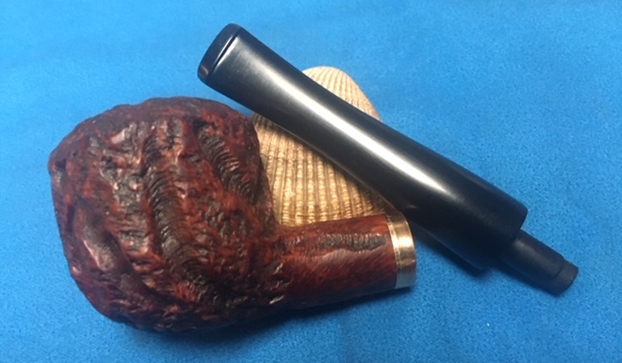
 I went through my collection of stems and found one that was the right profile and right length. I found a perfect stem that even had a turned tenon that would just need adjustment.
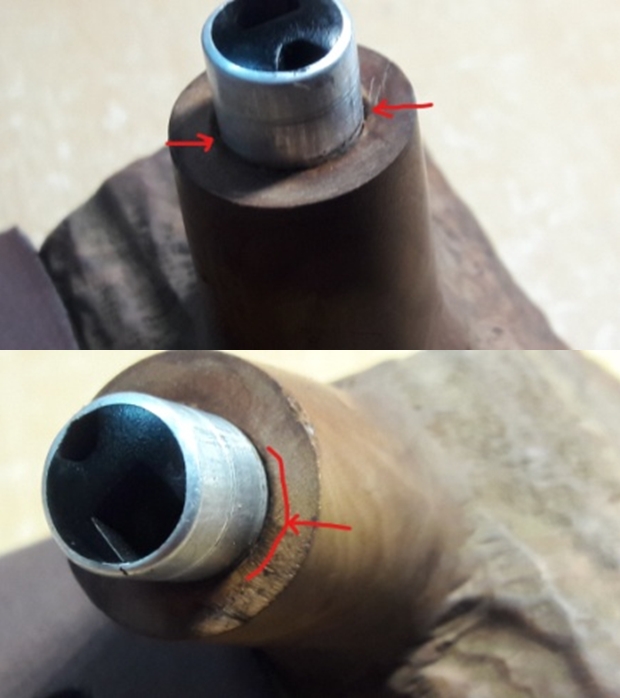
  I took some pictures of the shank end to show the cut angle of the shank. It is just slightly off not a huge amount but when a stem was against the shank it was obvious. The right side was longer than the left and the top was longer than the bottom.
 I used the topping board to lightly sand the shank end but it was not to be without removing more of the shank end than I wanted. The chips out of the shank end made it necessary to sand deeper. I decided to use a thin brass band that also capped the end of the shank. I coated the shank end with some all-purpose glue and pressed the band in place. I put the new stem on the shank and adjusted the band to take care of any deviation in the face of the shank. I removed the stem and set the bowl aside to let the glue cure.
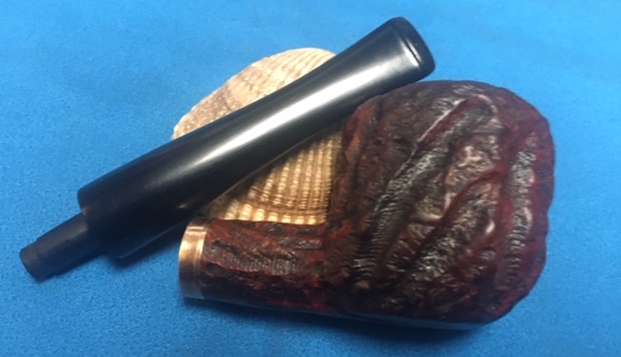
 Once the glue on the band had cured I put the new stem in place in the shank to show the fit to the shank end. There is a lot of material to remove from the diameter of the stem at this point but the fit is perfect.
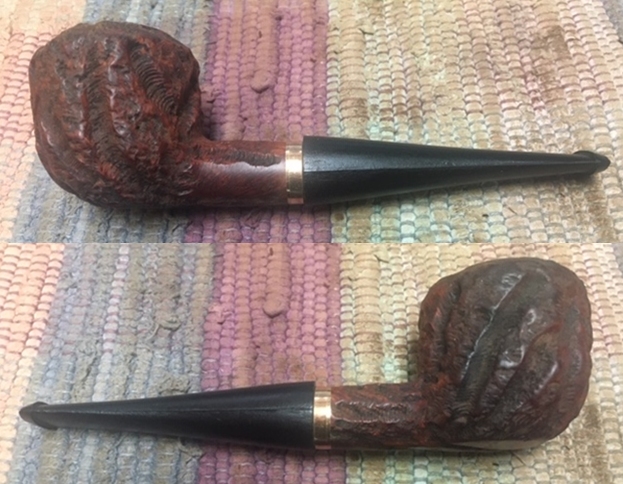
 I used my Dremel and sanding drum to carefully remove the excess material. I always start this process with the stem in place on the shank. I get it as close as possible to the shank size as I can without nicking the band. Once I have it close I remove the stem and finish it without the shank. The photo below is one I sent to Jeff to show him the progress. It shows the stem after the rough fitting. Lots of work still to do but you can see that it is coming along well.
 Now the shaping work began in earnest. I used folded 220 grit sandpaper to sand the stem and remove the scratching left behind by the Dremel and sanding drum. I also adjusted the fit to the shank by repeatedly taking photos of the fit. I have included some of those below so you can see the progress.
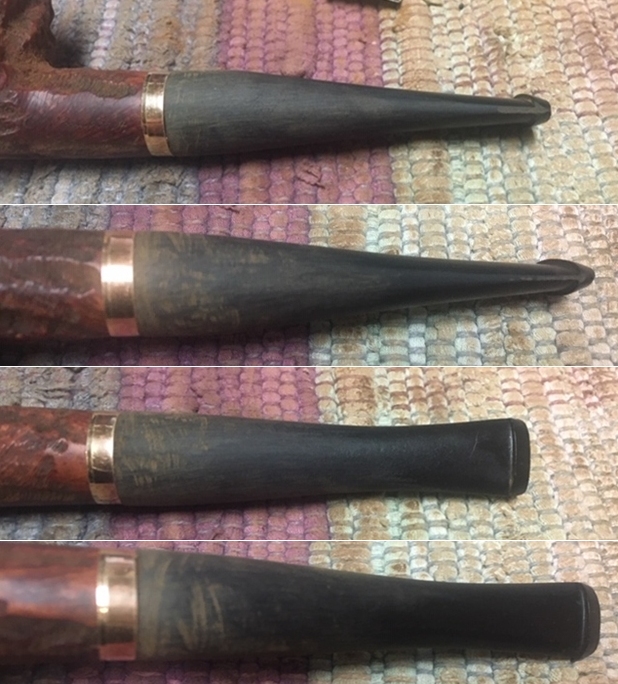 I continued to sand the stem until all of the sanding marks from the drum were gone and the stem was smooth. I started the polishing of the stem with 400 grit wet dry sandpaper. The photos below show the stem at this point.
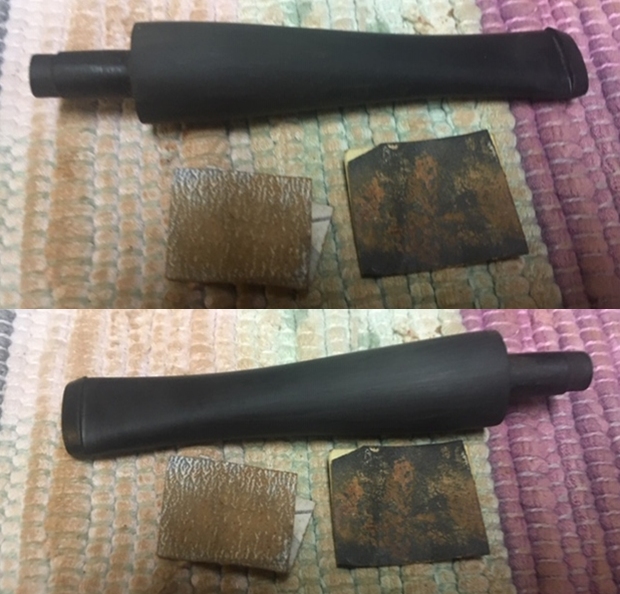 I set the stem aside at this point and rubbed some Before & After Restoration Balm into the surface of the briar. I worked it into the nooks and crannies of the briar with my fingertips and a horse hair shoe brush. The product works to clean, enliven and preserve the briar. I let it sit for 10 minutes while I worked on the stem. After the time passed I buffed it with a cotton cloth to deepen the shine. The briar came alive with the balm.
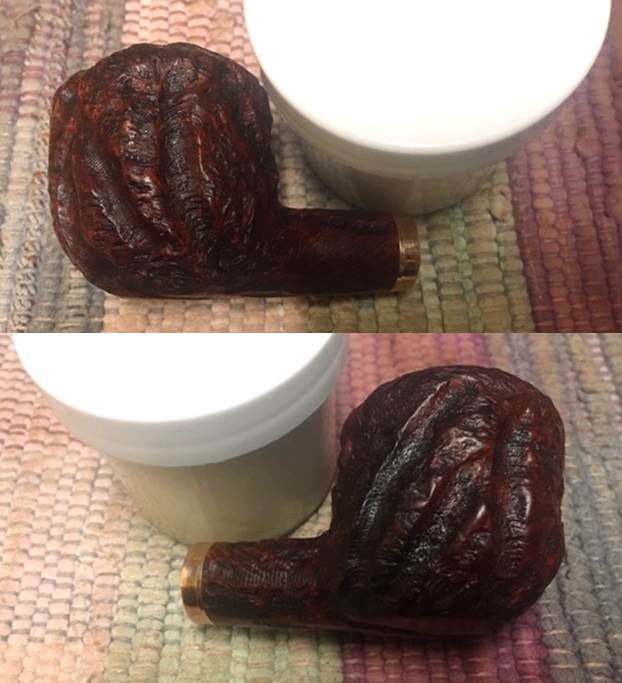
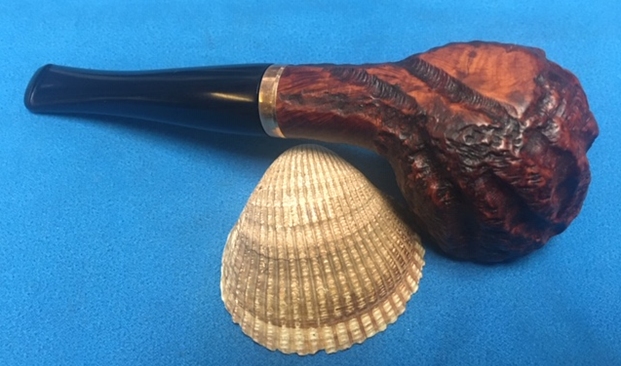
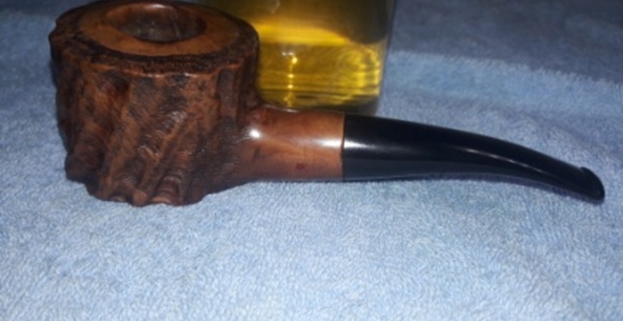
 When I am doing a restemming job I like to put it on the bowl and get a look at the pipe all along the way. There is something satisfying in watching the new pipe take shape. I was pleased with how the pipe was looking. I liked the flow of the stem and new shank band. It definitely was a step up from where I started. All that remains now is to finish polishing the stem and then buffing the pipe and waxing it. I was definitely getting there!
 I removed the stem from the bowl and set the bowl aside. I polished the stem with micromesh sanding pads – 1500-12000 grit pads. I wiped it down with Obsidian Oil after each sanding pad. I used Before & After Pipe Polish – both Fine and Extra Fine to further polish the stem.
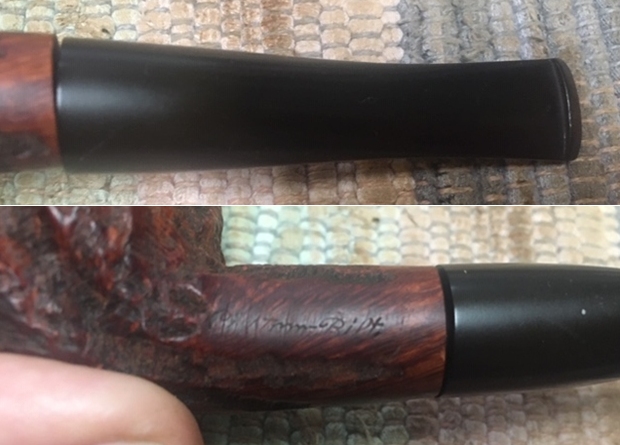
 This early Tracy Mincer made Custom-Bilt billiard was an absolute disaster when we found it. I cleaned up the shank, banded it to smooth it out and made a new stem. It is a great looking pipe. The brown stain on the mixed grain shining through the rustication is quite nice. The finish on the pipe is in excellent condition and the contrasting stains work well to give some contrast to the finish of the pipe. The polished black vulcanite taper stem adds to the mix. With the grime, debris and burn marks minimized from the finish the bowl it is really is eye-catching. The thin gold coloured band looks really nice on the shank. I put the stem back on the bowl and buffed the pipe with Blue Diamond on the buffing wheel, carefully avoiding the stamping on the shank. I gave the bowl multiple coats of Conservator’s Wax and the stem multiple coats of carnauba wax on the buffing wheel and followed that by buffing the entire pipe with a clean buffing pad. I hand buffed the pipe with a microfiber cloth to deepen the shine. The finished chunky, rustic Bulldog is quite nice and feels great in the hand. Give the finished pipe a look in the photos below. I can only tell you that like the other pipes I am working that it is much prettier in person than the photos capture. The dimensions of the pipe are Length: 5 ½ inches, Height: 2 inches, Outside diameter of the bowl: 1 ¾ inches, Chamber diameter: ¾ of an inch. Thanks for walking through the restoration with me as I worked over another interesting pipe. This rustic Mincer Custom-Bilt Billiard will be going on the rebornpipes store shortly. Keep an eye on the American Pipe Makers section of the store. If you want to add it to your collection send me an email or a message! Thanks for your time.


