A Visual History of Peterson’s Limited Edition / Pipe of the Year: 1997 – 2014.
Leave a reply
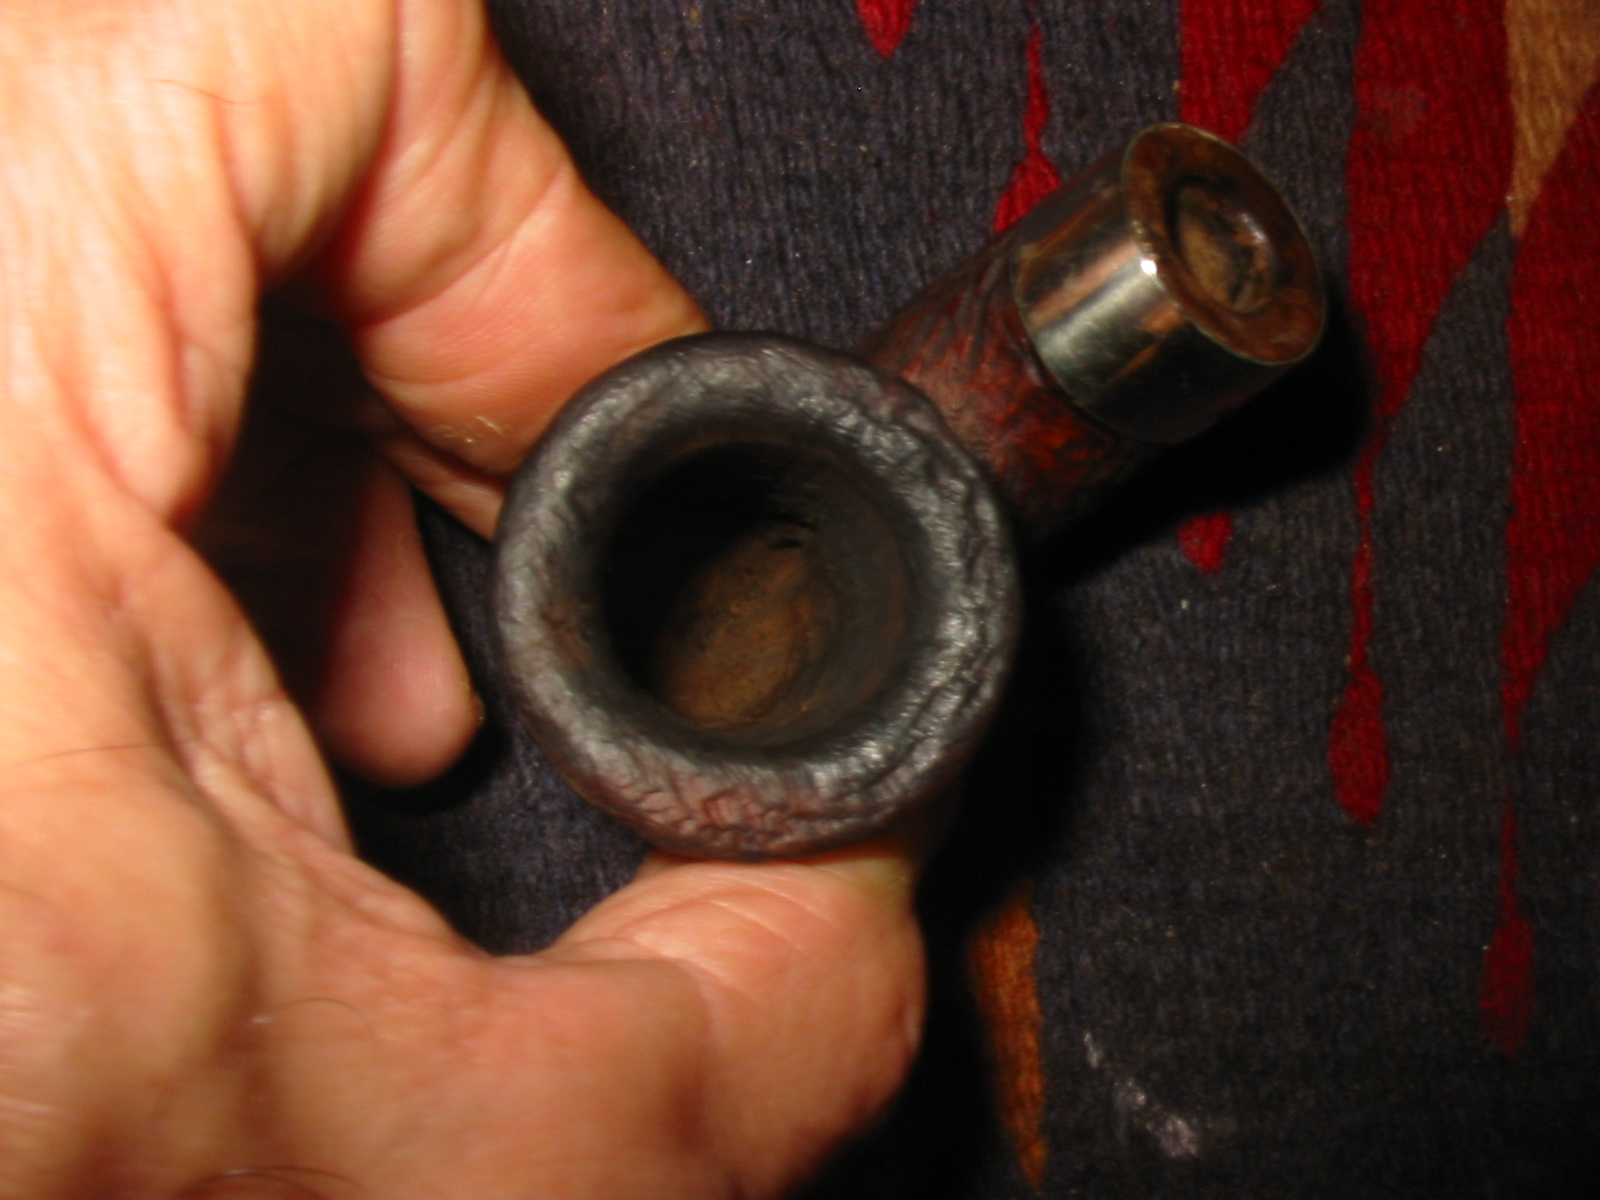
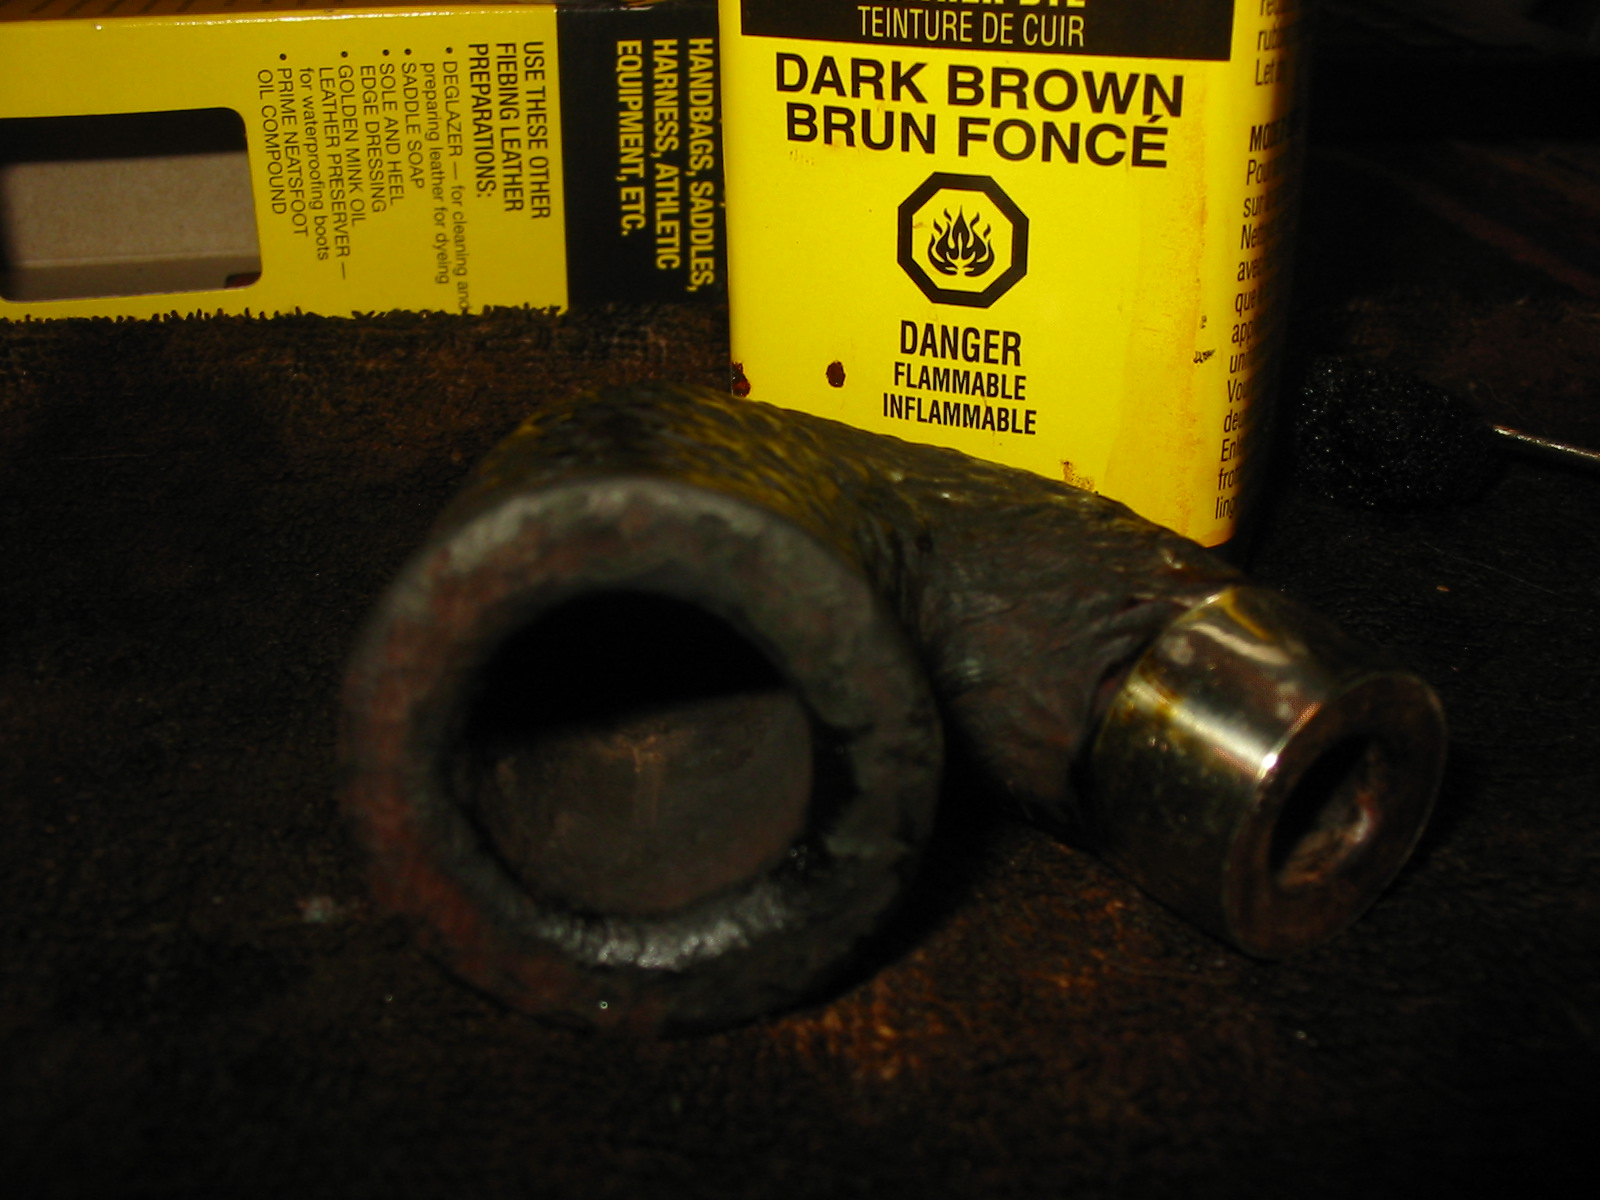
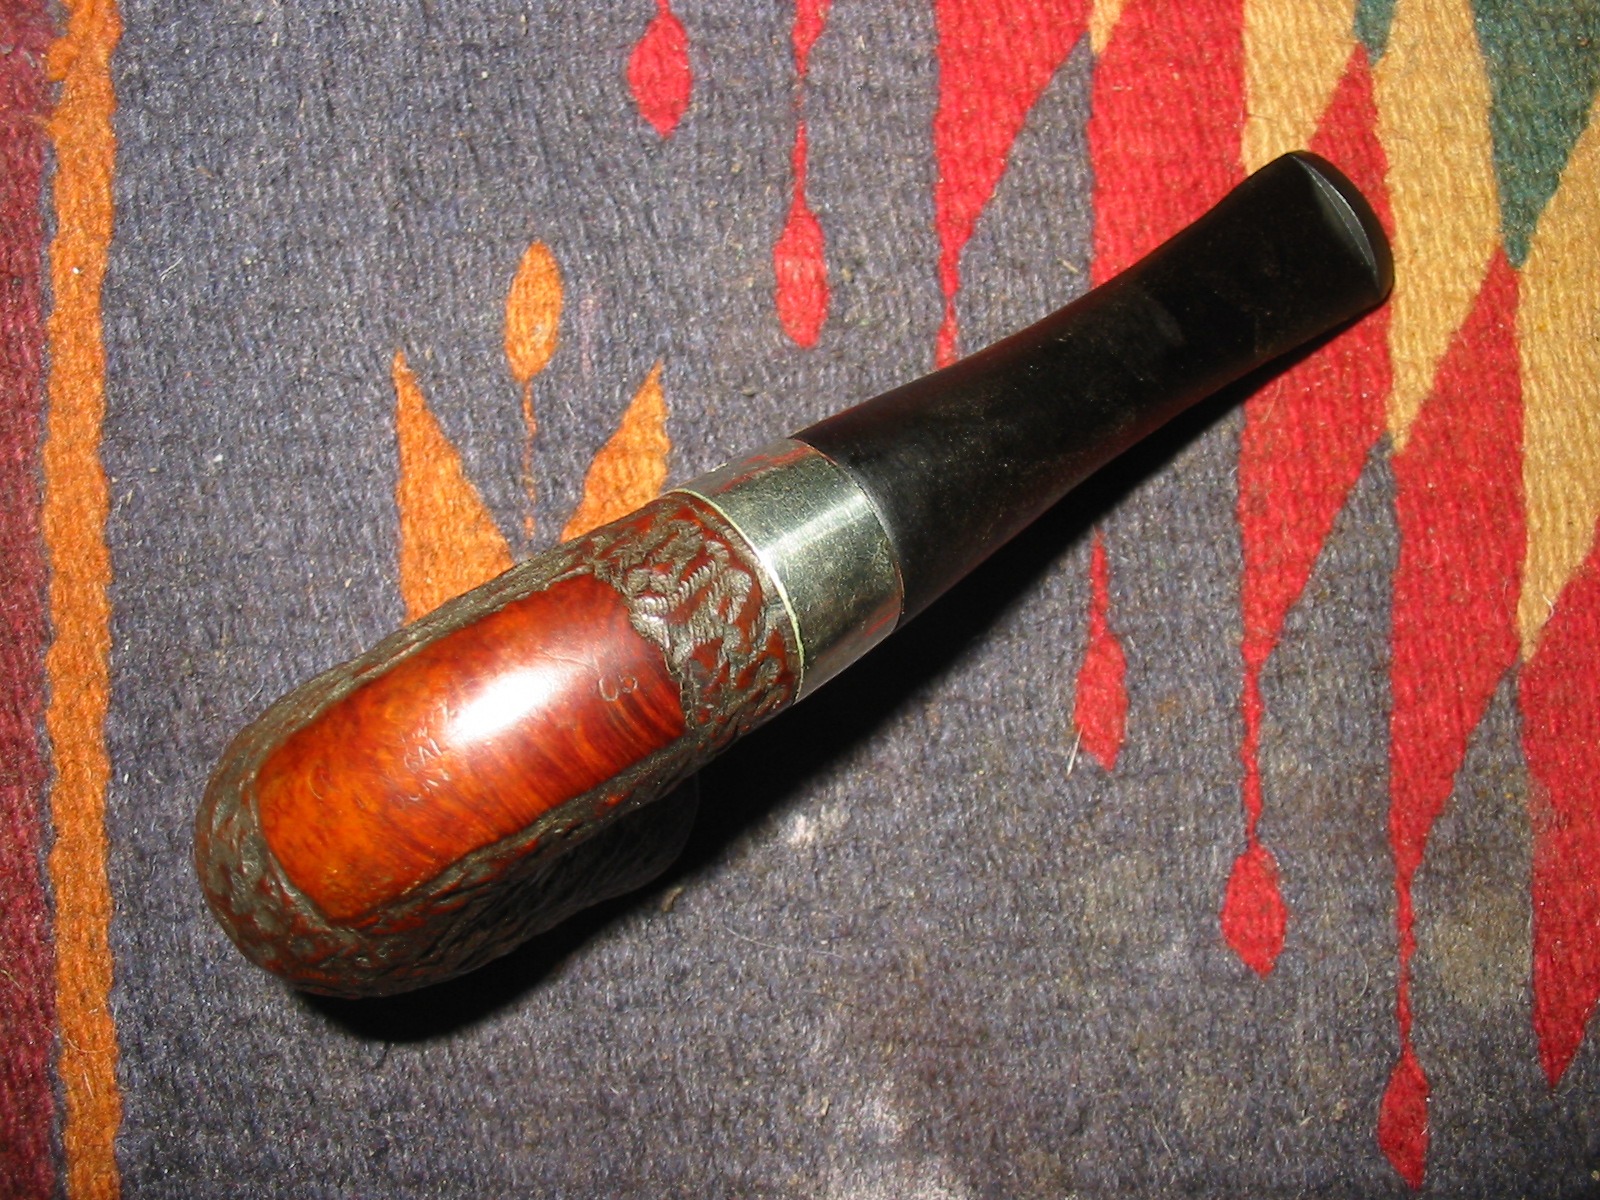
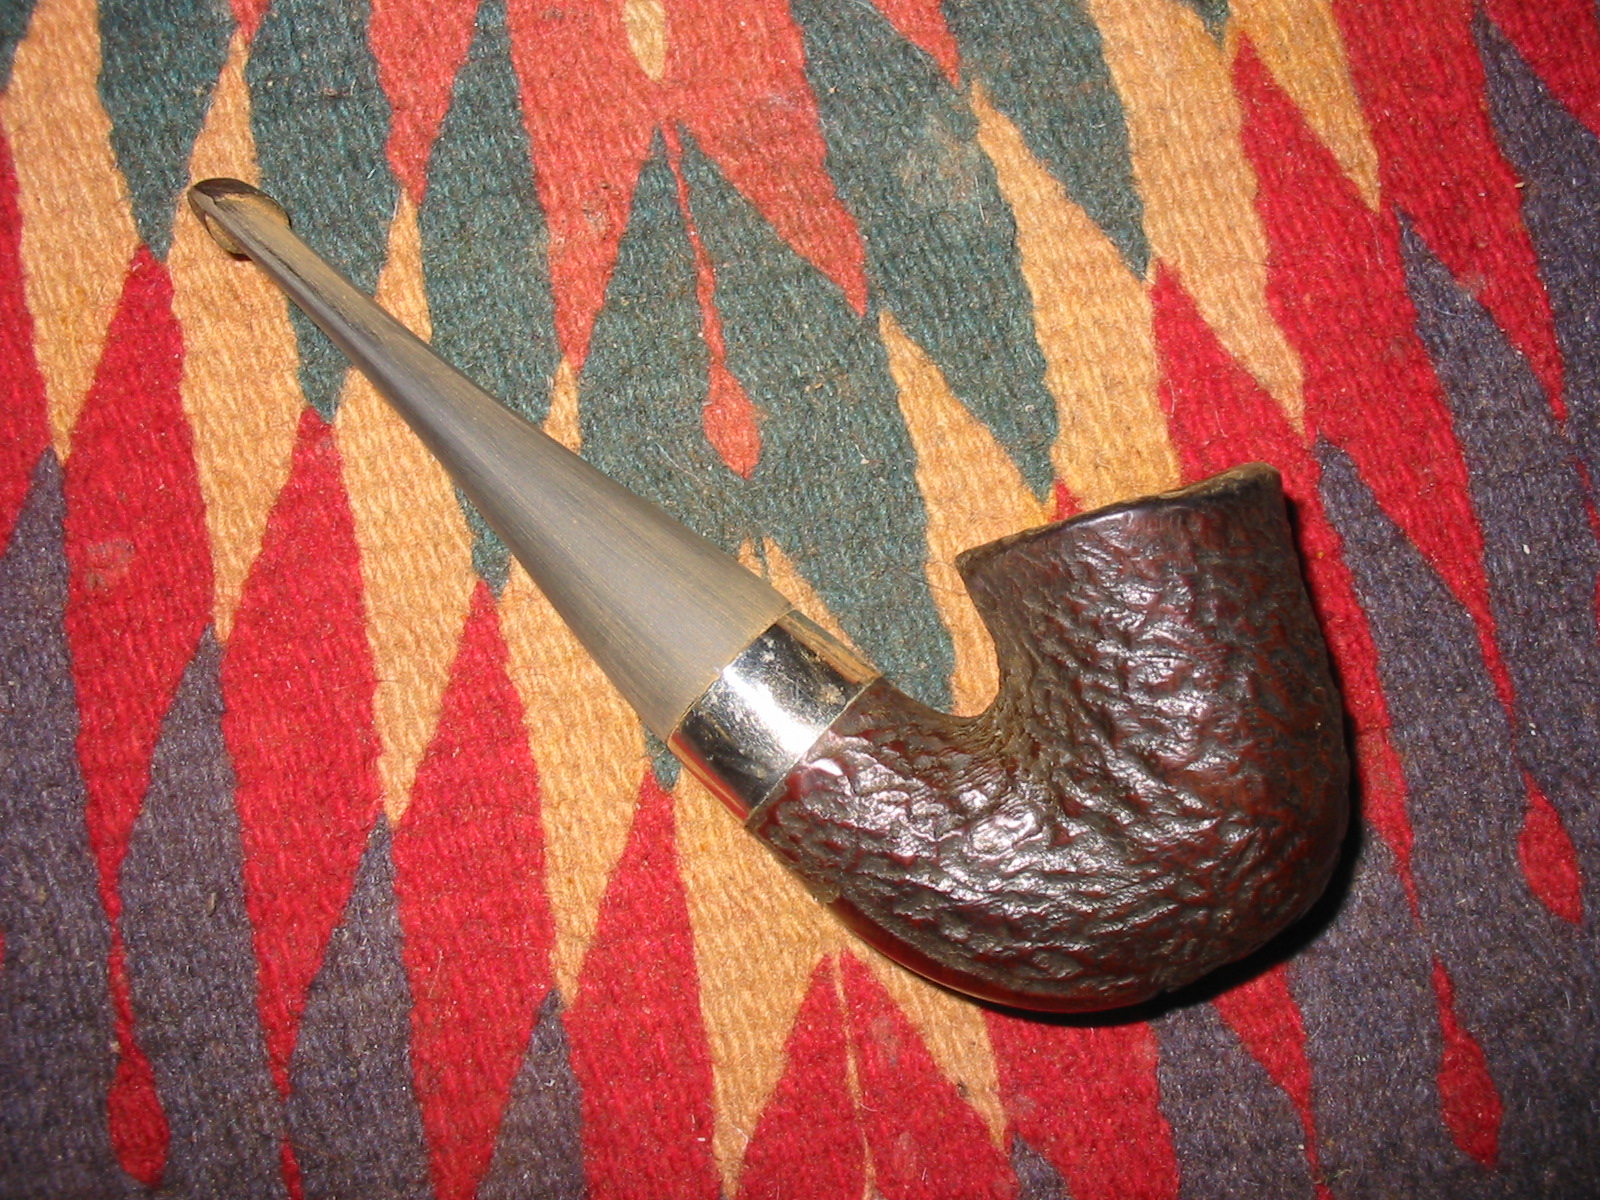
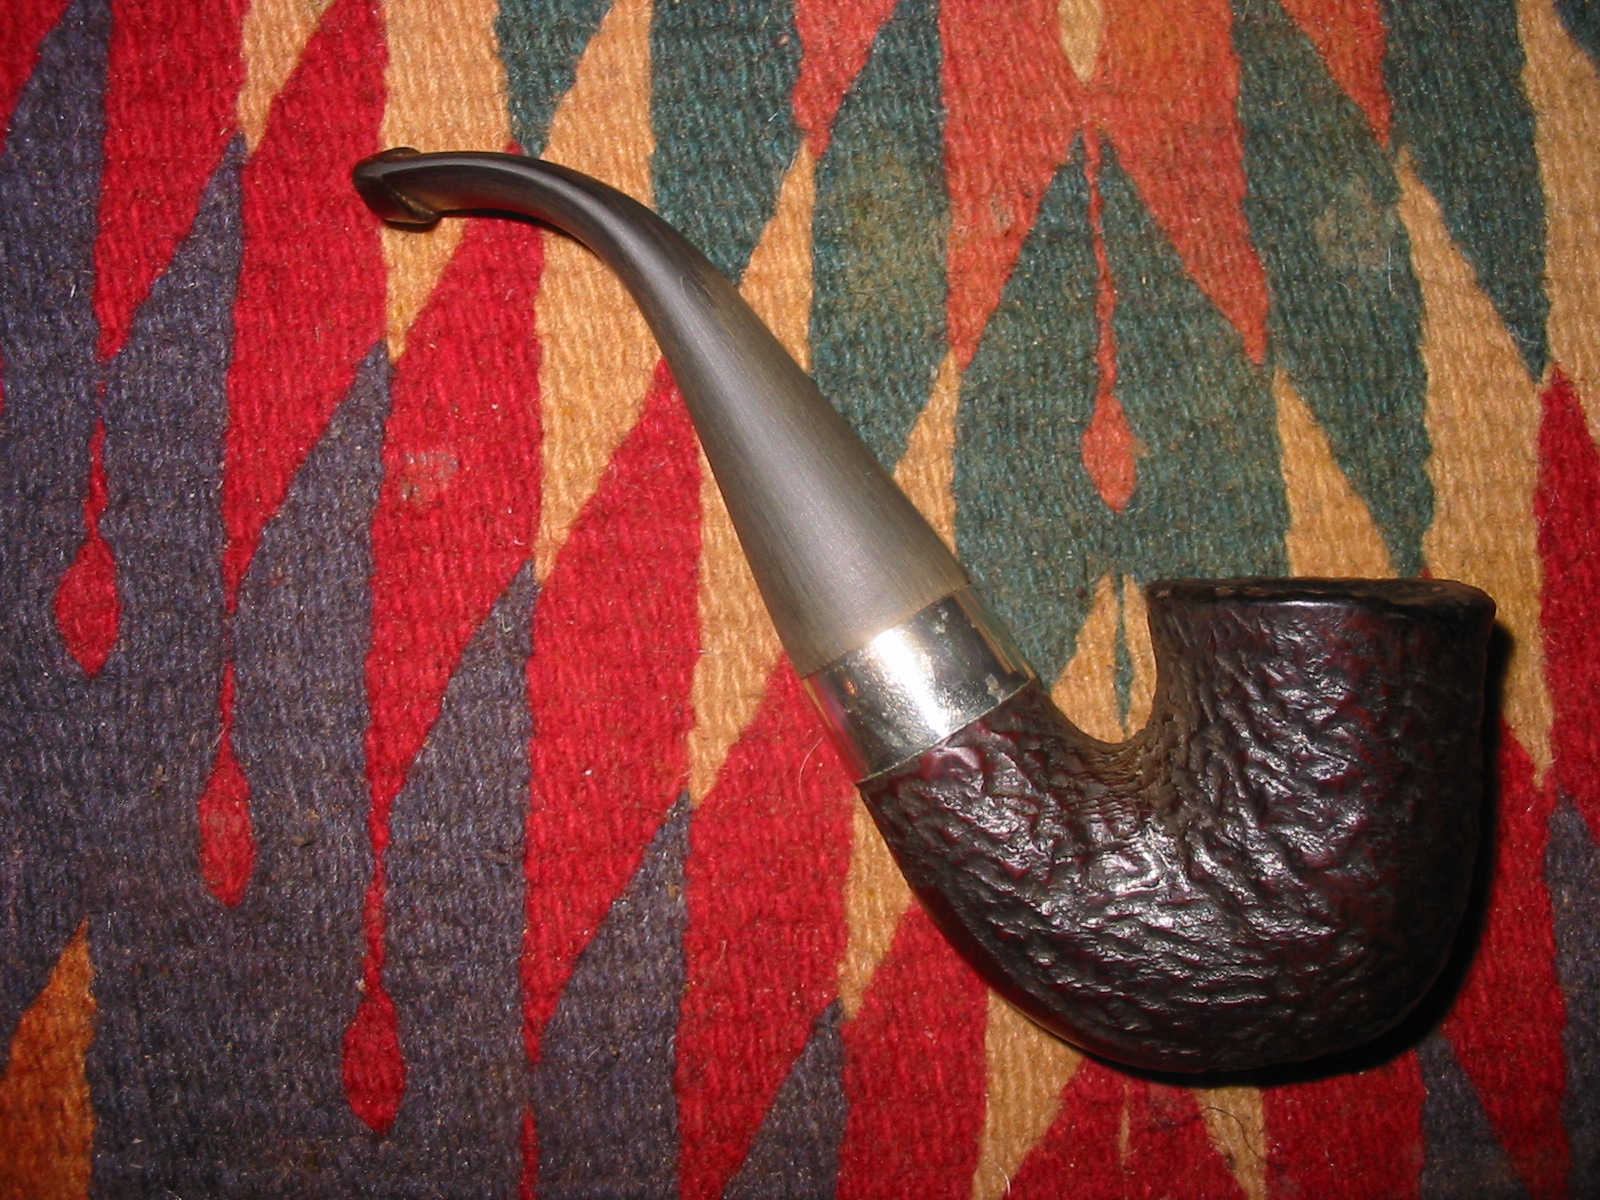
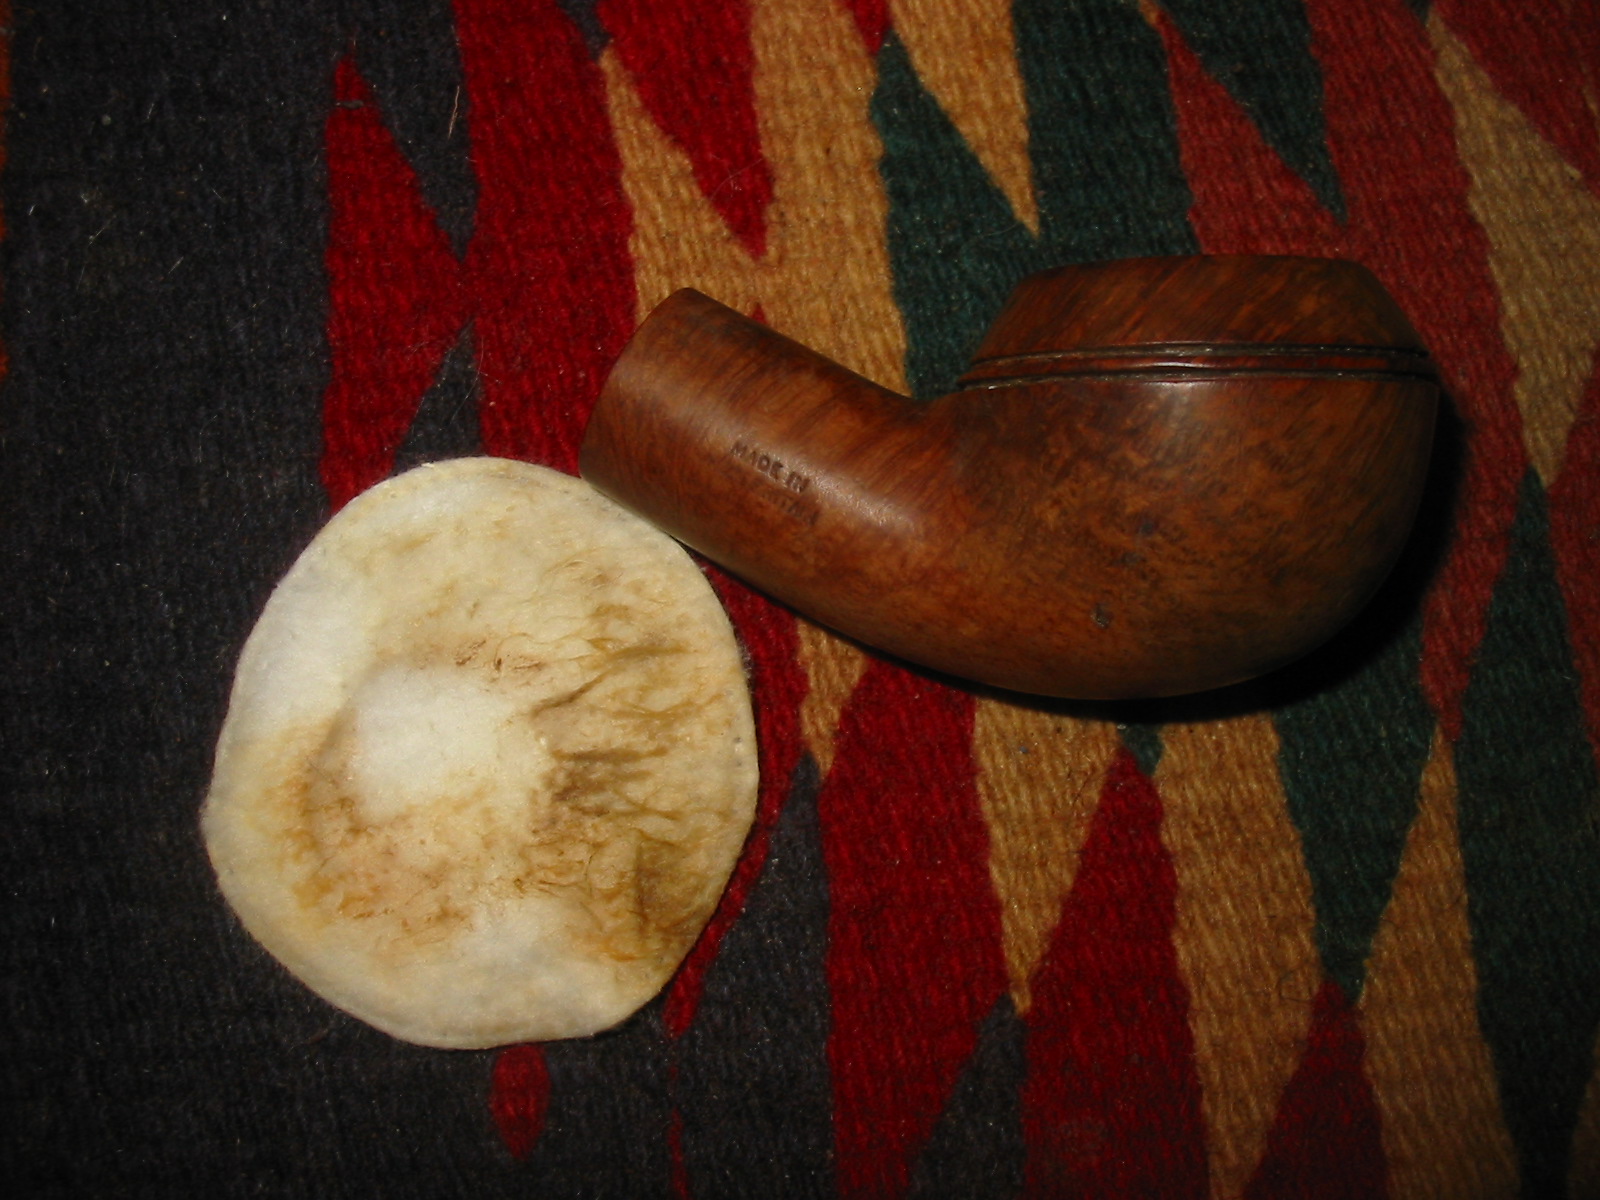
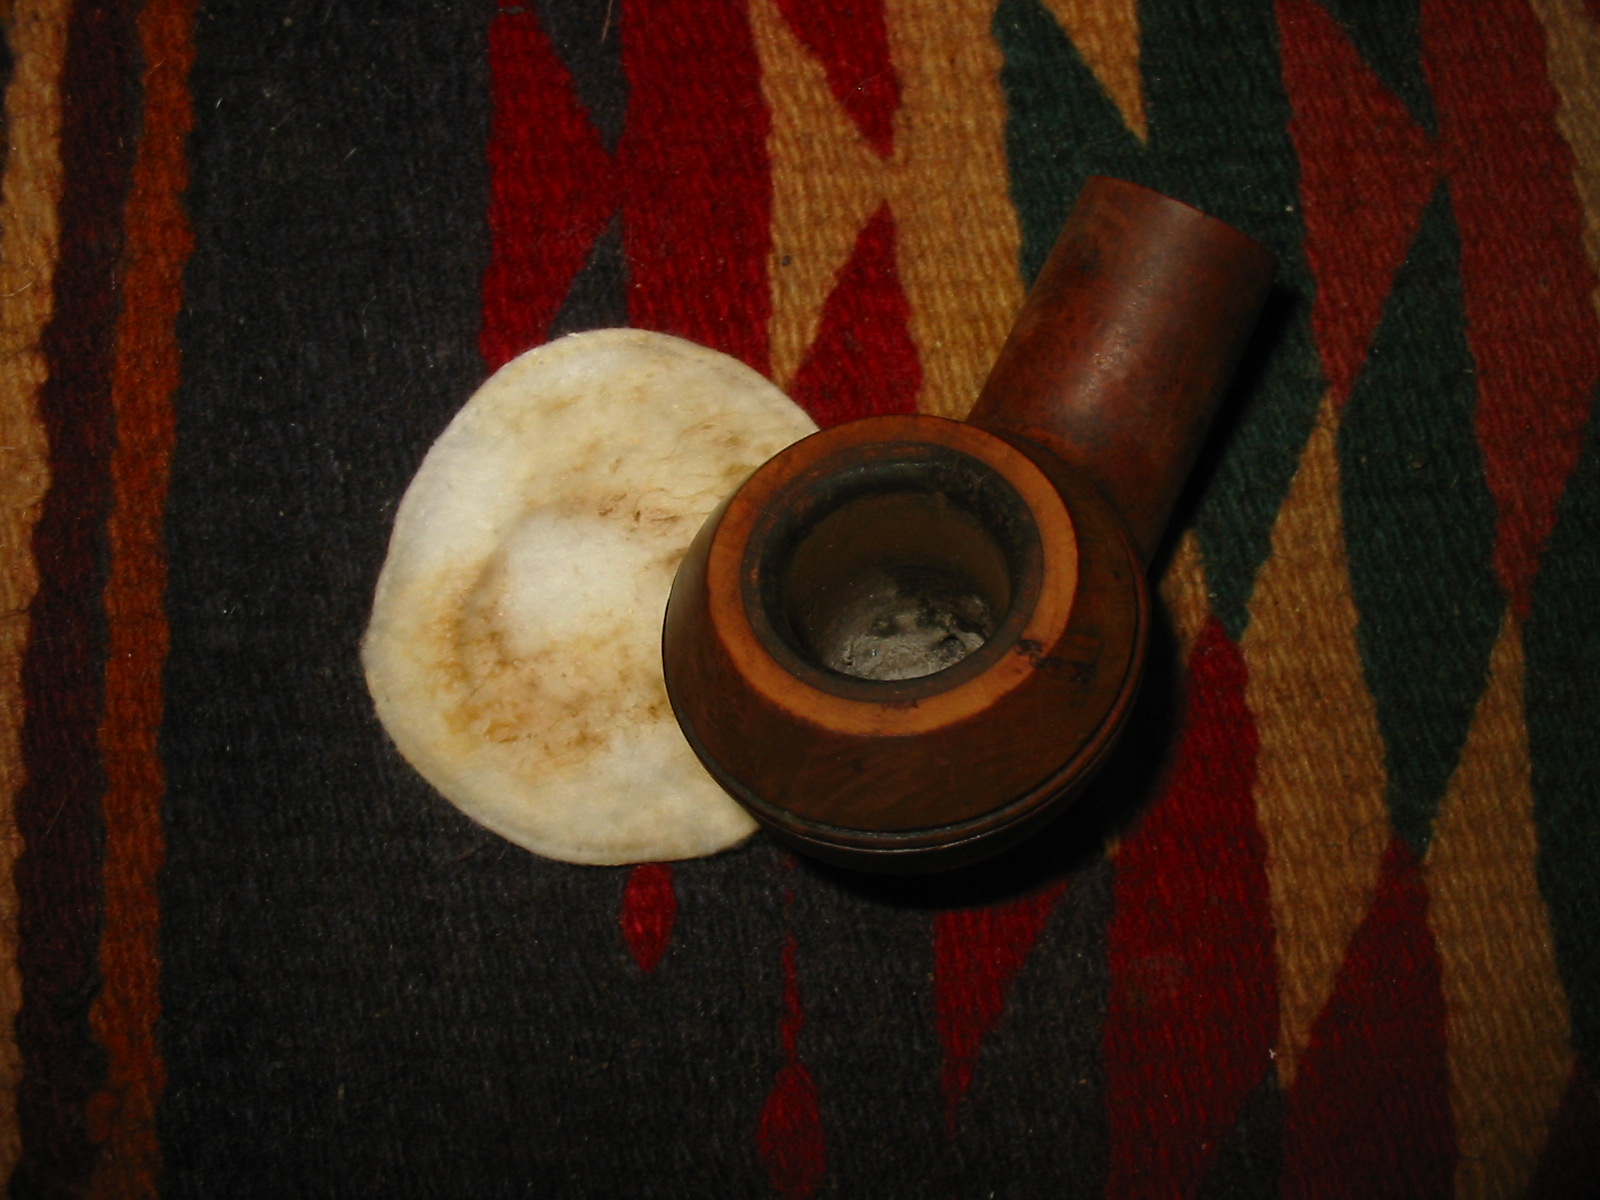
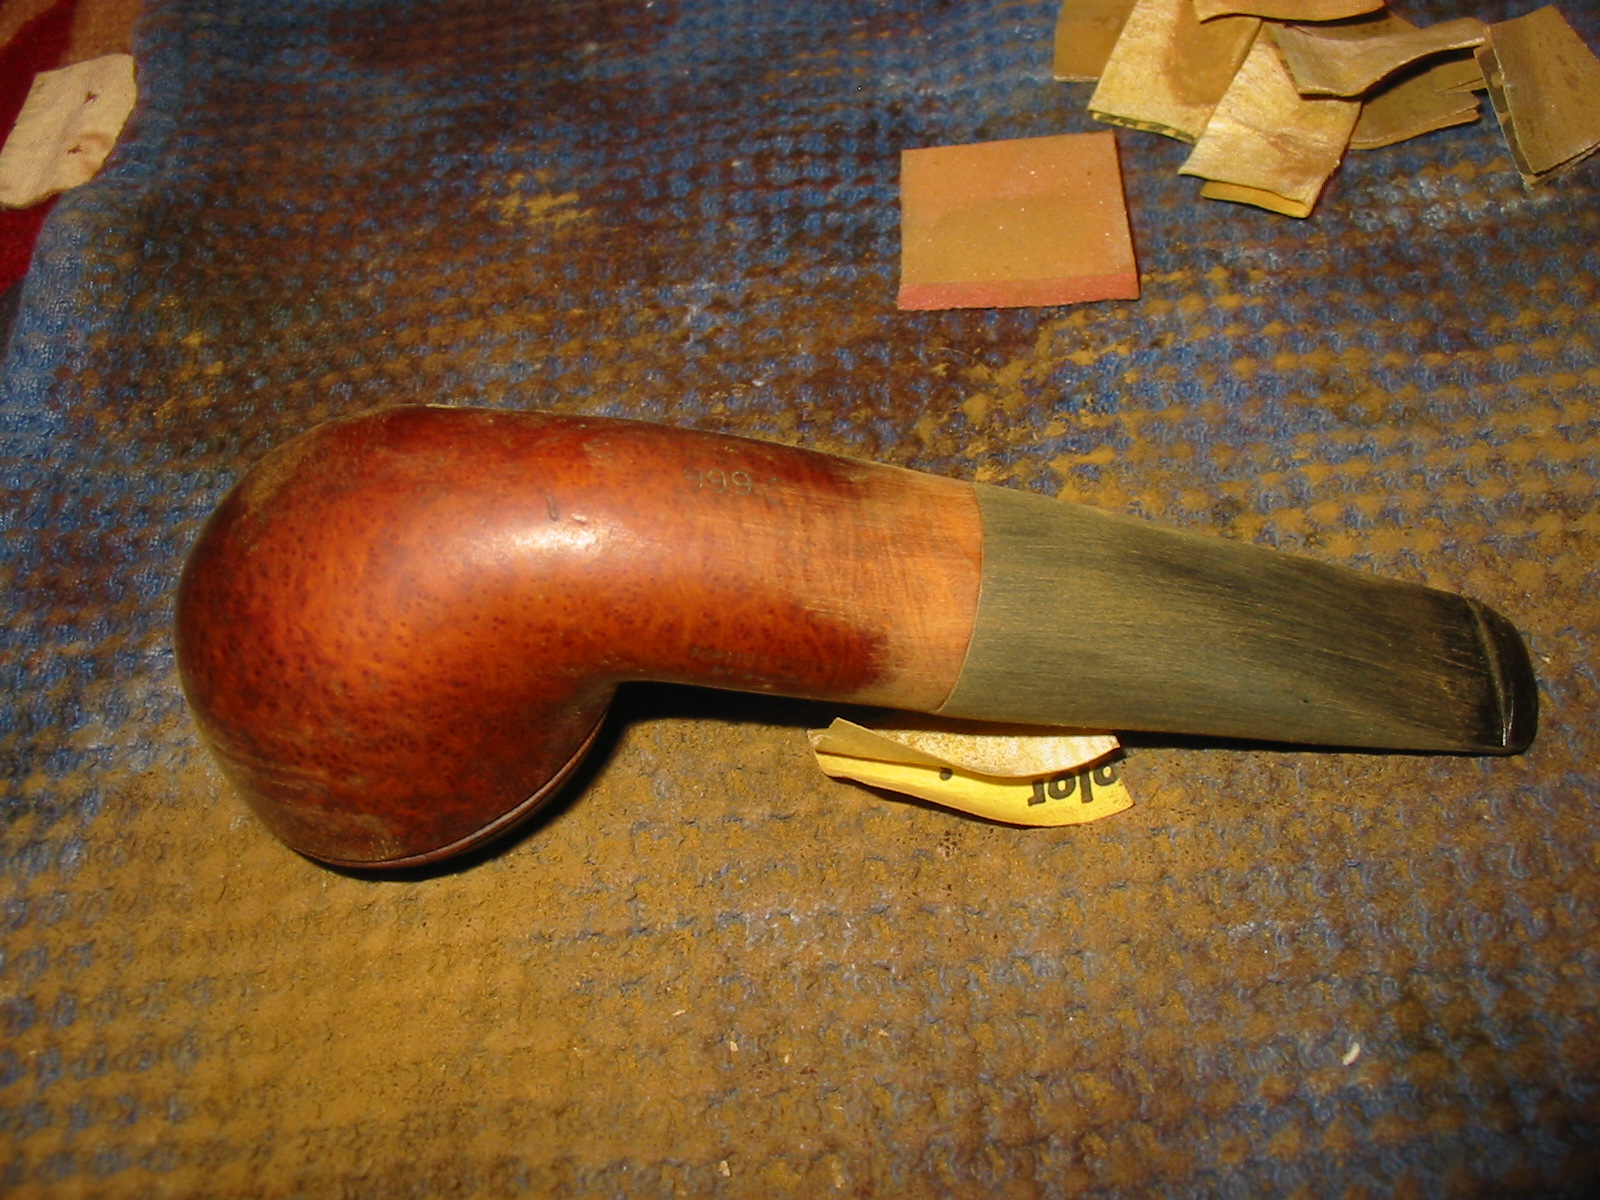
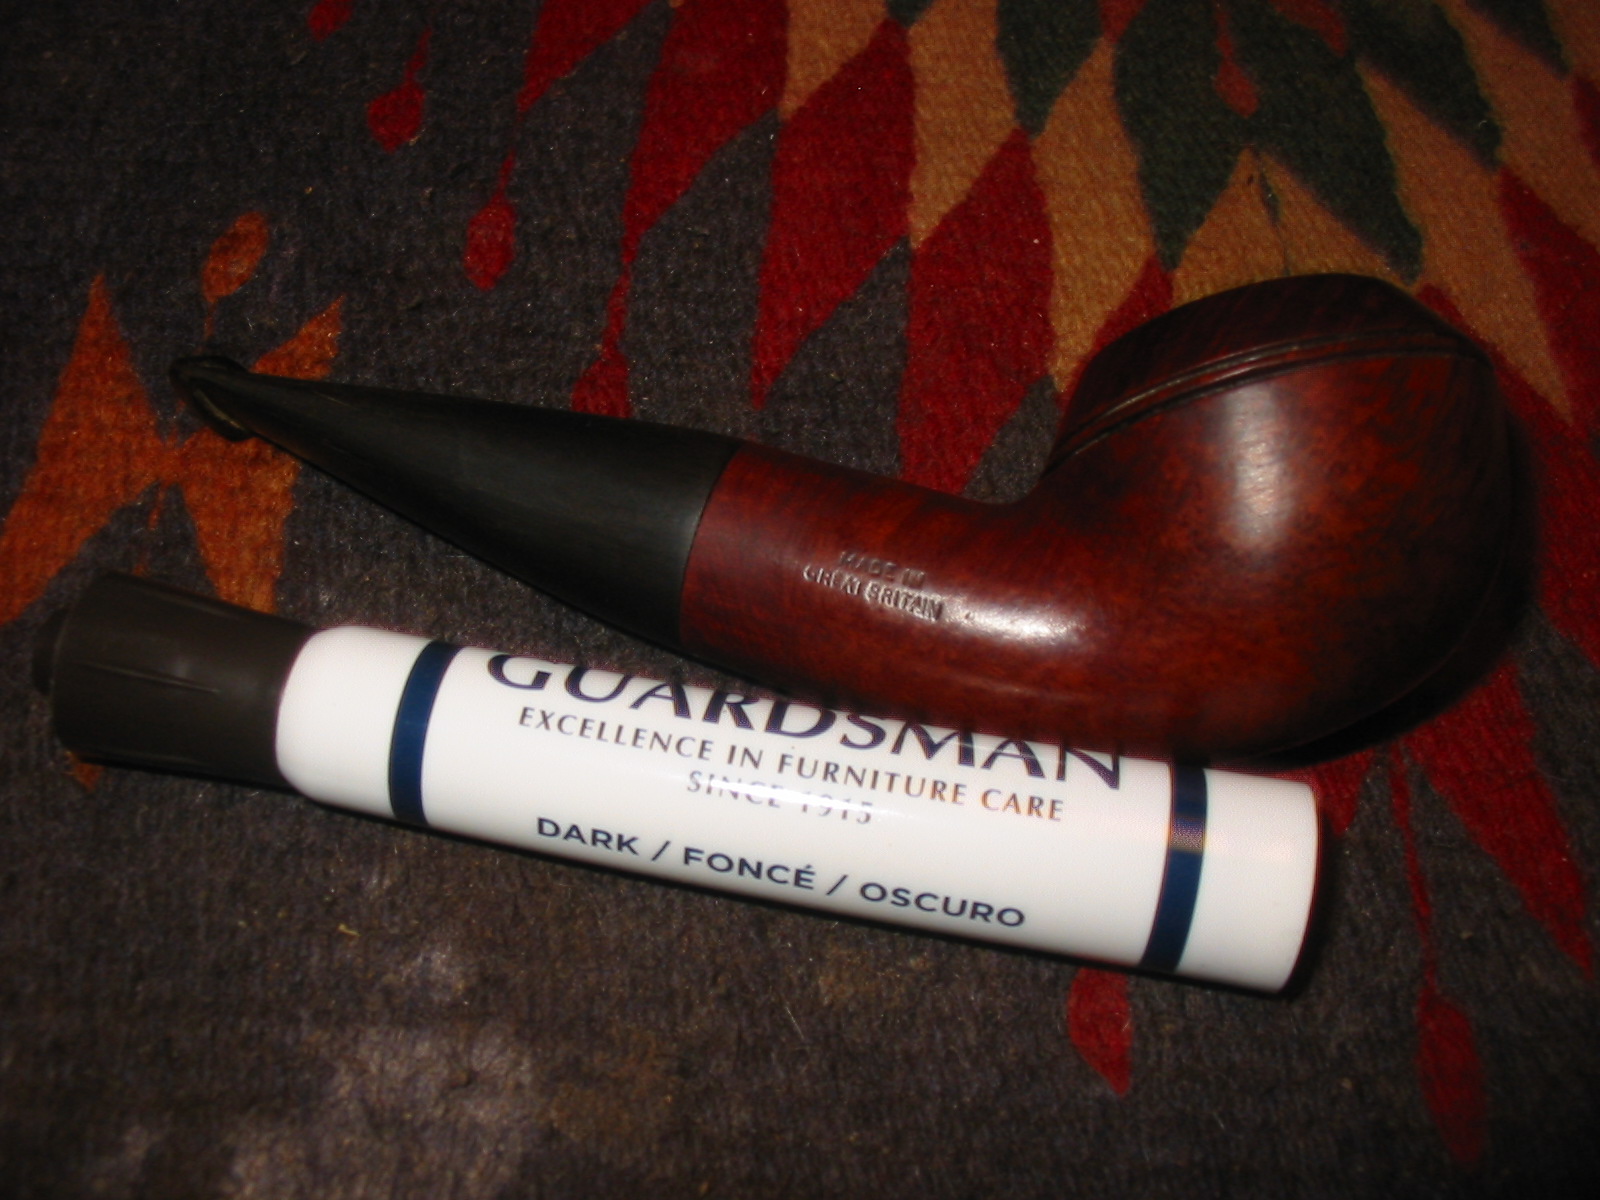
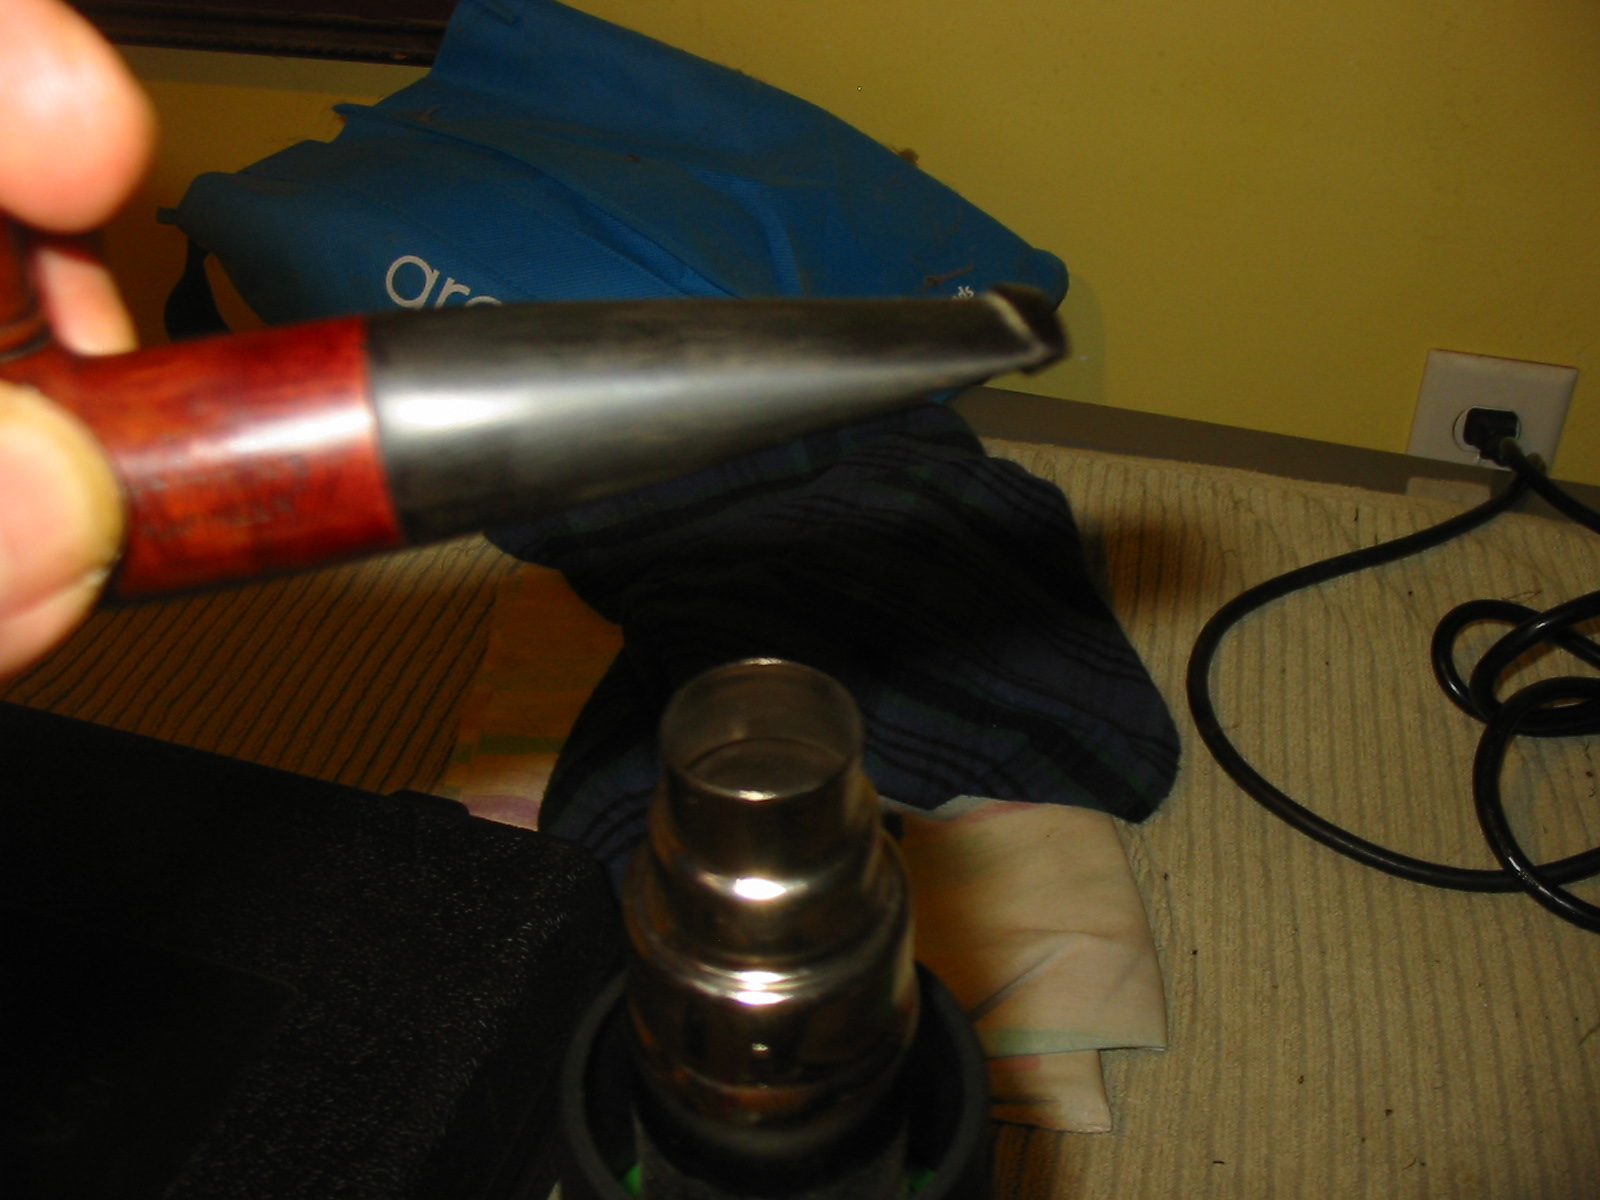
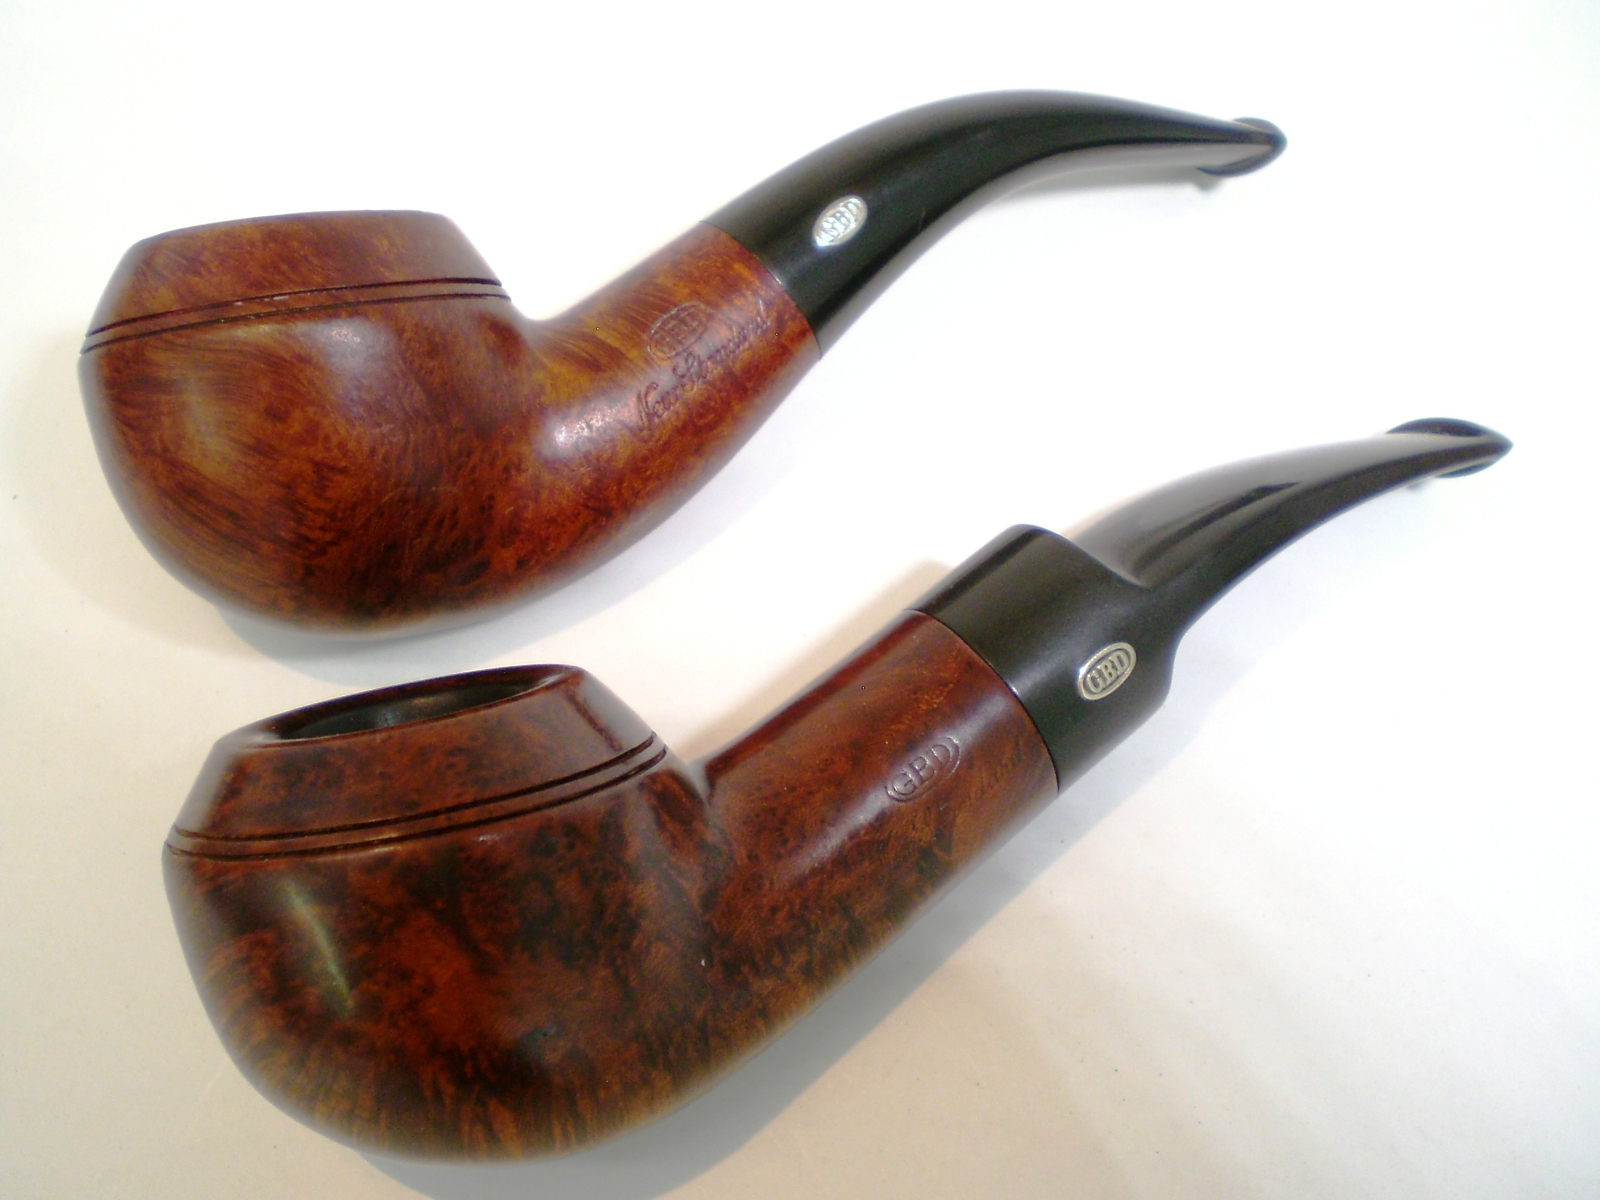
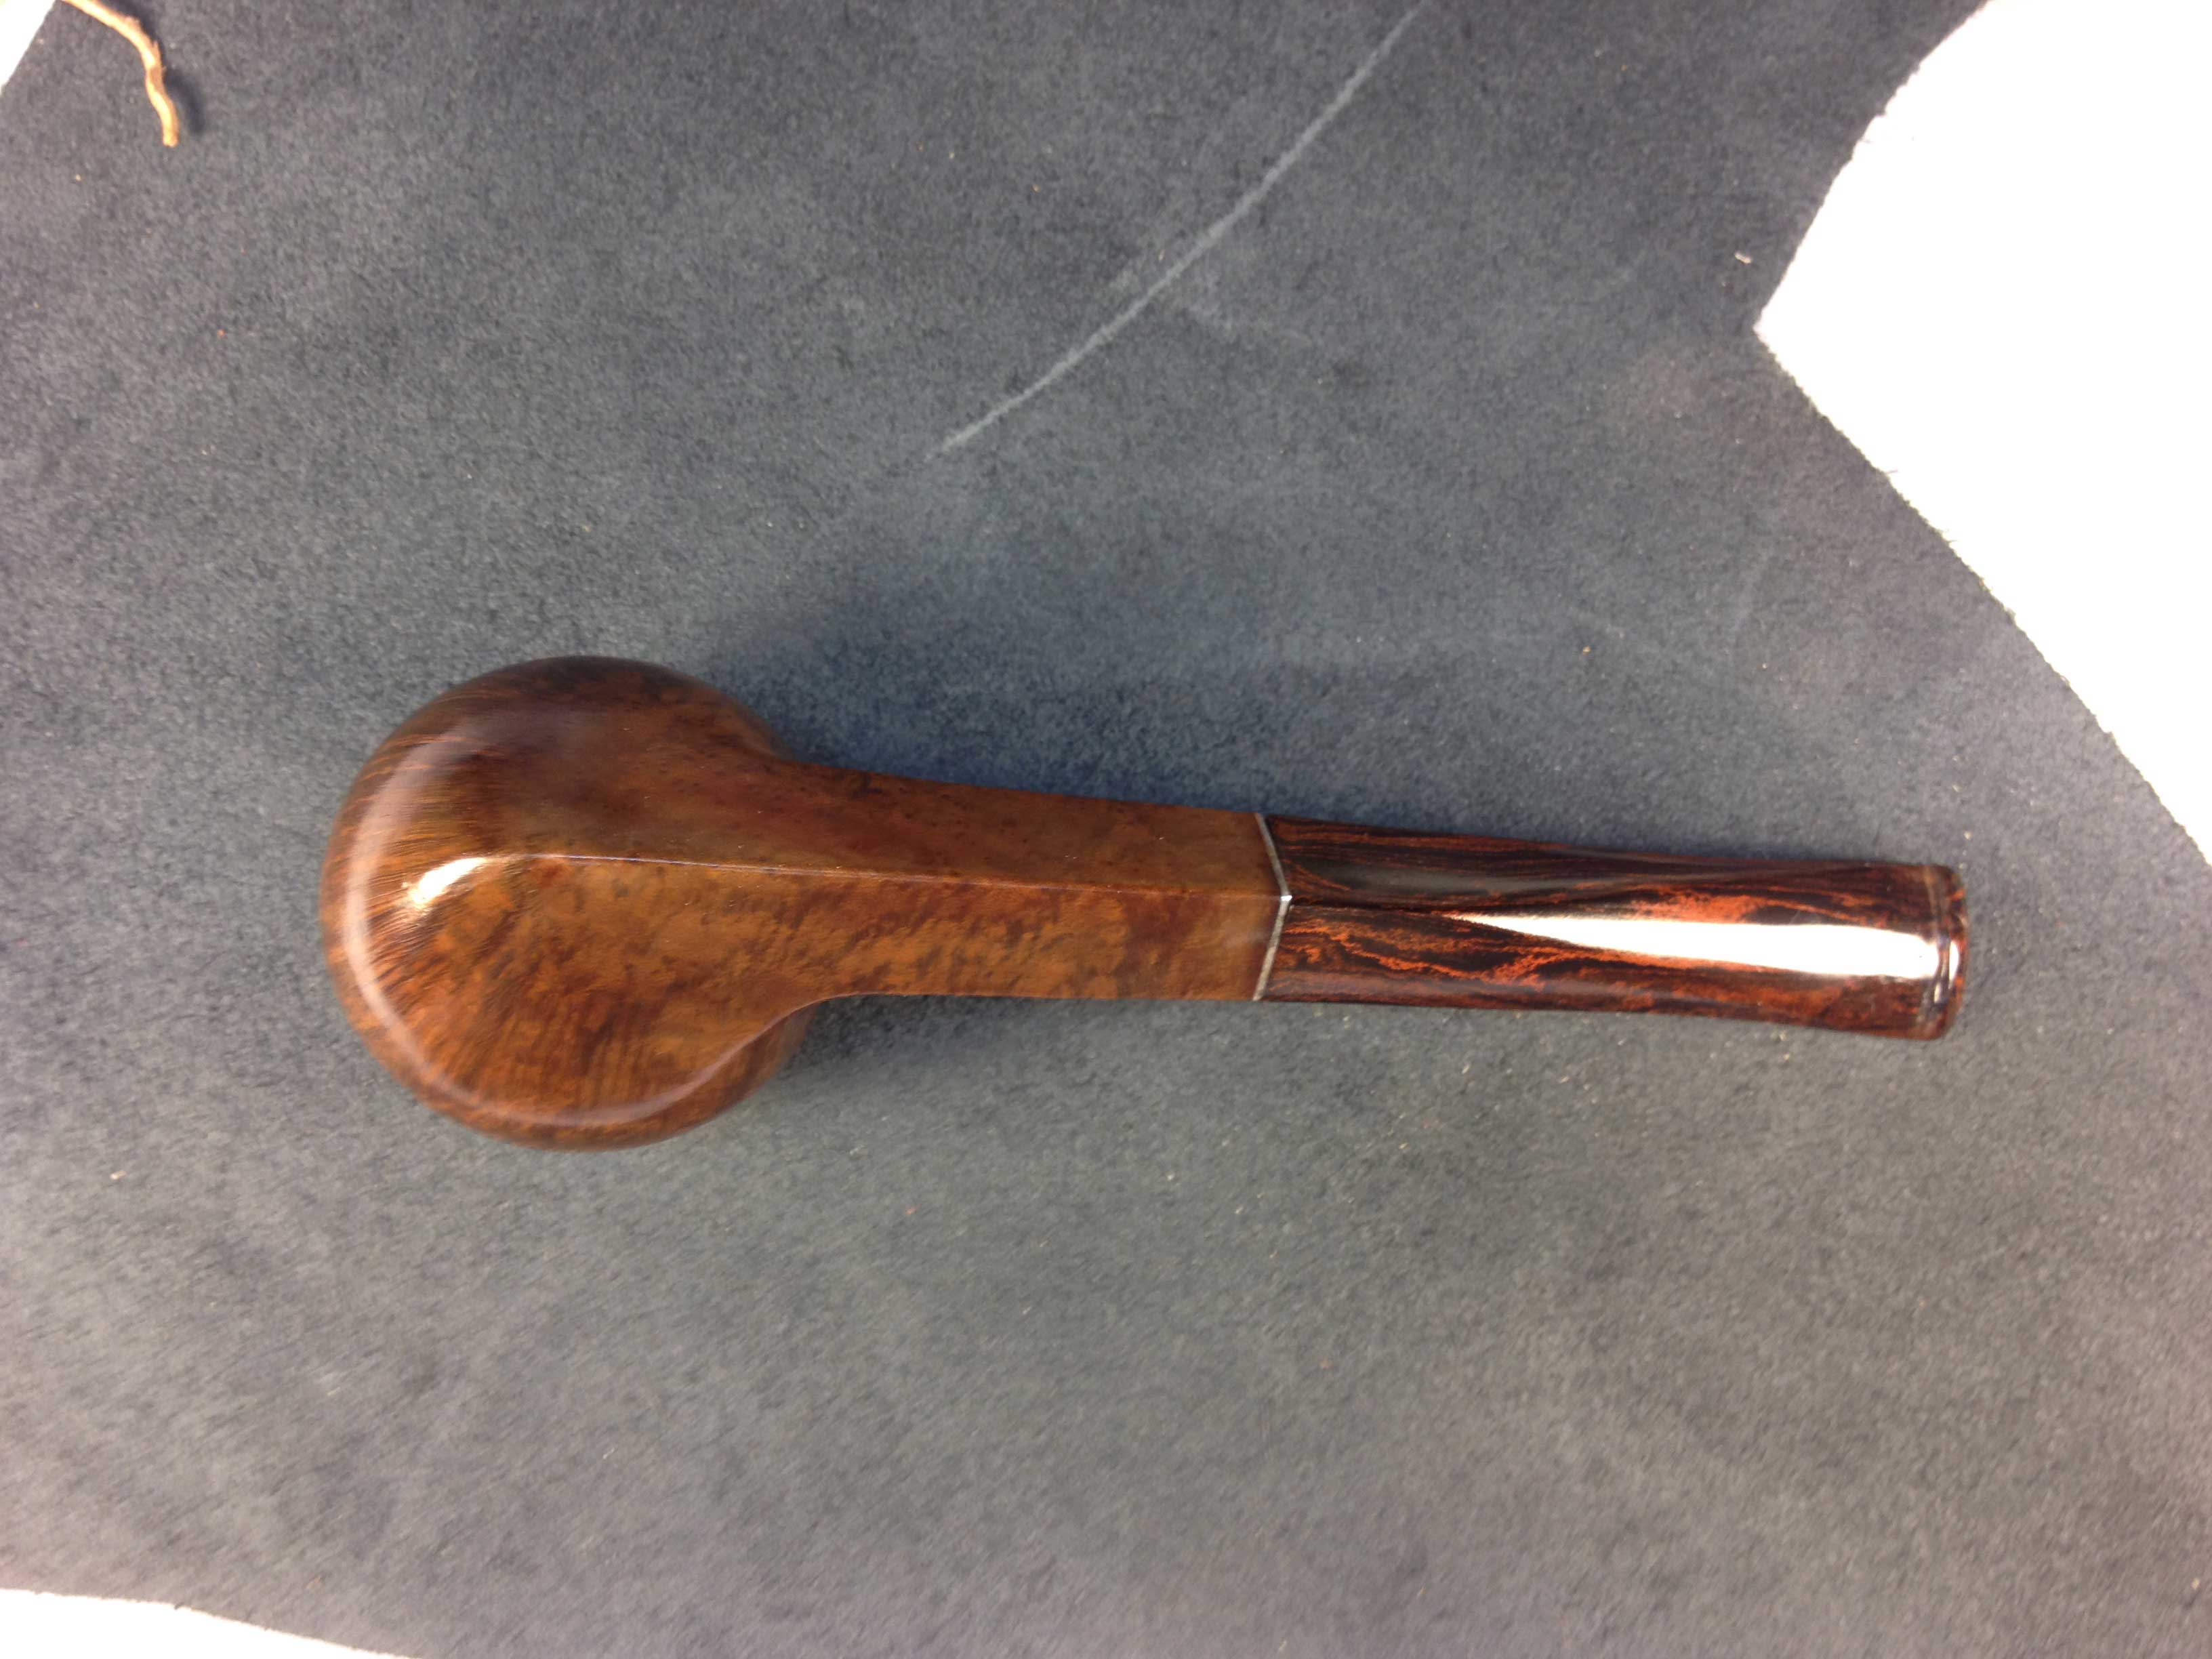
The third pipe in the Peterson trio of pipes shown in the photo below came to the worktable today. It is a Peterson’s Donegal Rocky 05 bent Dublin. It is the second pipe in the photo below. The bowl was badly caked – uneven and broken. The rim had a thick coat of tar and carbon buildup and was damaged on the right front side of the rim. The stem was missing and the nickel band was tarnished but undented. The finish was worn and the grooves of the rustication were filled with grit and grime from years of smoking. Like the other two pipes in this lot it must have been a favourite of the previous owner to be smoked to this degree. The inside of the shank was clogged with thick tars and oils and I was unable to blow air through it.
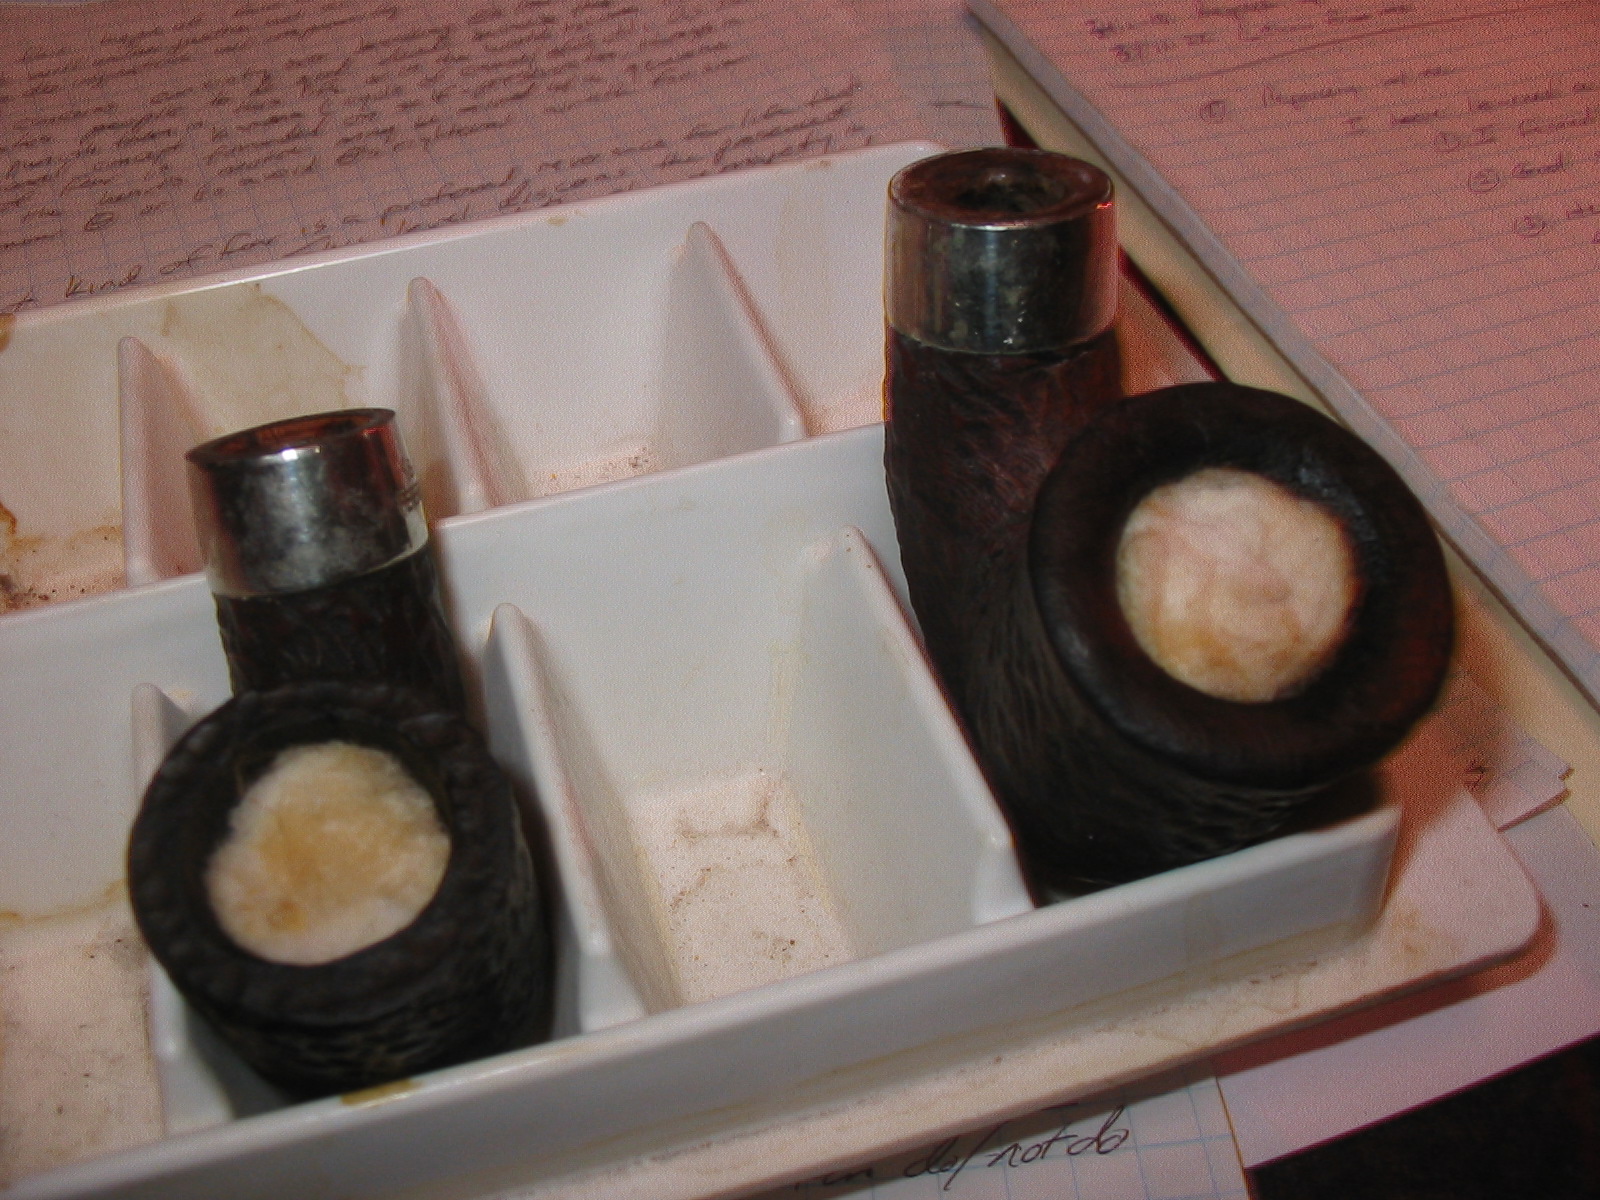
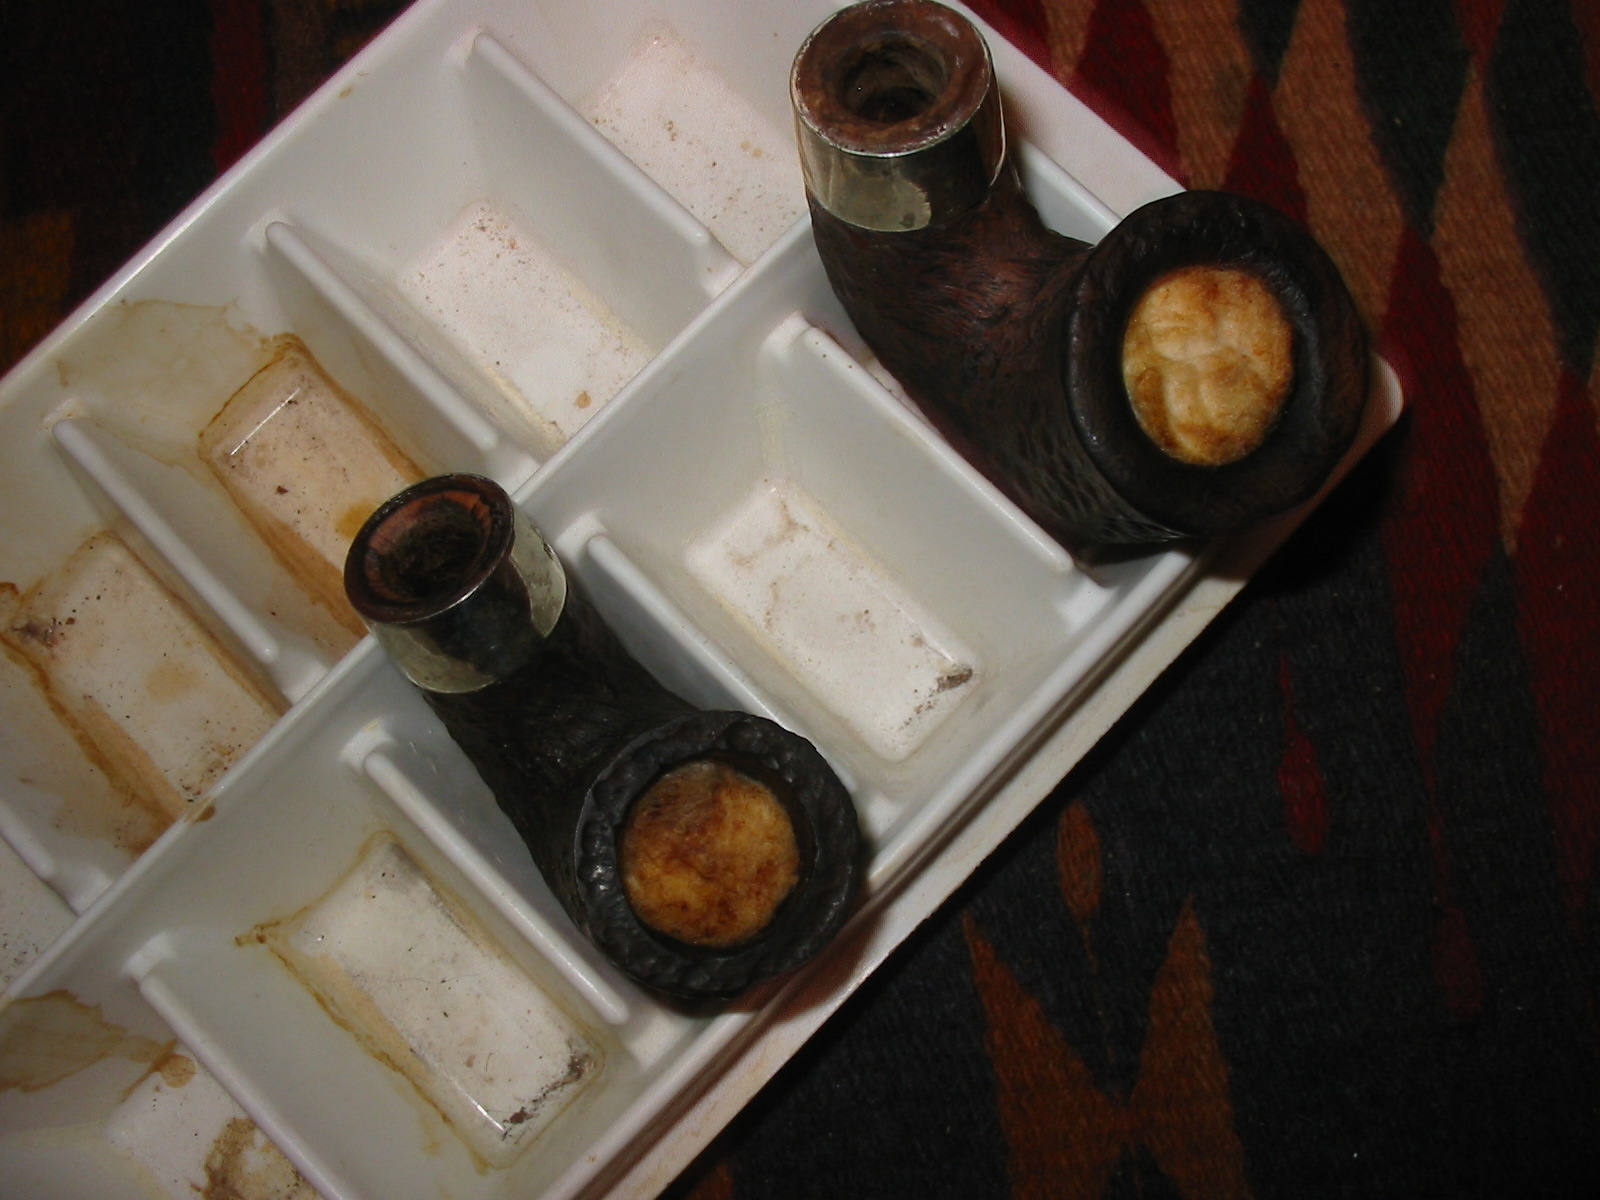
I reamed the bowl with a PipNet reamer until the cake was gone and the bowl was bare wood. My goal was to take back all the cake and rebuild a new smooth one. I pushed a paper clip through the airway to open the clog. I used cotton swabs, shank brushes and a drill bit to remove all of the grime and buildup in the airway and the shank. I scrubbed the exterior of the bowl with a soft bristle tooth brush and Murphy’s Oil Soap. I rinsed it under warm water to remove the soap and patted it dry. Once it was clean I filled the bowl with cotton balls and used an ear syringe to fill the bowl with isopropyl alcohol. I let the bowl sit over night in an ice cube tray to keep it upright. The first photo shows the set up when I first filled it. The second photo below shows the bowl after it had soaked over twelve hours.
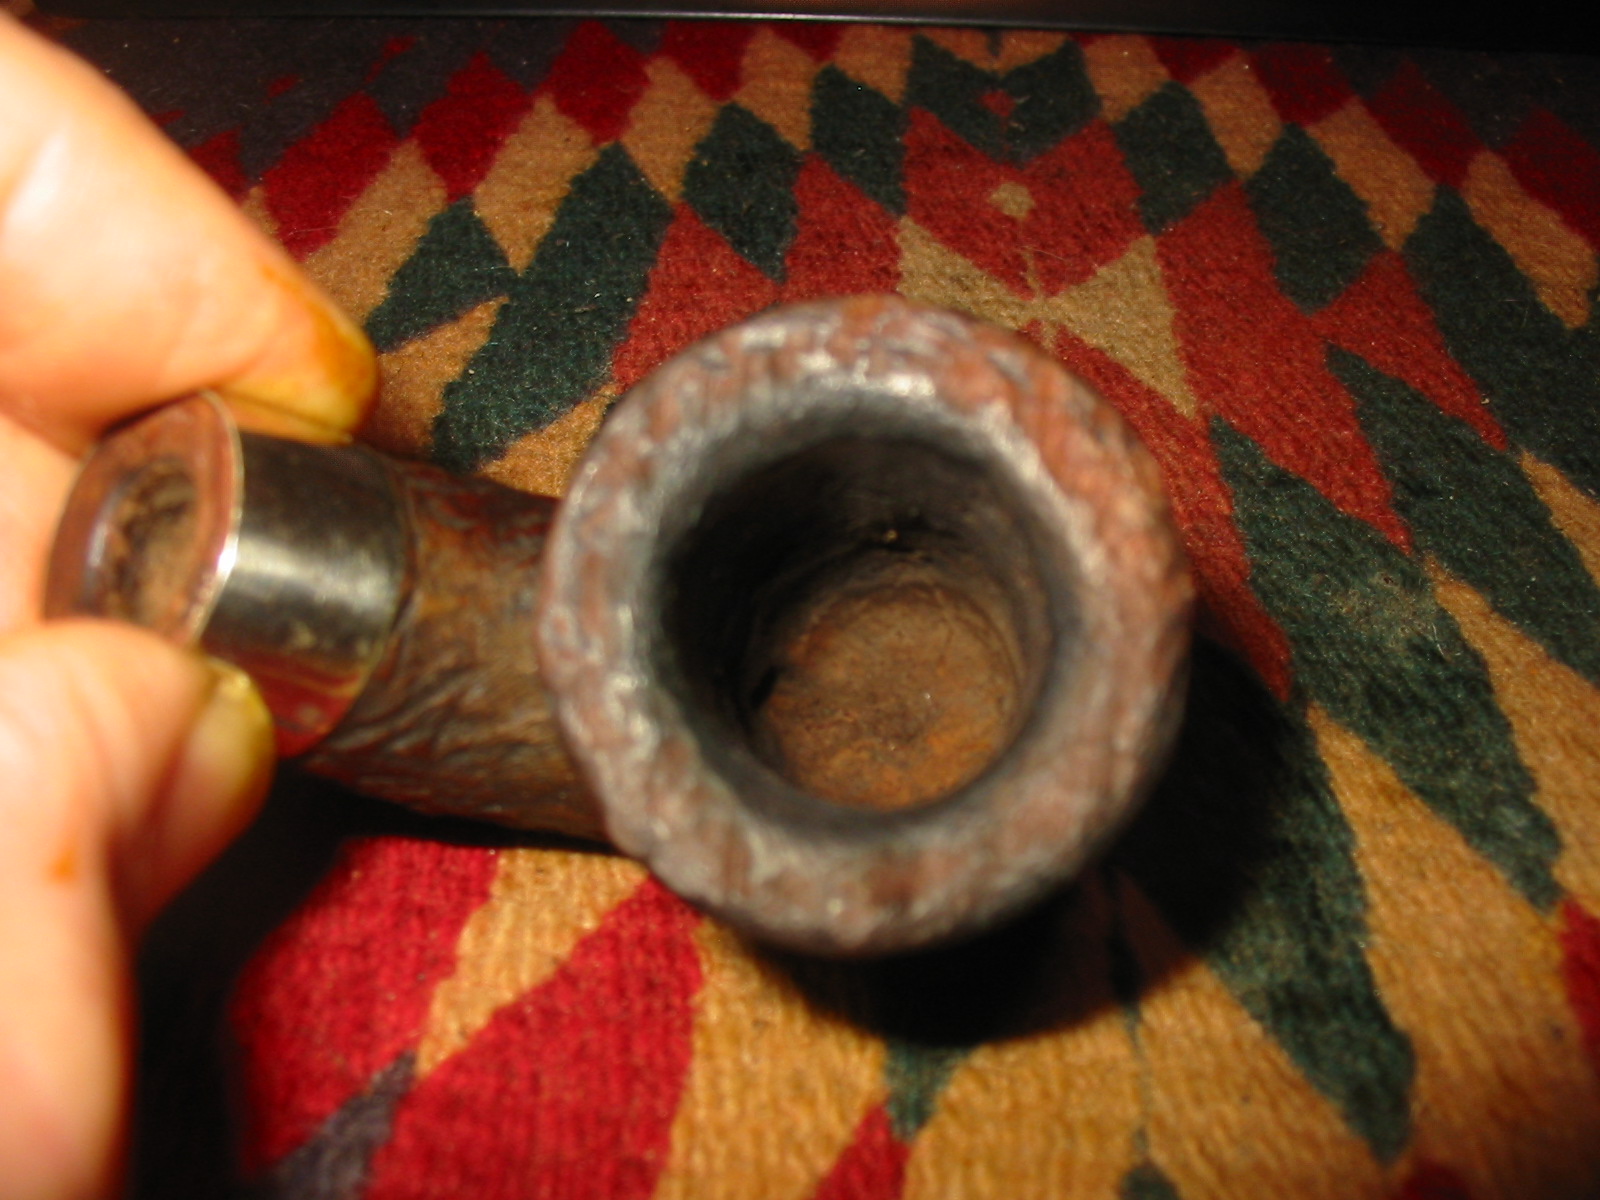
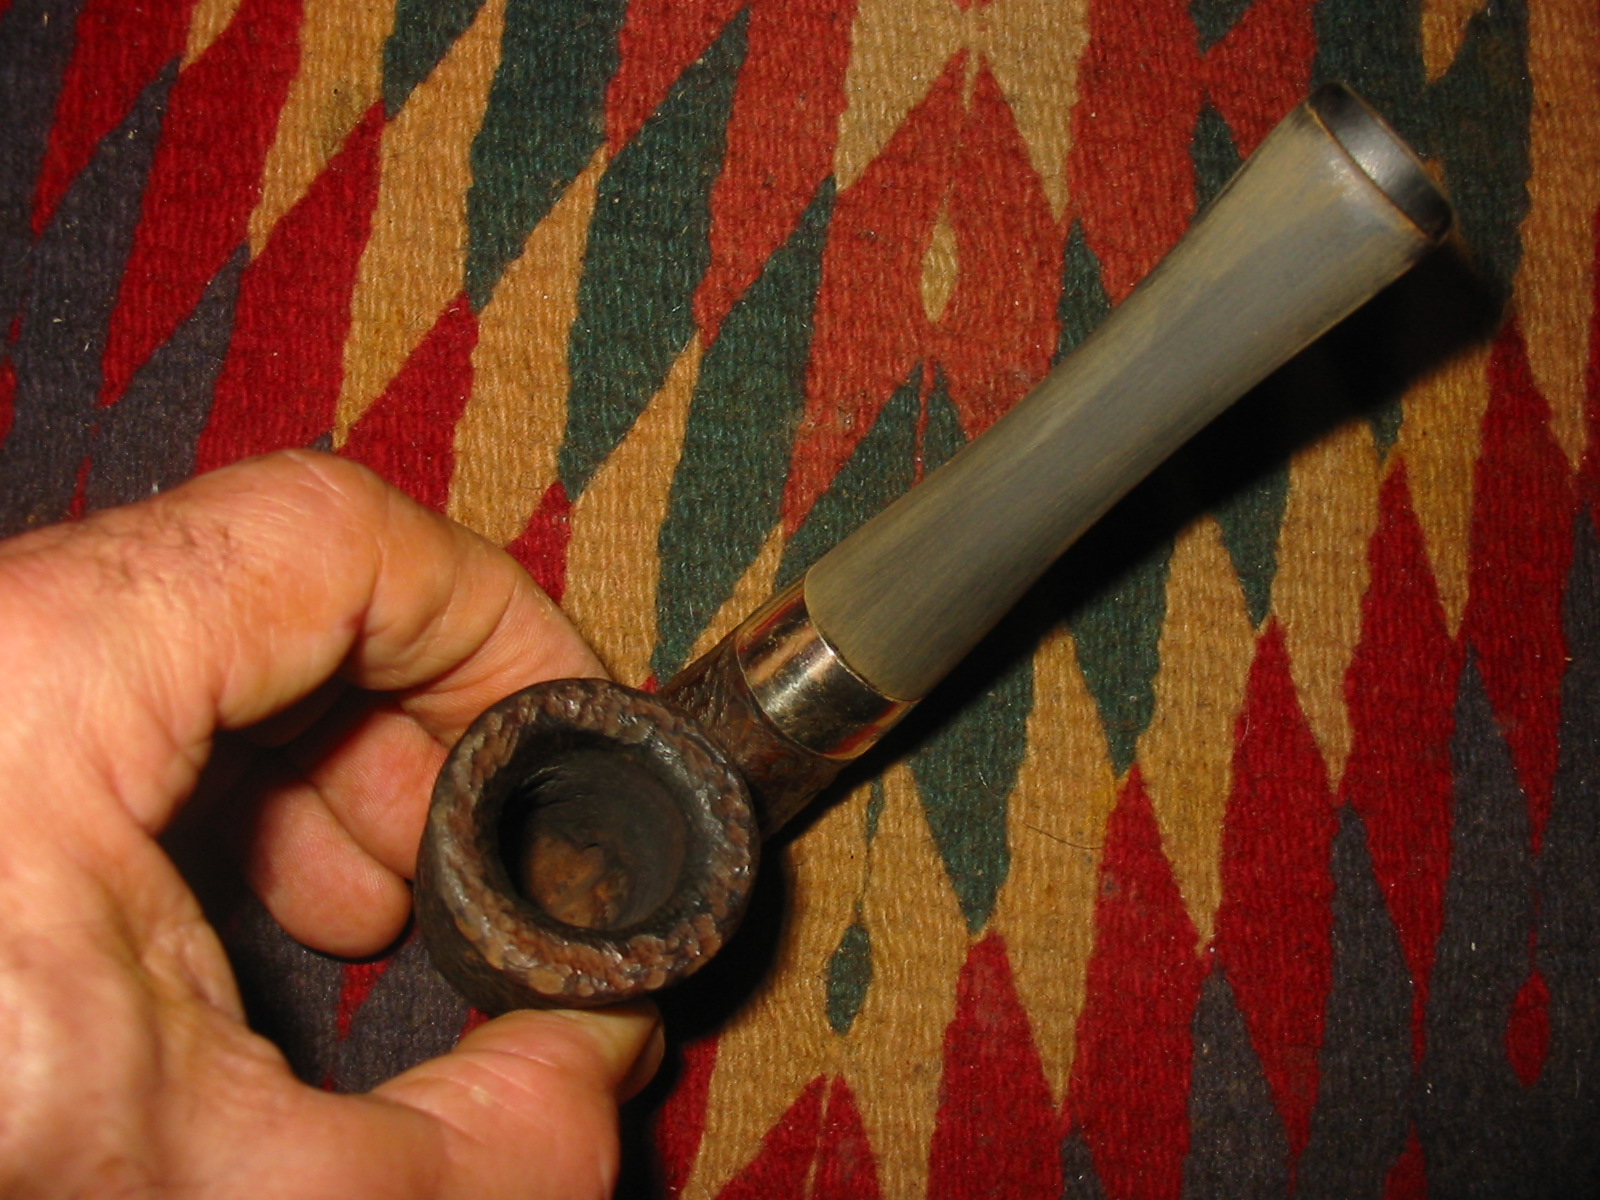
I took the dirty cotton balls out and washed out the bowl and shank with clean isopropyl alcohol and cotton swabs. While it was drying I scrubbed the rim with a brass tire brush to clean off the build up on the rustication. In the photo below the damage to the rustication is very evident. It is burned and worn smooth on the right front and side.
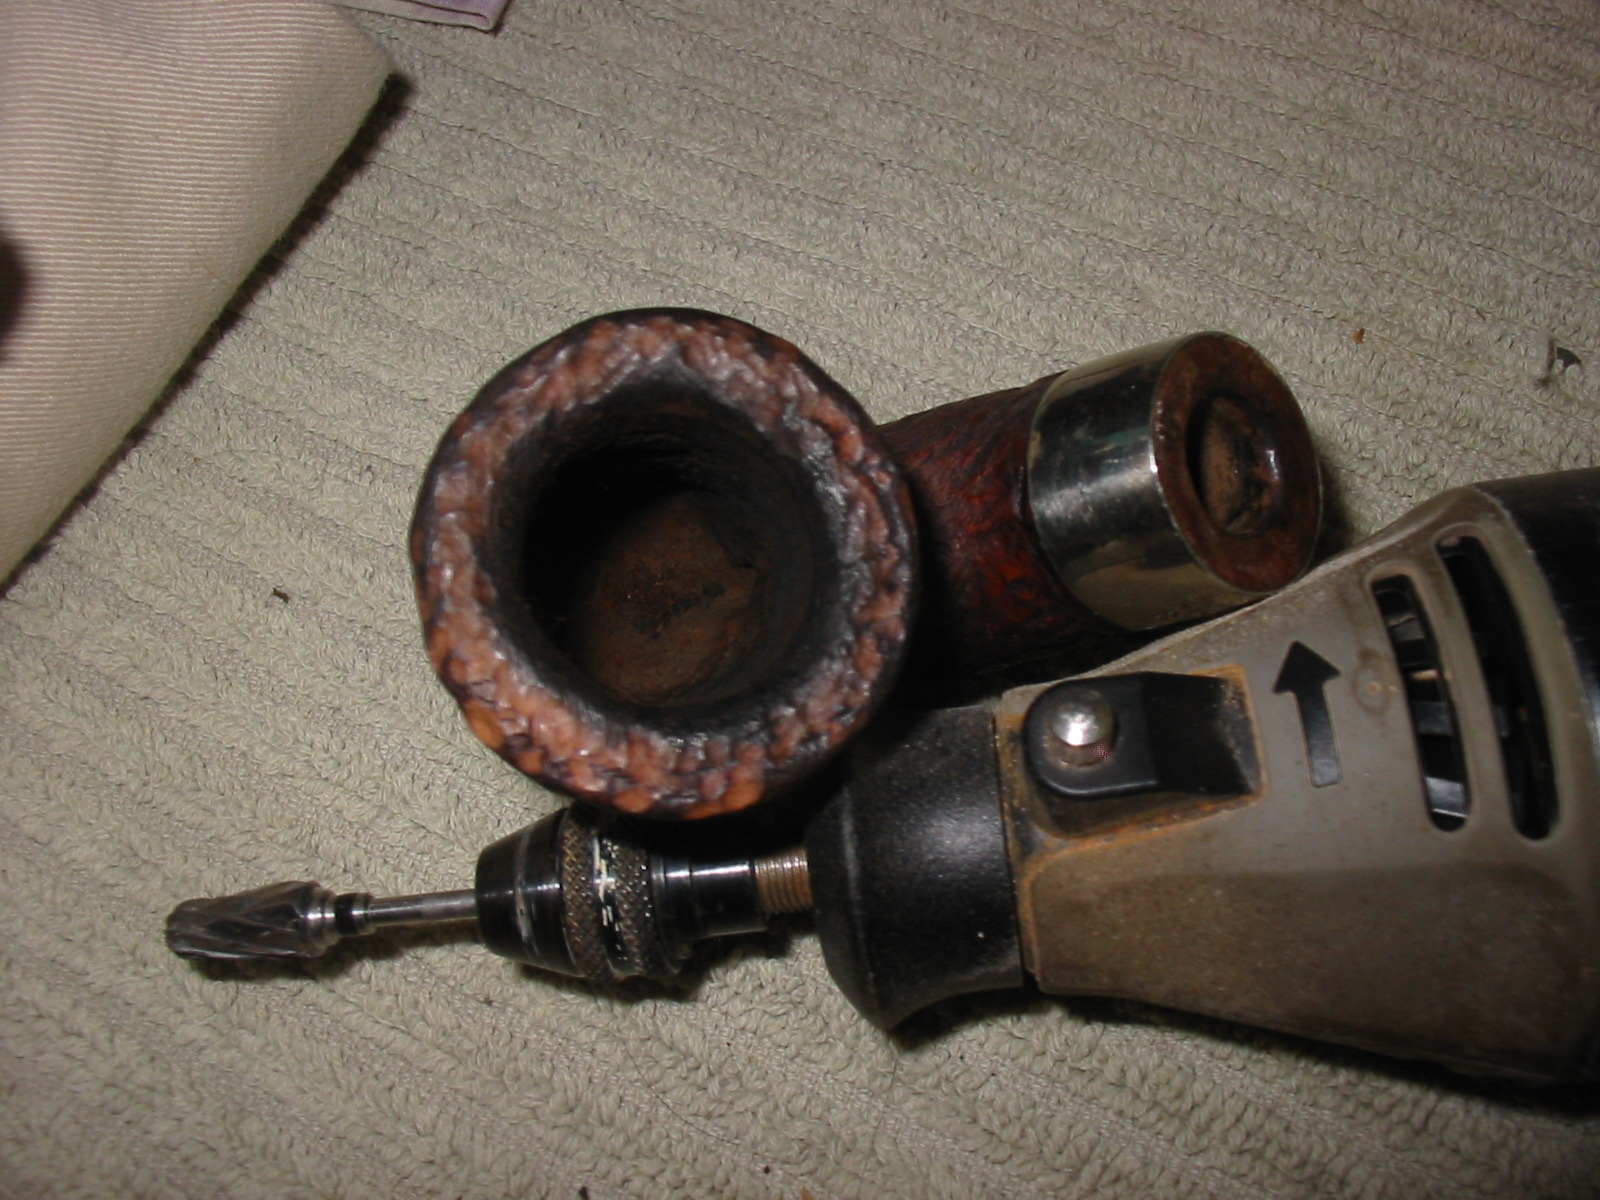
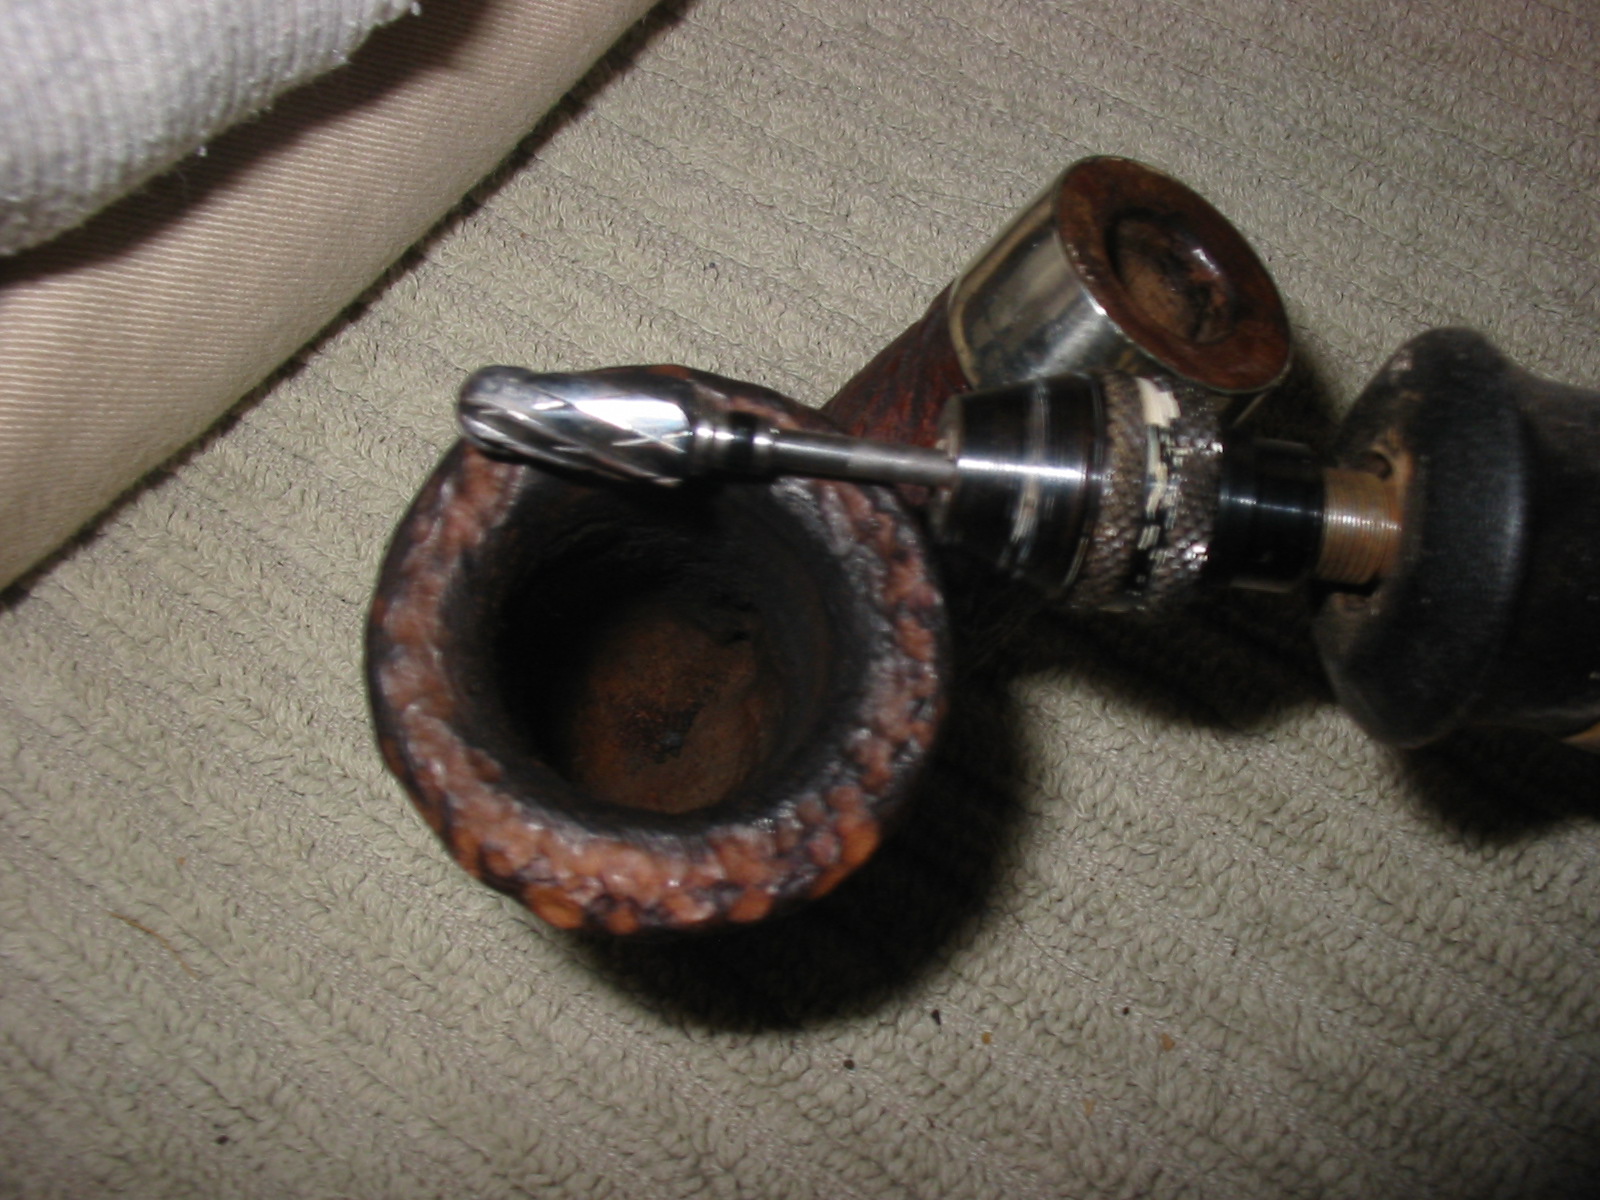
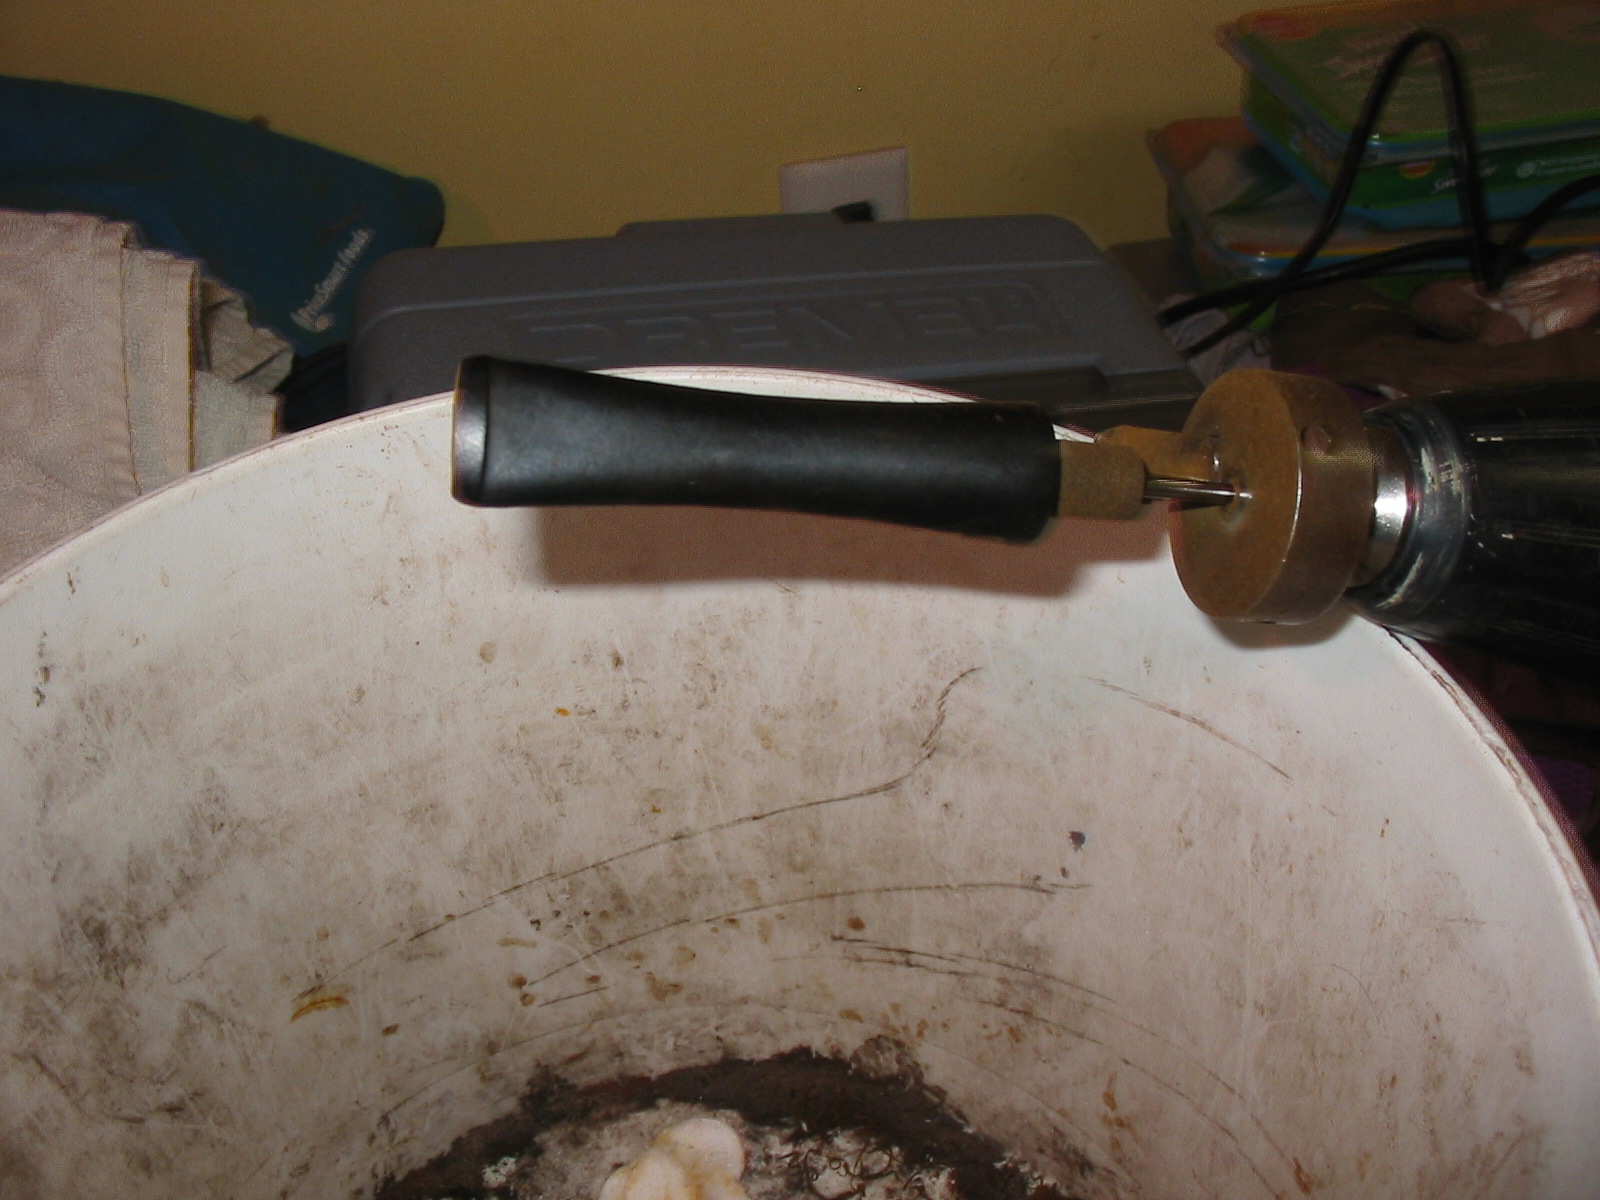
I used the Dremel with one of the burs that Joyal gave me to re-rusticate the rim. I followed the patter on the portions of the rim that were still visible and tried to duplicate them on the rest of the rim.
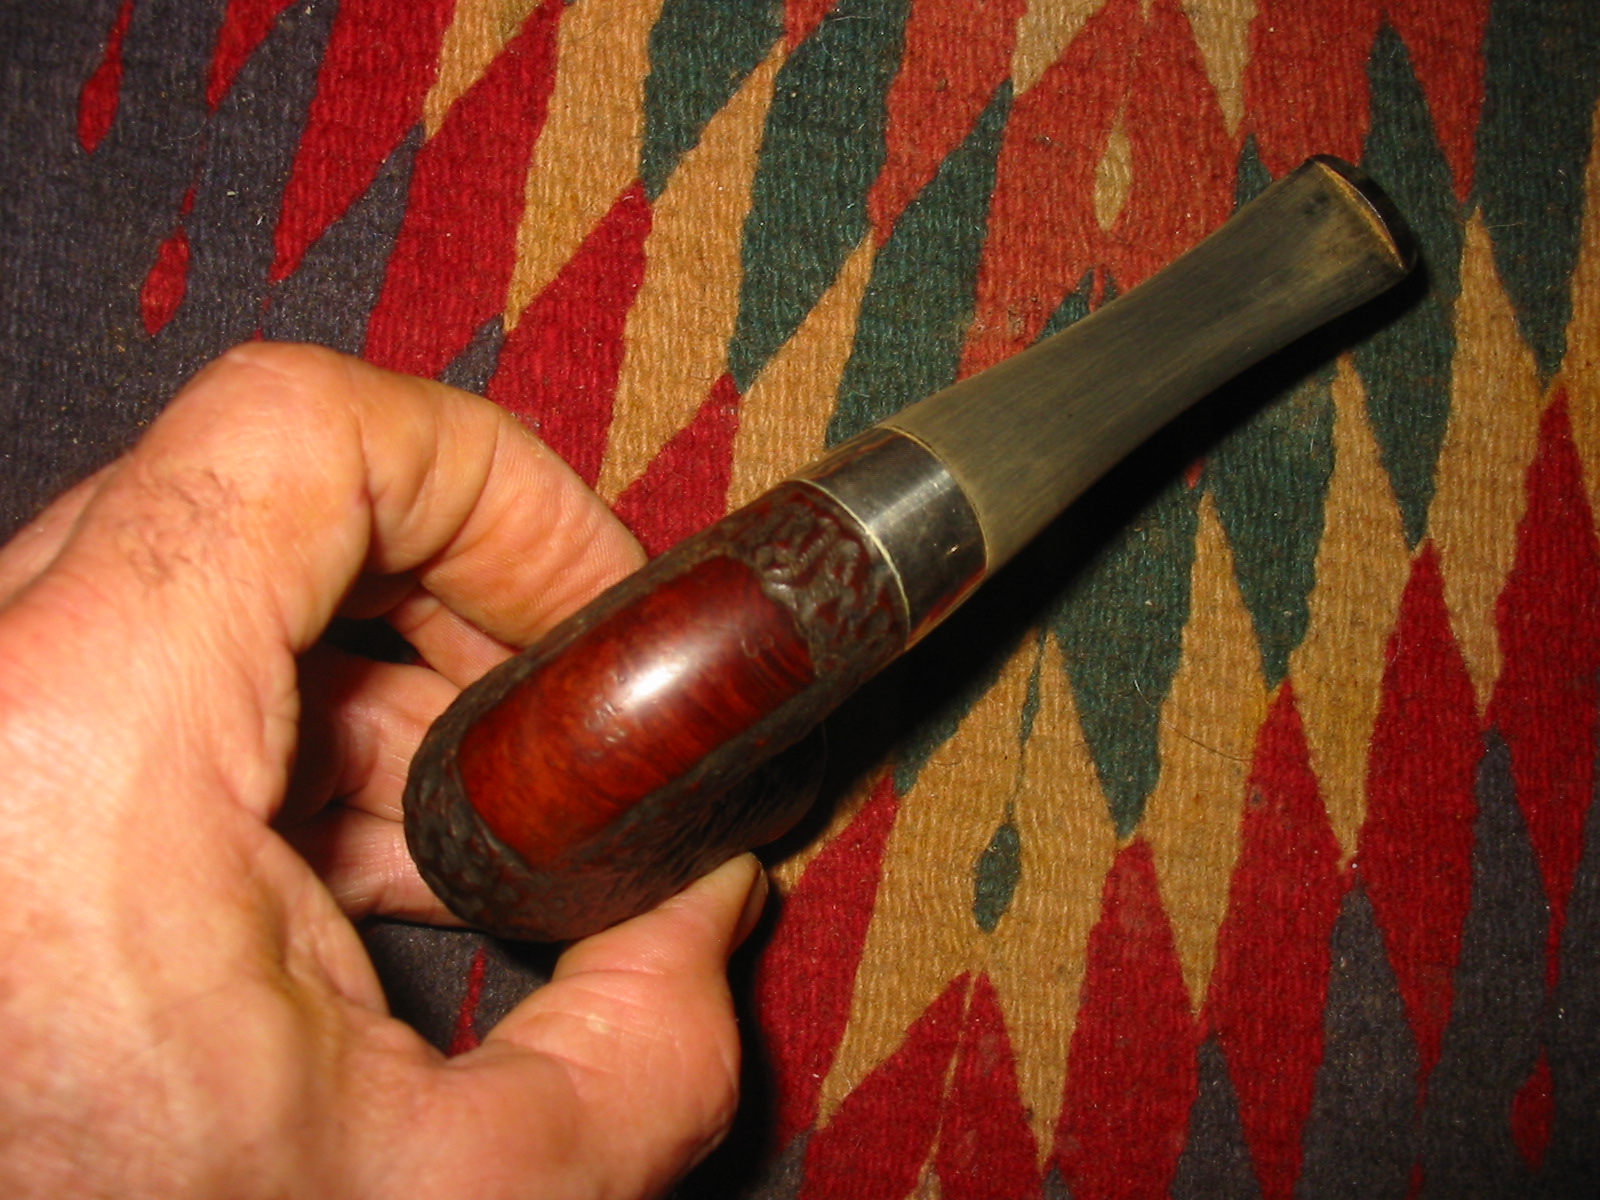
After rusticating the rim I restained it with a dark brown aniline stain. I applied the stain, flamed it and repeated the process until the coverage was even across the rim. I stained the bowl with the dark brown stain as well and flamed it.
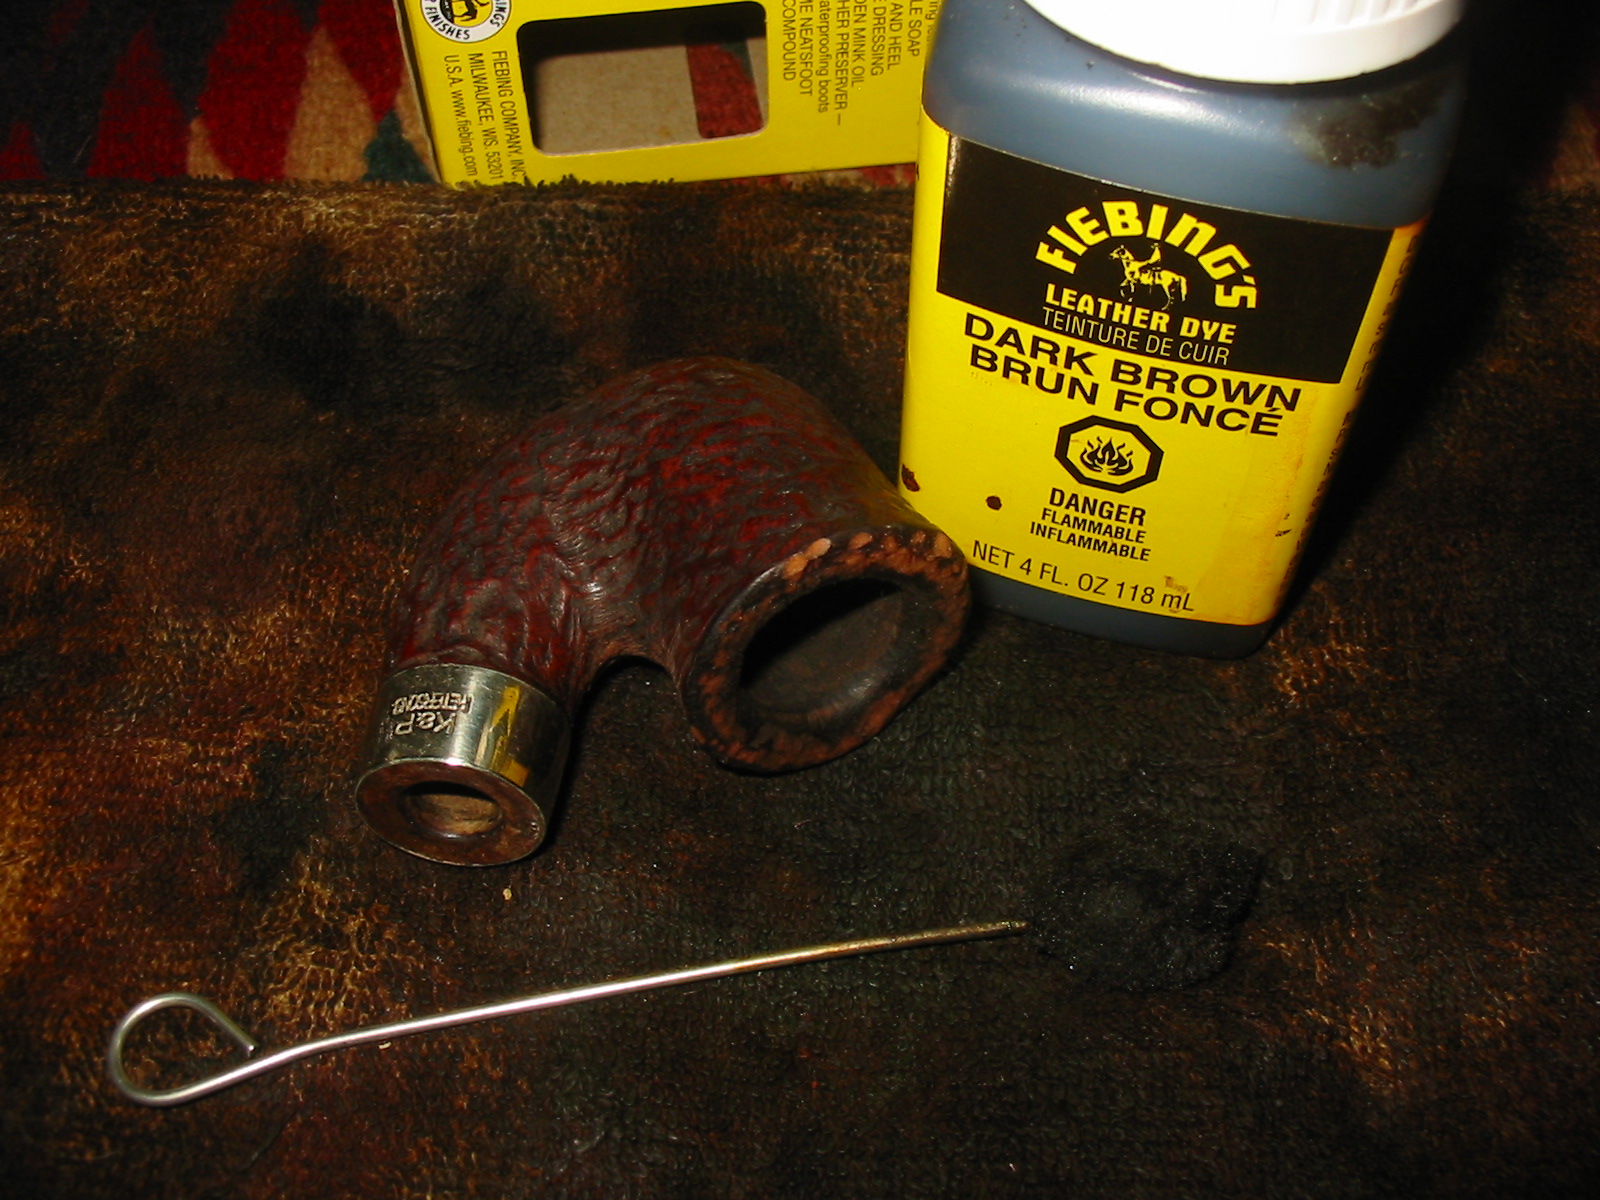
The brown stain was too opaque and the contrast between the dark in the crevices and grooves of the briar and the lighter brown on the high spots was gone. I wiped the bowl down with acetone on a cotton pad until I had the contrast that I was aiming for.

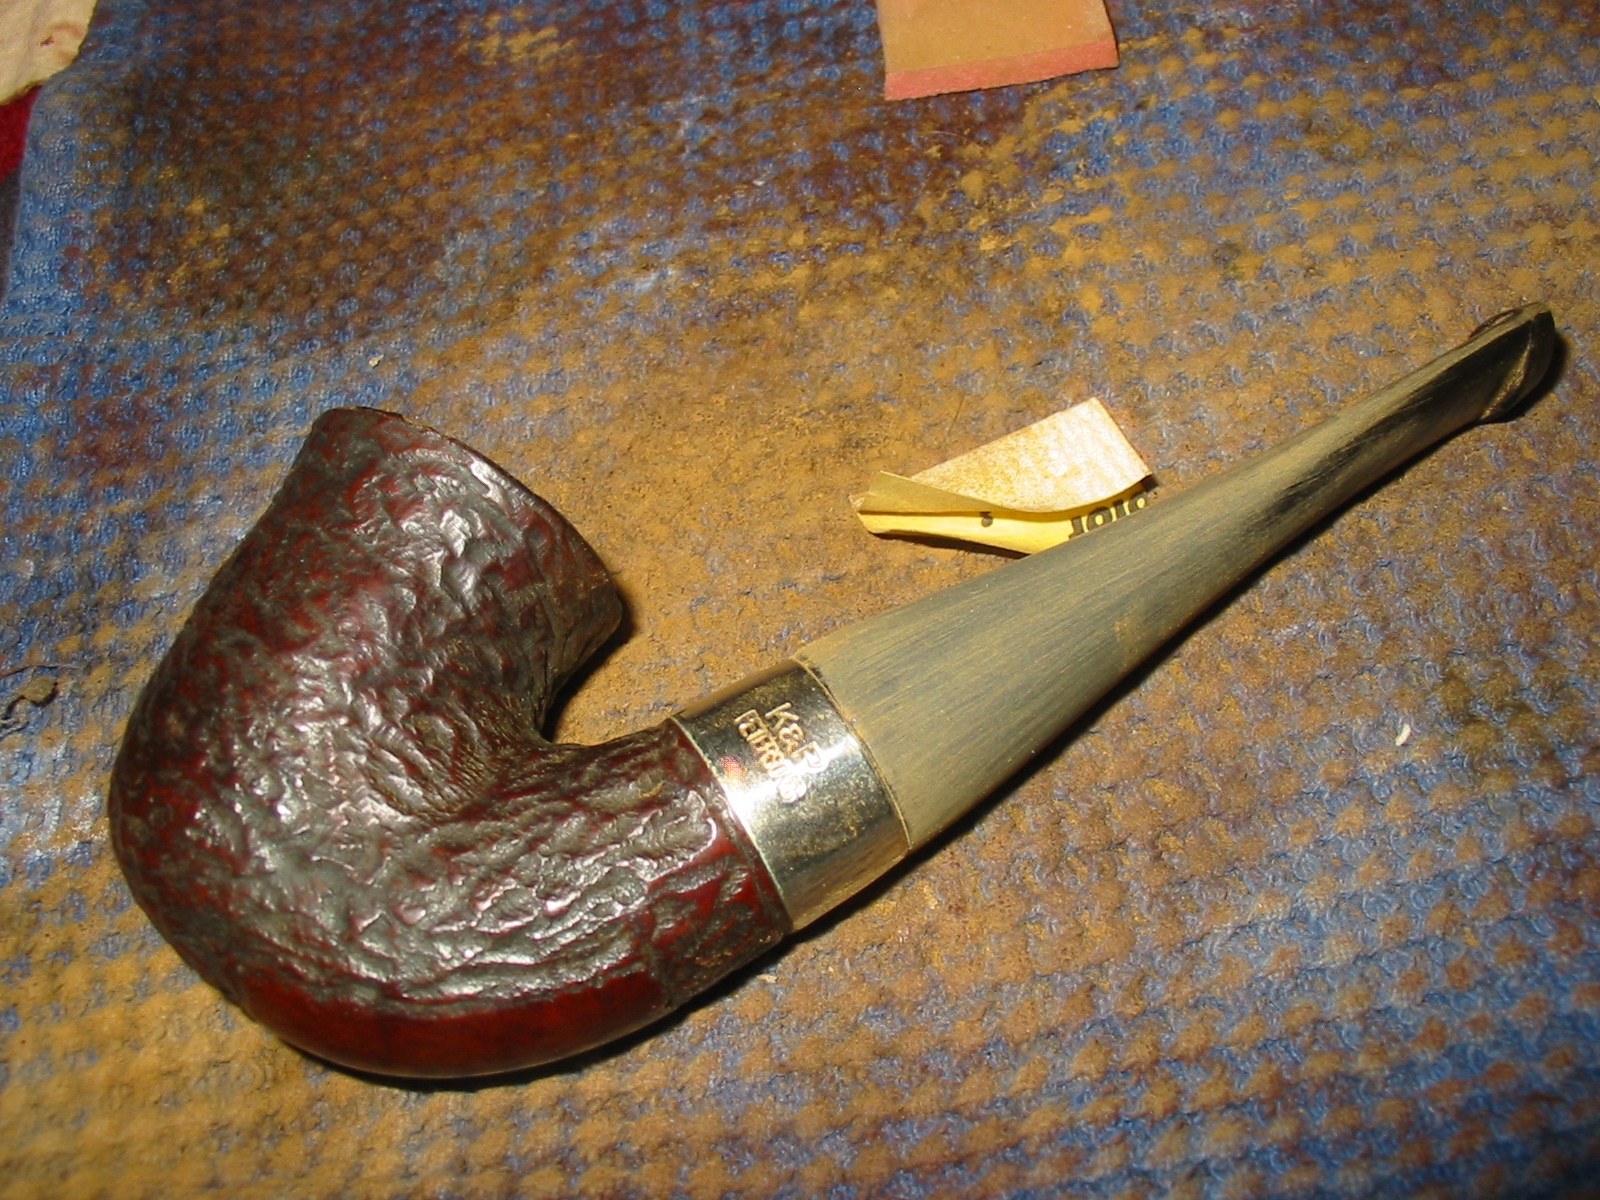
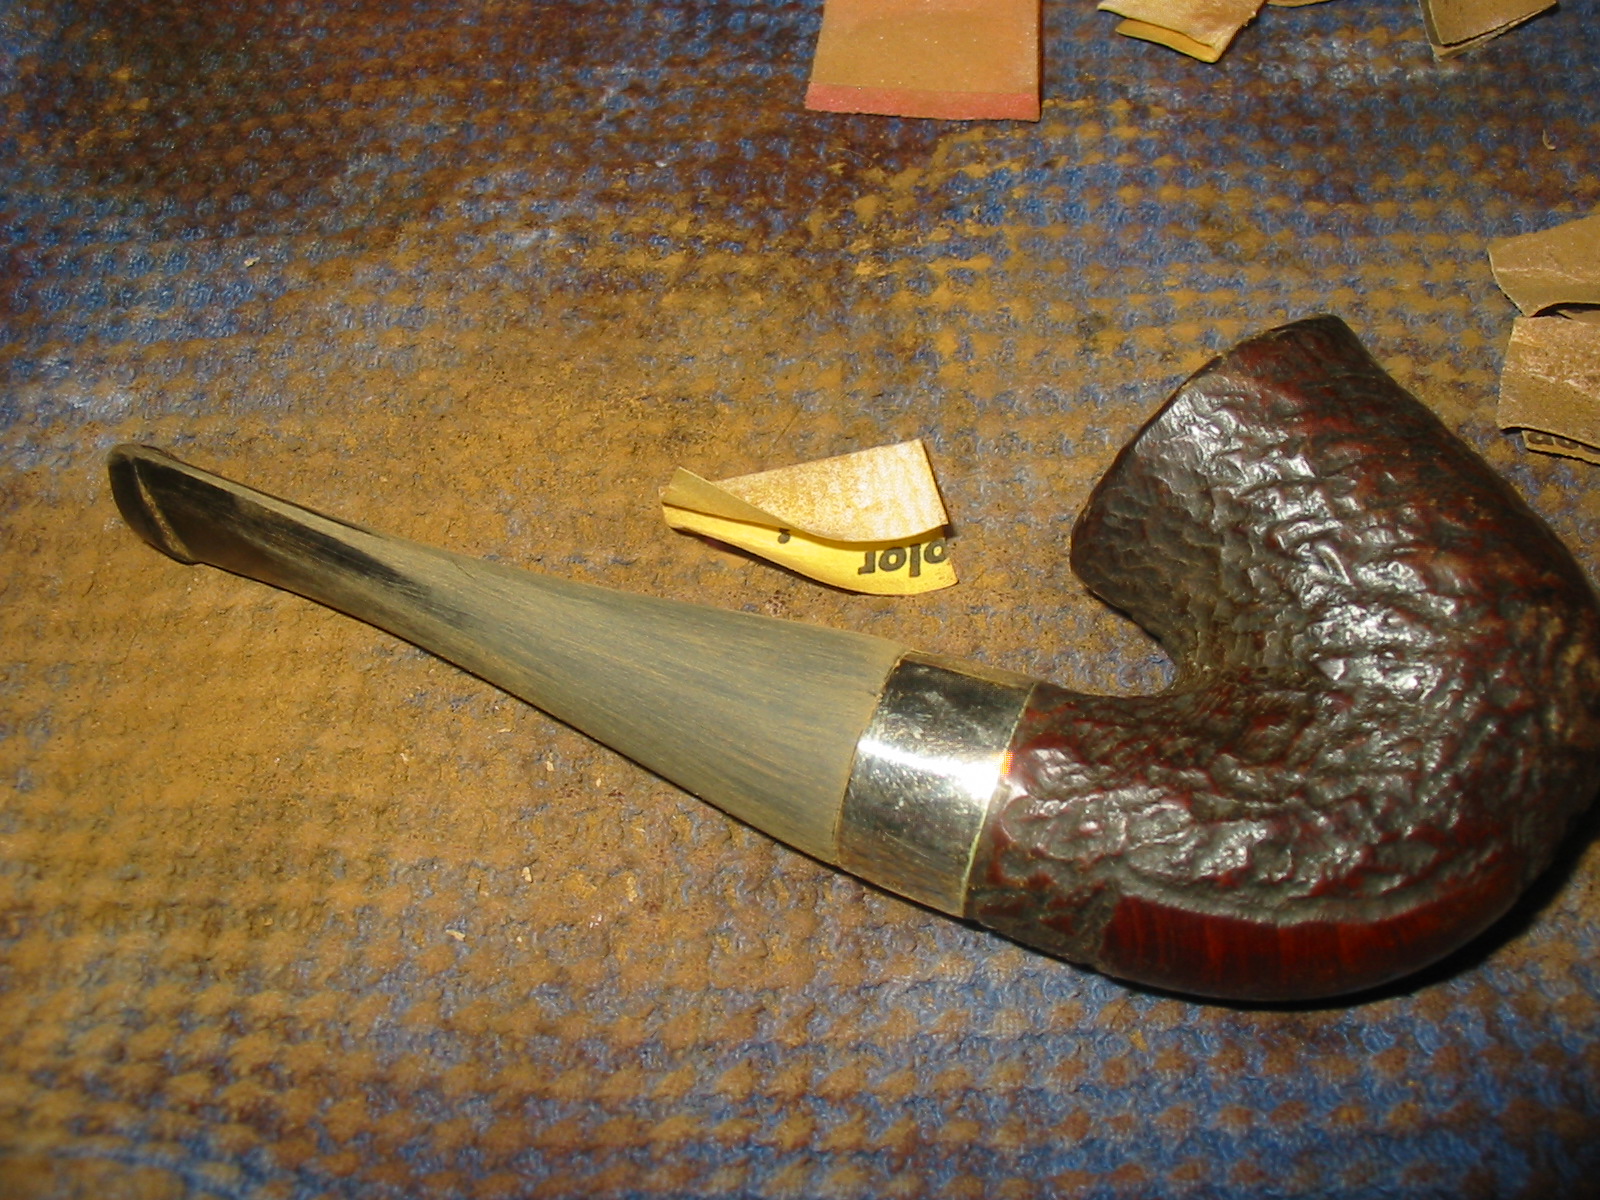
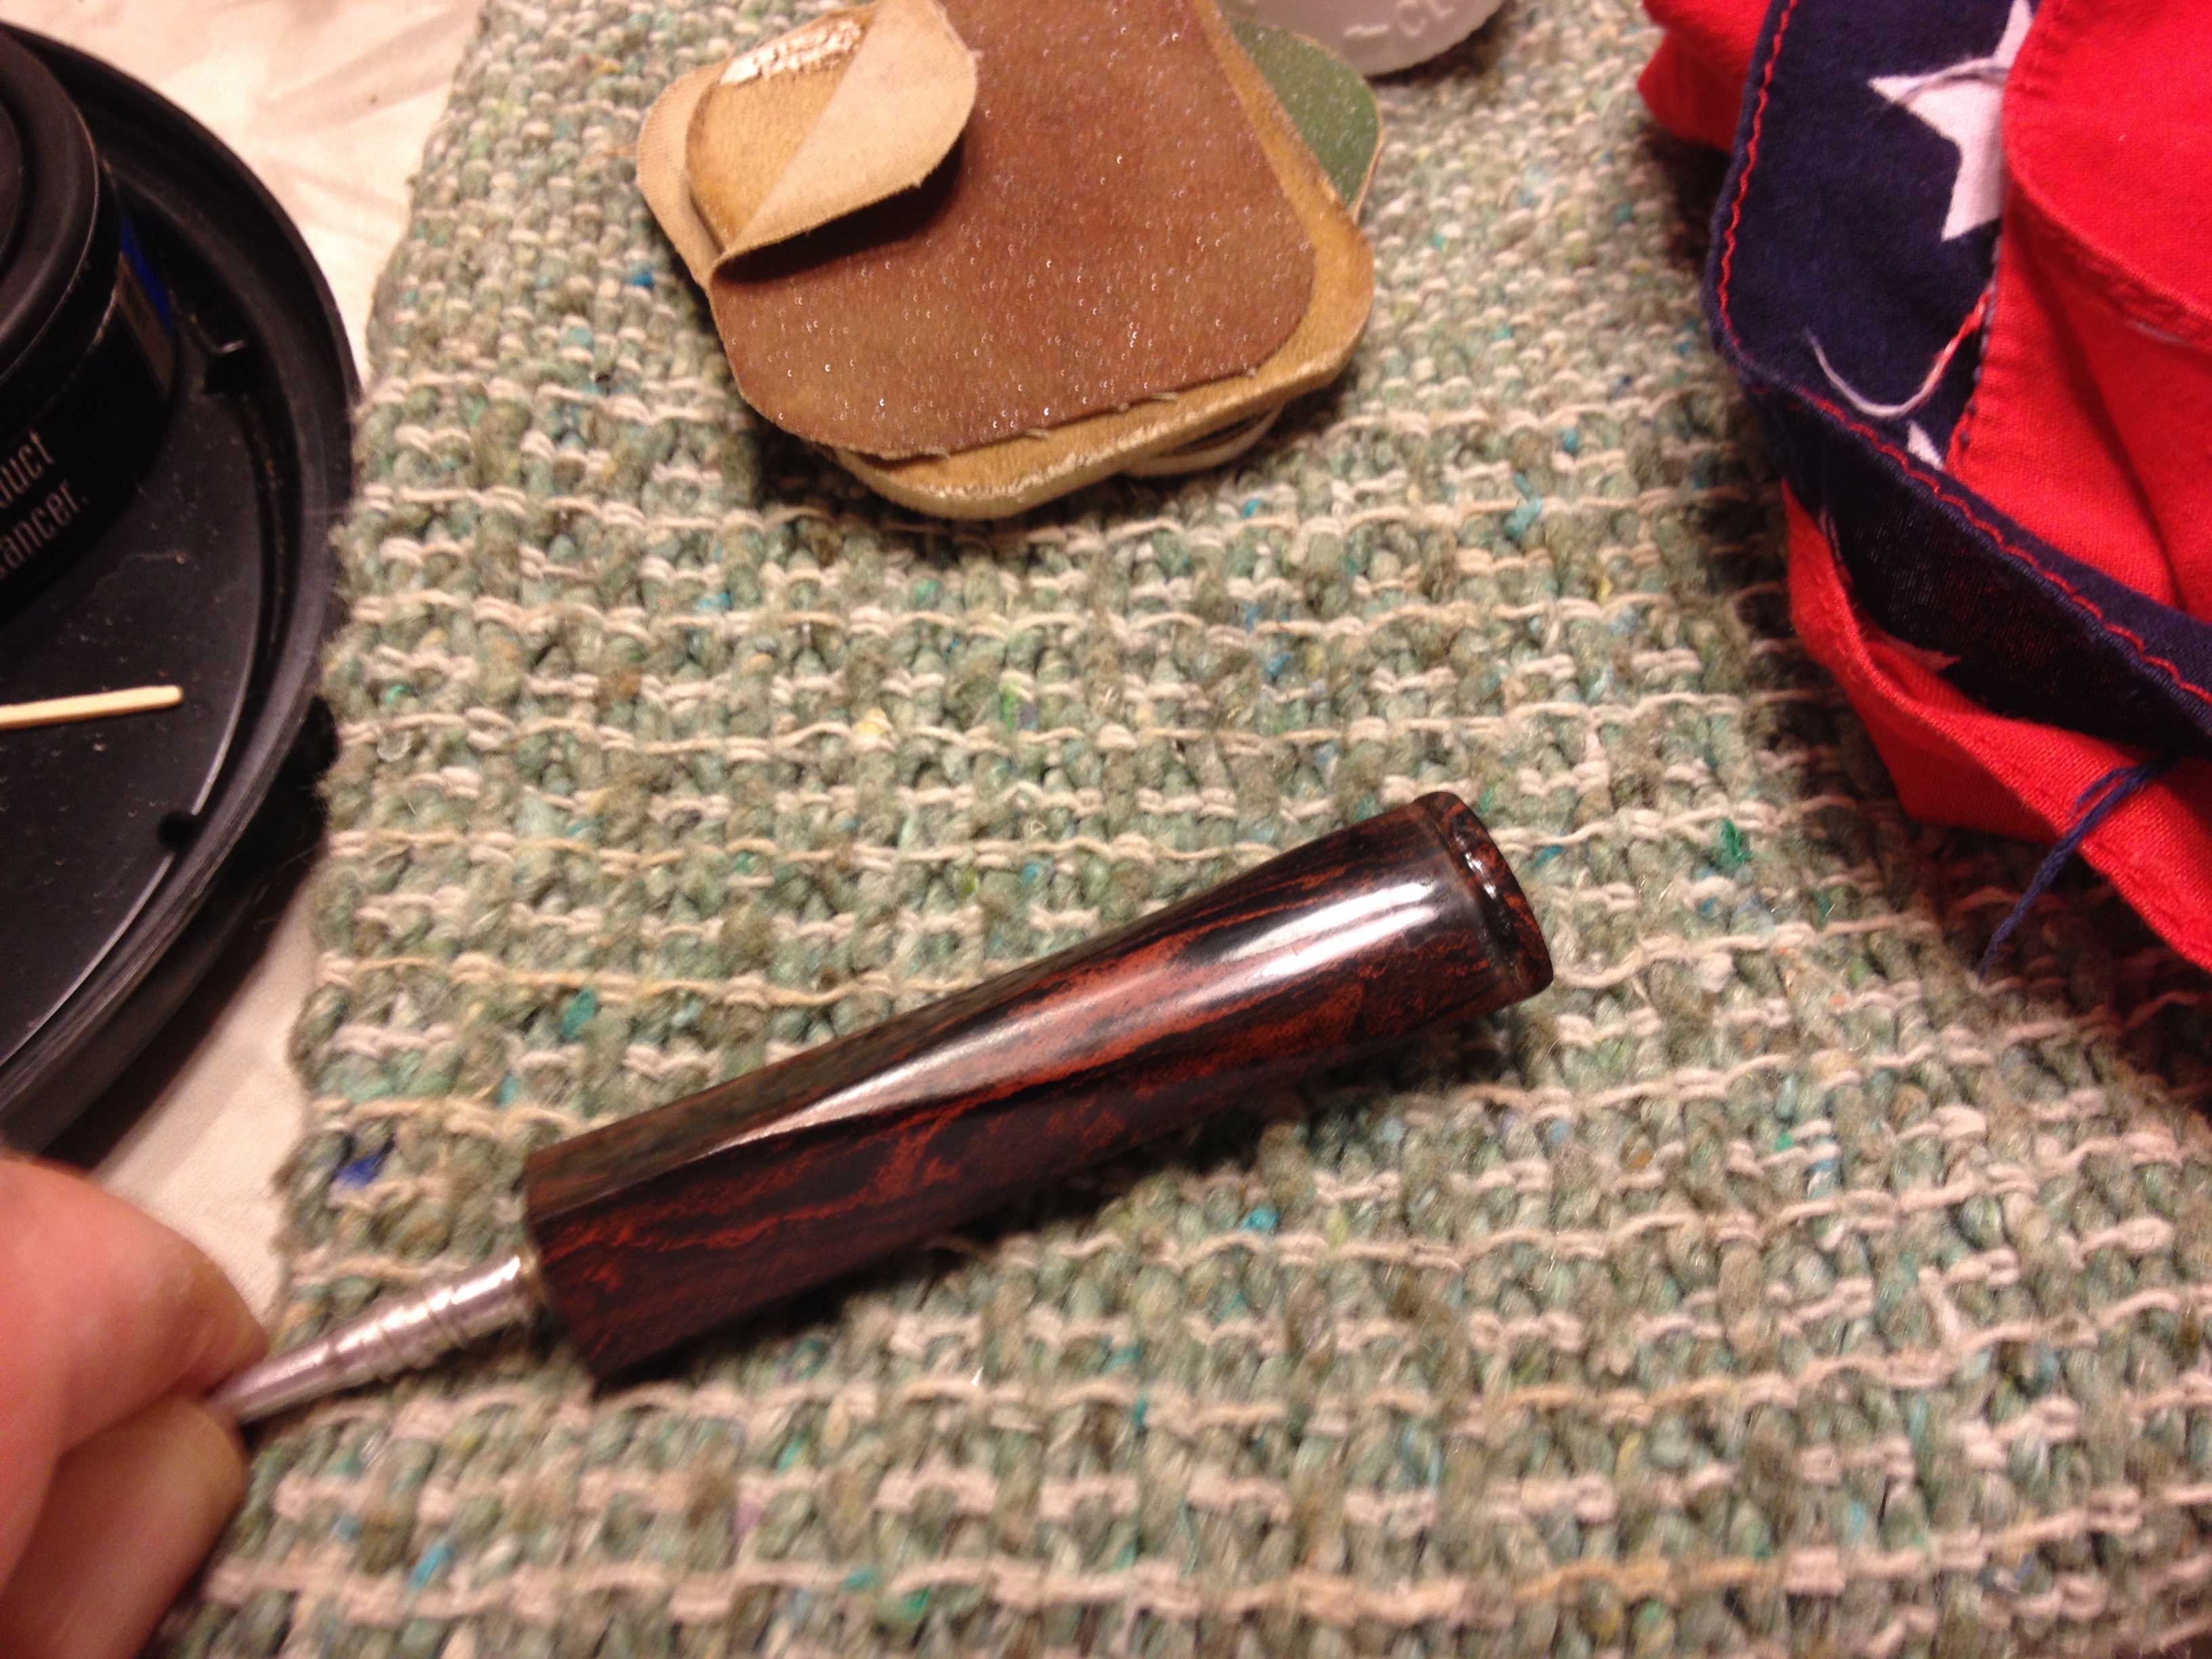
I ordered some stems that were the correct diameter and length for the 05 from Tim West at J.H. Lowe and Company. They arrived on Friday so I was able to fit one to the shank. I turned the tenon with a PIMO Tenon Turning Tool. The fitting of a tenon to the tapered shank of Peterson pipes takes a little getting used to. I worked to match the taper of the tenon to the taper of the mortise and was able to get a good fit on against the band.
I used the sanding drum on the Dremel to remove the casting seams on the sides and the button of the stem.
I sanded the stem with 150 and 220 grit sandpaper to match the diameter of the shank to the diameter of the band.
I sanded the stem with medium and fine grit sanding sponges to remove the scratching left behind by the sandpapers.
I wanted to bend the stem to match the original stem that would have been on the pipe. I looked up photos on the web of the 05 and copied one of them. I decided to use a fishtail stem instead of the p-lip stem but I was able to use the photo as a template of the bend.
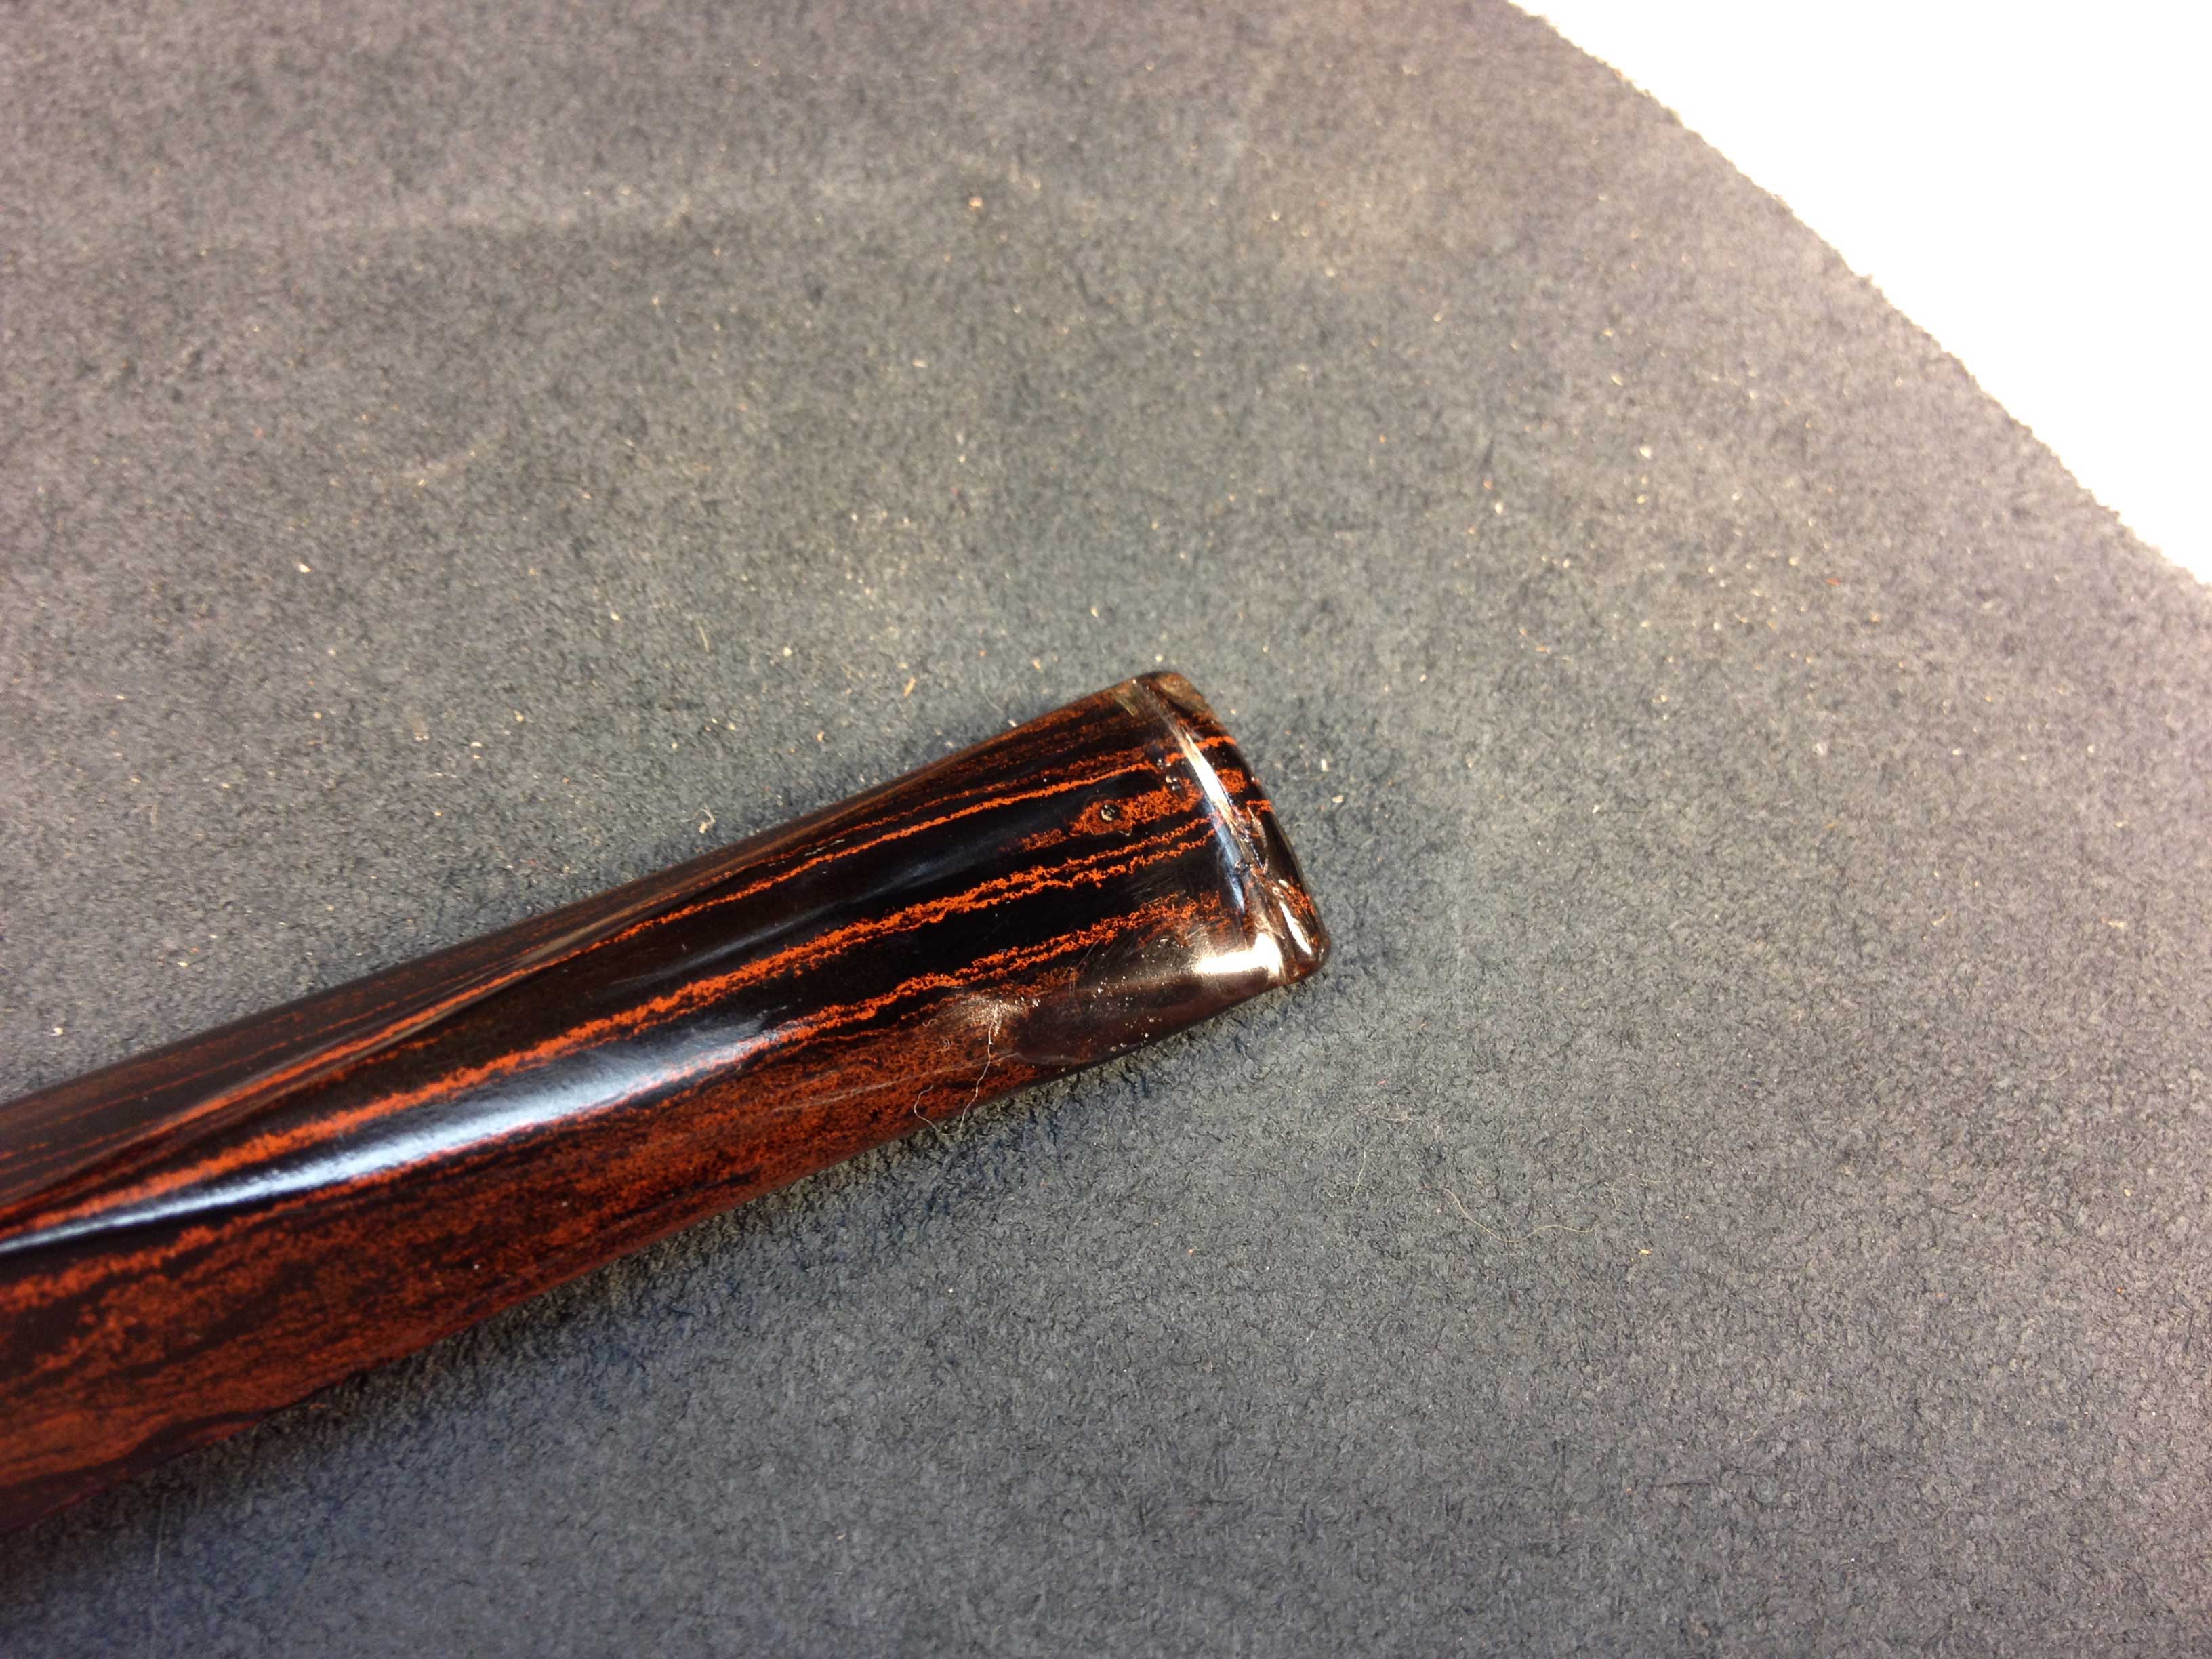
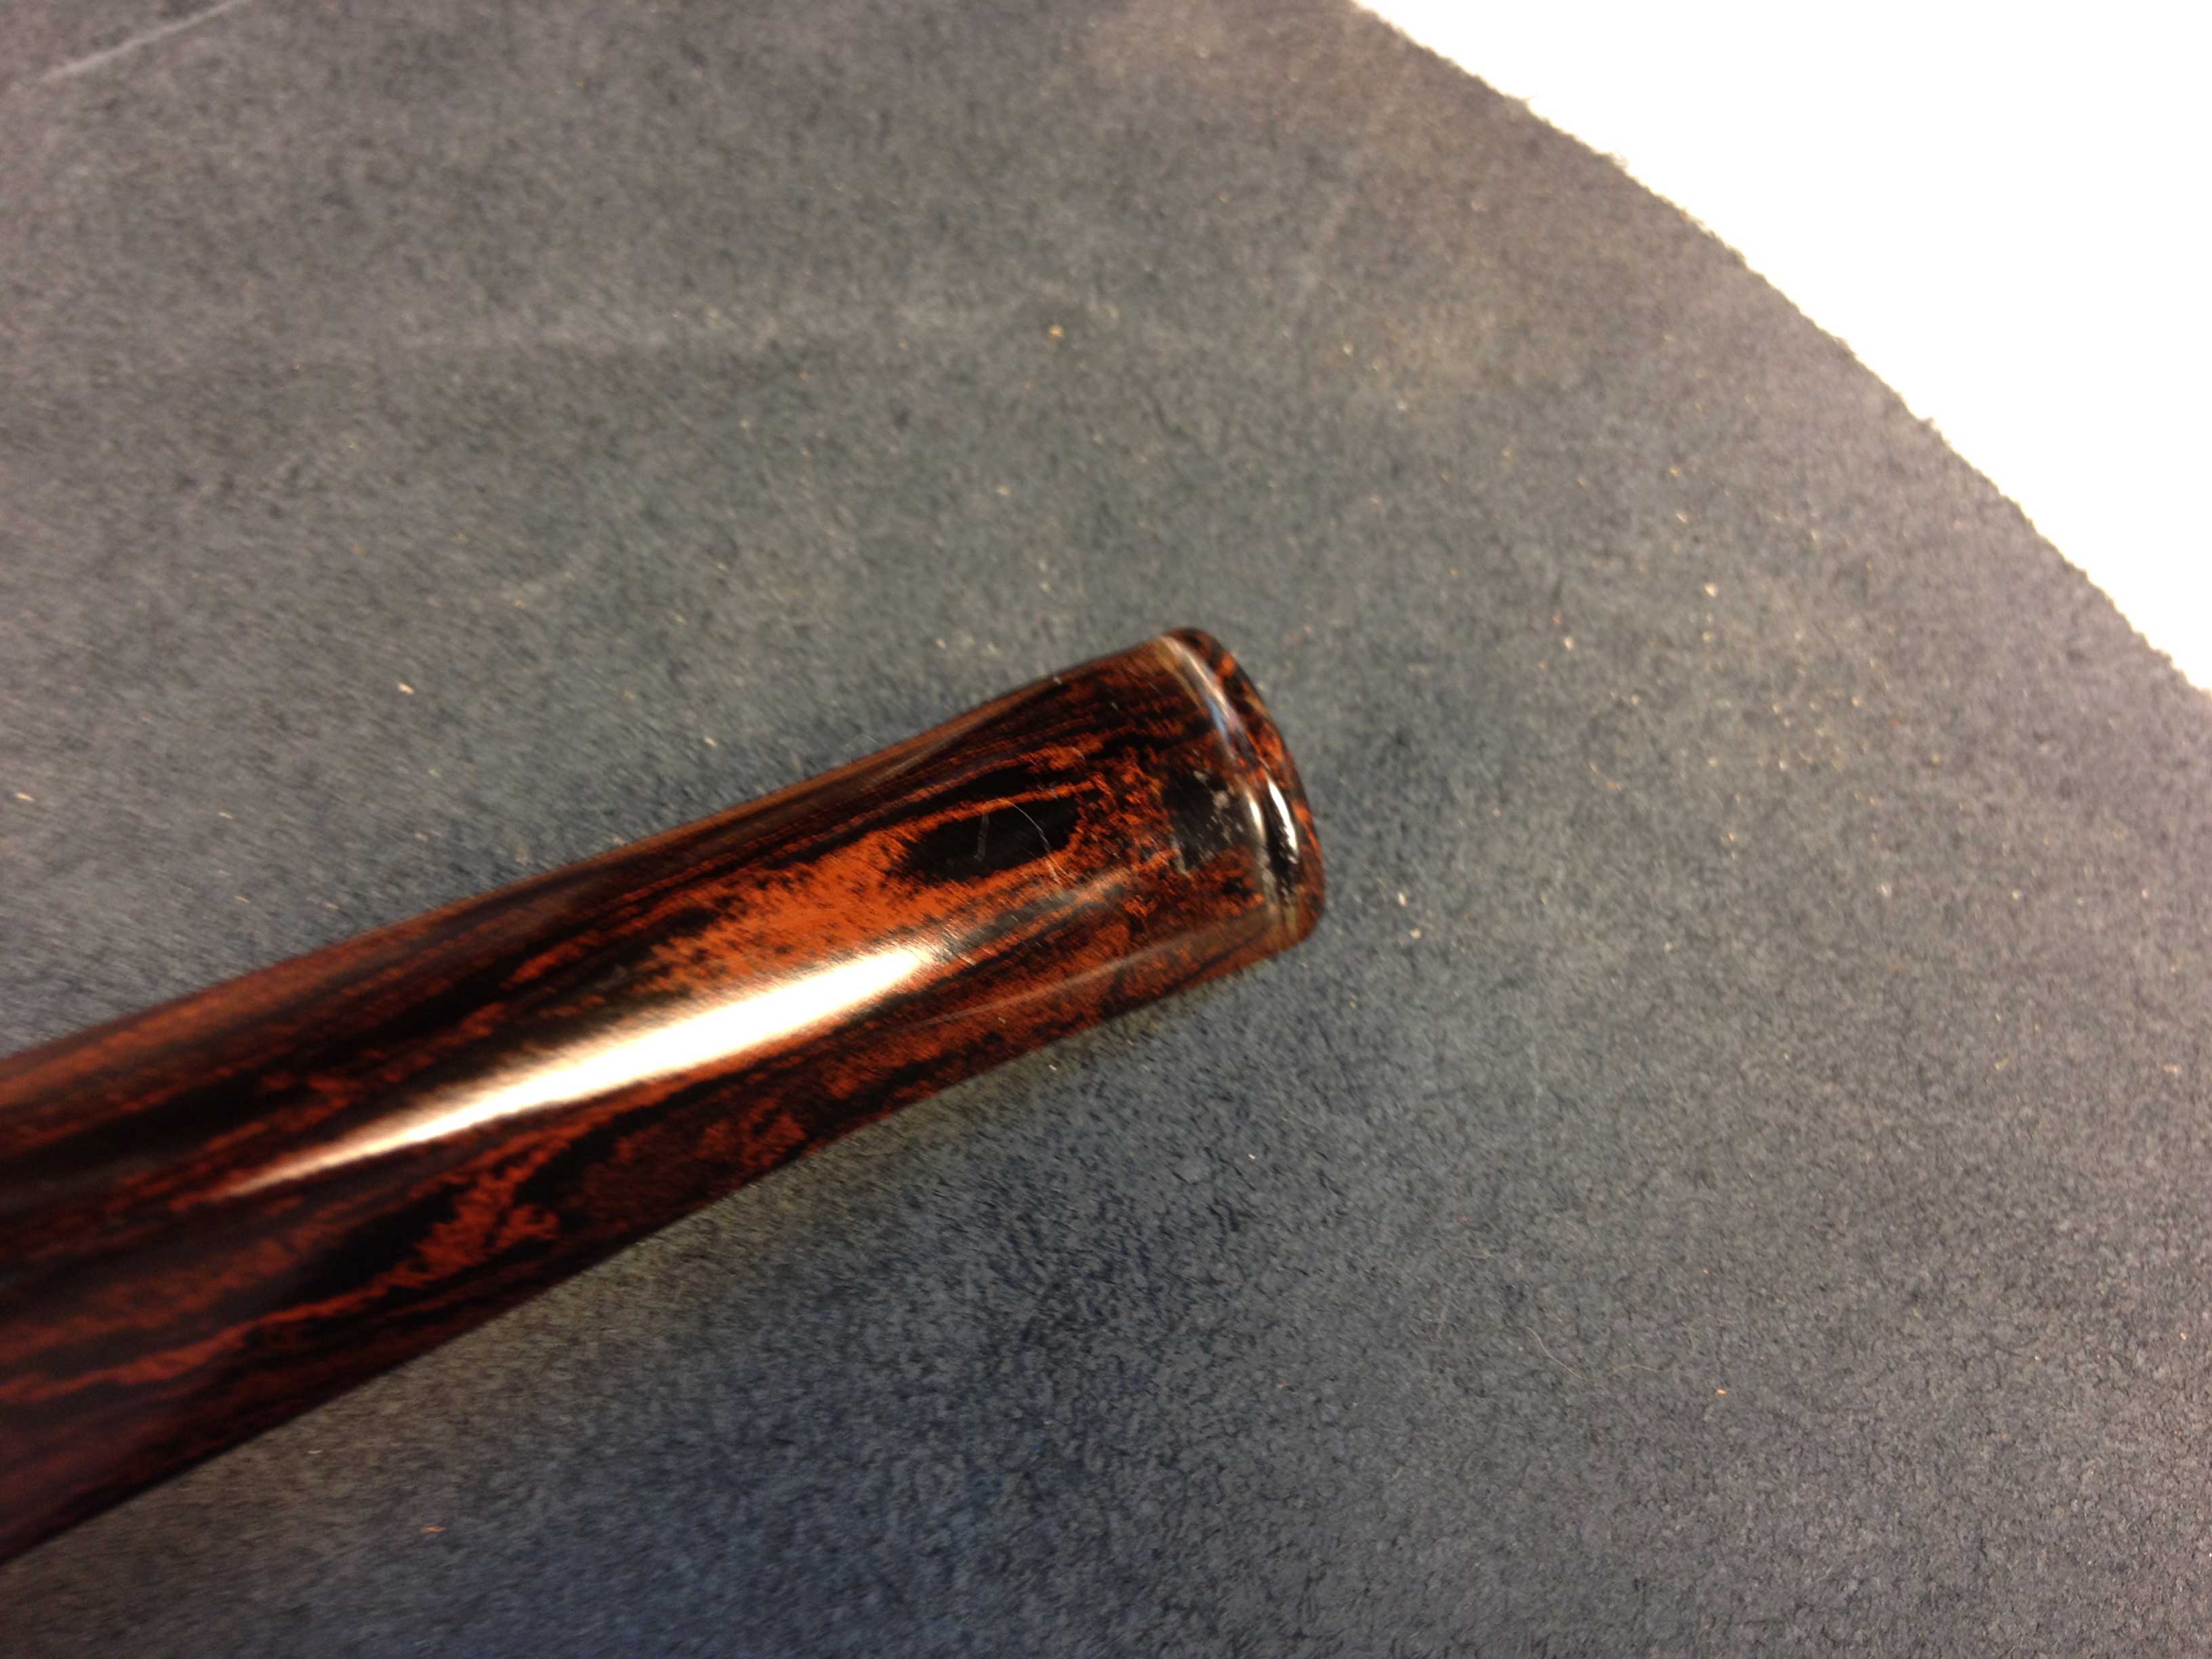
I heated the stem with a heat gun until it was flexible and then bent it over a rolling pin with a cardboard sleeve over it. I have found that the cardboard prevents the hot vulcanite from marring when I bend it. The second photo below shows the first attempt at the bend and the third photo shows it after I reheated it and rebent it to match the template.
I sanded the stem with the medium and fine grit sanding sponges again. At this point in the process the stem was ready for the fine sanding work with the micromesh sanding pads.
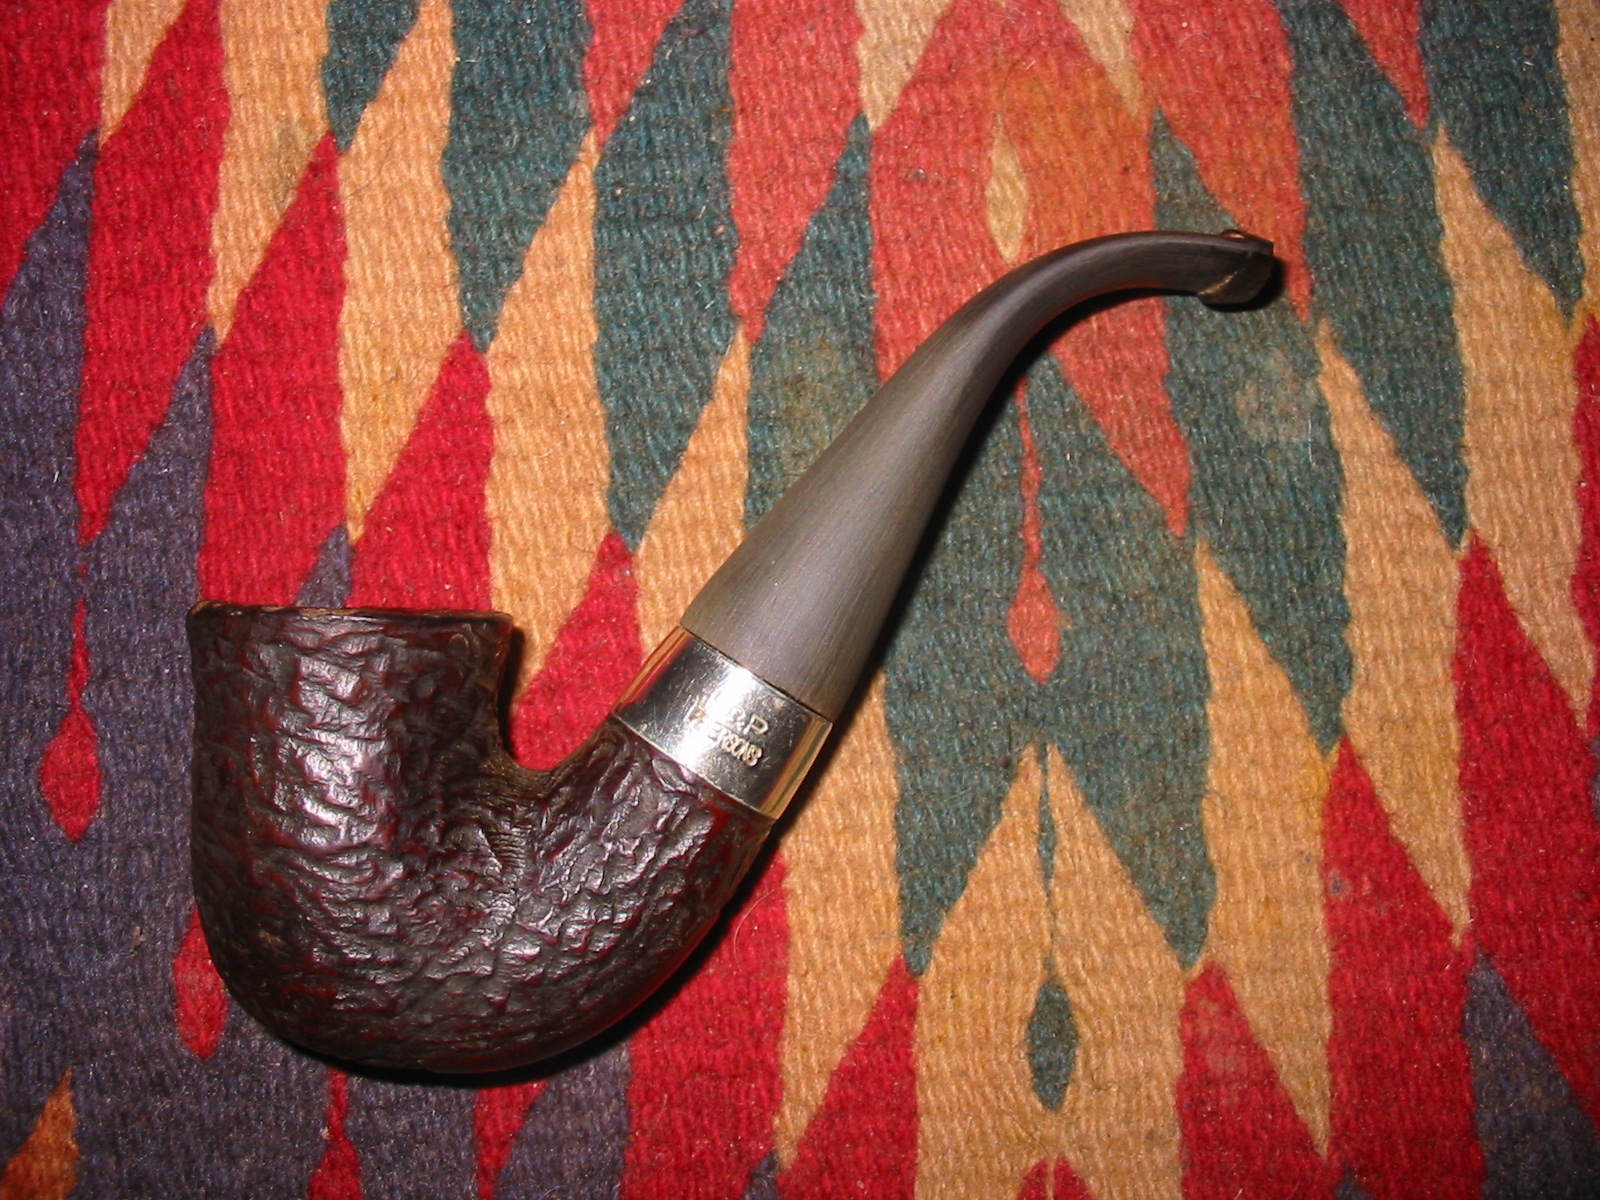
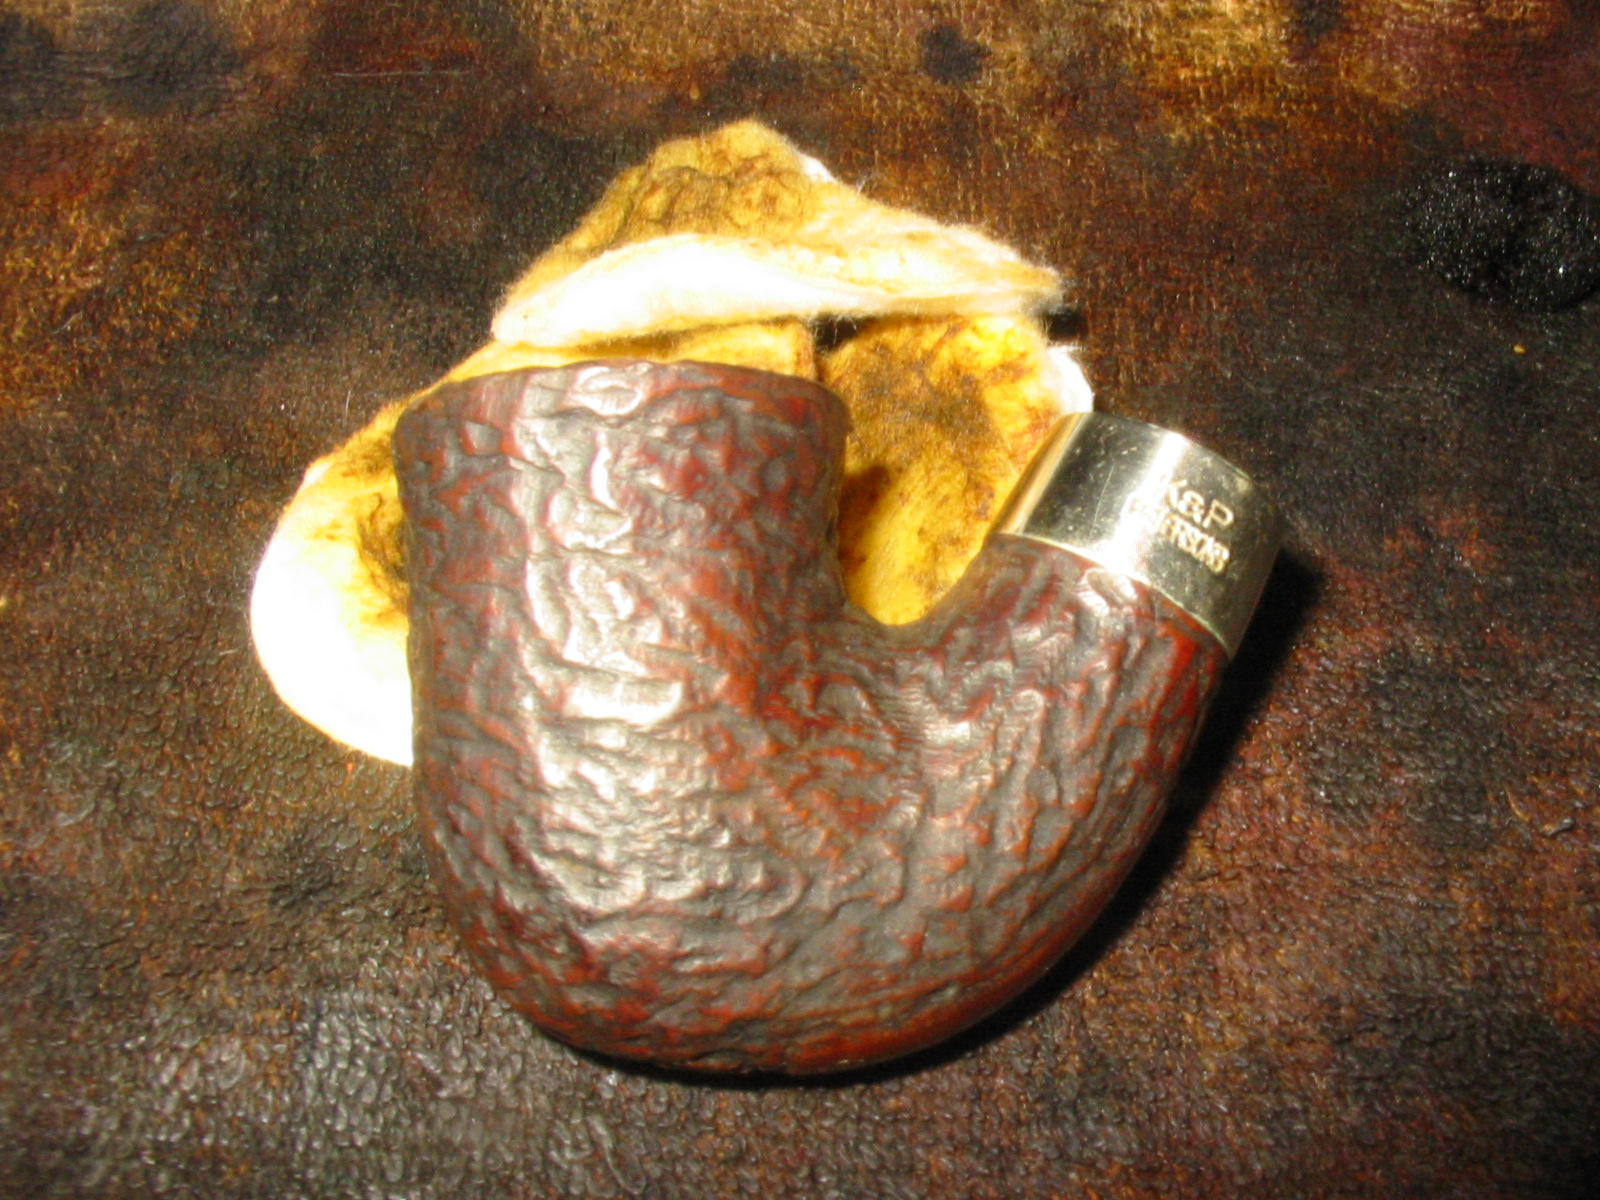
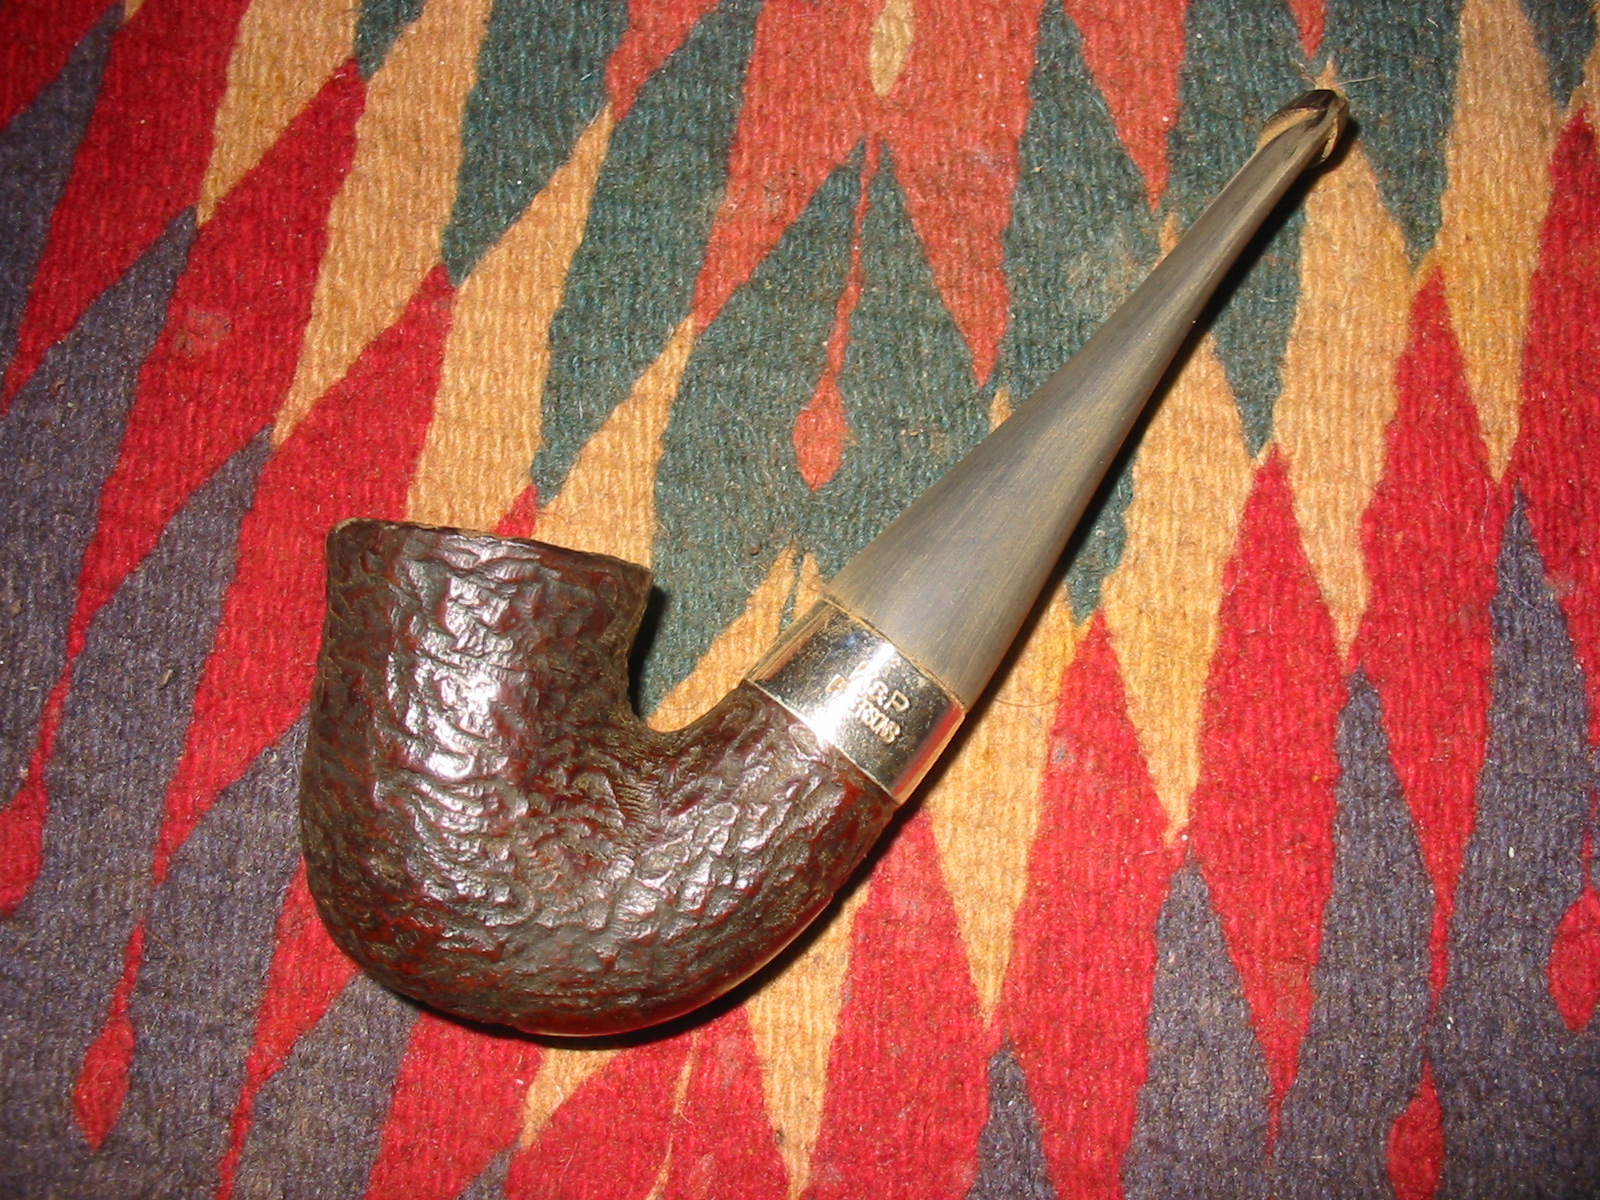
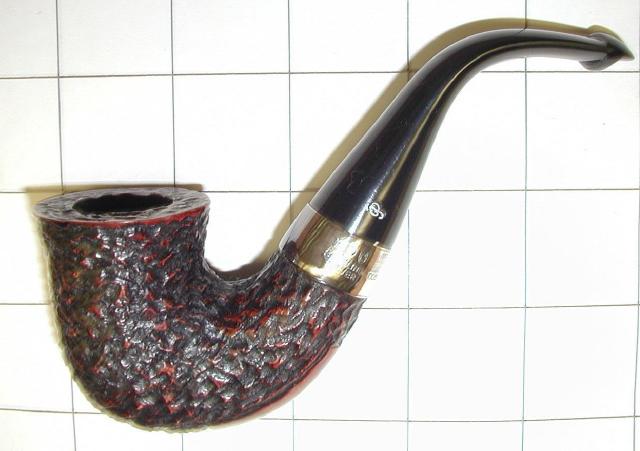
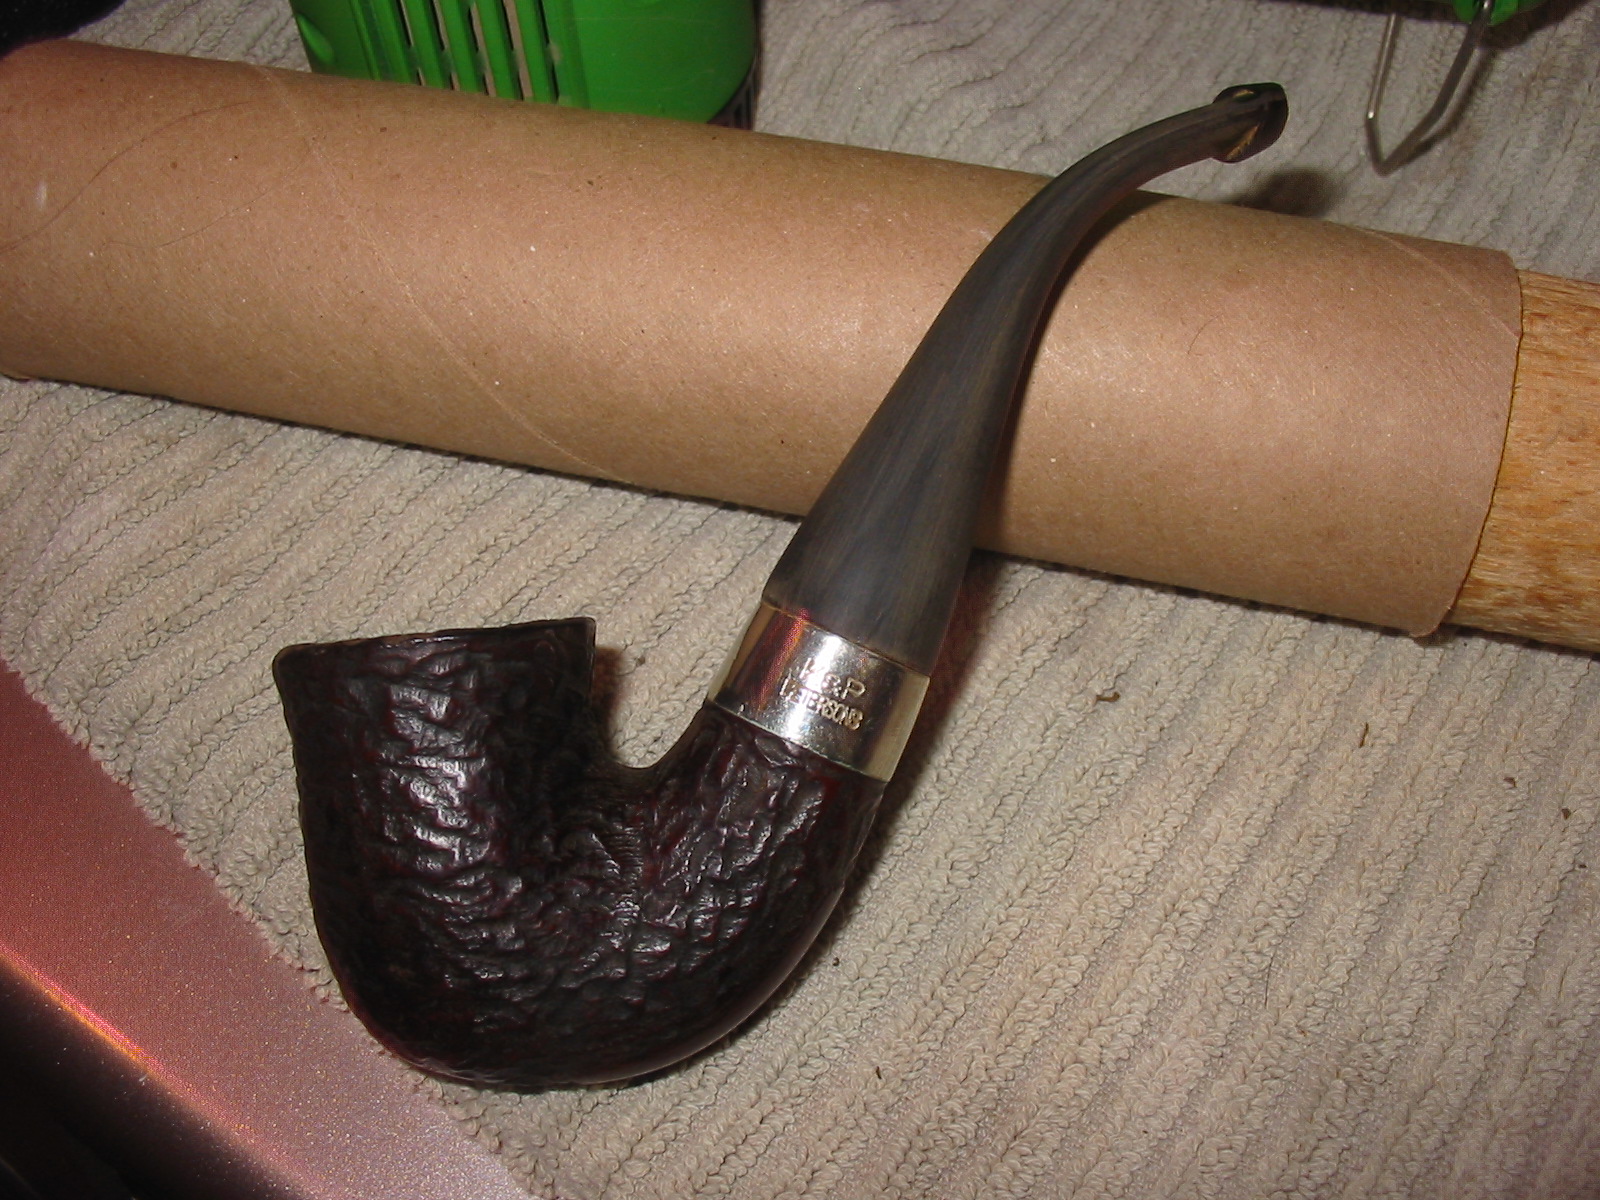
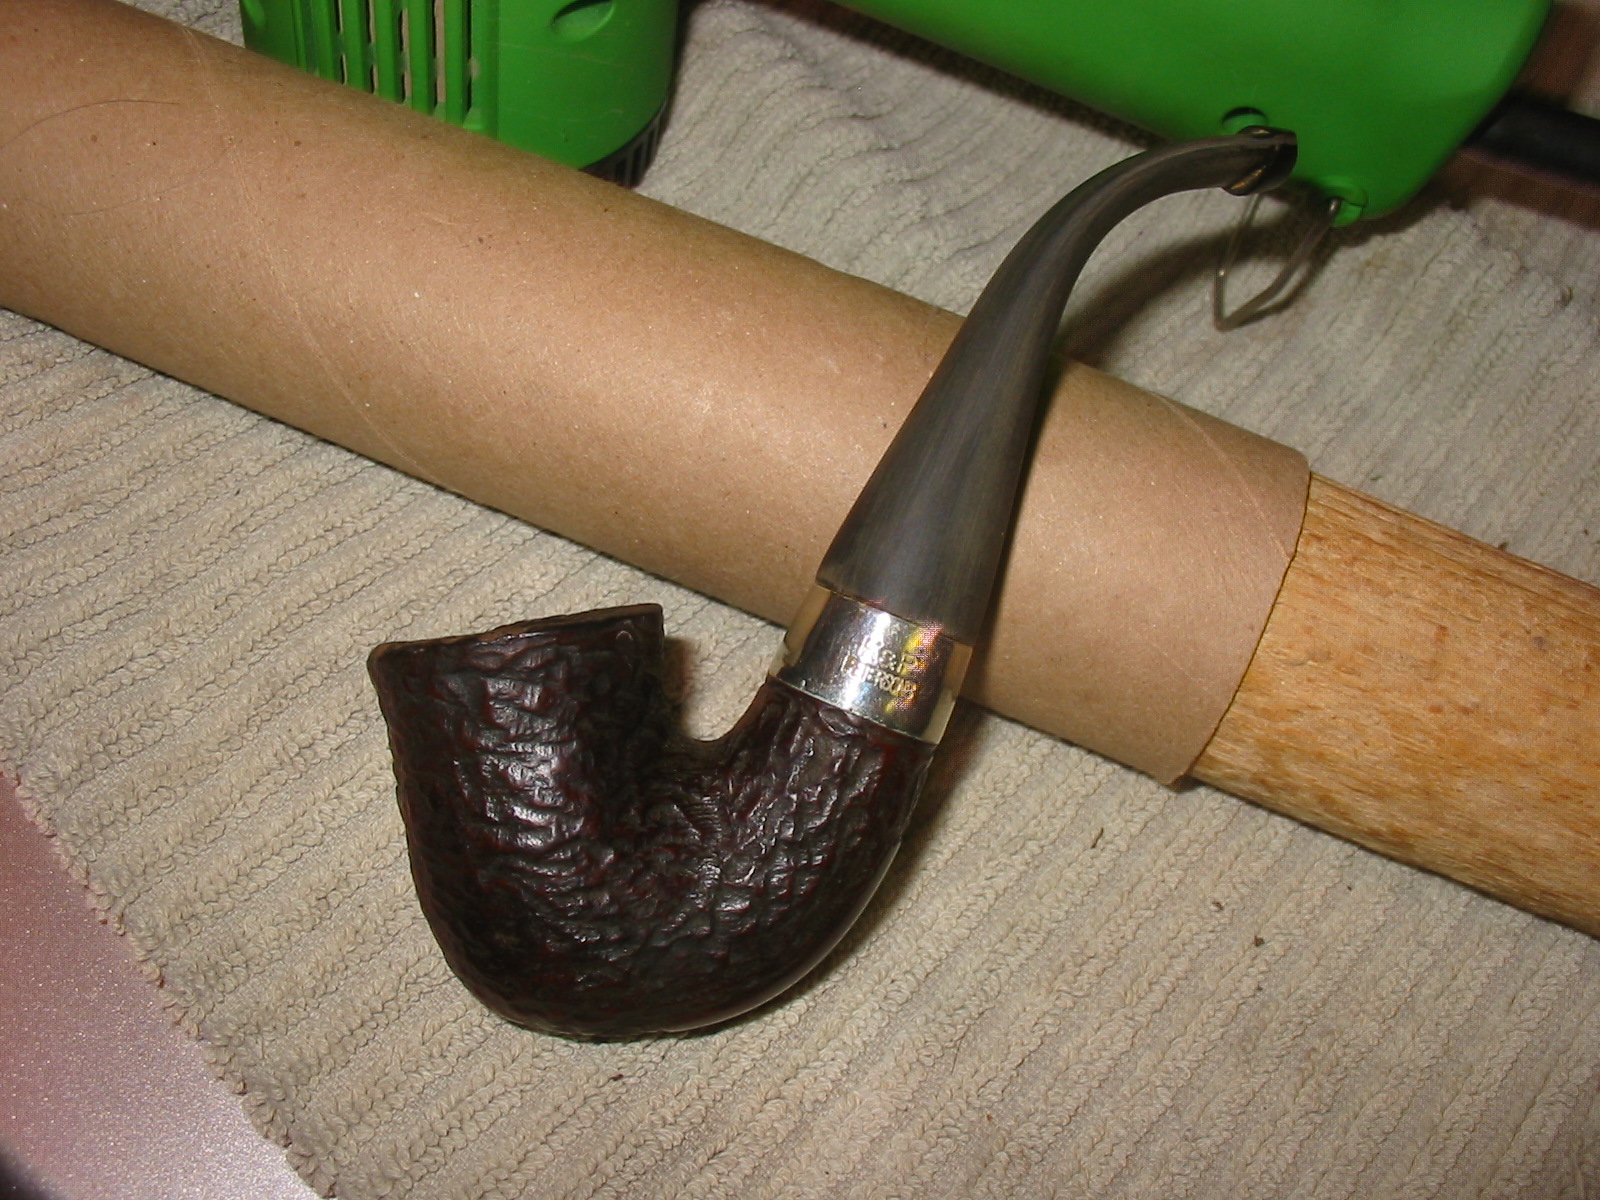
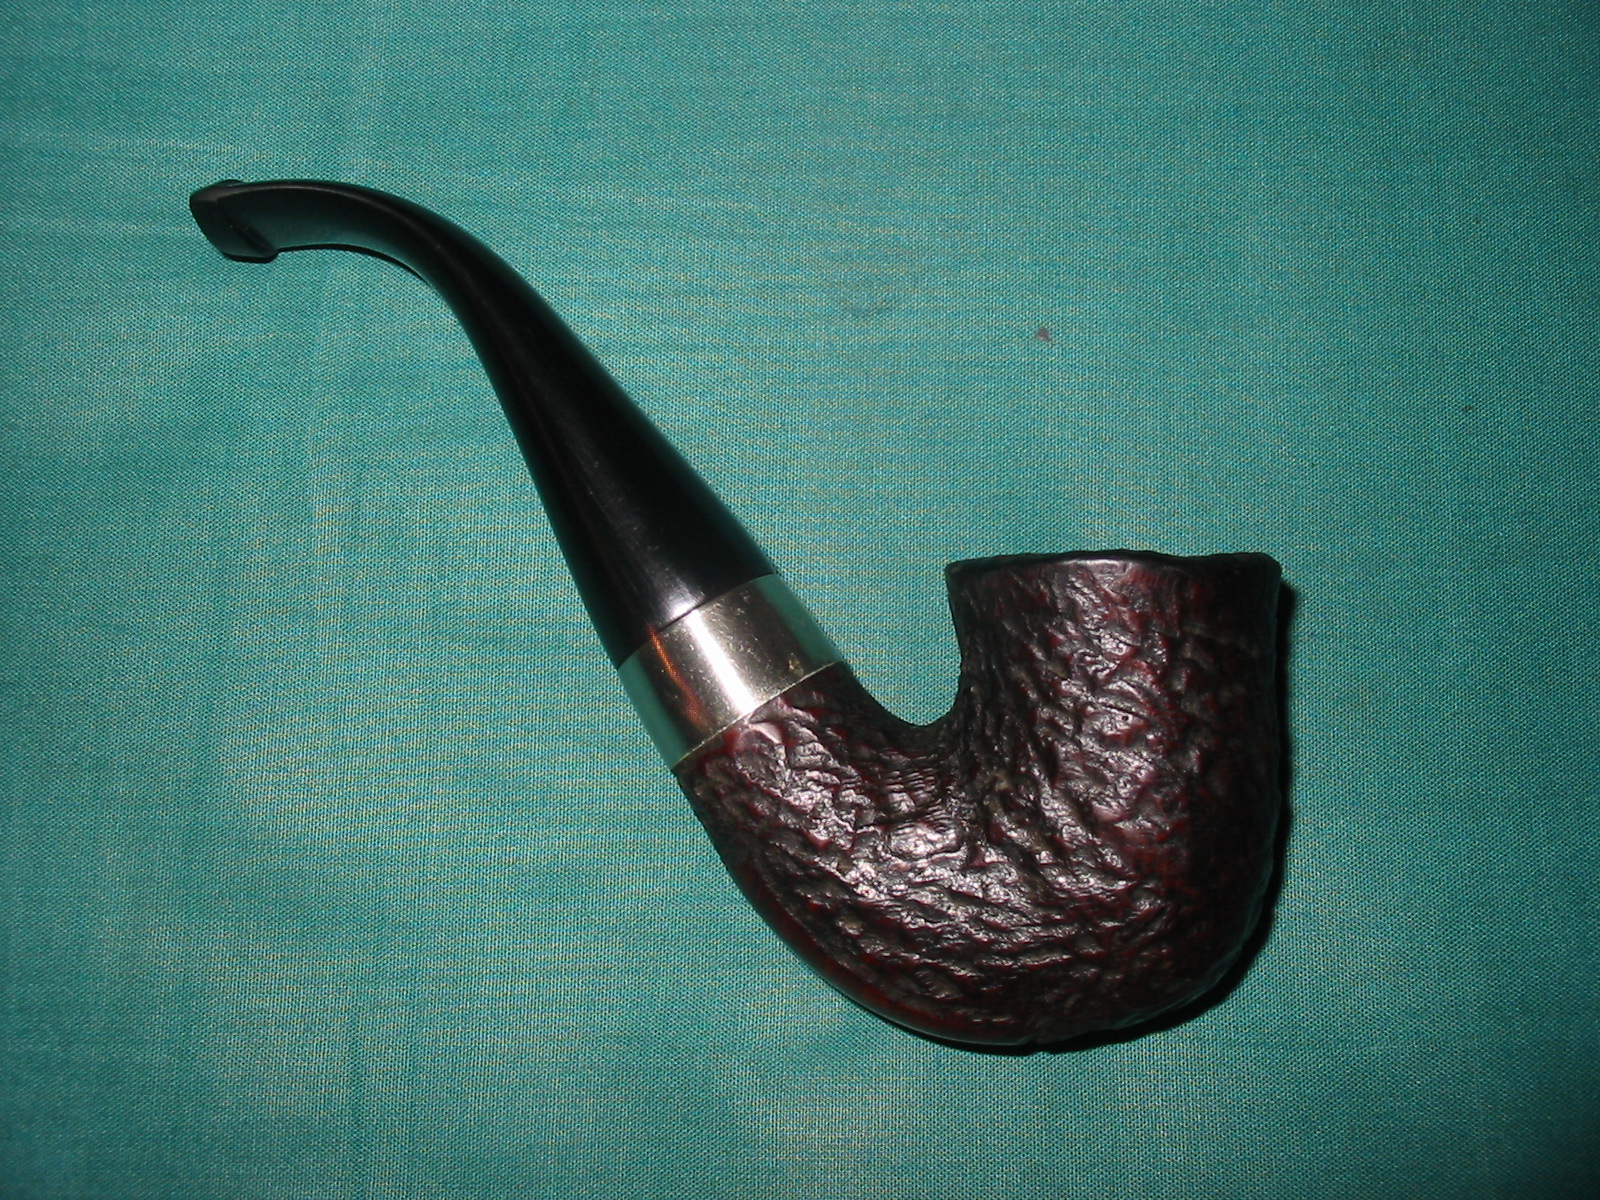
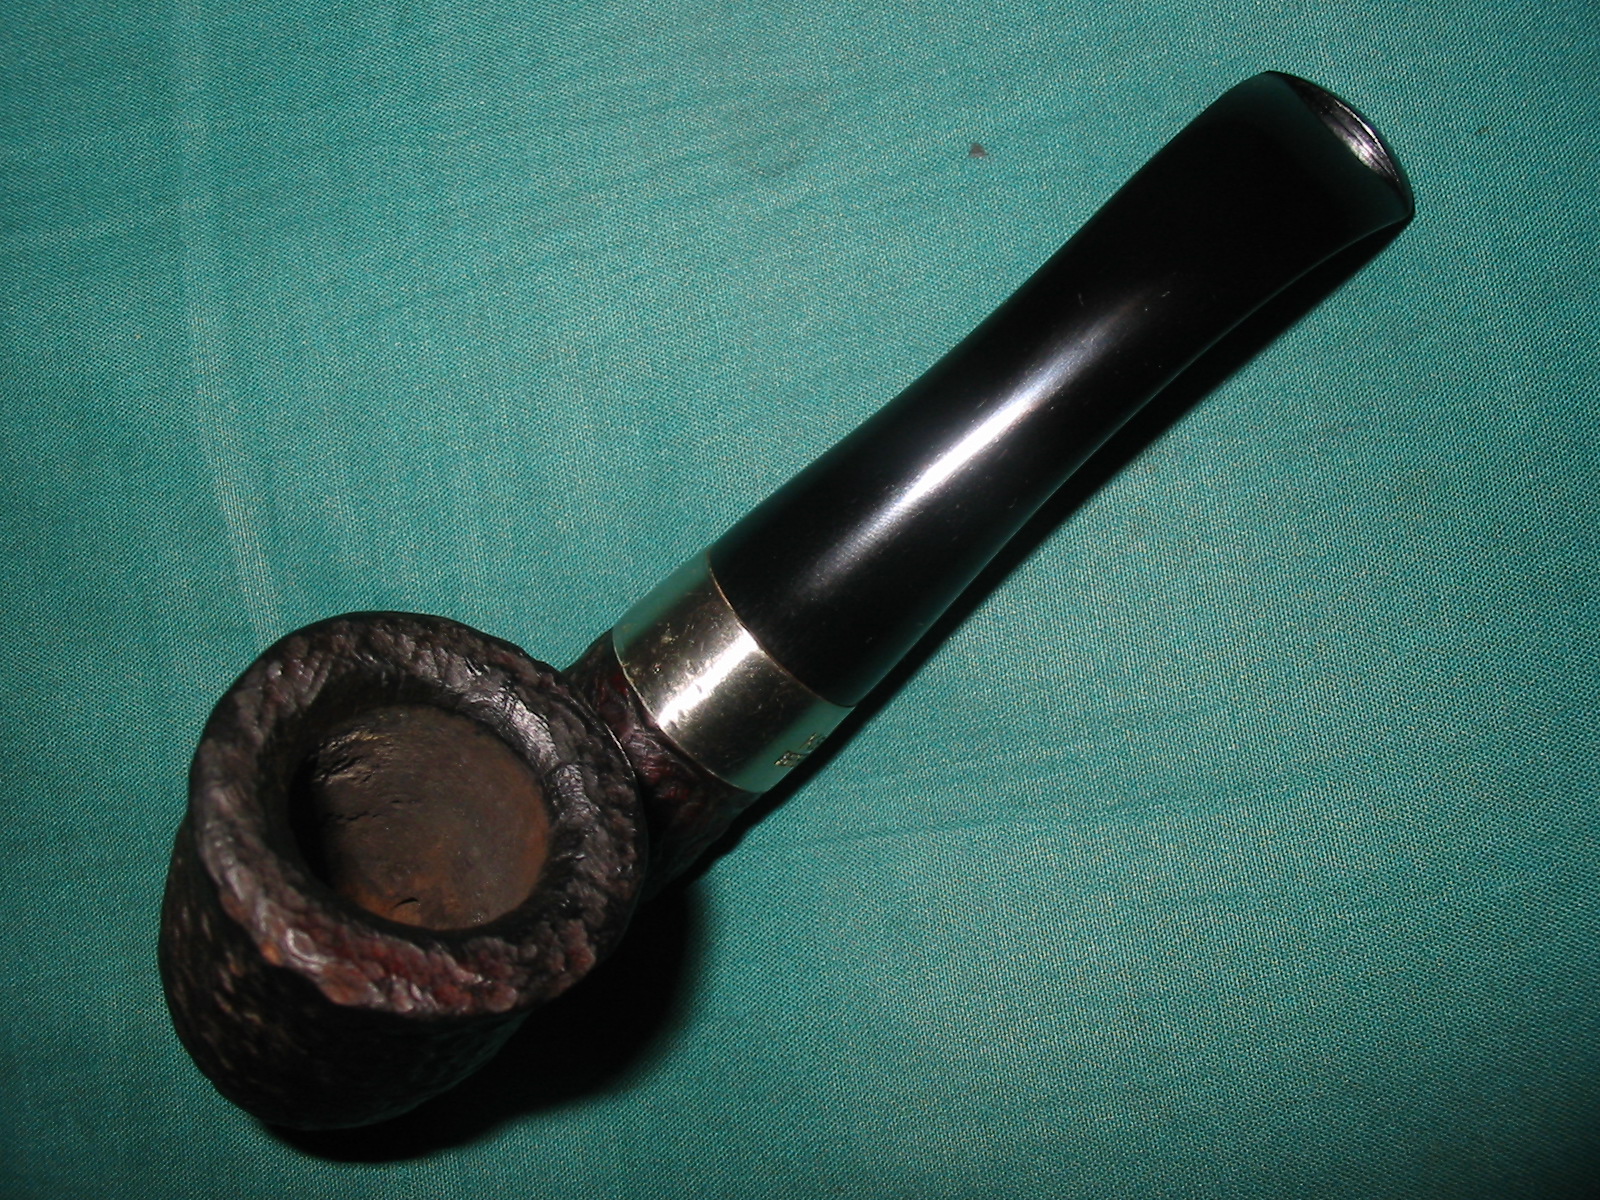
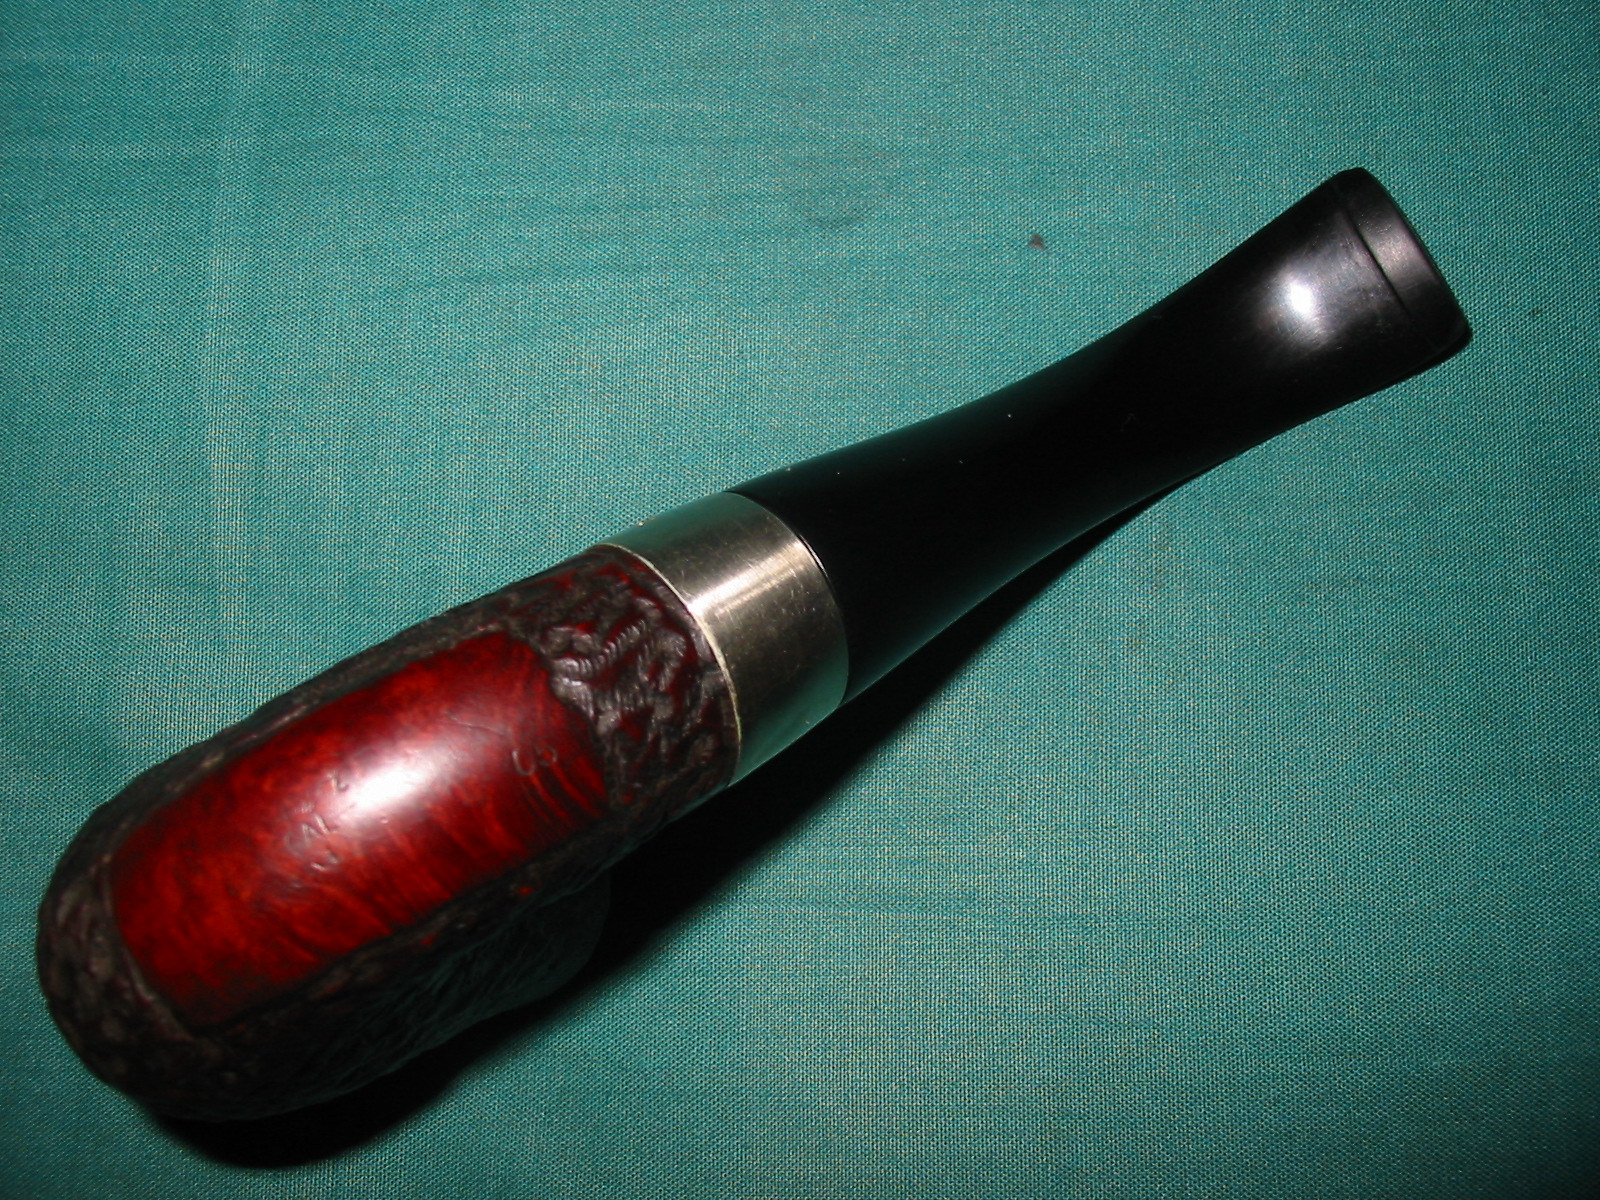
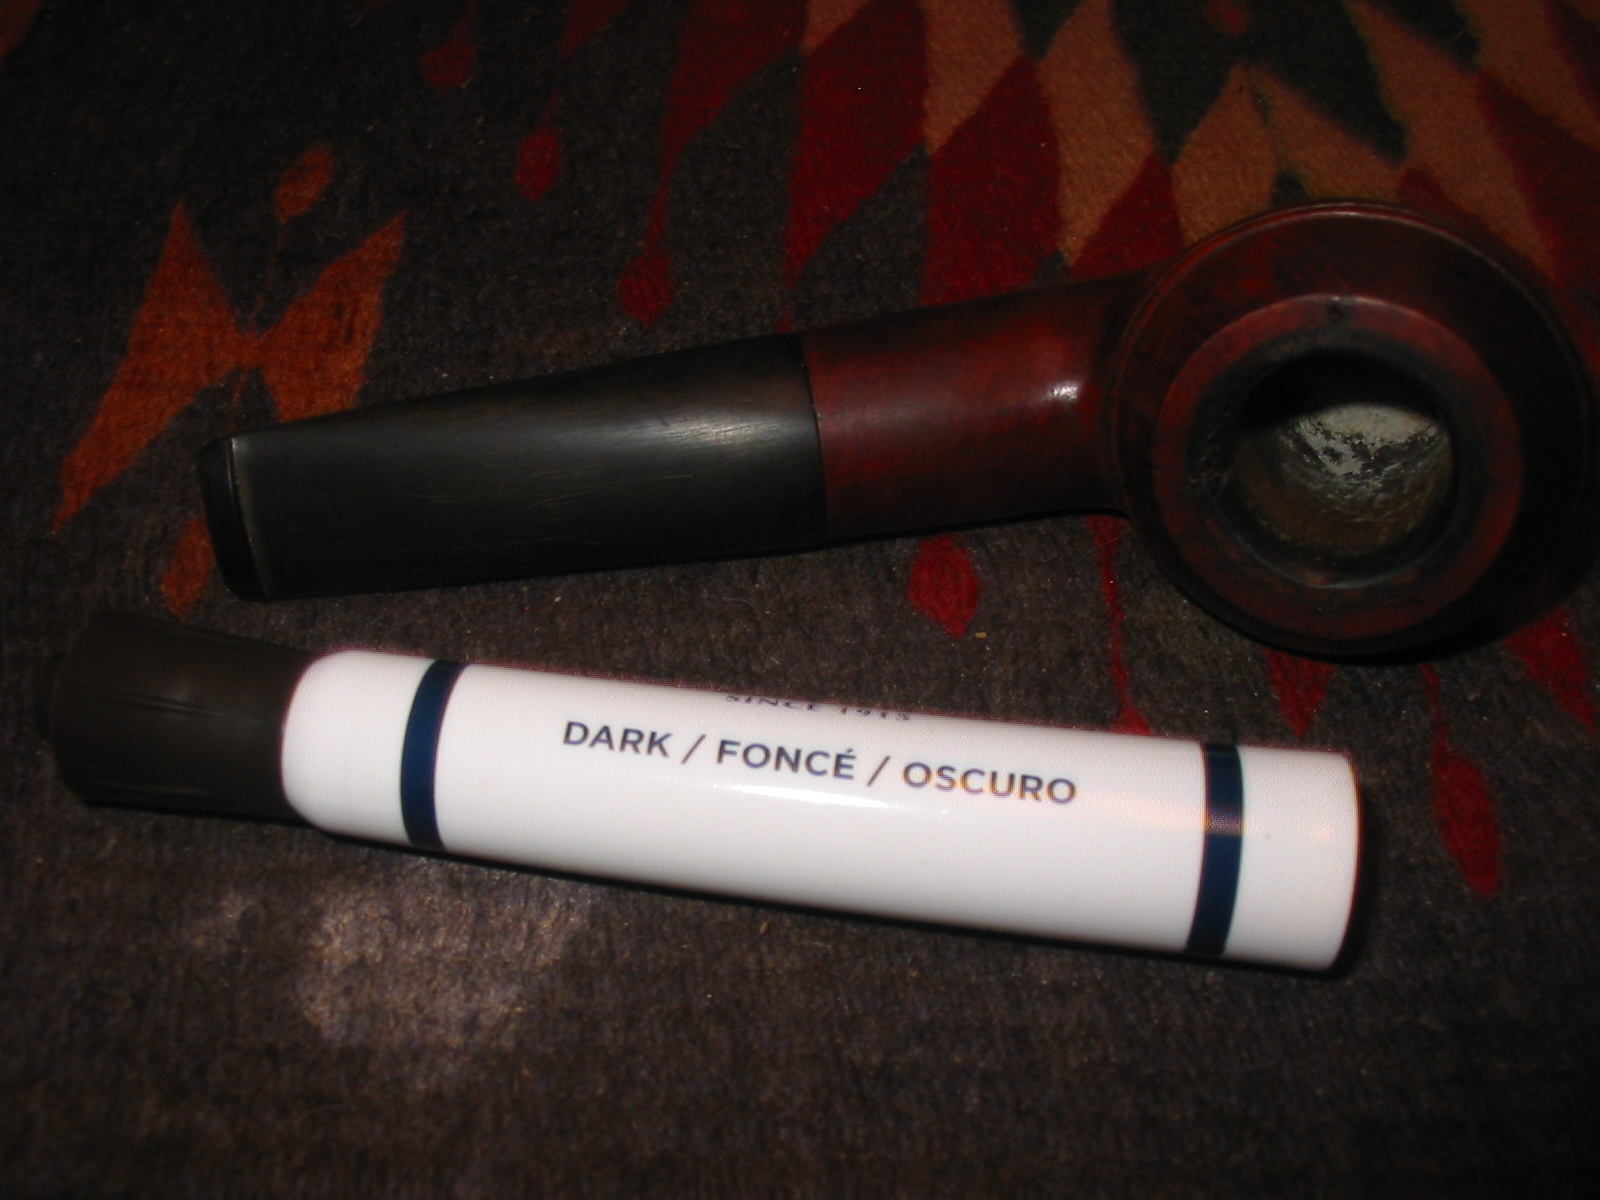
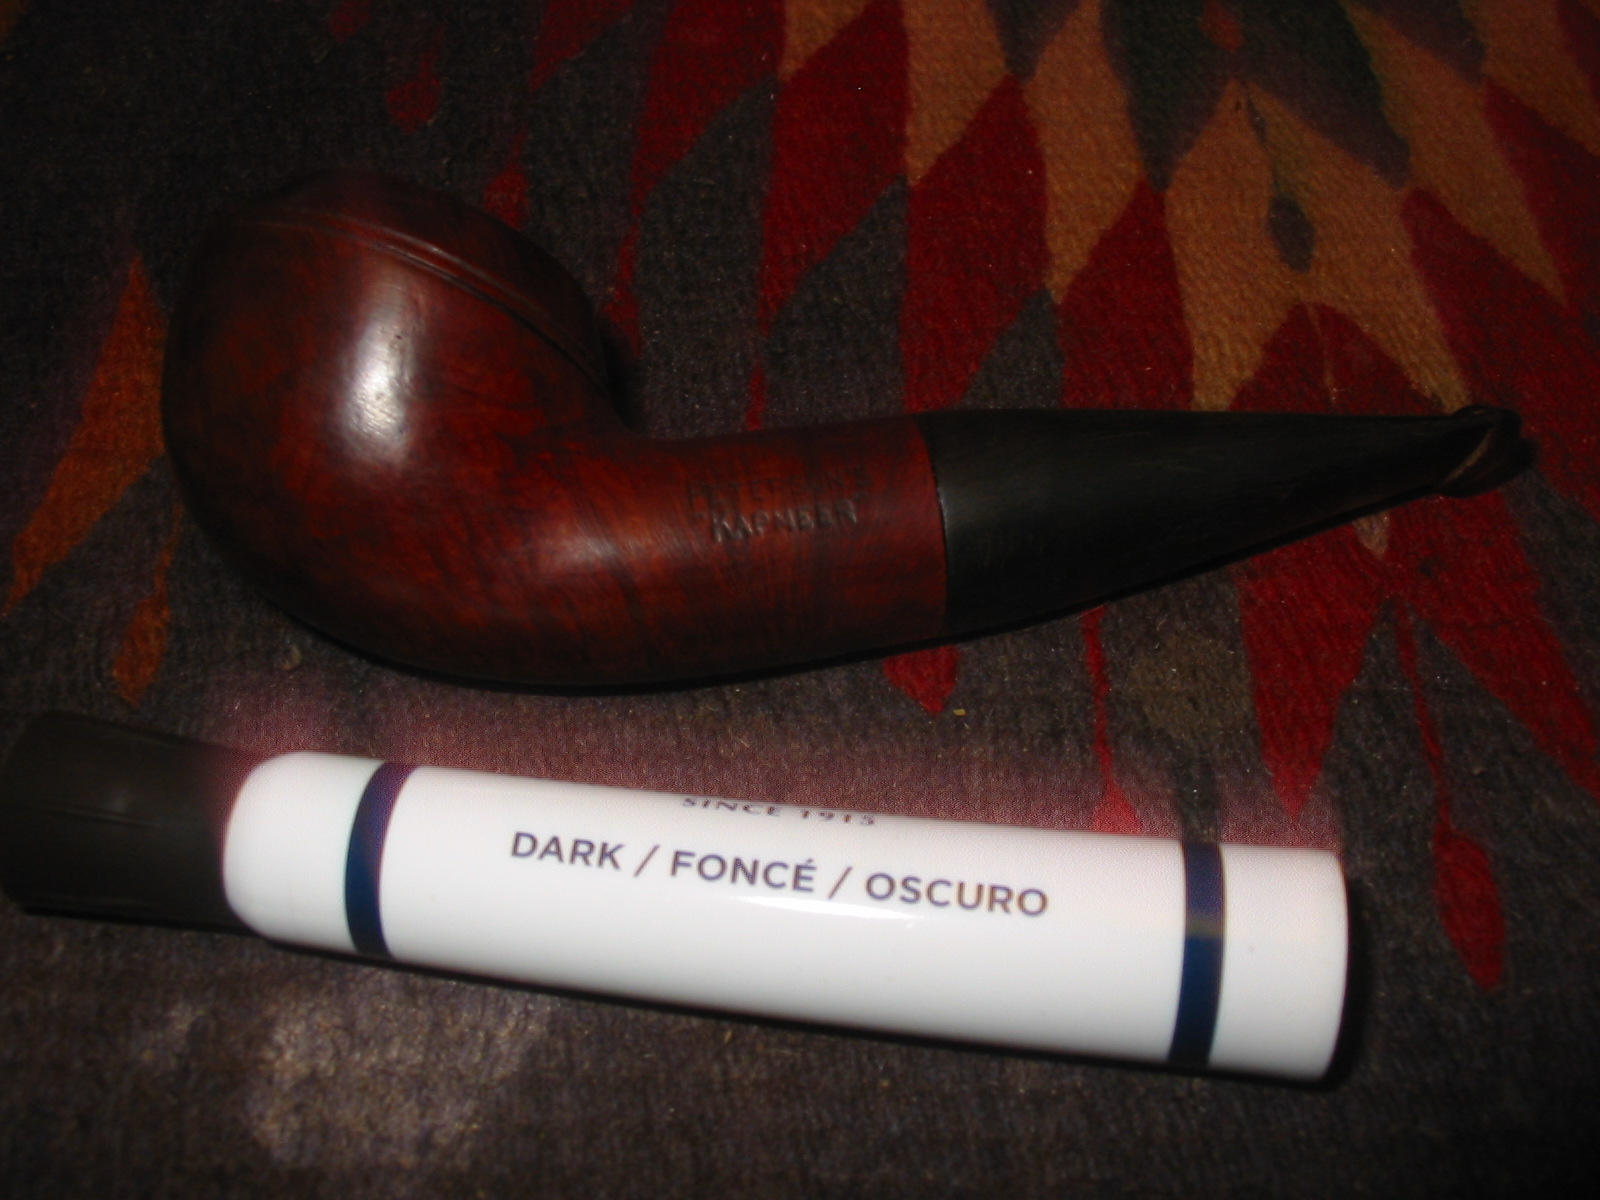
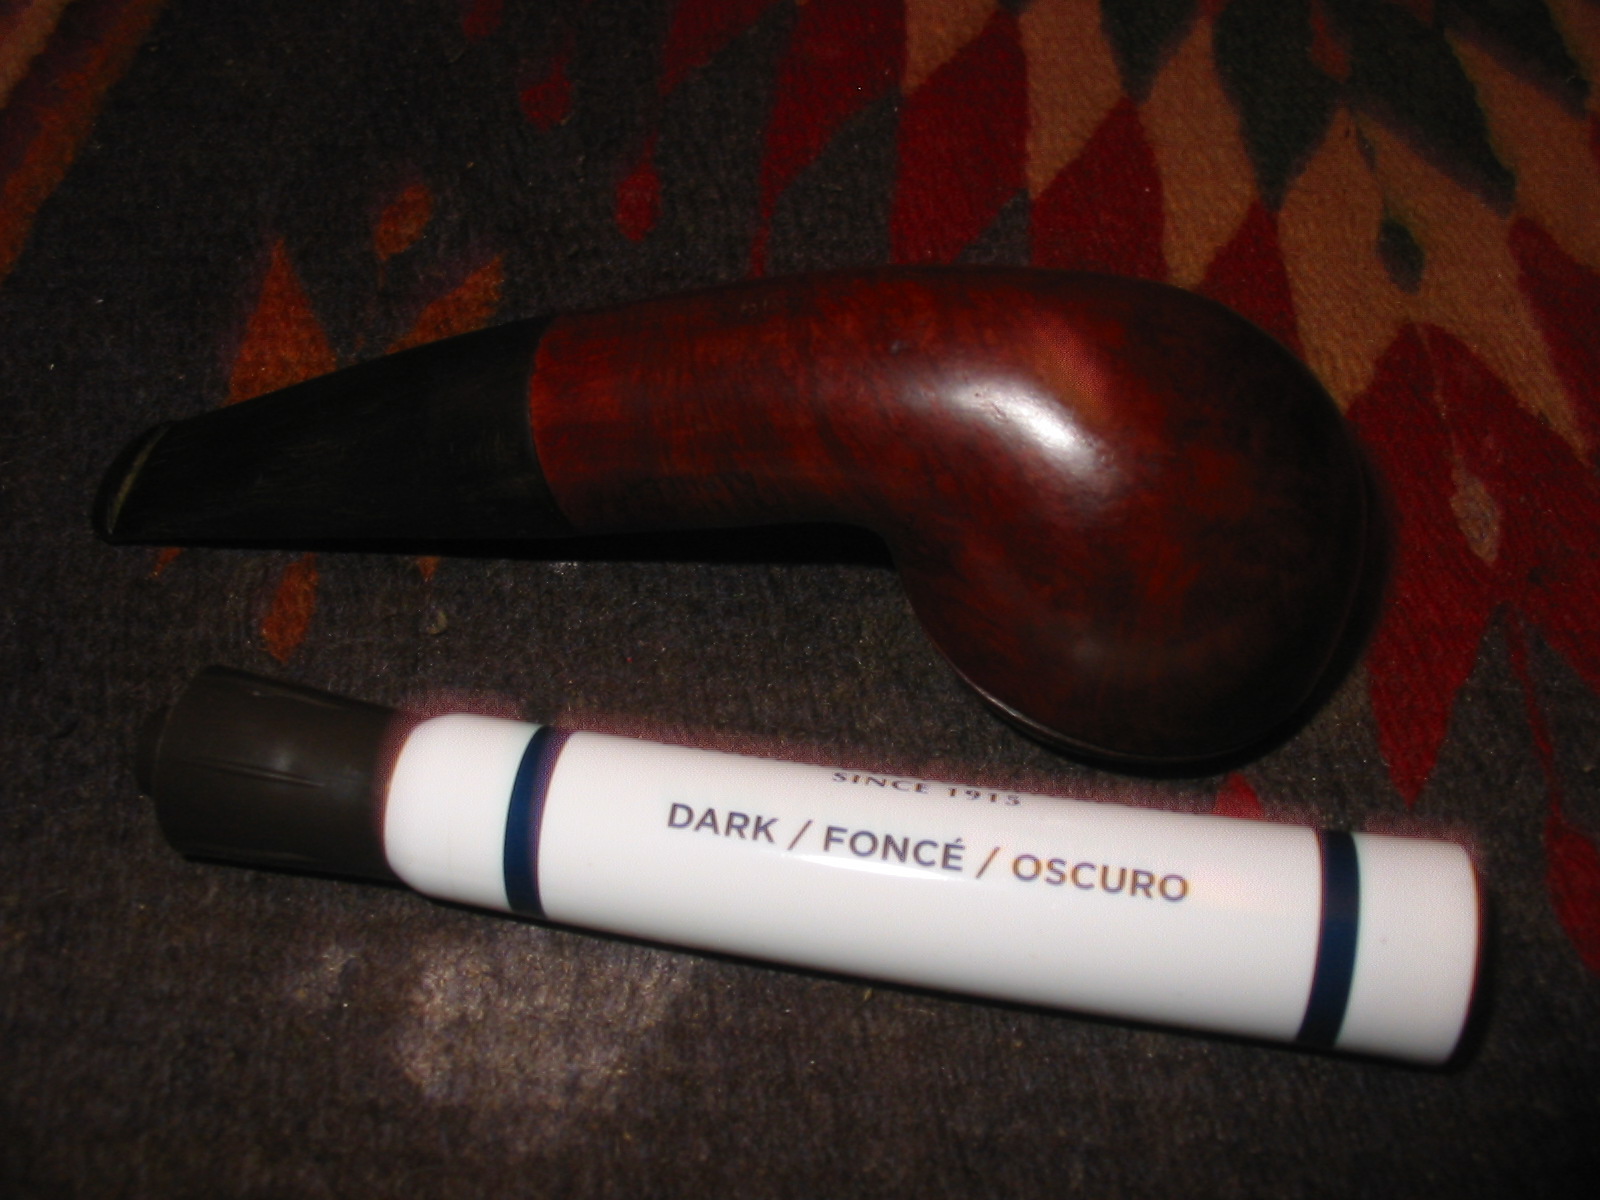
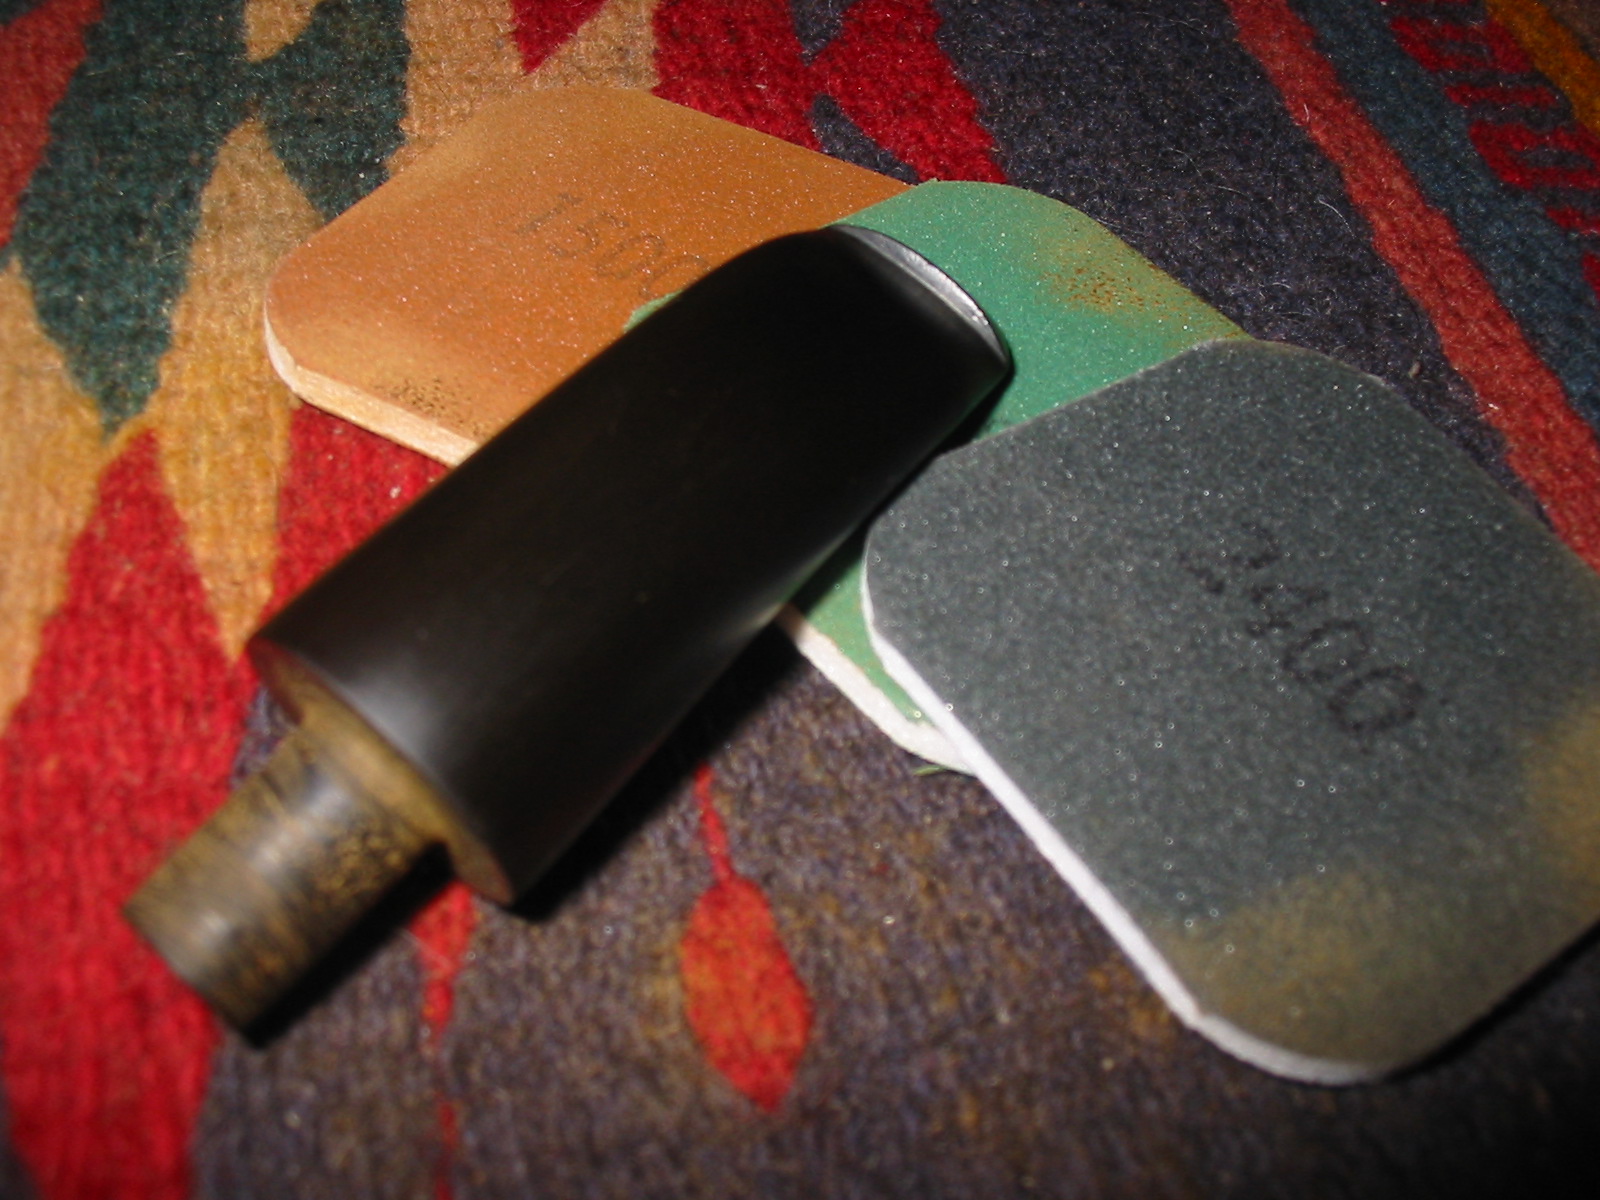
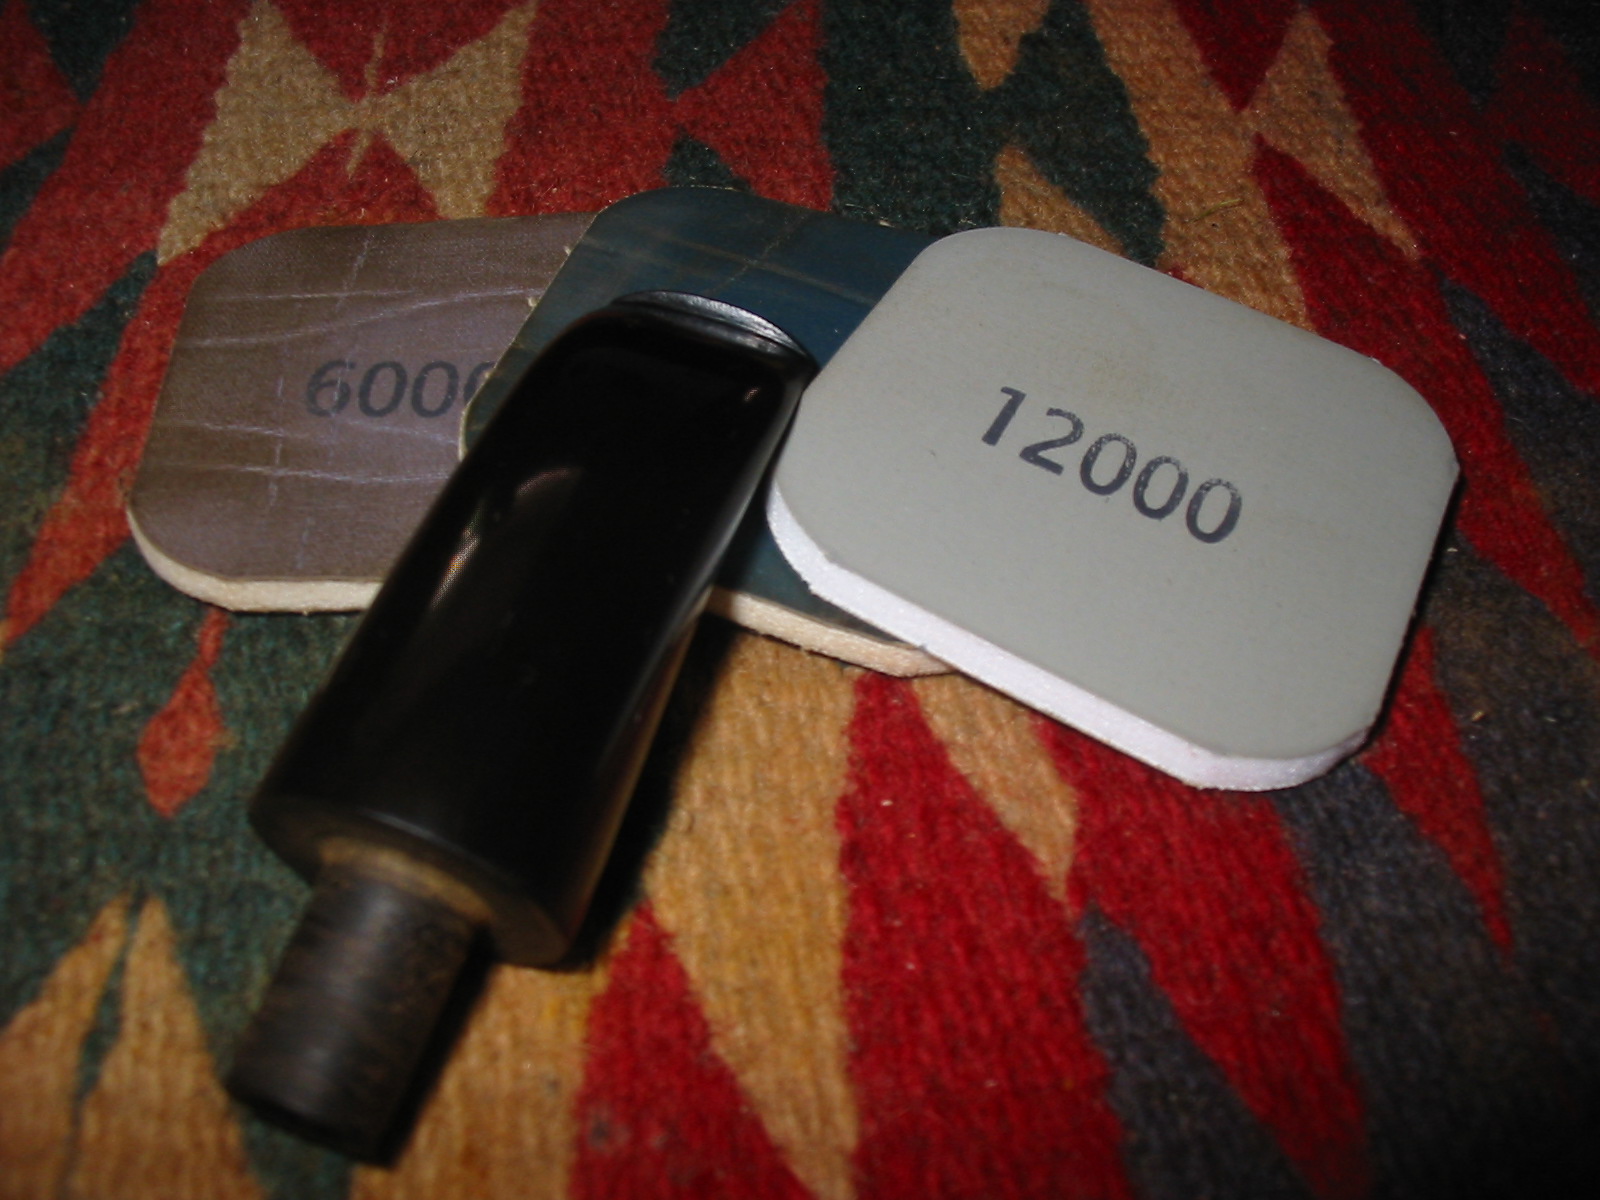
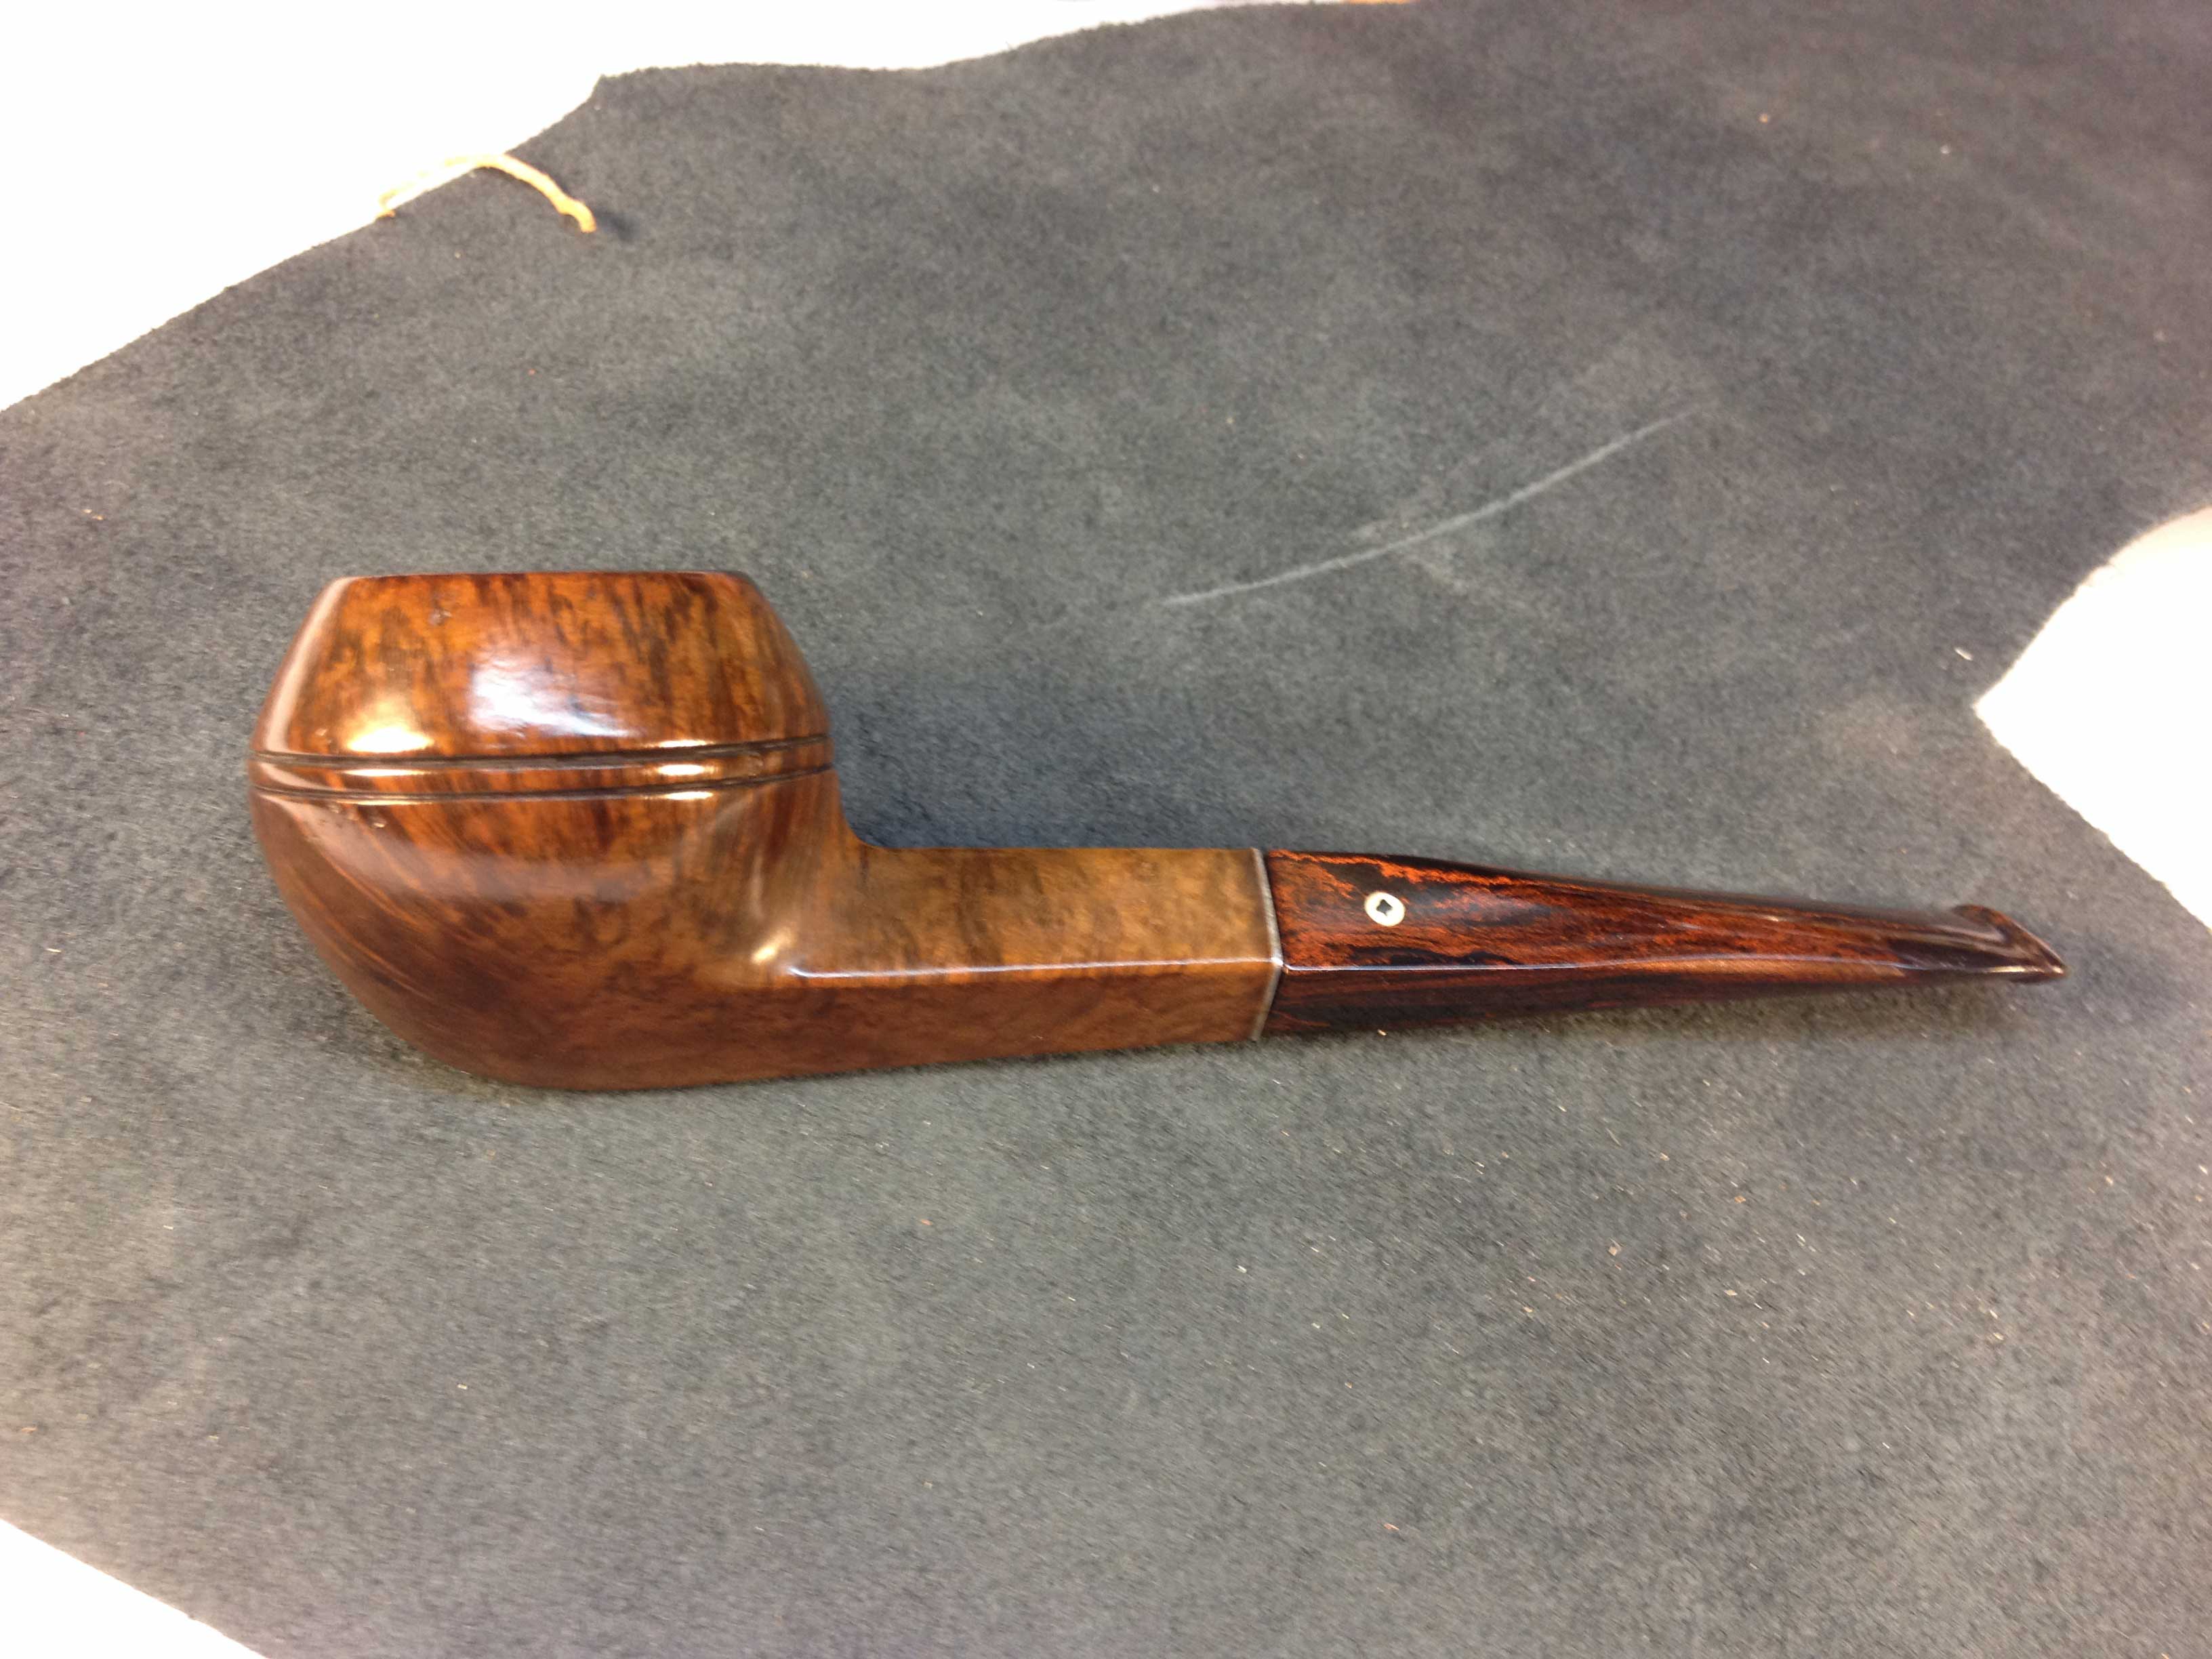
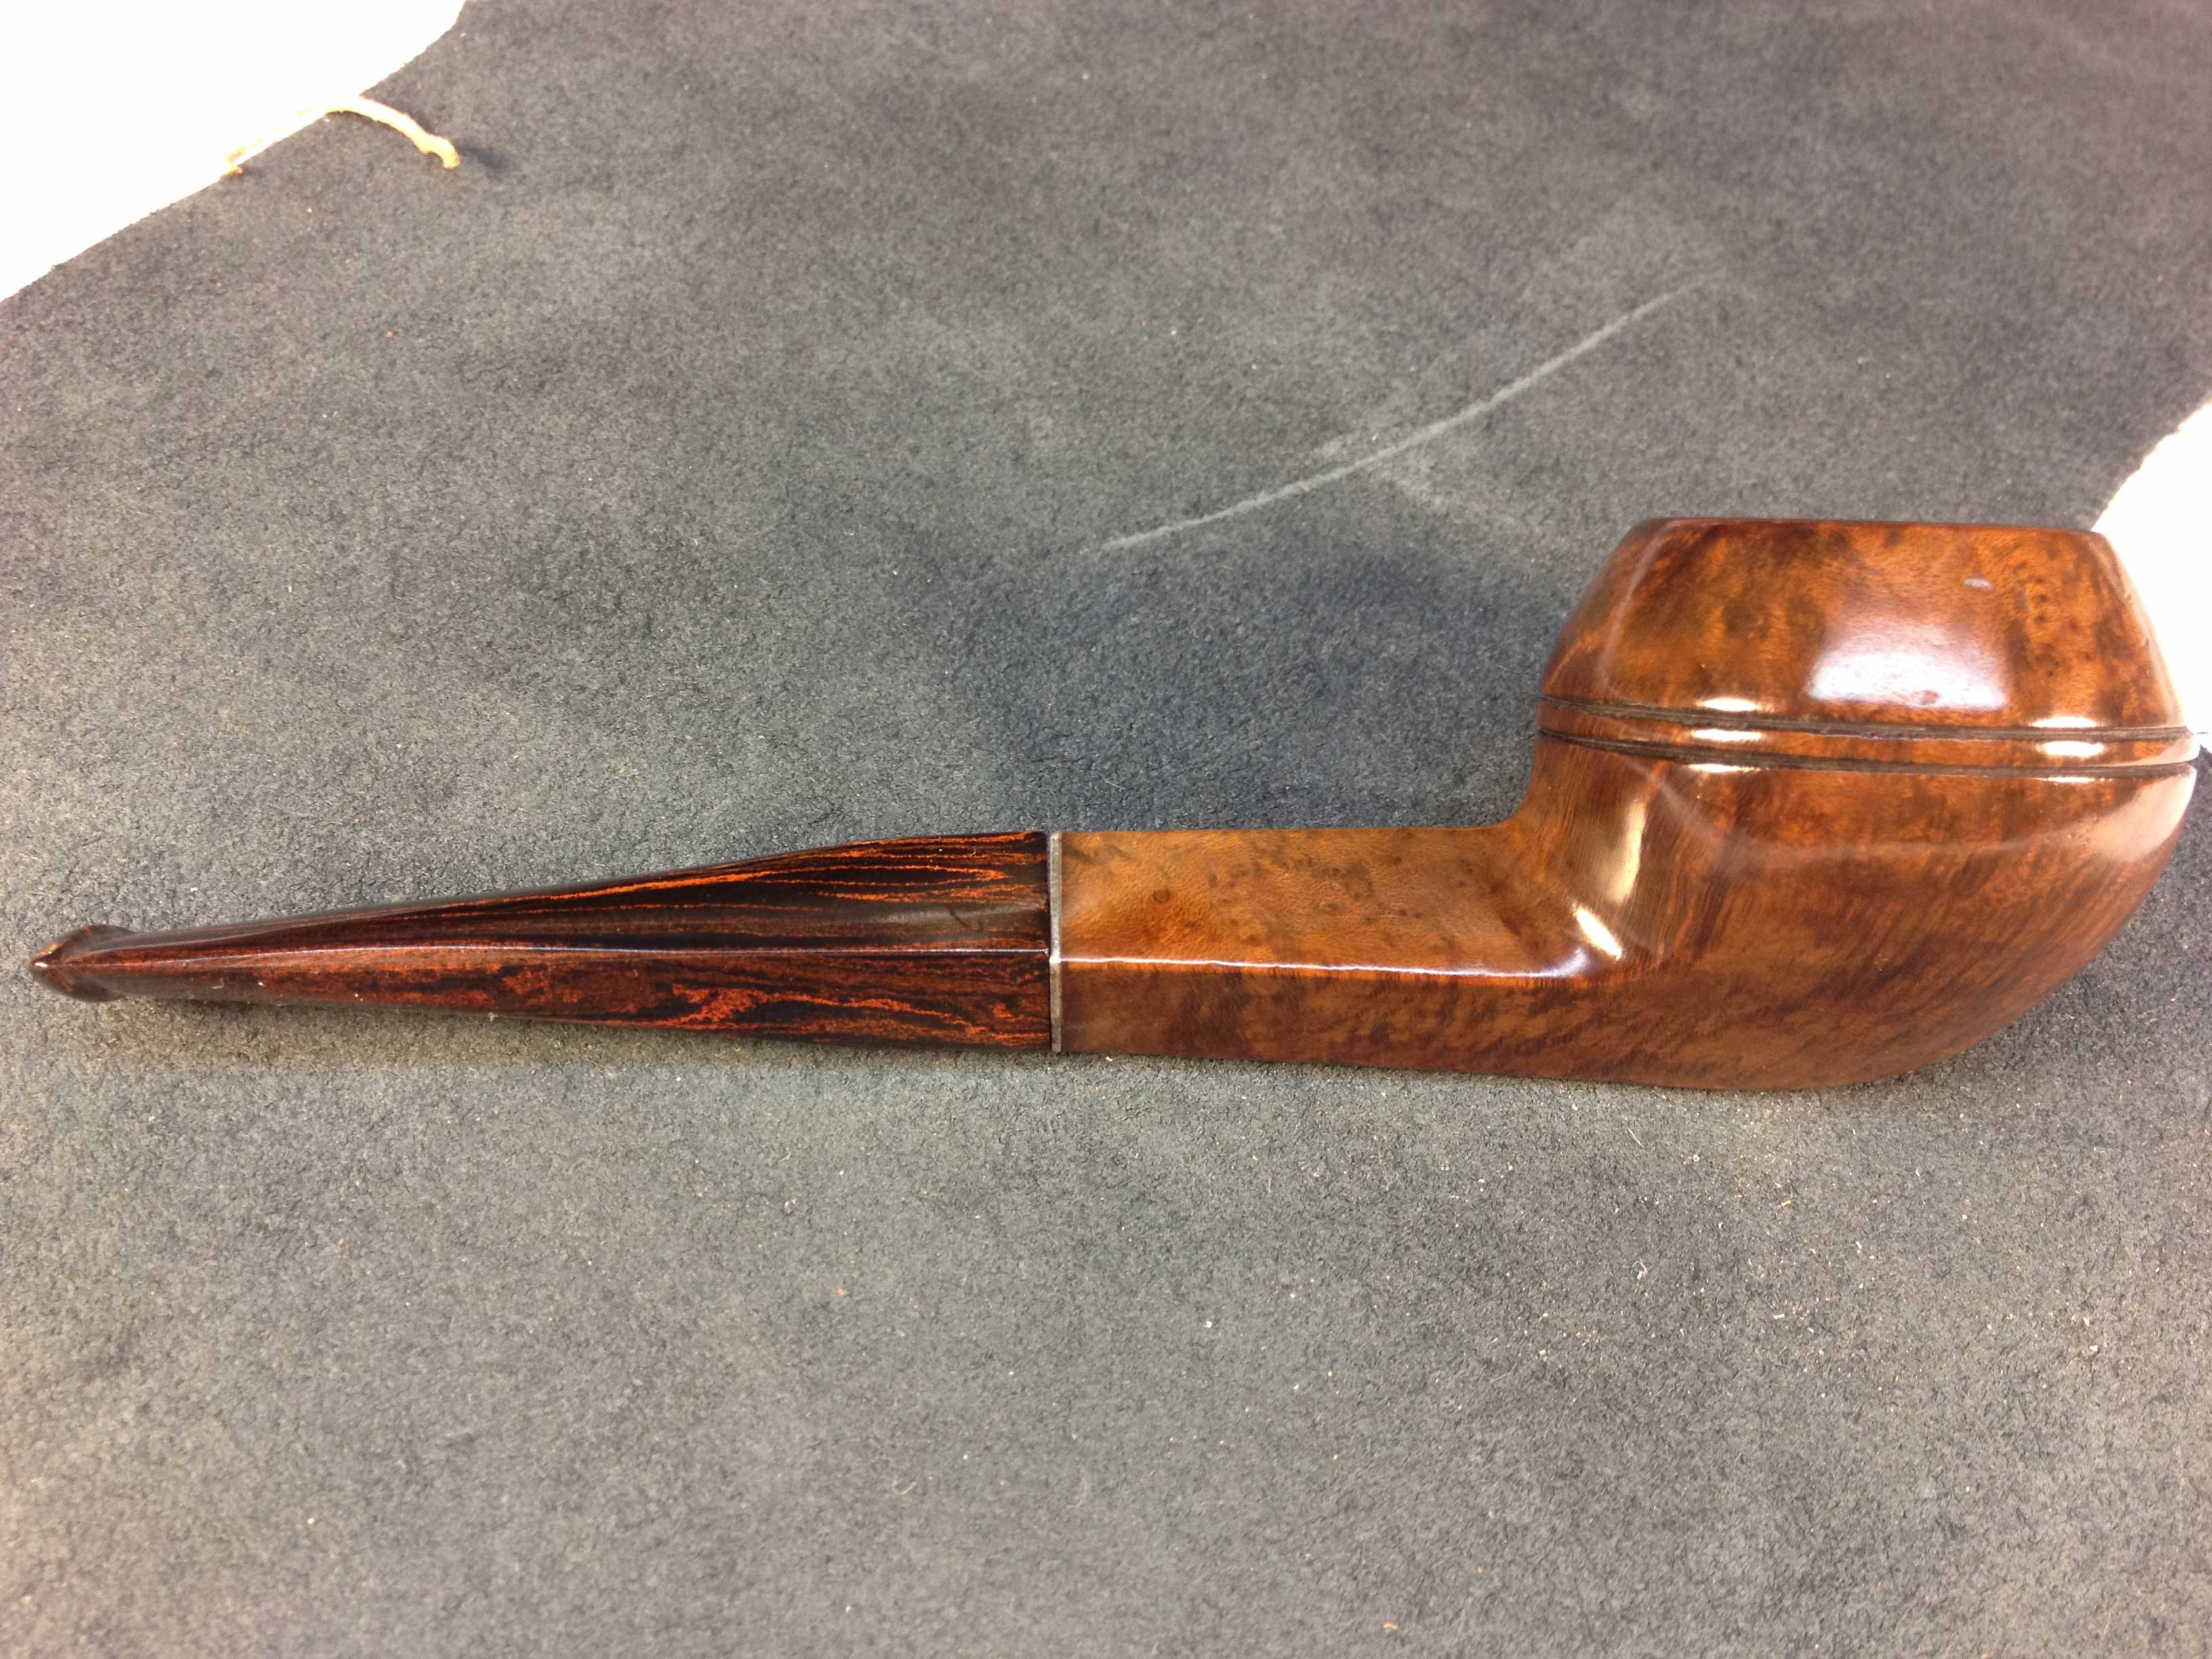
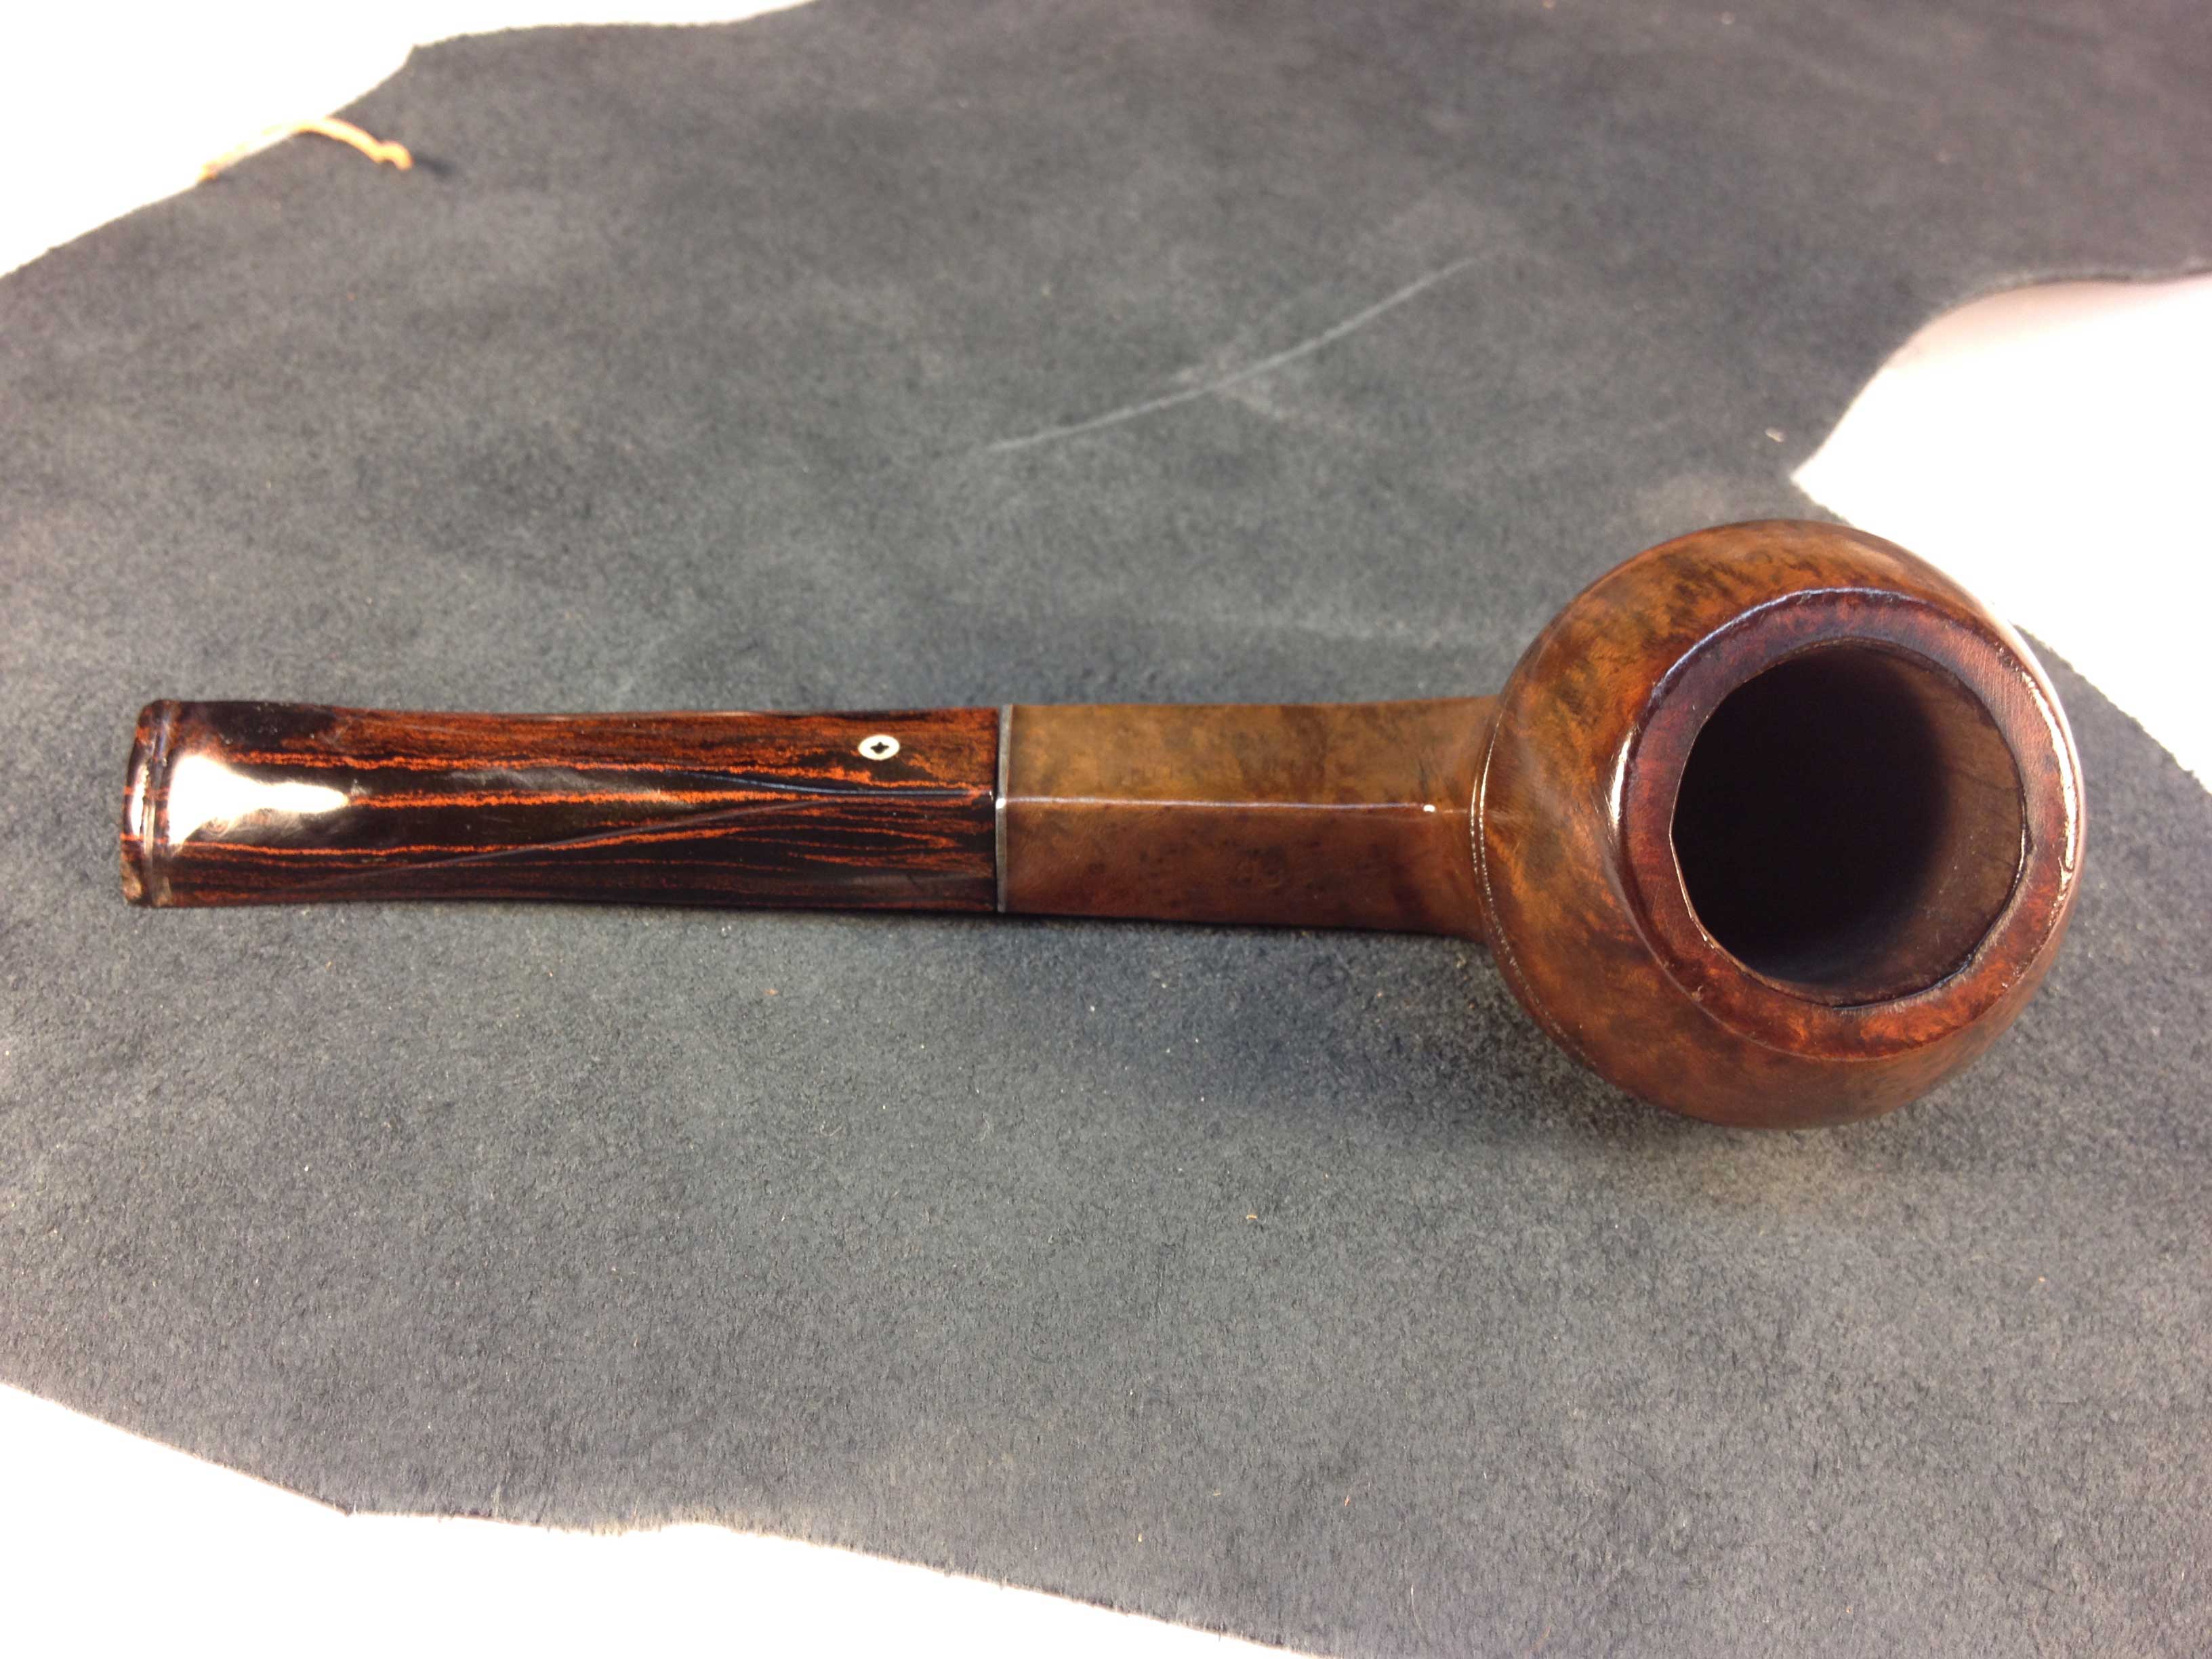
I sanded the stem with the usual array of micromesh sanding pads – wet sanding with 1500-2400 grit pads and dry sanding with 3200-12000 grit pads. In between each set of three pads (1500-2400, 3200-4000 and 6000-12000) I rubbed the stem down with Obsidian Oil. I let it dry before moving on to the next grit of pads. Once it was finished I rubbed it down with a final coat of Obsidian Oil and when it had dried I buffed the stem with White Diamond. I gave the bowl a coating of Halcyon II wax and hand buffed it with a shoe brush and gave the stem multiple coats of carnauba wax, buffing with a clean flannel buffing pad between applications. The finished pipe is shown below. It too is ready for its inaugural smoke – maybe a bowl of Louisiana Red will start this one off also… anyway, it is ready for the a long life ahead.

Blog by Steve Laug
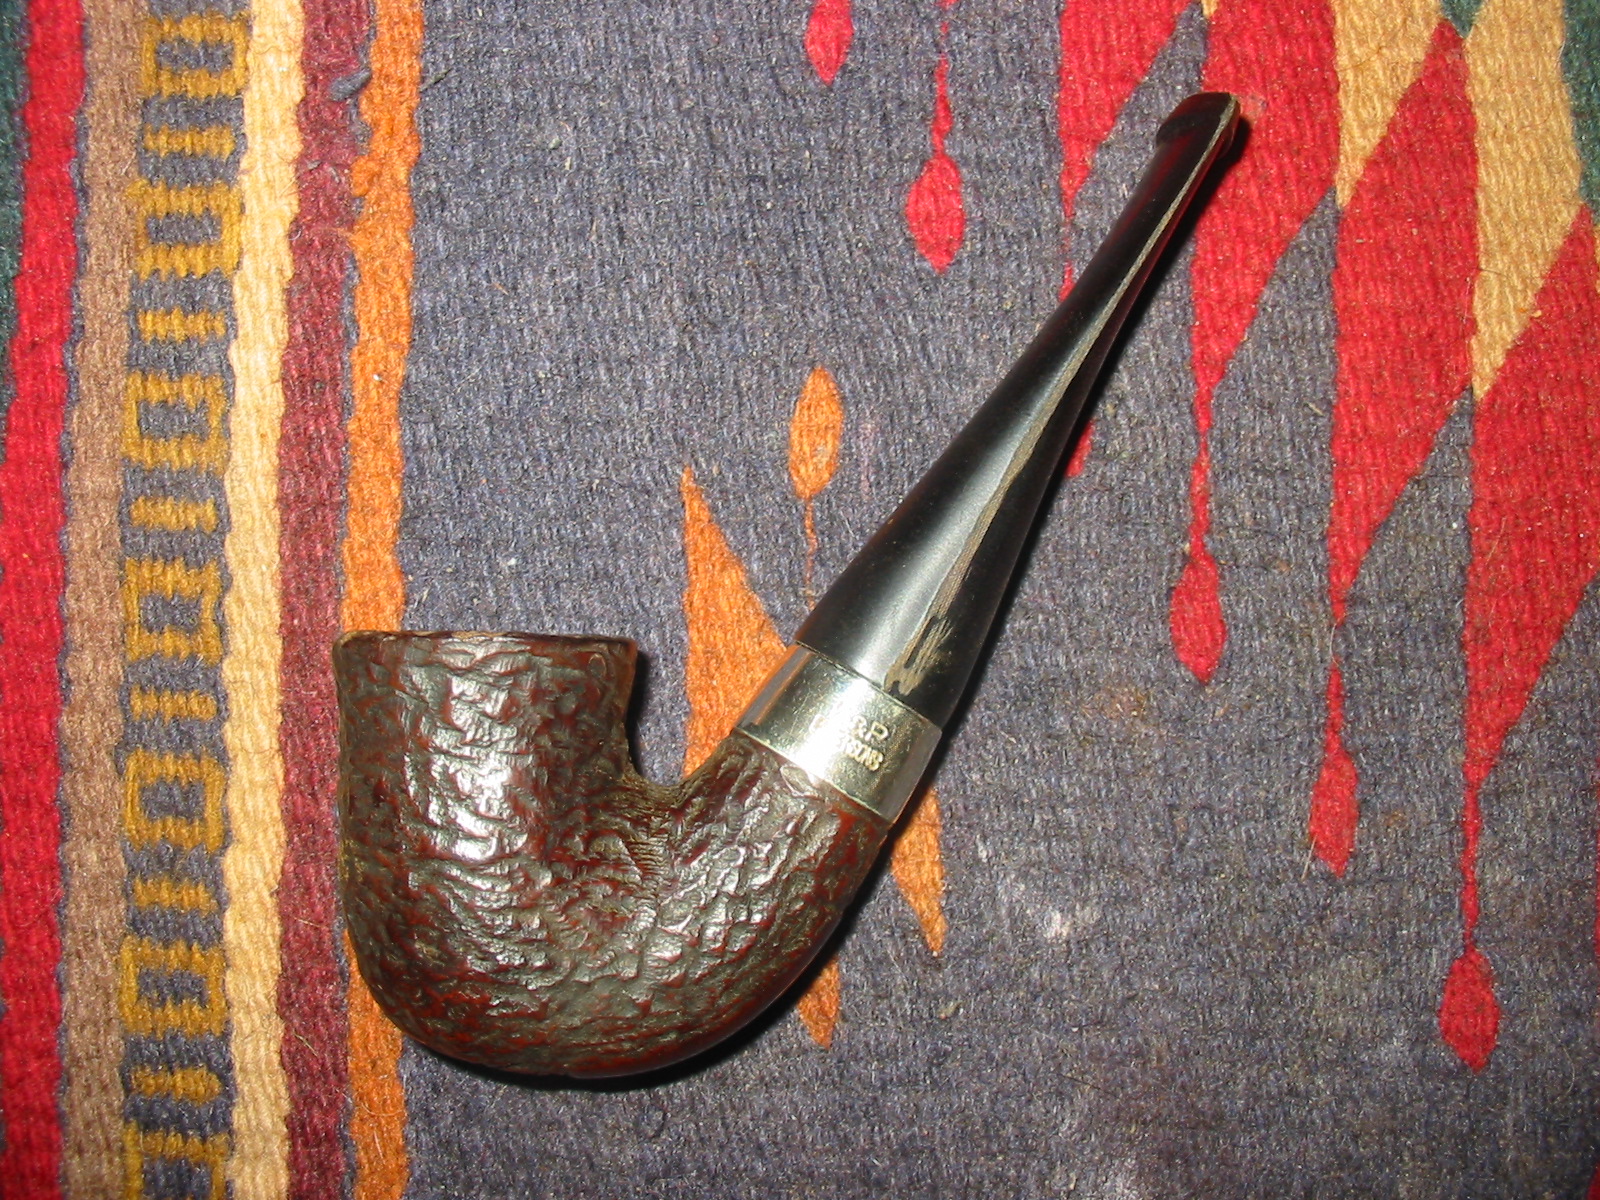
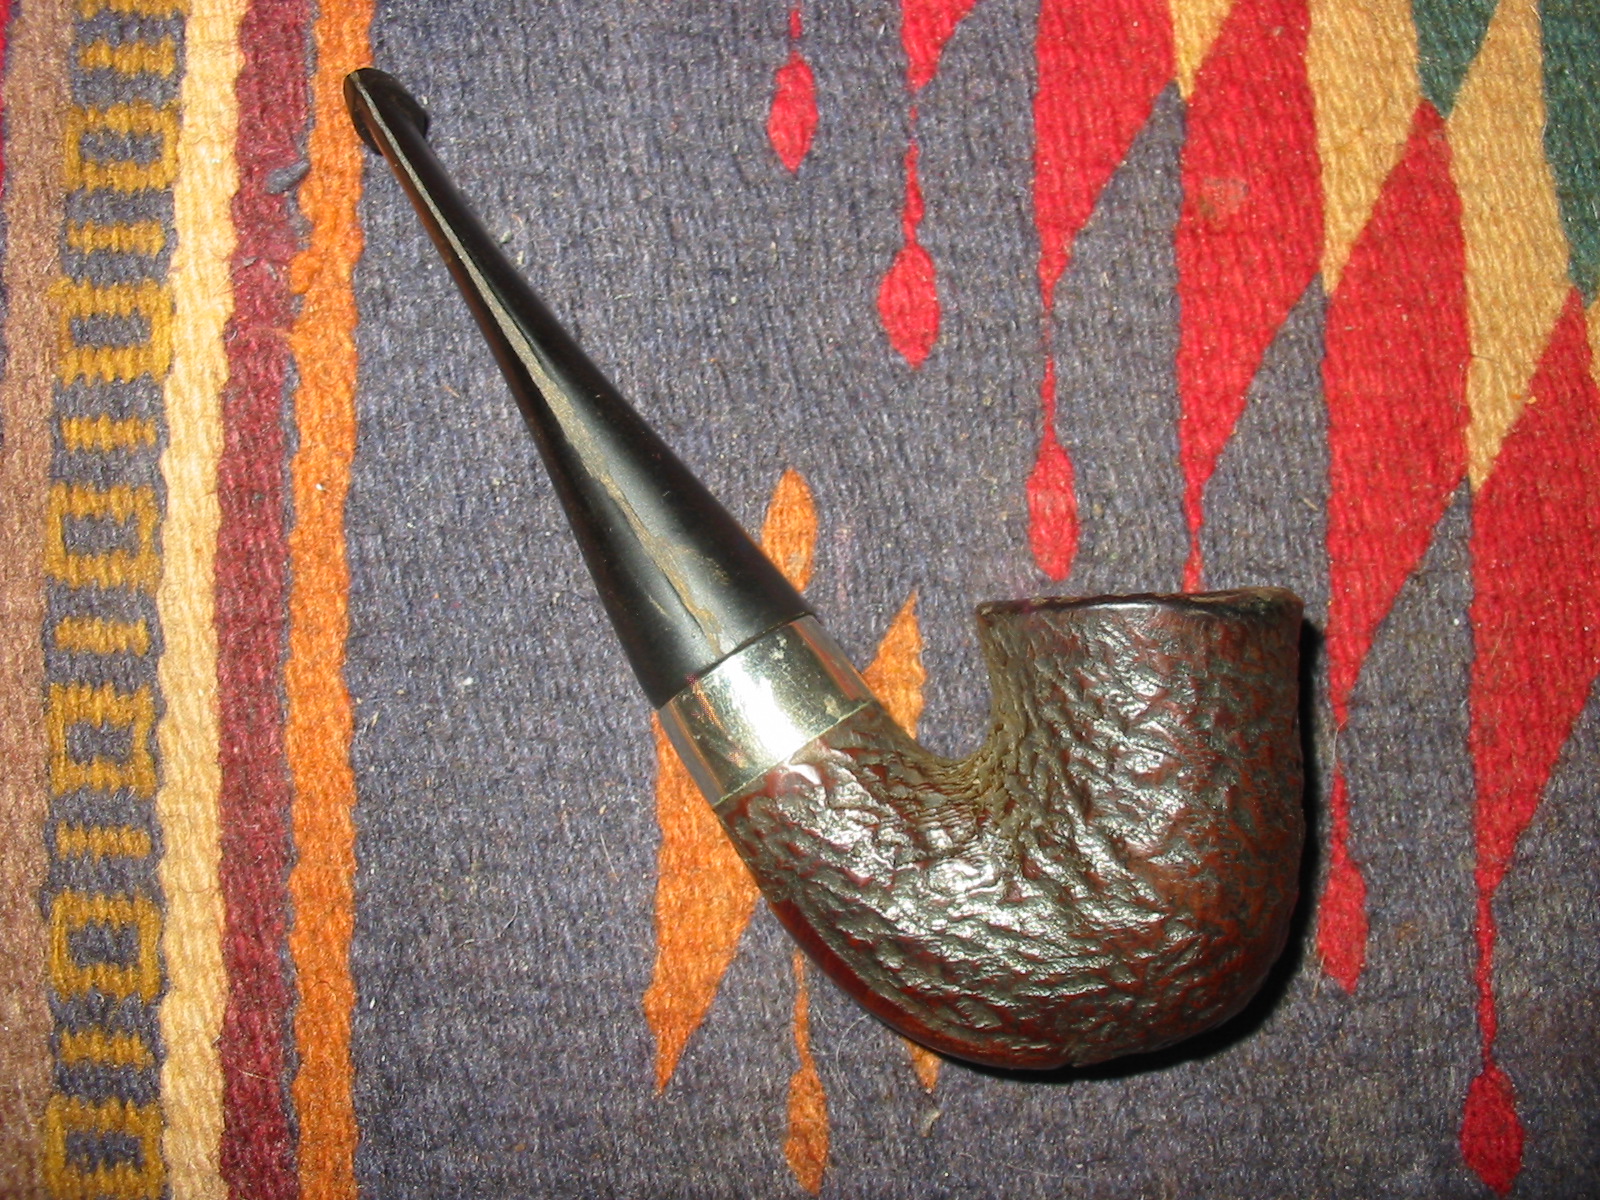
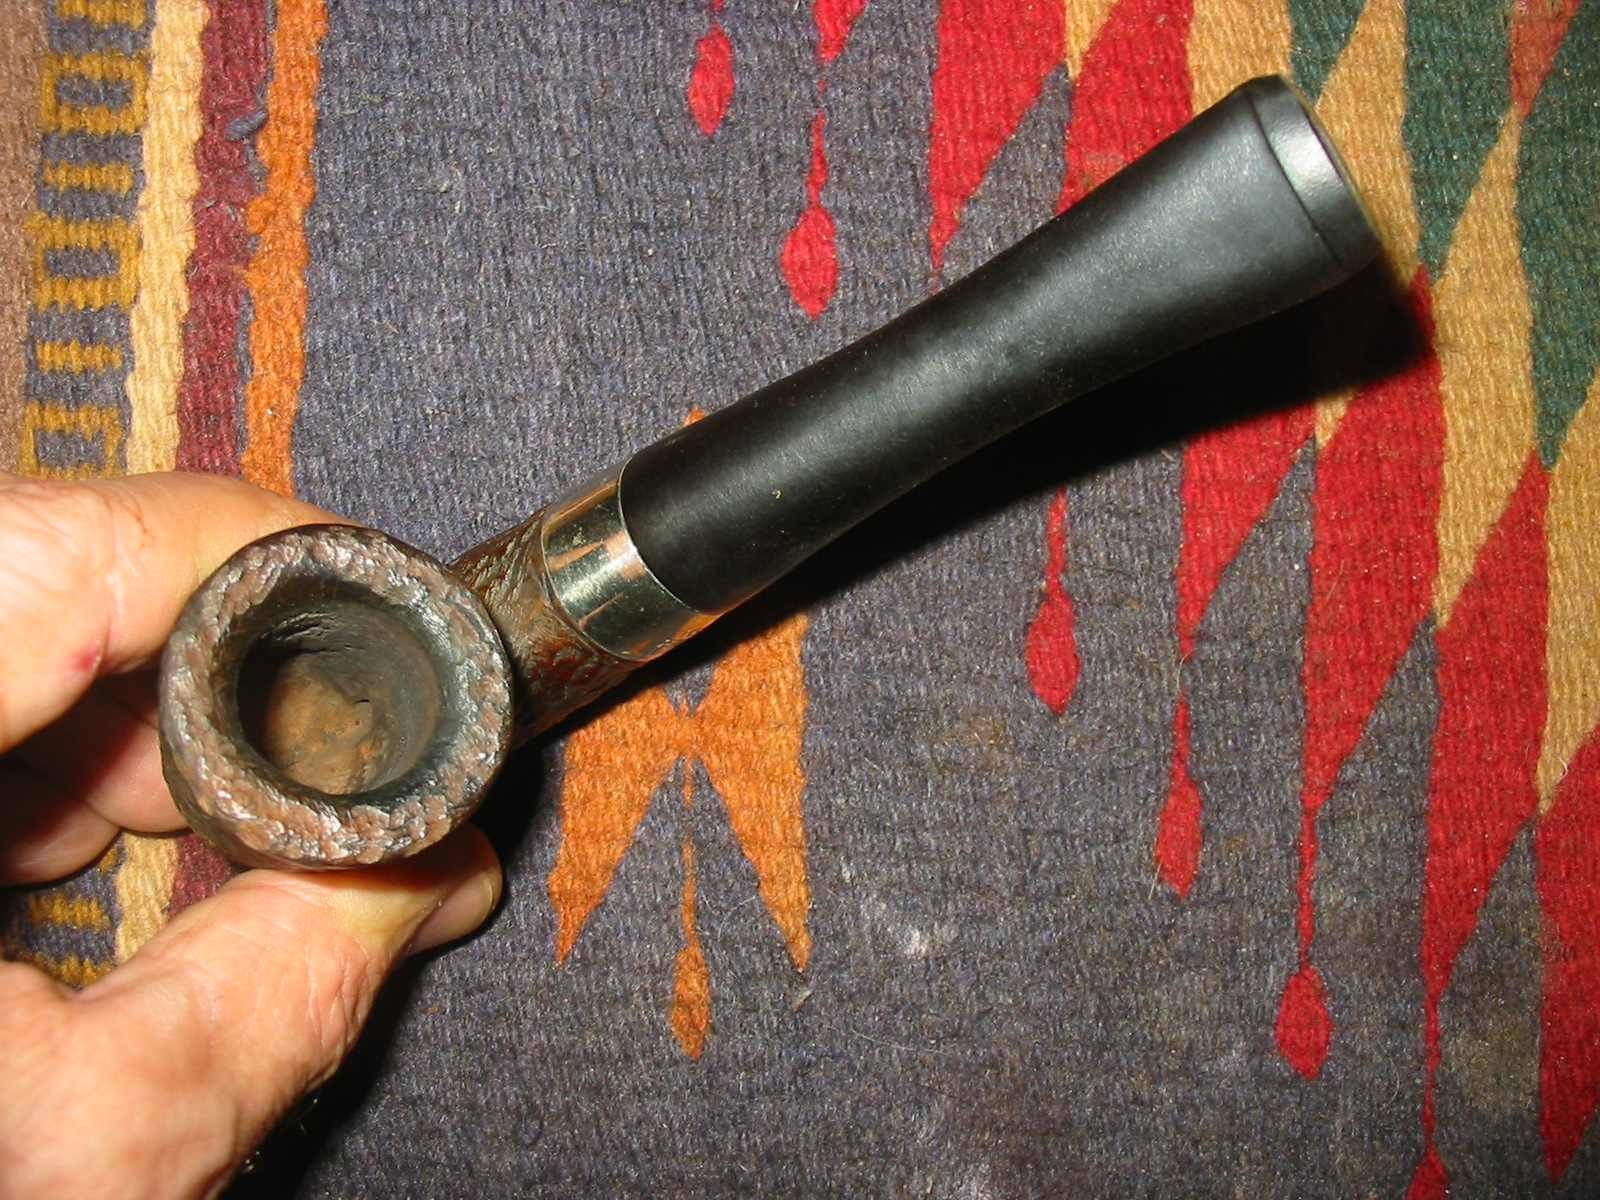
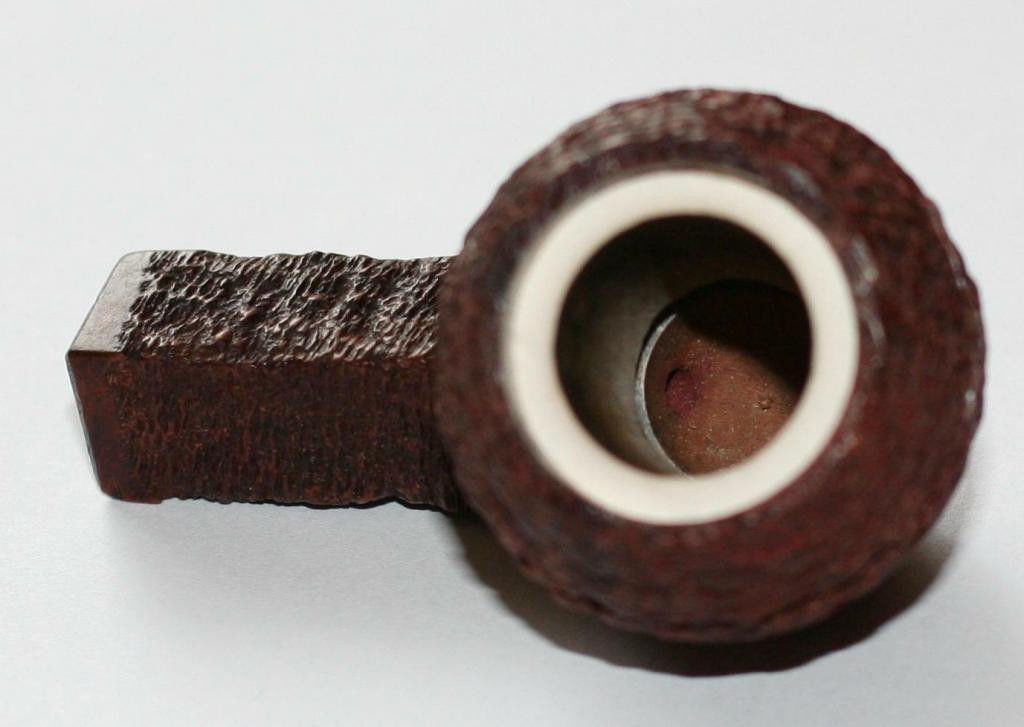
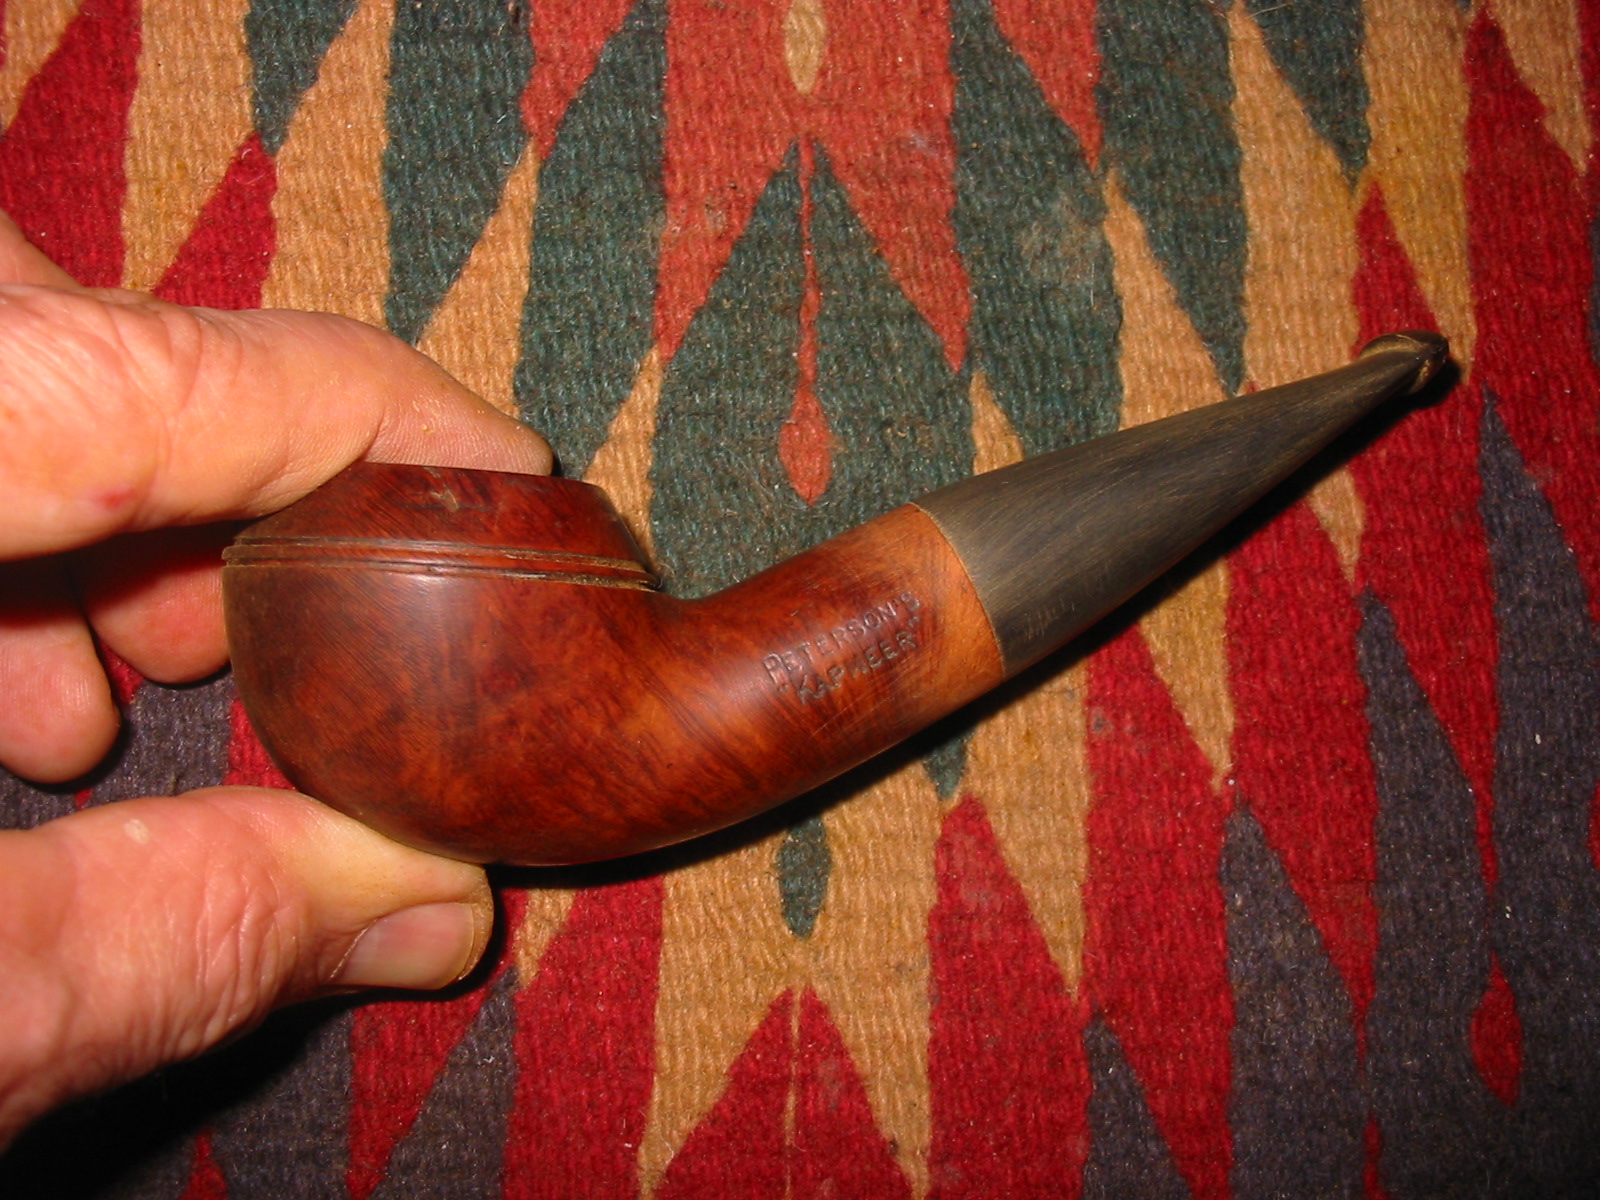
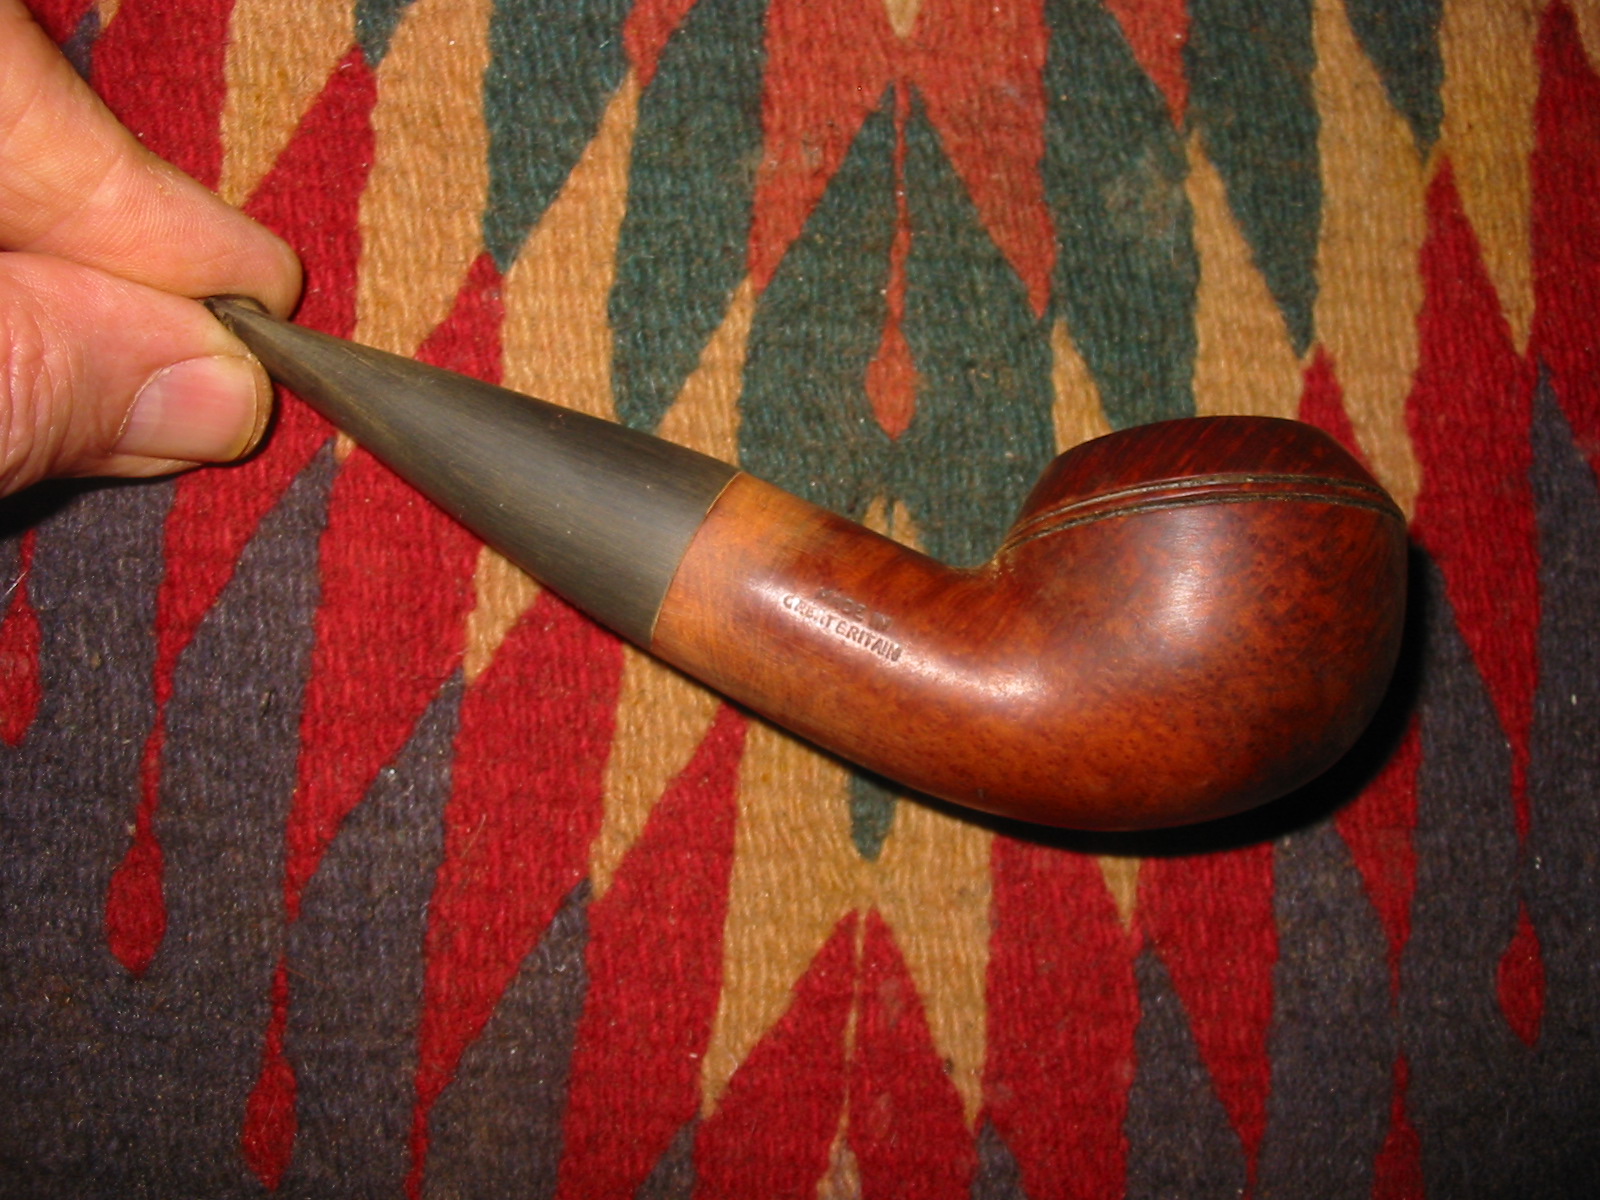
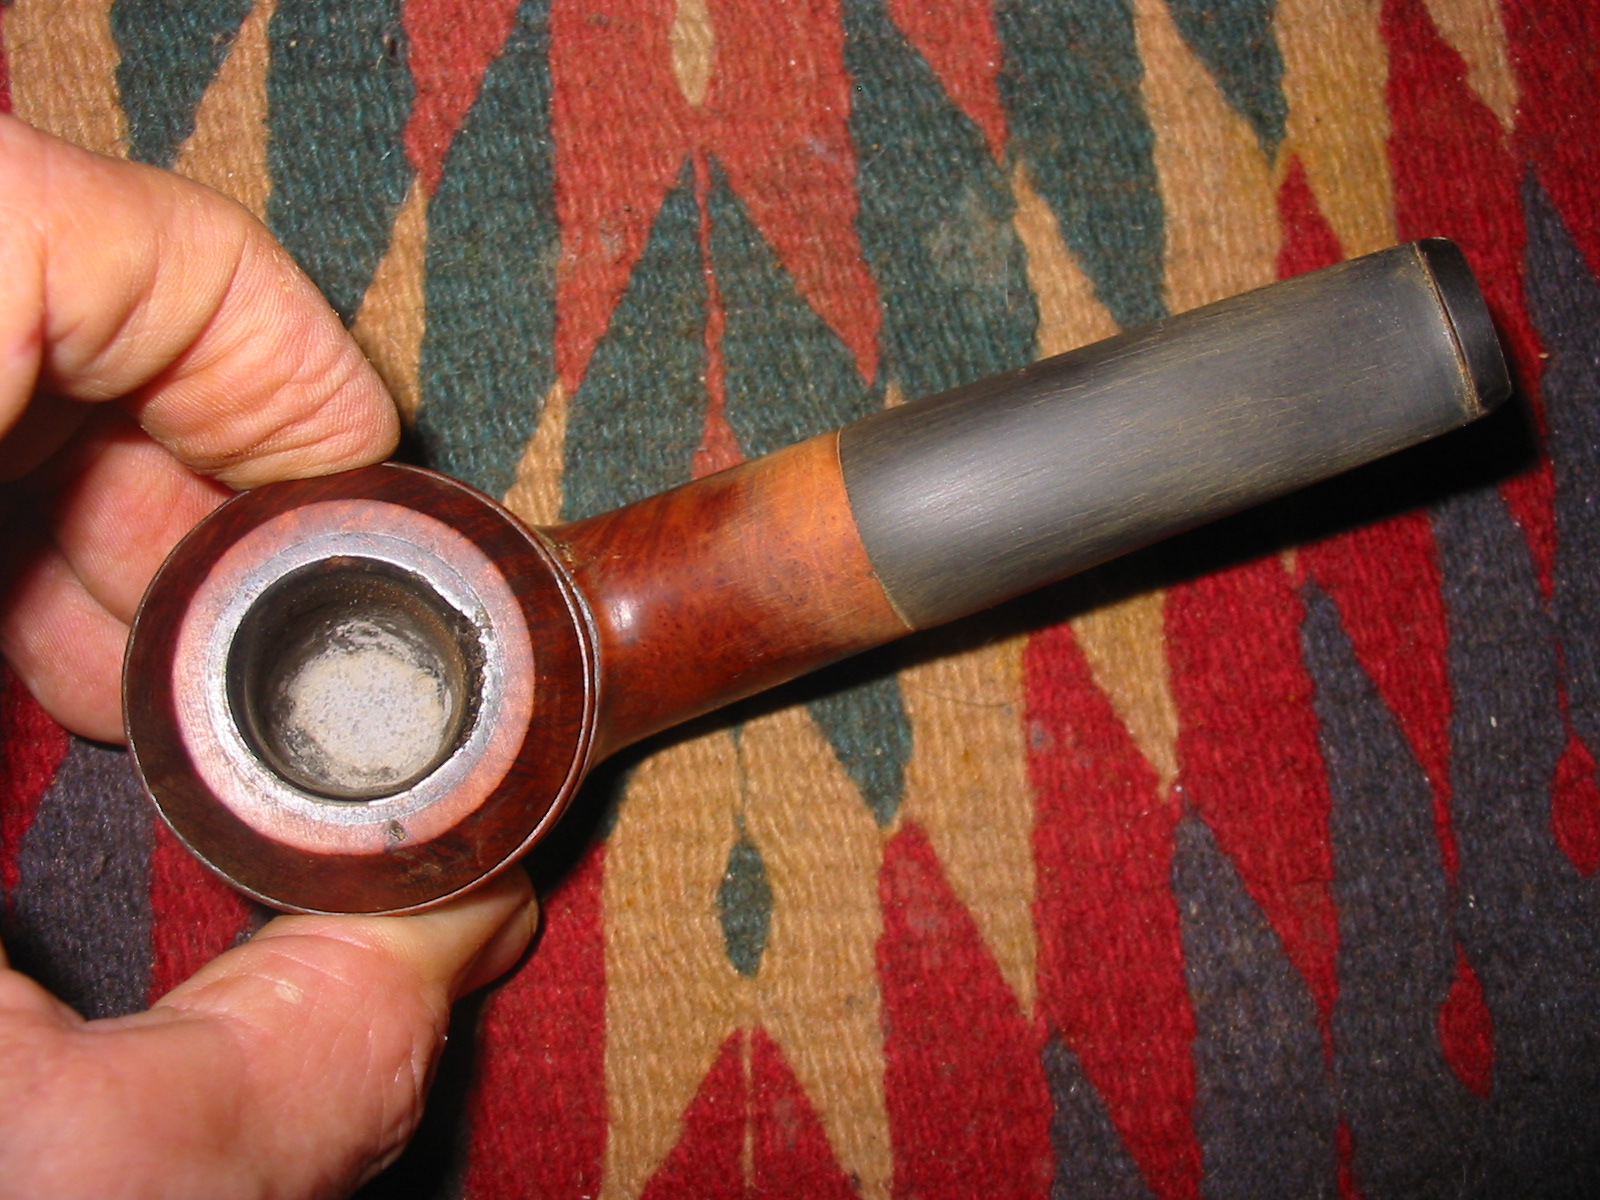
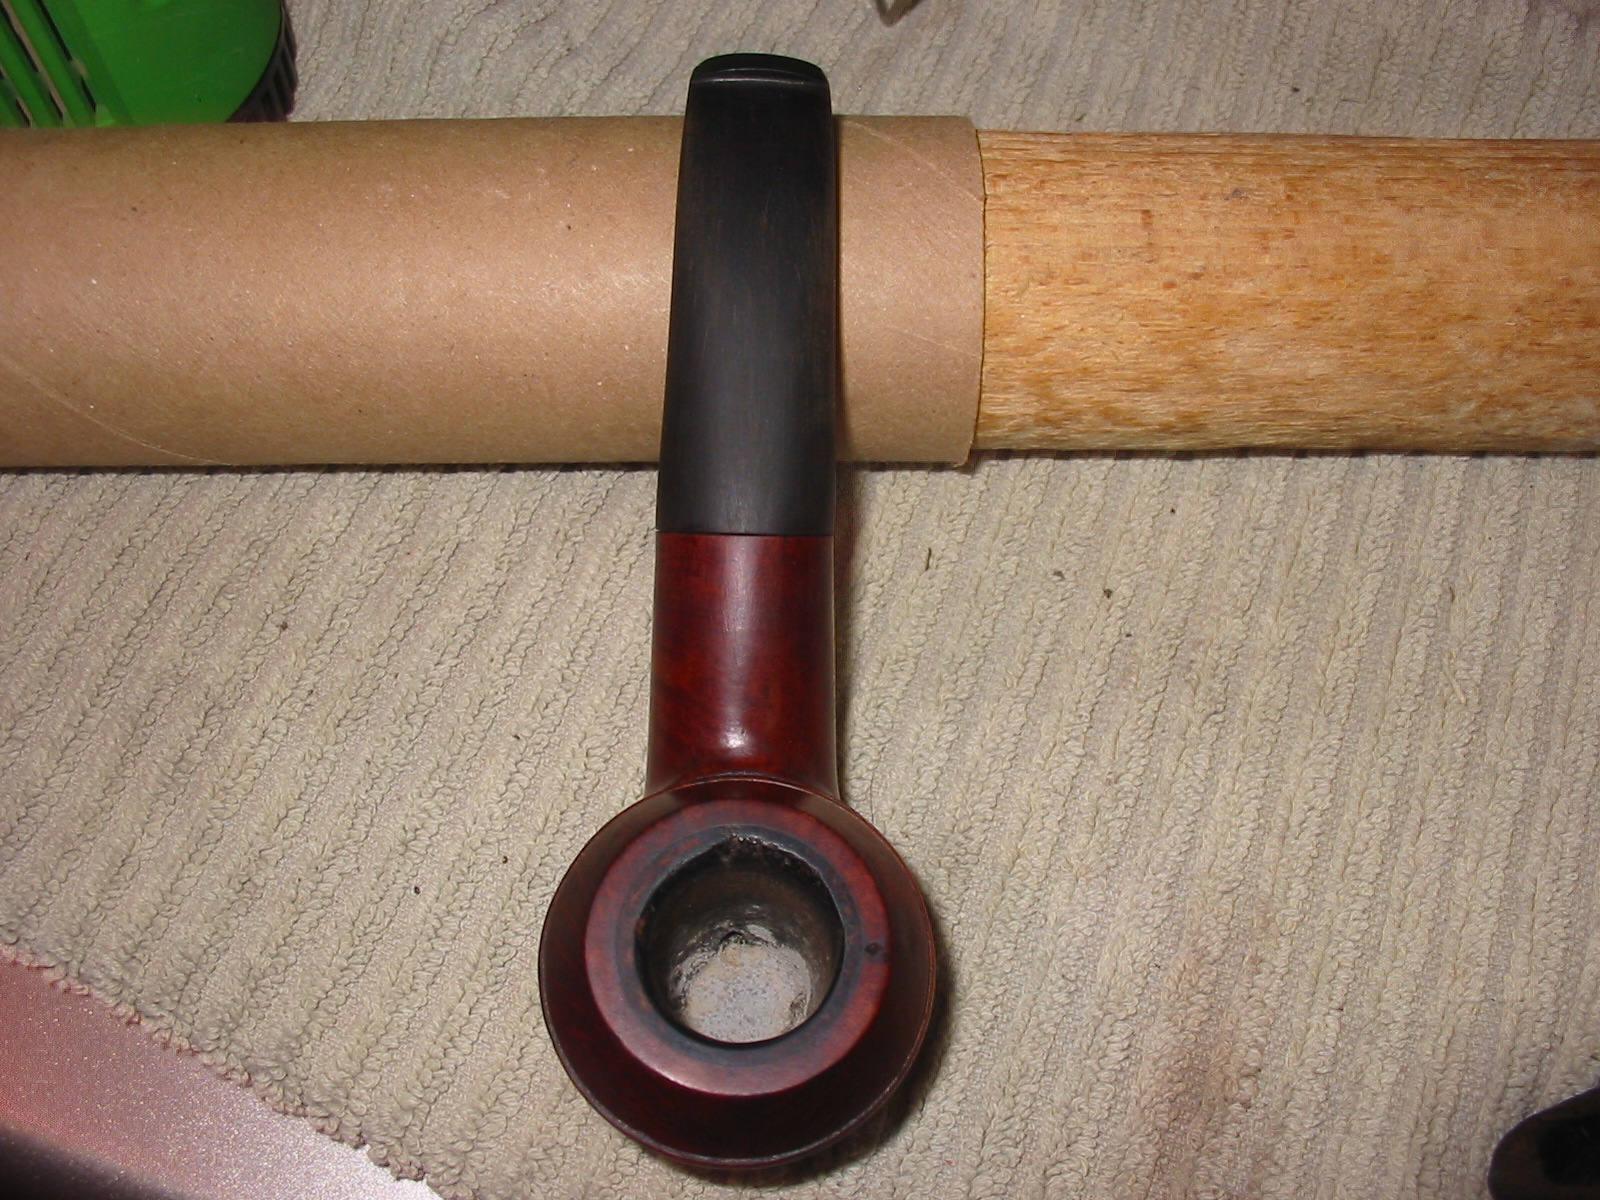
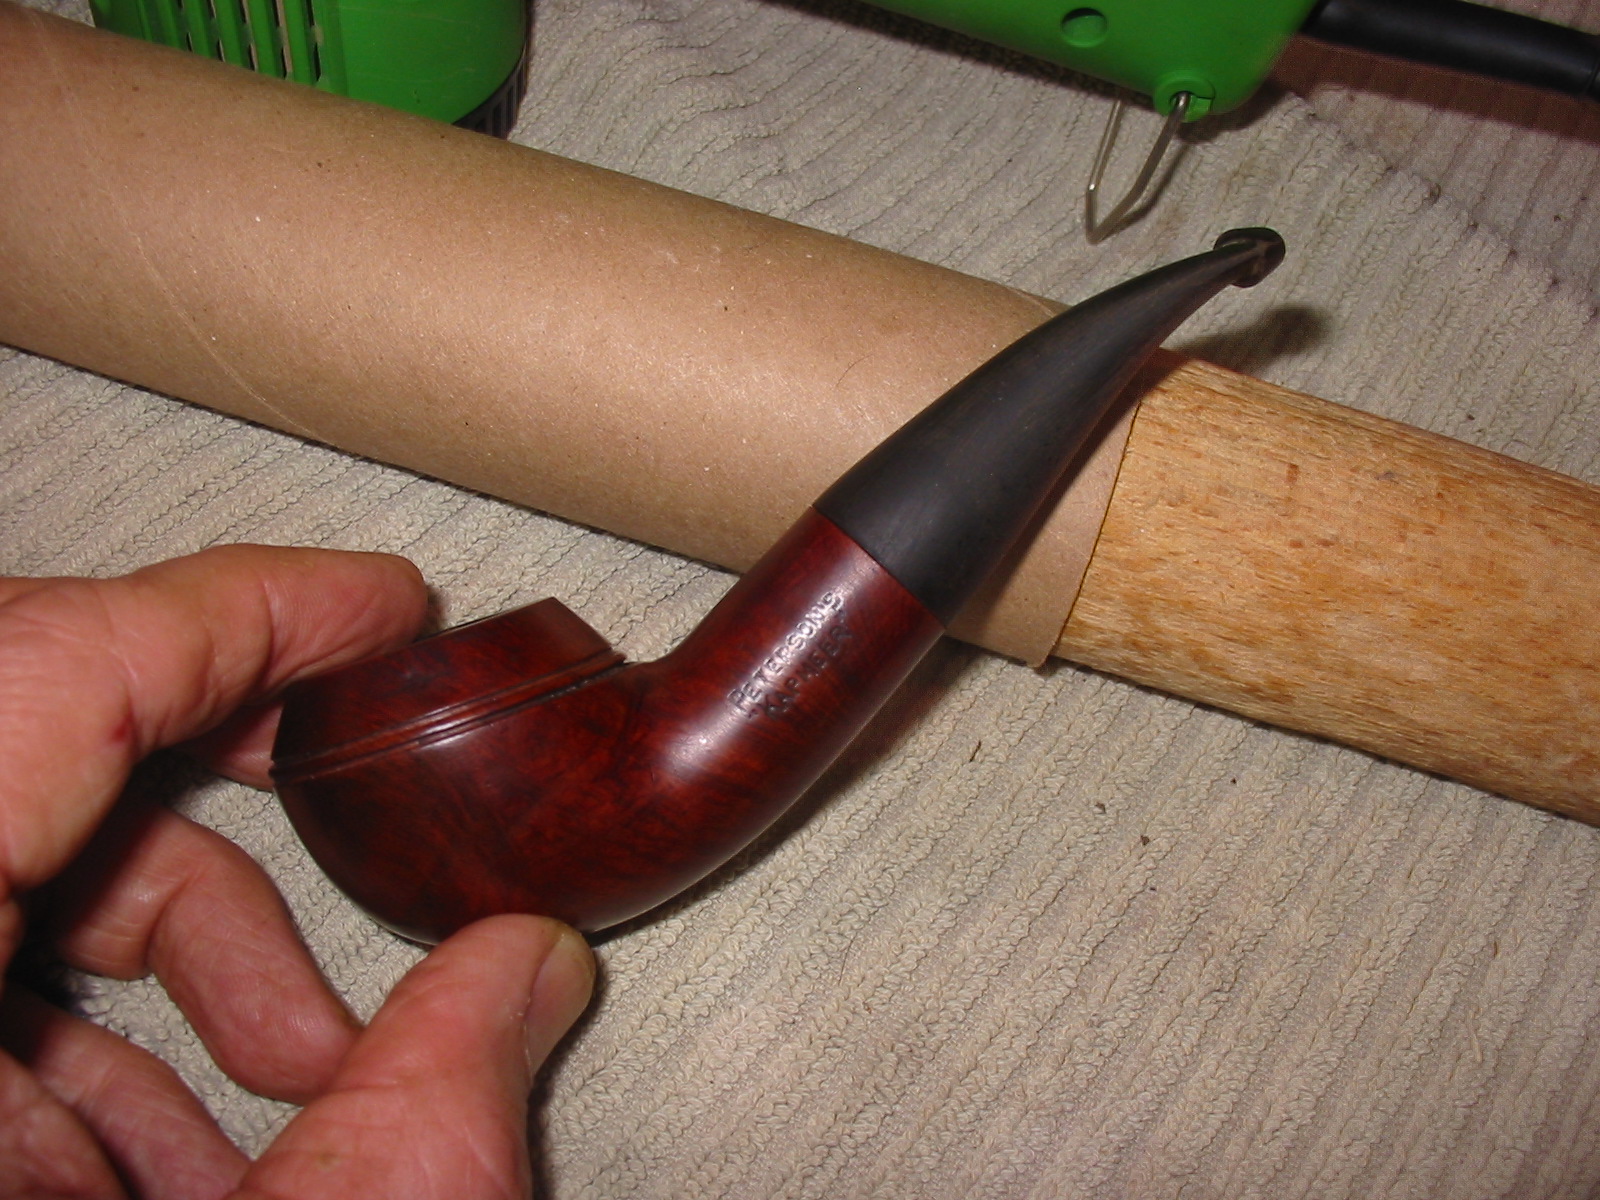
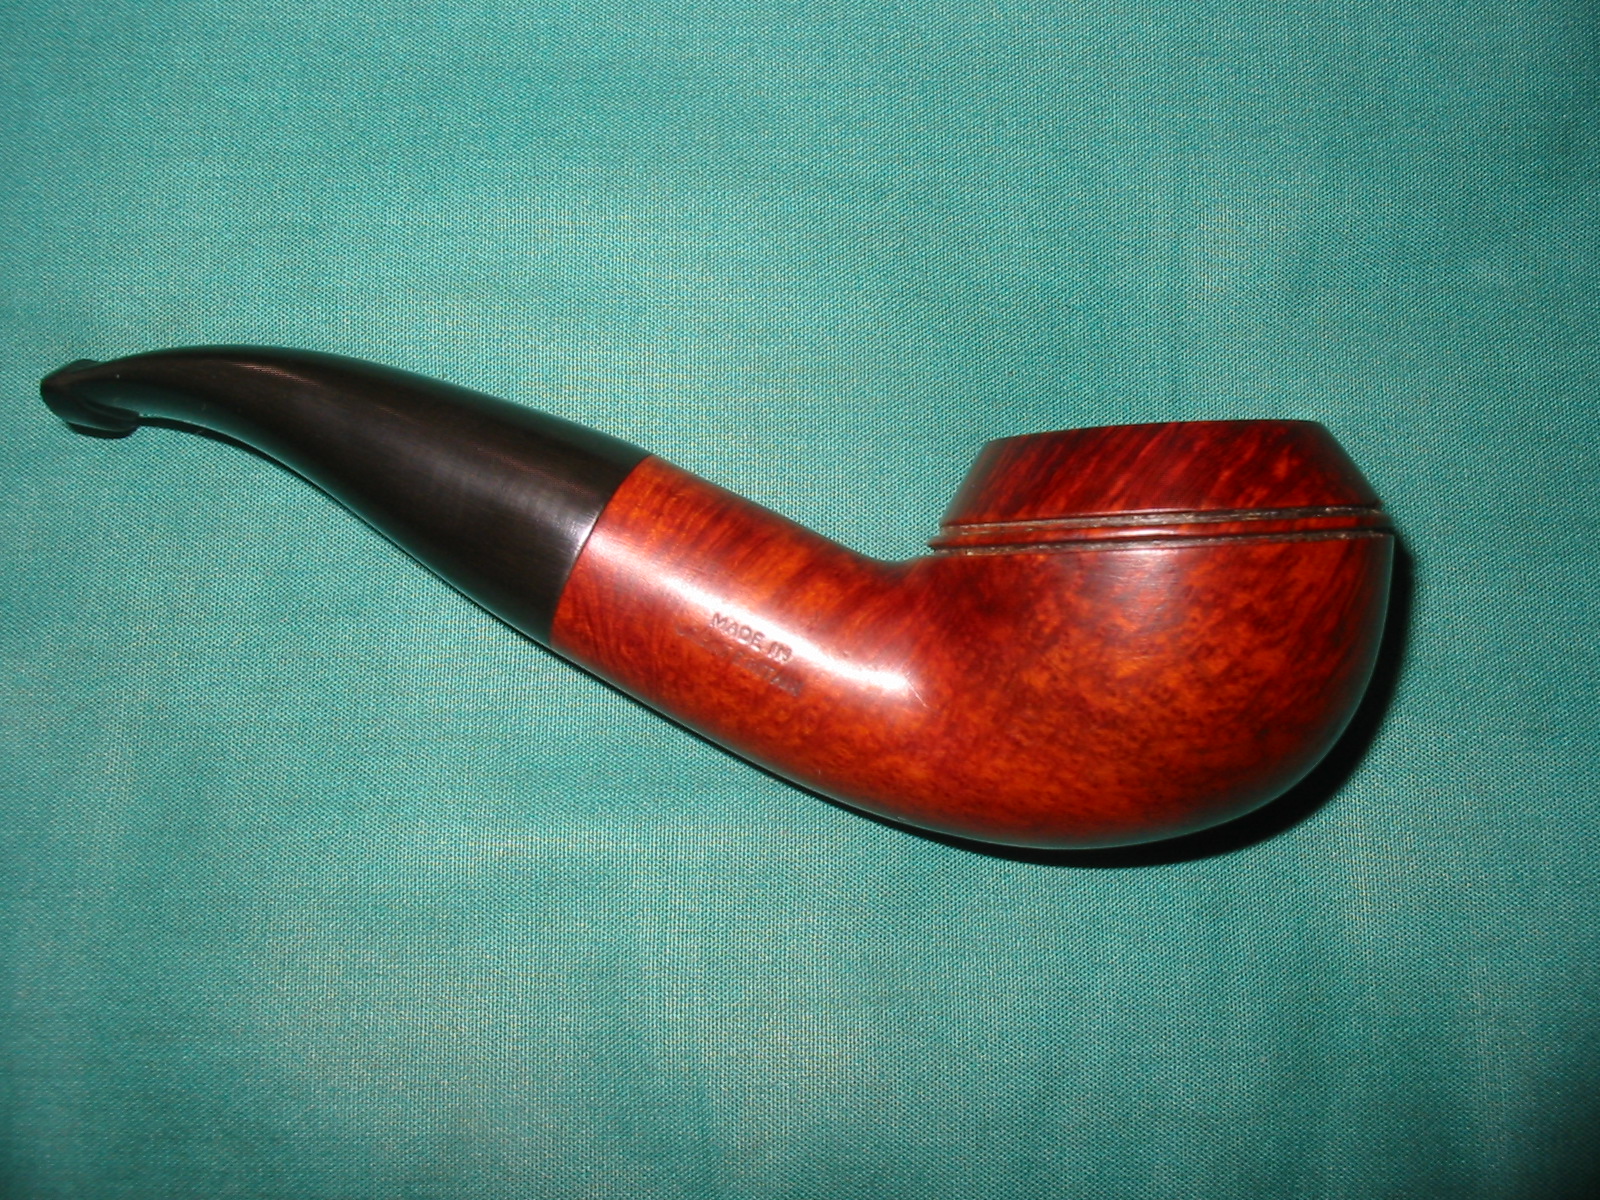
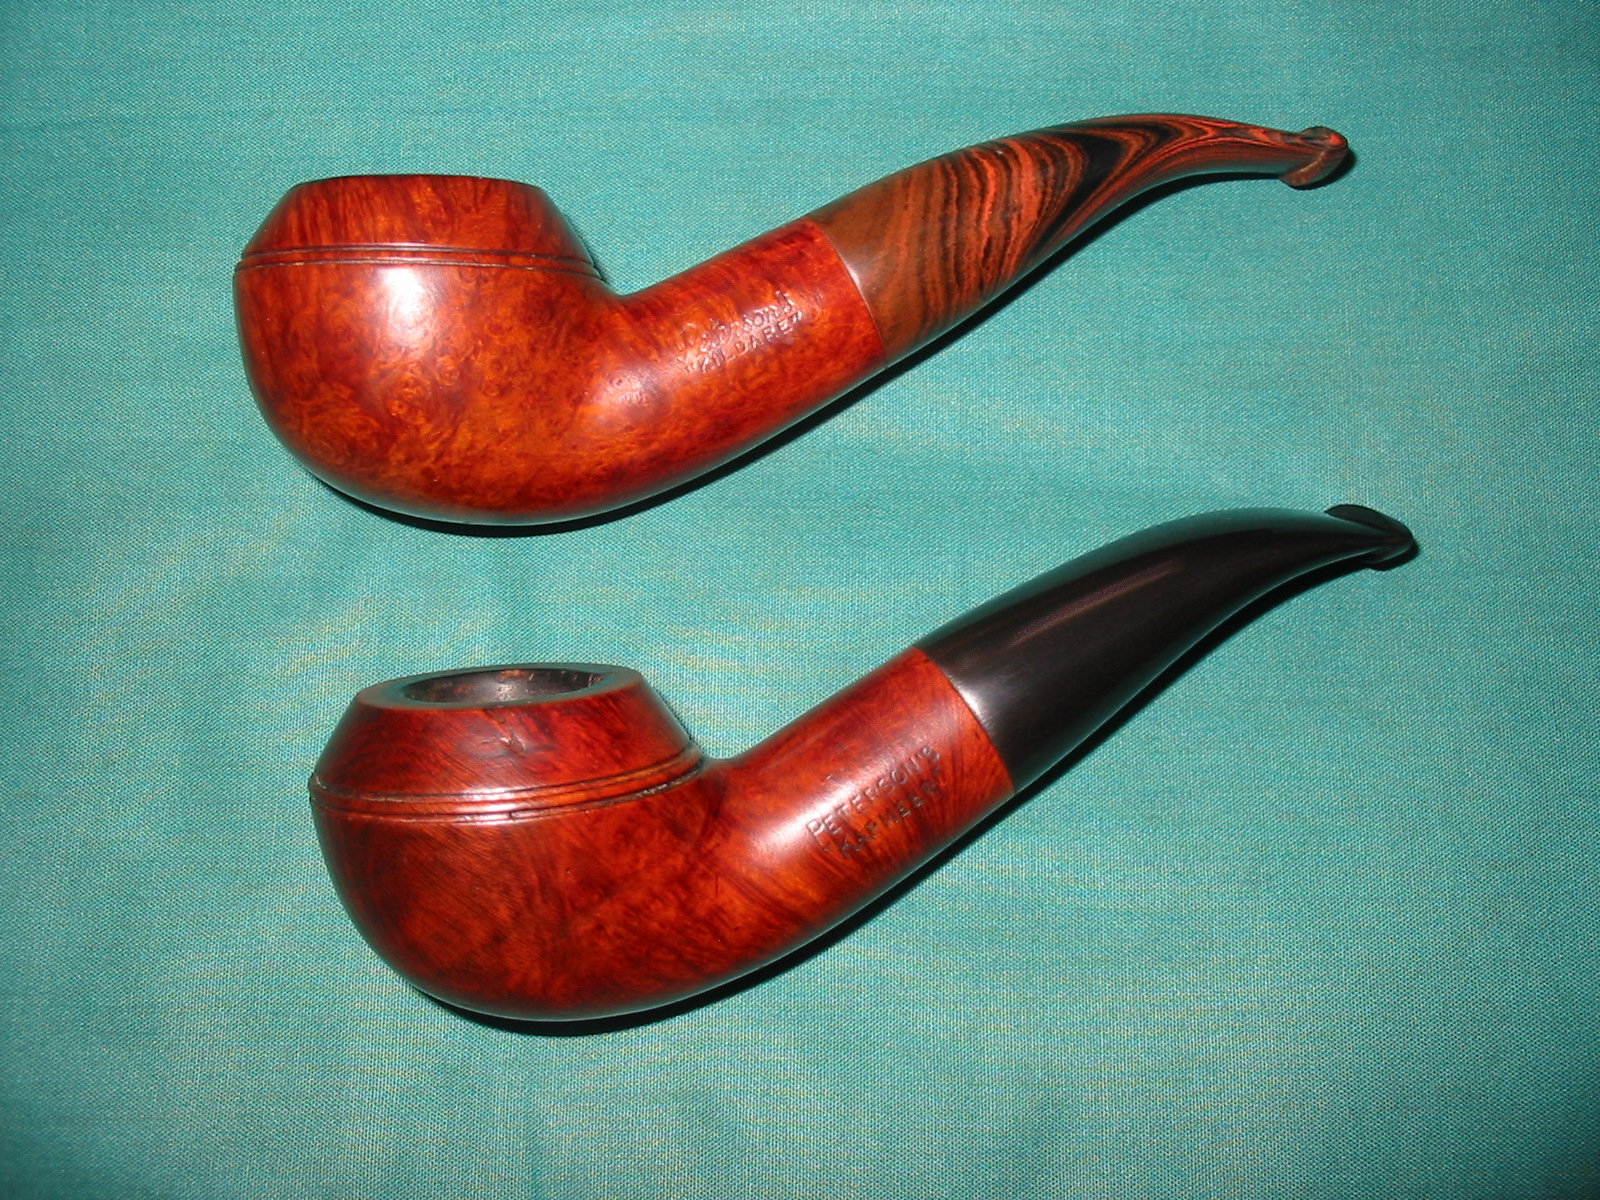
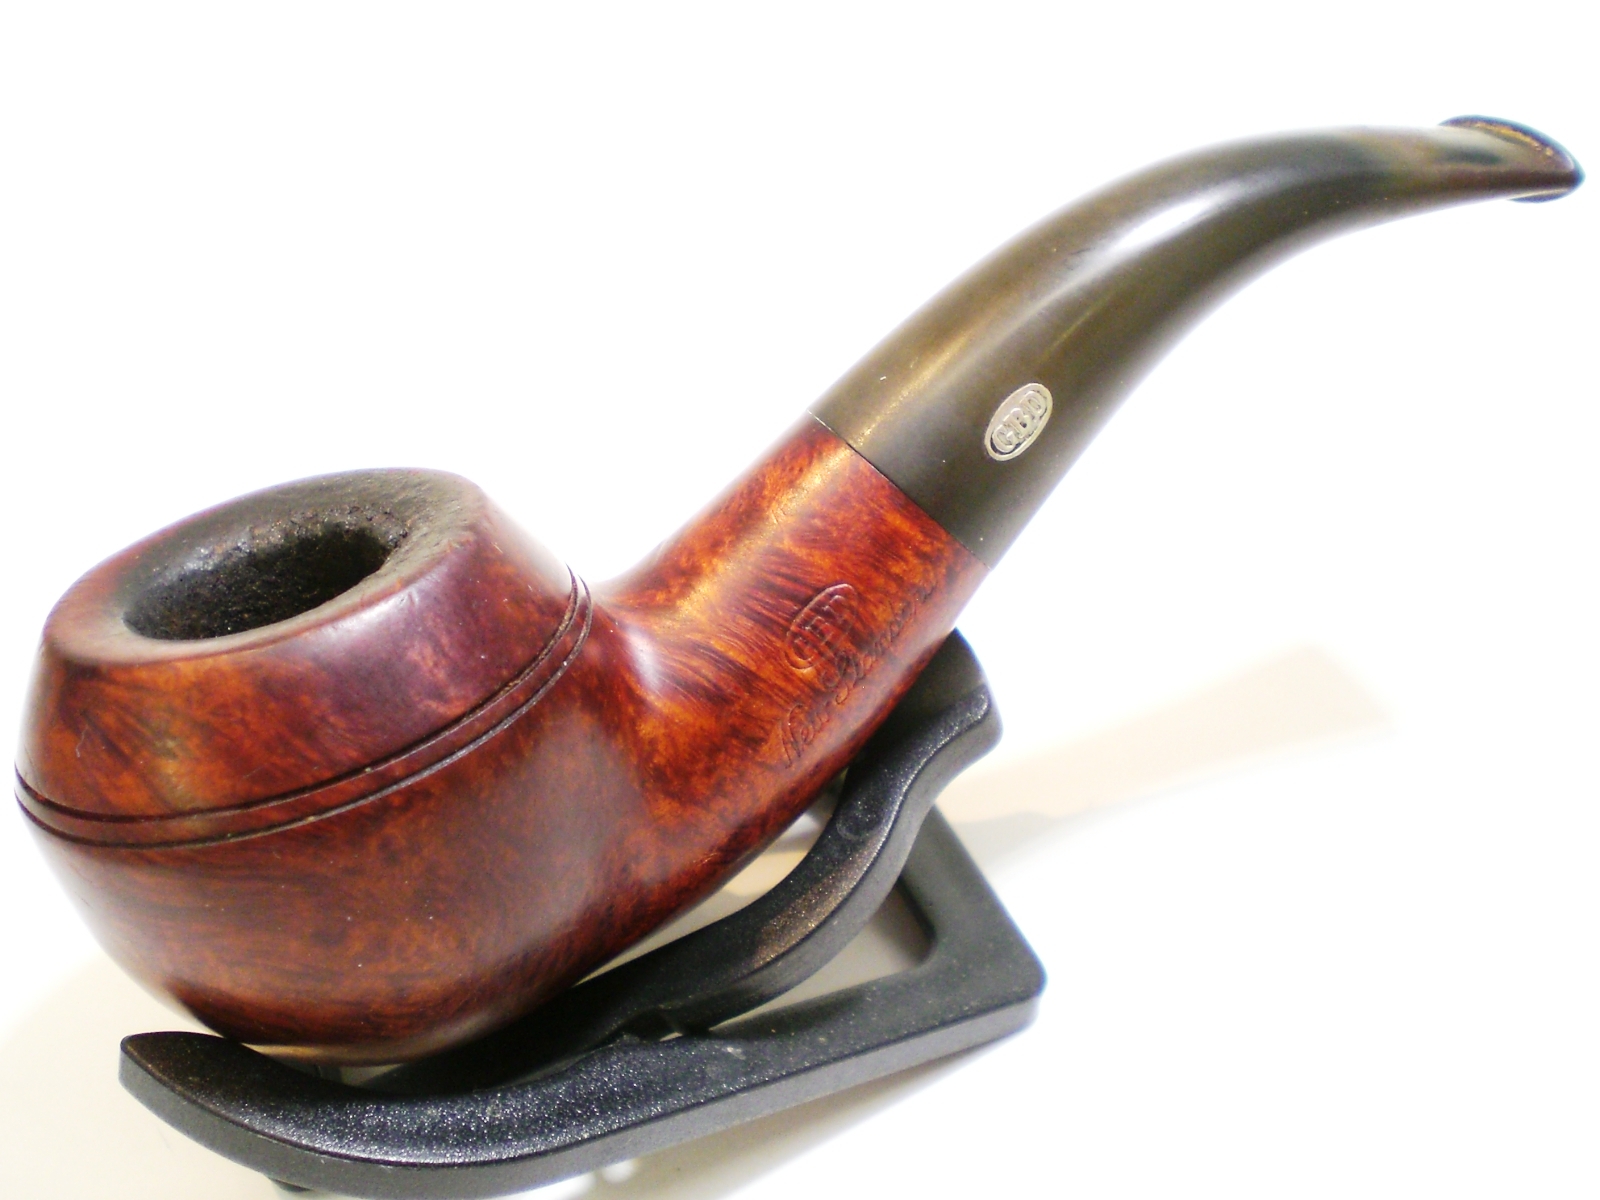
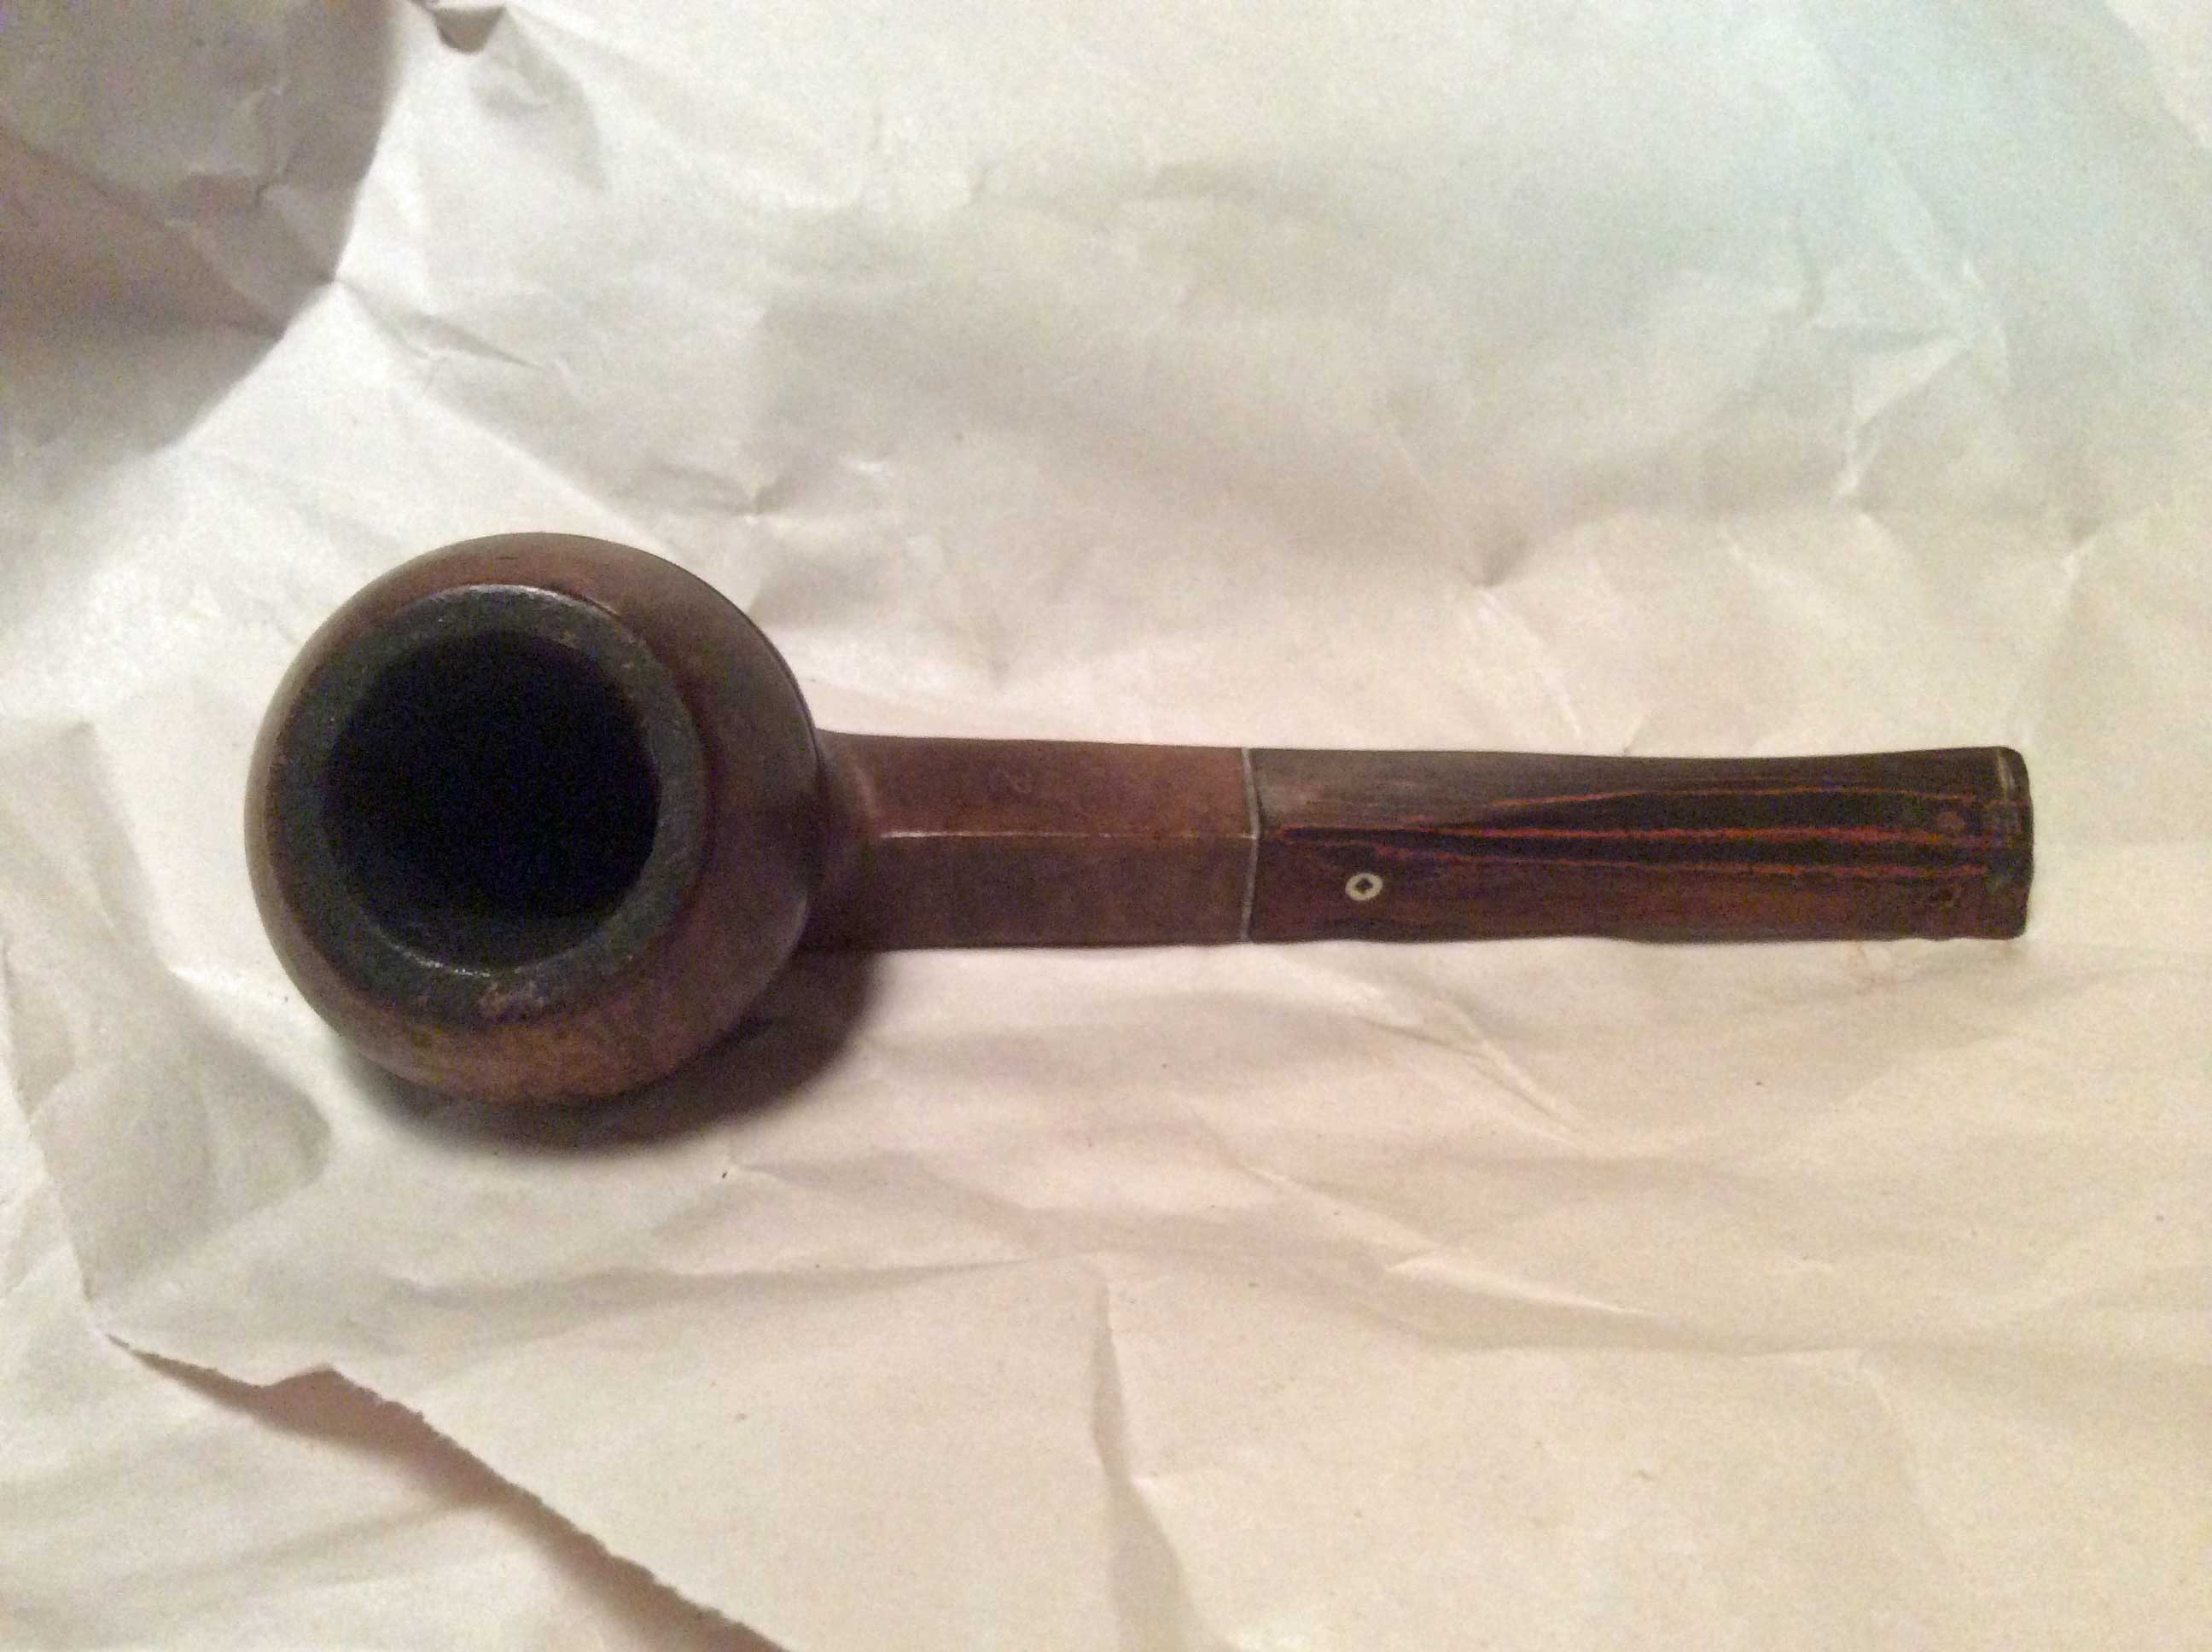
I just finished working on the second of the three pipes that I picked up on Ebay in the lot of three Petersons. It is the third bowl in the photos below. It is stamped Peterson’s over KAPMEER on the left side of the shank, 999S on the underside of the shank and Made in Great Britain on the right side of the shank. It is actually the reason I bid on this lot of pipe bowls. I love the older 999 shape with the thick shank. I like the way it feels in hand and the look of it. As you can see it was in rough shape. There was no stem for it. The finish was rough and worn, the bowl had a thick uneven cake in it and the top of the rim was thick with a cake build up. From what little I knew the KAPMEER was a meerlined pipe. There was something unique about its design but that escaped me at the moment.
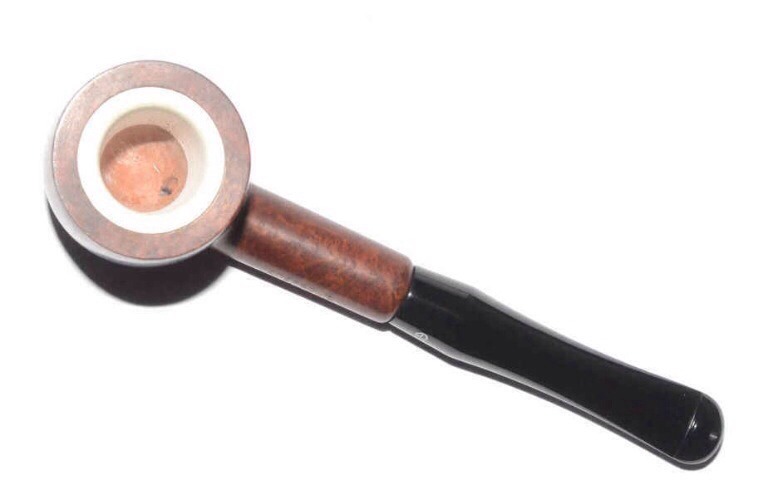
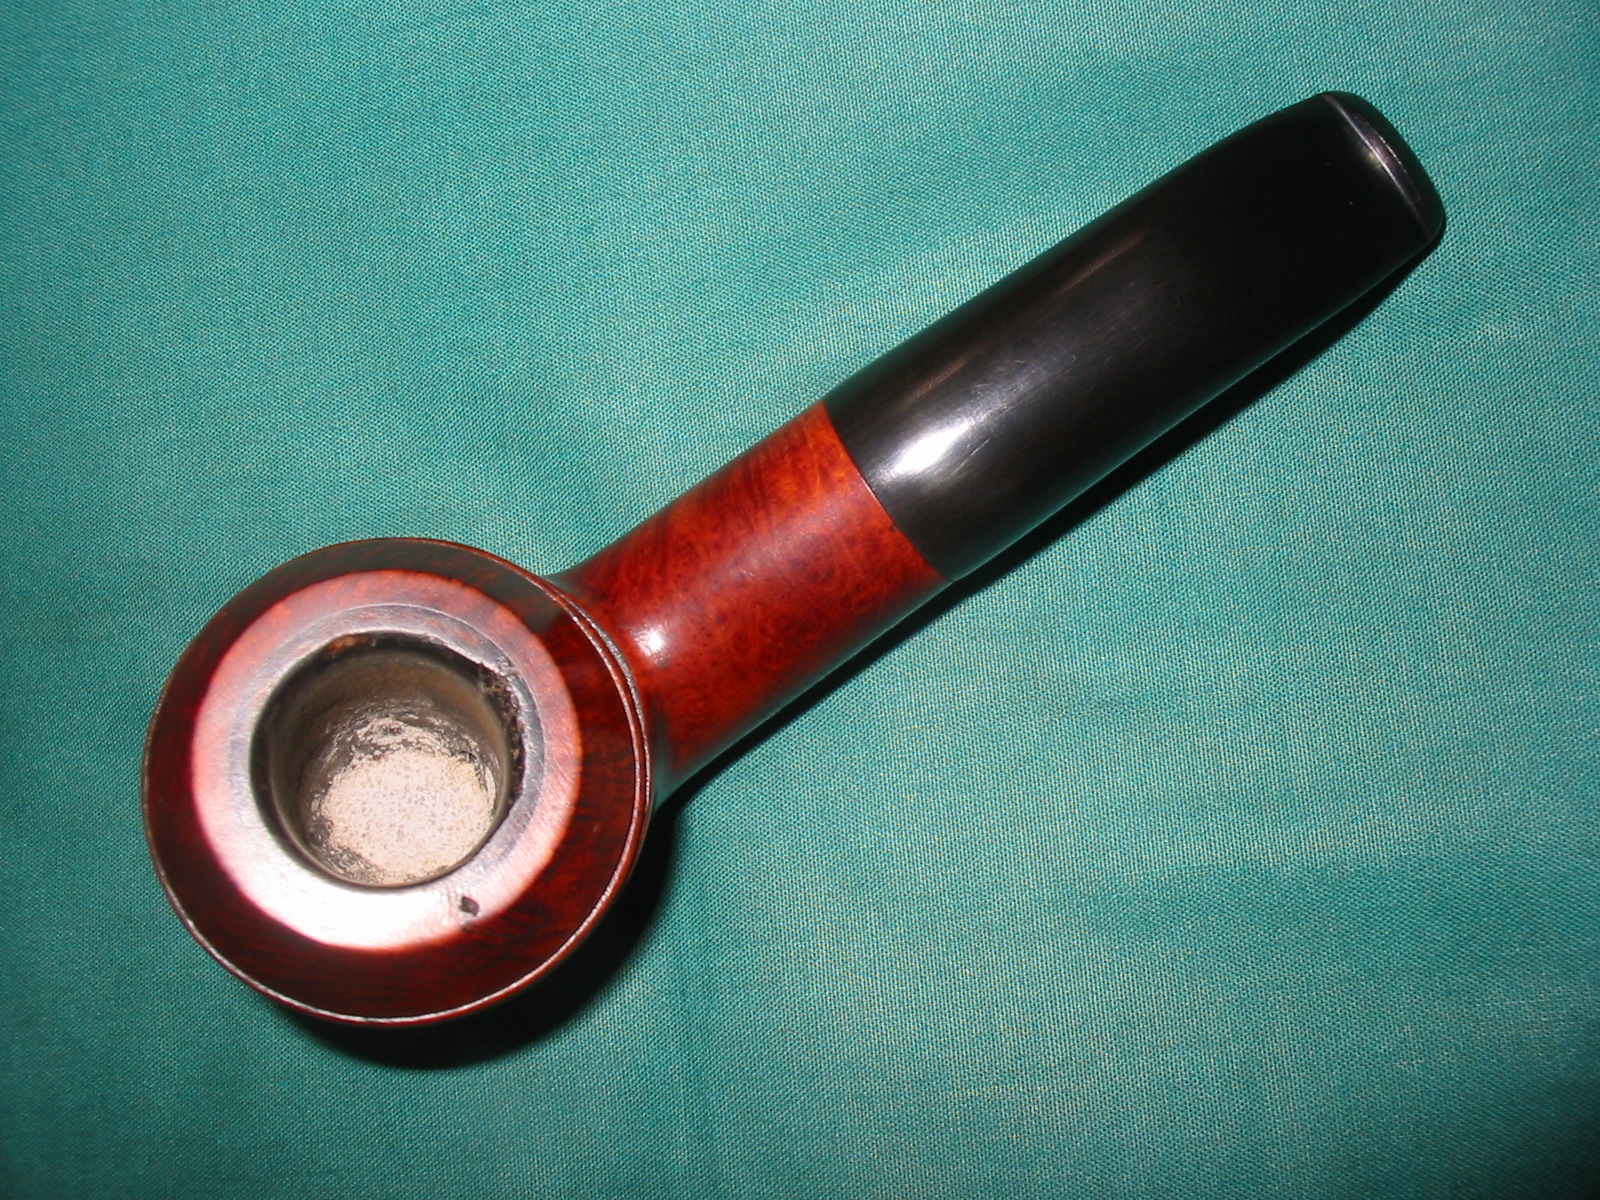
While I waited for it to arrive I did a bit of digging into the KAPMEER line. The first thing I found was a quote that said, “The line was introduced for those who preferred to smoke their tobacco in a meerschaum bowl, but still have the looks and advantages of a briar pipe”. That was not altogether helpful to me. It is much the same advertizing info that is included in most of the sales material for meerlined pipes. What was the difference between those pipes and the KAPMEER? The meerschaum lining ended just before the draw hole, so you do not have the problem of deterioration in the bottom of the meerschaum insert in the tobacco chamber. It was believed that this would reduce the possibility of a burn out on the sides of the bowl. I found the two photos below online that clearly show the design of the KAPMEER bowl. The first photo shows the bottom edge of the insert just above the draught hole. The bowl bottom is briar. The second photo shows the contrast between the meerschaum lining and the briar on the bottom of the bowl. In looking at these photos I think I understand the idea of combining the best of meerschaum and briar pipes. The theory would be that the meerschaum lining would deliver a meerschaum style cool smoke and the briar bottom would give the durability and strength of briar.
or early 1970s. The pipe in the second photo is a later design. The early pipes had a regular stem/shank junction rather than the faux military stem. The one that I had came from a period in time where the stem was most likely a tapered stem with an aligned fit. The pipes were made in Great Britain on the Isle of Man. I found out that though Peterson had maintained a factory in London since 1899, the ‘Made in England’ stamp was discontinued with the closing down of the London-based factory (1969/70). That puts my bowl pre-1970 in terms of date. The thick shank on the 999 bowl dates it earlier than that period.
I gently reamed the bowl, being careful to not damage the meer lining. I wanted to take the cake back as far as possible with the reamer and would do the rest with sandpaper. I sanded the meer lining with 220 grit sandpaper until the entire cake was gone and the meer was once again smooth. It was darkened and would not be white again do to use. I gently topped the bowl with a topping board to remove the cake and smooth out the rim damage before working on the rest of the bowl. I wiped the bowl down with acetone on cotton pads, carefully avoiding the meerschaum lining on the top of the rim. The acetone removed the grime and the spotty stain on the bowl and would form the base for restaining the bowl later.
The bottom of the bowl had been over reamed and the briar damaged with deep gouges on the bottom. The bottom was still thick so there were no worries about burn out. I mixed a batch of pipe mud from cigar ash and water and applied it to the bottom of the bowl to bring the bottom up to the airway entrance. I tamped it in place with a pipe nail. I put some mud on the side walls below the end of the meerschaum lining. I set it aside to cure.

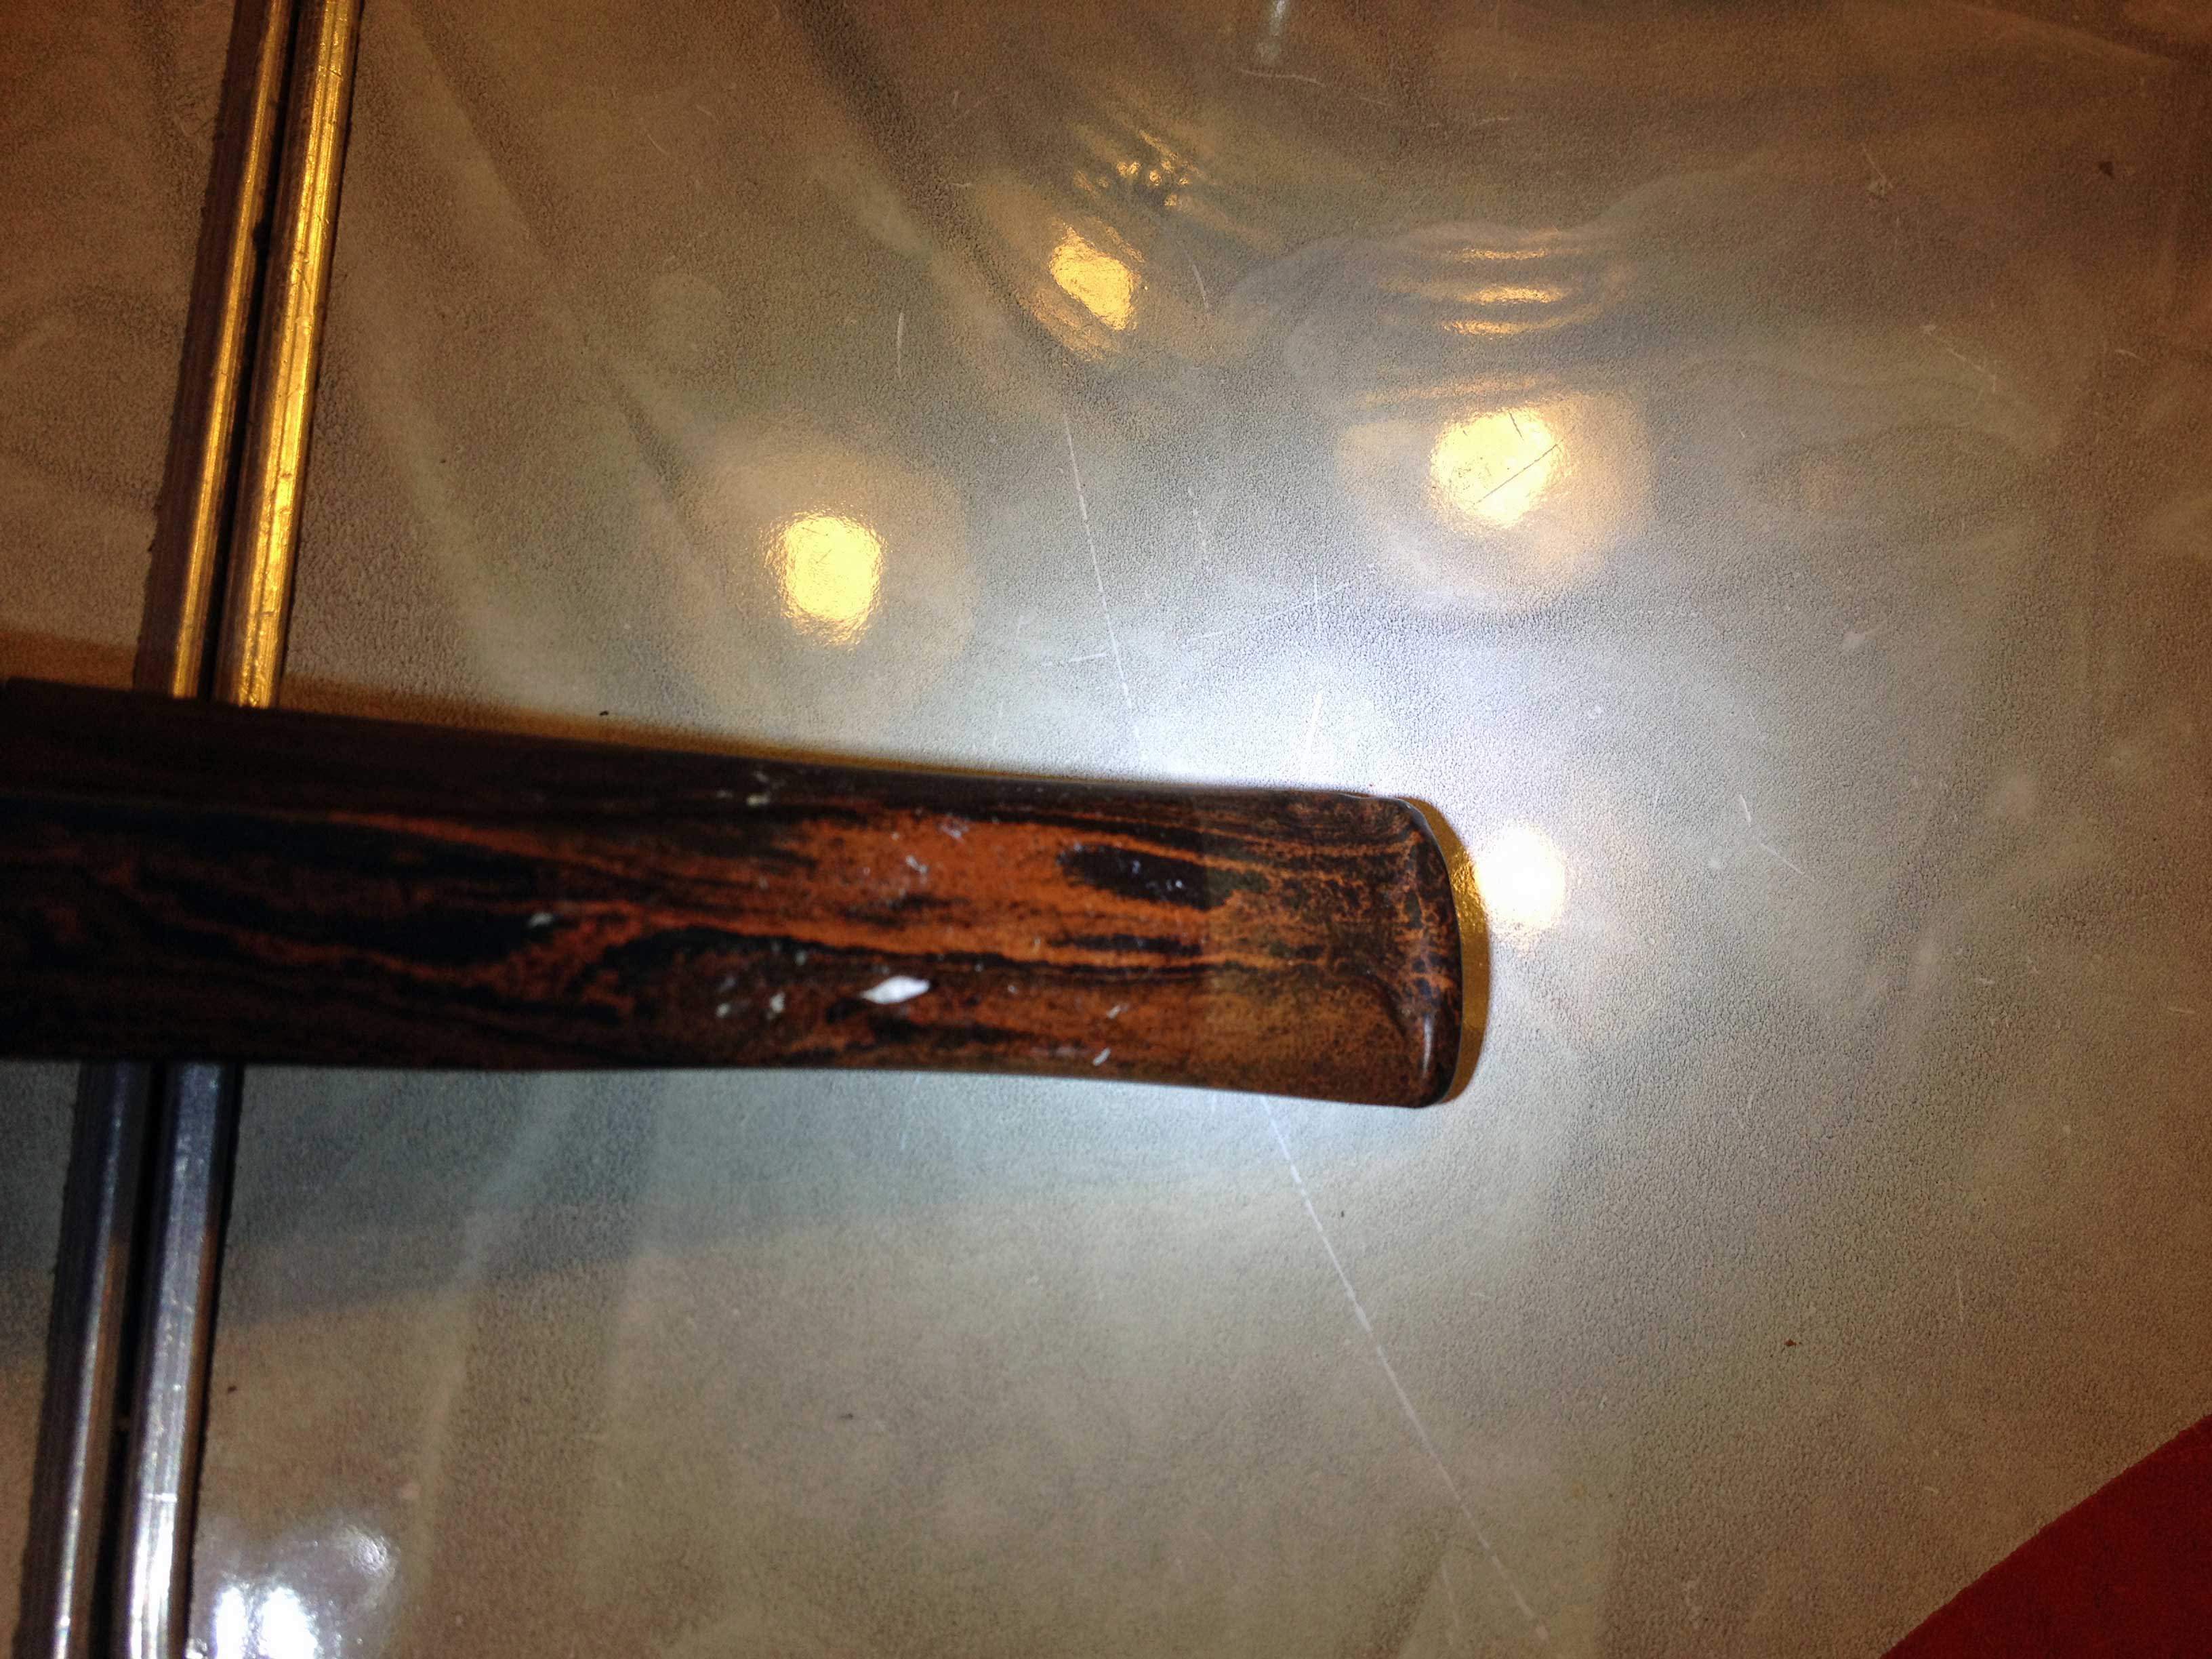
Once the mud had cured I wiped out the inside of the bowl with a damp cotton pad to clean any of the mud that had gotten on the meer lining. I wiped down the outside of the bowl with acetone and cotton pads a final time. I had a stem set aside from my can of stems that would fit the shank once the tenon was turned and the diameter of the stem reduced. I turned the tenon with a PIMO Tenon Turning Tool slowly until it fit the shank. I sanded the tenon with a sanding drum on a Dremel to finish the fit. I sanded the casting marks on both sides of the stem and on the end of the button with the Dremel as well. When all was finished the fit against the shank was snug and clean.

 As can be seen from the photos above the diameter of the stem was bigger than that of the shank. I used the sanding drum on the Dremel to take it down as close as possible to the shank diameter without damaging the shank. Once I had it close I did the rest of the work with 150 grit sandpaper and followed that with 220 grit sandpaper. When the transition between the two was smooth to touch I used a medium and a fine grit sanding sponge to remove the scratch marks from the stem. Since I was planning on restaining the pipe I sanded the shank gently to make sure that the transition would be smooth and the flow correct. I have found that this is the only way to keep the stem and shank matching without and shift in height on either material.
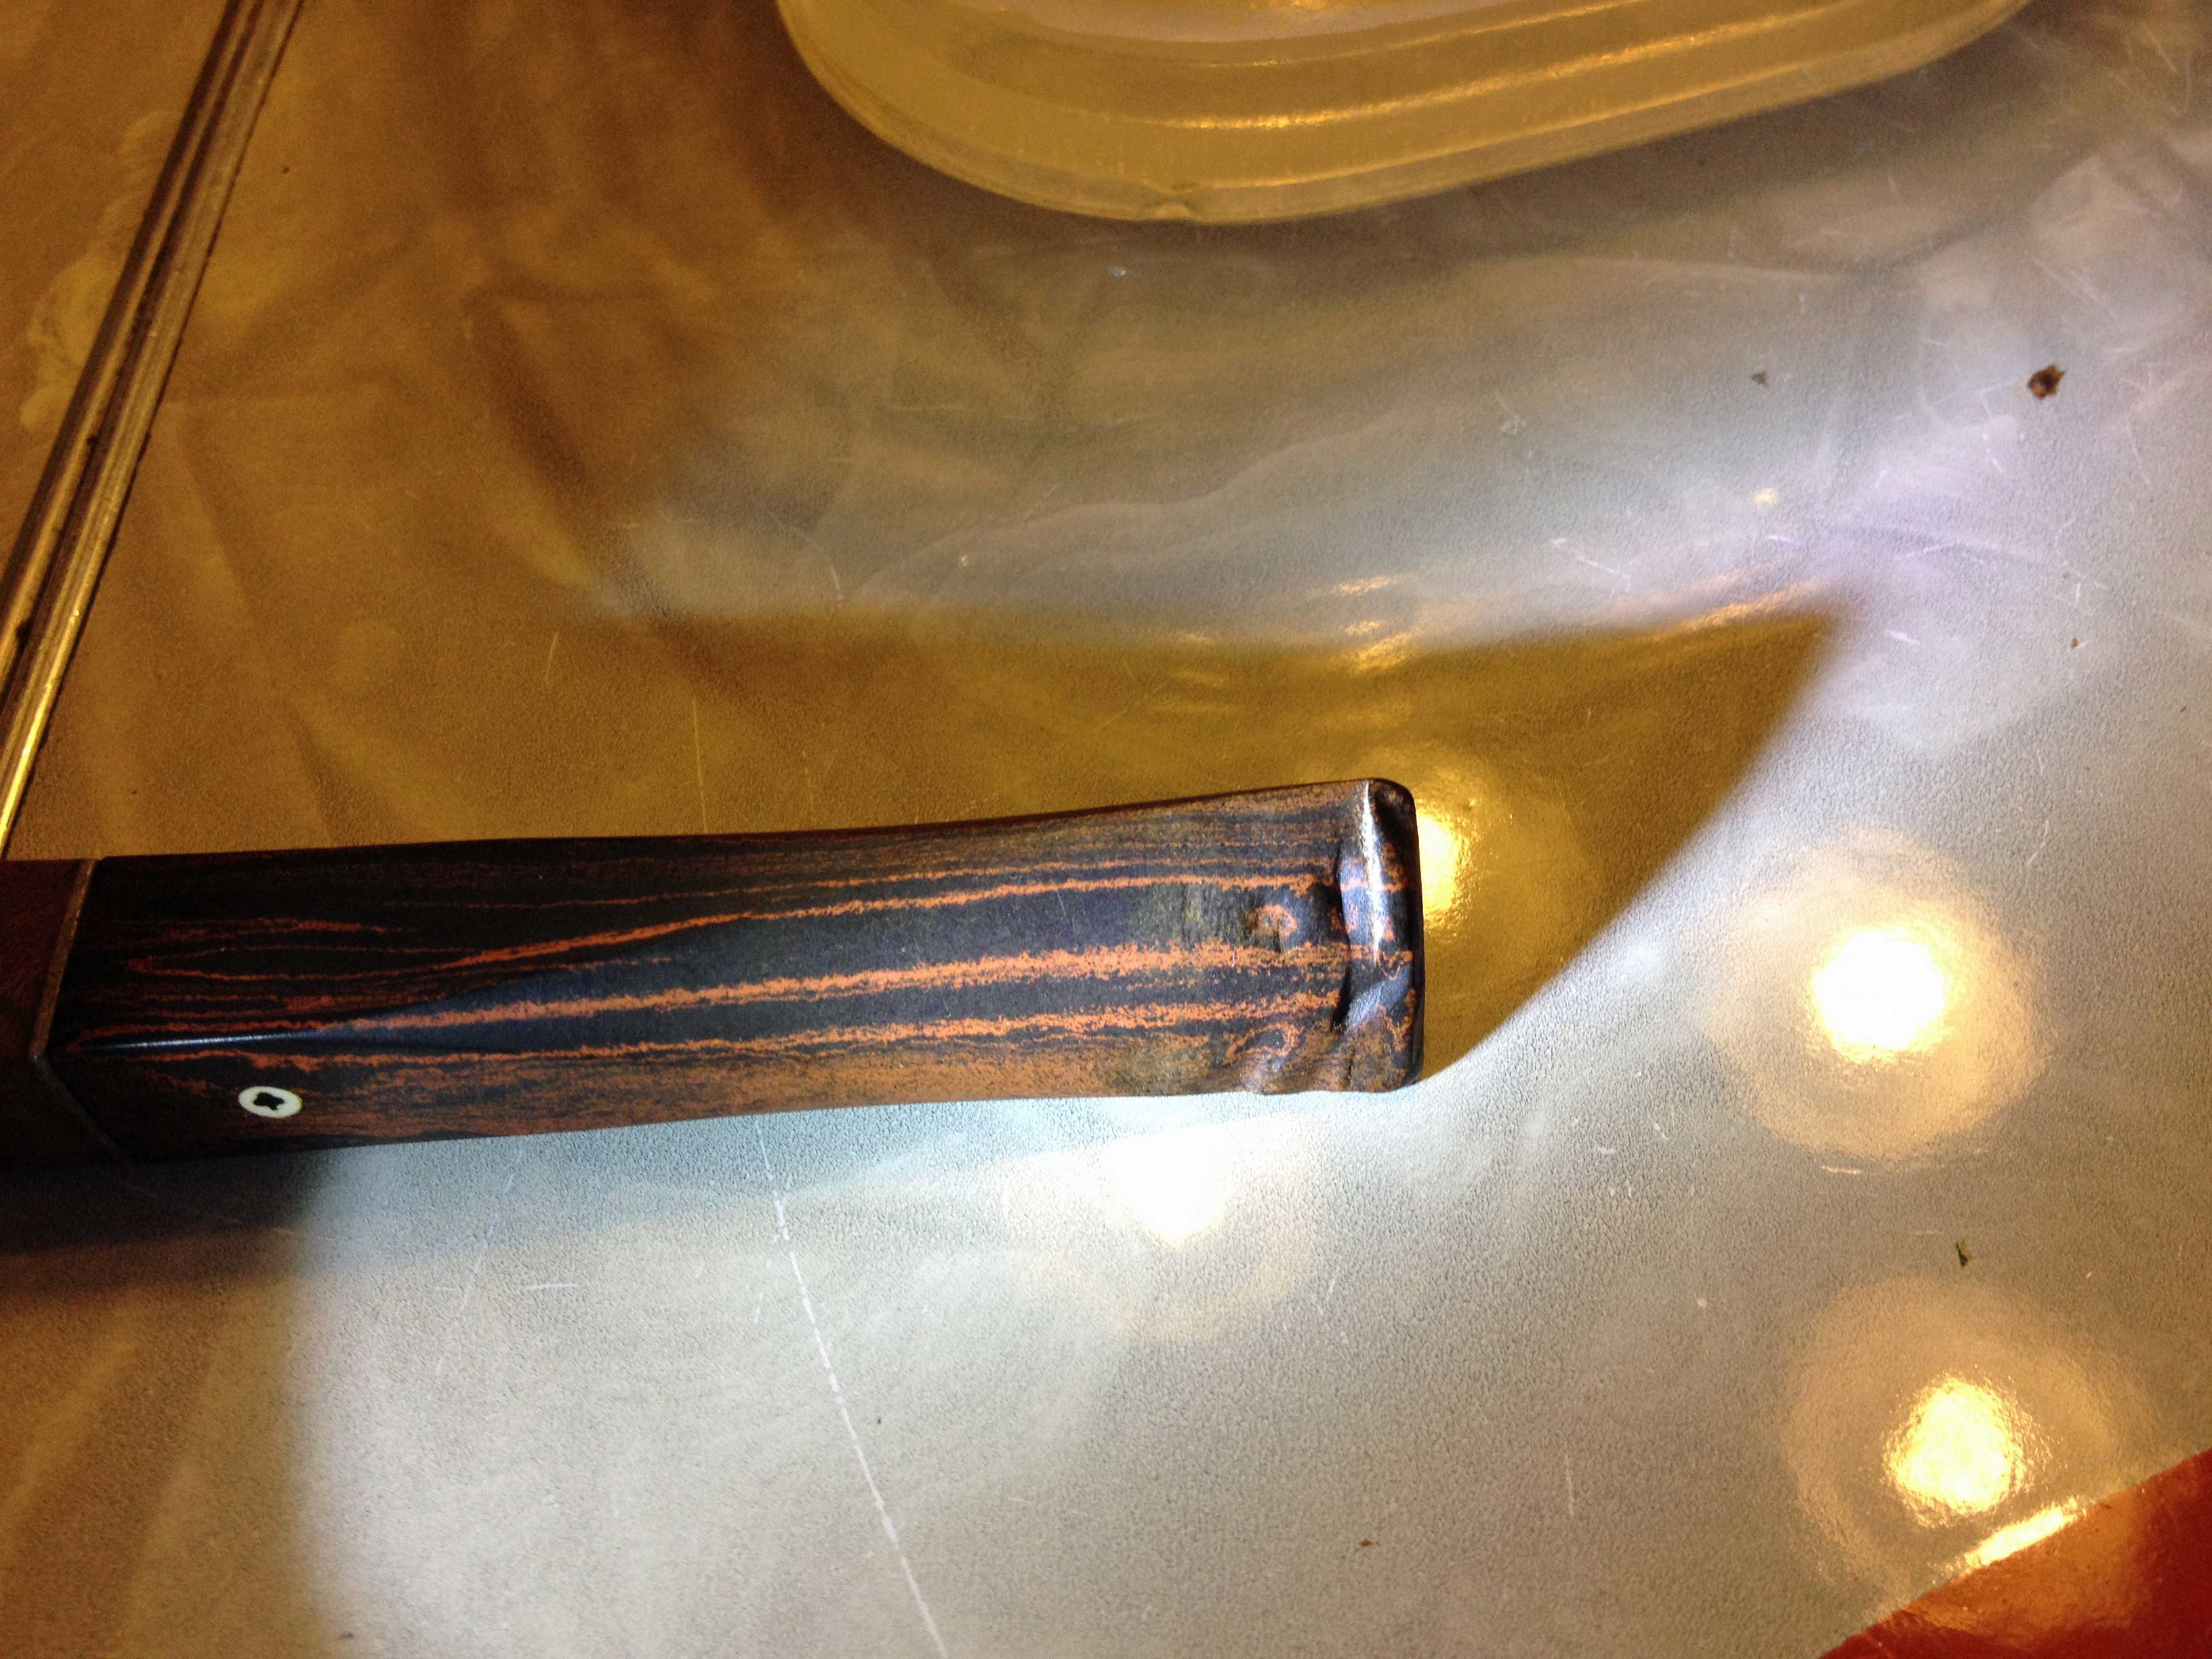
 I wiped off the sanding dust with a damp cloth and gave the stem a wipe down as well. The photos below show the look of the stem and shank union at this point in the process. I also gave the rim a light sanding with the sanding sponges as well. There is one small sandpit in the top left side of the rim. I decided to leave it rather than fill it.
 I sanded the shank with 1500-2400 grit micromesh sanding pads to remove scratches in the finish and wiped the bowl down with alcohol on a cotton pad. Greg sent me a set of staining pens to work with so I decided to try them out on this pipe. I tried the light and medium pens and found that they did not match the stain on the pipe so I settled for the dark pen. I drew on the unstained surface of the shank and then blended it into the rest of the bowl. I also did the same on the rim, blending it downward into the sides of the bowl. The pen was very easy to control and keep off the meer lining on the inner edge of the rim.
 When the stain had dried I buffed the bowl with White Diamond and then gave it a coating of carnauba wax to seal it and give it a shine. I had done enough of the early sanding on the stem by that point to set up a heat gun to heat and bend the stem. I held it over the heat until the stem was soft and then bent it over a rolling pin that I use for bending stems. I have a thick cardboard tube that I slide on the rolling pin to provide a softer surface than the old rolling pin when I am bending the heated vulcanite.
 The photo above shows the first attempt at the bend in the stem. It was not bent enough to my liking so I reheated it and bent it again. Once the bend was correct I set it in cool water.
 I took the pipe back to the worktable to sand the stem. I wet sanded with 1500-2400 grit micromesh sanding pads and dry sanded with 3200-12,000 grit pads. I rubbed the stem down between each of the three grits with Obsidian Oil and let it soak in before moving on to the next series of three grits.

 I rubbed it down a final time with the Obsidian Oil and then buffed the pipe and stem with White Diamond on the wheel. I gave the pipe multiple coats of carnauba wax and between each coat buffed it with a soft flannel buff. The finished pipe is shown in the photos below. All that is left is to load a bowl of some aged Louisiana Red and enjoy a bowl.
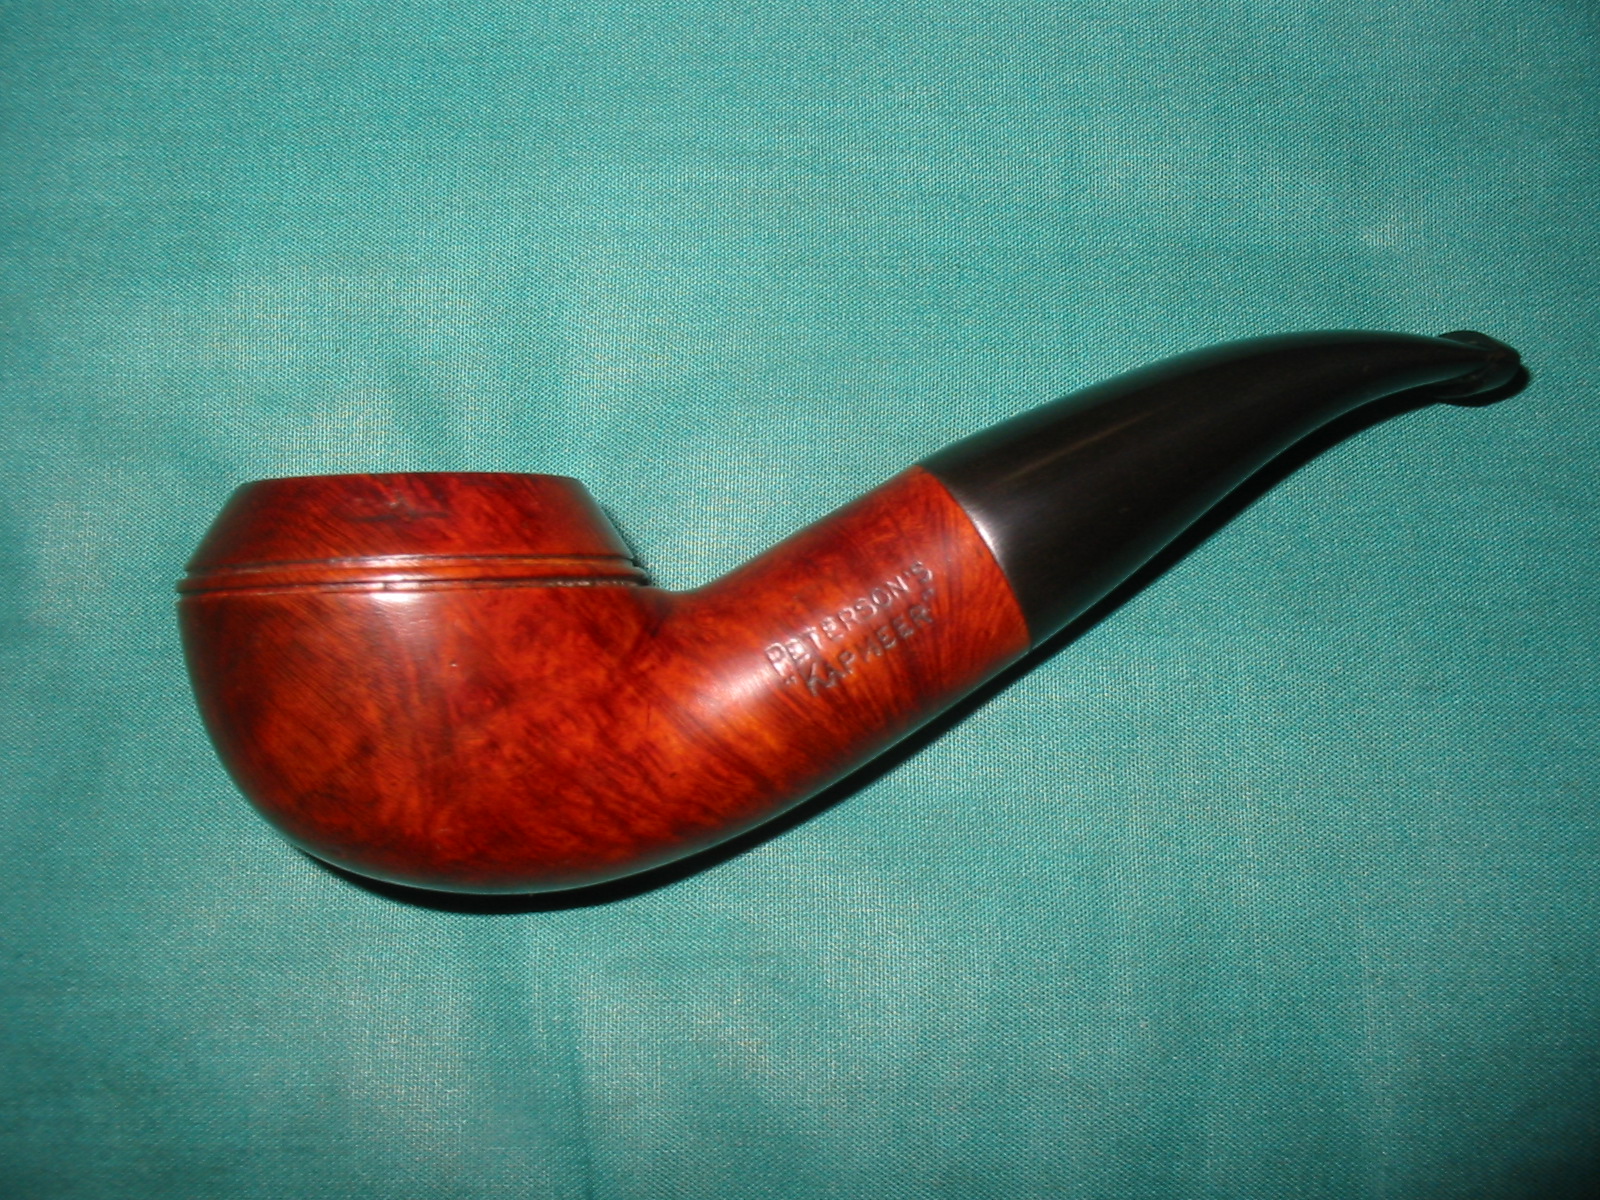
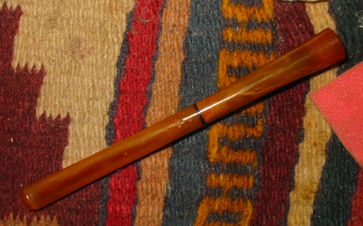
 For comparison sake, I have included a photo of the newly reworked KAPMEER with the earlier KILDARE that I restemmed from a piece of Cumberland rodstock that I purchased from Todd Bannard of Briar, Sweat and Tears Pipes http://www.briarsweatandtears.com/ . Todd cut the length and did the drilling and shaping on that piece before sending it to me to finish. As you can see both have the thicker old style shanks that are no longer used on Peterson 999 pipes. This pipe is the third one that I have from that earlier time period. It is the shape of the 999s that I favour.
Blog by Steve Laug
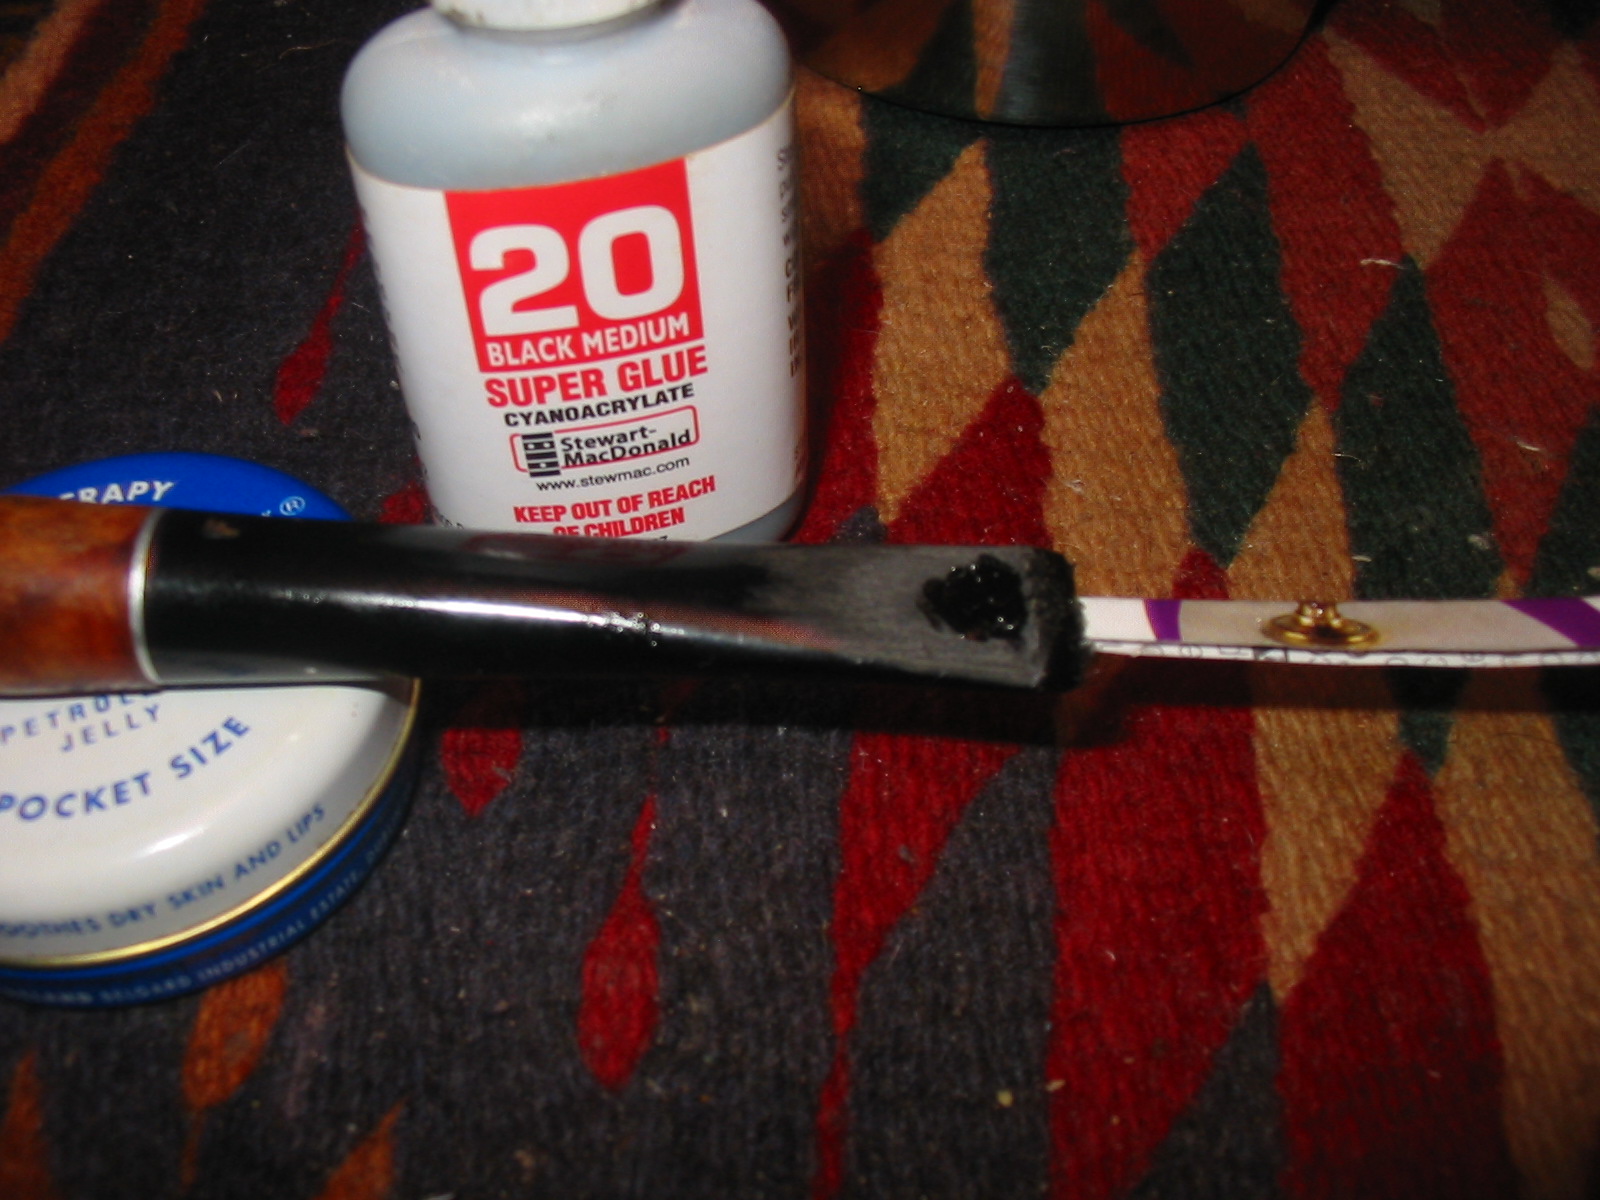
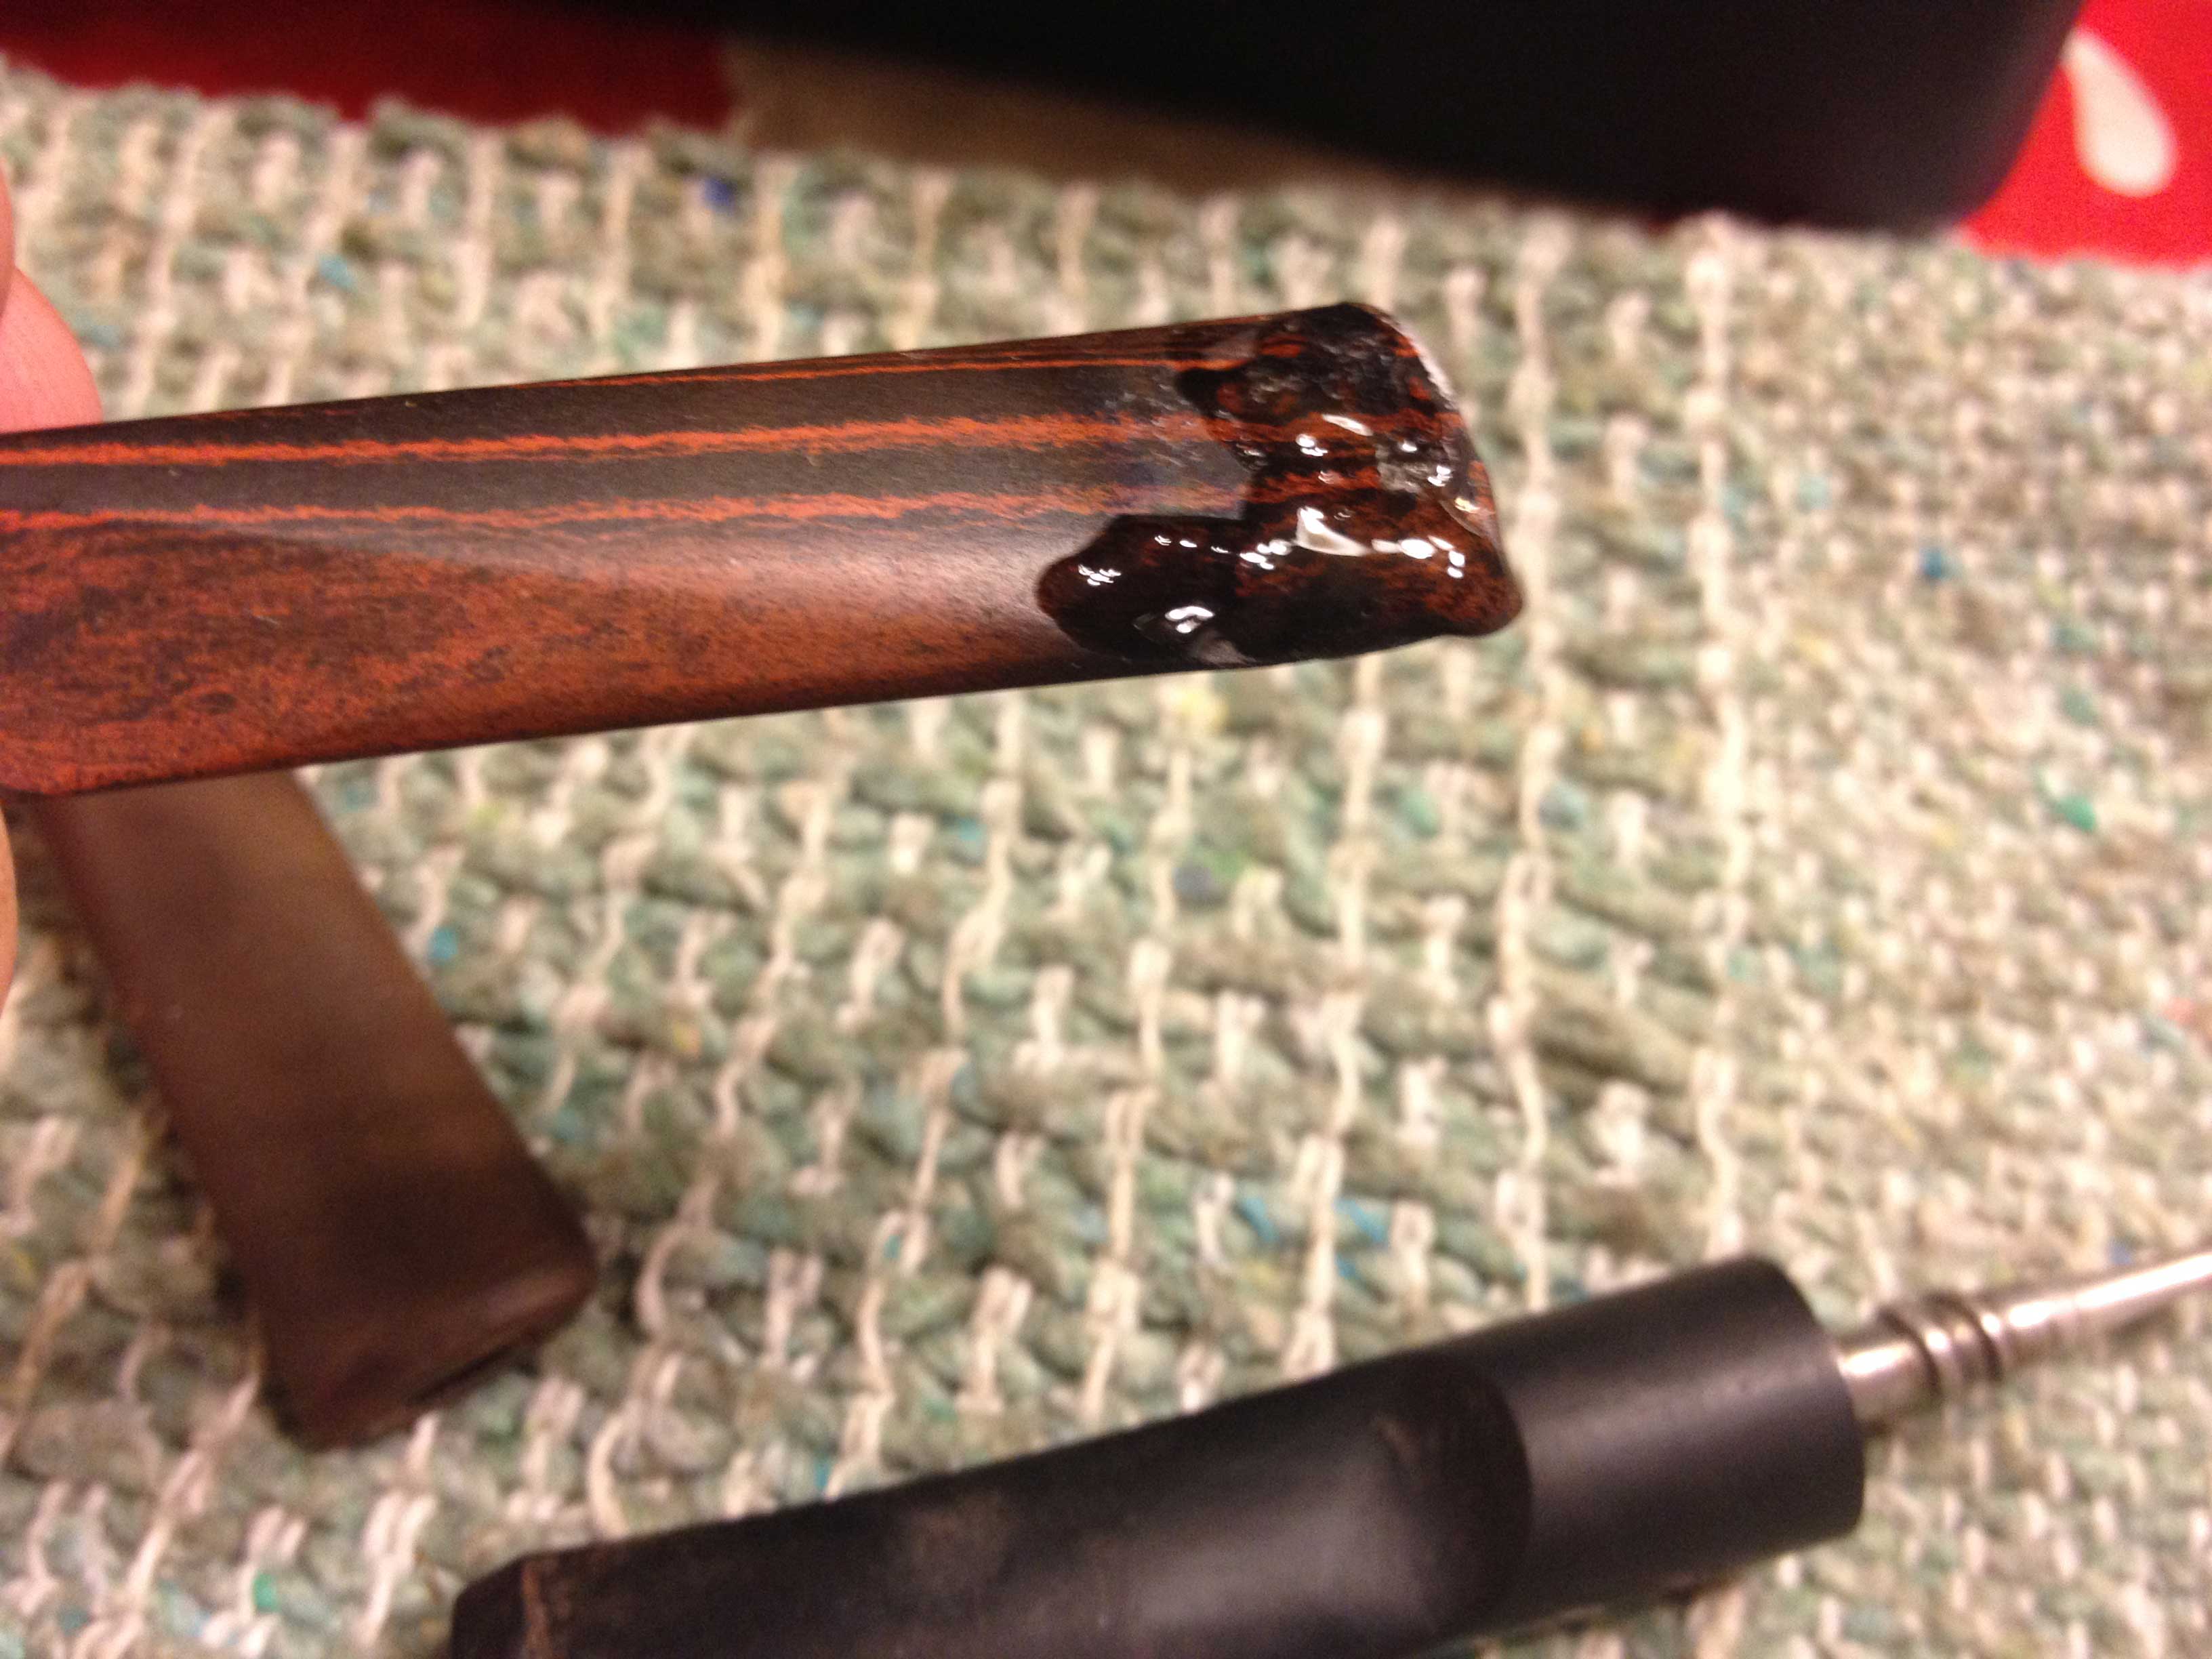
With all of the blog posts recently on repairing stems I decided to do a little work on one I had here. I wanted to use a black superglue and carbon mixture to see what I could do with this seriously damaged stem. It was a Medico pipe stem bearing the stamping F. The F stamping is a Medico brand mark but this stem was a different diameter than the shank of the pipe that it had come attached to so I replaced the stem on that pipe. I was left with this one and almost threw it away because the hole was large and on both sides of the stem. That combined with the fact that the stem was nylon would make it less desirable to repair for me. There were also deep tooth marks all around the holes. But I figured it was a perfect stem to do experiments on so went ahead with the repairs. I sanded the stem with 220 grit sandpaper to highlight the tooth marks and the holes. The button itself had dents in it as well and the crease had been flattened.
I cleaned out the debris from the hole with a dental pick (rather than the Dremel and bur that Joyal uses) and sanded around the edges of the hole with 220 grit sandpaper. I removed all of the loose or damaged material from the hole so that the edges were solid. I sanded them to roughen the edges slightly to provide a surface for the glue to bond to. I used a cotton pad and alcohol to clean out the dust from sanding and picking. I cut a piece of cardboard the same shape as the slot in the stem and greased it with Vaseline. I slipped it into the slot. I made sure that the Vaseline did not ooze out into the hole on either side.

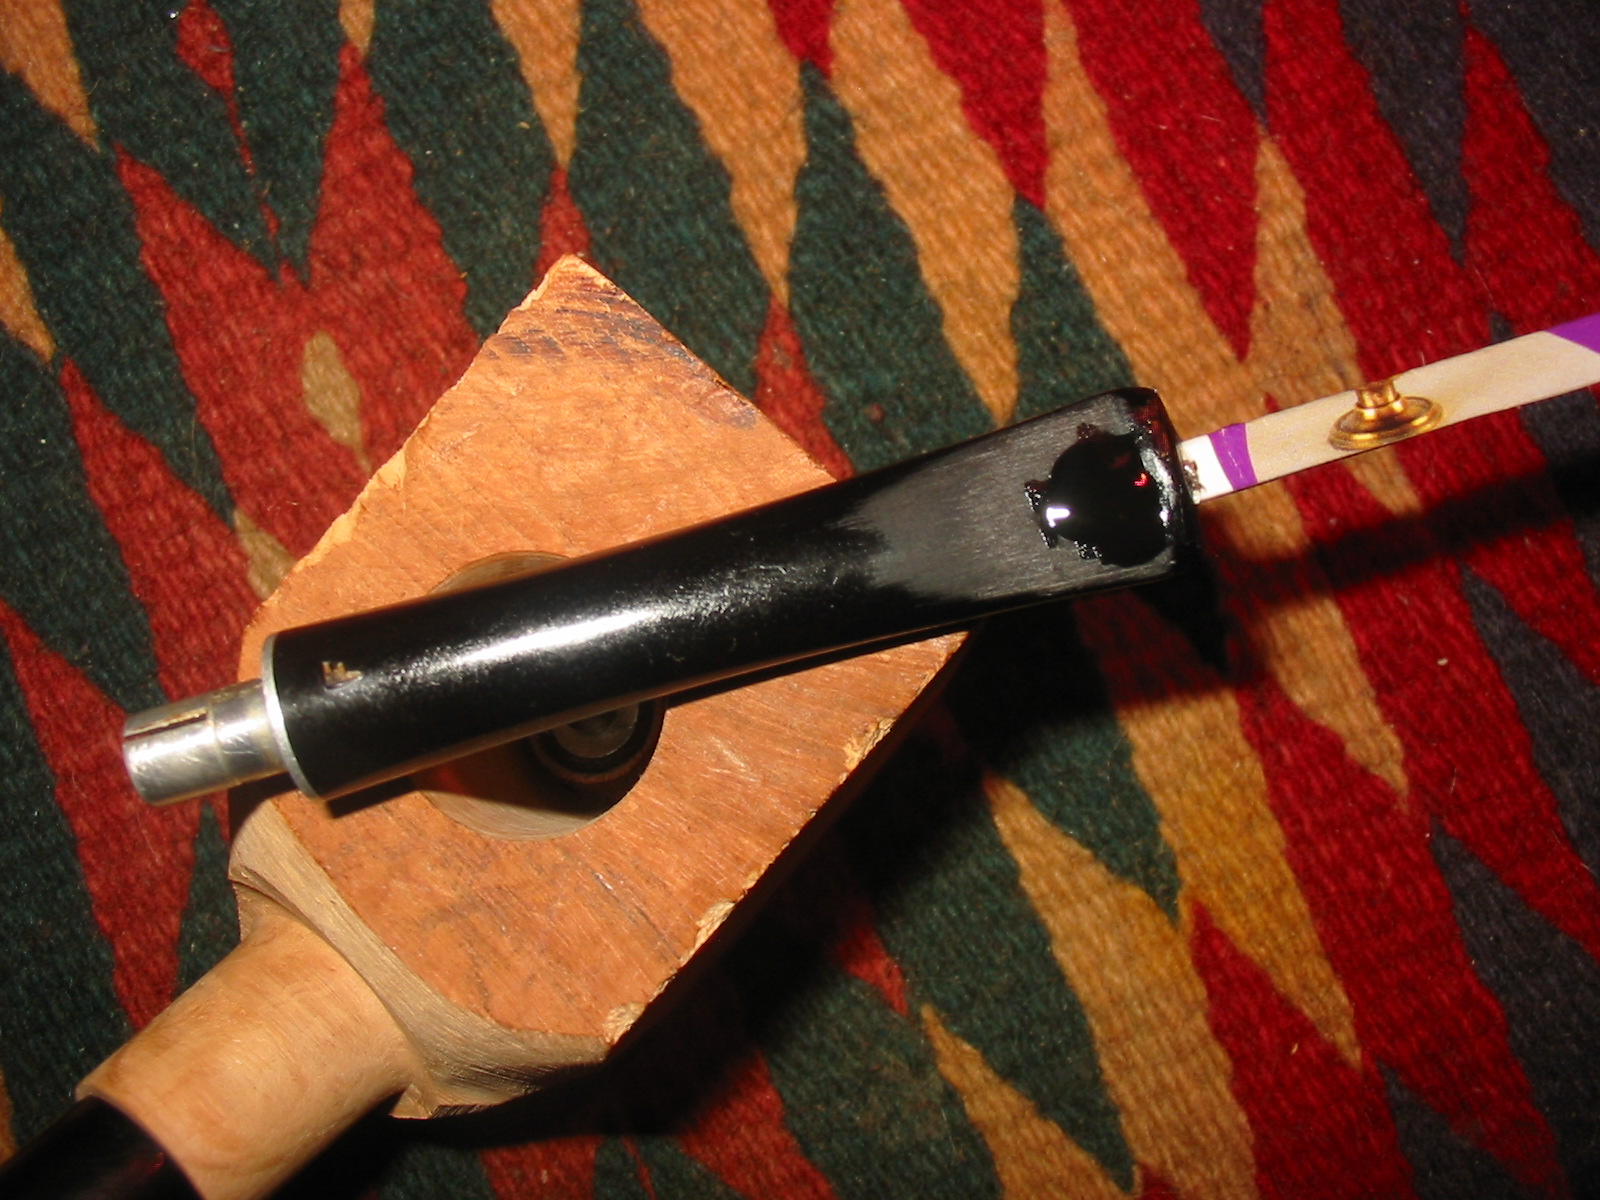
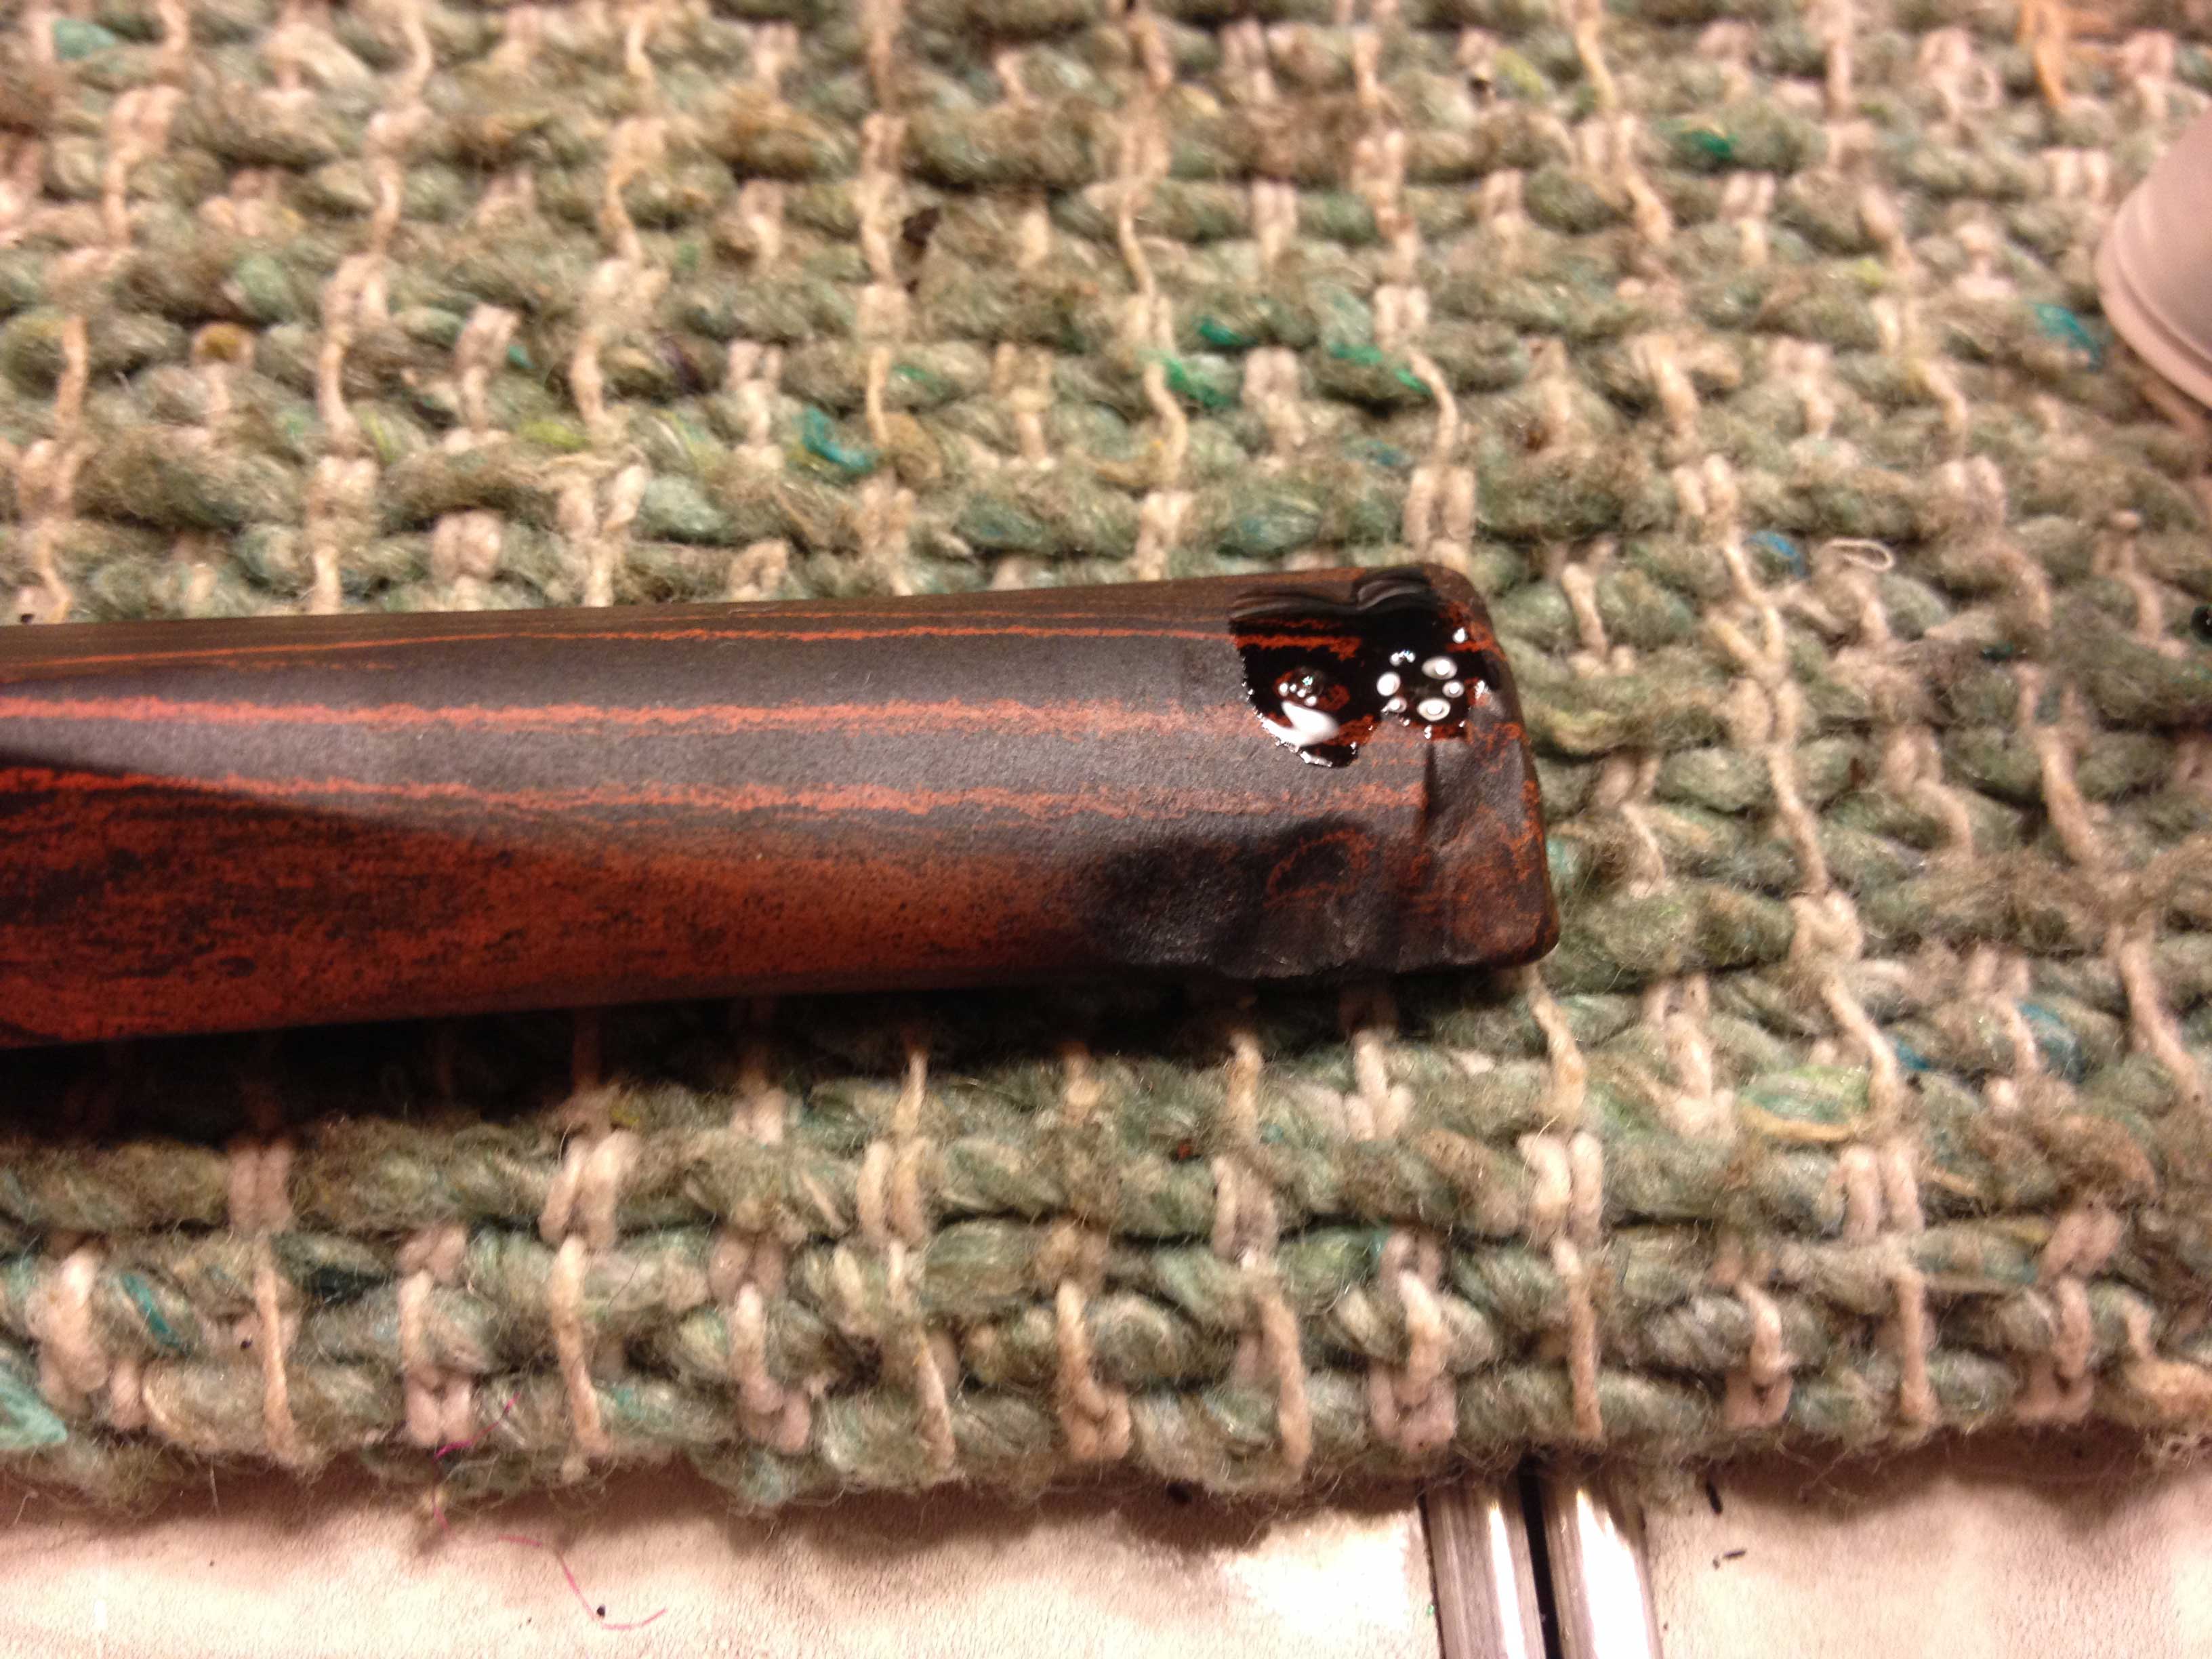
I used Stew Mac Black super glue to build up the edges of the holes. I find that I get a much stronger patch/repair if I slowly build up the patch with multiple layers of the glue. I mixed in some carbon powder taken from a charcoal digestive capsule. I put the glue on the edges of the hole; mixed in the carbon and then more glue more carbon to build the first layer. The next series of four photos show the gradual build up of the glue and carbon. The glue was allowed to cure over night between each layer of the repair. I sanded lightly between the layers to roughen the surface of the patch and smooth out some of the pitting. I find that doing so provides a surface for the new layer to bond to.
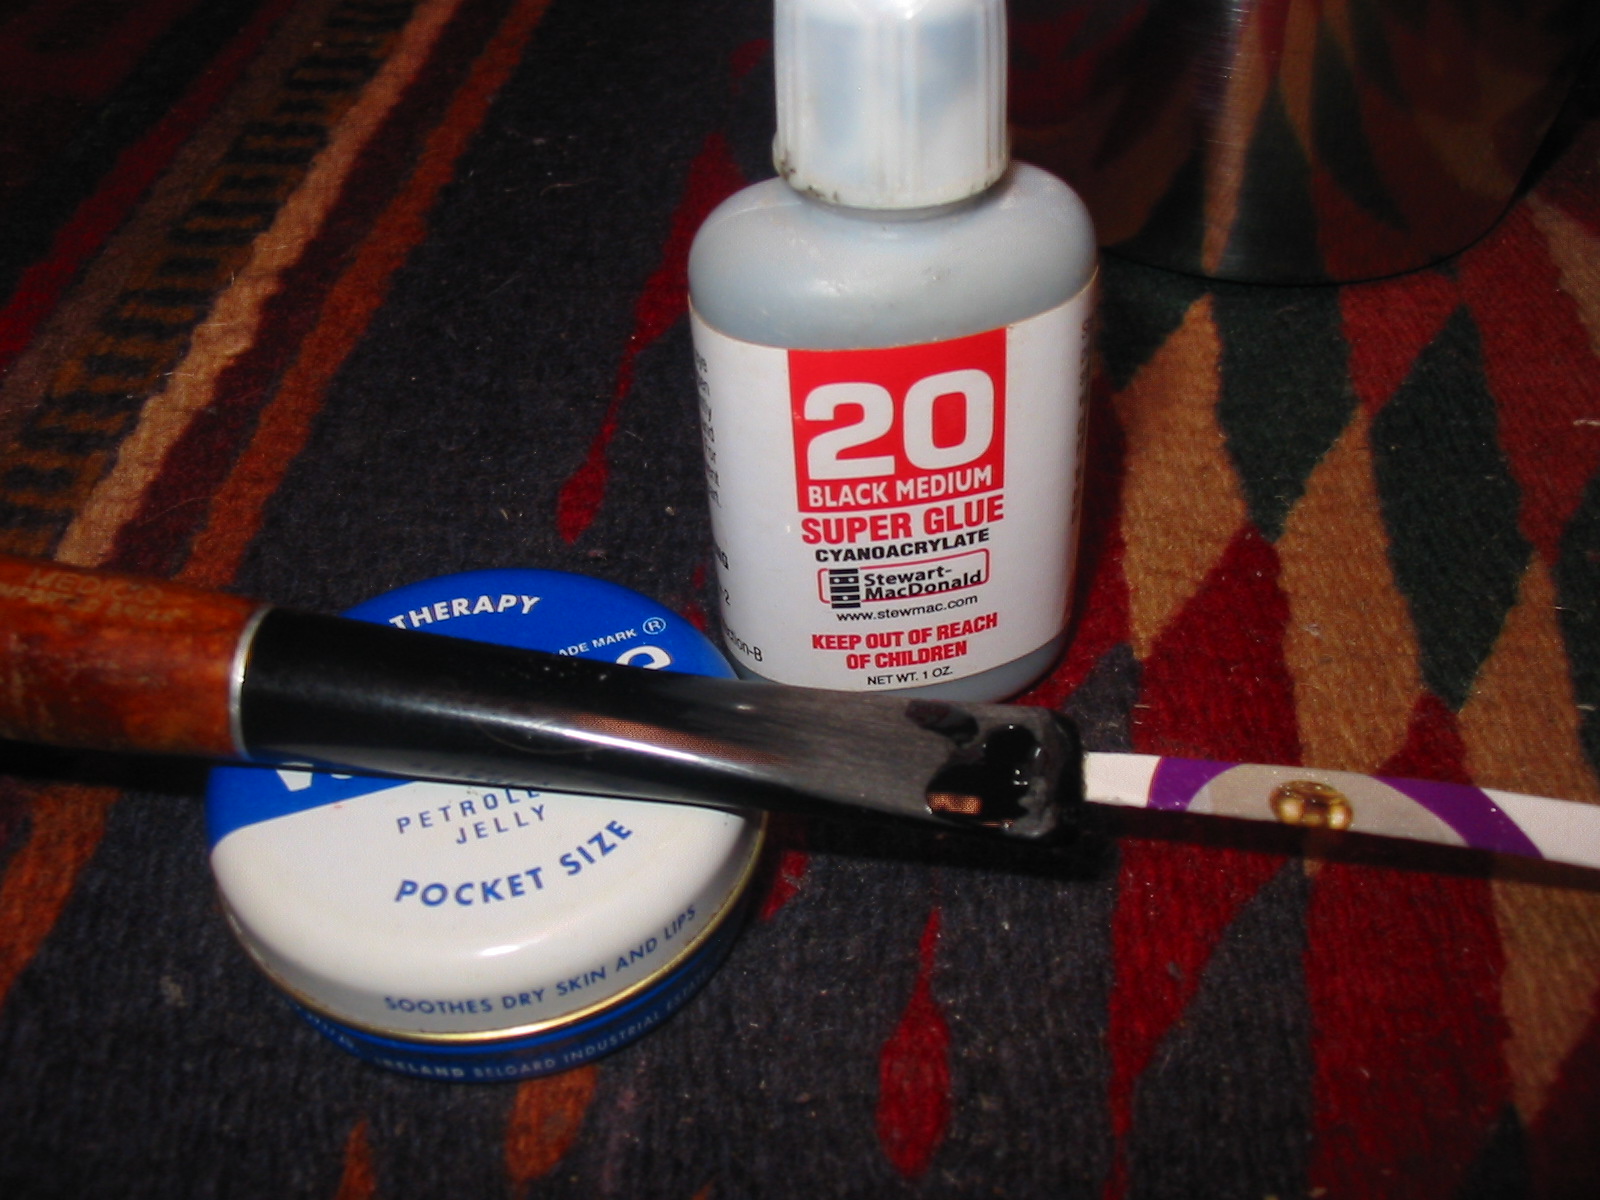

Once the patch had thoroughly cured and hardened I sanded it. I test the hardness by pressing a fingernail into the patch. If it is not hard I let it sit longer. Once it is hard I sanded it with 220 grit sandpaper to smooth out the patch. I used a small needle file to redefine the edge of the crease. Nylon turns white when sanded and so did the patch fortunately. The patch was slightly darker than the stem at this point but would blend in with further sanding.
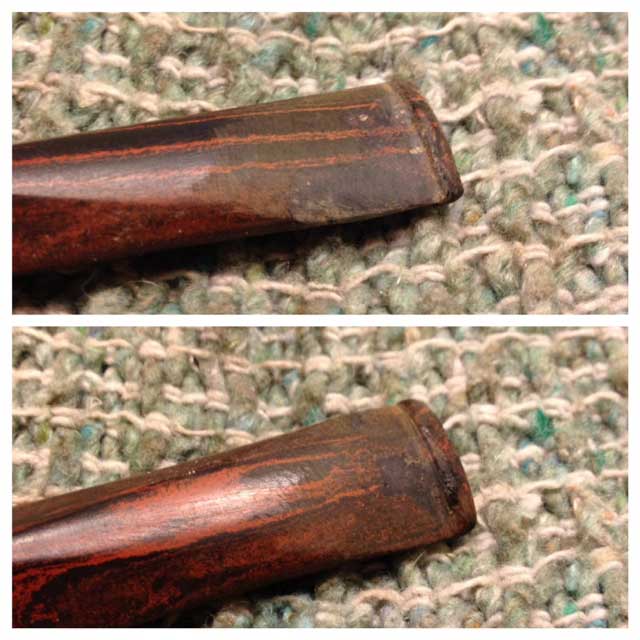
I sanded the stem with a medium and fine grit sanding sponge to remove the scratches. I further redefined the crease to sharpen it. The repairs are visible in the photos as slightly darker than the stem colour at this point.
In the process of the sanding I noticed that the dents in the button itself were not filled enough so I cleaned them out and filled them with black super glue. I also used black super glue to refill some spots on the surface of the blade that seemed to be pitted after the sanding. I sanded these after they were dry using 220 grit sandpaper followed by medium and fine grit sanding sponges. Once the surfaces were flat and smooth to my liking it was time to turn to sanding with the micromesh sanding pads. I wet sanded with 1500-2400 grit pads and dry sanded with 3200-12000 grit pads. I went back to the sanding sponges several times when I found that some of the scratches were not adequately removed. I then repeated the wet and dry sanding with the micromesh pads until the surface was shiny and smooth and the patches blended into the stem.
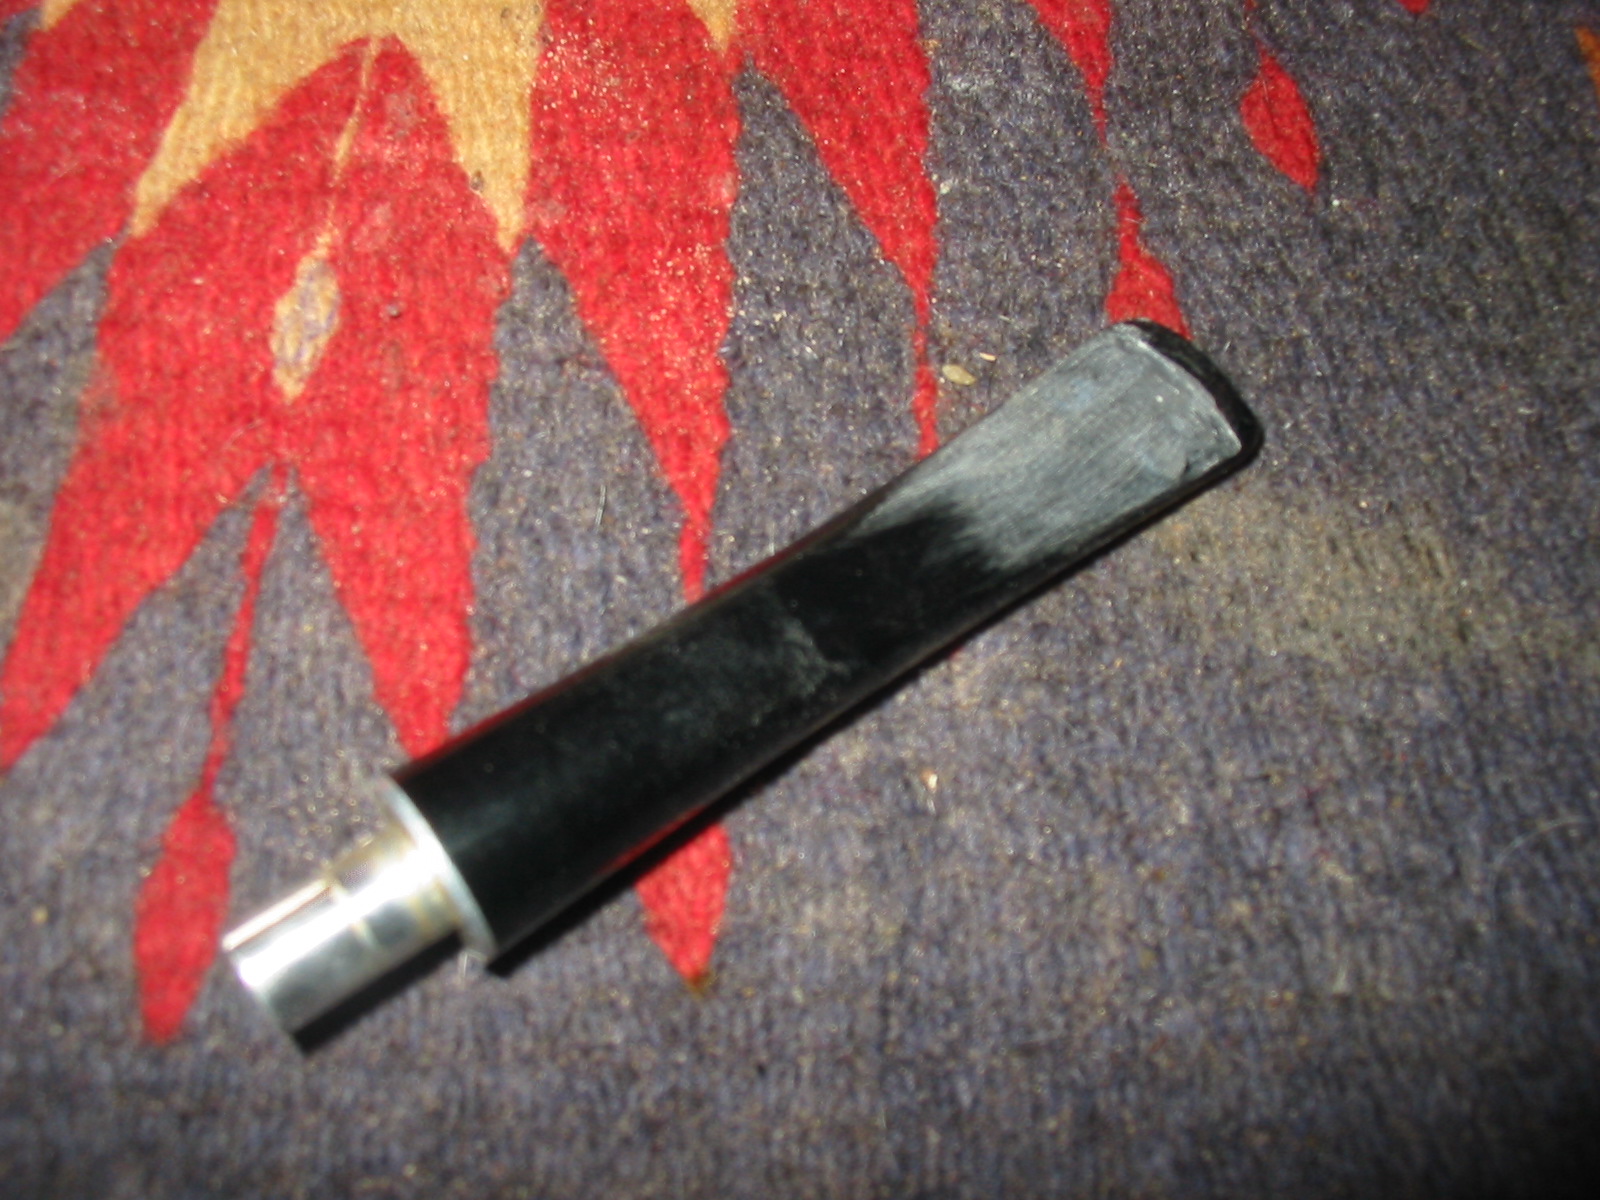
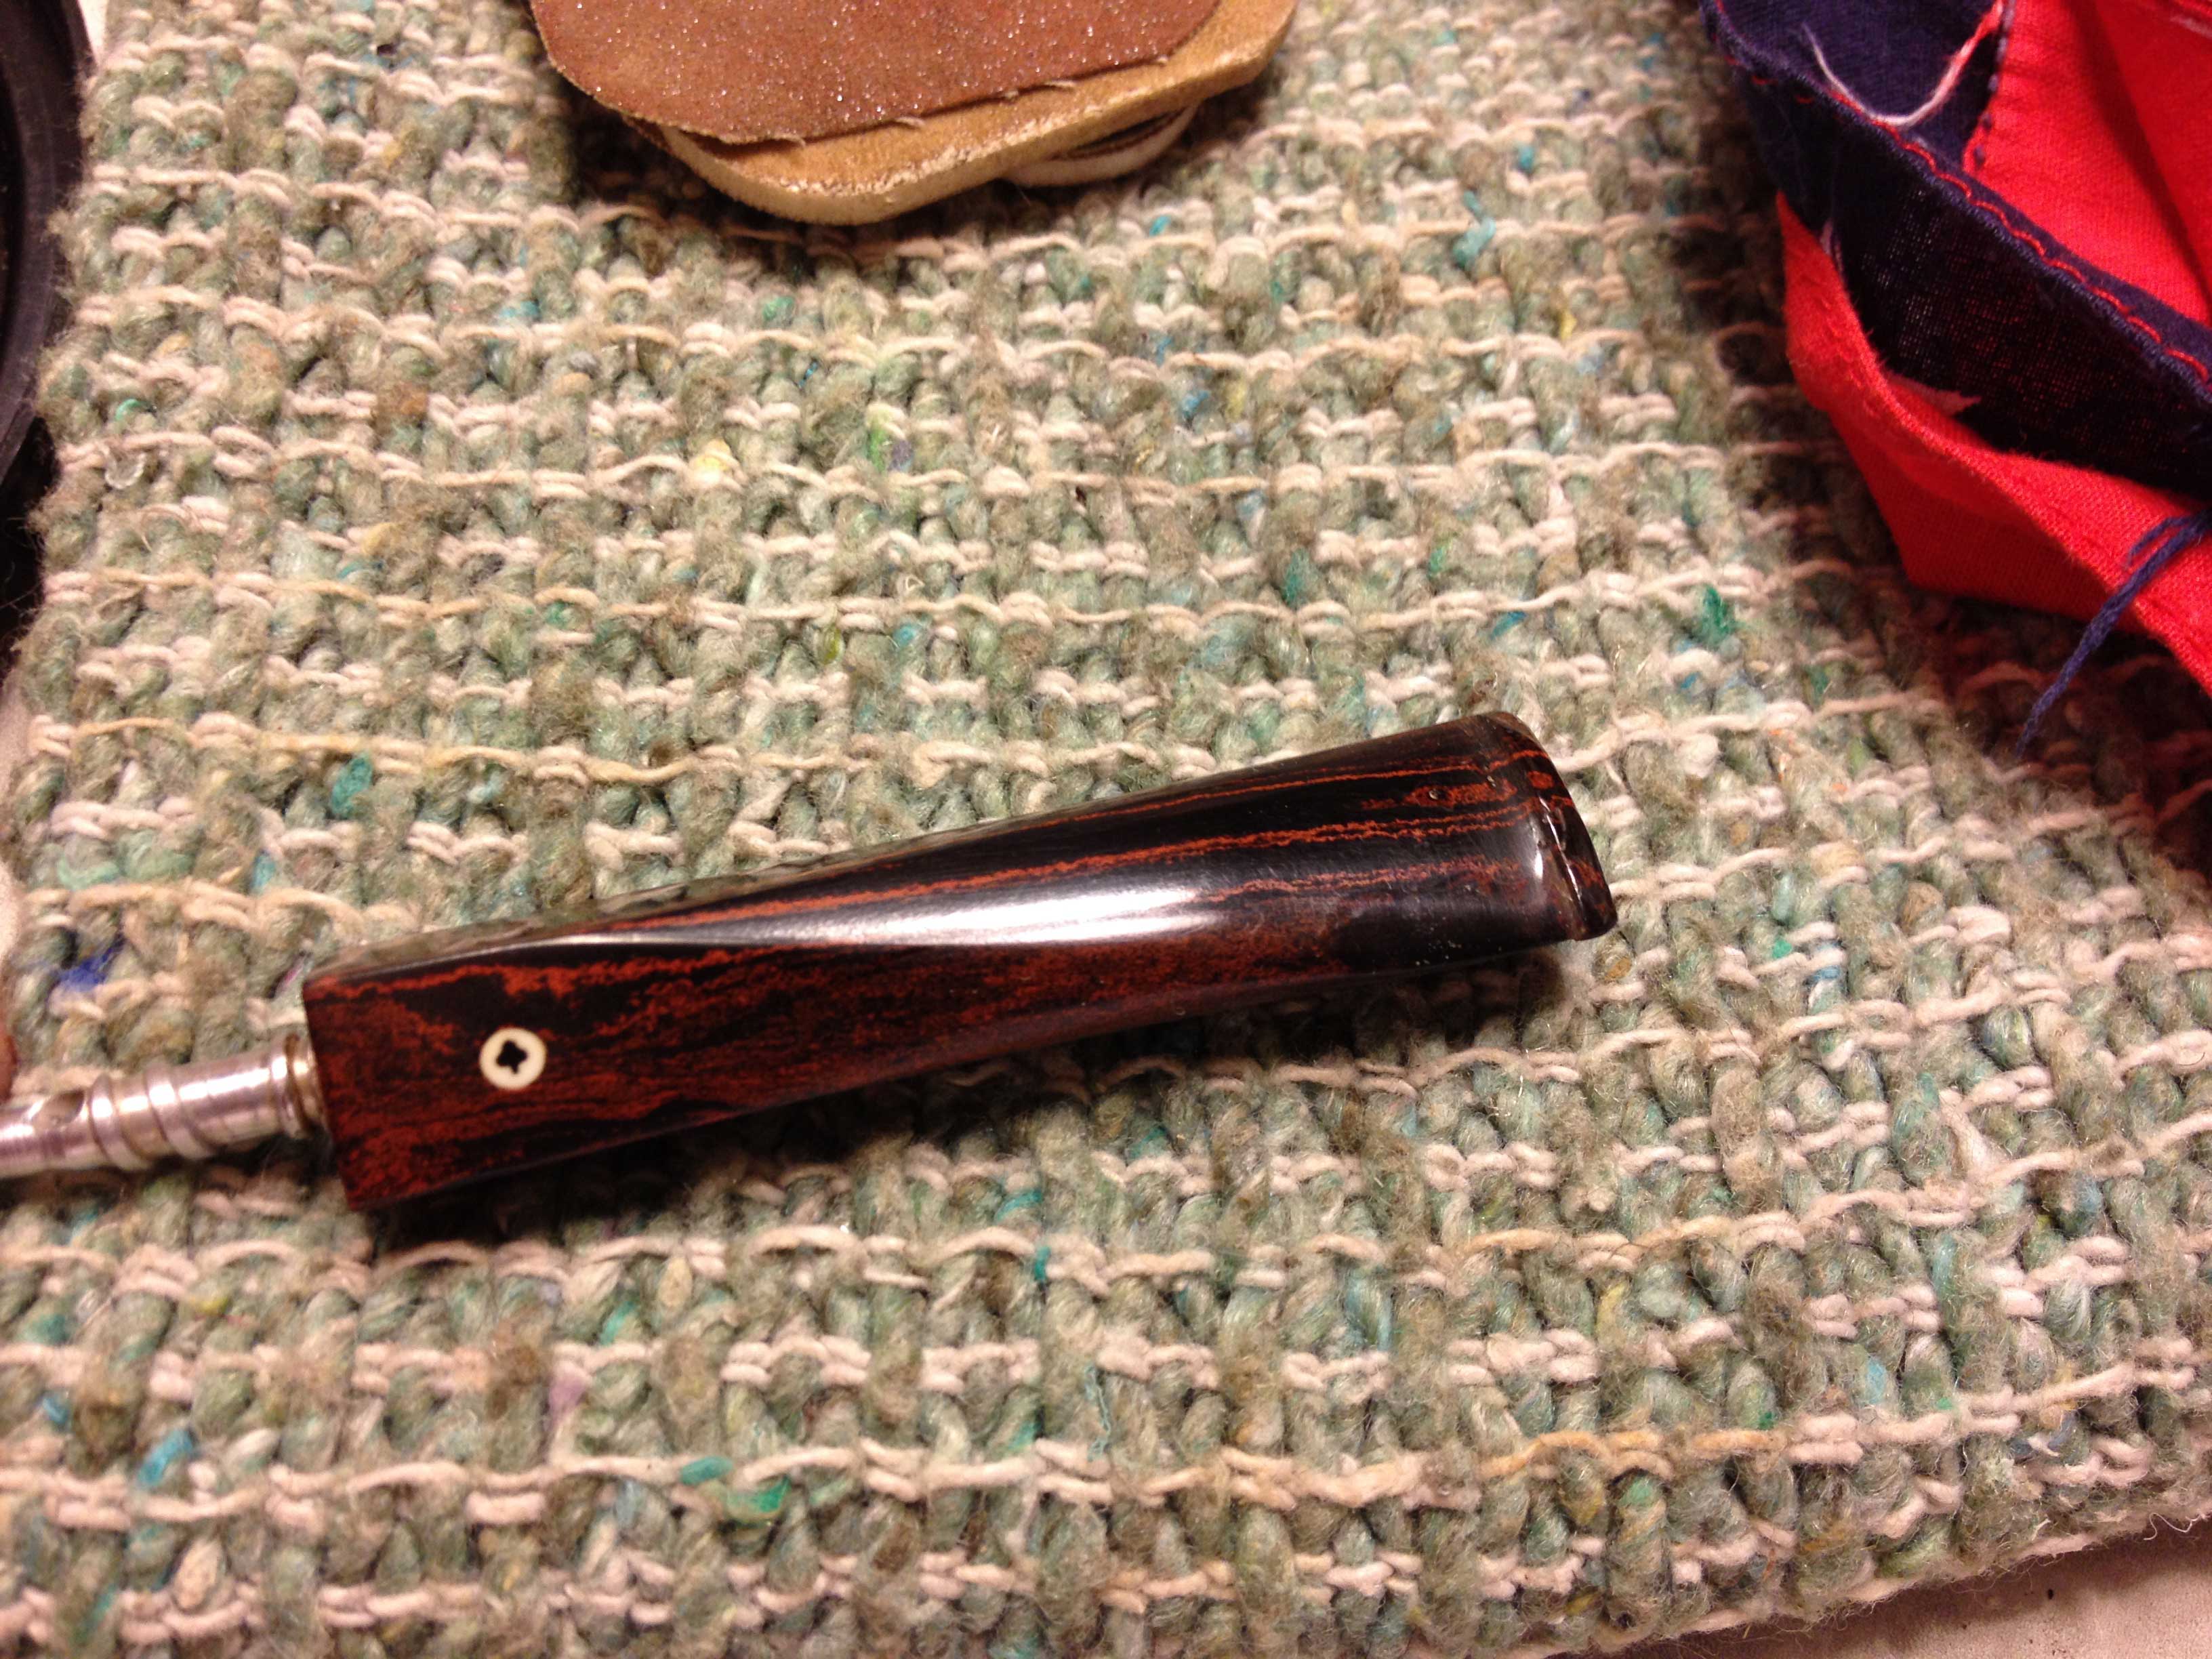
I rubbed the stem down with Obsidian Oil and when it was dry hand buffed the s tem and then resanded with the 3200-12,000 grit micromesh sanding pads.


I polished the finished stem lightly with White Diamond. You have to have a very light touch when buffing nylon as the heat the buffing creates melts the nylon and creates a mess. In this case I just lightly touched it and then gave it a light coating of carnauba wax and then hand buffed it. I gave the stem several coats of Paragon Wax and hand buffed it. The finished stem is shown in the photos below.

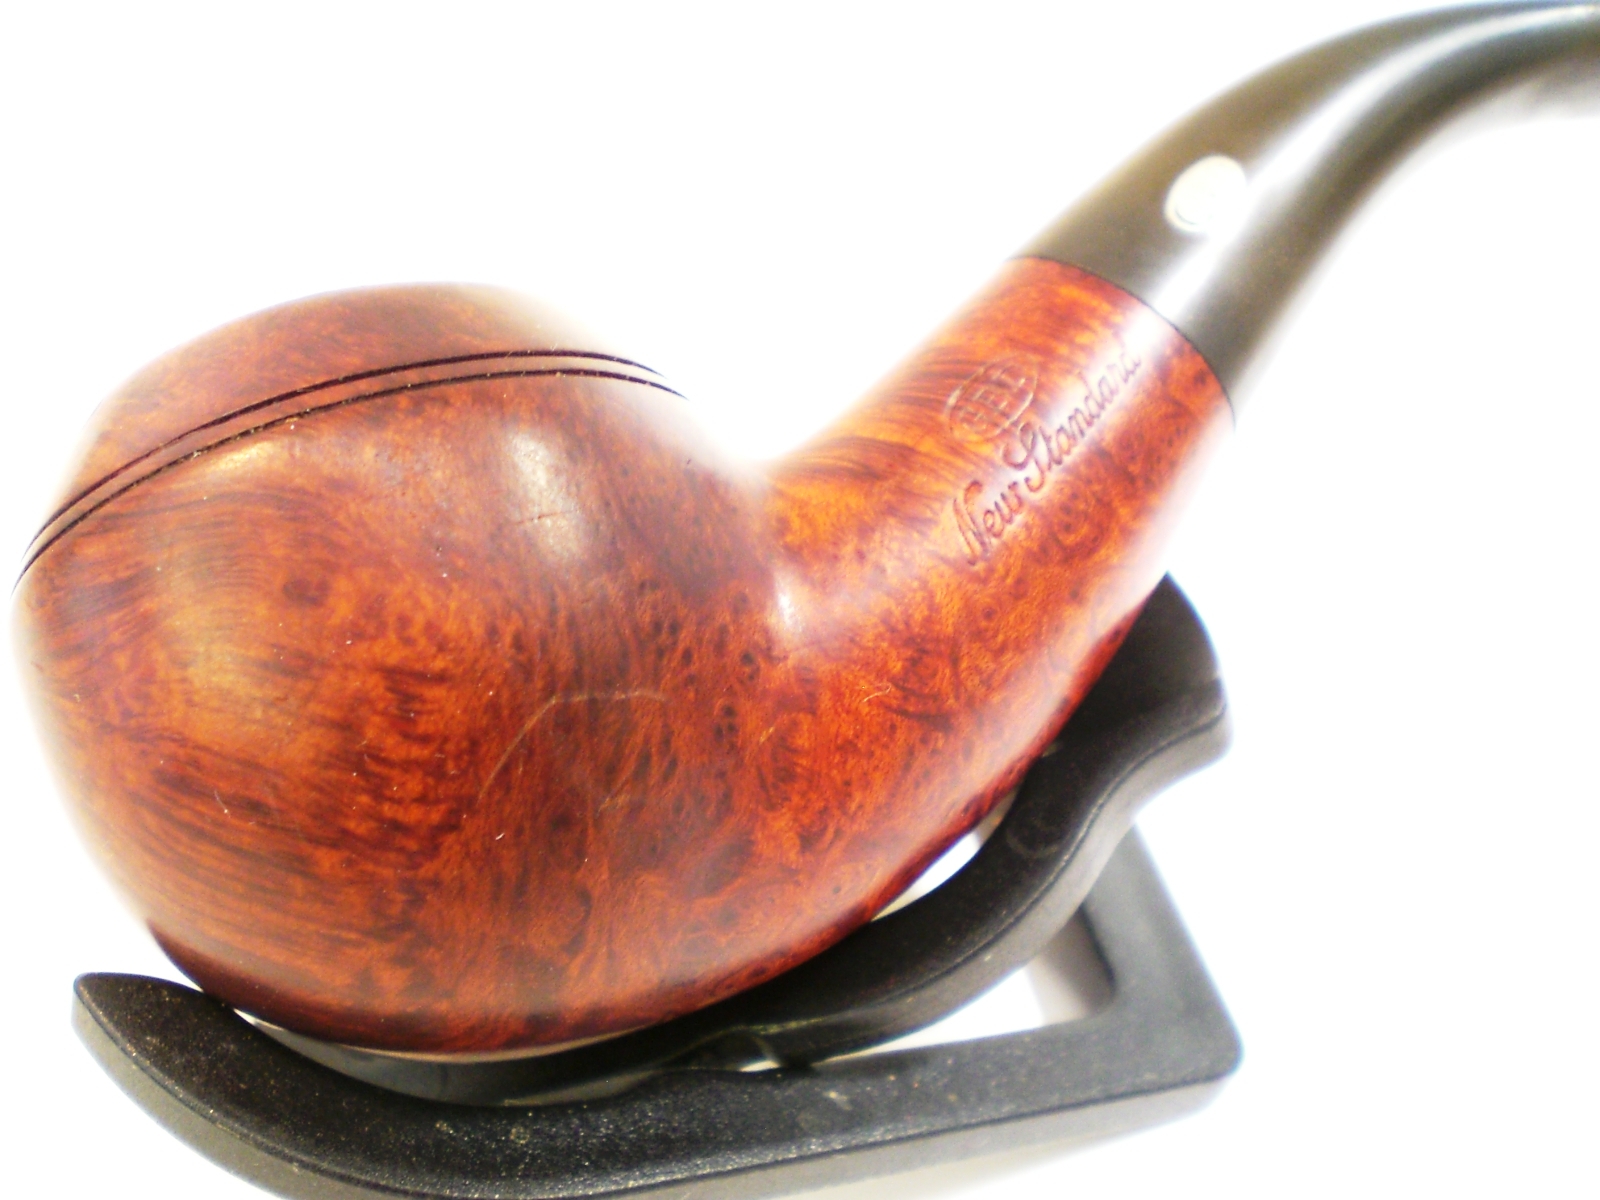
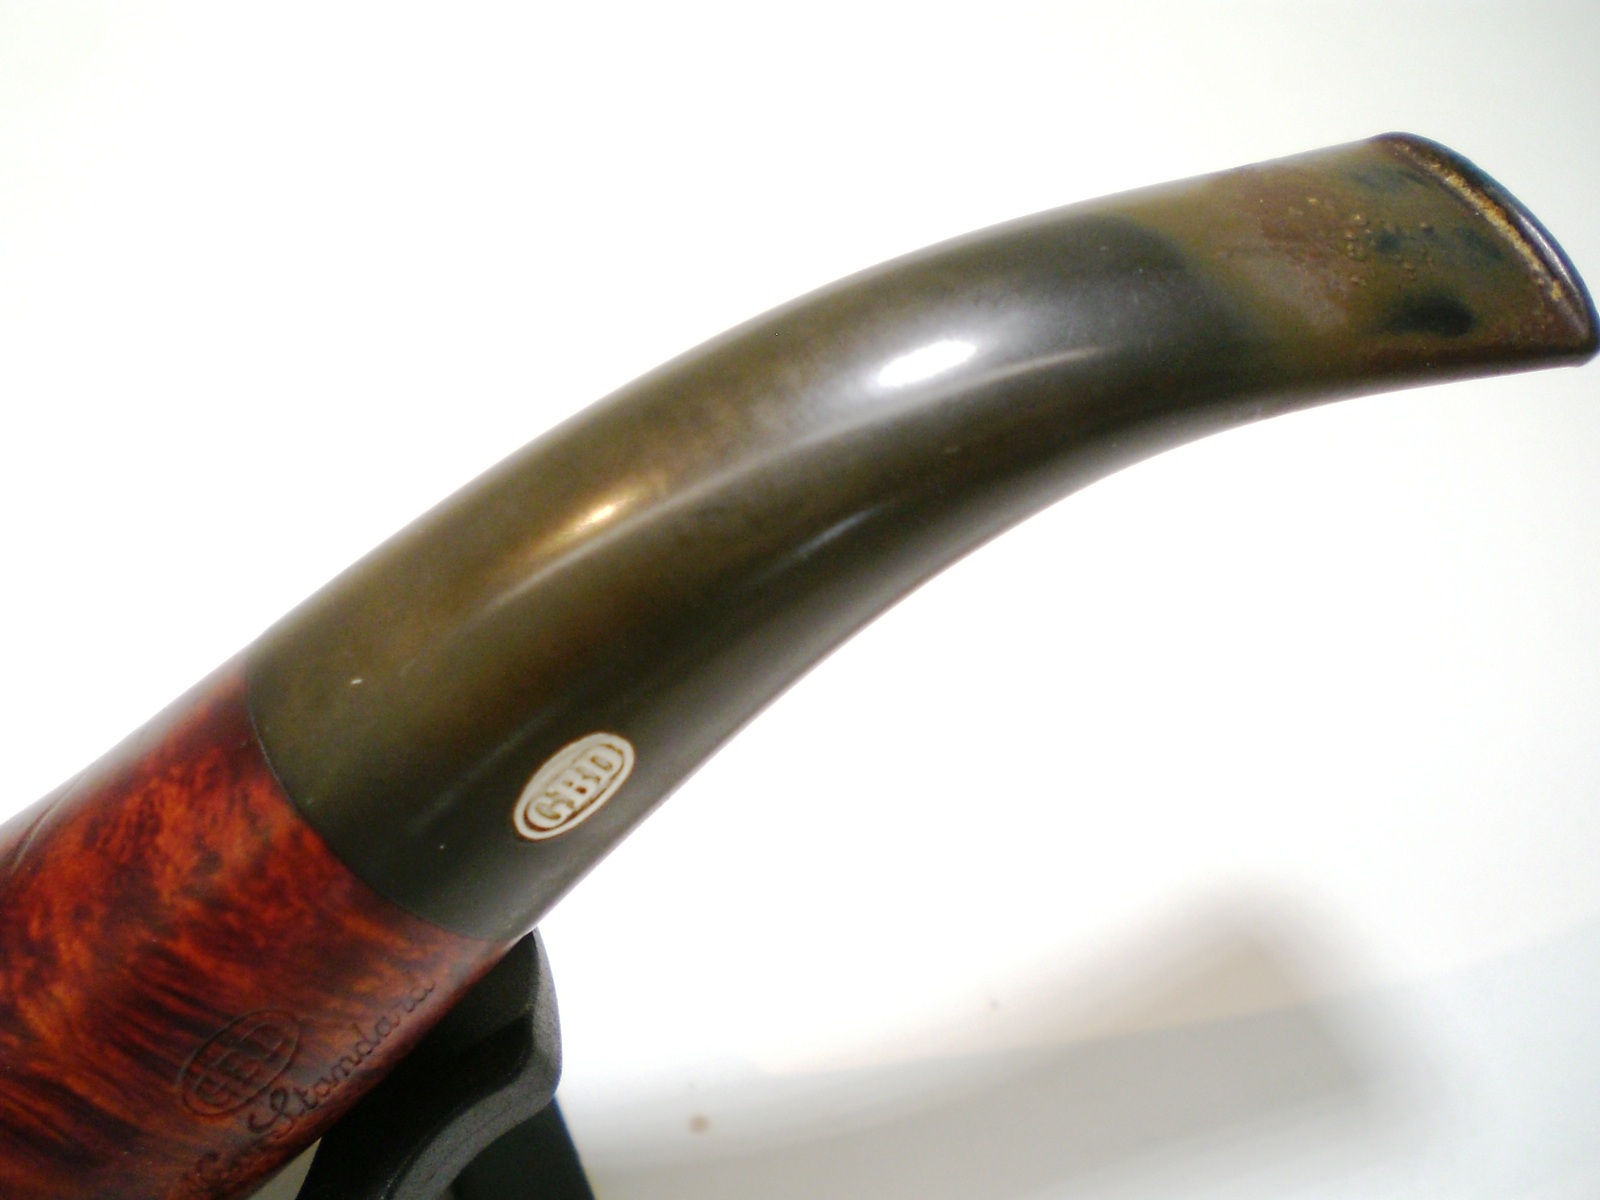
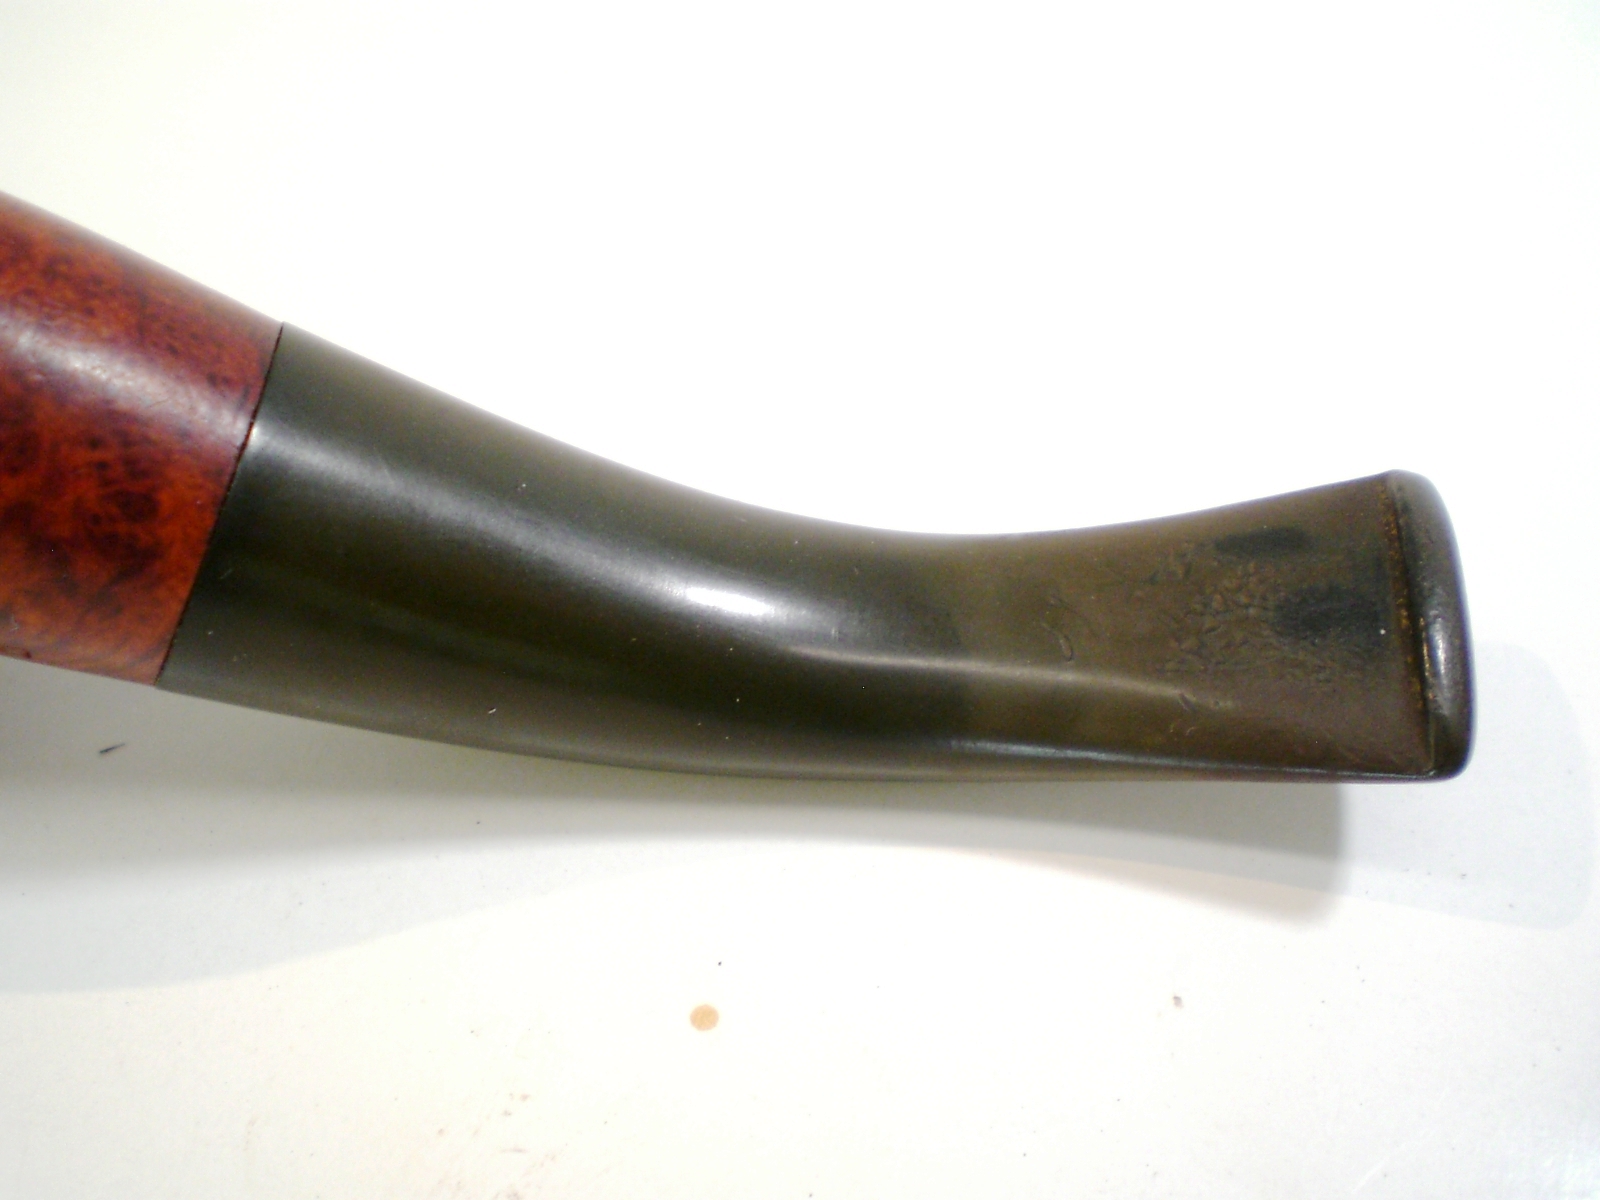
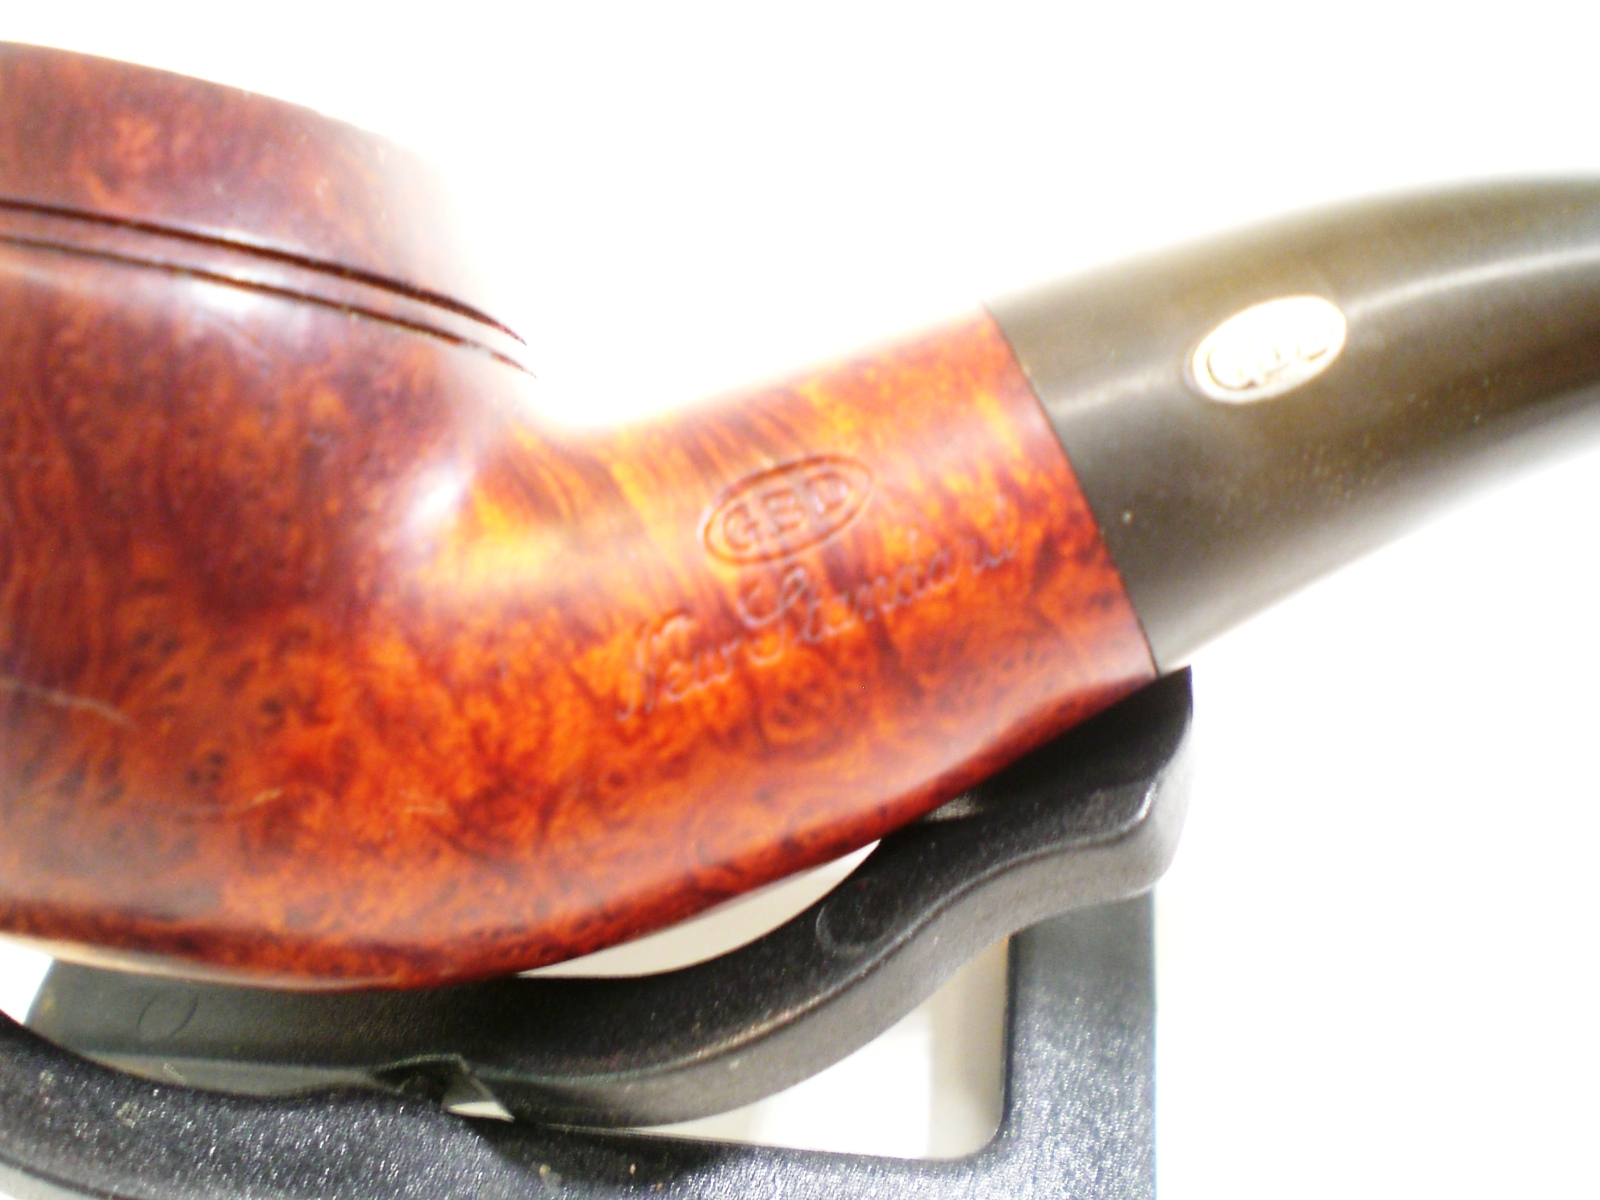
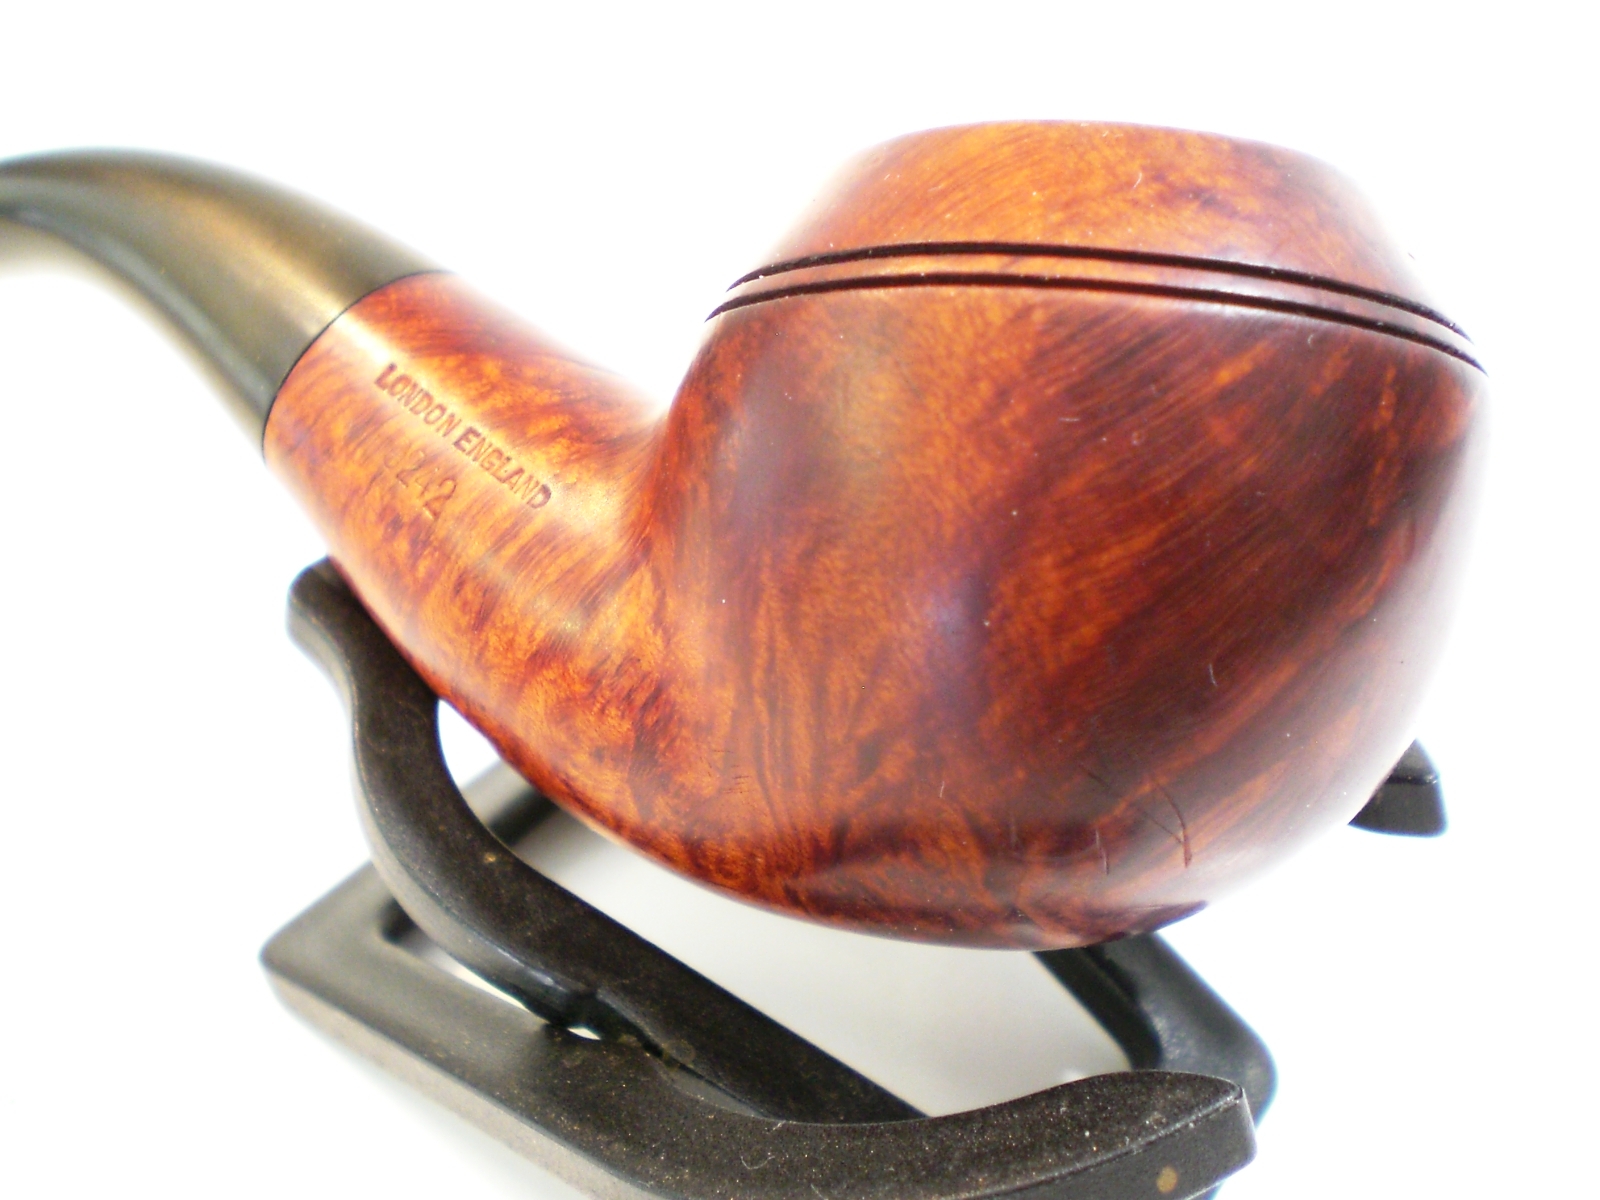
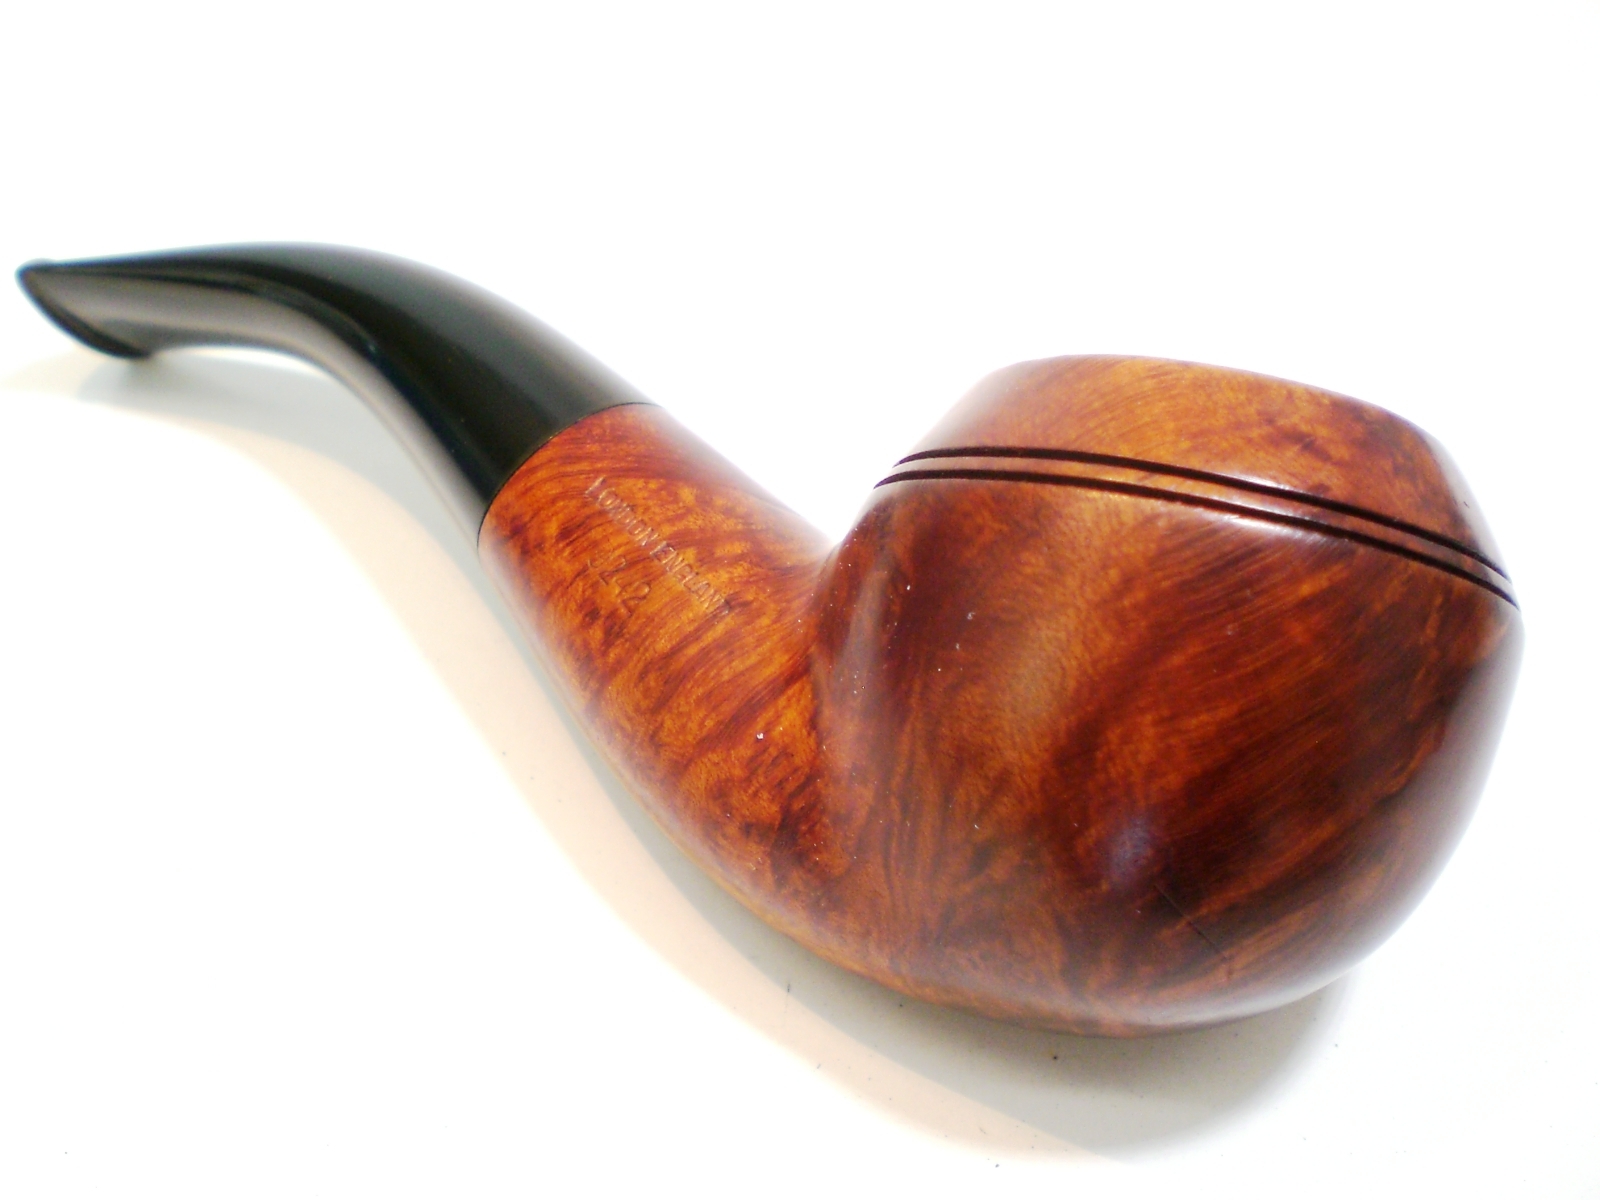
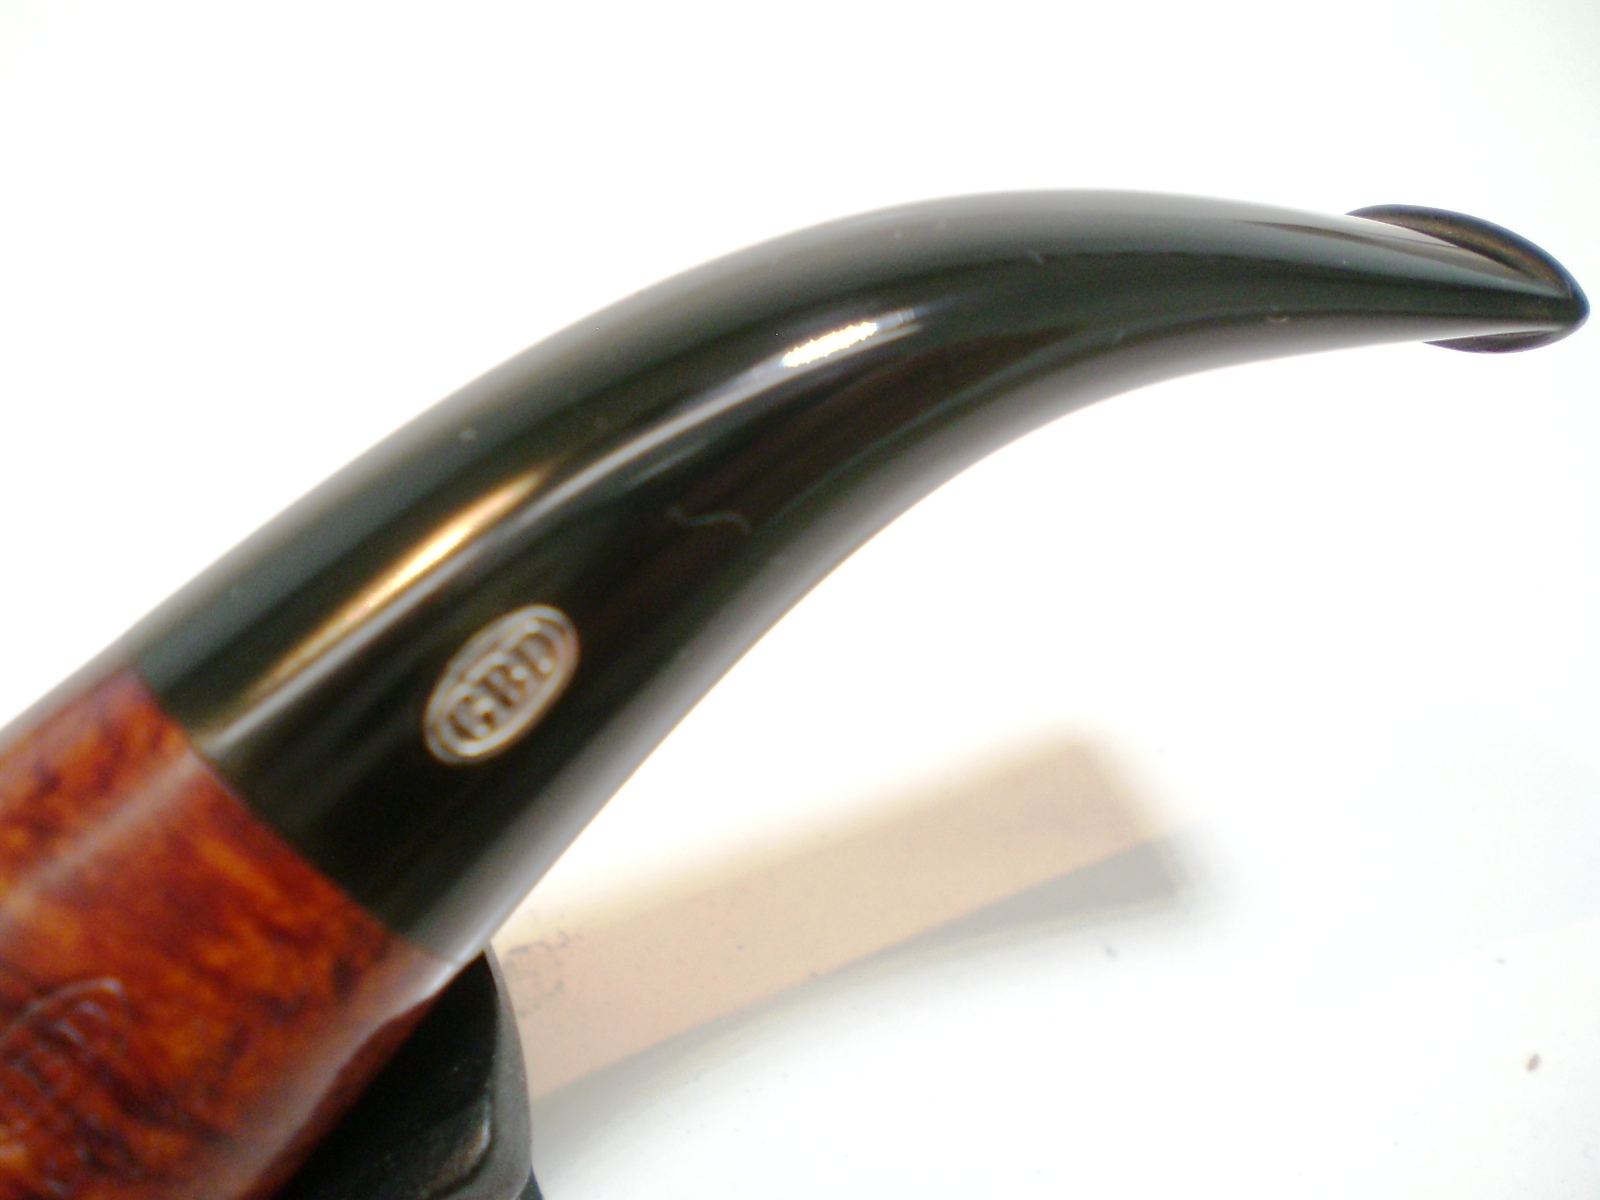
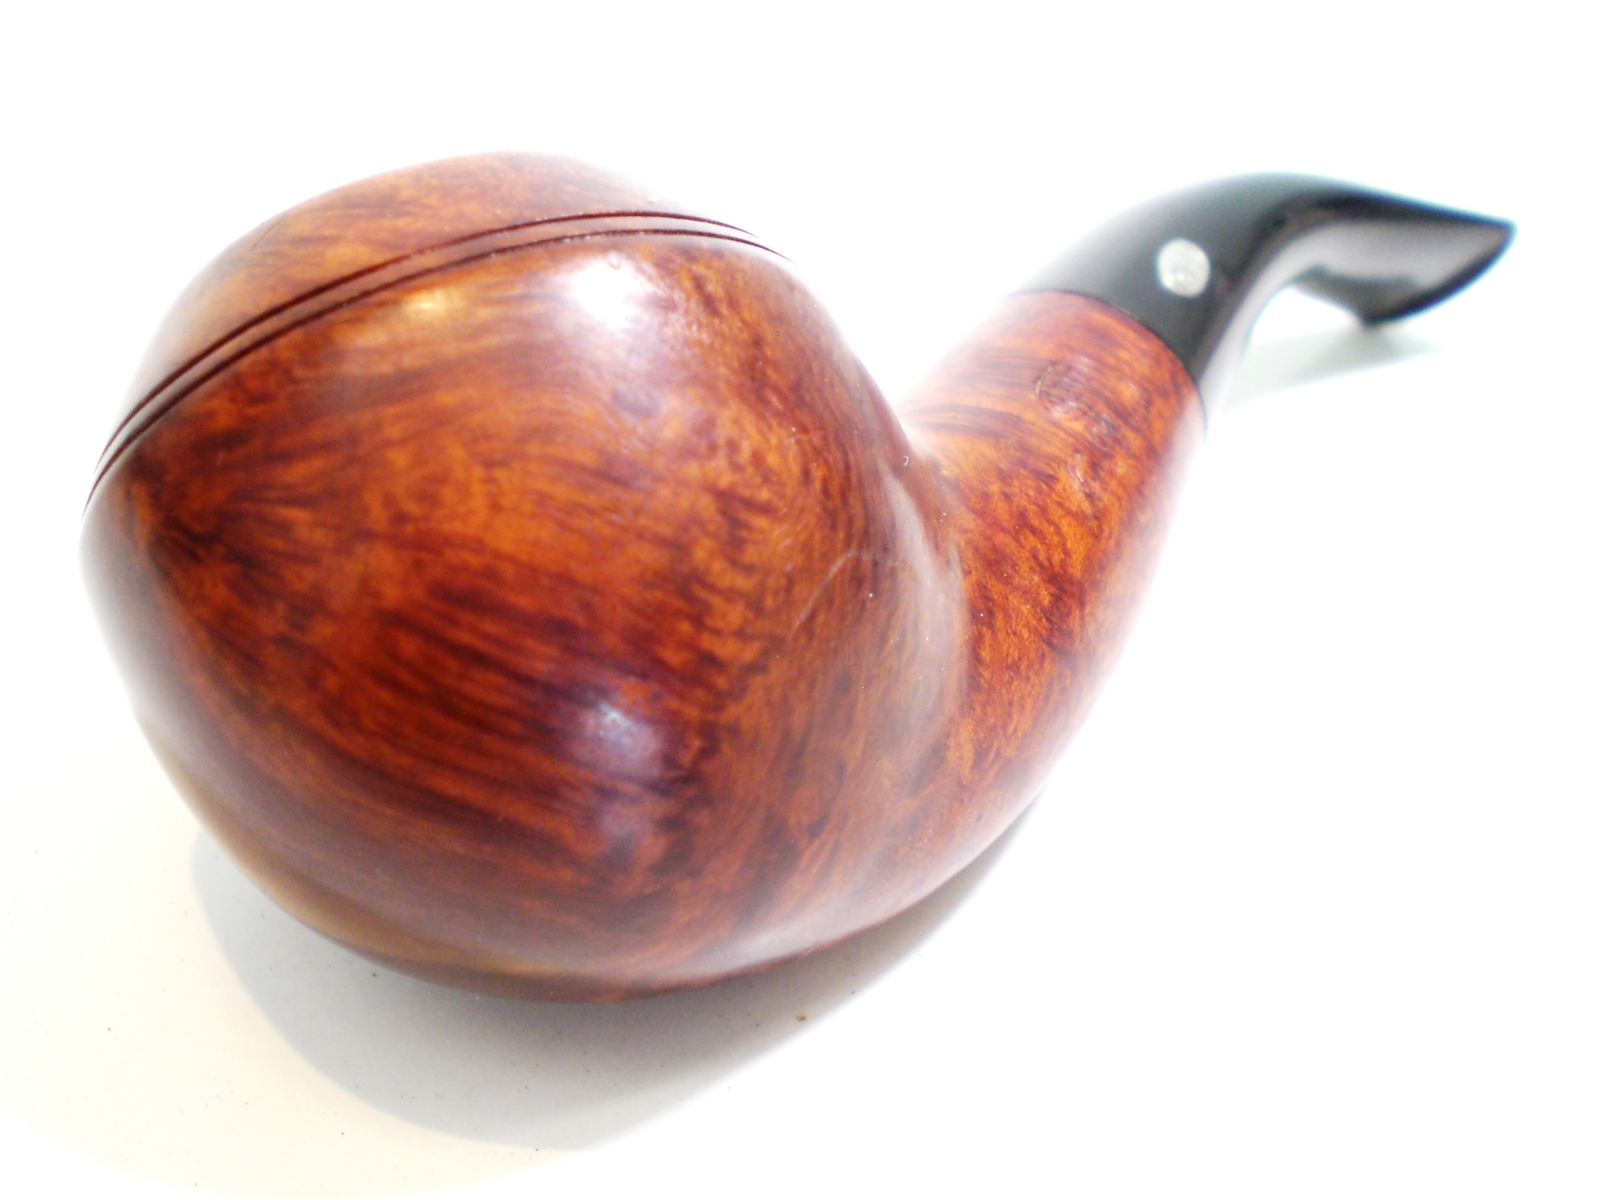
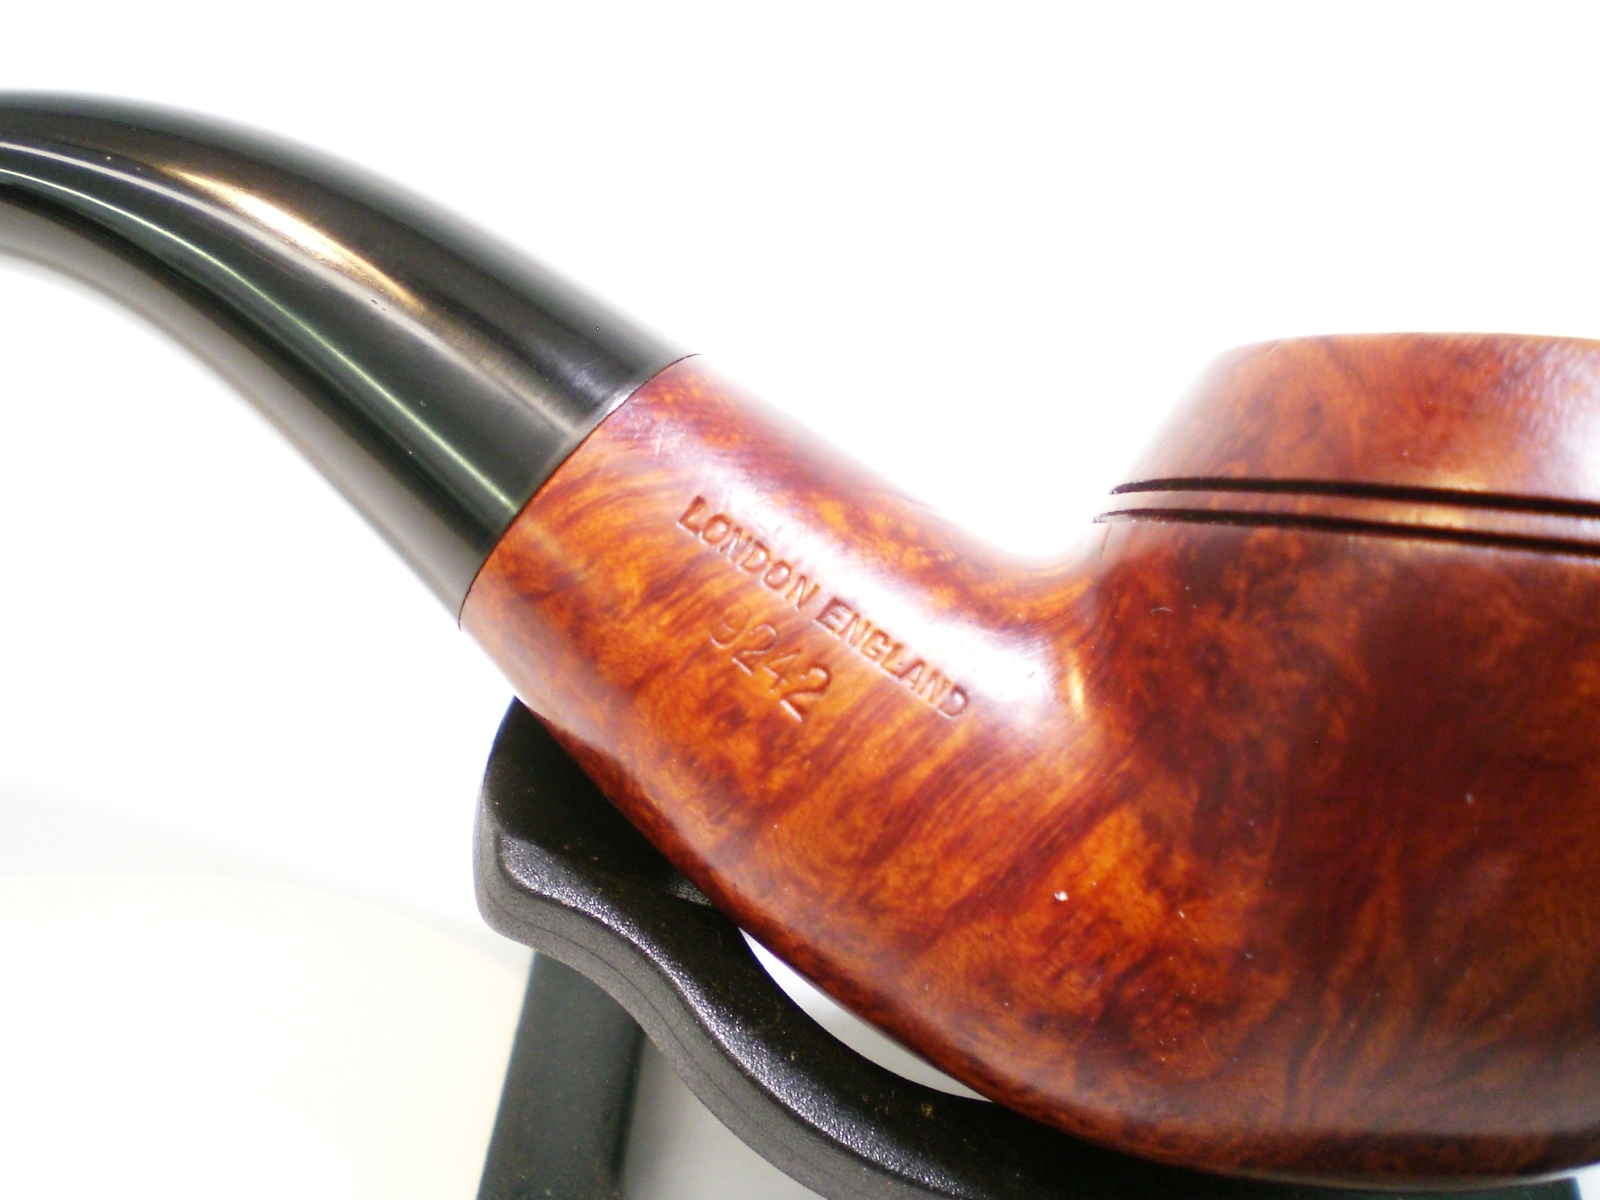
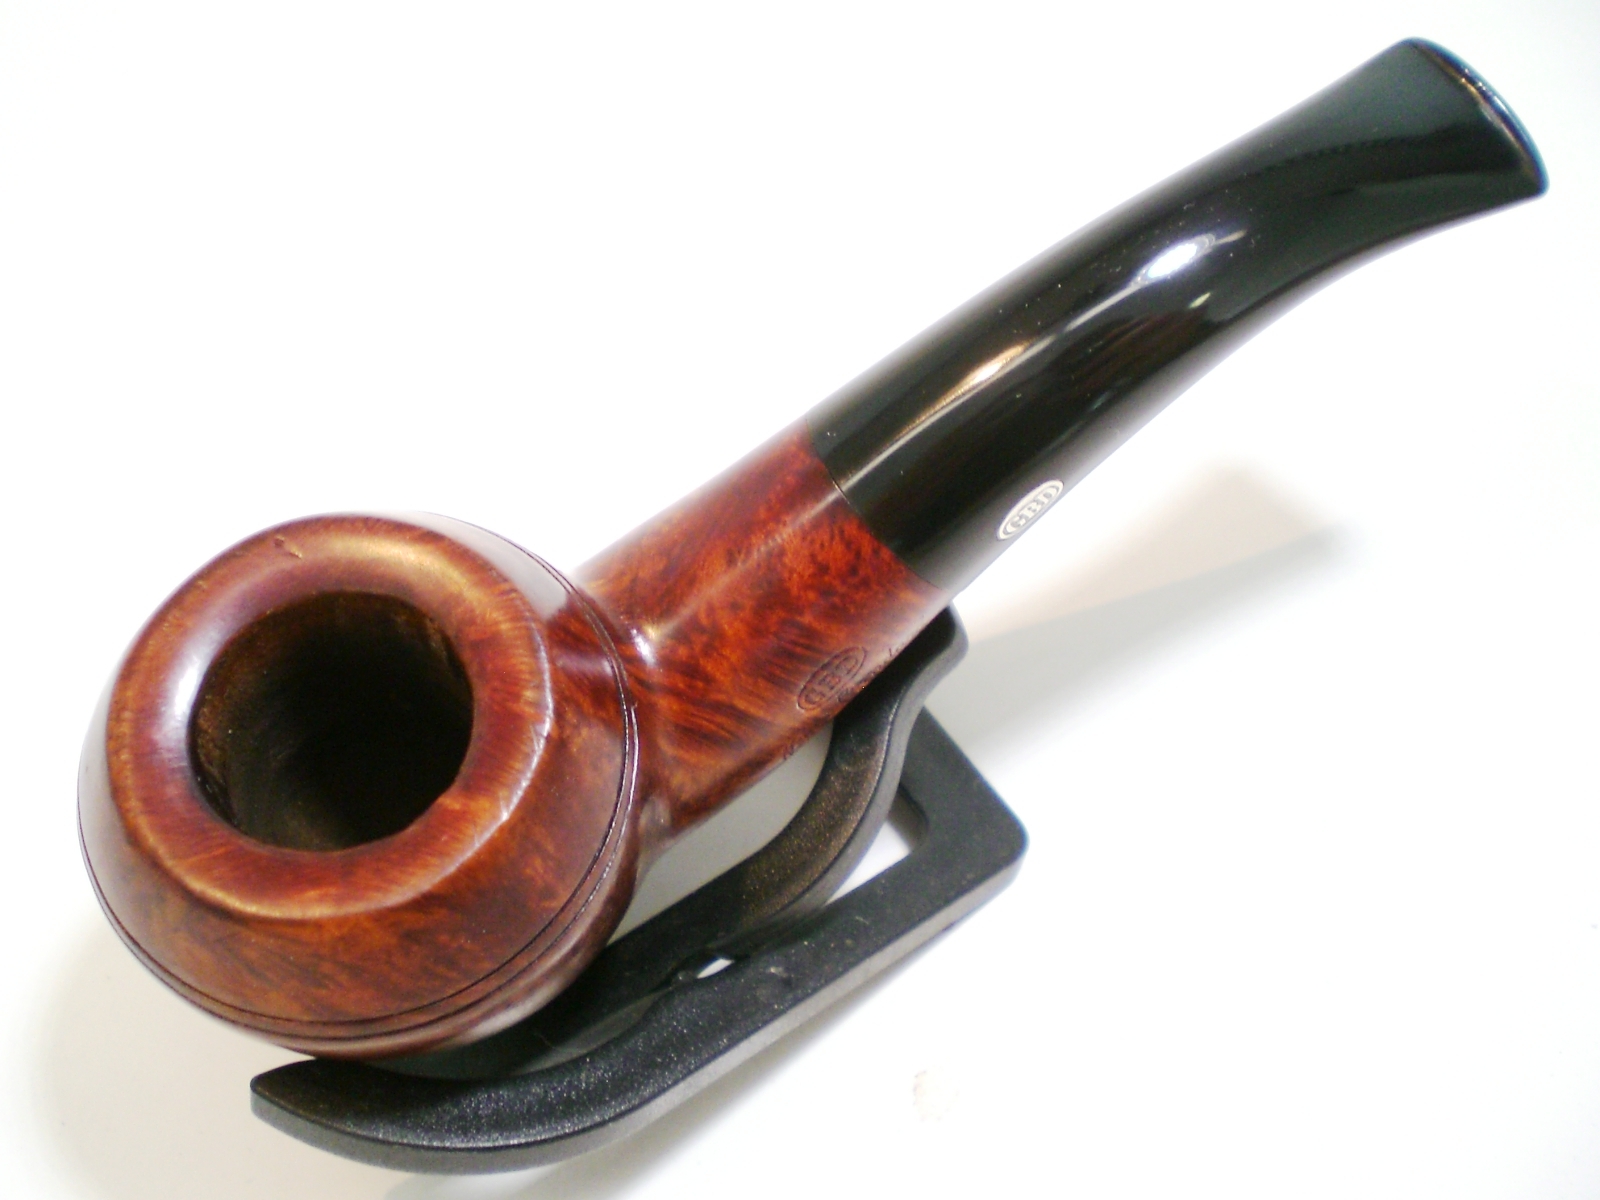
If you follow my restorations on Steve’s blog, you already know I love the Rhodesian shapes made by classic British pipe makers. I have a “Holy Grail” list of desired shapes and marques. The GBD 9242 has been at the top of that list for three years. In the past few years, this shape has been hotly contested and infrequently sold. I had resigned to myself that the probability of finding one, within my means, was slim. This week, a somewhat tired New Standard grade 9242 was listed and I was surprised to win the auction at a modest price. The pictures were fuzzy and showed it would need a lot of work. The stem did look quite promising and I hoped the tars and cake build-up on the bowl top would come off. The nomenclature, button, rondell and bowl beading all looked to be in very good condition.
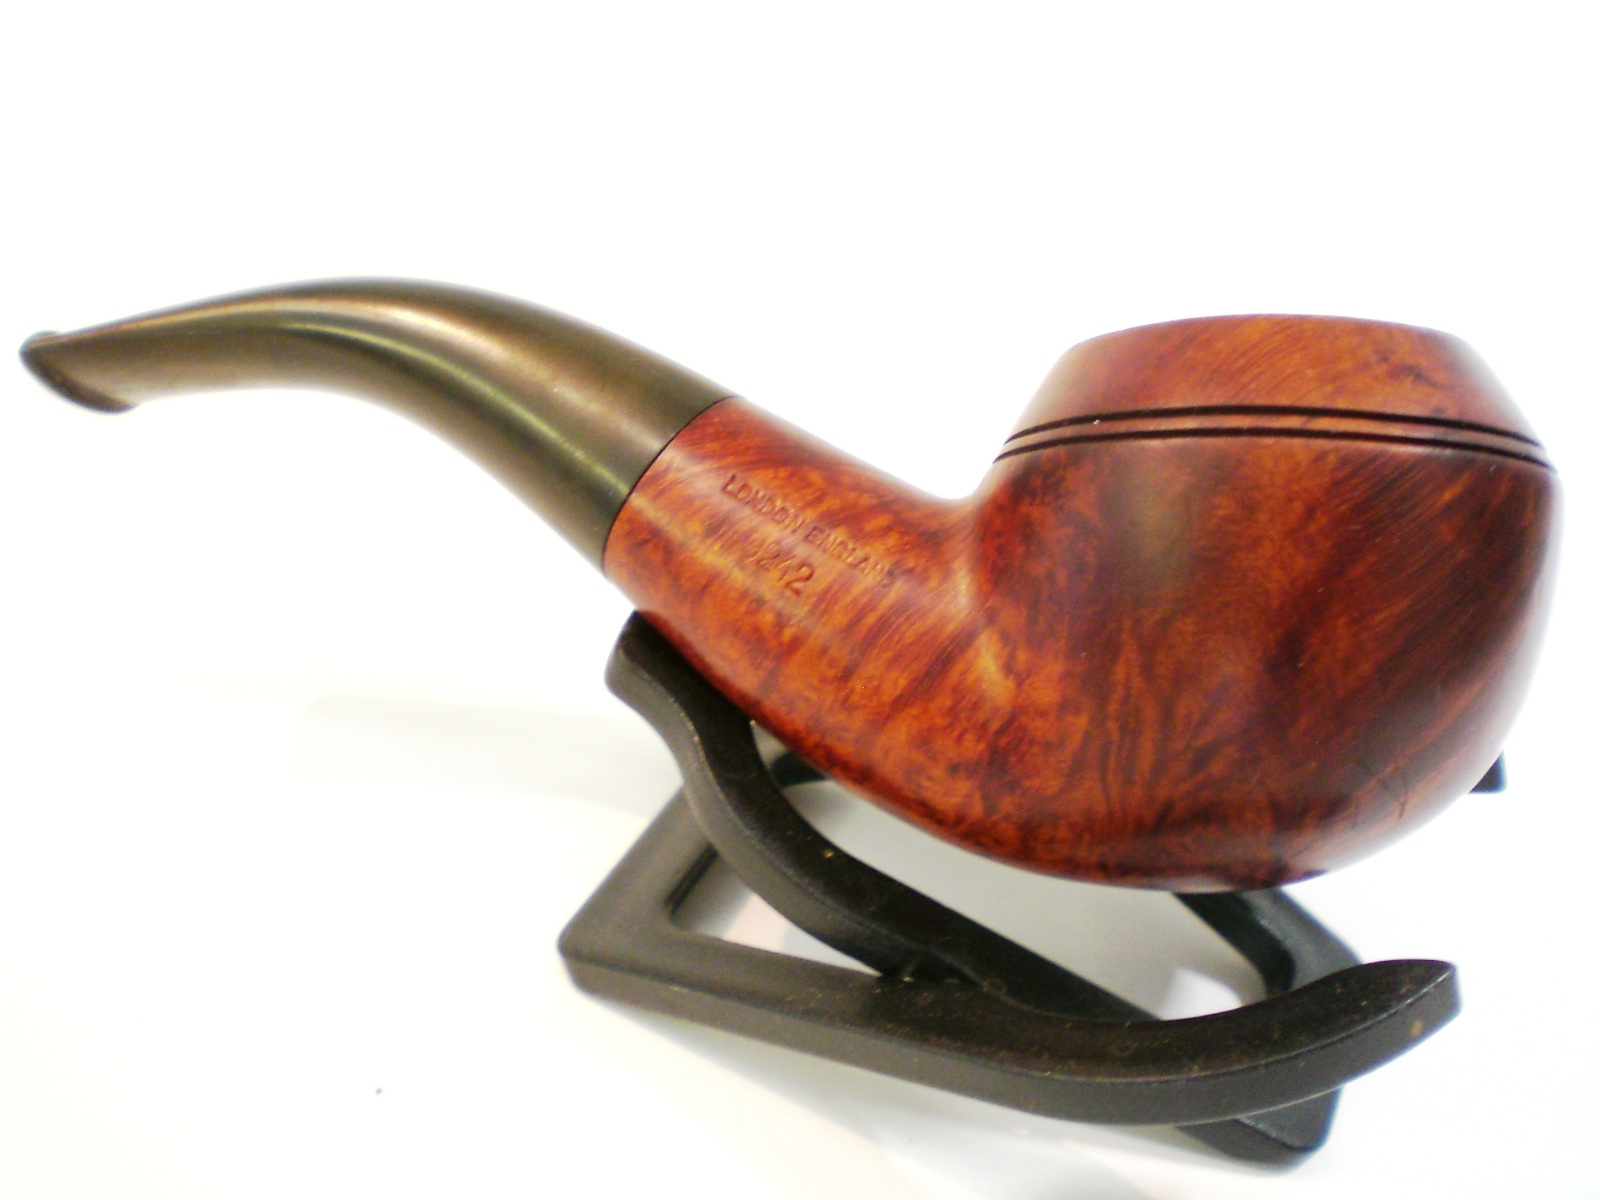

I used some distilled water and a rag to remove the tars from the bowl top, which did come off. That revealed a few dents and dings. I then removed the cake with my Castleford reamer and was pleased to find some very solid wood inside the bowl and a nicely drilled pipe. The shank was filthy inside and required a lot of cleaning with brushes and alcohol.
I worked on removing or minimizing some of the dings and marks on the briar. I used a kitchen knife, heated with a propane torch and a wet rag to steam out the dents. Some of the crease could not be removed, but I was able to minimize them.
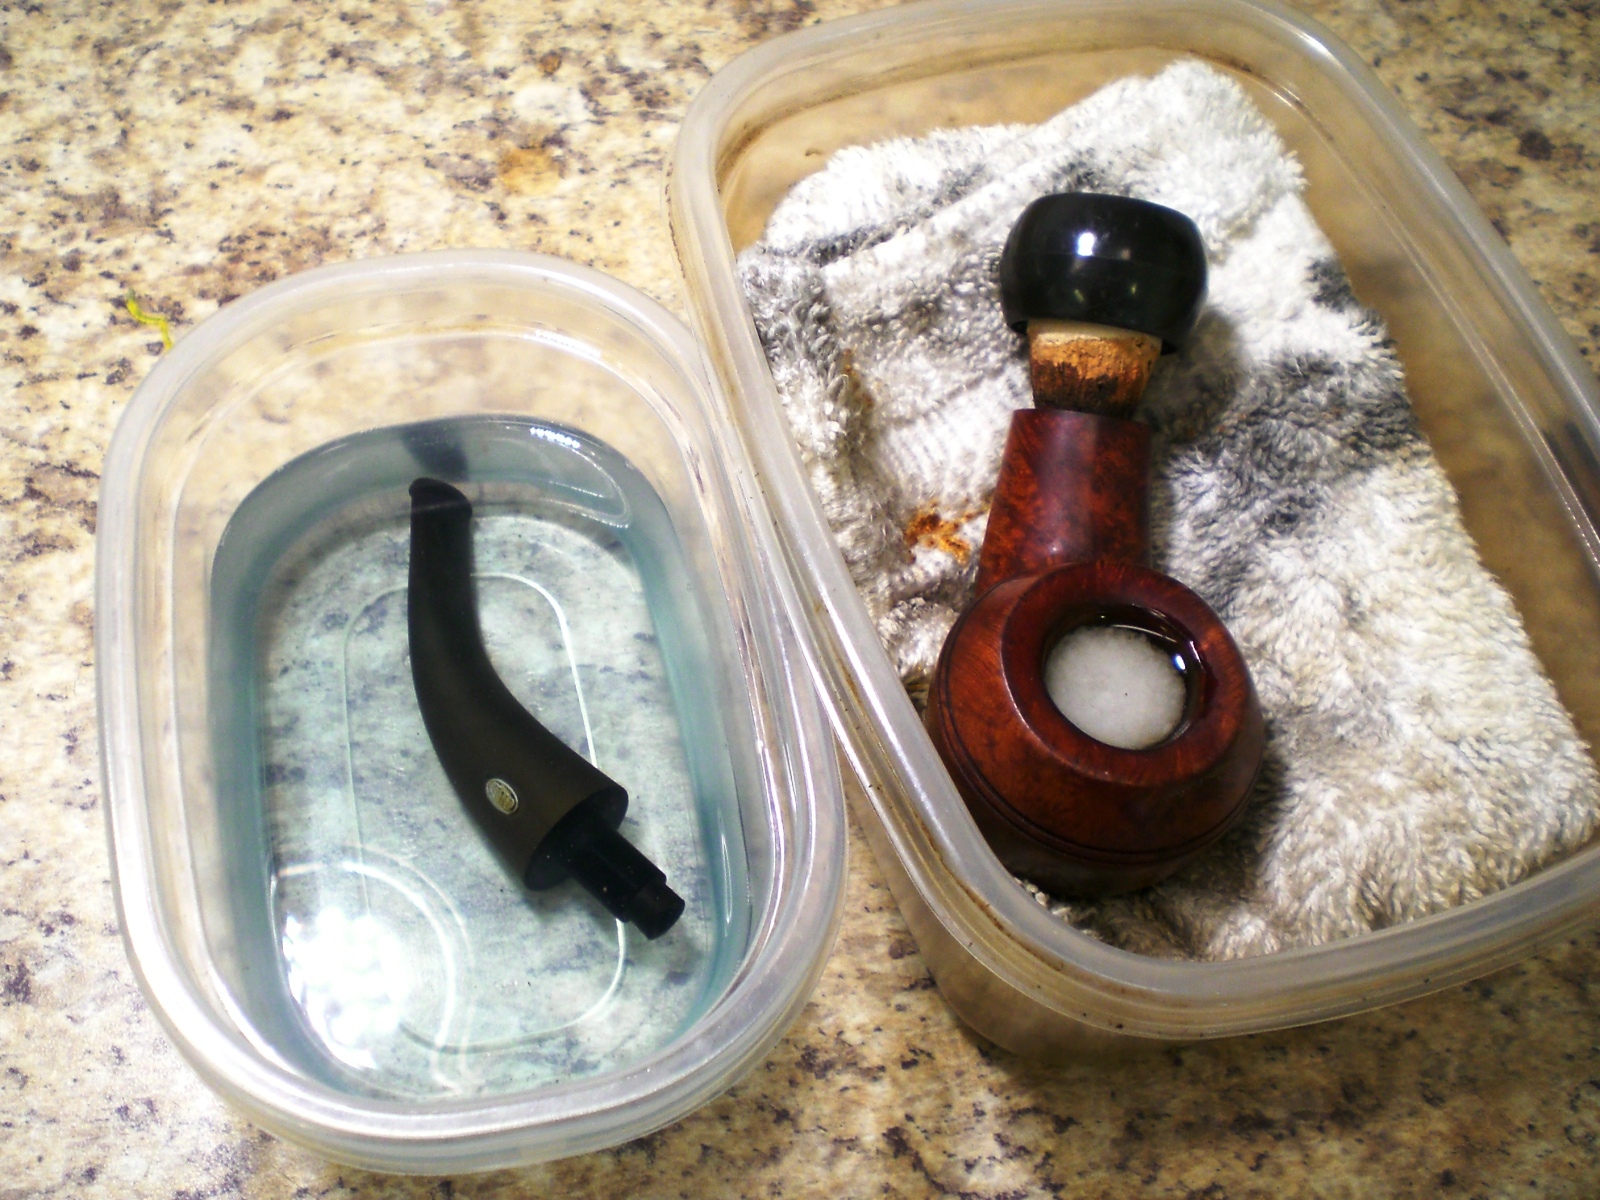
The bowl and shank were then packed with sea salt and alcohol to soak. The bowl and shank came out very clean inside, which should help reduce any ghosts. The stem was soaked in a mild Oxyclean solution, with a dab of grease on the rondell.

After the bowl soak was complete, I started to work on the stem. It had a pretty rough layer of oxidation near the button and I used 600 grit wet paper on that area. Then, progressively, I used 1000>1500 and finally 2000 grade wet paper on the rest of the stem, button and crease. Miraculously, the stem only had some mild teeth chatter under that oxidation. I then moved to Micromesh sheets in 8000 and 12000 grades. The stem was then polished, mounted on the pipe, with White diamond rouge (lightly!). The briar was also polished with White Diamond, but I was careful to stay away from the all important (to me) nomenclature.
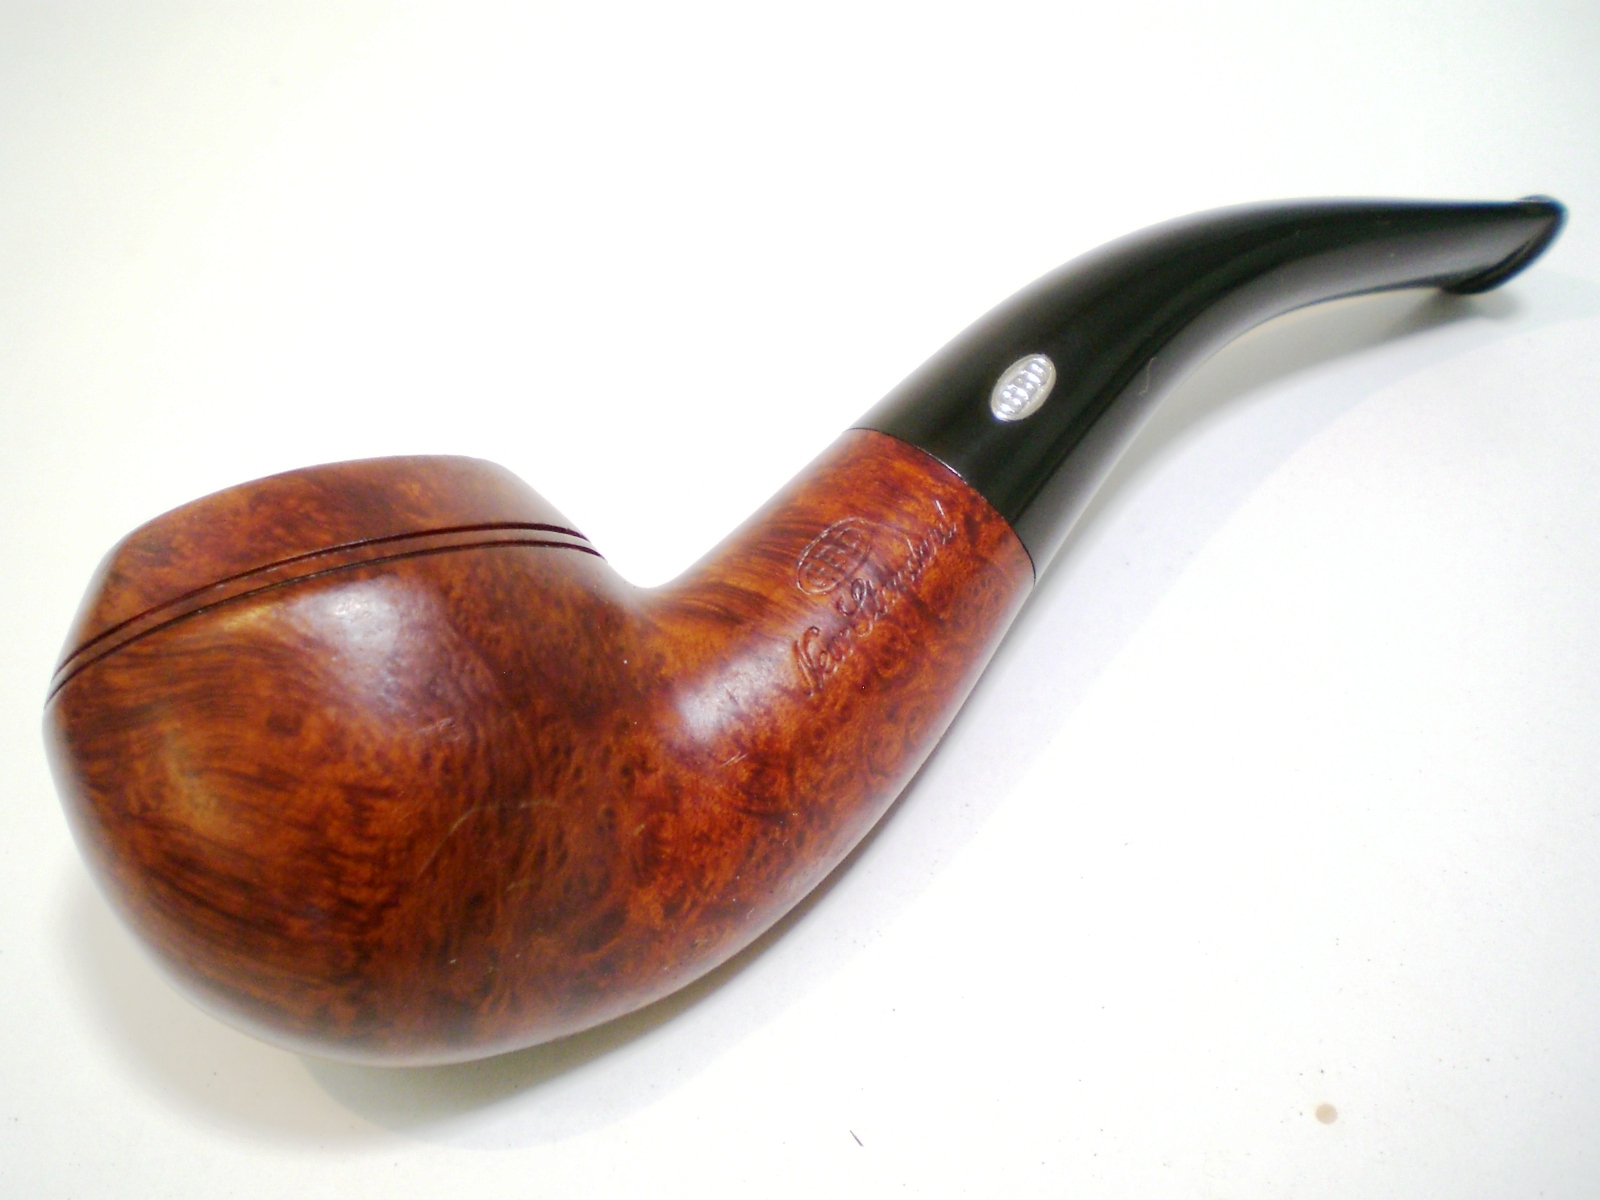


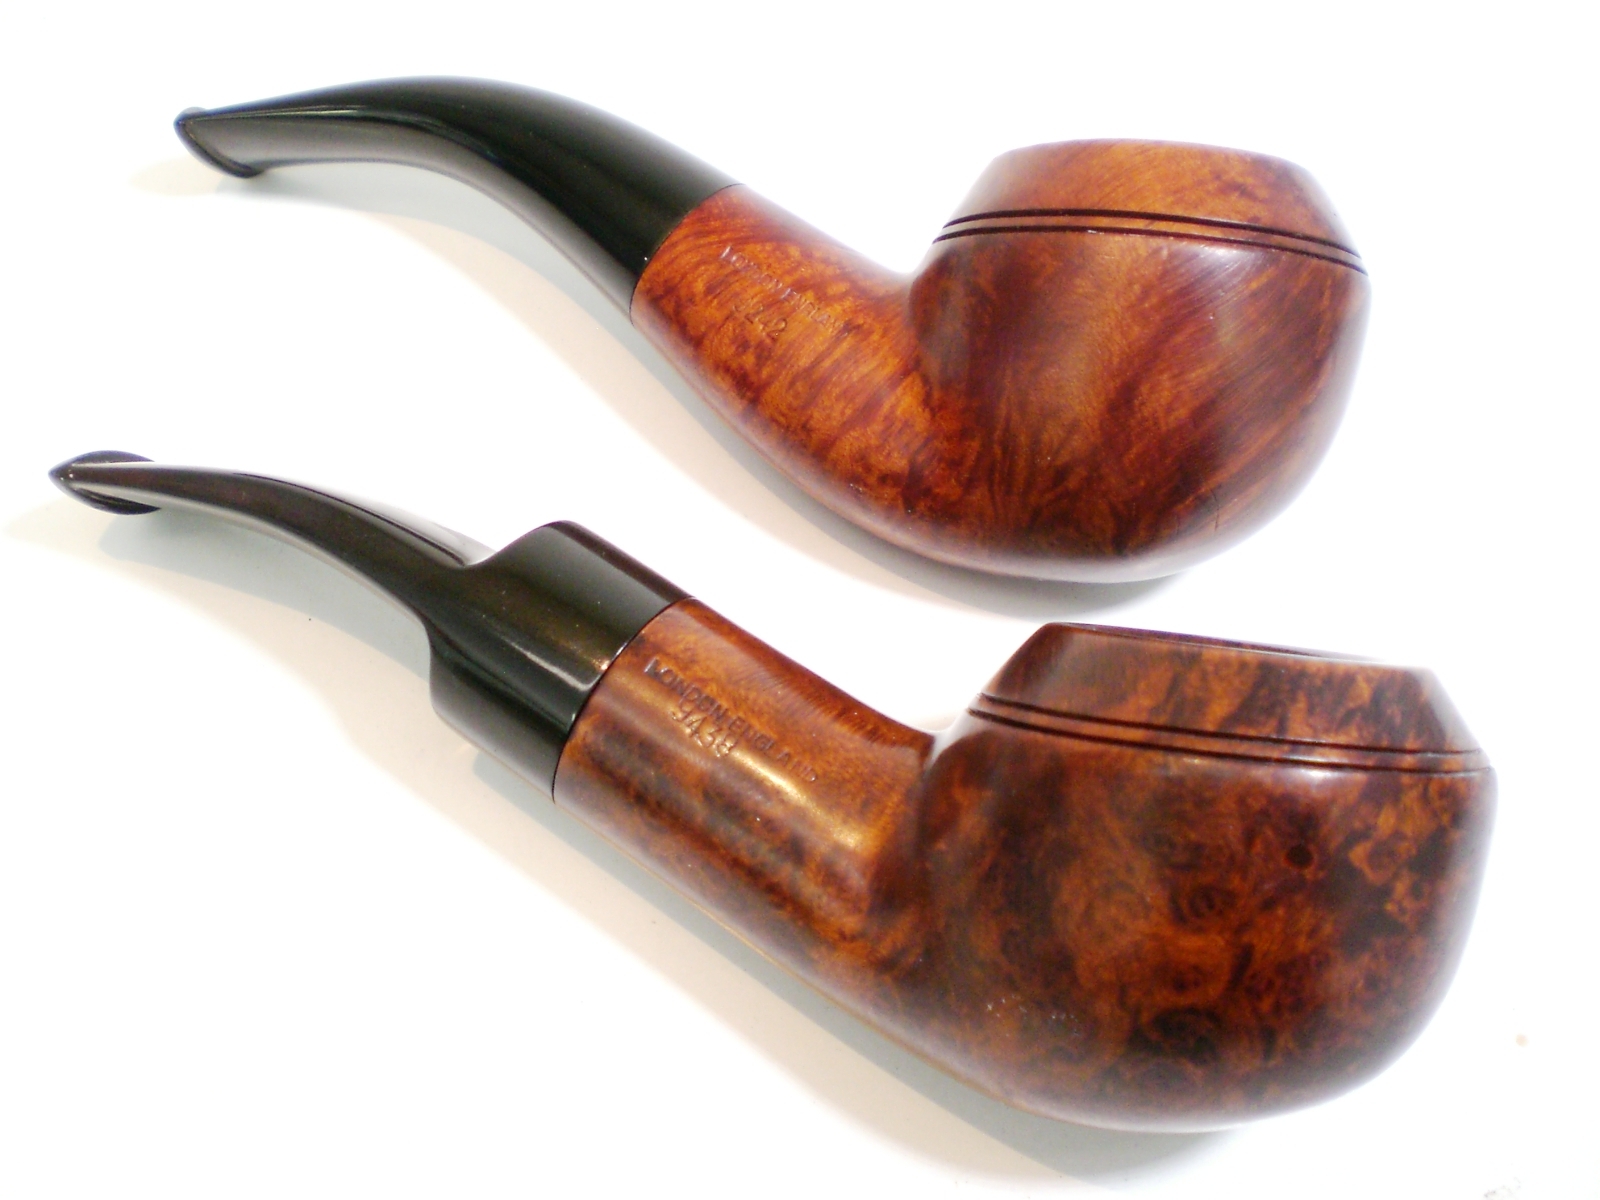
Below is a comparison shot with a GBD 9438 New Standard. The 9438 weighs 55 grams and my scale shows the 9242 comes in at 45 grams. Now I can see why this shape was so appealing to me, and others. That tapered shank and stem really make the pipe.
The pipe still has a few “character marks”, but I’m quite pleased to add this one to my collection. A piece I thought was almost unattainable.
Blog by Greg Wolford
I’ve been hoping to add a Kaywoodie Regent to my collection for some time now. A month or so ago we were out-of-town on vacation when I happened upon one in an antique store. There were actually several pipes in this vendor’s case, most of which I wasn’t interested in. Other than the Regent, there were also two other Kaywoodies I was interested in: a Relief Grain and an extra long Canadian. They all looked to have pretty good bones in the dark little store so I made them mine.
When I got them back to where we were staying I eagerly opened them up to see what I had. I found that they were a lot dirtier and caked up than I thought. I also now got a really good look at the damage to the Regent’s stem; this was going to take some trail and error I knew.
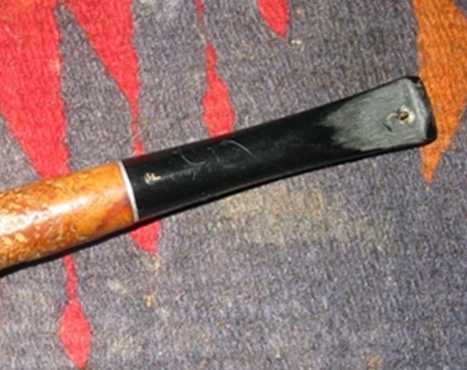
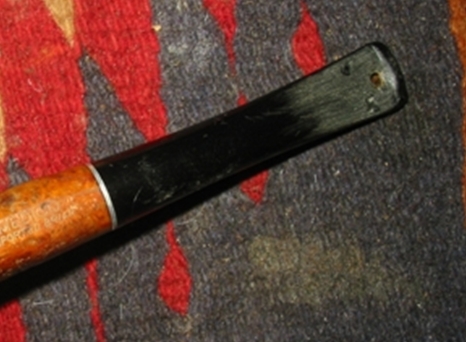
When I got home I took some better photos, showing the damage to the stem. There were deep teeth marks on the top and bottom of the stem and the edge of the side where the clover logo is was almost gone completely. This was going to take a lot of time and some research to get it even close to decent again I now realized.
My first step was to try some experiments on a Medico VFQ. Although I ended up with a good looking and smoking pipe, the experiments were somewhat in vain: the stems on the VFQ turned out to be nylon. So I now turned to some fellow restorers on the PSU Forum for hints. tips and ideas – and they really came through with many ideas and several new articles posted by Joyal. Some of the best advice for this project come from JoeMan: the idea of using activated charcoal powder with Gorilla brand super glue.
This project took days to complete do to all the patching a rebuilding of the stem. So, I didn’t do a great job documenting it all with photos and because of the extended time frame of the project I may miss a step or two in this article; I apologize in advance for these things.
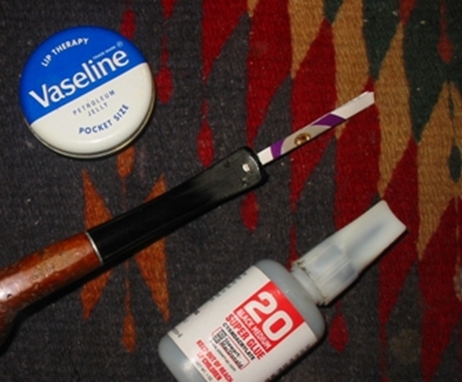
The fist thing I did (after thoroughly cleaning the stem with pipe cleaners and alcohol) was try to raise the dents as much as I could with heat from a candle; there was little success here.

Now I began the filling and shaping process. This took many forms and layers: I used clear super glue, both “regular” and gel, mixing in some of the StewMac black glue at times, and also Gorilla brand super glue both with and without charcoal powder mixed into it. one of the challenges was to add strength and black-color in some places while not covering up too much of the red in the Cumberland stem. Another challenge was to build up that chewed up side so the end of the stem would have the proper shape again.
The StewMac glue was too thin and took so long to dry that it wasn’t much help to me on this project. The Gorilla glue, both “plain” and with the charcoal powder mixed in, was a big help; it is thicker and dries quite fast, especially when the powder is mixed in.
Another thing that added time was the way I went about this repair. There were multiple layers needed, as well as different thicknesses, so I would apply a patch, let it cure, and then shape it as I needed, and then start the whole process over again. I did this many times to get an acceptable result. This photo is after almost all of the layering and shaping was done:
 I used needle files and a vulcrylic file for most of the shaping. I also used 220 grit sandpaper. After I had the final shape I was happy with I wet sanded with 320/400/600 and then micro mesh through 12000 grit; after 600 and every few grits thereafter I also polished the stem with Meguiar’s Scratch X2.0,which helps me see if I’ve missed anything along the way. The next four images are before micro mesh and after:


As you can see, this stem came out pretty nicely and is more than useable now. Then lines came out well, to my eye, and the rebuilding and patching blended rather nicely.
I didn’t do a lot to the stummel; the nomenclature is readable but very weak. There are some small “pocket” marks but I think they give the pipe an air of character so I basically left the stummel as I found it, sans, the thick cake, mess of tars and oils in the shank, and the buildup on the rim. The rim did require a very light topping and a round or two with the medium touch up marker to give it a head start on matching the patina on this rest of the wood. I only very lightly buffed the pipe with white diamond and carnauba wax and ending with a soft clean buff and hand polish with a micro fabric cloth.
I just noticed there is a bit of wax residue that I missed in the photos. Oh well, that’s easy enough to take care of after while ….
I’m very happy with how this project came out. It will soon find its way, I think, onto my rack where I can hopefully enjoy it for many years – unless my wife learns of its collectors appeal and potential value, then I might be in trouble!
Blog by Joyal Taylor
Earlier I posted a You Tube video that Joyal posted about patching this yellow acrylic stem https://rebornpipes.com/2014/07/08/stem-patch-using-amber-super-glue-joyal-taylor-aka-holymolar/ It is part of an ongoing work in progress where Joyal is experimenting with different mixture to patch a bite through in an acrylic yellow stem. This is Part 2 of the ongoing experiment. Thanks Joyal for taking us with you in this experiment.
Since the amber superglue didn’t work well on this stem, I’m trying other things.
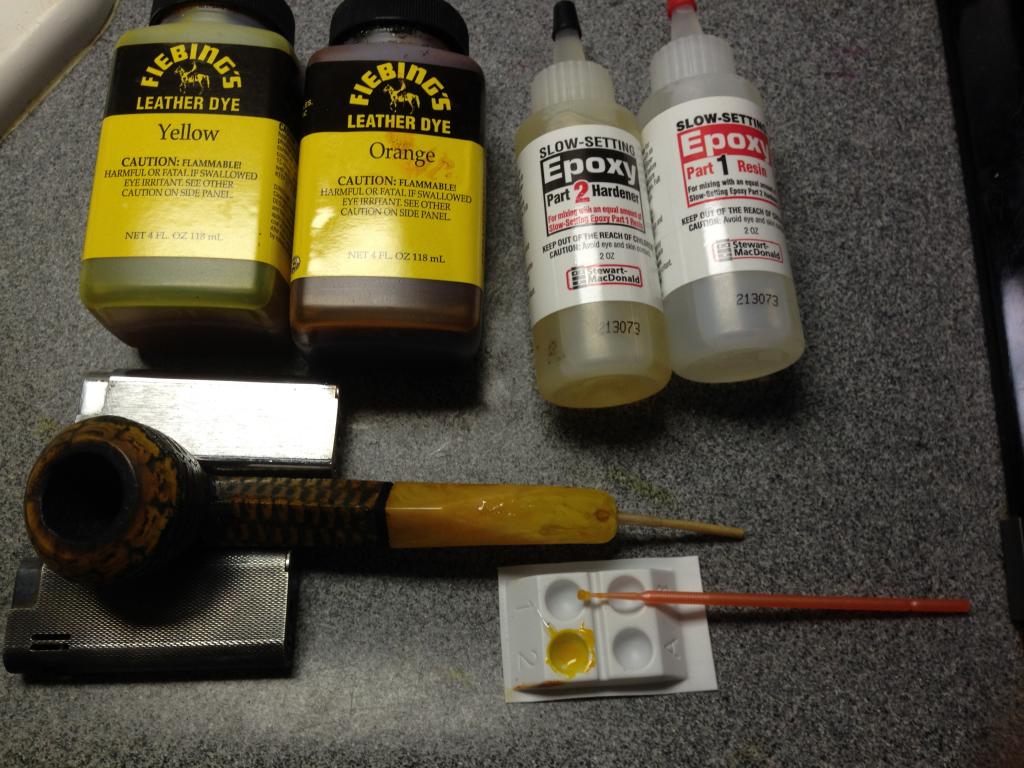
I tried mixing yellow and orange Fiebing’s Leather Dye with clear superglue, but the dye caused the glue to set instantly, even before I could mix it.
Next, I tried StewMac 2 part clear epoxy with Fiebing’s yellow and orange dyes, which mixed well.
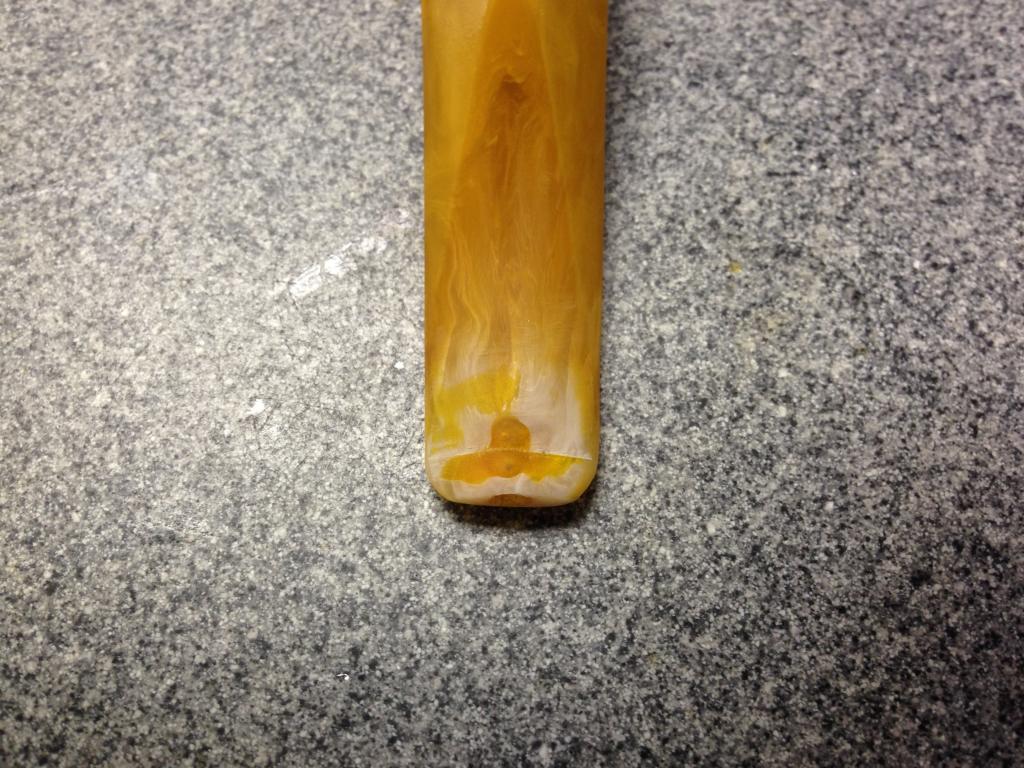
Before photo of only one side of the stem, but I worked on both sides:
I used a round bit in my dremel to remove the previous amber superglue patch and discoloration. Also, I roughen-up the area in front of the bit to try to re-color that area.
I tried several combinations of yellow and orange dye until I got close to the color of the stem
Close up photo looks like it may work

After shaping the bit with needle files and sanding/micromesh the epoxy.
This didn’t work out so well, either. Not only the color isn’t good but, also, the epoxy feels soft and rough to my teeth and lips.
We learn from our mistakes, so I’m going to continue experimenting with this.
Next, I’m going to remove the epoxy and try patching a third time by mixing dye powders with clear superglue.
I would appreciate it if anyone has other ideas to try for this stem repair.
In a conversation with Joyal about patching a stem that had a yellow/orange tint I suggested that he try the amber super glue from Stew Mac. He replied that he had tried it and done a video on it on You Tube. He said it was too clear and not opaque enough for a good match. He sent me the link to his You Tube video on using the Stewart MacDonald Amber coloured super glue.
Since You Tube is not something I have ever done, I was intrigued with it. I thought it would be great to post the link here for you to have a look at.
The amber super glue Joyal is using is available online at:
http://www.stewmac.com/Materials_and_Supplies/Glues_and_Adhesives/Glues/StewMac_Super_Glues/StewMac_Tinted_Super_Glue.html
Part 2 is a continuation of this work and is found under the title “Yellow Acrylic Stem Patch – Part 2 – Joyal Taylor (aka holymolar)” can be read at this link https://rebornpipes.com/2014/07/08/yellow-acrylic-stem-patch-part-2-joyal-taylor-aka-holymolar/
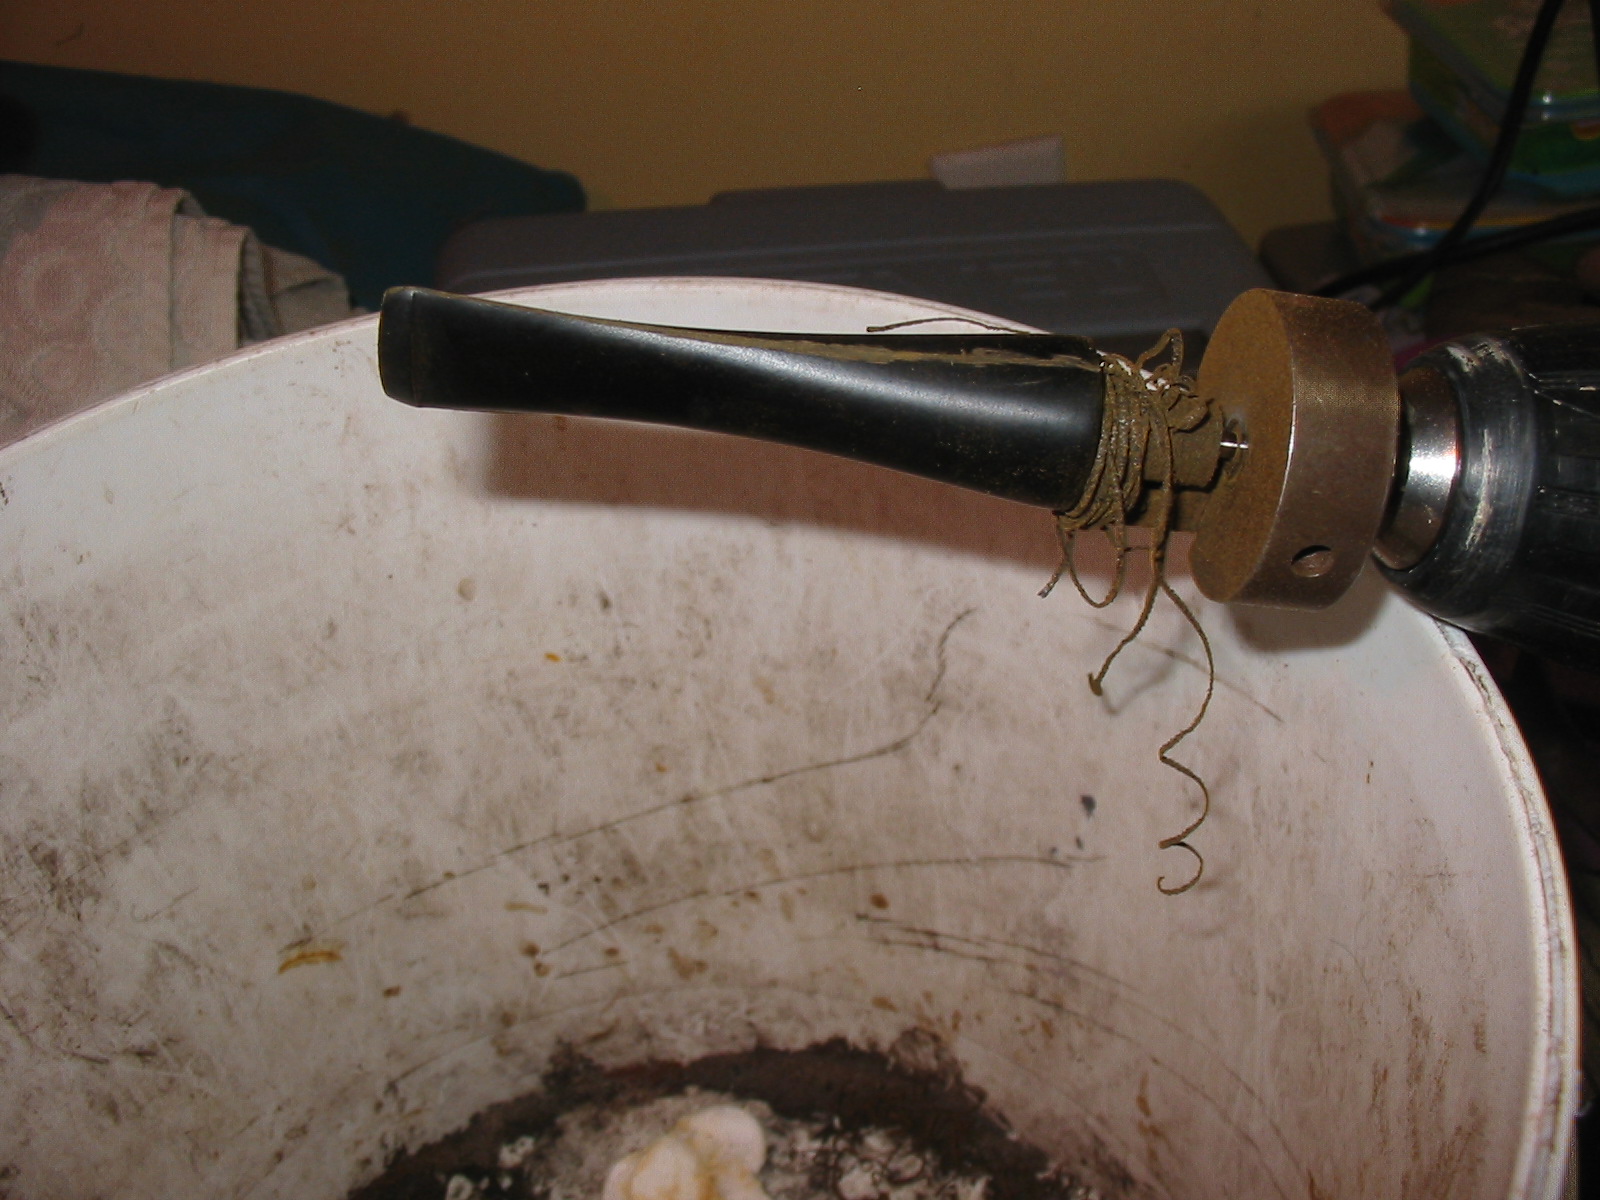
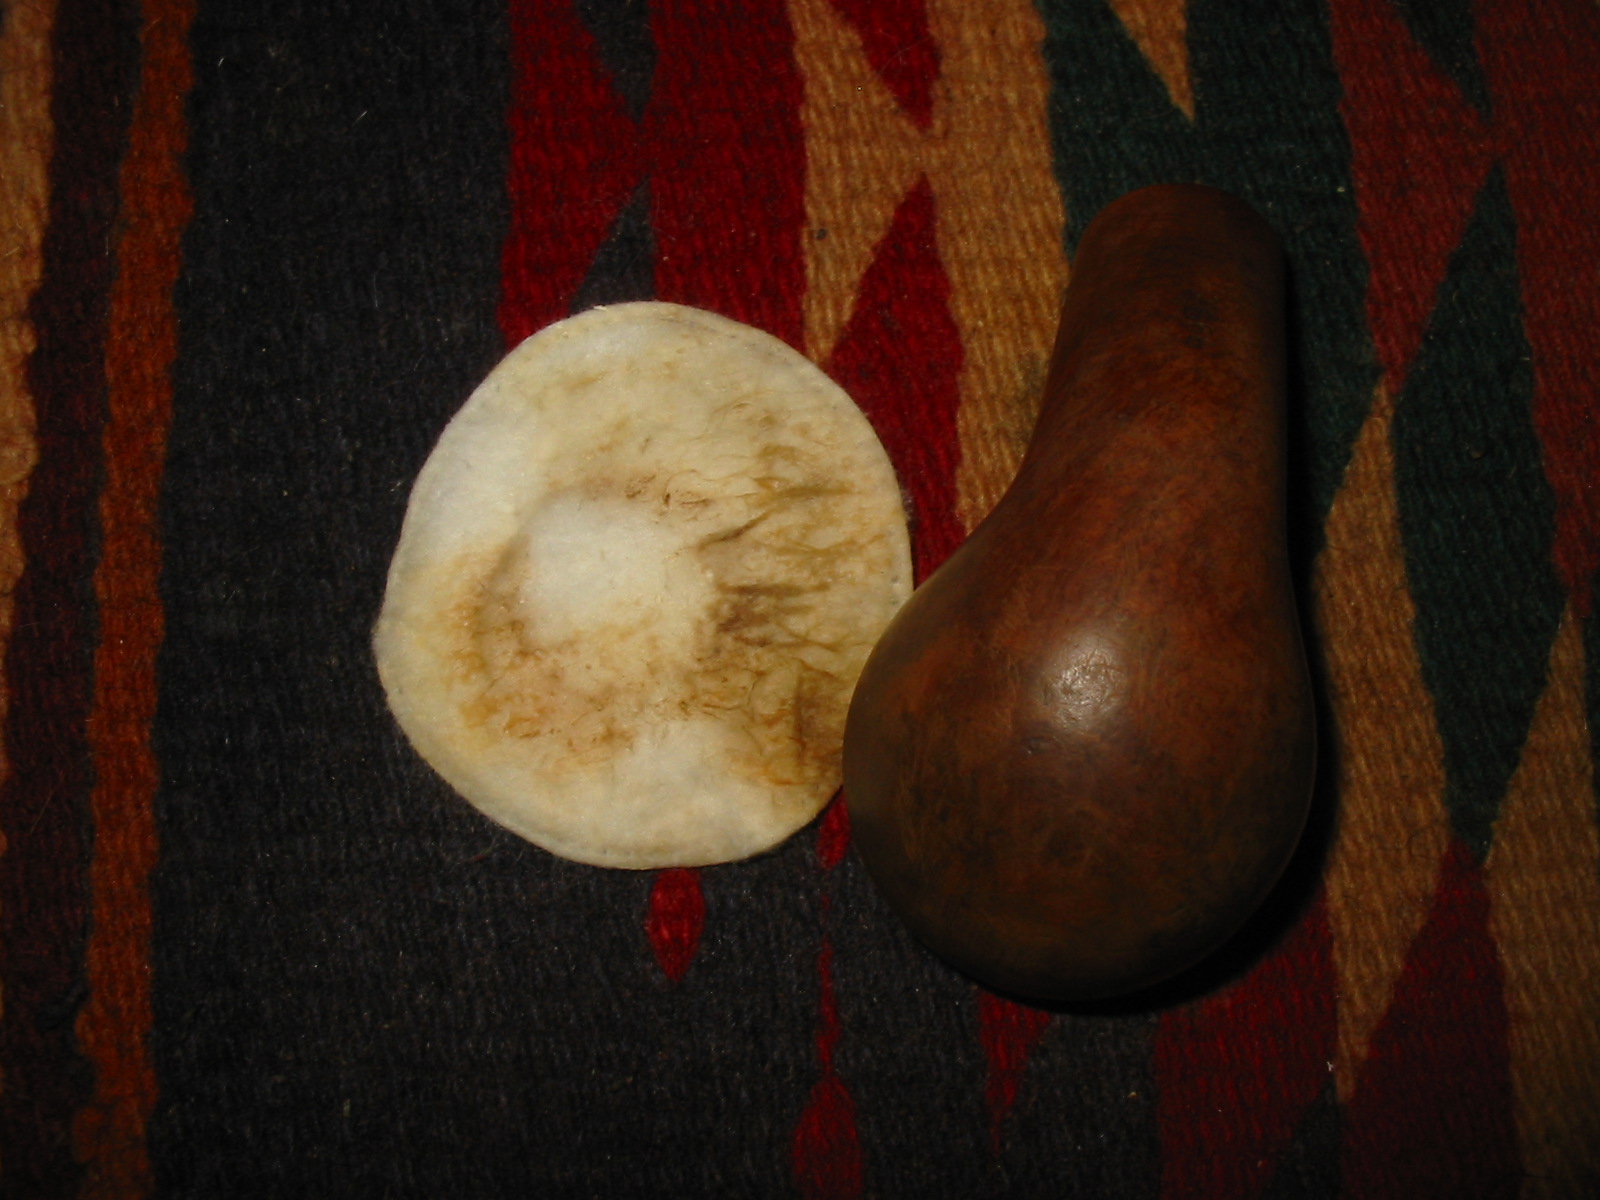
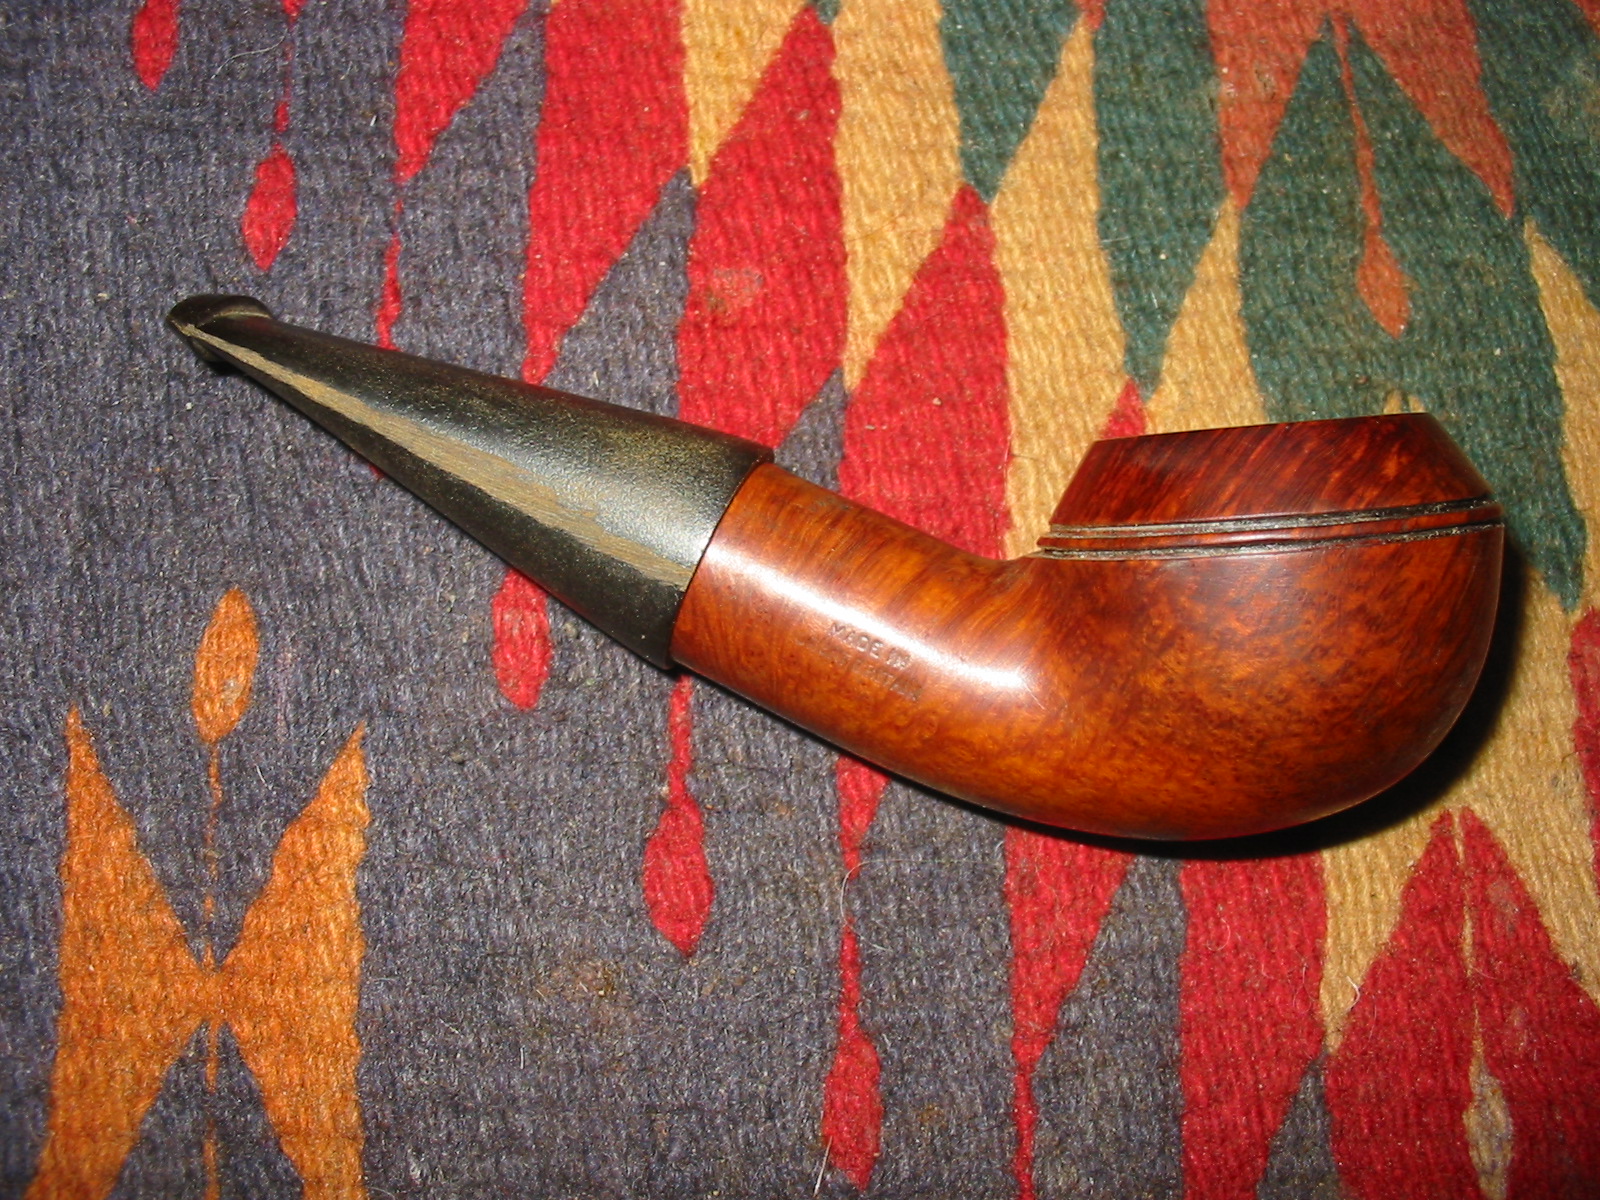
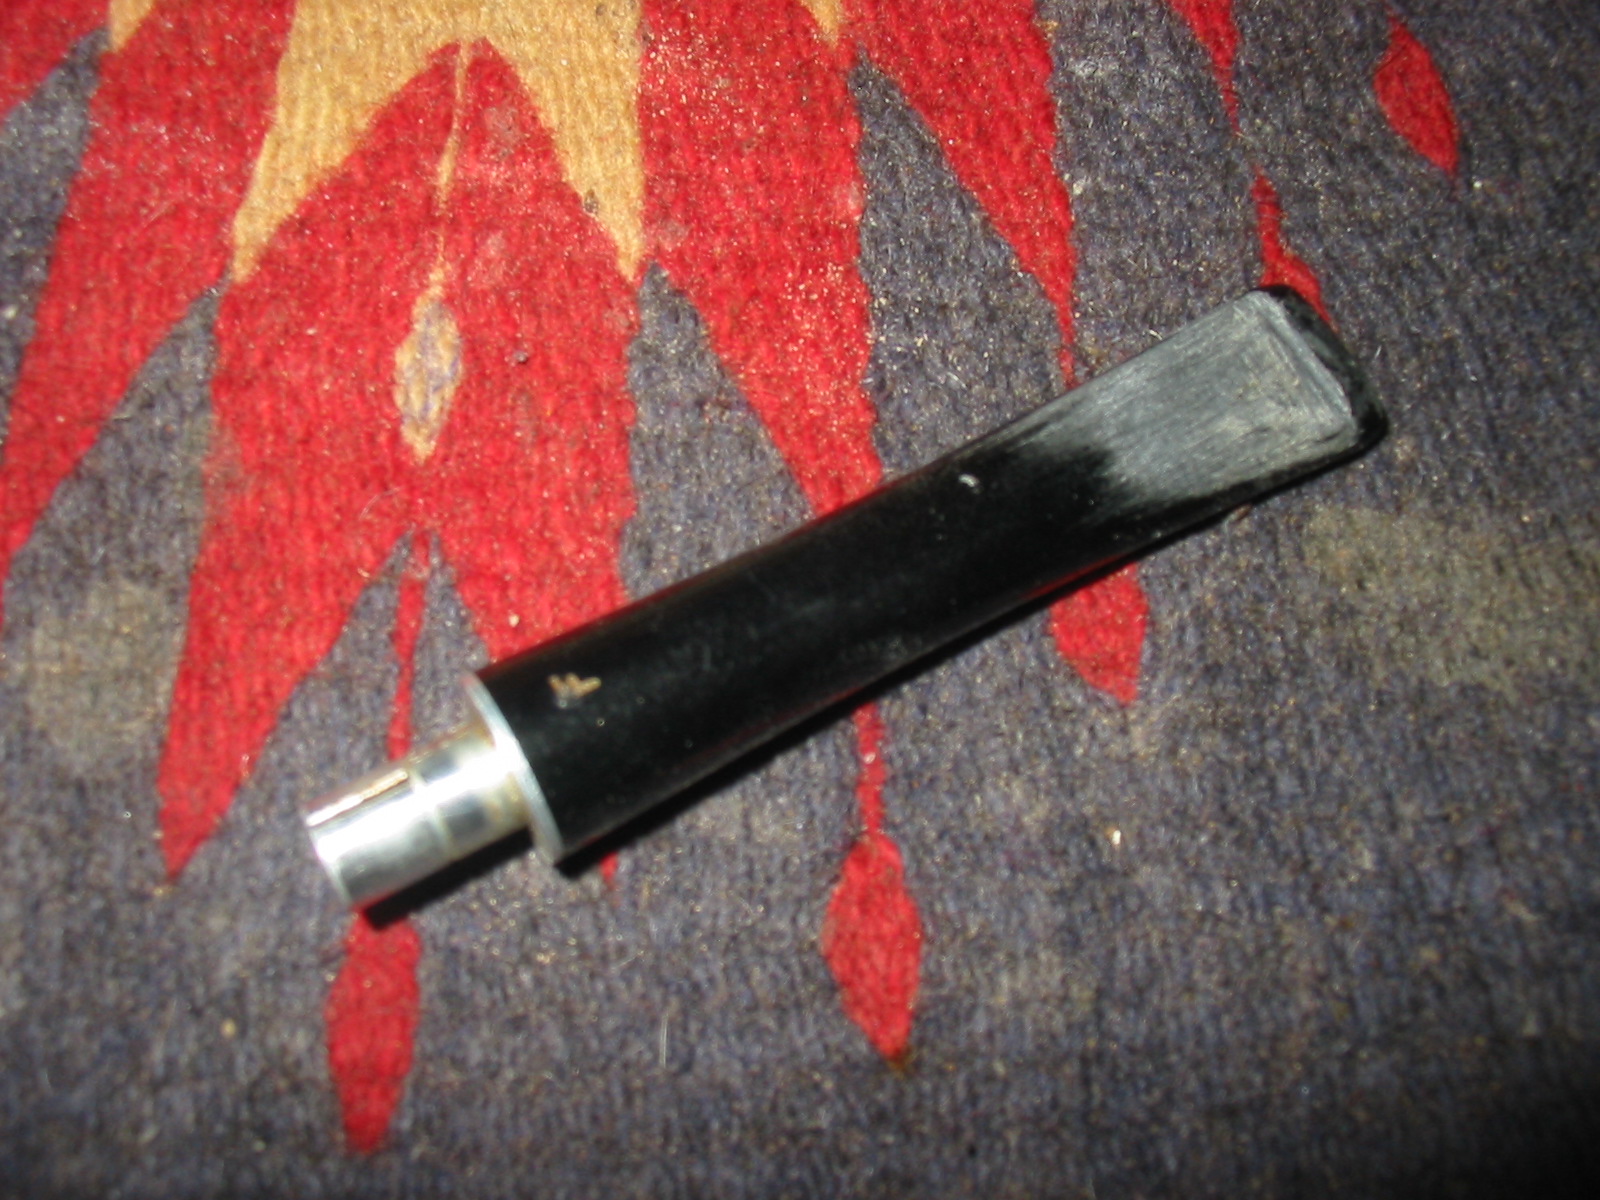
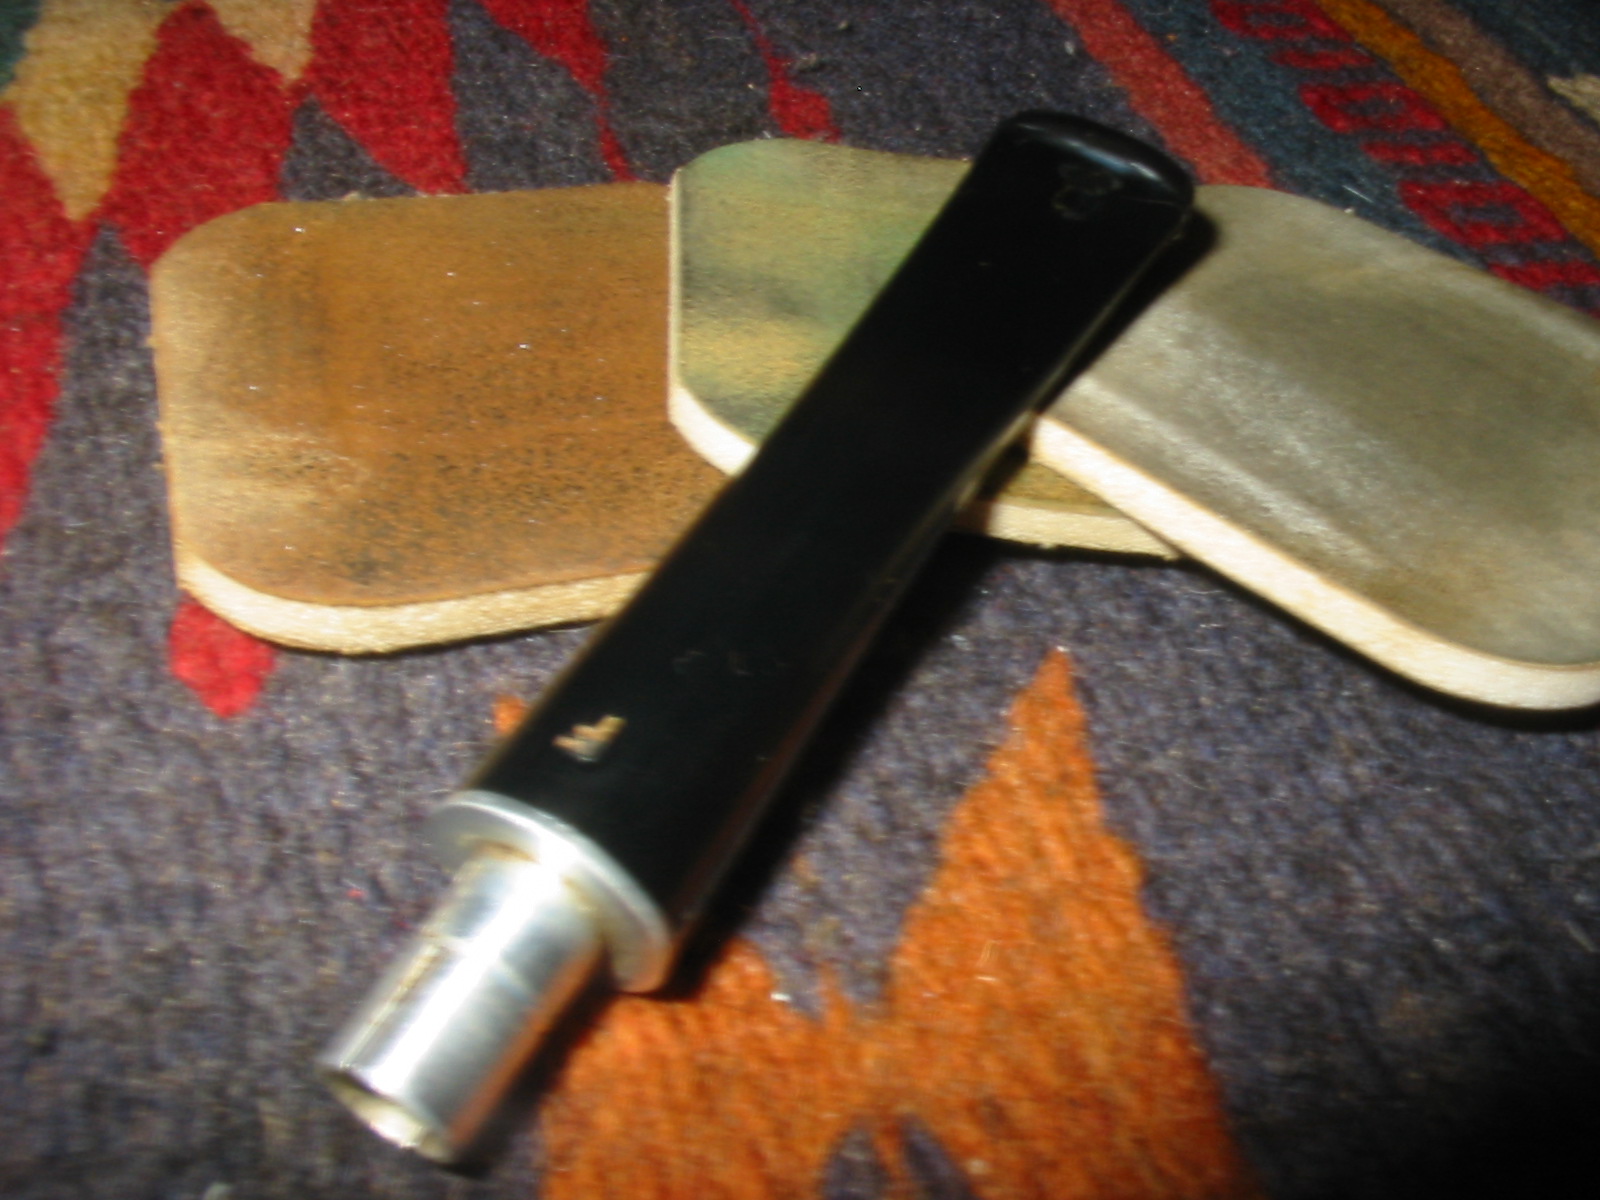
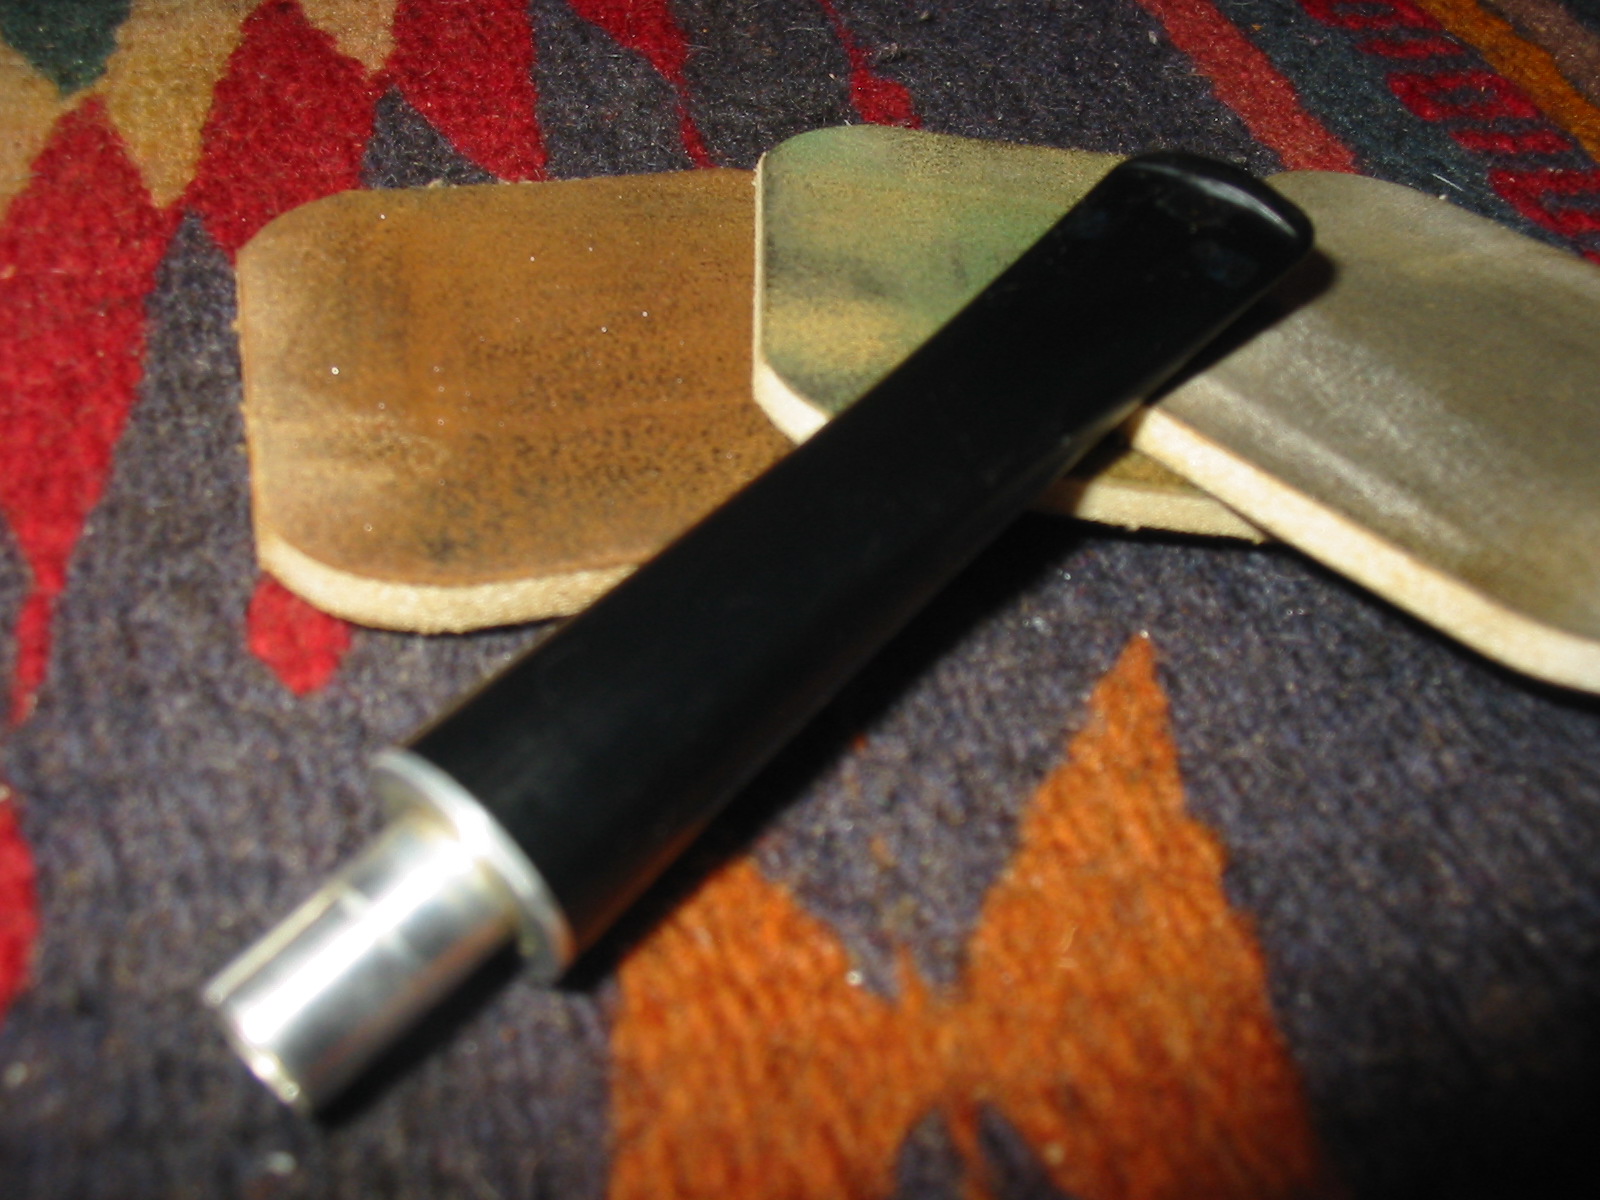
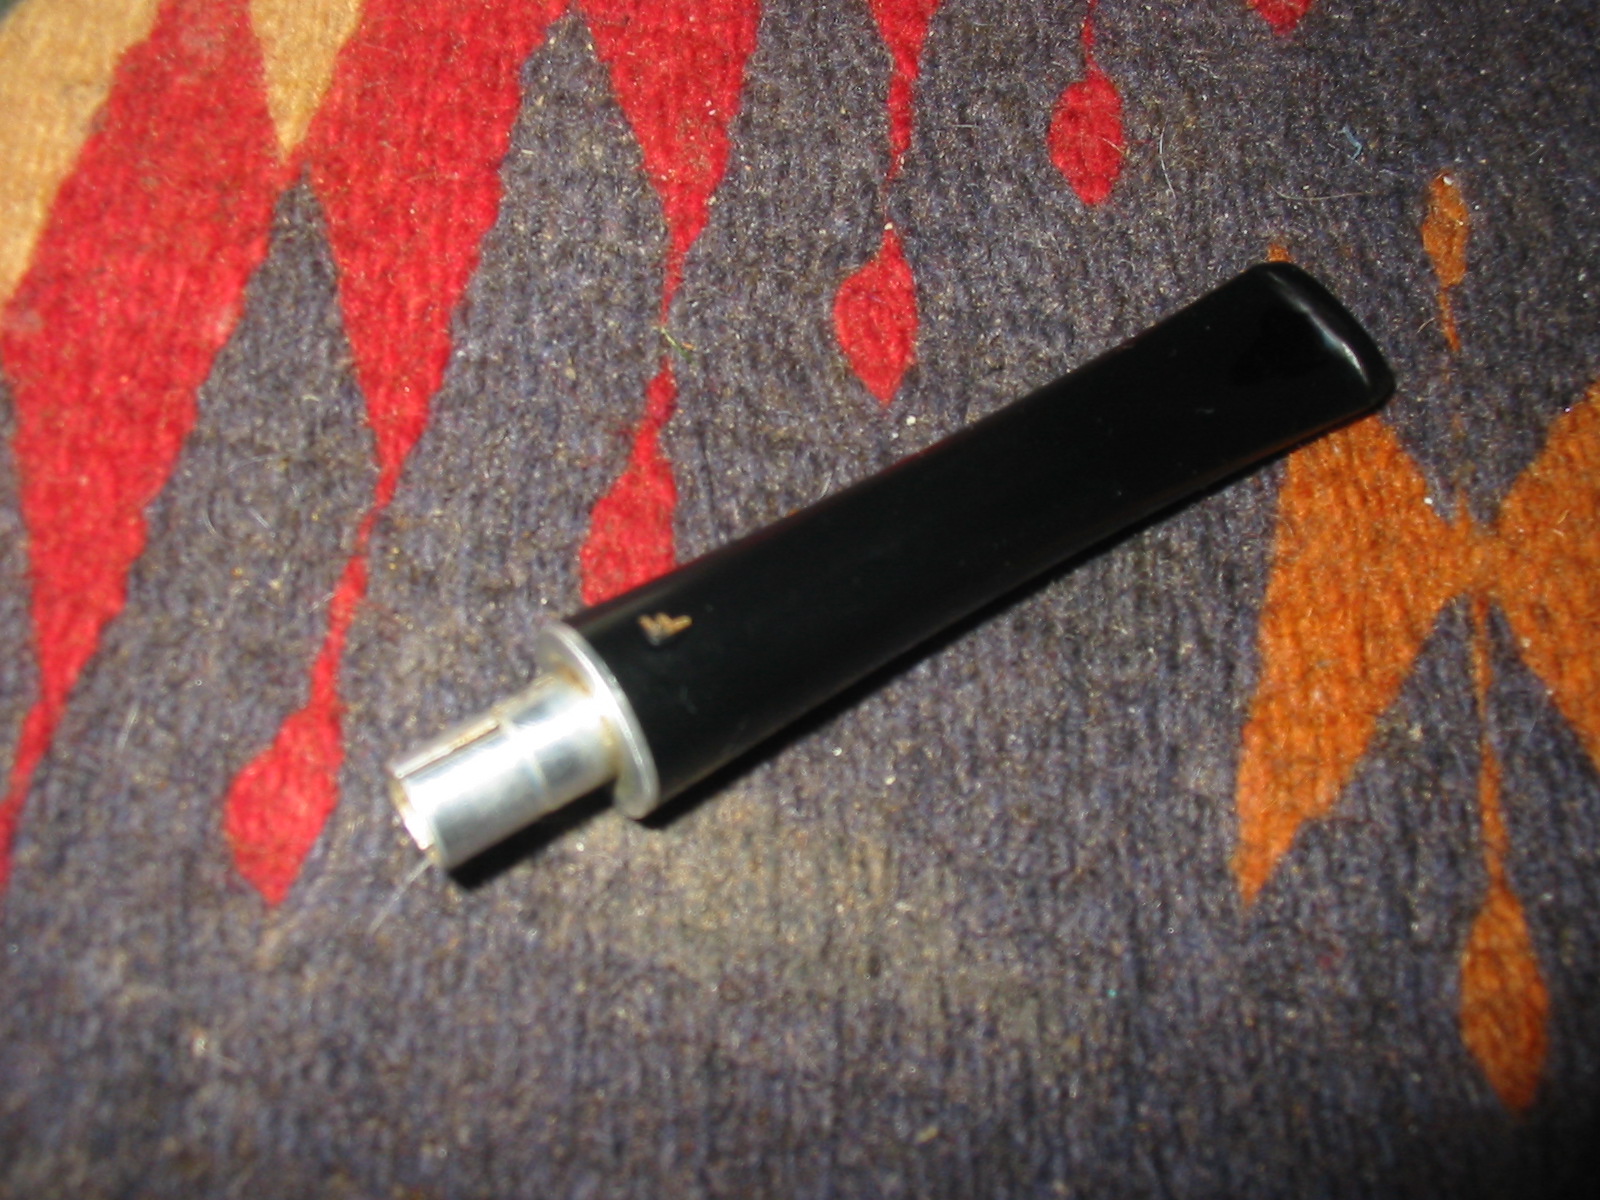
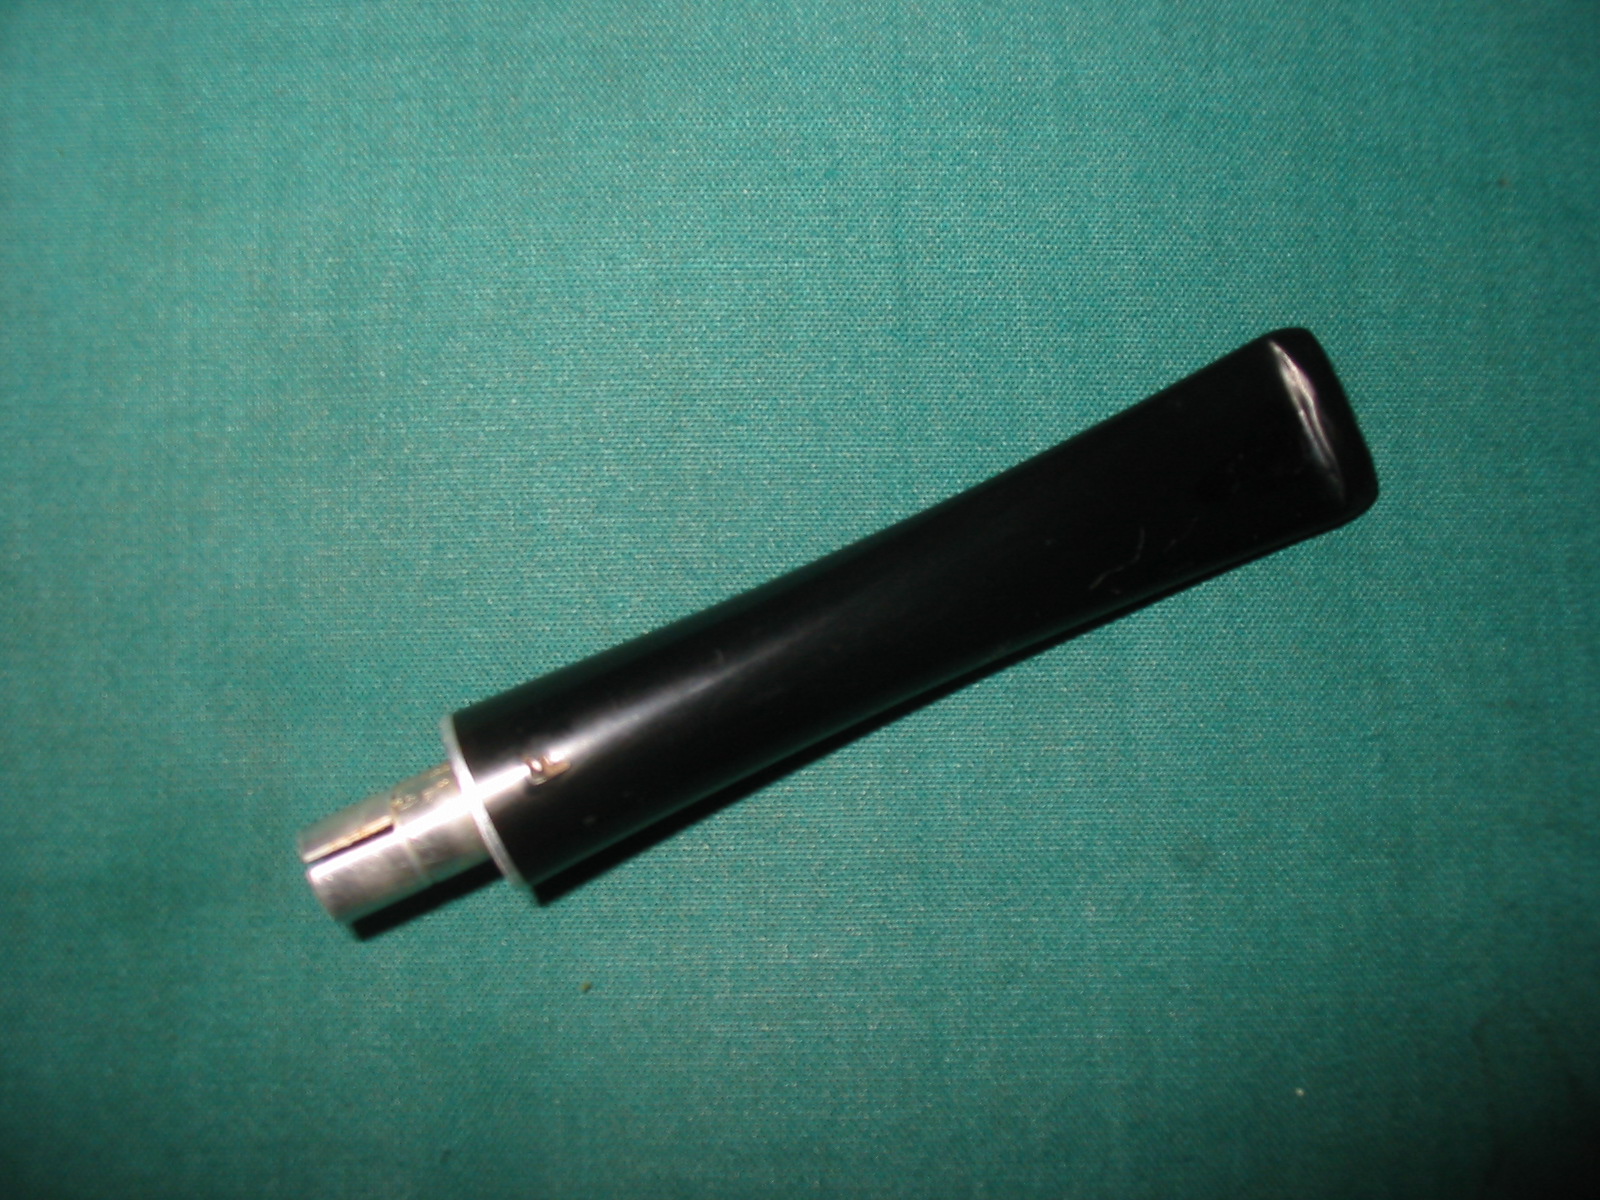
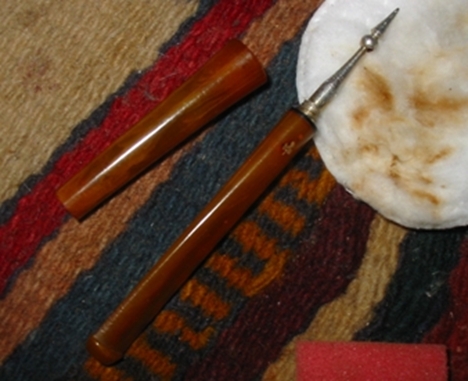
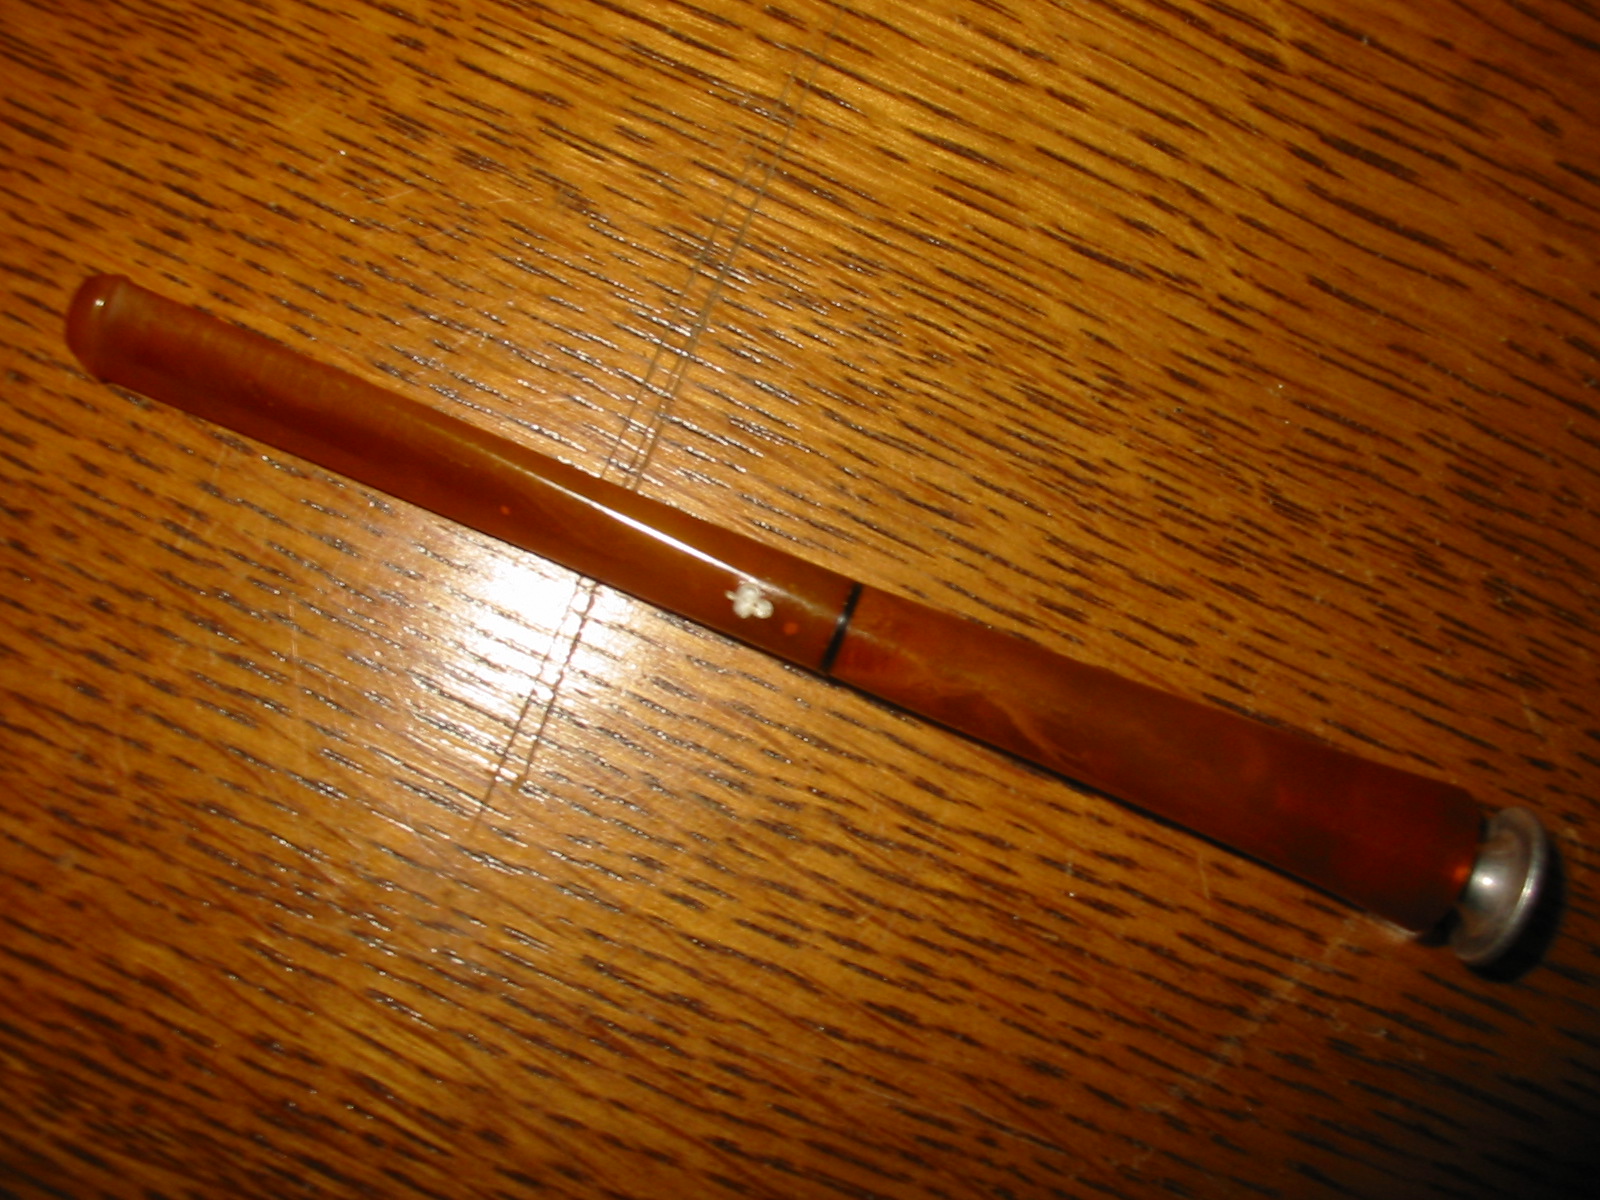
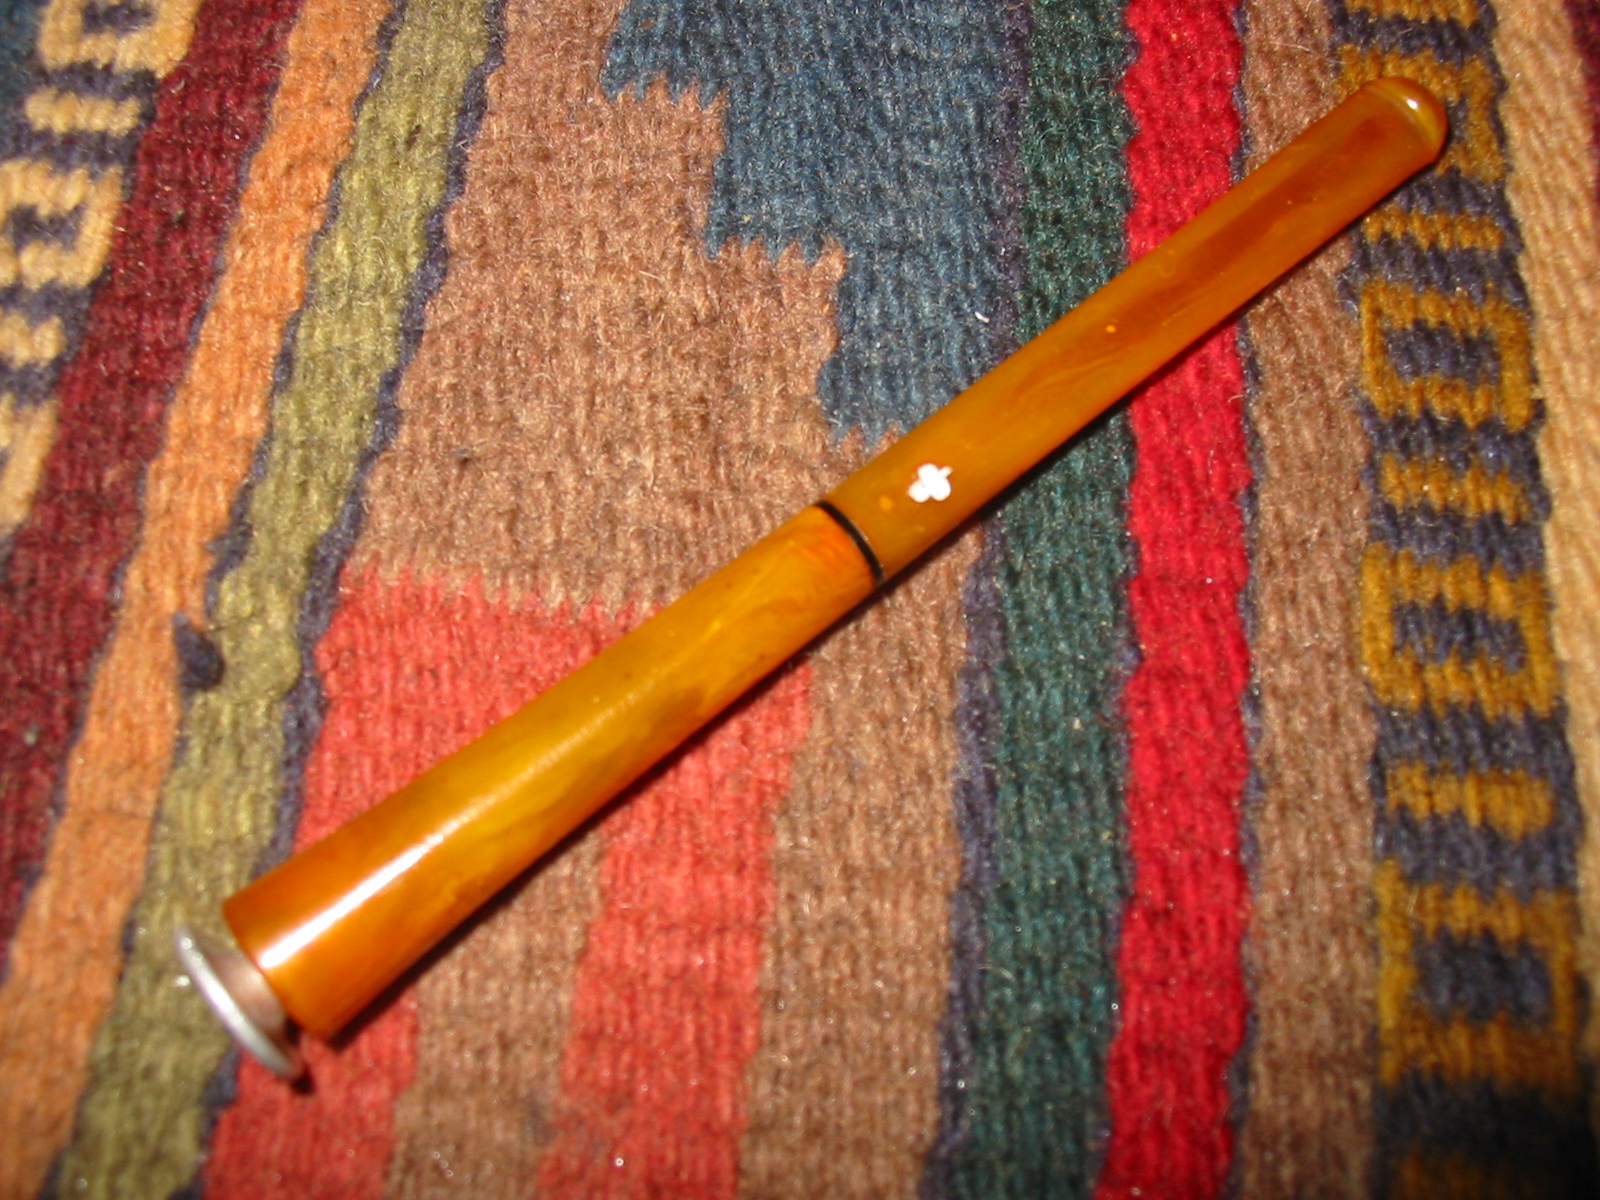
I don’t remember where I picked up this older DRINKLESS Kaywoodie Bakelite cigarette holder. I remember at the time writing to Bill Feuerbach at Kaywoodie and asked him about it to try to get a date. I remember that we exchanged several emails and pictures but never came to any conclusions. I was originally going to make a tamper out of it and I still may well do that. It is a two piece Bakelite holder. The front half is flared like a trumpet to hold the cigarette. It unscrews at the center. When the trumpet it removed there is the typical Drinkless four-hole stinger apparatus. It is different than the one in a pipe in that ball has a point on the end of it. There is a small black band on the end of the mouthpiece. It serves as a separation marker on the mouthpiece. The mouthpiece itself was clean and undamaged – no tooth marks or chatter. The Kaywoodie clover logo on top of stem was missing. The drilling/setting on the mouthpiece portion had fallen out. I am not sure if it was white or black. I have not seen one like this in all of my years of hunting for tobacciana. Approximate measurement: 4 1/4″ Length x 3/8″ Width at the end where the cigarette is inserted. The closest I can date this piece is that it was made in the 1930’s to 1940’s. It is in very good condition.
I took it apart and cleaned the stinger with alcohol on a cotton pad. I sanded the stinger with a fine grit sanding pad as it was badly pitted.
I used white out liquid to fill the space on the stem to replace the Kaywoodie clover logo. Once it was dry I sealed it with a drop of clear superglue.
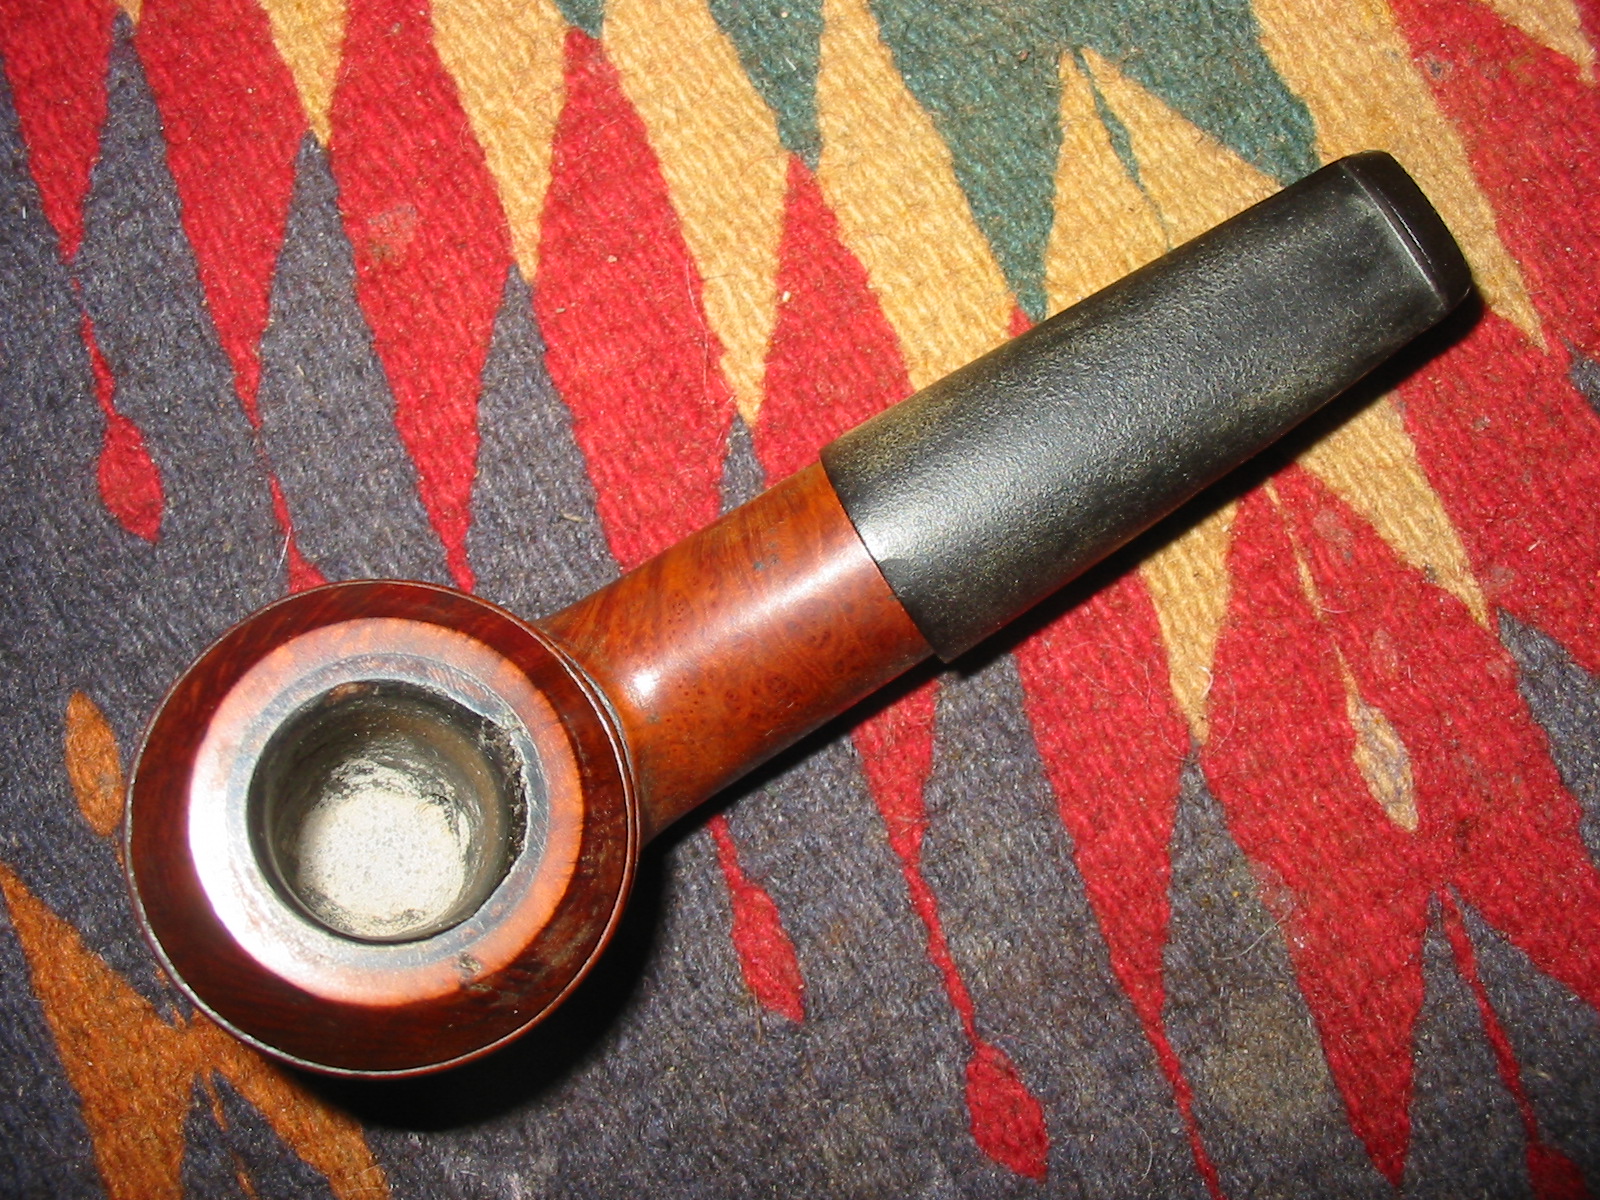
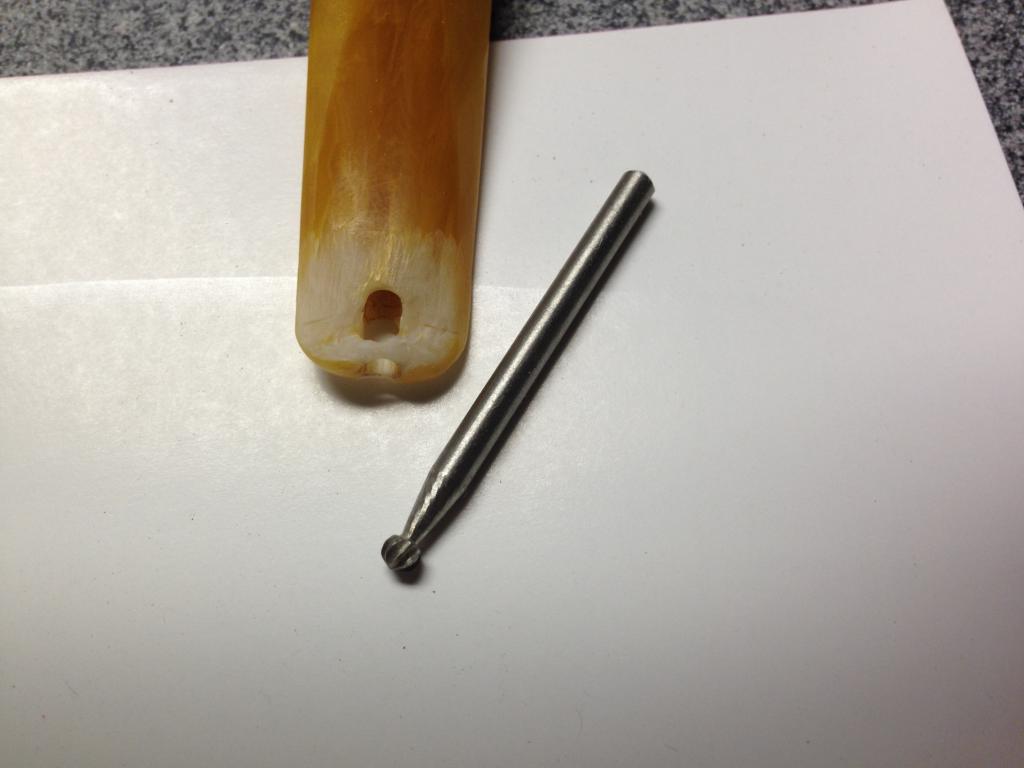
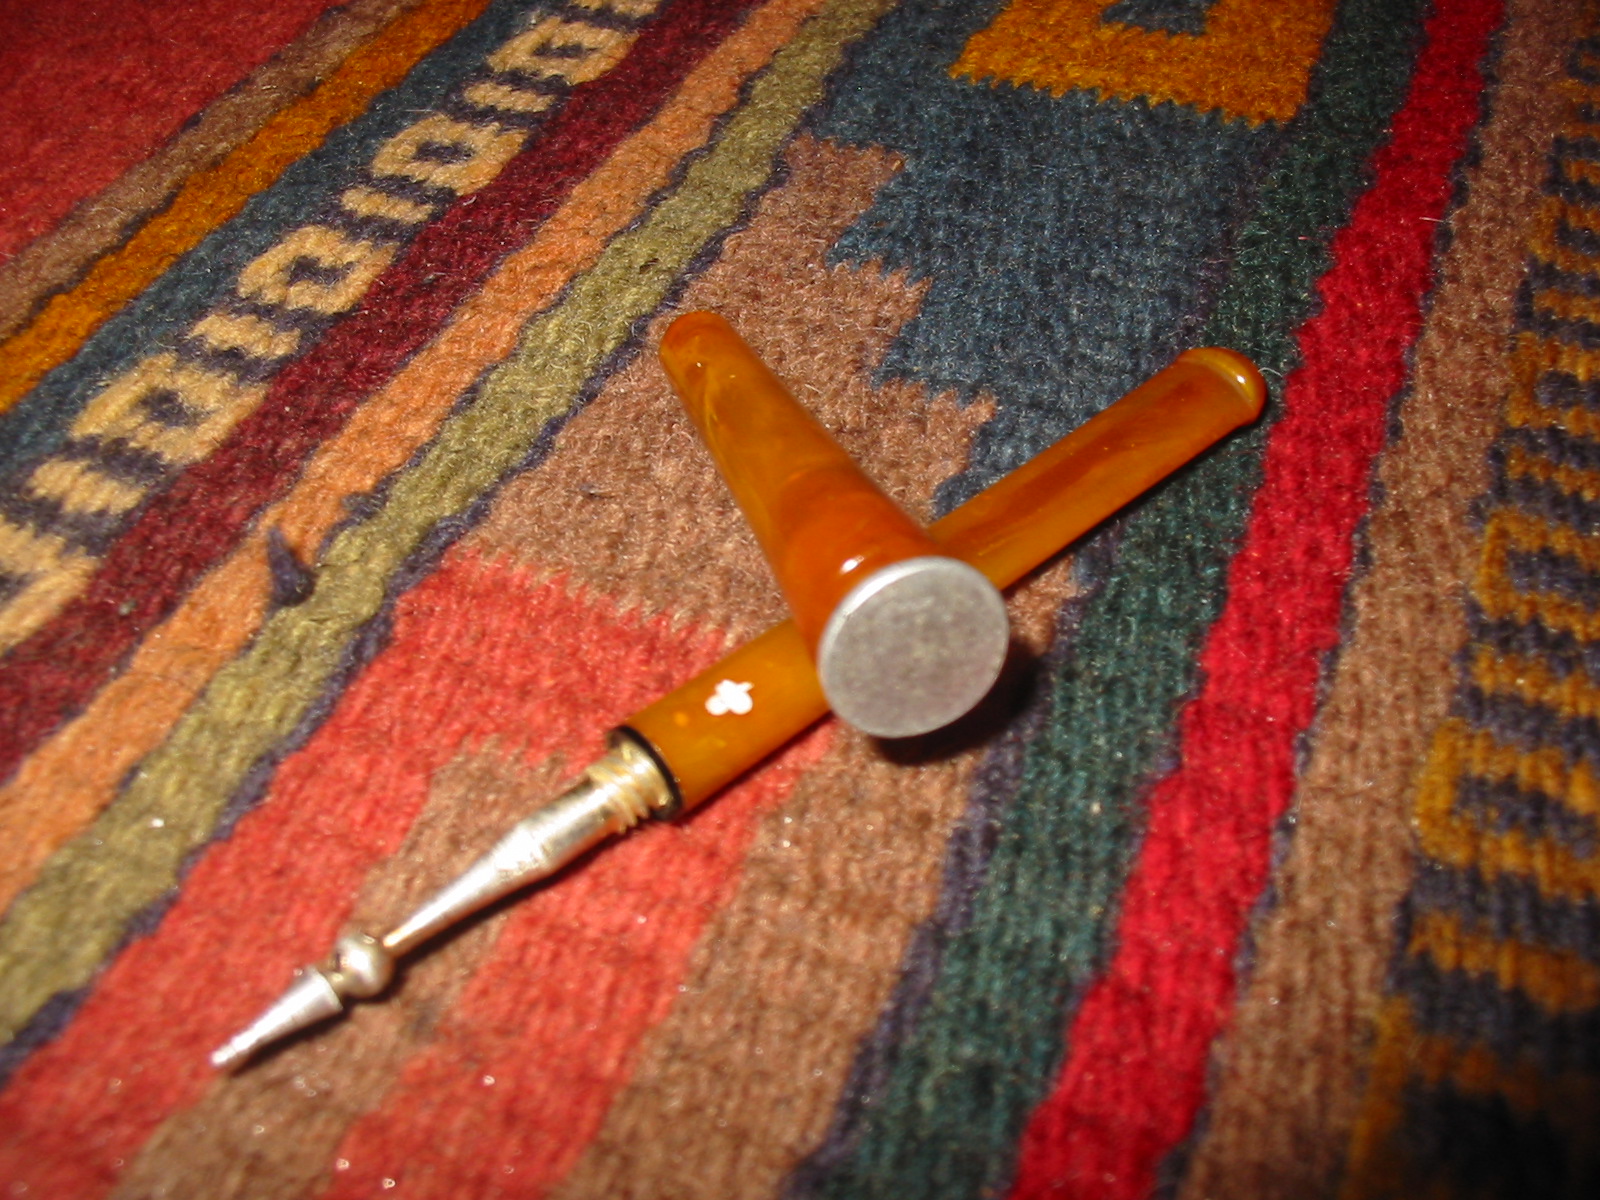
I cut off approximately 1 inch of a pipe nail to insert in the end of the holder. I wanted to have it extend slightly beyond the end of the holder so that it would not melt when it came in contact with the tobacco.
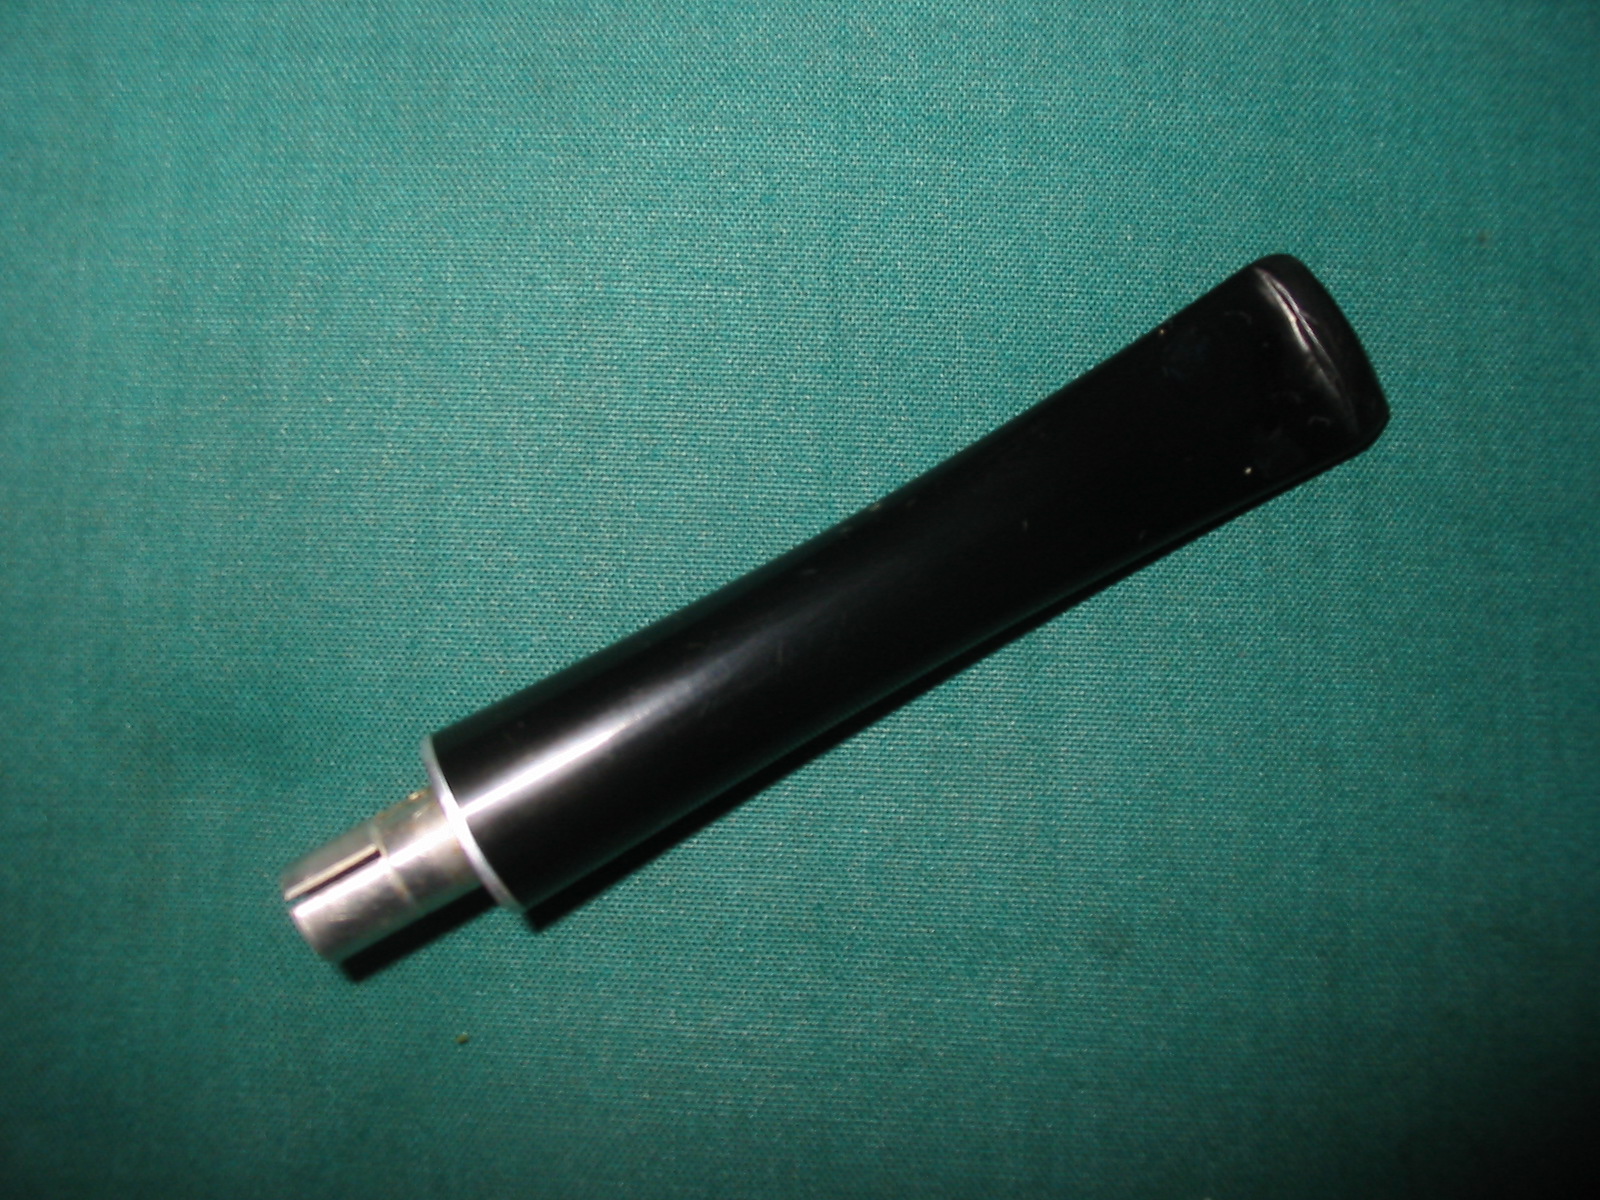
I had an idea that the stinger would work to loosen the dottle from a bowl when I had finished smoking the pipe. In the cigarette holder end I was thinking of inserting a cut pipe nail head and pressing it into place.
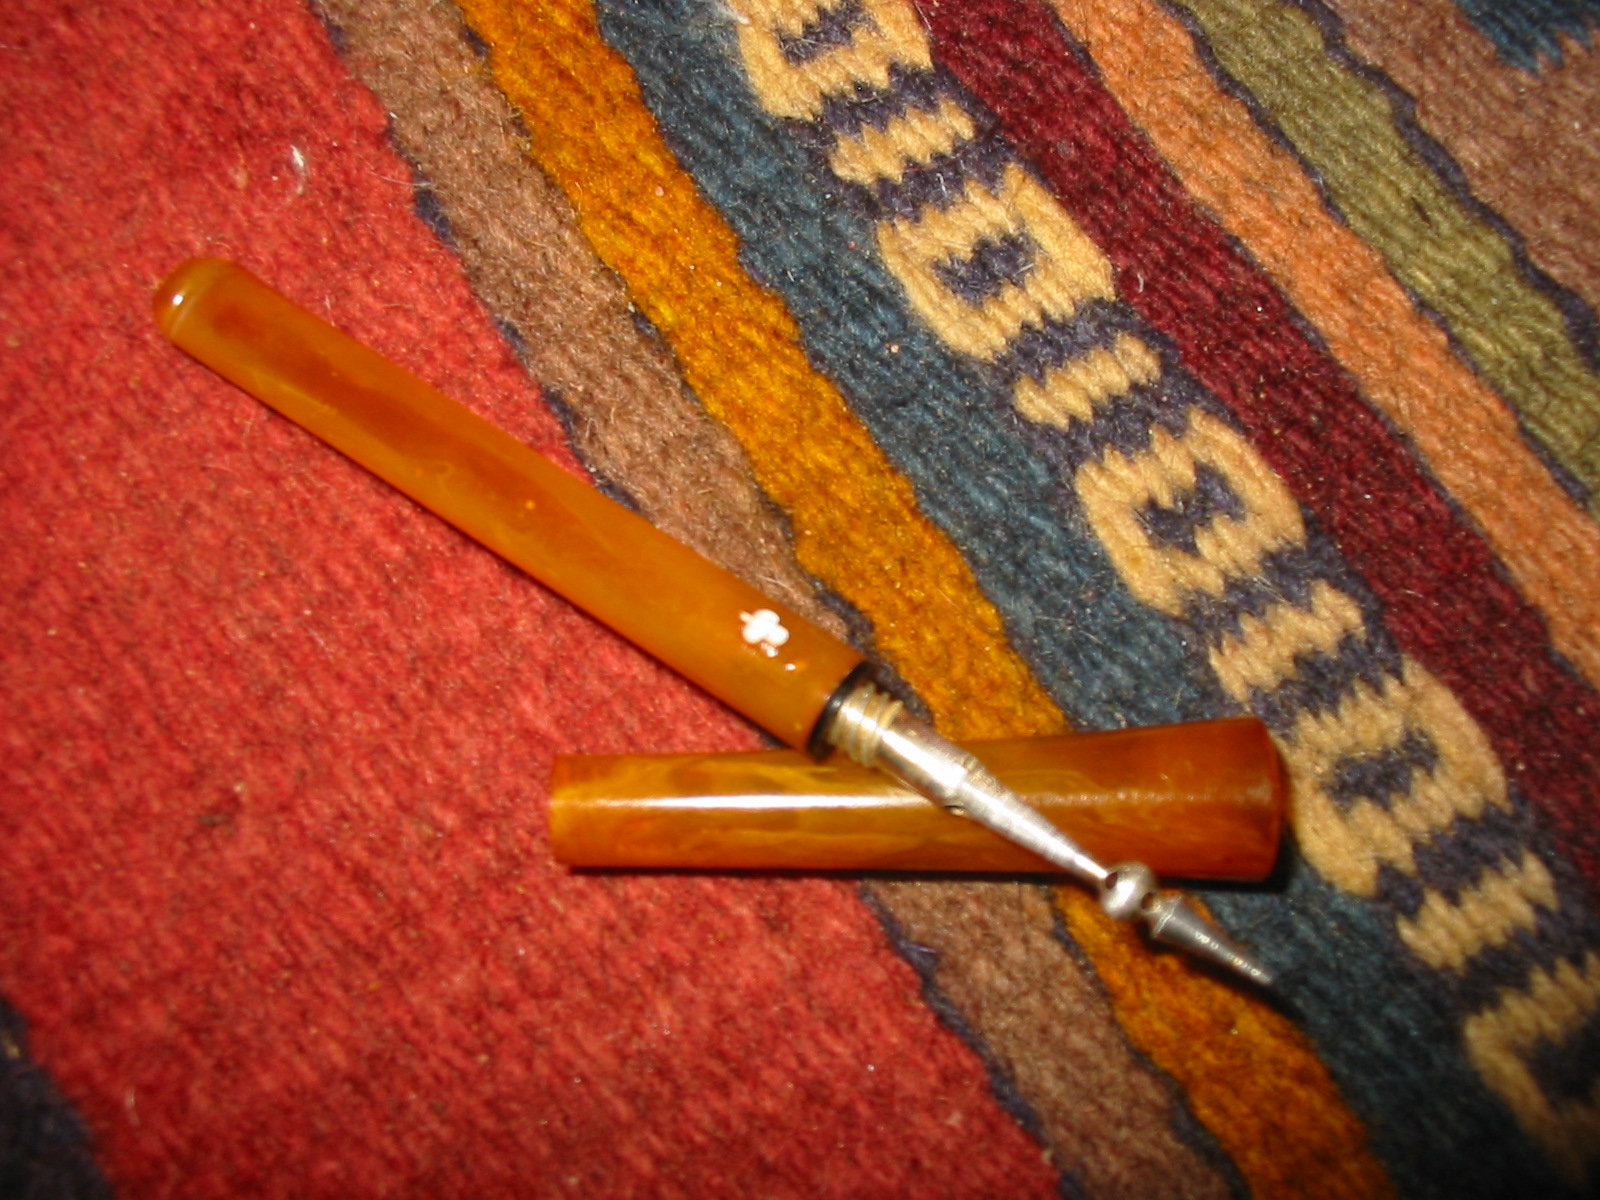
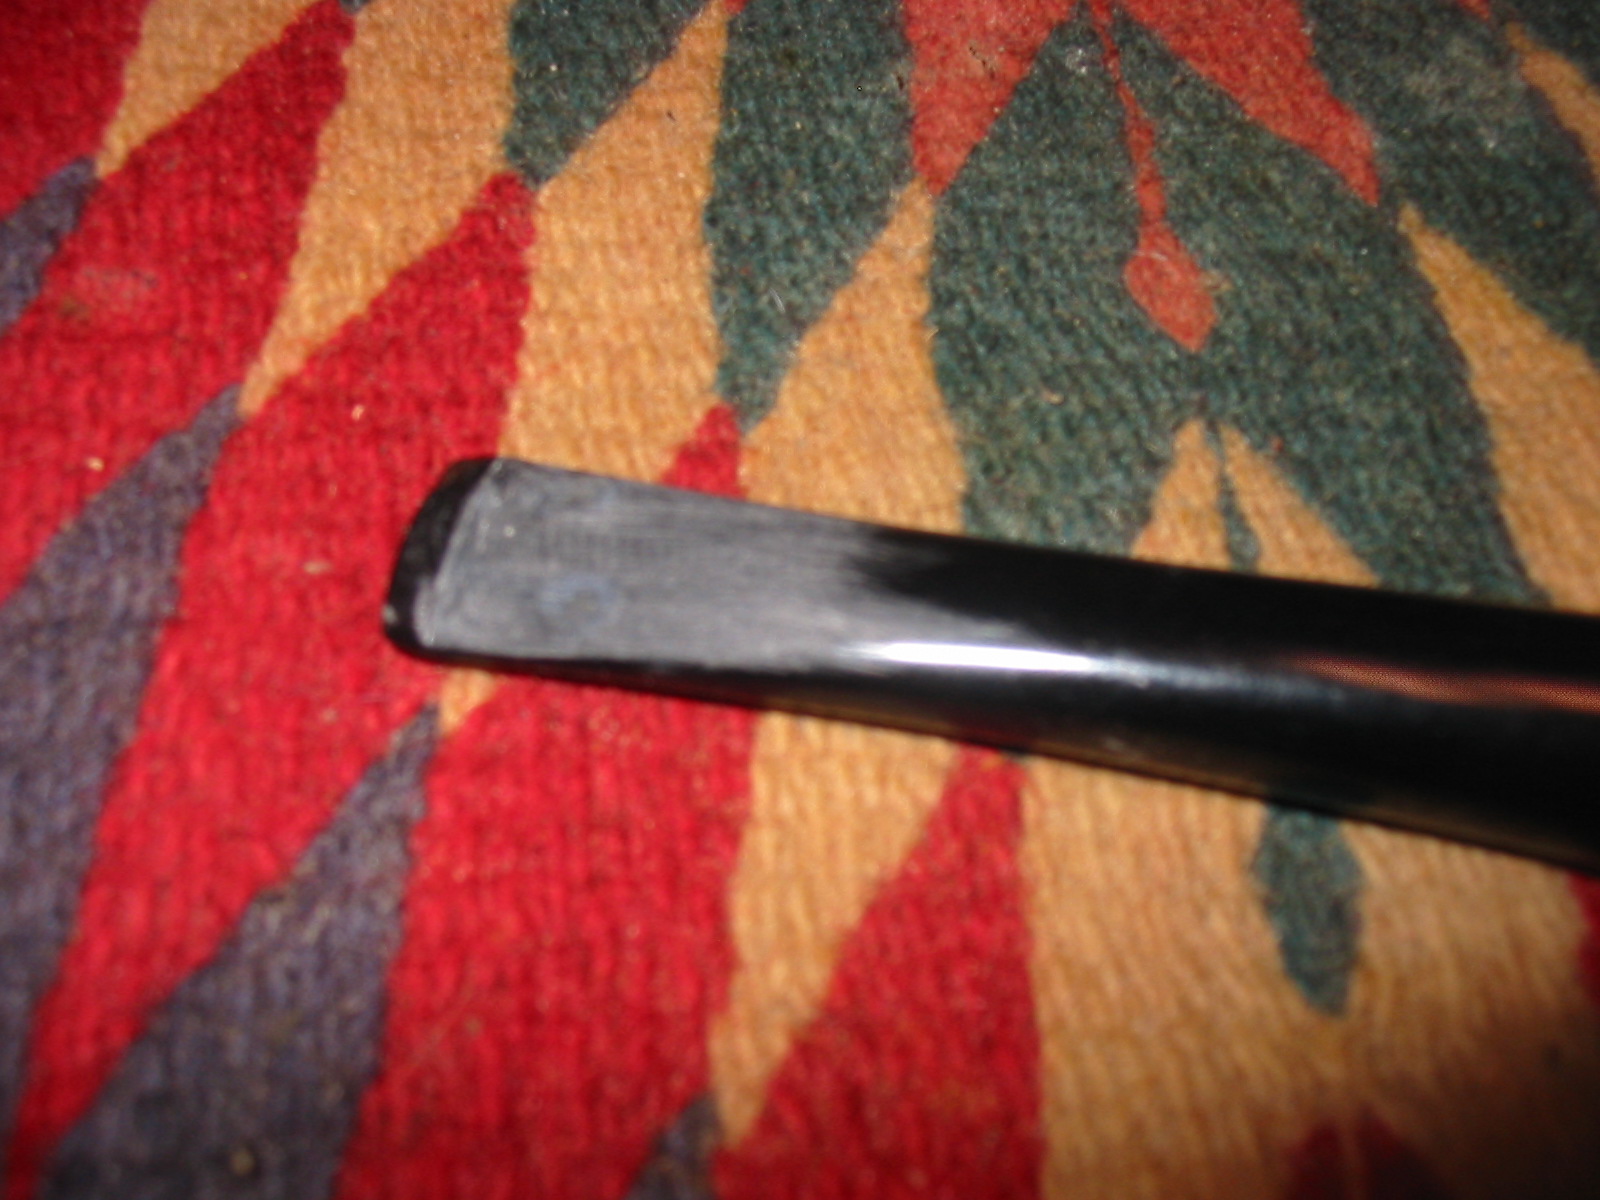
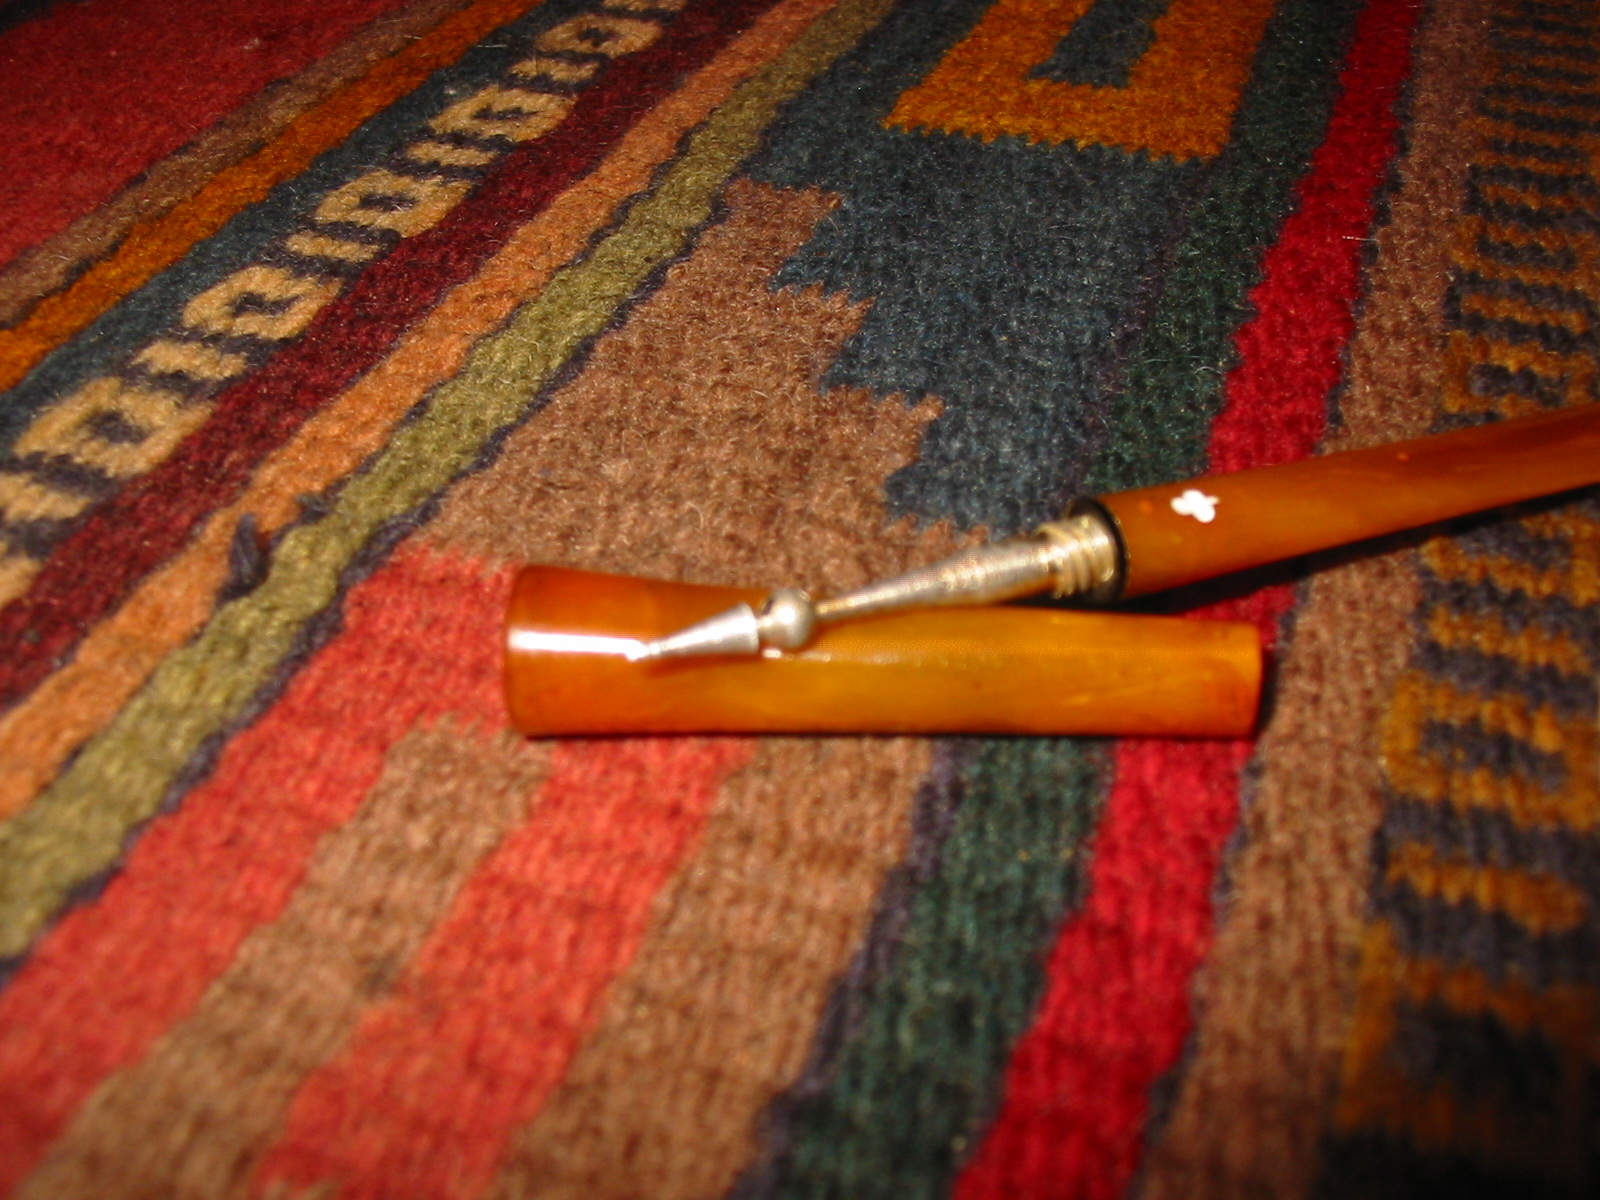
Once I cut the nail head off I ground the end slightly with a Dremel and sanding drum to get a smooth fit in the shank of the holder. I pressed it into place to see if it would hold and took the photo below.
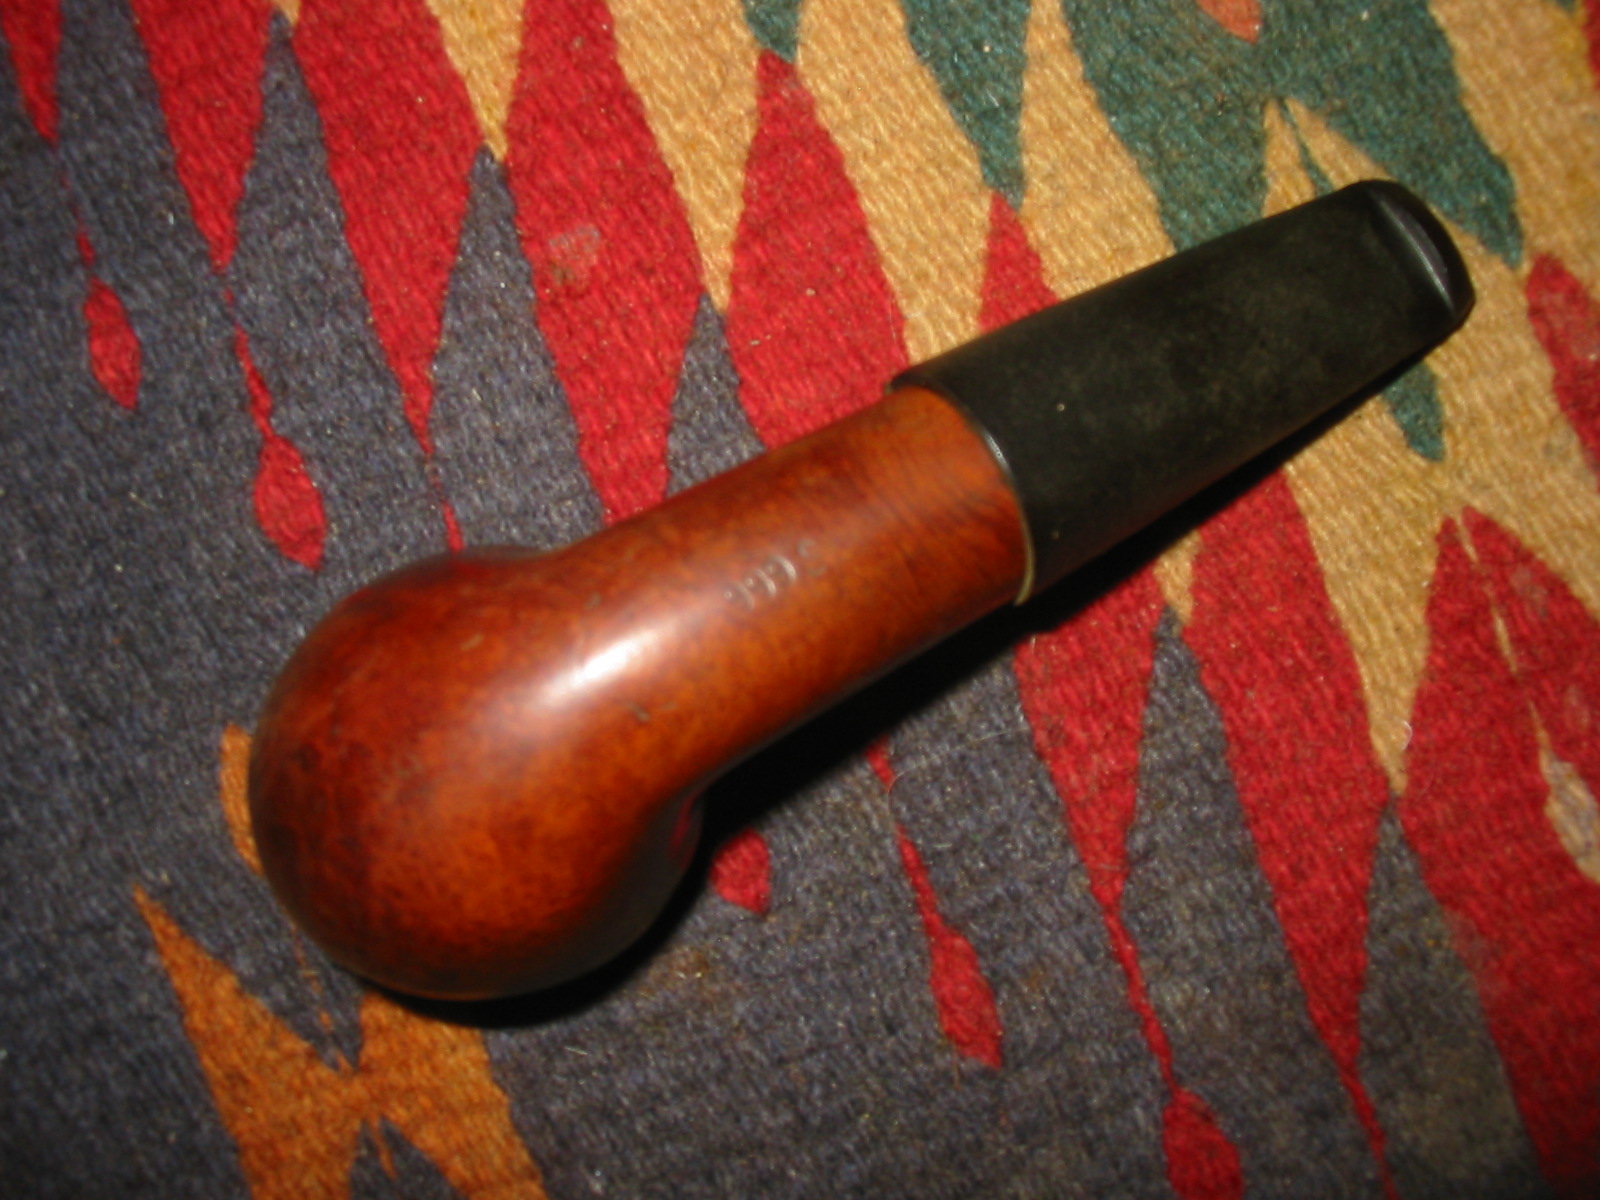
I found that it was not a tight enough fit to stay in place and was concerned I would lose the head when I carried it around. I decided to put a drop of super glue on the cut off end of the nail and insert it in place. When the glue set the nail would be permanent.
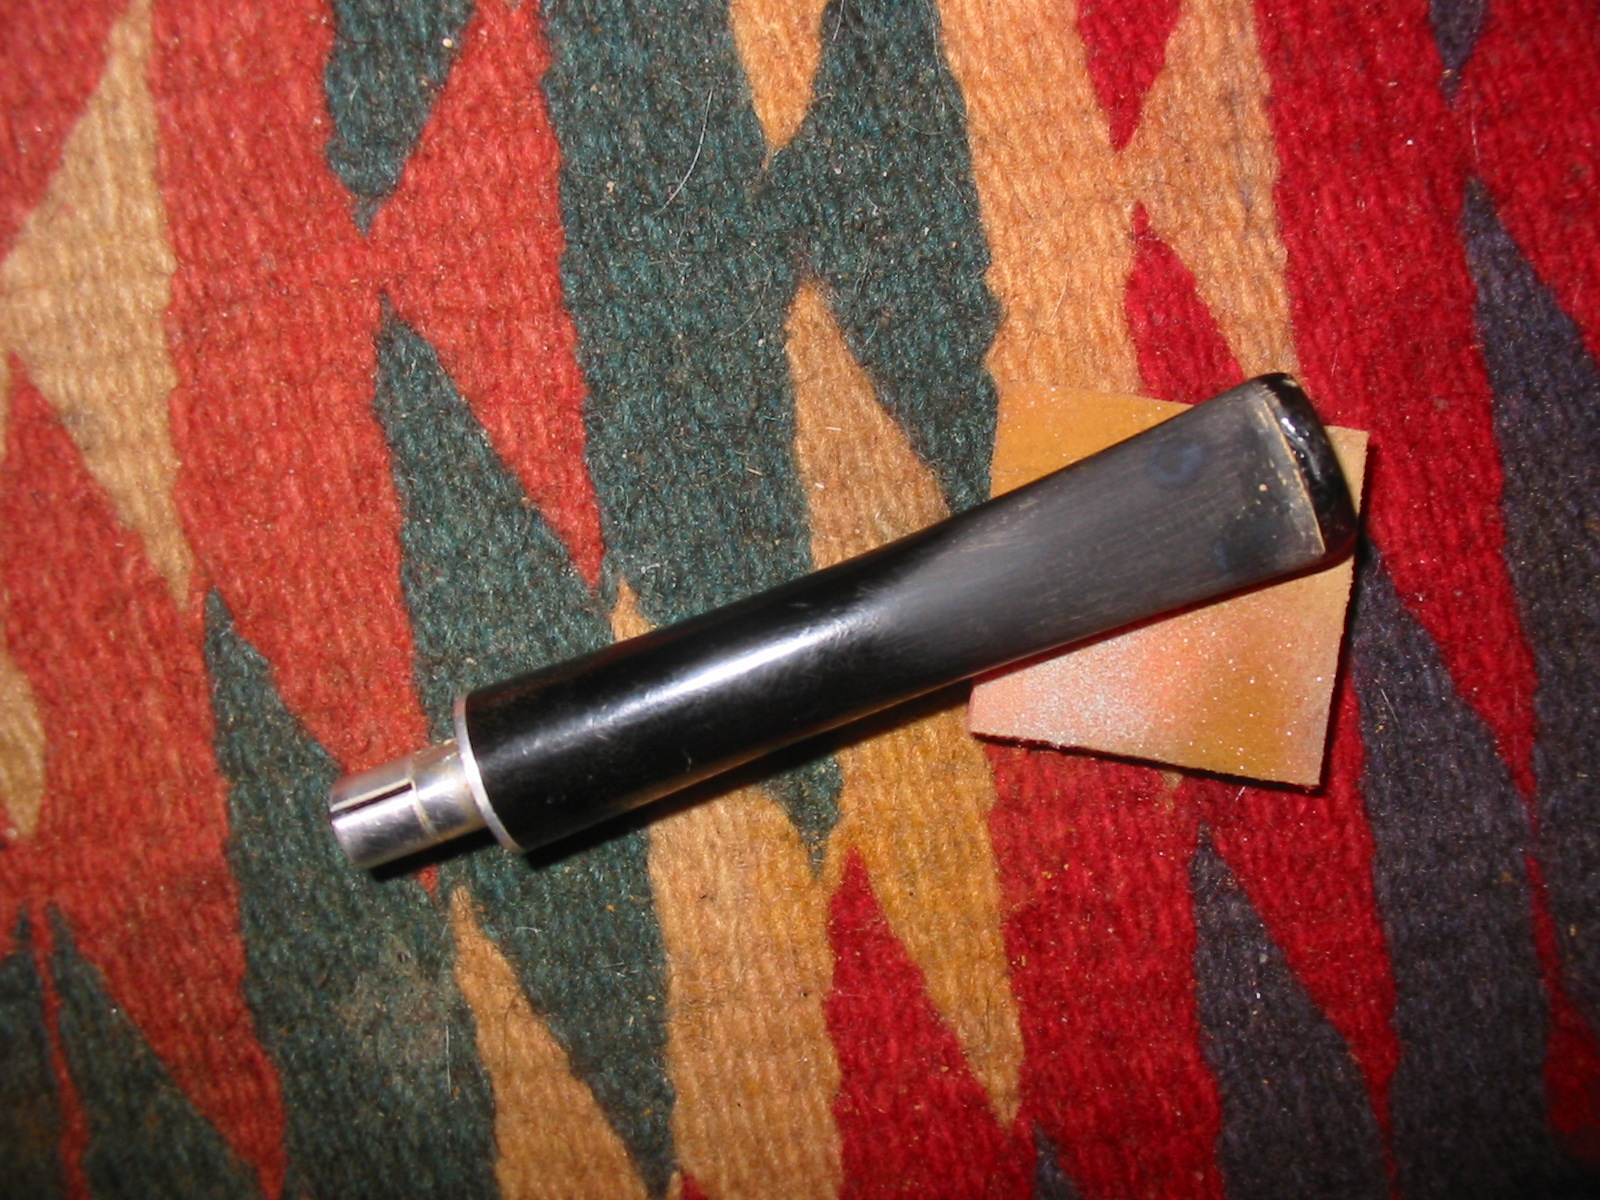
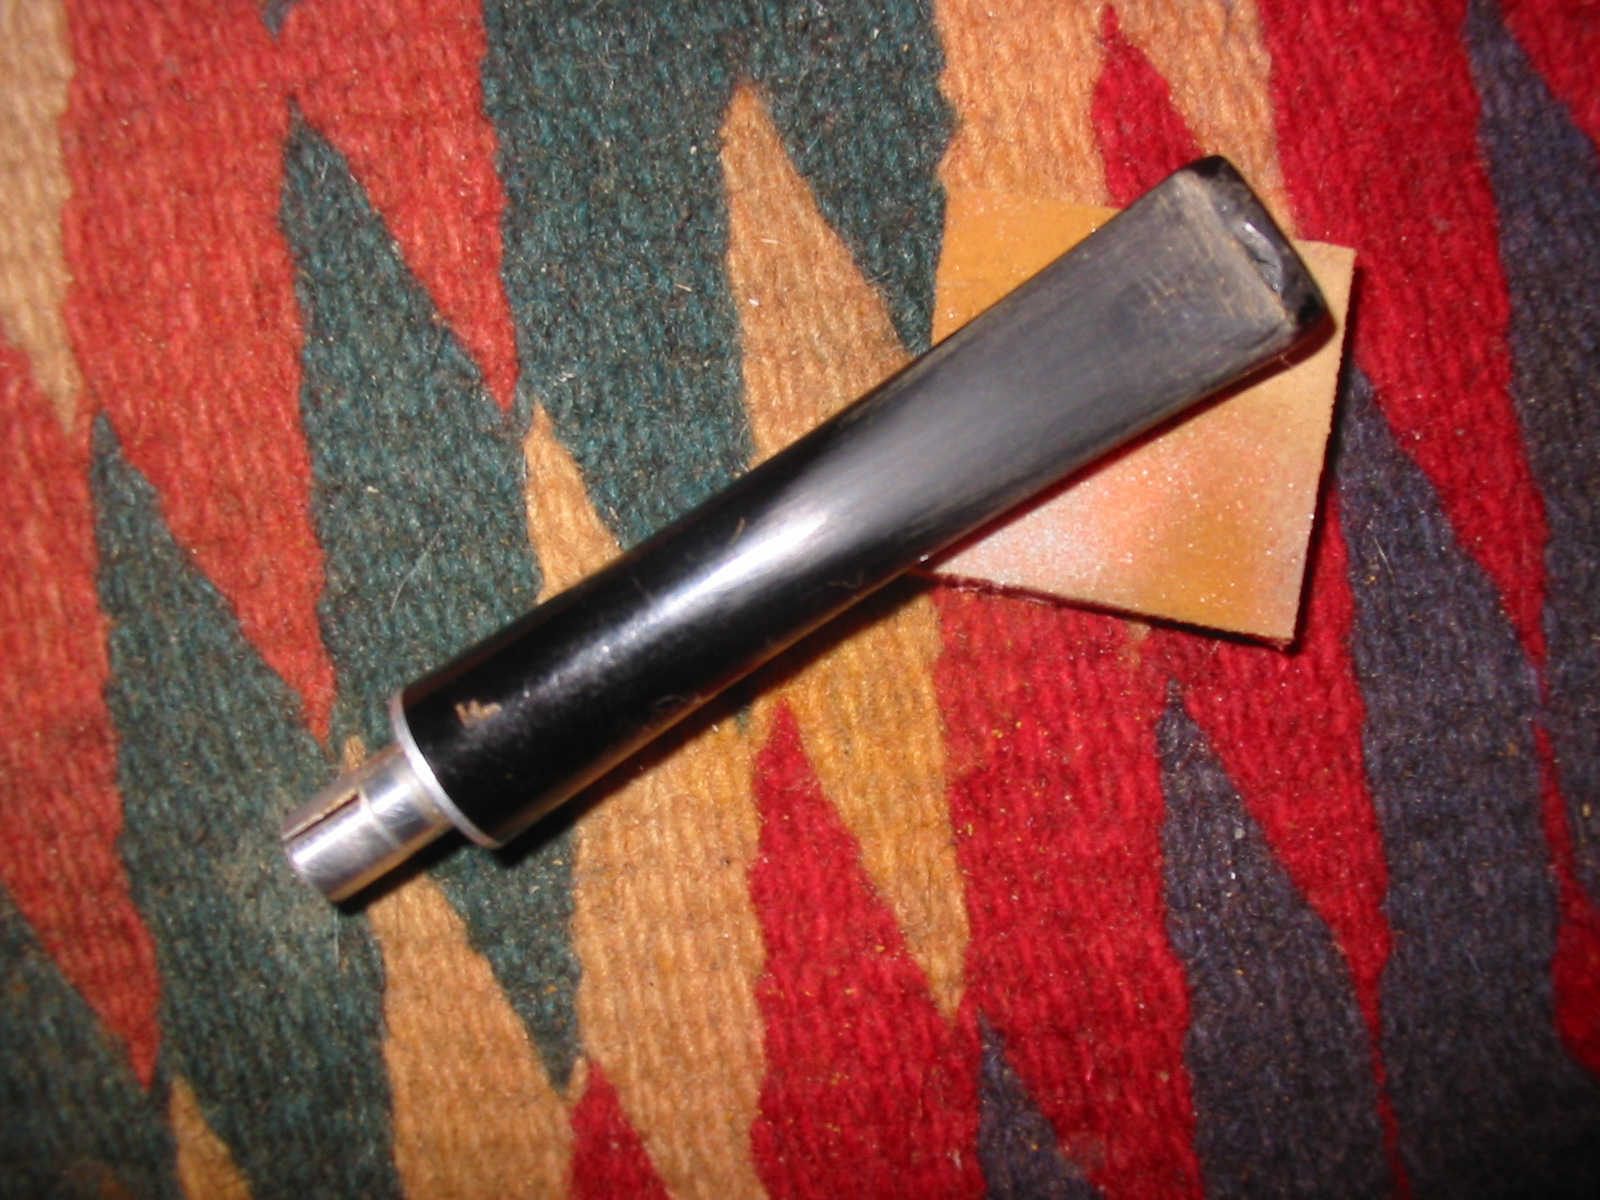
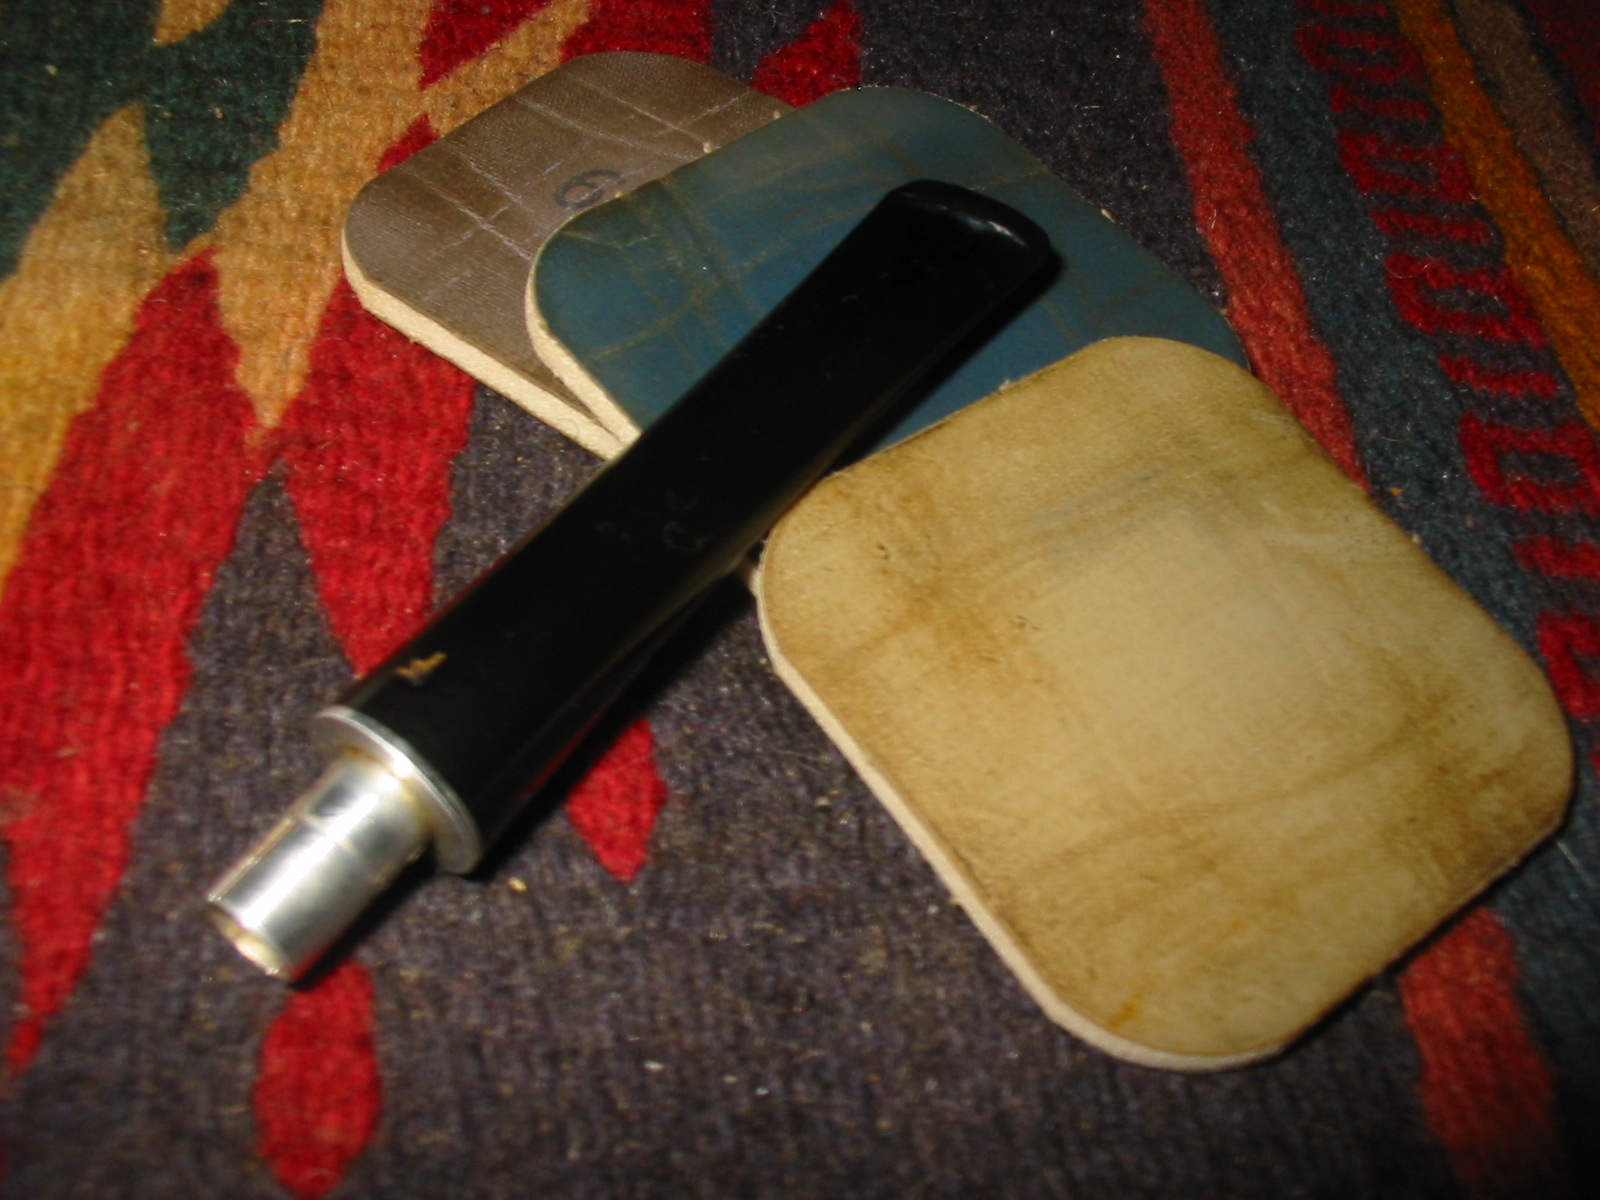
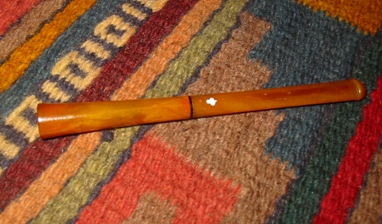
The final photo shows the tool with both of its parts – the poker for cleaning out the bowl and the tamper head for tamping the bowl. I think that the repurposing of this old cigarette holder went well and I have a functional tool to use in my pipe routines.
Now it is time to go and give it a try. I have a bowl of a tobacco sample sent to me by Robert ready to fire up. I have the tamper in hand and now it time to see if it works! Cheers.
