by Steve Laug
Back in the middle of February I received an email from a reader named David regarding a pipe of his that needed some work. I have included the email below.
Dear Steve,
I have a Dunhill Bruyere 36 with a cracked stem. I left it overnight in a cold garage, although a tight-fitting vulcanite mouthpiece may have stressed the wood stem and need slimming down. I’d like to send it to you for repair and banding. Do you have room in your schedule at the moment?
All the best, David
As we chatted it was clear that the shank had cracked on the top side at the end. The crack was clean and obvious. I wrote that t will need to be repair and band the crack. David and I made arrangements for him send it to me.
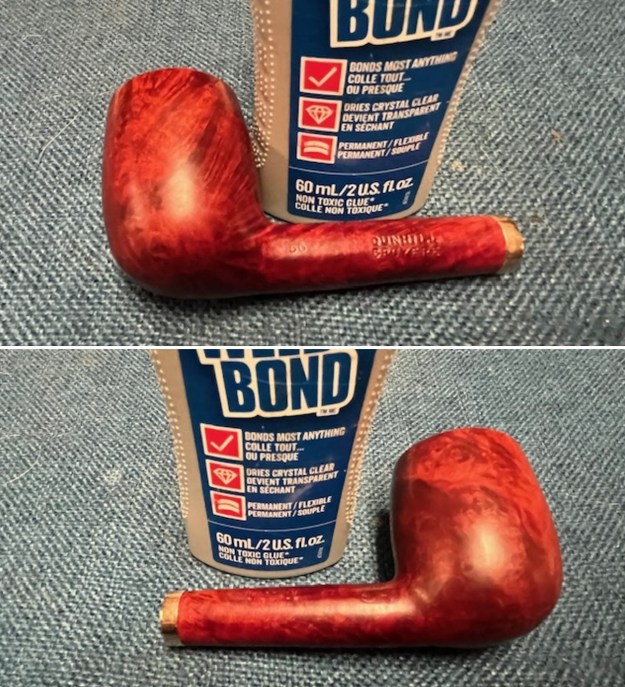
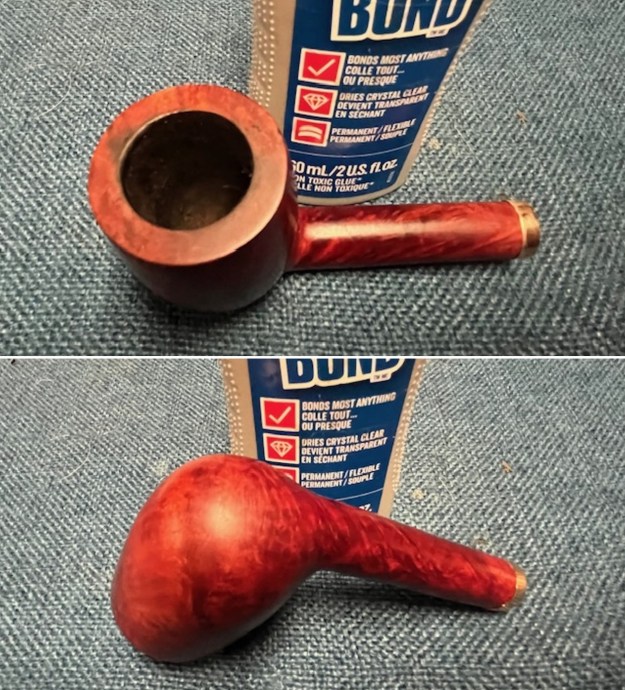
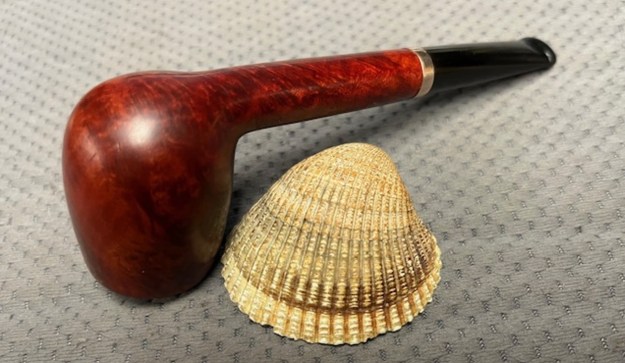
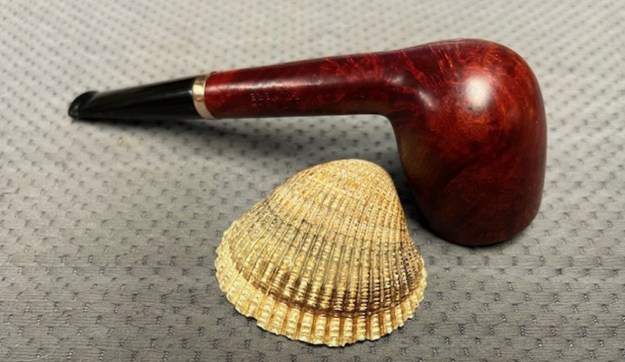
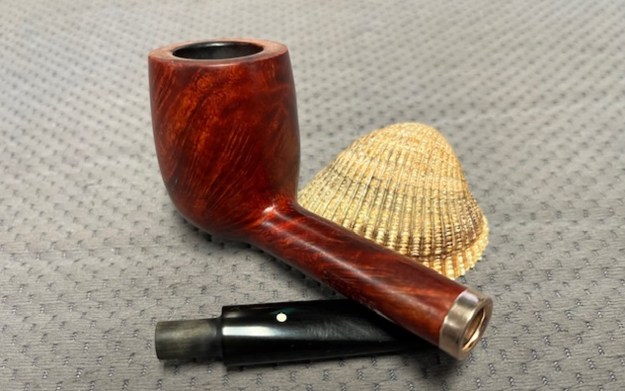
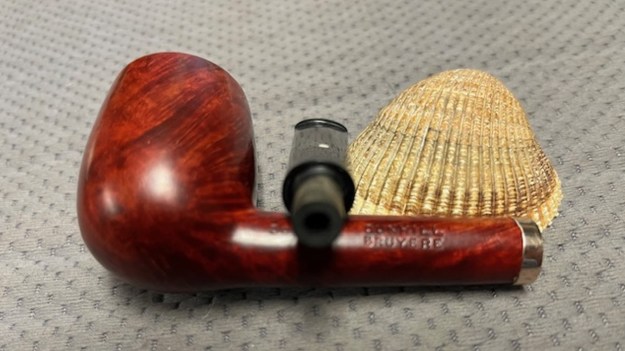
It arrived last evening. It was in great condition other than the crack and some darkening on the rim top and inner edge on the right front side of the bowl. The smooth finish around the bowl was in good condition with some slight dullness from use. The bowl had a light cake from the top to mid bowl and there was no lava on the inner edge or rim top. The unique in that it was a biteproof, or twin bore stem. It had some tooth marks and chatter on both sides ahead of the button. There was a white spot on the topside of the stem. The fit of the stem to the shank is tight as can be seen from the photos below and it was not pushed in due to the crack. The pipe is stamped on the left side of the shank and read 36 followed by Dunhill [over] Bruyere. On the right side it is stamped Made in London [over] England with the number 8 (date stamp) after the D of England. That is followed by 4 (size of pipe) in a circle followed by the letter A for Bruyere. I took some photos of the pipe before I started my work on it.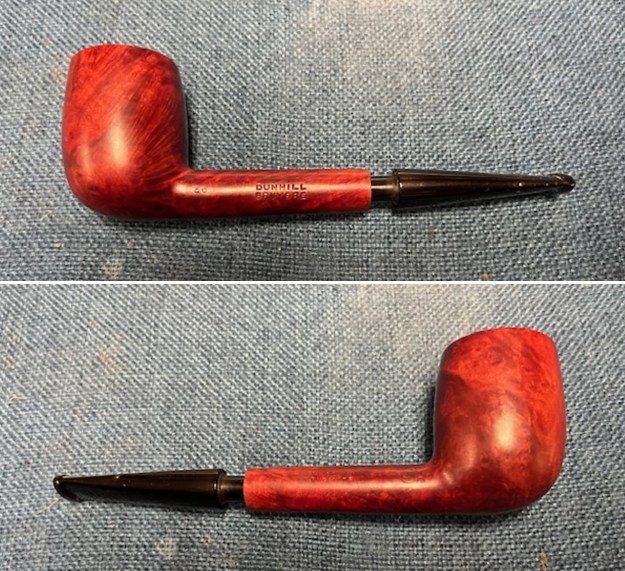
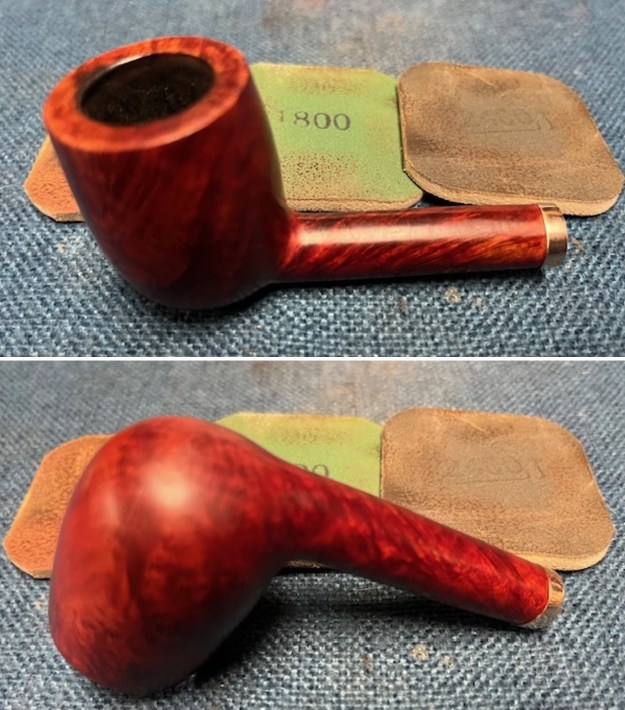
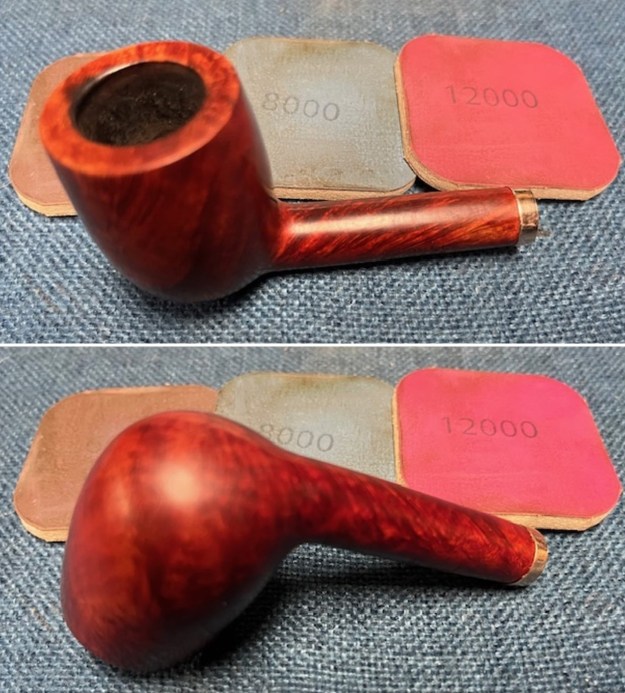
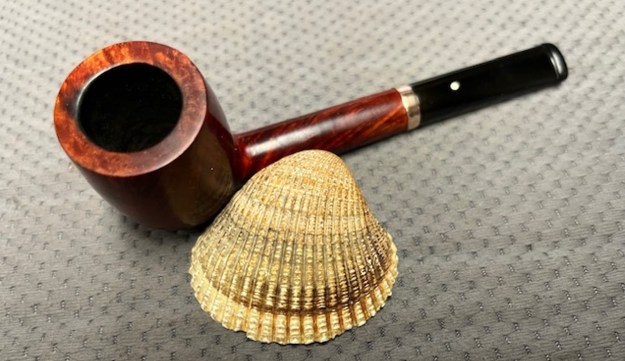
 I took photos of the bowl and rim top to show the bowl with the thin cake on the walls of the bowl. There was some darkening on the front right of the top of the rim and the edge of the bowl. The rim top looked pretty good, though a little dull. I took photos of the top and underside of the stem showing the tooth chatter and marks on the stem. I also took a photo of the twin bore stem.
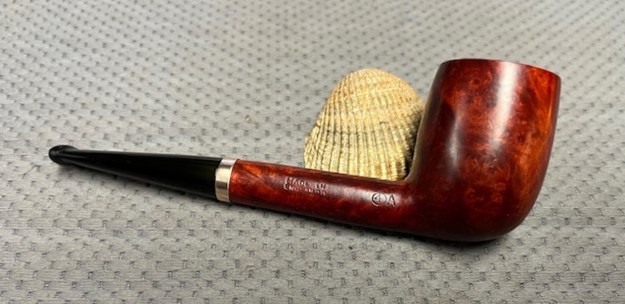
 I took photos of the stamping on the sides of the shank and they were clear and readable as noted above. I removed the stem from the shank and took a photo of the proportions of the pipe. It is quite nice.
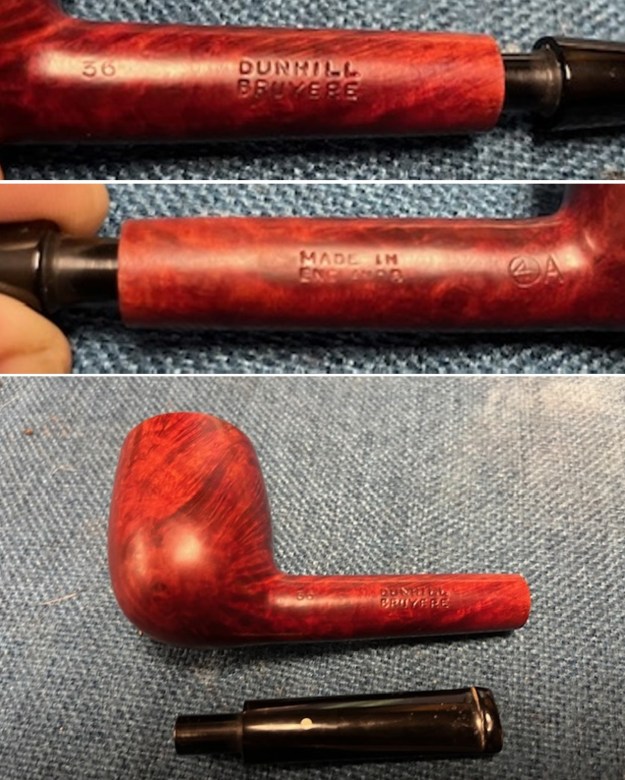 One of the first things I like to do is to unpack the stamping and understand each element in it. I turned to Pipephil’s helpful site (http://pipephil.eu/logos/en/dunhill/shell-briar1.html). The stamping is interpreted as follows: The 36 is the shape of the pipe which is a classic Liverpool. The Dunhill Bruyere is the finish. Following the Made In England8 gives the year that the pipe was made. The circle 4A is the stamp for a Group 4 in a Bruyere finish. There was some great information on the Bruyere finish that I have included below.
Bruyere
The original finish produced (usually made using Calabrian briar), and a big part of developing and marketing the brand. It was the only finish from 1910 until 1917. A dark reddish-brown stain. Before the 1950s, there were three possible finishes for Dunhill pipes. The Bruyere was a smooth finish with a deep red stain, obtained through two coats, a brown understain followed by a deep red.
There was a link on the above site to a section specifically written regarding the Bruyere finish (https://pipedia.org/wiki/Dunhill_Bruyere). I turned there and have included the information from that short article below.
Initially, made from over century-old briar burls, classified by a “B” (denoted highest quality pipe); “DR” (denoted straight-grained) and an “A” (denoted first quality), until early 1915. After that, they became a high-end subset to the Dunhill ‘Bruyere’. The DR and B pipes, a limited production, they should be distinguished as hand-cut in London from burls as opposed to the Bruyere line which was generally finished from French turned bowls until 1917, when the Calabrian briar started to be used, but not completely. Only in 1920 Dunhill took the final step in its pipe making operation and began sourcing and cutting all of its own bowls, proudly announcing thereafter that “no French briar was employed”.
Bruyere pipes were usually made using Calabrian briar, a very dense and hardy briar that has a modest grain but does very well with the deep red stain.
“Before the 1950s, there were three possible finishes for Dunhill pipes. The Bruyere was a smooth finish with a deep red stain, obtained through two coats, a brown understain followed by a deep red. The Shell finish was the original sandblast with a near-black stain (though the degree to which it is truly black has varied over the years). Lastly, the Root finish was smooth also but with a light brown finish. Early Dunhill used different briars with different stains, resulting in more distinct and identifiable creations… Over the years, to these traditional styles were added four new finishes: Cumberland, Dress, Chestnut and Amber Root, plus some now-defunct finishes, such as County, Russet and Red Bark.”
There was also a link to a catalogue page that gave examples and dates that the various finishes were introduced (https://pipedia.org/wiki/File:Dunnypipescatalog-1.png). 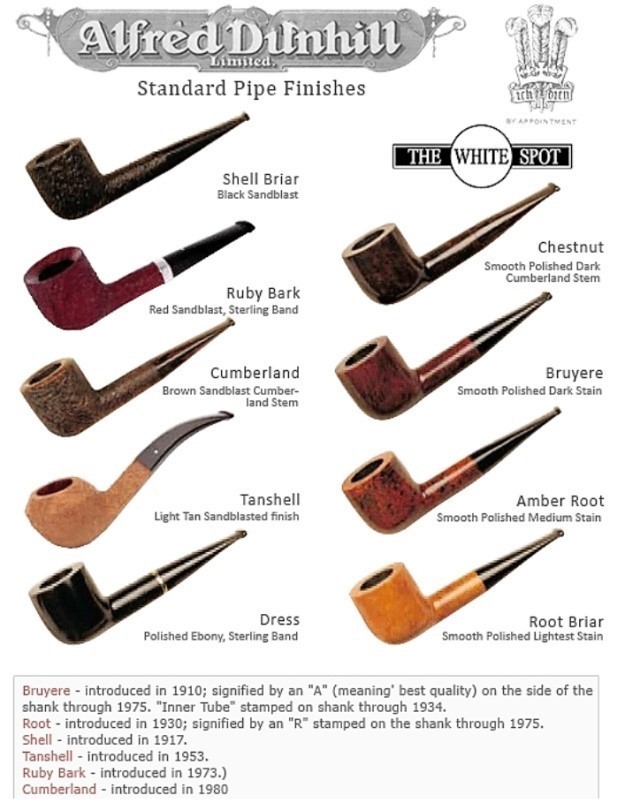 I turned to Pipephil’s dating guide to show how I arrived at the date of manufacture for this pipe (http://www.pipephil.eu/logos/en/dunhill/cledat-en1a.html). I am including the chart that is provided there for the dating a pipe. Since the pipe I am working on has a suffix8 that is the same height as the D in England. I turned to the 1960 line on the chart below with the suffix 5-9. It also gave me the formula for dating the pipe – 1960 + 8 dating the pipe to 1968.
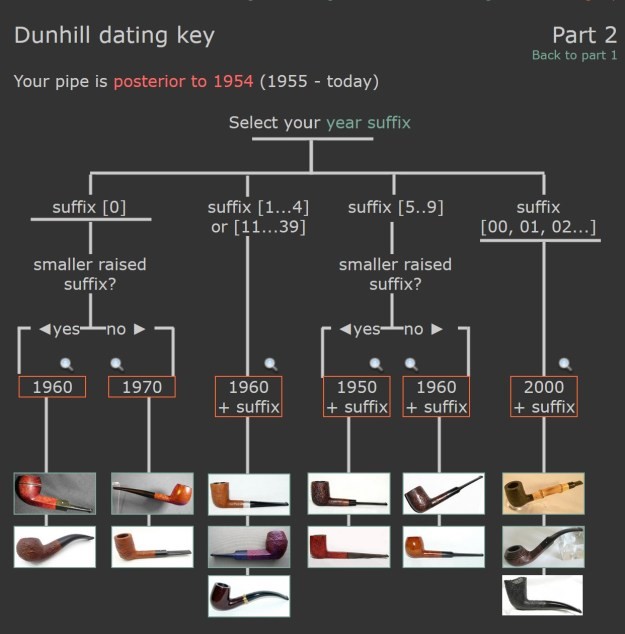 I now knew that I was working on a Bruyere that came out in 1968. The shape of the pipe was a Liverpool shape, 36 with a twin bore stem.
I tried to capture the crack in the shank in the photo below. The photo shows the location of the crack visible on the topside of the round shank. 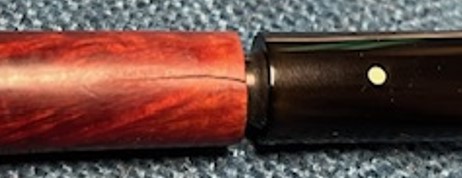 With the internals clean I turned to work on the cracked shank. I had polished brass/gold band that fit the shank perfectly. I used a tooth pick to paint the shank end with some all-purpose glue. I pressed the band in place on the shank.
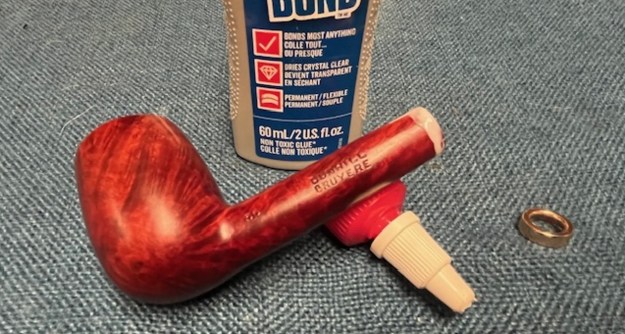
 I used a tooth pick to press clear CA glue into the crack in the shank. Once it cured I sanded the repair smooth. The glued crack and the band brought the pieces back together again. It was a snug and clean repair.
 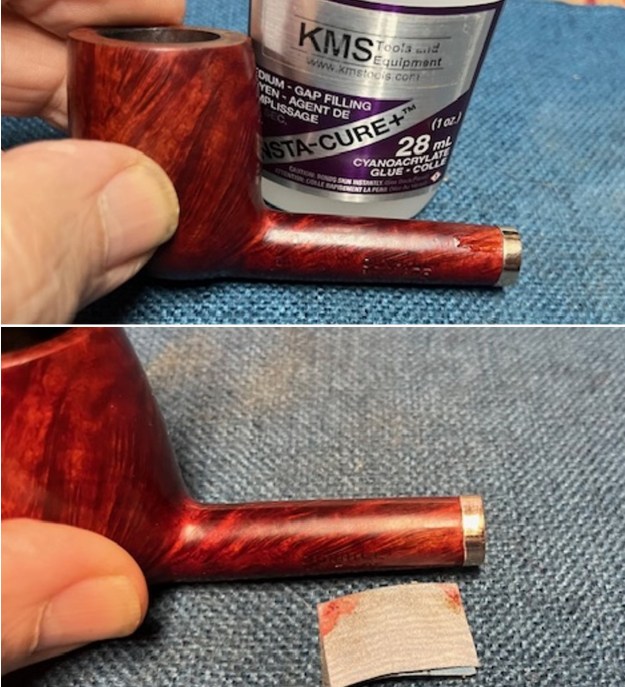 I touched up the stain on the repaired area on the shank and on the cleaned rim top and edge with a Cherry Stain Pen to blend them into the surrounding stain on the bowl and shank. It looked very good.
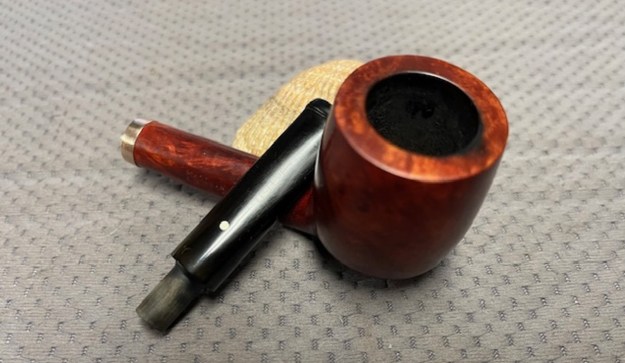
 I up the walls of the bowl with a Savinelli Fitsall Pipe Knife. I remove all the rest of the cake remnants on the bowl walls. I was very clean.
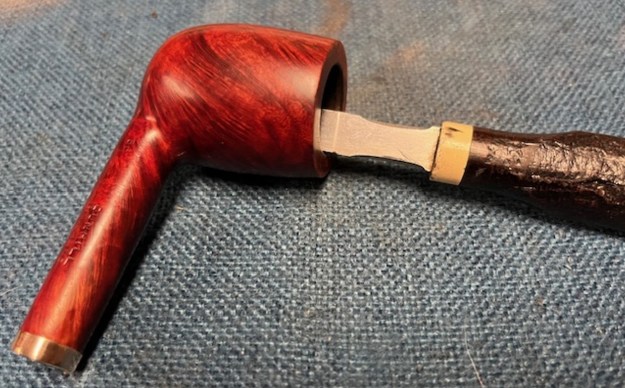 I cleaned out the airway in the shank, mortise and the stem with a bristle pipe cleaner and regular smooth cleaners and alcohol. It removed the remaining oils and tars but it was not too dirty.
 I used 320-3500 grit 2×2 inch sanding pads to smooth out the sanded and restained shank repair and rim top. I wiped the briar down with a damp cloth between pads to remove the sanding debris. The bowl looked much better.
 I polished the briar with micromesh sanding pads – dry sanding it with 1500-12000 grit sanding pads. I wiped the briar down with a damp cloth after each sanding pad and the bowl began to take on a deep shine and the scratches were minimized.
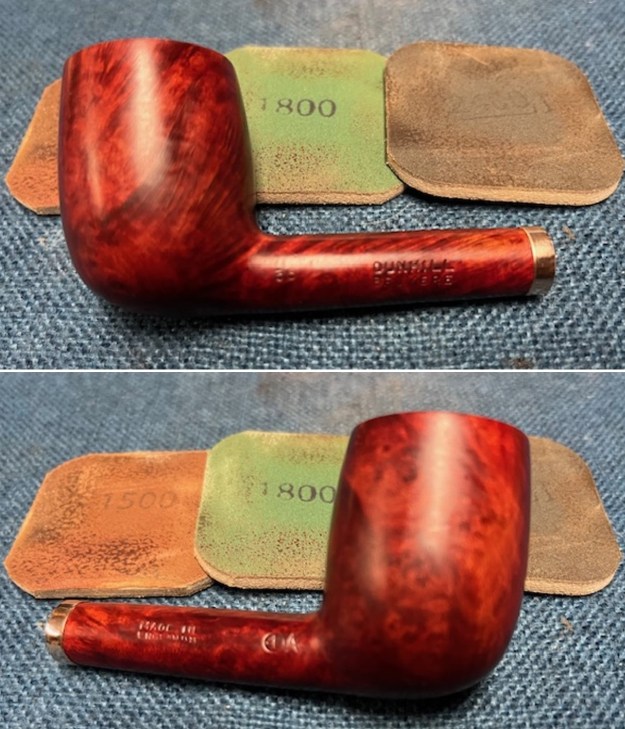

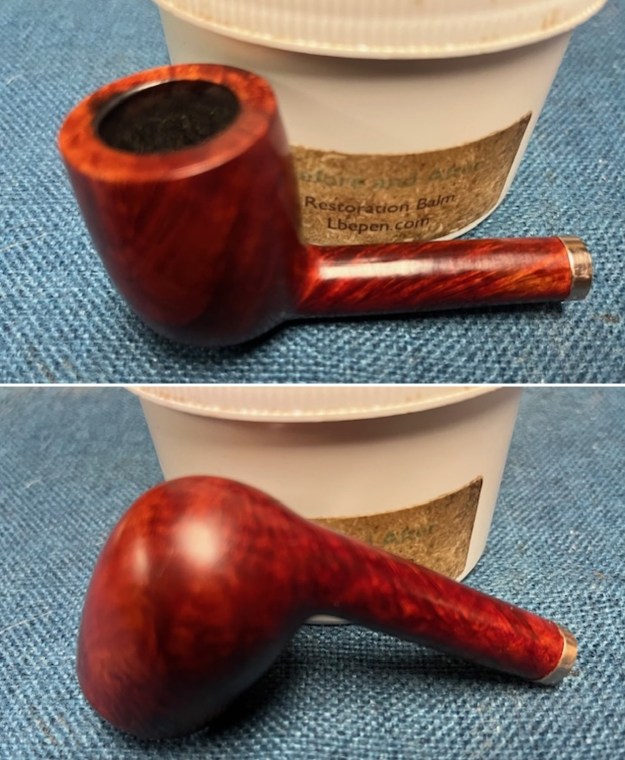
 I worked some Before & After Restoration Balm into the surface of the briar with my finger tips to get into the finish of the briar. The product is incredible and the way it brings the grain to the fore is unique. It works to clean, protect and invigorate the wood.
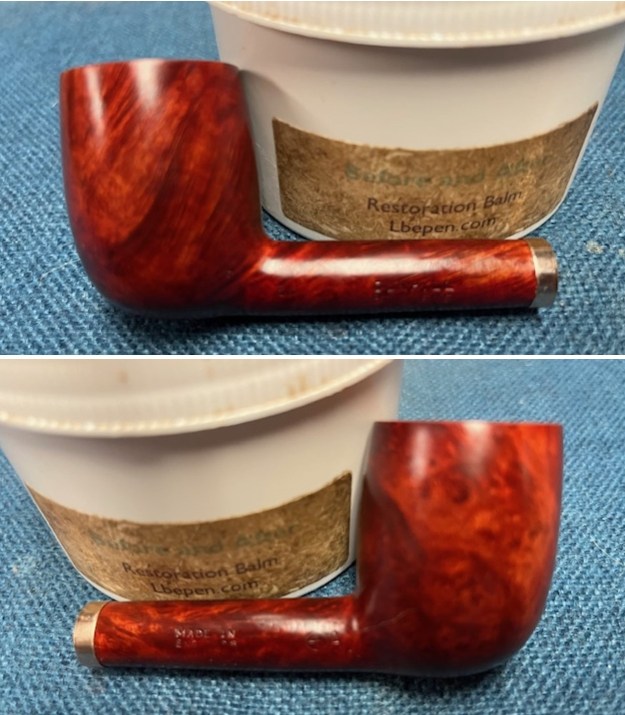
 With the bowl finish I turned my attention to the stem. I sanded the tenon to reduce the diameter to adjust the fit to the shank. Once it was smooth and snug I moved on to work on the tooth marks on the stem surface and on the surface of the button. I used a folded piece of 220 grit sandpaper to smooth out the damage on the button and on the surface of the stem. It looked much better. I also worked over the Twin Bore face of the button with the sandpaper to smooth out the tooth marks and flatten the face. It looked significantly better.
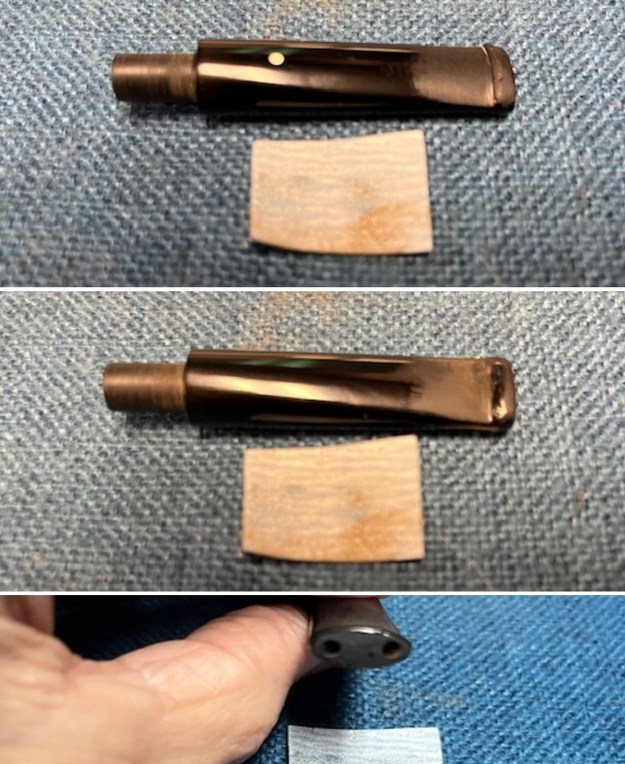 I set the bowl aside and turned my attention to the stem. I sanded the stem with 320-3500 grit sanding pads to smooth out the scratches and remove the light oxidation on both sides. I wiped the stem down with an Obsidian Oil cloth after each sanding pad to remove the sanding debris on the surface.
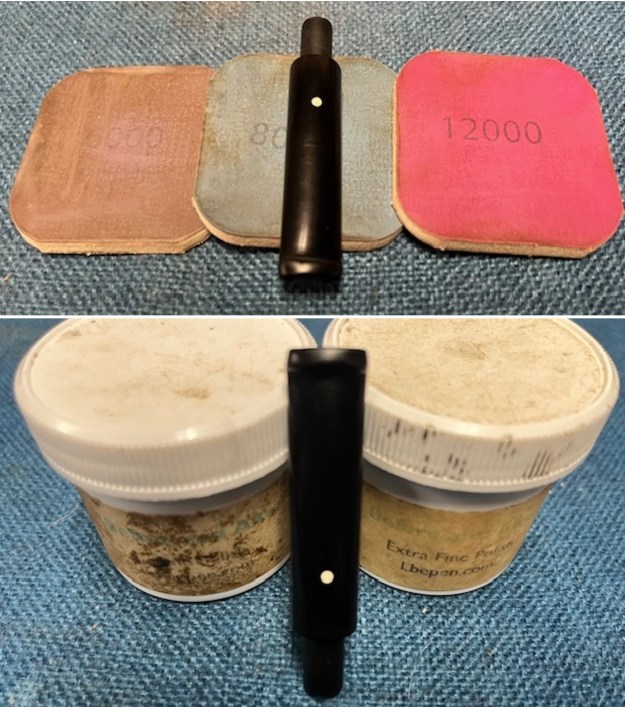
 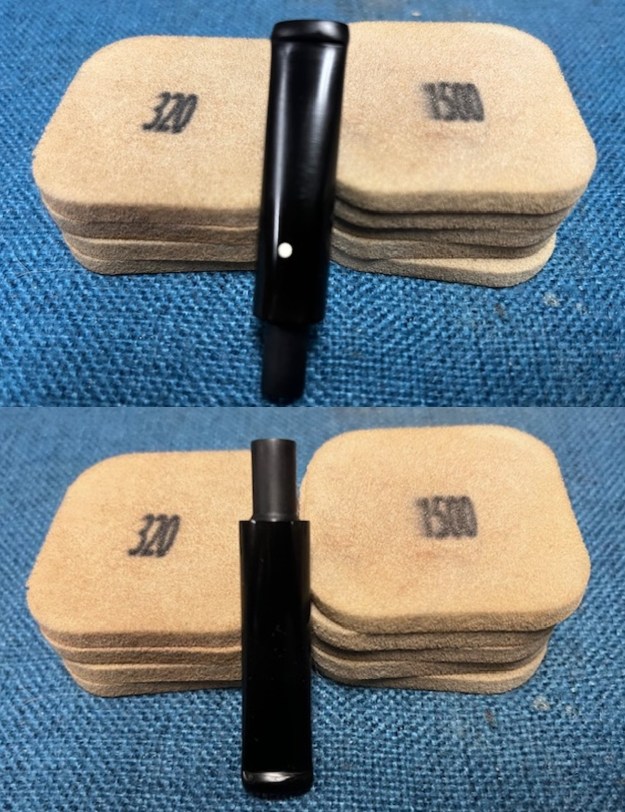 I set the bowl aside and turned my attention to the stem. It was in great condition after the cleanup so I polished the stem with micromesh sanding pads – dry sanding it 1500-12000 pads. I wiped it down with Obsidian after each pad to remove the dust and polishing debris. I polished it with Before After Pipe Polish – both Fine and Extra Fine. I gave it another coat of Obsidian Oil.
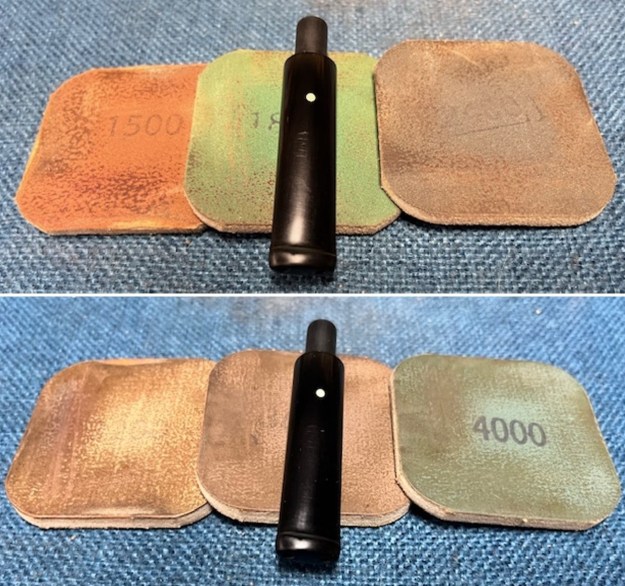
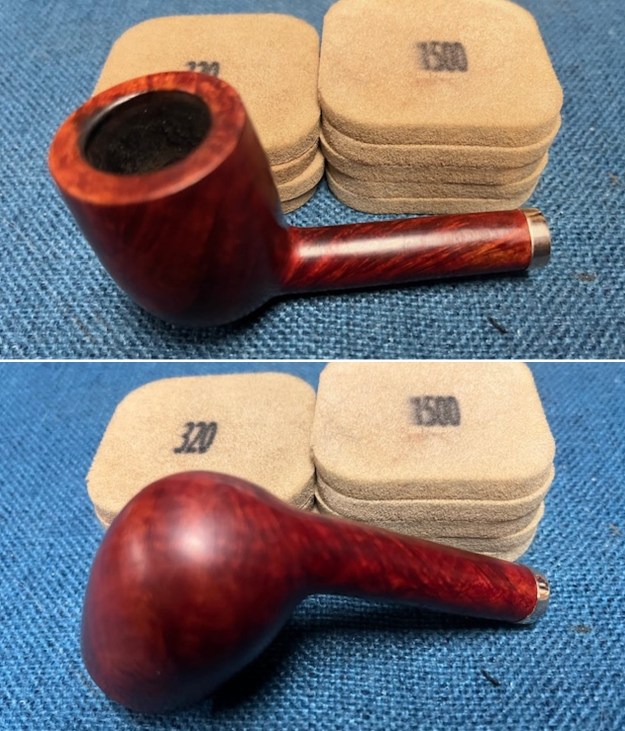
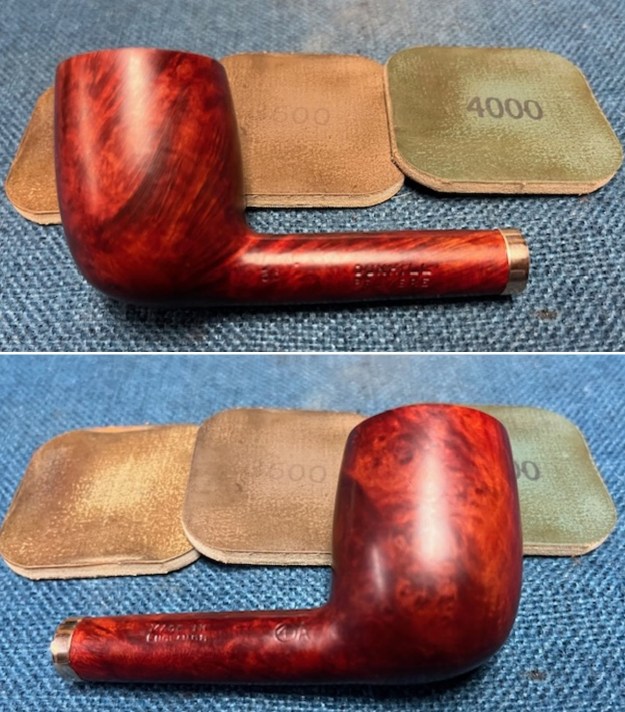
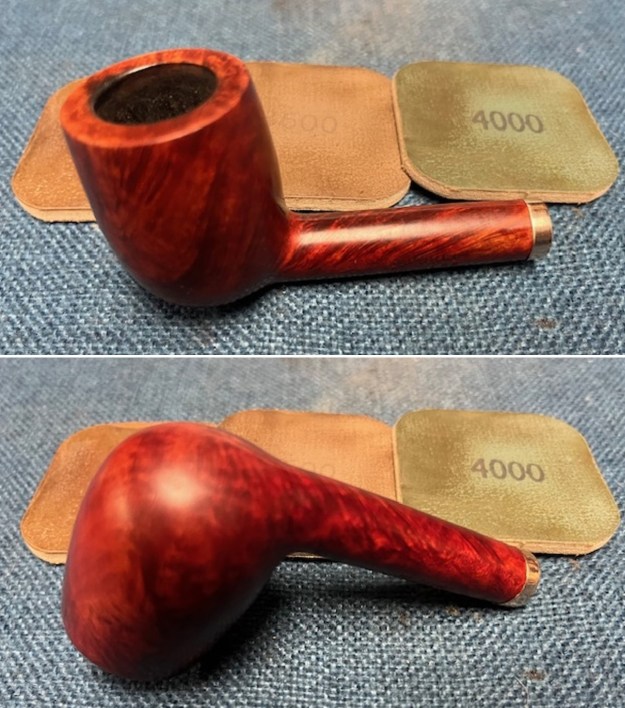
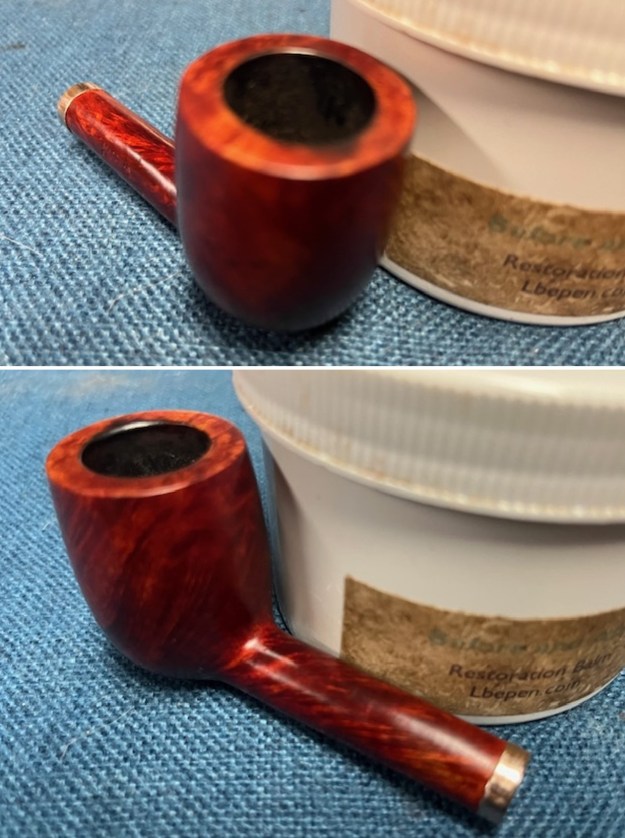
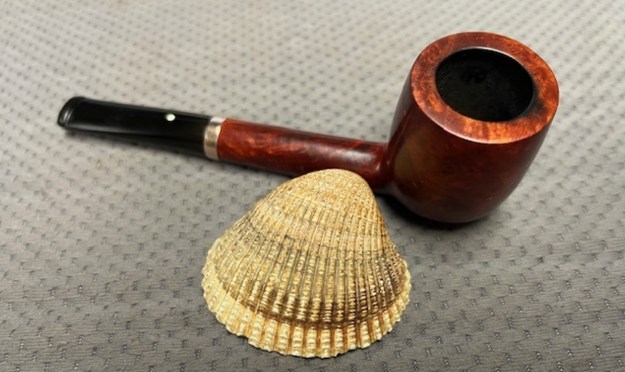
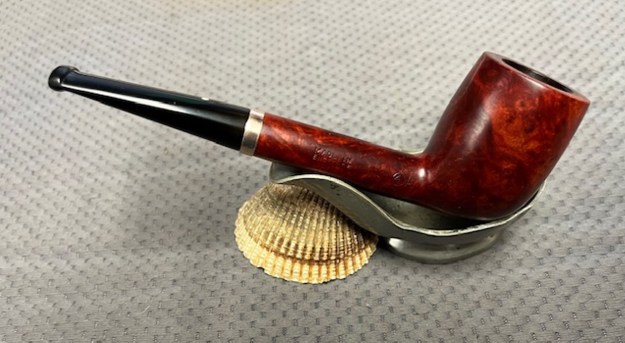
 This Dunhill Bruyere 36 Group 4A Liverpool from 1968 is a beautiful looking piece of briar that has a shape that follows grain. It is a great looking pipe that came out looking even better after the cleanup. The Bruyere is an early finish that Dunhill specialized in making. The finish on the pipe cleaned up well. The red and brown stain on the bowl works well to highlight the grain. The polished brass band looks very good with the finish. The polished black vulcanite Twin Bore taper stem adds to the mix. I put the stem back on the bowl and buffed the pipe with Blue Diamond on the buffing wheel being careful to not buff the stamping. I gave the bowl and the stem multiple coats of carnauba wax on the buffing wheel and buffed it with a clean buffing pad. I hand buffed the pipe with a microfiber cloth to deepen the shine. The finished 1968 Dunhill Bruyere 36 Liverpool is quite nice and feels great in the hand. Give the finished pipe a look in the photos below. The dimensions of the pipe are Length: 5 ¼ inches, Height: 1 ¾ inches, Outside diameter of the bowl: 1 ¼ inches, Chamber diameter: ¾ of an inch. The weight of the pipe is 32 grams/1.13 ounces. I will soon be packing it up and send it back to David this weekend. Thanks for walking through the restoration and banding with me.
Thanks for walking through the restoration with me as I worked over another beautiful pipe. Remember we are not pipe owners; we are pipemen and women who hold our pipes in trust until they pass on into the trust of the next generation. 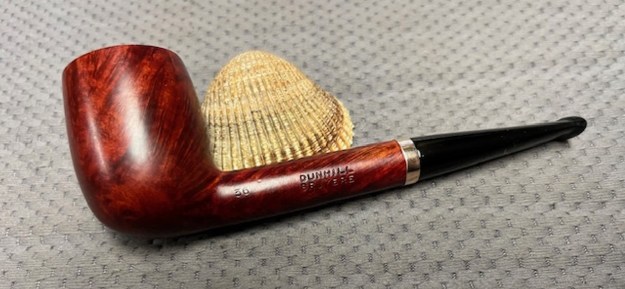


