by Steve Laug
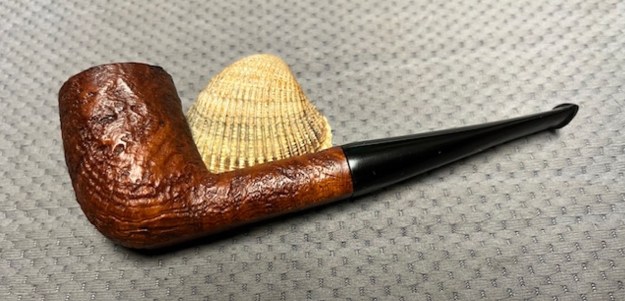
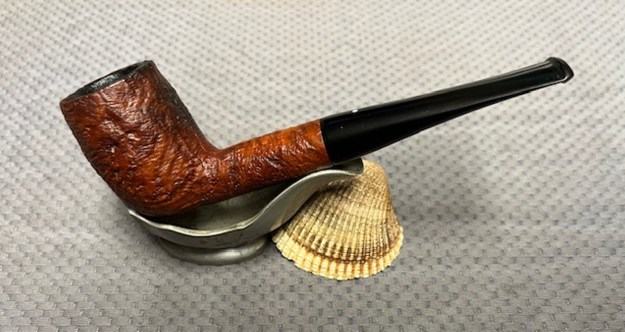
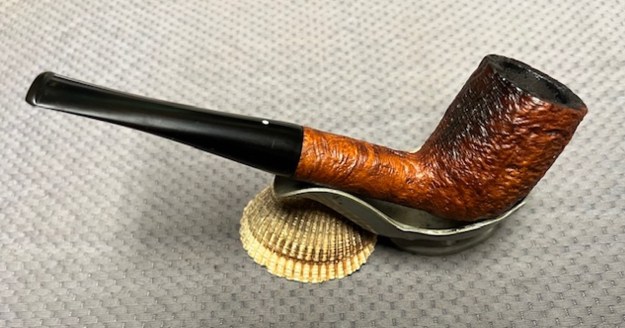
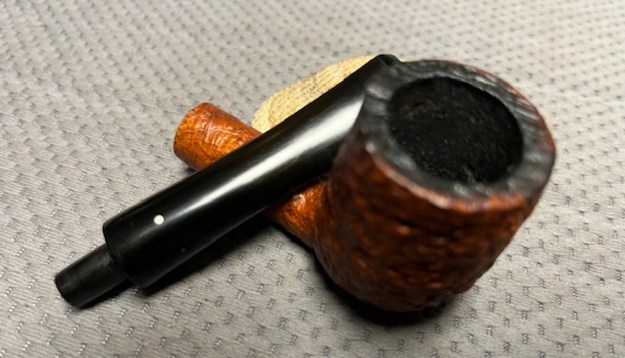
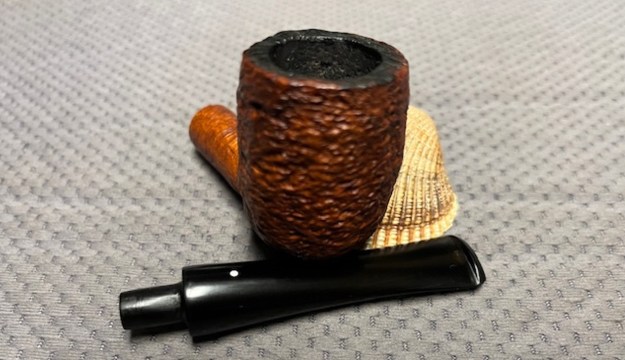
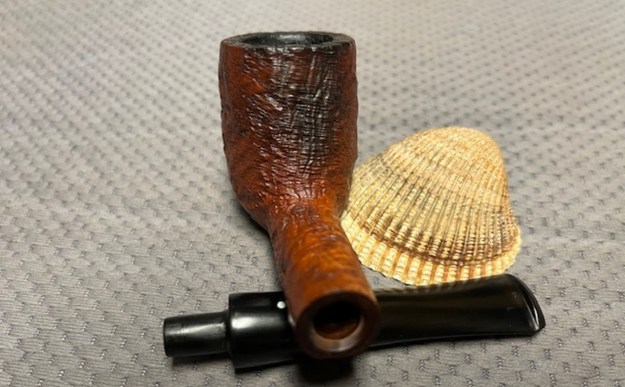
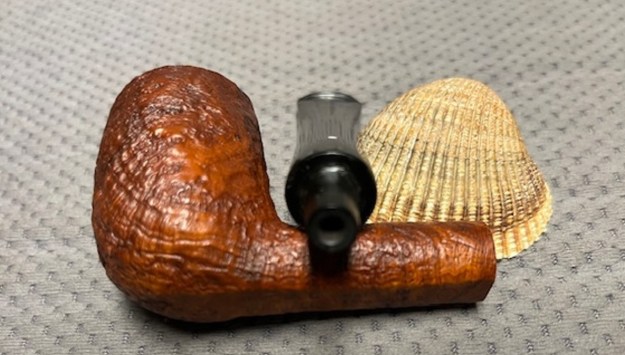
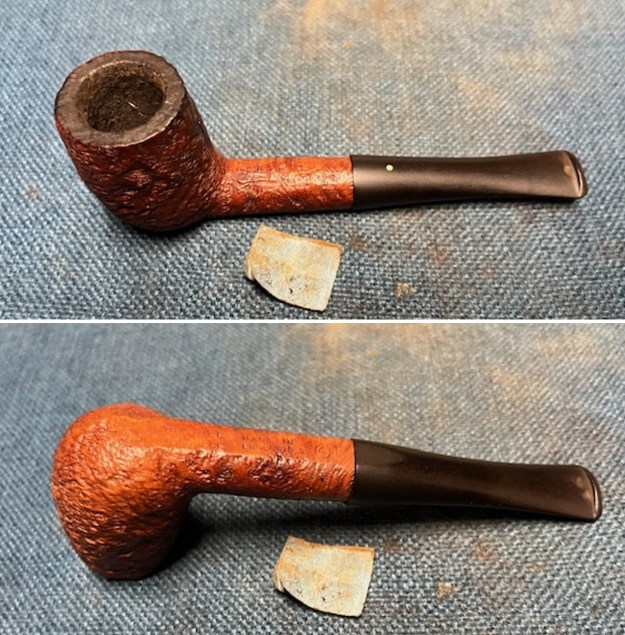
The next pipe on the table is another one that came to us from the seller in Caldwell, Idaho, USA on 07/12/2025. It is a beautiful Dunhill Tanshell Billiard with a straight vulcanite saddle stem. It is in dirty but in good condition as can be seen in the photos below. It is stamped on the underside of the shank and reads 59 on the heel of the bowl followed by Dunhill [over] Tanshell. Following that it is stamped Made in [over] England with the number 8 underlined and in superscript after the D. Below the 8 there is a superscript underlined 9. The stamping is clear and readable. It has rich finish with a blend of brown stains that highlight the depths of the sandblast around the bowl and shank that the shape follows well. The finish was dusty and dirty with grime ground into the finish. The bowl had a moderate cake and there was tobacco debris in the bowl. The rim top had a thick lava on the top and edges. The stem was quite dirty and oxidized. It was the wrong stem for the pipe as it was a Charatan Double Comfort Stem rather than a white spot stem. It will need to be replaced with a Dunhill stem. I took photos of the pipe to show what it looked like before I started working on it. 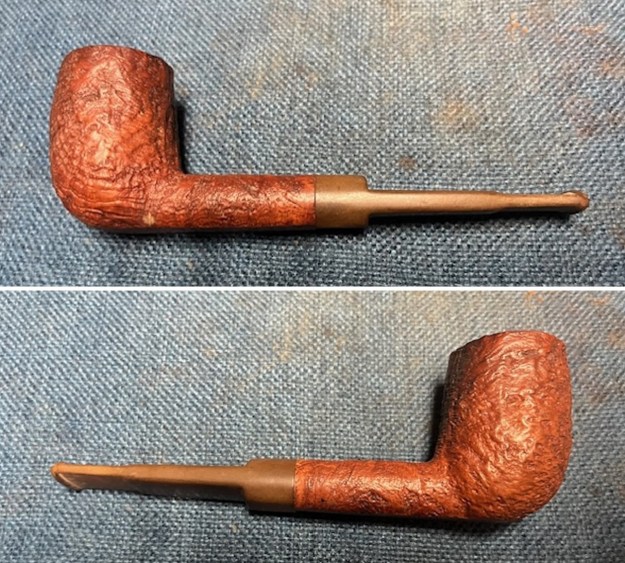
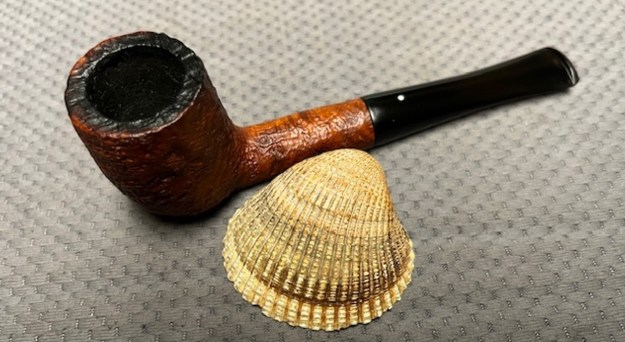
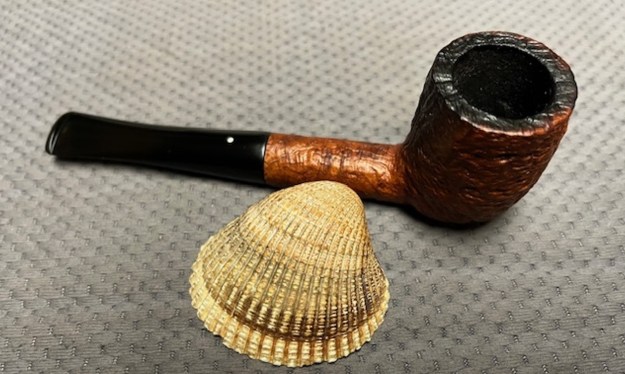
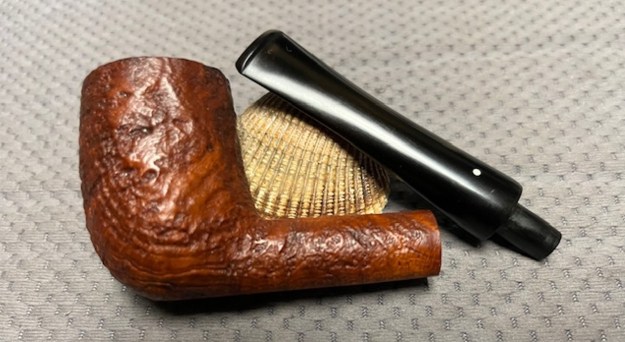
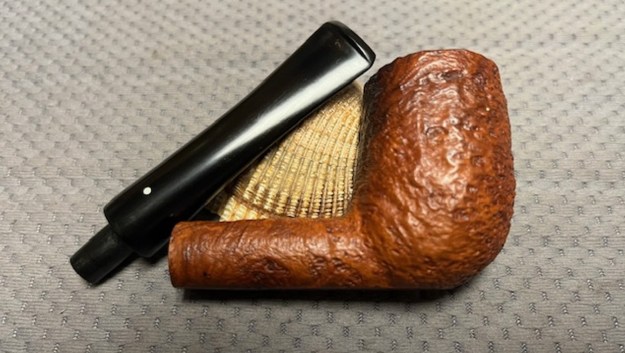
 I took photos of the bowl and rim top to show their condition and of the stem to show the condition of both sides of the stem.
 The stamping on the underside of the shank is shown in the photo below. It looks very good and is readable. It reads as noted and explained above. I captured the detail in the photos below. I need to fit the bowl with a new stem and will take photos then.
 One of the first things I like to do is to unpack the stamping and understand each element in it. I turned to Pipephil helpful site (http://pipephil.eu/logos/en/dunhill/tanshell1.html). The stamping is interpreted as follows: The number 59 is the shape number for a Billiard. The Tanshell stamp refers to the finish which is corroborated the T at the end of the stamping. The size of the pipe 4 in a circle is a Group 4. The 8 following the D of England gives the date the pipe. There is also a 9 down and to the right of the 8. The second number is typically stamped to show the date the pipe sold to a retailer.
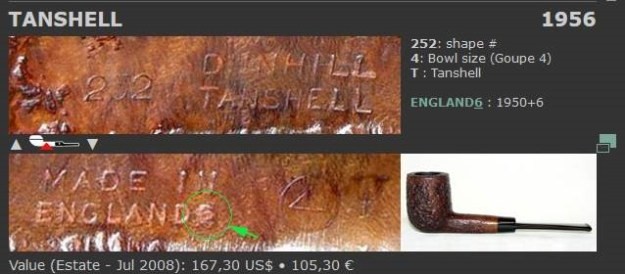 Pipephil also has some helpful dating keys on the site that are basically flow charts that you can walk through to date your pipe (http://pipephil.eu/logos/en/dunhill/cledat-en1.html). I turned to Part 1 of the Dating Key and followed the chart. This pipe has 8 following the D in England. That is followed by 9.
I followed the link following the “Your pipe is posterior to 1954. Narrow down your dating”. That took me to Page 2 of the dating key (http://pipephil.eu/logos/en/dunhill/cledat-en1a.html). The third column (suffix 5…9) led me to the section with an 8 after the D in England that a superscript. It is followed by a superscript 9. There was a directive for dating the pipe spelled out as follows: 1950 + suffix which gives the pipe a date of 1958. The superscript 9 is the date it went to the retailers – 1959.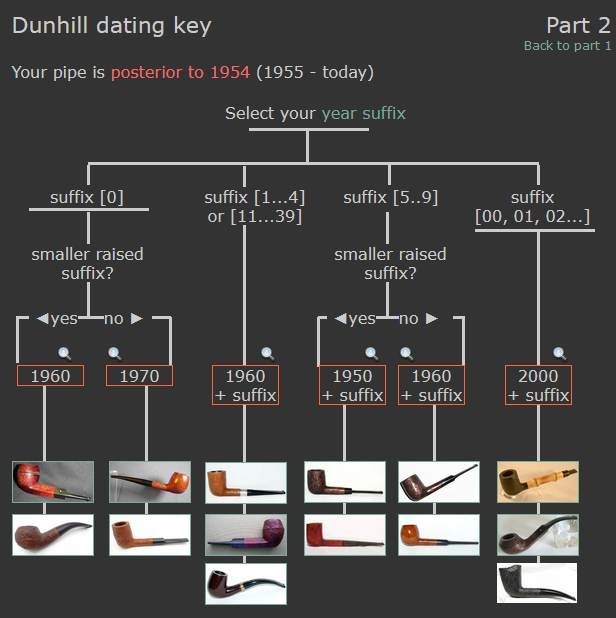 I then turned to Pipedia’s section on Dunhill Root Briar to get a bit of background on the Dunhill finishes (https://pipedia.org/wiki/Dunhill#Root_Briar). I quote:
Tanshell
The first lot was distributed in 1952 (usually made using Sardinian briar). The prototype was called “Root Shell “, produced in 1951. The Tanshell is a light tan sandblast. Sardinian briar was used for this sandblast. There is a distinct contrast in the sandblasts using Sardinian as opposed to Algerian briar. The Sardinian is much denser and much harder. The resulting pattern, when blasted, is far more even and regular both in terms of the surface texture and the finish.
The TanShell was Dunhill’s fourth finish and its first major post-war line addition. Introduced in 1951/1952 the TanShell was a naturally stained sandblasted pipe made exclusively from Sardinian briar through the 1960s. The TanShell apparently was not simply a light stained Shell but rather was also the product of “certain processes [unrevealed] not previously employed.” Initially, it appears that the pipe was to be named the Root Shell and a stamp to that effect was ordered and received by Dunhill in May 1951. Ultimately, however, the name TanShell was settled upon but the stamp for the TanShell name was not received by Dunhill until the beginning of December. Thus while the Tanshell was in production in 1951 it appears that most if not all TanShells made in that year did not enter into retail distribution until 1952 and were given a 1952 date code. Loring, J. C., The Dunhill Briar Pipe, The Patent Years and After (self-published, Chicago, 1998).
- See more examples here: Dunhill Tanshell
- See more about the patents applied here: Shellbriar & Tanshell, Patents 1917-1954
I have also included a chart from the site from Dunhill spelling out the Standard Pipe Finishes and giving short information and a timeline.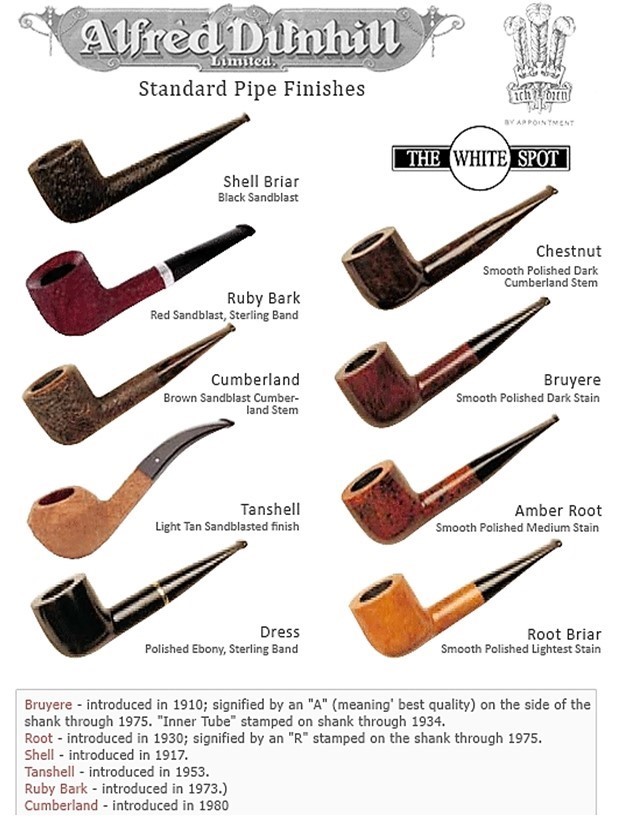 Before I started working on the bowl I decided to see if I could restem it with an original Dunhill stem. I went through the boxes of pipes Jeff sent me and low and behold there was a Sasieni London Made 17 Billiard and it had a Dunhill White Spot taper stem. It looked like it would fit quite well.
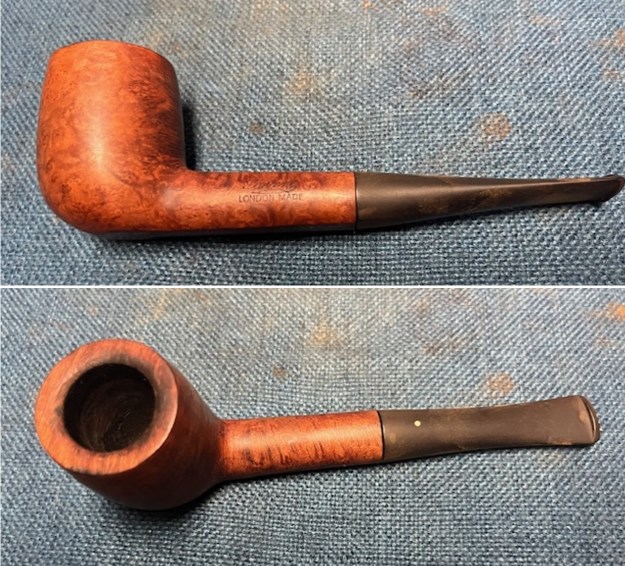
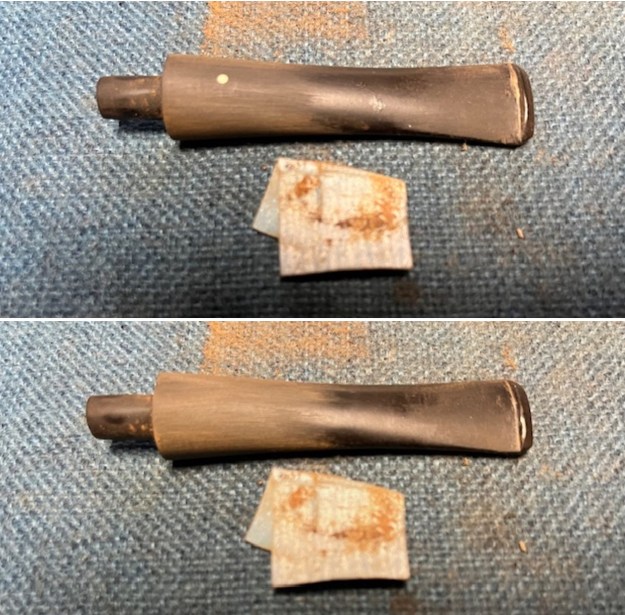
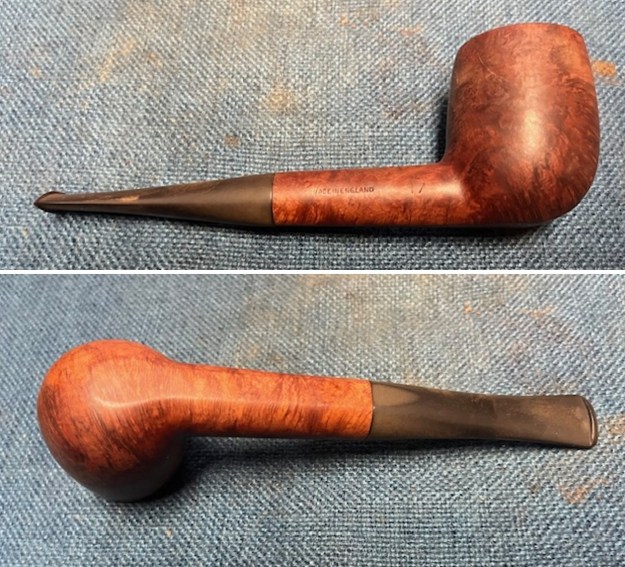 I removed the stem and checked it on the Tanshell. The tenon was a little large for the shank. I used a flat file and 220 grit sandpaper to reduce the diameter of the tenon to fit the shank.
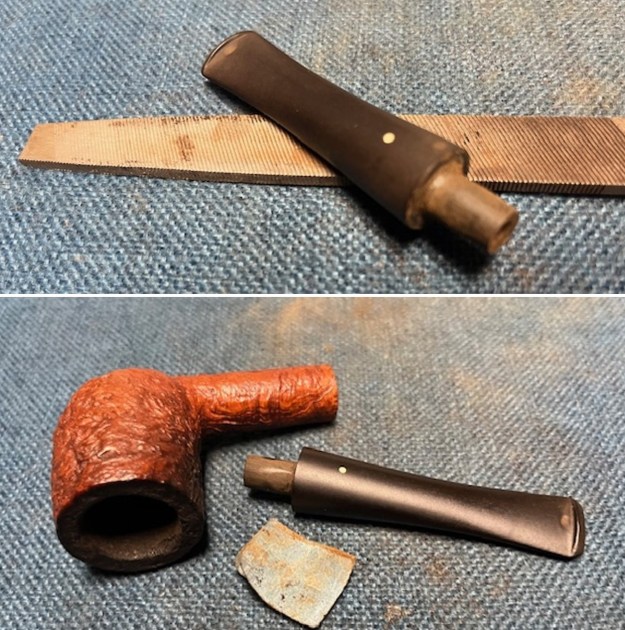 With that finished I inserted it in the shank and took photos of the fit. The diameter of the stem was very slightly wider than the shank. The flat bottom on the stem matched the flat portion of the shank. There were also some tooth marks on the top and underside of the stem ahead of the button.
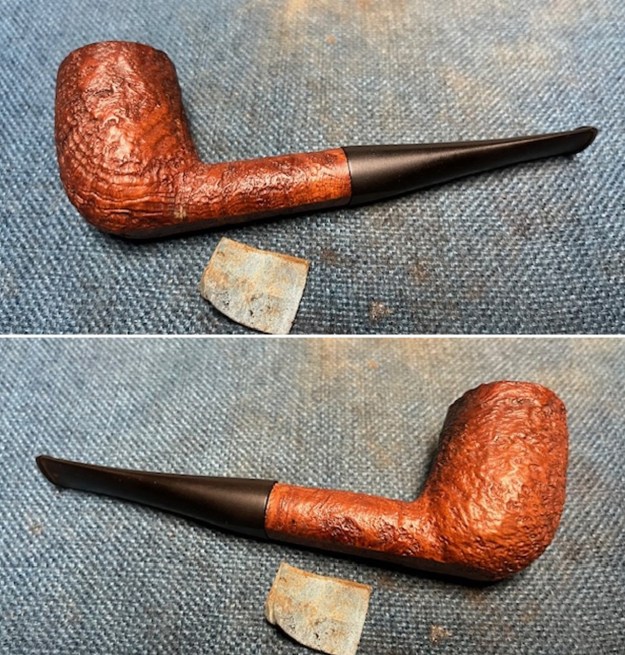
 I filled in the tooth marks with black CA glue and set the stem aside to let the repairs cure on the surface. It took about 20 minutes to harden. Once it hardened I flattened it with a folded piece of 220 grit sandpaper. I was able to blend it into the vulcanite. I also worked on the diameter of the stem to reduce it to match diameter of the shank.
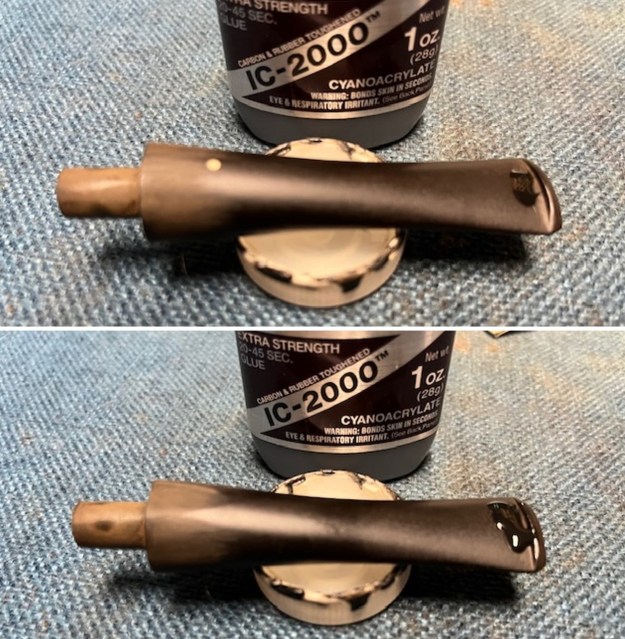
 I used the Dremel and sanding drum to further reduce the diameter of the stem. I worked it over further with 220 grit sandpaper to smooth out the scratches and blend in the marks to the surface of the vulcanite. I also wanted to really adjust the fit to the shank.
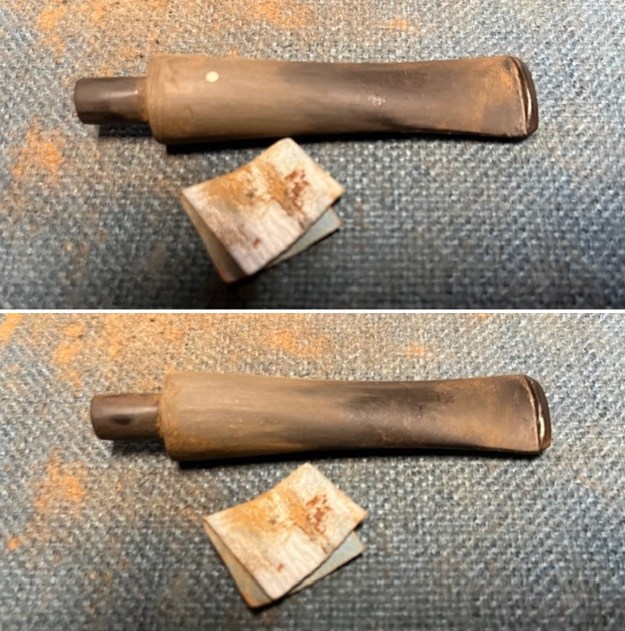 I sanded the stem further with 320-3500 grit 2×2 inch sanding pads and wiped it down with a damp cloth after each sanding pad. It started to look very good.
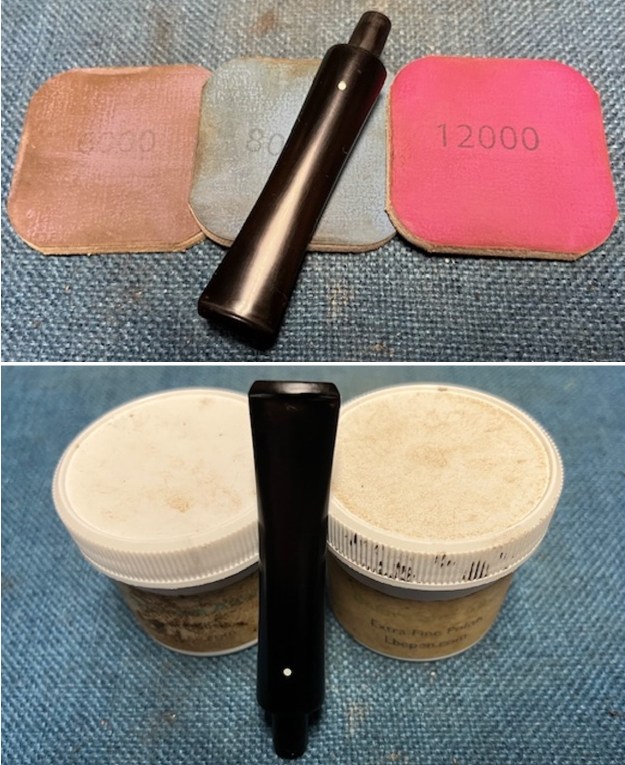
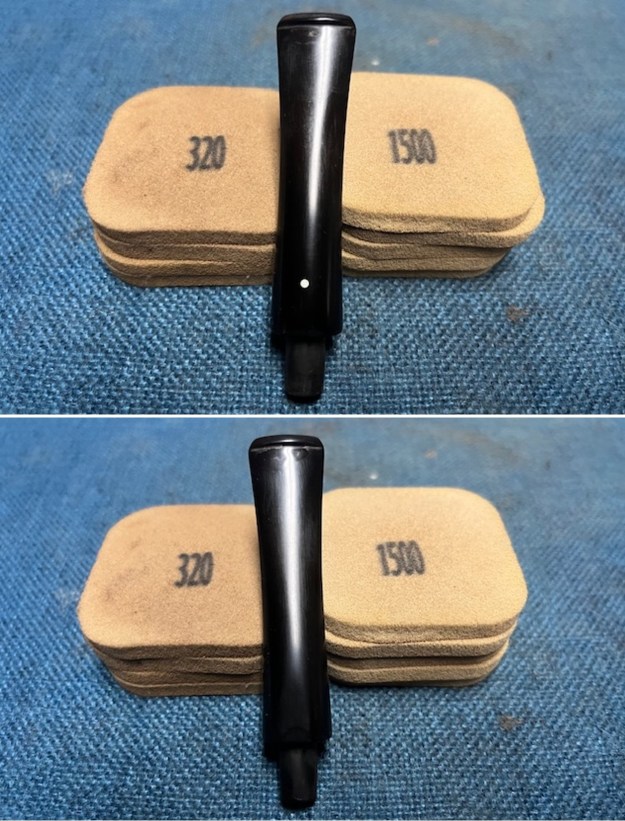 I polished the stem with micromesh sanding pads – dry sanding with 1500-12000 grit pads. I wiped the stem down after each sanding pad with Obsidian Oil. I polished it with Before & After Pipe Stem Polish – both Fine and Extra Fine. Once I had finished the polishing I gave it final coat of Obsidian Oil and set it aside to dry.
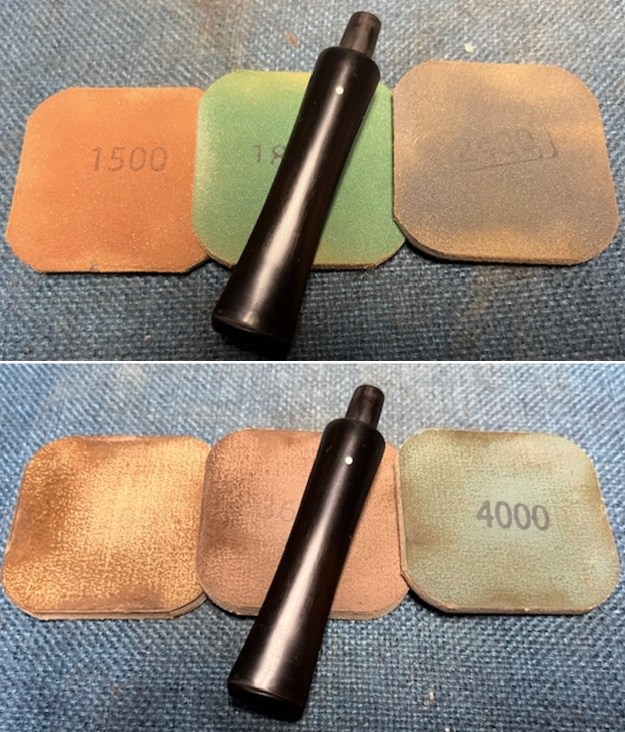
 I set the stem aside and turned to work on the bowl. I reamed the bowl with a PipNet reamer using the second and third cutting head. I took the cake back to bare briar. I cleaned up the reaming with a Savinelli Fitsall Pipe Knife and then sanded the bowl walls with a piece of dowel wrapped with 220 grit sandpaper. The bowl looked very good at this point there were no burn marks and only light checking on the walls.
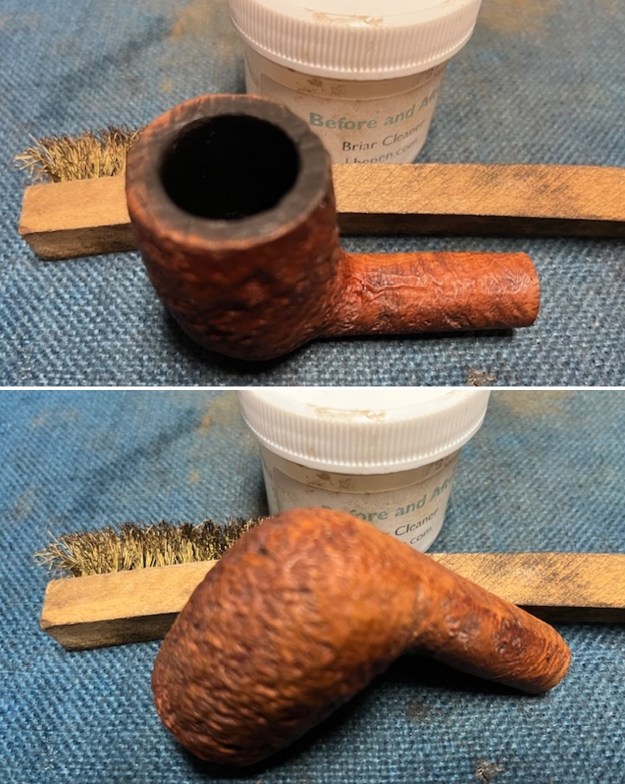
 I worked over the sandblast rim top with a brass bristle wire brush to clean up the debris in the valleys of the blast. It looked better.
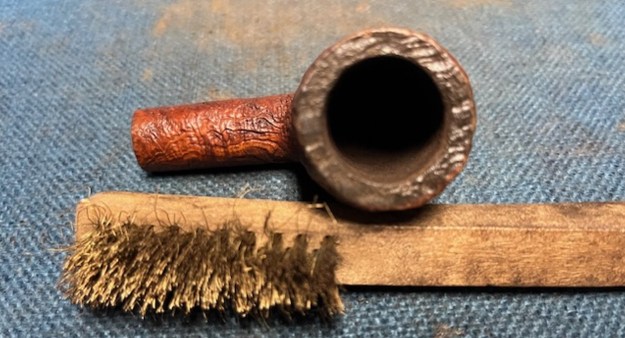 I cleaned out the inside of the shank and the airway in the stem with alcohol, cotton swabs and both bristle and regular pipe cleaners.
 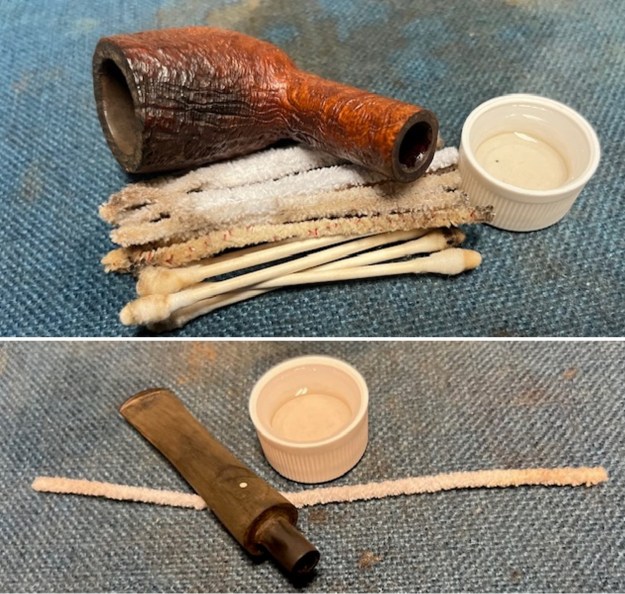 I scrubbed the bowl and shank with a tooth brush and some undiluted Murphy’s Oil Soap. I rinsed it off with warm water to remove the dust and soap from the finish. I dried it off with a soft cloth and it looked much better.
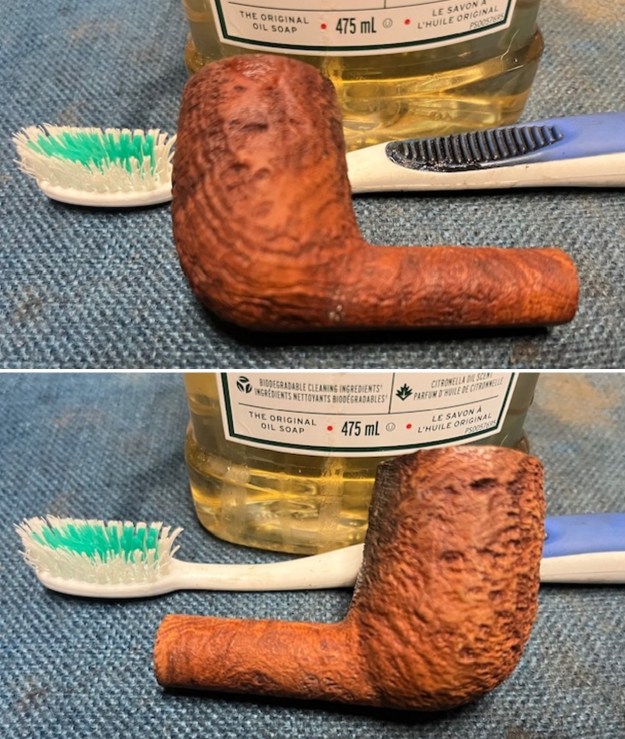
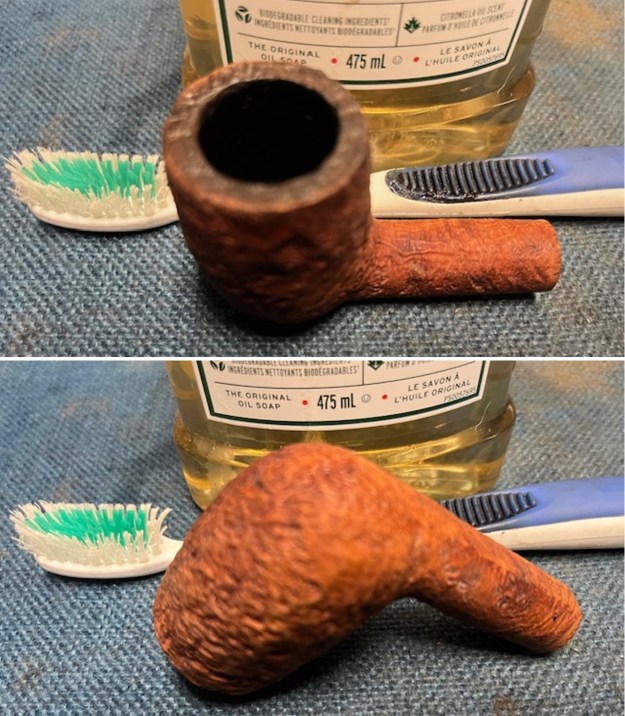 I continued scrubbing the bowl and rim top with Before & After Extra Strong Briar Cleaner. I scrubbed it with a brass bristle wire brush to clean out the rim top and the darkening on the backside of the bowl.
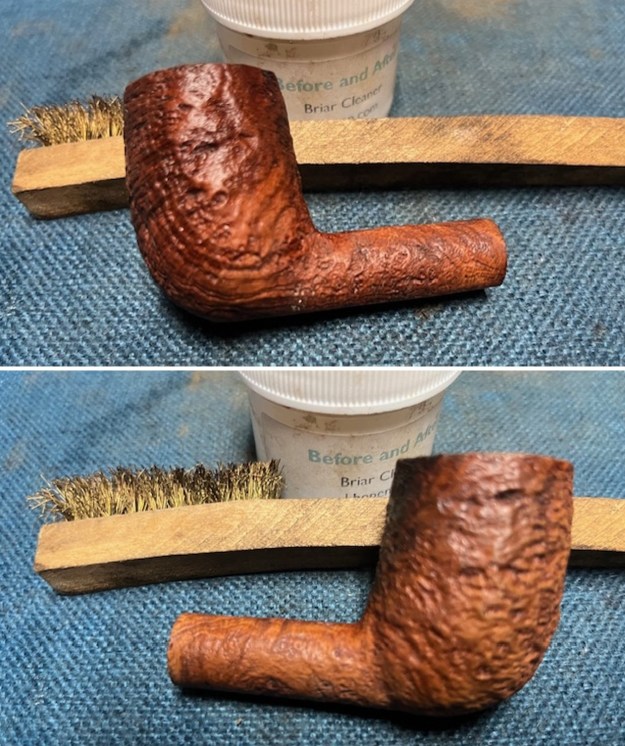
 I rubbed the briar down with Before & After Restoration Balm. I worked it into the rusticated rim top and the smooth briar with my fingertips to work it into the finish. The product works to clean, enliven and preserve the briar. I let it sit for 10 minutes then I buffed it with a cotton cloth to deepen the shine. The briar really comes alive with the balm.
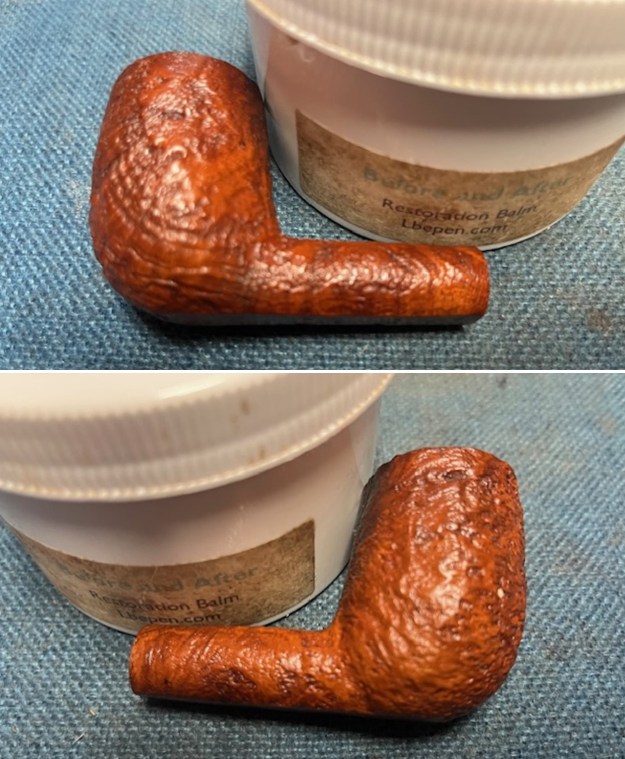
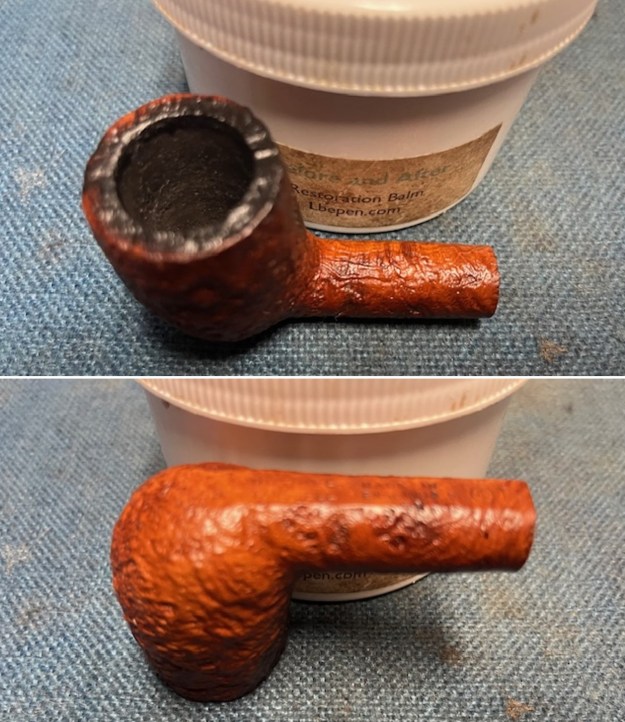
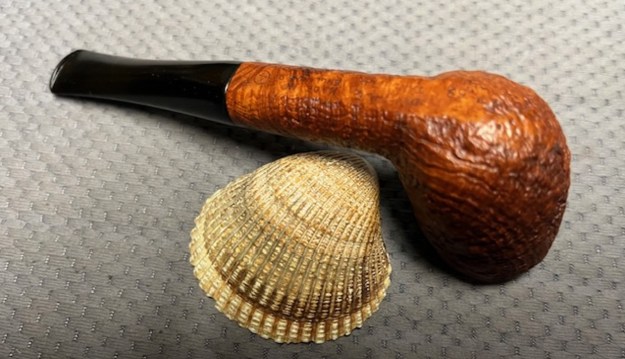
 I put the stem back on the bowl of this 1958 Dunhill Tanshell 59 Group 4 Billiard with a newly fitted Dunhill Taper Stem has a beautiful, unique Dunhill Sandblast finish that was deep and craggy and crisp. The Tanshell finish highlights a classic Dunhill rugged sandblast around the bowl and shank. The polished black vulcanite taper stem adds to the mix. I put the stem back on the bowl and buffed the pipe with Blue Diamond on the buffing wheel being careful to not buff the stamping. I gave the bowl multiple coats of Conservator’s Wax and the stem multiple coats of carnauba wax on the buffing wheel and followed that by buffing it with a clean buffing pad. I hand buffed the pipe with a microfiber cloth to deepen the shine. The finished lightweight Dunhill Tanshell 59 Billiard is quite nice and feels great in the hand. Give the finished pipe a look in the photos below. The dimensions of the pipe are Length: 5 ½ inches, Height: 1 ¾ inches, Outside diameter of the bowl: 1 ¼ inches, Chamber diameter: ¾ of an inch. The weight of the pipe is 1.09 ounces/32 grams. Thanks for walking through the restoration with me as I worked over another beautiful pipe. I appreciate you taking time to read the writeup.
As always, I encourage your questions and comments as you read the blog. Remember we are not pipe owners; we are pipe men and women who hold our pipes in trust until they pass on into the trust of those who follow us.