by Steve Laug
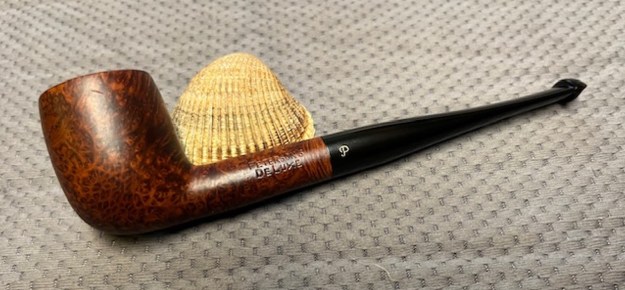
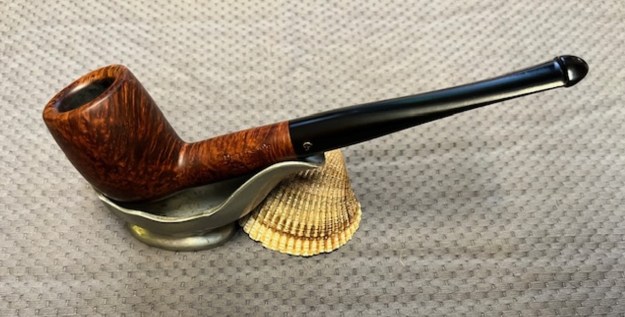
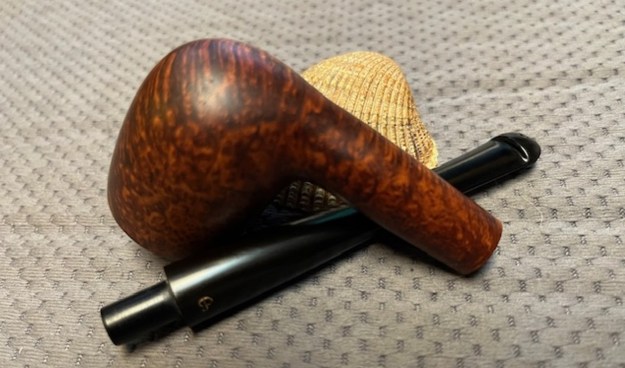
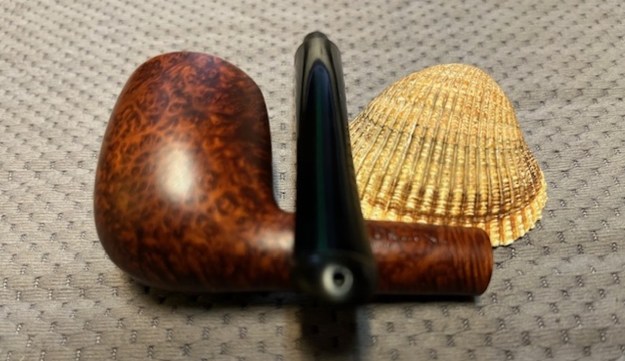
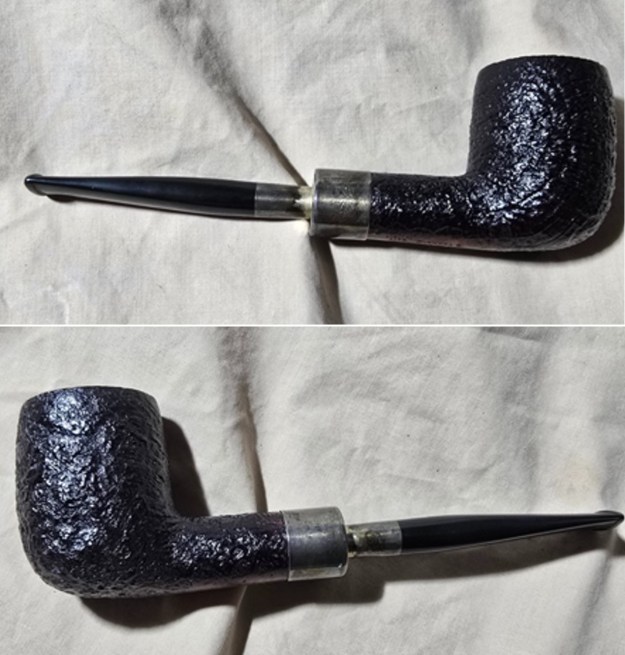
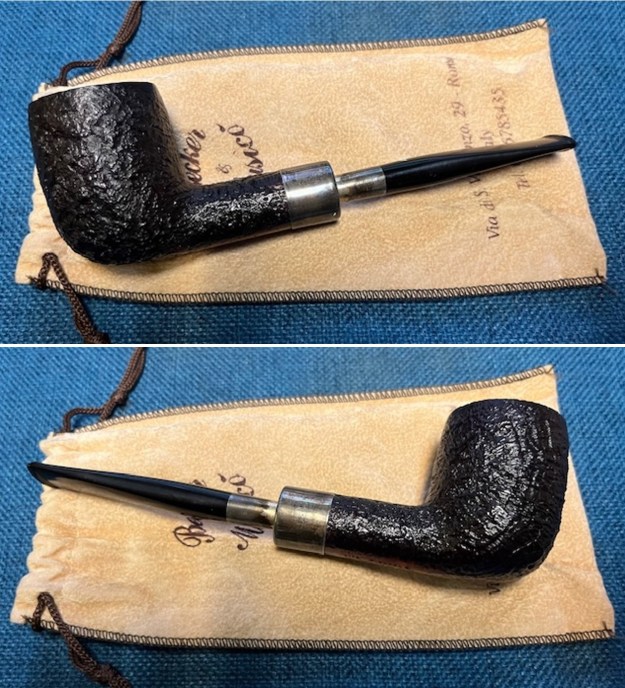
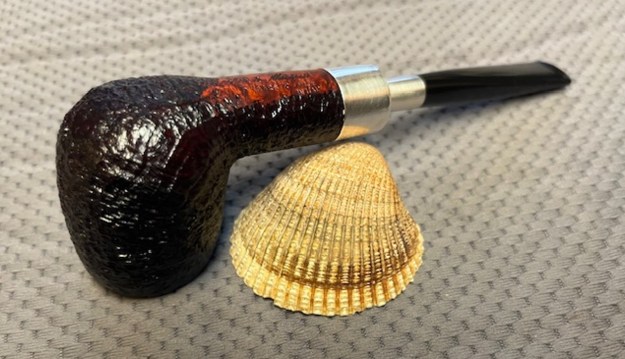
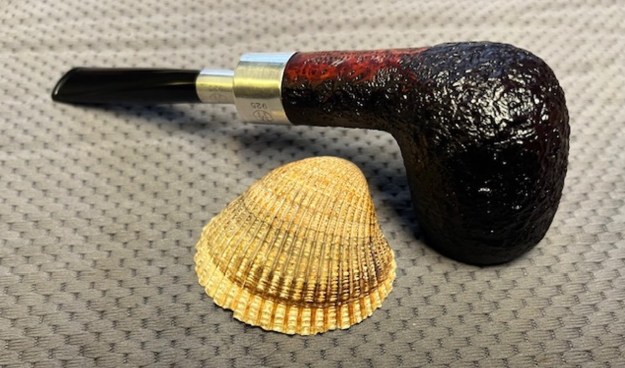
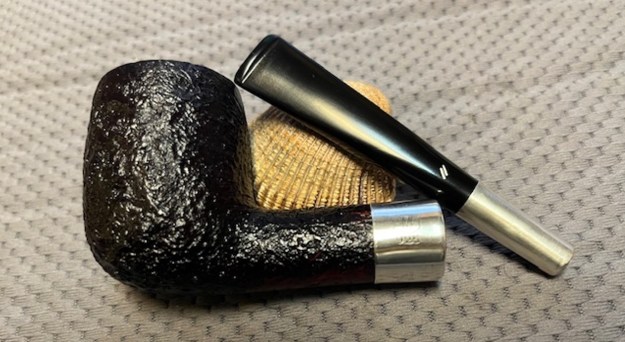
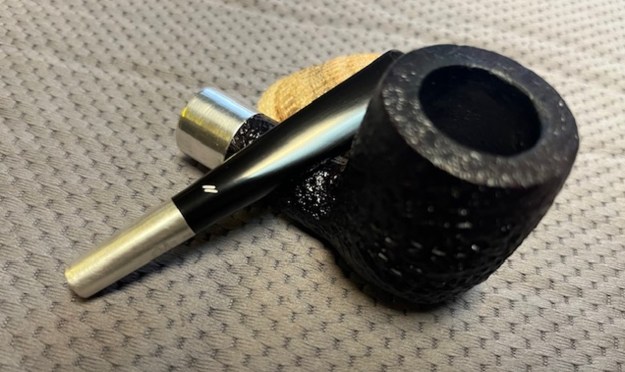
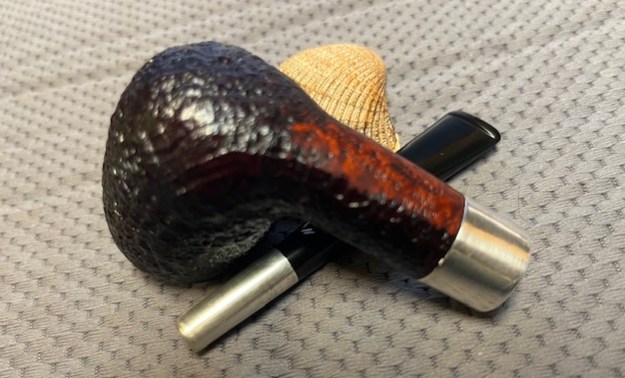
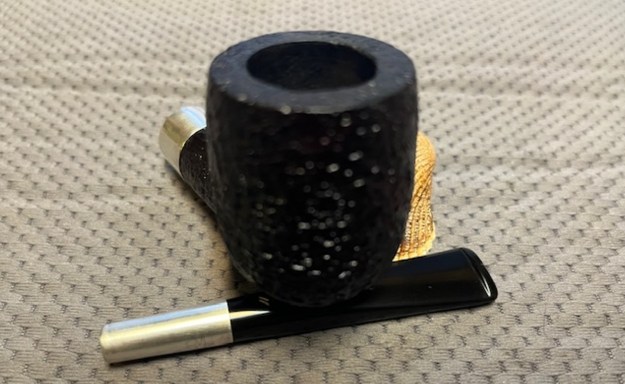
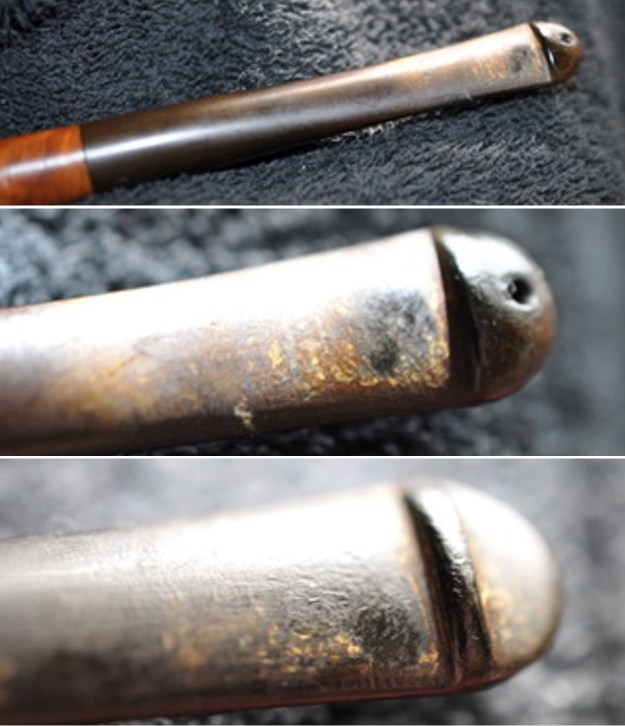
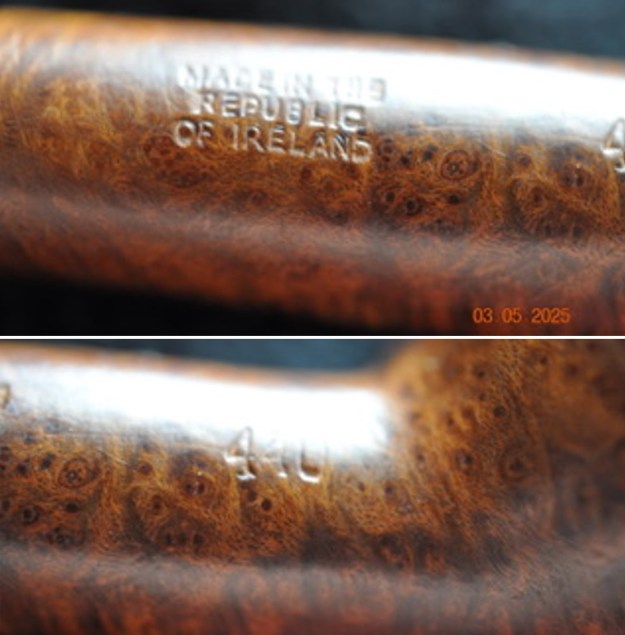
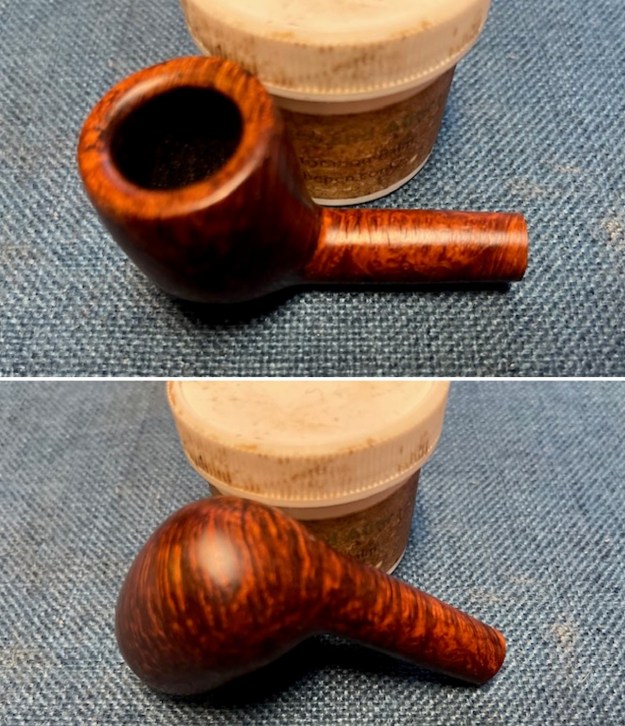
In the last box of pipes Jeff sent me there was an interesting, nicely grained Peterson’s Billiard to restore. We purchased it from a seller on eBay on 08/22/2024 who was in Harrison Township, Michigan, USA. It is a Peterson’s De Luxe 440 Straight Billiard. It is stamped on the left side of the shank Peterson’s [over] De Luxe and on the right side it reads Made in the Republic of Ireland (three lines) followed by the shape number 440. It was a dirty pipe when we received it. There was lava on the rim top and heavily coated on the bevelled inner edge of the rim. The rim top was dirty and showed some wear and tear on the surface coming up for the bowl. There was a thick cake in the bowl that had remnants of tobacco stuck in it. The finish was dirty and there were spots of grime and oils. Under the finish was a great looking pipe with nice grain. The stem was calcified, oxidized and there were light tooth marks and chatter on the top and underside ahead of the button. Jeff took some photos of the pipe before he started his cleanup work.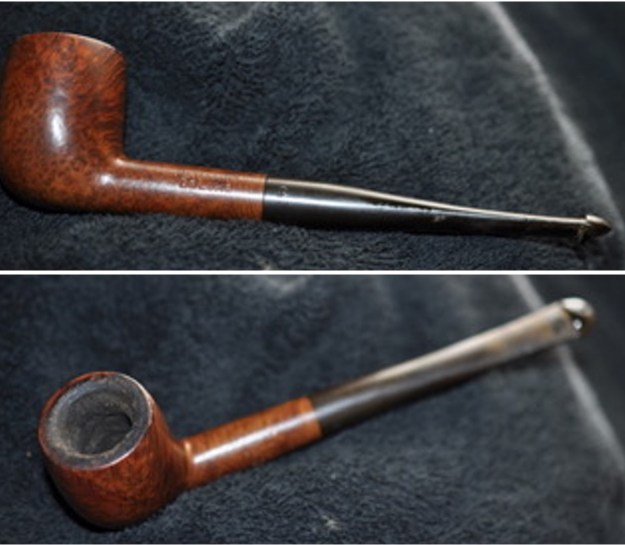 He took photos of the bowl and rim top to show their general condition. You can see the tars on the inner edge and some scuffing on the rim top. The cake in the bowl is quite thick and there is tobacco debris on the walls of the bowl. The finish on the bowl is dull but the grain is still very stunning. This pipe has a classic Peterson’s P-lip stem on a saddle stem. It has calcification and oxidation on the surface of the vulcanite that is quite deep. There seems to be some tooth marks and chatter on the top and underside.
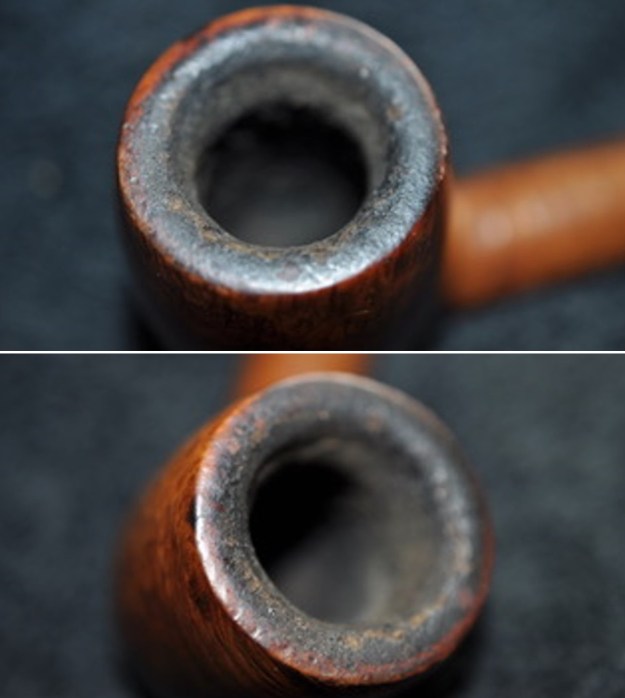
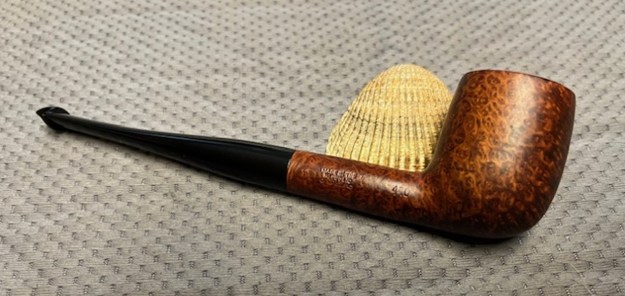
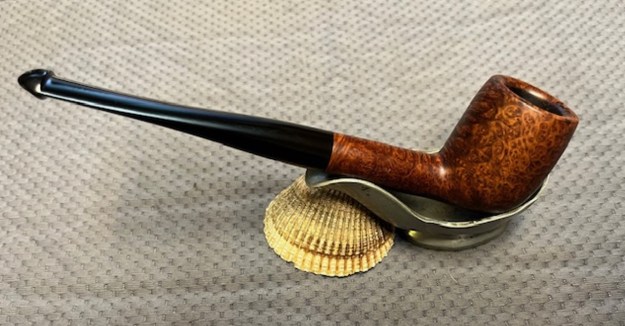
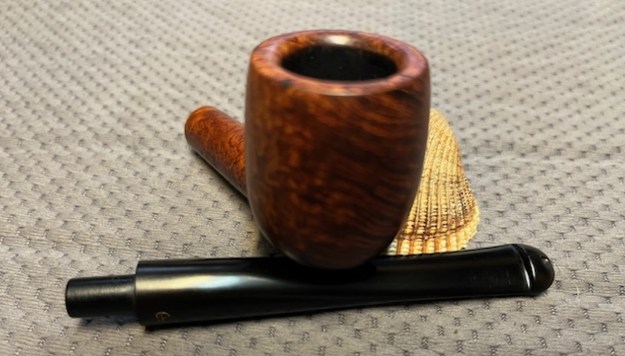
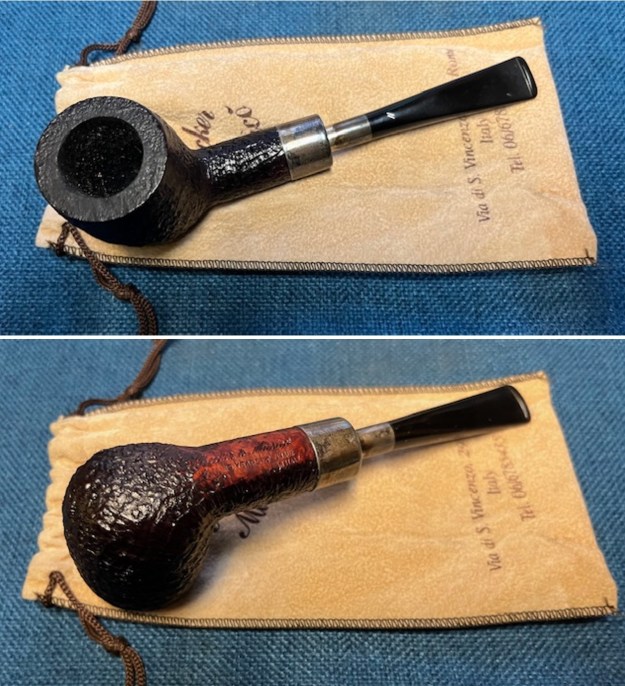
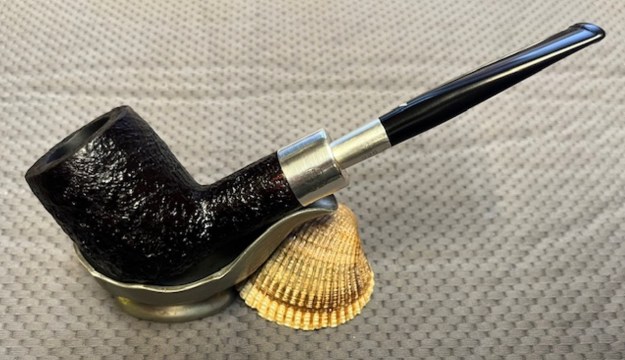
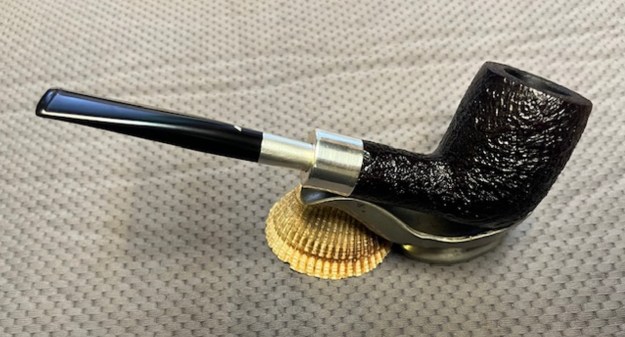
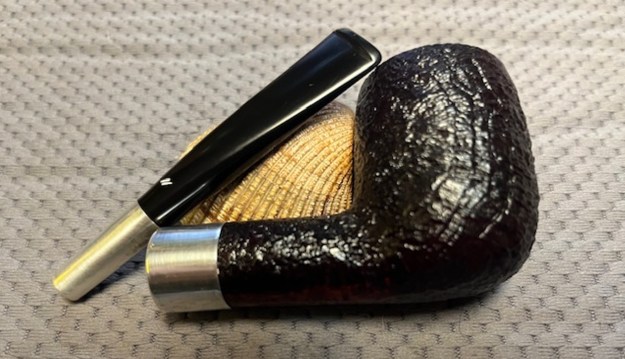
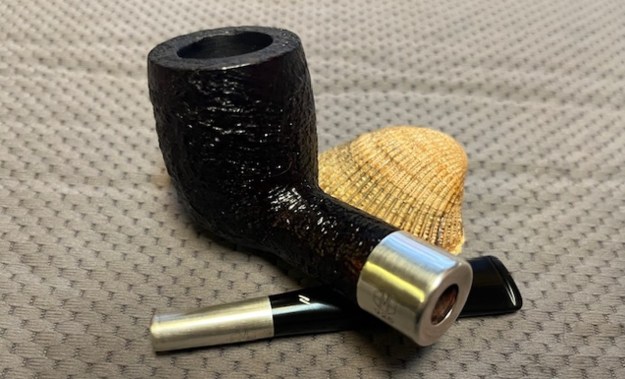
 Jeff took some photos of the sides and heel of the bowl to give an idea of the grain on this particular piece of briar. It is amazing and I cannot wait to see what it looks like once it is polished and waxed.
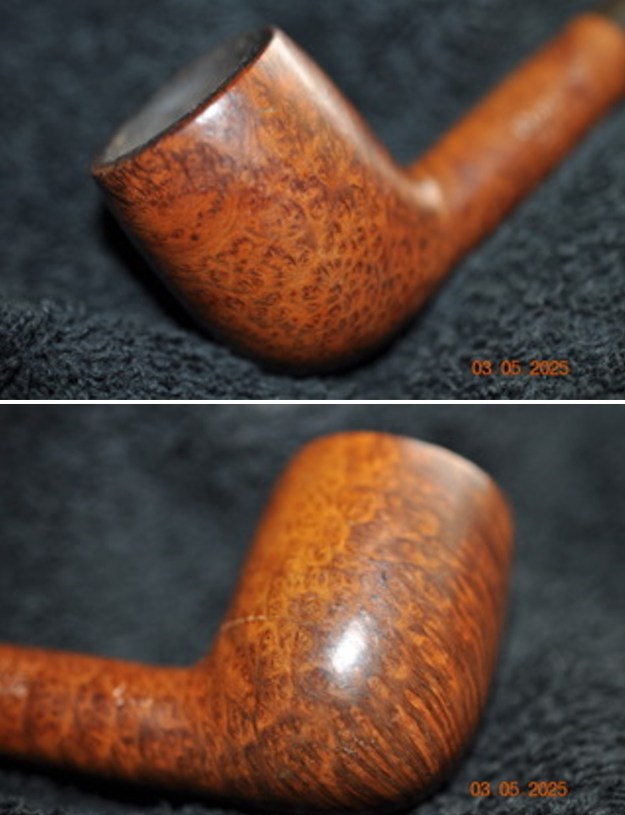
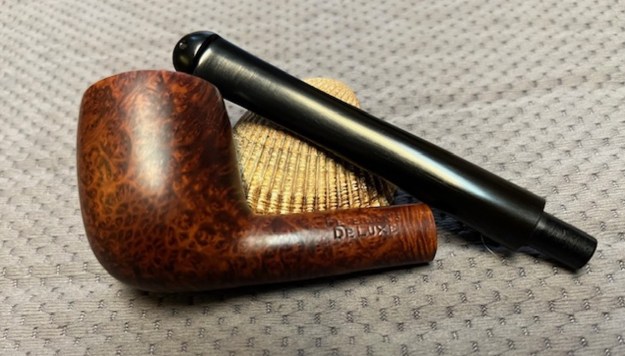
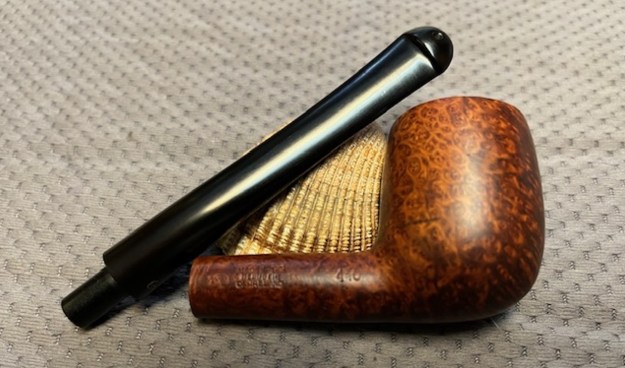
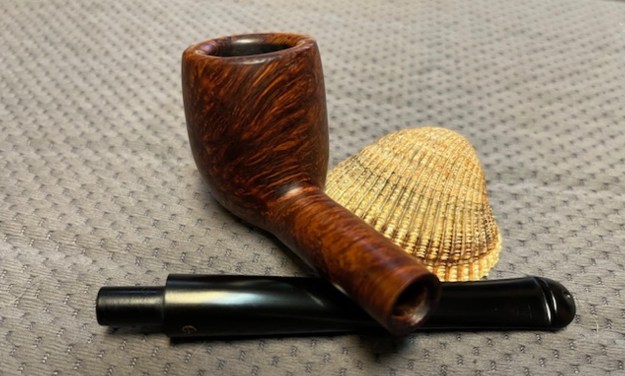
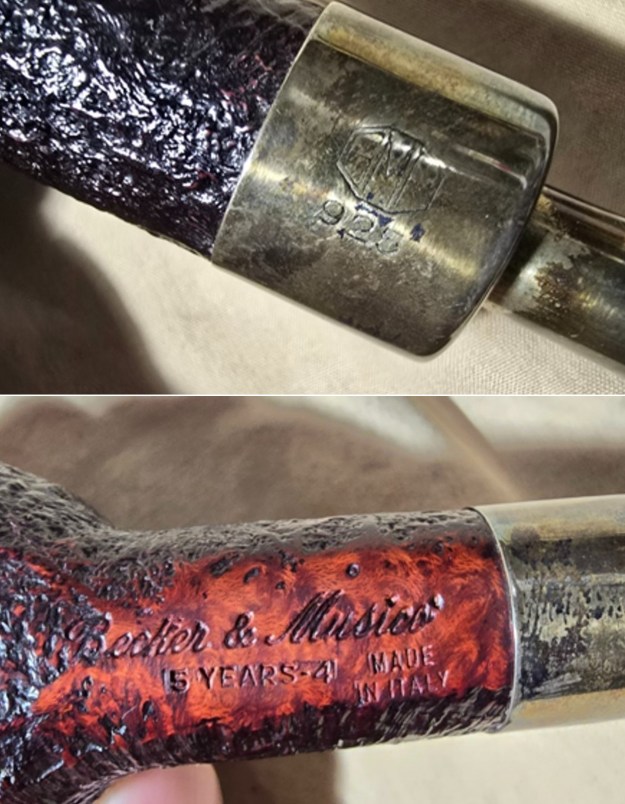
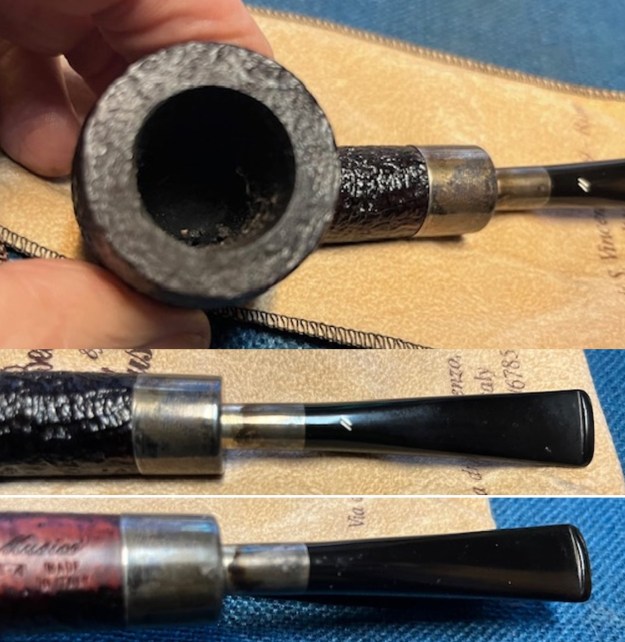
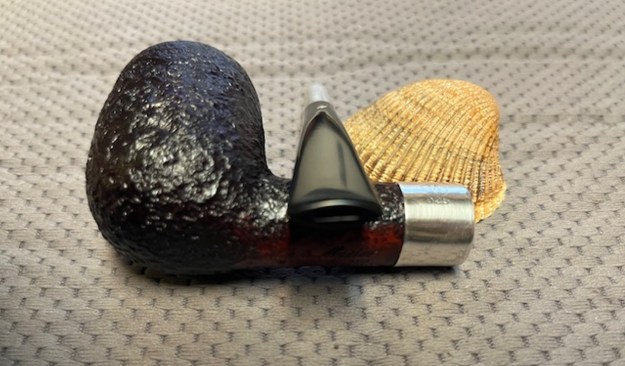
 He took photos of the stamping on both sides of the shank to capture it for me. The first photo shows the left side of the shank and the stamping as noted above as well as the P logo on the stem. The second and third photos show the right side of the shank with the Made in the Republic of Ireland three line stamp and shape number 440.
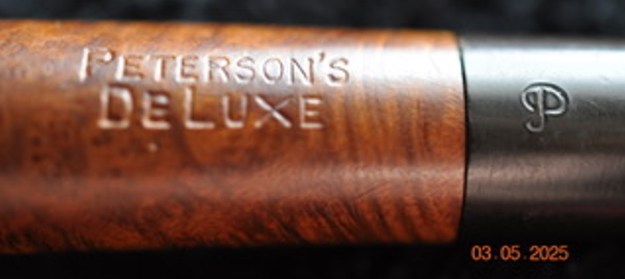
 I did a bit of work on Google to gather background on the De Luxe line of pipes when I worked on the 4S previously. I decided to quote that here as well.
The first information I found about the Deluxe line was on the Peterson’s website (https://www.peterson.ie/pipes/system/deluxe-system-smooth/). I quote from the description of the line below. I have highlighted several key portions in bold black for emphasis.
While the De Luxe stamp first appeared on our System pipes in 1940, the design itself dates to our 1896 and 1906 catalogues and, with the exception of the Supreme, has always marked our highest tier of System pipe. Like the System Standard and System Spigot lines, the Deluxe System pipe incorporates Charles Peterson’s patented System design, including a deep reservoir to collect excess moisture from the smoke; a graduated-bore mouthpiece that funnels the smoke and allows moisture to collect within the reservoir; a sturdy sterling silver military mount, which allows the pipe to be broken down and cleaned without damage or warping; and our patented P-Lip bit, which draws the smoke upward, thus reducing tongue bite. The De Luxe differs from those aforementioned lines, comprised of bowls with only the finest grain patterns and featuring a sterling silver mount and a push-gap stem, which was never designed to be flush-fitting, the space between the mount and stem base gradually decreasing with prolonged use. The Deluxe also elevates the System pipe by fixing each stem with a traditional chimney, an aluminum fitment that extends the tenon past the chamber’s airway for optimal System performance. Created for Peterson enthusiasts interested in acquiring the finest System pipe on the market, the Deluxe System will serve as the crown of any collection. Seen here in the Smooth finish.
From that information I knew how the De Luxe fit in the hierarchy of Peterson’s pipes. It was always the highest tier of the System pipes. The attachment of a chimney at the end of the tenon was to maximize System performance (the chimney was missing in this particular pipe).
From there I also turned to Pipedia to see what that would add to the information I had on the brand and line. I quote from an article by Jim Lilley and have included portions of it below. (https://pipedia.org/wiki/A_Closer_Look_at_The_Peterson_Deluxe_System_Pipe). Once again, I have highlighted pertinent sections in bold below.
The version of the system pipe for our closer inspection is one of Peterson’s more recognisable series, the handsome and very distinctive De Luxe system pipes, which include the Darwin and Mark Twain. These pipes are at the top of the ‘system’ series in terms of quality and finish.
Each Peterson Deluxe is made from carefully selected, age mellowed root briar. In matte finish with hallmarked sterling silver mounts and a unique space fitting mouthpiece to allow for years of wear. They are available in a wide range of shapes numbered, as follows 1s,2s,3s,4s,5s,8s,9s,11s,12.5s,20s, XL5s, 20FB and 11FB.
The pipes are well carved, construction, engineering and workmanship, is outstanding. The stems are well drilled and aligned. Silver work is excellent, finish very good, and the often maligned briar is of outstanding quality.
The design is a very typically Peterson classic shape. Apart from the Darwin, the balance can be stem heavy, the bit is thick and chunky, especially in the larger versions. I also enjoy the sense of presence they give to the pipe, particularly if smoking in company with friends or strangers. They have a sophistication about them.
The smoking qualities are excellent, dry and cool. The draw is good, and the flavour is particularly great in new pipes. The Mark Twain’s are outstanding in this department….
With that information I turned my attention to working on the pipe.
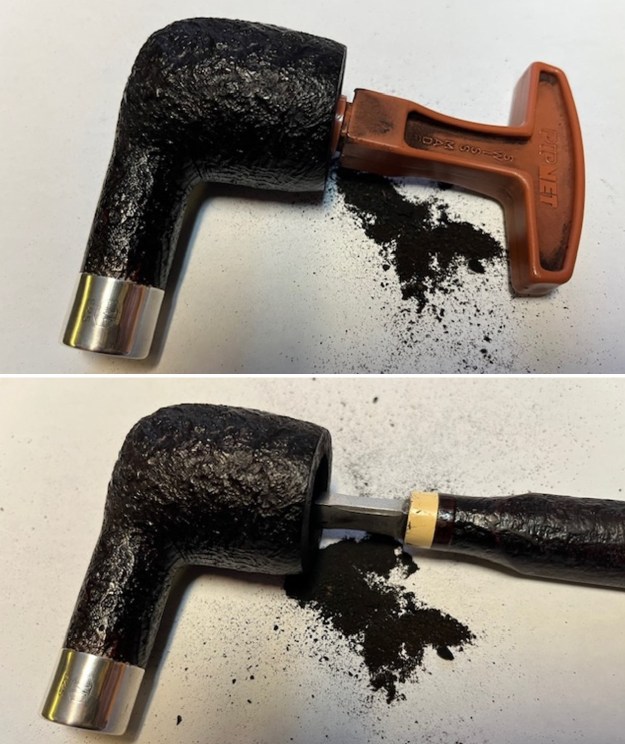
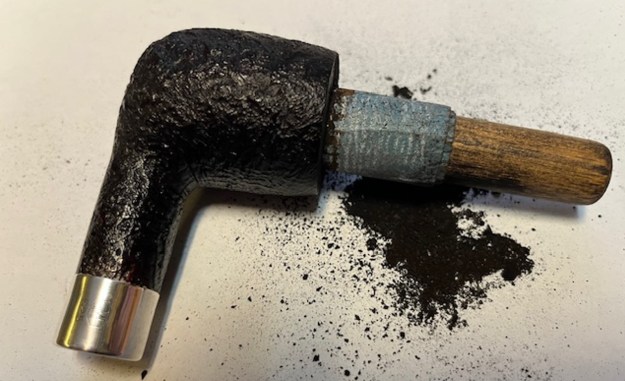
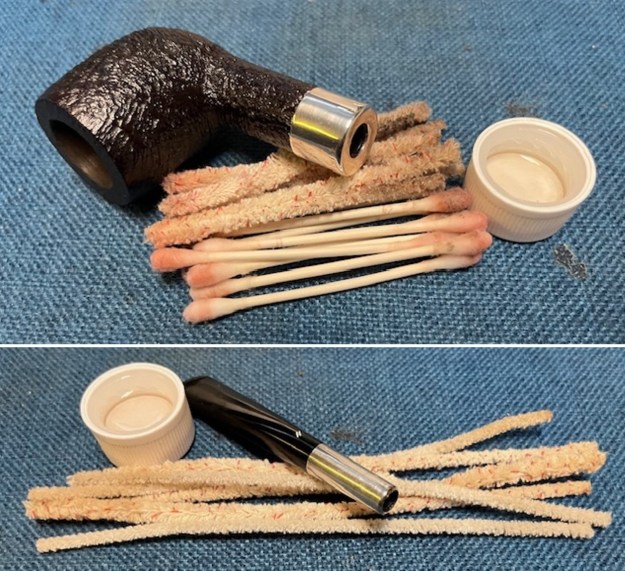
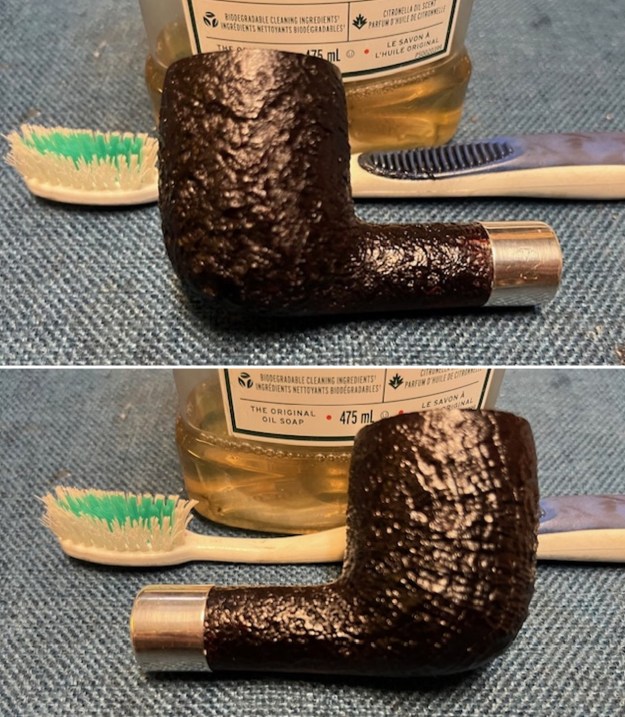
Jeff had cleaned it thoroughly. He had reamed it with a PipNet reamer and cleaned that up with a Savinelli Fitsall Pipe Knife. He had scrubbed the exterior of the briar with undiluted Murphy’s Oil Soap and a tooth brush. He rinsed it with running water to remove the grime and oils. He cleaned out the interior of the shank, sump and airway in the shank and stem with alcohol, pipe cleaners and cotton swabs. He scrubbed the stem with Soft Scrub to remove the oxidation and calcification on the surface. He soaked it in Briarville’s Pipe Stem Deoxidizer to remove the oxidation. He removed it from the Deoxidizer and rinsed it off with warm water. I took some photos of the pipe before I started my part of the work.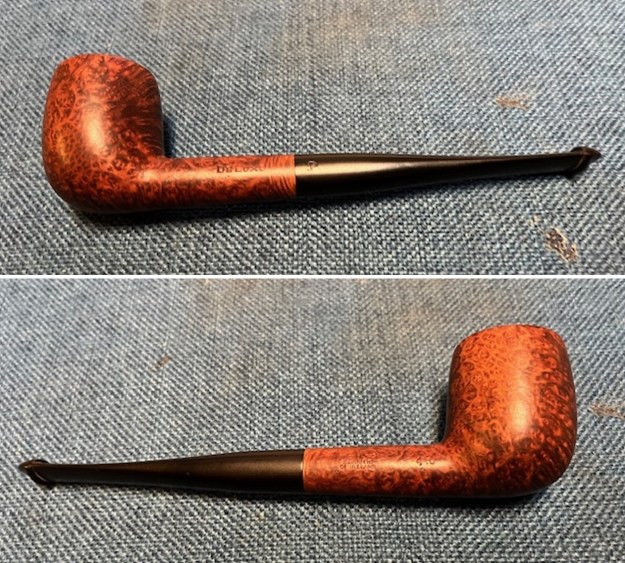
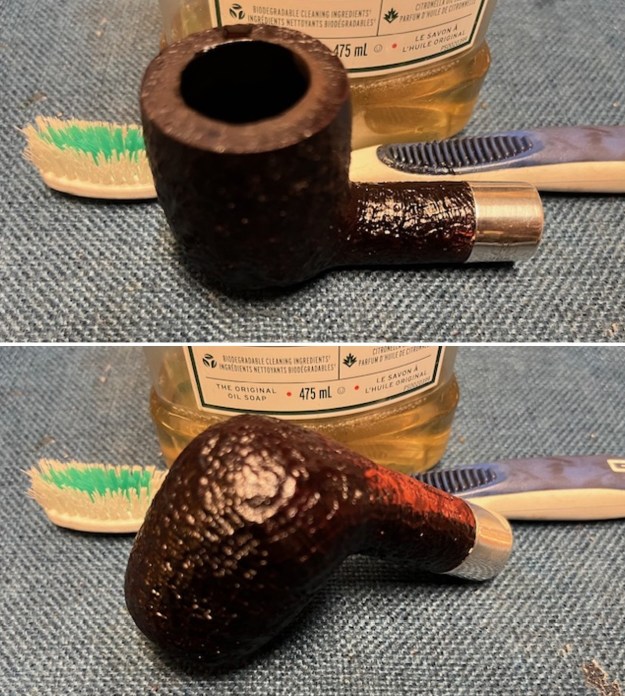
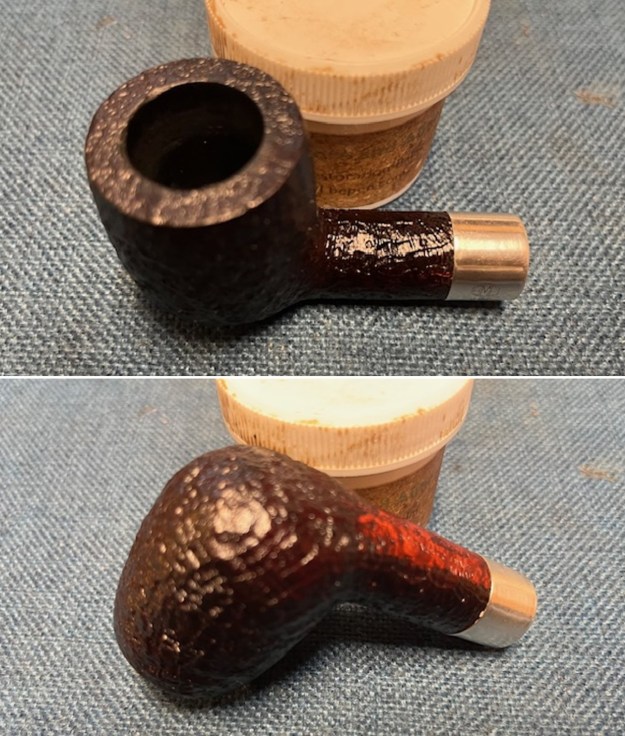
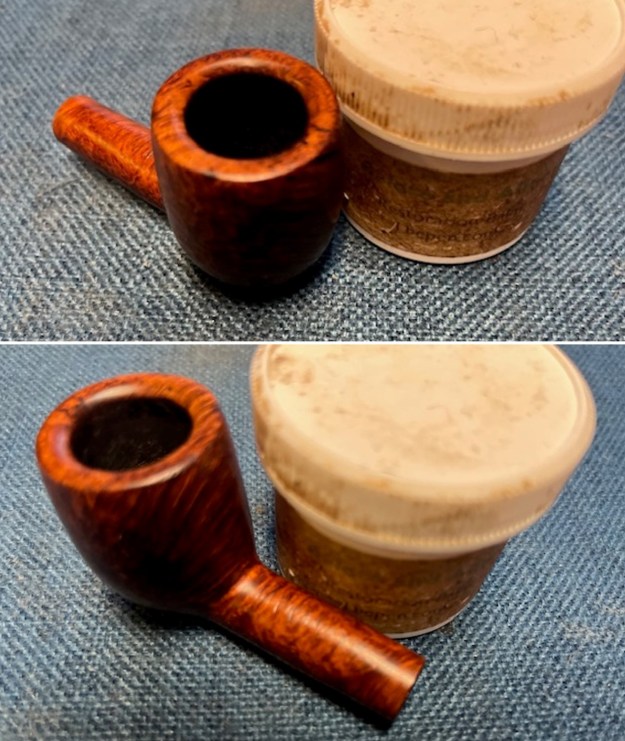
 I took some photos of the rim top and stem. The rim top and bowl looked very good. The cake and lava overflow were gone and the inward bevelled rim was very clean. There was also some darkening on the bevelled inner rim edge and light damage on the edge of the top and the bevel. Jeff had been able to get rid of all of the lava and tars. The rim top looked good with light marks and scratches on the surface. The closeup photos of the stem shows that it is a much cleaner and better looking stem. The tooth marks and chatter were still present ahead of the button.
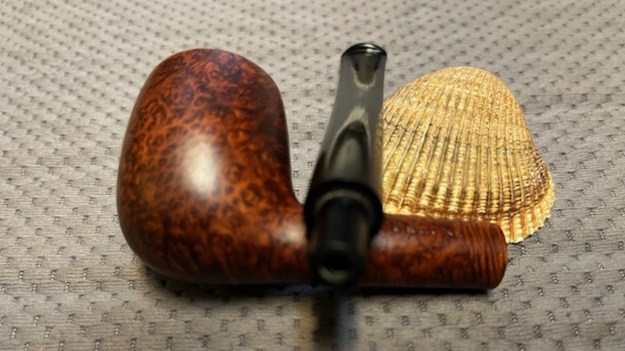
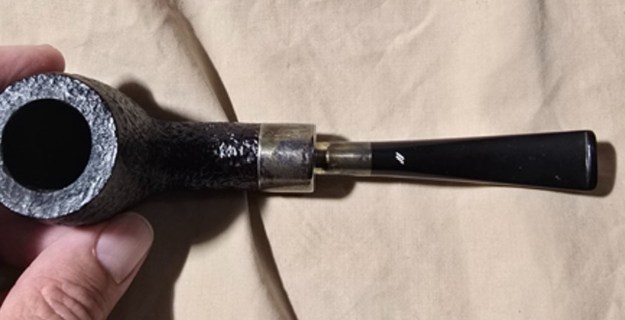
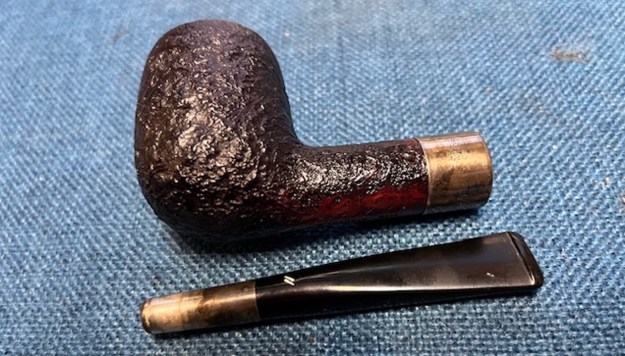
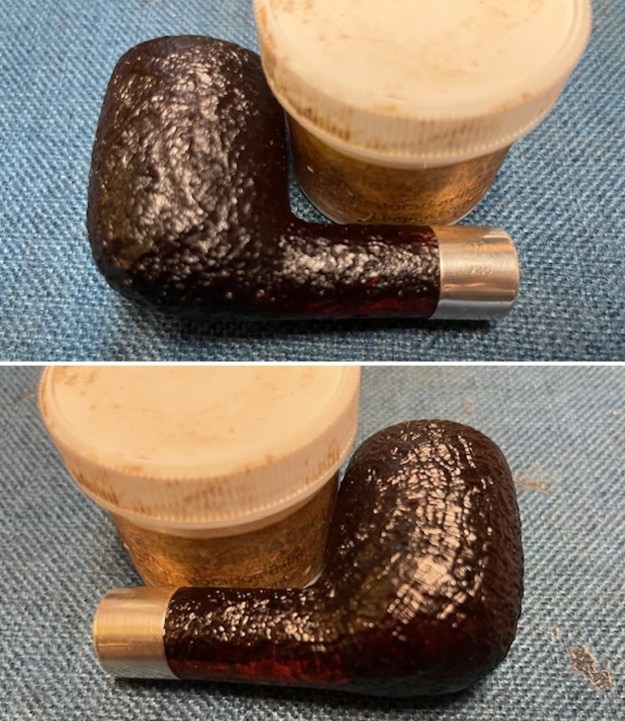
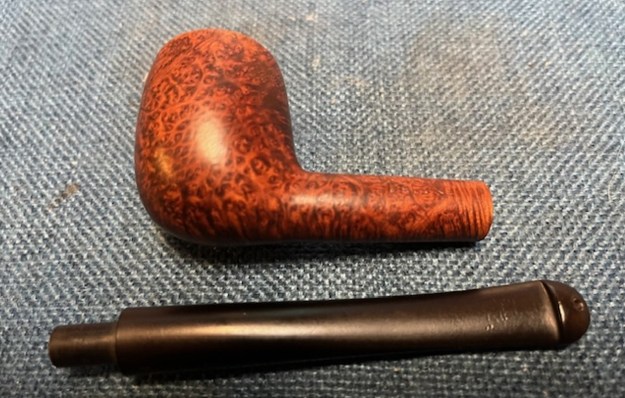
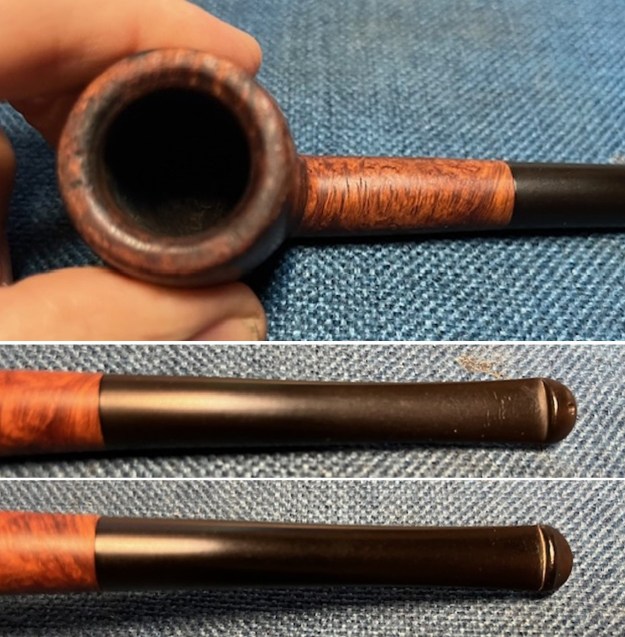 I took some photos of the stamping on the shank sides to show the condition after the cleanup. Often the stamping takes a hit with the cleaning and is lessened in its clarity. Jeff does a great job in leaving the stamping looking very good. The stamp on the stem is also in good condition and will need to be recoloured. I also took the stem off the shank and took a photo of the parts of the pipe to show the proportion. The grain around the bowl and shank on this pipe is very beautiful.
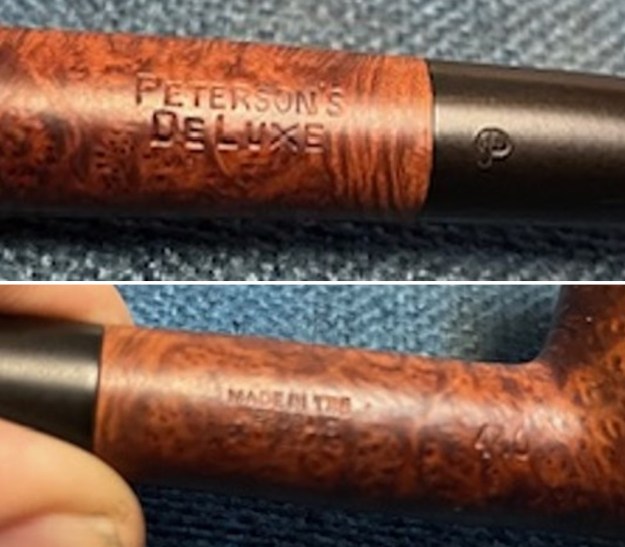
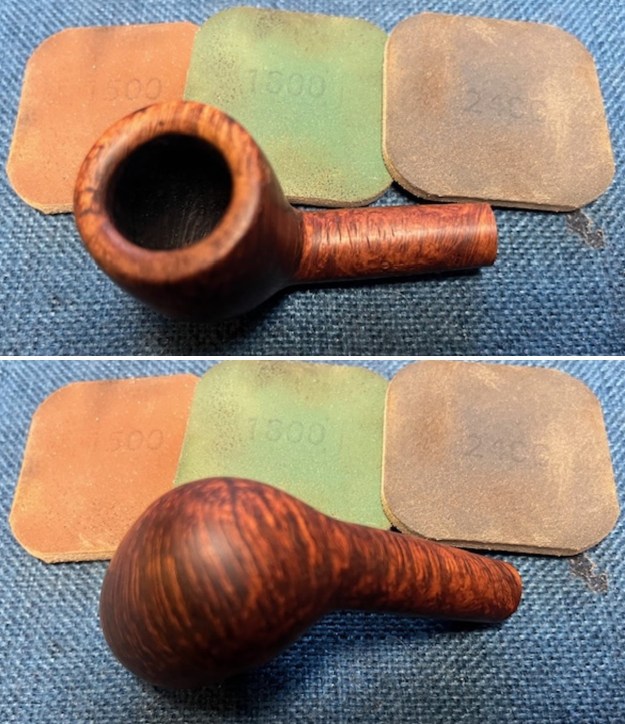
 I started my restoration work on this pipe by addressing the darkening around the inner edge of the bowl. I used a folded piece of 220 grit sandpaper to clean up the bevelled inner edge and the rim top with the same sandpaper. The finished rim top looked very good.
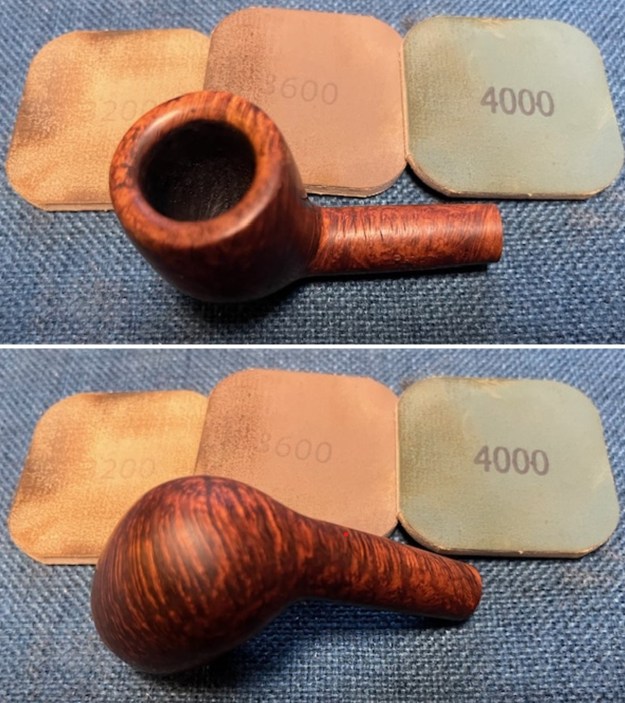
 I used 320-3500 grit 2×2 inch sanding pads to remove the darkening on the rim edges and top as well to smooth out some of the scratches in the briar. Once finished it was ready to be polished.
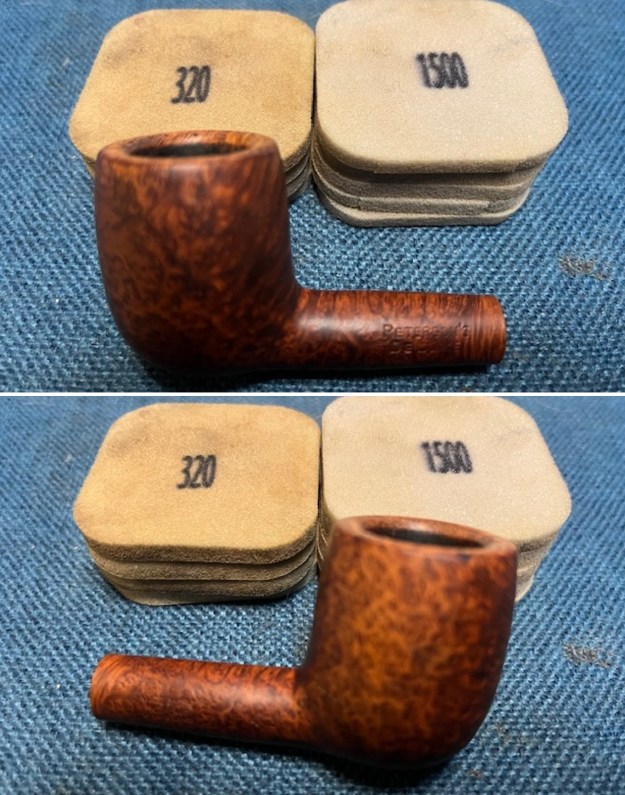
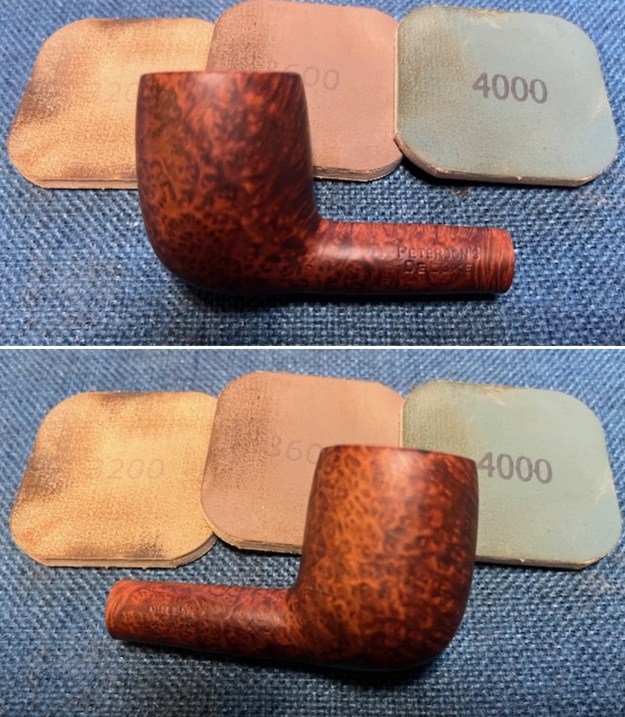
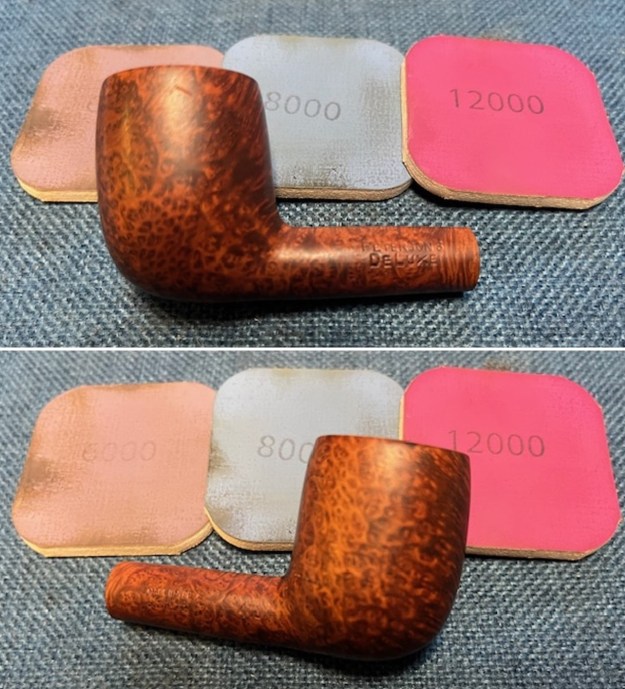
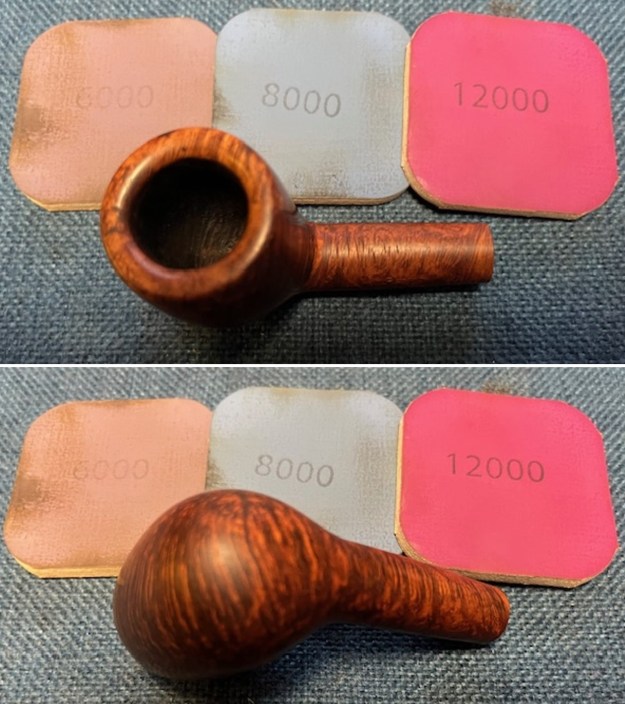
 I started my polishing regimen on the bowl. I used nine micromesh sanding pads and dry sanded the bowl with 1500-12000 grit pads. I wiped the bowl down with a damp cloth after each pad. The bowl really shines by the final three pads.
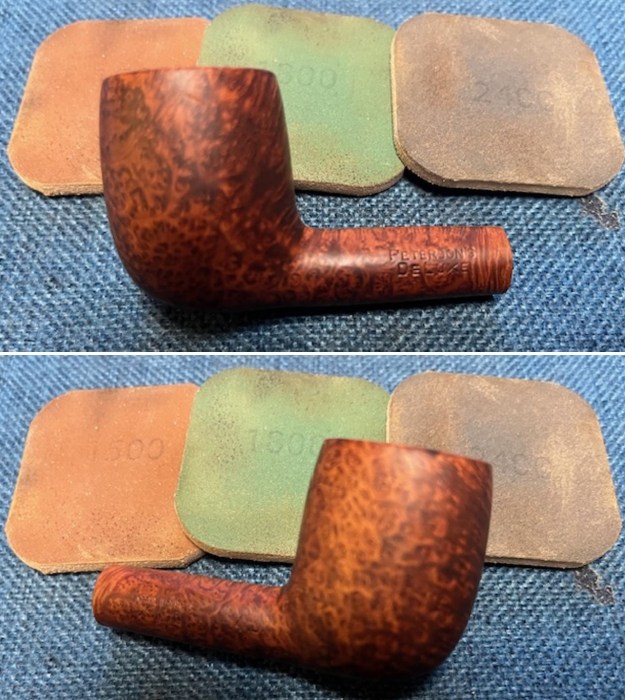
 I worked some Before & After Restoration Balm into the surface of the briar with my fingertips to clean, enliven and protect it. I let the balm sit for a little while and then buffed with a cotton cloth to raise the shine. The photos show the bowl at this point in the restoration process.
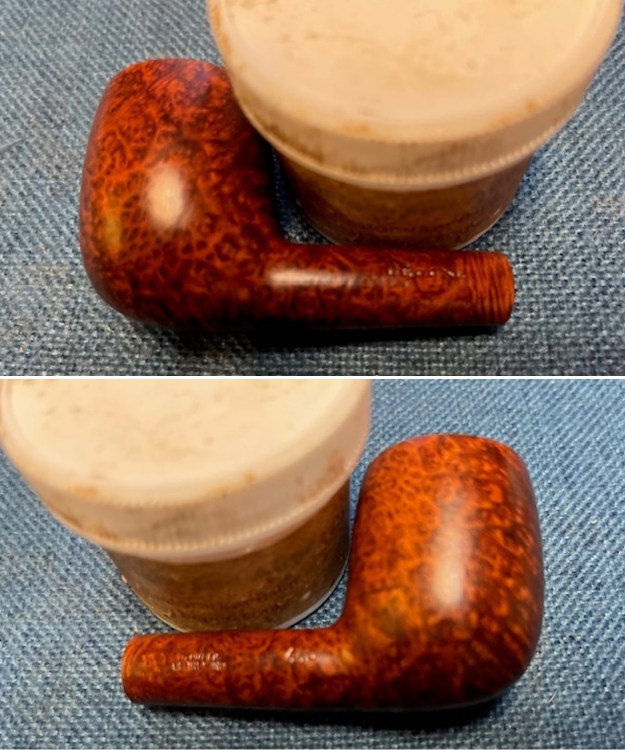
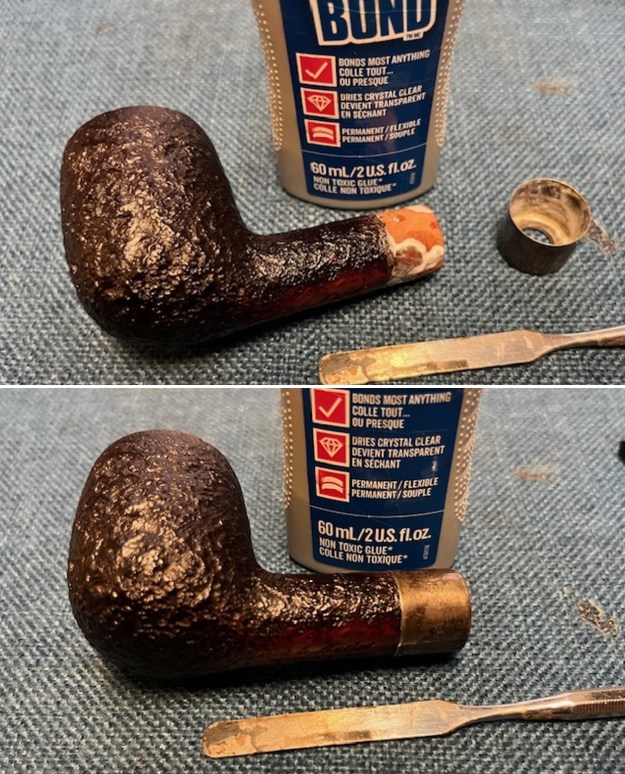
 I set the bowl aside and turned my attention to the stem. On other Deluxe pipes I have used gold to touch up the stamp rather than white acrylic. I touched up the “P” stamp on the left side of the stem with some Rub’n Buff Antique Gold. I worked it into the stamp with a tooth pick. I buffed it off with a soft cloth and some Obsidian Oil. It looked very good.
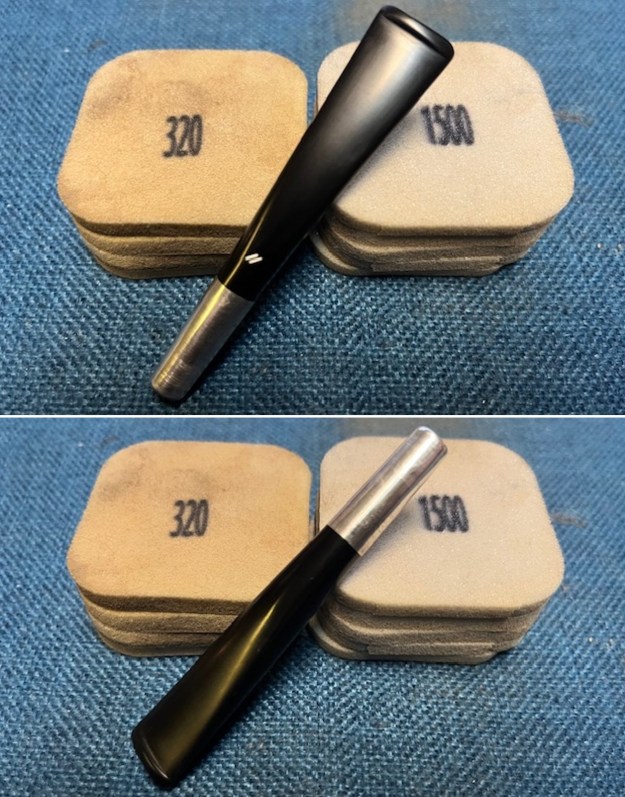
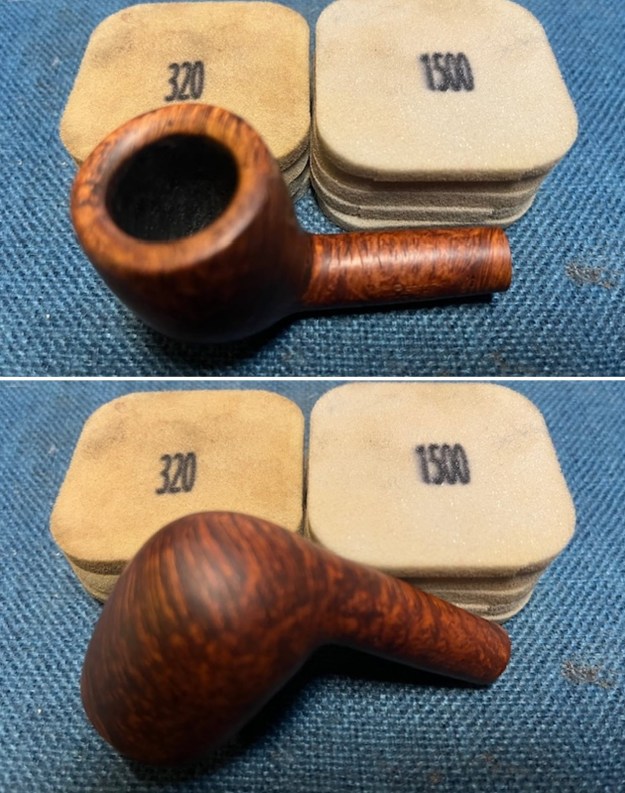
 I sanded the stem with 320-3500 grit sanding pads to minimize the scratches and tooth chatter. I wiped the stem down after each pad with Obsidian Oil on a cloth. By the final pad it looked good.
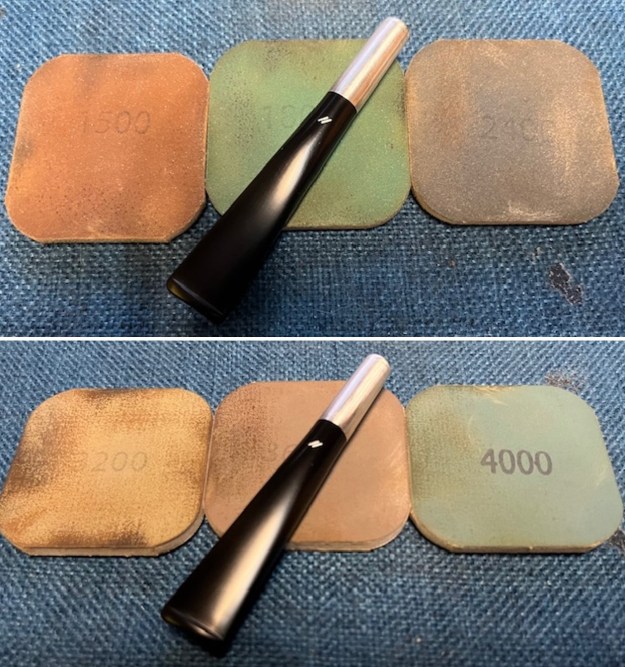
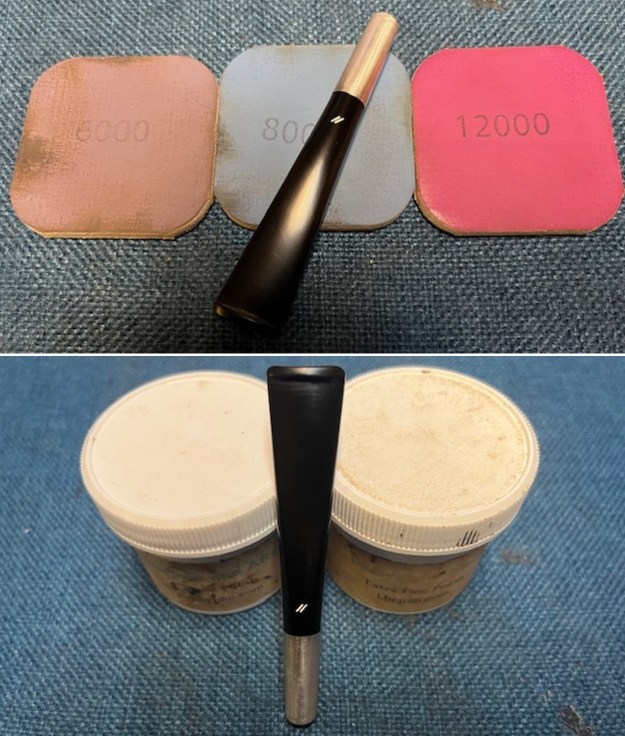
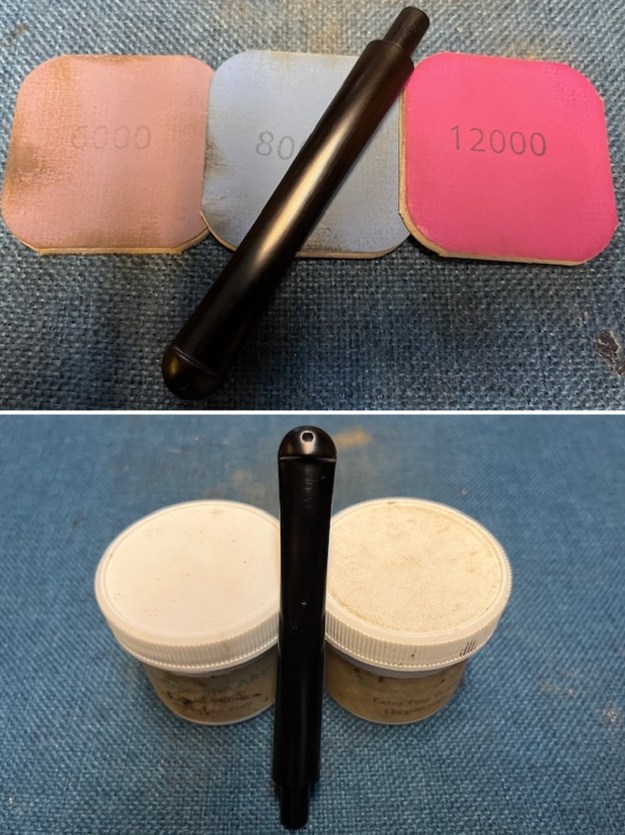
 I polished the stem with micromesh sanding pads – dry sanding with 1500-12000 grit sanding pads. I wiped them down after each sanding pad with a cloth containing some Obsidian Oil. I finished polishing it with Before & After Pipe Stem Polish – both Fine and Extra Fine and buffed it off with a cotton cloth. I gave it a coat of Obsidian Oil to preserve and protect the stem.
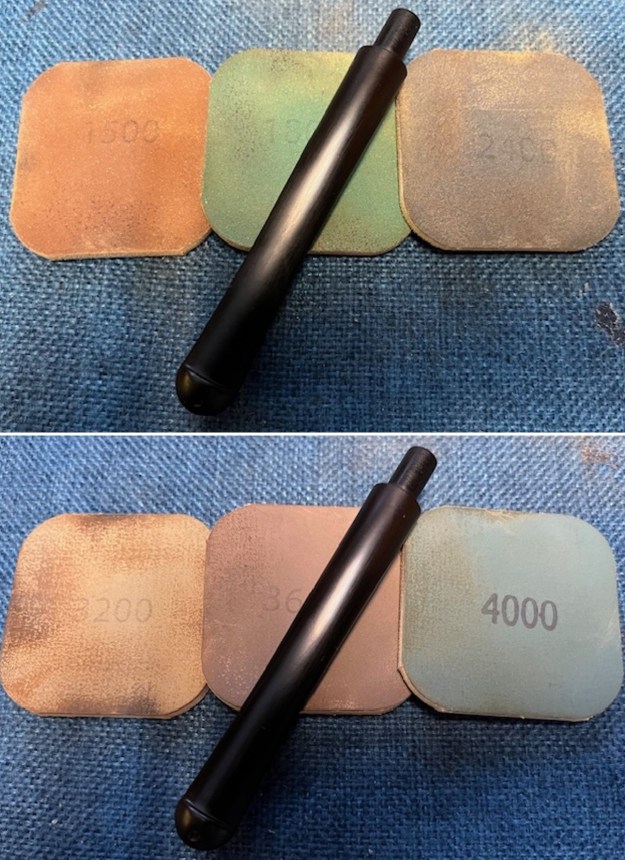
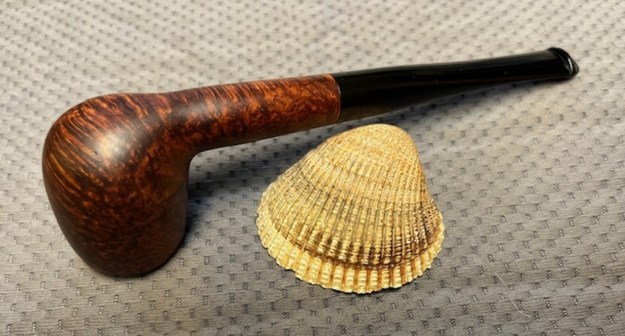
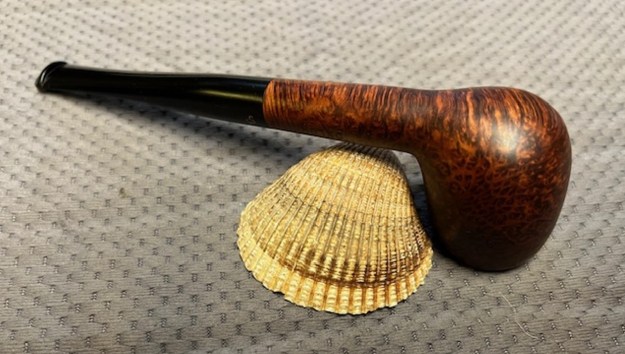
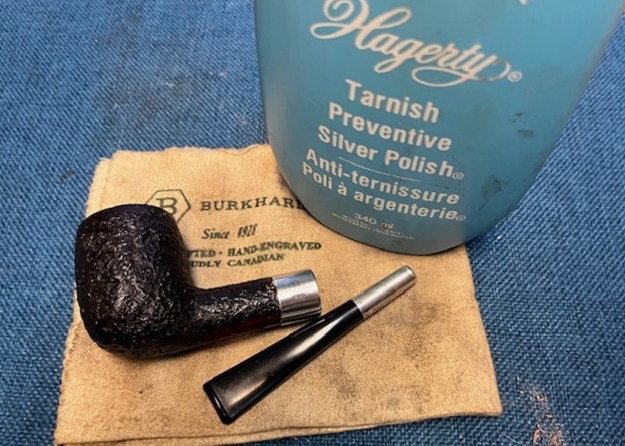
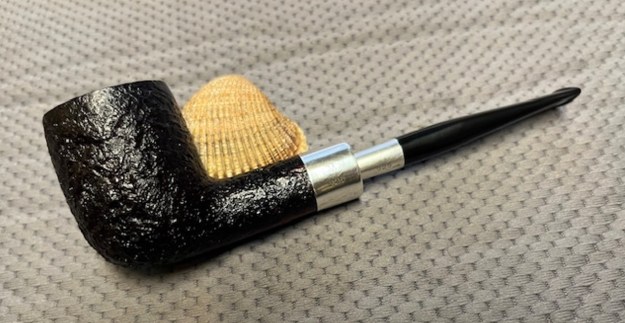
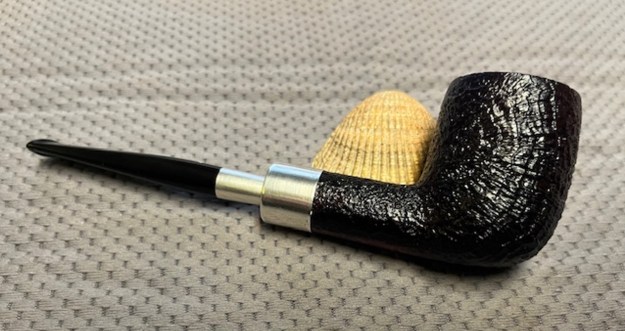
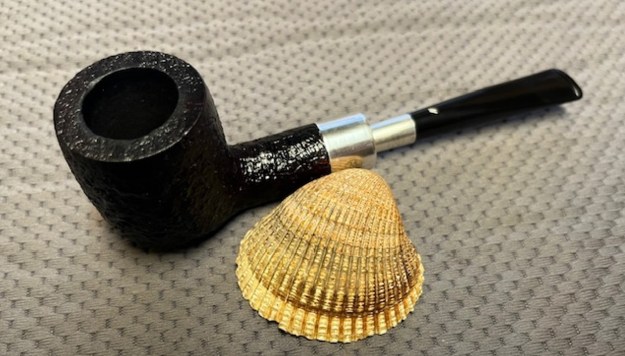
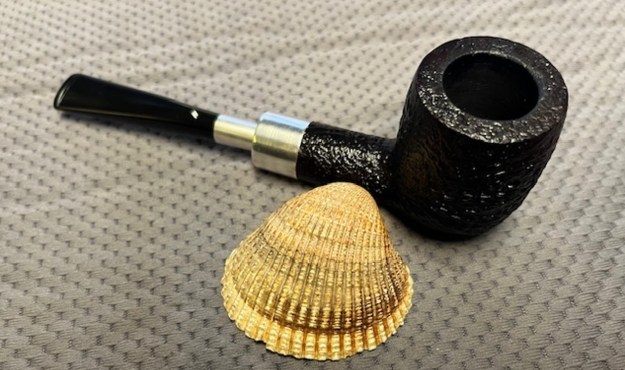
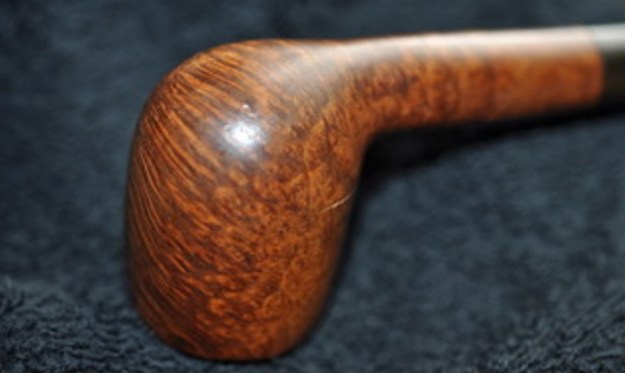
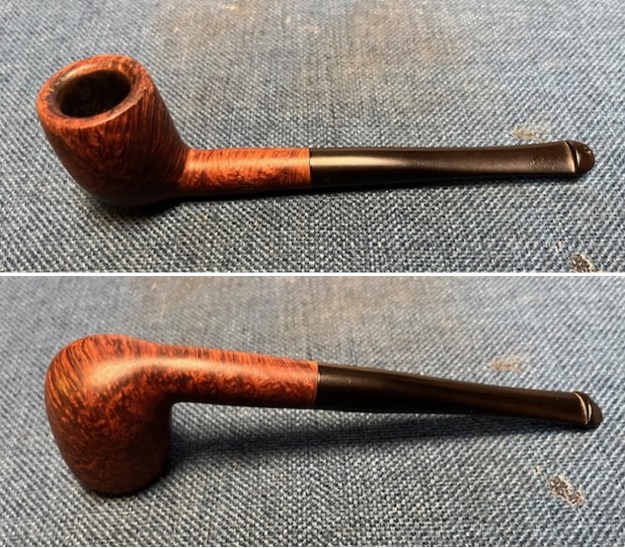
 I don’t know how many times I have said this but I love it when I come to the end of a restoration and all of the parts come together and the pipe looks better than when we started the cleanup process. I put the stem back on the Peterson’s De Luxe 440 Billiard and buffed the pipe with Blue Diamond on the buffing wheel. I carefully avoided the stamping on the shank sides during the process. I gave the bowl and stem multiple coats of carnauba wax on the buffing wheel and followed that by buffing it with a clean buffing pad on the buffer. I hand buffed the pipe with a microfiber cloth to deepen the shine. The finished pipe is a real stunning example of a Republic Era Peterson’s De Luxe 440 Straight Billiard. Once again, the grain and the way the shape follows the grain is amazing. Give the finish pipe a look in the photos below. I can only tell you that it is much prettier in person than the photos capture. The dimensions of the pipe are Length: 6 inches, Height: 1 ½ inches, Outside diameter of the bowl: 1 ¼ inches, Chamber diameter: ¾ of an inch. The weight of the pipe is .99 ounces/28 grams. Thanks for walking through the restoration with me as I worked over another beautiful pipe. I will be putting this one on the rebornpipes store in the Irish Pipemakers Section. Let me know if you are interested in adding it to your collection. Thanks for your time.
As always, I encourage your questions and comments as you read the blog. Thanks to each of you who are reading this blog. Remember we are not pipe owners; we are pipe men and women who hold our pipes in trust until they pass on into the trust of those who follow us.