by Steve Laug
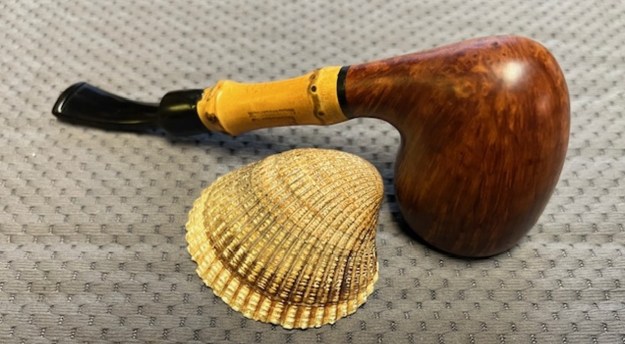
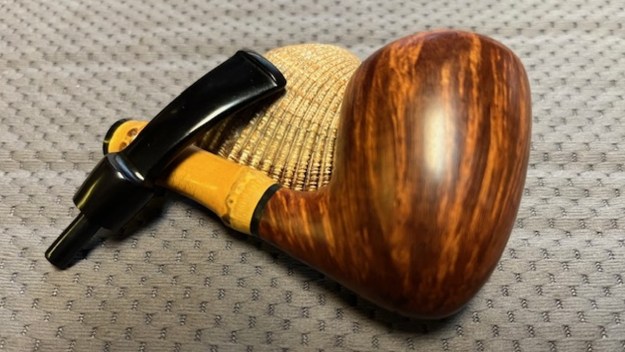
I was recently contacted by a fellow here in Vancouver about some pipes he had. He was referred to me by a local pipe shop. I was unclear if he wanted them cleaned or exactly what. When he came on the weekend he brought six pipes in two pipe boxes for me to have a look at. I spoke with him about the cost of restoring them. It finally became clear to me (I guess I am slow) that he wanted to sell the pipes. He was tasked with the job by his sister in law as the pipes were from her late husband’s collection. As I unpacked them it was clear that they were some nice pipes and some were higher grade. All but one was smoked and had the heavy smell of fruity aromatics to them. Some had cake in the bowl and lava on the rim. Of the six, four of them had significant rim damage – bowls out of round, burn marks, cut marks. The saddest part is that the damage was most significant on the higher end pipes. Most of them had tooth marks in the stems. Obviously, they had been his late brother in laws favourites and he had enjoyed them. He left them with me and I went over them, researched the brands and wrote up an offer for him to present to his sister in law. By the end of the day we had a deal. The six pipes now have a new home and the fruity smell needs to be exorcised! I set aside the long queue of pipes I am working on here to work on the second of these pipes. I bumped it ahead of the queue. It is a beautiful looking older Stanwell Regd. No. Bent Acorn Bamboo. It is stamped on the left side of the bamboo shank and reads Stanwell [over] Regd. No. 969-48 [over] Made in Denmark. There was an acrylic spacer on both ends of the bamboo. The one is between the shank and the bowl and the other is between the stem and the bamboo. The bowl had beautiful straight grain around sides. The Bamboo shank had a great patina. The finish is spotty and there were a lot of dents, scratches. The bowl and rim top were clean or cake and lava but a very prevalent smell of aromatic, fruity tobacco surround the bowl. The stem was clean but and had light tooth chatter on both sides of the stem.
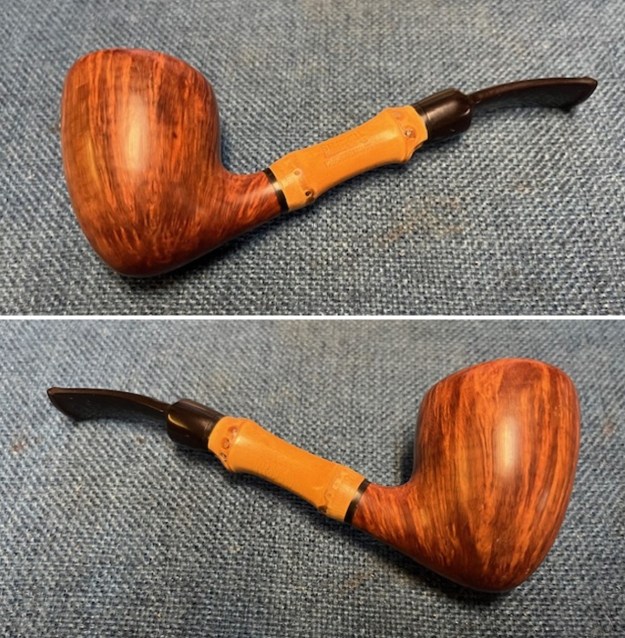
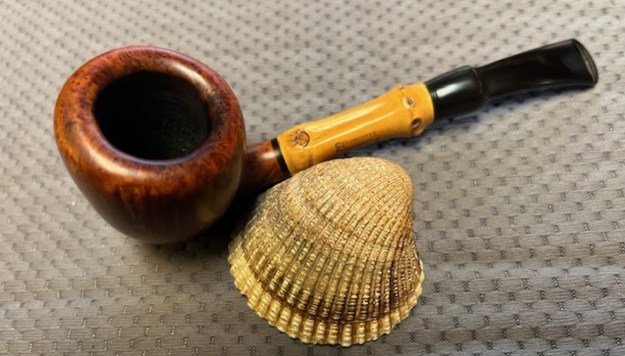
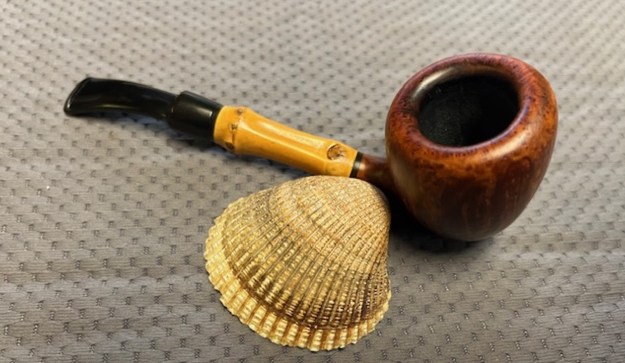
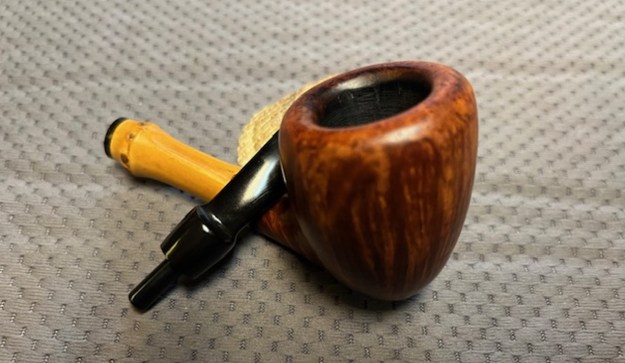
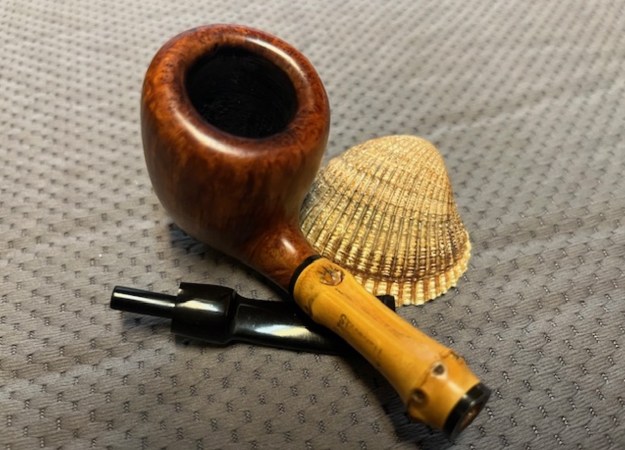
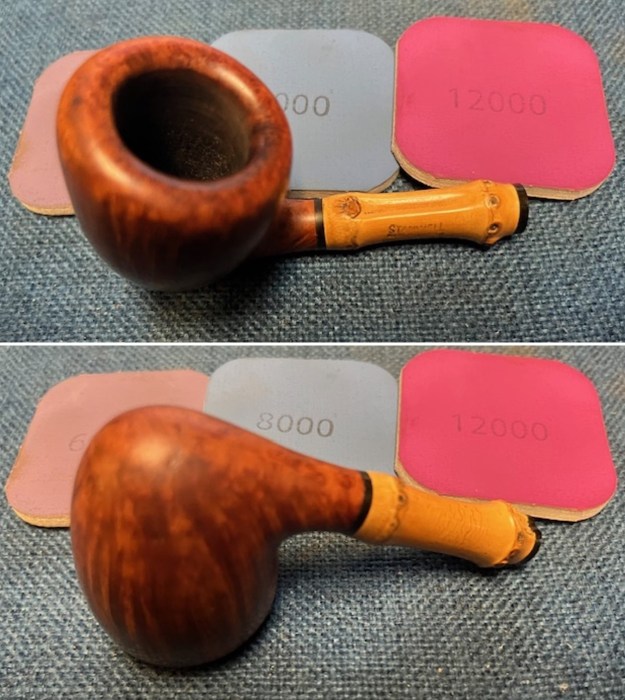
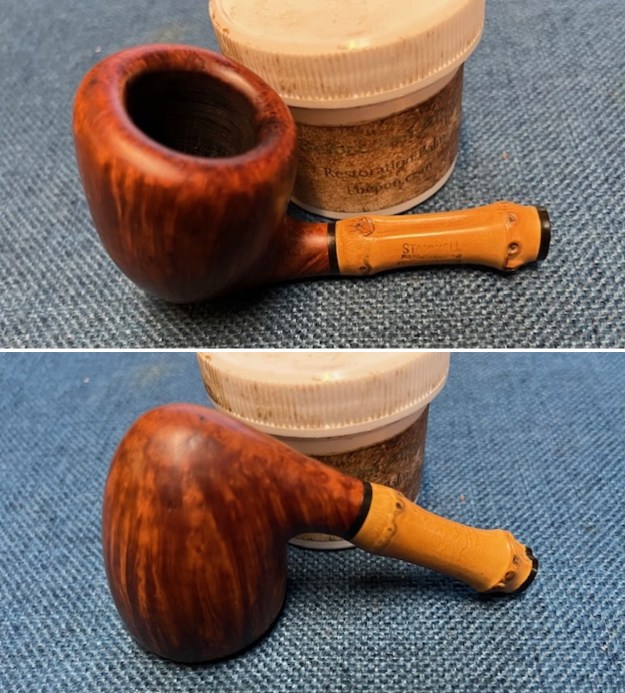
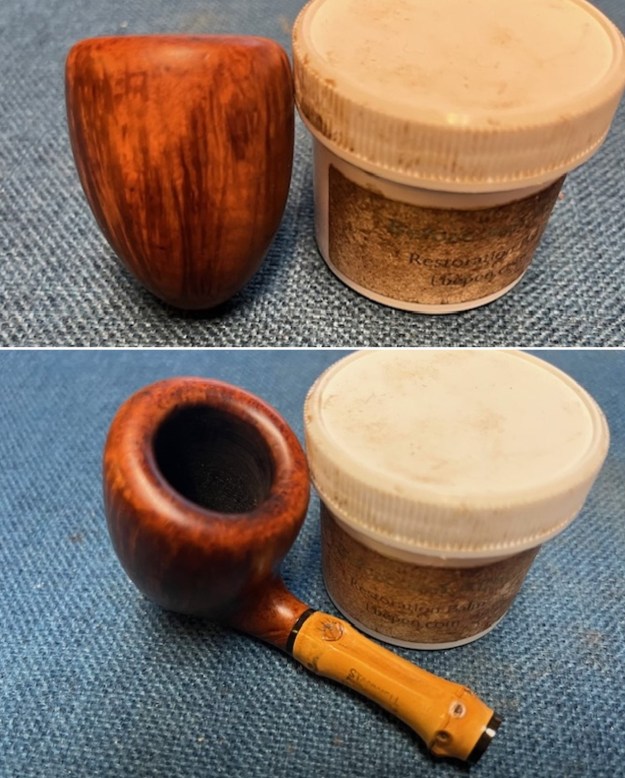
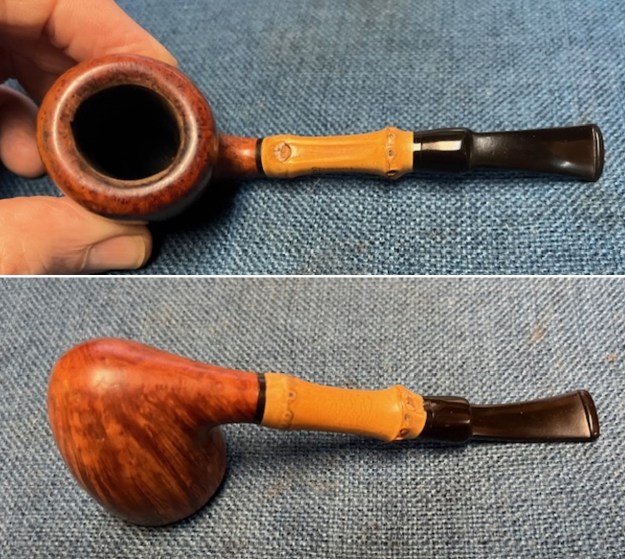 I took photos of the bowl and rim top to give you and idea of what I see. It is too bad that Word does now allow for the inclusion of smells because this is filling my work area. I have a candle going to mask the smell a bit. You can see the damage to the rim top and inner edge of the bowl. There is no cake in the bowl. The bamboo looks very good with some nice Patina. The stem is dirty and has light tooth chatter on both sides ahead of the button.
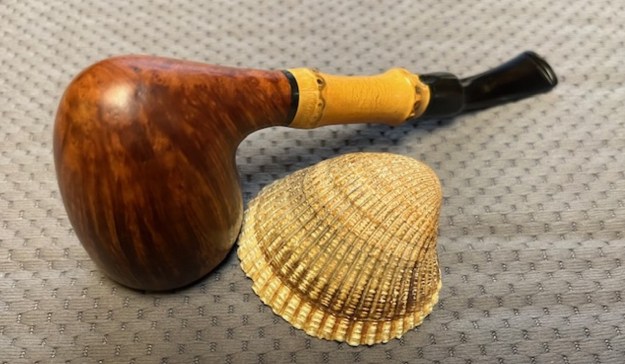
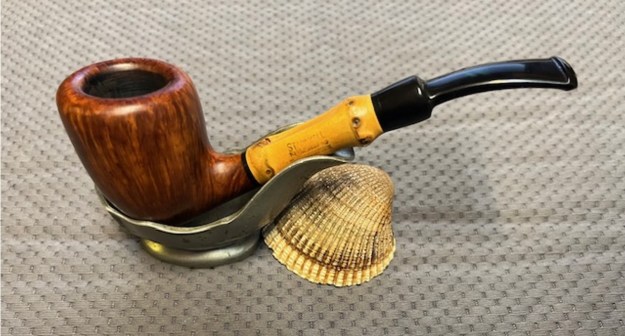
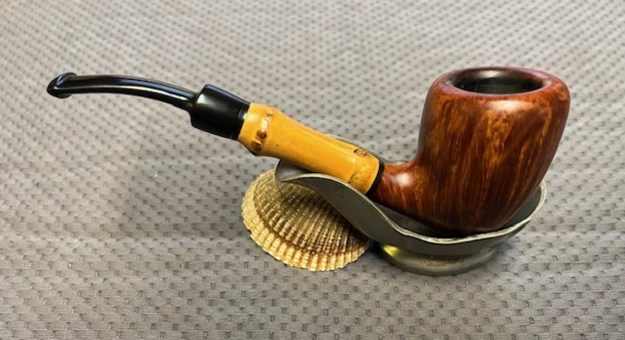
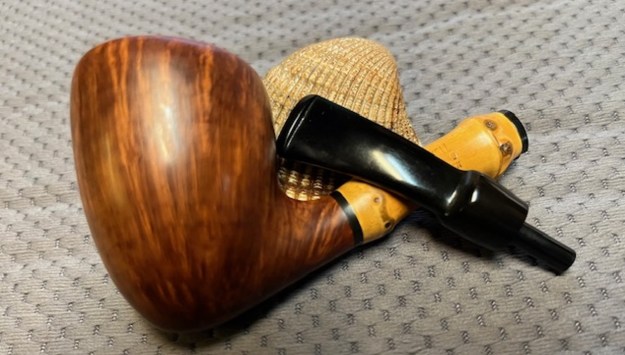
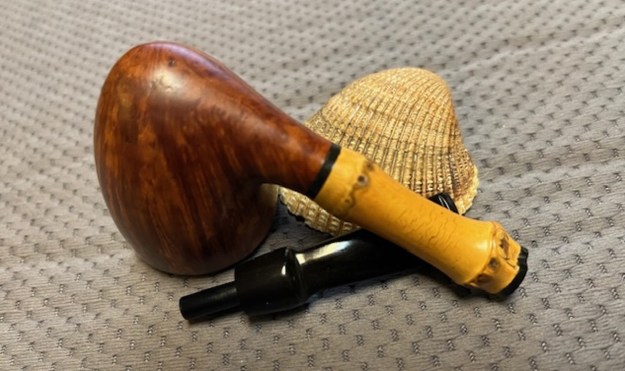
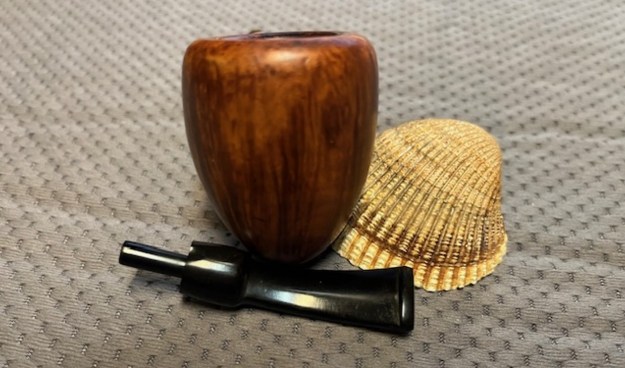
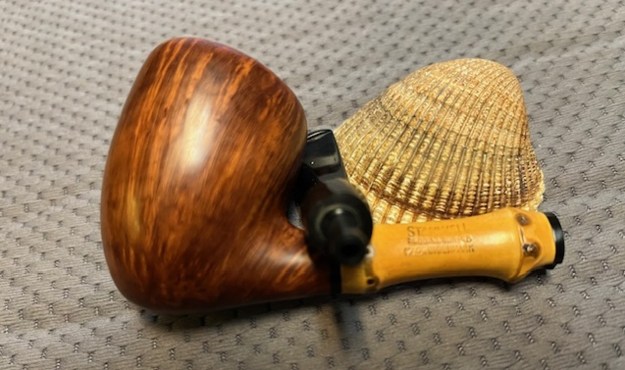
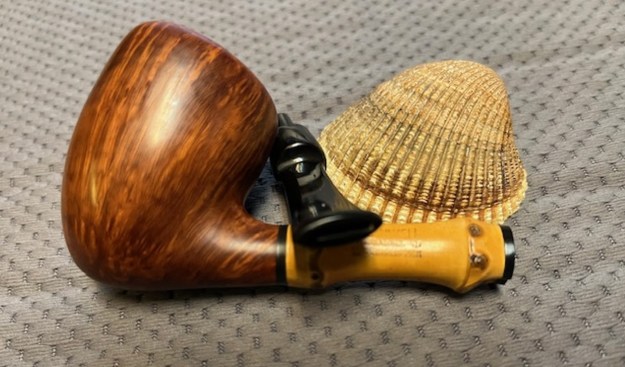
 I took a photo of the stamping on the left side of the Bamboo shank. It is clear and readable as noted above. I took photos of the bowl with the stem removed to give a sense of the proportion and appearance of the pipe.
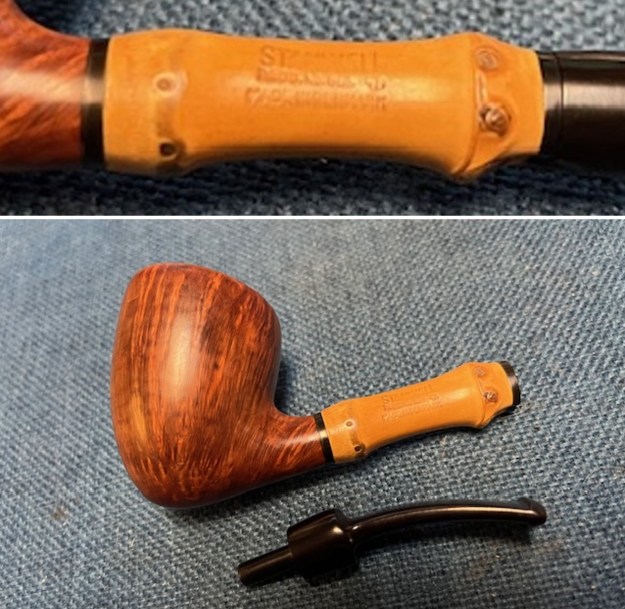 Before I started my work on the pipe I wanted to see if I could find any information that would help me get a sense of the line. I turned to Pipephil to get a quick review of the Bamboo line (http://pipephil.eu/logos/en/logo-stanwell.html). The pipe I was working on did not have Brass Crowned S inlaid on the stem. I have included a screen capture of the brand info there.
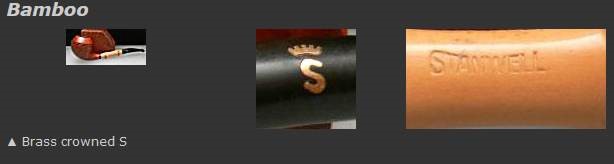 I then turned to Pipedia (https://pipedia.org/wiki/Stanwell) for more information. The article is great and gives a lot of history on the brand. There were also links to catalogues at the bottom of the page. I am including a page from a catalogue on the site below that gives a bit of a glimpse into the brand. Here is the link (http://www.axeljeske.de/Pfeifen/Stanwell_Amager.pdf).
 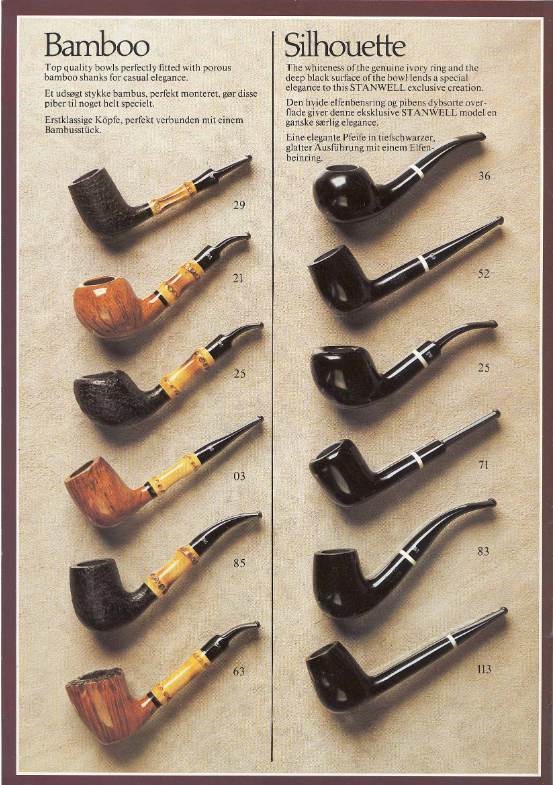 The catalogue page gives a great description of the Bamboo line. It reads as follows: Top quality bowls perfectly fitted with porous bamboo shanks for casual elegance.
Now it was time to work on the pipe.
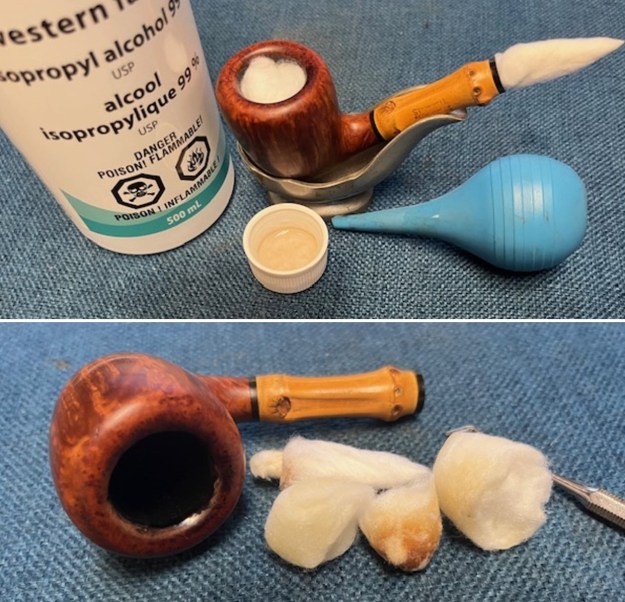
I cleaned out the stinky, fruity smelling tobacco oils and tars in the shank and the airway in the stem. I used 99% isopropyl alcohol, cotton swabs and pipe cleaners and was able to remove the debris and some of the stench. I needed to “deghost” the bowl and try to exorcise the smell.  I stuffed bowl with cotton bolls and used an ear syringe to fill it with alcohol. I set it aside to let the alcohol do its work and wick the oils into the cotton. While it sat for the afternoon, I did some other work. That evening I removed the cotton bolls and quite a bit of tars and oils had leeched out. It smelled significantly better.
 I used a folded piece of 220 grit sandpaper to minimize the damage on the inner edge of the rim and smooth it a bit. I was careful to not change the profile of the rim top and edges. There is some darkening on the rim top that remains and the bowl is slightly out of round.
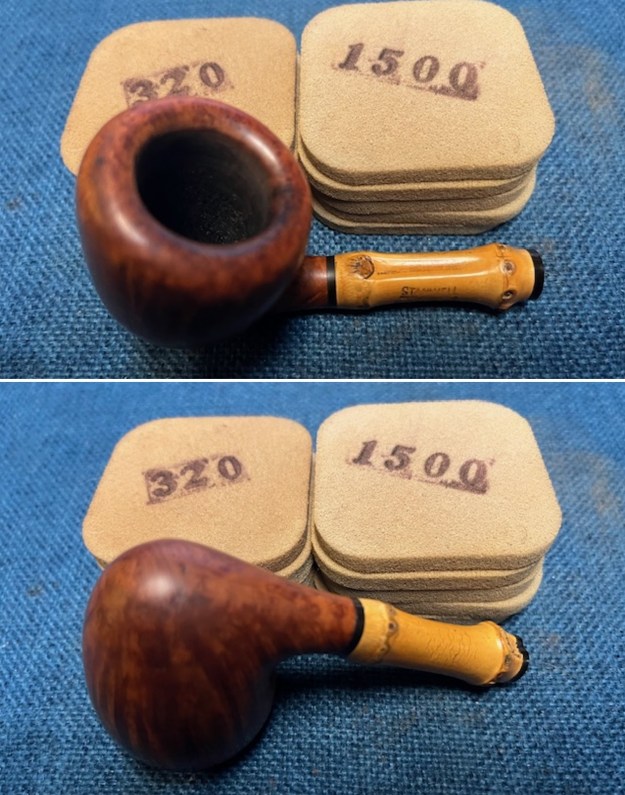
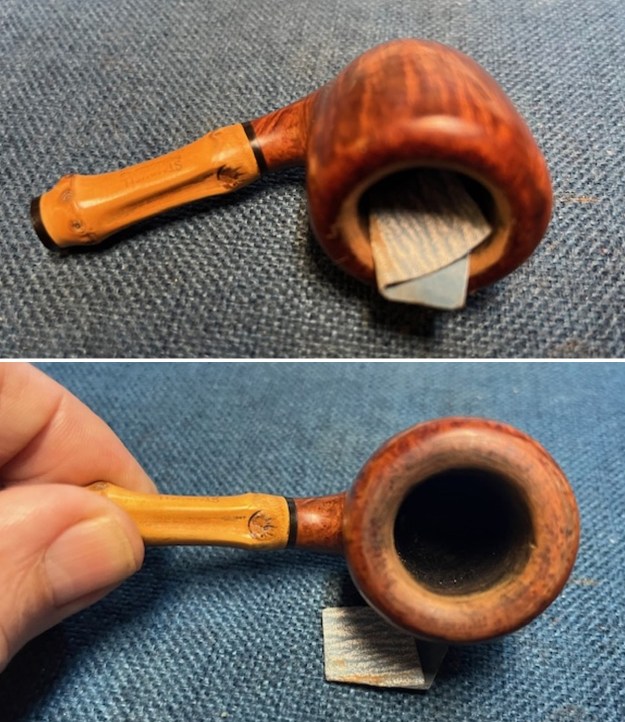 I used 320-3500 grit sanding pads to smooth out the scratches and nicks in the surface of the briar. There we many small scratches most of them in the varnish coat and lightly in the briar. I wiped the bowl down after each sanding pad with a damp cloth to remove the sanding dust and debris.
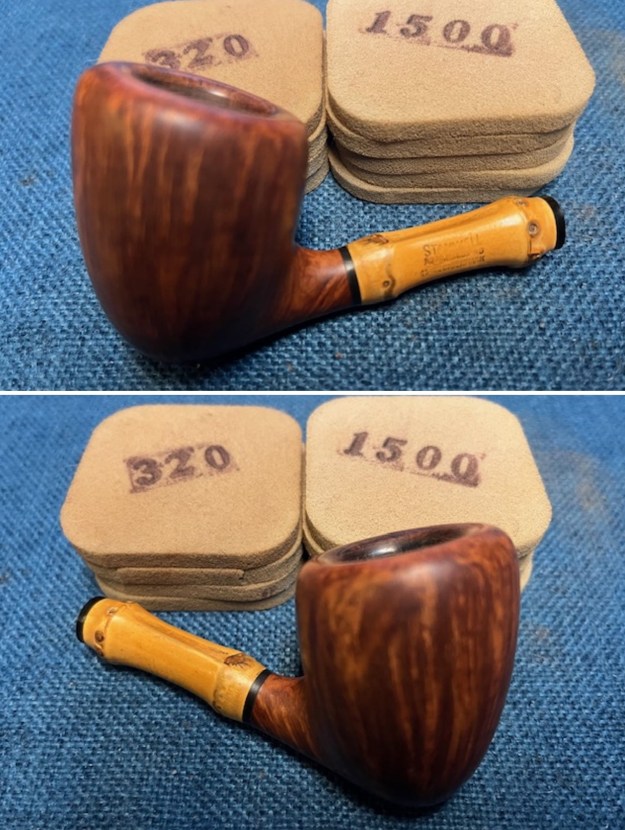
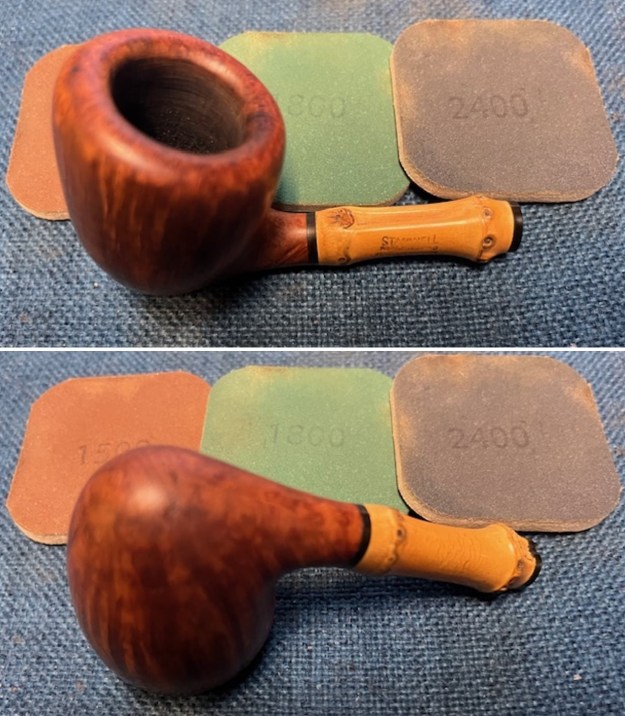
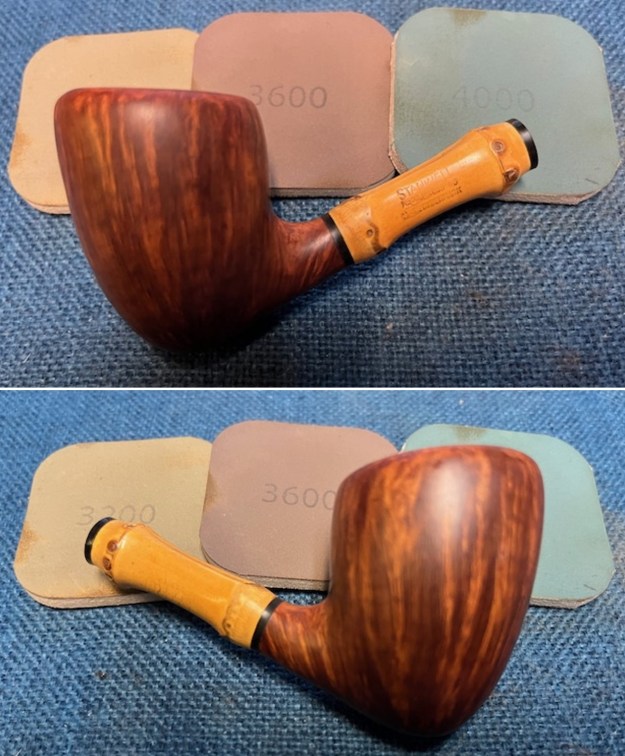
 I polished the briar with micromesh sanding pads – dry sanding with 1500-12000 grit pads and wiped it down the bowl after each sanding pad.
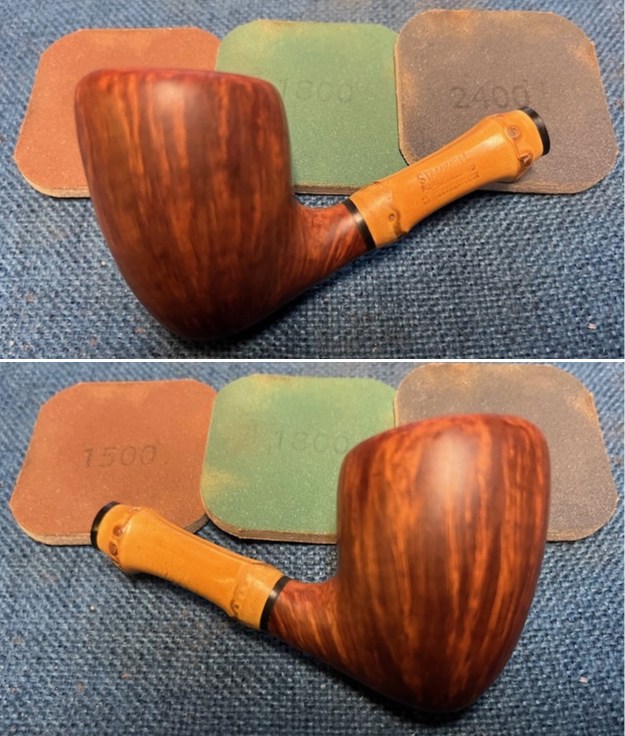

 As I examined the bowl before I gave it a coat of Before & After Balm I rubbed my fingers over the surface. I felt some flaws in the briar. I used my headlamp and build in lens to examine what I felt with my fingers. I saw some well done fills in the briar that followed vertical grains. They were shrunken in spots which made the bumps I was feeling. I used the headlamp and lens to give a clear view. I used a tooth pick and clear CA glue to fill in the spots in the briar. This was going to make a bit more work for me but it was worth doing.
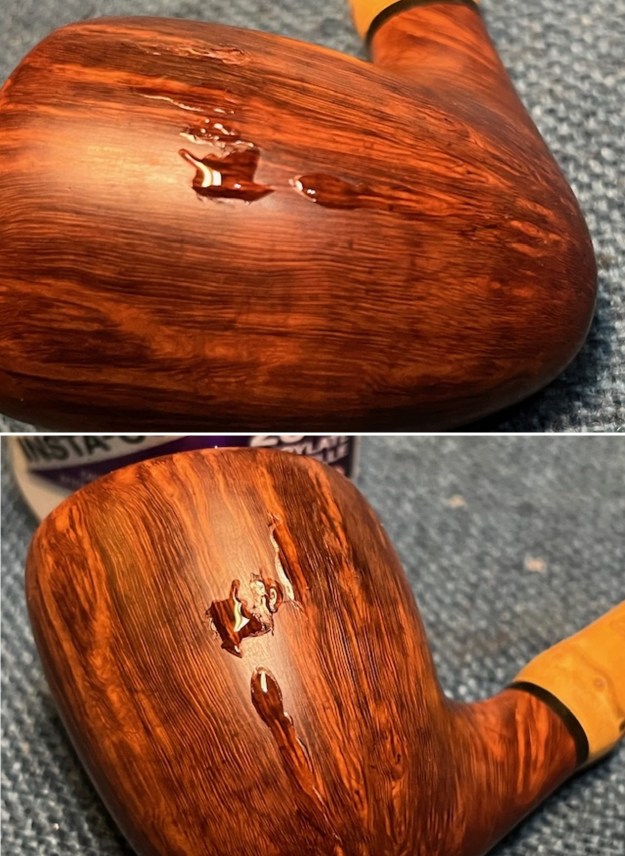 Once the fills cured I sanded each strip smooth with the edge of a folded piece of 220 grit sandpaper.
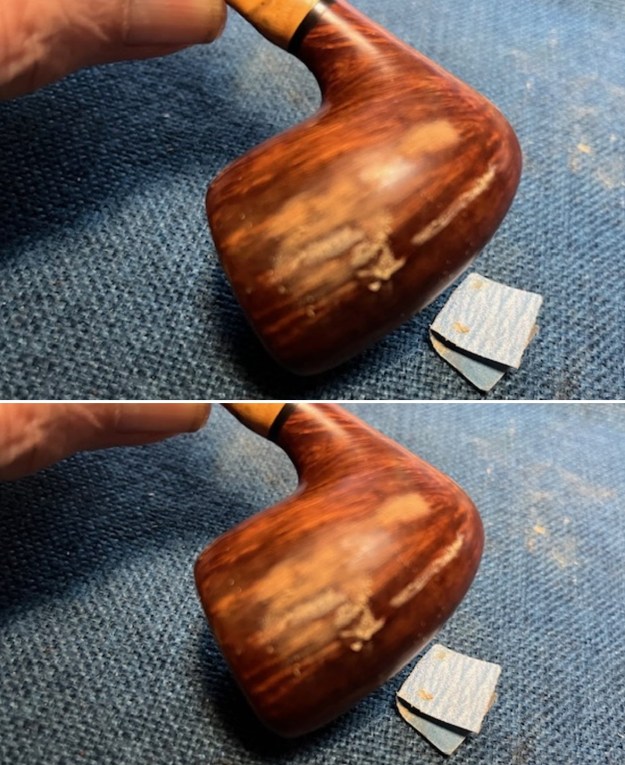 I sanded the area with 320-3500 grit sanding pads and wiped the bowl down with a damp cloth to remove the sanding debris. I followed that by polishing the bowl with 1500-12000 grit micromesh sanding pads. Again I wiped the bowl down with damp cloth to remove the sanding debris on the briar. I restained the area on the bowl side with a Walnut Stain pen. I blended the areas into the surrounding briar. The look and feel of the bowl was very good.
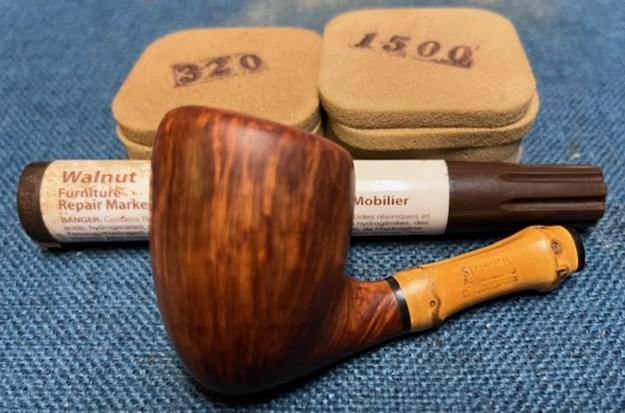 I rubbed the bowl and shank down with Before & After Restoration Balm. I worked it into the surface of the bowl sides and shank with my fingertips to clean, enliven and protect the briar. I let the balm sit for a little while and then buffed with a cotton cloth to raise the shine. The Balm did its magic and the grain stood out.
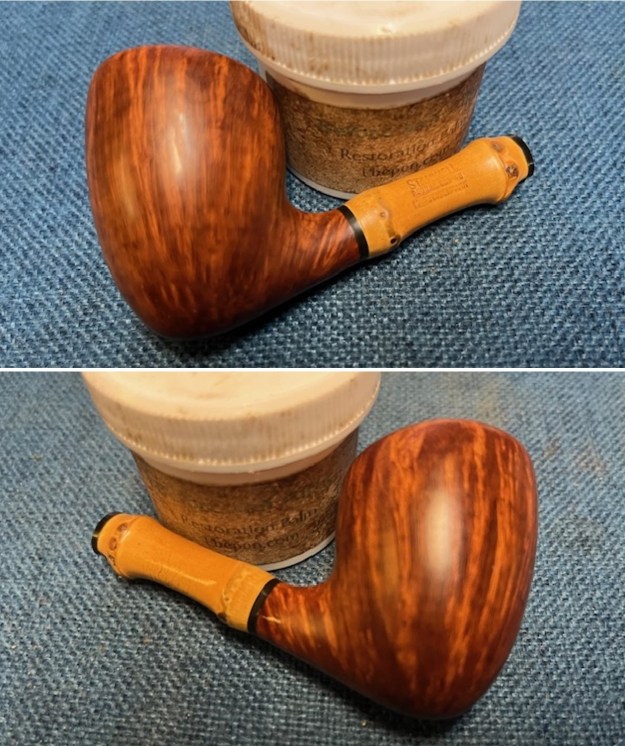
 I set the bowl aside and turned my attention to the stem. I was able to polish out the light tooth marks and chatter with 320-3500 grit sanding pads. I wiped the stem down after each pad with an Obsidian Oil cloth. It was beginning to look very good.
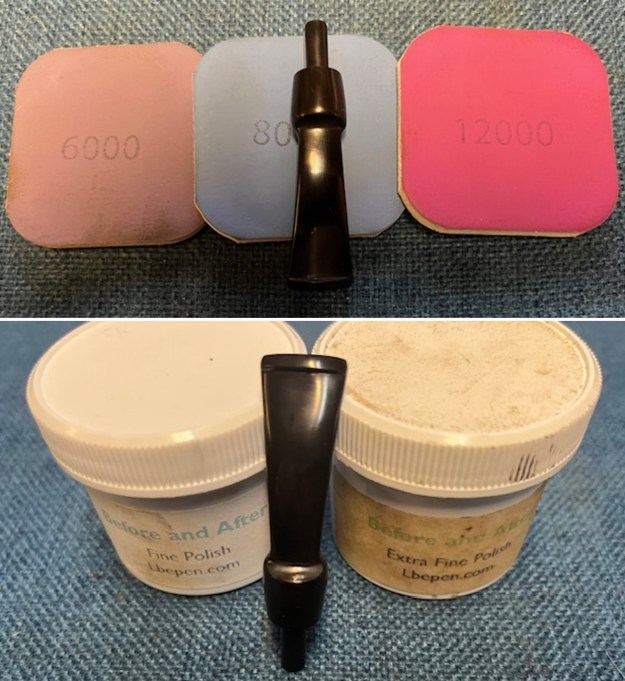
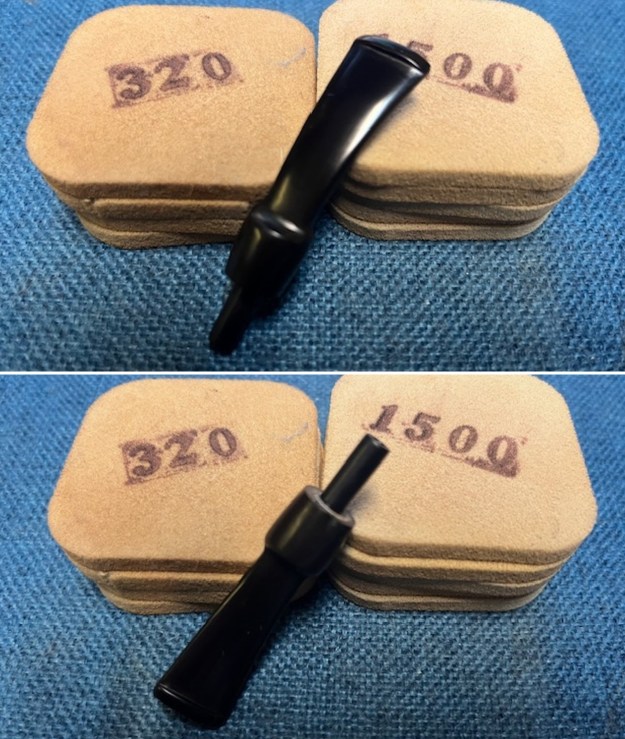 I polished the stem with micromesh sanding pads – 1500-12000 grit pads. I wiped it down with a damp cloth after each sanding pad. I used Before & After Pipe Polish – both Fine and Extra Fine to further polish the stem.
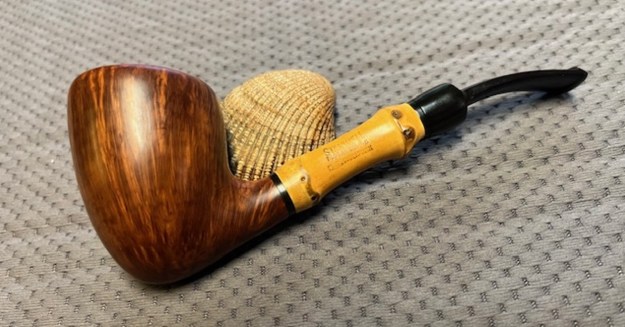
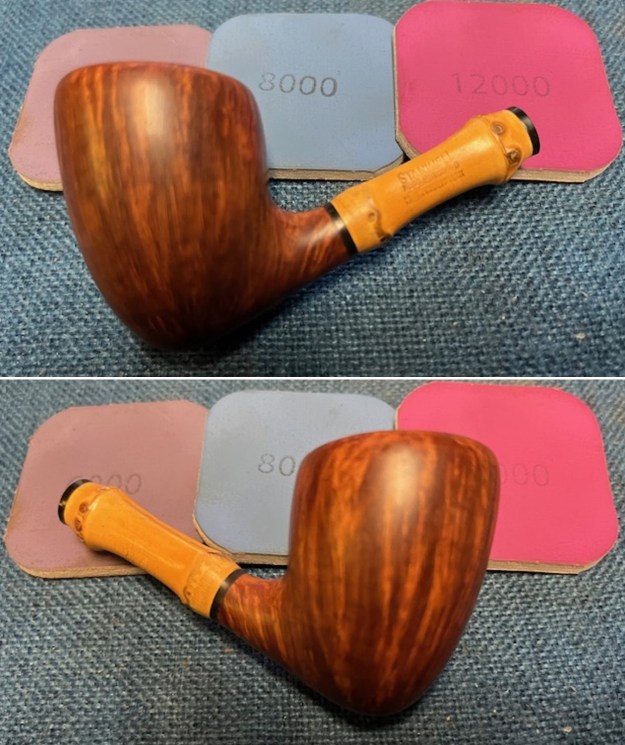
 This Stanwell Bamboo Shank Acorn with a vulcanite saddle stem is a great looking pipe now that it has been restored. The beautiful finish really highlights the grain and the polished finish is stunning. I put the stem back on the bowl and carefully buffed the pipe with Blue Diamond on the buffing wheel. I gave the bowl and the stem multiple coats of carnauba wax on the buffing wheel and followed that by buffing the entire pipe with a clean buffing pad. I hand buffed the pipe with a microfiber cloth to deepen the shine. The finished Stanwell Bamboo Shank Acorn fits nicely in the hand and feels great. Give the finished pipe a look in the photos below. The dimensions of the pipe are Length: 5 ½ inches, Height: 2 inches, Outside diameter of the bowl: 1 ½ inches, Chamber diameter: ¾ of an inch. The weight of the pipe is 37 grams /1.31 ounces. I will be adding the pipe to the Danish Pipe Makers Section of the rebornpipes store. If you are interested in purchasing this pipe send me a message or an email. Thanks for reading this blog and my reflections on the pipe while I worked on it.