Blog by Kenneth Lieblich
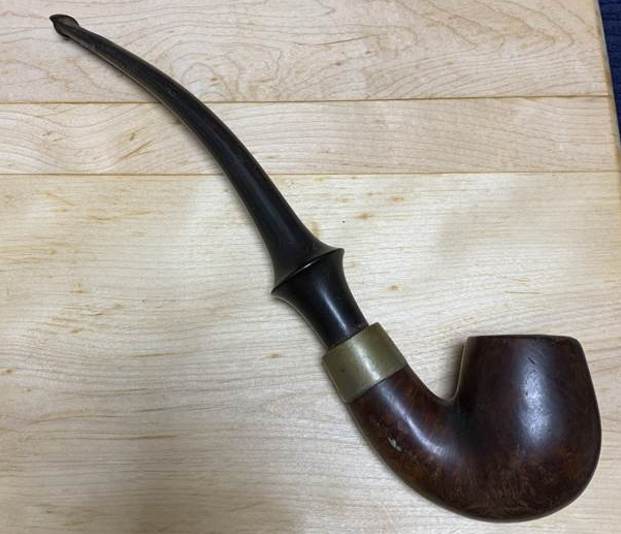
There are some pipes that are so rough that they are an entire pipe-restoration course in and of themselves. This is one of those pipes. It is a WDC Wellington Jumbo and it came to me in a lot of pipes from the USA. Recently, a customer of mine commissioned me to restore this pipe I readily agreed – because I didn’t know what I was getting myself into! The story of this pipe’s repair is a long one and it includes so many different elements that one can learn a lot just by reading. This pipe also reminded me that sometimes the wear-and-tear of the years needs to remain on a pipe as part of its story. I managed to bring great beauty back to this pipe, but it would always retain signs of its harsh past. This is one Wellington that did NOT win at Waterloo.
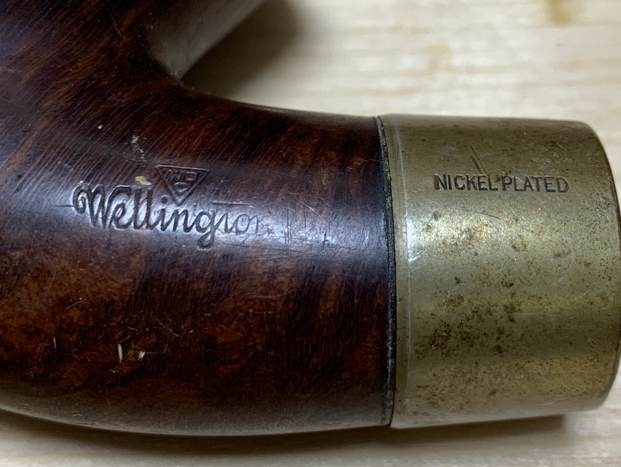

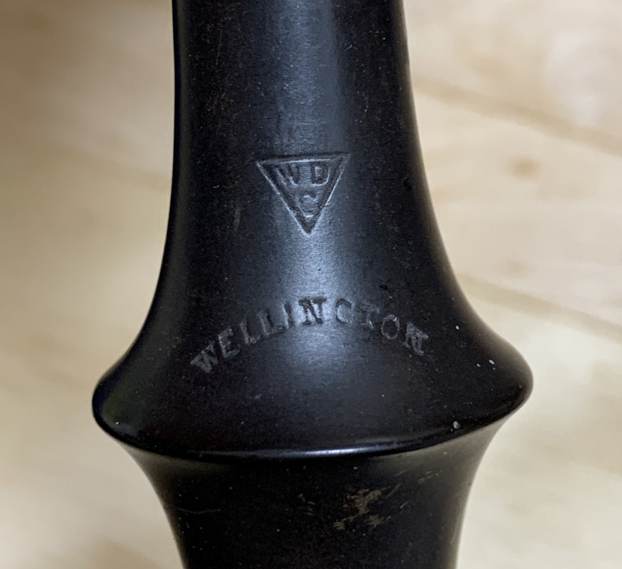 The pipe in question was made by the William Demuth Company of New York (hence, WDC). I read a blog Steve wrote on a Wellington Jumbo back in 2020 to learn more about the pipe’s background. I was directed to the Pipedia page on WDC and it has a lot of good information, including a great flyer which had a photo of some of the Jumbos.
 From Pipedia is a Wellington ad and another from 1915, courtesy of Pipephil:
 The Wellington is a charming pipe, but it had a number of significant issues. It might be most clear for you, dear reader, if I enumerate the issues, one-by-one, and we can address them in due course. There was a tremendous amount of work to do on this pipe, so I got to it. I divided up the problems into three categories: the stem, the ferrule/band, and the stummel.
1. I began by cleaning some of the filth on the outside of the stem with some Murphy’s Oil Soap on cotton rounds. This removed some of the surface staining.
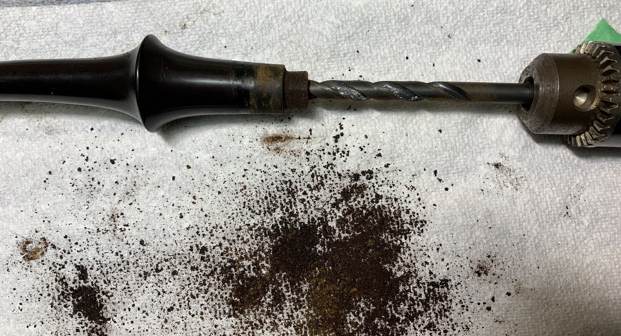
 2. The stem’s insides were absolutely clogged with filth. Steve told me that the Wellingtons are notorious for this, and I learned the hard way just how true that was. I actually used a drill bit (by hand) to break into the encrusted gunk in the stem. Then, I started cleaning the inside with isopropyl alcohol, Q-tips, and pipe cleaners. This took a long while. The inside was terribly dirty and it took an awful lot of cotton.
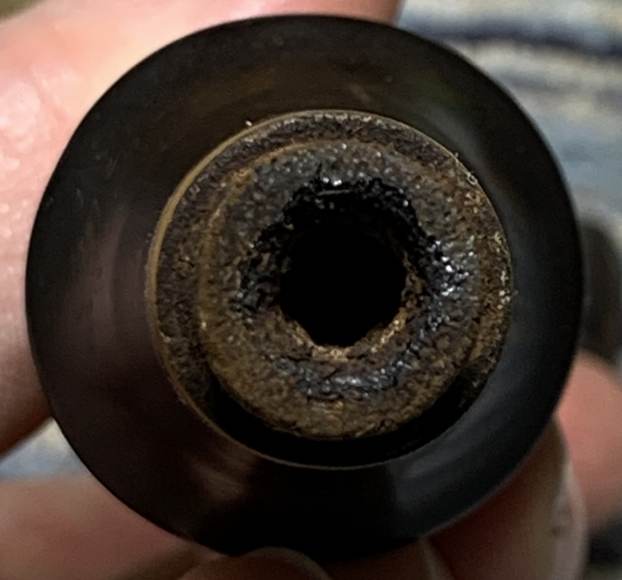
 3. Due to the size of the stem, I had to use churchwarden-size pipe cleaners, but this was just not doing enough to progress the process. I decided to plug up the bore-end, filled the stem with alcohol, and let it sit for a while – in the hope that it would loosen some of the gunk. This was mildly successful but insufficient. So, I then opted to use my tube brushes with alcohol and this worked quite well, dislodging some of the filth I couldn’t otherwise get to. It was clear that the pipe would require a retort, but that would have to wait until later.
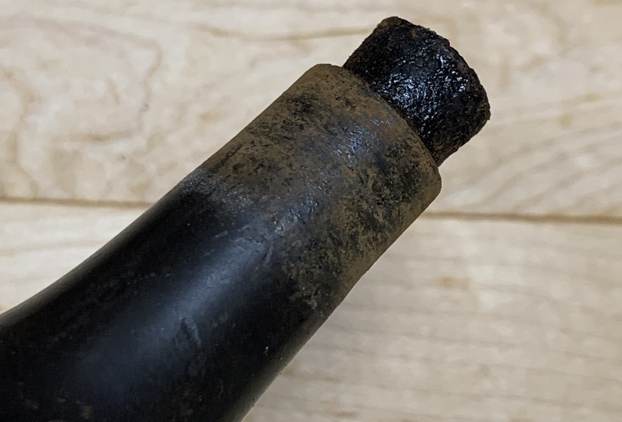
 4. The tenon end was burnt to a crisp from overuse and, more specifically, overheating. I sanded this down in order to even it out. I didn’t want to over-sand it, but I couldn’t just leave it as it was.
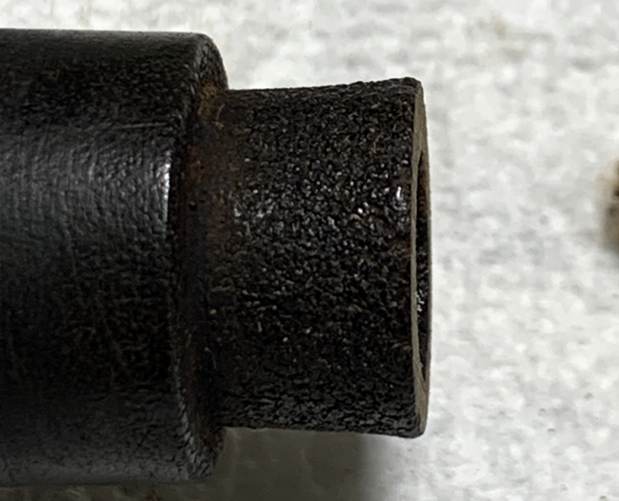 5. There was considerable oxidation, but the stem was too large to fit in my deoxidation fluid container. As a result, I had to do this by hand. I used SoftScrub with some cotton rounds and, as you can see, lots of revolting colour came off the stem. As expected, this took a lot of elbow grease, but I got it to a reasonable state.
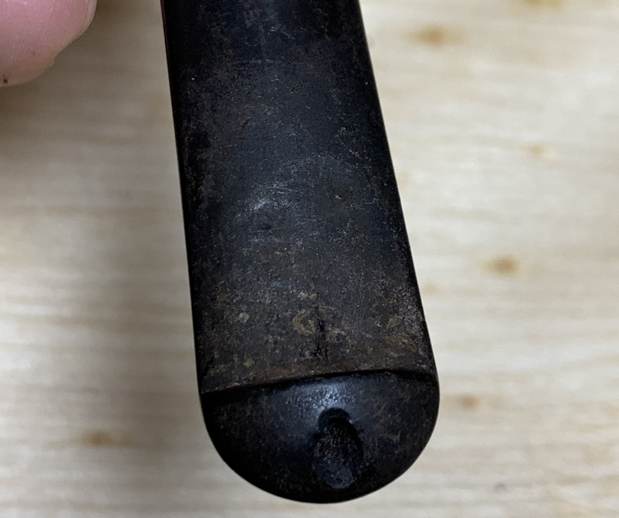
 6. The area of the stem just above the button was chomped as badly as I’ve ever seen and the vulcanite had actually ruptured at some point. Also, the bore hole was damaged. I used a BIC lighter to try and lift some of those dents, but very little (if anything) was lifted. I brought out my cyanoacrylate adhesive and I applied it liberally to the affected areas – including the bore. I used some accelerant to get the glue going, and then moved on.
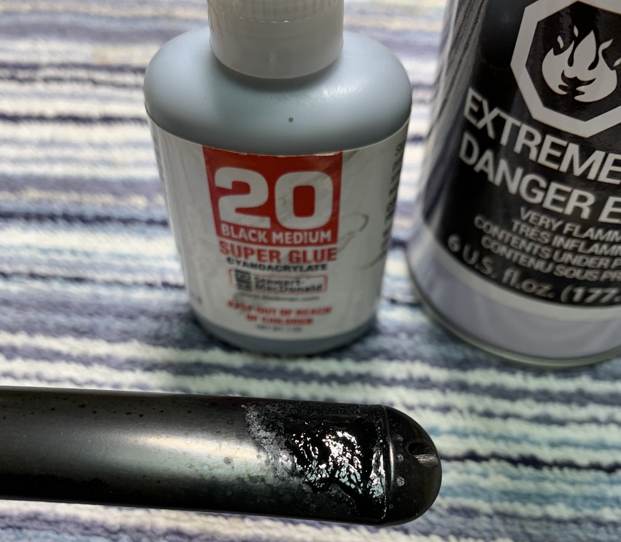
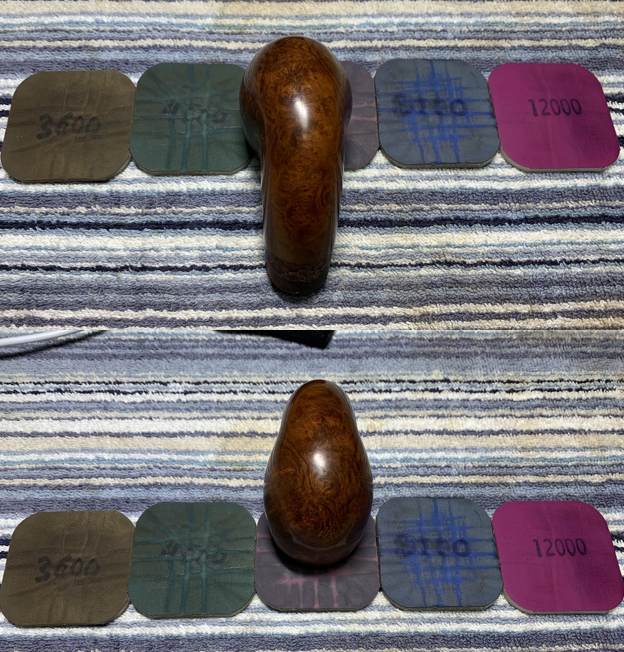
 7. I began the lengthy process of sanding and shaping the cyanoacrylate repairs. I used small files and both 220- and 400-grit sandpapers to remove the excess adhesive. Once I had shaped it the way I wanted it, I then used all nine Micromesh pads (1,500 through 12,000 grit) to bring out the lovely black lustre on the stem. I also used Obsidian Pipe Stem Oil in between each pad scrubbing. Hey –we’re finally making some progress!
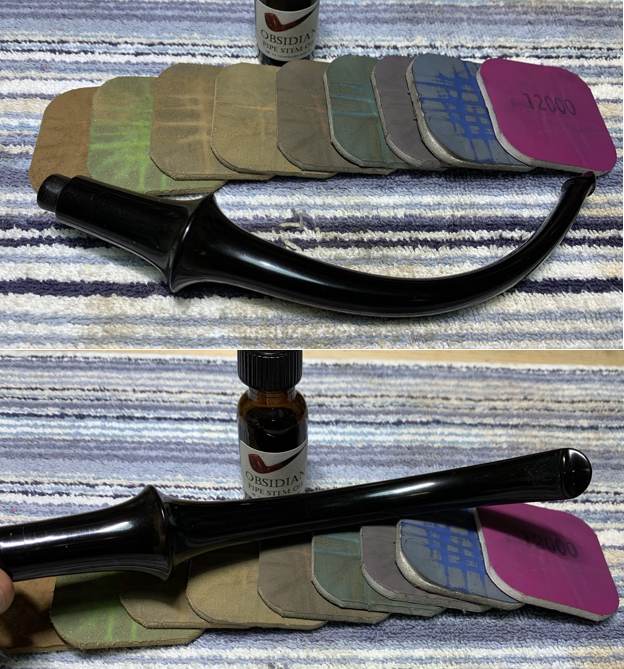 8. Halfway through the MicroMesh process, I paused to fix yet another problem with the stem: it had straightened over time and needed to be bent back into its correct shape. Essentially, I wanted the end of the stem to be close to parallel with the rim of the bowl. I brought out my heat gun and heated the vulcanite stem in order to make it malleable. The heat gun is very powerful – it does not take long! When it was soft, I gently curved the stem over a wooden dowel. The dowel provides a firm surface and a proper curve. Once I had the bend I wanted, I left the stem to cool and set itself in place.
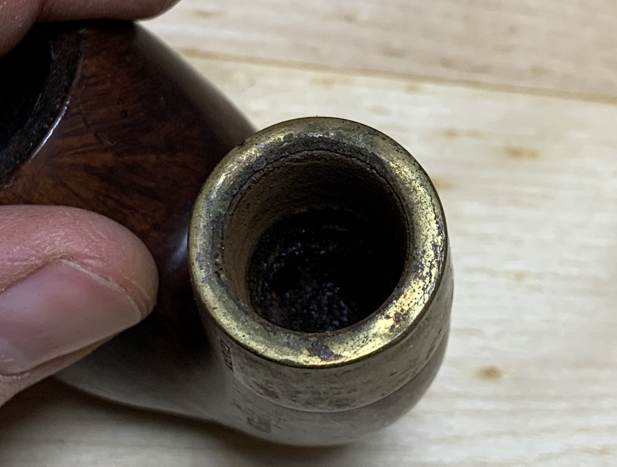
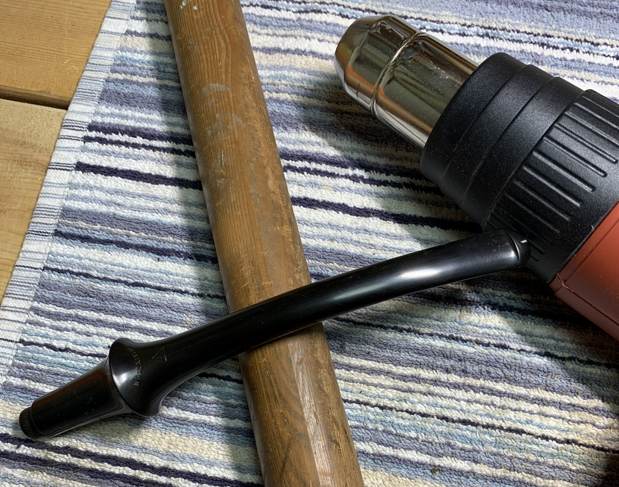 9. On to the ferrule – which was thoroughly corroded and discoloured from years of mistreatment. Somewhat to my surprise, the ferrule came off very easily and required no special effort. I began by cleaning the metal with some SoftScrub on cotton rounds. This was quite good at removing the unsightly bits.
 10. I sanded the inside of the ferrule with 220-grit sandpaper in order to remove the old glue and debris that came from the shank. This would provide a better surface for re-gluing later.
11. I used some of my MicroMesh pads (only 3,600-12,000) to eliminate some of the minor scratches on the metal. It also gave a nice shine which clearly hadn’t been seen for decades.
12. I used a jewelry cloth to give the final polish to the nickel. This ferrule would always retain some small dents etc. from its hard life, but it looks much improved.
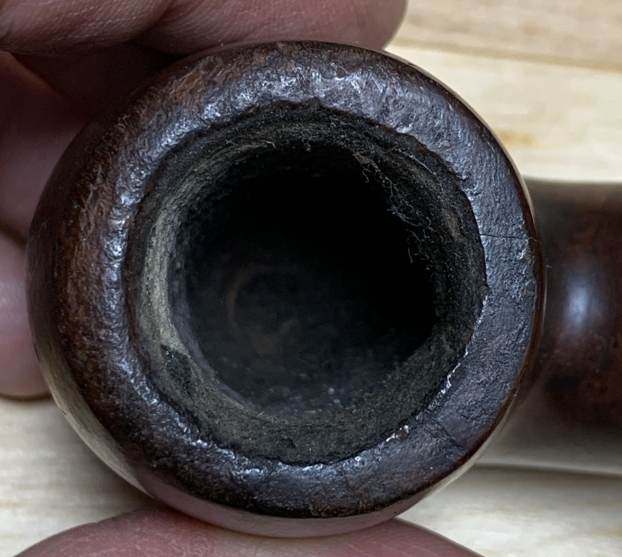
13. On to the stummel – this is where the lion’s share of the work was. The insides (both bowl and shank) were overwhelmed with cake and tar and anything else you’d care to mention. The bowl really needed to be reamed, so I used the KleenReem too to scrape off as much built-up cake. Sadly, this just wasn’t sufficient – I had to go to the next step to get things moving.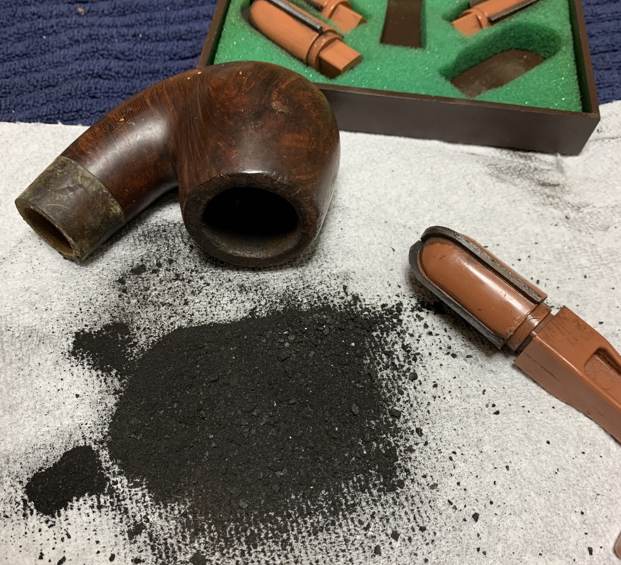 14. I threw the stummel in my alcohol bath in the hope that it would loosen some of the incredibly hard residue inside the bowl. After 24 hours, this worked a bit, but not enough. It was time for the nuclear option.
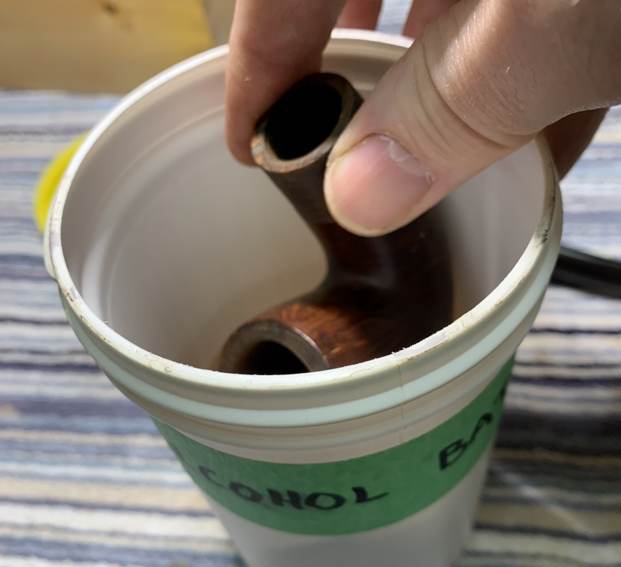 15. I put a sanding drum (and a couple of other bits) on my Dremel and carefully began removing the old stuff. This is not an option that I use regularly. The risk of oversanding is high and that can be an even bigger problem. However, I worked slowly and cautiously. Generally, I prefer to sand the chamber down to bare briar. When restoring, it is important to ensure that there is no damage to the briar under the cake. There are a few situations when I might leave some cake in the bowl, but not today. Sadly, there were definitely some hidden flaws to the briar on this pipe. I’ll come back to that later.
 16. Just like the bowl, the shank was absolutely disgusting. It had never been cleaned – or, not for many decades. I started cleaning the inside with isopropyl alcohol, Q-tips, and pipe cleaners. This took a while. The inside was very dirty and required and extraordinary number of Q-tips and pipe cleaners. Eventually some cleanliness came to it.
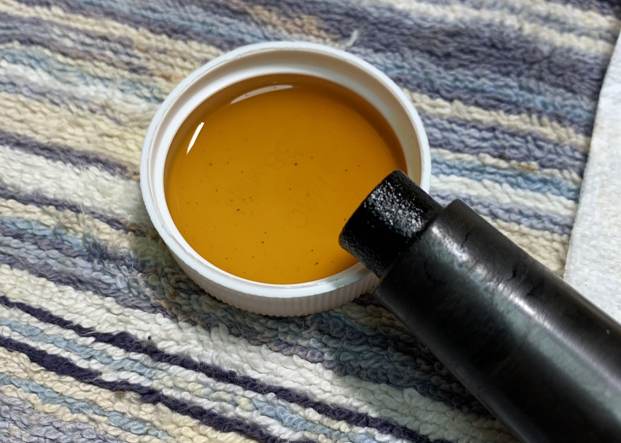
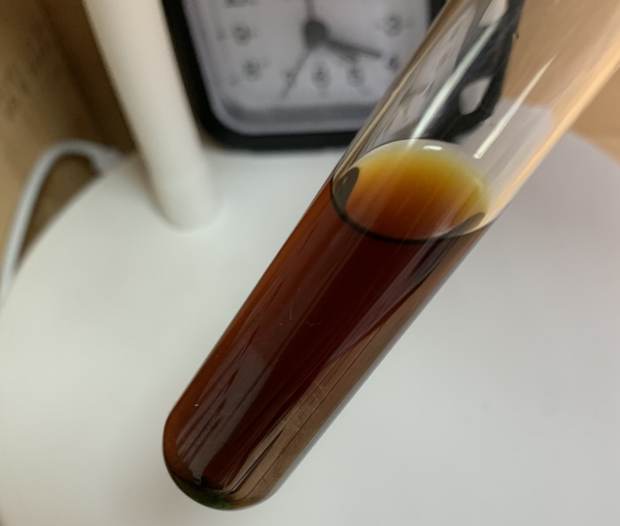
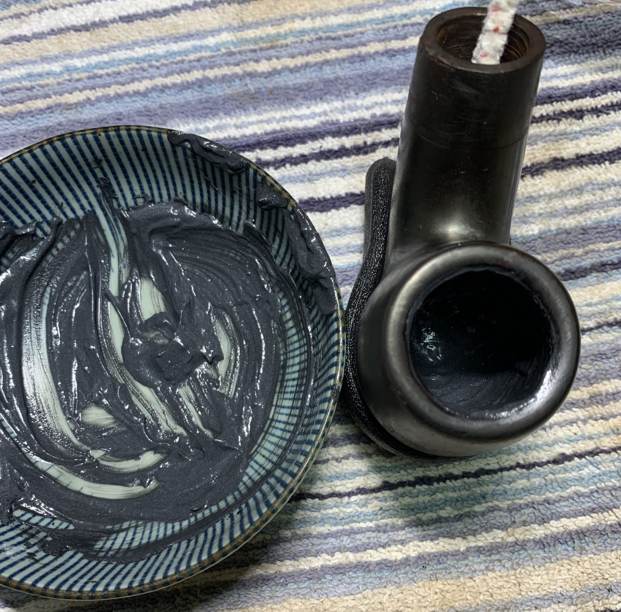
17. I decided to de-ghost the pipe in order to remove any lingering smells and dirt of the past. I thrust cotton balls into the bowl and the shank and saturated them with 99% isopropyl alcohol. I let the stummel sit overnight. This caused oils, tars and smells to leach out into the cotton. The bowl was supposed to be nice and clean after this, but this was no ordinary pipe. 18. At this point, it seemed sensible to set up a retort and further clean this whole pipe out. I put the stem and stummel back together and used my pipe retort system. This system uses boiling isopropyl alcohol and a vacuum (a void, not the household appliance) to clean the interior of a pipe. As you can see by the brownish colour of the alcohol, the retort worked well – although it took many changes of alcohol to get it clean. I managed to extract lots of otherwise inaccessible filth from inside the pipe.
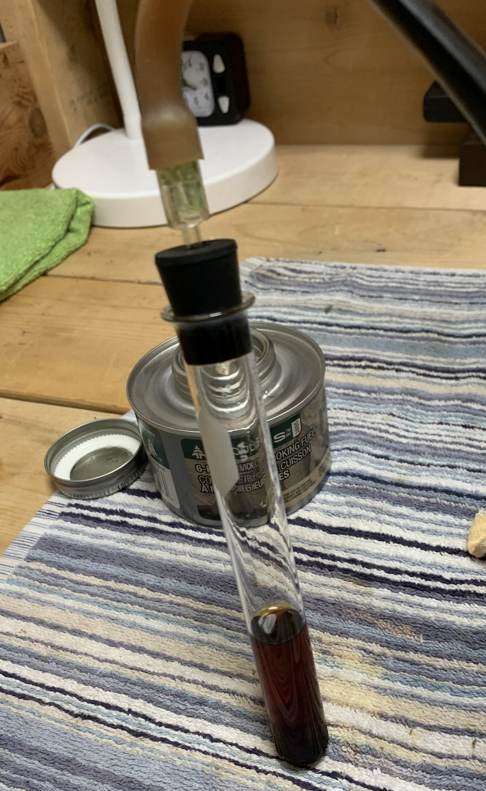
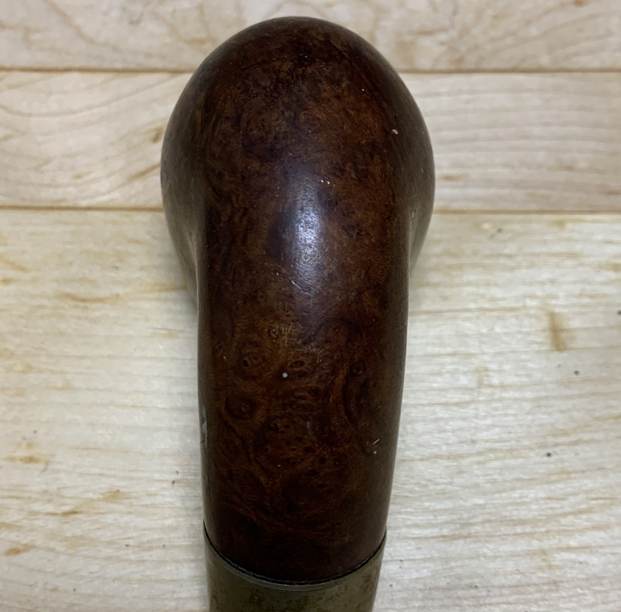
 19. Now that the pipe was clean, I wanted to have a closer look at the state of the briar, inside and out. For this, I scrubbed the outside of the stummel with Murphy’s Oil Soap on some cotton pads. That removed any latent dirt that blighted the wood. No surprise: there was lots.
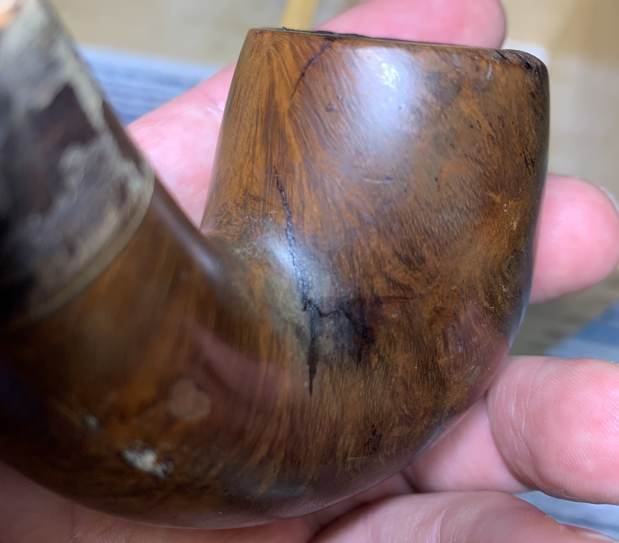
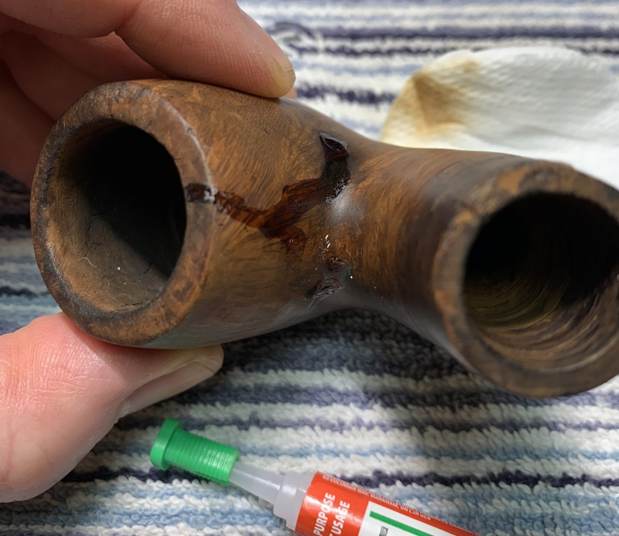
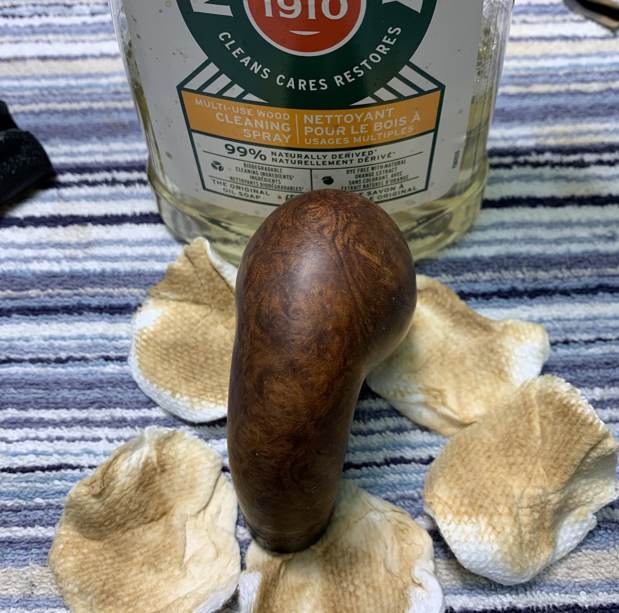 20. Several tiny cracks appeared on the outside of the stummel and I needed to address them. The first step in dealing with this was to ensure that the crack would not continue to creep after I had repaired it. To that end, I took a micro-drill bit, inserted it in my Dremel, and very carefully drilled a hole at the ends of the cracks. Since the cracks were not deep and did not go right through the wood, I did not drill all the way through. I then repaired the cracks by allowing cyanoacrylate adhesive to seep into them and then letting the glue cure.
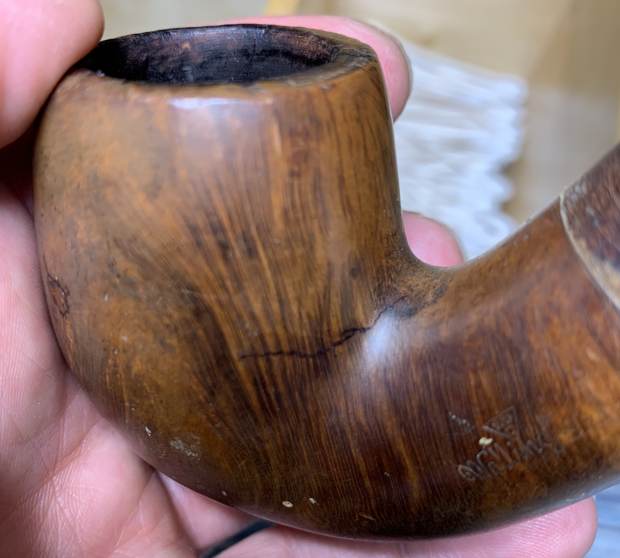
 21. Alas, there were also cracks inside the bowl. But beyond that, significant gouges were there from some prehistoric reaming tool. Removing the cake in the bowl did feel like an archaeological dig, so there were bound to be some surprises in the briar. The solution to this problem is always a tricky one: epoxy. I prepared some J.B. Weld epoxy and filled the cracks and gouges, ensuring that the epoxy was evenly spread throughout the bowl. Of course, I did plug the draught hole with a folded pipe cleaner (coated in Vaseline) to make sure none of the epoxy made its way up there. Once done, a good 24 hours was needed to ensure that the epoxy was properly set.
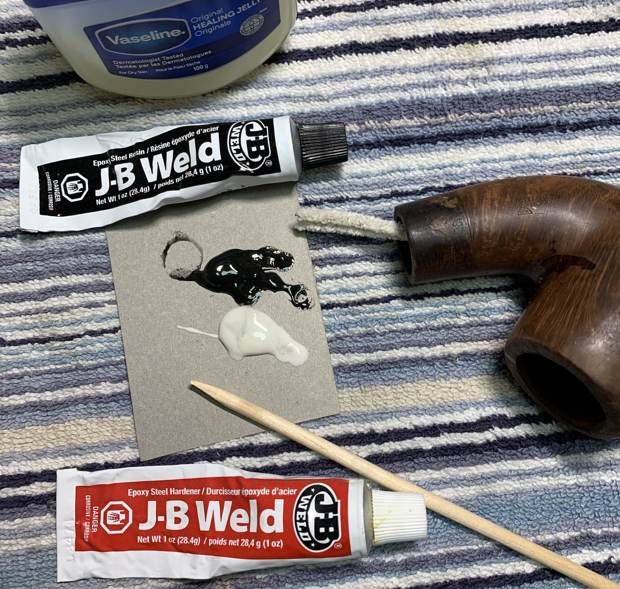
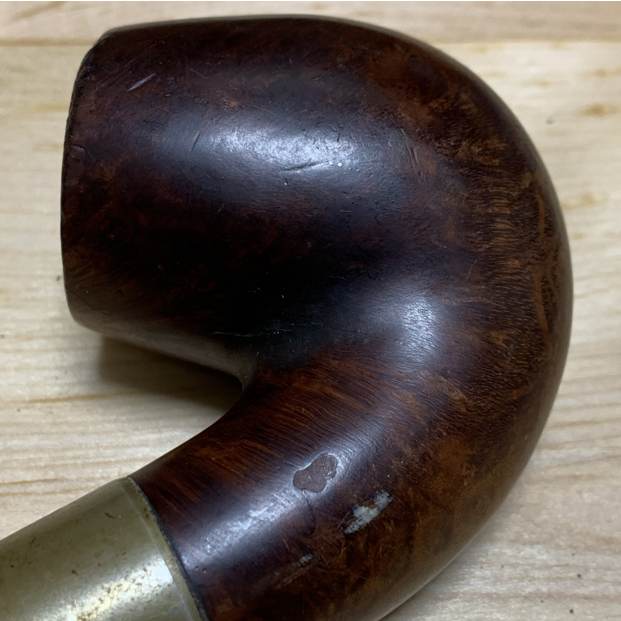
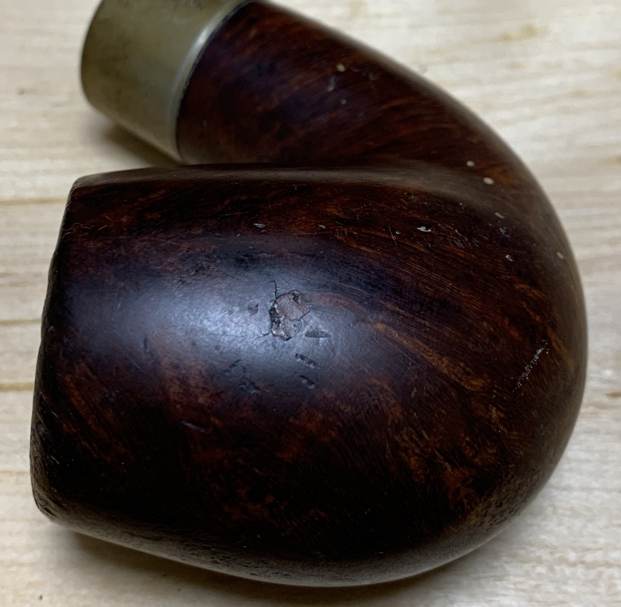
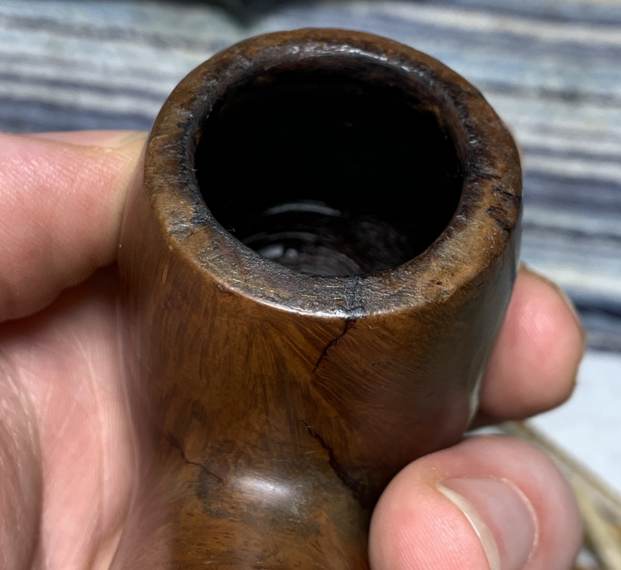
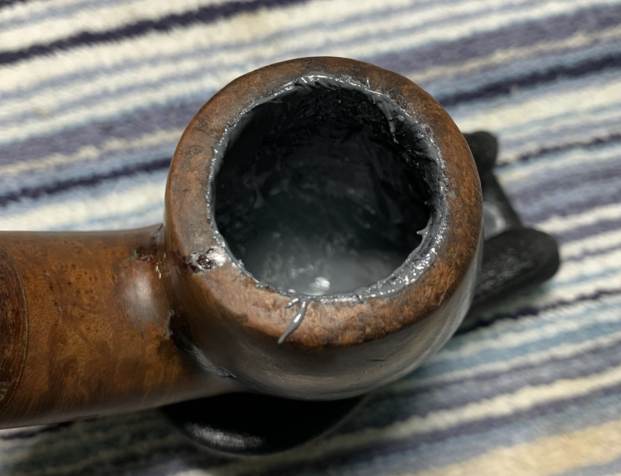 22. Burn marks and an uneven surface blighted the rim of the pipe and it needed to be redone. There was a lot of damage to the rim and the front edge had been bashed in, presumably from banging out dottle over the years. In order to remove the damage, I “topped” the pipe – that is to say, I gently and evenly sanded down the rim on a piece of 220-grit sandpaper. This is always a tricky business – I want to find the balance between removing old burns and maintaining as much of the pipe as possible.
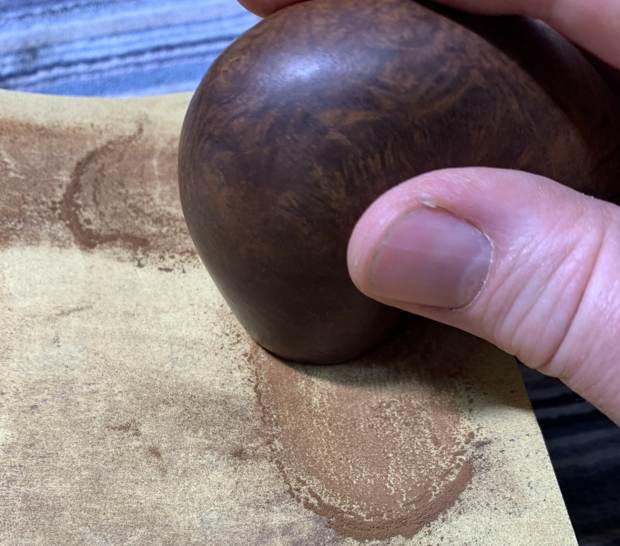 23. The rim needed some more help since the bowl opening was badly out of round. To fix this, I took a solid wooden sphere, wrapped some 220-grit sandpaper around it, and sanded the inner edge of the rim. In addition to this, I also sanded down the outside of the bowl, near the rim, so as to minimize the visual effect of the bashed edge. I sand all the way around to ensure that the pipe retains its look.
 24. As mentioned earlier, there were a few dents in the briar. I dug out my iron and a damp cloth to try to raise the nicks. The hot and moist steam can often cause the wood to swell slightly and return to shape. There was some movement in the wood, which was good. The repair was not perfect, but the remaining wounds would be improved by sanding.
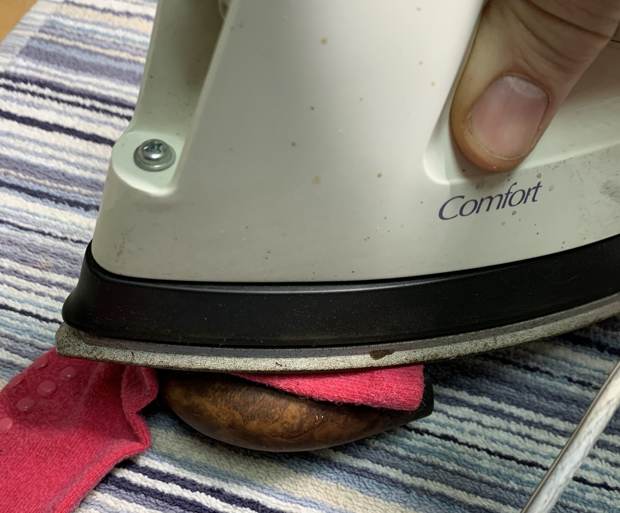 25. There were two significant fills on the bowl. They were large enough that I would not be able to make them disappear entirely, but I wanted to make them solid and smooth, and meld into the rest of the wood. I fixed them up with a mixture of cyanoacrylate adhesive and briar dust.
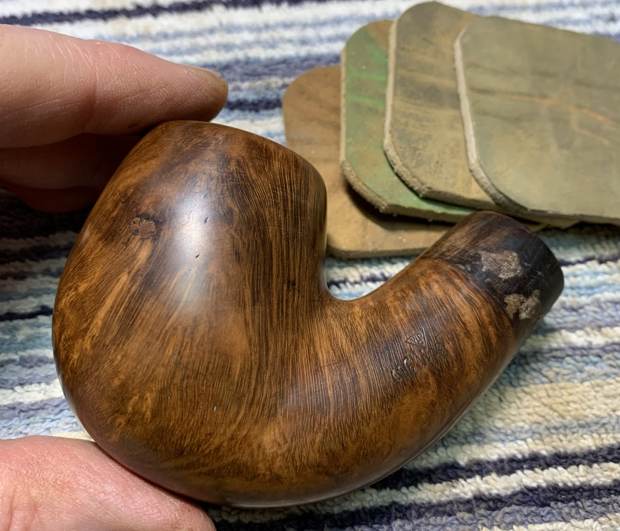
26. Next, I used all nine Micromesh pads (1,500 through 12,000 grit) all over the stummel to make it lovely and smooth.


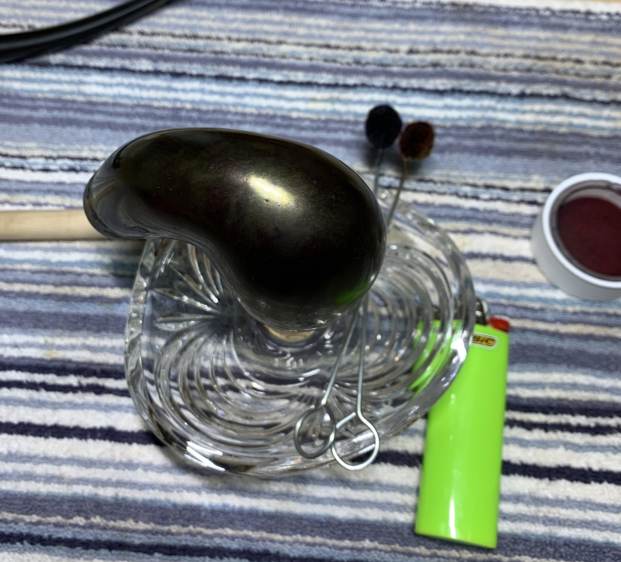
 27. Having completed that, it was time for staining. My customer wanted a deep, dark burgundy colour. First, I brought out my heat gun and spent a couple of minutes thoroughly heating the wood, so it would be as receptive as possible to the stain, to give the best results. I applied Fiebing’s Black Leather Dye with a cotton dauber. I flamed it with my BIC lighter and let it set. This dye is alcohol-based, so I used isopropyl alcohol to wipe down the pipe and remove excess stain. I coated it again with Fiebing’s Oxblood Leather Dye, flamed it again, and let that set too. I stained and flamed the pipe another two times (once with black, once with oxblood), always making sure I warmed the pipe with my heat gun first.
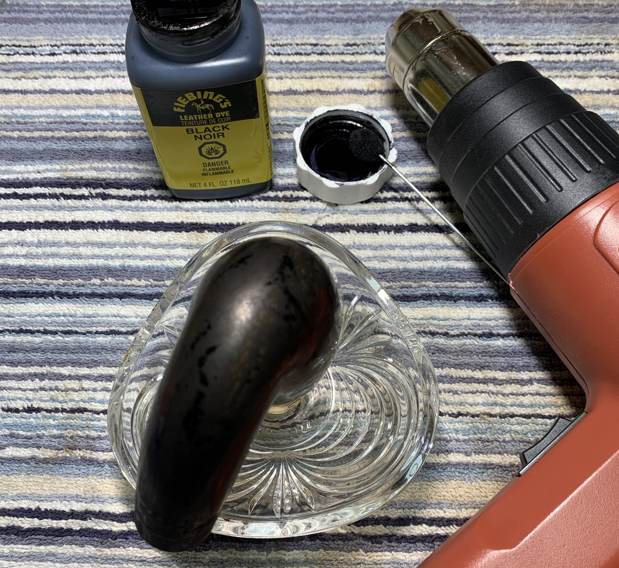

 28. Now that the epoxy had fully cured, I gently sanded the inside of the bowl to provide a rough surface for what was to come next. I coated the entire inside of the bowl with a mixture of activated charcoal and my wife’s homemade yogurt. Once hardened, this provided a good, slightly rough surface for a new cake to build.
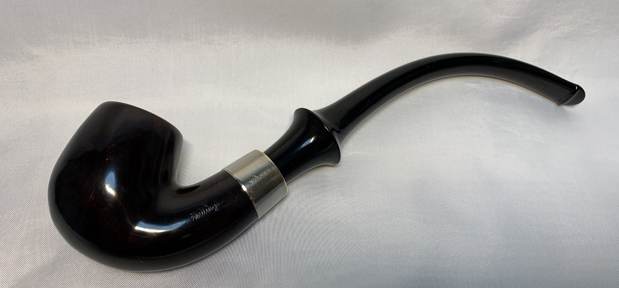
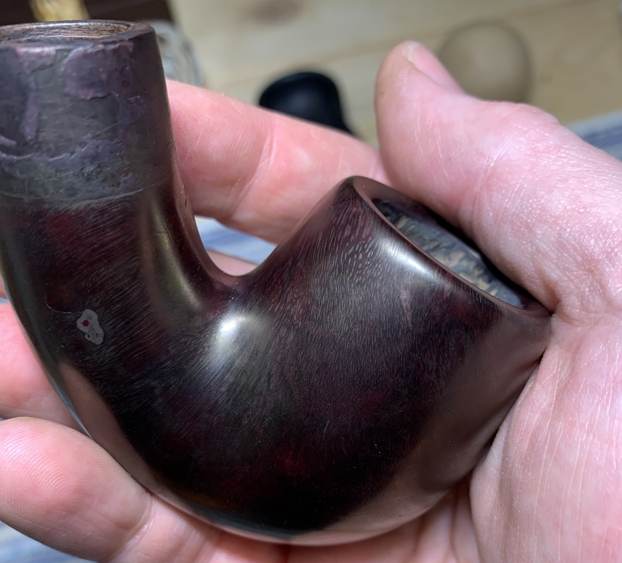
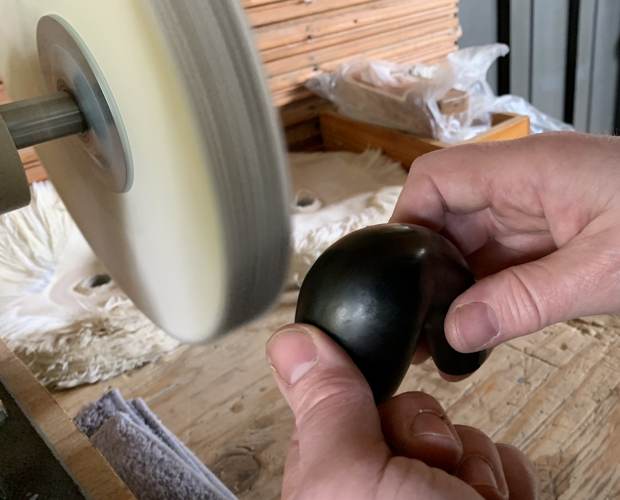
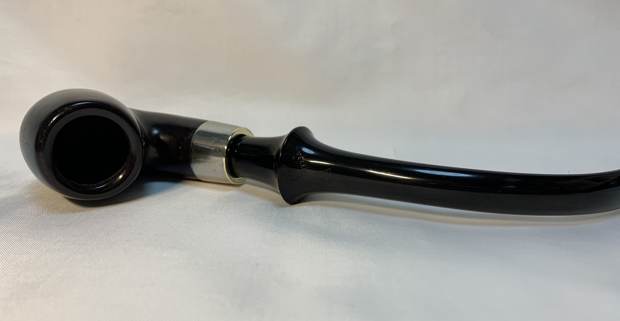
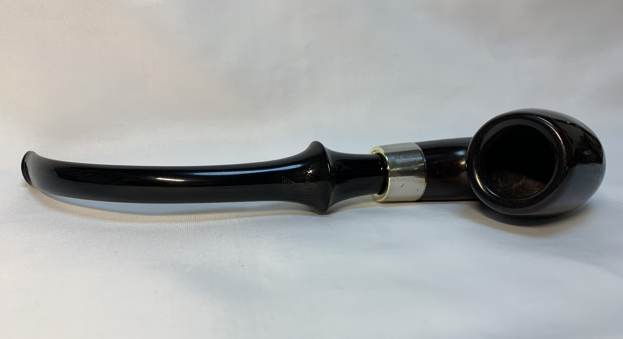
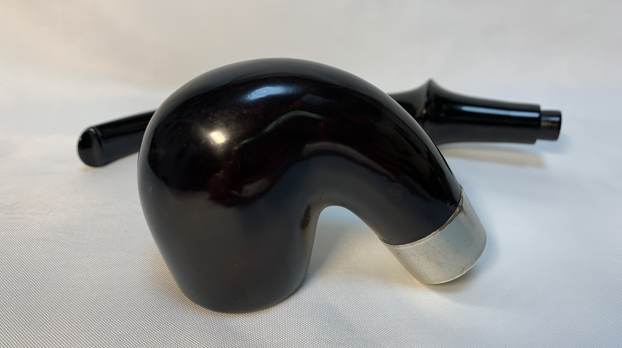
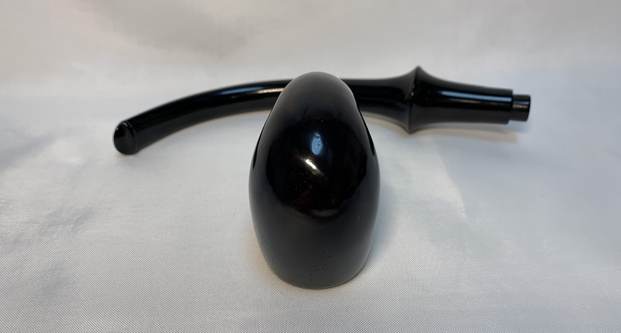
 29. At long last, I was off to my bench buffer to put the final touches on this pipe. I first gave it a thorough going-over with White Diamond compound. Following that, several coats of carnauba wax created a beautiful, glossy seal on the pipe and some closure to this long and involved repair.
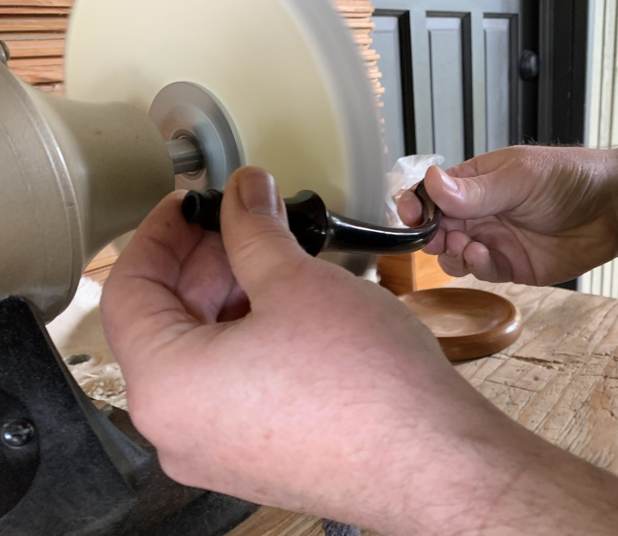
 The lovely shine made the wood look beautiful! I know that the new owner will enjoy smoking it for many years to come. I hope you enjoyed reading the story of this pipe as much I as I did restoring it. The approximate dimensions of the pipe are as follows: length 9½ in. (240 mm); height 6½ in. (165 mm); bowl diameter 1⅝ in. (41 mm); chamber diameter 1 in. (25 mm). The weight of the pipe is 3 oz. (86 g). If you are interested in more of my work, please follow me here on Steve’s website or email me directly at kenneth@knightsofthepipe.com. Thank you very much for reading and, as always, I welcome and encourage your comments.
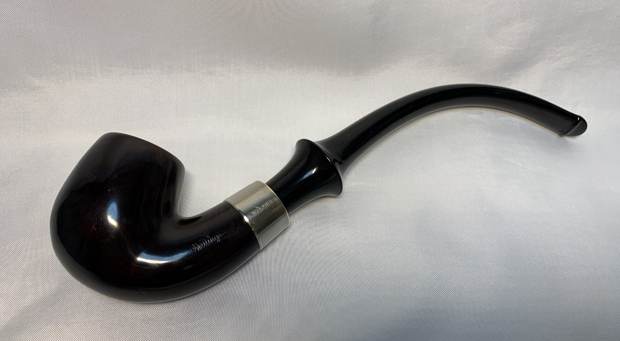


 When I first started working on pipes I literally picked up every pipe that I found whether I picked them up in flea markets, antique shops or thrift shops. I was incredibly indiscriminate and picked them all up. I bought Dr. Grabows, Yello Boles, any and every American or Canadian Made pipe, Danish, English, French, German or any other country where a pipe was made that caught my attention. I was always on the lookout for that illusive Dunhill or Preben Holm made pipe. I found a few of both over the years. In those early days, almost 20 years ago, I paid very little for the pipes I found. Most cost me between $10 and $12. I also bought a few on EBay as well in the same price range. These early days were filled with excitement regardless of the pipes that I had found.