Blog by Steve Laug, Jeff Laug, Dal Stanton, Paresh, Abha and Pavni Deshpande
The restoration on this beautiful Preben Holm freehand may appear to be just another pipe restoration but it was not. Let me assure you that it was definitely far more than that. It was really an East and West adventure in pipe restoration. My brother Jeff and I traveled to Pune, India where we met Dal Stanton of Pipe Steward and had an incredible visit with Paresh Deshpande, his wife Abha and his daughters Mudra and Pavni. With that cast of players – from the US, Canada, Bulgaria and India it was going to be a unique and memorable week of fellowship and pipe restoration. Each of us played a role in this restoration. I will try to include the contribution of each in the story as it unfolds. Paresh and I had spoken of the pipes that he wanted us to work on together while staying with him. This pipe was one of them. We had talked about the Preben Holm via Whatsapp in the past months and he wanted me to replace the broken tenon on the pipe so that he could learn the process.
Lest you might think that all we did was work on pipes, I can assure you that while staying in Pune we enjoyed the sights of the city, fellowship and great food along with working on pipes together. Paresh and his family did a magnificent job of hosting the event and making us all feel like we were part of his family. The hospitality, the amazing food provided by Abha and the joy and laughter of Mudra and Pavni were all part of making this an unforgettable visit. In the next weeks there will be several blogs written about the pipes that we worked on. Dal is working on a blog about the restoration of a BBB bent billiard that had belonged to Paresh’s grandfather that was a real group effort. Both Paresh and I will also be posting blogs on some of the other pipes that we worked on together including meerschaums and briars. We thoroughly enjoyed the time together while smoking our pipes and sharing beer and scotch to celebrate each restoration and to close each day. We exchanged tips and processes that we used. It was a time of sharing and learning for all of us.
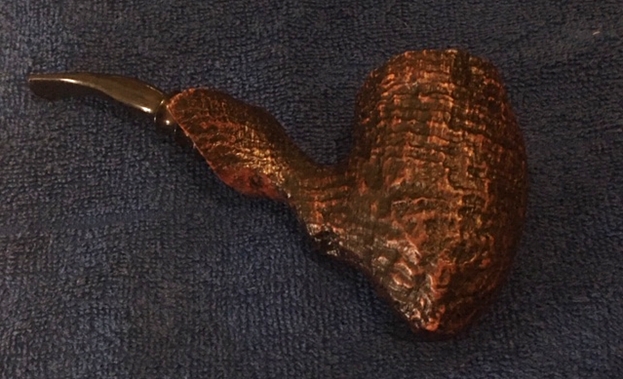
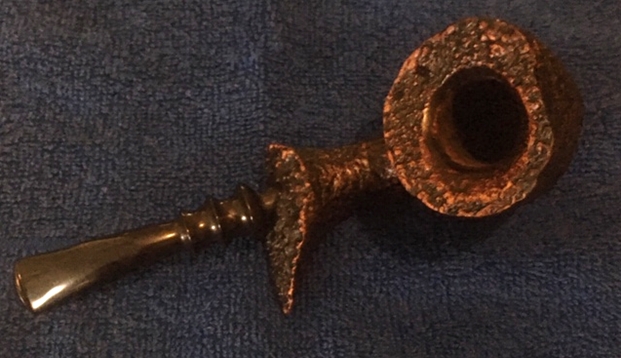
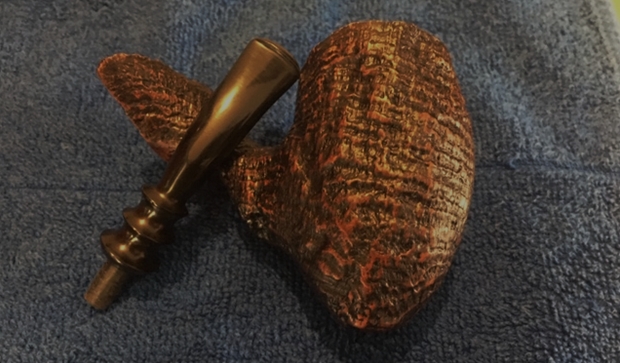
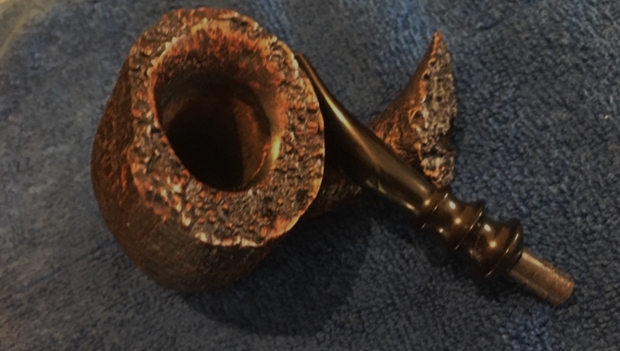
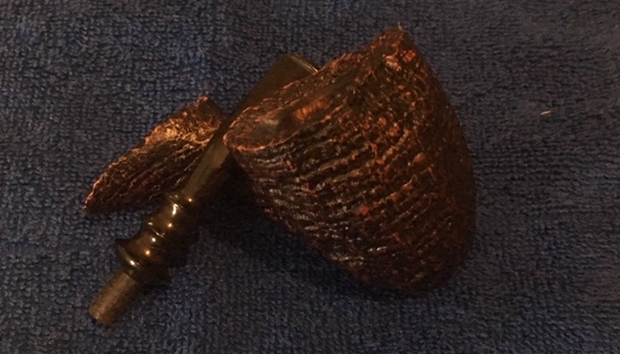
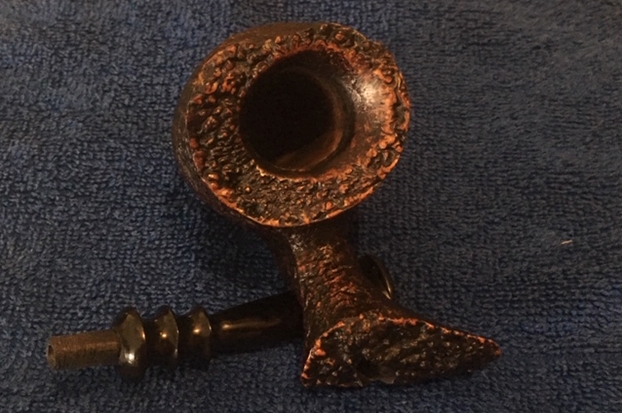
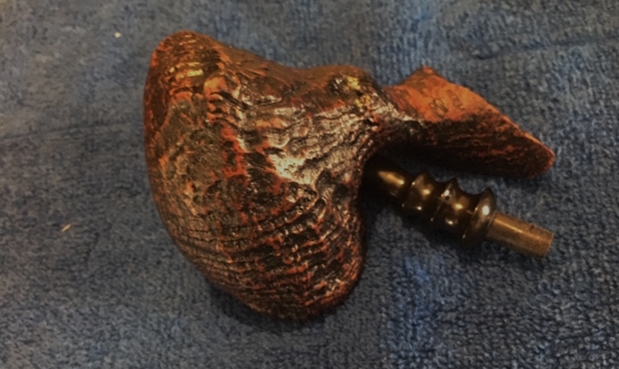
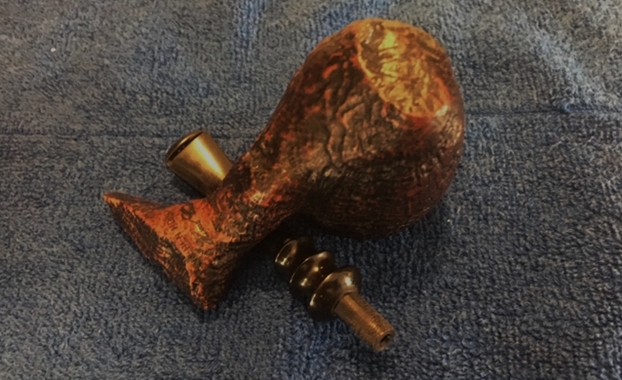
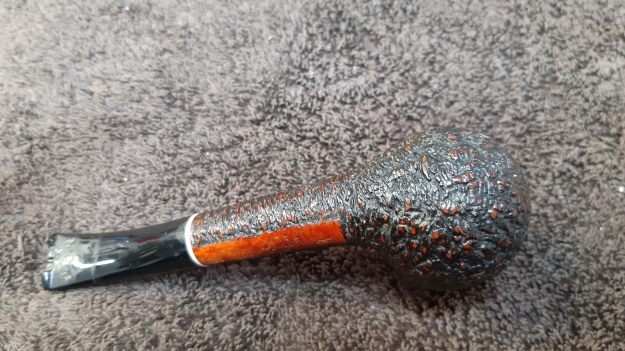
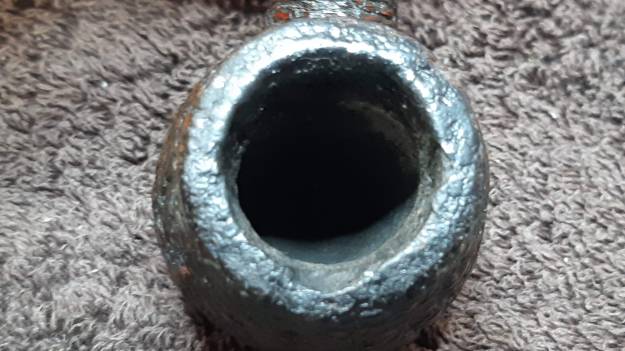
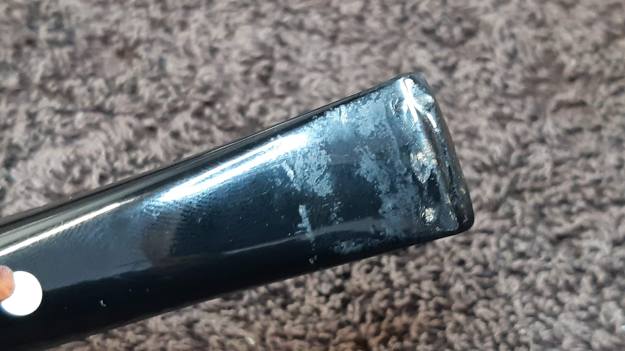
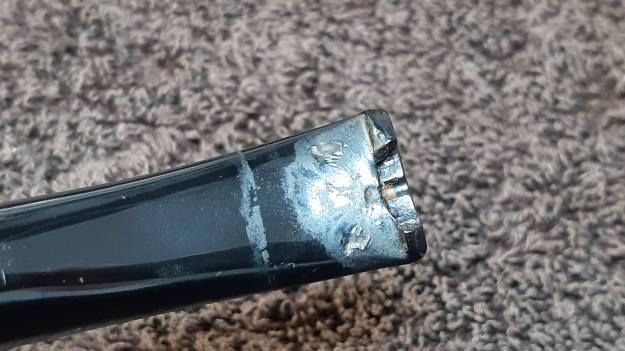
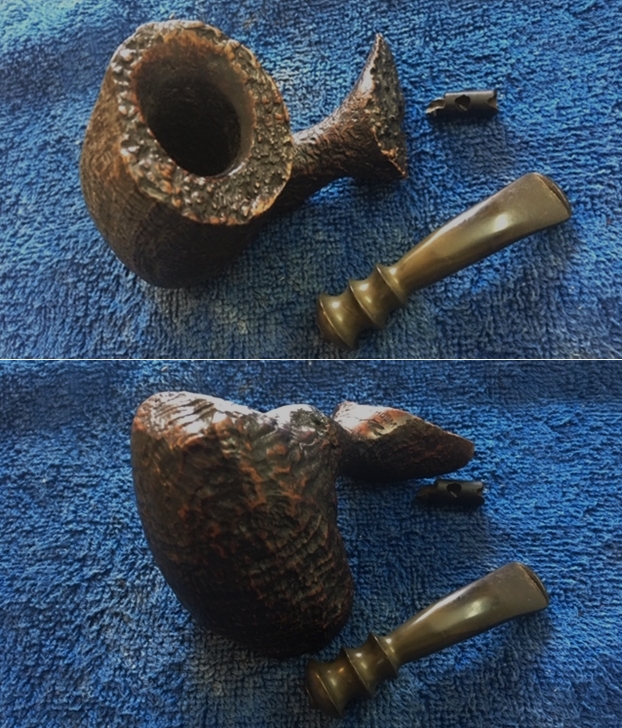
The blog I am writing now was on the restoration of a really well made Preben Holm freehand. Paresh had picked this pipe up off eBay for a good price because of the condition. I am sure that if the pipe had been complete it would have sold for a much higher price than it did. The sandblast finish was dirty but very well done – showing bother the underlying grain and the cross grain in the blast. The stain colour was a contrast of browns and blacks. The rim top and the shank end were both plateau. They were dirty but still quite stunning. The inner and outer edge of the bowl was in great condition. The exterior of the bowl was also in good condition under the grime of the years. The tenon had been broken off cleanly at the stem and whoever had pulled it had drilled through the broken tenon in the process of pulling it out of the shank. The stem had some tooth marks and chatter on the top and underside and some wear on the button edge but otherwise it was in very good condition. There was some oxidation on the surface and in the grooves of the fancy stem that would need to be addressed. We took photos of the pipe at this point in the process to show the parts and the condition.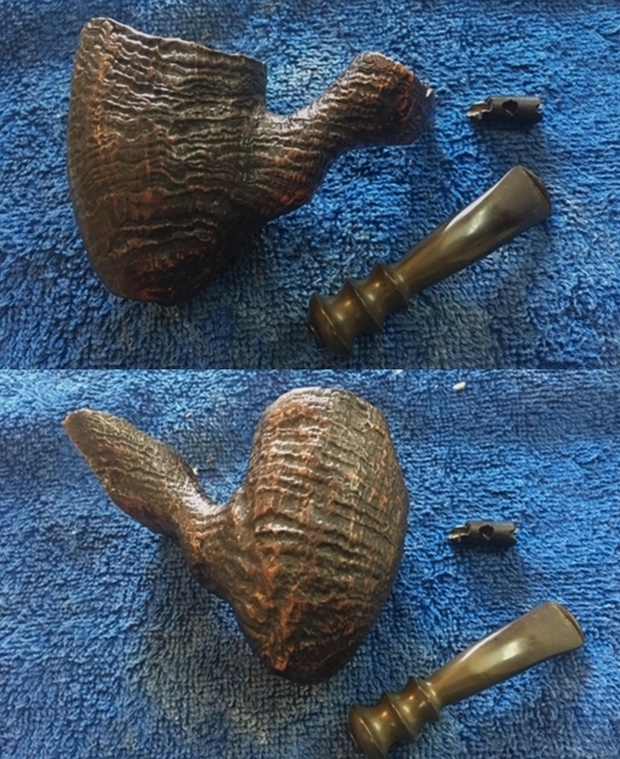
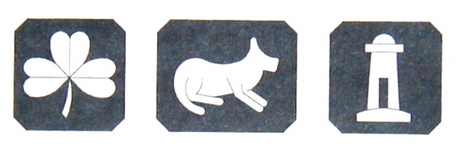
 I took a picture of the stamping on the underside of the shank. It was clear but showed some wear. It read Preben Holm over Hand Cut over Made in Denmark. There is also a circle with a number in it; sadly I failed to write down the number. I believe it is either a 1 or a 7. Perhaps Paresh can confirm this.
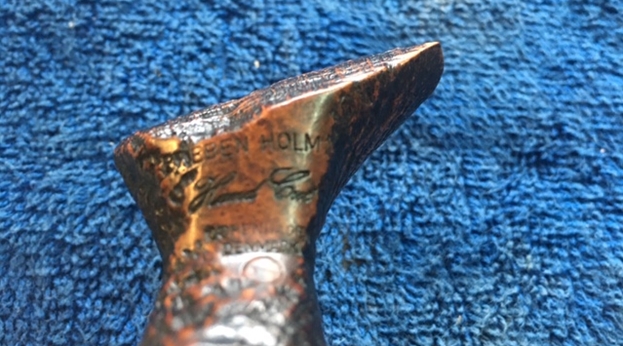 Now it was time to start on the stem repair on this pipe. I want to document the process on this restoration so that both Dal and Paresh have the information for their future tenon replacements. The first step is preparing the end of the stem for drilling out the airway. The remnants of the broken tenon need to be removed in order to have a smooth surface for drilling out the airway to receive the end of the new tenon. I did this be using a piece of 220 grit sandpaper on a topping board. I worked on the stem until the surface of the end was smooth.
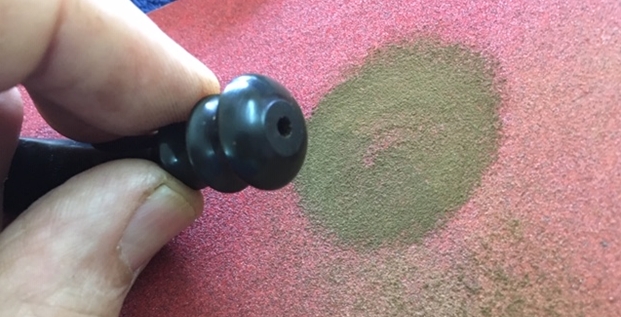 Once the end of the stem was smooth I used a sharp knife to give the airway a slight inward bevel to guide the drill bit when I started the drilling. I find that doing this helps facilitate a straight drill in the airway. The key for me in tenon replacement is to let the airway be the guide for the drilling. Doing this keeps things aligned and the airway straight. I started the drilling with a bit that was slightly larger than the existing airway. I proceed through a series of bits until I have drilled the airway with the final bit the same size as the end of the replacement tenon that I will use. I generally use a cordless drill to do this work but in this case I used a Hand Drill that Paresh had available. I tightened the bit in the chuck and carefully turned the stem onto the bit. I proceed with caution as I want to make sure that I keep the airway straight for a good fit of the new tenon. I use the length of the end of the tenon to determine the depth of the drilling. I generally mark the bit with a line of a piece of tape to ensure that I do not drill too deep.
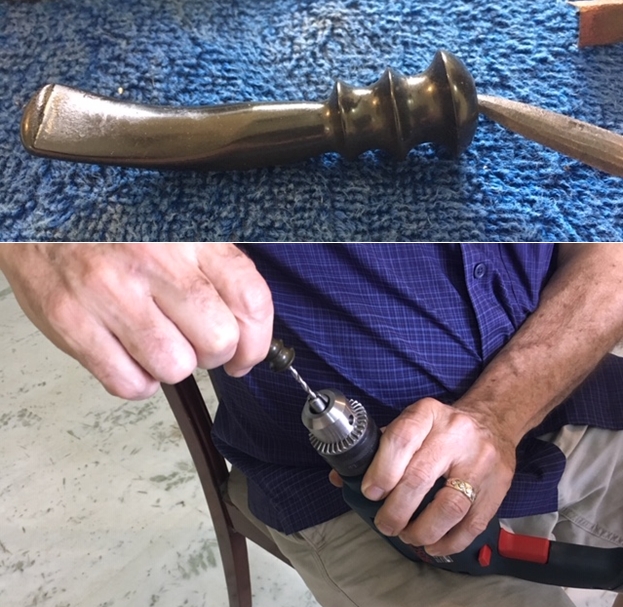 I worked my way up through a successive series of drill bits, to slowly open the airway to receive the tenon. I find that this process keeps the stem from chipping as I drill and creating more problems for me to repair in the process.
 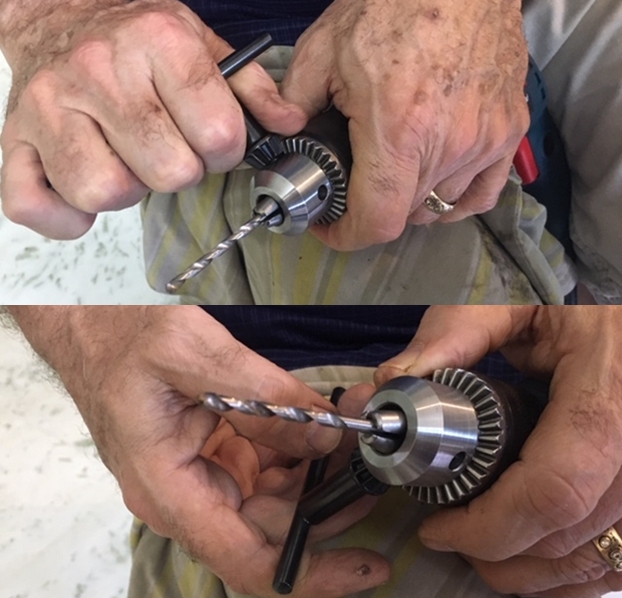 As I finshed using the first three bits I decided to use the power drill. Paresh gladly became the human vise to hold the drill. I aligned the bit and stem and pressed the trigger to drill the airway further. It was great to have extra hands in this process. Dal took photos as we worked on the stem.
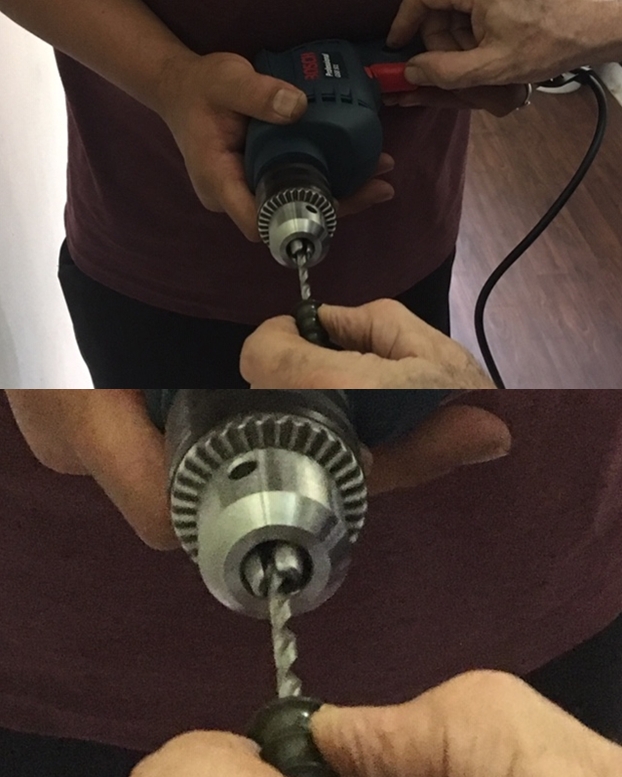 I used the 4.8 and 5 mm drill bits to finish drilling out the airway.
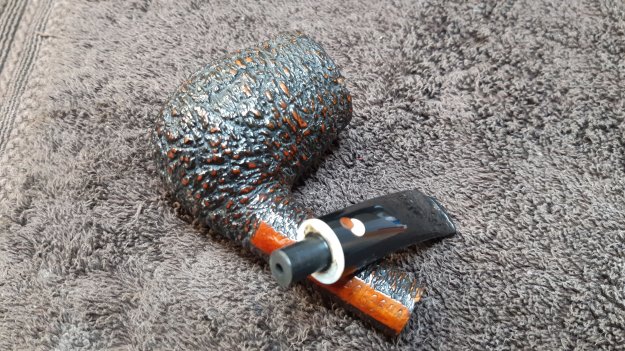
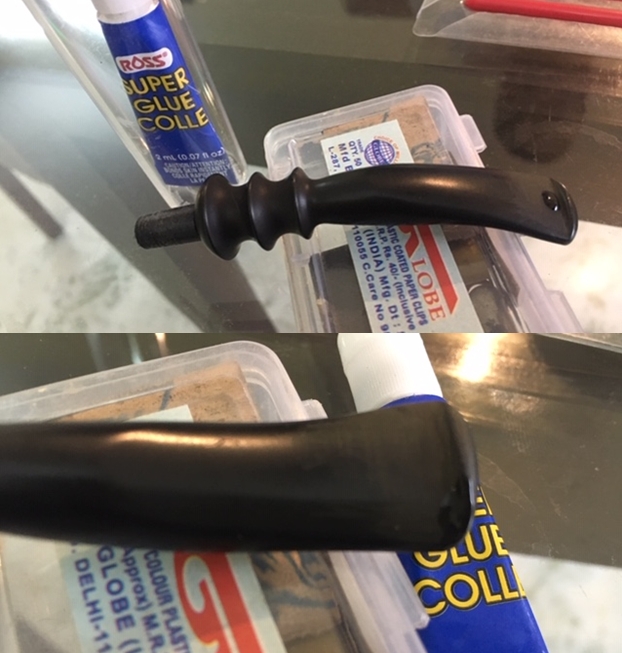
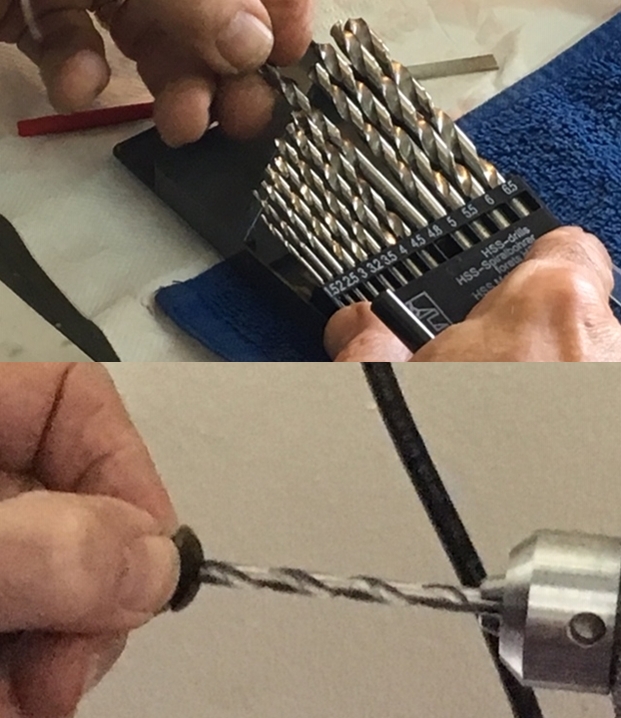 The airway was open to the right dimension to receive the new tenon. At home I have a tap set and would have threaded the airway to receive the tenon. In this case I did not have a tap so I used a file to knock off the threads on the tenon end enough to pressure fit it in place in the stem. Once they were knocked off enough I put some super glue on the tenon end and pressed it into the airway. I carefully checked the alignment to make sure the tenon was straight on the stem before setting it aside to cure.
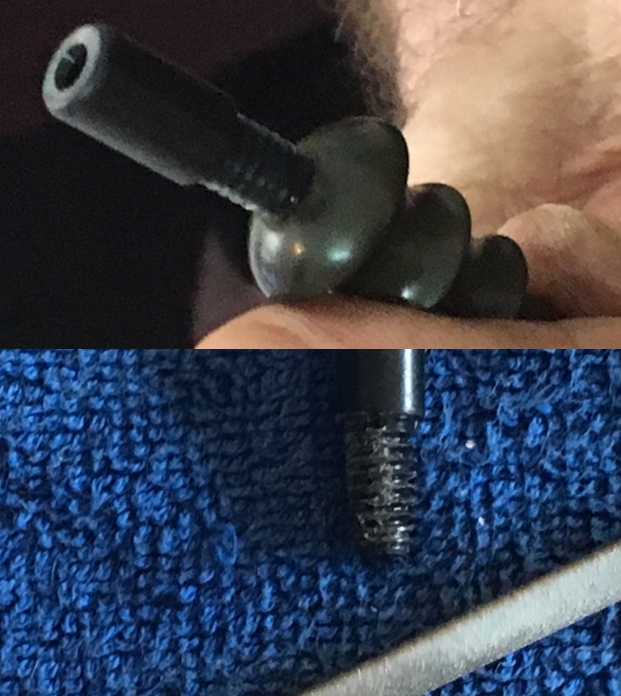
 Once the glue had cured on the tenon repair we put the stem in Mark Hoover’s Before & After Deoxidizer to let it do its work on the oxidation. I also wanted to experiment with how the deoxidizer affected the glue in the tenon repair. We set it aside for several hours while we worked on the bowl.
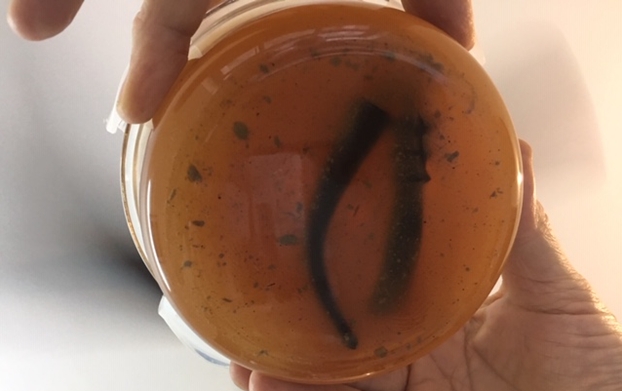 I turned the bowl over to Jeff to do the cleanup work and show us his process. Abha, Paresh’s wife joined in the cleanup process on this pipe as well as the others on the work table the week that we were all together. In watching him do the work we all learned some new tools and techniques to add to our arsenals of restoration. He reamed it with the Castleford Reamer that I brought as a gift for Abha. He took the cake back to bare briar so that we could check out the condition of the chamber walls. It looked very good. He cleaned the rim top and shank end with a brass bristle wire brush to clean the grime out of the plateau. He scrubbed out the interior of the pipe with pipe cleaners, cotton swabs and alcohol to remove the tars and oils. (Forgot to take pictures of this point of the process.)
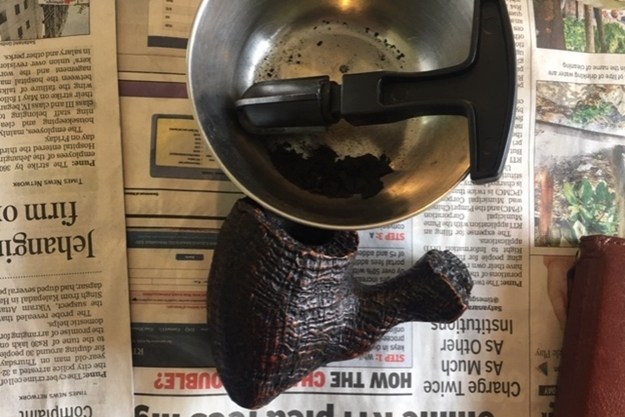
 Jeff scrubbed the surface of the bowl with Murphy’s Oil Soap and a tooth brush to remove the grime and debris from the plateau and the sandblast finish. Somehow we forgot a picture of this point of the process. He took it to the sink and rinsed it off and scrubbed the interior and exterior of the briar with dish soap. He scrubbed it further with the dish soap and tooth brush. He rinsed the pipe off with warm water in the sink.
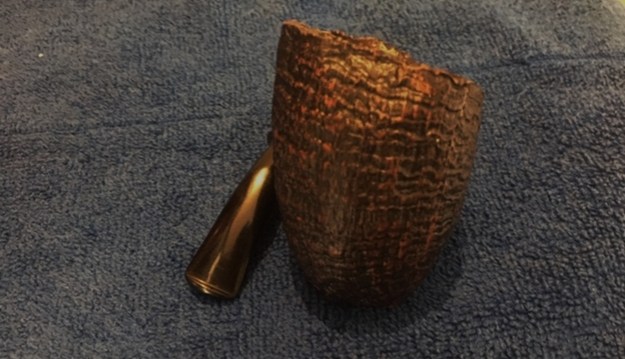
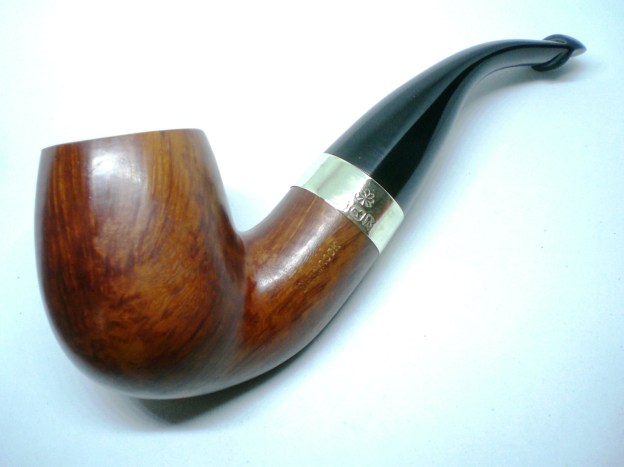
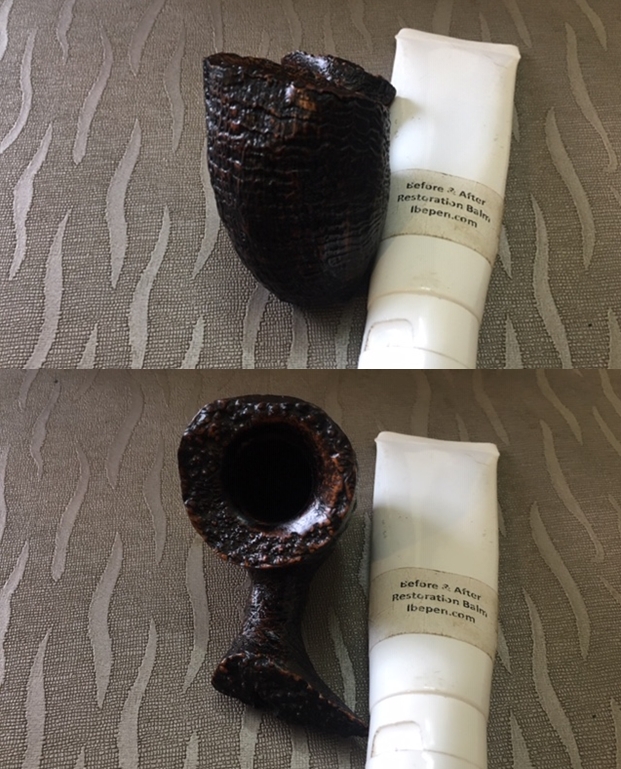
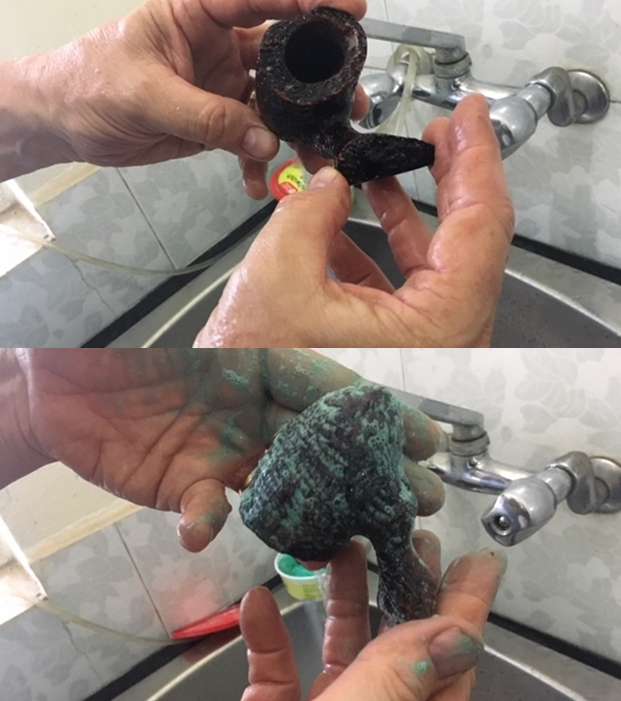 He dried the bowl off with a soft cloth and buffed it with a microfiber cloth to give some shine to the briar. We rubbed the surface down with some Before & After Restoration Balm to enliven, enrich and protect the briar. We buffed it once more with the microfiber cloth. The photos show the look of the cleaned briar.
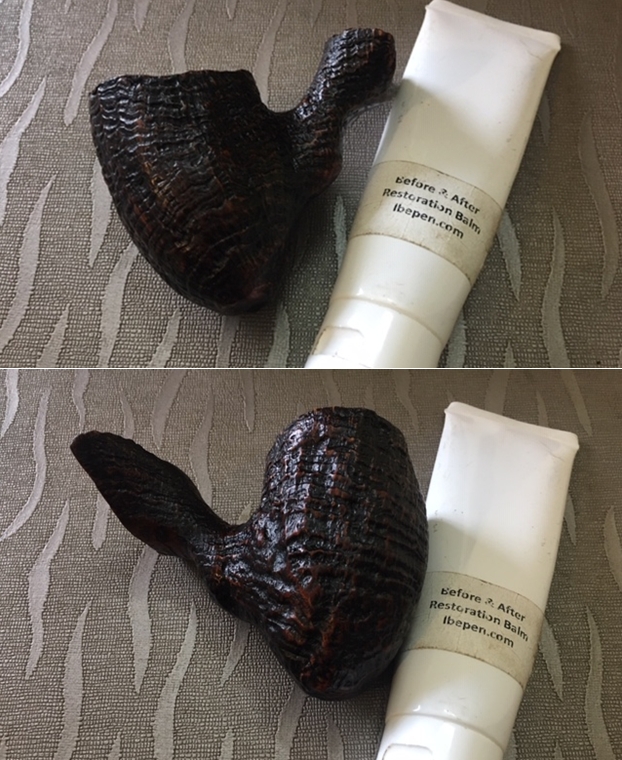
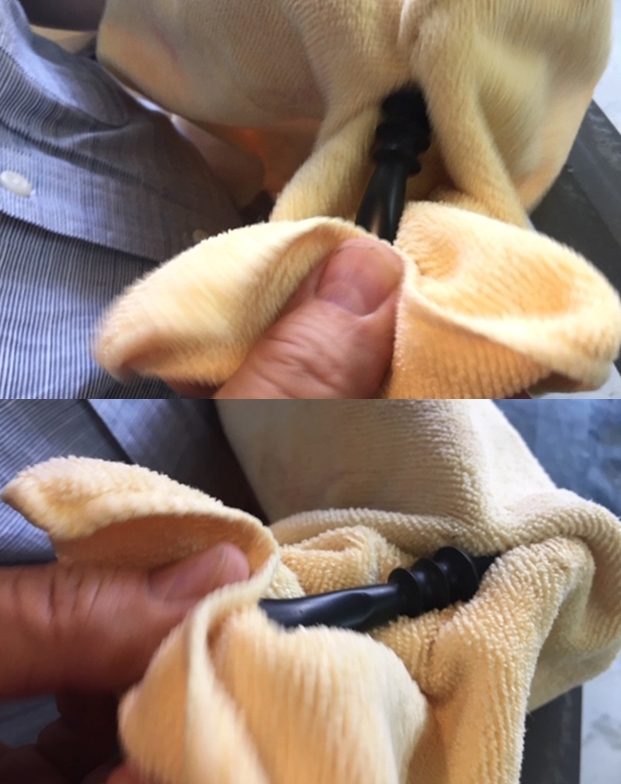
 With the bowl done we set it aside and turned our attentions to the stem. Jeff took it out of the bath and squeezed the excess deoxidizer off the stem into the bath. He rinsed it under warm water and ran water through the airway. He blew on the stem to clear out any deoxidizer in the airway. He ran a pipe cleaner with alcohol through the stem to remove any remaining dexodizer. He buffed it rigorously with a microfiber cloth to remove the remaining oxidation and polish the vulcanite. The tenon glue held up well in the bath and the tenon was tight in the stem.
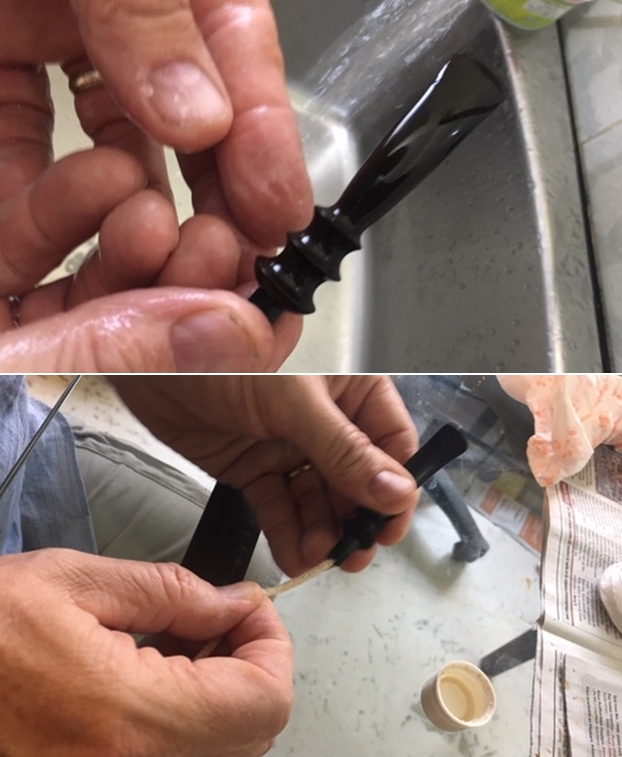
 I “painted” the stem surface with the flame of a Bic lighter to lift the tooth chatter and dents in the surface. Paresh sanded the stem surface with 220 grit sandpaper to remove the tooth chatter and minimize the tooth dents on the button and the surface of the stem. He wiped it down with alcohol and filled in the dents with clear super glue.
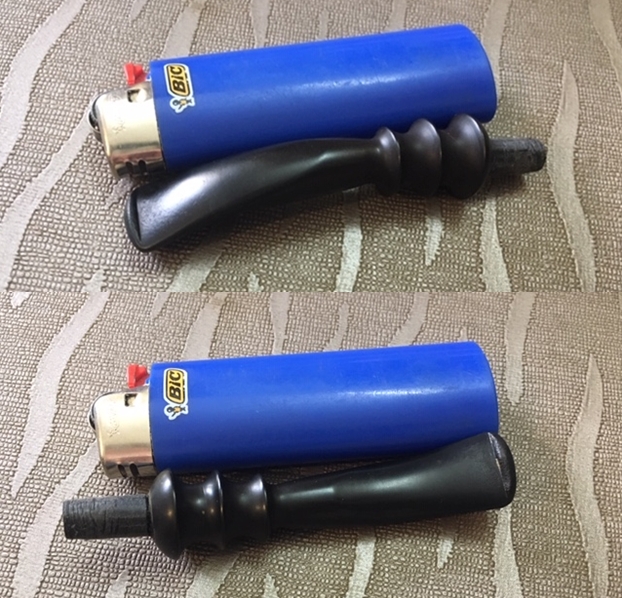
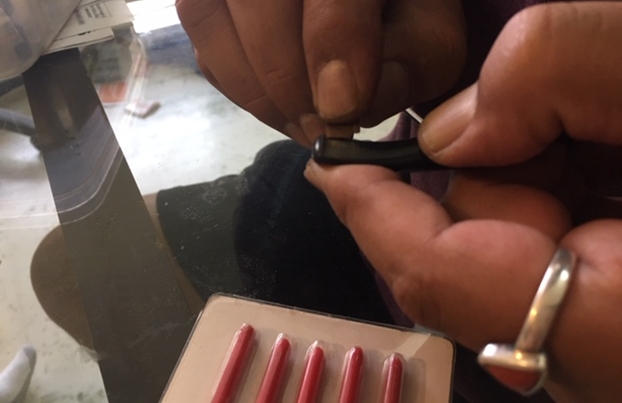
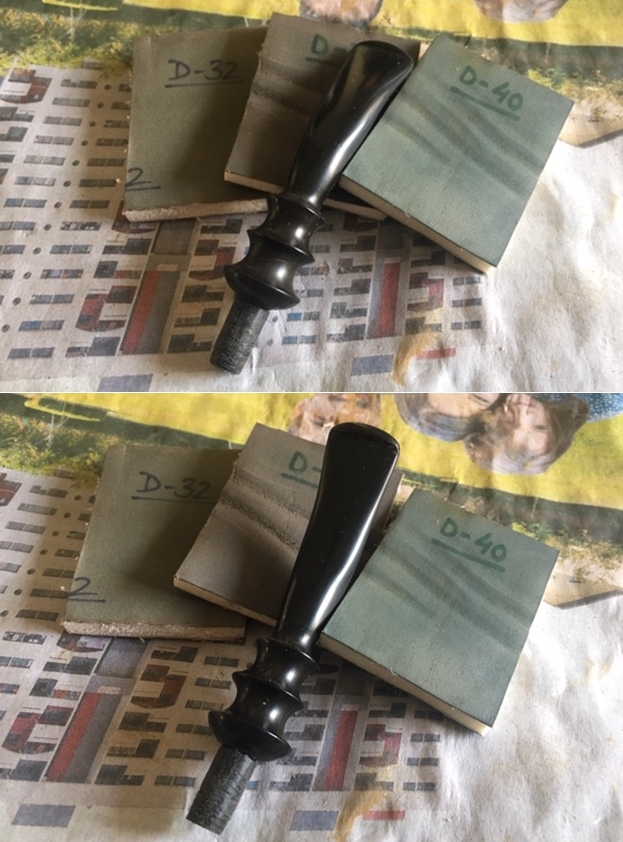
 When the glue had cured we smoothed out the repairs with a needle file and sanded them with 220 grit sandpaper to smooth and blend them into the surface of the stem. We polished the stem surface with micromesh sanding pads – wet sanding with all grits – 1500-12000 grit and rubbing the stem down with a microfiber cloth to give it a shine.
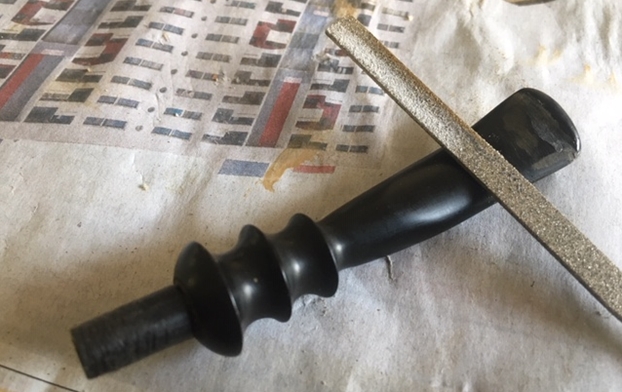

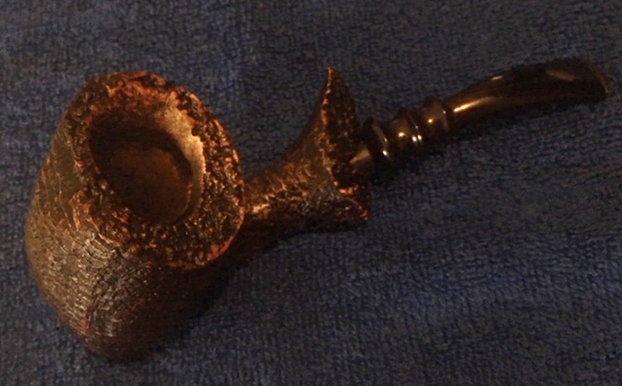
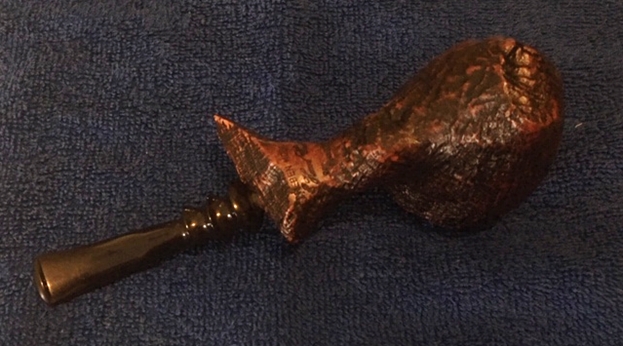
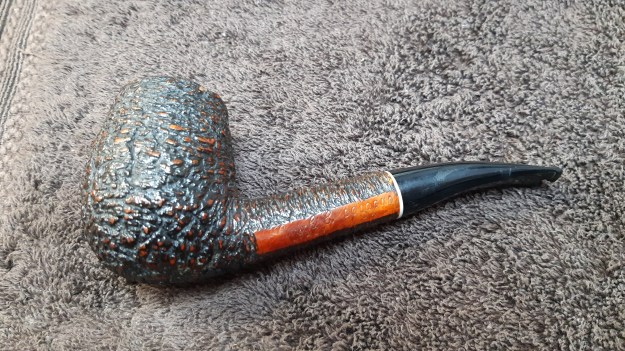
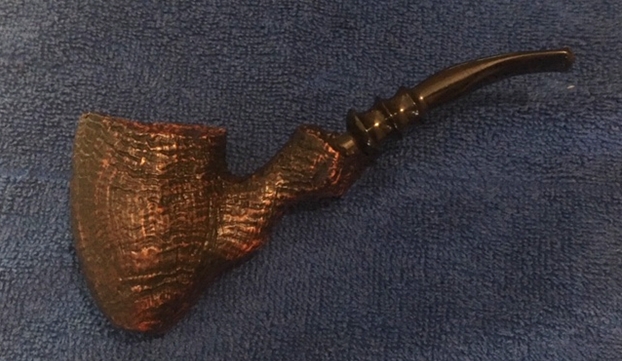
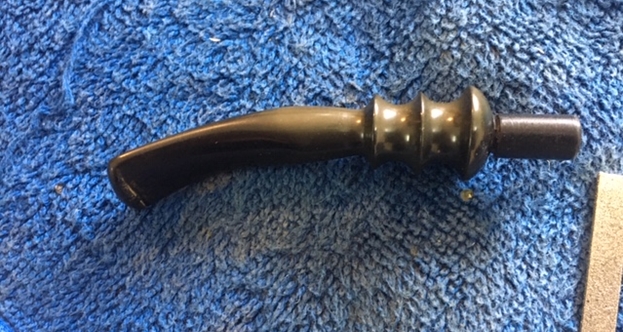
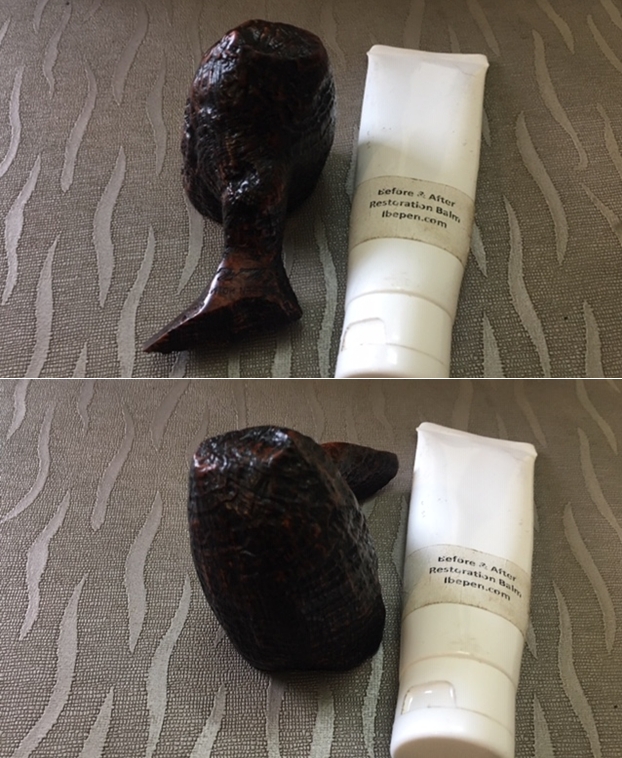
 I put the stem back on the bowl and buffed the bowl with a shoe brush that Paresh had in his kit. I rubbed the bowl and stem down with another coat of Balm and buffed it further with the brush. Dal, helped me install a new photo app on my phone to take the photos. (I have lots to learn about how to use the enhancements of the app but I took the photos and the lack of precision reflects my aptitude not Dal’s instruction.) The pictures below show the finished pipe. It is a beautiful Preben Holm Hand Cut Danish freehand that has a full life ahead of it in Paresh’s rotation. The process I use in putting a new tenon on the stem and revitalizing the finished pipe has been recorded. Jeff’s process on cleaning up the stem and briar has also been documented in the process. Paresh’s daughter Pavni polished the inside of the bowl with sandpaper bringing it to a shine that is unparalleled. This is a feature of all of Paresh’s restorations that none of us knew before. Thanks Pavni for your patient labour in bringing beauty to the inside of the bowl. The finished pipe is shown in the photos below. I look forward to hearing from Paresh how the pipe smokes as we did not get around to this one while we were in Pune. Thanks for looking and reading the blog. We all hope the documentation has been helpful.