Blog by Aaron Henson
Last evening I received an email from Aaron to which he attached this writeup on his restemming of an older KBB Yello-Bole. It is great to have the various readers of the blog submit articles to the blog to share with others. The dream of rebornpipes when I started it was just that – to provide a platform where those of us engaged in refurbishing tobacco pipes could share our methods, successes and failures. This community would provide ongoing education for anyone who wanted to try their hand at restoring estate pipes. With that background here is Aaron’s restoration and the explanation of his process. Welcome to rebornpipes Aaron.
By way of introduction, let me begin by saying that I am relatively new to pipe restoration. This write up details my third restoration and I thought I would submit it for two reasons; 1) I have gotten so much help from the regulars posting here at rebornpipes and from forums elsewhere I felt that I would like to share my experience for others to glean from, and 2) although it is not very different from some of the other restorations that Steve has catalog for us here, some of my tools and techniques may be a little different. I also hope to get some feedback on ways to improve my process.
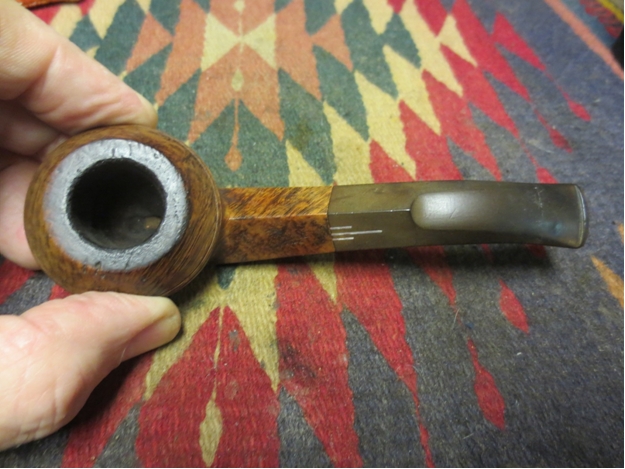
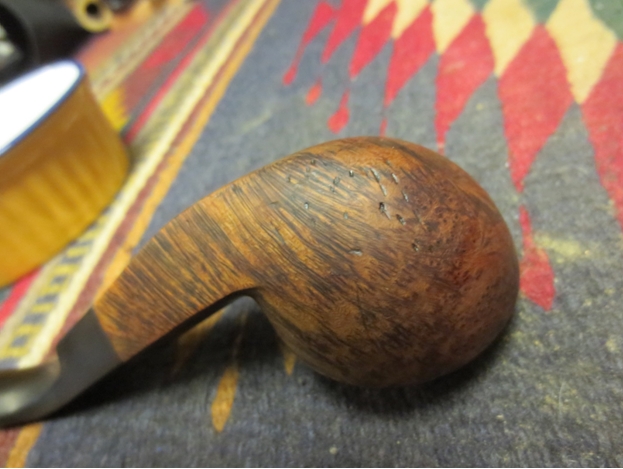
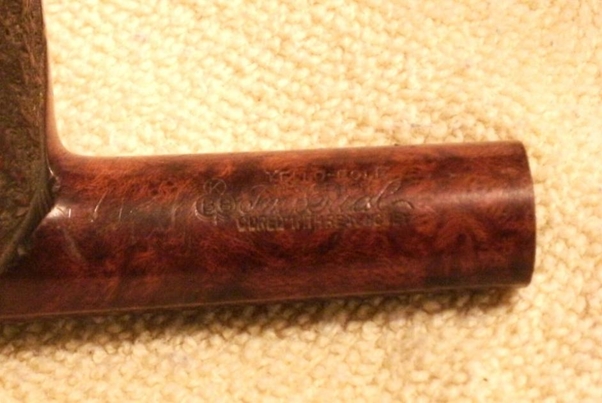
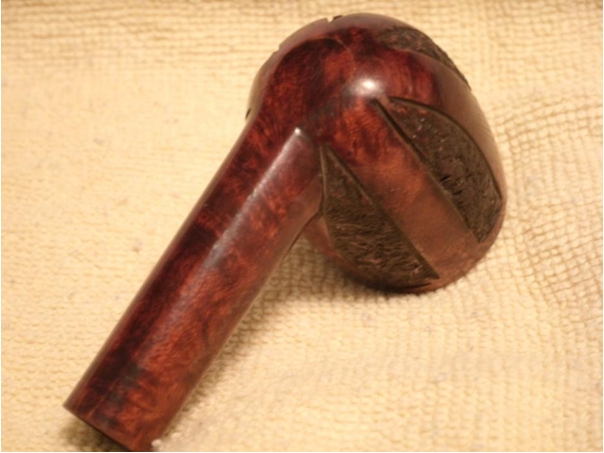
I was at local second-hand shop with my family around Thanksgiving and was looking for pipes when my son found a stemless KBB Yello-Bole stummel. After looking it over for cracks in the bowl and stem I realized that the briar was in relatively good condition. I noted a few chips on the edge of the rim and some blackening of the rim but no fills and not much cake in the bowl. The stem was clearly stamped with the KBB logo in a clover leaf just to the left of: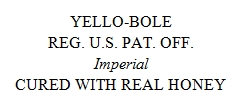
 I did not know much about the Yello-Bole brand but I thought I should be able to find a stem easily enough (aren’t they somewhat universal in size?). Besides, with a $4 price tag I figured I would not be out anything if it didn’t work out.
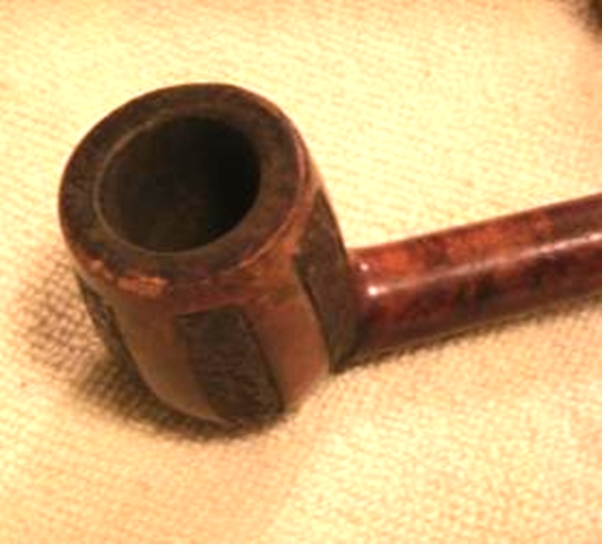
 I jumped on my computer as soon as I got home and found some interesting history on the Yello-Bole brand. I won’t go into it here because Steve has done a nice job summarizing it in one of his posts: Narrowing Down a Date for Kaufman Brothers & Bondy’s KBB and KB&B Pipes. From the data available I had to guess that this pipe was form the late 1950’s or 60’s.
After reading up on the history of the pipe I began looking online for a new stem. I quickly learned that not all pipe stems are created equal, nor are they interchangeable. For a while, I considered sending the stummel to someone to have a stem made but that kind of defeated the whole spirit of restoring the pipe myself.
It took a while to find a stem that I thought would look right on the pipe. I settled on a stem from Vermont Freehand (ebay vt_freehand), a 2½” tapered stem – No. 547. I ordered 3 of them, figuring that I would need at least one for practice.
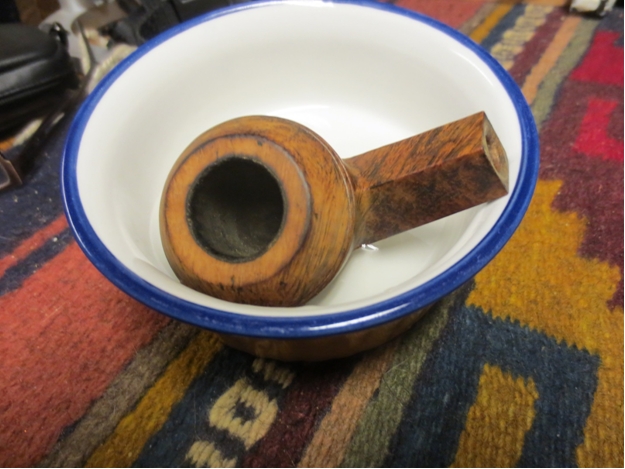
While I waited for the stems to arrive I began working on the stummel. There was not a lot of cake in the bowl so I started there – low hanging fruit. Now, I don’t own a reamer, but I have found that a ½” dowel wrapped with 60 grit sandpaper answers very well. What cake there was came out cleanly.
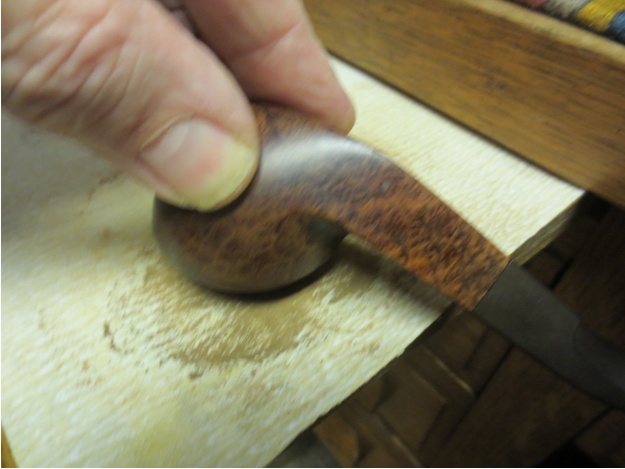
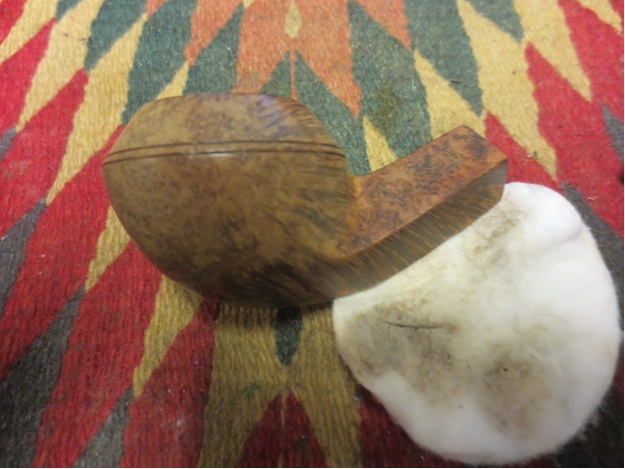
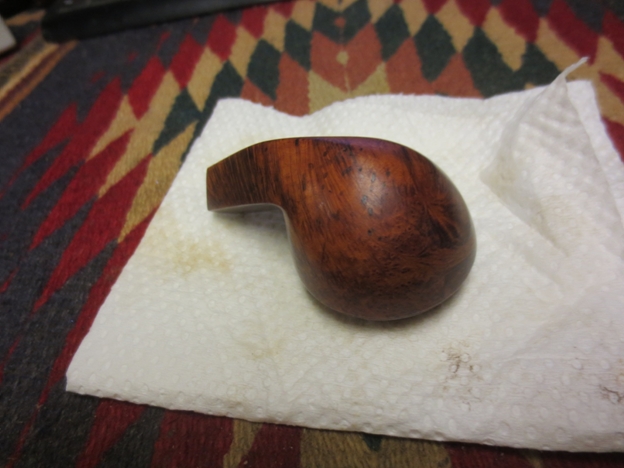
Besides the chip there was some charring on the rim. The chip was not very deep so I thought I would take care of both issues by taking the top of the bowl down to clean briar. Using 120 grit sand paper mounted on a flat surface, I carefully worked the bowl in a circular motion trying to keep it level. I didn’t want to take off too much of the top so I gave the outside lip of the bowl a slight chamfer to remove the bottom part of the chip.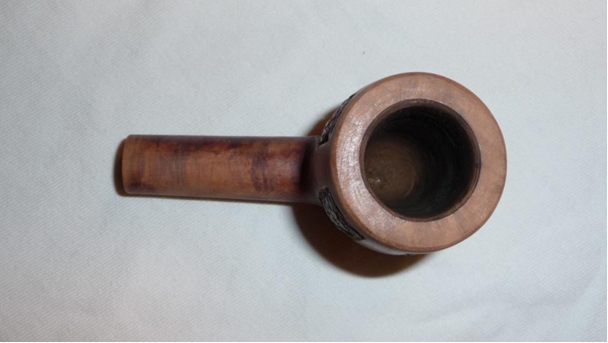 I then gave the stummel a soak in a 91% isopropyl alcohol bath. This was for the dual purpose of removing the existing finish and loosening the crud in the shank. I removed the stummel after about 24 hours and wiped off the existing stain. I then cleaned the shank with a bristled brush, bristled cleaners and cotton swabs. I wanted to make sure the mortise was thoroughly cleaned before I began to size the tenon on the new stem.
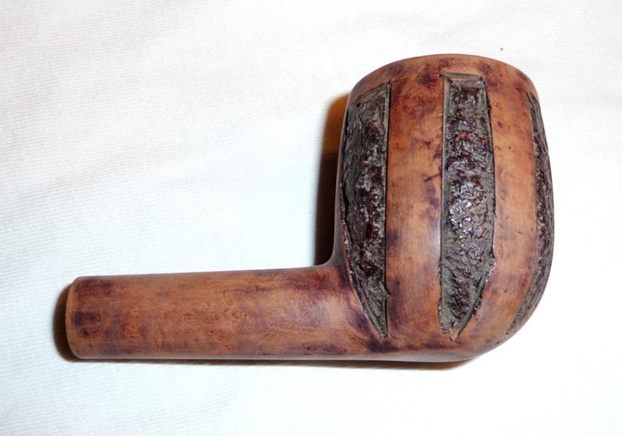 When the stems arrived, I realized that I probably could have been a little more attentive to the size I purchased. I was going to have to remove a lot of material to get the tenon to fit the mortise as well as flushing the stem to the shank. The best way to shape a stem is on a lathe, but not having a lathe I turned to my drill press.
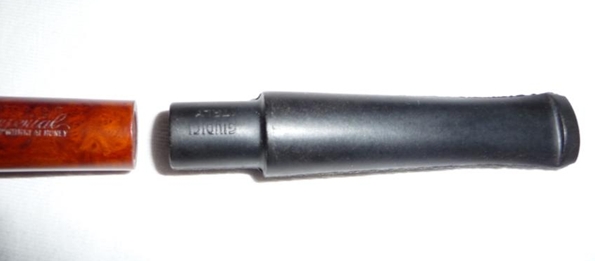 I found that a bamboo skewer fit very snugly into the air hole of the stem.
 Leaving about 1 inch of the skewer protruding out of the air hole, I chucked the stem into my drill press.
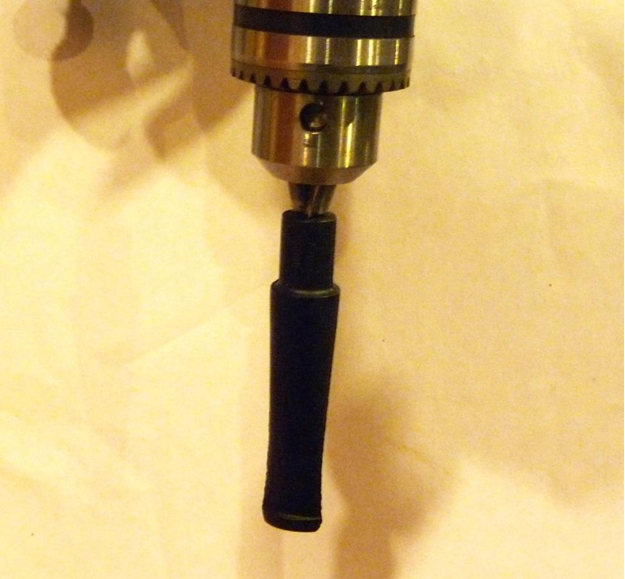 I started out a little timidly, removing material with 120 grit sand paper but the vulcanite is so soft that it gums up the paper very quickly. I switched to 60 grit and still was not seeing much progress. I tried a metal file next and when that did not answer I rummaged around the tool box and found a rasp. A bit aggressive I admit, and I would not recommend it unless you are removing a lot of material, and I was.
The drill press method worked great but was not without its problems. Pressing too hard with the file or rasp would cause the stem to slip on the skewer. The stem would then have to be reseated before I could resume. The other problem happened about half way through the rough shaping; the skewer broke off flush with the end of the tenon. I admit I panicked a little when I could not get a hold of the skewer with my needle nose pliers. But using a small drill bit I was able to carefully drill out the wedged skewer.
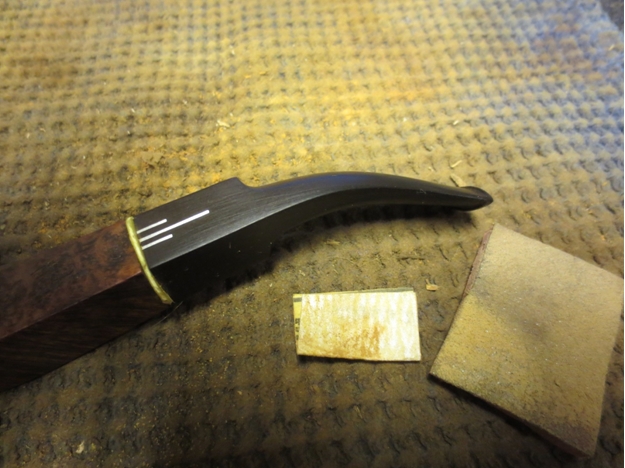
Back on track I, stopped often to check the fit. As I neared the correct size I switched back to the file then to the sand paper again. I finished the tenon with 320 grit sand paper.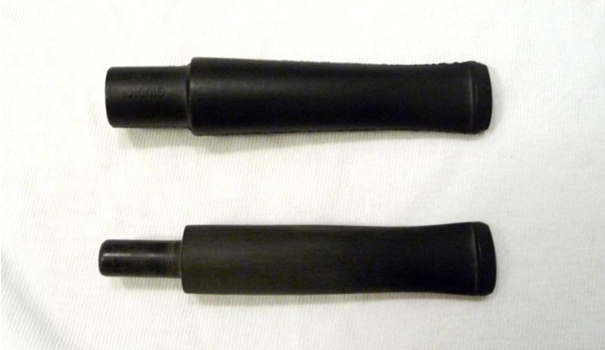 I thought fitting the tenon to the mortise was going to be the hard part but shaping the stem to get that perfect flush fit with the shank turned out to be the big challenge. You can see in the picture above that I have a ways to go to get the taper from the shank to the button. I have also started to get a bit of a wave about a quarter of the way from the tenon.
To fix this I stapled a piece of 240 grit paper to a 3” sanding block and went to town. The sanding block kept the contact surface flat and helped to eliminate the wave. It took about an hour of work stopping often for fit checks. In the end I was rewarded with nice taper. Somehow I had rounded over the shoulder of the stem ever so slightly. This formed a little groove at the stem/shank connection. It was not terrible and I felt could live with it for now.
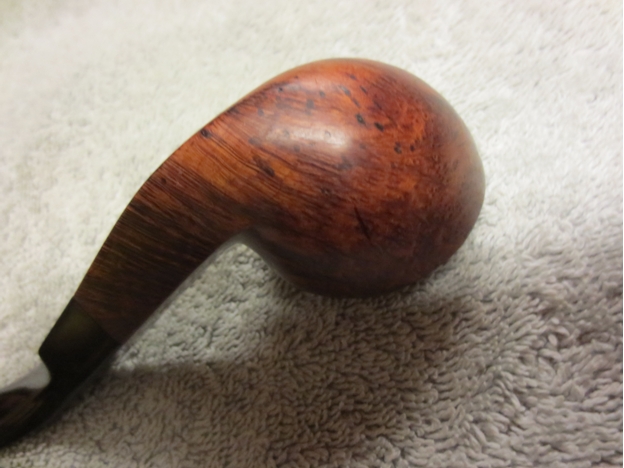
I finished the stem with 600, 1000, 2000, 4000, 6000 grit sand paper. Then set it aside to buff with the stummel once it was complete.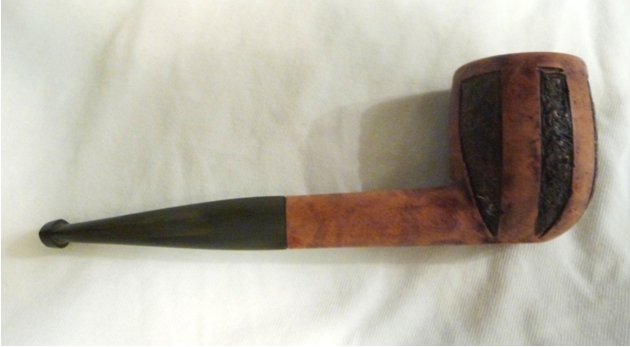 I stained the stummel using one part Fiebing’s light brown diluted with 2 parts isopropyl alcohol. I applied two coats, flaming each coat. Once dry, I wiped it down with a clean cloth and attached with stem.
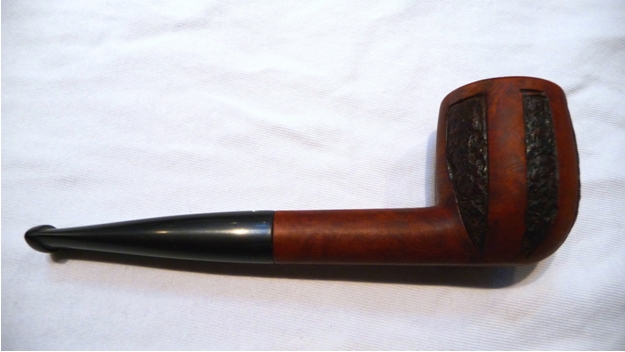 I set my drill press up with an inexpensive Sears buffing system and started with the white buffing compound. I found on previous projects that gearing down the drill speed to 1200 rpms was important to maintain control of the pipe and not overheat the pipe.
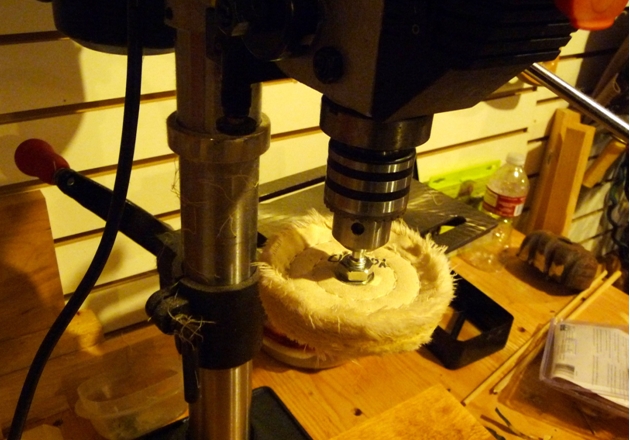 I finished with two coats of carnauba wax and buff with a soft cloth.
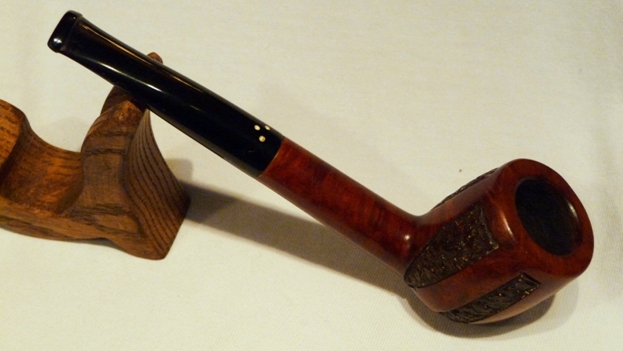
 I needed a tooth pick to remove some of the wax from the sand blasted areas. And that little groove between the stem and shank collected some wax too. Overall I am very happy with the outcome of this restoration. I am looking forward to smoking my first bowl in it.
Looking back, I am glad that I tried shaping my own stem. It was not without its challenges but the result was very rewarding. I now have two spare stems in my tool box, so I will be keeping an eye out for another stemless billiard.