By Steve Laug
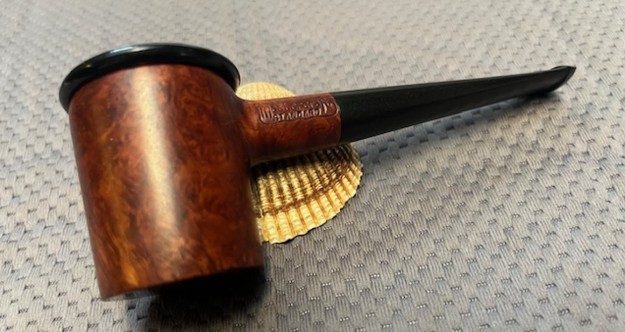
I don’t know what it is but there is something about these Campaign style pipes that captures my eye and my imagination. They are really quite ugly in terms of aesthetics so it can’t be that so I am not sure. It is basically a briar calabash pipe with a Bakelite bowl. I have had a few over the years so I know that they smoke very cool much like a gourd calabash. The bowl is screwed into the briar base with threads on both. The entrance of the airway is at the top of the bowl so the entire briar bowl is a cooling chamber to allow the settling of tars, oil and debris from the smoke before it rises to be drawn into the stem and your mouth. This pipe came to us on 12/07/2023 from a seller in Milwaukee, Oregon, USA. The pipe is stamped on the left side of the shank and reads Mastercraft [over] Standard in the Mastercraft logo shield. On the right side it reads IMPORTED BRIAR with the letter I missing on the shank end. There is no other stamping on the bowl, the insert or the vulcanite stem. The externals of the bowl and stem are quite dirty with oils and tars ground into the briar and light oxidation and chatter on the stem surface. The Bakelite bowl insert has a heavy cake in it with some lava on the rim top. The pipe was obviously someone’s favourite. Jeff took photos of the pipe before he started to clean it up. I have included them below.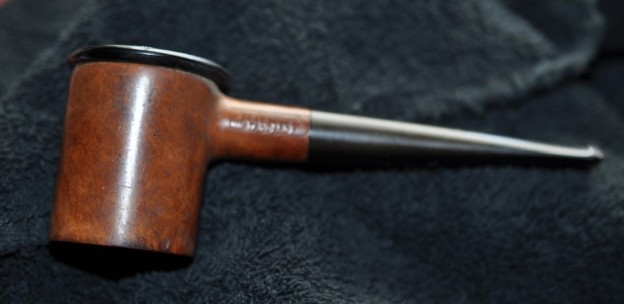
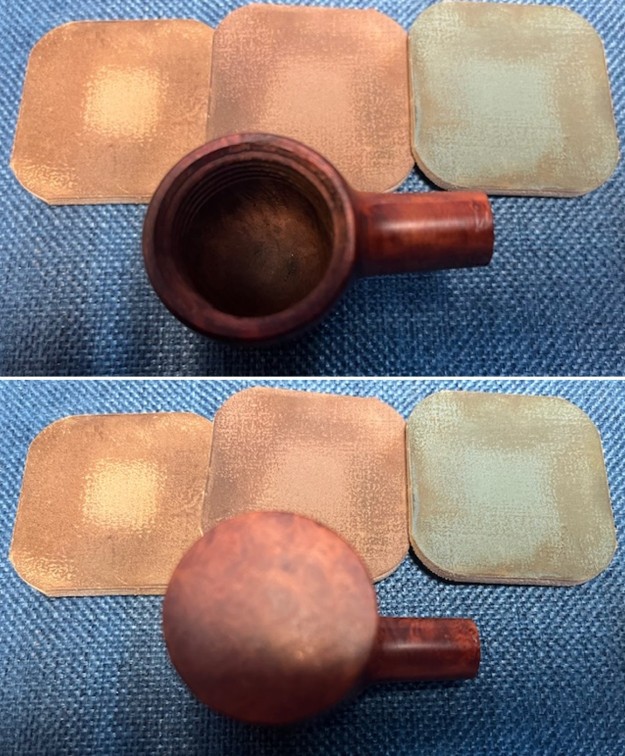
 Jeff took close-up photos of the bowl and rim top to show its condition. The bowl had a thick cake on the walls of the Bakelite and some lava overflow on the rim top. The edges looked very good at this point under the lava. The stem was lightly oxidized and showed some tooth marks and chatter on both sides ahead of the button.
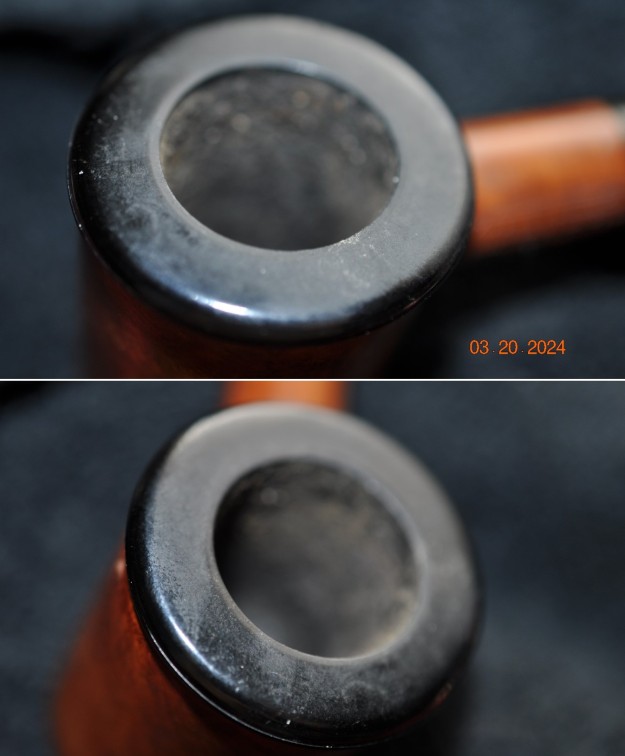
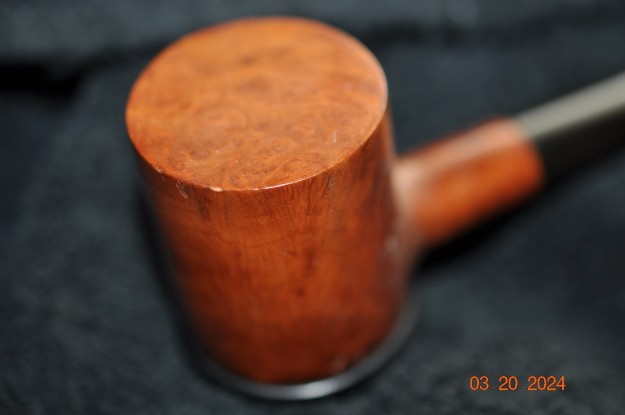
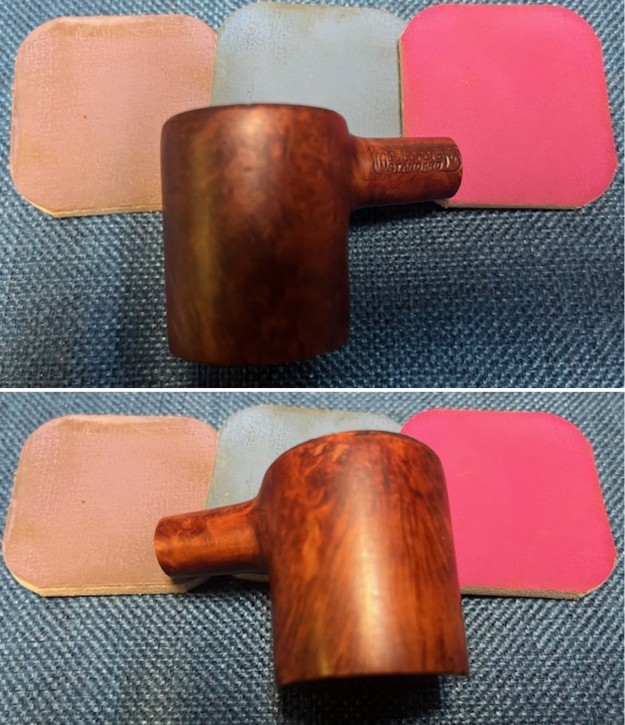
 Jeff took photos of the sides of the bowl and the heel to show the condition of the bowl at this point. It was dirty as can be seen. There appear to also be a few small fills on the right side of the bowl near the top. It will be interesting to see how well this cleans up.
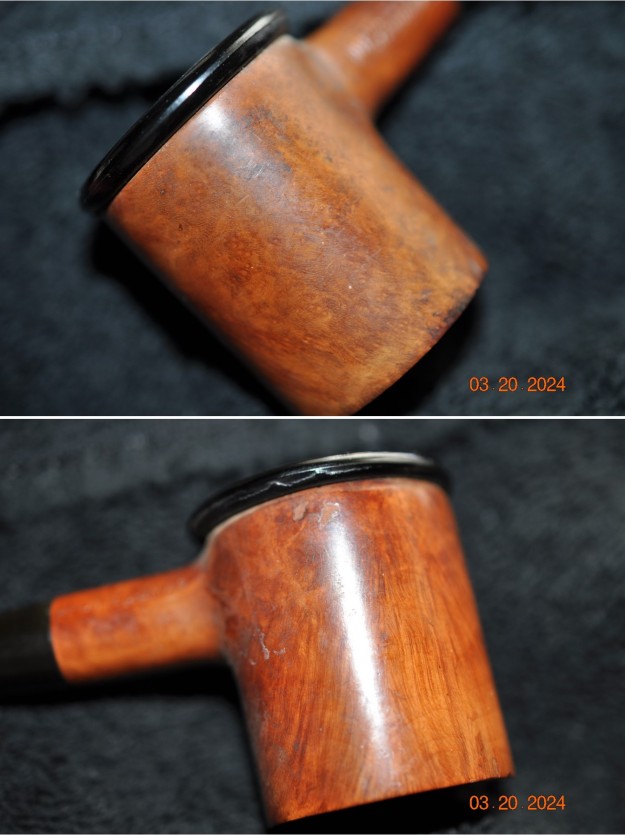
 He took photos of the stamping on the shank sides. You can see that it is clear and readable as noted bove. You can also see the letter “I” is missing on the right side of the shank. It probably was stamped in the gap between the stem and the shank.
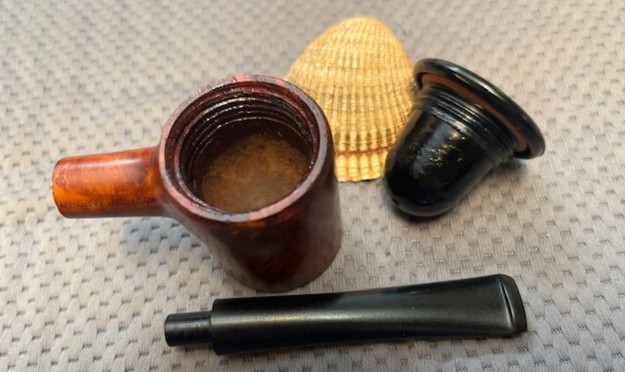
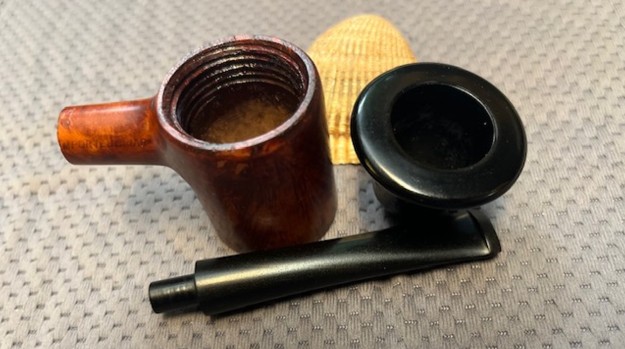
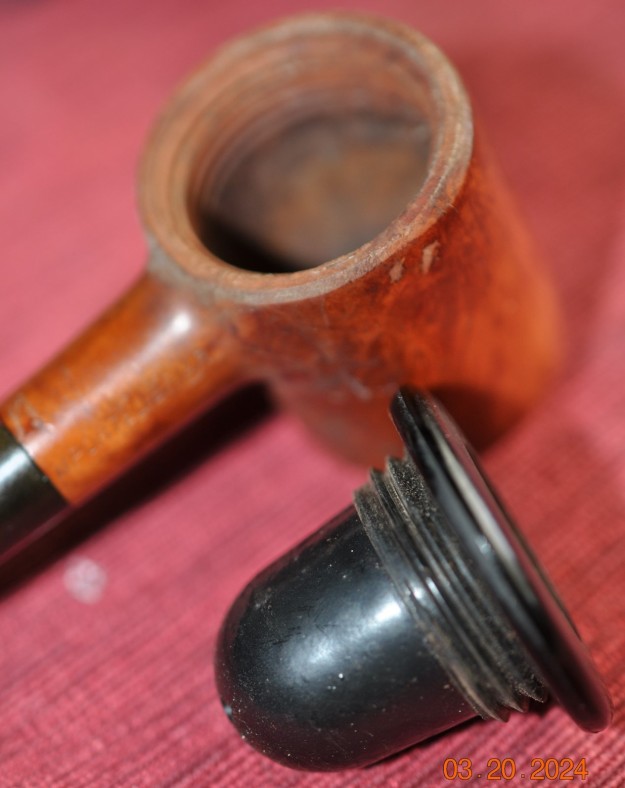
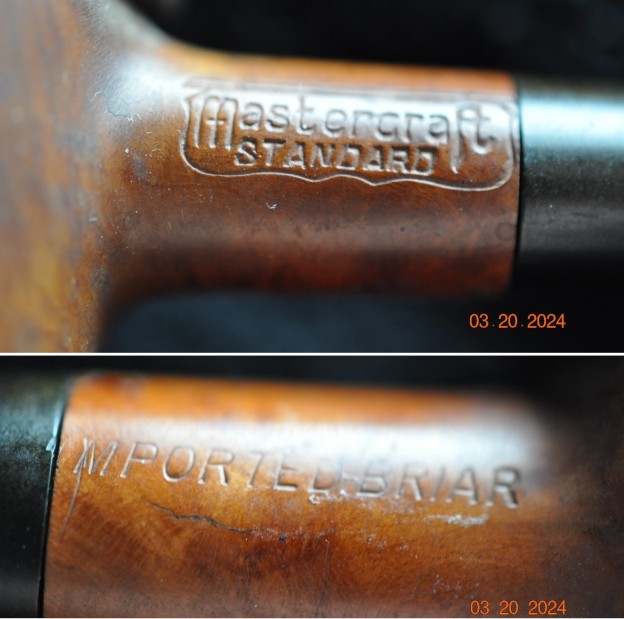 Jeff unscrewed the Bakelite bowl from the briar bowl and took photos. You can see the rubber gasket at the top of the inside of the Bakelite cap. You can also see the three holes in the bottom of the Bakelite cup.
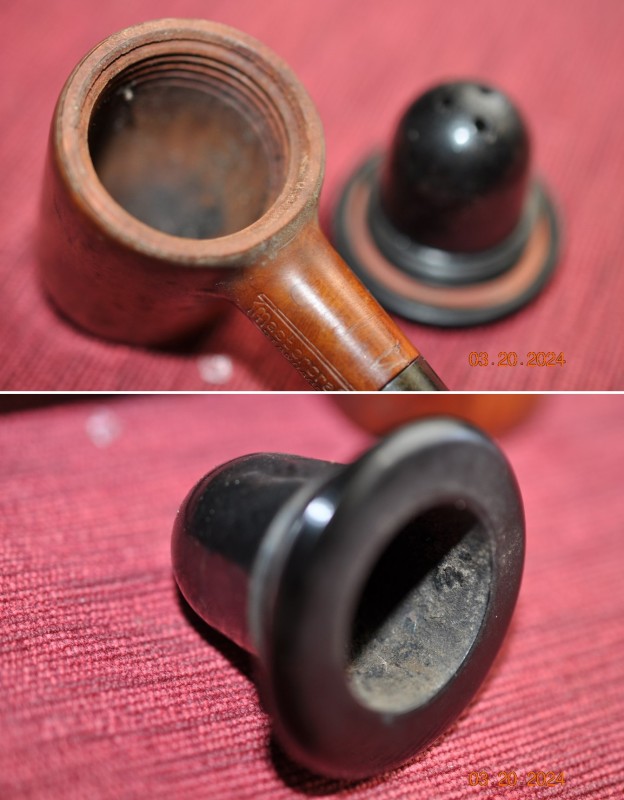
 This kind of Briar Calabash has been made by many companies – WDC, Kaywoodie, Mastercraft, Dunhill and others. They have come out with different names. They have been branded as Campaign pipes, Captain Warren pipes, Lyon Pipes, the General Dawes pipes and other names. Obviously, the concept of the inserted bowl is quite popular and has been around for a long time. The bowl insert has been made of different things in various pipes – the bowls could be meerschaum, briar or as in this case Bakelite. It really is a true calabash that acts to filter out tars, oils and debris and deliver a smooth smoke.
I have restored several of them over the years and always enjoyed working on them. They are also some good smoking pipes. Here are some links to a few of the pipes I have worked on over the years.
https://rebornpipes.com/2017/07/02/loving-the-old-wdc-campaign-pipe/
https://rebornpipes.com/2018/02/03/61583/
https://rebornpipes.com/2021/04/04/resurrecting-a-briar-wdc-campaign-pipe/
I found an excellent article on Pipedia on the Campaign style of pipes and two particular brands that were issued. It has some great history on the General Dawes and the Captain Warren pipes and the men behind them both. Give the article a read and take time to take a trip back in time. (https://pipedia.org/wiki/The_General_and_the_Captain:_Two_Period_Pipes_of_the_Early_Twentieth_Century).
The pipe I am working on is a little different than these because of the Bakelite Bowl that screws into the briar bowl. The others above were typically briar bowls and even a meerschaum bowl occasionally but I had not seen one of these with a Bakelite cup. It was now time to do my part of the work on the pipe.
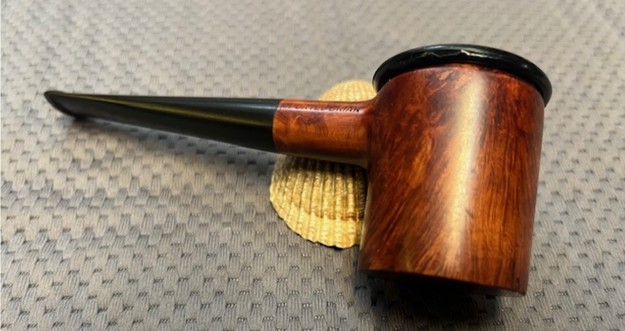
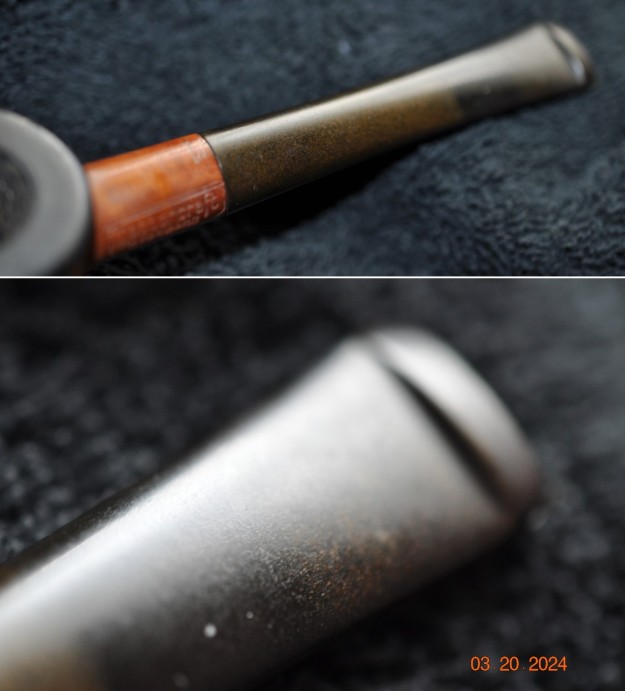
Jeff reamed it with a PipNet pipe reamer and cleaned up the reaming with a Savinelli Fitsall Pipe Knife. He scrubbed out the internals of the shank and stem with alcohol, pipe cleaners and cotton swabs until the pipe was clean. He scrubbed the exterior of the bowl with Murphy’s Oil Soap and a tooth brush to remove the grime and grit on the briar and the lava on the rim top. The finish on the bowl looked really good when I got it. The rim top and edges looked very good. He soaked the twin bore stem in Briarville’s Pipe Stem Deoxidizer bath to remove the oxidation. The stem looked better and the deep tooth marks and chatter on the surface were also visible. When the pipe arrived here in Vancouver for the second stop of its restoration tour it looked much better than when he found it. I took photos of the pipe before I started my work on it. 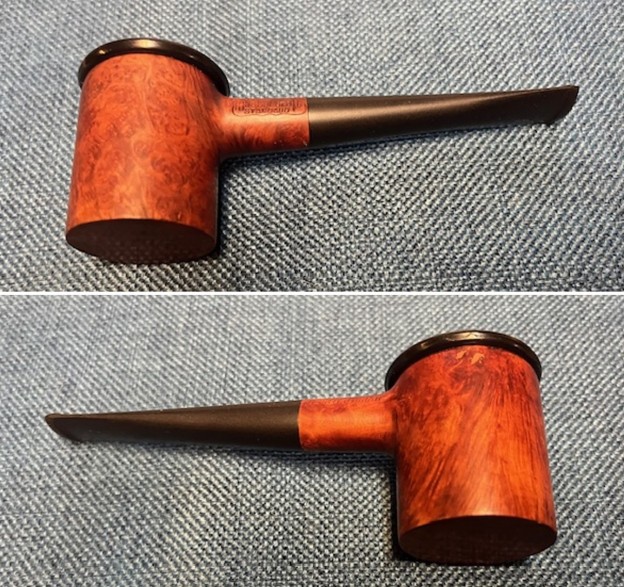
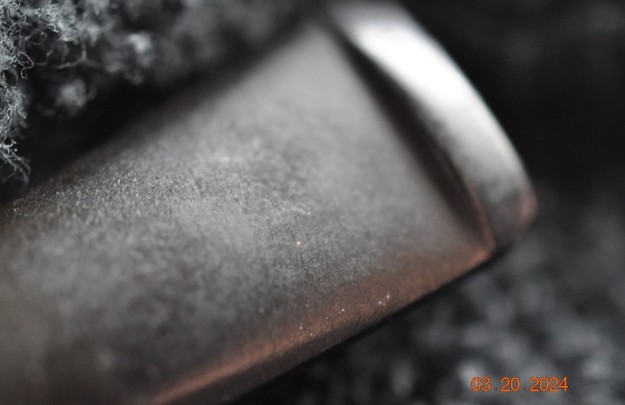
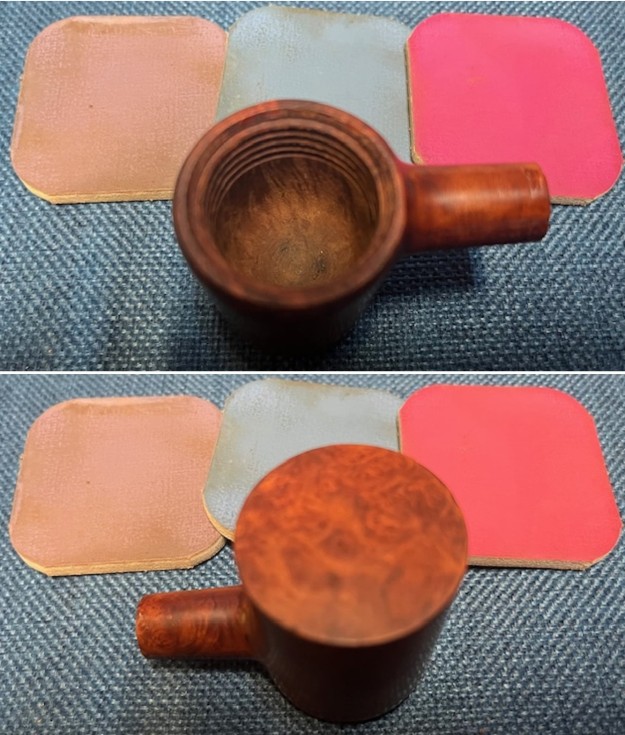
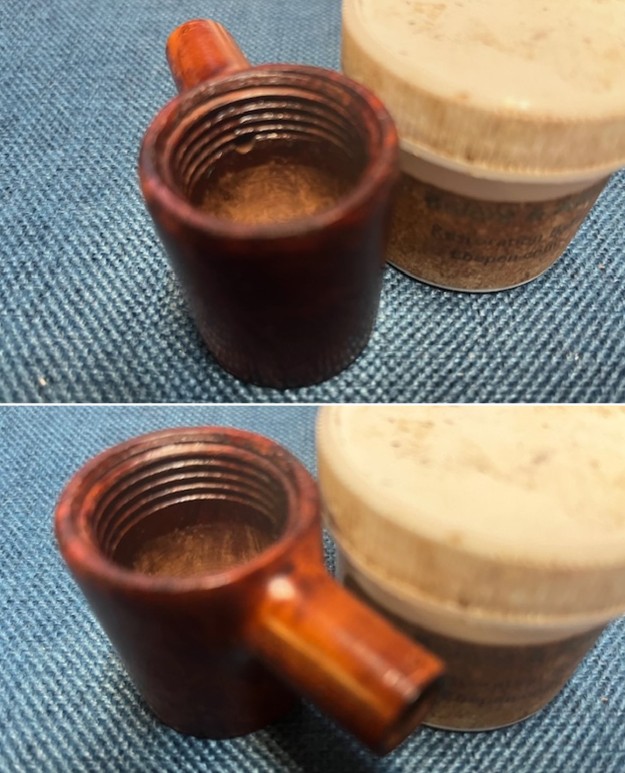
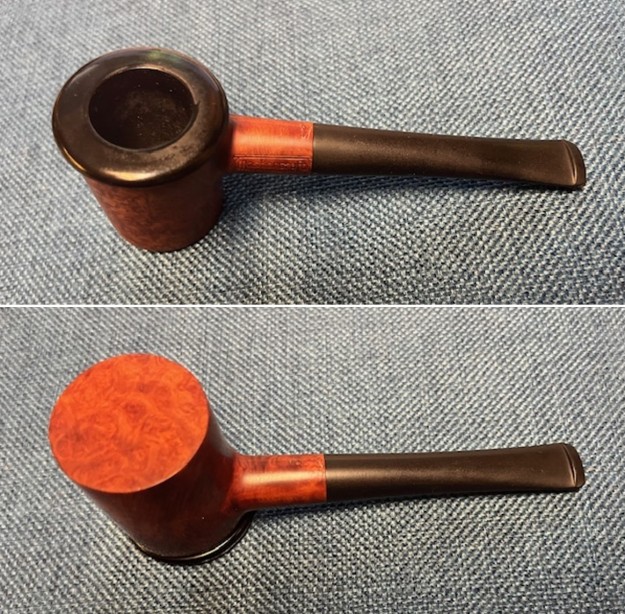 I took photos of the condition of the rim top and stem before I started working. The rim top looks very good and the bowl is spotless. The stem is much better but still shows some oxidation and tooth chatter and deep marks on both sides near the button.
  I took photos of the stamping on the sides of the shank. The stamping was clear and readable as noted above.
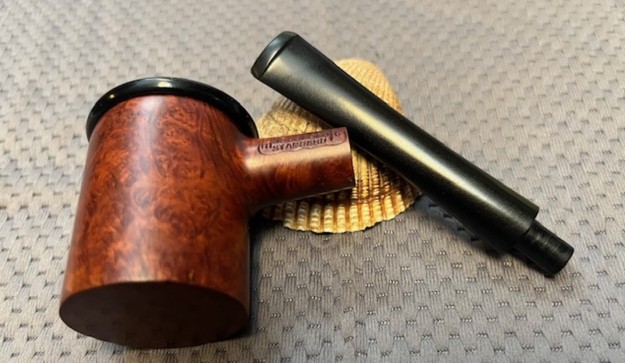
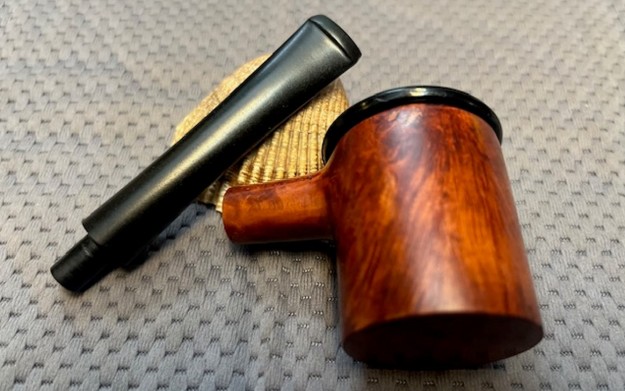
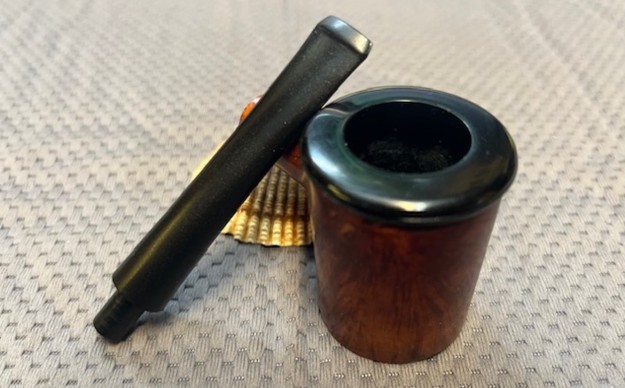
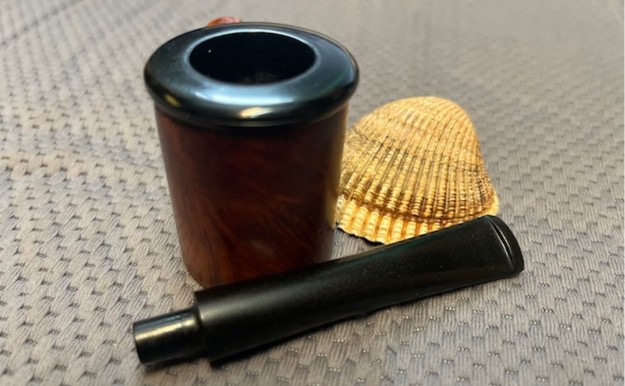
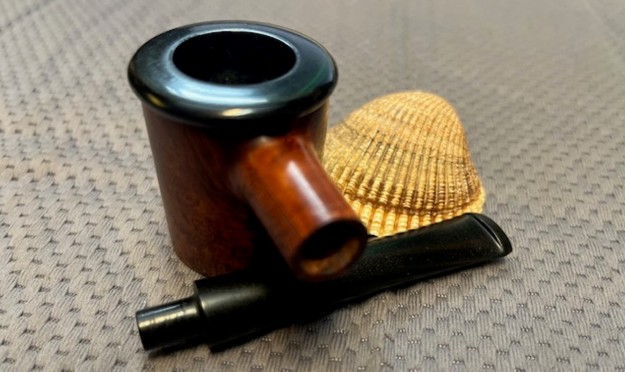
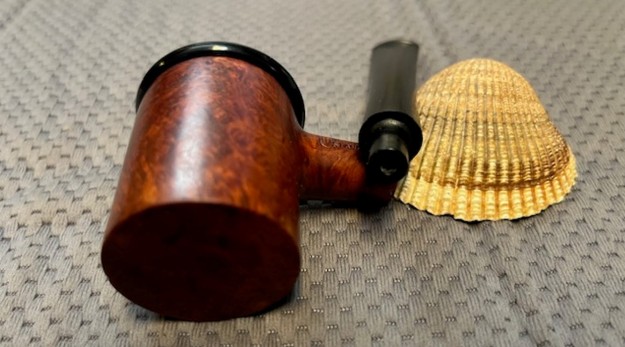
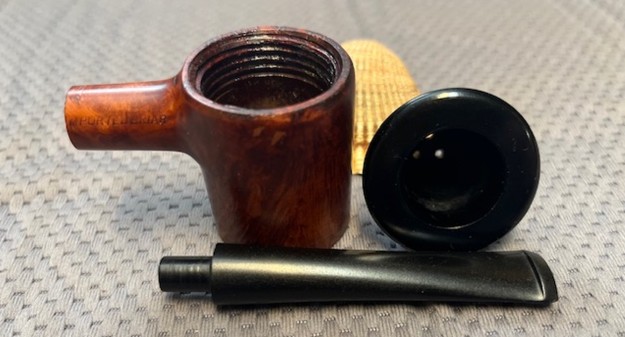
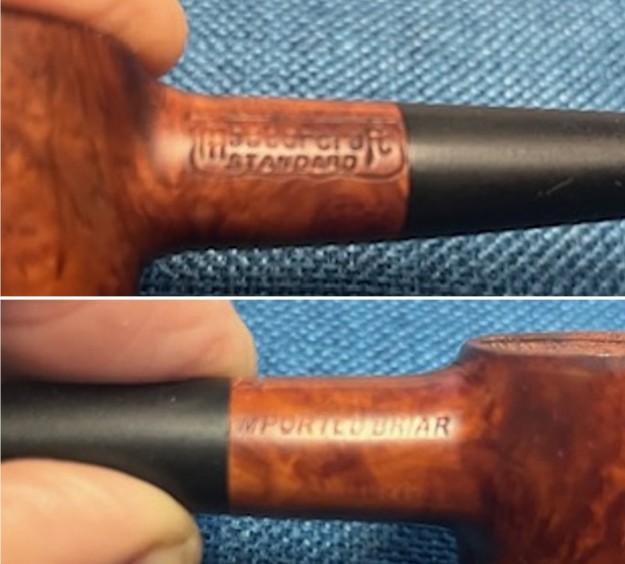 I took the bowl and stem apart and took a photo of the pipe to show the look of the pipe. The first one shows the bowl unscrewed and the threads on both. The other photos show the parts with the stem removed.
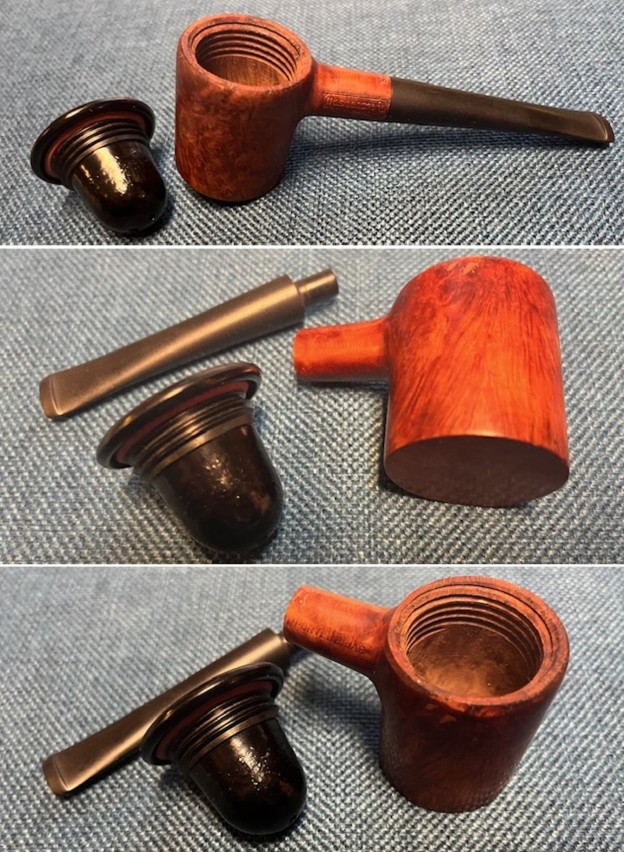 Now it was my turn to work on the pipe. The bowl was in very good condition so I polished the briar with micromesh sanding pads – dry sanding with 1500-12000 grit pads. I wiped the bowl down after each pad with a damp cloth to remove the sanding dust.
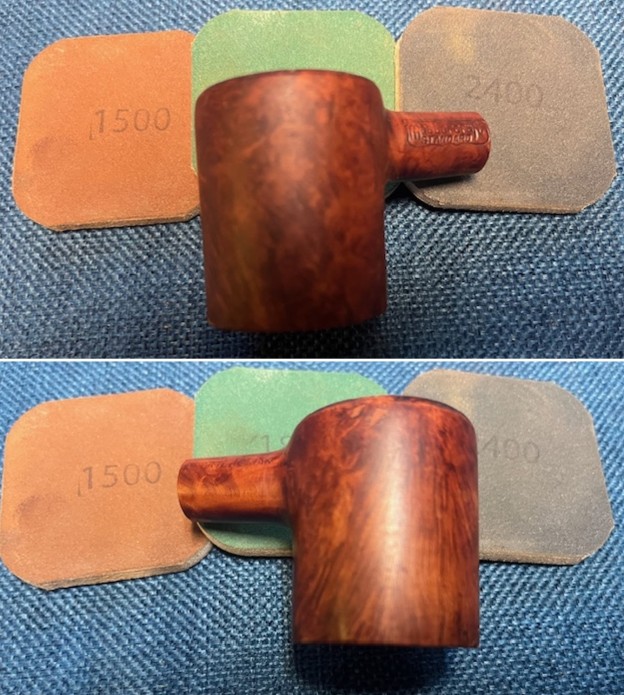
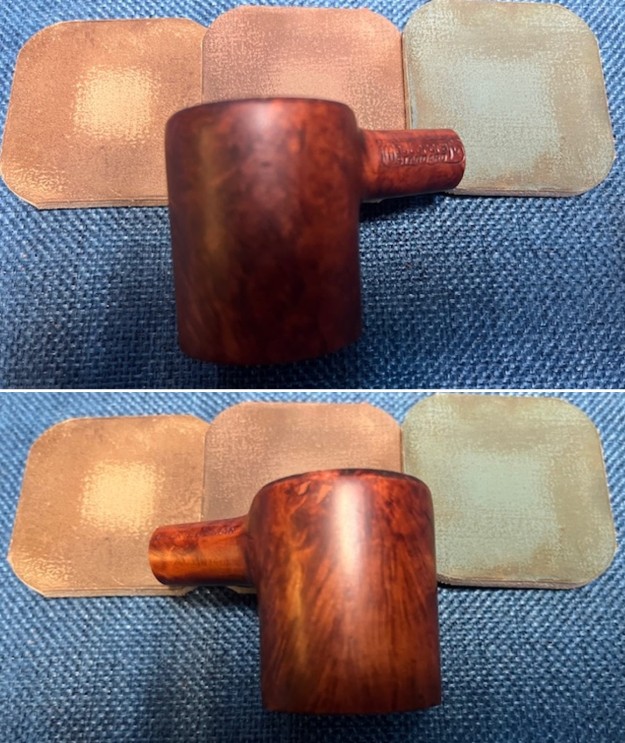
 I worked some Before & After Restoration Balm into the finish of the bowl, rim top and shank with my fingertips to clean, enliven and protect it. I find that the balm really makes the briar come alive again. The contrasts in the layers of stain really made the grain stand out. I let the balm sit for 15 minutes and then buffed with a cotton cloth to raise the shine. The bowl really looks good at this point.
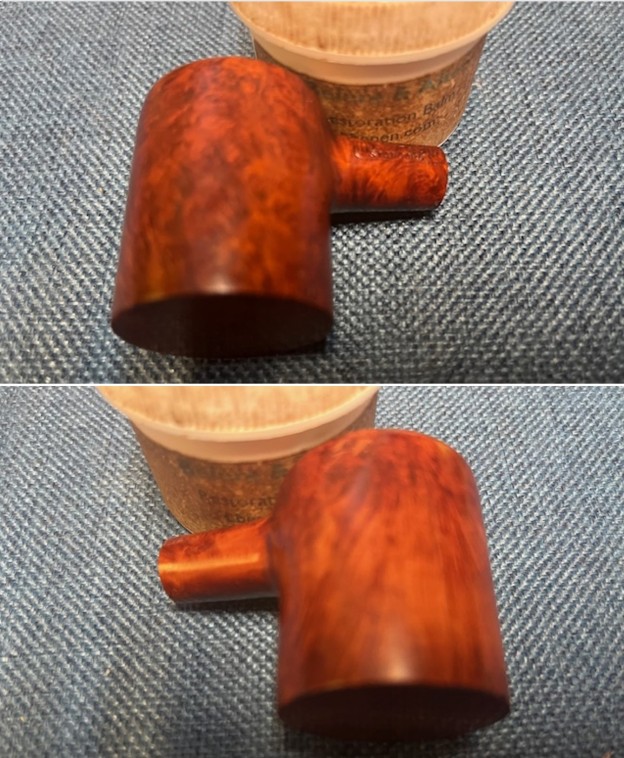
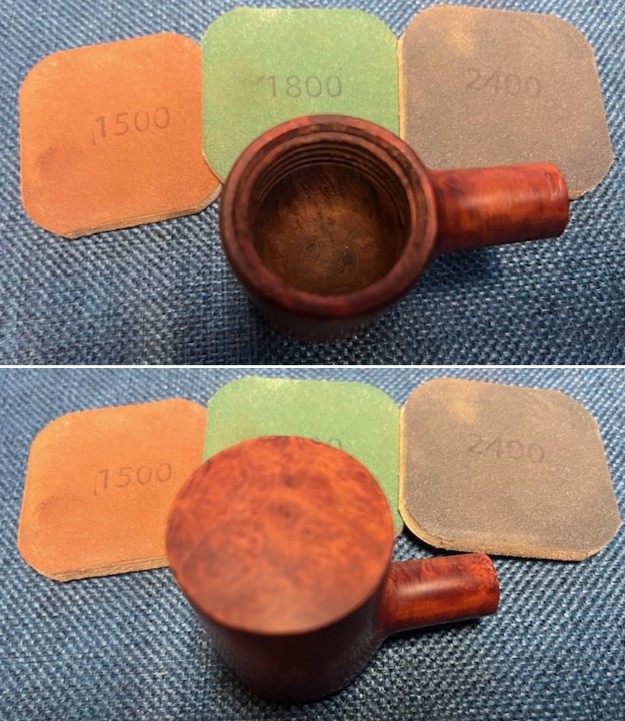
 I polished the Bakelite cup top with micromesh sanding pads – dry sanding with 1500-12000 grit sanding pads. I wiped the rim top down after each sanding pad with a damp cloth. It really took on a shine.
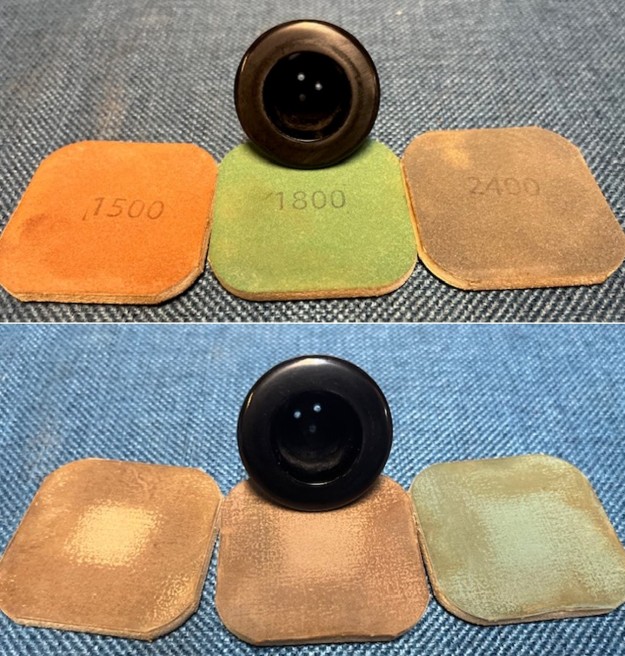
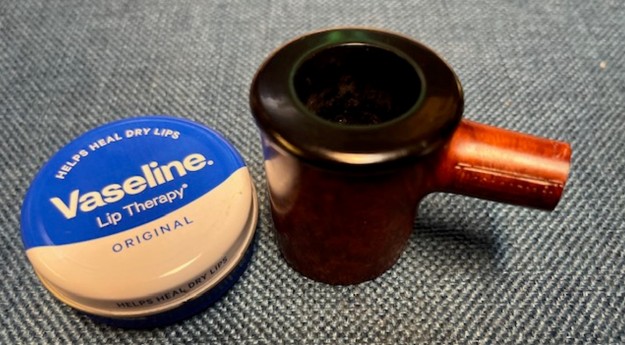
 I wiped the threads down on both the cup insert and the briar bowl with Vaseline. I rubbed it deep into the threads of the briar and on the threads of the insert.
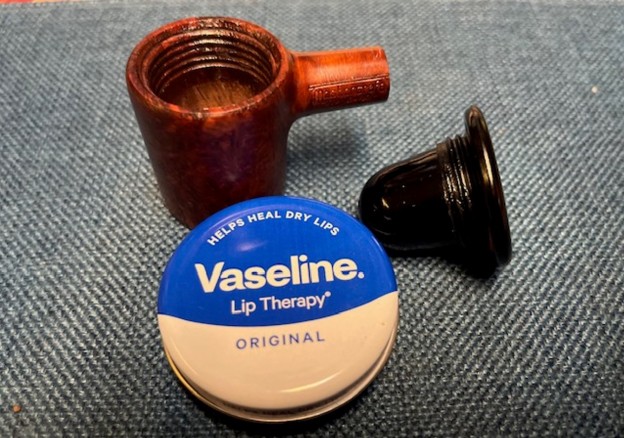
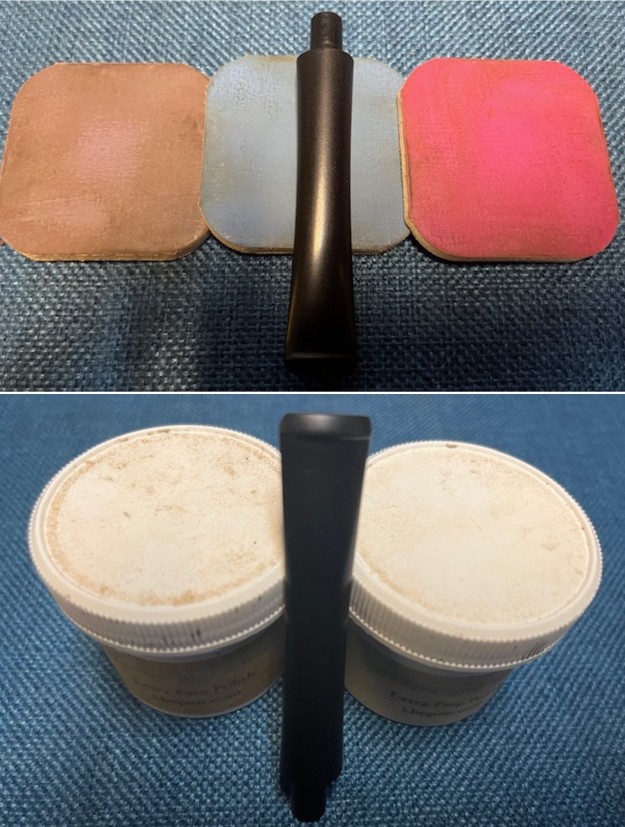
 I polished the vulcanite with micromesh sanding pads – 1500-12000 grit pads. I wiped it down with Obsidian Oil after each sanding pad. I used Before & After Pipe Polish – both Fine and Extra Fine to further polish the stem. I gave it a final coat of Obsidian Oil and let it dry.
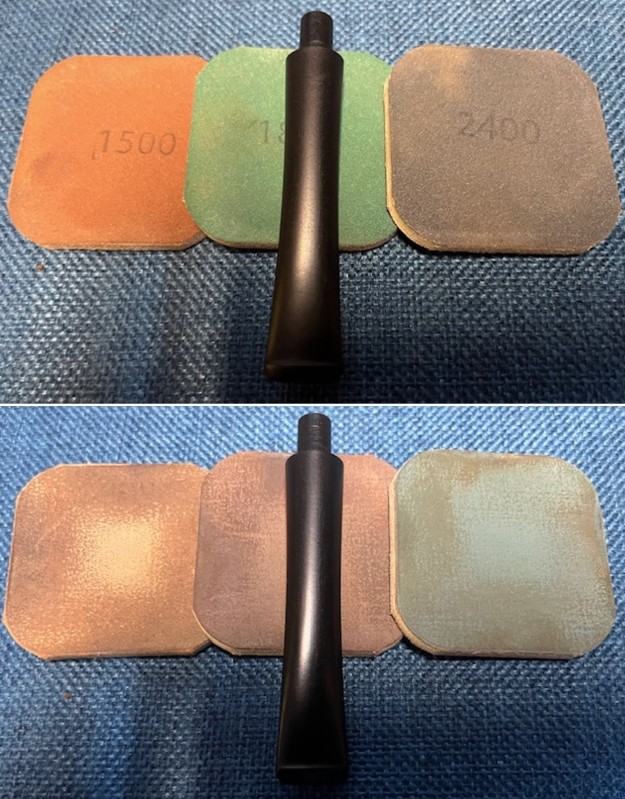
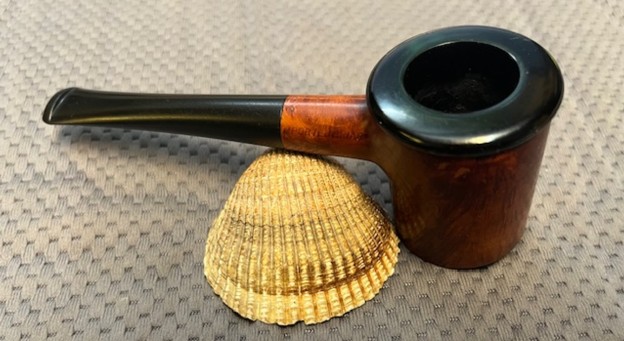
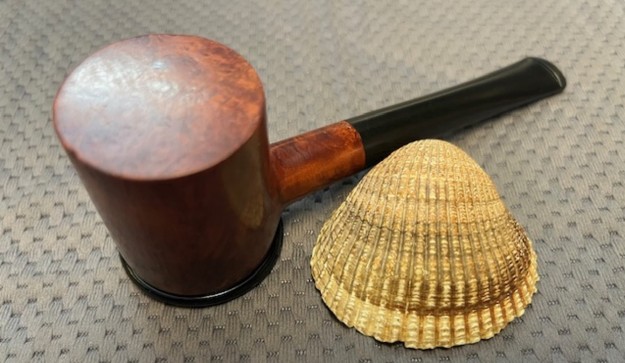
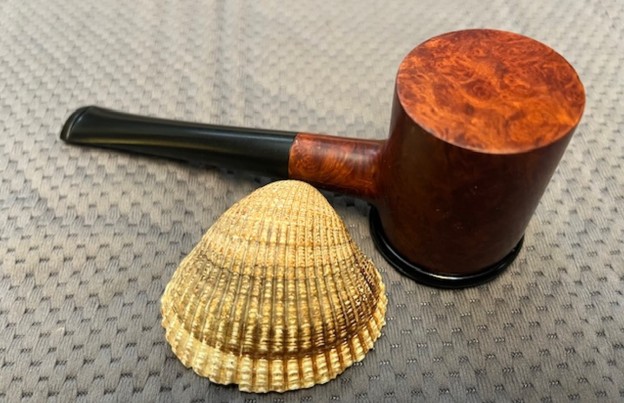
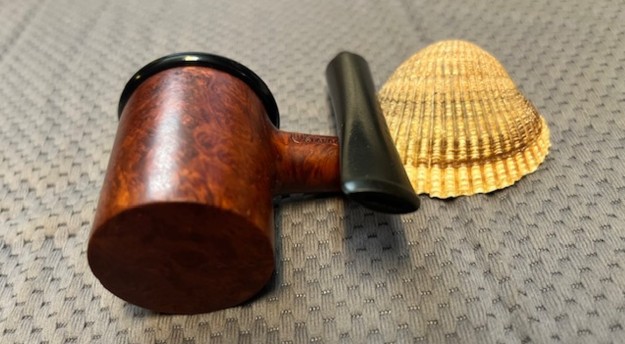
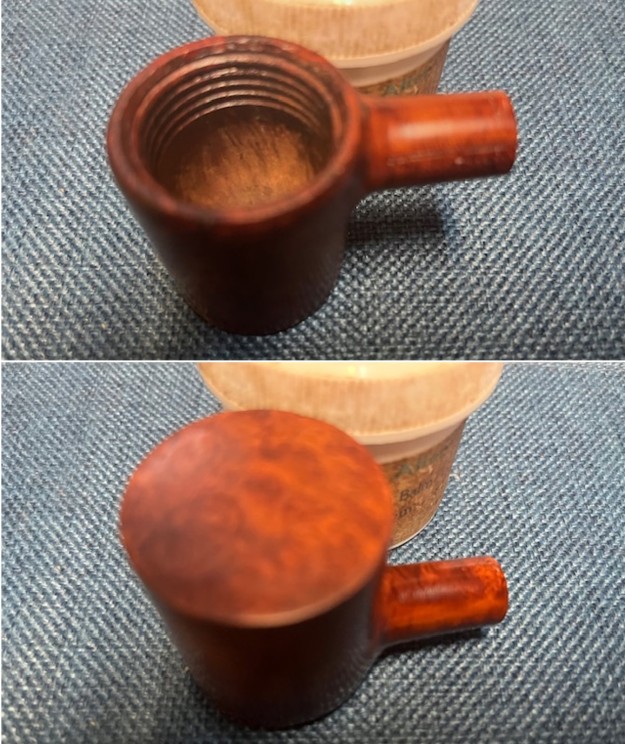
 This Mastercraft Standard Calabash with a Bakelite Bowl Cup and a vulcanite taper stem has a beautiful, uniquely grained outer bowl that houses the threaded Bakelite cup. The polished vulcanite taper stem adds to the mix. I put the stem back on the bowl and buffed the pipe with Blue Diamond on the buffing wheel being careful to not buff the stamping. I gave the bowl and the stem multiple coats of carnauba wax on the buffing wheel and followed that by buffing it with a clean buffing pad. I hand buffed the pipe with a microfiber cloth to deepen the shine. The finished Mastercraft Standard Calabash is quite nice and feels great in the hand. Give the finished pipe a look in the photos below. The dimensions of the pipe are Length: 5 inches, Height: 1 ¾ inches, Outside diameter of the bowl: 1 ½ inches, Chamber diameter: ¾ of an inch. The weight of the pipe is 1.45 ounces/41 grams. Thanks for walking through the restoration with me as I worked over another beautiful pipe. This one will be going on the rebornpipes store in the American Pipe Makers Section. Thanks for your time.