Blog by Steve Laug
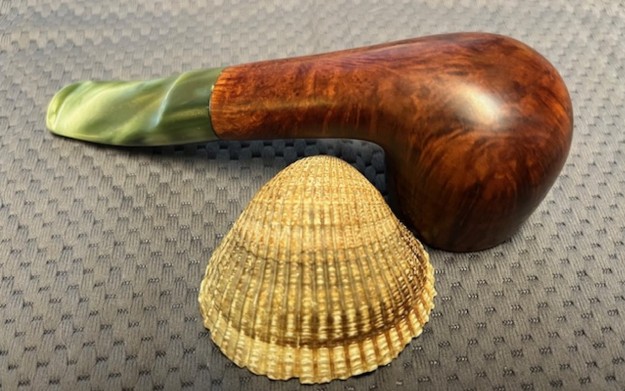
On our recent Victoria Day Weekend (5/18/24) my family met Jeff and his wife in Bellingham for breakfast, a visit and a bit of pipe hunting. We visited three of my favourite antique malls and worked out way through the aisles of wares for sale. Jeff and I tend to divide and conquer, each walking through the aisles of the shop looking for pipes. The rest of the family moves through looking for their own treasures. In the second shop we visited we had some success in our finds. The shop is one that I have visited for over 20 years and come to know the owner. We generally have a great chat on our visits and spent some time chatting and catching up on life. By the time we finished chatting we came away with five pipes added to the hunt bag. These included a Savinelli Sherwood Rock Briar 316KS, a Sir Winstons Own Bellingham WA, a Kensington Made in London England Pot, Genuine Block Meerschaum Opera pipe, and last of all an Oval shank 1/4 Bent pot no name but great grain. Here is the link to the blog on the hunt and a photo of the five pipes we added (https://rebornpipes.com/tag/bellingham-pipe-hunt/). 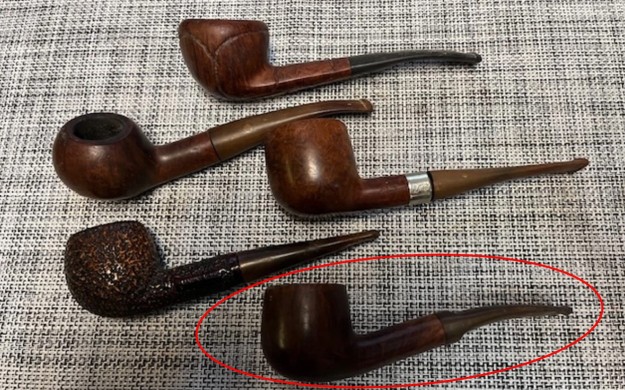 I decided to take a break from the pipes in my queue of pipes to work on and deal with the no name bent author. I have circled the pipe in the photo above. It was an interesting shape that has some great grain under the grime on the bowl and shank. When we purchased it, we thought it was unstamped or over buffed. But when I brought it to the worktable and used my lens and a light it turns out that is stamped on the topside of the shank. It reads Sir Winston’s Own [over] Bellingham, WA. So it is another Sir Winston’s Own pipe like the second one above. There was no other stamping on the rest of the pipe. As I mentioned before the Sir Winston’s Stamp brought back some memories for me of a visit to a long-closed pipe shop in Bellingham so I excited to work on a second one. The stem was a mess with a chewed end and a large chunk missing from the button end. There were no marks on the stem either. The bowl had a thick cake in it and some bits and bobs of tobacco stuck to the walls. There was a thick lava coat on the rim top and edges. I liked the shape of the bowl and a new stem would bring it back to life and usability once more. I would get to see what that would look like soon enough. I took some photos of the pipe before I started working on it.
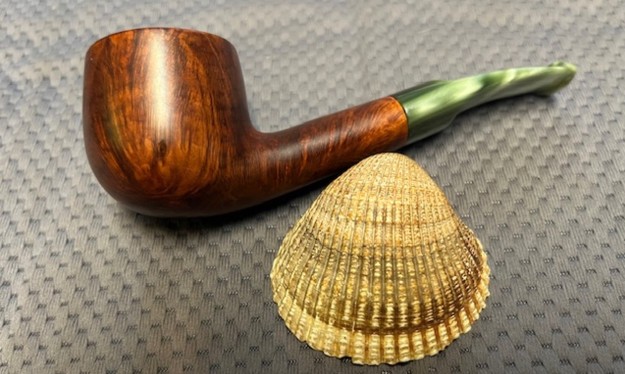
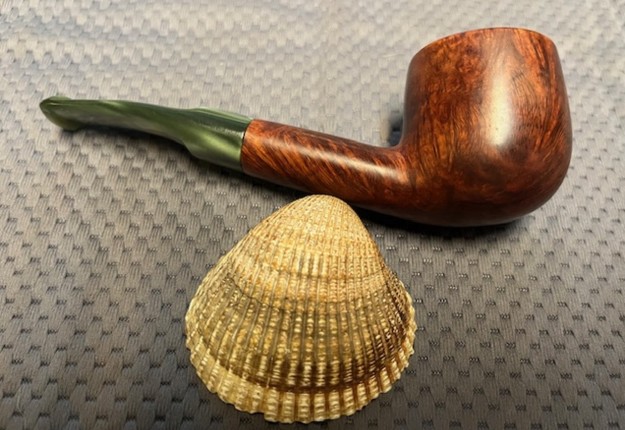
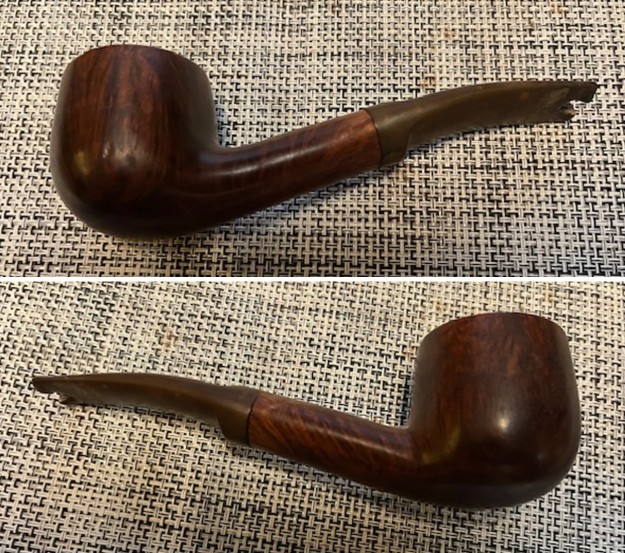
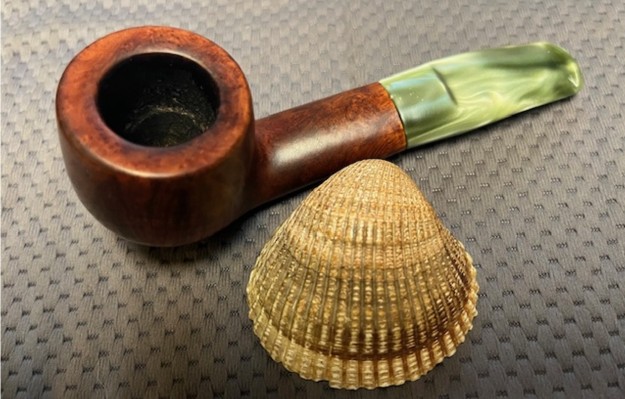
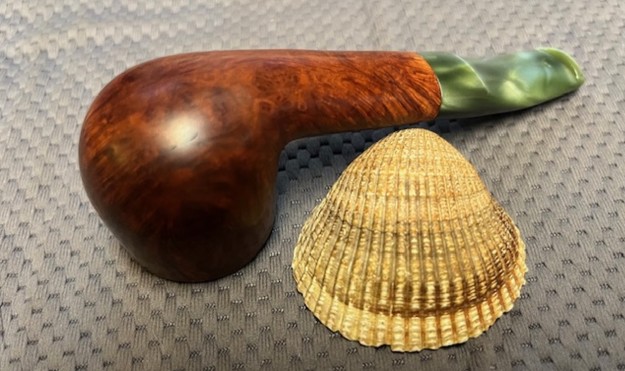
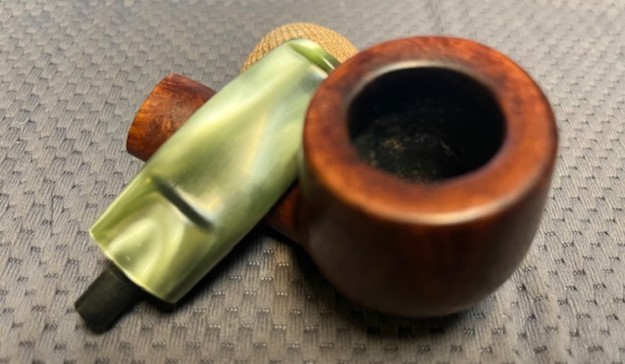
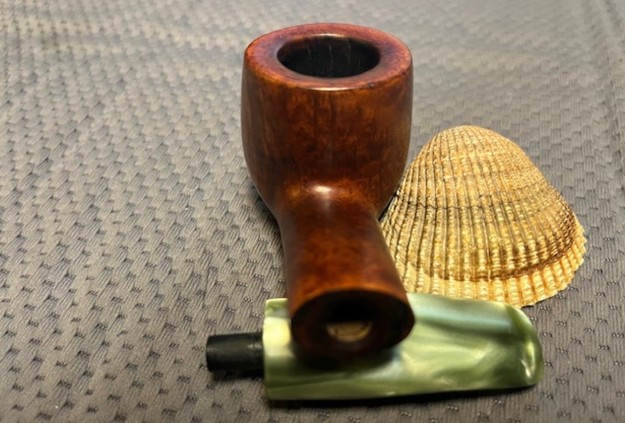
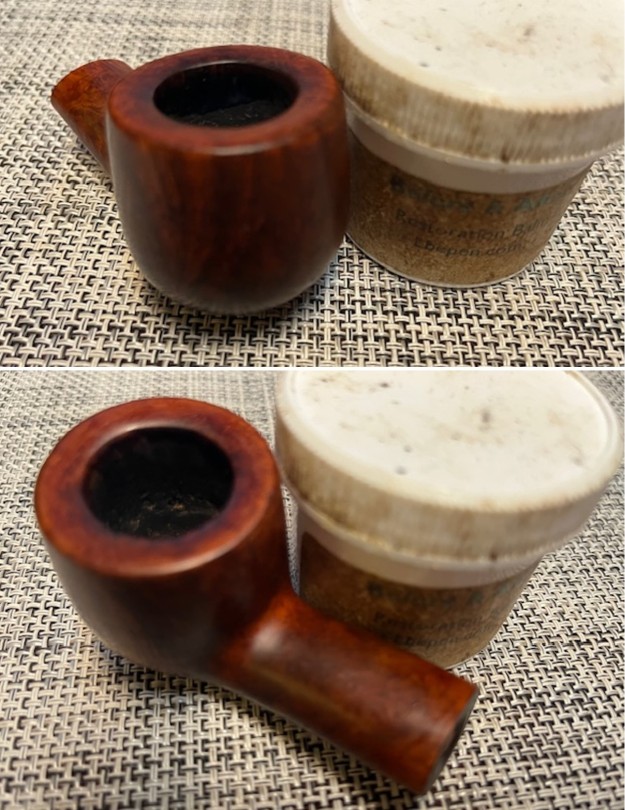
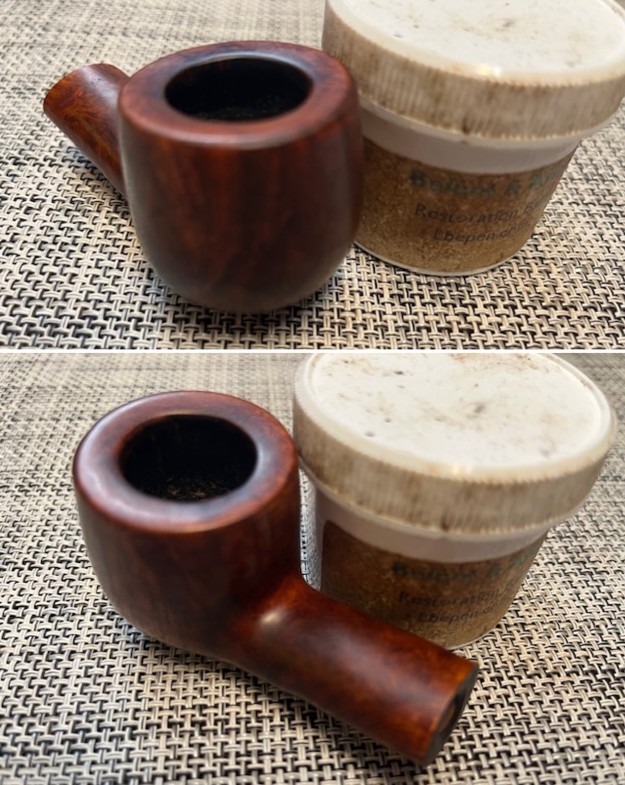
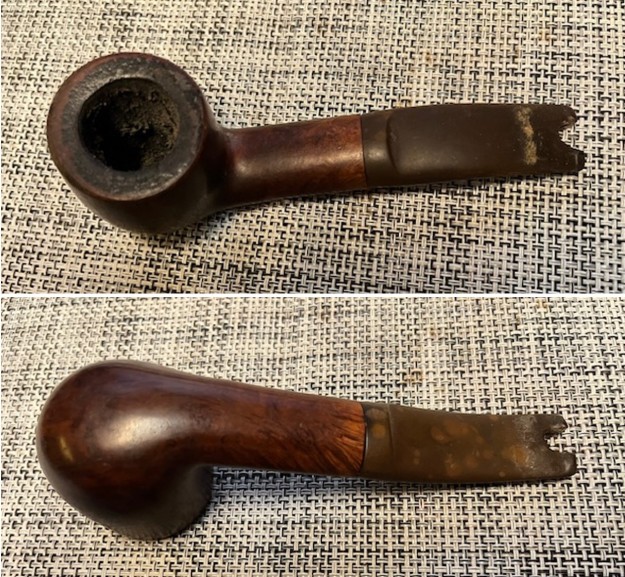 I took photos of the rim top and stem to show the general condition of the pipe. The bowl is heavily caked and the rim top and edges have a heavy coat of lava overflowing on to them. It is hard to know with certainty the condition of the bowl at this point but clean up will reveal all. The stem is oxidized, calcified and has a large chunk of vulcanite missing from the button end. The stem will need to be replaced.
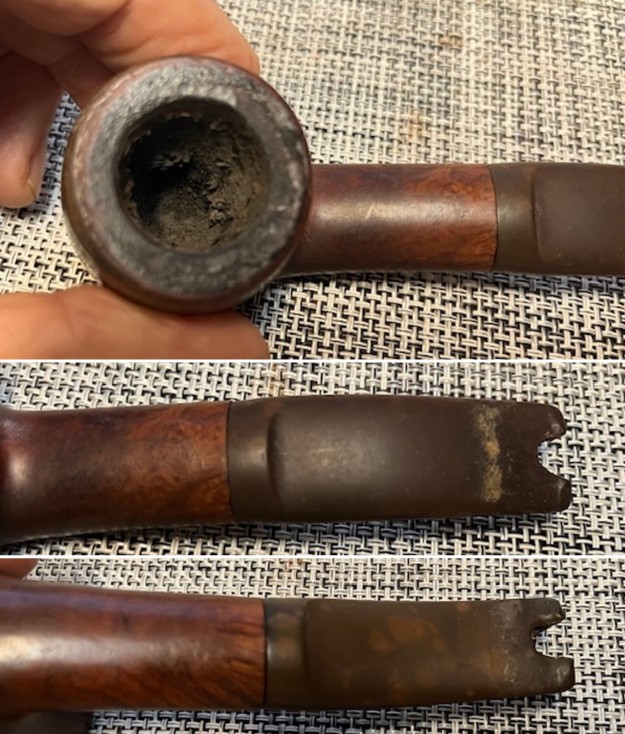 I took a photo of the stamping on the topside of the shank. You can see that it is faint but it is readable with a light and lens. It is hard to capture with the camera.
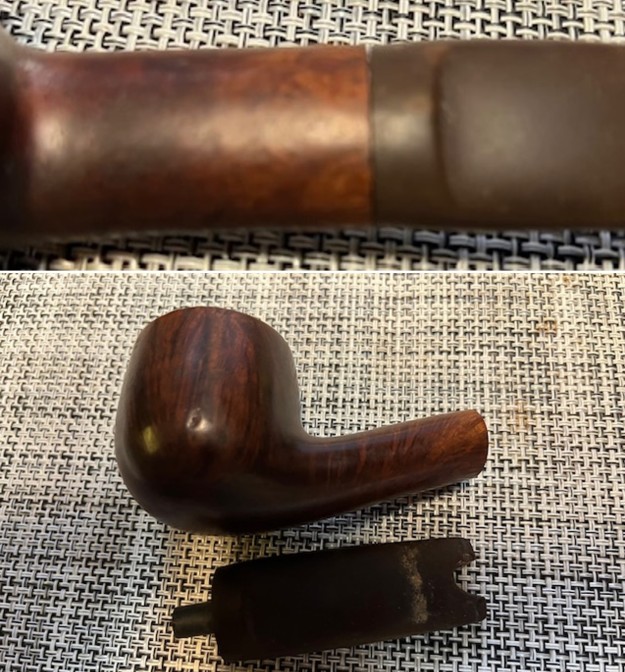 I was excited to see a second pipe from the pipe shop once I was able to see the stamp on the shank side that read Sir Winston’s Own [over] Bellingham WA. I have included the information that I included in the previous blog about the brand (https://rebornpipes.com/2024/05/26/a-pipe-hunt-find-in-bellingham-a-sir-winstons-own-author/). I quote that below:
I wrote a blog about the visit the first time I went there in a blog on a shop that closed and also this one (https://rebornpipes.com/tag/sir-winston-pipe-shop-in-bellingham-wasington/). I clicked on the link and read the story of my visit to the shop. I am quoting from that blog below. I have included the information and the photos to give a sense of context to the Sir Winston’s Own Bellingham, WA pipe that I am working on now.
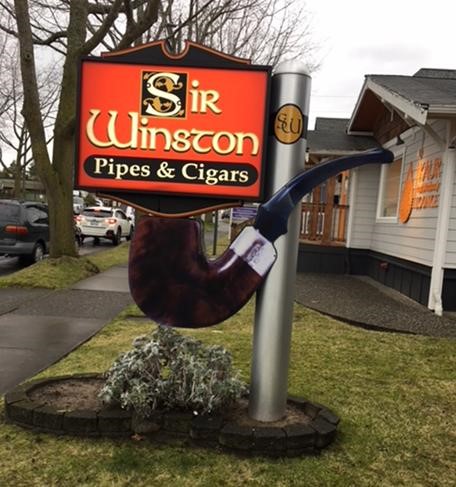 I googled pipe shops in Bellingham and there was one that came up that was not too far away from the old Senate location. In fact, the app said it was a 7-minute drive. It said the shop did not open until 11am so we stopped by a coffee shop and relaxed while we waited for the shop to open. While we sat there I read some of the online reviews of the shop and looked through the photos. The shop was called Sir Winston Pipes & Cigars. The photos showed some bulk tobacco. As we got closer to 11 o’clock we headed over to the shop. It was located at 2122 James St. in Bellingham, WA. It was an interesting neighbourhood – residential dwellings surrounded by light industrial buildings. It was on a busy four lane street. We found the address and a parking place in front of the house. The sign in the front yard caught my attention. It was bright red sign that read Sir Winston Pipes & Cigars. It hung by its right side from what looked like a silver cigar tube with the SW (Sir Winston) label on the tube. There was a large Peterson’s style system pipe hanging below the sign – dark brown bowl, silver ferrule and a black stem.
 The shop itself was a small house with a large front porch. It was nicely laid out and had a well laid out yard with sidewalk leading to the front door. There was a parking lot behind the shop and a rear entrance that also lead into the shop. We arrived a little before 11 and the shop keeper was opening the front door and turning on the “Open” sign in the front window on the right as you came up the sidewalk. I turned the handle on the door and open it inward. The sales counter was to my left as I came in the door. I asked the shop keep if the shop was open and she said, “Just about… but come on in”. My friend and I came in the shop and had a look around…
…The inside of this shop was a real old fashioned tobacco shop. There were no glass pipes, bongs and the like on the counters or walls. There were no fruit flavoured cigars on the counter and not a lot of drug store tobaccos. Those were my first impressions as I opened the door to the shop. It looked and smelled like a tobacco shop. I could almost imagine the days, not that long ago when you could walk into a shop like this and see old timers sitting in the back of the shop around the fireplace, under the television set enjoying a pipe or cigar. Sitting and chatting with each other wreathed in tobacco smoke and chatting and laughing. There would have been a coffee pot going and maybe a refrigerator with some drinks. None of those were there now but the space was there and the memory was still present in my mind as I looked things over.
…After my ramble through the shop I took time to talk with the shop keeper. She turned out to be the owner. She had run this shop for 30 years and knew her stuff. Turned out she was a pipe smoker so we talked about the various blends that she had and the ones that were on order and had not come in to fill in her inventory after the Christmas season. Her name was Robbie and she really knew her stuff. We talked about the changes in the laws and the impact that had on her shop. She talked about the changes in the tobacco that was available for her to order. She remembered the days when her walls were lined with English and European tobaccos as well as a wide range of American ones. Those days she said had passed and it was hard to get any variety.
I decided to pick up some pipe cleaners so I put them on the front counter. My friend and I wanted to purchase some of her bulk tobaccos so she went over to the shelf and we had Robbie weigh out some for us. I picked a couple of ounces of her Scottish Blend and my friend got some of that and some of the Queen’s Blend. She bagged our tobaccos and carried them over to the counter. My friend picked up a pipe pouch made by Comoy’s that would hold his pipe, tobacco, tampers and lighter. While we were looking several other customers, who were obviously old friends came into the shop and purchased tobacco and other items from her. It was good to see that the place was still a living and working shop with a following that was known and made to feel at home.
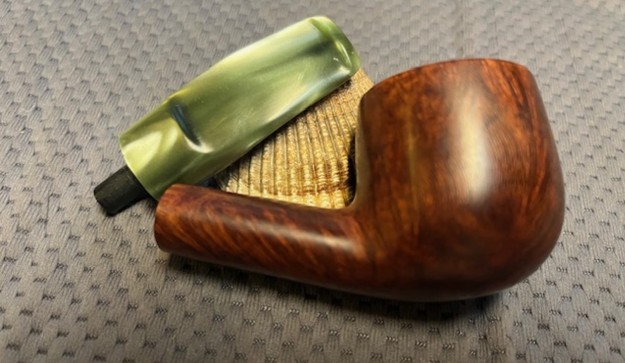
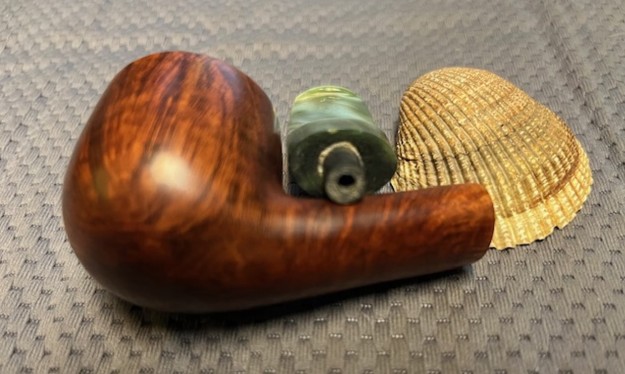
Reminded of the great adventure I had at this now defunct pipe shop I was ready to work on this second Sir Winston’s Own Pipe I had picked up. It would be nice to have this memory piece from that Pipe Shop. I was ready to restem it and clean it up. I decided to start with a new stem. I went through my stems and found a nice looking mint green, acrylic saddle stem that I thought would be a good fit and look good. The tenon was the same size but the overall diameter of the oval stem was slightly wider on the sides. I took a photo of the new stem with the old one. You can see the crown stamp on the top of the saddle. It was faint and would easily be sanded out. There were some small tooth marks on the top and underside next to the button that I would need to remove.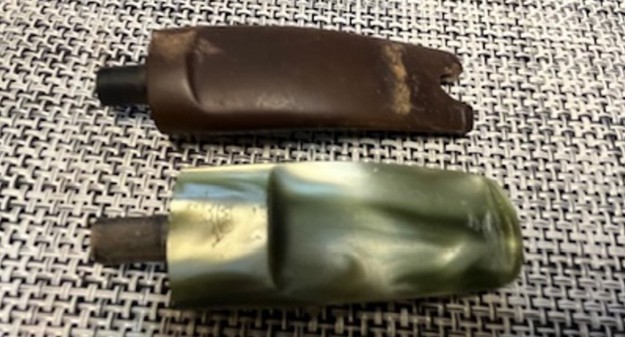 I put the new stem on the shank and took photos. I still needed to reduce the diameter of the saddle portion of the stem to fit the shank but I like the look of the new stem both in terms of length and shape. It was going to be a nice looking pipe once I was finished.
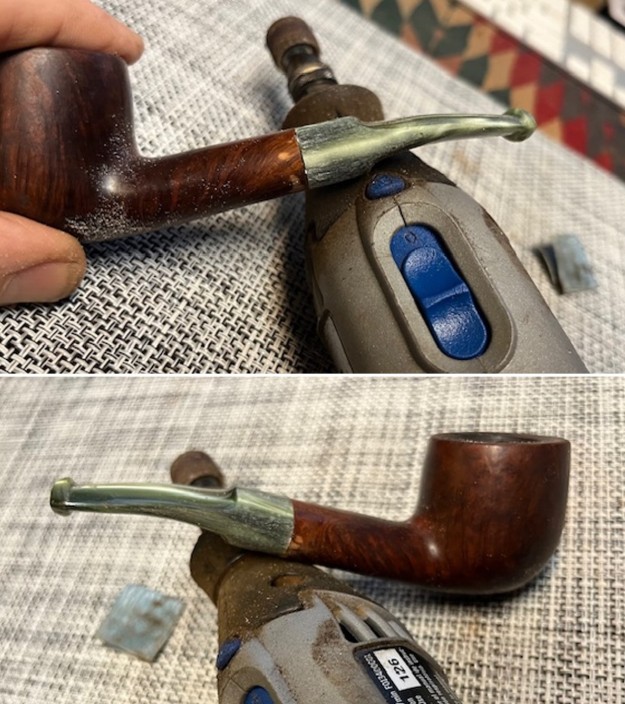
 I used my Dremel and sanding drum along with a flat file to begin reducing the diameter of the stem to fit that of the shank. I took off quite a bit with Dremel and started fine tuning it with the file. It is beginning to look very good at this point.
 There was still a lot of work to do on the fit of the stem to the shank but I decided to clean up the bowl and internals before finishing the stem fit. I wanted to make sure that the shank was clean and that it sat correctly in the shank. I wanted to make sure it was fitted with no gap between the shank end and the stem. I started the process by reaming the bowl with a PipNet pipe reamer to take the cake back to bare briar. I took the cake back to bare briar and cleaned up the remnants of the cake with a Savinelli Fitsall Pipe Knife. I sanded the bowl walls with sandpaper wrapped around a piece of briar to smooth them out. The inside walls were clean and there was no sign of burning or checking on them.
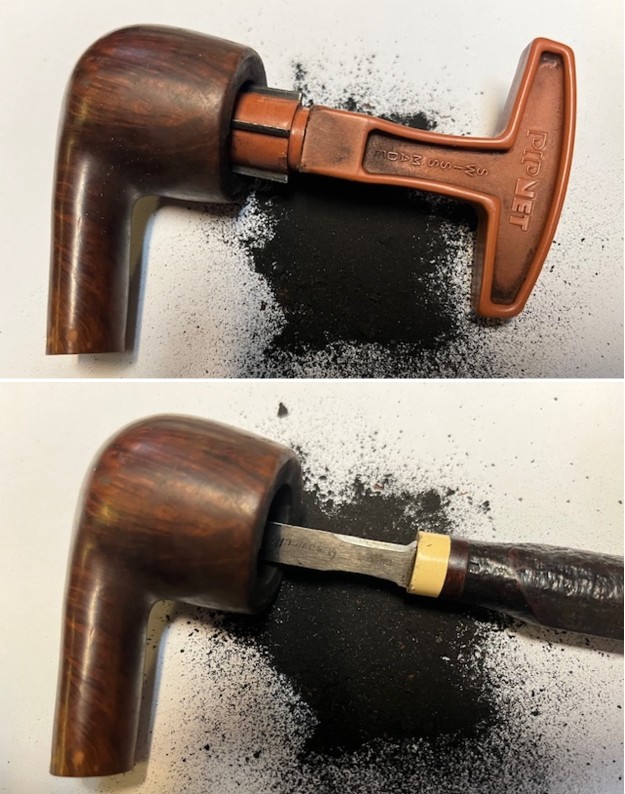
 I decided to clean the internals before scrubbing the externals. I scrubbed the shank and the airway in the shank and the stem with pipe cleaners, cotton swabs and isopropyl alcohol. Once it was clean it smelled much better and I knew the walls were clean enough to make for a snug fit in the shank.
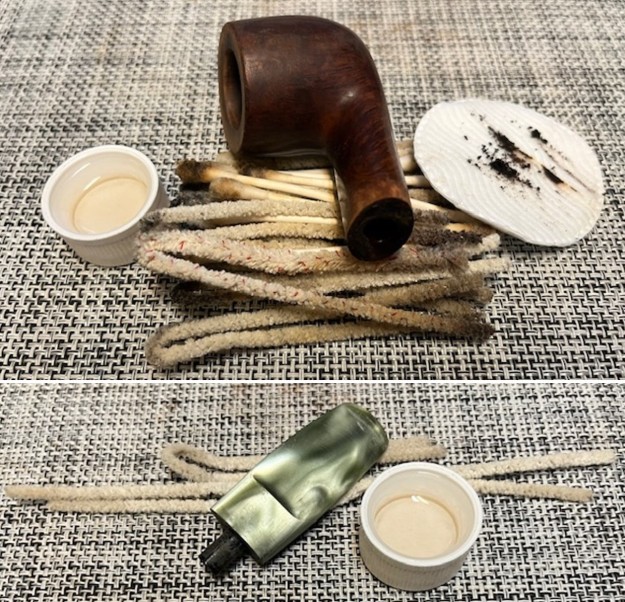 I scrubbed the externals of the bowl and shank with undiluted Murphy’s Oil Soap and a tooth brush to remove the grime in the finish. I rinsed the bowl off with warm water. I scrubbed the internals with a shank brush and soap to remove the grime inside. I was able to remove a lot of the lava on the rim top as well. The bowl was beginning to look much better at this point.
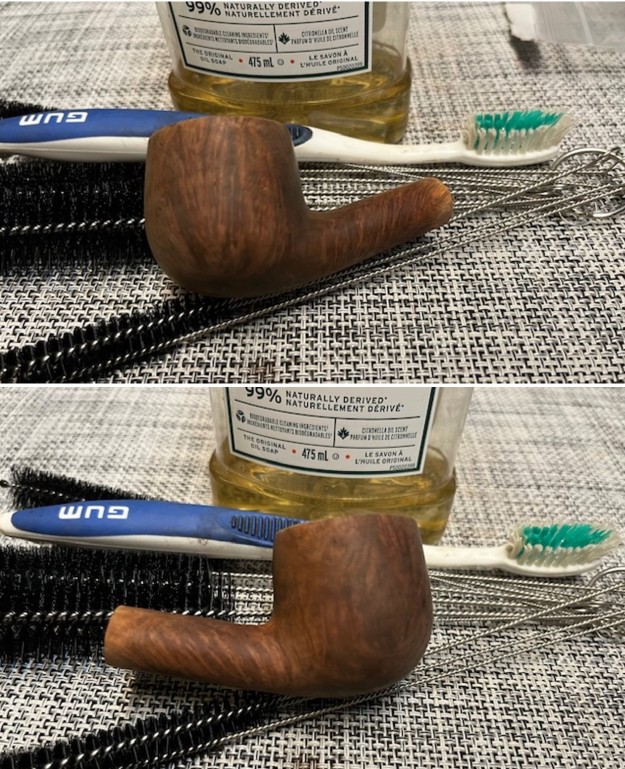
 I used a Maple Stain Pen to touch up the lighter areas on the shank end and on the rim top to bring the colour closer to the bowl sides.
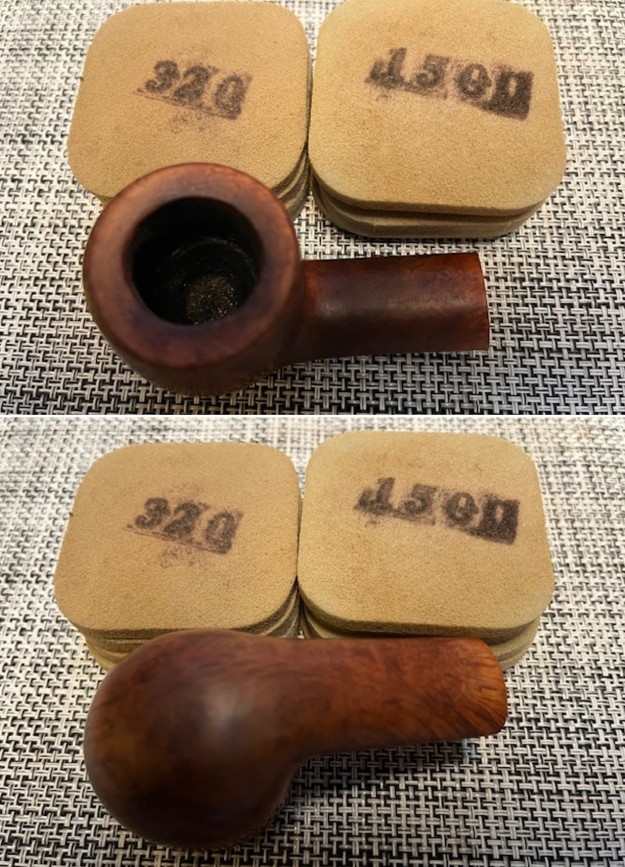
 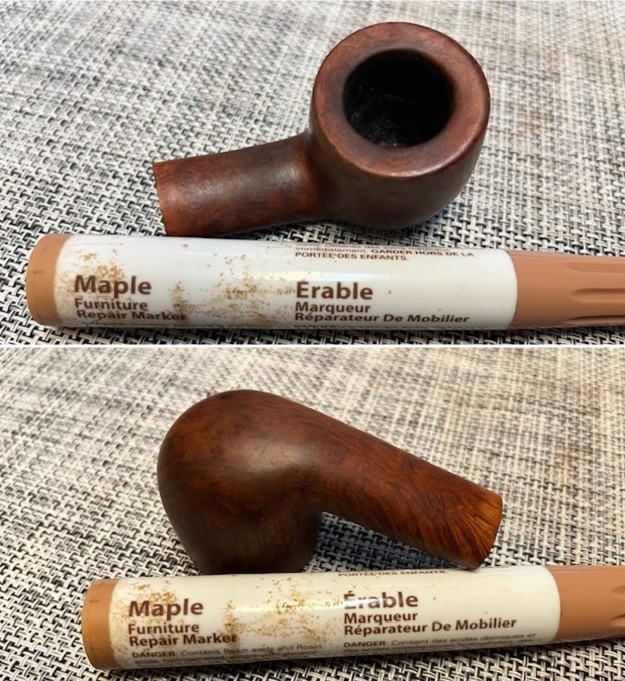 I sanded the bowl (rim top and shank) with sanding pads – sanding with 320-3500 grit pads and wiped down with a damp cloth after each sanding pad. The bowl began to take on a real shine. It was going to be a beautiful pipe.
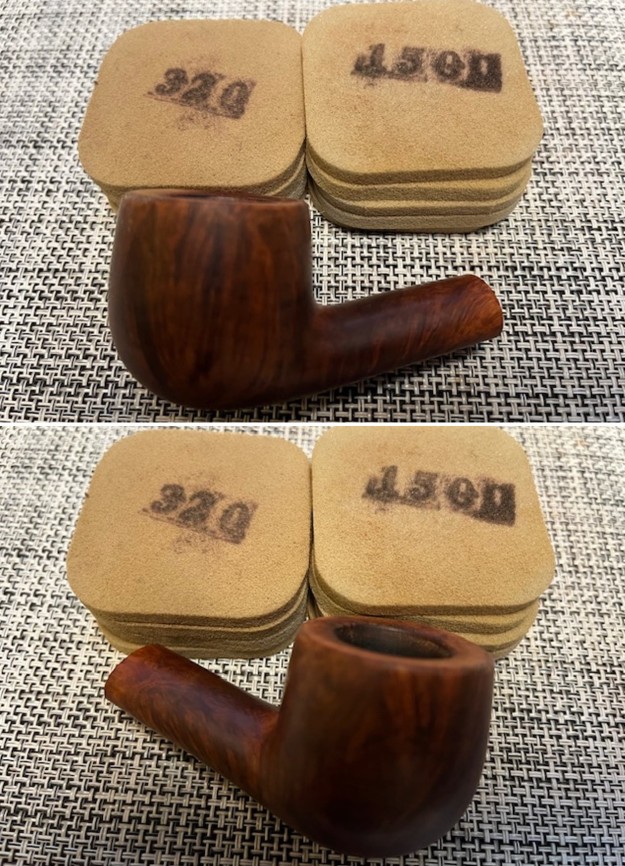
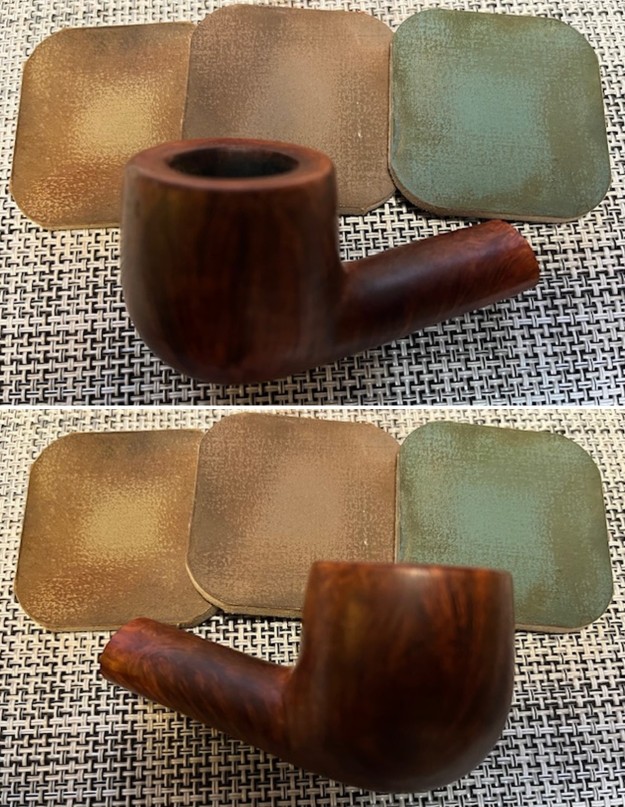
 I polished the briar with micromesh sanding pads – dry sanding with 1500-12000 grit pads and wiping the bowl down after each sanding pad. The grain really began to shine through. It is a beautiful pipe.
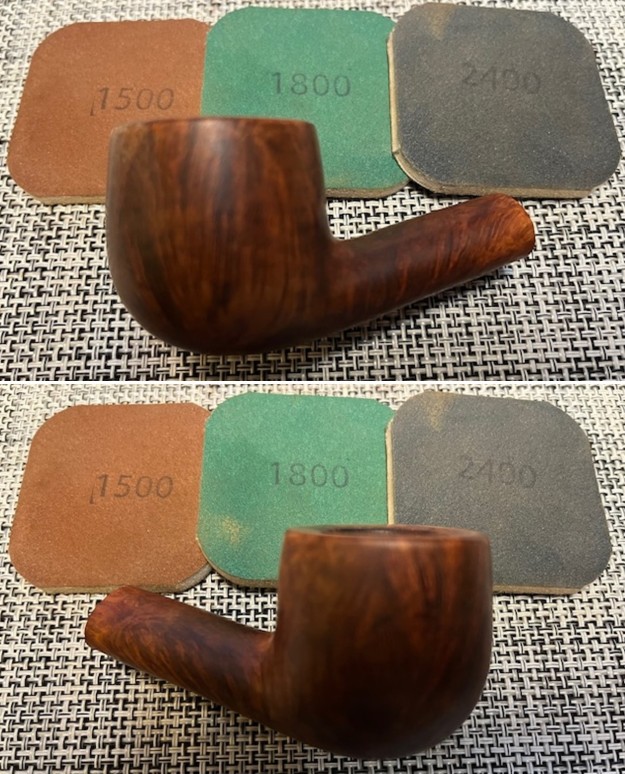

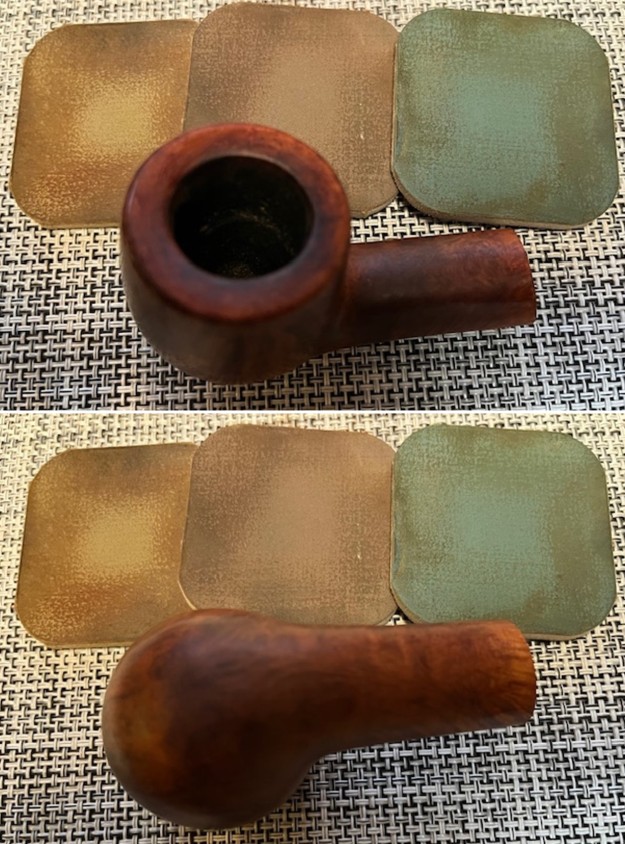

 I rubbed the bowl down with Before & After Restoration Balm. I worked it into the surface of the briar to clean, preserve and polish the wood. The product works to really give new life to the briar and in this case the briar looked much better.
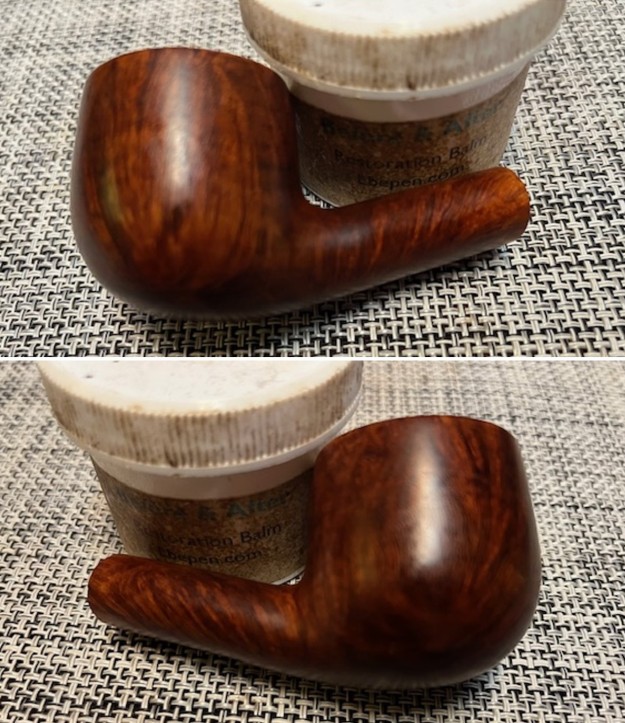

 I turned back to fitting the stem to the shank more smoothly. I put it on the shank and worked on it with a small file and a folded piece of 220 grit sandpaper to remove the excess. I put the stem in the shank repeatedly to check on the progress of the work on the stem. I knew at this point that I would also need to restain the shank end to match the bowl. . It looked much better.
 I sanded the shank end with 1500-12000 grit micromesh sanding pads to smooth out the light file marks and sanding scratches. I restained the shank end with a Cherry Stain Pen to match the rest of the bowl and shank.
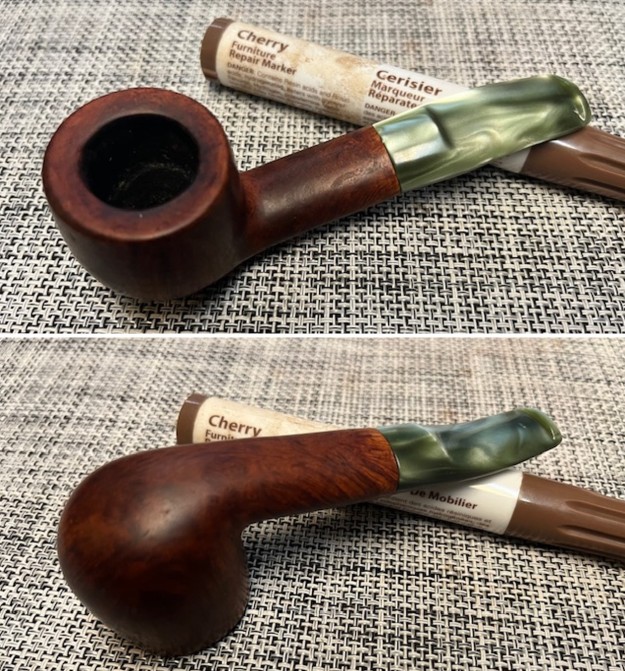 I liked the look of the new stem and fit to the shank was really nice. The flow of the shank to the stem was smooth with no high spots on the transition. It felt great in the hand and really looked good.
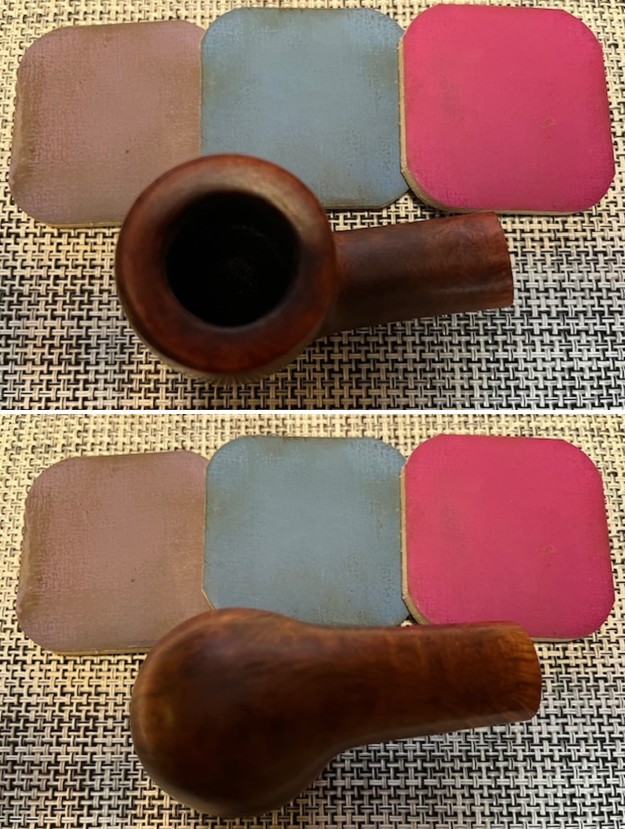
 The polishing of the rim top and inner edge brought the rim top colour to match the rest of the bowl. I worked some Before & After Restoration Balm into the surface of the briar with my fingertips to clean, enliven and protect the briar. I let the balm sit for 15 minutes and then buffed with a cotton cloth to raise the shine. The photos show the bowl at this point in the restoration process.
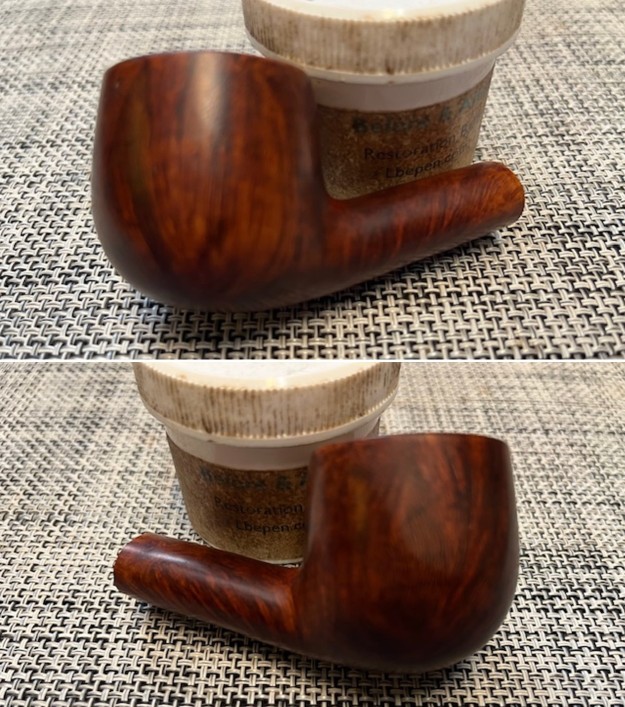

 I sanded out the scratches and marks in the stem surface with 320-3500 grit sanding pads. I wiped the stem down with a damp cloth after each sanding pad. It looked much better and really started to take on a shine.
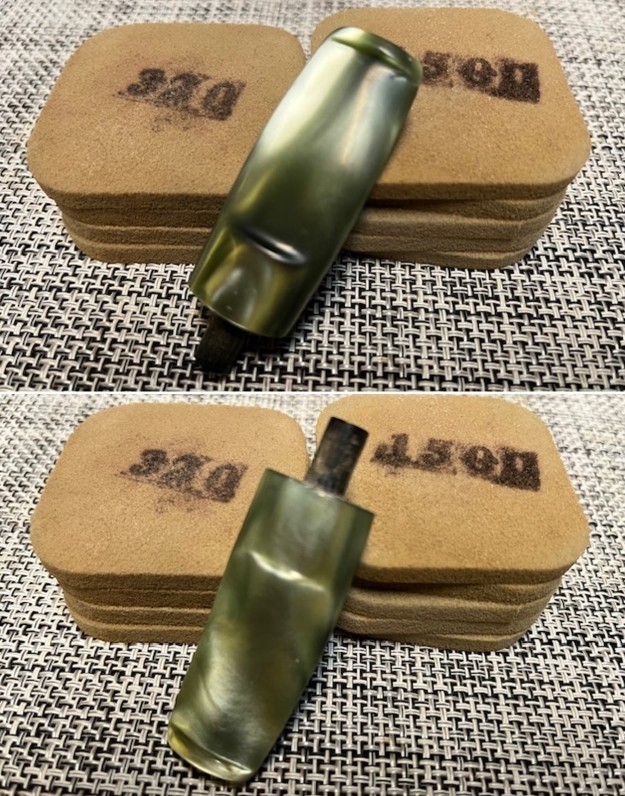 I polished the stem with micromesh sanding pads – wet sanding with 1500-12000 grit sanding pads. I wiped it down after each sanding pad with Obsidian Oil. I polished it with Before & After Pipe Stem Polish – both Fine and Extra Fine.
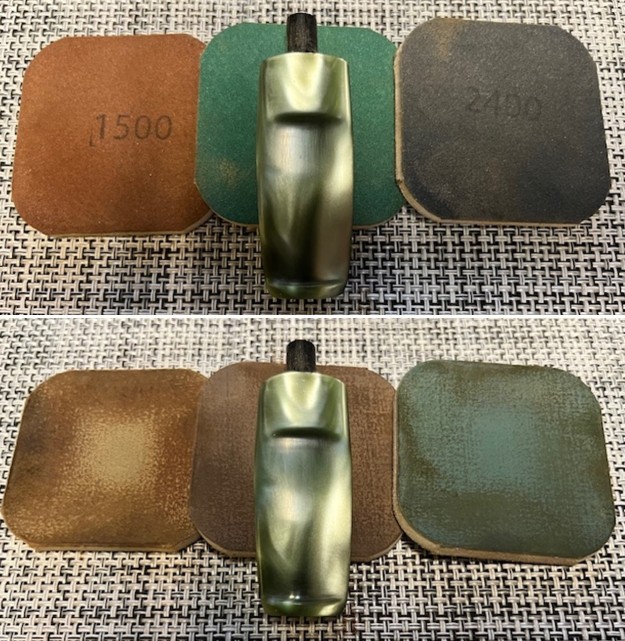
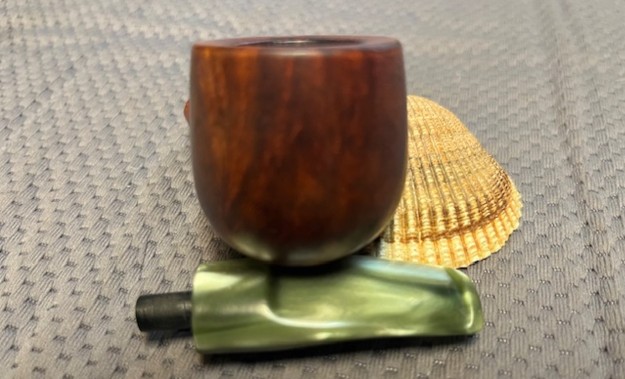
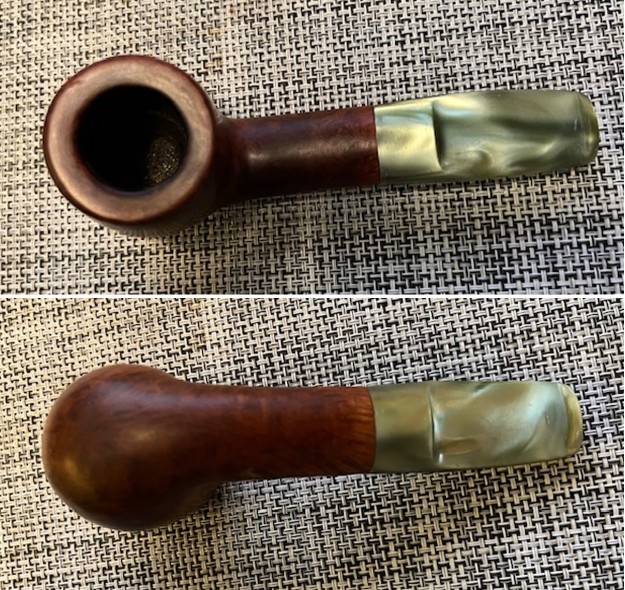
 I am excited to put the final touches on this interesting piece of Bellingham, Washington Pipe Shop history. It is a beautiful Sir Winston’s Own Bellingham WA pipe shop pipe. I put the pipe back together and buffed it with Blue Diamond on the buffing wheel. I gave the bowl and the stem multiple coats of carnauba wax. I hand buffed the pipe with a clean buffing pad to raise the shine. It is fun to see what the polished bowl looks like with beautiful grain on the bowl sides, top and bottom. The polished black vulcanite, newly fitted stem combined with the bowl to make a stunning pipe that brings back to my mind that 2018 visit to a no longer existent pipe shop. This smooth Sir Winston’s Own Author is great looking and the pipe feels great in my hand. It is light and well balanced. Have a look at it with the photos below. The dimensions are Length: 5 inches, Height: 1 ½ inches, Outside diameter of the bowl: 1 ¼ inches, Chamber diameter: ¾ of an inch. The weight of the pipe is 46 grams/1.62 ounces. It is another one that I will enjoy as I remember that beautiful day at Sir Winston’s Pipe Shop in Bellingham. I still have the Scottish Blend jarred and stored here that I purchased there in 2018. I am looking forward to that first smoke which may well be tomorrow morning. Thanks for walking through the restoration with me as I worked over this pipe. Thanks to each of you who are reading this blog.