Blog by Steve Laug
This is one of the Dunhill Shell Briar pipes that I sold earlier this year. It is a 196F/T Shell Billiard. Not too long ago I received an email from Bill the buyer of the pipe saying that there had been an accident and that the stem had broken off the pipe leaving the tenon in the shank. He was a bit forlorn in asking if it was repairable or not. I assured him that it could be fixed and told him to send it up to me in Vancouver. I had to laugh in that when it arrived it was in the original box that I had used to ship it to him – all the packing etc. was the same. Great use of the boxes. It will soon make its second trip to Bill. This is a well-traveled box and pipe – twice to the East Coast of the US from Canada and once back to me for repair. I put the pipe in queue as I have a large backlog of pipes to work on from several estates that the families are waiting on. I figured I would be able to slip into the work somewhere along the way.
Today was the day. I finished a lot of pipes lately so I felt ok about working on this one. I figured it would be pretty straight forward to pull the broken tenon and replace it. Boy was I wrong. The broken tenon was stuck in the shank. My usual tricks for pulling a broken tenon – a screw in the airway and wiggling it free – did not work. Even a trip to the freezer did not work. I had to resort to more serious tools. I got out my cordless drill and chucked up a series of drill bits to see if I could pull it that way. I have often found that in the process of drilling out the tenon it will stick to the bit and come out as I back out the drill. That did not happen on this pipe! I ended up working through the bits until I finally was finished and the mortise was smooth and clear of the old tenon.
 With the airway cleared in the mortise I measured it for a new tenon. Yet again another setback. I did not have any tenons that were the right diameter for the mortise! I chucked the PIMO tenon turning tool in my cordless drill and reduced the diameter of a threaded tenon replacement that I had in stock until it was the right diameter to fit the mortise. I tried to hold the tenon by hand and turn it but soon realized that did not work this time. I used a pair of needle nose pliers to hold it until the tenon was finished.
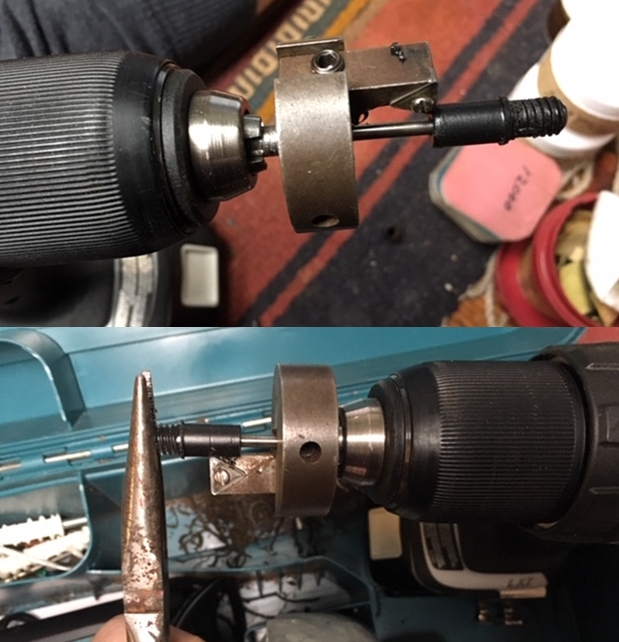 When I finished there was a small hip between the threaded portion and the smooth portion of the new tenon. I worked the tool back and forth to remove that. I also held a needle file against the hip while the tenon was spinning on the drill. It did not take too long to remedy that issue. The new tenon was almost ready to use. I would still need to reduce the diameter of the threaded portion before I could use it but it was good for the moment.
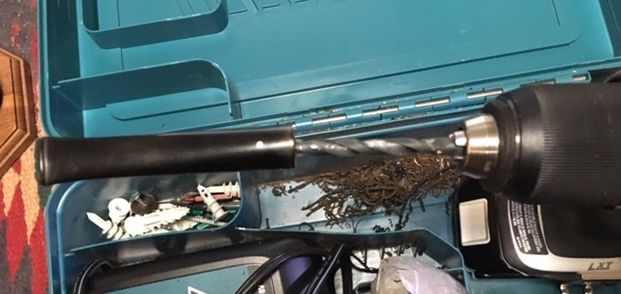
 I drilled out the airway in the stem to receive the new tenon. This is always a little tricky as you need to keep the stem absolutely straight so that you do not angle the airway. I always start with a bit slightly larger than the airway and work my way up to the size of the tenon insert. In this case I also needed to be careful not to drill the stem too deeply as the tape is quite long and it would be easy to ruin the stem.
 With the airway opened in the stem to take the threaded tenon end I used a tap to thread the airway inside the bowl. I had to open the airway a little more so I used a penknife to widen the diameter to take the tap. I used a Dremel with a sanding drum to reduce the diameter of the threaded portion of the new tenon until it could be screwed into the stem.
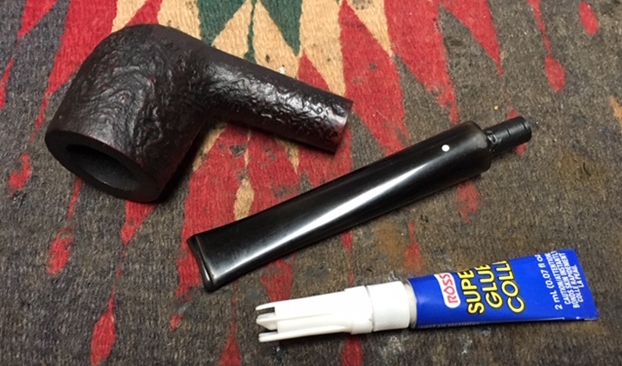
 I coated the threaded end of the tenon with super glue and turned it into the end of the stem. I pressed it completely in place against the table top so there was not a gap. I filled in the slight gap with some clear super glue and laid the stem aside to let the repair cure.
 When the glue cured I addressed some oxidation at the shank end of the stem. I sanded it with 400 grit wet dry sandpaper until the oxidation was removed from the stem surface. I wiped the stem down with Obsidian Oil and let it dry.
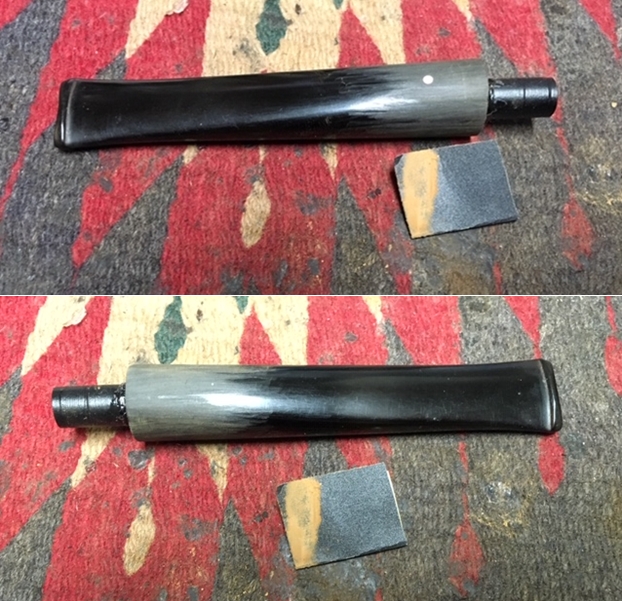 I polished the stem surface with micromesh sanding pads to bring back the shine to the vulcanite. I wet sanded it with 1500-2400 grit pads and dry sanded it with 3200-12000 grit pads. I rubbed it down with Obsidian Oil after each pad and a final coat after the 12000 grit pad.
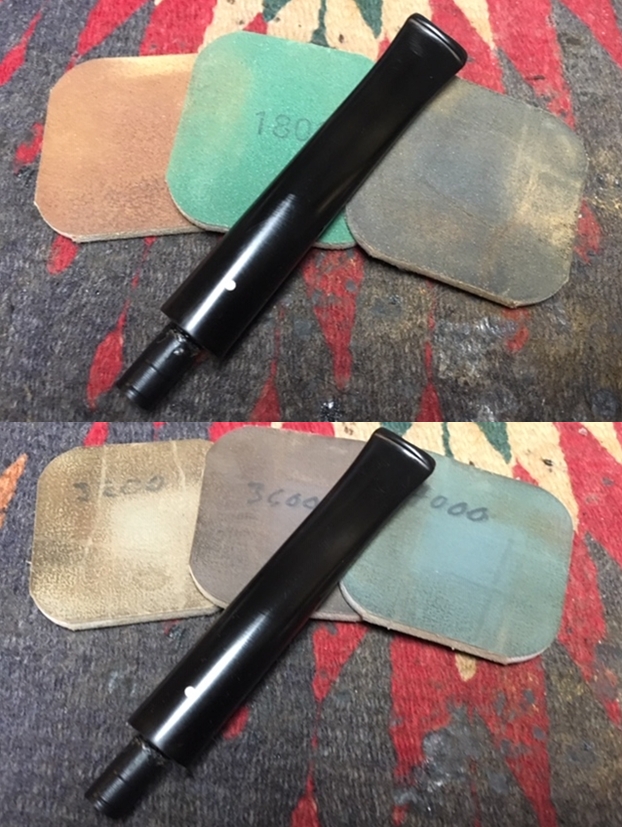
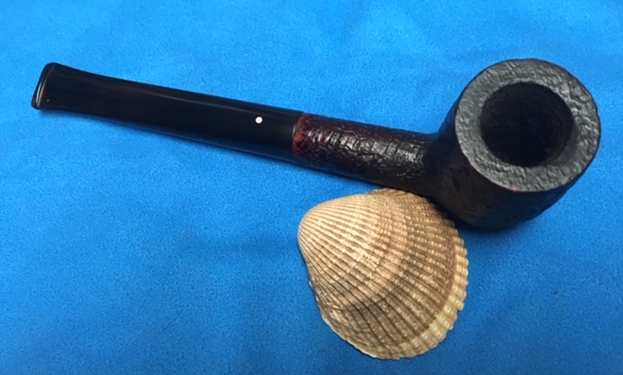
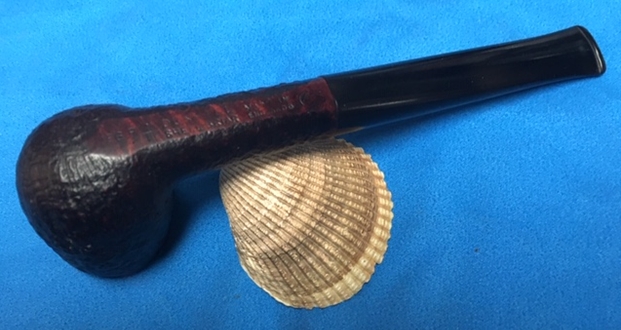
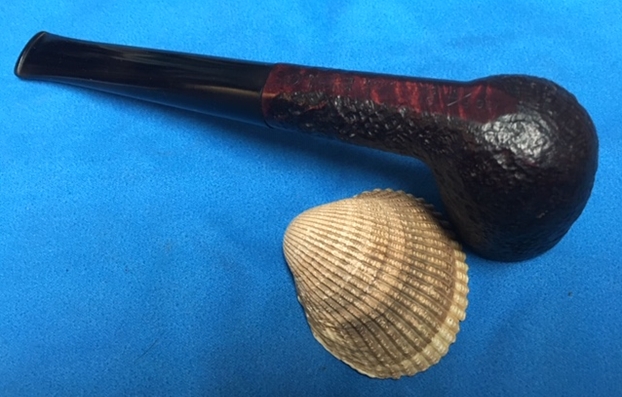
 I polished the stem with Blue Diamond on the buffing wheel and gave it several coats of carnauba wax. I gave the bowl several coats of Conservator’s Wax. I buffed the finished pipe with a clean buffing pad to raise the shine. The finished pipe is shown in the photos below and I think it came out looking pretty good. I just got back from the Post Office and sent it back to Bill. I look forward to seeing what he thinks once it is in hand once again. Thanks for reading this.