by Kenneth Lieblich
Next on the chopping block is a bent Dublin sitter from the Swiss luxury brand, Davidoff. I acquired it from an older gentleman in Vancouver. He said he got this (and the other pipes I got from him) “fifty years ago” – his words. That would put it in the early to mid-seventies, which fits with the style of the pipe and with Davidoff’s history in pipes.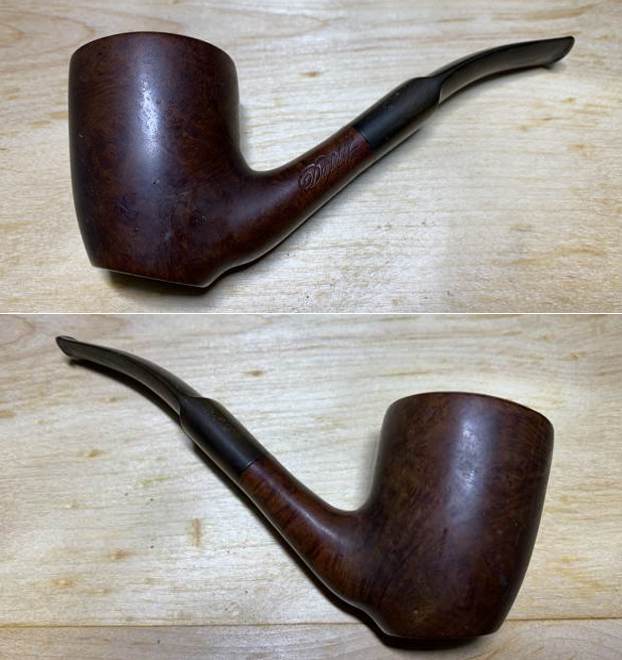 To be honest, I was more familiar with Davidoff in the context of high-end cigars than I was with their pipes per se, so I did some digging. First, I went to Pipedia. They paraphrase (and don’t quote exactly) from José Manuel Lopes book:
Davidoff started in 1911 as a family run tobacconist located in Geneva. Henri Davidoff, a Russian emigrant, was the founder. The shop was located in Geneva. His son, Zino Davidoff (1906-1994), concentrated on the tobacco business, starting in 1924, and revolutionized the conservation of quality cheroots throughout Europe. Davidoff became world famous, and the company was acquired in 1970 by the Oettinger group, and expanded into numerous accessories for men. For Zino, the pursuit of pleasure was a constant, two of his maxims being: “Take pleasure from everything in life, without excess” and “the pipe is a valuable companion, the essence of tranquility and must be smoked with respect”. Davidoff’s first pipes date from 1974 [emphasis mine] and were commissioned by various companies, notably Butz-Choquin and the Cuty-Fort Group. The brand offers 14 classic shapes, in three finishes and with acrylic stems. According to Pipedia, Davidoff has this to say on their website about their own (current) pipes:
Creation of the Davidoff Pipe entails a meticulous, detailed process performed by only the most skilled Italian pipemakers. This dedication is why the Davidoff Pipe upholds a standard of quality and design found in no other pipe in the world. Made of the finest and carefully selected briar, each Davidoff Pipe features a flawless, hand-finished bowl and perfectly fitted, hand-cut acrylic stem. The Davidoff Pipe is available in three beautiful designs and finishes — sandblasted black, red brilliant and natural light brown. I also had a look at Pipephil, who confirmed that Davidoff pipes were carved by pipemakers of the Cuty-Fort group (Chacom, Jeantet, Vuillard, Jean Lacroix, Ropp, etc.).
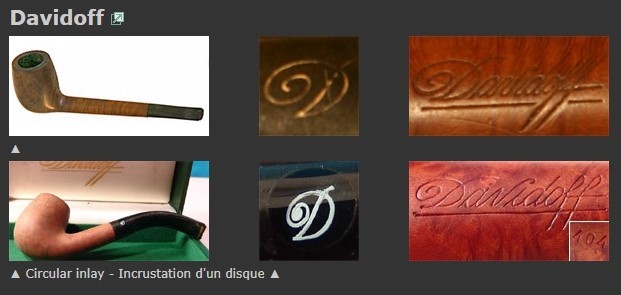 Davidoff is big enough and famous enough to be known outside the world of pipes. It has more than one website of its own, given that the company has been split up into different ranges. It also has a Wikipedia page, which I recommend reading: https://en.wikipedia.org/wiki/Davidoff. I quote just a bit here:
Davidoff is a Swiss premium brand of cigars, cigarettes and smoker’s accessories. The Davidoff cigarette brand has been owned by Imperial Brands after purchasing it in 2006. The non-cigarette portion of the Davidoff tobacco brand is owned by Oettinger Davidoff AG, which is based in Basel, Switzerland. Oettinger Davidoff AG manufactures a broad portfolio of cigars, cigarillos, pipe tobaccos and smoker’s accessories under the brands Davidoff, Camacho and Zino Platinum.
And this little nugget:
In 1972, the first Davidoff pipe tobaccos were released.
Taking all this information into account, the gentleman from whom I acquired this pipe must have purchased it right at the start of Davidoff’s production of pipes. This makes it an interesting piece of pipe history. Furthermore, it was possibly made by Butz-Choquin. I say only “possibly”, as I have some reservations about the BC connection.
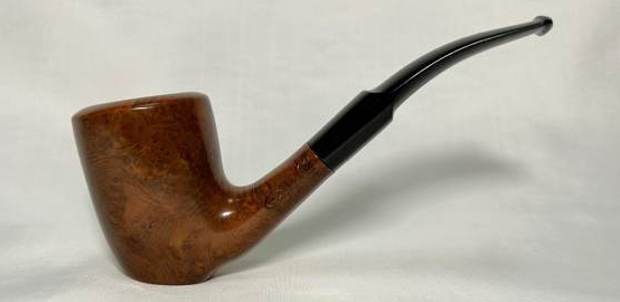
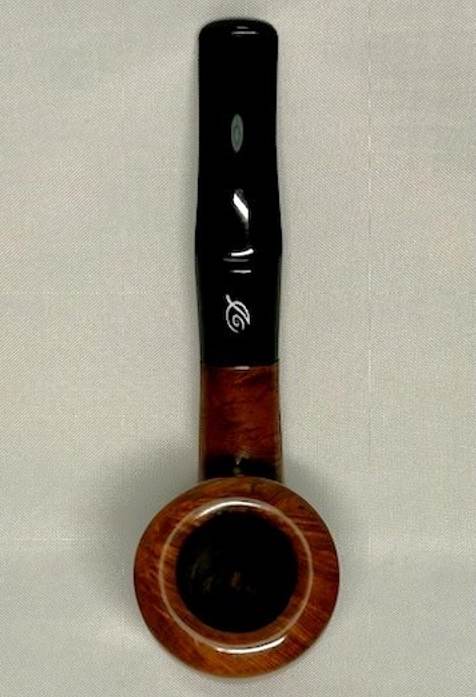
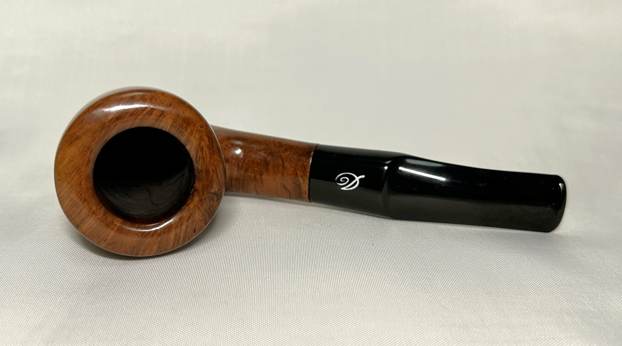
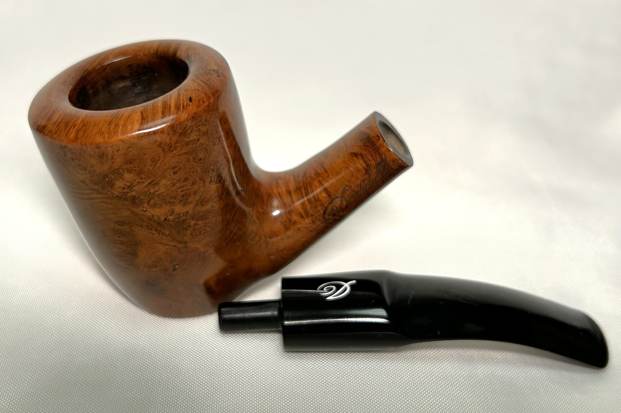
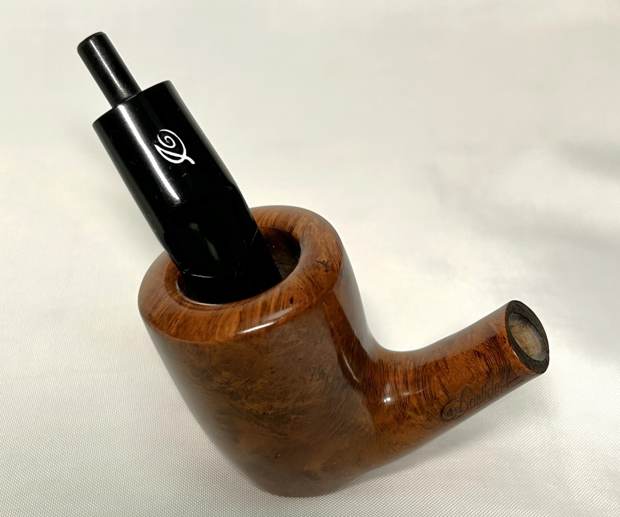
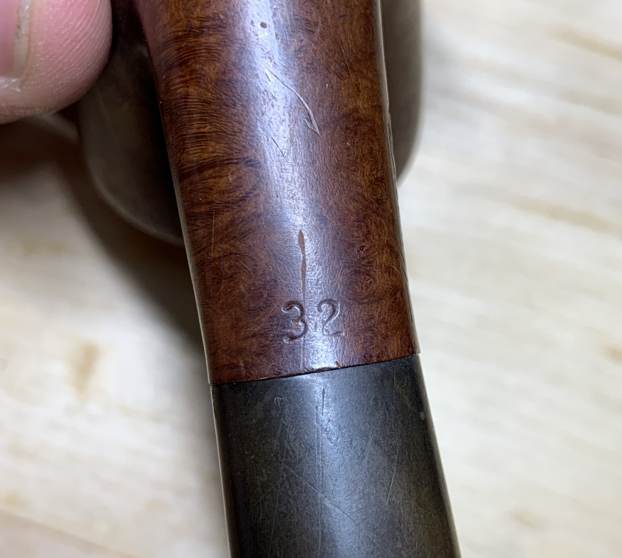
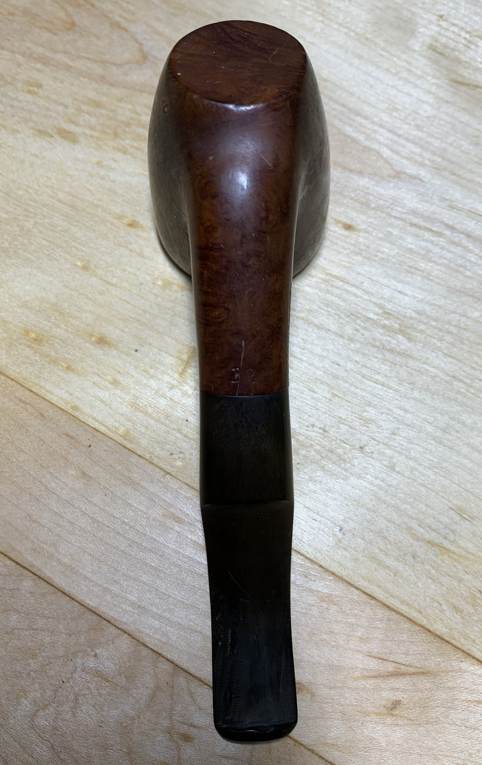
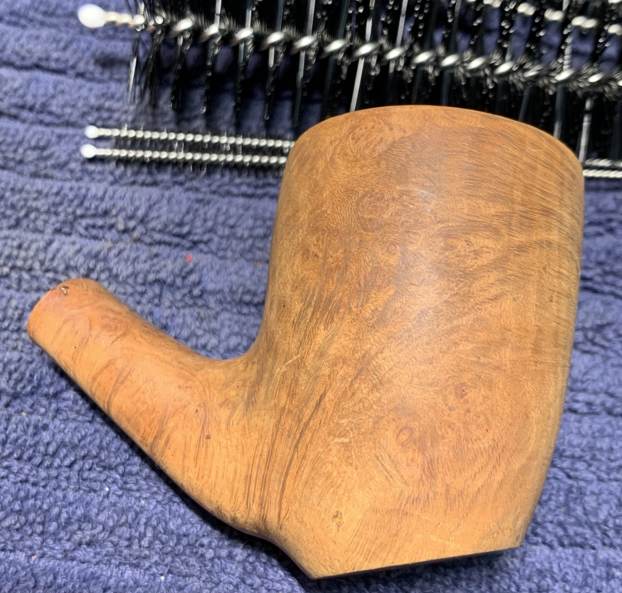
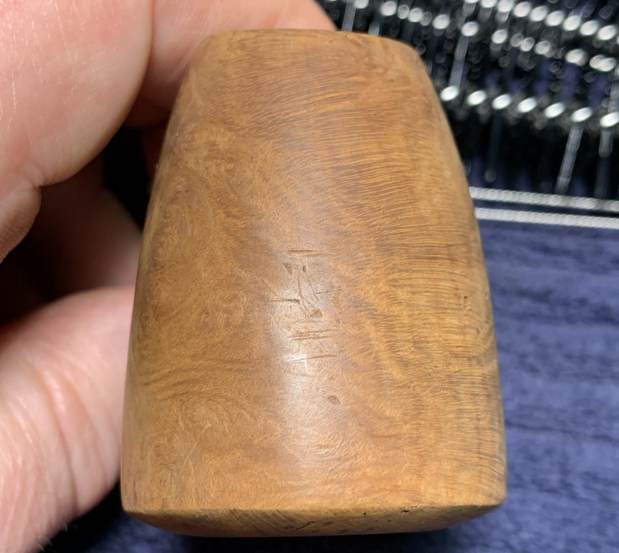
Anyway, let’s take a closer look at the pipe – and it’s a real beauty. The left side of the shank has the word “Davidoff”. On the underside of the shank reads the number “32”, and the stem has the stylized “D” of the Davidoff company.
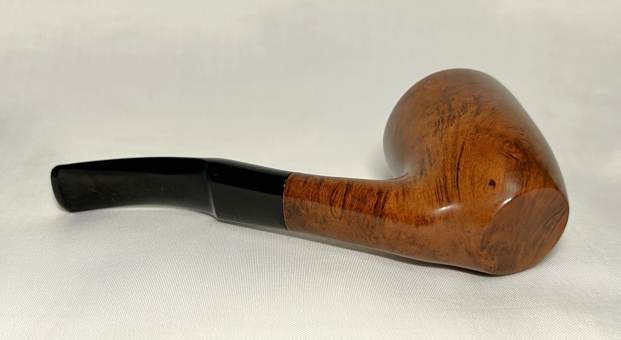
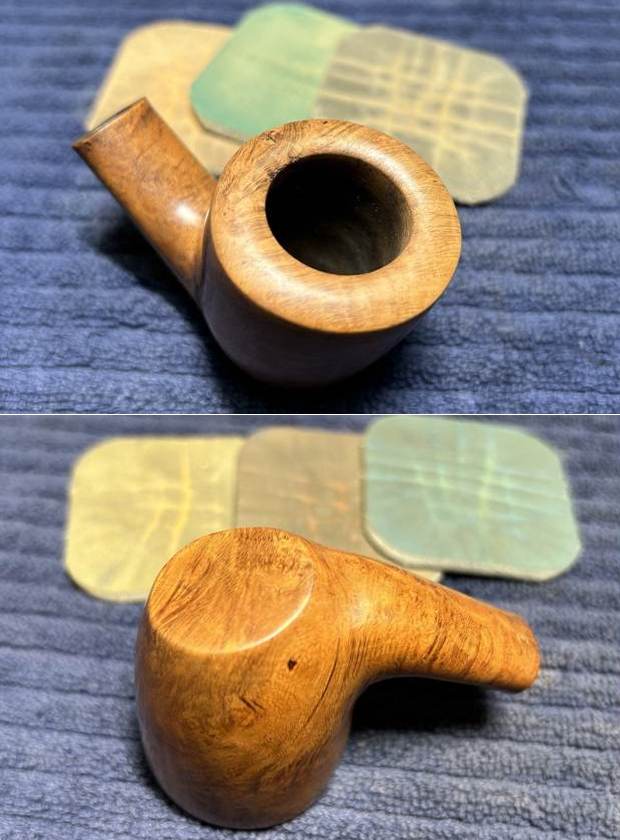
 Overall, the state of the pipe was good. It had clearly been sitting around for years and showed signs of wear and tear, but nothing major. The stem had some tooth dents and some kind of scraping, as if someone had tried to clean it in the past and done more harm than good. The button was dented too. This pipe must have been a great smoker and well-loved. It had some bangs and dents, but most of the damage was on the rim, including a notable gouge.
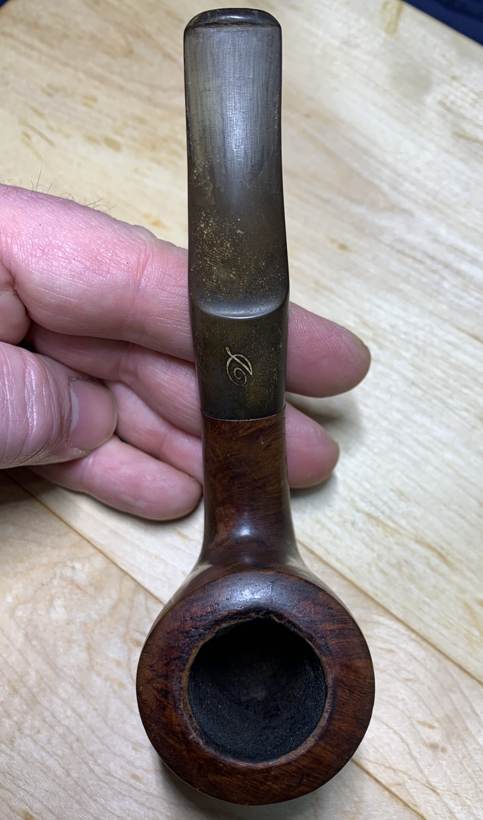
 The stem was first up. I wiped the outside down with Murphy’s Oil Soap on some cotton pads. I also took a BIC lighter and ‘painted’ the stem with its flame to lift the few bite marks and dents. Then I cleaned out the inside with pipe cleaners and lemon-infused isopropyl alcohol.
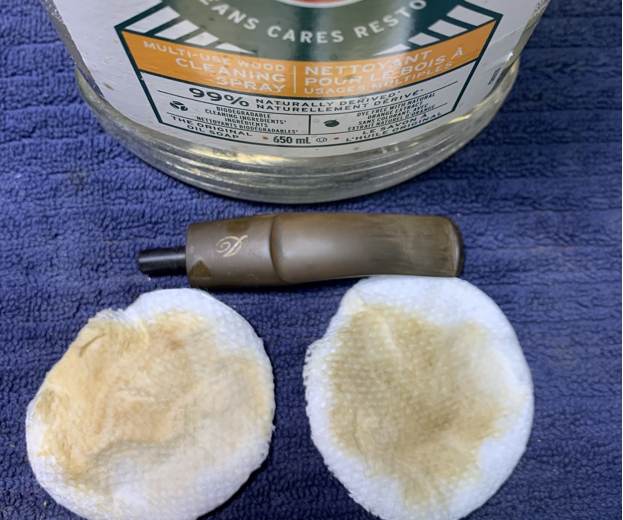
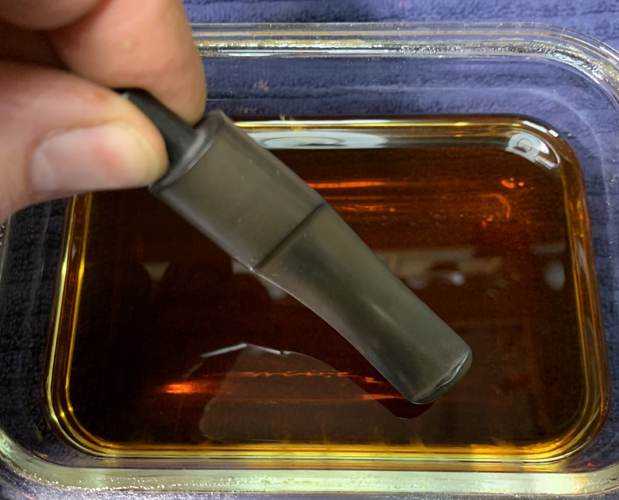
 After that, I wiped down the stem with SoftScrub cleaner to remove surface oxidation. Once this process was done, the stem went for an overnight soak in the Pipe Stem Oxidation Remover. This allows me to clean the oxidation off in a couple of ways: by applying a mild cleaner to the surface and sanding the stem. The next day, I used SoftScrub again with some cotton rounds and more oxidation came off.
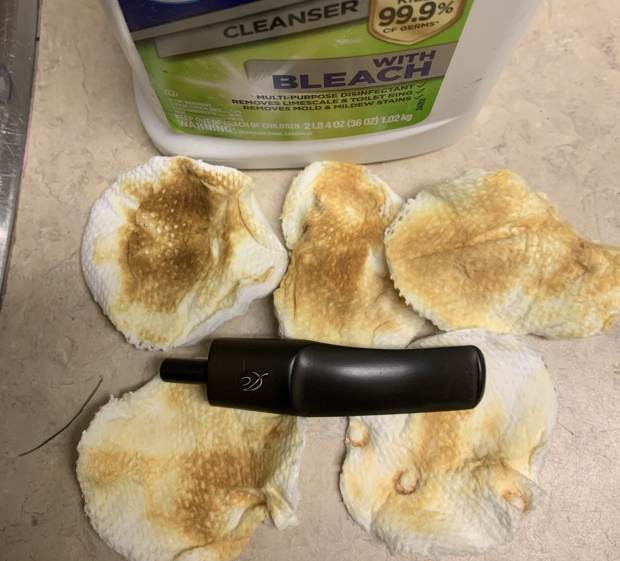
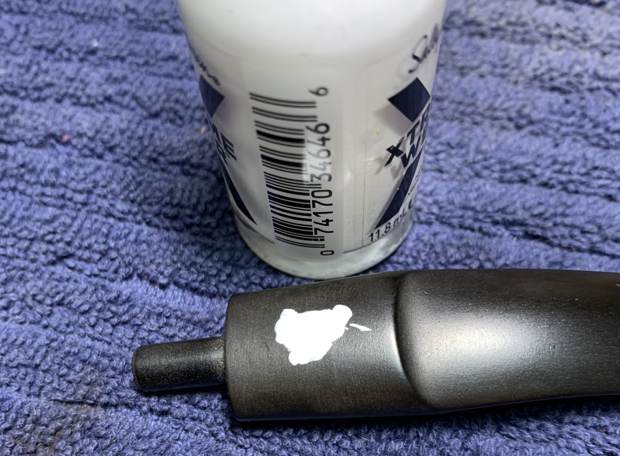
 After this, I built up the dents on the stem with black cyanoacrylate adhesive and let the repairs fully cure. I used some nail polish to restore the logo on the stem. I painted the area carefully and let it set before proceeding.
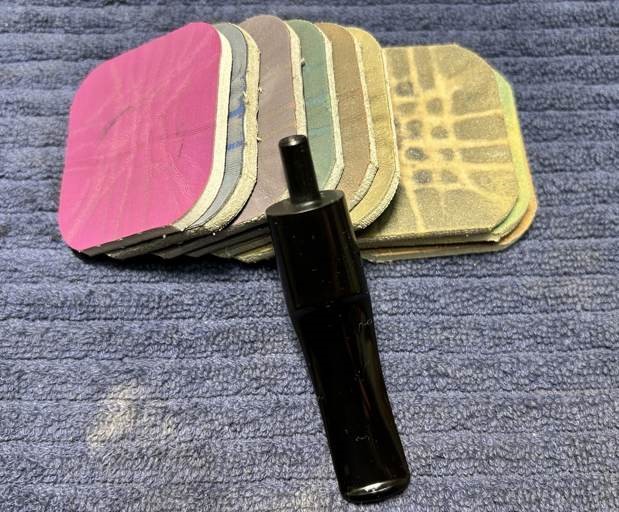
 I then sanded the adhesive down – first with a small file – then with 220- and 400-grit sandpapers to meld seamlessly into the stem. I then used all nine Micromesh pads (1,500 through 12,000 grit) to bring out the lovely black lustre on the stem. I also used Obsidian Pipe Stem Oil in between each pad scrubbing.
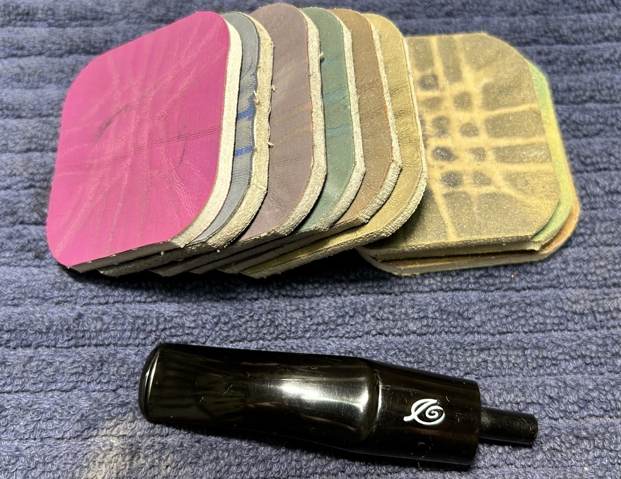
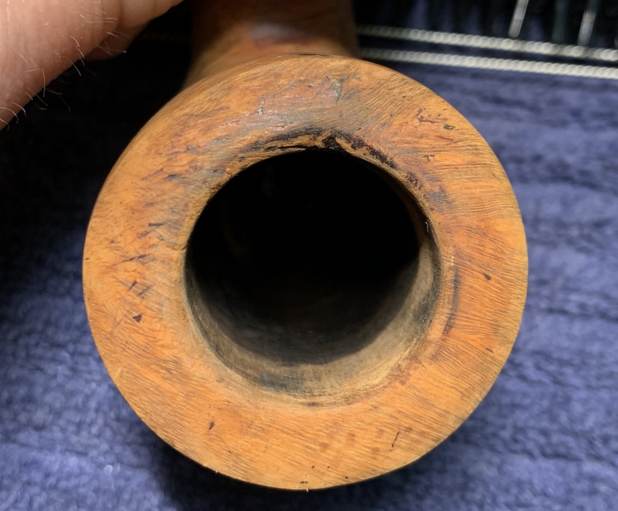
 Moving on to the stummel, I started by reaming out the bowl. I used the PipNet Reamer to remove the built-up cake and followed that with 220-grit sandpaper taped to a dowel to eliminate as much as I could. I took the chamber down to bare briar, as I wanted to ensure there were no hidden flaws in the wall. Fortunately, there were none. Due to the damage on the inside edge of the rim, I took some 220-grit sandpaper and tried to smooth some of that out too.
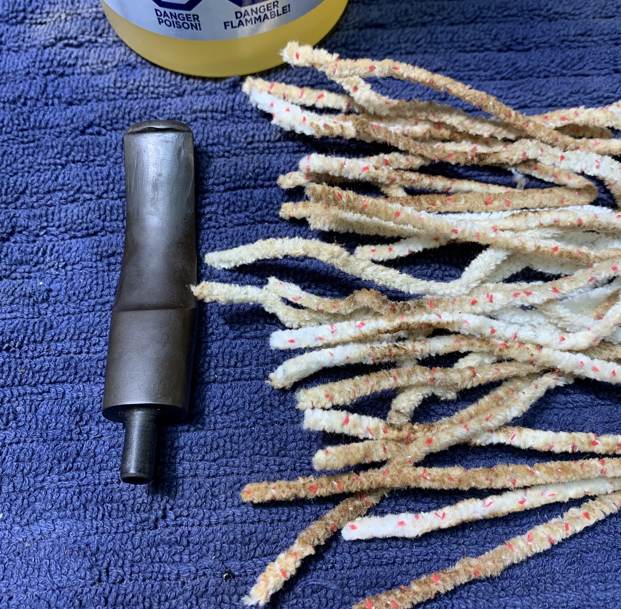
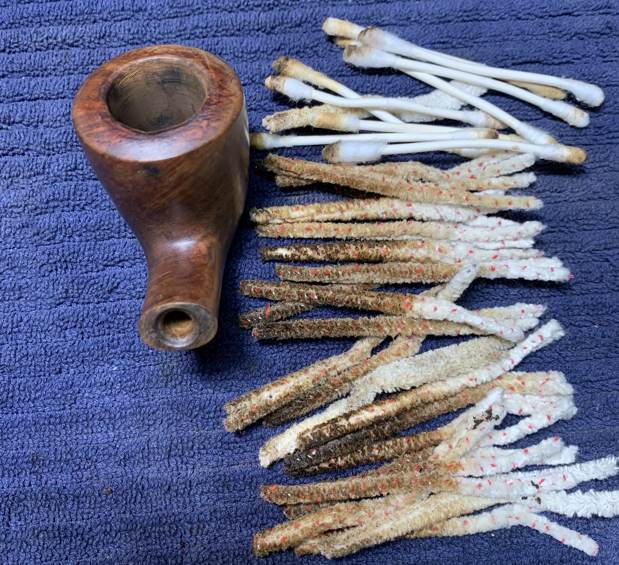
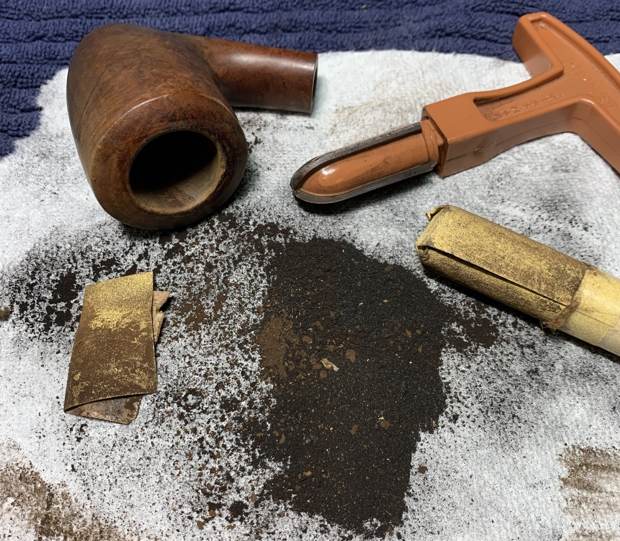 Down in the shank, I noticed it was especially grungy, so I took a dental tool and dislodged some chunks of debris. After dealing with that mess, I proceeded to clean out the insides of the shank with Q-tips, pipe cleaners, and lemon-infused isopropyl alcohol. It was pretty darn dirty and it took a fair amount of cotton to get it clean. I followed that up by cleaning the insides with some dish soap and tube brushes. I used cotton rounds and some Murphy’s Oil Soap to scrub the outside of the stummel and a toothbrush with Murphy’s for the lava on the rim of the pipe.
 I decided to de-ghost the pipe to remove any lingering smells of the past. I thrust cotton balls into the bowl and the shank and saturated them with 99% isopropyl alcohol. I let the stummel sit overnight. This caused any remaining oils, tars and smells to leach out into the cotton. The bowl was nice and clean after this.
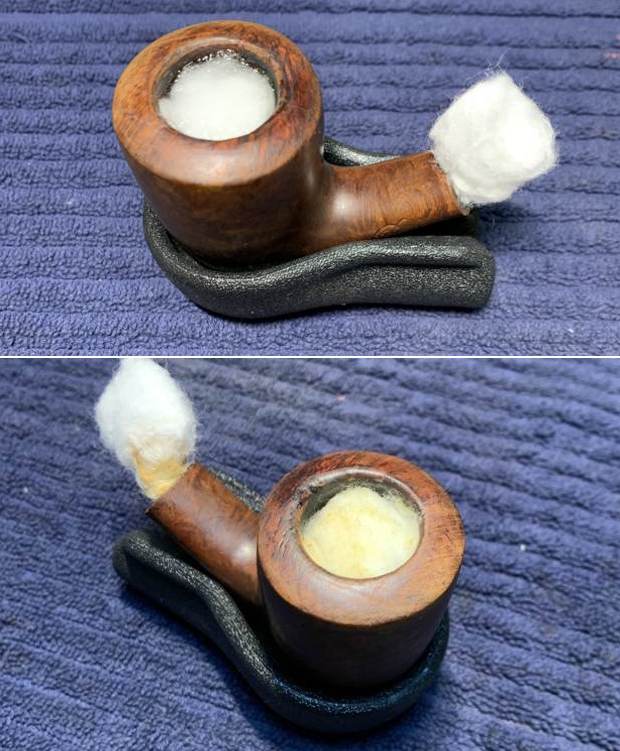 I used cotton rounds and some Murphy’s Oil Soap to scrub the outside of the stummel and a toothbrush with Murphy’s for the lava on the rim of the pipe. I followed that up by cleaning the insides with some dish soap and tube brushes.
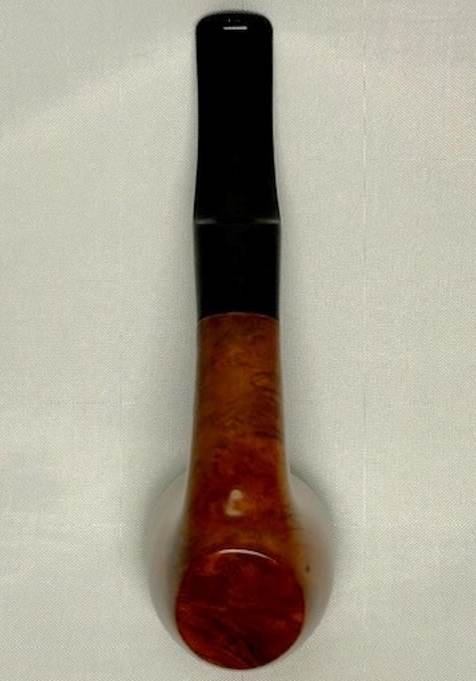
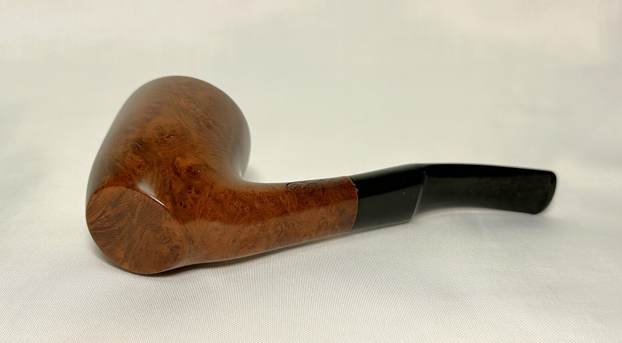
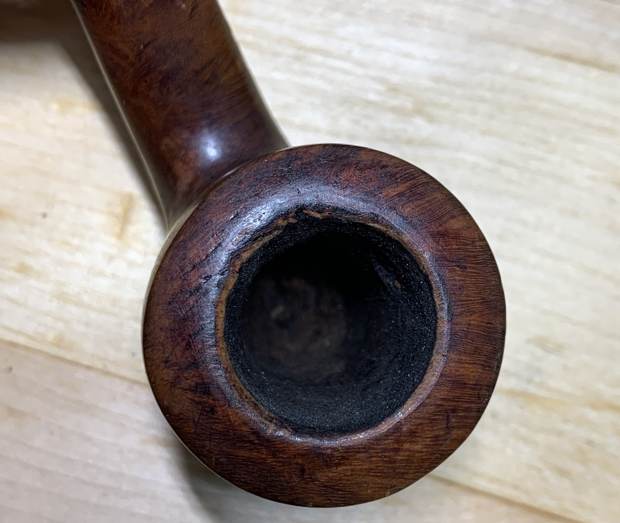
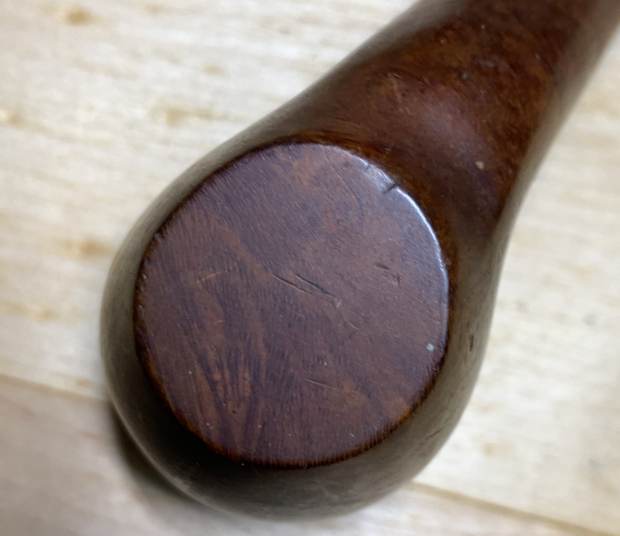
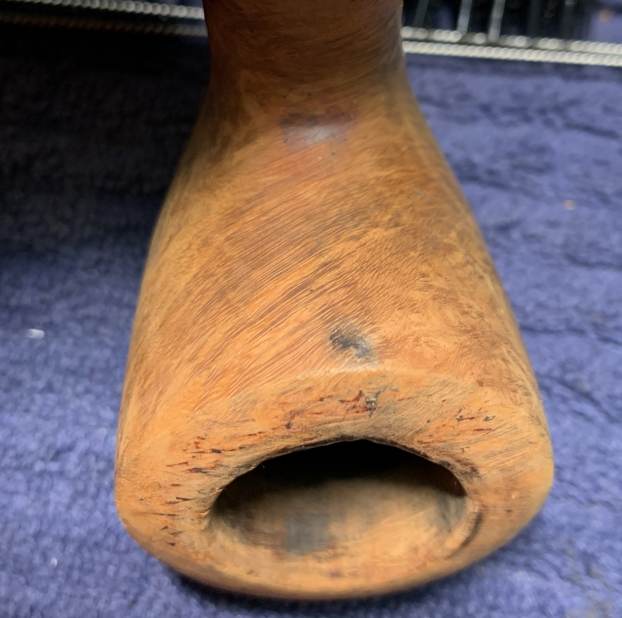
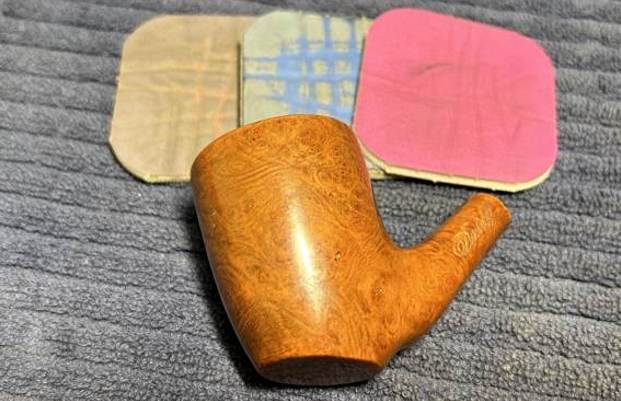
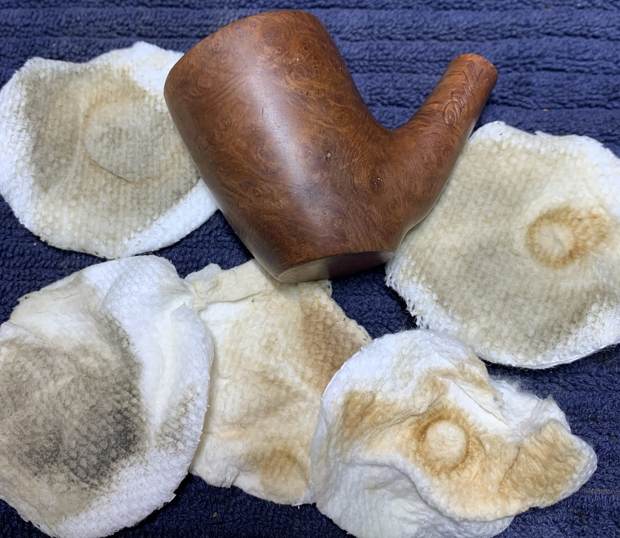 Now with the stummel nice and clean, I could do a closer inspection of the pipe’s problems. In this image, you can see a couple of stains or burns on the front side of the stummel. Those would need to be dealt with. On the back, some scratches needed addressing. Again, back to the rim, there was some light burning and a notable gouge that I’d have to fill in.
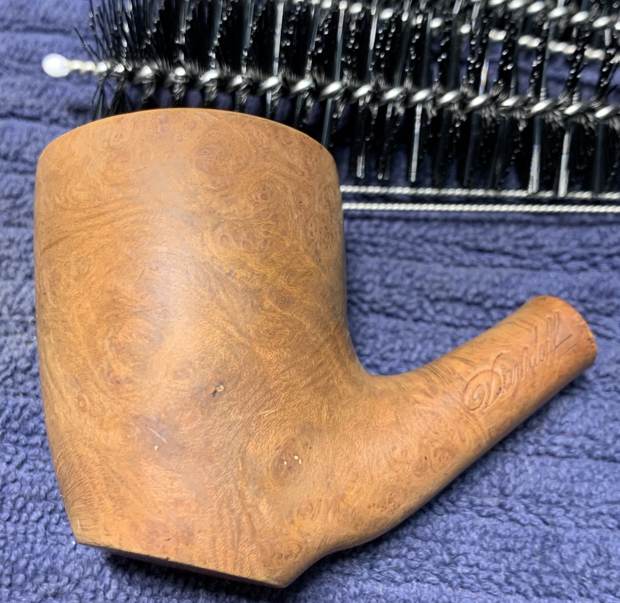
 Having completed that, I was able to address the small nicks on the bowl. I dug out my iron and a damp cloth to try to raise the nicks. The hot and moist steam can often cause the wood to swell slightly and return to shape. To my joy, this worked wonderfully. The repair was not perfect, but the remaining scratches would be improved by sanding.
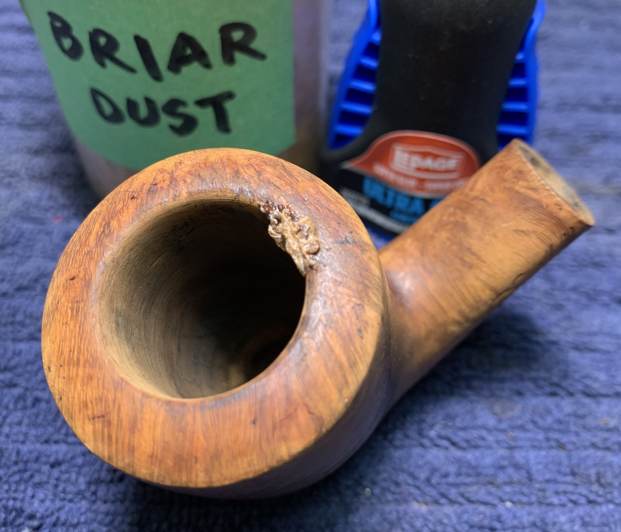
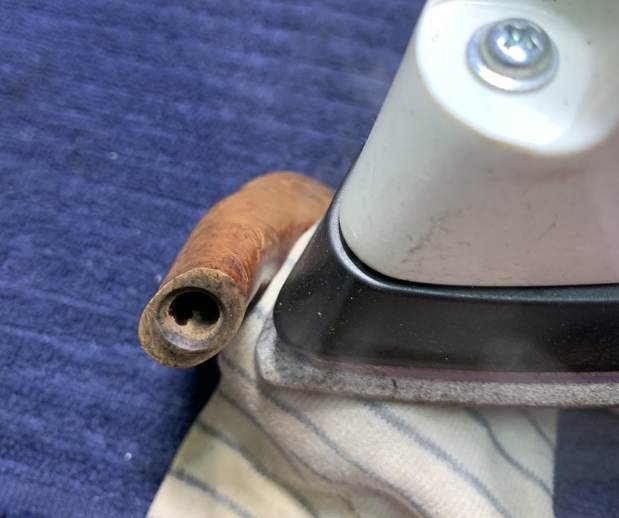 A few tiny fills were addressed with cyanoacrylate. For the gouge on the inside edge of the rim, I made a mixture of briar dust and CA glue and applied it. This also came out well.
 I took a solid wooden sphere, wrapped a piece of 220-grit sandpaper around it, and sanded the inner side of the chamber. This achieved two things: first, it removed some of the burn marks on the inner edge of the rim; and second (and more importantly), the motion of the sphere gradually returned the edge to a perfect circle. I took quite a bit of time to ensure that the crown of the rim was maintained in its shape, and also beautified. Finally, I used all nine micromesh pads to smooth and polish it up.
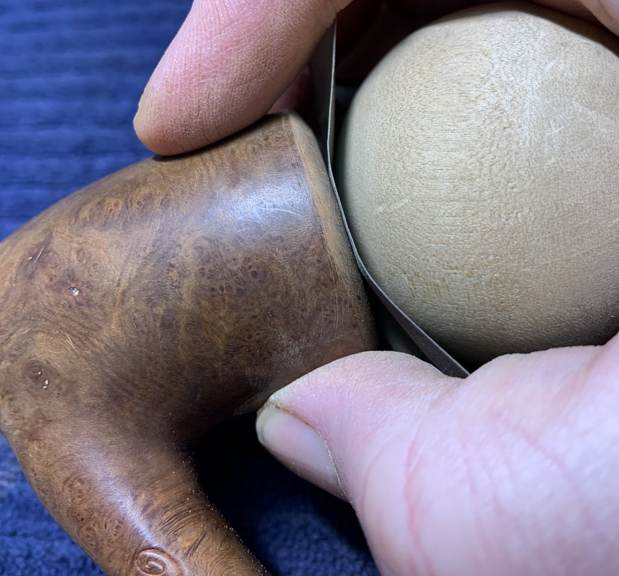
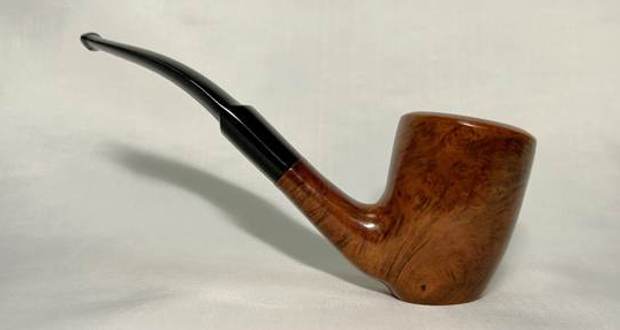
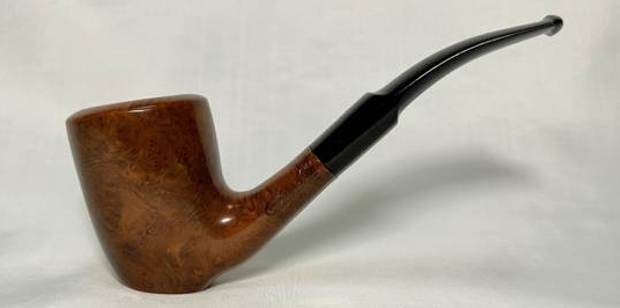
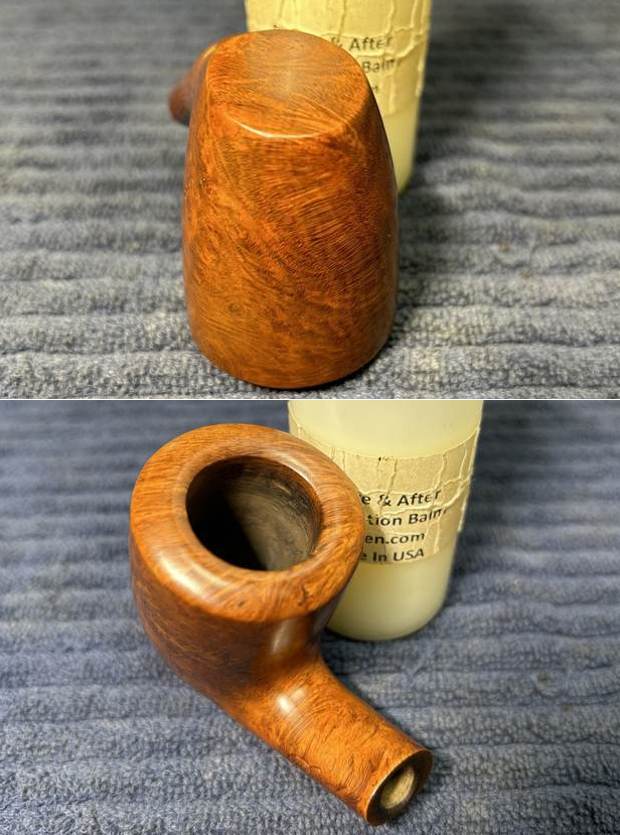
 After that, a light application of Before & After Restoration Balm brought out the best in the stummel’s grain. This is a very elegant pipe. A dose of White Diamond and a few coats of carnauba wax were applied with my bench polisher and – wow – we have a real looker!
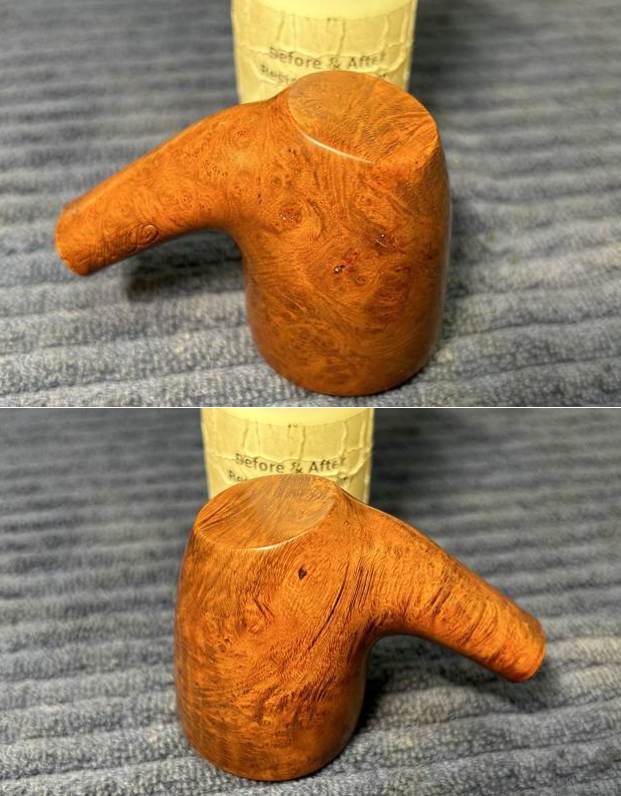
 This Davidoff looks magnificent again and is ready to be enjoyed again by the next owner! I am pleased to announce that this pipe is for sale! If you are interested in acquiring it for your collection, please have a look in the “Various Makers” pipe section of the store here on Steve’s website. You can also email me directly at kenneth@knightsofthepipe.com. The approximate dimensions of the pipe are as follows: length 5 in. (1247 mm); height 2⅛ in. (54 mm); bowl diameter 1½ in. (38 mm); chamber diameter ¾ in. (20 mm). The weight of the pipe is 1⅜ oz. (41 g). I hope you enjoyed reading the story of this pipe’s restoration as much as I did restoring it. If you are interested in more of my work, please follow me here on Steve’s website or send me an email. Thank you very much for reading and, as always, I welcome and encourage your comments.