Blog by Paresh Despande
I had been working on a pair of WDC pipes that came in a beautiful well preserved Presentation case. I have completed researching and refurbishing the first pipe, a straight Bulldog. Though I had worked on both these pipes simultaneously, I have done the write up in two parts.
For detailed information on the brand and other general information about the pipe and material used here, please read PART I of this series.
PART II: – BENT BULLDOG
Initial Visual Inspection
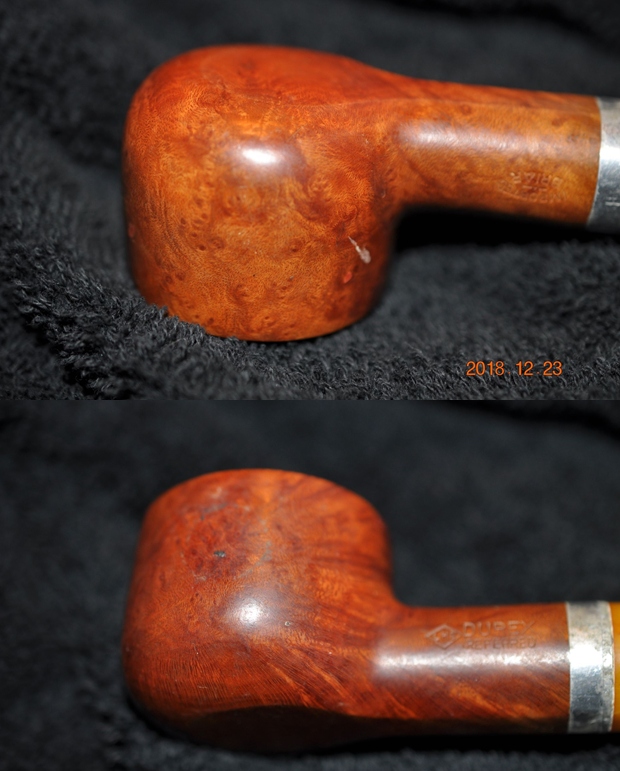
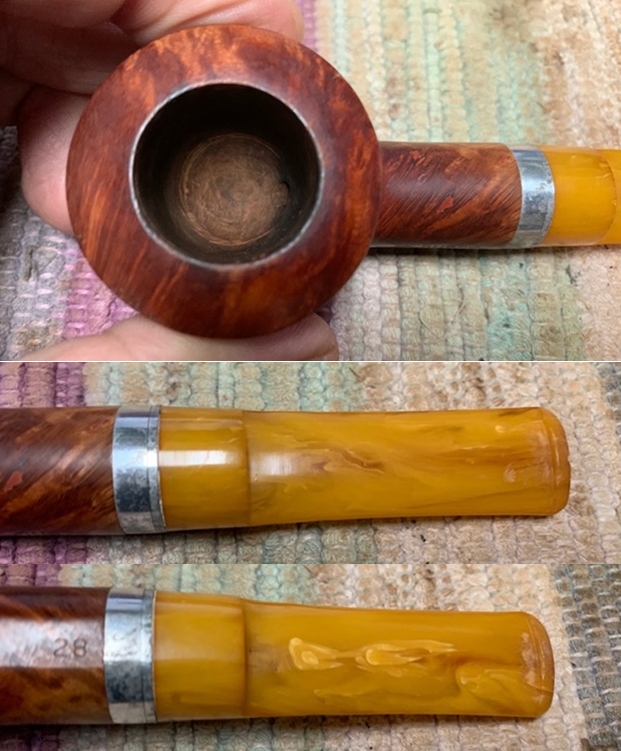
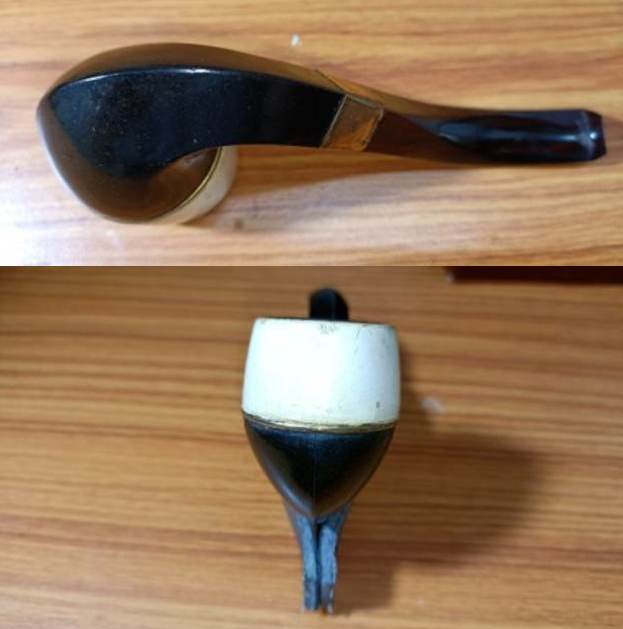
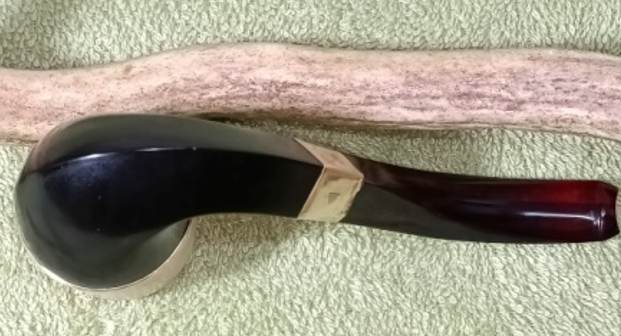
The condition of the pipe points to the fact that this pipe has seen significantly more use than the straight Bulldog. There is a thick cake in the chamber with lava overflow over the rim top surface. The base and shank shows heavy accumulation of tars and crud. The brass rim top cover over the Bakelite base/ shank is also covered in dried oils and tars. The Bakelite shank is dull and covered in completely dried out dirt and grime. The brass shank band at the shank end shows signs of wear but not badly damaged. The Redmanol stem is dull and lackluster with a few tooth indentations on either surface in the bite zone. All said, the condition of the pipe is not bad at all.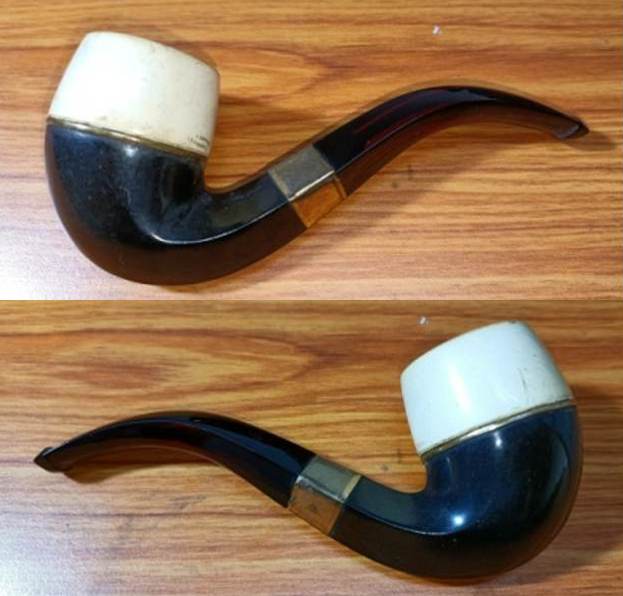
 Detailed Inspection
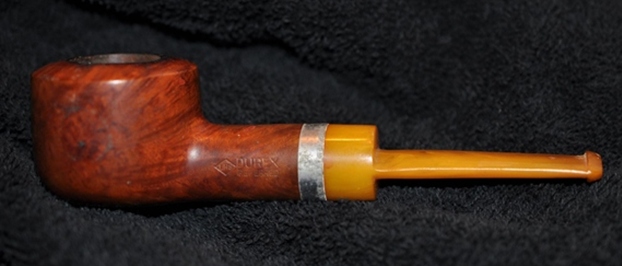
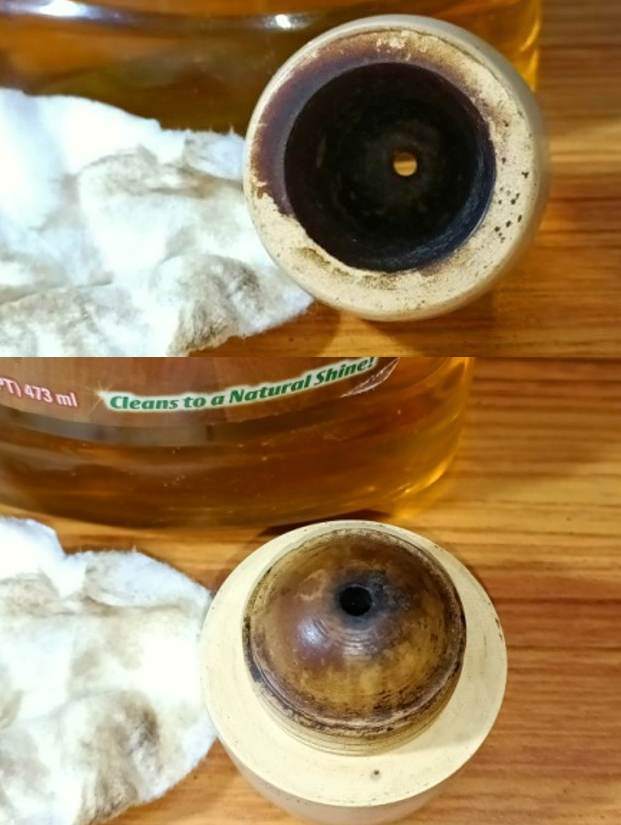
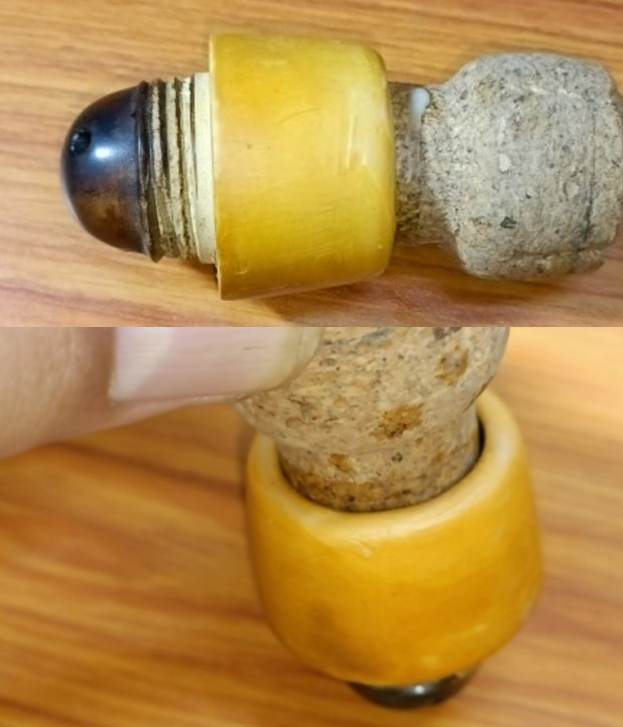
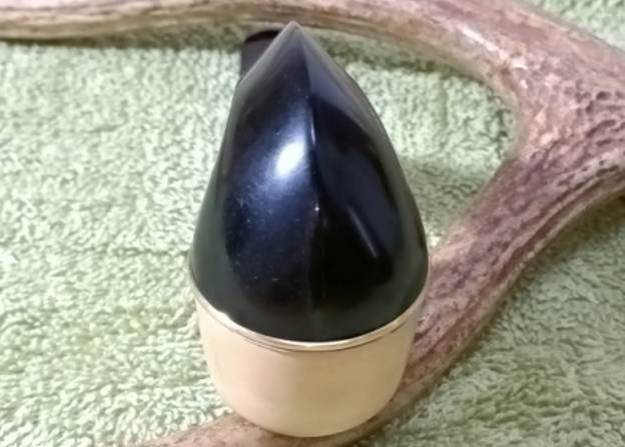
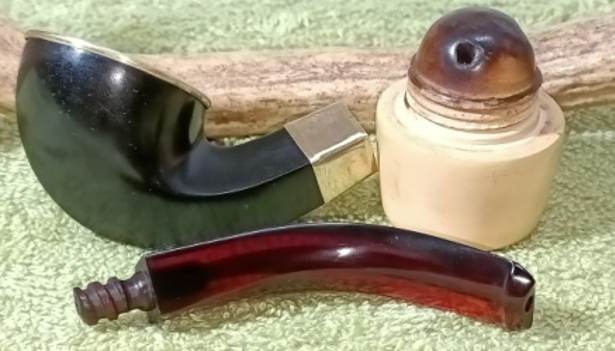
The three parts of the pipe are as shown below. The condition of the short threaded meerschaum bowl, filthy Bakelite shank and the bent Redmanol stem with threaded tenon all point to heavy use.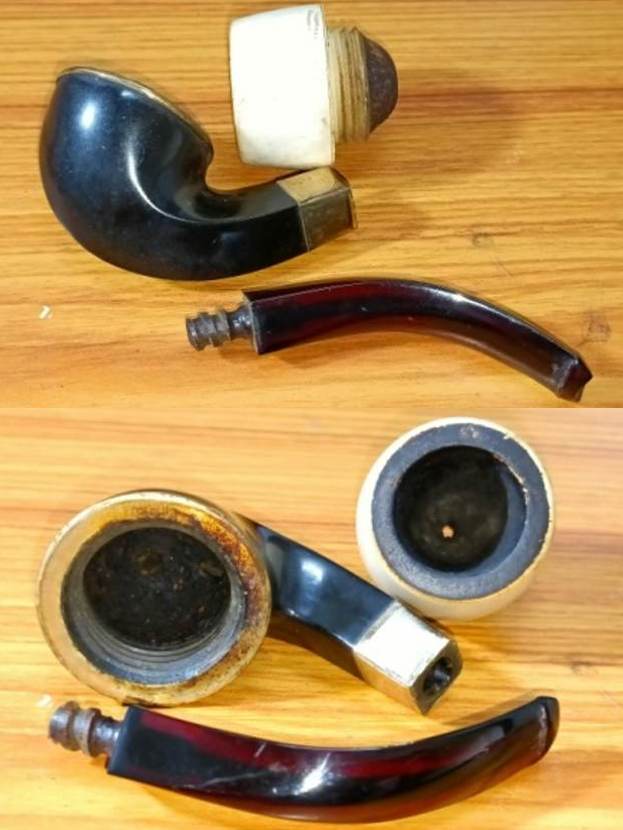 The Meerschaum bowl has a thick layer of carbon in the chamber. The cake is soft and dry. The single draught hole at the heel of the bowl is partially clogged restricting the aperture opening. There is a thick layer of lava overflow on the rim top surface. There are a couple of spots where the white of the Meerschaum peeks out of the rim top surface but these are just spots from where the dry soft carbon cake had peeled off. The threads at the bottom of the bowl have worn out a bit but still firmly threads in to the Bakelite shank without any give or play. The convex bottom of the bowl is covered in dried ash and crud. There are a few scratches, nicks and dings over the surface but they are all very minor and do not detract from the beauty of the bowl.
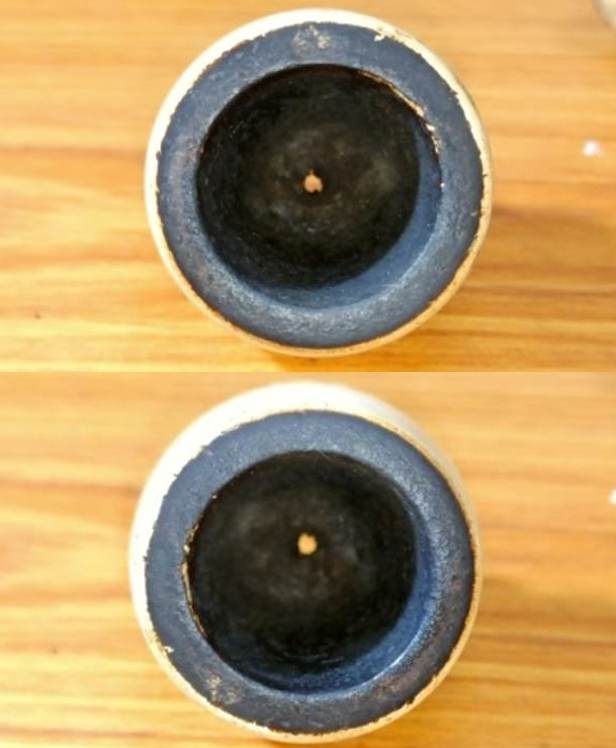
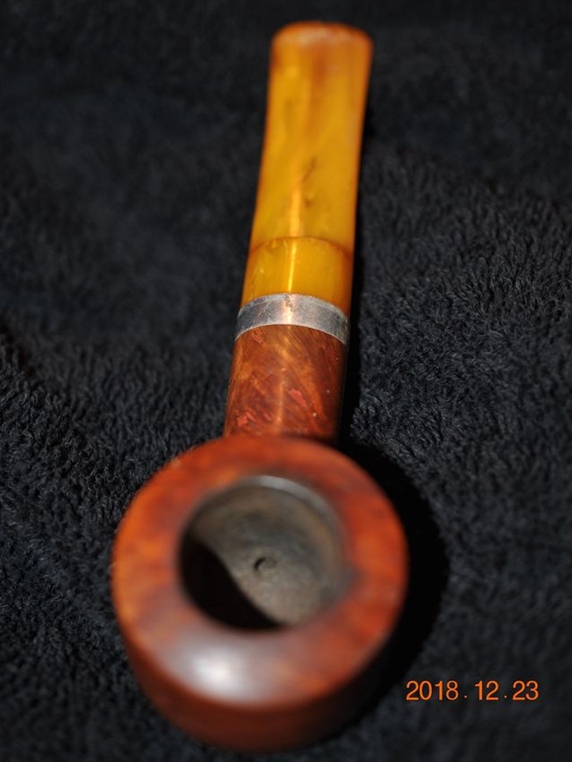
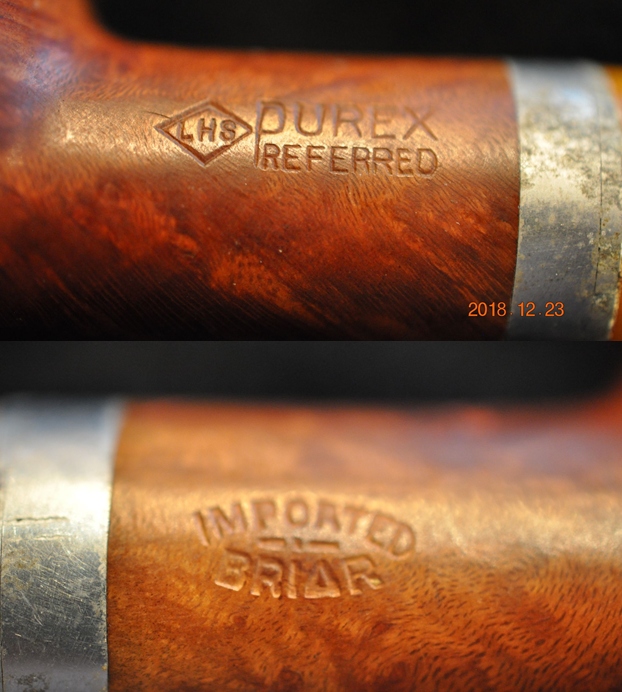
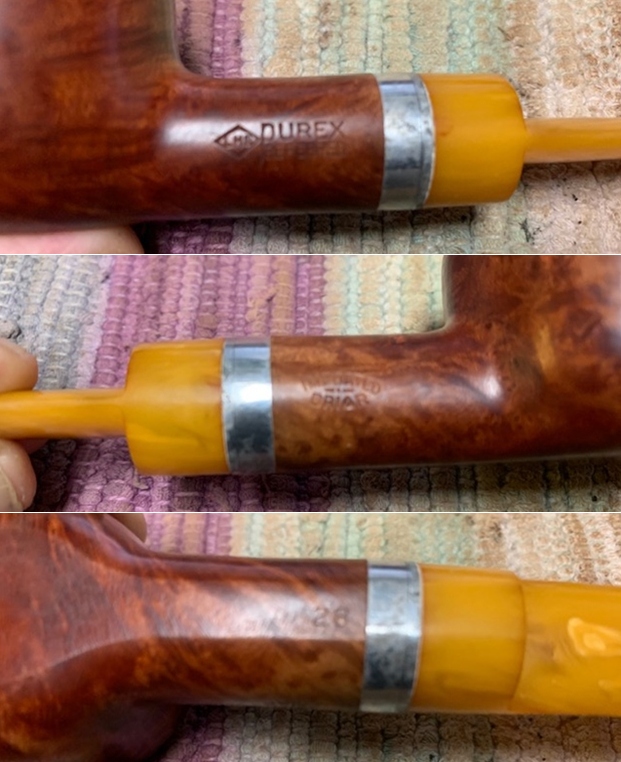
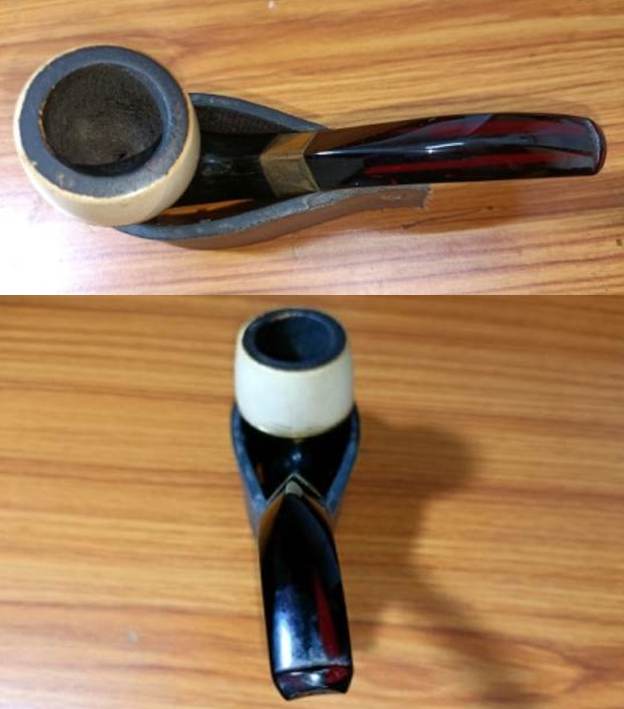
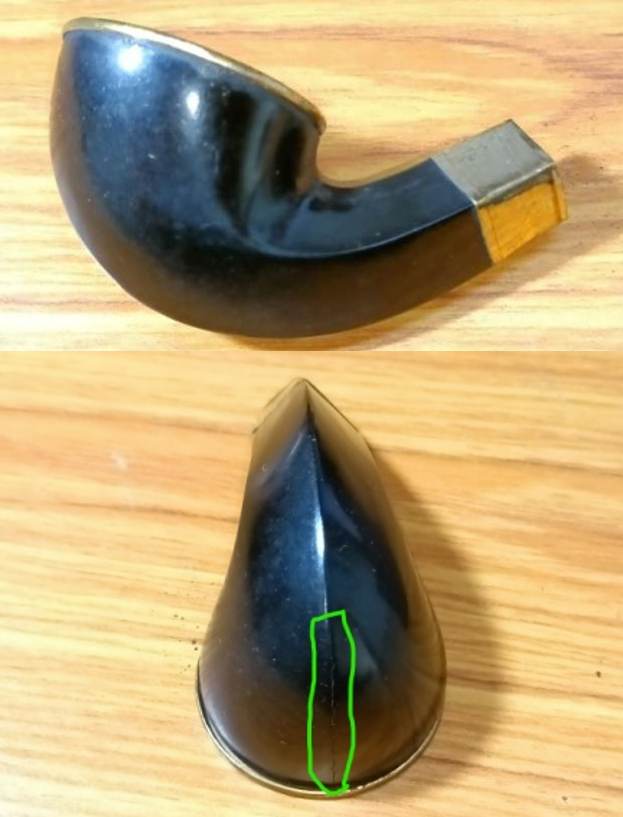
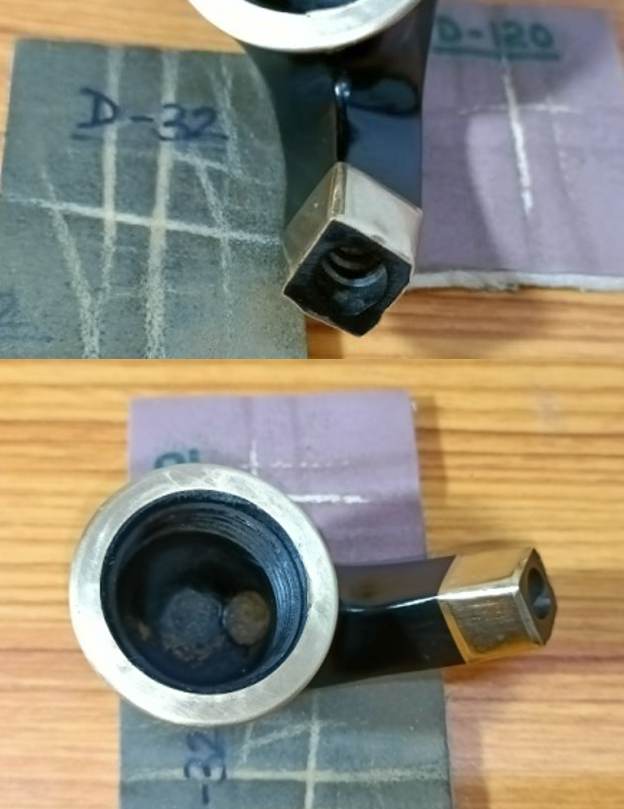
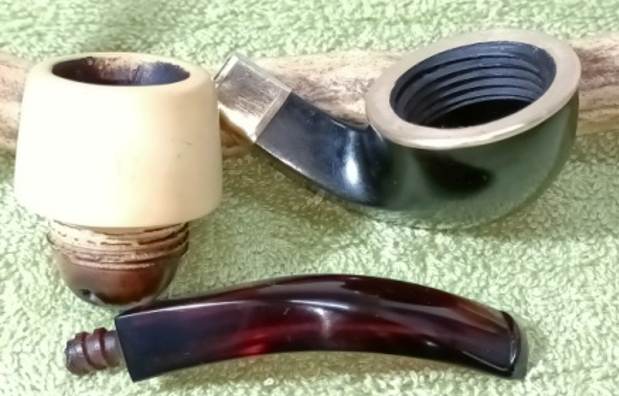
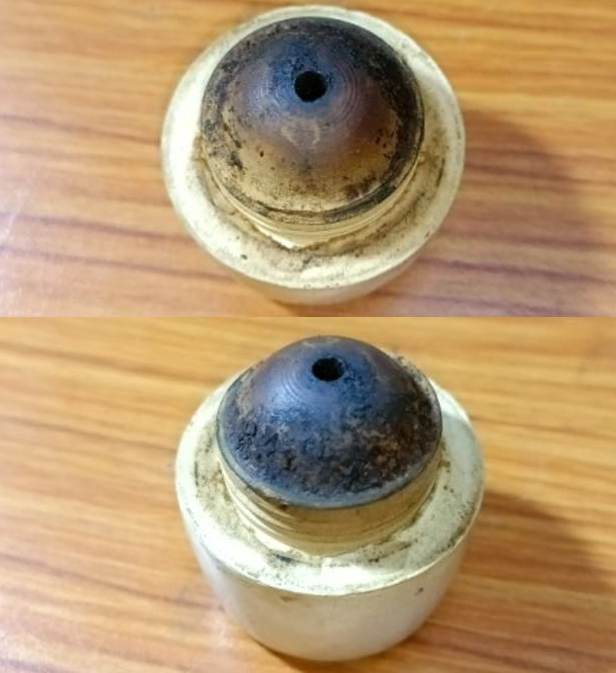 The Bakelite base/shank shows heavy accumulation of old dried oils, tars and ash in the trough that houses the Meerschaum bowl. The threads in the base are all intact but covered in oils and grime. The brass rim top ring is covered in grime. Close scrutiny of the shank surface under magnification revealed a crack (indicated in green) along the seam running from the top front of the bowl to about half way to the foot of the Bakelite base. I would first need to clean the internals of the base to ascertain if this crack extends inside. This was an unanticipated damage, but one that would need to be addressed. The mortise is clogged with dried oils and gunk making the draw laborious and constricted.
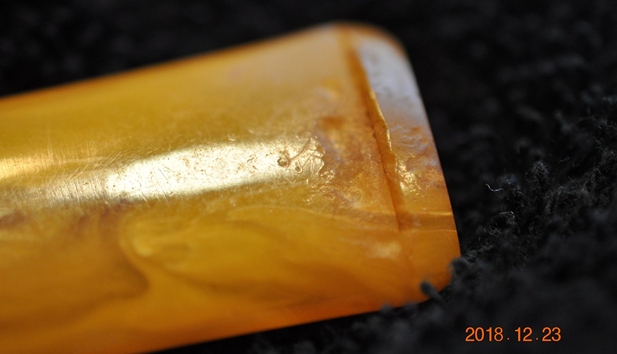
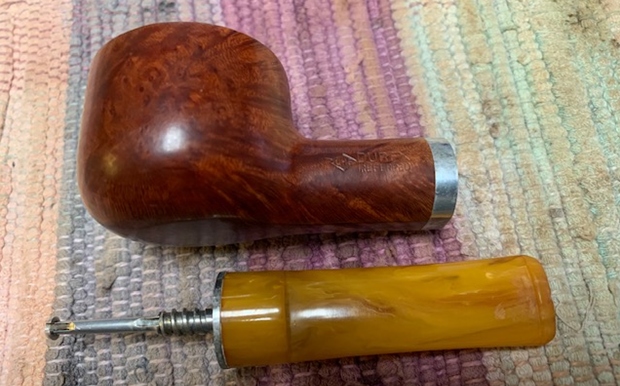
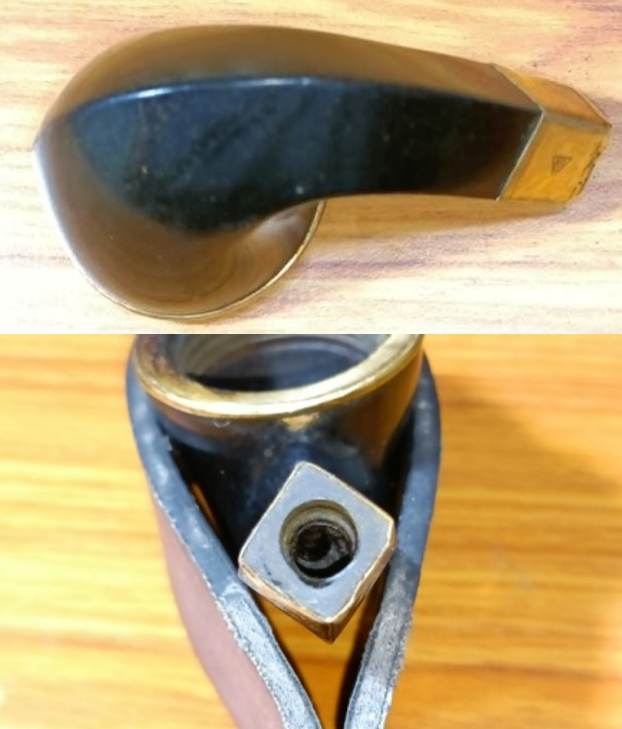 The bent Redmanol stem is dull looking but with a nice cleaning and polishing will add to the visual treat of the completed pipe. The stem airway has darkened considerably due to dried gunk that accumulated along the walls of the airway. There is some minor tooth chatter and couple of deeper tooth indentations on either surface of the stem. The round orifice and the threaded tenon are covered in gunk. Overall, there is not much damage to the stem and should clean up nicely.
 The Process
In normal course, I would have addressed the shank repairs first. However, since I worked on the pair concurrently, I first reamed the chamber with my smaller fabricated knife followed by sanding the walls with a folded piece of 220 grit sandpaper. This removes cake completely and evens out the chamber wall surfaces. I scraped off the dried oils and tars from the bottom of the bowl and also from in between the threads. A wipe using isopropyl alcohol on a cotton swab ensured that the carbon dust that remained is completely lifted from the wall surface and the ghost smells are eliminated. I was pleased to find smooth and solid chamber walls. With the sharp knife, I gently scraped off the lava overflow from the rim top surface. I would continue further cleaning of the rim top during the refurbishing process.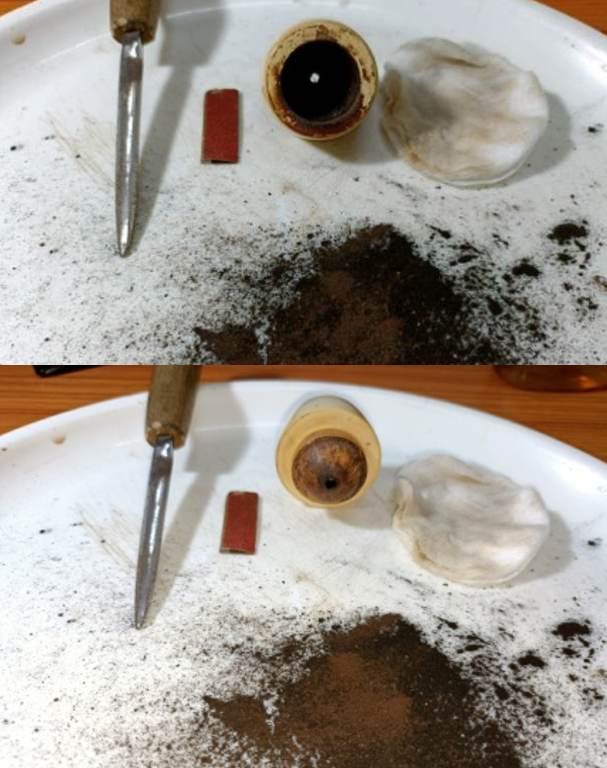
 As I working the Meerschaum bowl, out of the blue, a round thin ring come off the bottom of the bowl and my heart sank… Did the bottom of the bowl just break in my hand? I heaved a sigh of relief when I realized that it was nothing more than a spacer that was cut out of a Greeting card. But it was so well cut and matched, that it missed my inspection. Now I am beginning to understand why the bowls were interchanged on the pipes in the first place. The long neck Meerschaum bowl with three draught holes should belong to this bent Bulldog but was switched with the shorter neck bowl with single hole. The crack along the seam must have been opening up as the Meerschaum bowl was threaded in to the base, pushing the bowl further down in to the base. The long neck of the bowl scraped the heel of the base, restricting the air flow. Thus, the short neck bowl from the straight Bulldog was swapped with this long neck and the paper washer was installed to make the seating of the short neck Meerschaum bowl in to the base airtight. With this modification, the bent Bulldog became a better smoker than the straight Bulldog and hence was more extensively used.
 I wiped the external surface of the bowl with Murphy’s Oil soap on a cotton swab. While cleaning, I was especially deliberate around the threads and over the rim top surface as I wanted to get rid of the entire gunk from those areas. Though the bowl cleaned up well, the rim remains darkened, akin to burning marks. This would need more invasive methods to clean away. The scratches and dings that are now visible will be left as they are for being a part of the journey of this pipe till date. I wiped the bowl with a moist cloth to remove the soap and grime that was left behind.
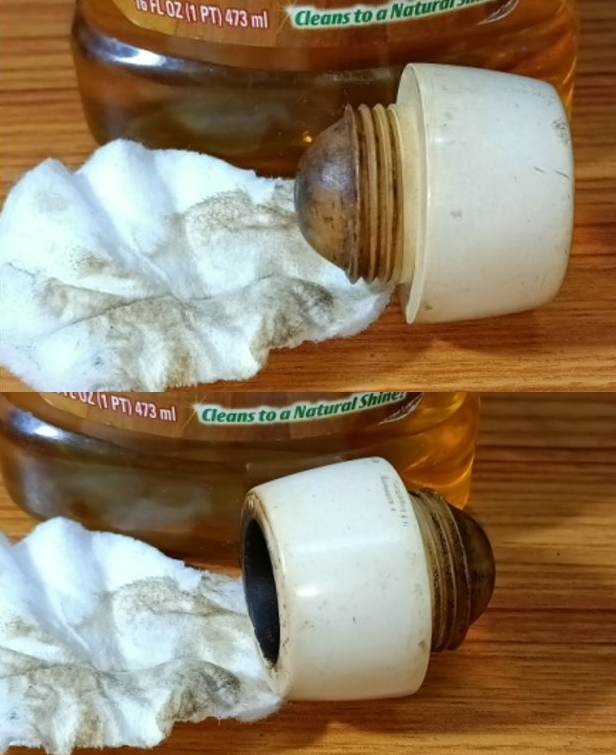
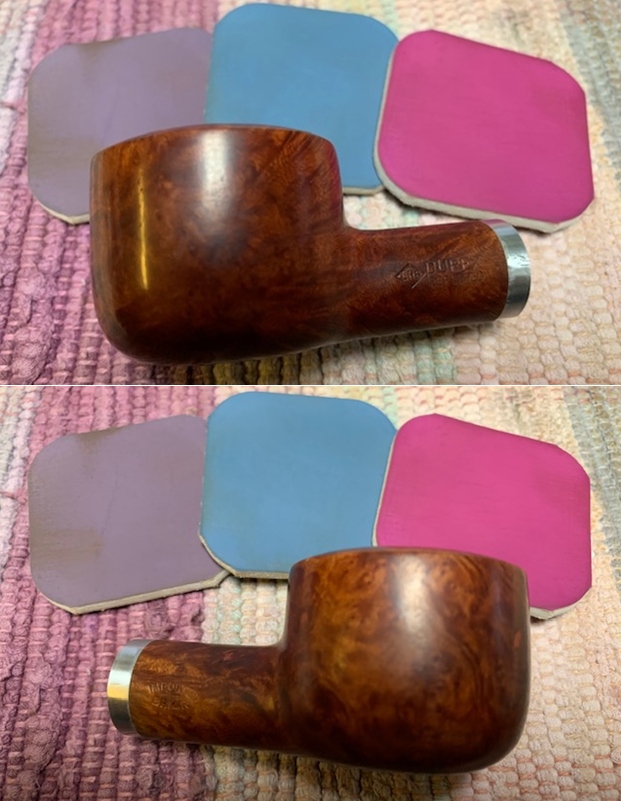
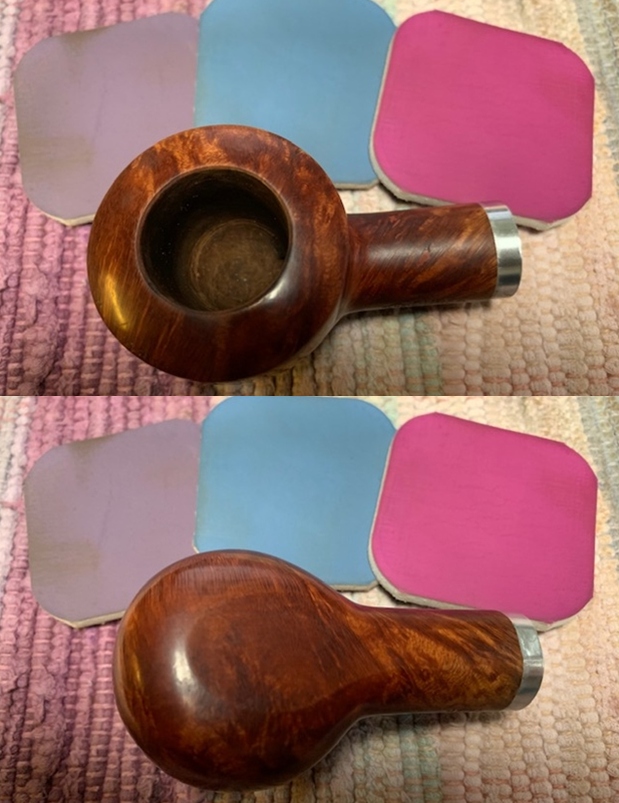
 Using folded piece 220 grit sandpaper, I sand the rim top to remove the darkening over the surface. Though not completely eliminated, the rim surface looks now looks much better.
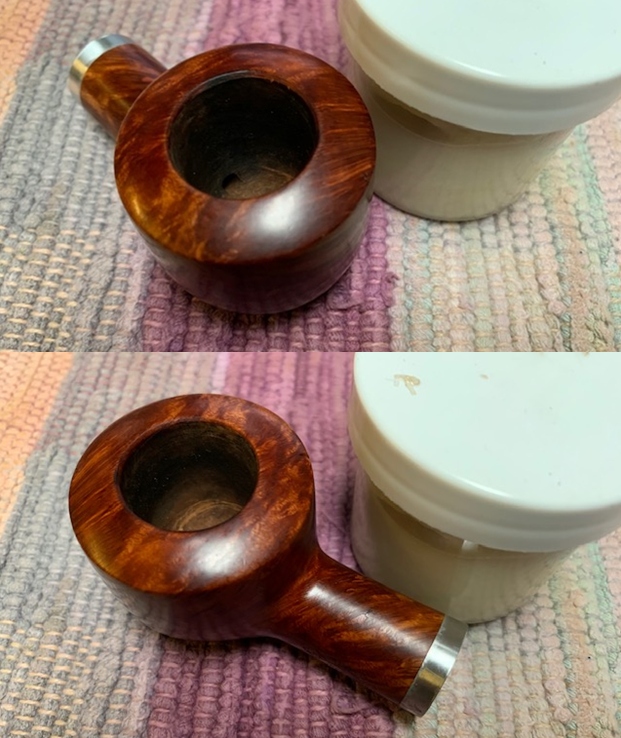
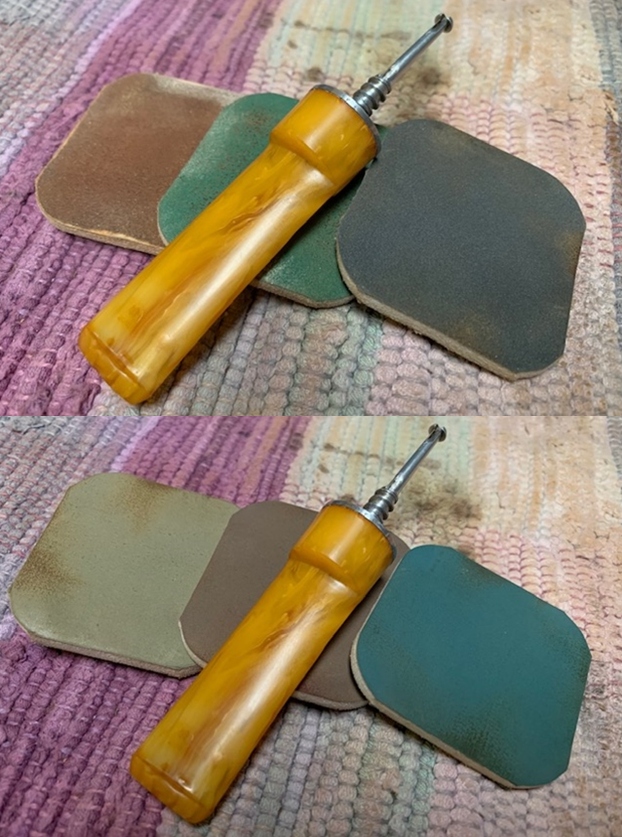
  I handed over the cup to Abha, my wife, to work her magic in polishing the cup. She polished the rim top surface and rim edges with micromesh pads. She then went on to dry sand the entire stummel with 1500-12000 grit pads and wiped the bowl down with a damp cloth to remove the dust that was left behind by the sanding. I had requested her to minimize the scratches but not necessarily remove them. These lacerations and dings must have had a history and I wanted to preserve it. She did a fantastic job of polishing the meerschaum cup to a nice deep shine.
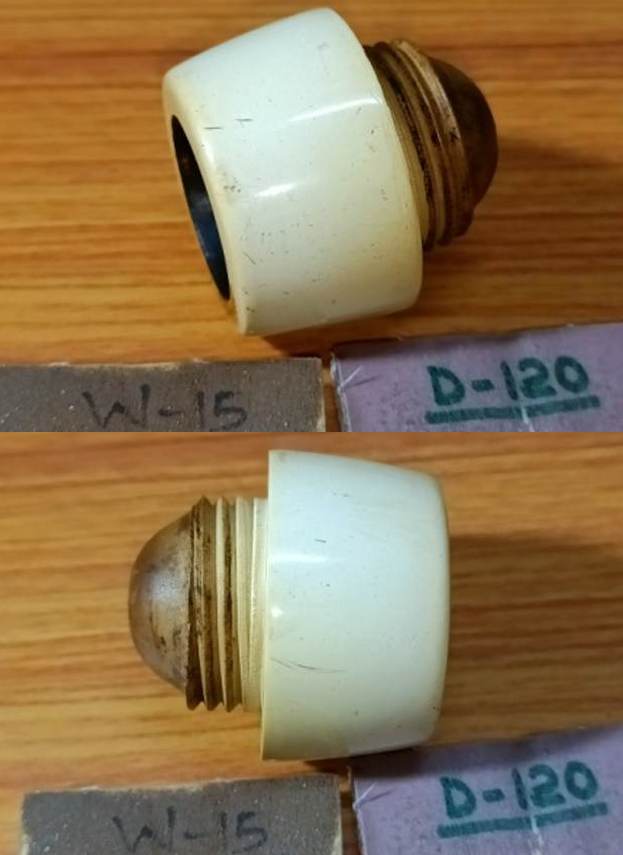
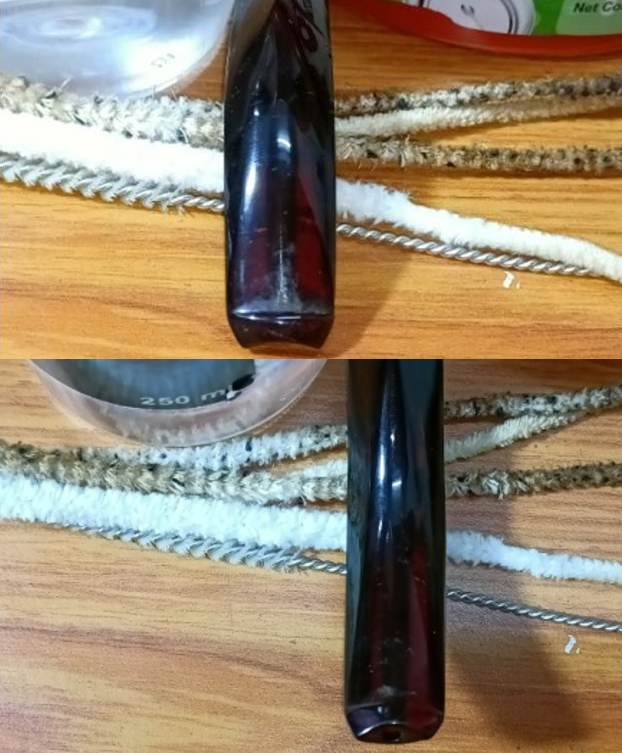
 As Abha was polishing the Meerschaum bowl, I worked on the stem repairs. I first cleaned the stem surface and airway using anti-oil dish cleaning soap and thin shank brush and rinsed it under warm running water to remove the entire gunk from the airway. I also cleaned up the threaded tenon with a tooth brush and soap. To finish the cleaning, I ran a few bristled and regular pipe cleaners dipped in alcohol to remove the residual gunk from the airway and dry it out.
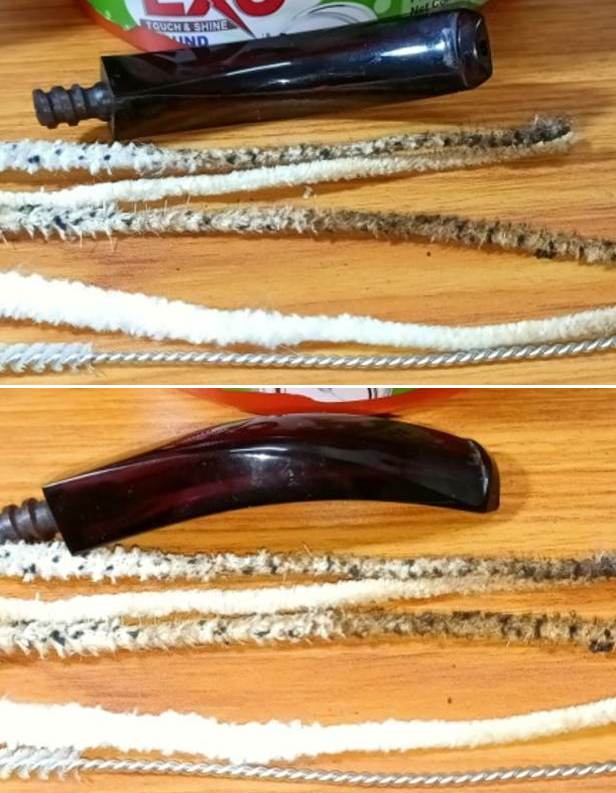
 I next sand the bite zone with a 320 grit sandpaper to address the minor tooth chatter on either surface. I filled the deeper tooth indentations with clear CA superglue and set the stem aside for the glue to cure completely.
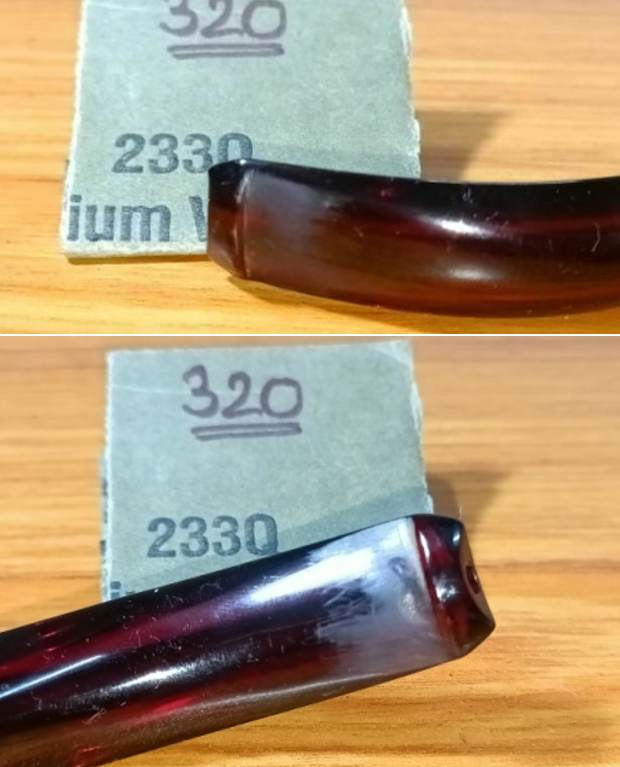
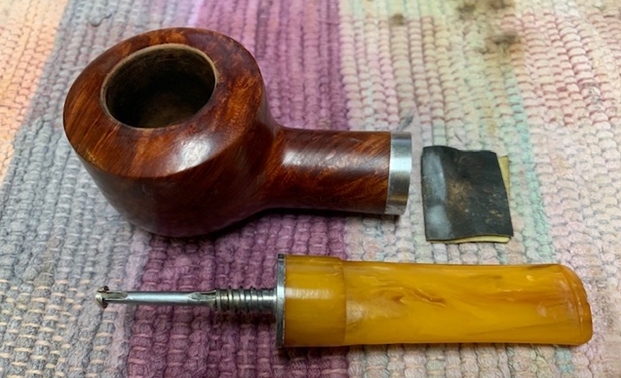
 With the Meerschaum bowl polished by Abha and the stem repairs set aside for the fills to cure, I worked the Bakelite shank. With a fabricated tool, I scraped all the dried oils, tars and ash from the trough of the Bakelite base. I also cleaned the mortise by scraping out the dried gunk using my fabricated tool. As I was working on the shank, the brass cap over the shank rim top came free. I would need to reattach it once I was done with internal and external cleaning of the shank.
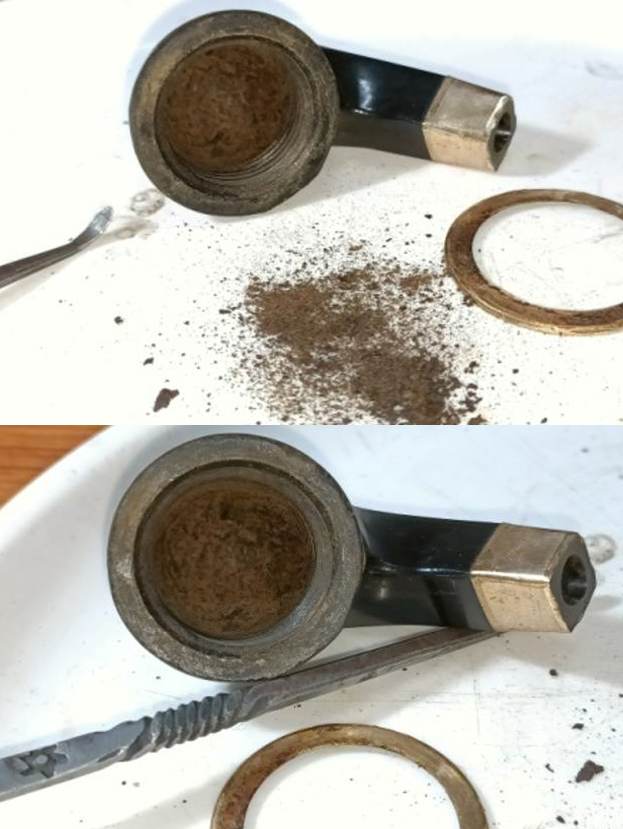 Next, I cleaned the Bakelite shank with anti oil dish soap and tooth brush. I cleaned the shank internals and the mortise with shank brush and anti oil soap and rinsed it under warm water. The brass cap was scrubbed clean with the soap and Scotch Brite pad. The shank is now clean both from the inside and the outside.
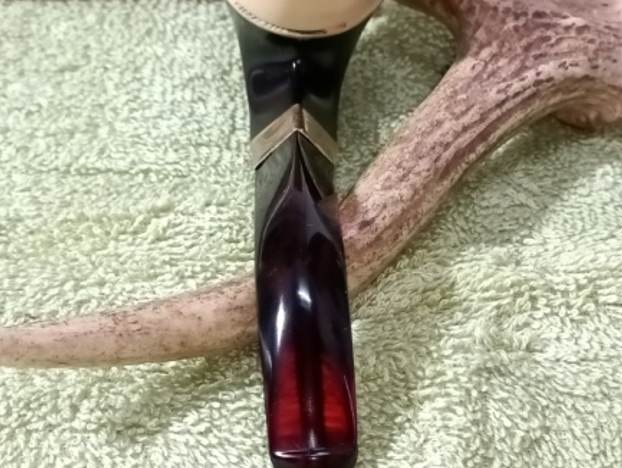
 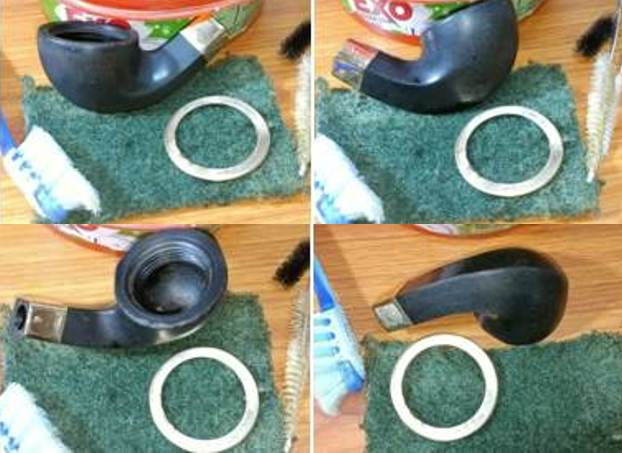 With the external and internal surface of the Bakelite shank cleaned up, the crack at the seam is now clearly visible. As I had expected, this crack extends to the inside of the shank also. Both these are encircled in red. I discussed with Steve and he advised that drilling of counter holes to arrest the spread of these cracks should be avoided as the Bakelite could shatter due to the impact of the drill machine. The best way to ensure a robust and lasting repair would be to lay a fine bead of CA superglue along the crack. The glue would seep into the crack and once hardened, would form a strong joint along the seam. I did just that and set the shank aside for the glue to cure.
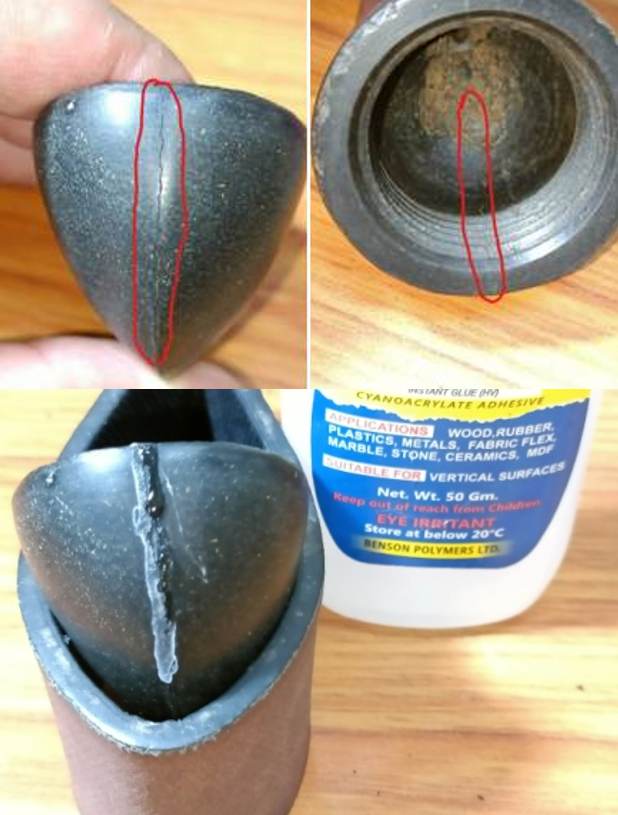 By next day afternoon, the fills had completely hardened. With a flat head needle file, I sand the fills to achieve a rough match with the rest of the shank surface. To further fine tune the match, I sand the fill with a 320 followed by 600 grit sandpapers. I sand the fill inside the Bakelite trough with the sandpapers only as it was not possible to use the needle file. I am quite happy with these repairs at this junction.
 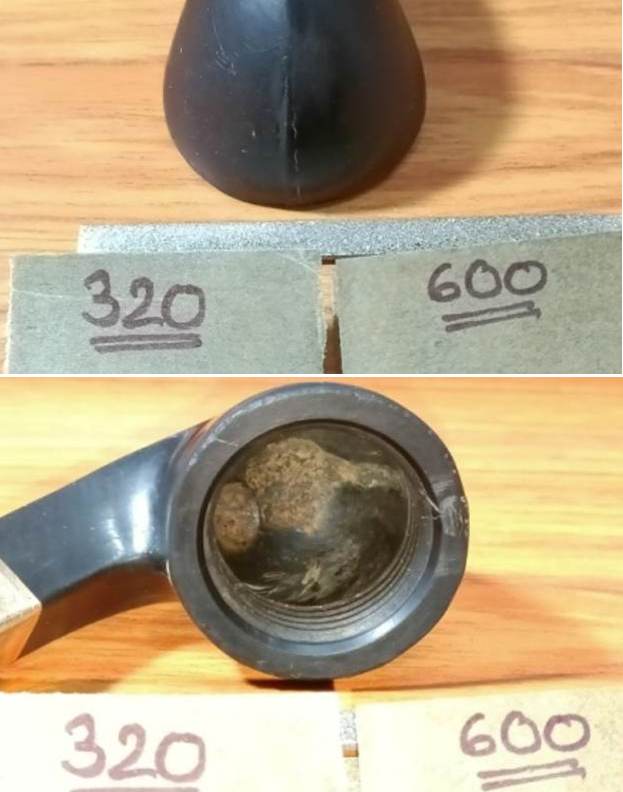 The Redmanol stem fills too had hardened and I worked the fills with a needle file to match it with the rest of the stem surface. I fine tuned this match further by sanding it with a 320 followed by 600 grit sandpapers. The fills have blended in perfectly with the stem surface. Thereafter, I handed the stem over to Abha to polish it to a high gloss.
 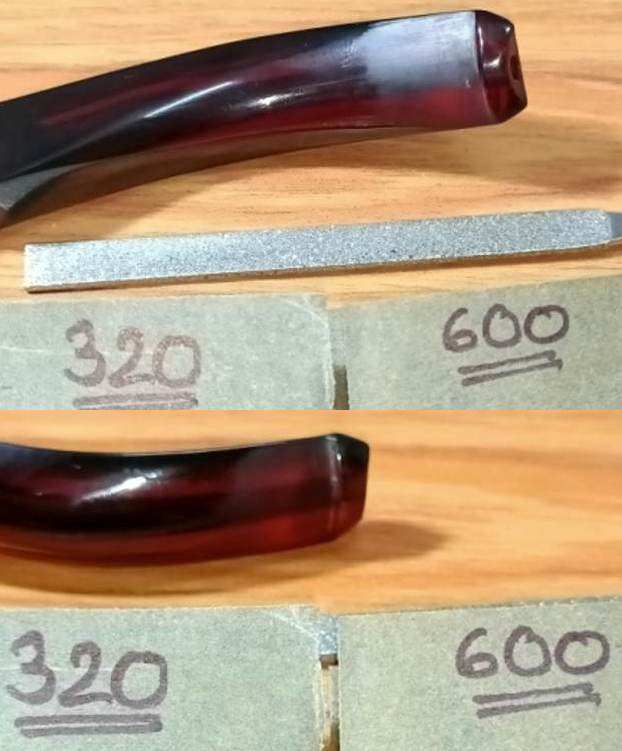 After the stem was handed over to Abha, I polished the Bakelite base/ shank by wet sanding the surface with 800, 1000, 1500 and 2000 grit sandpapers. The Bakelite is now beginning to take on a nice shine.
  Before moving on to final polish using micromesh pads, I decided to reattach the brass cap first. I polished the brass cap with a polishing compound that we get in India here. I rubbed the compound over the rim cap and wiped it using a soft cloth. I applied a small quantity of superglue along the rim top surface and pressed the rim cap over the rim top. I wiped the excess glue with a cotton swab wetted with alcohol.
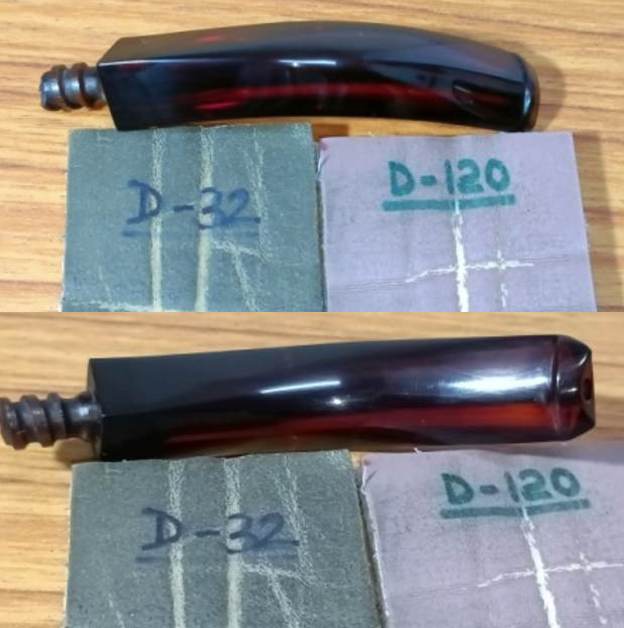
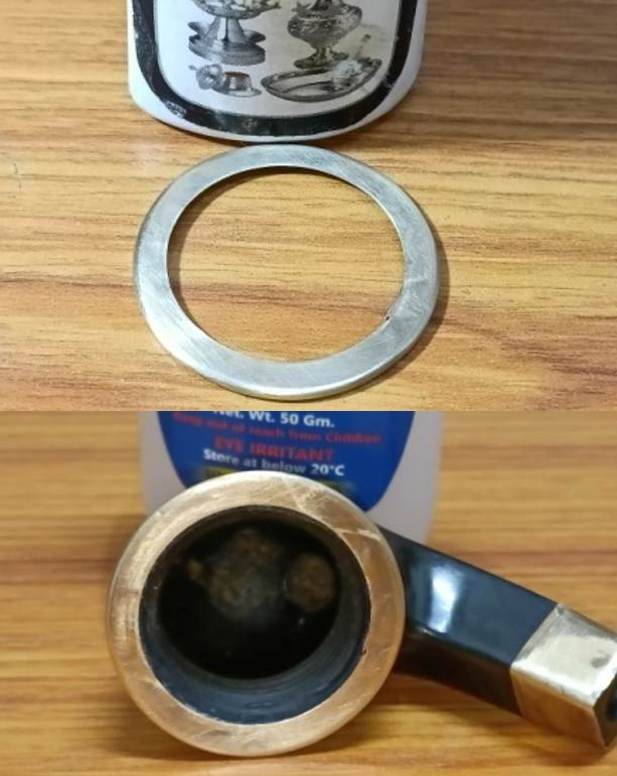 Next I polished the shank by dry sanding with 3200 to 12000 grit micromesh pads. I applied a little Extra Virgin Olive oil to the surface just to enhance the shine.
 All this while, Abha was quietly busy polishing the stem. She wet sanded the entire stem with 800, 1000, 1500 and 2000 grit sandpapers and followed it up by dry sanding with 3200 to 12000 grit micromesh pads. The stem looks fabulous and I cannot thank Abha enough for the help and support she extends in this hobby of mine.
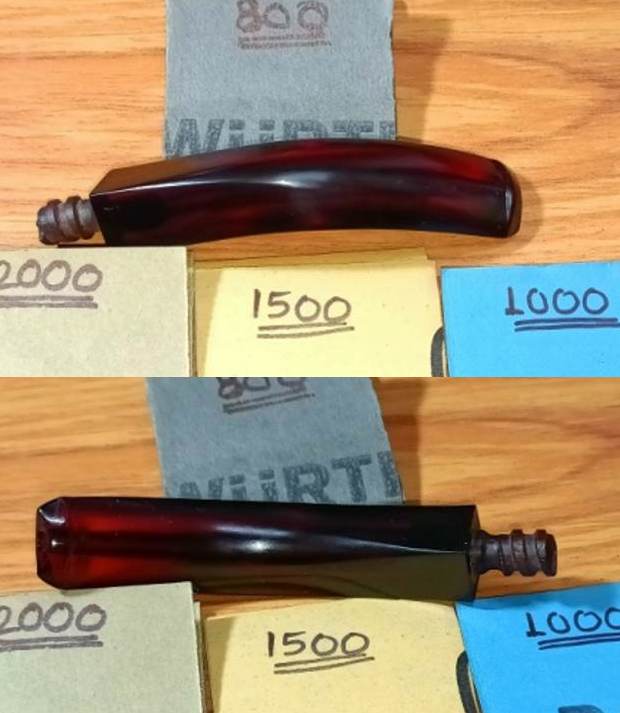
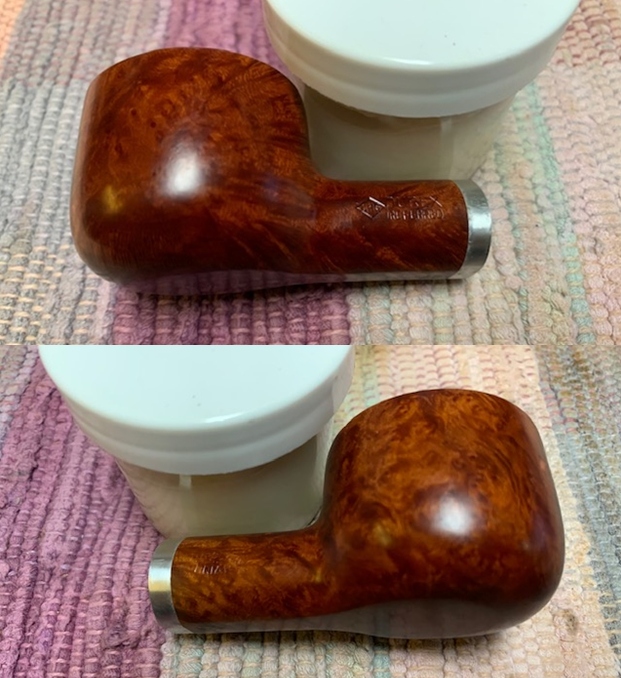
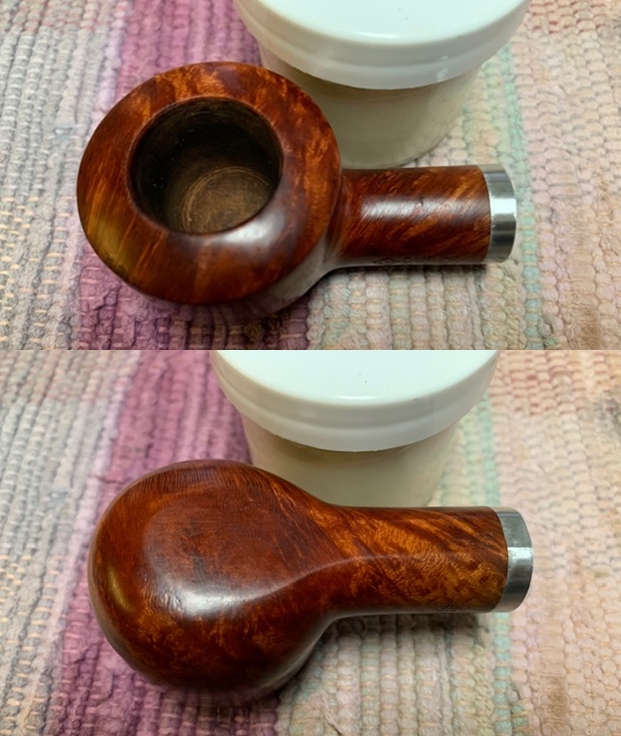
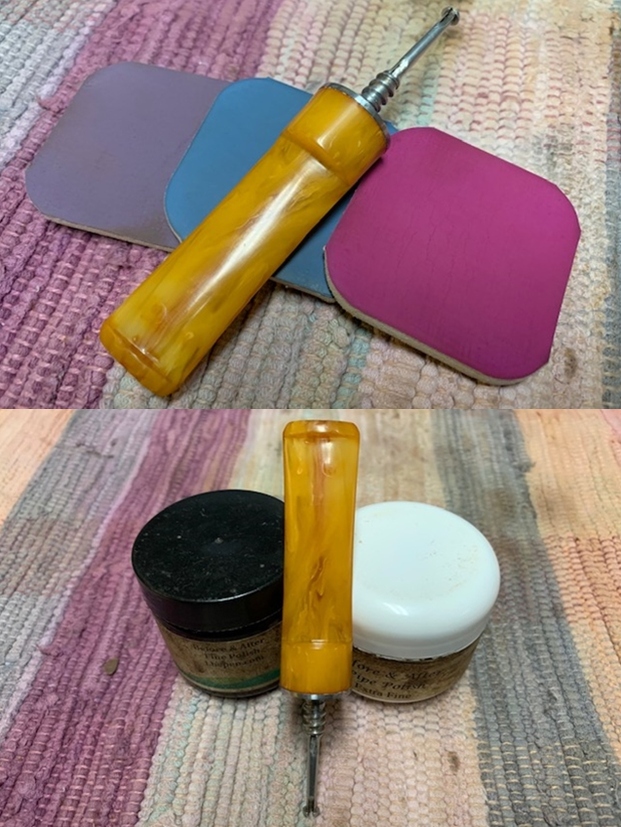
 Next I gave a beeswax polish to the meerschaum bowl. The process that I followed for this polish has been explained in Part- I and not being repeated here. The following pictures will give you an idea of the process and also of the end results. It was here that I had swapped the Meerschaum bowls and correctly matched them with their original pipes.
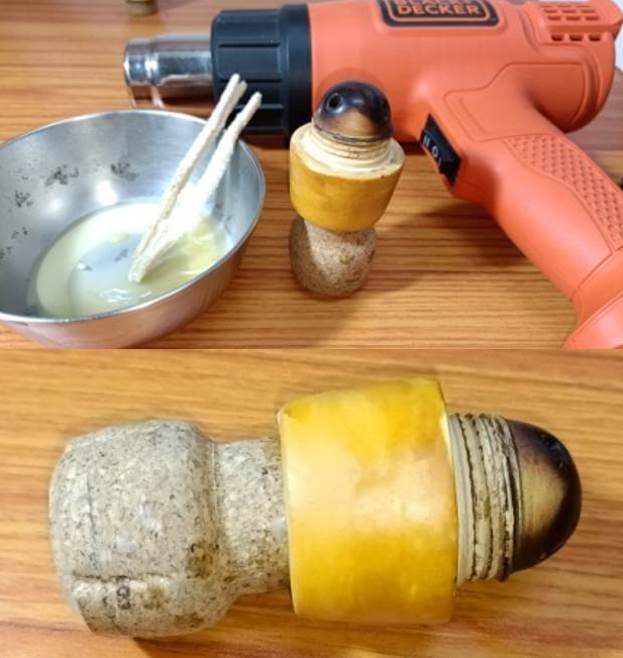
 While the Meerschaum bowl was soaking in the beeswax, I cleaned the external surface of the Presentation Box with Murphy’s Oil soap and cotton swab. I wiped the surface with a moist cloth to remove any residual soap from the surface. Next I applied some “Before and After” Restoration balm to the surface to rehydrate the wood and polished it with a microfiber cloth.
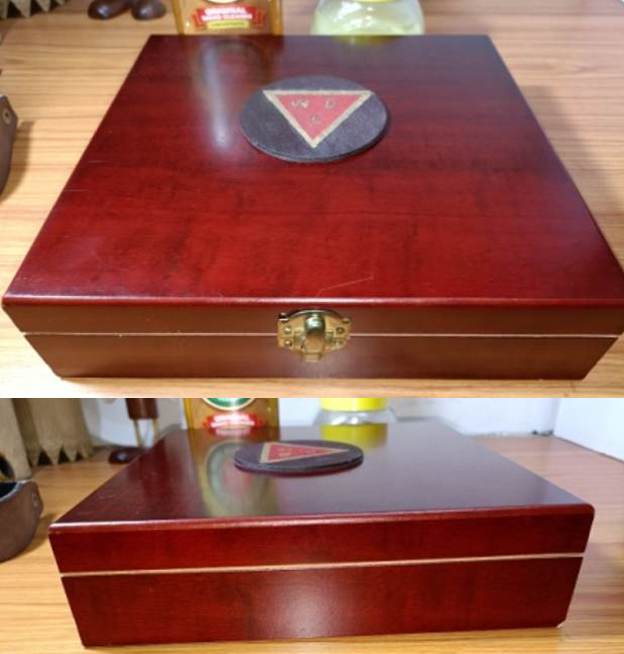
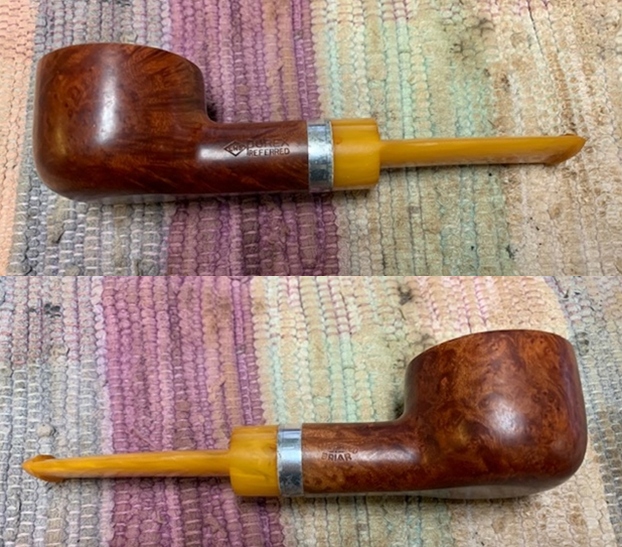
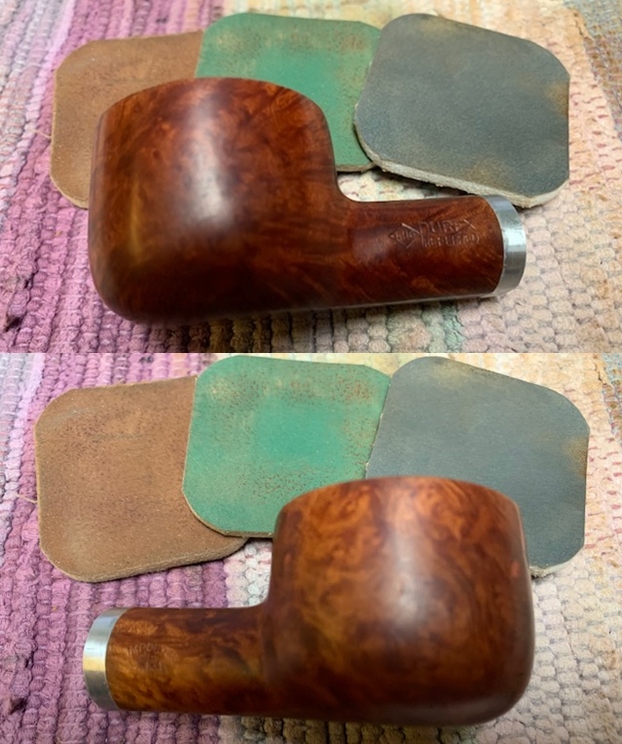
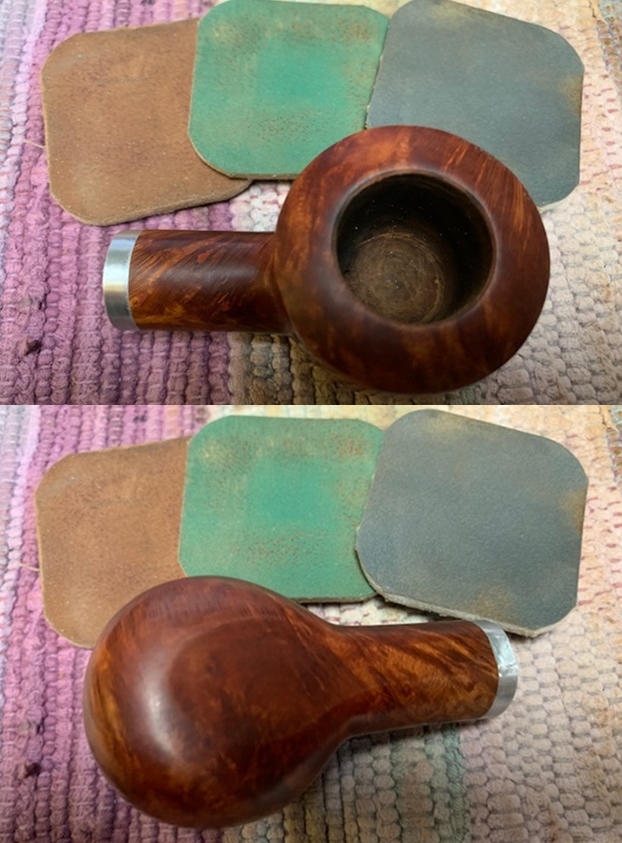
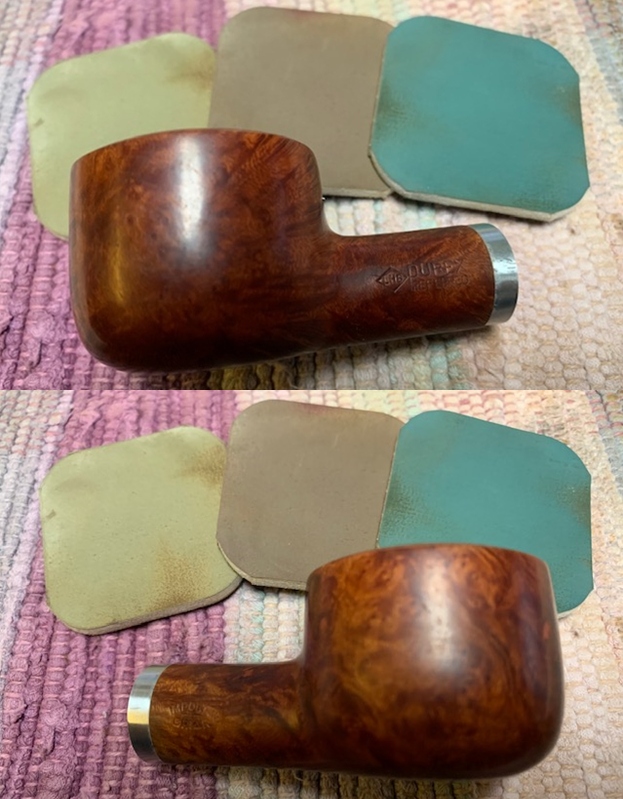
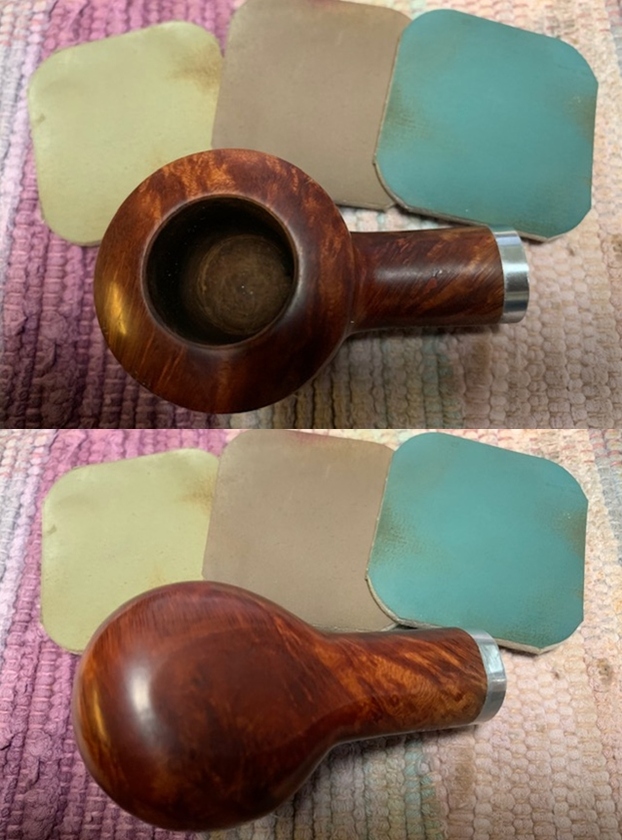
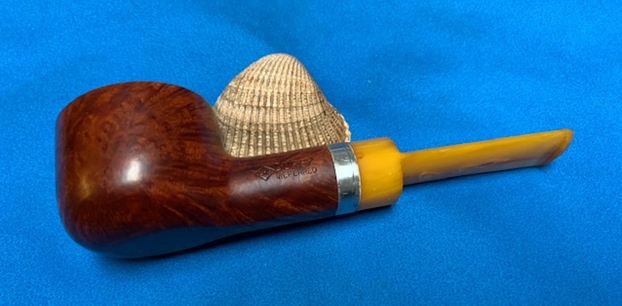
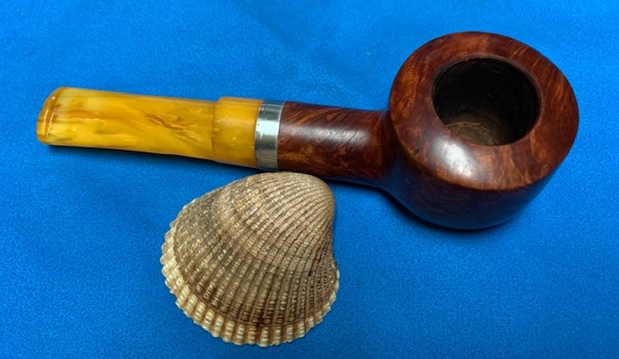
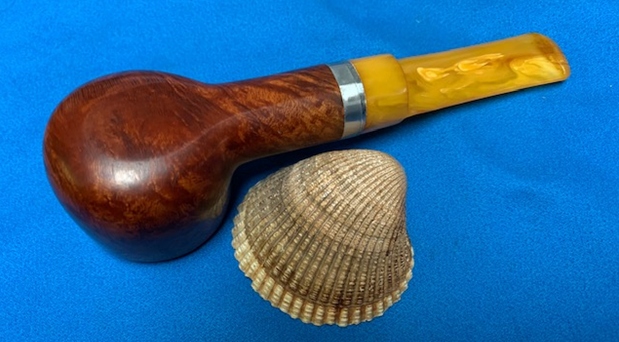
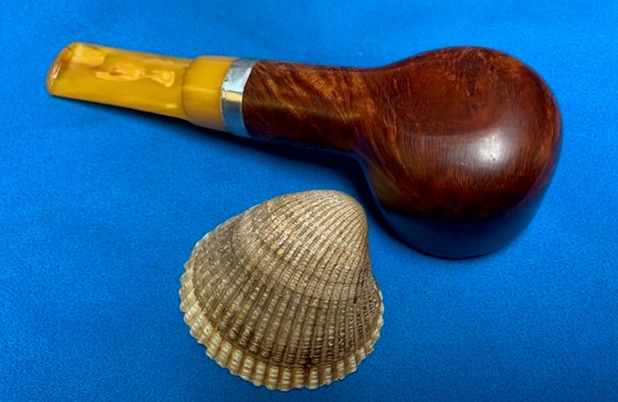
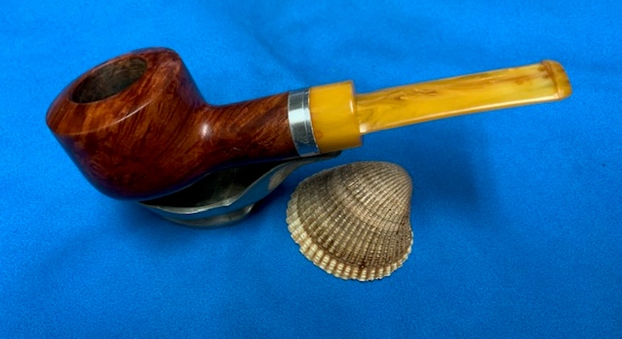
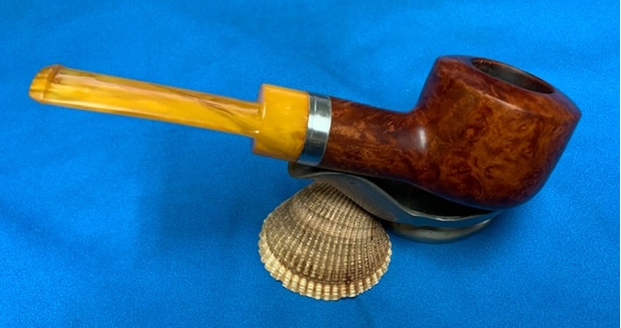
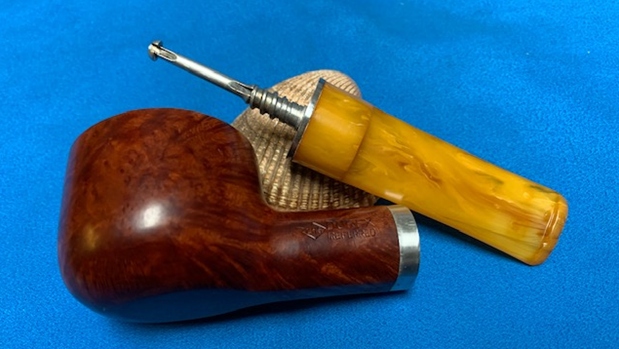
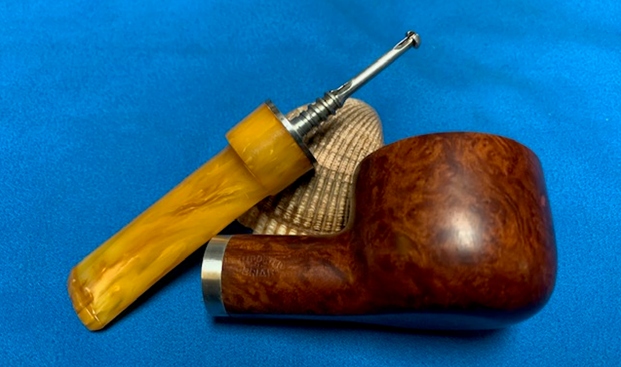
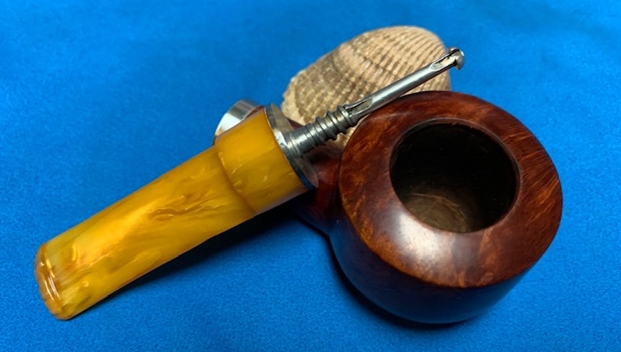
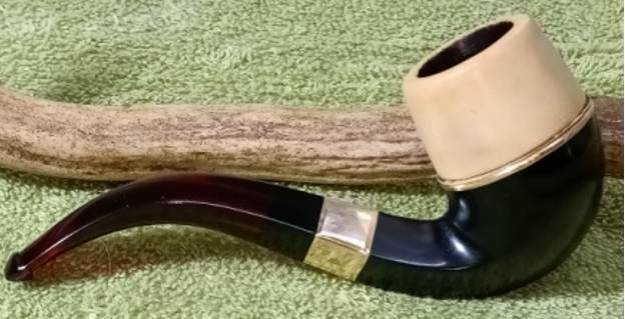
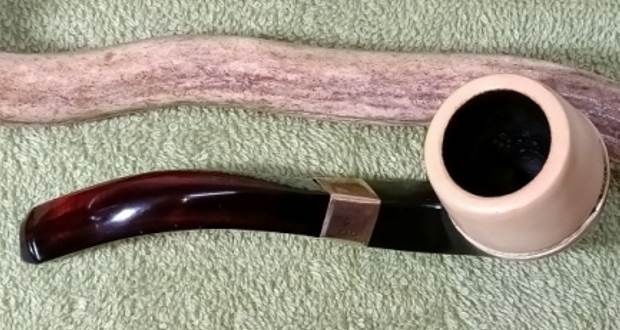
 To finish, I re-attach the Redmanol stem with the Bakelite shank. I mount a cotton cloth buffing wheel on to my hand held rotary tool and setting the speed at 50% RPM, applied Blue Diamond compound over the shank and the stem surface. I wiped/ buffed the parts with a soft cotton cloth to clear it of any leftover compound dust. I then mounted another cotton cloth wheel on to the polishing machine and applied several coats of carnauba wax over the shank and the stem of the pipe. I finished the restoration by giving the pipe a rigorous hand buffing using a microfiber cloth to raise the shine further. Have a look at the completed pipe below.
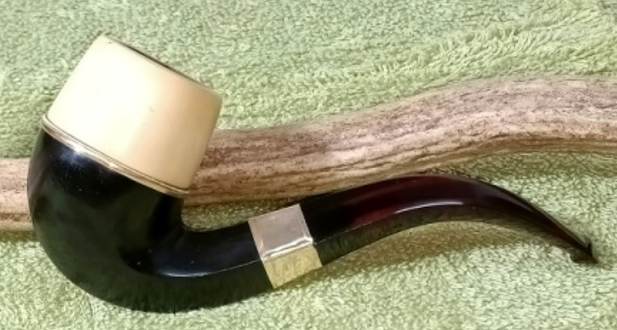
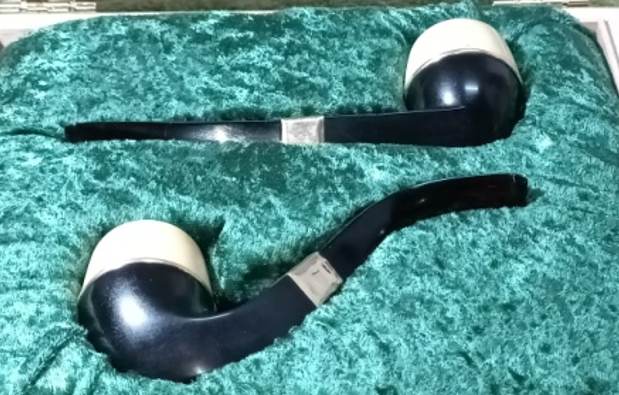
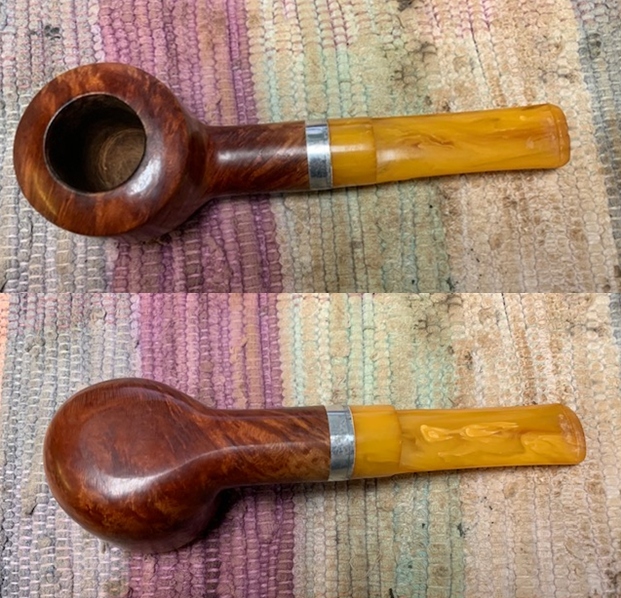
 And here are a couple of pictures of both the pipes in their Presentation Case. Thank you all for joining me on this path as I repaired and restored this fabulous piece of pipe history to its former glory and functionality.