Blog by Steve Laug
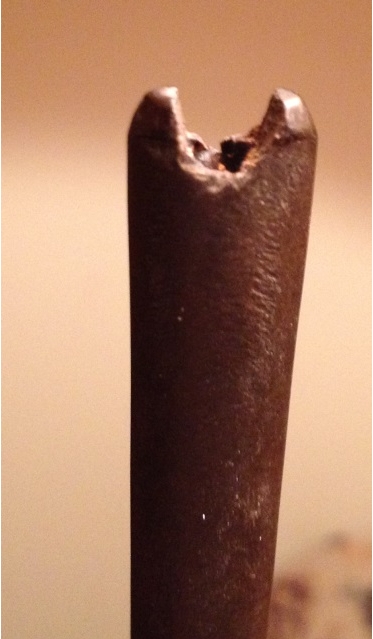
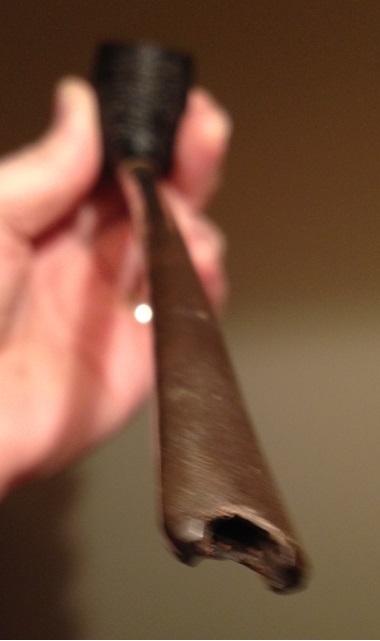
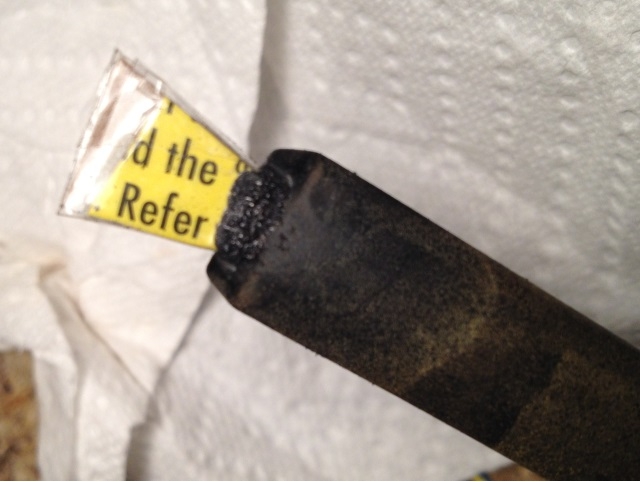
My brother sent me the Ebay link to this Jobey Cauldron and I was hooked. It was in pretty worn shape in terms of the finish and the rim. There was a thick cake in the bowl and some serious lava had overflowed the rim. There were nicks around the outer edge of the rim and the bevel on the inner edge was pretty well covered with lava. There were scratches in the sides of the bowl and it was truly filthy. The stem was oxidized and spotty on the stop side and the saddle. Underneath it was missing a large triangular chunk from the button forward. It was a Jobey so it had the Jobey link tenon that screwed into the shank and the stem fit over the tenon. It was made for a quick and easy replacement. The photos below are from the Ebay seller and clearly show the state of the pipe he was selling. We bid on it and won. Little did I know that what I saw in terms of issues with this pipe were only part of the problems that I would need to deal with in restoring it. 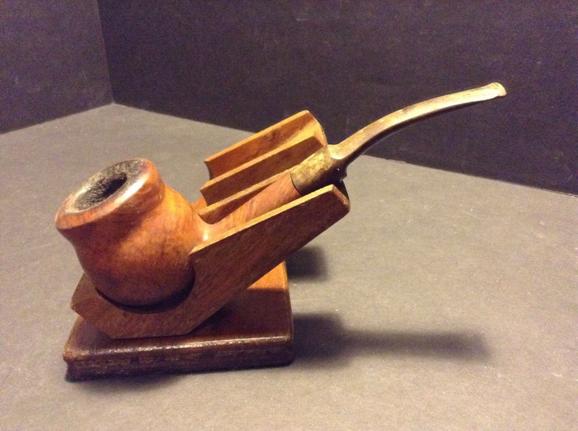

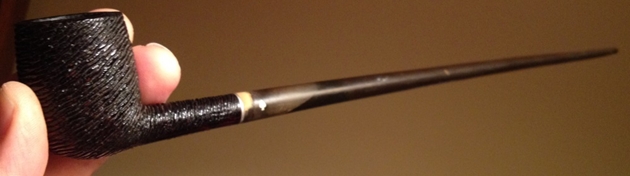
 The seller included a few close up photos to show some of the damage to the pipe. The oxidized and spotty stem is shown in the first photo and the second shows the state of the rim and bowl.
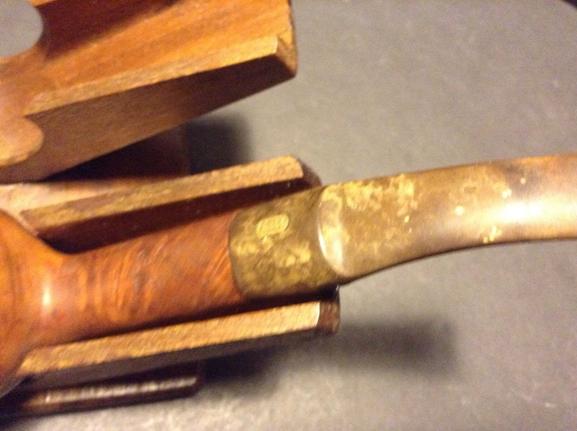
 The next two photos show the stamping on the pipe. The top of the shank is stamped Jobey in script over FAWN. The underside is stamped E52 over EXTRA.
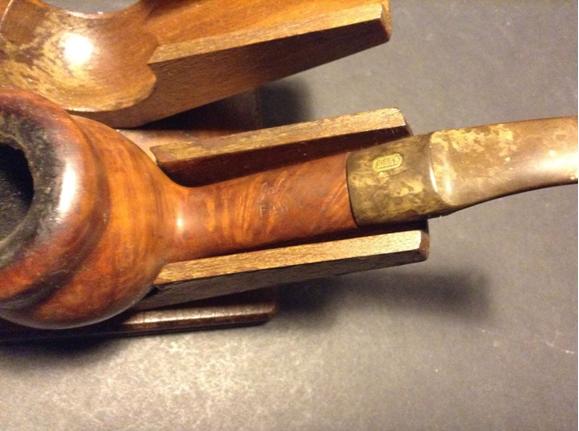
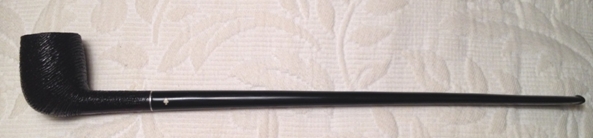
 The seller also included the following photos to give a clear picture of the profile of the pipe and the damage to the underside of the stem. He gets full props for full disclosure of the issues with this pipe (at least those that were visible through the grime and build up on the briar and stem).
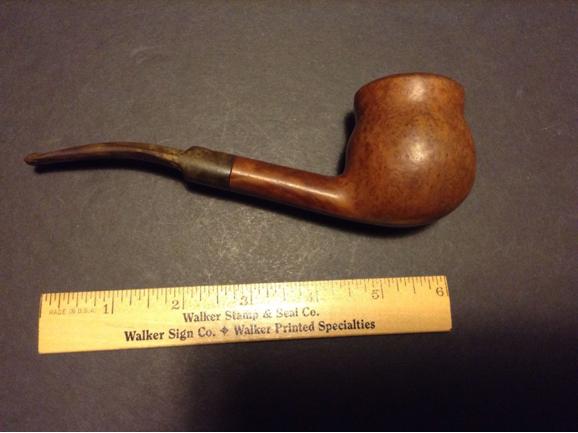

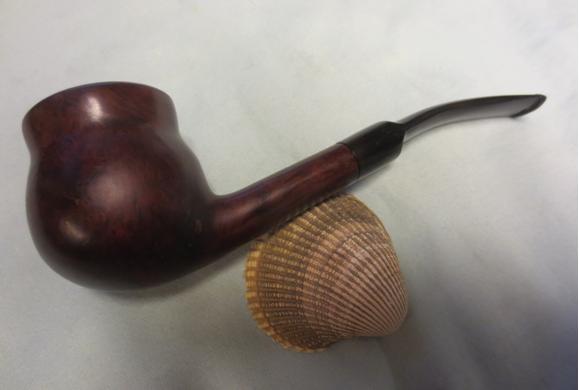
 I went online and searched for a photo of what the pipe had originally looked like and found this one on Smokingpipes.com. Looking at it gave me hope for the repairs and restoration of the one we purchased.
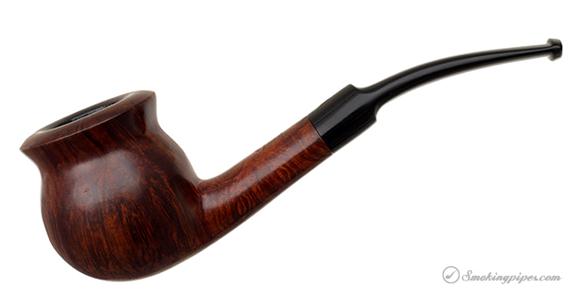 When the pipe arrived I put it in my box of pipes to be refurbed and it sat for several months. When I took it out and looked it over I found that the stem was not aligned. I tried to unscrew it from the shank and it would not turn. I tried to wiggle the stem free from the shank and in the process heard that awful cracking sound which refurbishers the world over have come to dread. The tenon snapped off. Great! Now I added one more issue to the refurbishing process on this old pipe. Fortunately, I was able to clear the broken end out of the stem with very little problem but the one in the shank took a bit more ingenuity. I finally was able to remove it by hand turning a drill bit into the broken end and then turning it free of the shank. I cleaned out the shank with pipe cleaners, cotton swabs and alcohol, and then put the parts aside. Since I had no Jobey Link tenons in my kit I would need to wait until I could get some. I called Tim West at JH Lowe and put in an order for tenons. Even that turned out to be far more of an issue than I expected – they came in five sizes and the one I had was so shattered that I was unable to get the measurements. I could estimate the measurements but not get an accurate diameter on either the threaded end or the insert. So I had to order one of each of the three sizes that Tim had in stock. I was hoping that when they arrived that one of them would fit the stem and the shank. Now I would have to wait for their arrival.
It did not take too long of the package to come from Tim. I took out the various Jobey Links that he included and breathed a sigh of relief when the middle sized link was a perfect fit in the shank. The end of the tenon is slotted so that it can be screwed into the shank and unscrewed with a slotted screw driver. In this case it turned into the shank with no issues. The stem did not fit over the end of the tenon but the measurements were correct so I cleaned out the end of the stem and was astonished at the amount of grit that came out of it. I used cotton swabs and alcohol to scrub it clean. Once it was clean the stem fit snuggly over the end of the tenon and all parts aligned perfectly.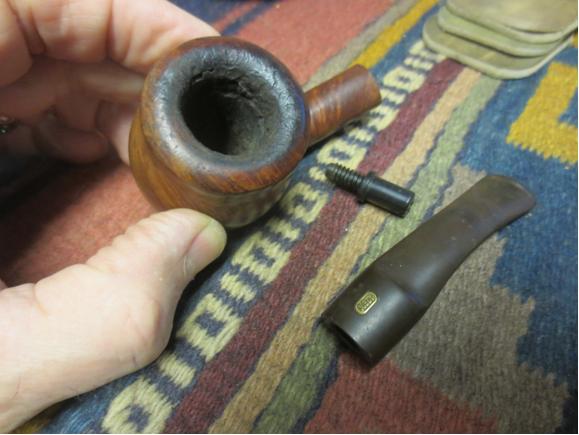


 With the stem fit completed and the new tenon in place it was time to clean up the pipe and see what I was dealing with underneath the grime and dirt. I took some close up photos of the bowl and the stem issues and a complete set of photos of the pipe from multiple angles to show what it looked like when I started.
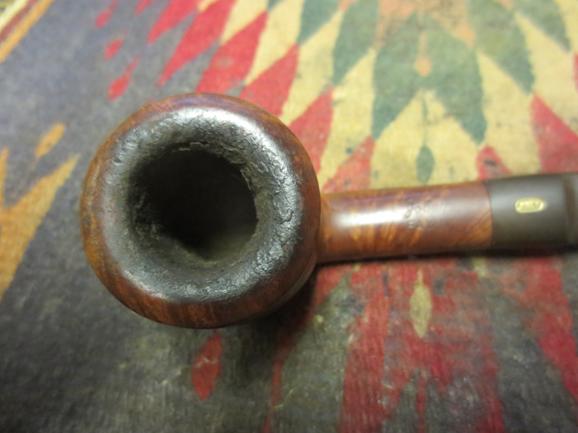


 The bowl on this pipe is quite large. I reamed it with the two largest cutting heads on the PipNet pipe reamer and took the cake back to bare briar. I cleaned up the ridges and edges of the broken cake shown in the second photo below with a pen knife and the bowl inside was smooth and clean.
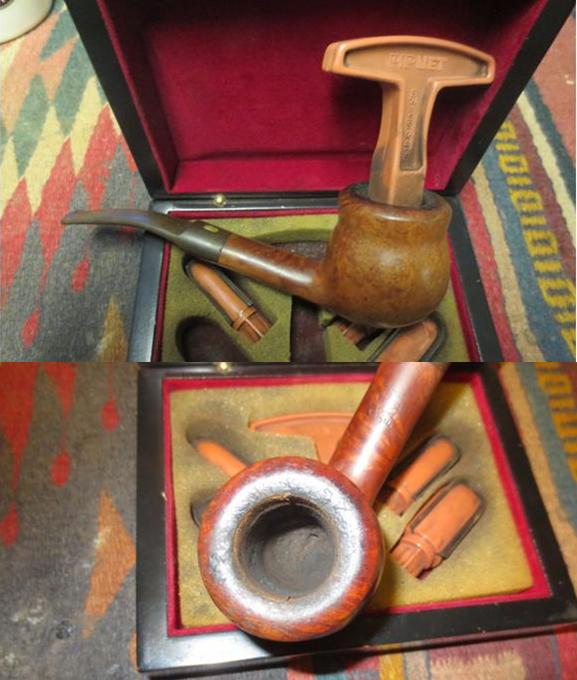 I lightly sanded the rim with 220 grit sandpaper to cut through the thick lava on the rim and the inner edge of the bowl. I was able to remove most of it with the sandpaper and finished by scrubbing the bowl down with acetone on cotton pads. The next photo shows the beauty of the rim that lay beneath the lava flow.
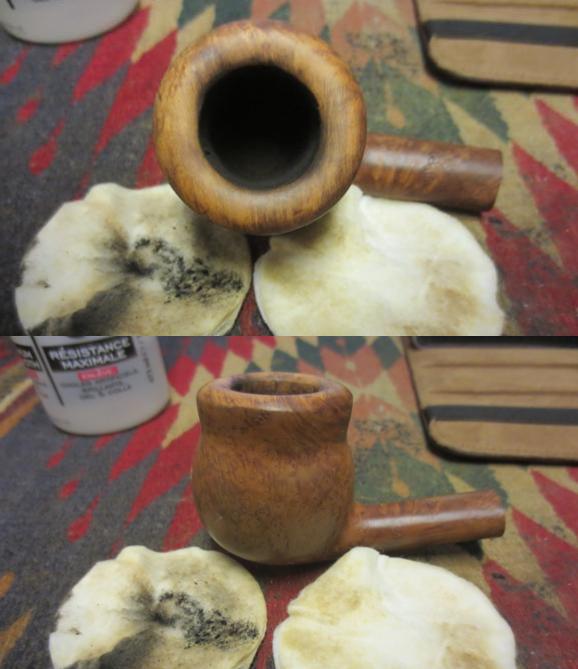 Once I had removed the grime and the finish I examined the bowl to look for issues that I would need to deal with. Sadly I found that there was a hairline crack where the shank connected to the bowl. It was on the underside of that junction and went up the left side. It was about an inch long. This Jobey Cauldron was turning out to be far more work than I originally imagined when my brother and I had looked at the Ebay photos.
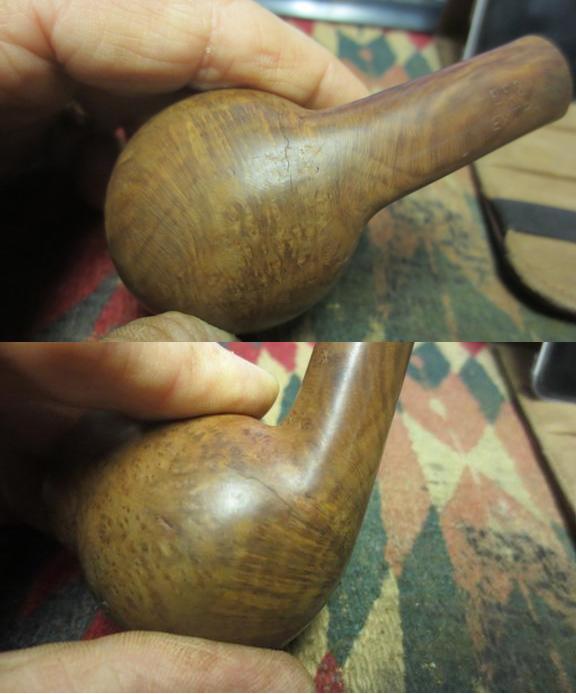 This crack, though not deep and pretty cosmetic at this point, would need to be dealt with so that it would not become a bigger issue. I used a micro drill bit on the Dremel and drilled both ends of the crack. I examined it with a lens and saw that it went a little further than I had expected originally and redrilled the end of the crack on the side of the bowl.
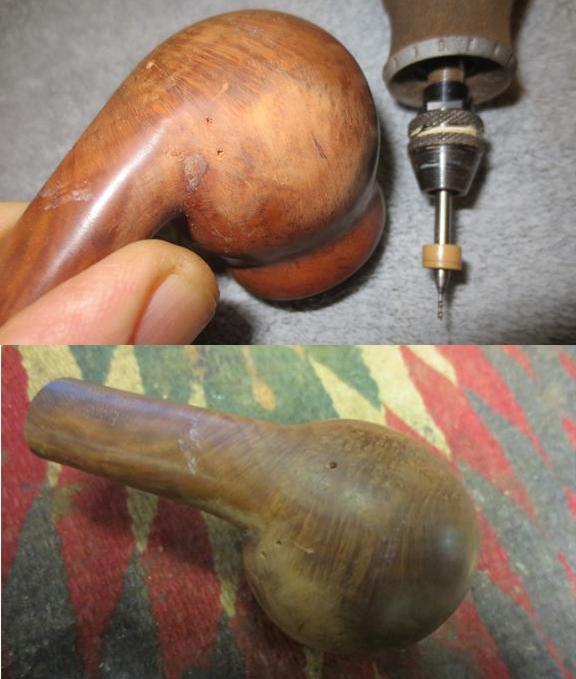 I decided to also drill some small holes along the crack to make sure that I could seal it further.
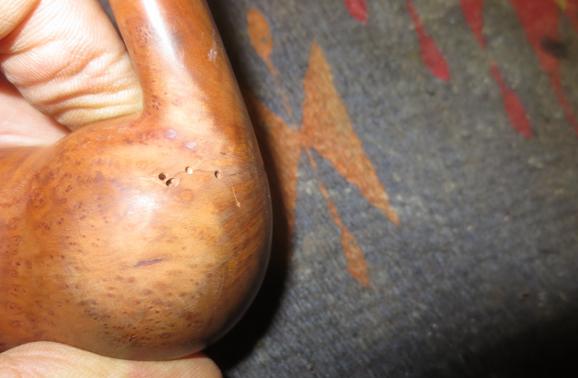 I pressed some briar dust into the drill holes with a dental pick and then put drops of super glue into the filled holes. I pressed some more briar dust into the surface of the holes to deal with expected shrinkage as the patches dried. At this point the repair always looks ugly and over done but I have found if I skip the last step I have to repeat the process to ensure that the holes are filled.
 I sanded the repairs with 220 grit sandpaper and then with a medium and fine grit sanding sponge.
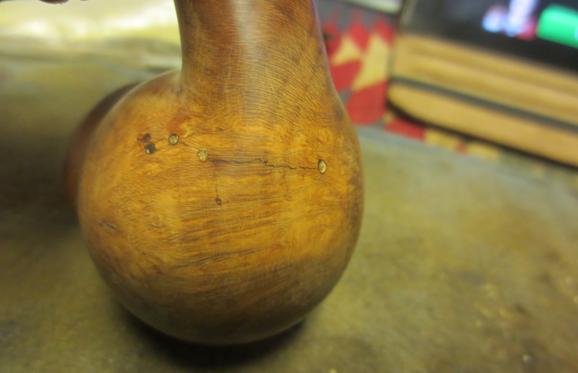 I stained the repair area and the top of the rim with a light brown stain pen to blend it into the colour of the bowl and shank. This would not be the final colour of the bowl but I wanted to minimize the difference between the sanded areas and the rest of the bowl and shank when I gave it a final stain coat.
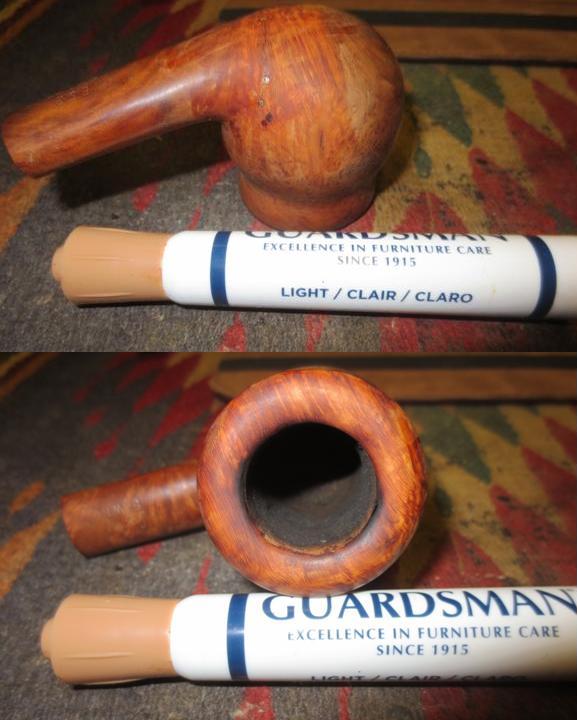
I buffed the bowl with Blue Diamond to even out the stain. While the repairs showed through the stain at this point I intended to darken the stain later and it would blend in the repairs a bit more.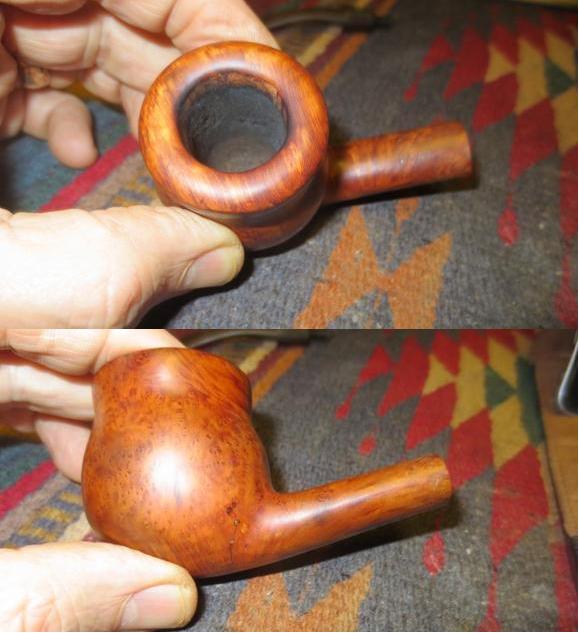
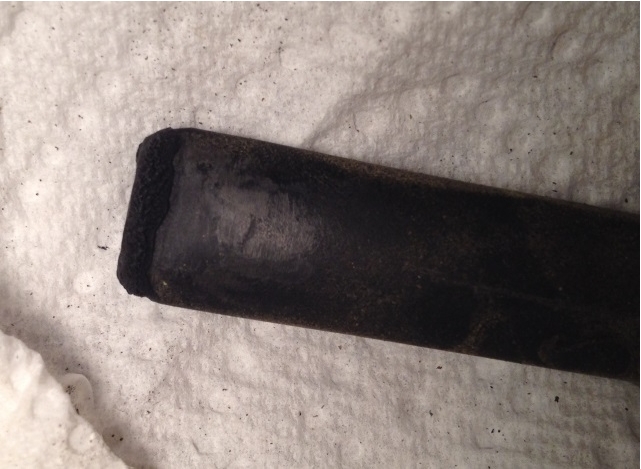
 With the bowl basically finished at this point I worked on the stem. The missing chunk in the stem end was the expected major repair that needed to be addressed. I mixed up a batch of black super glue and activated charcoal powder to make a paste. I put a wedge of cardboard wrapped in packing tape in what remained of the slot in the stem and applied the paste to the hole in the stem with a dental spatula. At this point I was more interested in getting a good thick coat of the paste in place than in making it look pretty. Shaping and smoothing would be done once it cured.
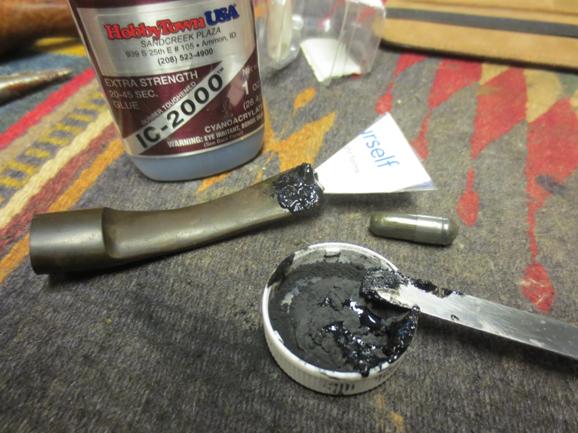
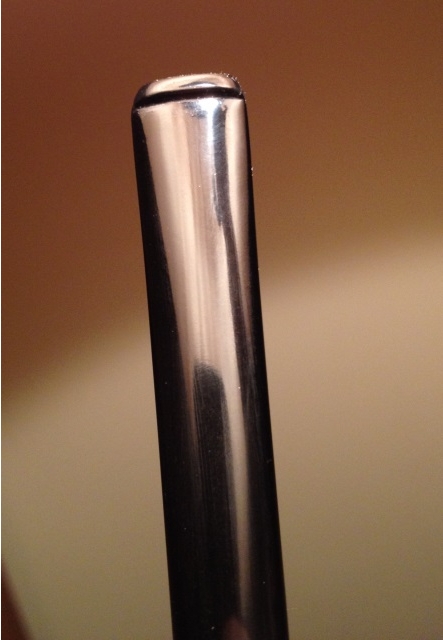
 Once the patch had cured I used a file to define the edge of the button and to smooth out the surface of the stem. I used the topping board to smooth out the end of the stem.
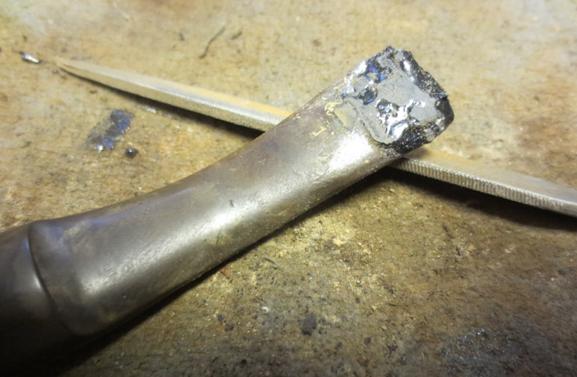 It took a lot of filing with needle files to clean up and define the button and then sanding with 220 grit sandpaper to blend the patch into the surface of the surround stem. I used a round, an oval and a flattened oval needle file to open up and shape the slot on the bottom side to match that of the top side.
 I continued to sand the stem surface with 220 grit sandpaper to shape the blade and the button. The stem was beginning to take shape. The new button and the repair to the bottom of the stem were complete.
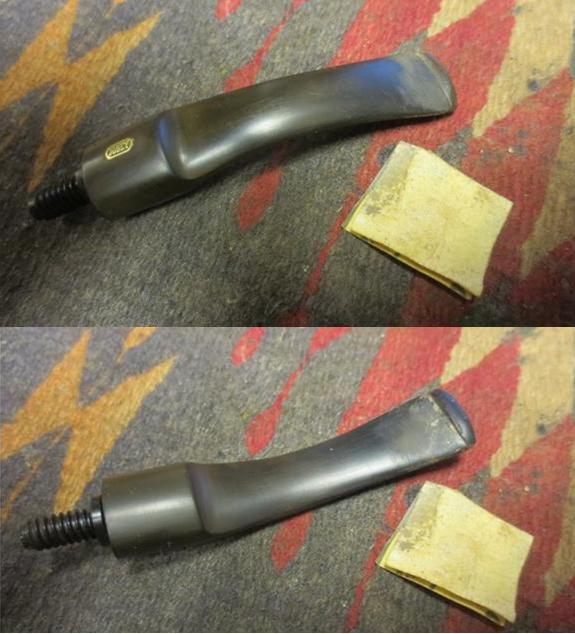 I wanted to make sure to stain the bowl before I called it a night so I set the stem aside for a bit and stained the bowl. I gave it several coats of dark brown aniline stain and flamed it between to set the colour in the briar. The darker colour would bring the pipe to a similar colour to the one that I found on Smoking pipes.com (shown above).
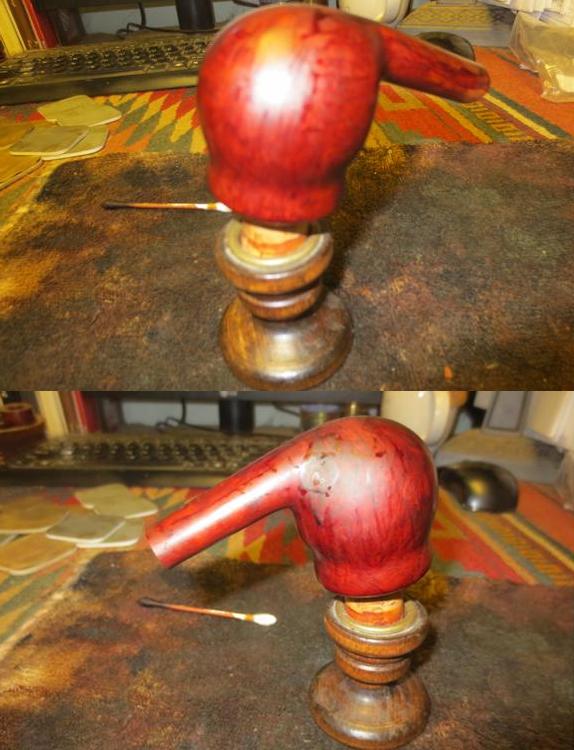 In the morning I worked some more on the stem. I wet sanded it with 1500-2400 micromesh sanding pads. I gave it a coat of Obsidian Oil and then dry sanded it with 3200-4000 grit pads. I gave it another coat of oil and then finished sanding it with 6000-12000 grit pads. I gave it a final coat of Obsidian Oil and set it aside to dry.

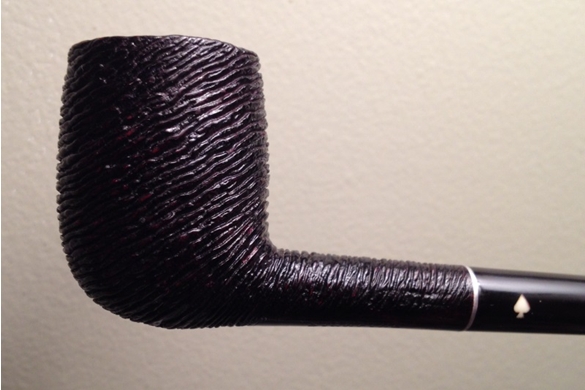
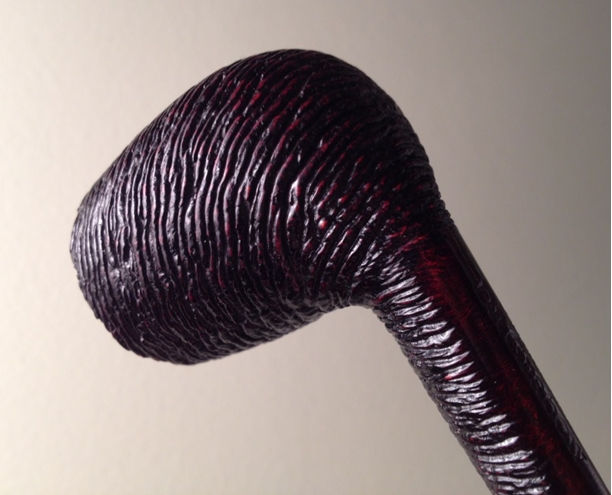
 At this point in the process you can see the scratches on the underside of the stem. No matter how much I sanded them with the micromesh pads these still remained. I started over the process of sanding with the pads – beginning with 1500 grit I worked my way through them until I had finished with 12000 grit. Finally I was able to remove the scratches. I buffed the stem and bowl with Blue Diamond on the wheel and then gave both the bowl and stem several coats of carnauba wax. I buffed it with a clean flannel buff and then with a microfiber cloth before taking the photos below. The finished pipe is shown in the photos below. The repairs to the hairline crack and the stem repair though still visible under scrutiny blend in well with the rest of the bowl and stem. The darker stain covers the repairs on the bowl and look quite natural. The bowl has been brought back to life and I like the rich colour of the buffed and polished dark brown stain. Thanks for looking.