Tag Archives: removing oxidation on stems

GBD Oval-Shank Pot “Seventy-Six” Restoration


In 1976 GBD introduced a series called the “Seventy-Six” to commemorate the United States Bicentennial.  I was in Sophomore in high school during 1976 and the year-long celebration had a big impact on me.  The Seventy-Six model remained in the GBD catalog until 1981.  From the 1976 Catalog:

“The GBD “Seventy-Six” is our contribution to the Bicentennial celebrations.  We have really pushed out the boats for “the colonies” in launching this new series that will be remembered by its proud owner long after the celebrations are forgotten.”

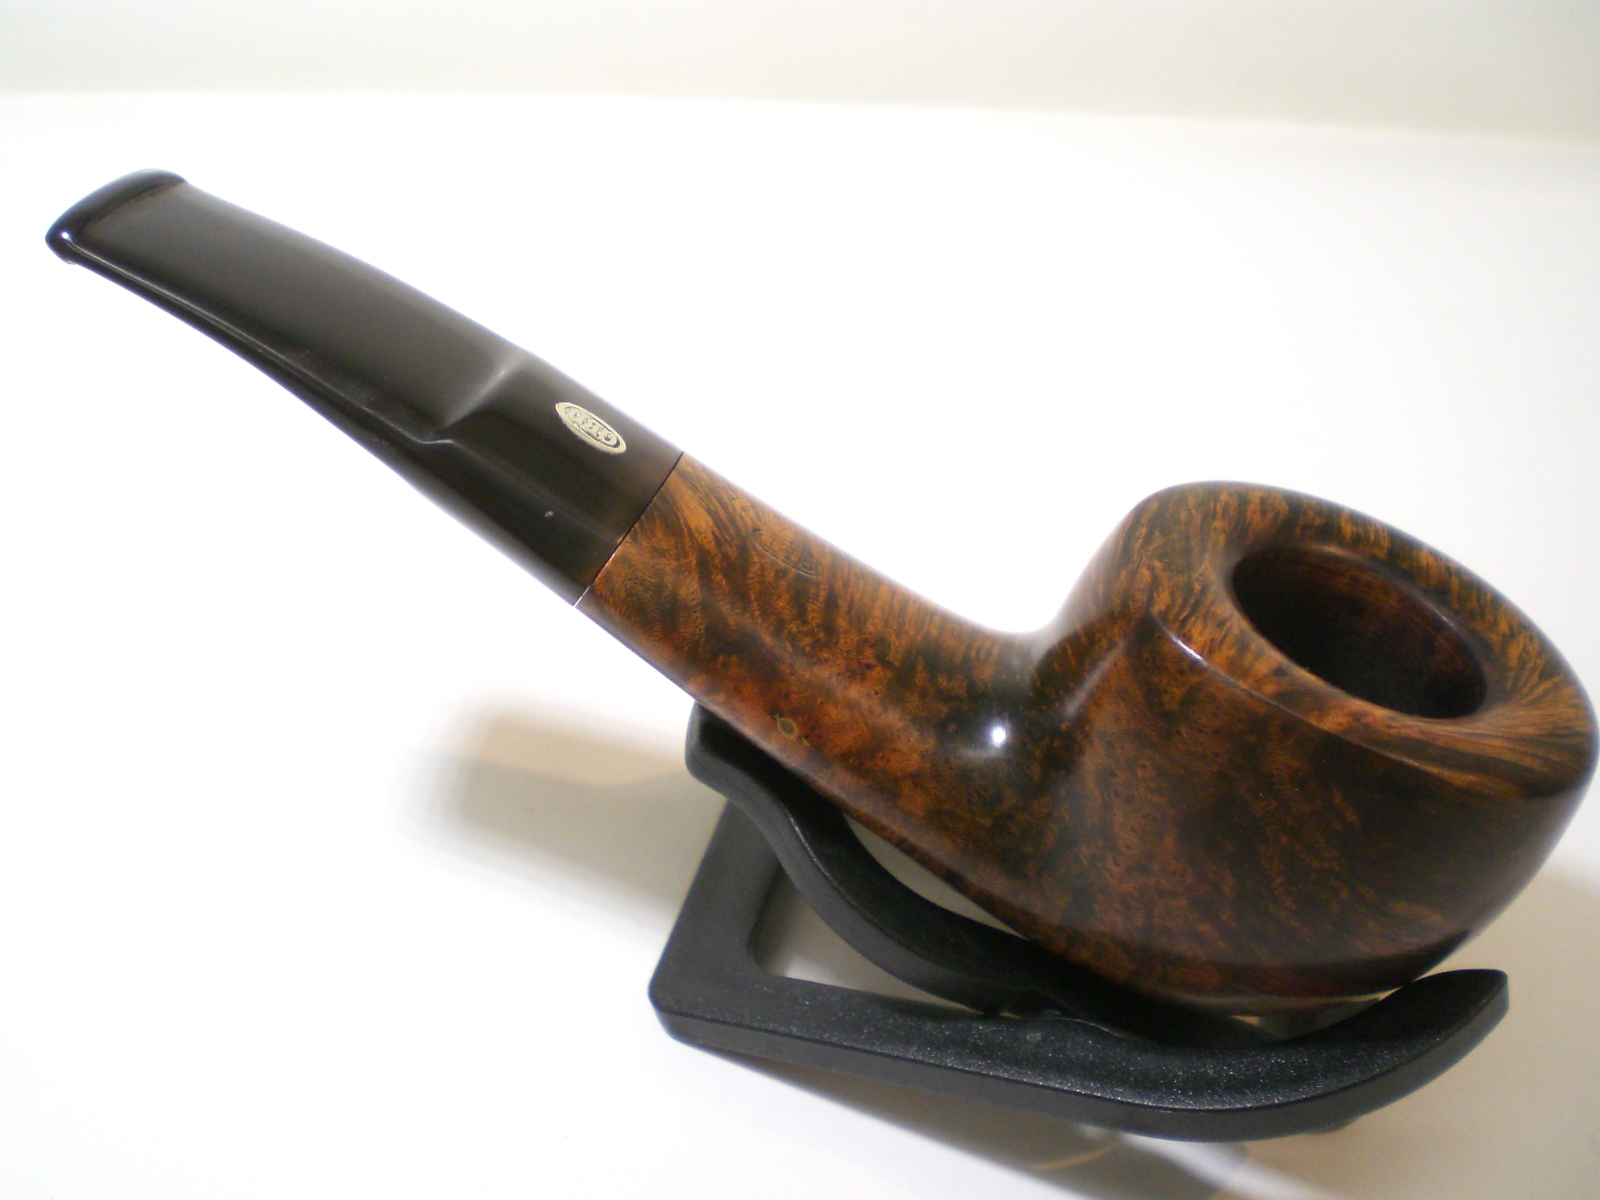
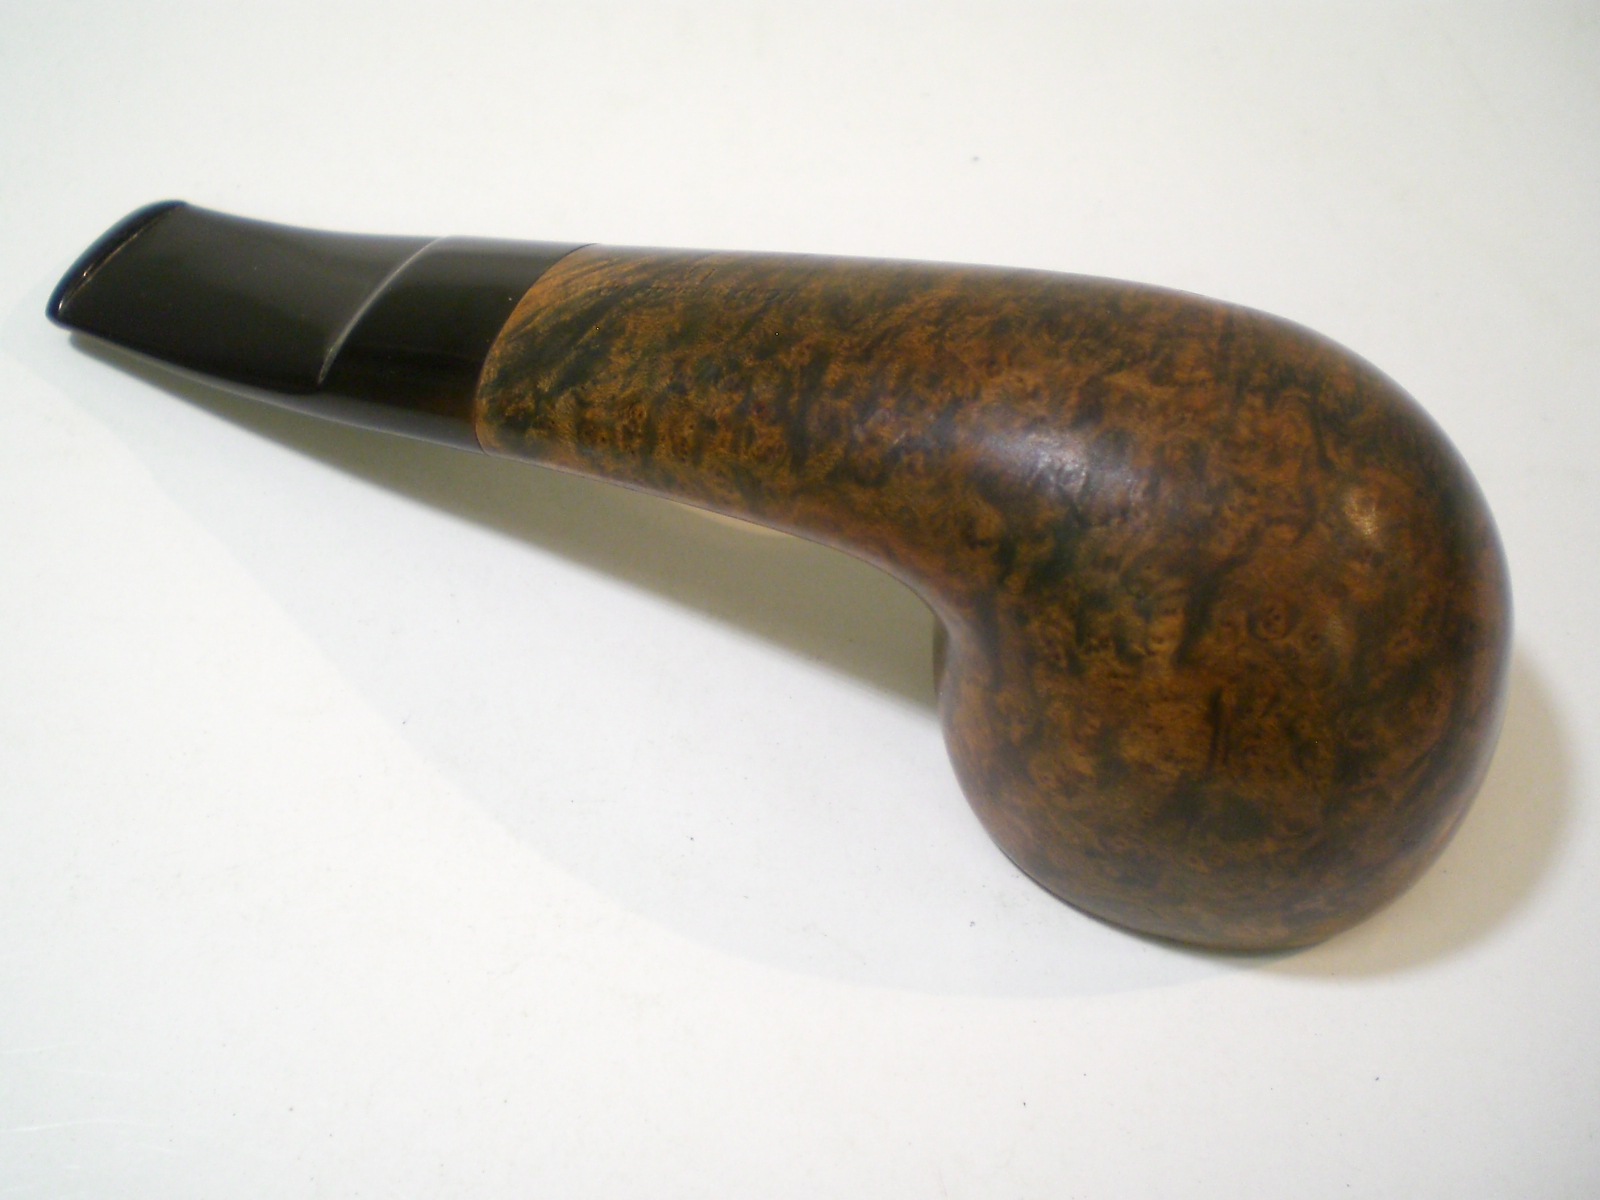
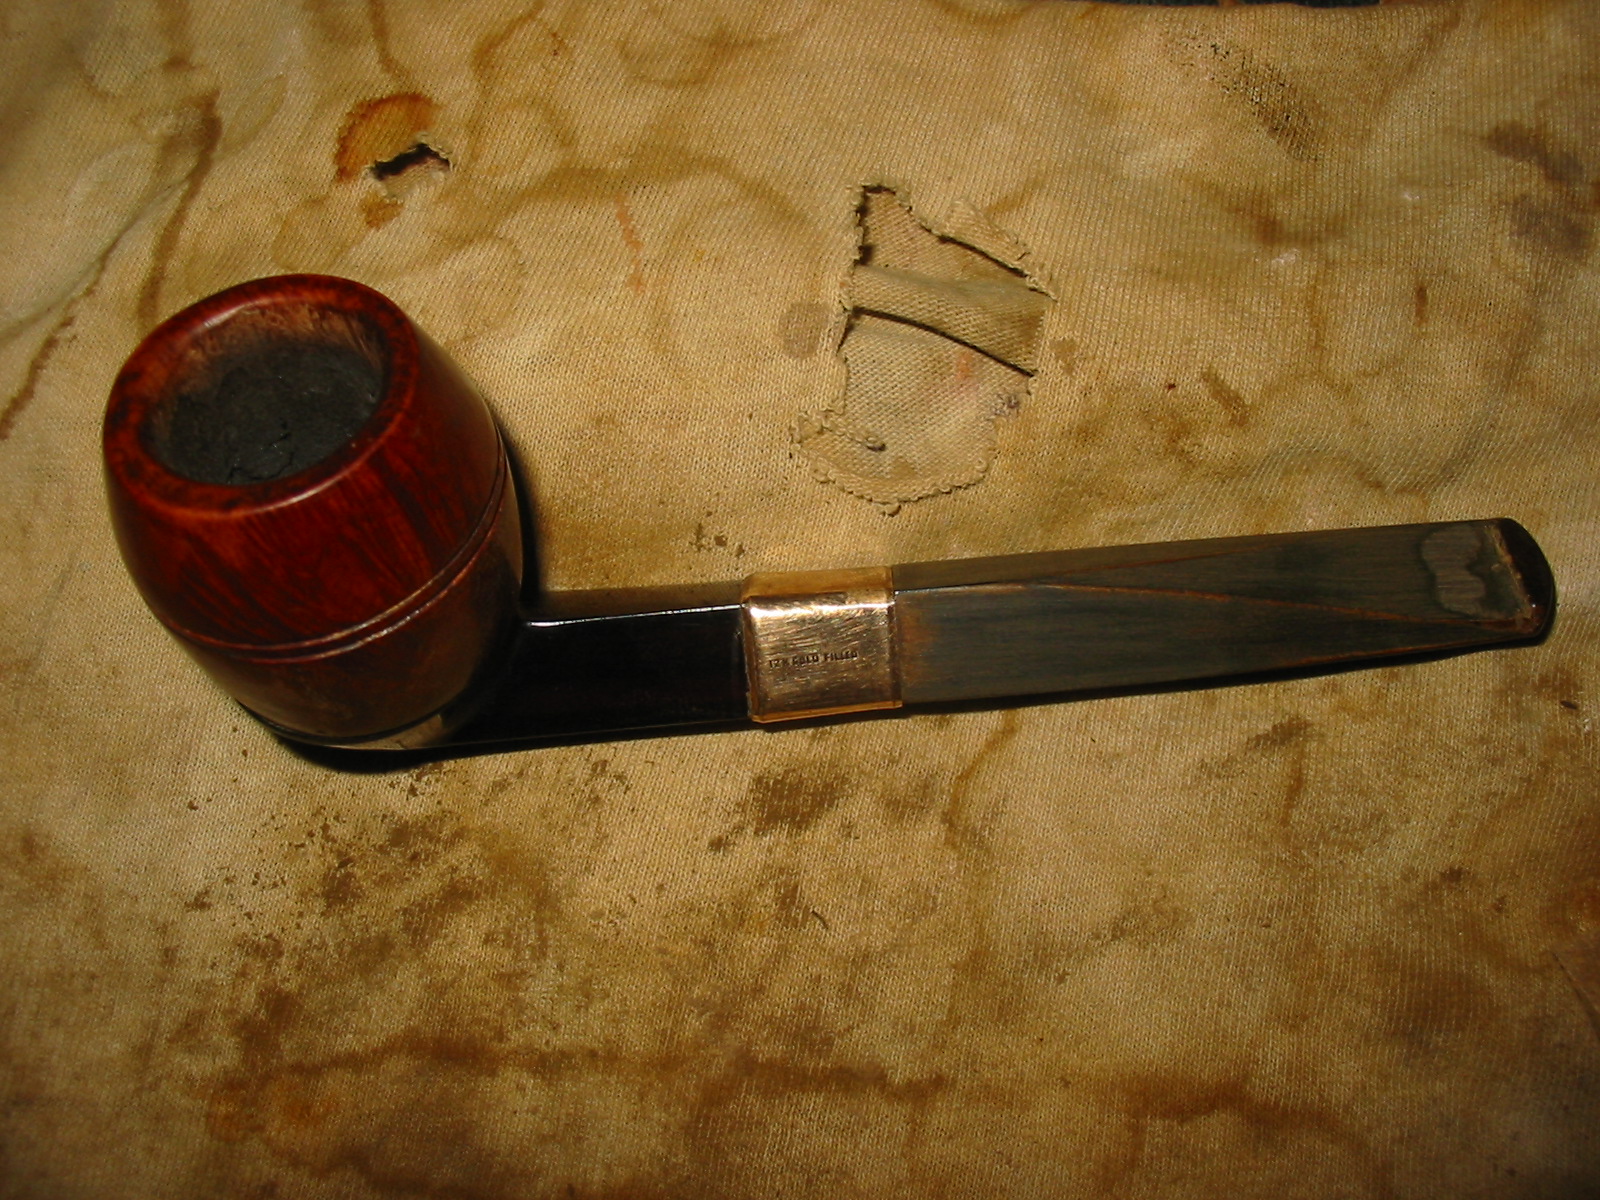
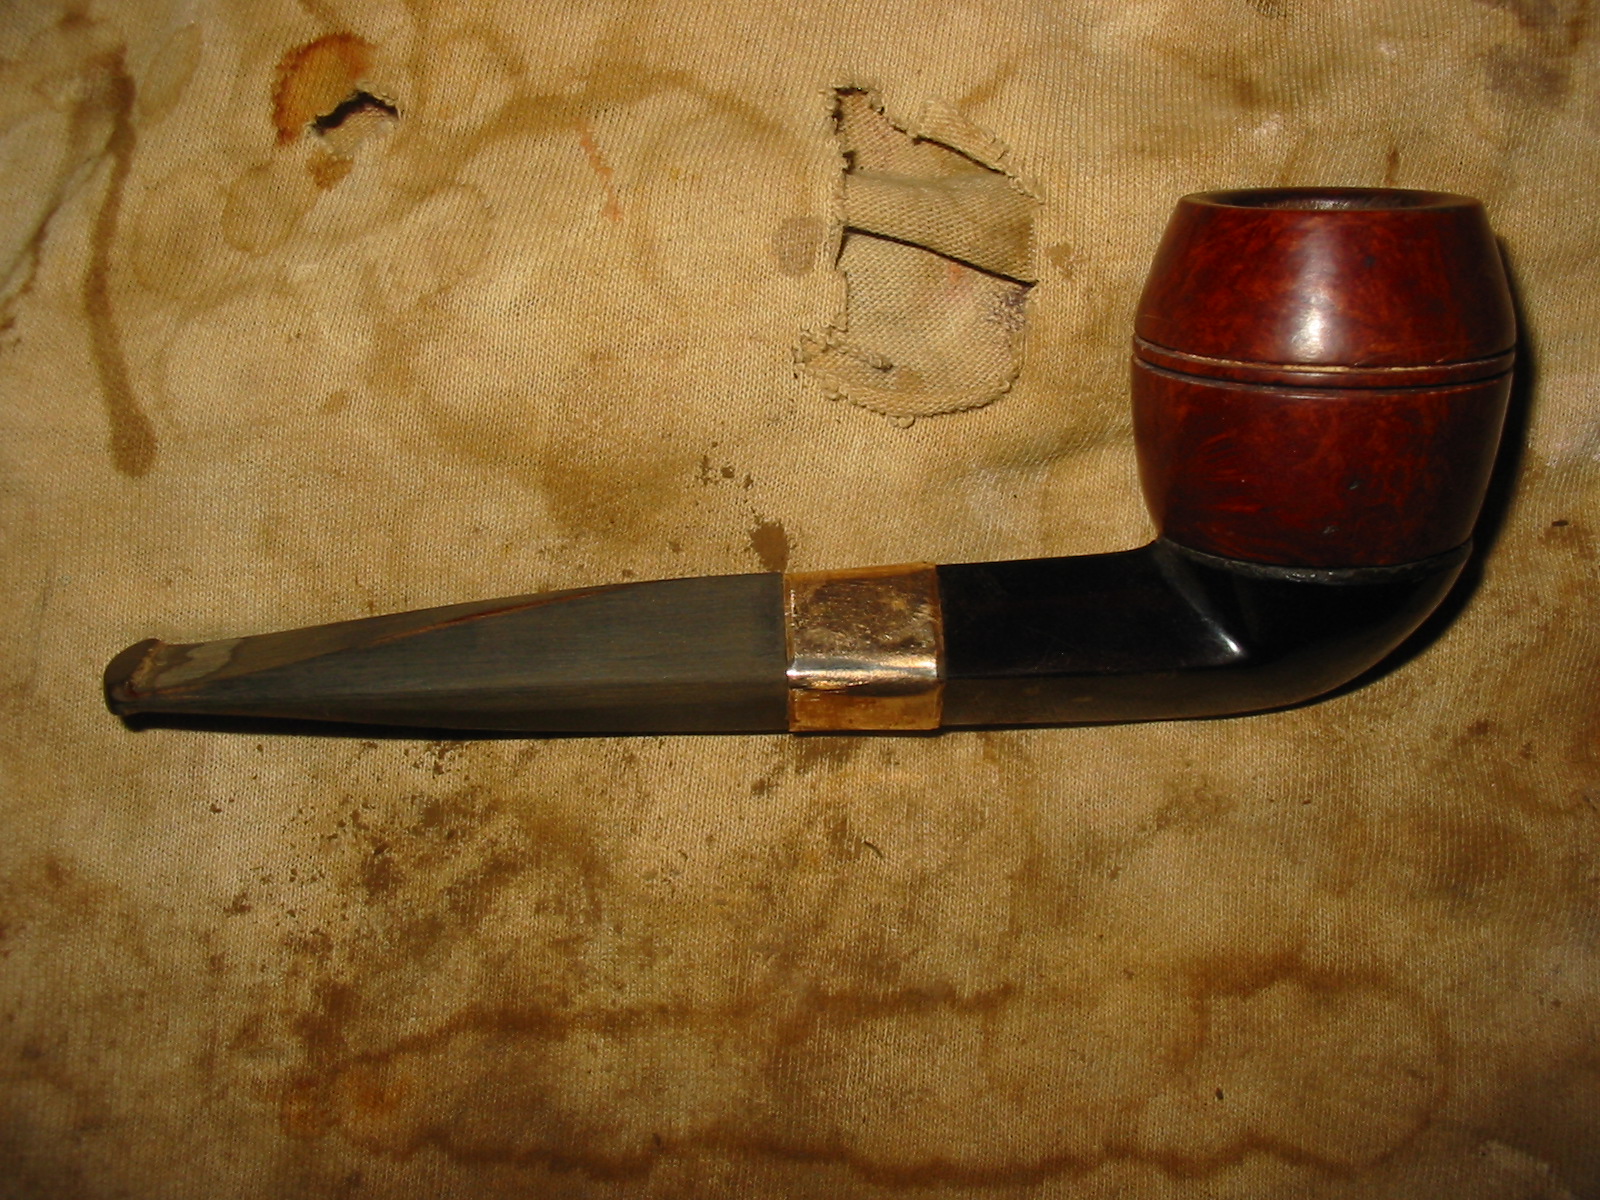
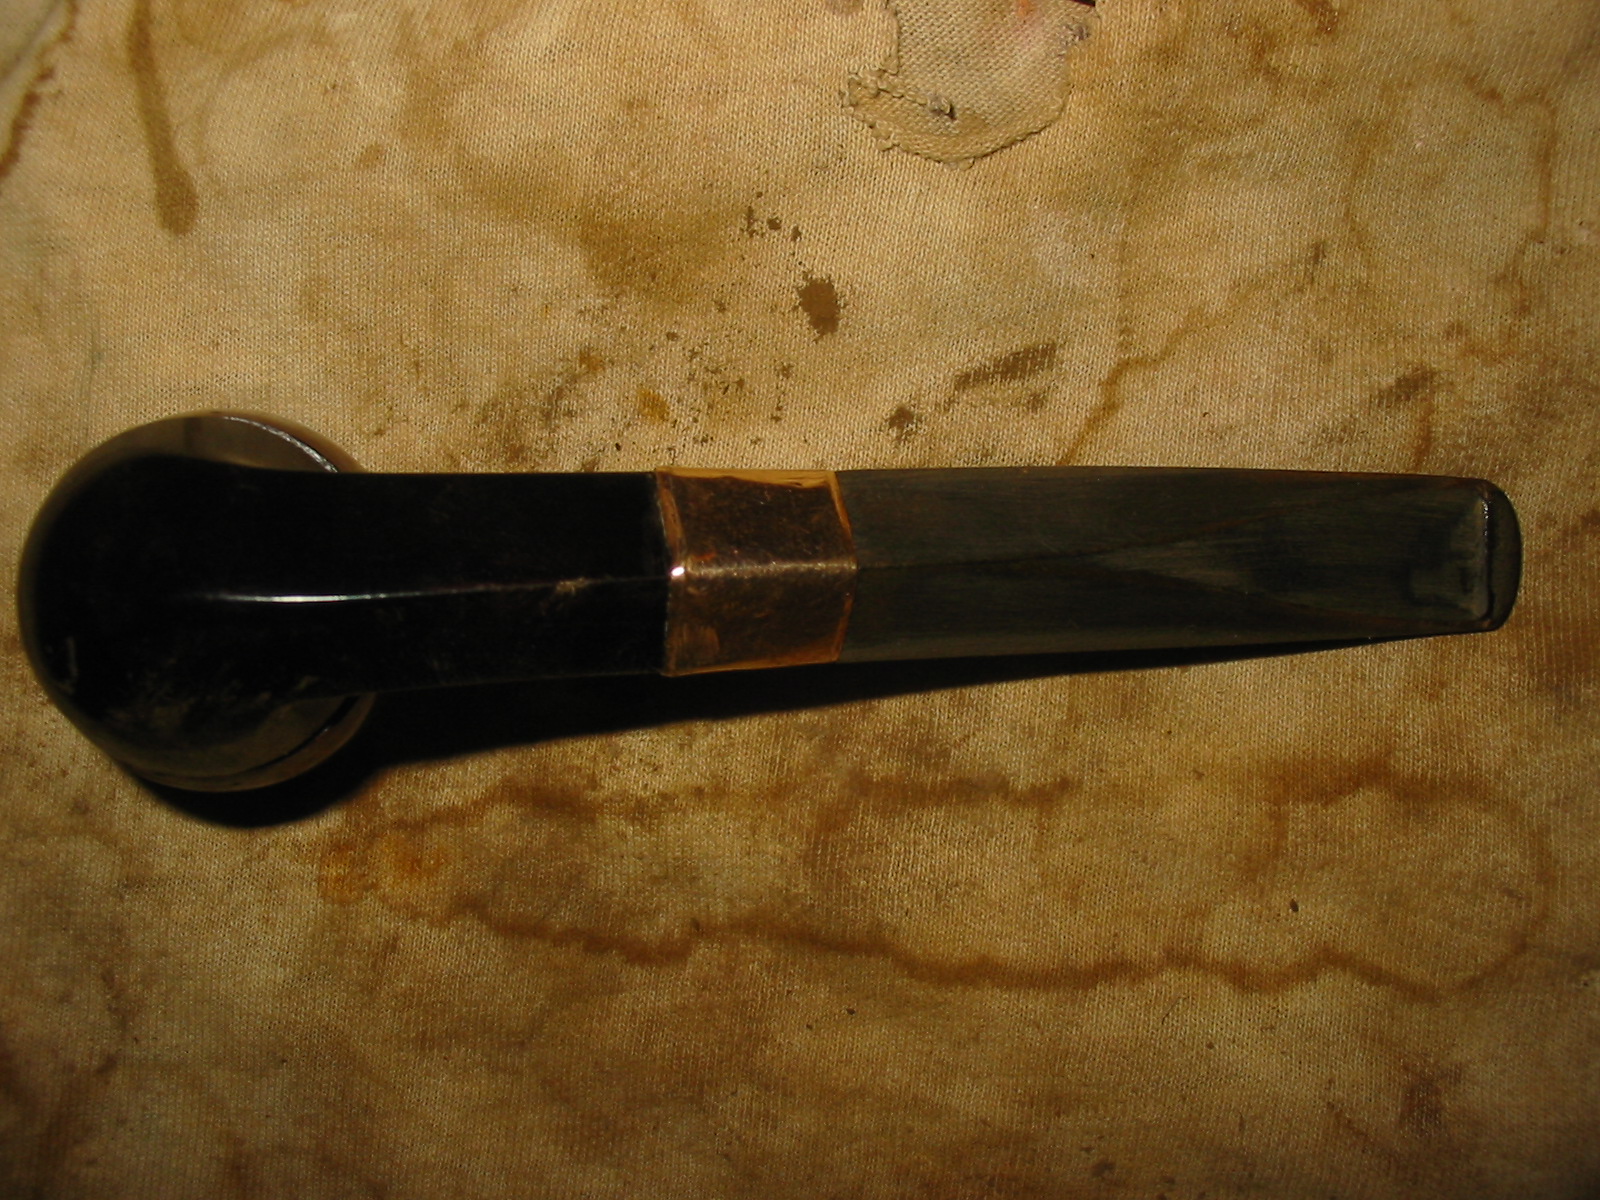
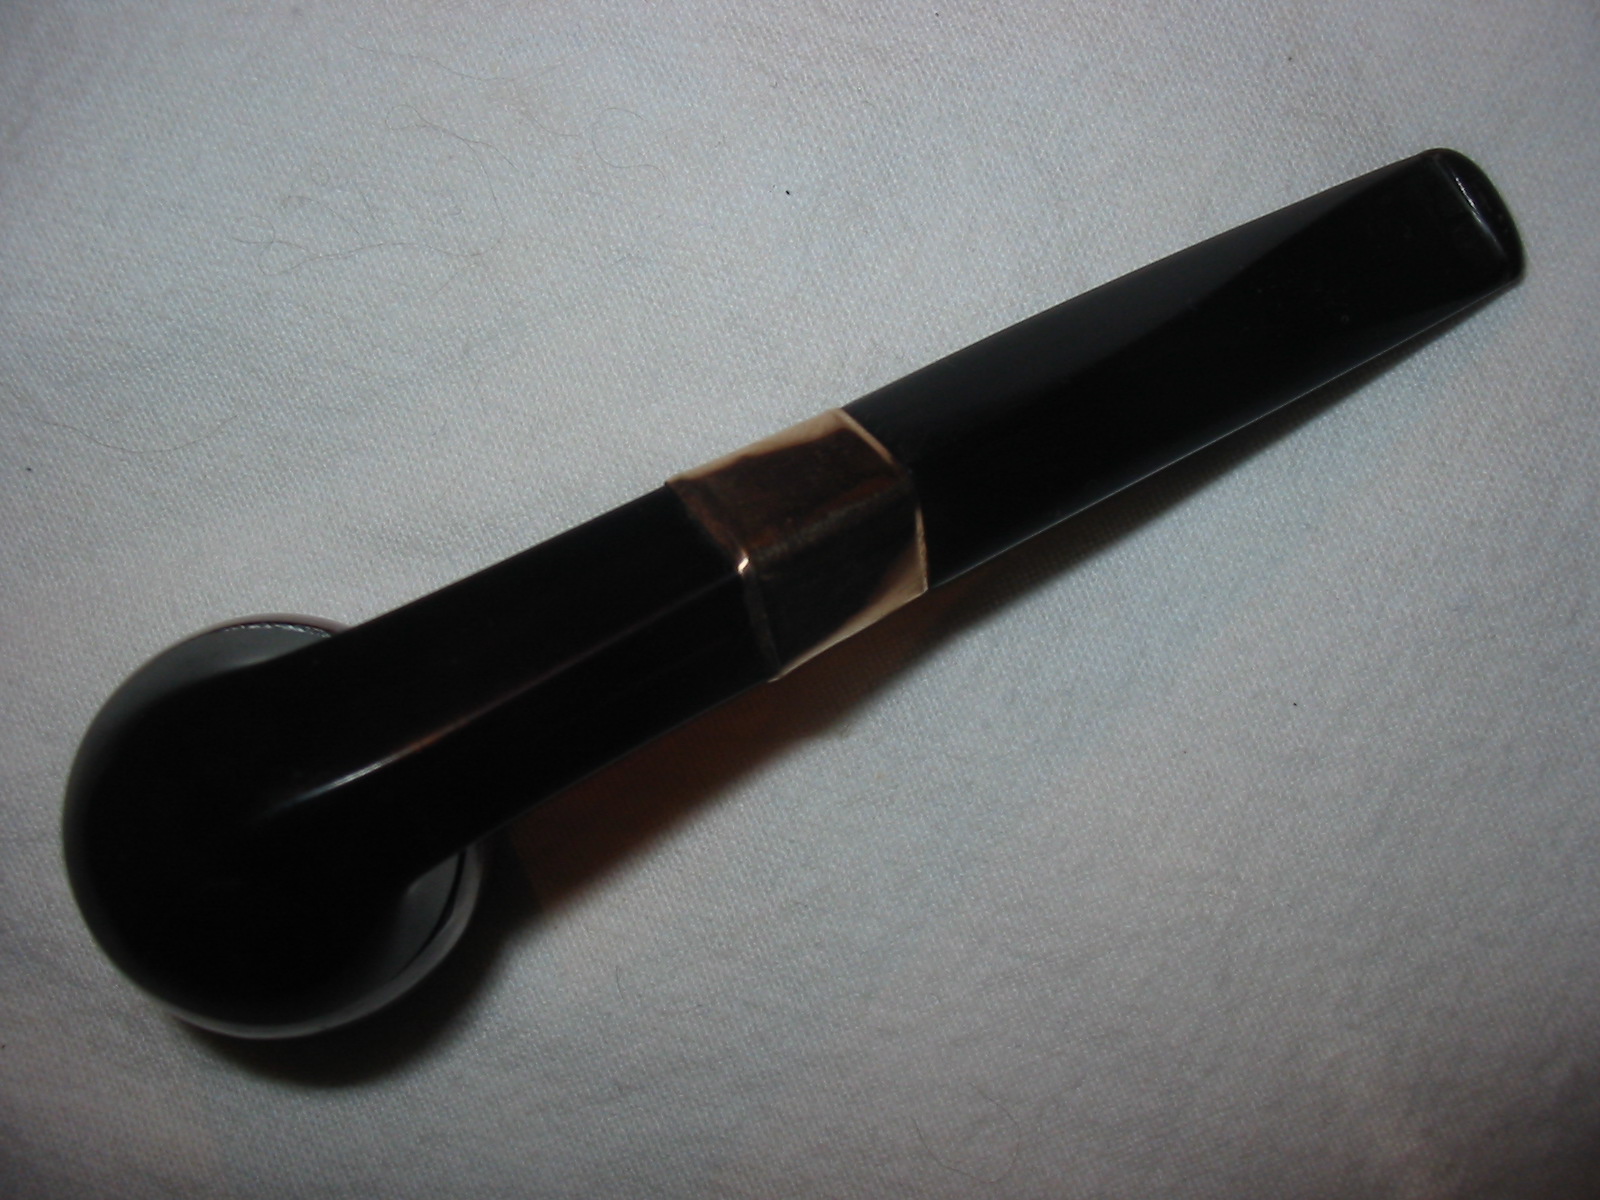
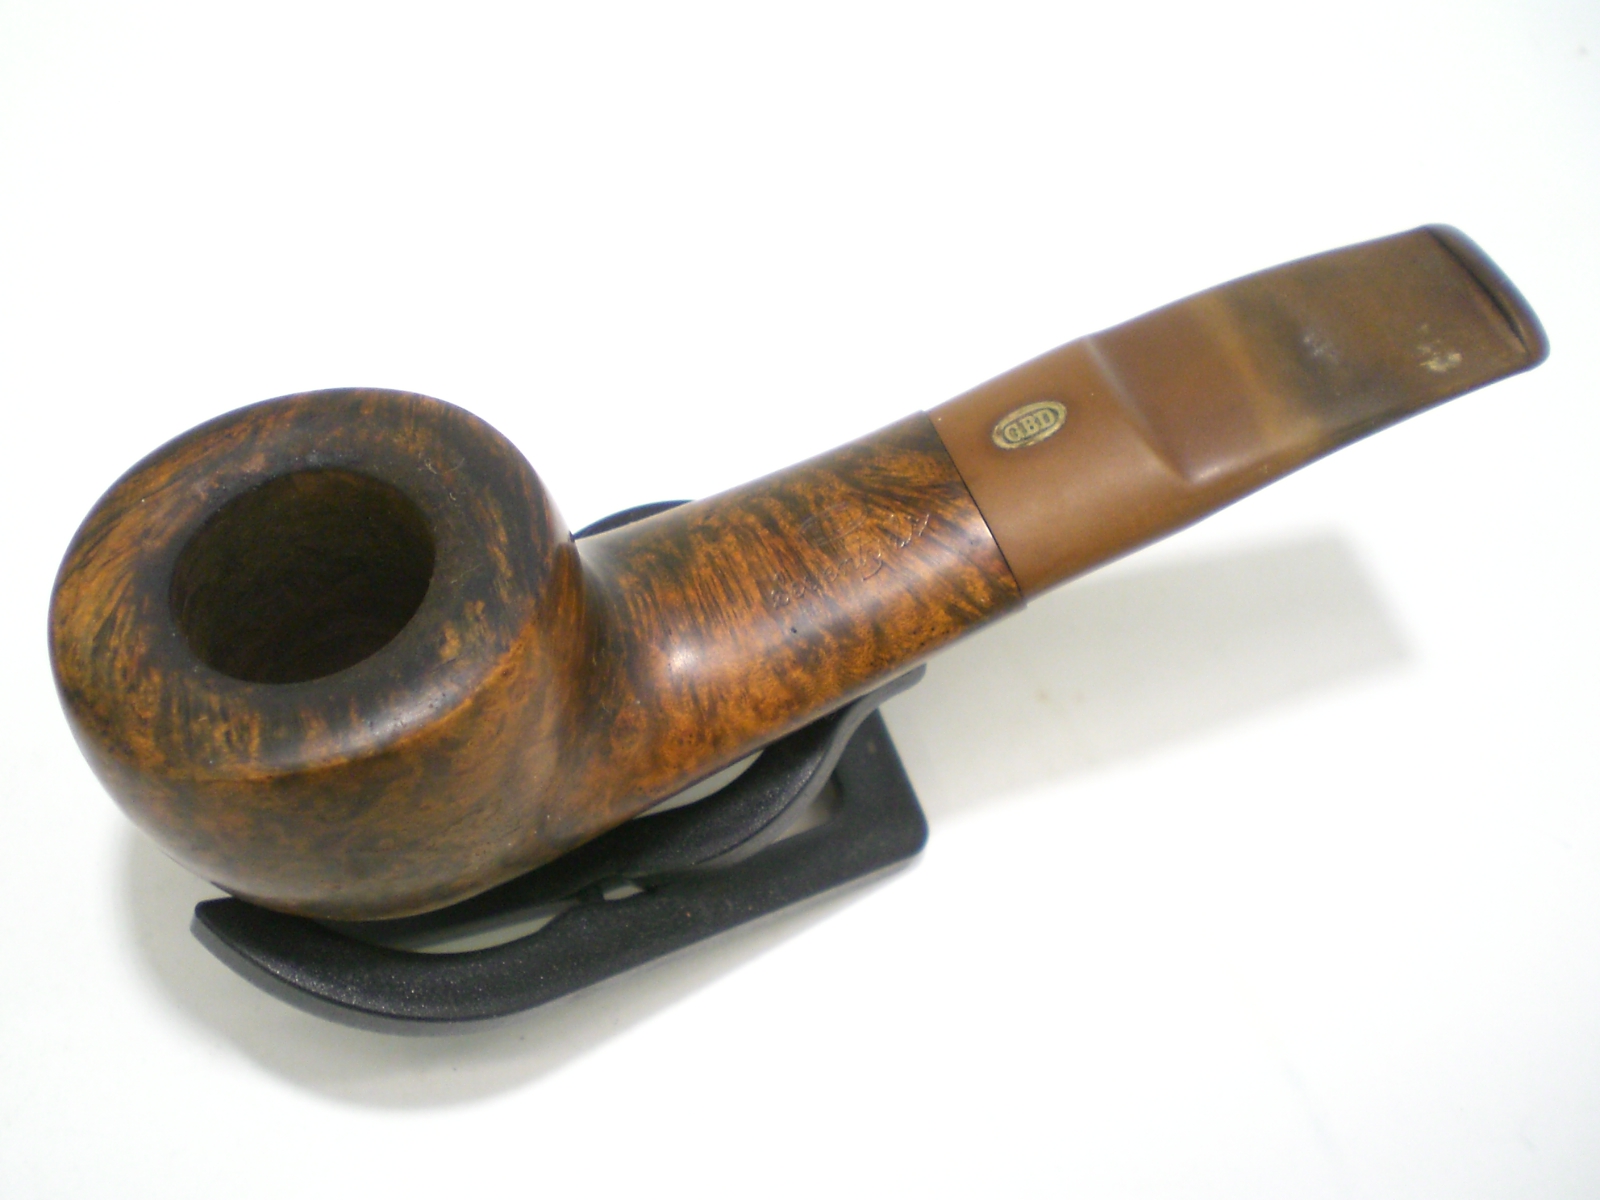
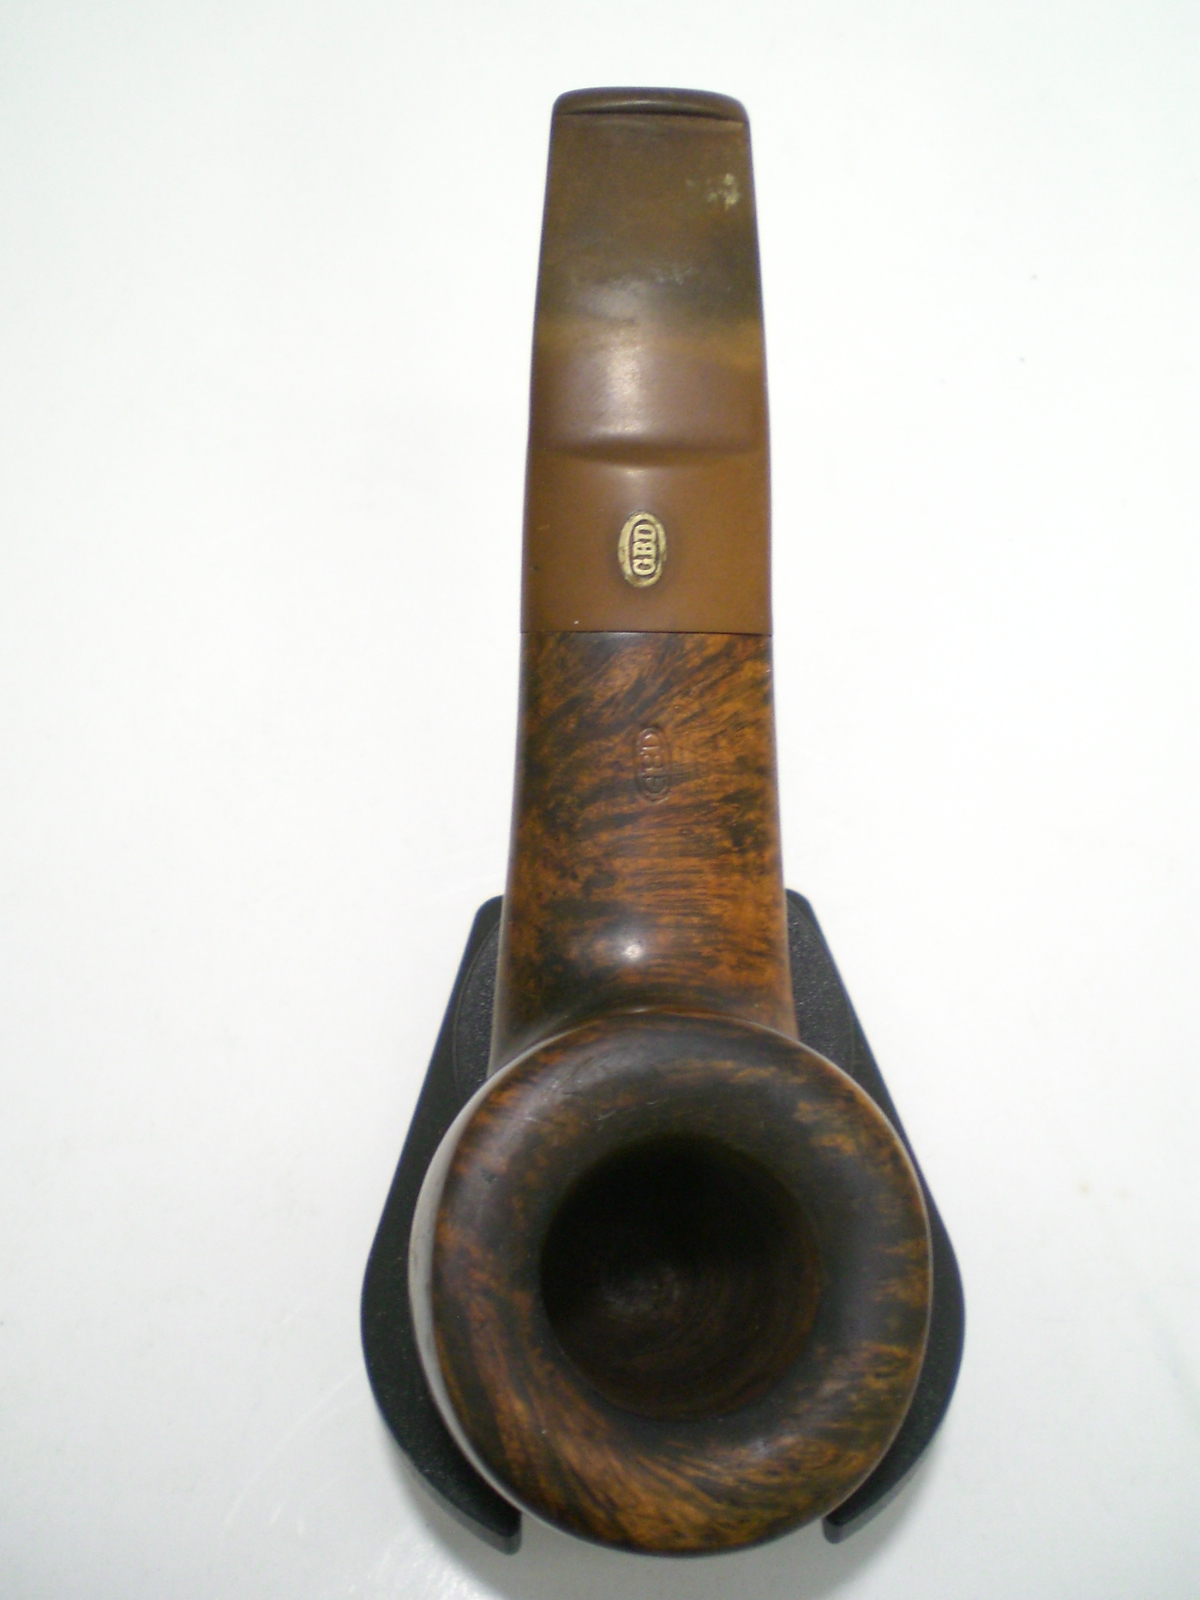
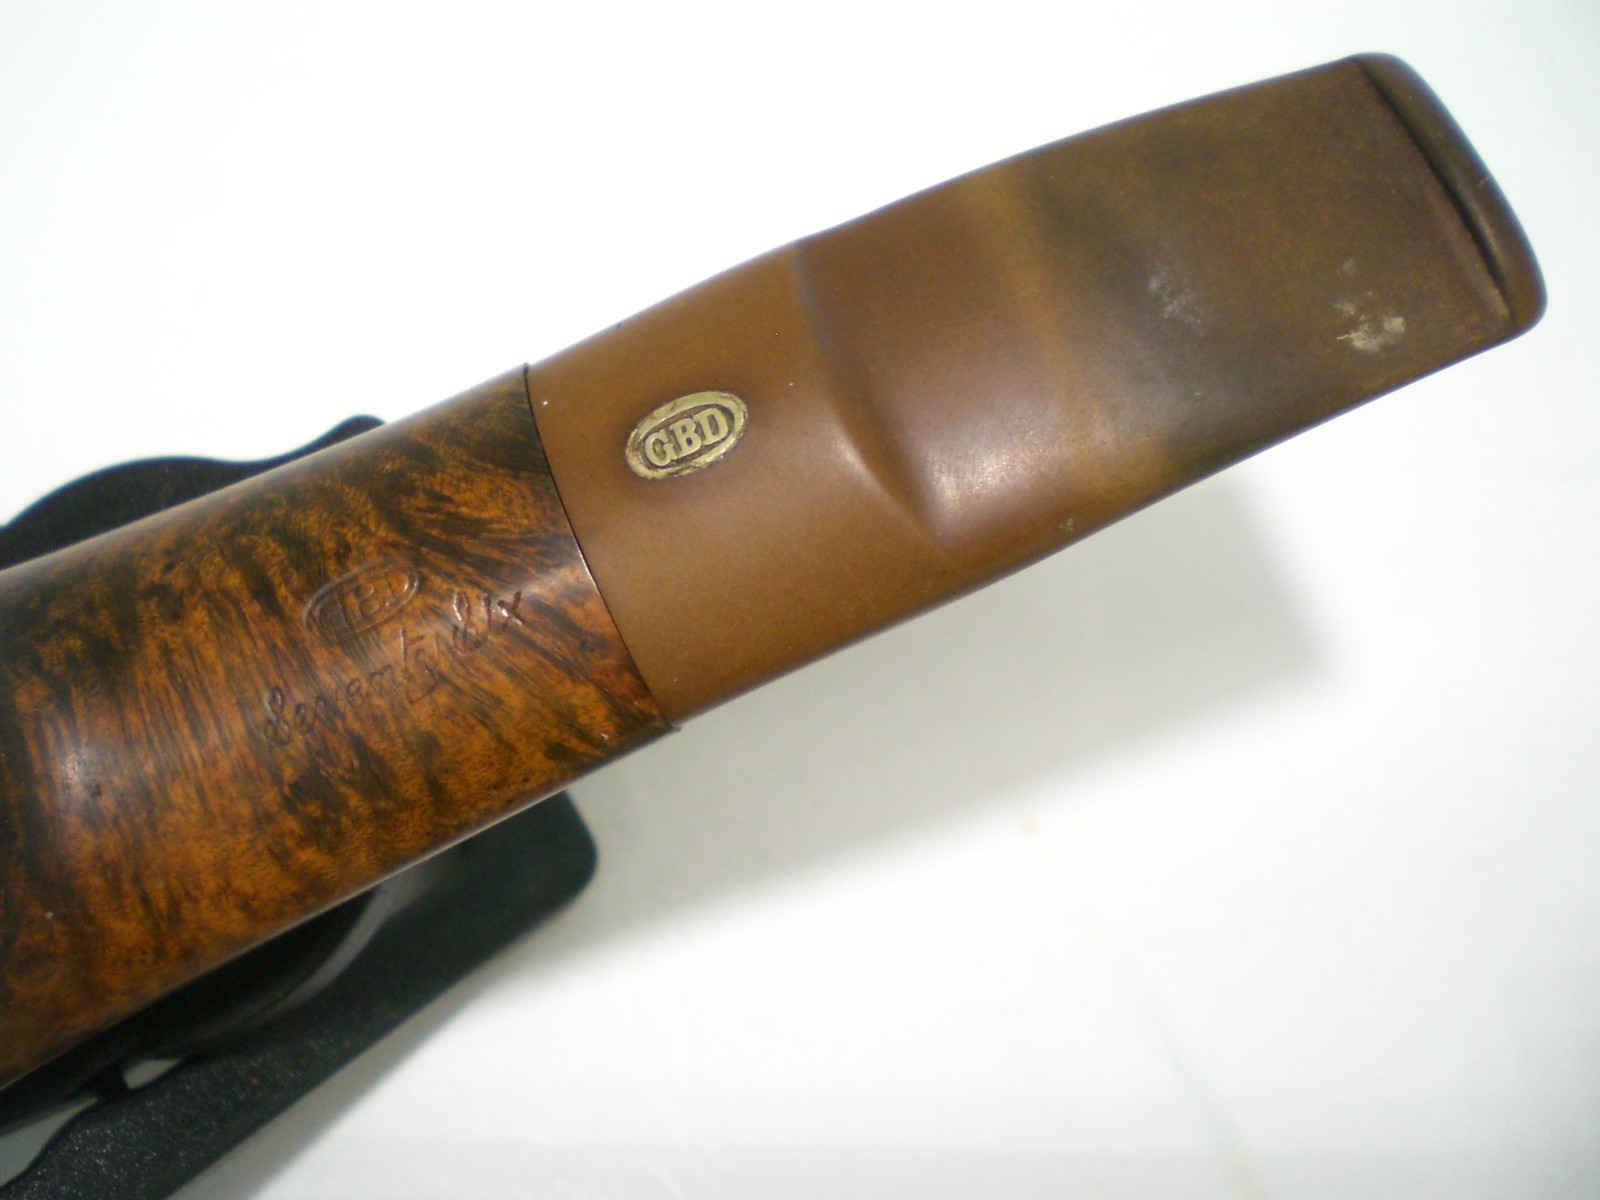
My first “Seventy-Six” model was a 1976 Coloussus and I’ve since added three more, including this Shape 1353.  I would call this a banker, but in a Smokers Haven sales ad, it is referred to as a “bent oval-shank pot”.

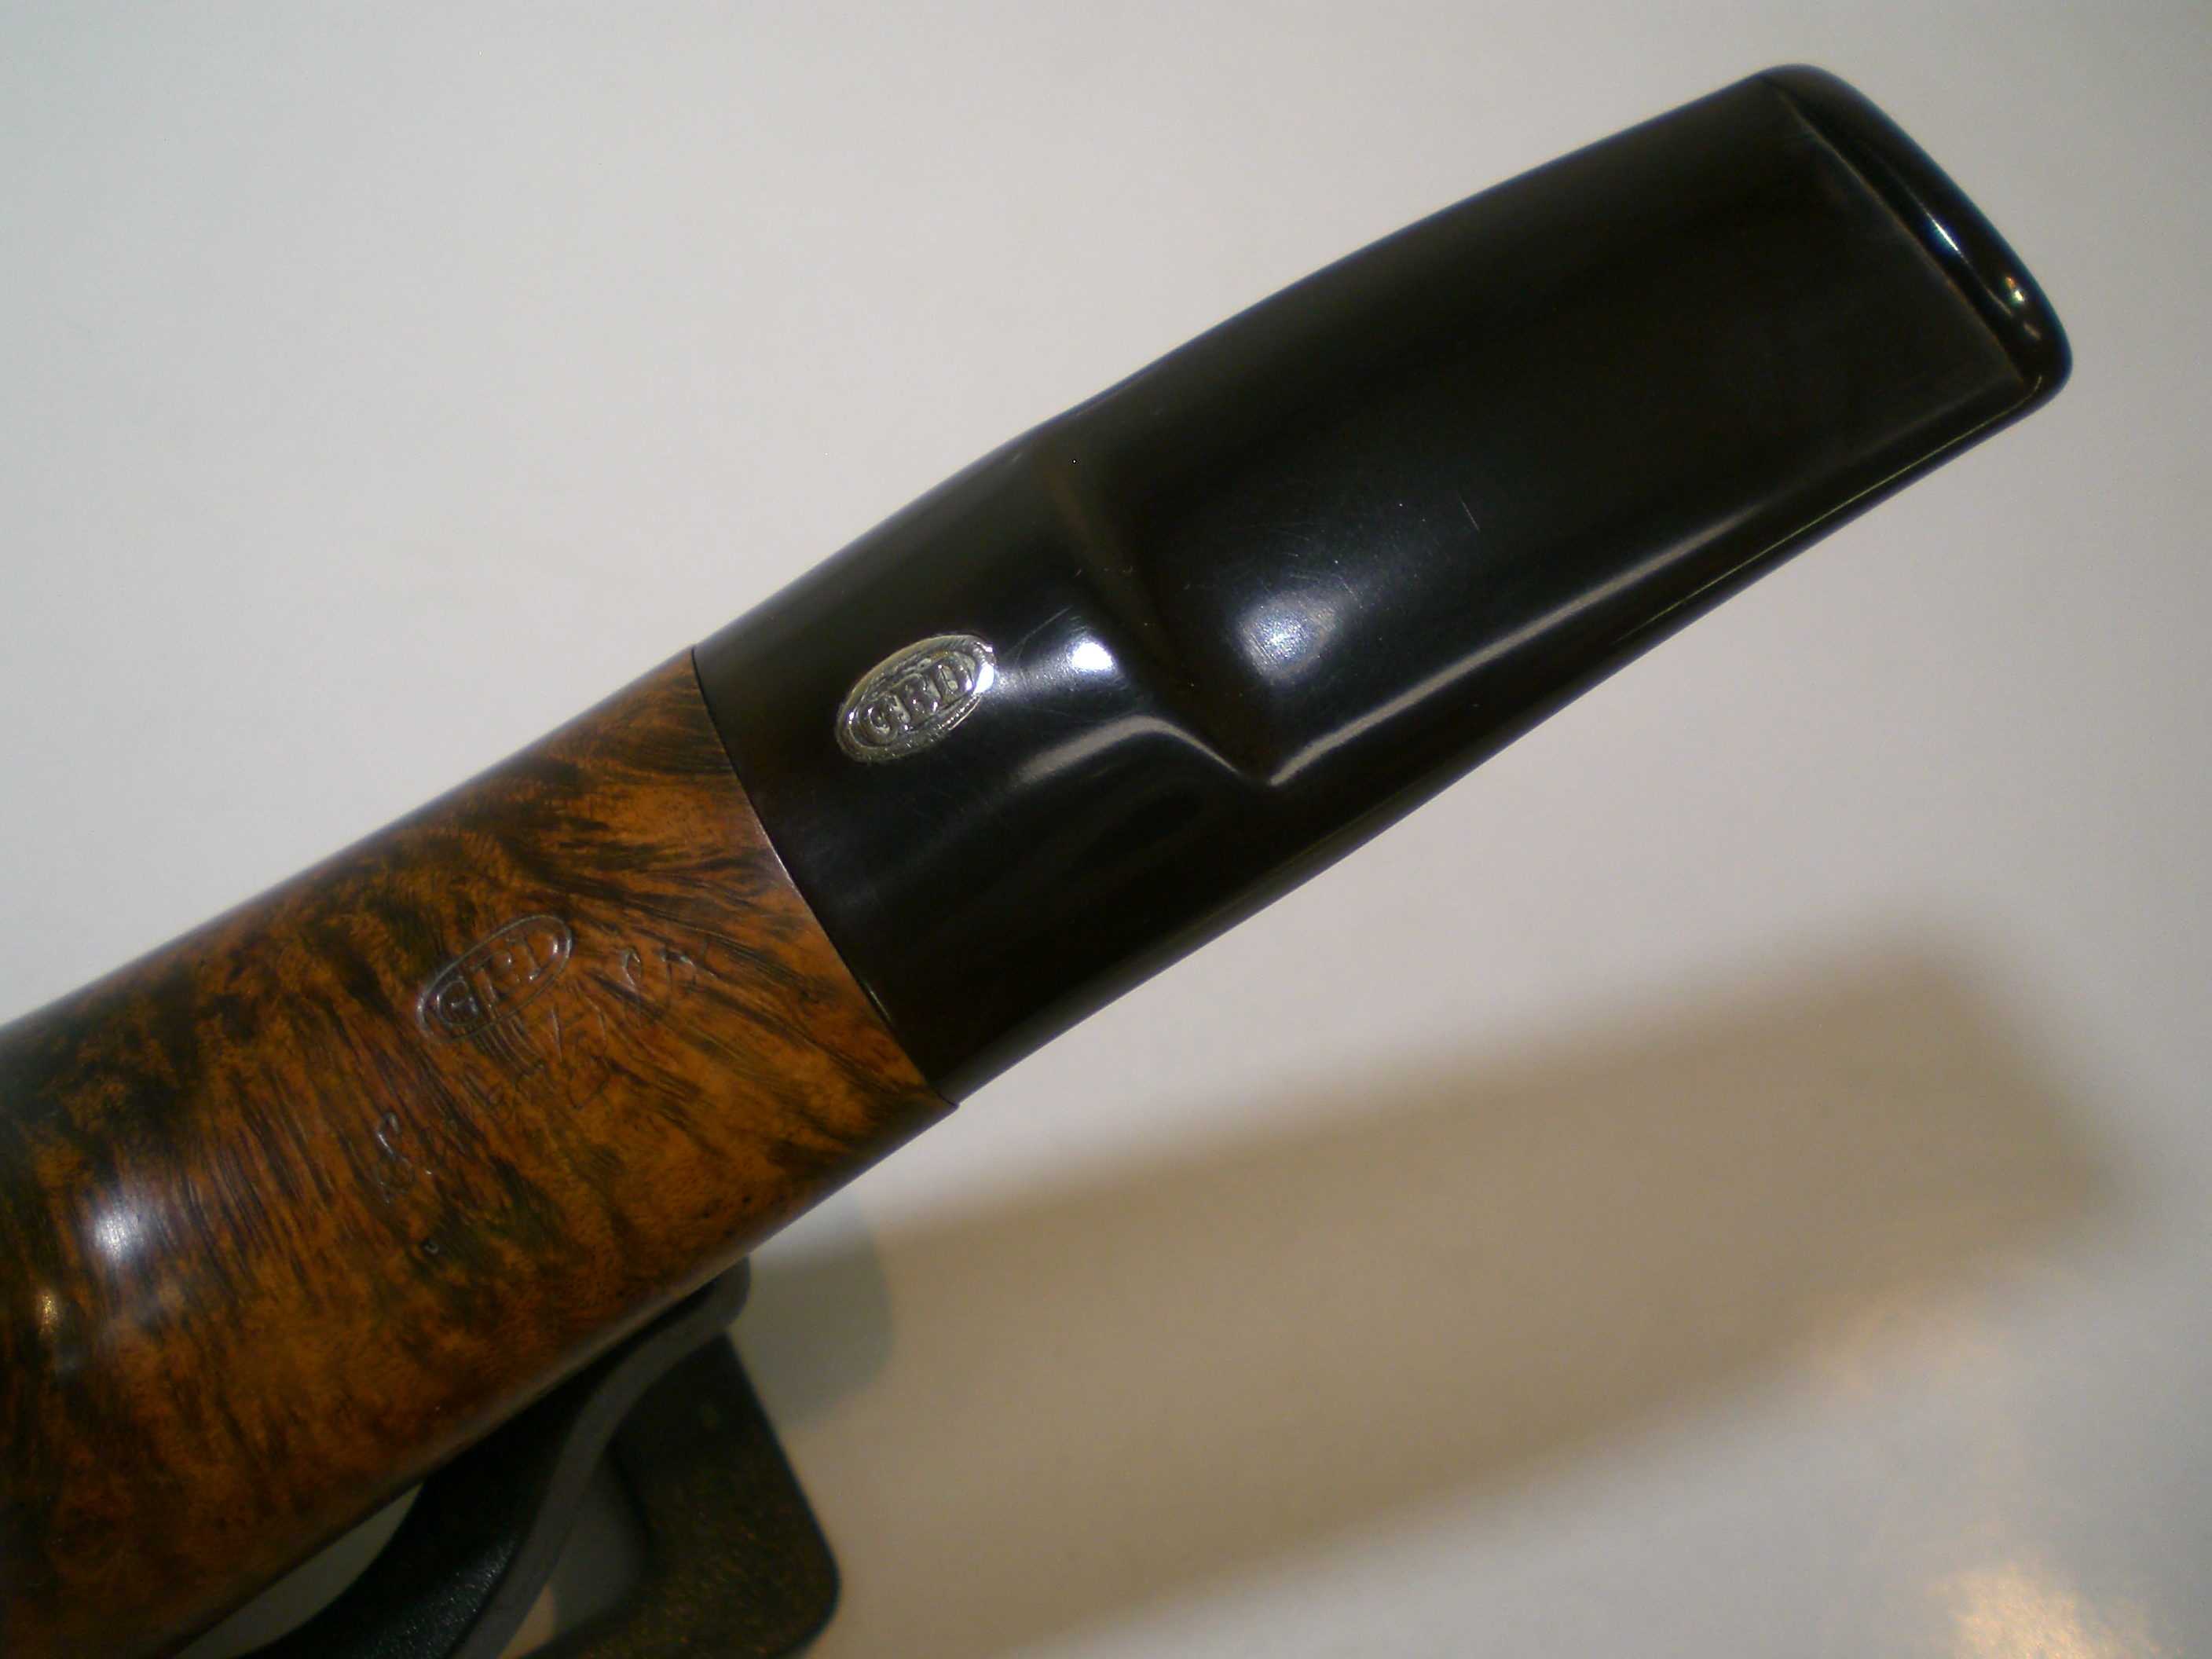
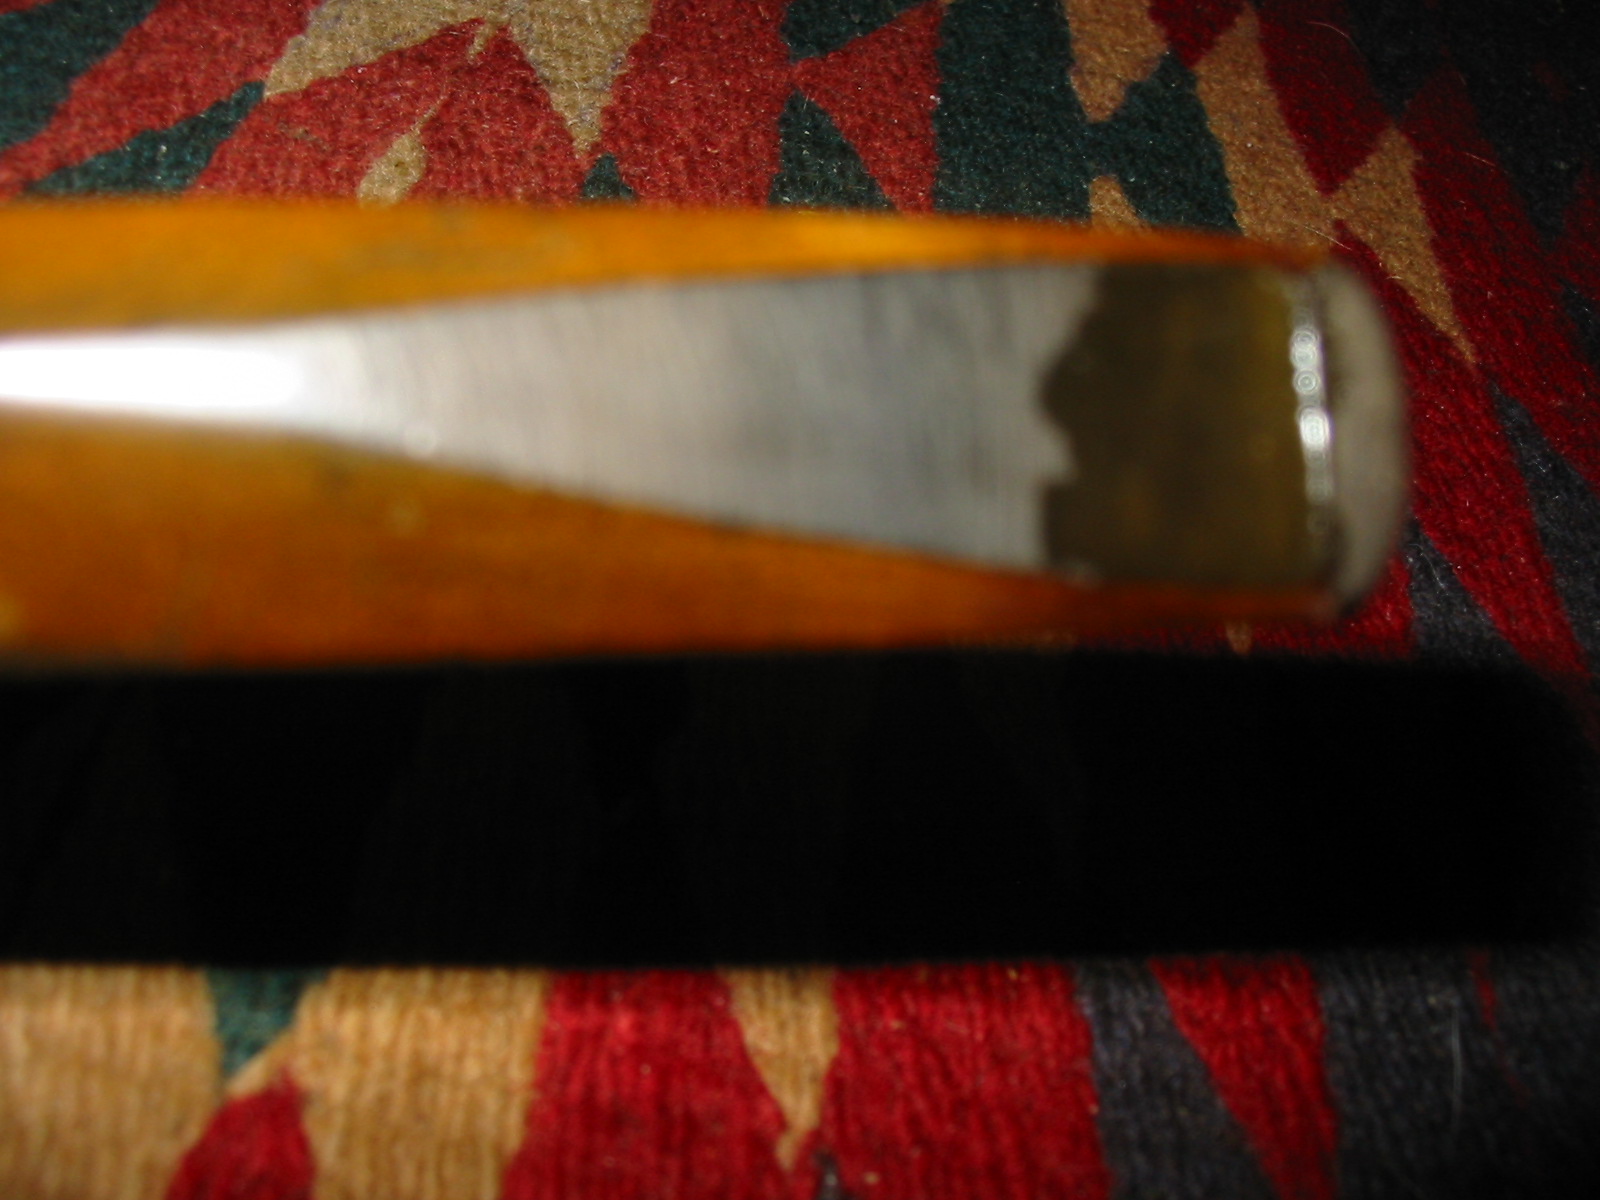
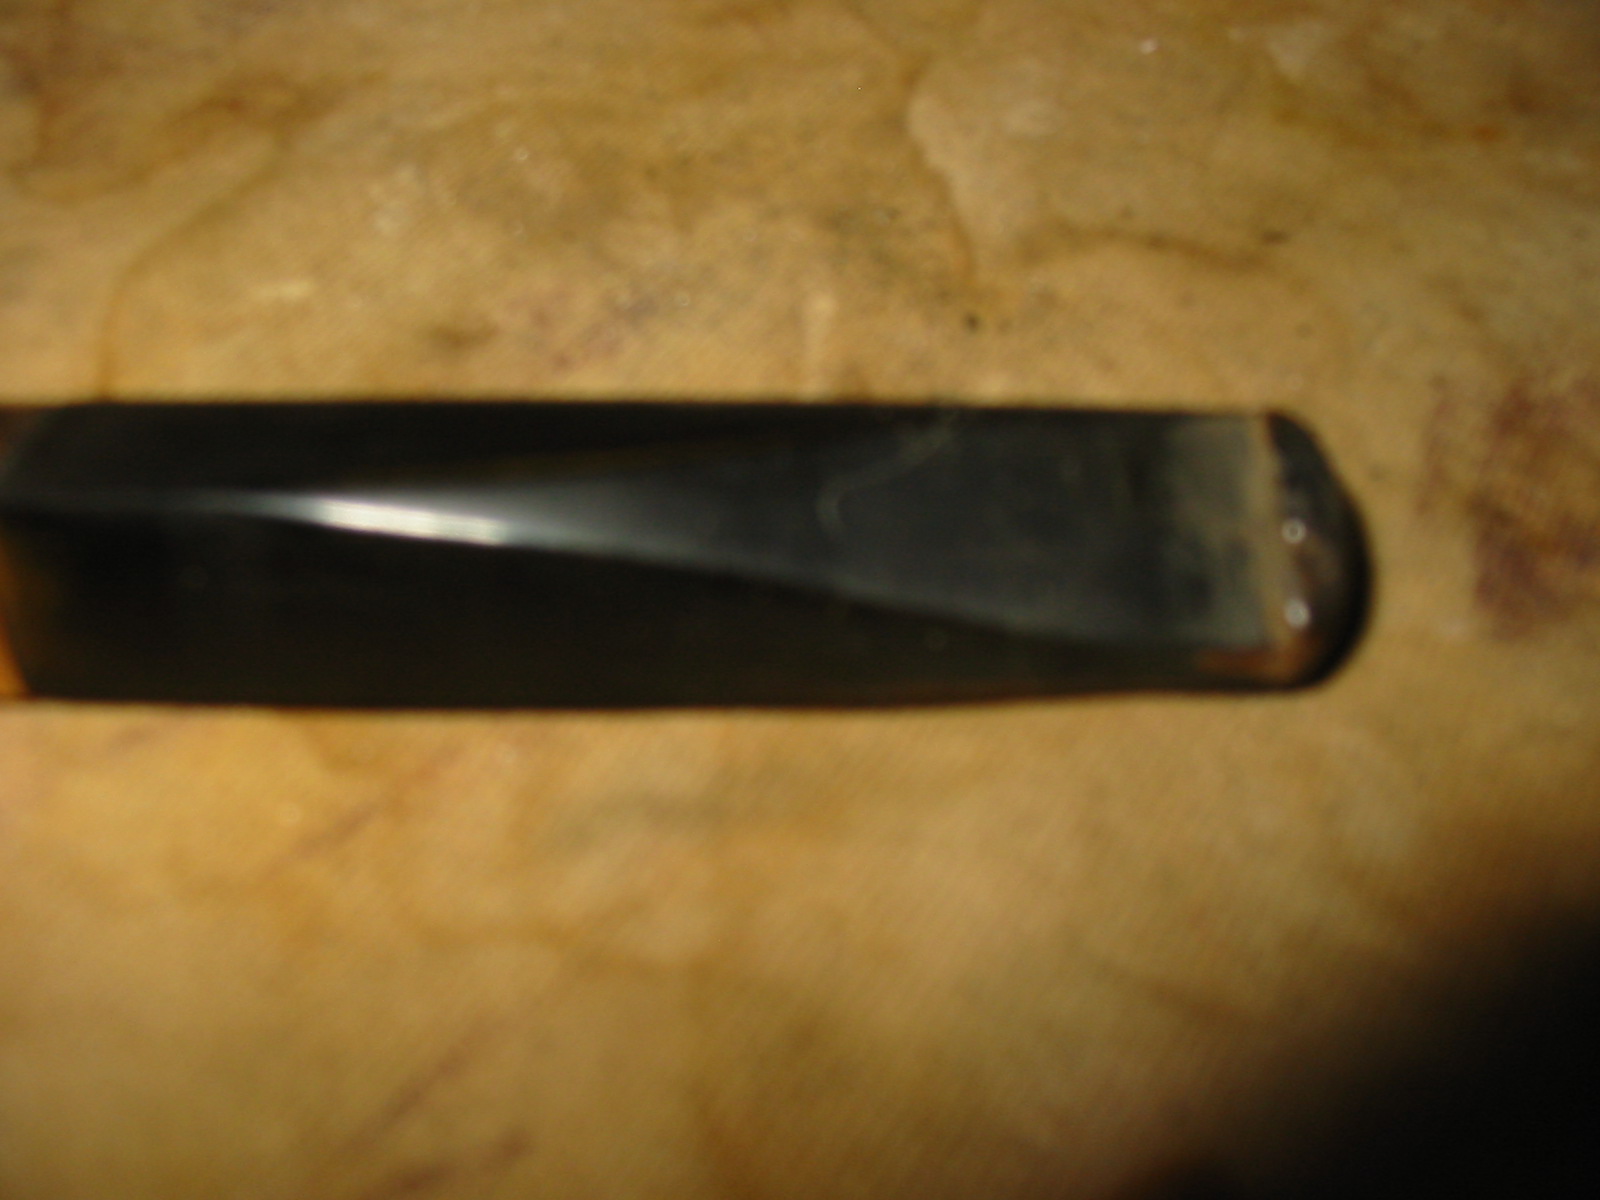
The pipe was in decent shape, with a moderate coating tars on the bowl top, along with a few nicks and dents.  The stem, while heavily oxidized still had the brass rondell.  The rondell along with the “London, England” stamp indicated a pre-Cadogan era GBD.  The stem was also free of any serious teeth marks.  Several of the nicks were very noticeable and I wasn’t sure they could be removed or hidden easily.

GBD_1353_76_Before GBD_1353_76_Before (1) GBD_1353_76_Before (2) GBD_1353_76_Before (3)

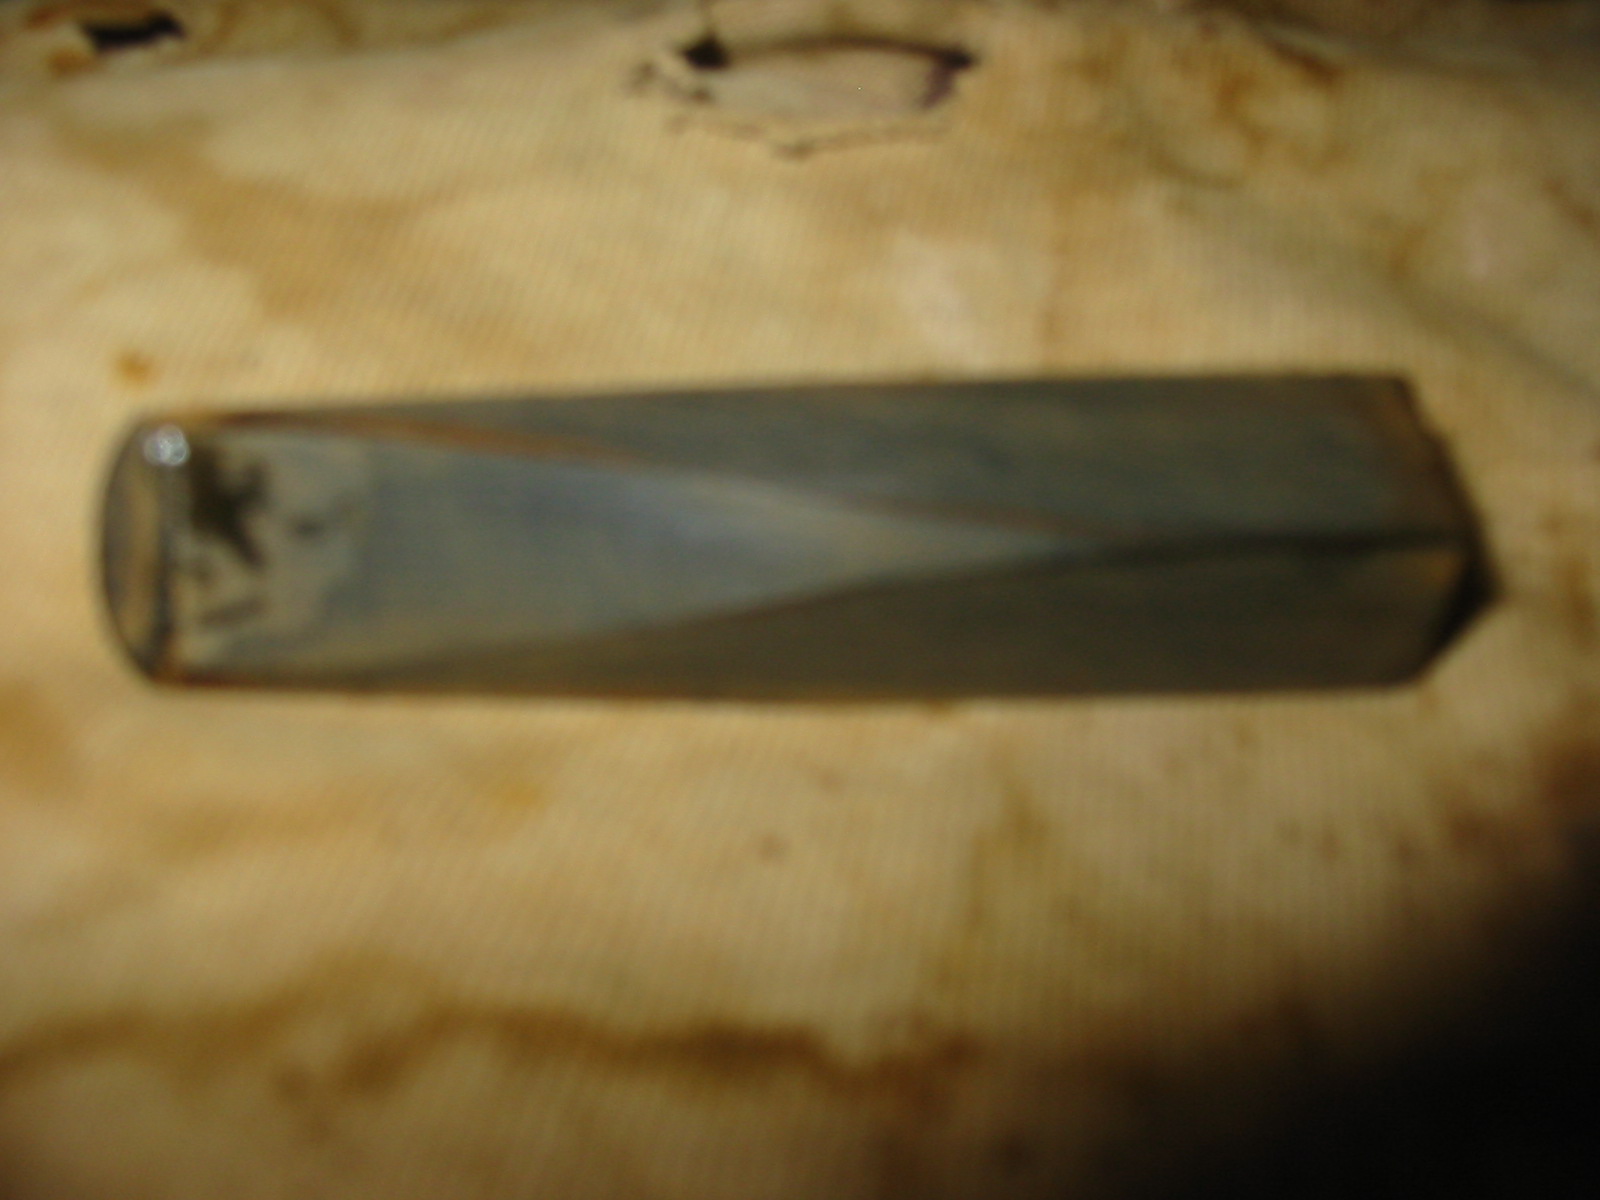
I reamed the bowl and soaked it for six hours with some Everclear and sea salt.  Prior to soaking, I buffed the pipe lightly with some Tripoli and White diamond followed by a buff with carnuba wax.  I like to leave the wax on the pipe during the soaking process in the event some alcohol is splashed on the briar bowl top and I believe the wax gives it some protection from lifting the stain.  While the bowl was soaking, the stem was also soaked in a mild solution of Oxy-clean.  I put a dab of grease on the brass rondell.  The oxidation was so heavy, part of the rondell was obscured and at first I thought it was just worn heavily.   That turned out not to be the case.

GBD_1353_76_Restore (13) GBD_1353_76_Restore (5)

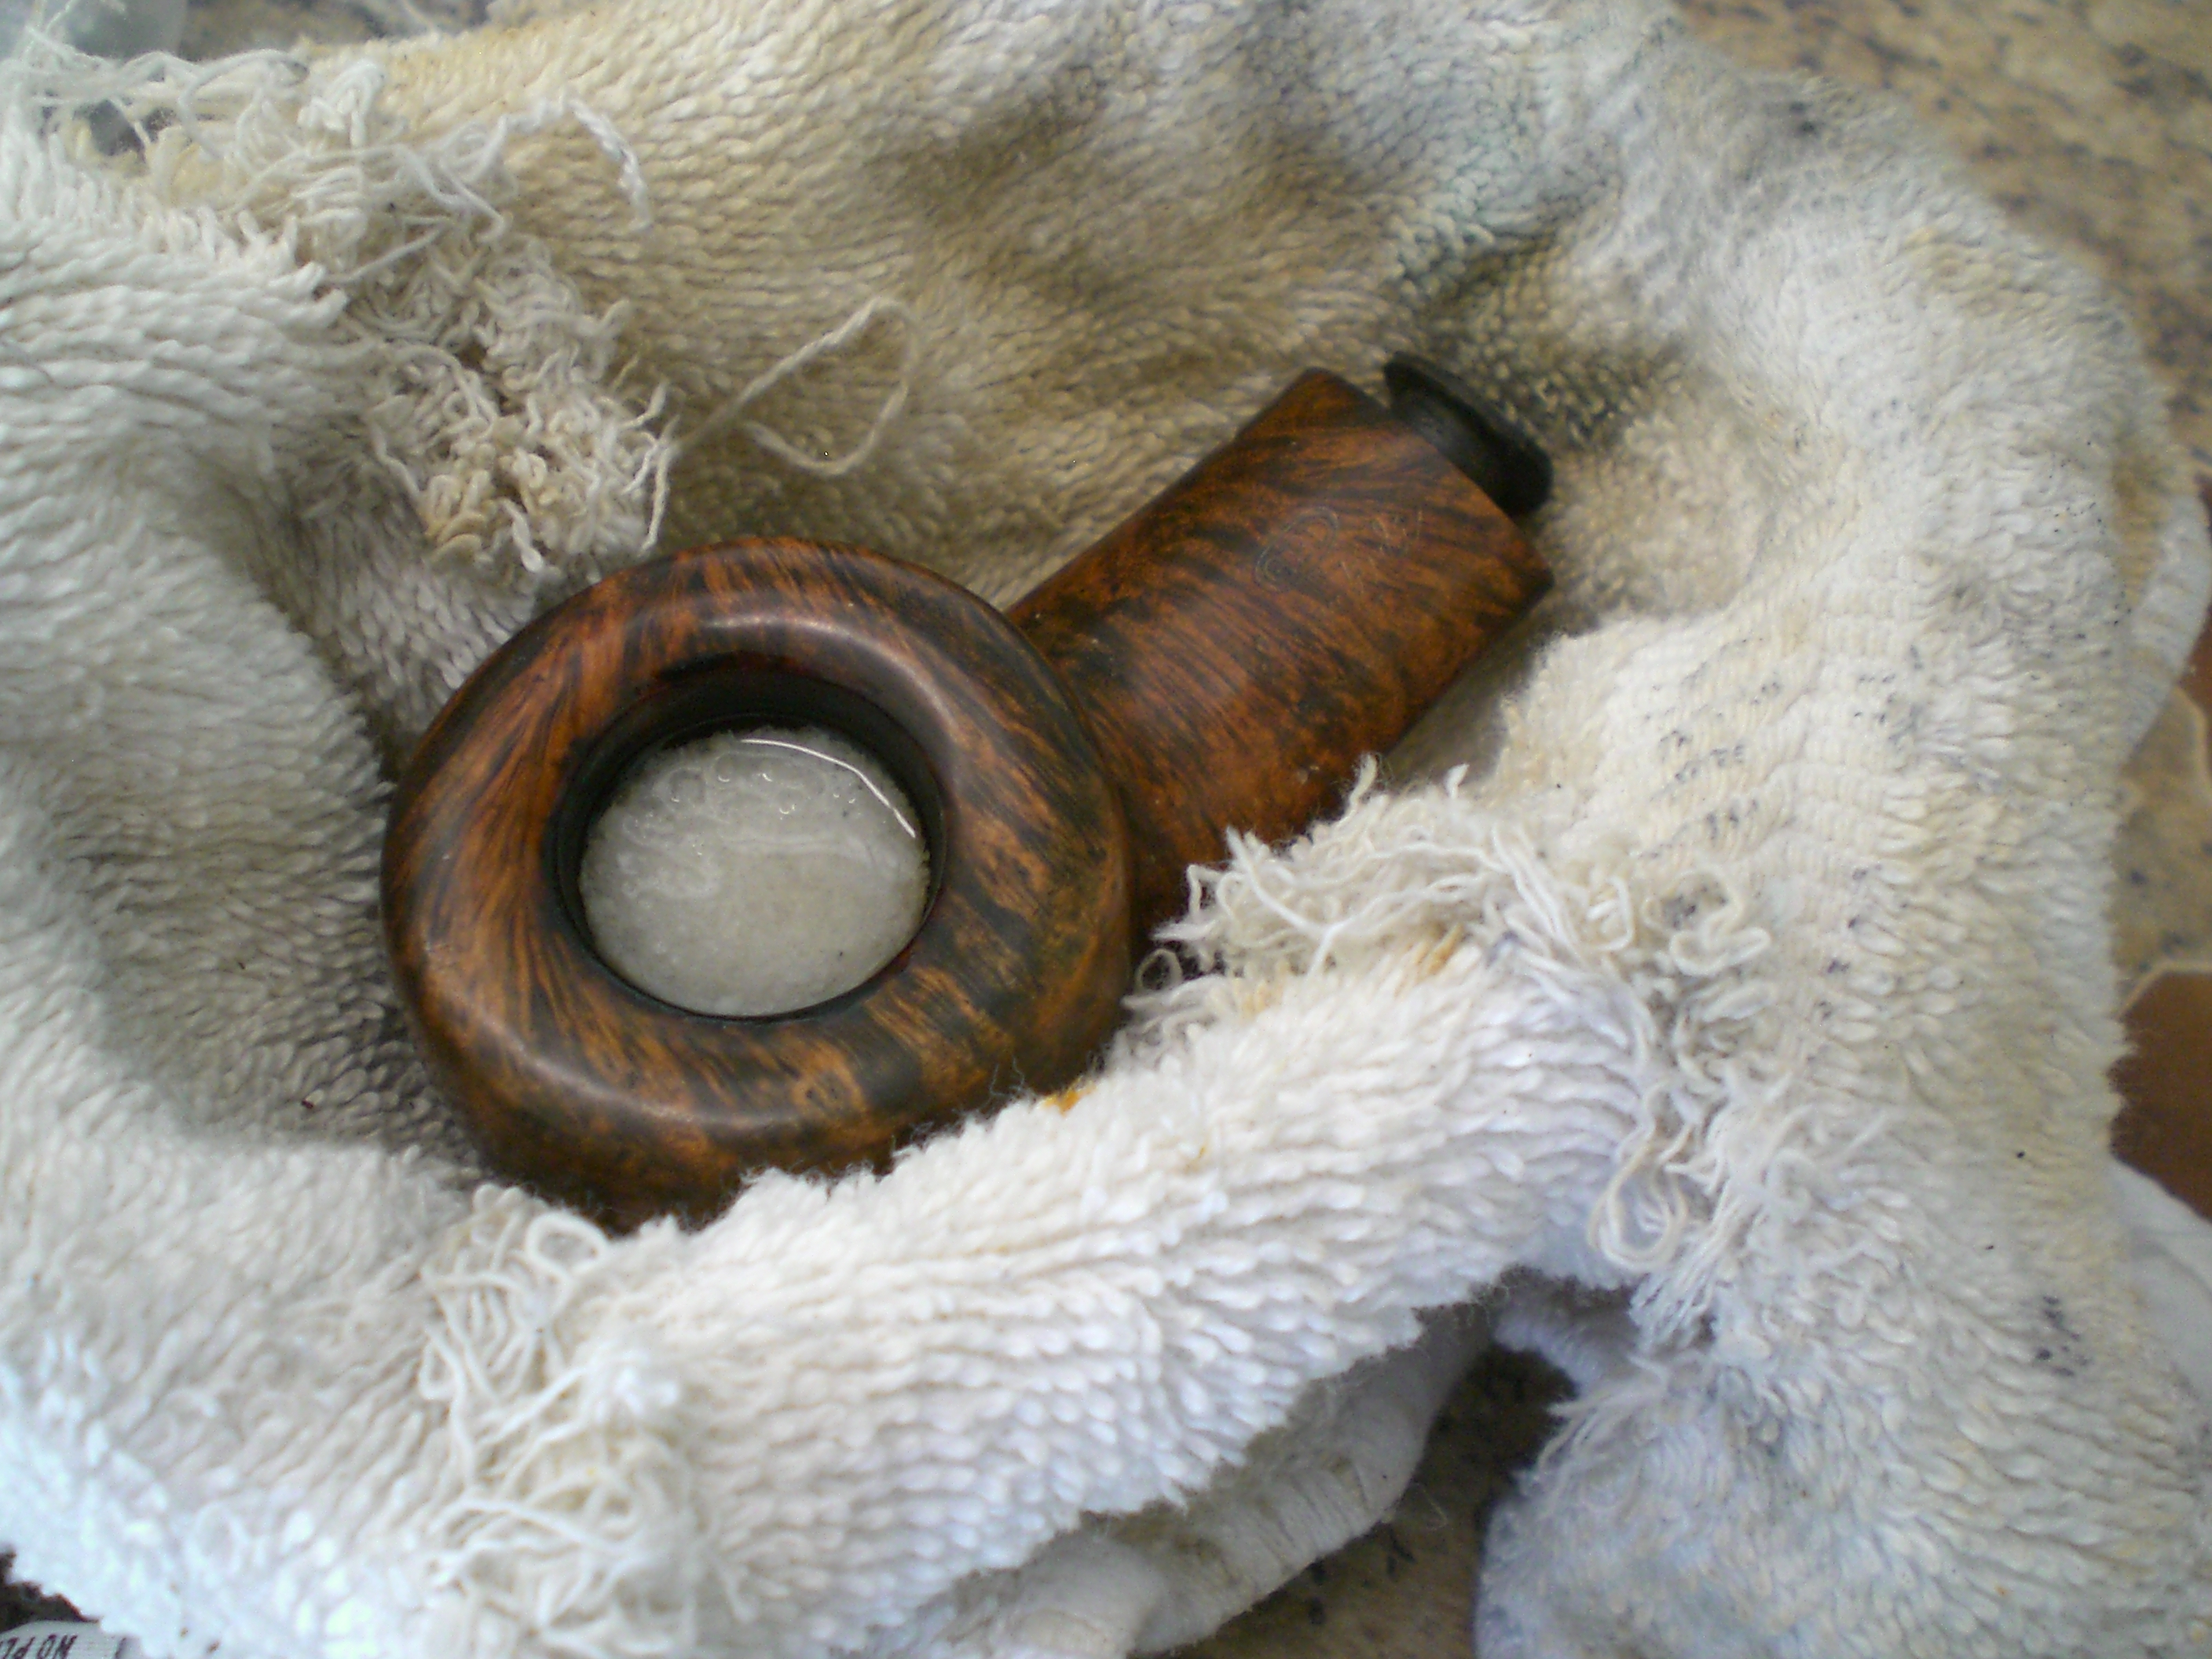
After the bowl was soaked, I emptied the salt and alcohol solution.   I heated a kitchen knife with a torch and applied that to the dents with a wet towel.  The steam generated allows the dents to pop back out most of the time.  In this case, the dents did spring back to shape and I was able to reduce the depth of some of the nicks.  Next I buffed the briar bowl again, using separate wheels of Tripoli, White Diamond and several coats of carnuba wax.  I was able to diminish all of the nicks, in particular the one on the right side of the oval stem.

Next I went to work on the stem, which I re-attached to the bowl in order not to round off the crisp edge.  I removed the oxidation with 1500 grade wet paper (dipped in my oxy-clean solution) followed by 2000 grade paper.  Next I moved to the Micromesh sheets, using 8000 and finally 12000 grade paper.  I then buffed the stem with white diamond and Blue Magic brand plastic polish.

A wire bristle brush dipped in Everclear was used to clean the shank.  It took approximately 25 swabs with the bristle cleaner until the brush came out clean.    I’ll let the briar dry out for a few days before smoking the pipe.   Below are some pictures of the finished pipe.

GBD_1353_Gallery2 GBD_1353_Finished (1) GBD_1353_Finished2 (3) GBD_1353_Finished (3) GBD_1353_Finished (5) GBD_1353_Finished (4)

Rebirth of a No Name Bakelite Pipe with Bakelite Stem


This pipe came to me from Chuck Richards (Desertpipe) in a box he sent me. It is the first of three old timers that he sent for me to work with. It is a common interest that we share – this love of the old timers and restoring them to some of their former glory. The first four photos below show the pipe as it was when it arrived to my work table. There is no stamping on the pipe at all. The gold band is stamped 14K Gold Filled. The stem has no logos or stampings. The underside of the bowl and the Bakelite base has no information stamped on it either. It is much like some of the WDC or William Demuth pipes that I have from the same era. The pipe itself was in pretty decent shape. The bowl was very clean. The rim was undamaged and the finish on the bowl was quite nice. The double grooves around the bowl were filled with grit and the surface had a few pits in it. The Bakelite bowl base and shank were in good shape. There seems to have been a metal decorative rim that went around the base between the bowl and base that was missing. The 14K gold filled band was in place but was on backwards so that the stamping of the gold was upside down. The stem was very oxidized and had been filed to give a steeper angle on the taper to the button. The filing had gone too deep and the airway next to the button was exposed. At first examination it appeared that the stem was too hard a material to be vulcanite and the filing marks did not look like they were on vulcanite. My initial guess was that the stem was also Bakelite.
IMG_0649

IMG_0650

IMG_0651

IMG_0652
I removed the bowl from the base and reamed and cleaned it. I reamed it with a PipNet reamer back to a very thin cake. I cleaned out the airway at the bottom of the bowl. I used a dental pick to clean out the dual lines around the bowl top. I cleaned out the reservoir in the bottom of the base with cotton swabs and Everclear. I cleaned out the shank with bristle and fluffy pipe cleaners and Everclear as well. I removed the band from the shank by heating it gently. The glue softened and I was able to remove it and turn it around. I tapped the band with a small furniture hammer to flatten out the edges and squared the edges. I reglued it with wood glue. When this work was done I set the bowl and shank aside and went to work on the stem.
The stem took significant work. Somehow my camera failed (maybe the photographer did) and I was unable to get any good photos of the stem work. I built up the filed area against the button with clear superglue (Photos 1 -2). I layered on lightly, let it dry, relayered it and repeated until the thickness was sufficient enough for the airway to be protected. I also built up the button. It looked to me that a previous repair had been done and a new button had been cut in the stem. I repaired the shape and the thickness of the button. It was an old style bone tenon that was mounted in the shank so I cleaned that up and cleaned the inside the stem. The hole in the button was the old style orific or “o” opening. The rebuilding of the button and stem took the majority of time in working on this old stem. Once it was dry and had cured overnight I worked on the oxidation. I did not want to use anything that could possible harm the Bakelite so I kept the alcohol to a minimum and only on the inside the airway and was careful not let it touch the outside. For the outside I used 240 grit sandpaper to smooth out the newly repaired slope on the stem and to sand out the file marks that remained from the previous repair. I also sanded the corners on the stem to give it a more rounded look in keeping with the era it was made. The 240 grit sandpaper easily removed the oxidation. Photos 3 – 4, though of poor quality, give an idea of how the stem looked after patching with the superglue and sanding with the 240 grit sandpaper. The oxidation was pretty well removed. The button is shaped and the patch on the stem in front of the button is visible. There is still a lot of sanding to do at this point. From the 240 grit I went on to sand with 320 grit and also a fine grit sanding sponge to further blend the patch and to remove the oxidation.
IMG_0647

IMG_0648

IMG_0653

IMG_0660
I put the stem back on the pipe and worked on the fit against the band. When I reversed the band the stem was too large on the right side and extended beyond the width of the band. To repair that I had to take of material at the bottom edge of the top right side and the upper edge of the bottom right side of the diamond to reduce the angle of the diamond on that side. By reducing these two points on the stem I was able to bring the sharp edge to the same width as the shank and band. It balanced the look of the stem. I used the 240 and 320 grit sandpaper for doing this part of the stem work. I continued to use the sanding sponge to blend the patches on the top and bottom of the slope to the button. The next series of eight photos show the progress on the stem. The patch is clearly visible in the photos of the top side. The one on the bottom was not as big and it blended in more easily.
IMG_0662

IMG_0663

IMG_0664

IMG_0665

IMG_0666

IMG_0687

IMG_0688

IMG_0689
After removing the scratches and oxidation with the sandpaper I sanded with the fine grit sanding sponge and then progressed through the various grits of micromesh sanding pads from 1500-12,000 to smooth and polish the stem. As I worked on it my initial conjecture about the material being Bakelite was confirmed. The next four photos are a sample of the work of the micromesh sanding pads on the stem. The pad in the photos is 3600 grit. I also used the micromesh on the bowl and the Bakelite base and shank to remove some of the surface scratches.
IMG_0690

IMG_0691

IMG_0692

IMG_0693
I gave the pipe a very light buff on the buffer with White Diamond. I had learned on previous occasions that the speed of the buffing pad can produce heat that can actually damage the Bakelite and cause fibres from the pad to embed in the stem. A very light touch is necessary if you are going to buff these stems. I wanted to give them a quick light buff to remove any remaining scratches and give it a quick sheen. I buffed the base and bowl at the same time as well. The final series of four photos show the finished pipe. I applied a coating of carnauba wax to the pipe by hand. I buffed it lightly with a soft flannel cloth to bring up a shine and finished buffing with a soft shoe brush. The finished pipe speaks for itself. It is a testimony to the life that resides in these old timers. It is a life that will certainly extend beyond mine! As mentioned above, I share a love for these older pipes with Chuck that seems to extend to their restoration and re-entry into the purposes for which they were made. What do you think Chuck? How does the final pipe look to you?
IMG_0695

IMG_0696

IMG_0697

IMG_0698