Blog by Steve Laug
I received an email from Pat about a pipe he had that he wanted to know if I would have a look at and see if I could do anything with it. Here is his first email.
Hello Steve, I have a 1930’s Comoy,s grand slam 210 Lovat with the old bar logo on the stem. The stem however is broken in three or four places. I have all the pieces but one. Is it possible to join the pieces back together again and fill the remaining hole from the missing piece? I visit your site often and you truly have done some amazing things. I don’t know if you typically do repairs but if you do would you consider taking on a repair like this. It’s a lovely old Comoy’s and I’d really like to bring it back to its former glory. Can you help? Thanks for your consideration. — Pat
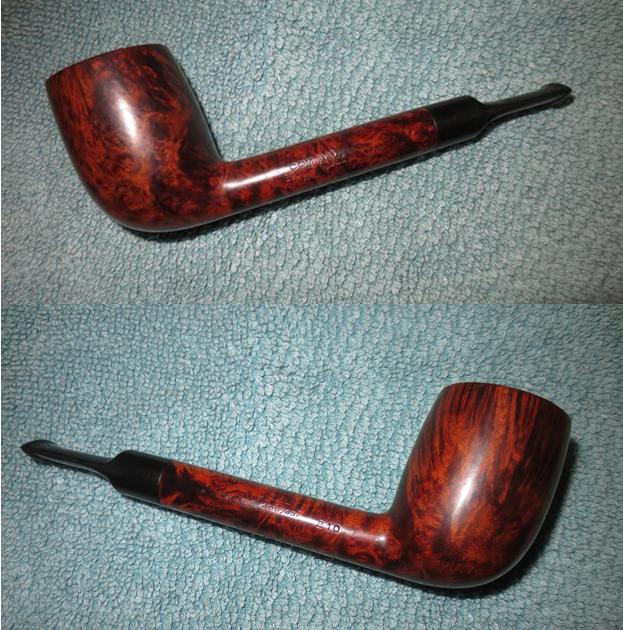
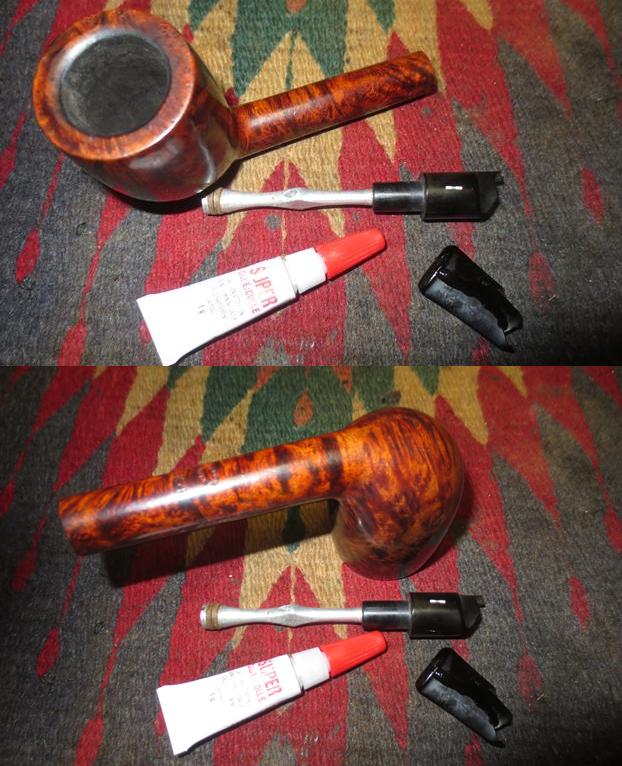
I wrote him back saying that I would like to see photos of the pipe before I committed to trying a repair. He sent the following two photos of the pipe for me to look at. The piece of briar was a typically beautiful specimen of a Comoy’s pipe. It had some excellent grain and the finish was in very good shape for a pipe this old. The stem however, was another issue. It had shattered.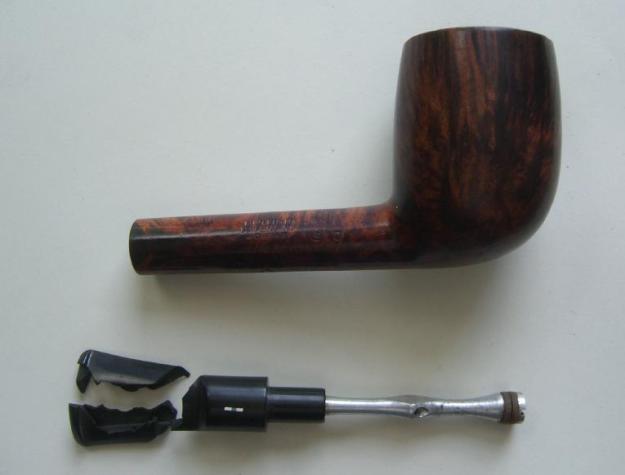 The first photo above showed the bowl and stem together. I had been a really nice looking Lovat and with the bar logo on the stem it was indeed an old one. He wanted to see if I could somehow piece the stem back together preserving the old logo. Looking at the photos I was pretty amazed at the condition. It was obvious to me that the stem must have been stuck in the shank and when someone torqued on it to remove it the stem had shattered into pieces. It looked to me that there were some pieces missing but maybe I could do something with it. I had him ship it to me with all of the parts included.
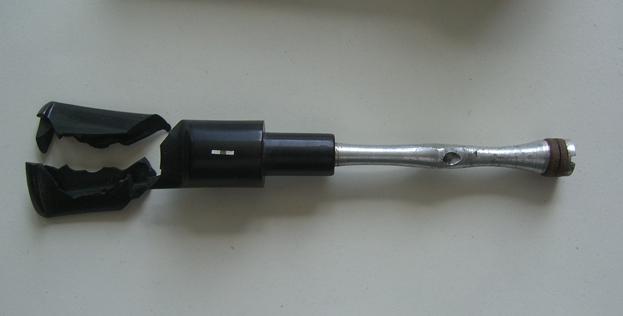 It did not take too long to arrive in Canada and when it did, I opened the box with some trepidation. I was expecting the worst and what I found inside was pretty close to what I had expected. There were two broken pieces in a small baggy, the rest of the stem with the stinger in another baggy and the bowl wrapped in bubble wrap. I laid out the pieces to get a feel for what was missing. The two broken pieces fit well together and together they fit well with the saddle portion. The underside of the stem looked pretty good with the parts connected. However the top side was another story – there was a large chunk of vulcanite missing virtually the length of the stem. Now I knew what I was dealing with.
I put the pieces back in the bag and put the bag and bowl back into the box. I laid it aside and took some time to think through the best course of action for putting it back together again. It was a true Humpty Dumpty project and I did not know if all the kings’ men or even this king’s man could put it back together again. I let it sit while I repaired pipes that were in the queue ahead of it.
Several weeks went by, at least it seemed that way to me and I did not look at the pipe again. I knew it was there but I was not ready to commit to a repair. Today, Saturday arrived and I finished the repairs that were ahead of it. I decided that today was the day. I unpacked the pieces and put them together again to have a look. The tenon/saddle end had a clean break away from the rest of the pieces. The airway inside was oval shaped as was the airway in the button and in the gap between the pieces. Whatever I used to repair this one would have to take that into account. I would need to give an adequate interior base for the rebuild of the stem. If I could glue the pieces together and then insert a tube of some sort I could then rebuild the gap of the missing pieces of vulcanite. It seemed like the plan would work. The first step was to glue to two parts of the button end together. I cleaned the surface with alcohol and ran a bead of clear super glue along the edges of each piece. I put them together and ran a bead of glue along the surface of the crack on the underside of the stem.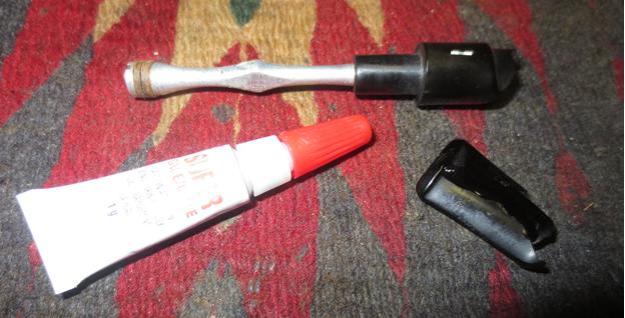 I took some photos of the bowl and rest of the broken stem just to give an idea of the beauty of the pipe and the magnitude of the issue at hand.
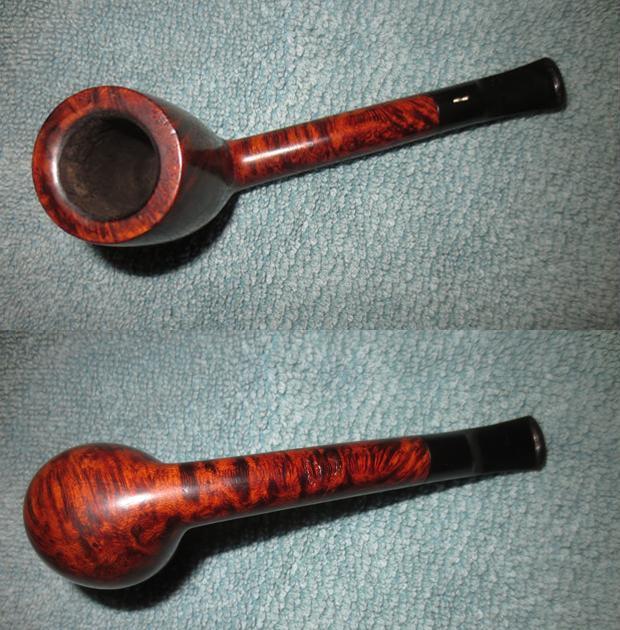
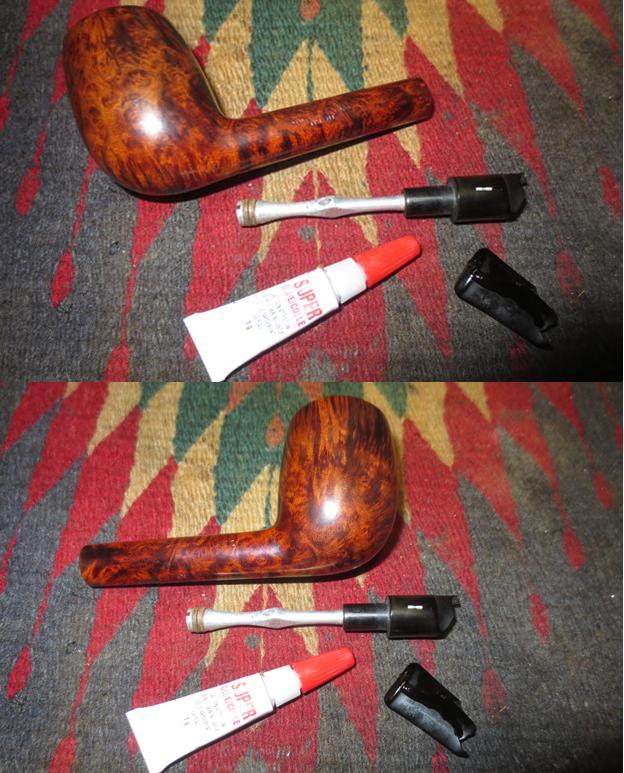
 The bowl and the finish on the pipe were in excellent condition. It really did not need any work. I don’t know if Pat cleaned the briar or not but it was looking really good. To encourage myself a bit I took some photos of the bowl. The grain is beautiful and the stamping is very sharp and clear. It is stamped on the left side of the shank Comoy’s over Grand Slam over Patent. On the right side it is stamped British over Patent No. over 40574.
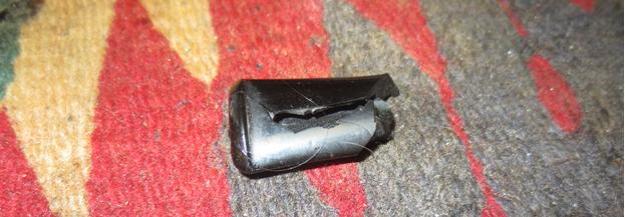 I flattened the first two inches of the inner tube to make it oval. The trick was not to collapse the tube but merely change its shape from round to oval. It worked really well. I slid the oval tube into the repaired pieces of stem. I aligned it so that it was centred looking at it from the slot in the button. I took photos of the tube in place from the top and the bottom sides.
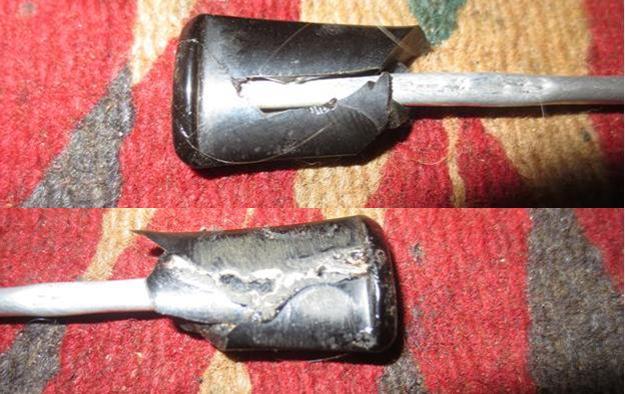 It was now time to proceed. I prepared my charcoal powder and black super glue putty mixture on a folded piece of paper. Because the super glue cures slowly I stir the two components together until I get a thick paste. I double checked the alignment of the tube in the stem end and then applied the mixture to both sides of the stem with a dental spatula. I pressed it into the area on the top side where the stem pieces were missing first then applied a thick coat over the top of the repaired area. The photos below show the progress and the filled repair once I had smoothed it out with the spatula. The flattened tube is anchored solidly in place and the area around it is filled in with the putty. The putty is purposely thick so I have a good base to work with once it dries. I will need to flatten it out and reshape the edges of the button. So far I was happy with the progress of the repair.
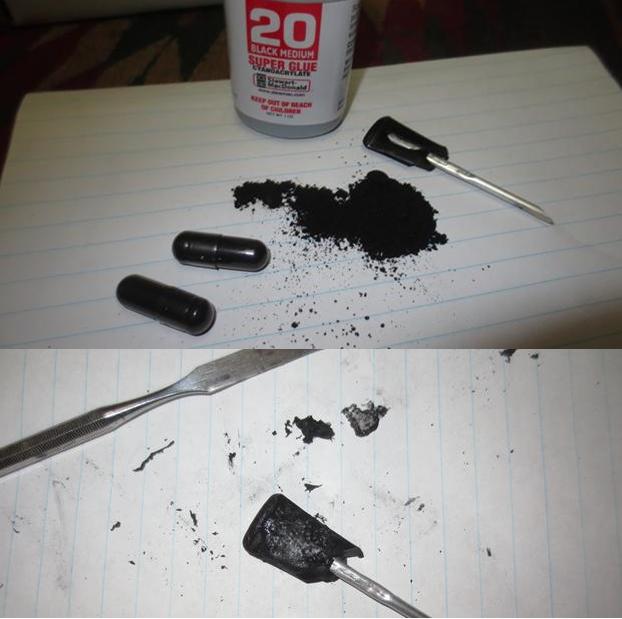
 Once the repair had dried it was time to work on shortening the tube to fit into the other half of the stem. I cut it off with a hacksaw until the length such that when I slid the two parts together it would allow them to match.
 I applied super glue to the edges of both pieces of the stem and slid the two parts together. I filled in the low spots on the connection with clear super glue to begin with and set the stem aside to cure some more.
 When the repair had cured I sanded the patch with 180 grit sandpaper to smooth out the surface and begin to blend it into the rest of the stem. I wanted the two parts of the stem to flow together naturally. I continued to sand it with 220 grit sandpaper to further smooth out the surface. In the process air bubbles showed up in the repair surface. This is a normal occurrence and would need to be patched further once I finished this stage of sanding. I also lightly sanded the tenon as the fit in the shank was too tight and I was pretty certain that the stem had shattered because of that.
 I used black super glue to fill in the air bubbles and pits in the surface of the stem and set the stem aside to cure overnight. In the morning I would sand out those repairs and continue to shape the stem.
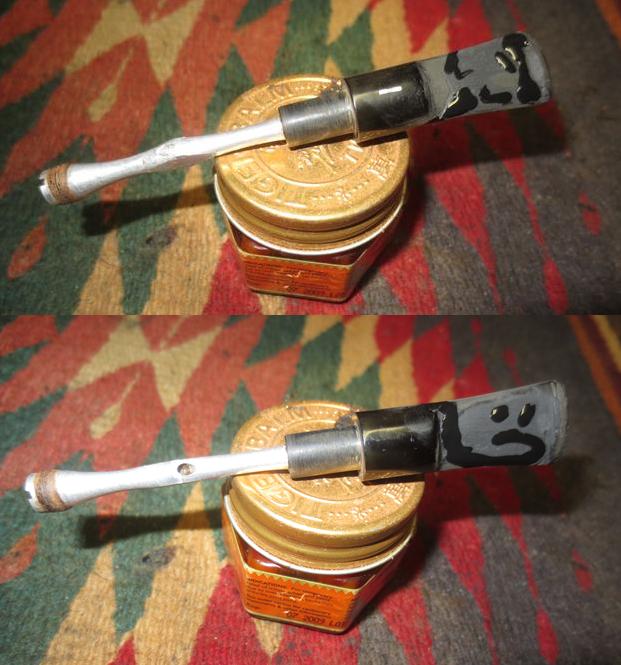 In the morning the repaired had cured well and the stem was solid. It was a unit once more. The touch up repairs to the air bubbles had also cured so I began the long process of sanding the stem with 220 grit sandpaper to smooth things out. The next two photos show the beginning of the progress. The stem is starting to look pretty good. Still a lot more sanding to do before it is finished but I like what I see so far.
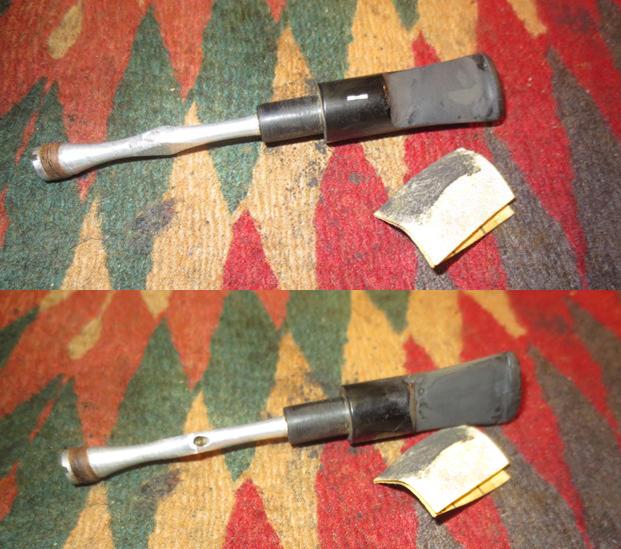 In talking to Patrick he wanted to have the stinger apparatus removed and cleaned up so that he could put it back in place should he want it but he wanted the more open draught of the stem without the stinger. These older style Comoy’s stingers were usually threaded and screwed into the tenon of the stem. In all of the ones that I have cleaned up the stingers were locked in place by the lacquer like tobacco juices that had dried and caused it to be frozen in place.
I rubbed the tenon end down with a cotton swab and alcohol and let it soak into the tenon itself. I wanted to soften the tars and oils there and the alcohol would do that without damaging the rest of my repair. Once it had soaked for a while I dried off the area to make sure there was no residual alcohol and heated the stinger repeatedly with the flame of a Bic lighter. Heat would further loosen the lacquers on the threads so that I could unscrew it without damaging the tenon. I used the flat sides of the diamond on the stinger as anchor spots for a pair of needle nose pliers and unscrewed it from the tenon. It was threaded on the end and sat at the bottom of the tenon.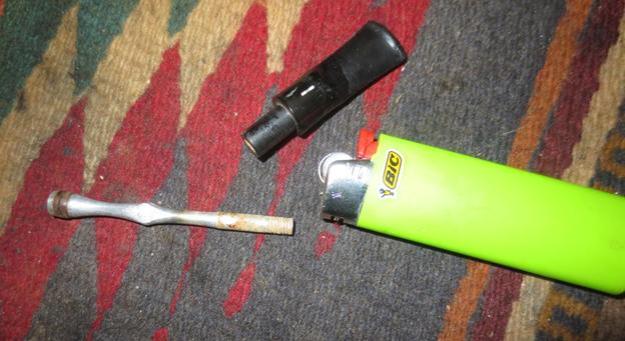 The tenon was slightly enlarged and would not seat easily in the mortise. I wonder if this may not have been part of the reason the stem had shattered. Even before I heated the stinger the fit in the mortise had been tight and it would not sit snug against the shank. I cleaned out the inside of the mortise and shank with cotton swabs, alcohol and pipe cleaners to remove any residue that lined the walls. I wanted to be sure that the fit was not hampered by the shank itself. In examining the tenon I could see that the it was slightly thicker at the tenon/saddle junction. I used a needle file to smooth out the thickness and sanded it with 220 grit sandpaper.
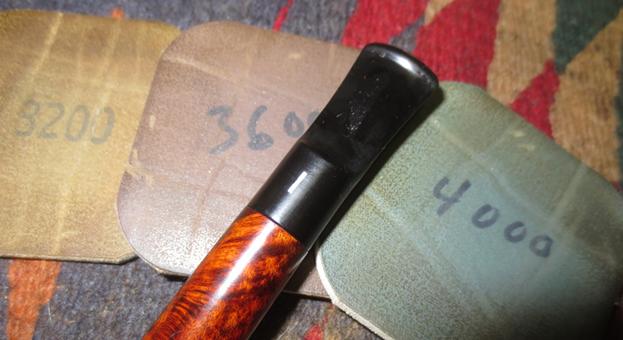
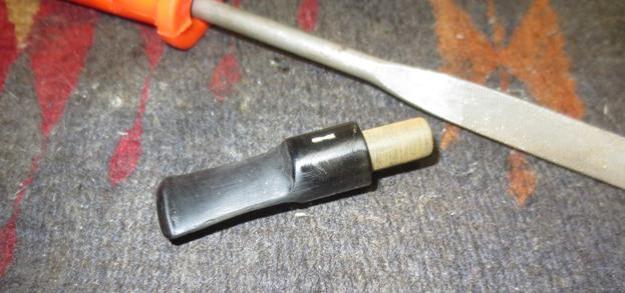 The fit of the tenon now was snug and the stem could be easily removed and put in place without being tight. I sanded the stem with 220, 320 and 400 wet dry sandpaper.
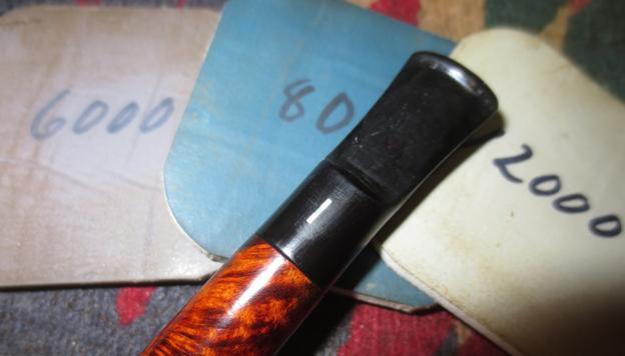
 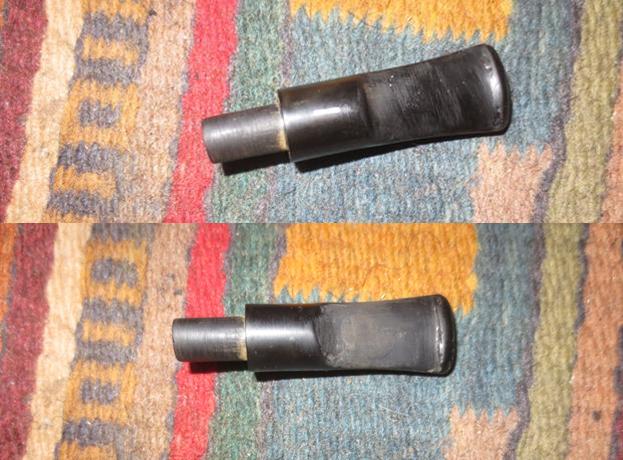 I polished the stem with micromesh sanding pads – wet sanding it with 1500-2400 grit pads and dry sanding with 3200-12000 grit pads. I wiped it down with Obsidian Oil after each pad and gave it a final coat after the 12000 grit pad. The photos show some white flecks on the top surface of the stem. These needed to be sanded out and polished.
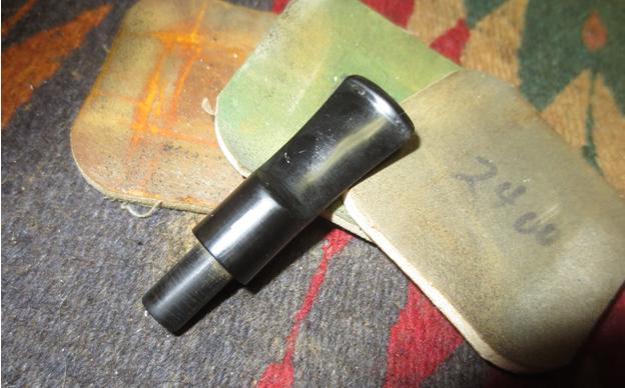
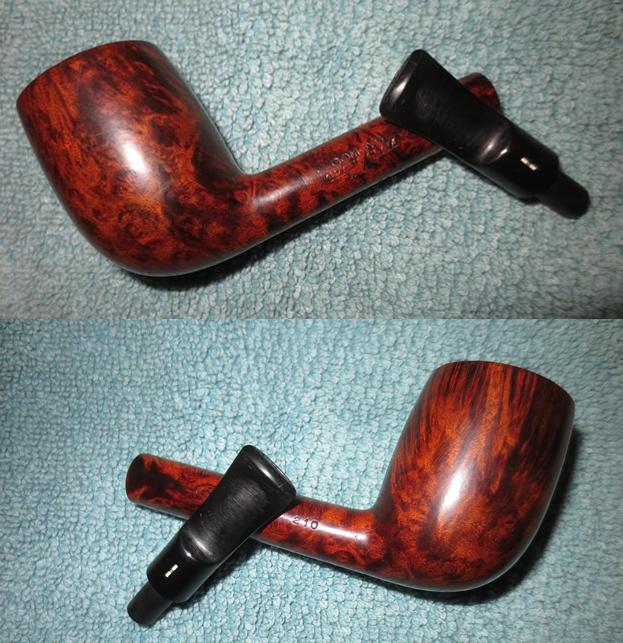
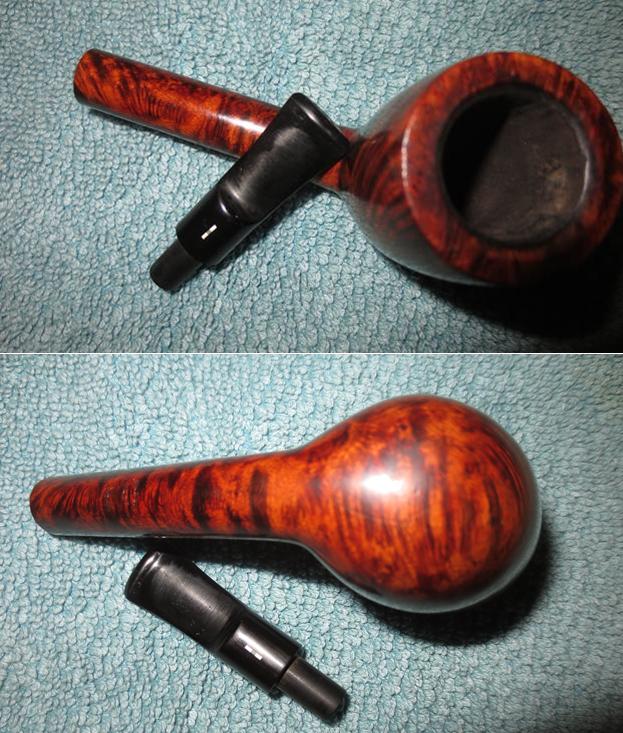
 I gave the stem multiple coats of Conservator’s Wax and hand buffed the stem and pipe with a shoe brush to polish it. I buffed it with a microfibre cloth to raise and deepen a shine on the briar and the vulcanite. The finished pipe is shown in the photos below. I am sending the original stinger back with the finished pipe to Patrick. He has the option of using it or not as he chooses. The finished stem looks better than the three parts and missing chunks that arrived. It should work for him but I am wondering about the fragileness of the old vulcanite. We shall see. Care will need to be exercised when smoking this pipe and taking it apart for cleaning. The briar is absolutely beautiful and the age and patina of the pipe is stunning. I will send it back soon Patrick. Can’t wait to hear what you think.