by Steve Laug
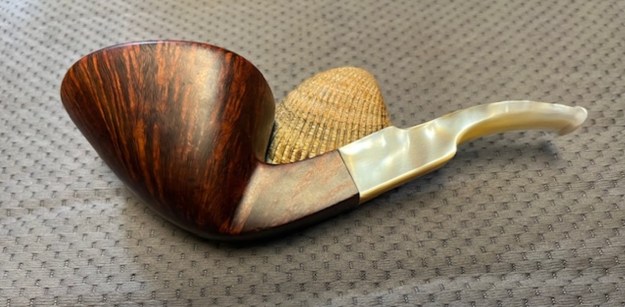
The next pipe on the table is a beautiful freehand in a brand we had not seen before. We picked the pipe up from a seller in Wellsville, Kansas, USA on 12/09/2024. Probably the fact that it is a Danish and Hand Crafted caught our eye on this one. It is stamped on the underside of the shank and reads Mr. Andersen in script [over] Hand Crafted [over] Made in Denmark followed by the number 3. It is a nice looking Freehand “Dublinesque” Freehand that had great grain around the bowl and shank. The rim top was smooth and rectangular with a bit of scoop running from front to back of the bowl. The finish looked good other than the usual dust. The bowl had been recently reamed and the rim top was quite clean other than some oils. The edge of the bowl looked to be in good condition. The acrylic saddle was a bit off at the shank end in terms of a smooth transition between the shank and stem and there was tooth chatter and light tooth marks on both sides near the button. There is no logo stamp on the stem. The surface of the button looks very good on both sides. Jeff took some photos of the pipe to show the general condition of the pipe before he started his clean up.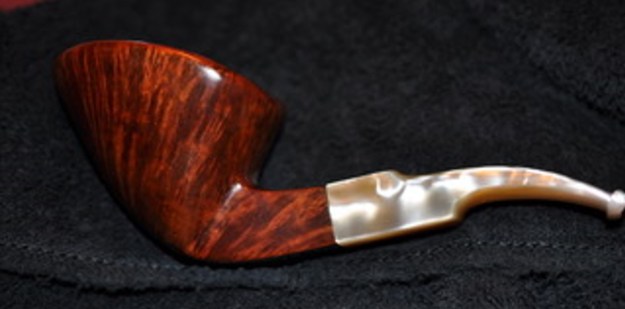
 Jeff took photos of the rim top and stem to show the general condition of the pipe. The bowl is clean and the rim top looks good. The inner edge of the bowl is in excellent condition. The stem has some fitting issues at the shank and there is light tooth chatter and marks on the top and underside near the button.

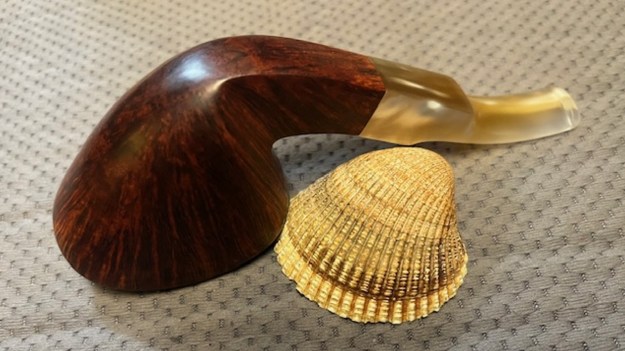
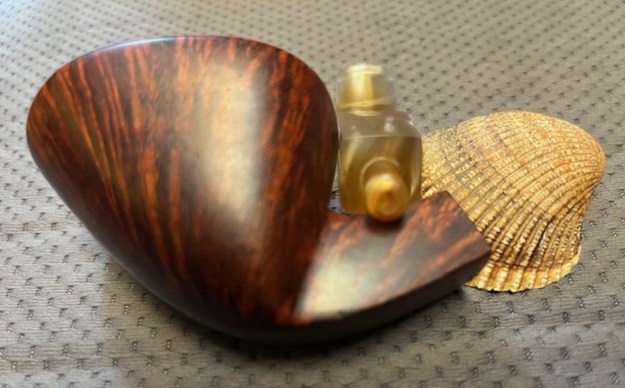
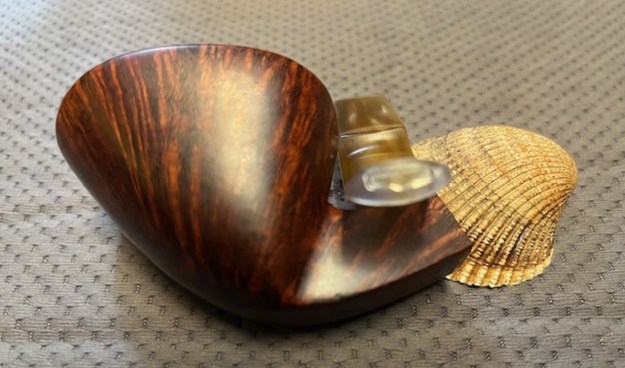
 Jeff took photos of the bowl sides and heel to show the condition of the smooth finish around this bowl. The grain is quite beautiful and it is a nice looking pipe.
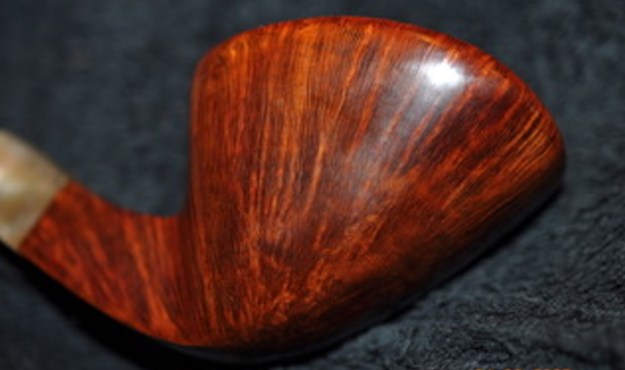
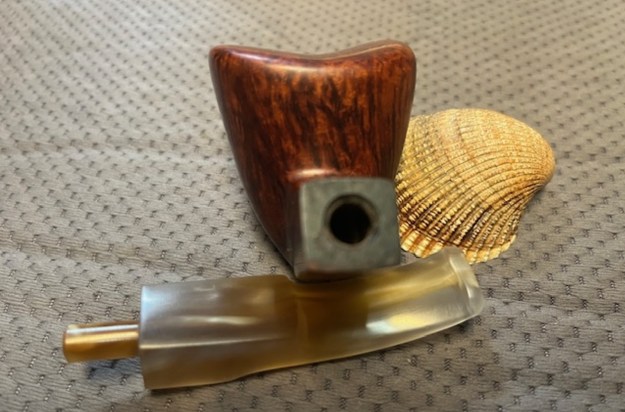
 He took photos of the stamping on underside of the shank. It is clear and readable as noted above. I removed the stem and took photos of the part to give a sense of the look of the pipe.
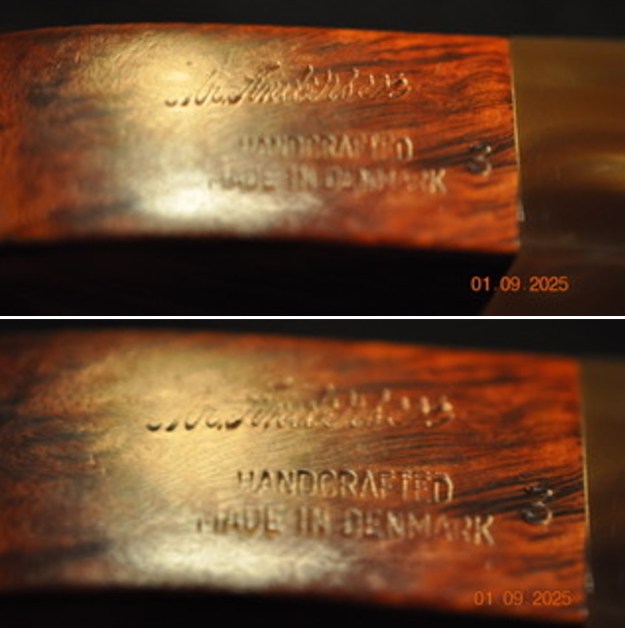 Before I started working on the pipe I wanted to get a sense of the provenance of the pipe. It was a brand with which I was unfamiliar. I turned first to Pipephil’s site and there was nothing on that brand. I turned then to Pipedia (https://pipedia.org/wiki/Mr._Andersen). The was some interesting information on the brand and help with the carver of the pipe. I quote:
It had previously been reported that Jørgen Larsen made Mr. Andersen pipes. However David Field, the importer for Larsen states, “Jørgen Larsen never made Mr. Andersen pipes to my knowledge.”
As it turns out, there are two Jørgen Larsens making pipes!
Søren Eric Andersen writes, “the brand MR: ANDERSEN was introduced by Remo Sørensen, a well known pipe dealer in Copenhagen. The pipes were made by several pipemakers, although I personally only knew one of them, Jørgen Larsen, formerly with Larsen & Stigart. It is unlucky that there are TWO Jørgen Larsens in this small trade, but the name is rather common in Denmark. I was not happy with [them using] that brand [name] for obvious reasons, but Andersen is quite a common name too. With my best regards, Søren Eric Andersen.”
José Manuel Lopes states in Pipes, Artisans and Trademarks that these pipes were also made by Jarl and Chieftan.
Nikolaj Nielsen, proprietor of The Danish Pipes Shop reports that Finn Andersen was the maker (or perhaps one of the makers) of Mr. Andersen pipes for Remo Sørensen. It is unclear if this Finn Andersen, is Finn Meyan Andersen, who was instrumental in setting up the machinery at the Briar Workshop, but that seems possible, if not likely.
Now I knew the pipe was probably sold by Remo Sorensen a well known pipe dealer in Copenhagen. Jorgen Larsen of Larsen & Stigart was probably the carver. Now it was time to work on the pipe.
Armed with that information I turned my attention to the pipe itself. Jeff had cleaned the pipe with his usual penchant for thoroughness that I really appreciate. He cleaned up the reaming with a PipNet pipe reamer and a Savinelli Fitsall Pipe Knife. He scrubbed out the internals with alcohol, pipe cleaners, shank brushes and cotton swabs until the pipe was clean. He scrubbed the exterior of the bowl with undiluted Murphy’s Oil Soap and a tooth brush to remove the grime and grit on the briar and the light lava on the rim top. The finish looks very good with good looking grain around the bowl and shank. He cleaned the acrylic stem alcohol and pipe cleaners to remove the oils and tars. He scrubbed the surface with some Soft Scrub to clean up the surface. When the pipe arrived here in Vancouver for the second stop of its restoration tour it looked very good. I took photos before I started my part of the work. 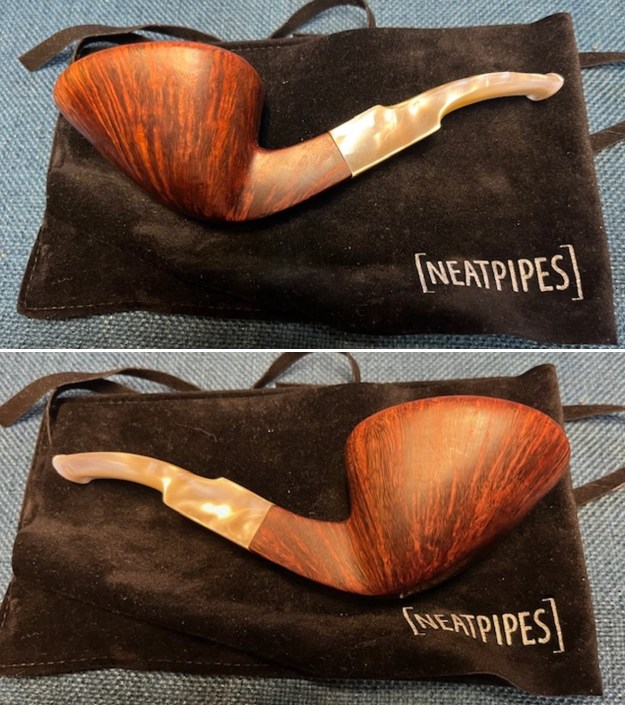
 I took close up photos of the bowl and rim top as well as the stem. You can see the condition of the rim top and bowl in the first photo. Jeff was able to remove all of the dust and oils on the top and the edges of the bowl. It looked very good. The stem had a sloppy fit to the shank and there was light tooth chatter on both sides ahead of the button.
 I took a photo of the stamping on the shank sides to show the condition. The stamping was clear and readable as noted above. I removed the stem and took a photo to show the parts of the pipe. It is a beauty.
 I polished the briar with 1500-12000 grit sanding pads. I wiped down the bowl with a damp cloth to remove the sanding debris and dust. The bowl began to look amazing.
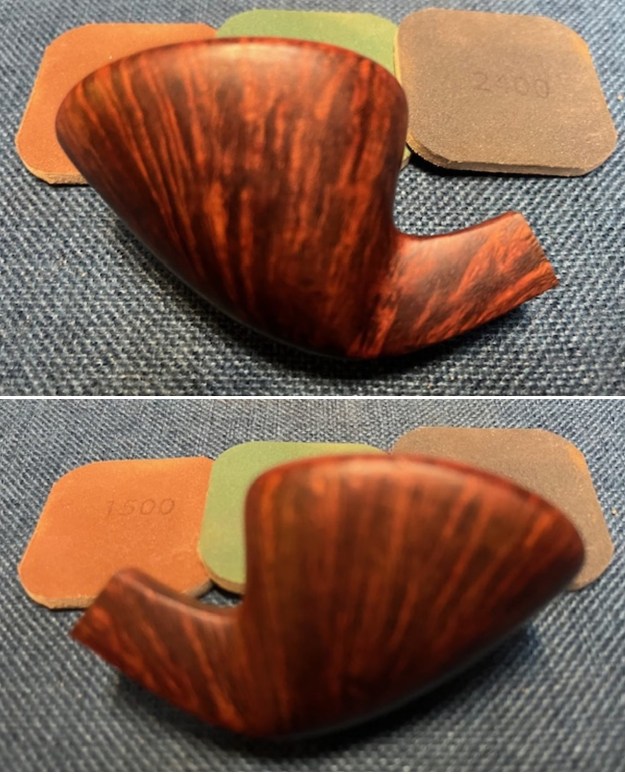
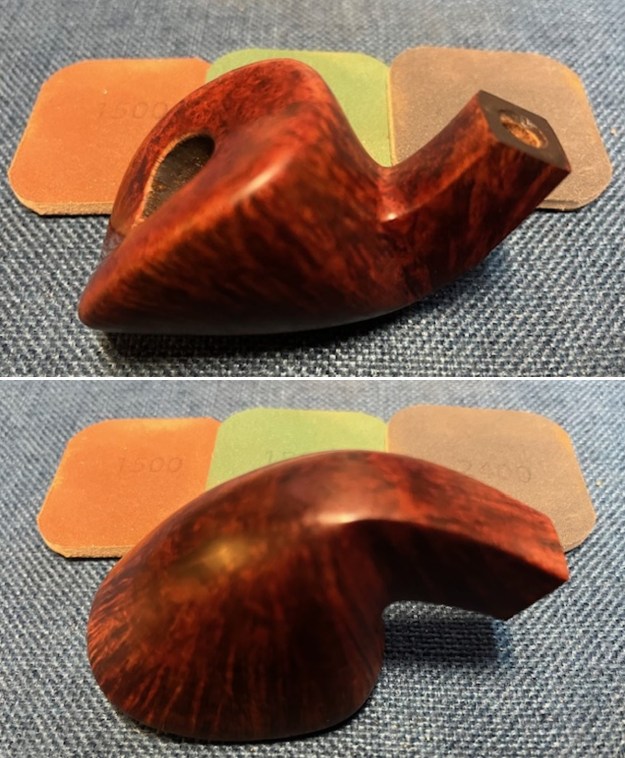


 I worked some Before & After Restoration Balm into the surface of the briar with my fingertips to clean, enliven and protect it. I let the balm sit for a little while and then buffed with a cotton cloth to raise the shine. The following photos show the bowl at this point in the restoration process. I am very happy with the results.

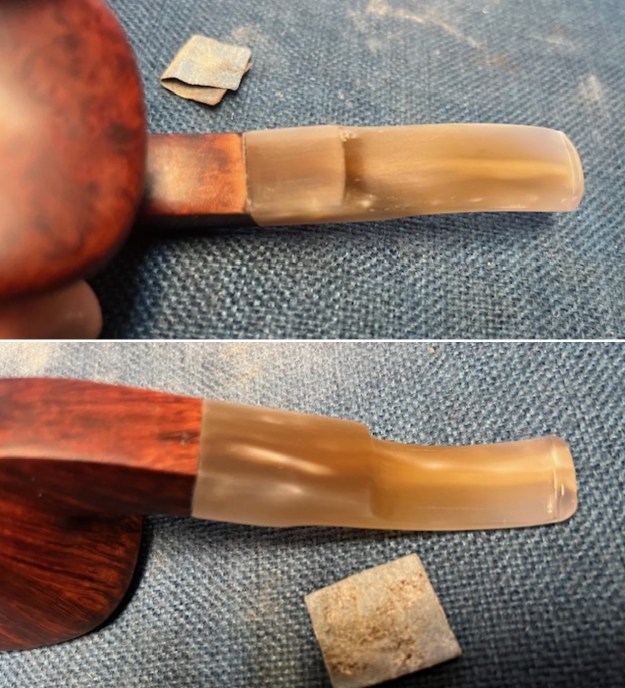
 I worked on the fit to the shank with a folded piece of 220 grit sandpaper. I was able to smooth the stem on the sides and underside to match the flow of the shank. The topside took a bit more work to flatten the transition and smooth the flow.
 I smoothed out the sanded area with 320-3500 grit sanding pads. Once it was smooth I stained the top of the shank with a Cherry Stain pen.
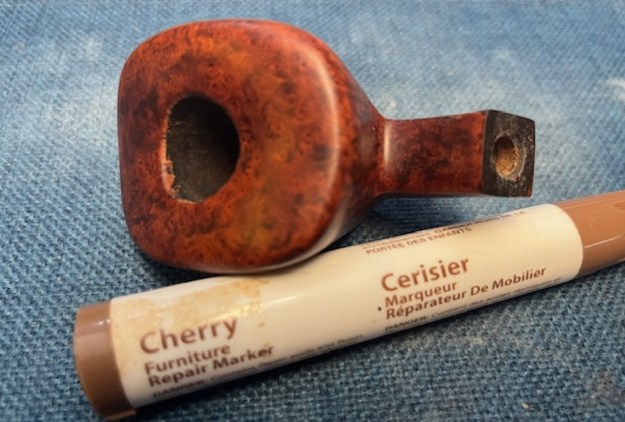 I sanded the stem with 320-3500 grit sanding pads. I wiped the stem down with an Obsidian Oil cloth after each sanding pad. The tooth marks and chatter had disappeared.
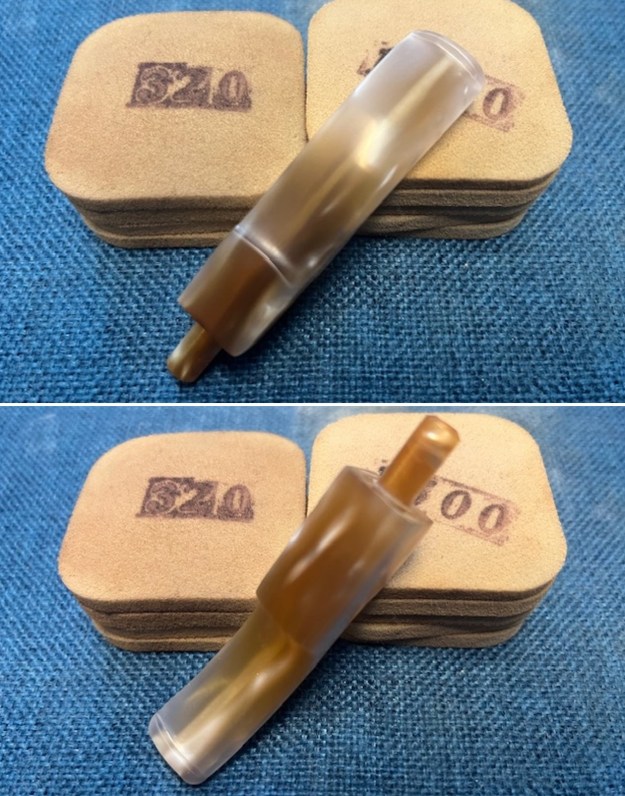 I polished the stem with micromesh sanding pads – wet sanding with 1500-12000 grit sanding pads. I wiped it down after each sanding pad Obsidian Oil. I finished by polishing it with Before & After Pipe Stem Polish both fine and extra Fine and then wiped it down with a final coat of Obsidian Oil.
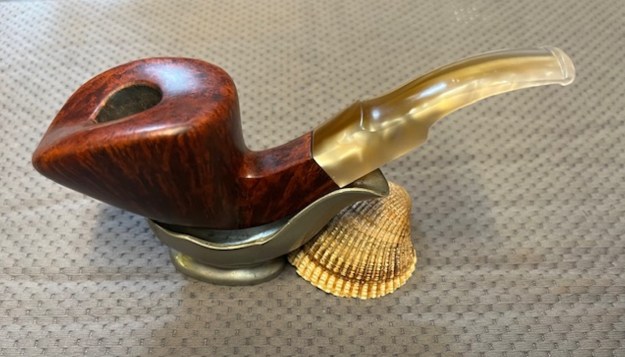
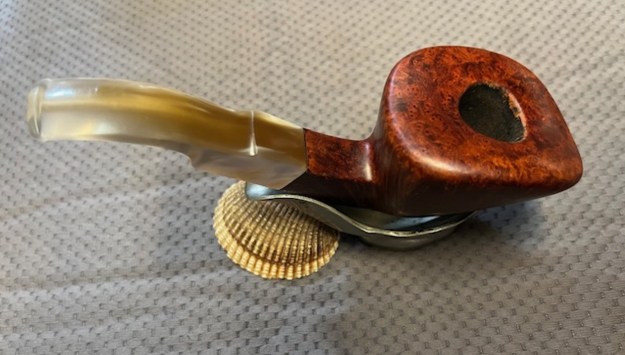
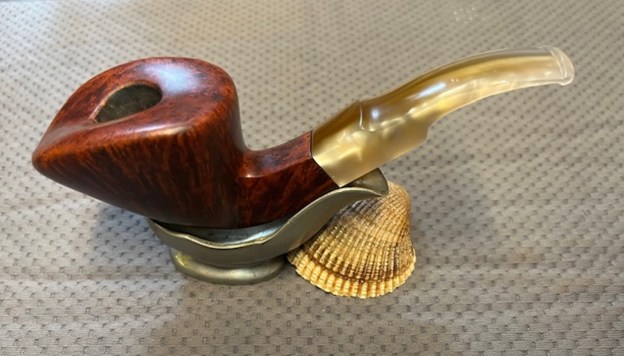
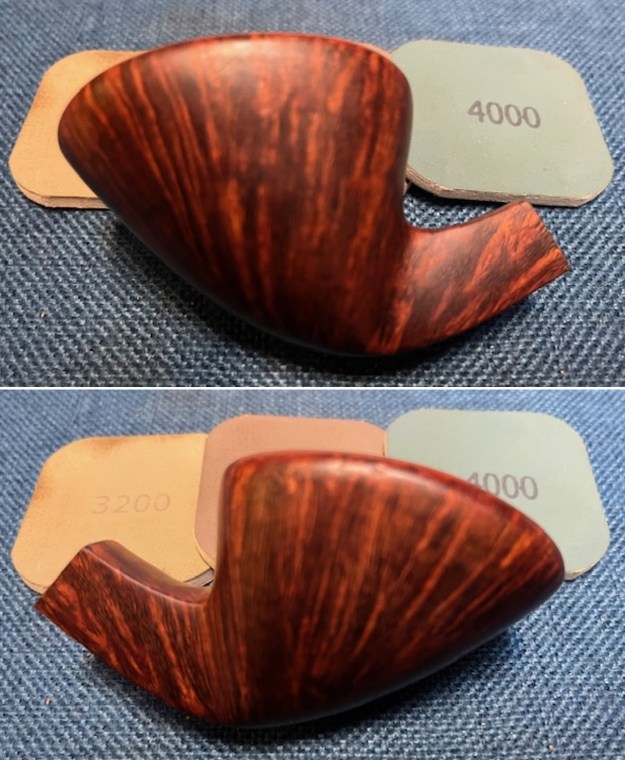
 This is a beautiful Mr. Andersen Hand Crafted Freehand Dublin with a square shank and square acrylic saddle stem. It has a great look and feel. The shape of the bowl, the scooped rim top and the cut of the briar work well to highlight the grain around the bowl sides. I polished stem and the bowl with Blue Diamond polish on the buffing wheel. I gave the bowl and the stem multiple coats of carnauba wax. I buffed the pipe with a clean buffing pad to raise the shine. I hand buffed it with a microfiber cloth to deepen the shine. The Mr. Andersen Freehand Dublin polished up pretty nicely. The grain took on life with the buffing. The rich stains work well with the polished vulcanite stem. The finished pipe has a rich look that is quite catching. Have a look at it with the photos below. The shape, finish and flow of the pipe and stem are very well done. The dimensions are Length: 6 inches, Height: 2 inches, Outside diameter of the bowl: 1 ¾ inches wide x 2 ½ inches long, Chamber diameter: ¾ of an inch. The weight of the pipe is 2.33 ounces/66 grams. It is a beautiful pipe. I will be putting it on the rebornpipes store shortly in the Danish Pipemakers Section if you are interested in adding it to your collection. Thanks for walking with me through the restoration.