Blog by Steve Laug
This is the seventh pipe from the box of pipes that I was gifted by a good friend of mine with the instructed purpose of cleaning them up and selling them with all of the proceeds going to the aid of earthquake victims in Nepal. Once again all funds raised will all go to the SA Foundation, and organization that has worked in Nepal for over 15 years helping provide recovery, housing and job training for women who are victims of sexual exploitation and trafficking. The ongoing earthquakes (over 300) that continue to shake Nepal have left much in ruins. The SA Foundation Project there was able to find new housing for the women and help with staff as well. Every dollar raised from the sale of these pipes will go to the work in Nepal.
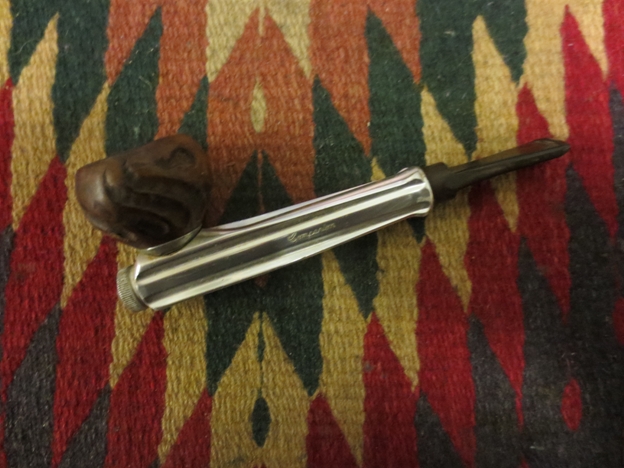
It is a Kirsten metal pipe with a briar Dublin bowl. It is stamped on the left side of the shank, Kirsten in a cursive script. On the underside it is stamped Made in U.S.A. – K. These pipes were made for a long period of time in the Seattle, Washington area of the US. They came in four generations or iterations – Generation 1, 1.5, 2 and 3. The stamping on this one, the absence of a metal cap to hold the bowl, and the presence of the rubber O rings on the metal valve and on the stem insert, point to it being a Generation 1.5 pipe or a transitional one.
Documentation that I quote on an earlier blog from Dave Whitney shows the following information on the Generation 1.5 – transitional period – mid to late 50’s. This was an experimental stage. Kirsten realized that the bit and insert were prone to seizure as the condensate dried. This model always has O-rings on the metal insert, and later models can have O-rings on both. Same markings, as I remember it. There is no metal cup spacer under the bowl. This generation has O rings either on the valve or mouthpiece but no O rings on the other end. This transitional period is stamped “Pat. Pending” and “Pats. & Pats. Pending” some with “Made in U.S.A. It seems like the company was using surplus parts to combine into this series of pipes. This particular pipe is stamped K after the U.S.A. thus making it a Companion.
When I brought this one to the work table the stem was frozen in the shank and the valve on the end was also frozen. The bowl could not be turned off by hand as my other Kirsten’s can. The bowl had a layer of cake and the screw in the bottom of the bowl was also caked and dirty. The rim was dirty and the metal was barrel was dull and soiled. The stem was not only stuck but it also had tooth marks on the top and underside of the stem near the button. There was also some discoloration and sticky buildup on the stem.


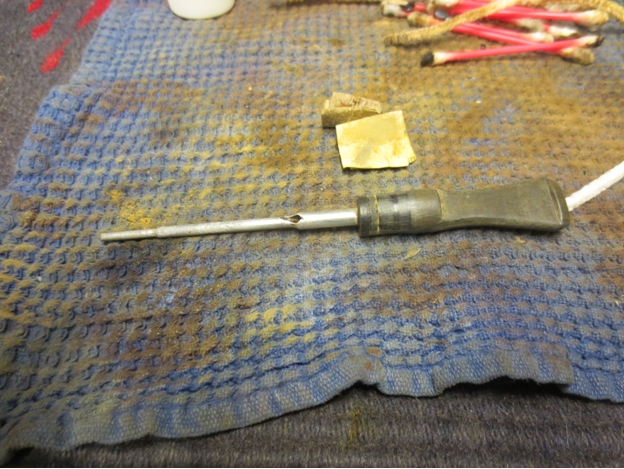
 I cleaned out the slot on the screw in the bottom of the bowl and was able to remove it with a flat blade screwdriver. The valve at the end of the barrel also came out when I used a pair of pliers that I had taped the end on so that it would not damage the aluminum of the valve. It was very tight and the tobacco oils acted like dried varnish on the rubber gasket and the aluminum almost welding it to the barrel. By carefully working it back and forth I was finally able to remove it.
 The stem would not budge so I dropped the barrel stem down in my alcohol bath and let it soak overnight. I dropped the bowl into the bath at the same time to soften the cake in it and also make the cleanup of the rim and bowl easier.
 I filled a small cap with alcohol and put the valve and the screw into the small bath overnight as well. I figured a good soak would make the clean up process much simpler.
 In the morning I was able to remove the stem and rod apparatus from the barrel with ease. It was caked with the same kind of varnish from the tars and oils of the tobacco.
 I took a photograph down the barrel to show what the inside looked like once the stem was removed.
 I took the bowl out of the bath as well and laid out the parts of the pipe side by side for the photos before I cleaned them up.
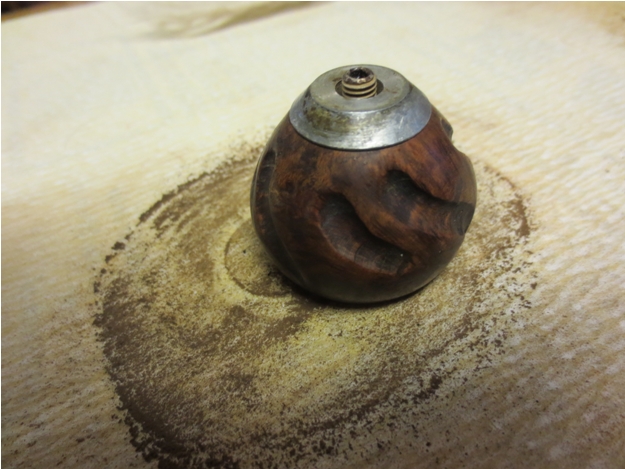
 Using a piece of 0000 steel wool I scrubbed the rod and the bowl down to clean up the grime and buildup. I also scrubbed the screw and the valve as well with the steel wool. It did not take much effort to remove that from the metal or the briar. The photo below shows the cleaned up parts.
 I scrubbed out the barrel with cotton swabs and alcohol as far as I could reach. I pushed it through the threaded connector for the bowl as well to remove all of the oils and tar.
 I took the next photo of the barrel to show the inside and how much cleaner it was. I still needed to clean it more so I twisted some tissue into a cord and turned it into the barrel until it came out the other end. I move it back and forth to scrub out the inside of the barrel. Once it was out the inside of the barrel shone.
 I reamed the bowl using a sharp pen knife paying particular attention to the seat at the bottom of the bowl which held the screw flat against the bowl bottom. I cut the cake back to a very thin coat along the walls. I then used some Vaseline on the threads of the screw and put it through the bottom of the bowl and used the screw driver to turn it into the barrel. I still needed to polish the grooves on the barrel and the valve but the pipe was beginning to look very good.
 I sanded the tooth marks on the stem with 220 grit sandpaper to remove as much of them as I could without thinning the surface of the stem or leaving behind a groove. I was able to remove both marks on the top and bottom of the stem.
 I used micromesh sanding pads to polish the stem and bring back the shine. I wet sanded with 1500-2400 grit pads and then rubbed the stem down with Obsidian Oil and then dry sanded with 3200-4000 grit pads and gave it another coat of oil. Finally I sanded with the 6000-12,000 grit pads and then gave it a final coat of oil and let it dry.

 I buffed the stem with Blue Diamond Plastic Polish on the wheel and brought out a deep shine. I then gave the stem multiple coats of carnauba wax and buffed it with a clean, soft flannel buffing pad to raise the shine.
 I buffed the barrel lightly with the Blue Diamond and also buffed the bowl. I gave the bowl and barrel several coats of carnauba wax and then lightly buffed it with a clean flannel buffing pad to raise the shine. The finished pipe is shown in the photos below. It is ready for someone who has been looking for one of these to pick it up and add it to their rack and help out the women of Nepal at the same time.


 This older Kirsten Companion K is a great looking pipe and the Dublin bowl gives it a distinctive look. As I said above, it should make someone a great addition. If you are interested in this pipe email me with an offer at slaug@uniserve.com and we can discuss it. The entirety of the sale price will go to the Nepal project. I will pay the postage so that does not get taken off the proceeds. If you are interested in reading about the SA Foundation you can look at their website at http://www.safoundation.com.
Thanks for looking.