Tag Archives: drilling out a broken tenon in a stem

Replacing a Broken Tenon on a Capri Warlock Sandblast


Blog by Steve Laug

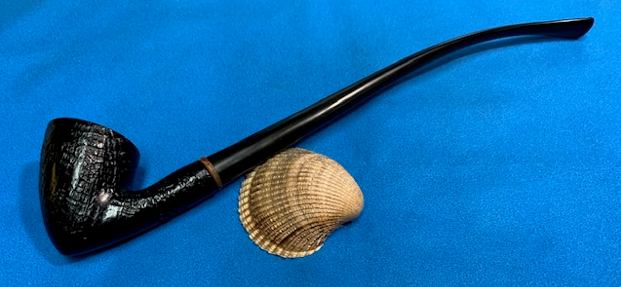
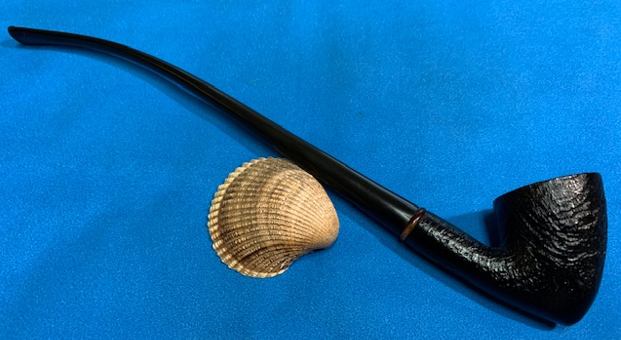
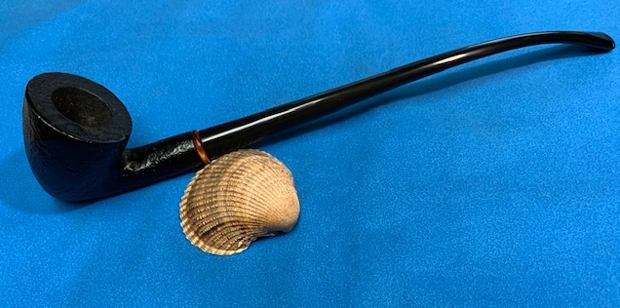
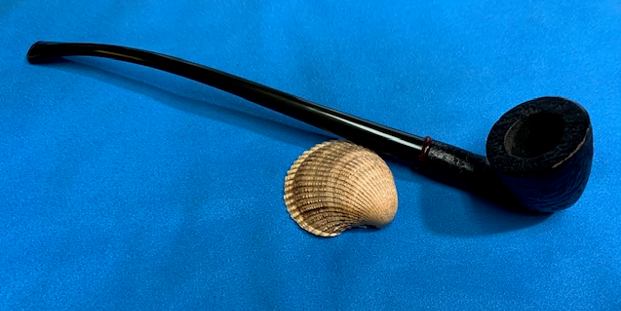
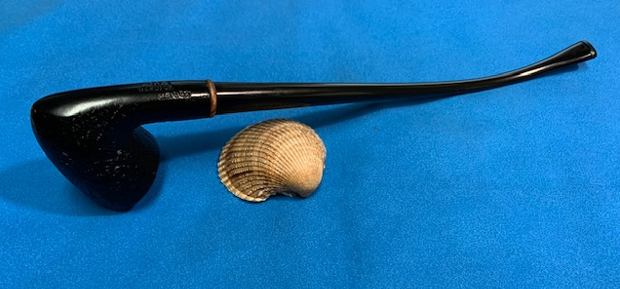
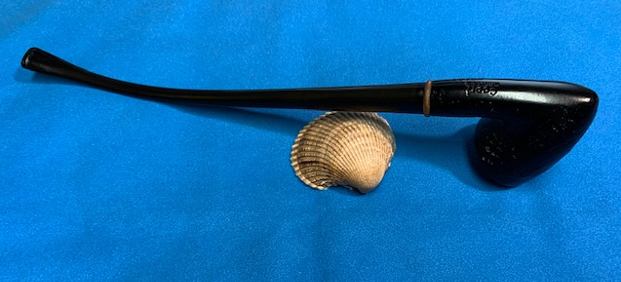
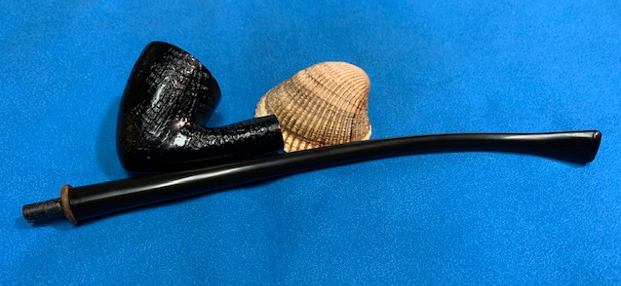
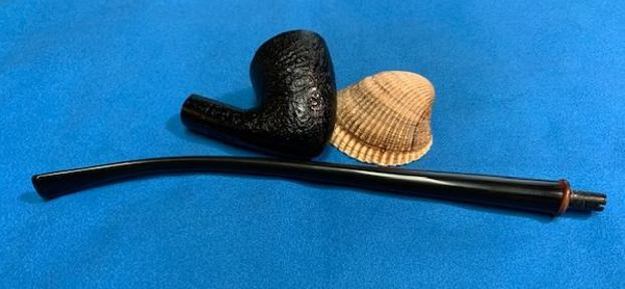
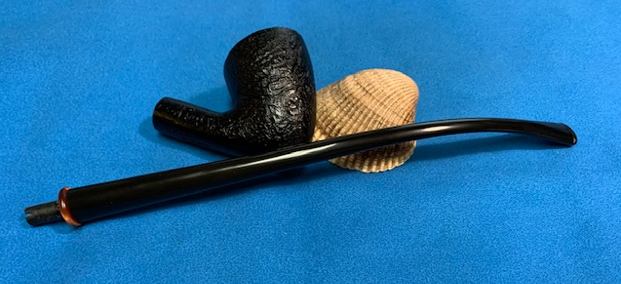
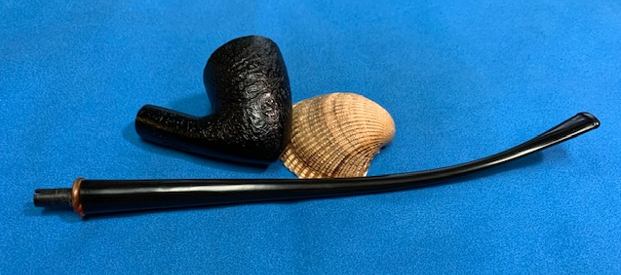
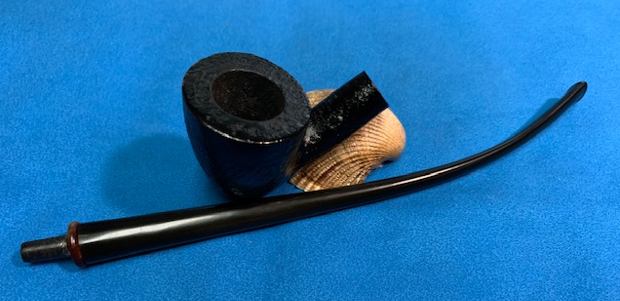
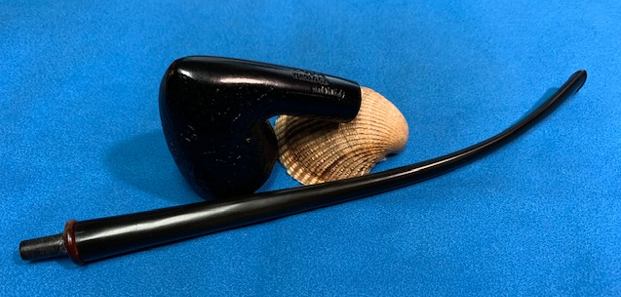
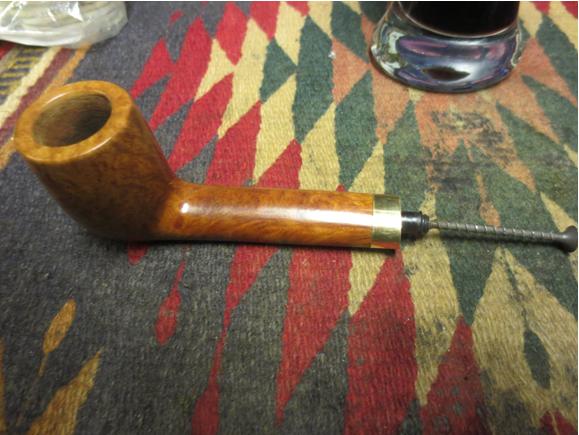
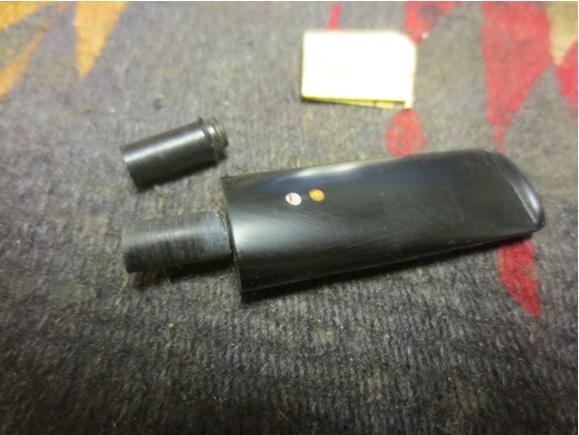
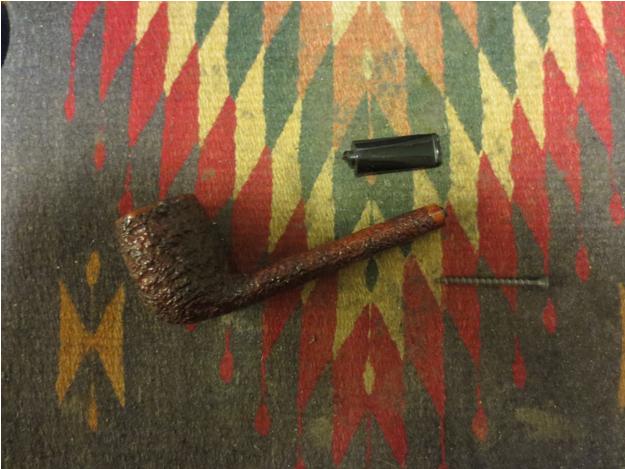
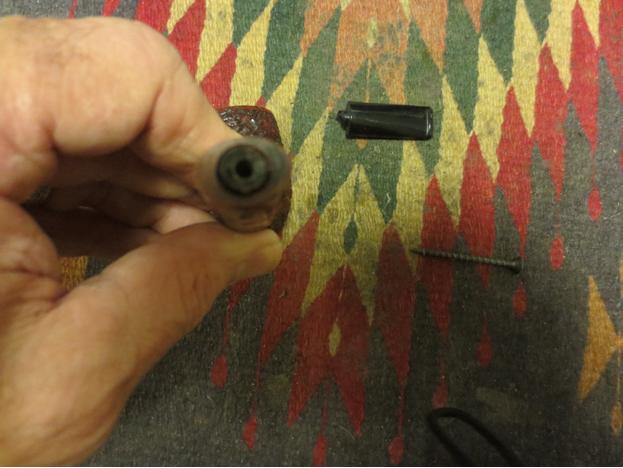
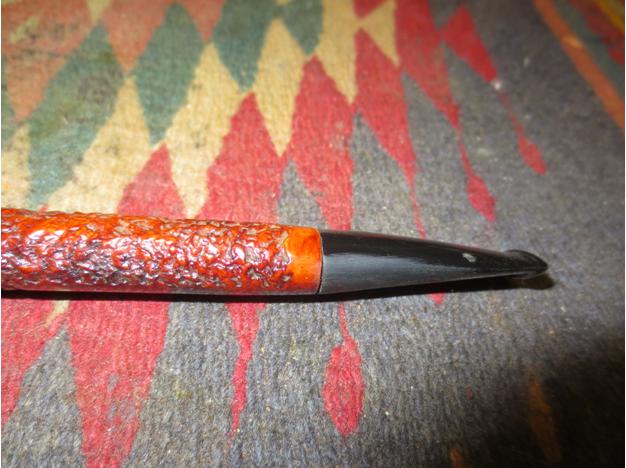
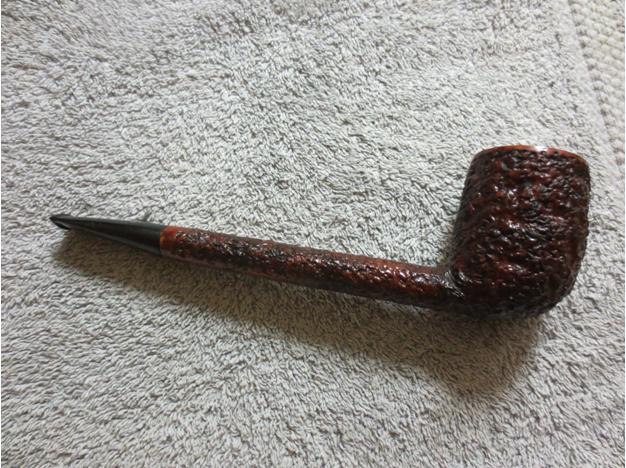
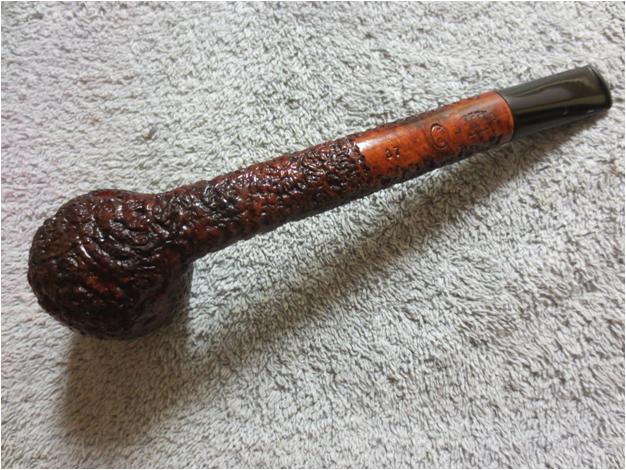
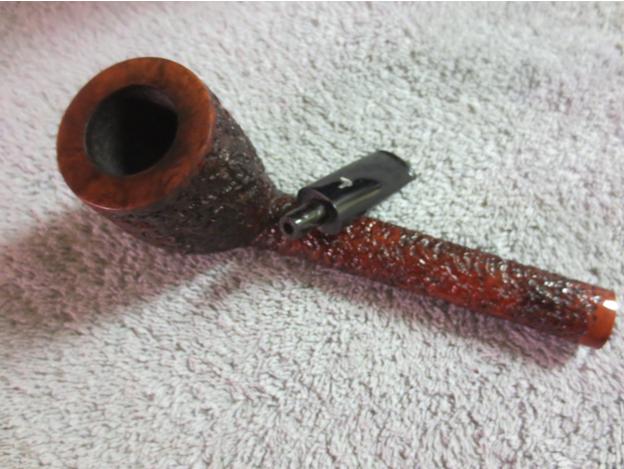
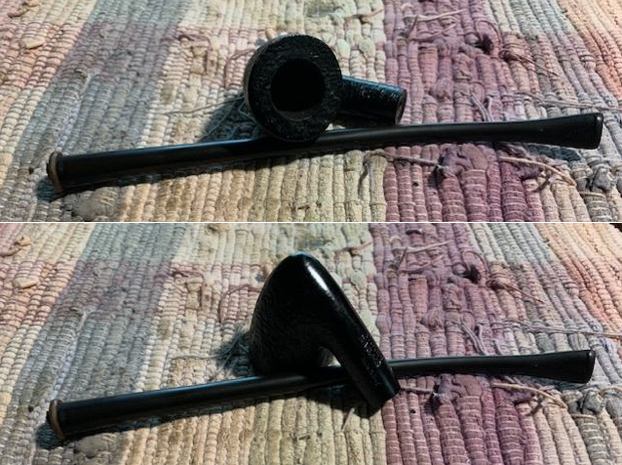
Last week I received a call from a fellow who was referred to me by our local pipe shop. He had a churchwarden that was stamped Capri [over]Warlock [over] Made in Italy on the underside of the shank. He had broken off the tenon and was not sure how to proceed. We talked about replacing the tenon on the stem and he breathed a sigh of relief. We discussed how to get it to me to work on. He decided he would mail it to me. On Monday this week that package arrived with his pipe. It was a nice looking pipe in many ways. The shank was clear of the broken tenon and the bowl was quite clean. The shank and stem were filthy inside and it is quite clear that he had not cleaned it often. The stem had an acrylic adornment ring on the end that was glued in place. The tenon had broken off just ahead of this ring. It was sharply broken and the airway in the previous tenon had not been centered in the tenon. It was significantly thinner on one side than the other which I think probably was part of the reason for a break. The stem had some light tooth chatter on both sides near the button. I took some photos of the parts of the pipe before I started my work on it. 
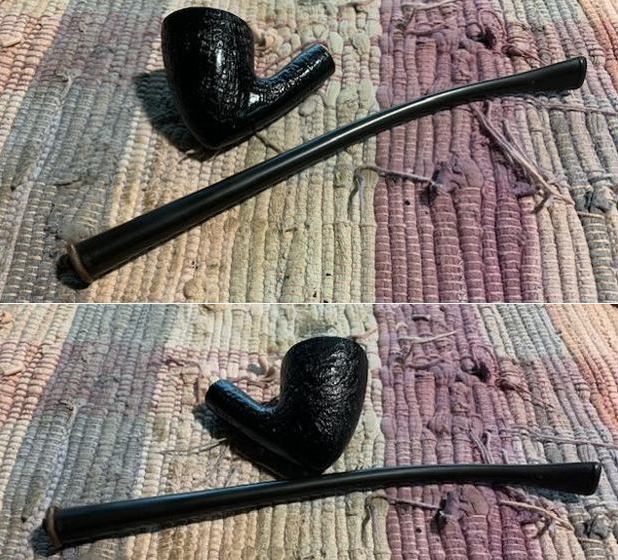
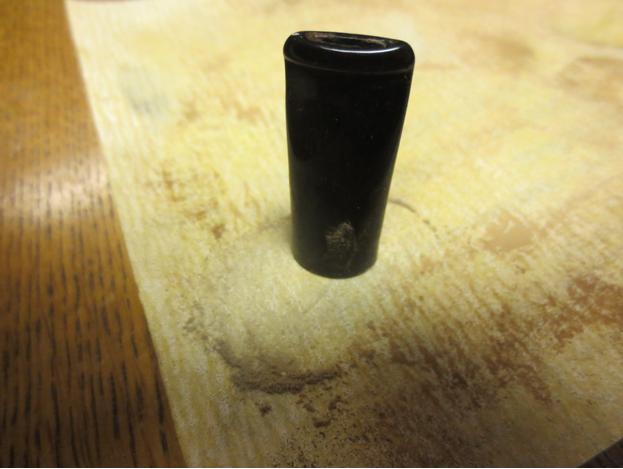
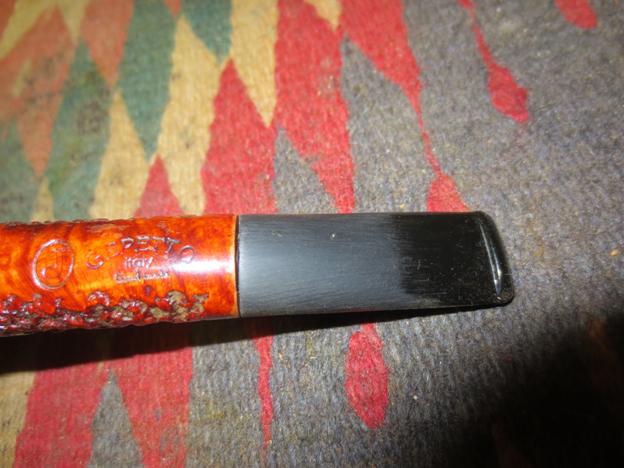
I took a photo of the stamping on the underside of the shank. It was clear and read as noted above.
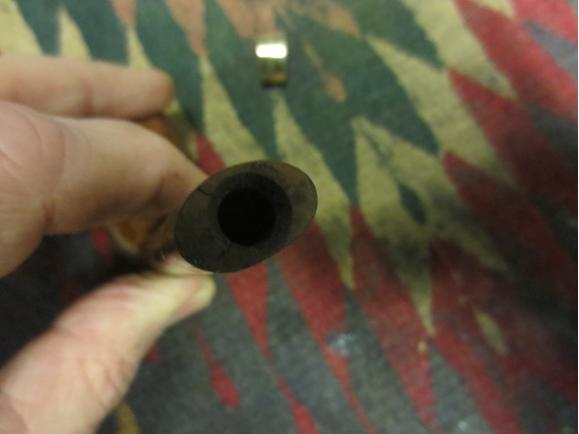
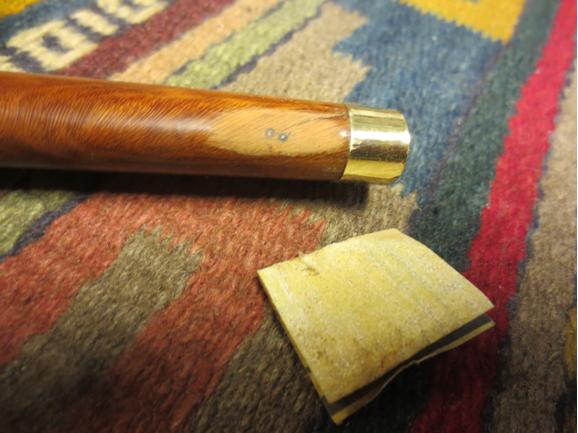
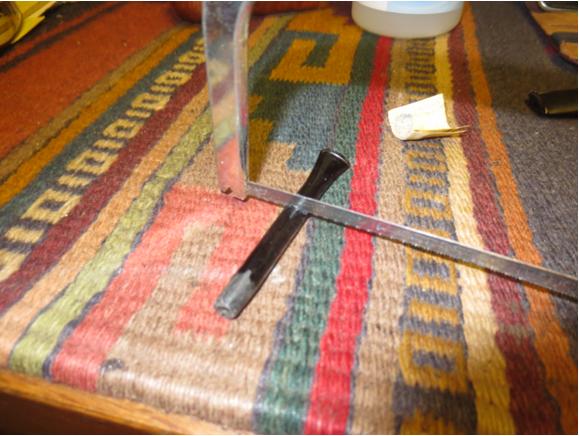
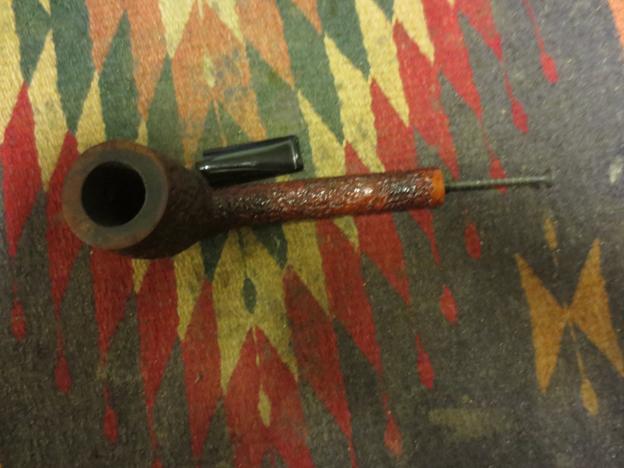
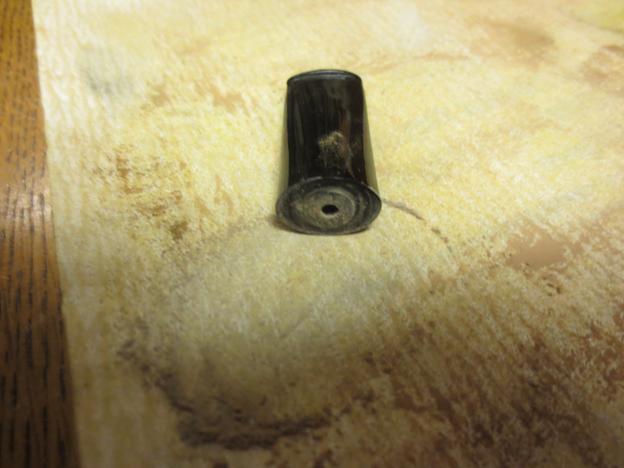
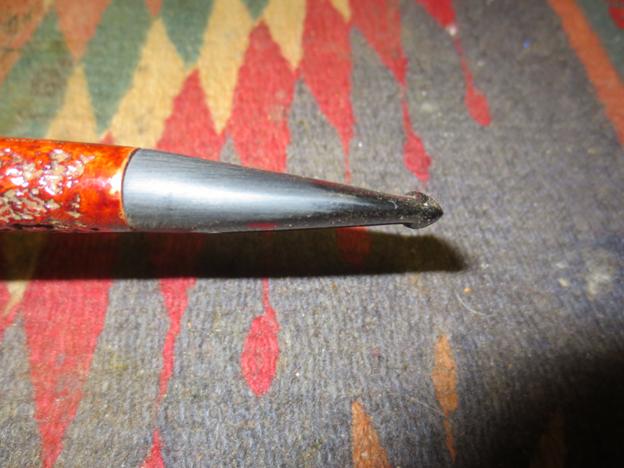
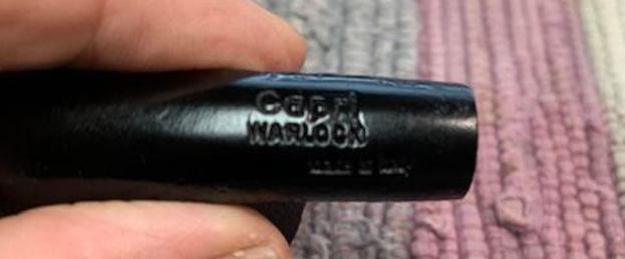
I took a photo of the bowl and rim top to show the condition of the bowl when it arrived. I also took a photo of the broken tenon end on the stem.
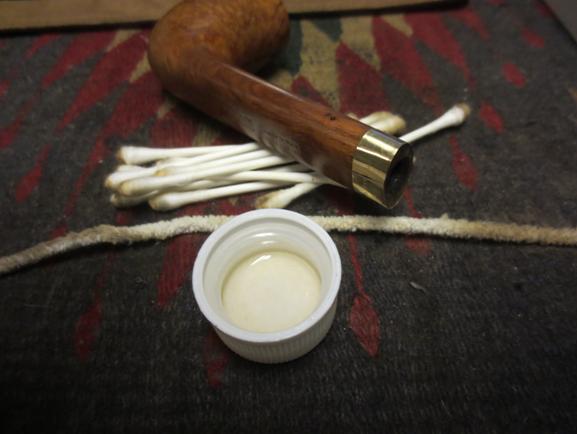
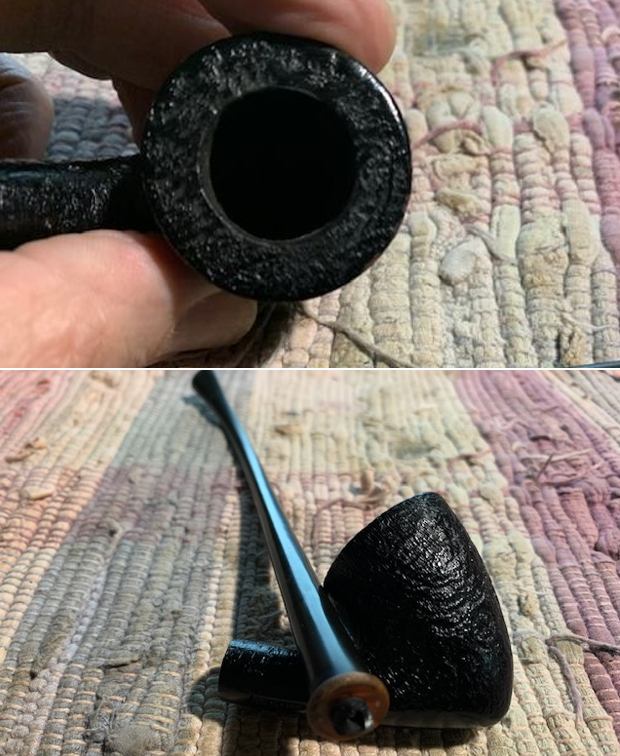
The pipe smelled really strong even though the bowl was clean and had no cake. It was filthy in the shank and the airway in the stem. I cleaned both out with 99% isopropyl alcohol, cotton swabs and pipe cleaners. It took some work but it is finally clean and smells fresh.
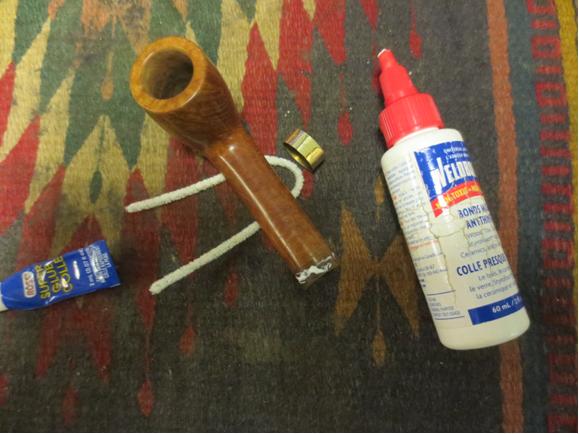
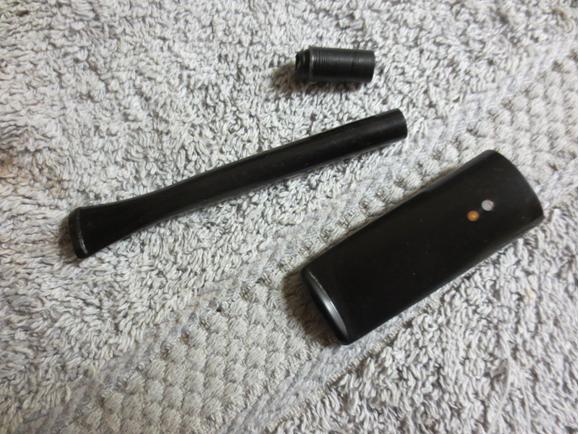
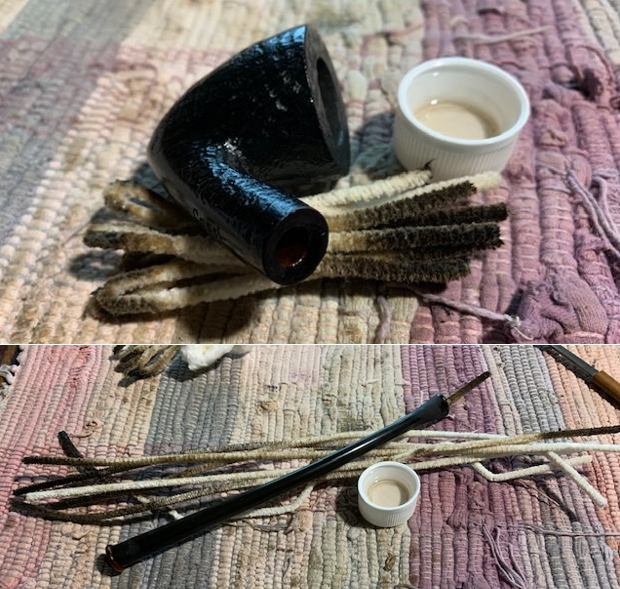
I used my Dremel and sanding drum to flatten out the end of the shank and remove the remainder of the broken tenon in preparation for the new tenon. I chose a new tenon from my assortment of them. It was a little large both in terms of the mortise and the shank end but it would work.
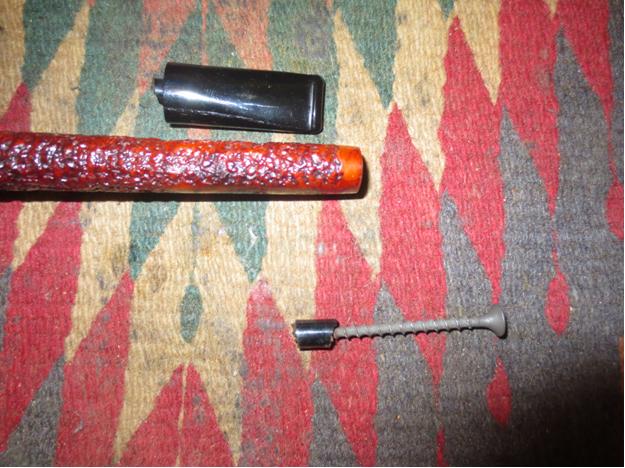
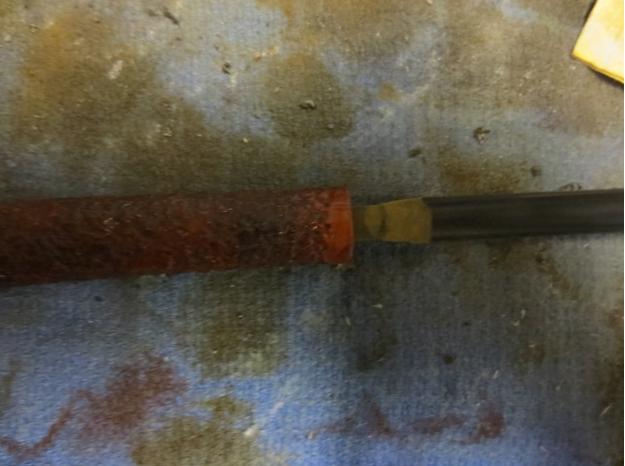
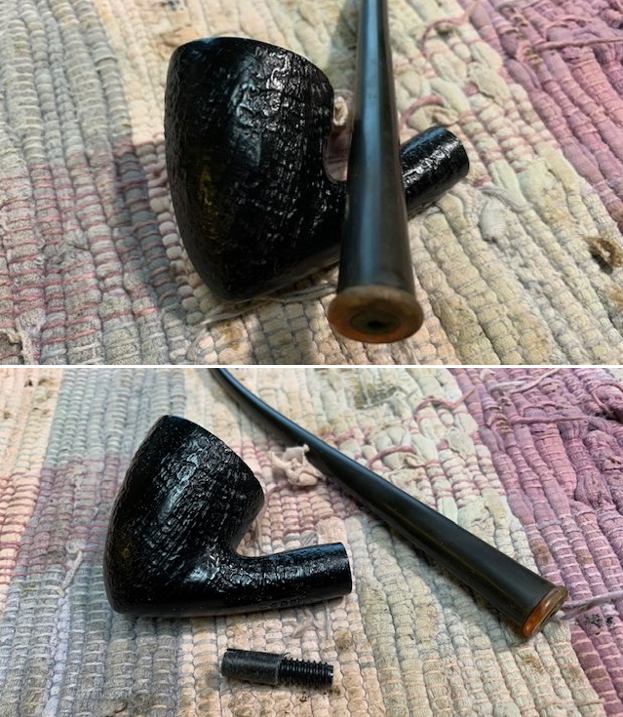
I drilled out the airway in the stem with a bit on my cordless drill. Before I drilled it I used a sharp knife to center the airway in the stem and remove the off-center nature. I was able to center it then drilled. I started small and worked my way up to the maximum size the airway would take without weakening the walls of the stem. I used my Dremel and sanding drum to reduce the diameter of both ends of the tenon replacement. I checked it frequently for fit in both the stem and the shank. It took a bit of work but it finally was the right size.
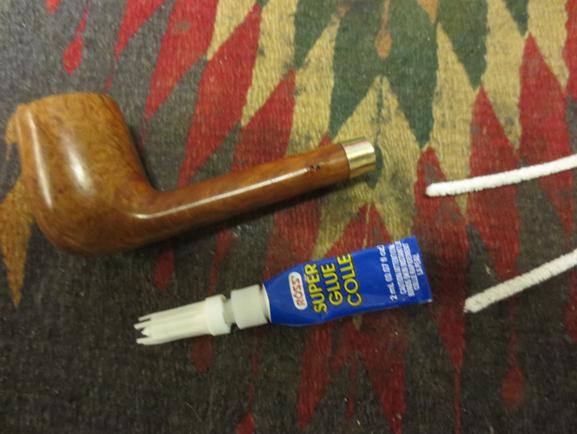
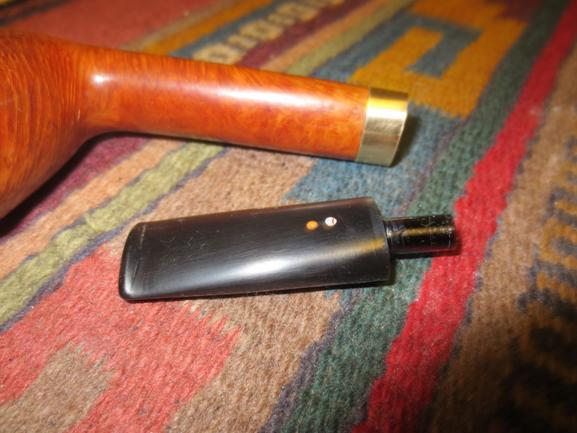
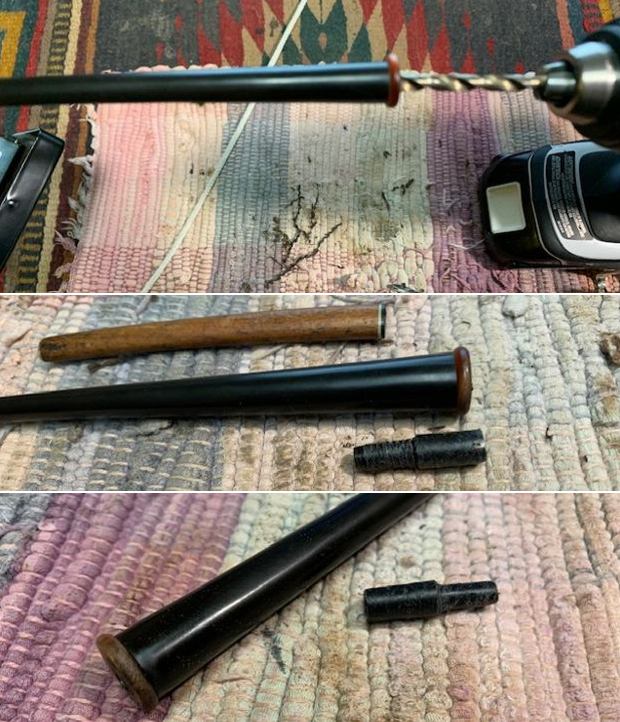
I checked the fit in the stem one final time then glued it in place in the airway with black CA glue. I set it aside over night to let the glue cure.
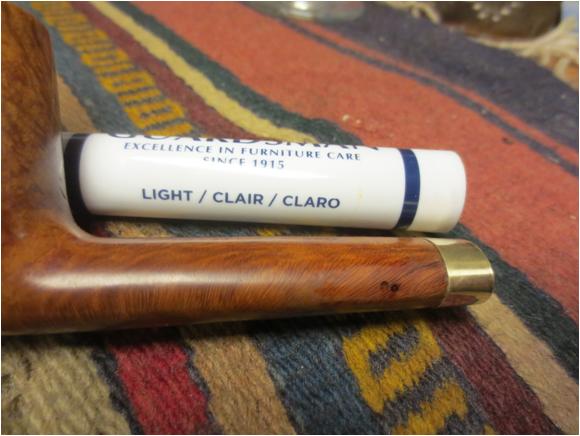
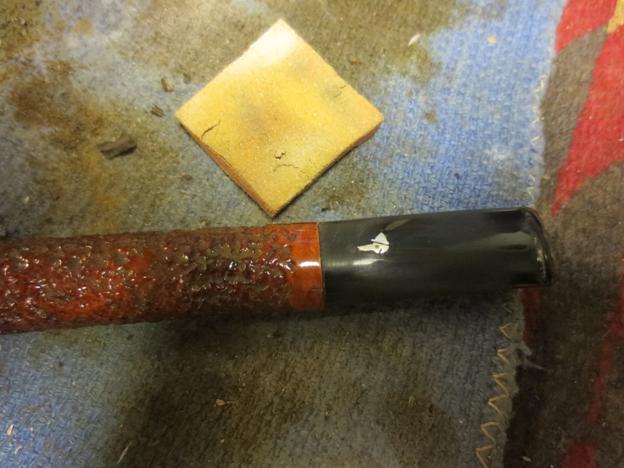
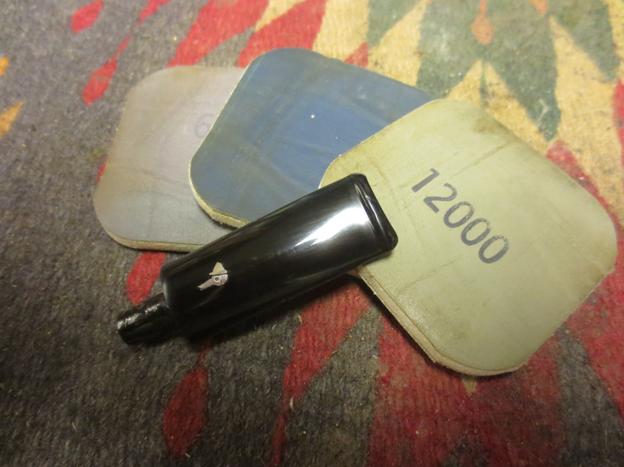
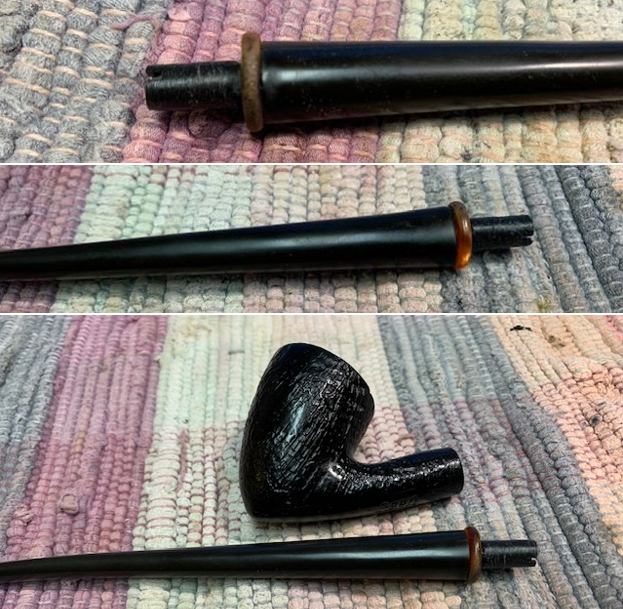
I polished the stem with micromesh sanding pads to remove the tooth chatter and slight damage that had happened to the ring and the stem when the tenon broke. I dry sanded with 1500-12000 grit pads and wiped the stem down after each sanding pad with Obsidian Oil to protect and preserve the vulcanite.
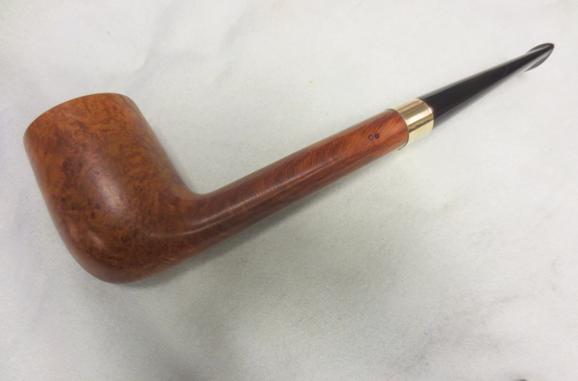
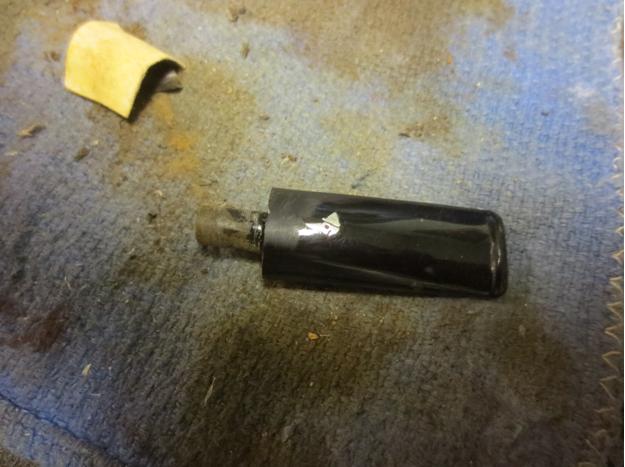
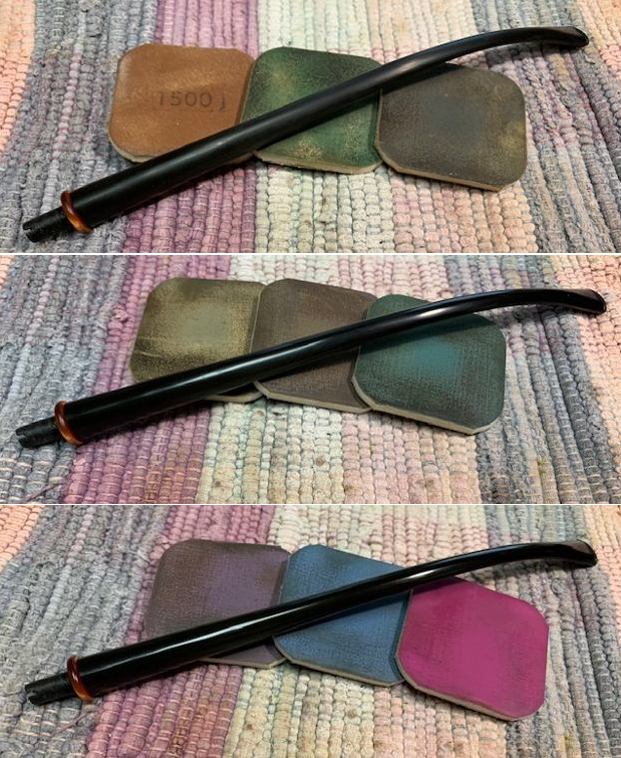
I put the pipe back together – the bowl with its repaired stem. This restemmed and restored Capri Warlock (Churchwarden) is a real beauty and I think that the fit of the new tenon works very well. The grain on the bowl came alive with the buffing. I used Blue Diamond on the buffing wheel on both the bowl and stem. I gave both multiple coats of carnauba wax on the wheel then buffed it with a clean buffing pad to raise the shine. I hand buffed it with a microfibre cloth to deepen the shine. The Capri Warlock feels great in the hand. It is lightweight and the contrast in the blacks of the briar, the brown swirled acrylic ring and the polished vulcanite stem looks quite nice. The dimensions of the pipe are Length: 10 inches, Height: 1 ¾ inches, Outer diameter of the bowl: 1 ½ inches, Chamber diameter: ¾ of an inch. The weight of the pipe is 2.50 ounces/71 grams. It really is a beauty. I will be packing it up this evening and mailing it out to the fellow soon. I think he will be excited to get it back.Thanks for walking through the replacement of the new tenon and the restoration with me. Cheers.  

Replacing a Broken Tenon & Repairing a Cracked Shank on a Radice Brown Canadian


Blog by Steve Laug

A friend on Facebook messaged me not long ago with a proposition. I had repaired a pipe for a friend of his before Christmas and now he had one for me. He would send it up with some pipes to add to my refurbishing box. The one he had for me to repair was a Radice Brown Canadian with a gold band. The pipe arrived with the broken tenon stuck in the shank. In looking it over I could also see a small crack coming out from under the band that would need to be addressed. I used my usual tenon pulling method and was able to wiggle it free of the shank. The tenon was Delrin and was threaded so that it screwed into the stem. It had broken off leaving two full threads remaining on the end of the tenon. The second photo below shows the pulled tenon and the broken remainder of the tenon in the stem.Radice1

Radice2 I drilled out the broken tenon using a drill bit slightly smaller than the diameter of the hole in the stem. As I drilled it the broken tenon stuck on the drill bit and I was able to unscrew it from the stem. The photo below shows the freshly drilled stem. There was a lot of clutter left behind by the drill that I would need to clean out. I used a dental pick and pipe cleaners to remove all the debris and open up the airway in the stem. I noticed that there was a ridge on the inside of the bowl toward the bottom from whoever had reamed it before I received it.Radice3 Once I had the tenon out of the shank and the stem drilled and cleaned I examined the pipe carefully. From experience I have seen that when a tenon snaps there can also be collateral damage such as a cracked shank. The band on the pipe was loose so I slid it off and examined the shank. From the end view photo below you can see a crack at about 11 o’clock. It ran up the shank for about ¼ inch and then turned downward along the side of the shank. It extended for almost an inch along the side of the shank. There was a slight crack that split off of it and headed backward toward the end of the shank as well. I used a microdrill bit on the Dremel and drilled a small pin hole at the end of each branch of the crack.Radice4

Radice5 I put a light line of white all purpose glue around the shank and pressed the band in place. I cleaned up the overage of the white glue.Radice6 I used a dental pick to guide super glue drops into the drill holes and along the crack.Radice7

Radice8 I sanded the repair I had made to the cracked shank with 220 grit sandpaper and then with a medium and a fine grit sanding sponge.Radice9 I sanded the repair area with 1500-2400 grit micromesh sanding pads and then stained it with a light coloured stain touch up pen. The colour matched the rest of the bowl and shank and once it was polished blended in well. The two dark spots on the side of the shank were the filled drill holes. They are smooth to touch.Radice10 I used a needle file to smooth out the ridge at the bottom of the bowl and blended it in with the sides of the bowl as much as possible. I cleaned out the shank with pipe cleaners, cotton swabs and alcohol. I used a dental pick to clean out the slot on the stem and then ran pipe cleaners and cotton swabs through it to clean up the threads in the tenon end and the airway throughout the pipe.Radice11 I set the bowl aside and began to work on the stem. I decided to fill the missing dot on the top of the stem before I replaced the tenon. I screwed the broken tenon in to give me something to hold onto while I worked on the stem. I used a knitting needle that was ivory coloured and cut it down with the Dremel until I had a piece that would fit in the hole in the stem. I glued it in place with super glue and then cut off the body of the needle leaving just a small piece in the hole. I sanded it with the sanding drum on the Dremel and brought it as close to flush with the surface of the stem as possible without damaging the stem.Radice12

Radice13

Radice14 I sanded the dot flush with the surface of the stem with sandpaper and then with the sanding sponges and micromesh pads. I removed the broken tenon and prepared to cut a new tenon. For the material I used a small stem that I have been cannibalizing for tenon repairs.Radice15 I cut off a piece of the stem that would give me material to work with using a hacksaw.Radice16 I used the Dremel and sanding drum and two different rasps to reduce the diameter of the end of the newly cut tenon that would insert into the stem. It had to be the same diameter as the threaded end of the old tenon.Radice17 When I had the tenon fit I cut the length back to match the length of the previous tenon. I put some clear super glue on the small end of the tenon and pressed it into the stem. I ran a bead of clear super glue around the insertion point of the new tenon to make an air tight fit. The photo below shows the new tenon in place in the stem sitting next to the broken one.Radice18 I sanded the new tenon with micromesh sanding pads to polish it and readied it for the shank. Once it was clean I pushed the stem into the shank and took a series of photos to show the newly stemmed pipe. I quickly sanded the gold band with 6000-12000 grit micromesh pads to remove the scratching and grooves that had been present when I received the pipe.Radice19

Radice20

Radice21

Radice22

Radice23 I sanded the stem with micromesh sanding pads – wet sanding with 1500-2400 grit pads and wiping down the stem with Obsidian Oil. I dry sanded with 3200-4000 grit pads and then gave it another coat of oil. I finished sanding with 6000-12000 grit pads and then gave it a final coat to wipe off the sanding dust.Radice24

Radice25

Radice25a I buffed the pipe and stem with Blue Diamond on the wheel and then gave it multiple coats of carnauba wax. I buffed it with a clean flannel buff. I hand buffed it with a microfibre cloth and then set it aside for photographs. I hand polished the band with a jeweler’s cloth to give it a shine to match the stem.Radice26

Radice27

Radice28

Radice29

Radice30

Radice31

Radice32

Replacing a Broken Tenon on a Gepetto Canadian 37


Blog by Steve Laug

A good friend of mine stopped by for a bowl the other day and to drop off some pipes he was donating to the Nepal Pipe Project. He has given quite a few already and some of you have benefited from his generosity. This time he had a couple of surprises with him as well. He had two of his favourite pipes with him that needed some attention. The first was a handmade Gepetto Canadian made by Ser Jacopo. It was a shape #37 and had a rusticated finish. It was a beautiful pipe. He had been twisting the stem out of the shank and it was stuck. One little twist too much and the tenon snapped in the shank. It broke off quite deep in the shank and was solidly stuck in place. I would need to pull the tenon, drill out the stem and insert a new tenon.Gepetto1

Gepetto2 I used my drywall screw and twisted it into the airway of the broken tenon until it caught hold and then wiggled it loose. With careful wiggling and pulling the broken tenon came free of the shank.Gepetto3

Gepetto4 I used the Dremel and sanding drum to take off the majority of the remaining broken tenon on the stem itself. I faced it on the topping board with 220 grit sandpaper until it was flat against the rest of the stem face.Gepetto5

Gepetto6 The stem is Lucite and the original tenon was an integral part of the stem. I did not have any Lucite tenon and also no Delrin tenons. So once again I decided to do some improvisation. I turned down the tenon on an old thin vulcanite stem that I had in my stem can until it was a snug fit in the mortise of the shank. I wanted it to sit as deeply as the previous tenon so I turned it down accordingly with the Dremel and sanding drum. When the fit was correct I left it in place in the shank and carefully cut off the stem with a hacksaw. I left enough of the new tenon to sit in the hole I would drill in the stem face.Gepetto7 I set up a drill and turned the stem onto the drill bit by hand until it was deep enough to hold the new tenon but not too deep because of the sharp taper of the stem. If it was too deep it would have broken through the top and bottom side of the taper. I measured the depth I had to work with and drilled only that depth in the stem. I started out using a drill bit slightly larger than the airway in the stem and worked my way up to a ¼ inch bit. I used a round needle file to clean up the inside edges of the drilled out stem. I turned the end of the tenon down until it slid snugly into the hole. Once I had a good fit I coated the end of the tenon with super glue and pressed it into the hole. I did this carefully to keep the tenon straight both horizontally and vertically. Gepetto8 Once the glue set on the new tenon I cleaned it up with some sandpaper and then pushed it into the mortise of the pipe. The fit was good and the taper lined up correctly on the top, sides and bottom of the shank. The stem needed to be sanded to clean it up and polish it. I sanded it with 220 grit sandpaper to smooth out the edges and around the button.Gepetto9

Gepetto10

Gepetto11

Gepetto12 I continued to sand it with a medium and a fine grit sanding sponge. The fit against shank on the underside had a slight gap so I needed to do some adjustments. I heated the tenon and then pushed it in place and held it against the shank until it cooled and set. The fit was better.Gepetto13 I wet sanded the stem with 1500-2400 grit micromesh pads and then used some mineral oil to give the next grits of micromesh some bite. I then dry sanded with 3200-4000 grit pads and repeated the oil and then finished with 6000-12000 grit pads. I put the stem on the pipe and buffed it with Blue Diamond.Gepetto14

Gepetto15

Gepetto16 The rim had some build up of tars on the back top edge so I cleaned that off and then buffed the rim the rim to polish it. I lightly buffed the entire bowl. I used carnauba wax on the rim and the smooth portions of the pipe as well as the stem. I buffed it with a clean flannel buff and then buffed it by hand with a microfibre cloth. The finished pipe is shown below. It should be back in my friend’s hands soon and he can enjoy it once again. Thanks for looking.Gepetto17

Gepetto18

Gepetto19

Gepetto20

Gepetto21

Gepetto22