Blog by Steve Laug
It was time to work on one of the pipes that was purchased off EBay back in 06/05/2016 from a seller in Frederiksberg, Denmark. This one is a straight Bulldog with a diamond shank and a saddle stem. The rim topped is worn and dirty and had darkening and burn damage on the front rim top and bowl. It also has some darkening on the lower part of the bowl on both sides. It is stamped on the left side of the shank BBB in a diamond [over] Tortoise followed by RJ. On the right side it is stamped London, England and the shape number 403S. The stem has a BBB Diamond medallion on the topside of the saddle. The pipe was very dirty with a thick cake in the bowl and some lava overflowing on to the rim top. It was hard to know what the inner edge of the rim looked like because of the lava and cake. From the photos there seemed to be some damage to the inner edge at the front of the bowl but I could not be sure. The shank was quite dirty so the tenon did not seat in the shank. The stem was pearlized white. There was light tooth chatter and tooth marks on both sides of the stem at the button. Jeff took the following photos before he started his cleanup.  He took photos of the rim top to show the thick cake in the bowl and the overflow of lava. The cake is thick and hard and the lava overflow is a thick band around the bowl. The bowl is a real mess. This must have been a great smoking pipe. There were not photos of the stem surface to include as we did not take photos of that at this point in time.
 Jeff took photos of the stamping to capture the clarity of it even under the grime. The brand and the shape number are very readable. He also took a photo of the BBB Diamond Medallion on the stem top.
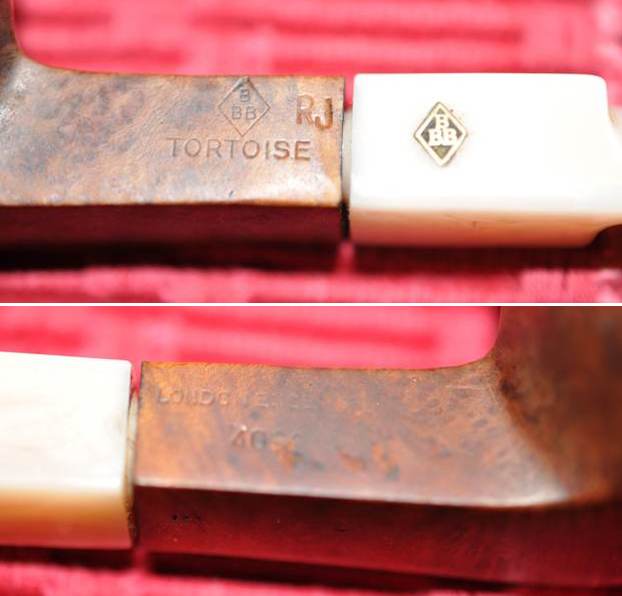 I turned to Pipephil (http://pipephil.eu/logos/en/logo-bbb.html) to see what I could learn about the BBB Tortoise Model. The pipes that came with a pearlized stem that almost looked like it was made of abalone. It was acrylic of some sort but has the softness of vulcanite. It is remarkable material. I have included a screen capture of the section on the Tortoise.
 I turned to address the pipe itself. Jeff had cleaned up the pipe for me. He reamed the bowl with a PipNet pipe reamer and cleaned it up with a Savinelli Fitsall Pipe Knife. He scrubbed the exterior with Murphy’s Oil Soap and a tooth brush to clean off the grime off the finish and the heavy overflow of lava on the rim top. He cleaned up the internals of the shank, mortise and stem with pipe cleaners, cotton swabs and alcohol to remove all of the oils and tars in the pipe. He scrubbed the stem Soft Scrub to clean off the grime and grit. When it arrived here in Vancouver it was a clean pipe and I knew what I had to work with. I took photos of it before I started my part of the restoration.
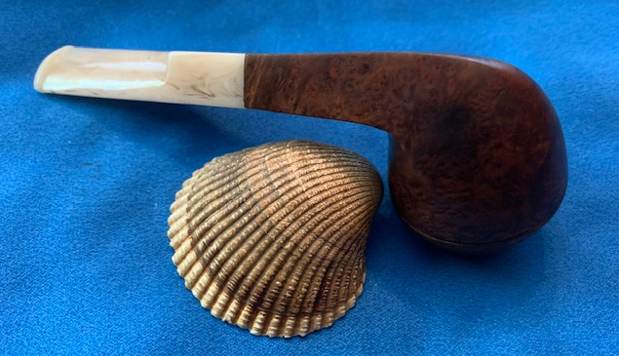
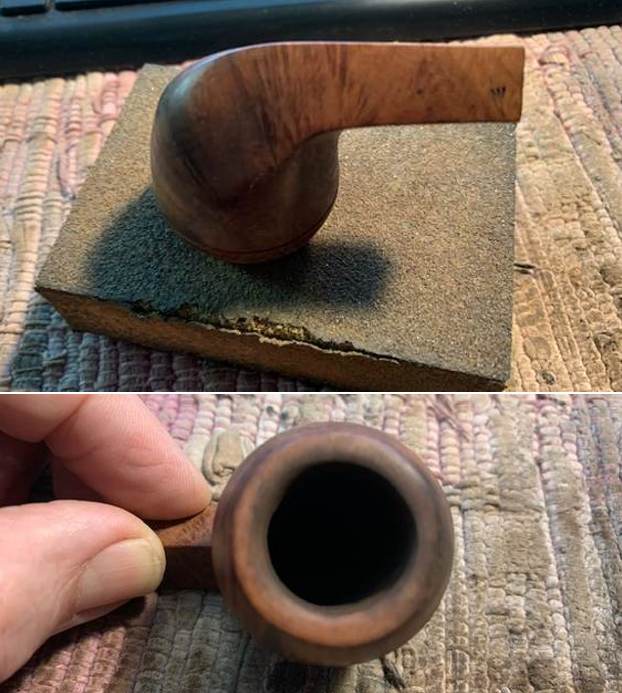
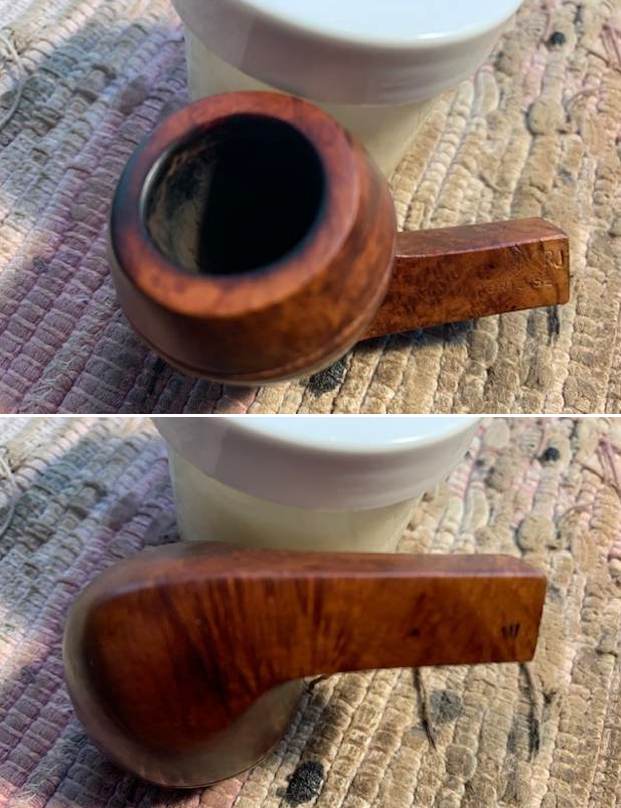
 I took photos of the rim top and the stem to show their condition. Jeff was able to clean up the incredibly thick cake and lava overflow that was shown in the rim and bowl photos above. He was also able to get rid of the grime and grit in the surface of the briar. There was some burn damage on the rim top and the inner and outer edge toward the front of the bowl. There was also some darkening on the rest of the rim top. The stem was much cleaner than before. There was some staining just ahead of the button.
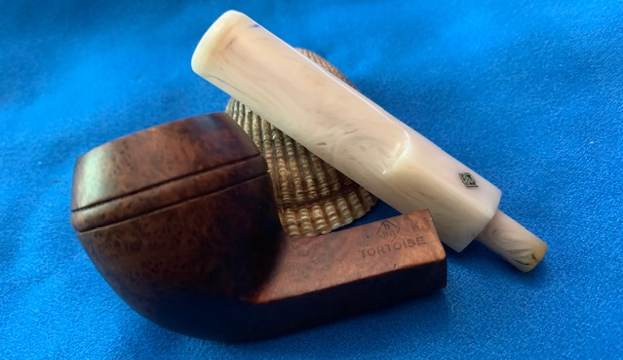
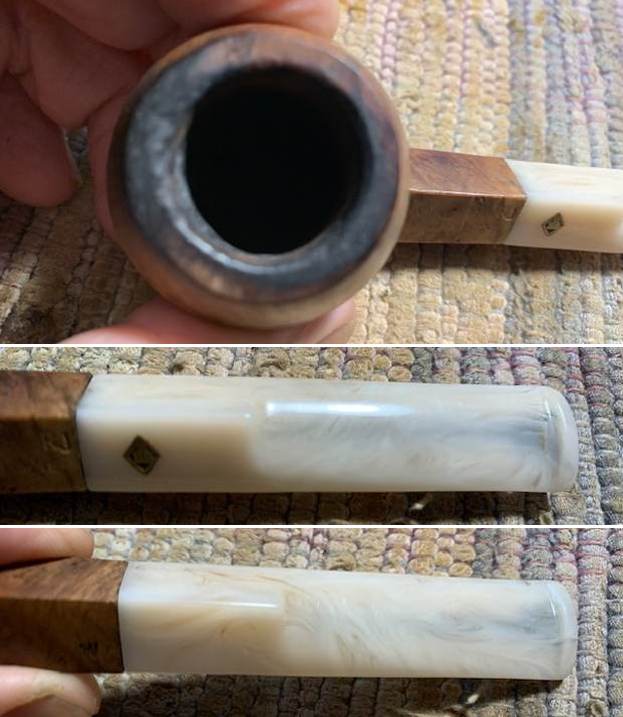 I took photos of the stamping on the sides of the shank and stem. They are a bit faint but are readable as noted above.
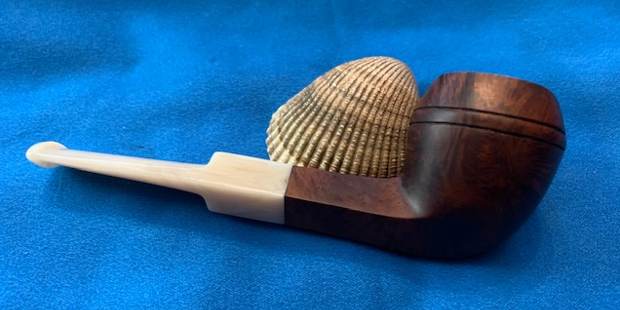
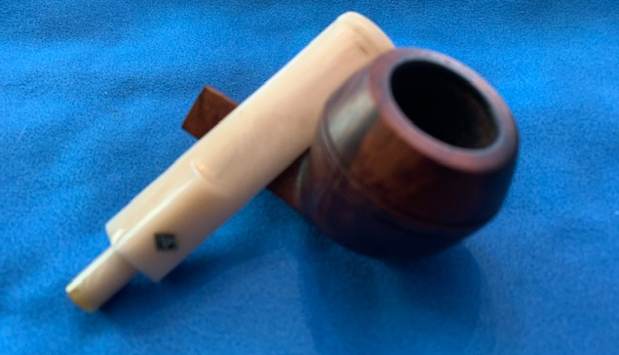
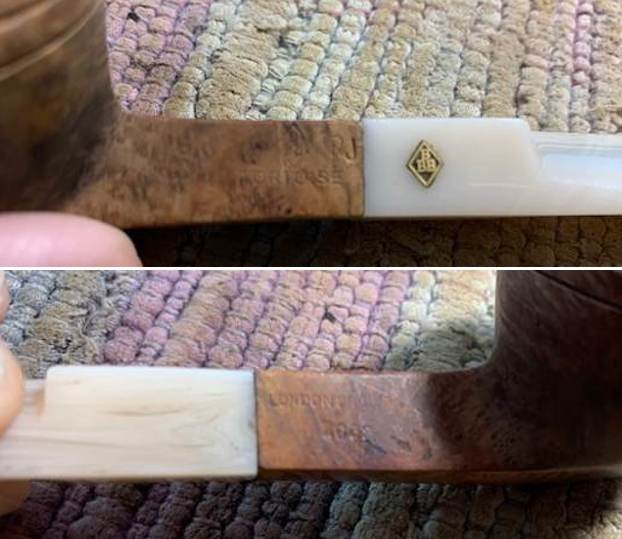 I removed the stem and took a photo of the pipe to show the parts and the size of the stem compared to the shank and bowl. It is a well made pipe.
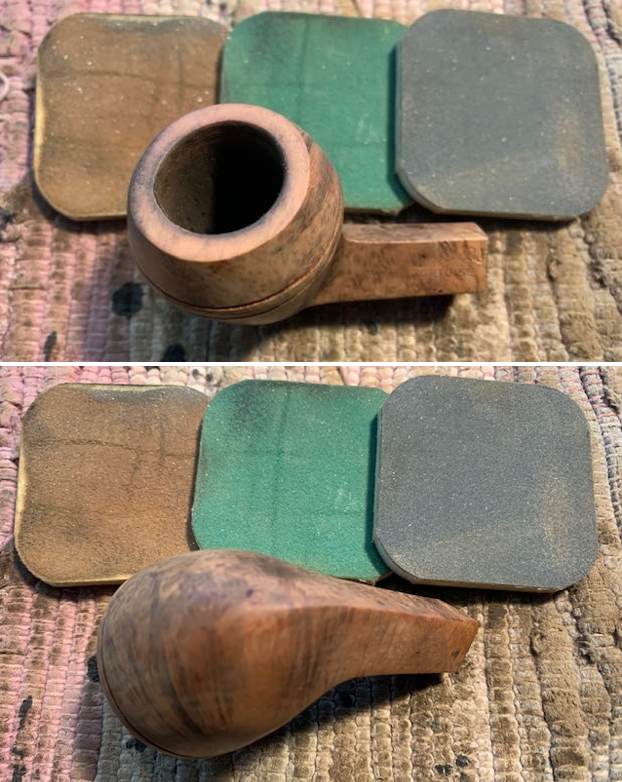
 I decided to address the bowl first. I worked on both the rim damage and try to minimize the burn damage on the front top and on the inner and outer edges. I worked on the inner edge of the rim first using a folded piece of 220 grit sandpaper smooth out the damage and give a light bevel to the inner edge. I next tried to lightly top the bowl with a medium sanding sponge to see if I could minimize it further. While it was better I was not happy with it at this point.
 The rim top has a slight dip where the burn had been and the top was not flat. I decided to do a more radical topping on the topping board with 180 grit sandpaper. I took off a minimal amount just to flatten the rim top. I would need to clean up the inner edge again but I liked the look the pipe was beginning to have.
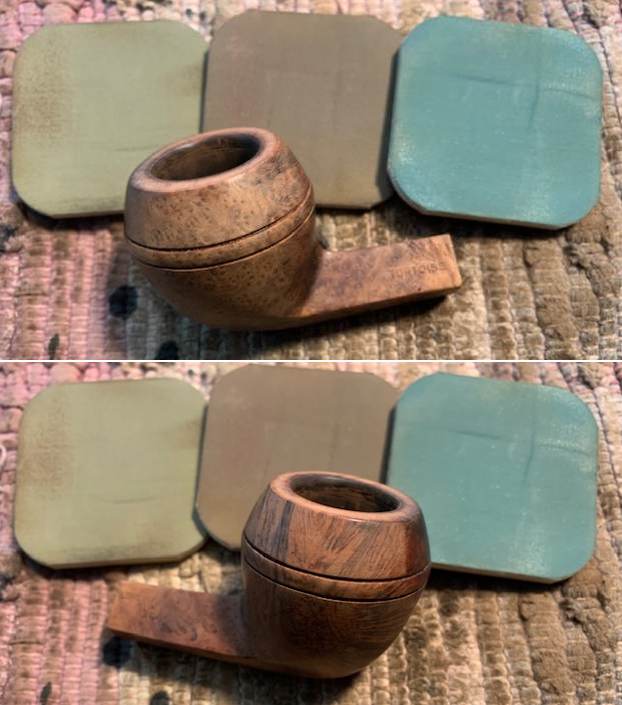
 I polished the briar, including the inner edge of the bowl with micromesh sanding pads – dry sanding with 1500-12000 grit pads. I wiped the bowl down after each pad with a damp cloth.


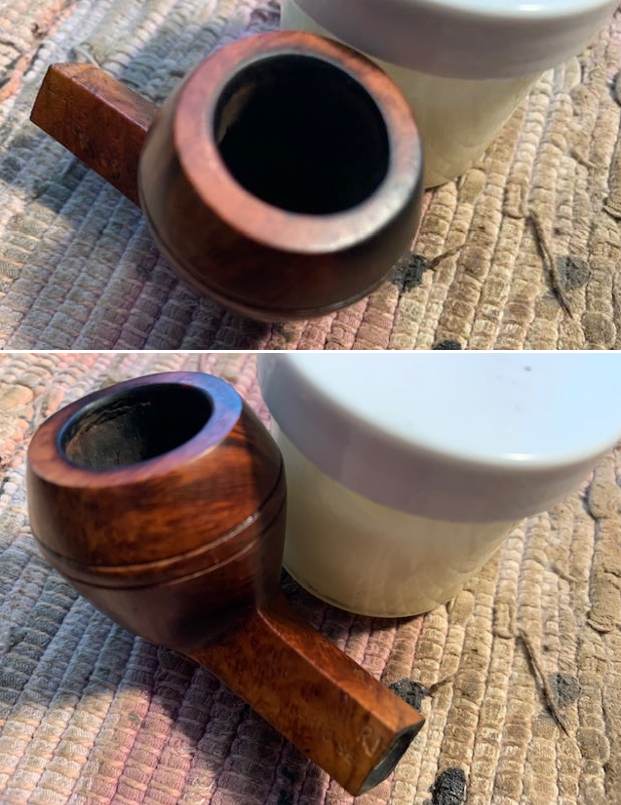
 I rubbed the bowl and shank down with Before & After Restoration Balm to deep clean the finish on the bowl and shank. The product works to clean, enliven and protect the briar. I worked it in with my fingers to get it into the briar. After it sat for a little while I wiped it off and buffed it with a soft cloth. The briar really began to have a rich shine. I took some photos of the bowl at this point to mark the progress in the restoration. It is a beautiful bowl and even the burn damage it not too intrusive – it is present but not too distracting as it is now just darkening.
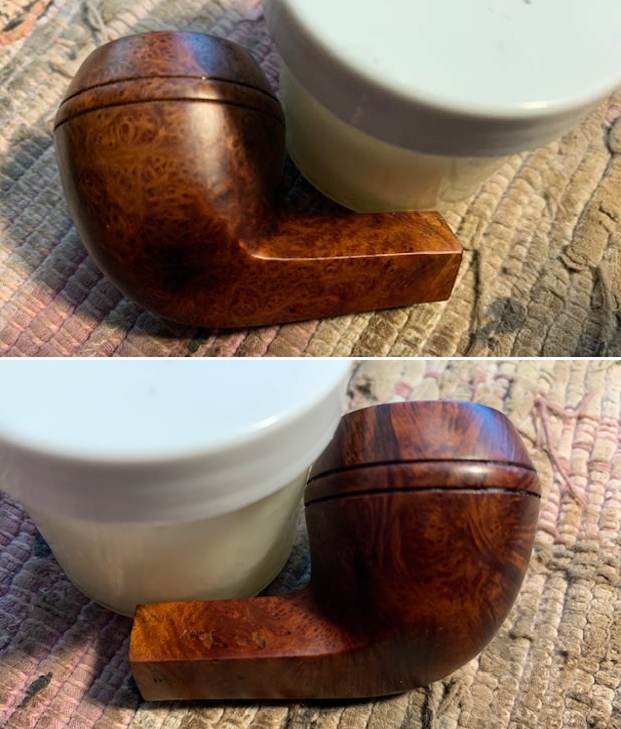
 With the exterior cleaned and polished I looked down the shank with a light and saw that the shank was still quite oily looking. I cleaned it and the airway into the bowl with alcohol, pipe cleaners and cotton swabs. I cleaned out the airway in the stem and removed the dark tars and material that was on the internal of the slot and V into the airway. It took time and some extra work but I was able to clean both well.
  I set the bowl aside and worked on the externals of the stem at this point in the process. I polished it with micromesh sanding pads – dry sanding with 1500-12000 grit pads. I wiped the stem down after each pad with Obsidian Oil to enliven and protect the stem material. I used the Before & After Pipe Polish to remove the small minute scratches left in the pearlized stem even after the micromesh regimen. I finished by wiping the stem down with a final coat of Obsidian Oil and set it aside to dry.
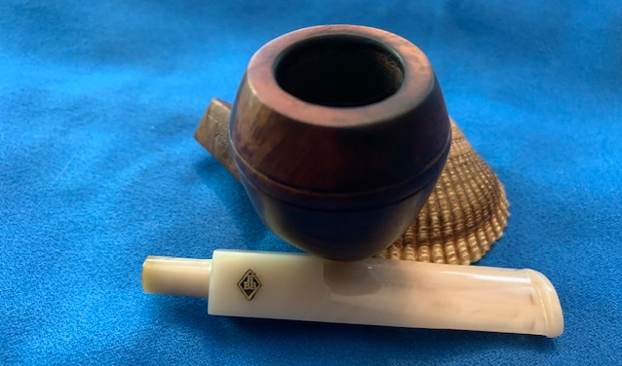
 I put the stem back on the pipe and took the pipe to the buffer. I worked it over with Blue Diamond to polish out the remaining small scratches. I gave the bowl and the stem several coats of carnauba wax and buffed the pipe with a clean buffing pad to raise the shine. I hand buffed it with a microfiber cloth to deepen the shine. The pipe polished up really well and even the newly beveled rim top looked good. I was happy with the results of the reworking of the rim. The finished pipe is shown in the photos below. The unique BBB 403S Straight Bulldog Tortoise shape and look of the pipe is a beauty which epitomizes the BBB Tortoise pipes that I have restored. It is a very stunning looking pipe with the mixed grain and the pearlized stem. The polished stem looks really good with the browns of the briar. The dimensions of the pipe are Length: 5 ½ inches, Height: 1 ¾ inches, Outside diameter of the bowl: 1 ¼ inches, Chamber diameter: ¾ of an inch. The weight of the pipe is 1.06 ounces/30 grams. This is another pipe that I will be putting it on the rebornpipes online store in the British Pipe Makers Section shortly, if you are interested in adding it to your collection. Thanks for walking through the restoration with me on this beauty!