Blog by Steve Laug
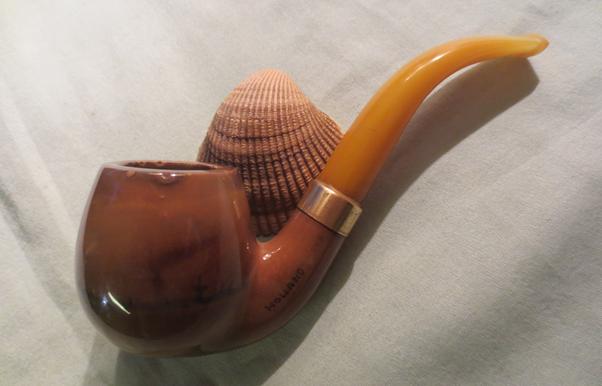
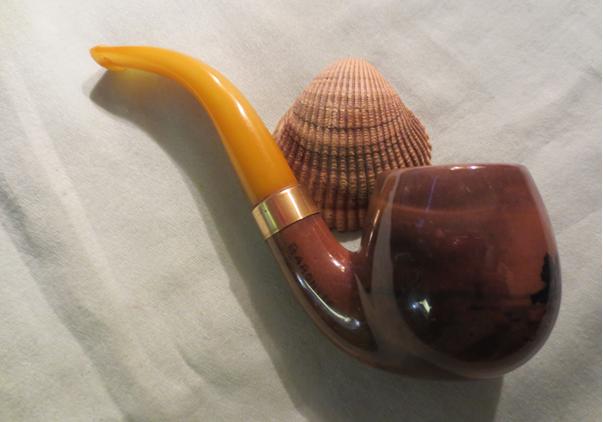
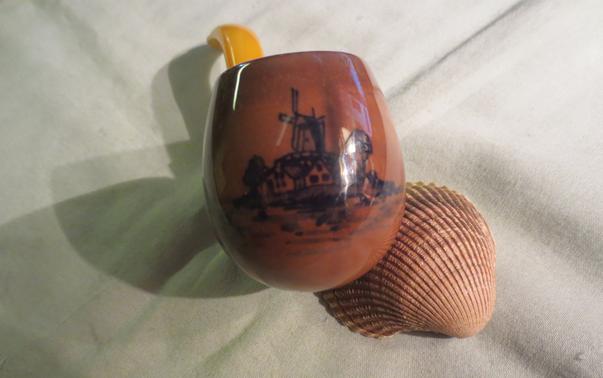
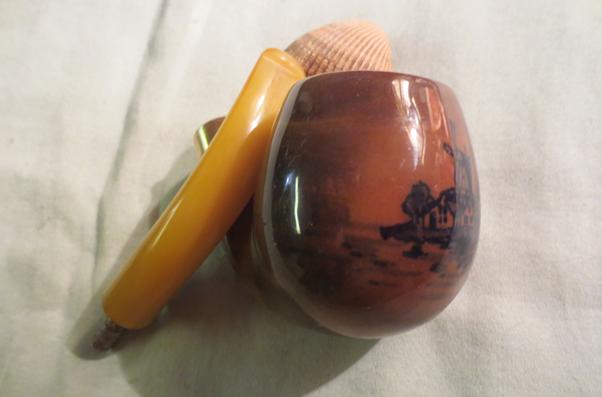
Steve, a pipe man in Northern British Columbia who sent me this old Baronite pipe said it belonged to his grandfather. That makes sense to me looking at the patina on this old double walled ceramic pipe. It is darkened with age like a well cured meerschaum. I have cleaned up quite a few of these but I have not seen one darkened to this degree. It is basically a bent apple shaped pipe with a windmill and canal scene on the front of the bowl wrapping slightly onto each side. On the left side of the shank it reads Holland and on the right side Baronite. I had a memory of the Baronite stamping referring to a line of pipes from a Dutch company called GoedeWaagen. I looked it up on Pipedia: https://pipedia.org/wiki/GoedeWaagen. I found the following information that confirms that the Baronite was a line of Double Walled Ceramic pipes produced by GoedeWaagen. I quote the short article in full:
Dirck GoedeWaagen became a master pipemaker on January 1, 1779 and took on his first assistant the following month. Soon after Dirck’s grandson fell in love with and married a girl from the illustrious De Jong family, legendary in the ceramic pipemakers guild in Gouda. He built a workshop in the Keizerstraat in Gouda, which continued for two generations until his grandsom Abraham GoedeWaagen moved the company to a new location.
In 1853, Pieter Goedewaagen purchased his father-in-law’s factory “De Star”, which becomes the basis of the modern GoedeWaagen company. In approximately 1880, Abraham’s grandson Aart GoedeWaagen persuaded his father Pieter to expand the business with an eye towards more models of pipes, and P. GoedeWaagen & Sons was founded in response. Within ten years the firm had hundreds of models and P. GoedeWaagen & Son was exporting pipes around the globe.
GoedeWaagen continued to make pipes, but also began acquiring other ceramics firms, including ‘De Distel’ in 1923, and in so doing acquiring the expertise to make decorated ceramics other than clay pipes. It is at this time that the company is granted a Royal charter and by the 1930’s Royal Goedewaagen is one of the top names in dutch ceramics.
While Goedewaagen pipes were originally traditional and figural clays, after the invention of the double walled clay pipe by Zenith, also a Gouda company, Goedewaagen began producing pipes in that commonly seen style, which they marketed as The Baronite Pipe, advertised for its clean smoking and health benefits. Since the company’s bankruptcy in 1982, however, they have made only the occasional souvenir pipe, including a line commemorating Holland’s monarchs.
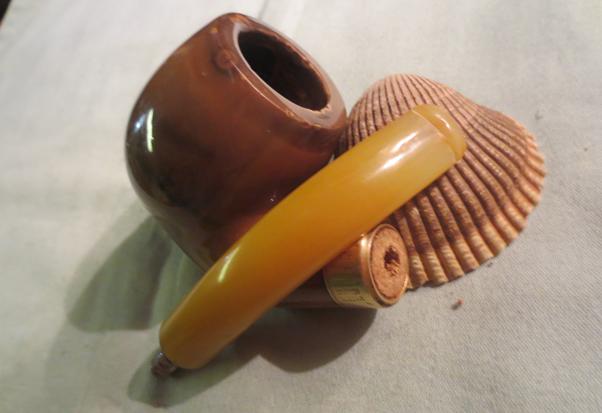
I have no idea when this pipe was made but at least we now know who made it and where it was made. The stem is yellow Bakelite with a threaded metal tenon. I don’t know if that is original but it is in excellent shape. It is screwed into a cork insert in the shank of the pipe. It had deep tooth marks on the top and bottom sides near the button and into the top of the button edges. The bowl in this case had a fairly thick cake of carbon built up inside. The exterior of the bowl had a lot of dirt and debris stuck to the surface of the bowl and shank. The pipe reeked of strong tobacco. The rim seemed to have some spots of either damage or flaws from the original manufacture. There was also some tar buildup on the rim top. The brass band on the shank was oxidized and dull. Overall it was a dirty pipe in need of TLC.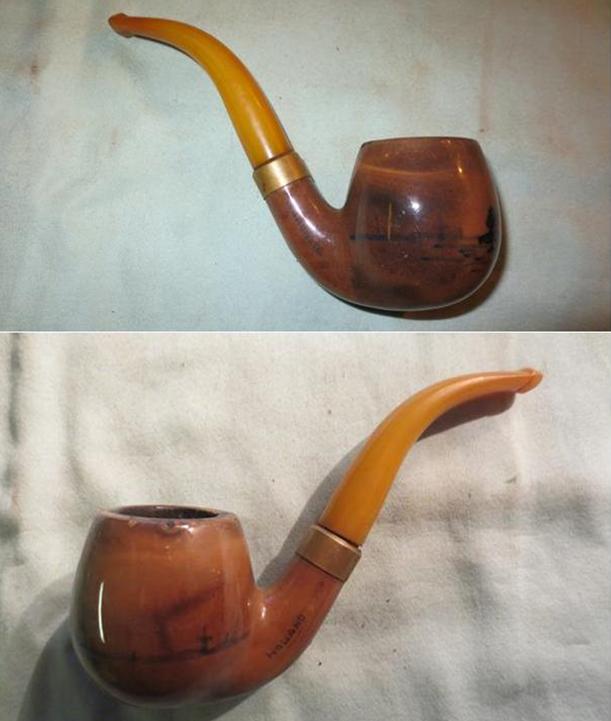
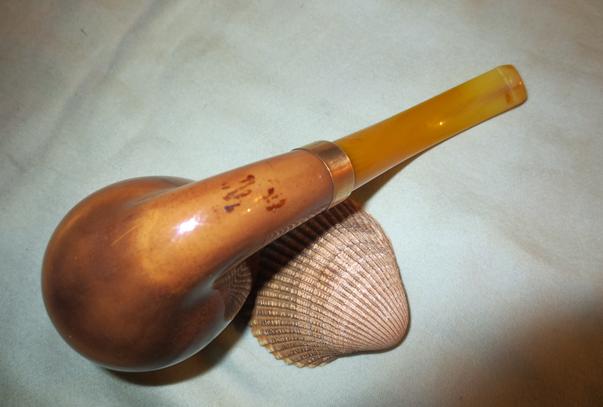
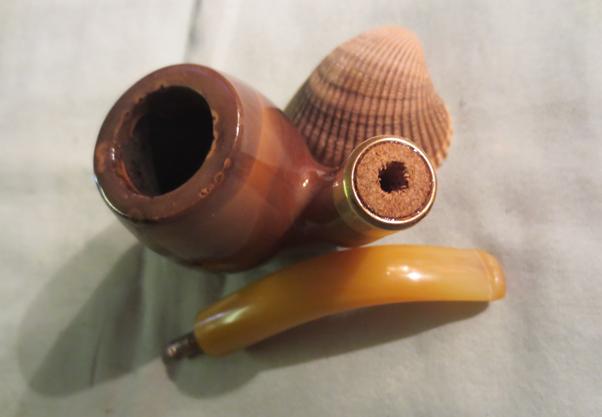
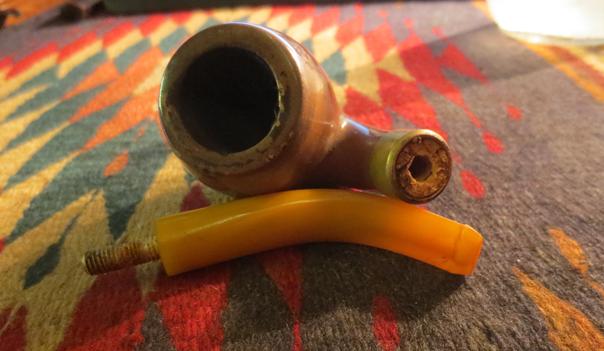
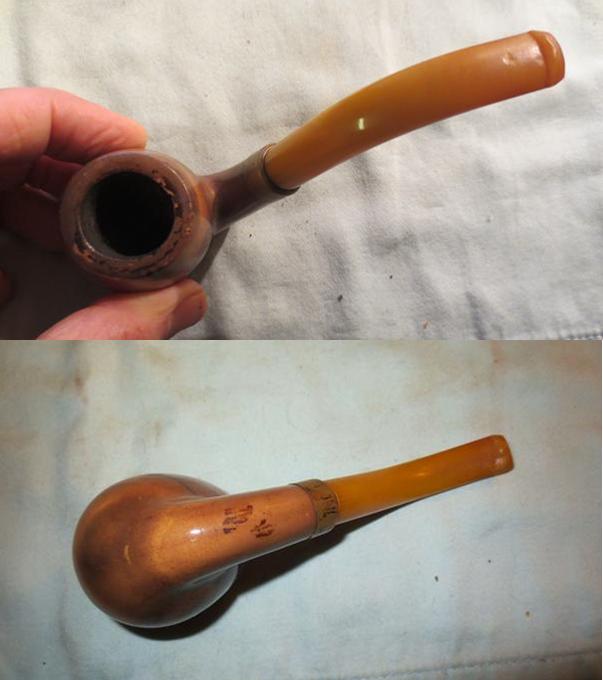 I took this close up photo of the interior of the bowl and the rim. Note the airway at the bottom of the bowl that drops into the inner space between the two ceramic walls. The rim is also dirty with tar. In the second photo I removed the stem and you can see the crumbling cork insert.
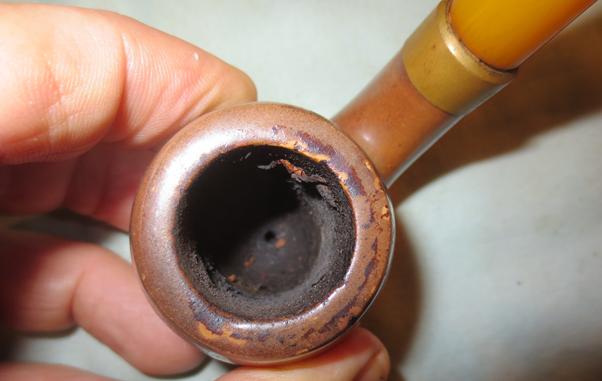
 I sanded the top of the bowl with a 1500 grit micromesh sanding pad to remove the tar and buildup without damaging the glaze on the ceramic. I reamed the bowl with a Savinelli Pipe Knife to scrape the cake back to the bare ceramic walls. Just a note – ceramic bowls like meerschaum bowls should be wiped out after each smoke to make sure that a cake does not build up in the bowl.
 I pulled the cork insert out of the shank and it was dry and deteriorated. I wanted to try to rejuvenate the cork but it was too far gone and crumbled in my hands. A new cork could have been purchased from a pharmaceutical supply but I have always cut and shaped my own cork inserts for these from old wine corks. I cut a piece of cork the same thickness as the insert.
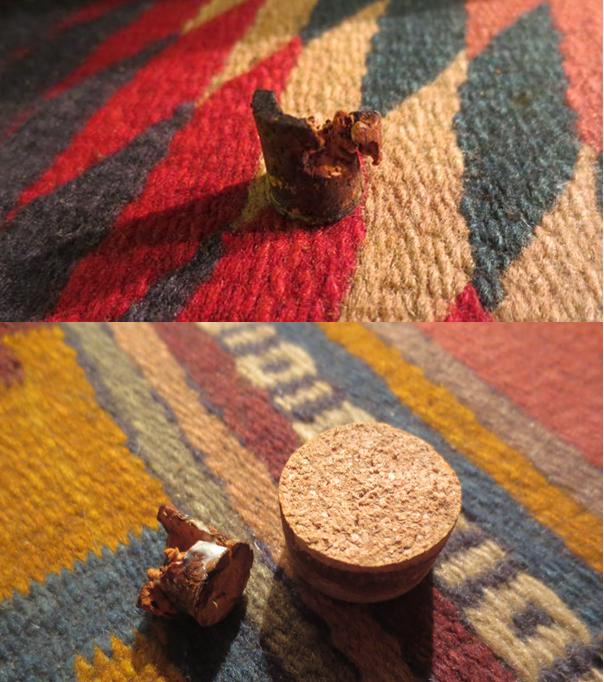 I traced the diameter of the old insert on the new piece of cork and cut off the excess with a sharp pen knife. I shaped it with a Dremel and sanding drum until it was round. I twisted the cork onto a drill bit the sized of the tenon.
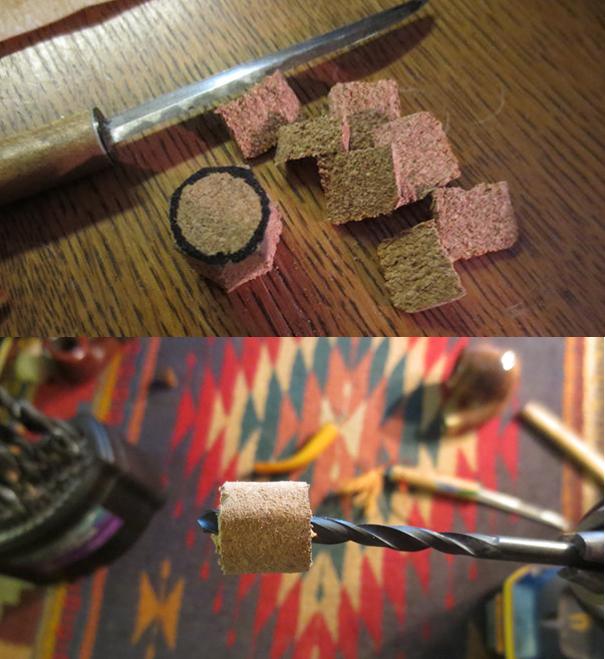 I sanded the diameter of the insert with the Dremel and sanding drum until the diameter was the same as the old insert and could be compressed into the shank of the pipe. In the photo below you can still see a slight ridge in the middle of the cork. I would need to smooth that out before I inserted it in the shank.
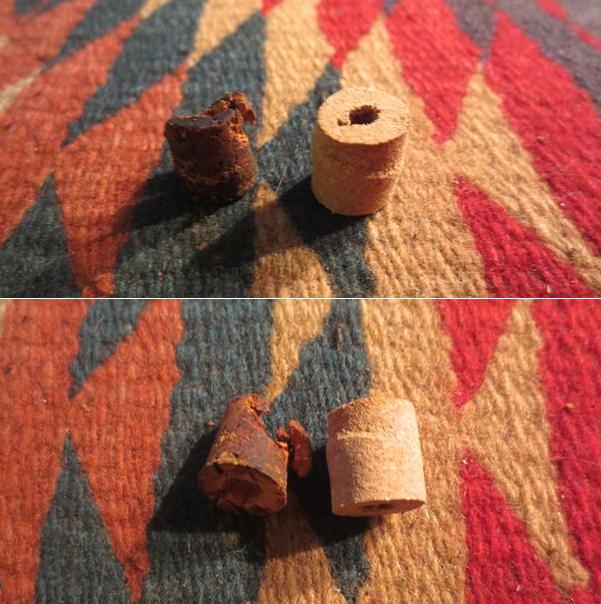 I scrubbed out the shank and the airway in the stem with pipe cleaners, cotton swabs and alcohol. I was able to get a lot of the grime and grit out of the shank. I was not able to clean in the airspace between the walls using this method.
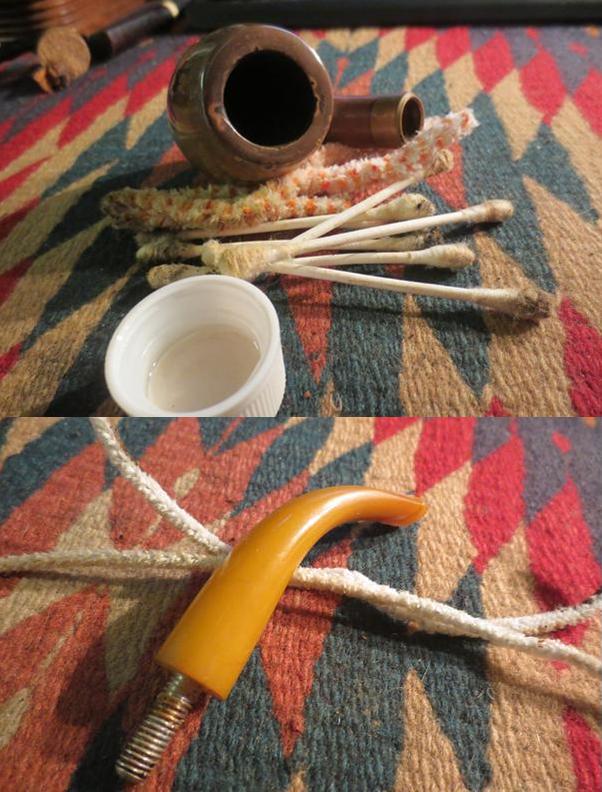 I remembered reading somewhere that you could rinse out the inside of the shank and the airspace with water. I ran warm water in the shank and plugged the bowl with my thumb and vigorously shook the bowl. The warm water loosened the buildup in the airspace and soon chunks of dark tar fell out of the shank. I continued to shake and rinse the bowl until the water came out clean. The pipe began to smell fresh again.
 Before I left for work this morning I repaired the deep tooth marks on the stem with clear super glue and let the stem cure all day. When I got home I cleaned the threads on the metal tenon with a brass bristle brush to remove the rust and oils that had accumulated there as well.
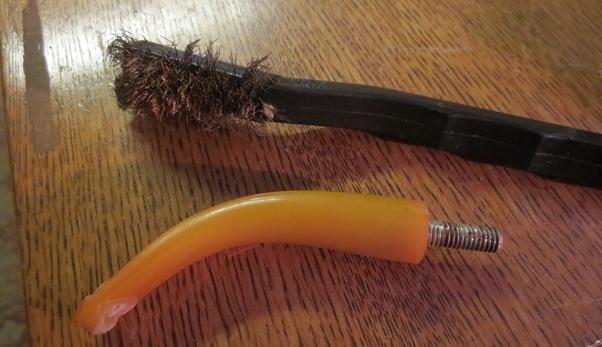 I filed the patches on the stem and recut the edges of the button and took the repairs down until they were even with the surface of the Bakelite stem.
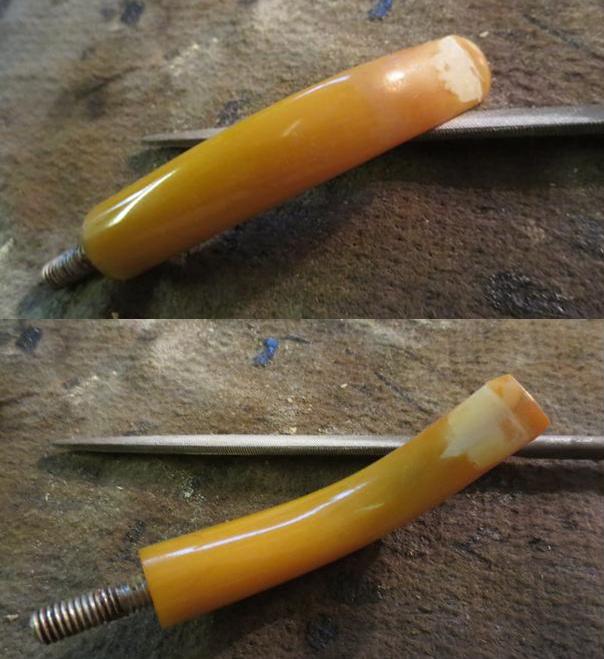 I sanded the patched areas of the stem with 220 grit sandpaper and reshaped the button as well. The surface of the patch blended in on both sides of the stem. There is a slight problem in sanding the yellow Bakelite stem in that the sanded areas are lighter than the rest of the stem. Polishing the stem will minimize this but it is definitely lighter. To me a smooth stem is far better than a rough, tooth marked stem so I am willing to live with the slightly lighter stem at that point. I have also found that as the pipe is used the colour eventually blends in.
 I polished the stem with 1500-12000 grit micromesh sanding pads – wet sanding with 1500-2400 grit pads and dry sanding with 3200-12000 grit pads. I rubbed the stem down with Obsidian Oil between each set of three pads. I am pretty sure that it does nothing for the Bakelite but it does give the micromesh pads more bite and add to the quality of the polishing.
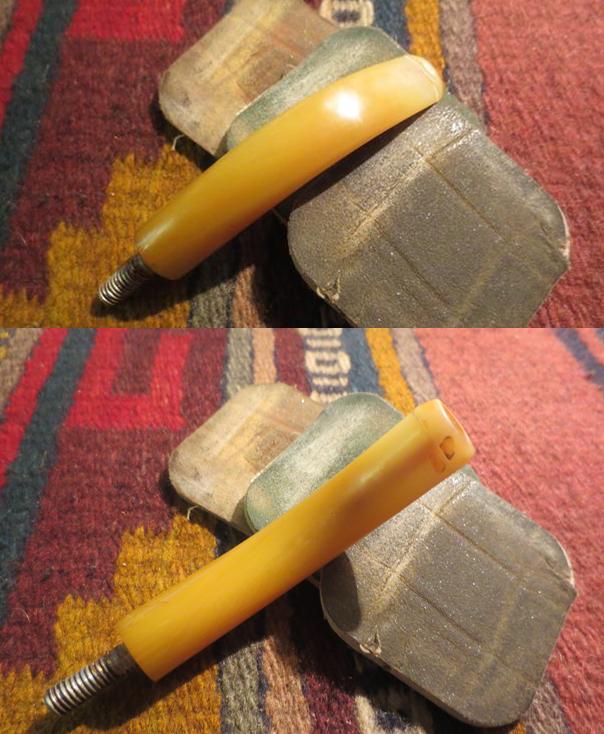

 With the stem polished it was time to twist the cork insert onto the tenon. I have inserted them directly into the shank before but find that this method works easier and keeps the cork from breaking in the process of inserting it.
 Before I inserted it into the shank I rubbed the cork down with Vaseline Petroleum Jelly to soften the cork and make it easier to slip into the shank. Once the cork was greased I carefully pushed it into the shank.
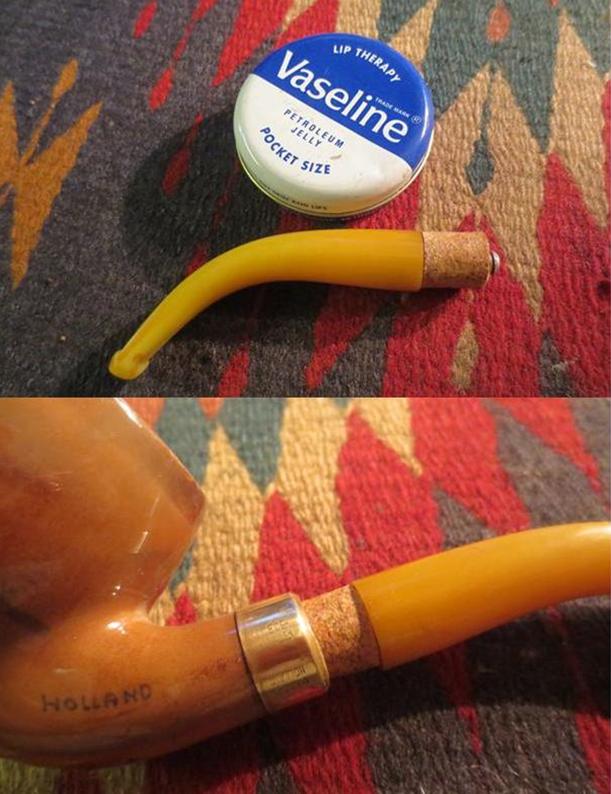 I hand buffed the bowl and stem with Conservator’s Wax and a soft microfibre cloth to polish it and give it a shine. I was able to clean off the grime and leave behind the rich reddish-brown patina on the bowl. I polished the brass band with 6000-12000 grit micromesh sanding pads. I waxed it as well. The finished pipe is shown in the photos below. It is ready for another long life of enjoyment. It looks and smells great. The polishing of the stem minimised the lightning of the yellow so that it almost is unnoticeable. I am hoping that Steve enjoys his grand dad’s pipe and lets his mind travel to the times he remembers him smoking it. Cheers. Thanks for looking.