by Steve Laug
Not too long ago I received and email from Nick, a fellow up the coast of British Columbia. He was not too far away and had gotten my information from City Cigar, a pipe and cigar shop that I do a lot of repairs for. He wrote the following email about two pipes he want me to restem for him.
Dear Steve,
I have a couple of pipes in need of new stems. City cigar suggested you might be able to help.
One is a diplomat, the other a cherrywood. Are you able to make new ones if I get the bowls to you?
I asked him to send me some photos of the pipe so I could see what he had and what I would be working with. I have a pretty good idea of the stems that I have and could tell him quite quickly once I saw the pipe if it was something I could work on.
He wrote back and sent me another brief email and included two photos of his pipes. This email made me think twice about the pipe because of what he wrote.
In trying to pull the tenon in the silver collared pipe, the diplomat I broke off a brass screw. It will need drilling I think. Best Nick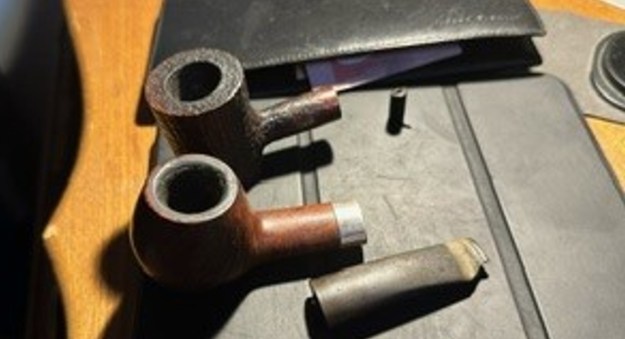
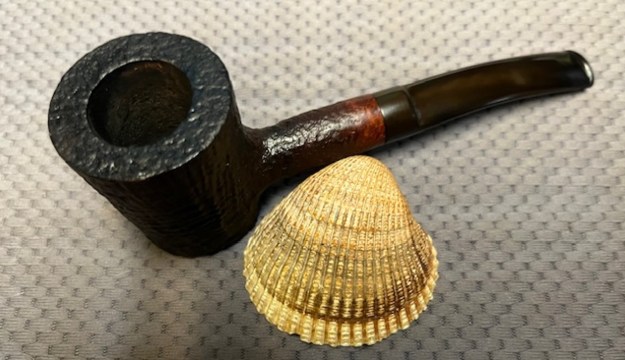
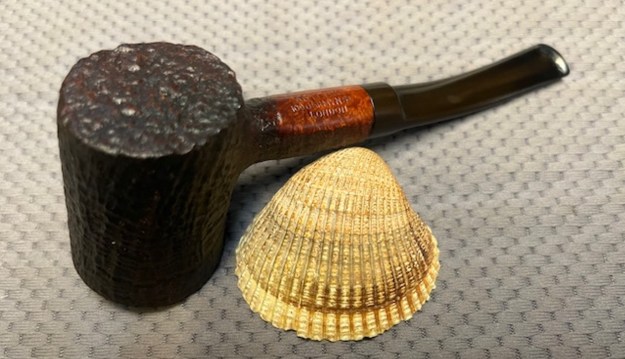
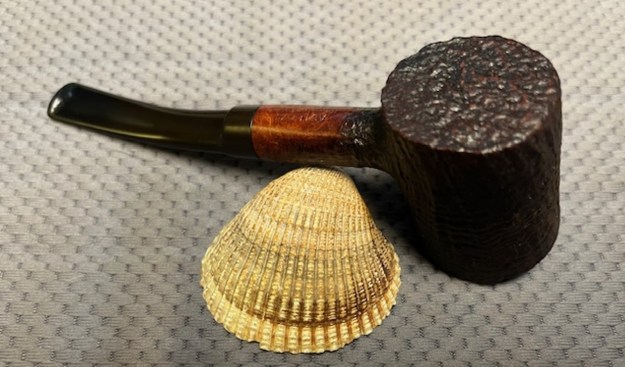
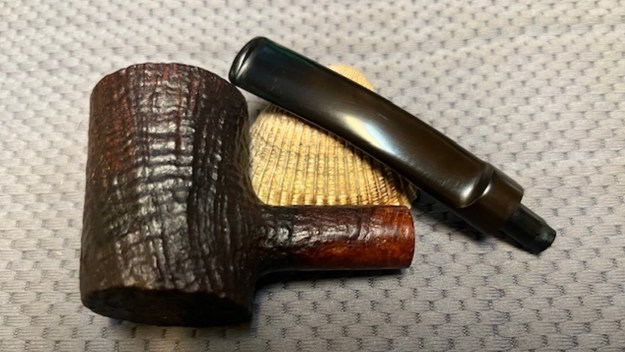
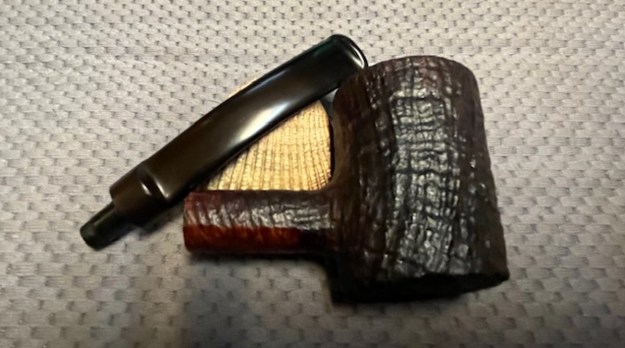
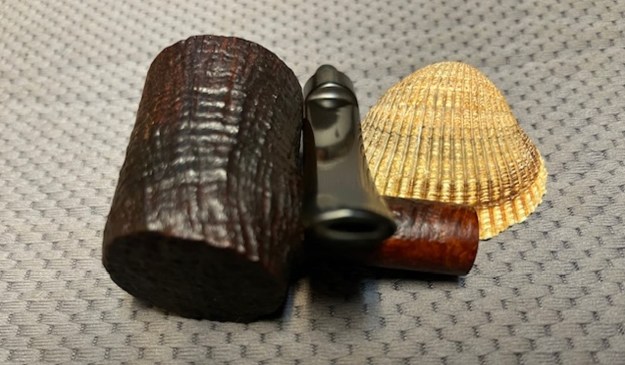
 The pipes arrived this week and I was surprised to find that they were both Astley’s pipes. I chose to work on the Cherrywood first. It had a lovely sandblast finish what was dirty and was stamped on a smooth panel on the underside of the shank. It read Astley’s [over] 109 Jermyn St. [over] London. The stamping was clear and readable. The bowl of the pipe had a moderate cake with some dust and debris in the sandblast of the rim top. The inner and outer edges of the bowl looked good. The pipe was missing the stem but Nick had sent along the snapped tenon in the bag with the pipes. I took photos of the stem to get a sense of what it looked like before I started my clean up.
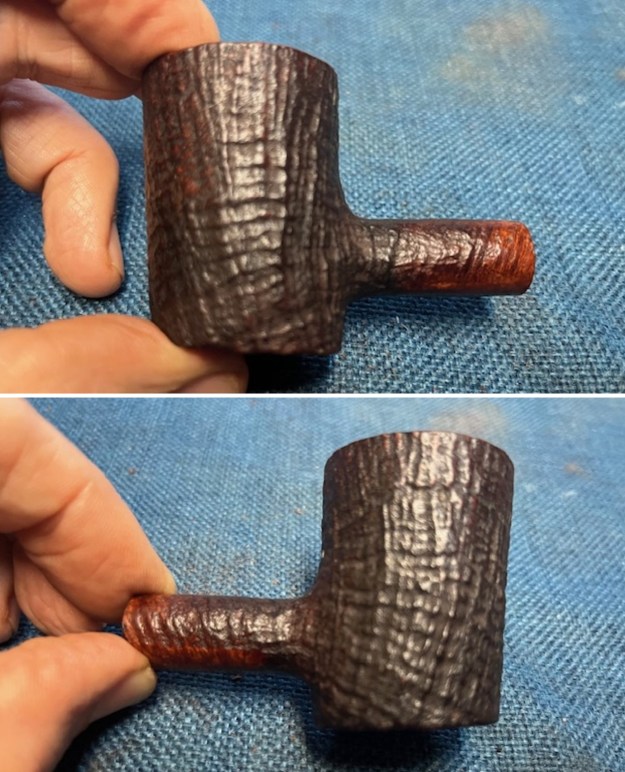
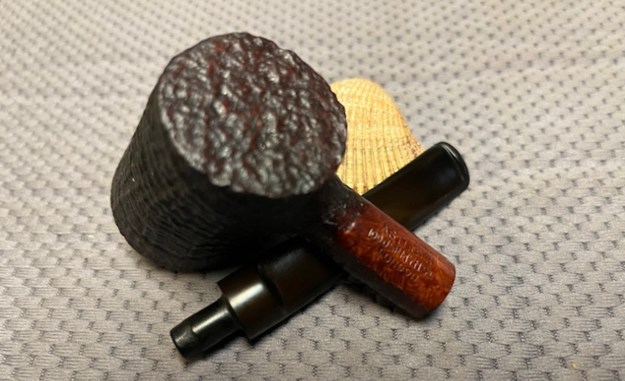
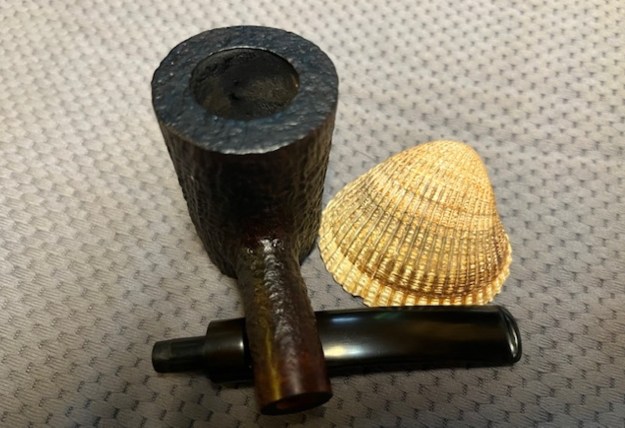
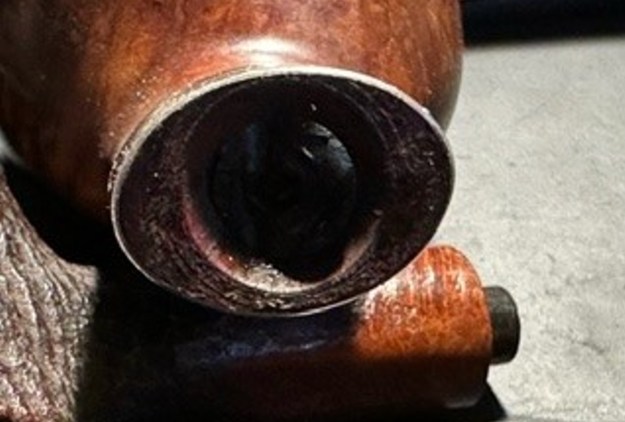
 I took a photo of the rim top to capture the condition of the bowl and rim top. I like to capture that condition before I started my work on the pipe. You can see the dust in the sandblast on the rim top and the cake in the bowl. It is a nice looking pipe.
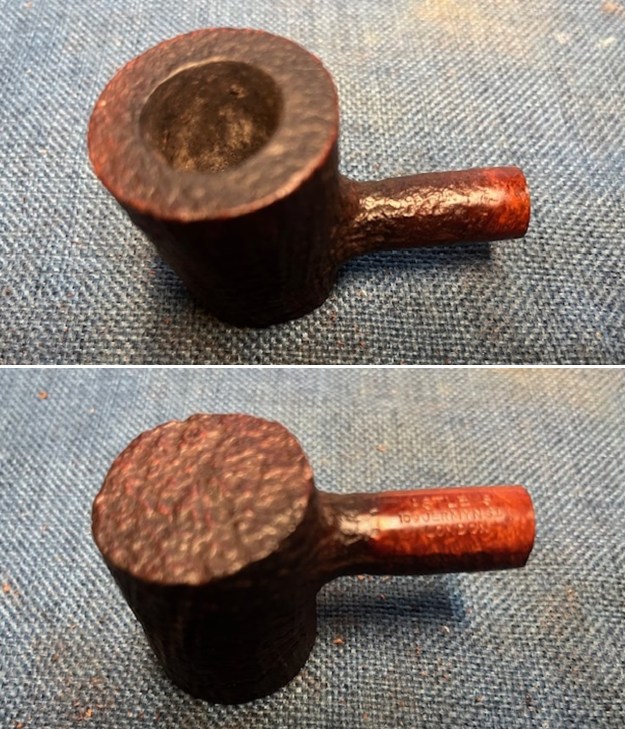
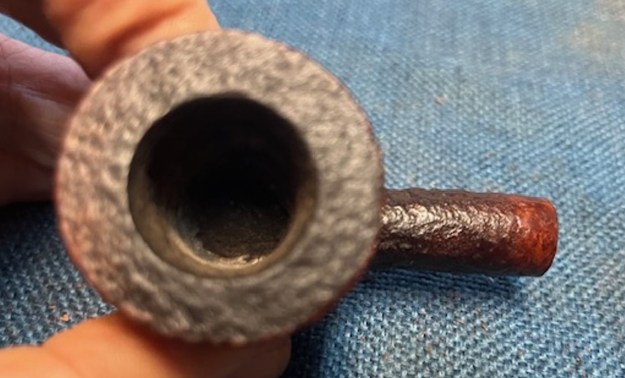 I took a photo of the stamping on the underside of the shank and it is much clearer than the photo shows. It reads as noted above. Interestingly there was no shape number on the shank so it was a bit of a mystery pipe.
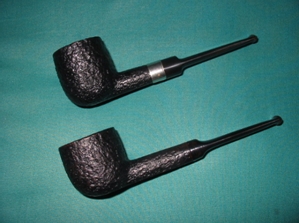
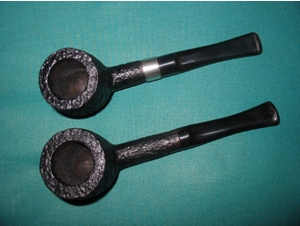
 Before I started my work on the pipe I did a bit of reading. I knew that I had work on an Astley’s Cherrywood previously and done a blog on it. A quick search on the blog took me to it. Here is a link (https://rebornpipes.com/2014/09/27/breathing-new-life-into-an-astleys-48-cherrywood/). I quote a portion of the blog below on the pipe. I found that it was a pipe that had a similar shape and had a shape number. I am also including some photos of the pipe when I had finished the restoration. The finish was not a sandblast but a rustication pattern that was very tight. The shape was the same as the one I was working on. This pipe was stamped on the heel of the bowl rather than the shank but it was the same. What was good about it was that it showed me the kind of stem that was originally on the pipe. That would guide me in fitting a new stem.
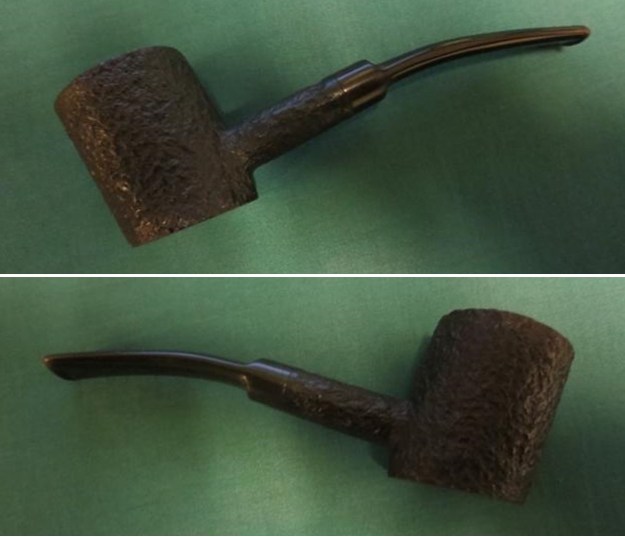 This bowl had been stamped on the smooth bottom and read Astleys over 109 Jermyn St. Under that was stamped London over 48. I looked up the shape in an old Astleys catalogue (page pictured below) and found the 48 was a Round Cherrywood Briar. The description stated that it was a copy of an old English Cherrywood with a flat base. The bend on the stem can also be seen in the photo below from the catalogue.
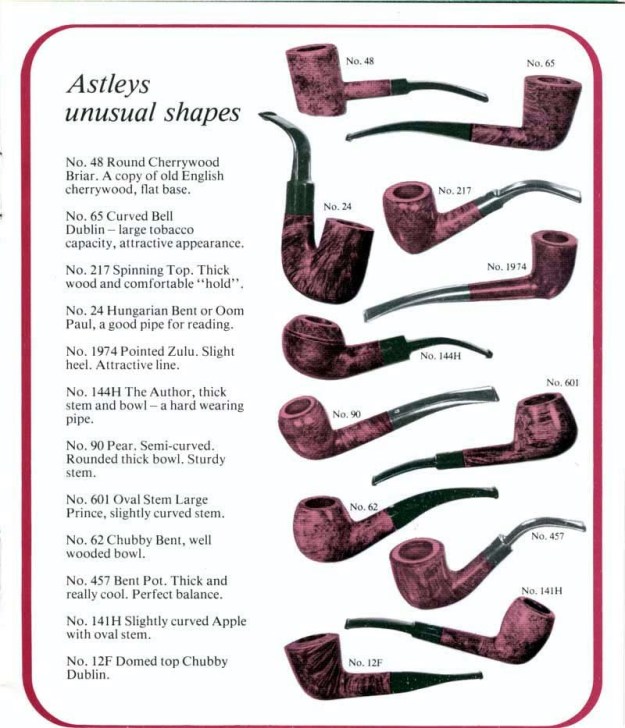 I started my work on the pipe by reaming it with a PipNet reamer using the second cutting head to take the cake back to bare briar. I cleaned up the reaming with a Savinelli Fitsall Pipe Knife. I sanded the walls of the bowl with 220 grit sandpaper wrapped around a piece of dowel to smooth out the walls. There was no checking or burn marks on the bowl walls it looked very good.
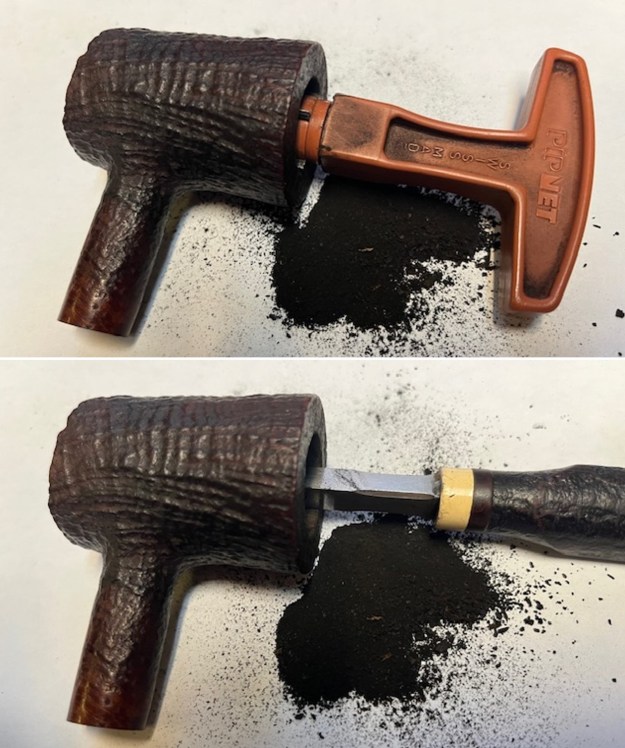
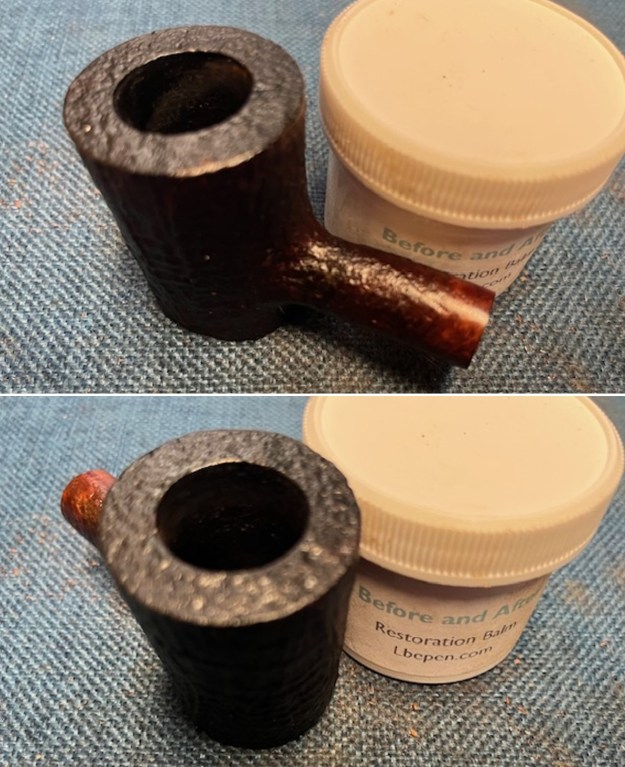
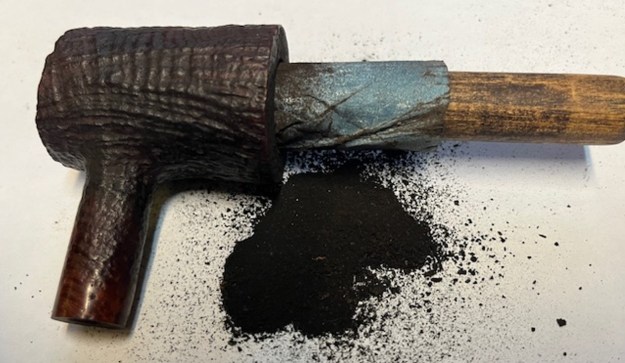 I used a brass bristle wire brush to clean out the debris in the sandblast finish on the rim top. It looked much better at this point.
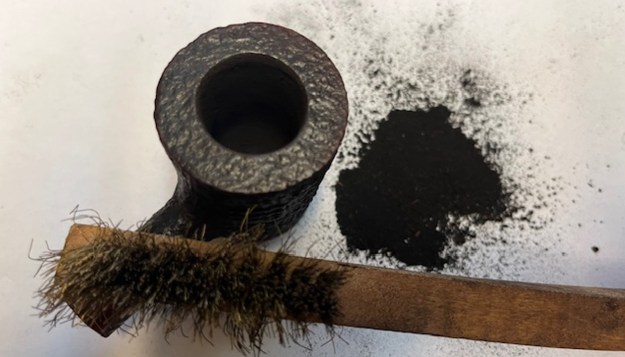 I cleaned out the inside of the pipe – airway into the shank, the mortise and shank walls with pipe cleaners, alcohol and cotton swabs. I worked on it until it was very clean.
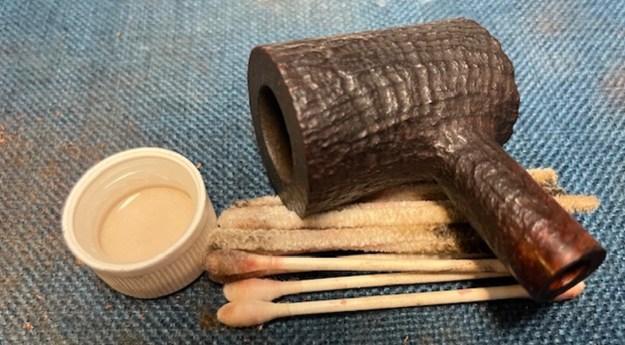 I scrubbed the exterior of the pipe with undiluted Murphy’s Oil Soap and a tooth brush. I rinsed it off with warm running water and dried it off with a soft towel. The bowl looked good. The rim top had some fading that I would need to restain.
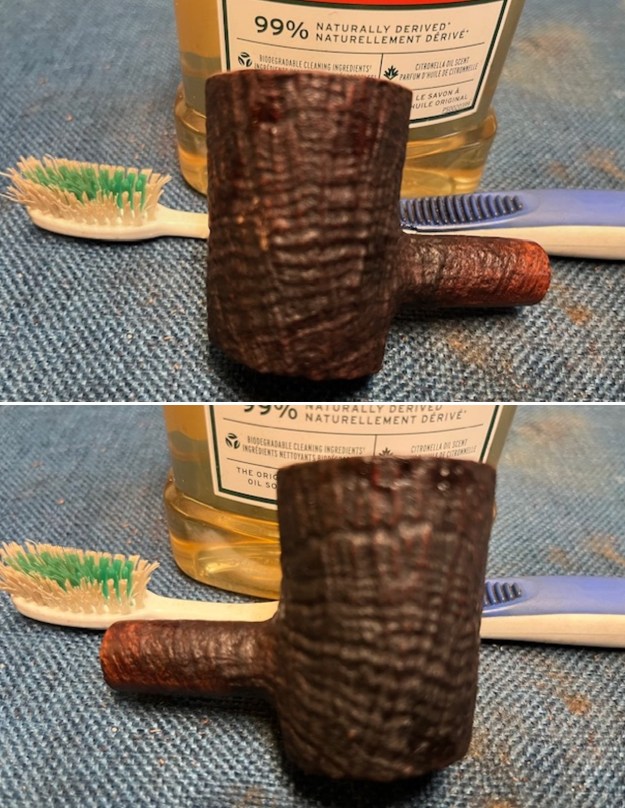
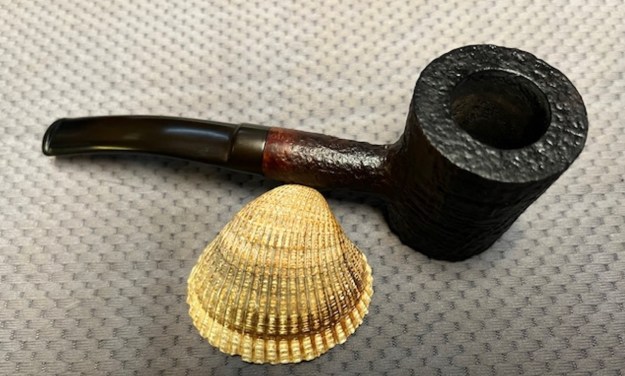
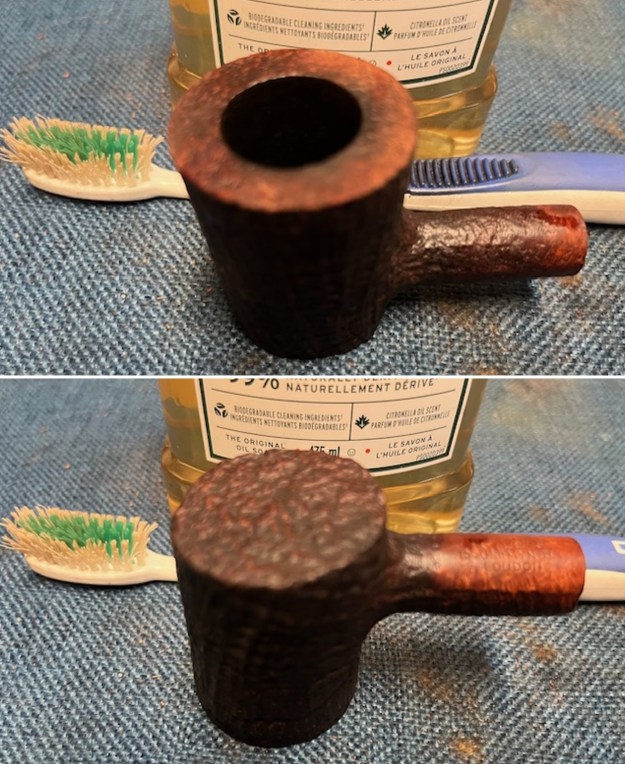 I restained the faded rim top with a Mahogany stain pen to match the rest of the bowl and shank. The match to the rest of the bowl is quite perfect and it really makes the grain pop in the sandblast.
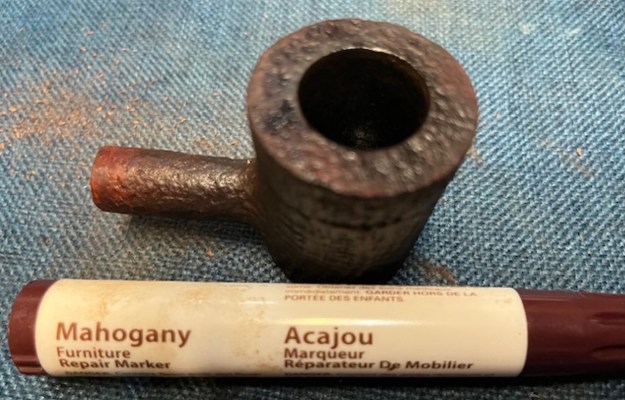 I worked some Before & After Restoration Balm into the surface of the briar with my fingertips and a shoe brush to clean, enliven and protect it. I let the balm sit for a little while and then buffed with a cotton cloth to raise the shine. The following photos show the bowl at this point in the restoration process. I am very happy with the results.
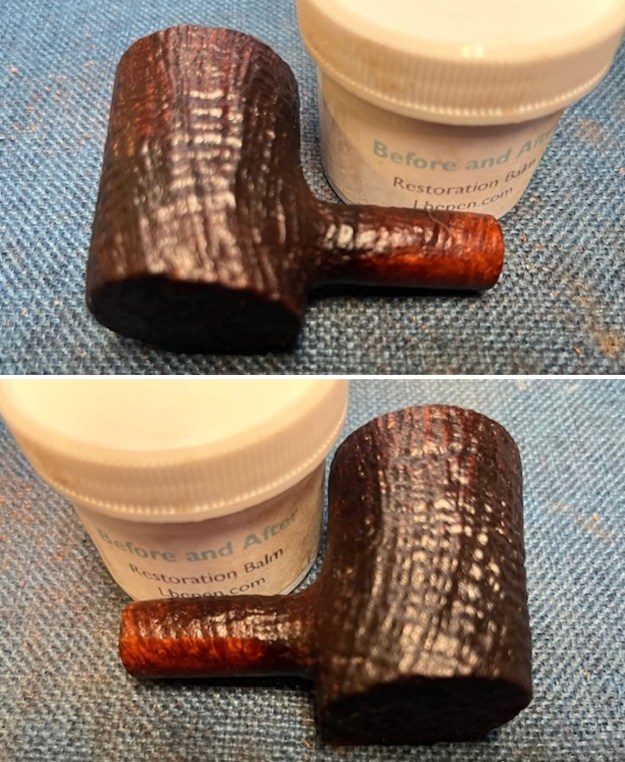

 With the bowl completed it was time to pick out a stem to fit the shank of the pipe. I wanted it to be the same diameter as the shank and fit snug in the shank. I went through my stems and found one that looked a lot like the Astley’s stem on the Cherrywood in the photos above. It is a saddle stem with a thin blade. It is used but it should clean up very well.
 I cleaned out the airway in the stem with pipe cleaners and alcohol. The internals cleaned up very well. I also cleaned up the externals at the same time.
 I created a slight step down on the end of the tenon to secure a snug fit in the shank. I started the process with files and finished the shape with a Dremel and a sanding drum. Once it was finished it looked very good. It was similar in shape to the tenon on the Heritage pipe. It was going to work very well.
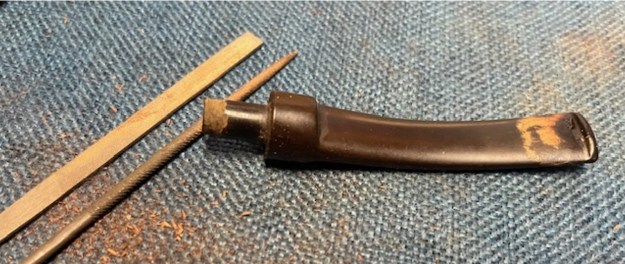 I filled in the tooth marks along the edge of the button with some rubberized black super glue.
 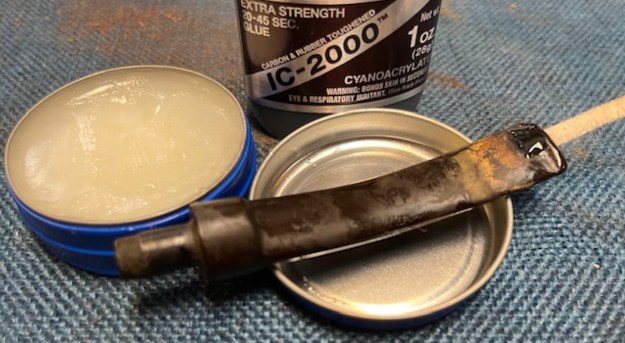 By this time the repairs on the stem had cured so I flattened them out with a folded piece of 220 grit sandpaper. I worked over the button edge. It was beginning to shape up well.
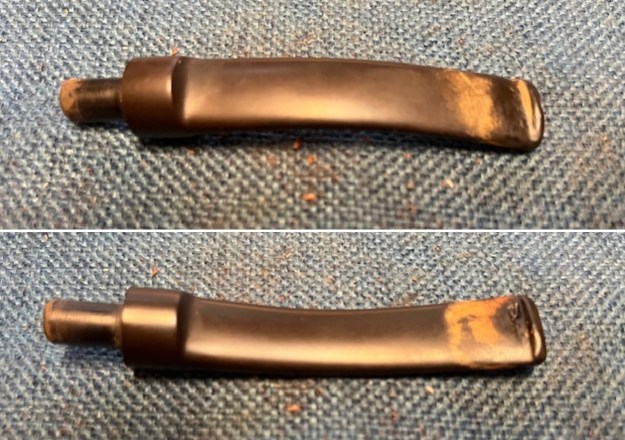
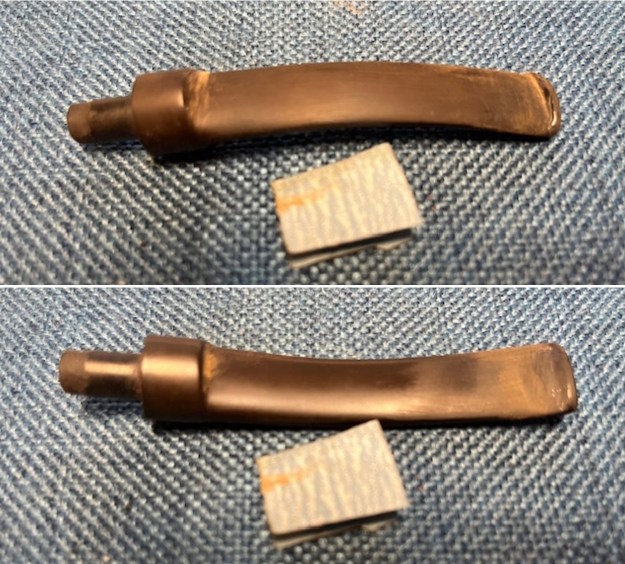 I sanded the stem with 320-3500 grit sanding pads and wiped the stem down after each pad to remove the sanding debris. It began to take on a deep shine.
 I polished the vulcanite stem with micromesh sanding pads – 1500-12000 grit pads. I wiped it down with a damp cloth after each sanding pad. I used Before & After Pipe Polish – both Fine and Extra Fine to further polish the stem. I wiped it down with a final coat of Obsidian Oil and set it aside.
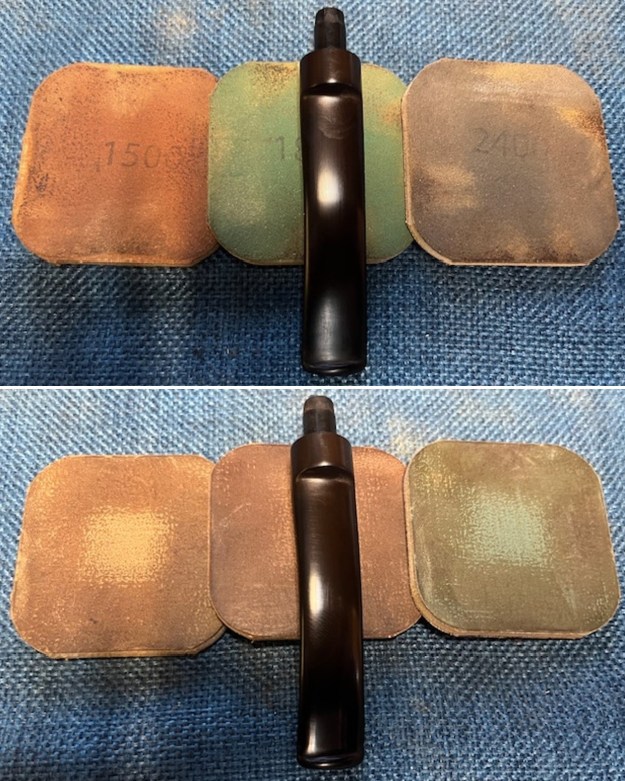
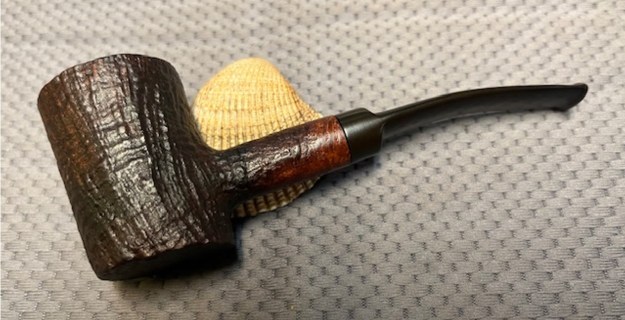
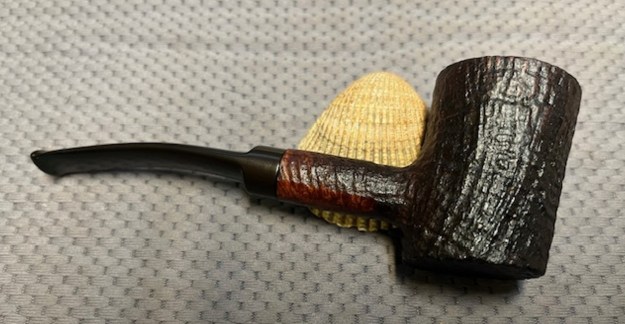
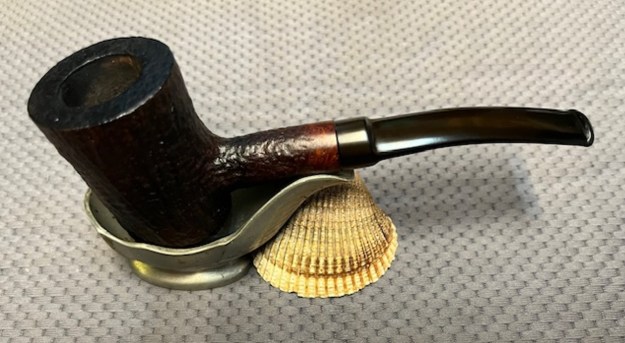
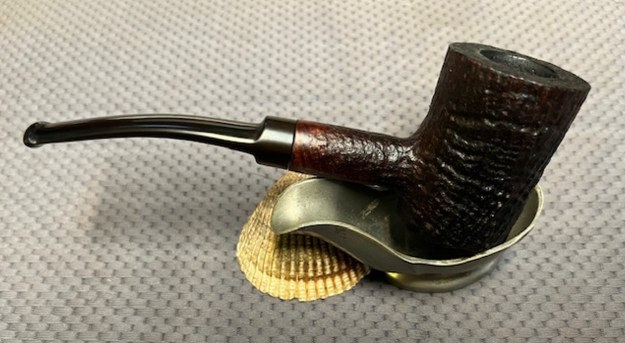
 The sandblast Astley’s 109 Jermyn St. London Cherrywood is a real beauty and the finish and shape are well done and have a classic English look. The newly fit vulcanite saddle stem polished up on the buffing wheel with Blue Diamond and had a rich glow. I gave the bowl multiple coats of Conservator’s Wax and the stem multiple coats of carnauba wax on the buffing wheel and followed that by buffing the entire pipe with a clean buffing pad. I hand buffed the pipe with a microfiber cloth to deepen the shine. The finished Astley’s Cherry with a saddle stem fits nicely in the hand and feels great. Give the finished pipe a look in the photos below. The dimensions of the pipe are Length: 6 inches, Height: 2 inches, Outside diameter of the bowl: 1 ½ inches, Chamber diameter: ¾ of an inch. The weight of the pipe is 1.48 ounces/42 grams. I have one more pipe of Nick’s to restem and then I will be sending them back to him. Thanks for reading this blog and my reflections on the pipe while I worked on it. There are many more to come!