Category Archives: Examples of Refurbished Pipes

In this section of the blog you will find before and after pictures of pipes that I have reworked. In each of them I give a summary of the work done to them. There are tips on working with different materials in these posts as well. For instance I have posted two horn stem pipes that I did work on the horn stems to removed tooth damage.

Refurbished Sir Wilkens Danish Made


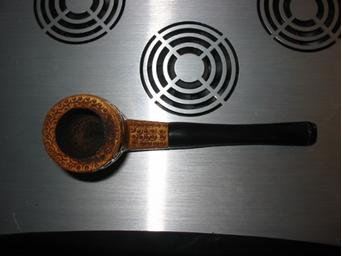
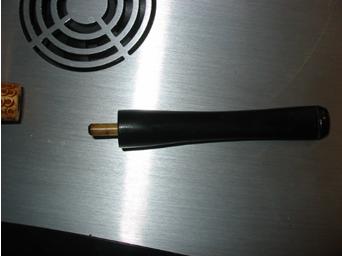
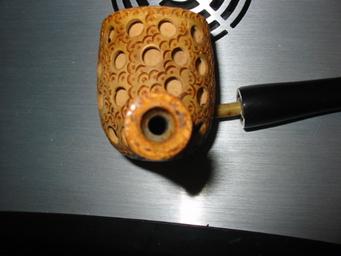
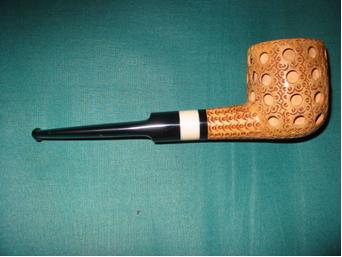
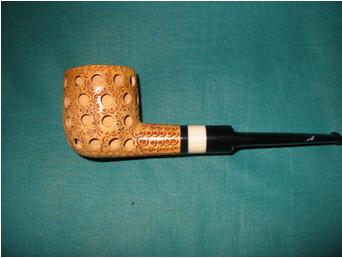
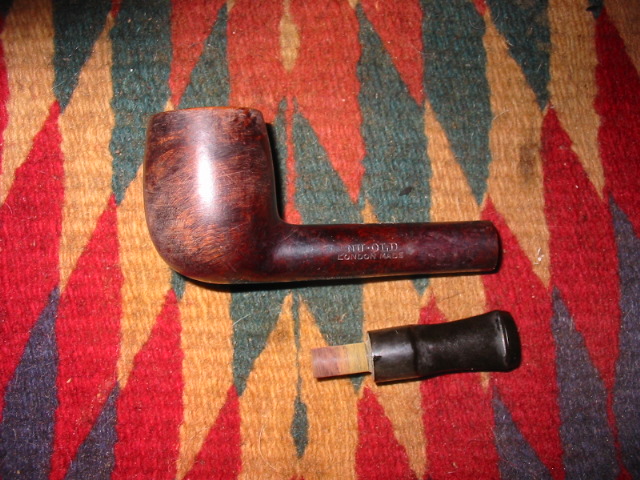
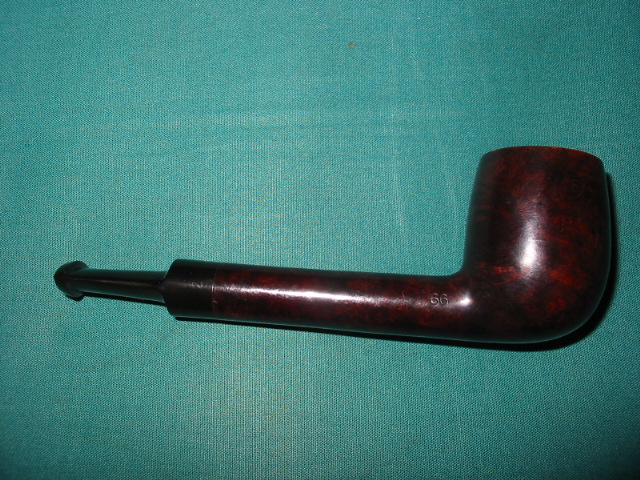
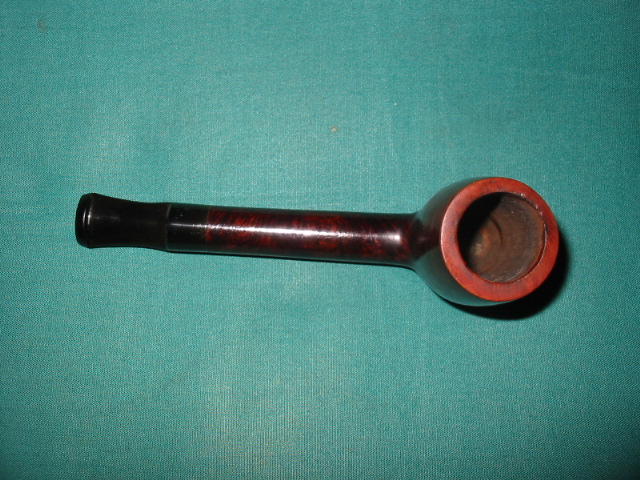
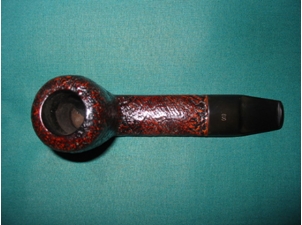
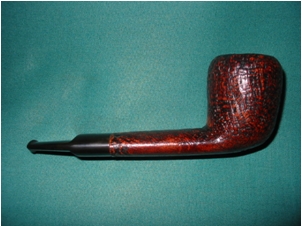
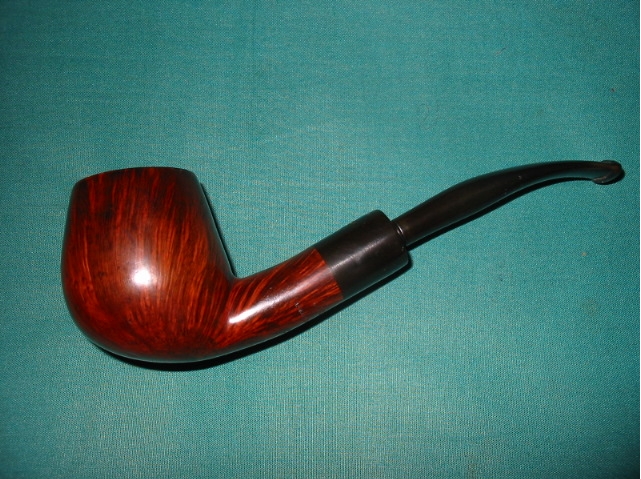
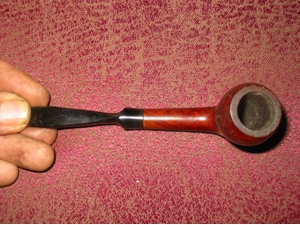
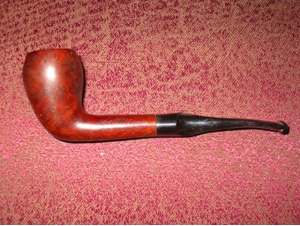
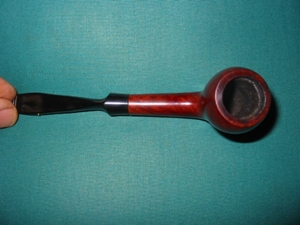
I had this old Danish shaped pipe in my box for refurbishing for some time. I had never heard of the brand but I liked the shape of this particular pipe. It is delicate looking and yet feels comfortable in the hand and mouth. The grain is not remarkable but it is good. It is stamped made in Denmark and I would call it an acorn shape. I always like to do a bit of detective work on the brands I come across and have done a fair bit of research on the web to find out any information. Nothing was found on the web. The stem is a modified saddle bit, pinched at the sides from the top and bottom views but generally tapered to the saddle. It is a slightly bent stem. The bowl was dirty and caked with what smelled like an aromatic tobacco – very vanilla smelling. The stem had a coating of some kind of sticky substance – like scotch tape that had been applied with a price tag. The finish was dirty and the grain appeared smudged beneath the finish. The rim was tarred but not scorched. This was going to be an easy clean up.

Image Image

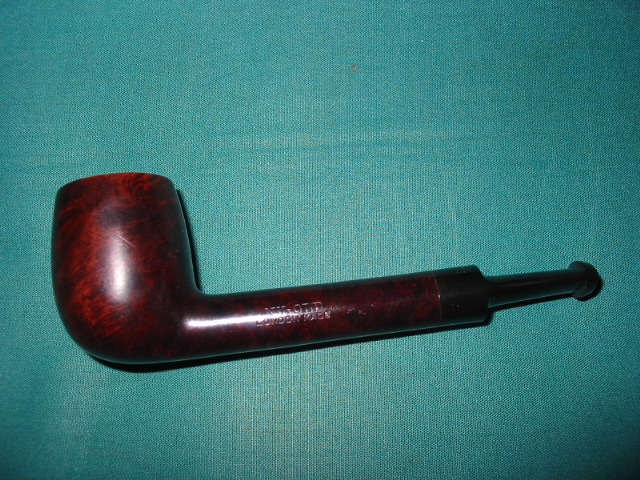
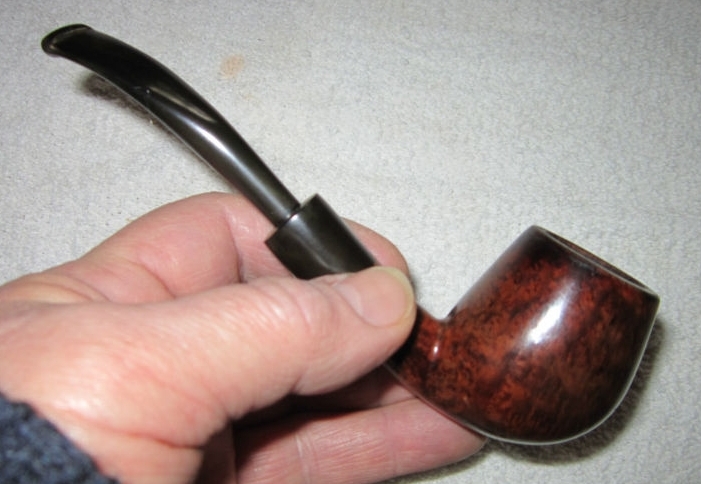
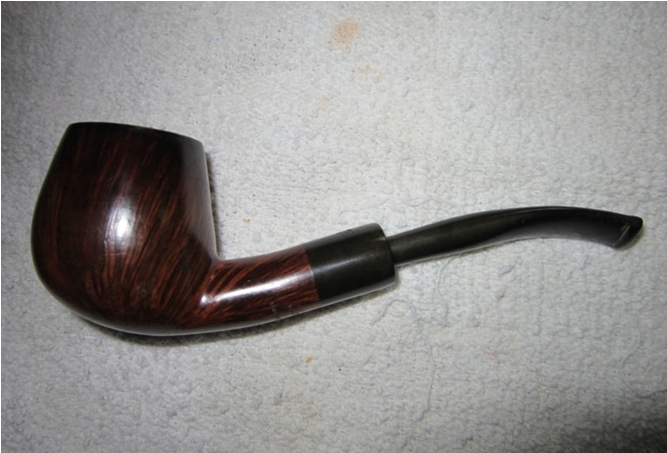
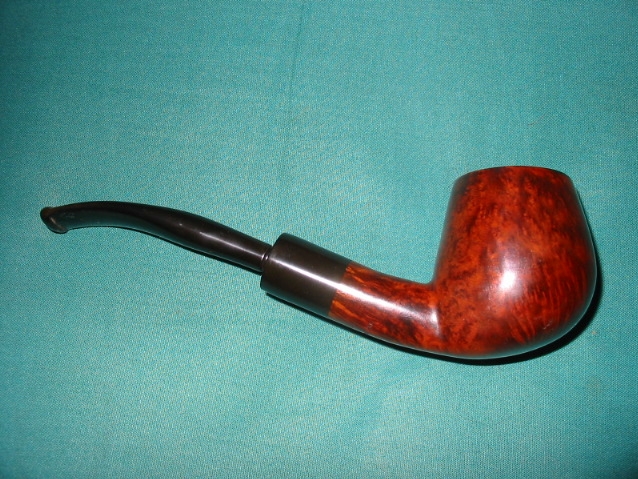
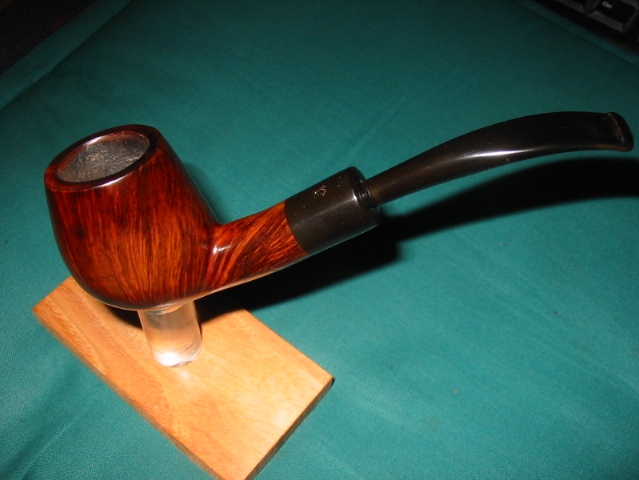
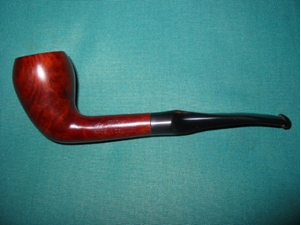
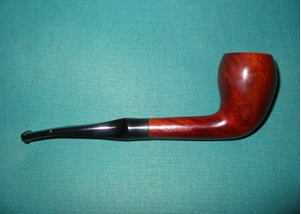
I reamed and cleaned the bowl to remove the thick cake. I also filled the bowl with cotton bolls and isopropyl alcohol and let it sit over night to leach out the tars and oils. In the morning I wiped down the outside with alcohol to remove a bit of the darkened finish and grime. I then buffed it and polished it with White Diamond to bring back the shine. I cleaned the stem with isopropyl alcohol to remove the sticky residue on it and then cleaned the inside of the stem with pipe cleaners and alcohol. I buffed away the slight oxidation. I then took the pipe to my buffer and gave it a final buff with White Diamond and then multiple coats of carnauba wax.

Image ImageImage

Any help on identifying the maker of this pipe would be appreciated. You can post responses here. Thanks ahead of time for your help.

Another on the unique and unusual side – a piece of history


I like the unusual and unique in briar pipes. In fact if it is a bit of an oddball or one that I have not seen before over the past 30 some years I want it. I will often be the only person bidding on these pieces on EBay but I usually get them for a pretty good price. This one has to be one of my favourites – an Italian Folding Pocket Pipe. I have no idea of the age of it but from many signs of stem and button shape I am guessing it is older. I am fairly certain it is a Savinelli but I have really no idea if that is so. It is stamped Made in Italy. The stem is in great shape. The bend is 90 degrees and there are no wrinkles or collapsing of the airway at all. There are no problems. The button is in great shape and is a hole or orific button. There are no bite marks or chewing on the stem.The bowl was clean though used. It had been smoked more than other folding pipes that I have picked up. I have since smoked it and see why. It is a great smoking pipe.

The finish was dirty and once I cleaned it off I needed to restain it. I did so with a medium brown aniline dye. The sandblast or possibly a rusticated finish that looks like a blast is very clean and unworn. The rim on the bowl was intact and without damage. I buffed the pipe and stem with Tripoli and White Diamond and then gave the entirety multiple coats of carnauba wax. The walls are thin but the finish seems to dispense the heat very well when smoking. It is one that I pick up often to carry with me on a walk or hike.

Here are some pictures of the finished pipe.

A Creative Pipe Maker’s Anonymous Attempt at a Cool, Dry Smoke


This is another interesting piece of pipe history. I seem to have trouble passing up odd and creative pipe making attempts. I have no idea who designed or made this one or what the patent information is as there is absolutely no stamping or identification on the pipe itself. I remember seeing one on EBay awhile ago but somehow missed keeping the information. If anyone has any information on it please leave a comment in response to this post.

The pipe itself was in rough shape when I got it. The stem is chewed up badly and I have not taken the time to rework the stem. It is the dreaded nylon stem so it always leaves me cold in wanting to work on it. It is probably the most unforgiving stem material there is in my opinion. You can sand and sand it and it does not seem to change the damage. The heat gun and boiling water do not seem to lift the dents and tooth marks at all. What is there seems to be permanent. The bowl was badly caked – in fact so badly caked that it had a split in the side of the bowl. The finish is strange – best I can say about it almost little worm trails in the briar. The stem was stuck in the shank. I thought at first it was a screw tenon it was so tight. Under the stem was the flat base with what looked like an adjustment screw of some kind. It was also stuck tightly.

I reamed the bowl and found that the draught hole was in the bottom of the bowl – like a calabash. I opened that with a dental pick and cleaned it out. I packed the bowl with cotton bolls and filled it with isopropyl alcohol. I use 99% as it has little water content and seems to work well in drawing out the oils and tars. It took quite a bit of alcohol as it filled the reservoir below the bowl. I put a pipe cleaner in the stem and laid it aside overnight. My hope was that the alcohol would not only draw out the tars and oils but loosen the adjusting screw on the bottom of the shank as well as the stem.

In the morning I removed the cotton bolls. They were almost black with the tars and oils that they drew out. The stem was actually loose – that happens so little that I was surprised when I turned on it and it came out. I was expecting a screw tenon and found that it was not at all. It was an aluminum tenon made to hold a Medico style paper filter. The one in the tenon was almost black with grime and now it was soggy as well. I am still trying to figure out the airflow on this pipe. I also was able to turn the adjusting screw under the stem and it came out as well. I expected that it would adjust the airflow somehow (kind of like a Kirsten). But it was not an adjusting screw at all; instead it was a stinger like apparatus with a long twisted blade on it. Now the airflow was becoming clearer. The smoker pulled the air through the bowl down through the air hole in the bottom of the bowl. Once there it entered the chamber that ran the length of the shank and bowl and contained the twisted stinger. That apparatus would pick up the liquids and oils of the tobacco. The smoke would go up through a hole in the top of the chamber and enter the shank where the paper filter would trap the remaining debris of the smoke (and in my opinion whatever flavour still remained) before delivering it out the slot at the end of the stem.

I cleaned out the chamber and the shank by filling them with isopropyl and plugging the holes and shaking the fluid for several minutes. I would unplug and dump the dirty alcohol down the drain. I repeated this until the fluid came out clear. Then I cleaned the chamber and shank with a shank brush and bristle and ordinary pipe cleaners and more isopropyl alcohol until they came out clean and fresh. The stinger soaked in alcohol and I scrubbed it with 0000 steel wool until it shone. The stem needed a lot of cleaning though it was more dirt and grime that came out rather than tars. I was able to polish the tenon inside and out and clean up the stem. The dents and tooth marks I left alone. One day I will have to work them over and see if I can remove them. But not that day!

I scrubbed the outside of the bowl with a bristle tooth brush and Murphy’s Oil Soap to remove all of the grime from the bowl surface. I cleaned out the crack in the bowl with my dental pick. I then wiped it down with acetone and restained it with a medium brown aniline stain, flamed it and then buffed it with Tripoli and White Diamond. Once it was polished and clean I coated it with several coats of carnauba wax and then buffed it with a clean flannel buff.

I finished up the pipe and put it back together. I added a pipe softee bit to cover the bites and dents on the stem and make it more comfortable in the mouth. I packed a bowl of nice Virginia in it to try it out. I decided to leave out the paper filter and just smoke it as it was. It was an interesting and cool smoke though it pretty much removed the flavour of the Virginias that I chose to smoke. This one will sit in the cupboard as a memorabilia item but will not enter the rotation.


Here are the pictures of the process of repair. I patched it with black super glue and built up the angle of the stem to give a clean flow. I filled the dents and bite throughs on both sides of the stem. I sanded and sanded with 240 grit sandpaper and micromesh 1500 through 12,000 grit. Then gave it a coat of Obsidian Oil and finally several coats of wax. The last four photos show the final product.

Refurb on a BBK Panel Billiard – Swiss made


This BBK Panel was an interesting refurb for me. I had not heard of BBK pipes until I came upon this one. I think it came in a box of pipes that was gifted to me but I am no longer certain where it came from or when I received it. It is stamped BBK both on the bottom of the shank and on the logo on the stem. It had a beautiful blast finish. When I took it out of the box it was dirty and the bowl had a thick cake in it. The rim was blackened and tarred. The stem was a brownish green from oxidation. The beauty was that it was not chewed or dented by tooth marks. It would take a thorough cleaning to learn more about this pipe.

I did not know that I was dealing with a meerschaum lined pipe until I wiped it down to begin the cleaning process. I always wipe down the rim with some Murphy’s Oil Soap to get to the rim and clean away the build up and grime. I use it undiluted and scrub it on the pipe with a toothbrush. Once found that I was dealing with a meerlined pipe I carefully reamed the cake that had built up and then sanded it back. I sanded the rim back to get the grime off of it and expose the meer again. In the second photo below you can see what I found once I had wiped the pipe down with oil soap.


The blast is really nice on this panel so I cleaned it and then restained it with a black aniline stain (Feibings Shoe Dye) to match the original colour of the pipe. I flamed the stain to set it in the briar and buffed it lightly with White Diamond to remove the excess and to give it a polish. I finished by giving it several coats of Halcyon Wax to protect the finish. The stem was oxidized so I buffed it with Tripoli to remove the surface coating of oxidation. I soaked it in Oxyclean to soften the remaining oxidation and then sanded it with 240 grit and 400 and 600 grit wet dry sandpaper before using the micromesh sanding pads (1500 to 6000 grit) to finish the work. I rubbed the stem down with Obsidian Oil and then gave the entirety another coat of Halcyon on the bowl and carnauba on the stem.

I used some liquid White Out to try to recolour the logo on the stem but it did not stick… time to try again. Thanks for looking.

Some Refurbs South African Style – Piet Binsbergen


One of my ideas when starting rebornpipes was to have a place where folks who did refurbishing could post and interact. Today another piece of that idea is coming to fruition. I am posting a series of refurbs from a friend in South Africa – Piet Binsbergen. Last evening (my time) we connected on Skype after a long interaction via email over the past year. Here are a few of his pipes that have been restored. Following is Piet’s post and the pictures.

Hey Steve,
Good to chat with you friend. Here are some of my latest clean ups. Here is a GBD Prehistoric Prince, 1960’s, I am not a cool as you so the stem needed replacing. I am working on the Steve Laug filling trick, I may just graduate soon. I opened the air way to 4mm right through.

Here is a Peterson that I needed to sand the bowl and restain. Round 1 black to penetrate the soft wood, sand and then round two I used brown stain. I have also been pre-carbonising the bowls of late.

Next is a pipe belonging to Mark Vosseler in NY. It was his dad’s. Wanted a new stem as this one draws bad! Fitted a pre-moulded sem and added elephant ivory ring, opened airway 4mm. Sanded and re stained bowl to get rid of fills.

The last one in this lot is this GBD Concord. It was cleaned and refurbished. Restained the bowl and worked on the oxidized stem.

A Pair of Doodlers Restemmed


I picked up these two Doodler bowls that needed stemming. They were made by Tracy Mincer of Custom Bilt fame. They are unique in the pipe world, and often have been copied by others. The basic design involves deep grooves cut into the bowl and then holes drill from the rim to the bottom of the pipe. These tubes around the bowl and the open grooves are designed to cool the bowl as the pipe is smoked and deliver a cool dry smoke. These two were a mess when they arrived and need quite a bit of work. The shanks on both bowls were crack with hairlines crack in several places. They required gluing with super glue and then a pressure fit nickel band on each one. The bowls were reamed and cleaned and then restained with a medium brown aniline stain. I buffed them both with Tripoli and White Diamond to polish them.

I took two stems out of my can of stems – one a saddle and one a taper stem. I used the PIMO tool to turn the tenons to fit the shank. Then I used my Dremel to fit the stem to the shank. I took off the extra material until it was the same diameter as the shank. I used a variety of sandpapers to bring the stem down to the perfect fit. I used 400 and 600 grit wet dry sandpaper and water to remove all of the scratches. I used Micromesh from 1500-6000 grit to polish and smooth the stem. Both pipes and stems were polished with carnauba wax and a soft flannel buff. ImageImage

NightOwl PipeWorks Blueprinted Meerschaum


Blog by Steve Laug

I sent off this old lattice meerschaum to Ronni Bikacson for him to do a Blueprint Conversion. He describes the processes he uses on his web site as follows:

“This process combines two of Ronni’s processes that make this pipe a much better smoking pipe. The first is the “Blueprint” technique – this process involves opening the draft bore of a pipe for smooth smoking.  Rather than gouge out huge bores in the shank, I strive to equalize the bore diameter from bowl to bit.  This includes redrilling the shank to 3.5 or 4mm, drilling the stem to 3.5mm as far as possible and then hand finishing the bore to an open slot at the bit.  Each pipe is treated as an individual system; no “one size fits all”.  I also make special mortise sleeves that help a pipe cleaner pass all the way without stem removal.  The result is a smooth, dry smoke without having to fight a pipe cleaner afterwards.

The second is the “Bulletproof Shank Repair” – this process eliminates the need for bands on cracked or broken shanks.  All repair is performed internally with either Delrin, stainless steel, or carbon fiber sleeves. I pioneered this technique in 2003 and have continually worked to improve the efficiency and durability of this repair.

A combination of the two above techniques has resulted in the “Blueprint Conversion” for meerschaums. The old “plumbing” is removed from the shank and replaced with a new sleeve that is bored to align the different draft angles between stem and shank. The stem is Blueprinted and fitted with the appropriate tenon. The result is a world class smoke that will accept a pipe cleaner without disassembly.” http://www.nightowlpipeworks.com/home/index.html

So I sent this pipe off to Ronni. The first series of three photos show the pipe as it was when I received as a gift from a friend. The stem I believe was a replacement and it did not fit well. The diameter of the stem at the shank was larger than the shank and it still had many file marks on it. The tenon was narrow and the draught on the pipe was very tight. The airway was constricted and narrow. A pipe cleaner would not fit through the stem.
meer1

meer2

meer3

The next two photos show the internals of the pipe. The first is the small tenon with a very small airway and a tight draw. The second is the mortise – which is the same size as the tenon and the airway at the end is narrow like the end of the tenon.
meer4

meer5

When I sent it to Ronni and I asked that he also make a new stem for the pipe. He crafted one out of acrylic with a white acrylic band between the black of the band next to the shank and the black of the saddle stem that he made. The contrast with the colouring meer was a nice touch. The first four photos show the marbleized black acrylic with grey and silver highlights.
meer6

meer7

meer8

meer9

This last photo shows the new internals. Ronni opened the shank and inserted a new Delrin insert and made a stainless steel tenon with a wide open draw. The pipe smokes incredibly well now with little effort. I cannot recommend Ronni highly enough for his blueprinting process for meers. It is well done and for me changed a mediocre smoker into a smoking machine!
meer10

Nu Old Lovat reworked


Blog by Steve Laug

This small lovat needed restemming and also a restain on the bowl. It was pretty clean when I took it out of the box of bowls that I have here for restemming. The finish was shot and most of the stain was worn off. The bowl was clean, just dusty. The rim was nicked and dented and would need to be topped. Here is a picture of it when I took it out of the box. I matched a stem from my can of stems to it. It is a nice little Lovat and is stamped Nu-Old over London Made on the left side of the shank. On the right side it is stamped with its shape number – 66. The Nu Old pipes were made by Civic Pipes in London. Image

I fit the tenon to the bowl and then shaped the saddle to match the shank diameter. The stem needed a bit of work to smooth out the casting marks and the roughness of the surface. I sanded it with medium grit emery cloth to remove the marks and general roughness of the stem. Then I followed up with 240 grit sandpaper and 400 and 600 grit wet dry and water to remove all the scratches and marks. I polished it and did a final sanding with micromesh sanding pads 1500-6000 grit. I then turned my attention to the bowl. I used acetone on a cotton swab to remove the remaining finish on the pipe. This took repeated washing with the acetone to get the bowl to be clear of the original remaining finish. When I was finished with that the bowl was uniformly a light reddish hue. I topped the bowl with my sanding board and then polished the bowl with micromesh pads. Once it was finished I wiped it down with isopropyl alcohol before giving it a new stain with oxblood. I gave this one several coats of stain to give a good coverage, flaming the stain between each coat. Once it was finished I buffed it lightly with Tripoli to open up the finish and show the grain. I then polished it with White Diamond and gave the whole pipe several coats of carnauba wax which I buffed with a soft flannel buff. ImageImageImage

Refurbished Stanwell 89


Blog by Steve Laug

The day I decided to work on this one turned out to be my day for Danish pipes. The first one I chose to refurbish was this nice little Stanwell sandblast shape 89 – one of my favourite shapes with a flat oval shank and stem. It was very dirty and the finish was in rough shape. The bowl was heavily caked and the tars had run over the rim and down the edges. The sand blast was nicely done but almost smooth from the grime that filled the grooves. The stem was stamped hand cut and was oxidized. It also looked like it had worn a softie bit at one time as there was a hard line of calcified grit across the stem in front of the button. The pipe is stamped Stanwell Hand Made. It is a comfortable pipe to hold in the hand.

ImageImage

I reamed the bowl and scrubbed the inside of the bowl and shank with isopropyl alcohol and pipe cleaners, cotton swabs and a shank brush to clean out the grime. It took many pipe cleaners and cotton swabs before they came out clean and white. To clean the outside of the bowl I washed it with Murphy’s Oil Soap and wiped clean. I scoured the crevices of the blast with a brass bristle tire brush to get grime out of the grooves. I honestly did not care if it took of some of the stain and colour as I planned on restaining it anyway. Once it was clean I dropped it in my alcohol bath to let it soak and finish removing the finish.

I worked on the stem while the bowl soaked. I buffed it with Tripoli to knock off the oxidation as it was not a deep brown. This was an easy stem to clean as the oxidation was on the surface. I used 1500-6000 grit micromesh pads after the buffing. I buffed it carefully as I wanted to preserve the logo and the sharp edges of the stem where it met the shank. Once the bowl was finished I would put it on the pipe to give it a final buff with White Diamond.

I took the bowl out of the alcohol bath and dried it off. I then cleaned off any remaining grime and finish with a cotton pad and clean alcohol. Once dry I stained it with a medium brown aniline stain and flamed it to set the stain. I then put the stem on the pipe and took it to the buffer. I buffed it lightly with Tripoli to take remove some of the stain from the high spots on the blast and then buffed the whole pipe with White Diamond. I used a light touch on the bowl as I did not want to blur the edges of the blast. Once finished I coated it with multiple coats of Halcyon wax.

ImageImageImage

Refurbished a Karl Erik Apple


I picked this beautiful older Karl Erik apple up on EBay. When it arrived I loved the looks of it and decided to work on it immediately upon opening the package. It had many dents in the sides of the bowl and front and back. The bowl had some darkening along the back side of the bowl near the rim. It was not charred or burned just darkly stained. The rim was clean of tars and oils and the bowl had been reamed already. It was a very clean pipe other than the darkening and the dents on the rim and bowl sides. The stem was oxidized minimally and had a few bite marks on it that were not too deep. There was not a lot of work to do on this one so I went to work. ImageImage

I took it into the kitchen and turned on one of the gas burners on the stove. I wet a dish cloth so and laid it on the counter next to the stove. I heated my old butter knife over the flame. I placed the folded wet dish cloth on the dents that are visible on the sides of the bowl to steam them out. The hiss of the hot knife on the damp cloth generated the steam that lifted the dents. I worked on the dents on both sides of the bowl and on the rim. When I was finished the dents were gone. I washed the exterior of the bowl down with some isopropyl alcohol to clean off the darkening along the top edges of the bowl on the back side and on both sides. It came off quite easily. Once that was done I sanded the bowl with micromesh pads to smooth out the finish and prepare it for restaining. I stained it with a medium brown stain. I buffed it with White Diamond and then gave it several coats of carnauba wax.

I used my heat gun to lift the tooth marks on the stem near the button and then sanded it with 240 grit sandpaper and also the usual 400 and 600 grit wet dry sandpaper and water. Once they were smoothed out I sanded it with micromesh 1500-6000 grit and then put it back on the bowl. I  buffed and polished the whole pipe and waxed it again. It is a beautiful little pipe that I will enjoy smoking.
ImageImageImage