Author Archives: upshallfan

Unknown's avatar

About upshallfan

Moderator on the PipesMagazine forum since 2011. Guest contributor on the Reborn Pipes Blog by Steve Laug.

Kaywoodie Supergrain Churchwarden (Shape 95)


Blog by Al Jones

I’ve never owned or smoked a Churchwarden style pipe.  Last year I added finding the right one to my pipe wish list.  When I started investigating vintage Kaywoodie options, I learned they are somewhat rare and that I would face some fierce competition.  I had just about given up hope on finding one and I did a generic search on Ebay for a Churchwarden pipe.  I thought that it would be necessary to settle for Savinelli or Peterson.  To my surprise, in the middle of my 100+ pipe search list, was this Kaywoodie Churchwarden, complete with box and bag.   I had somehow missed this pipe on my daily Ebay search results.

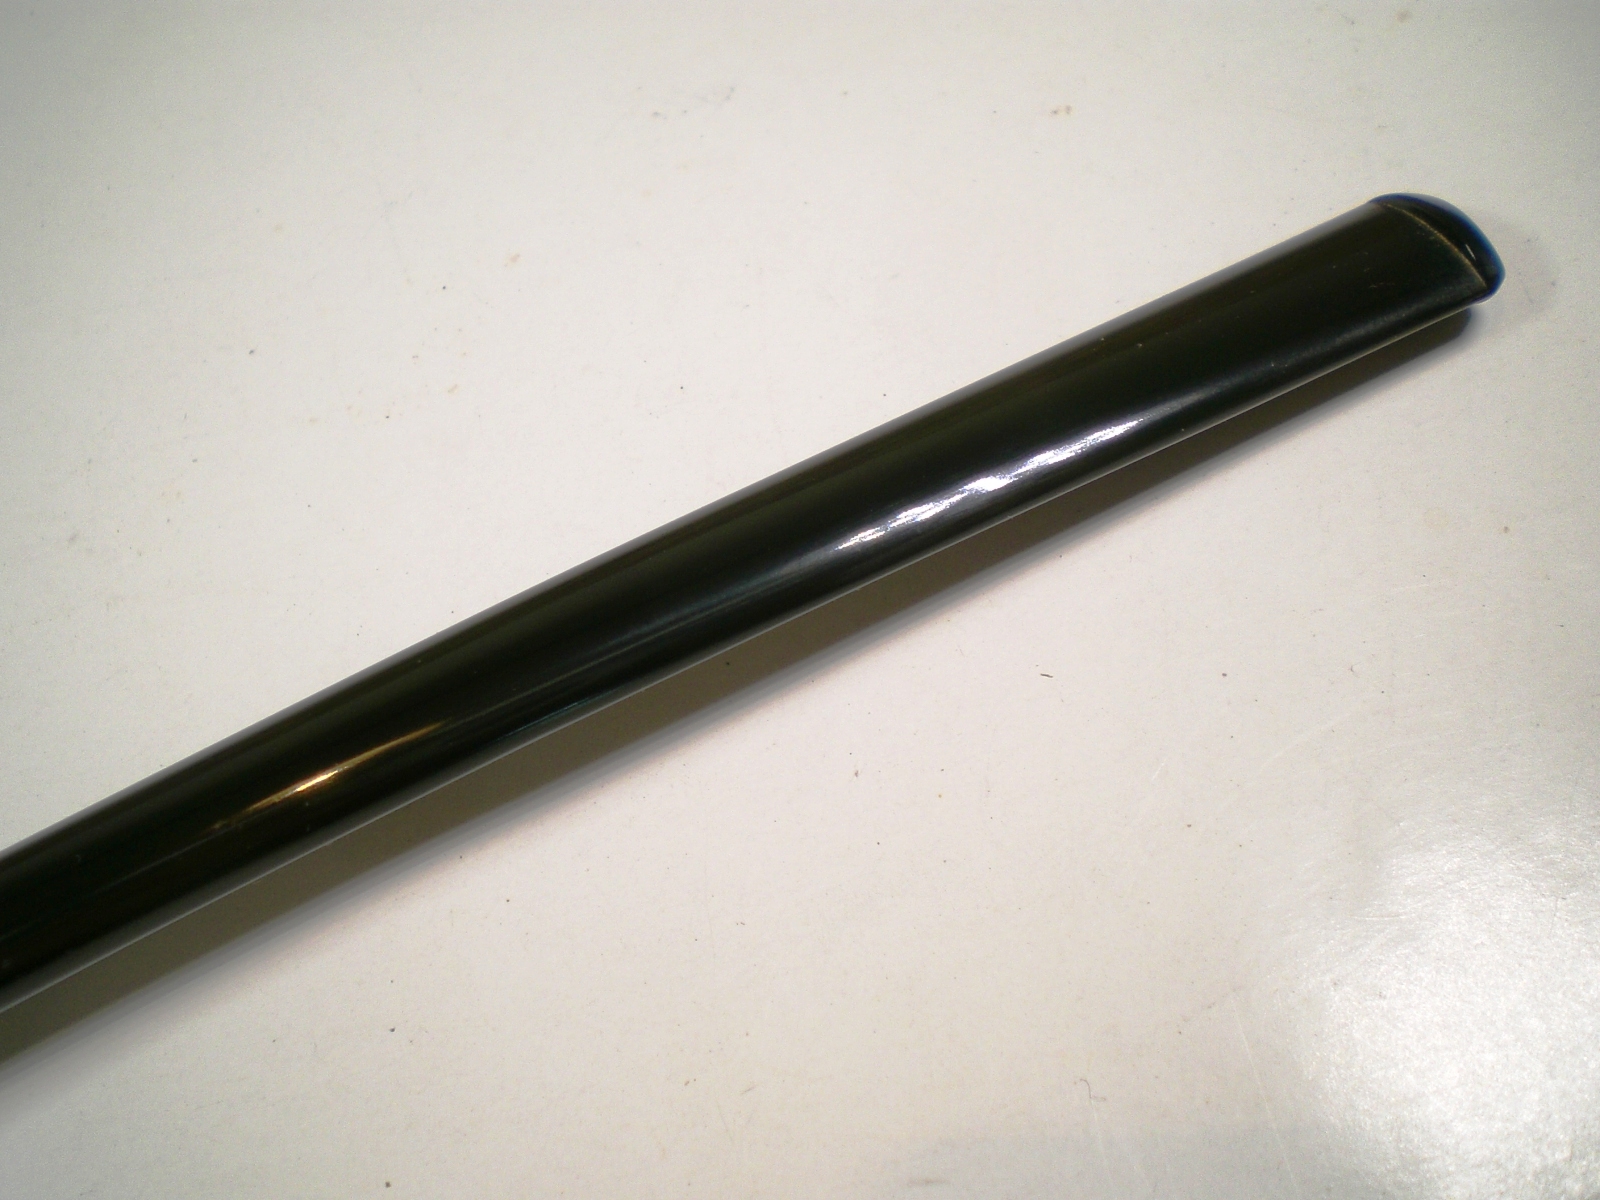
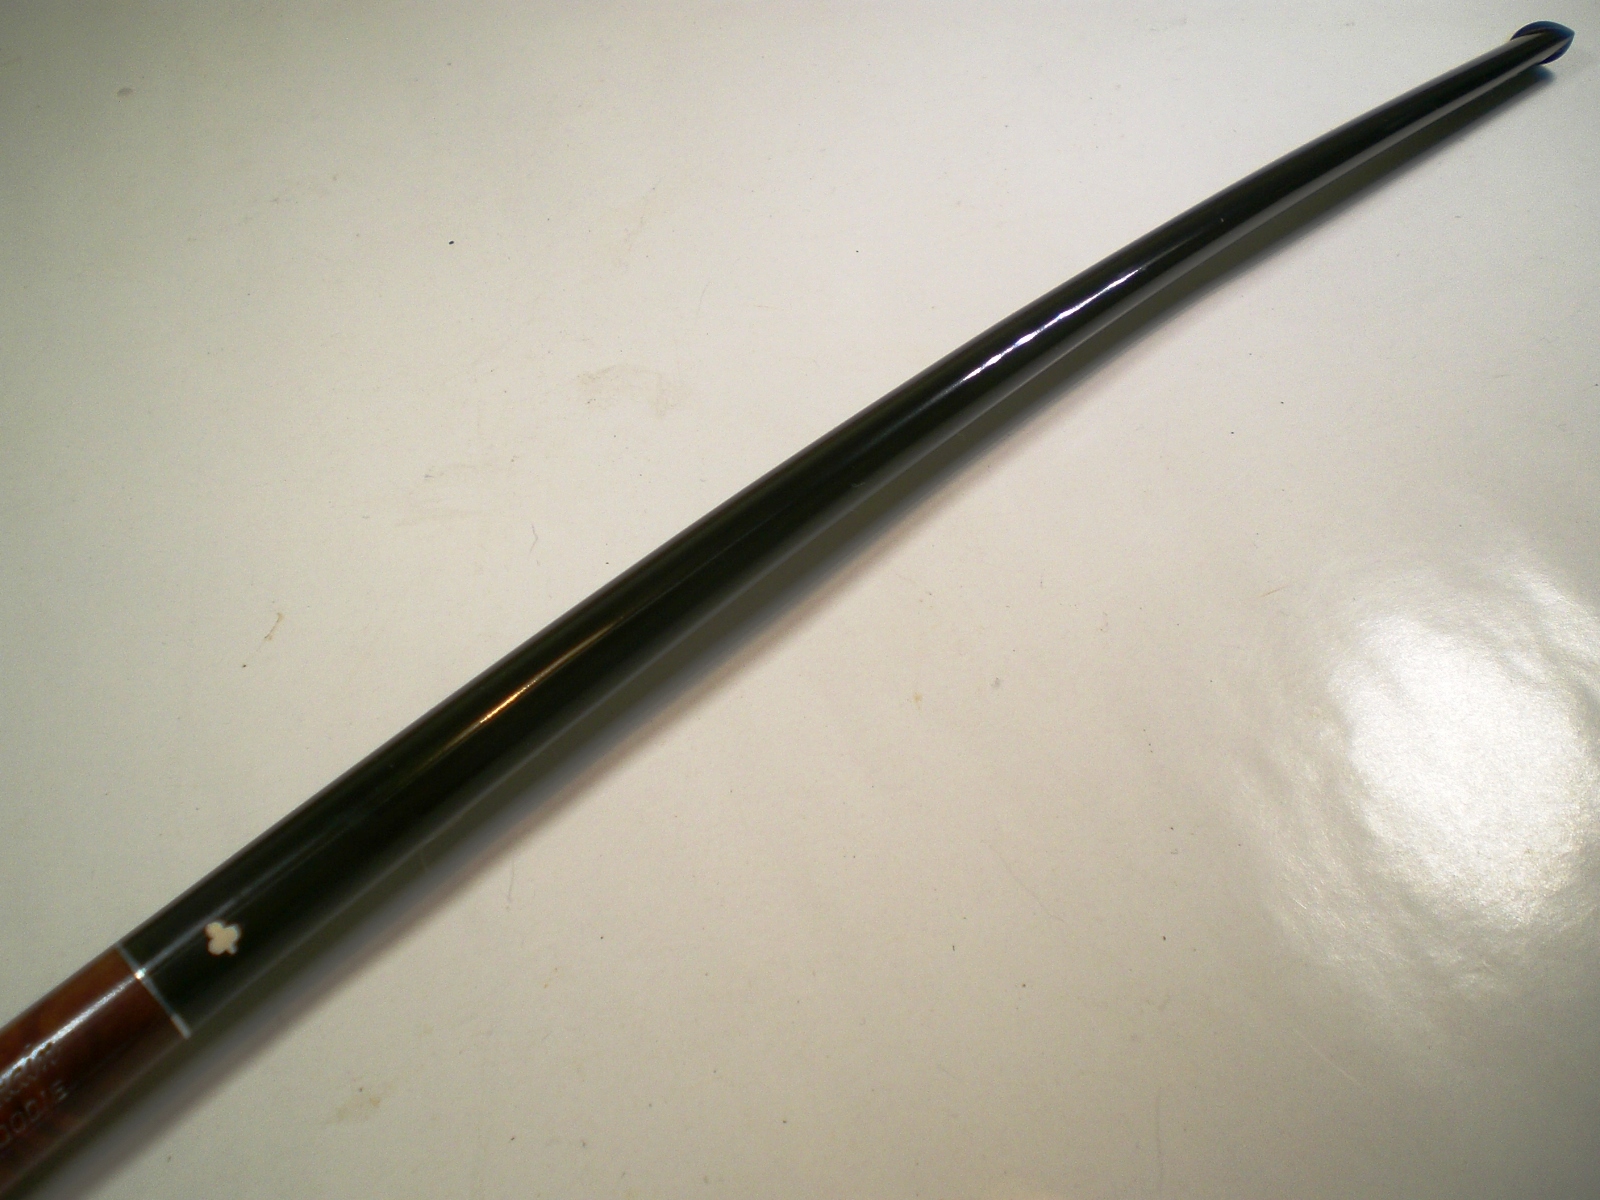
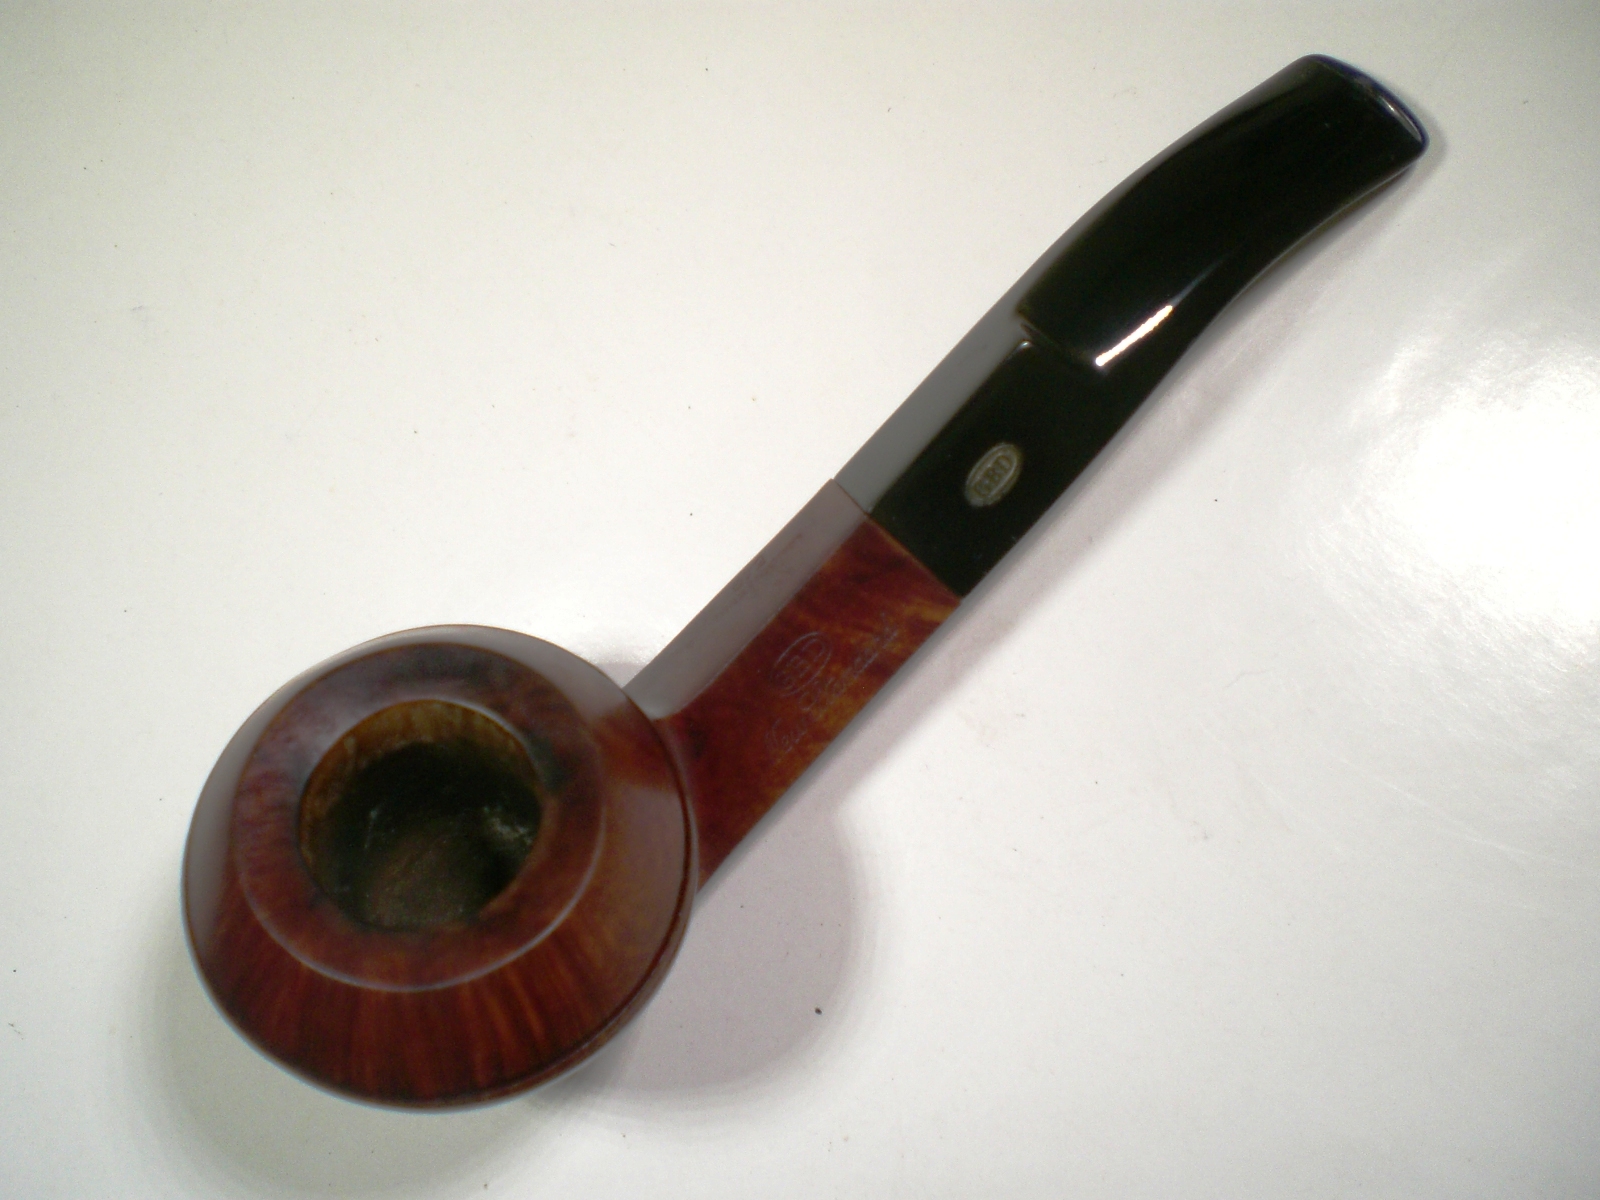
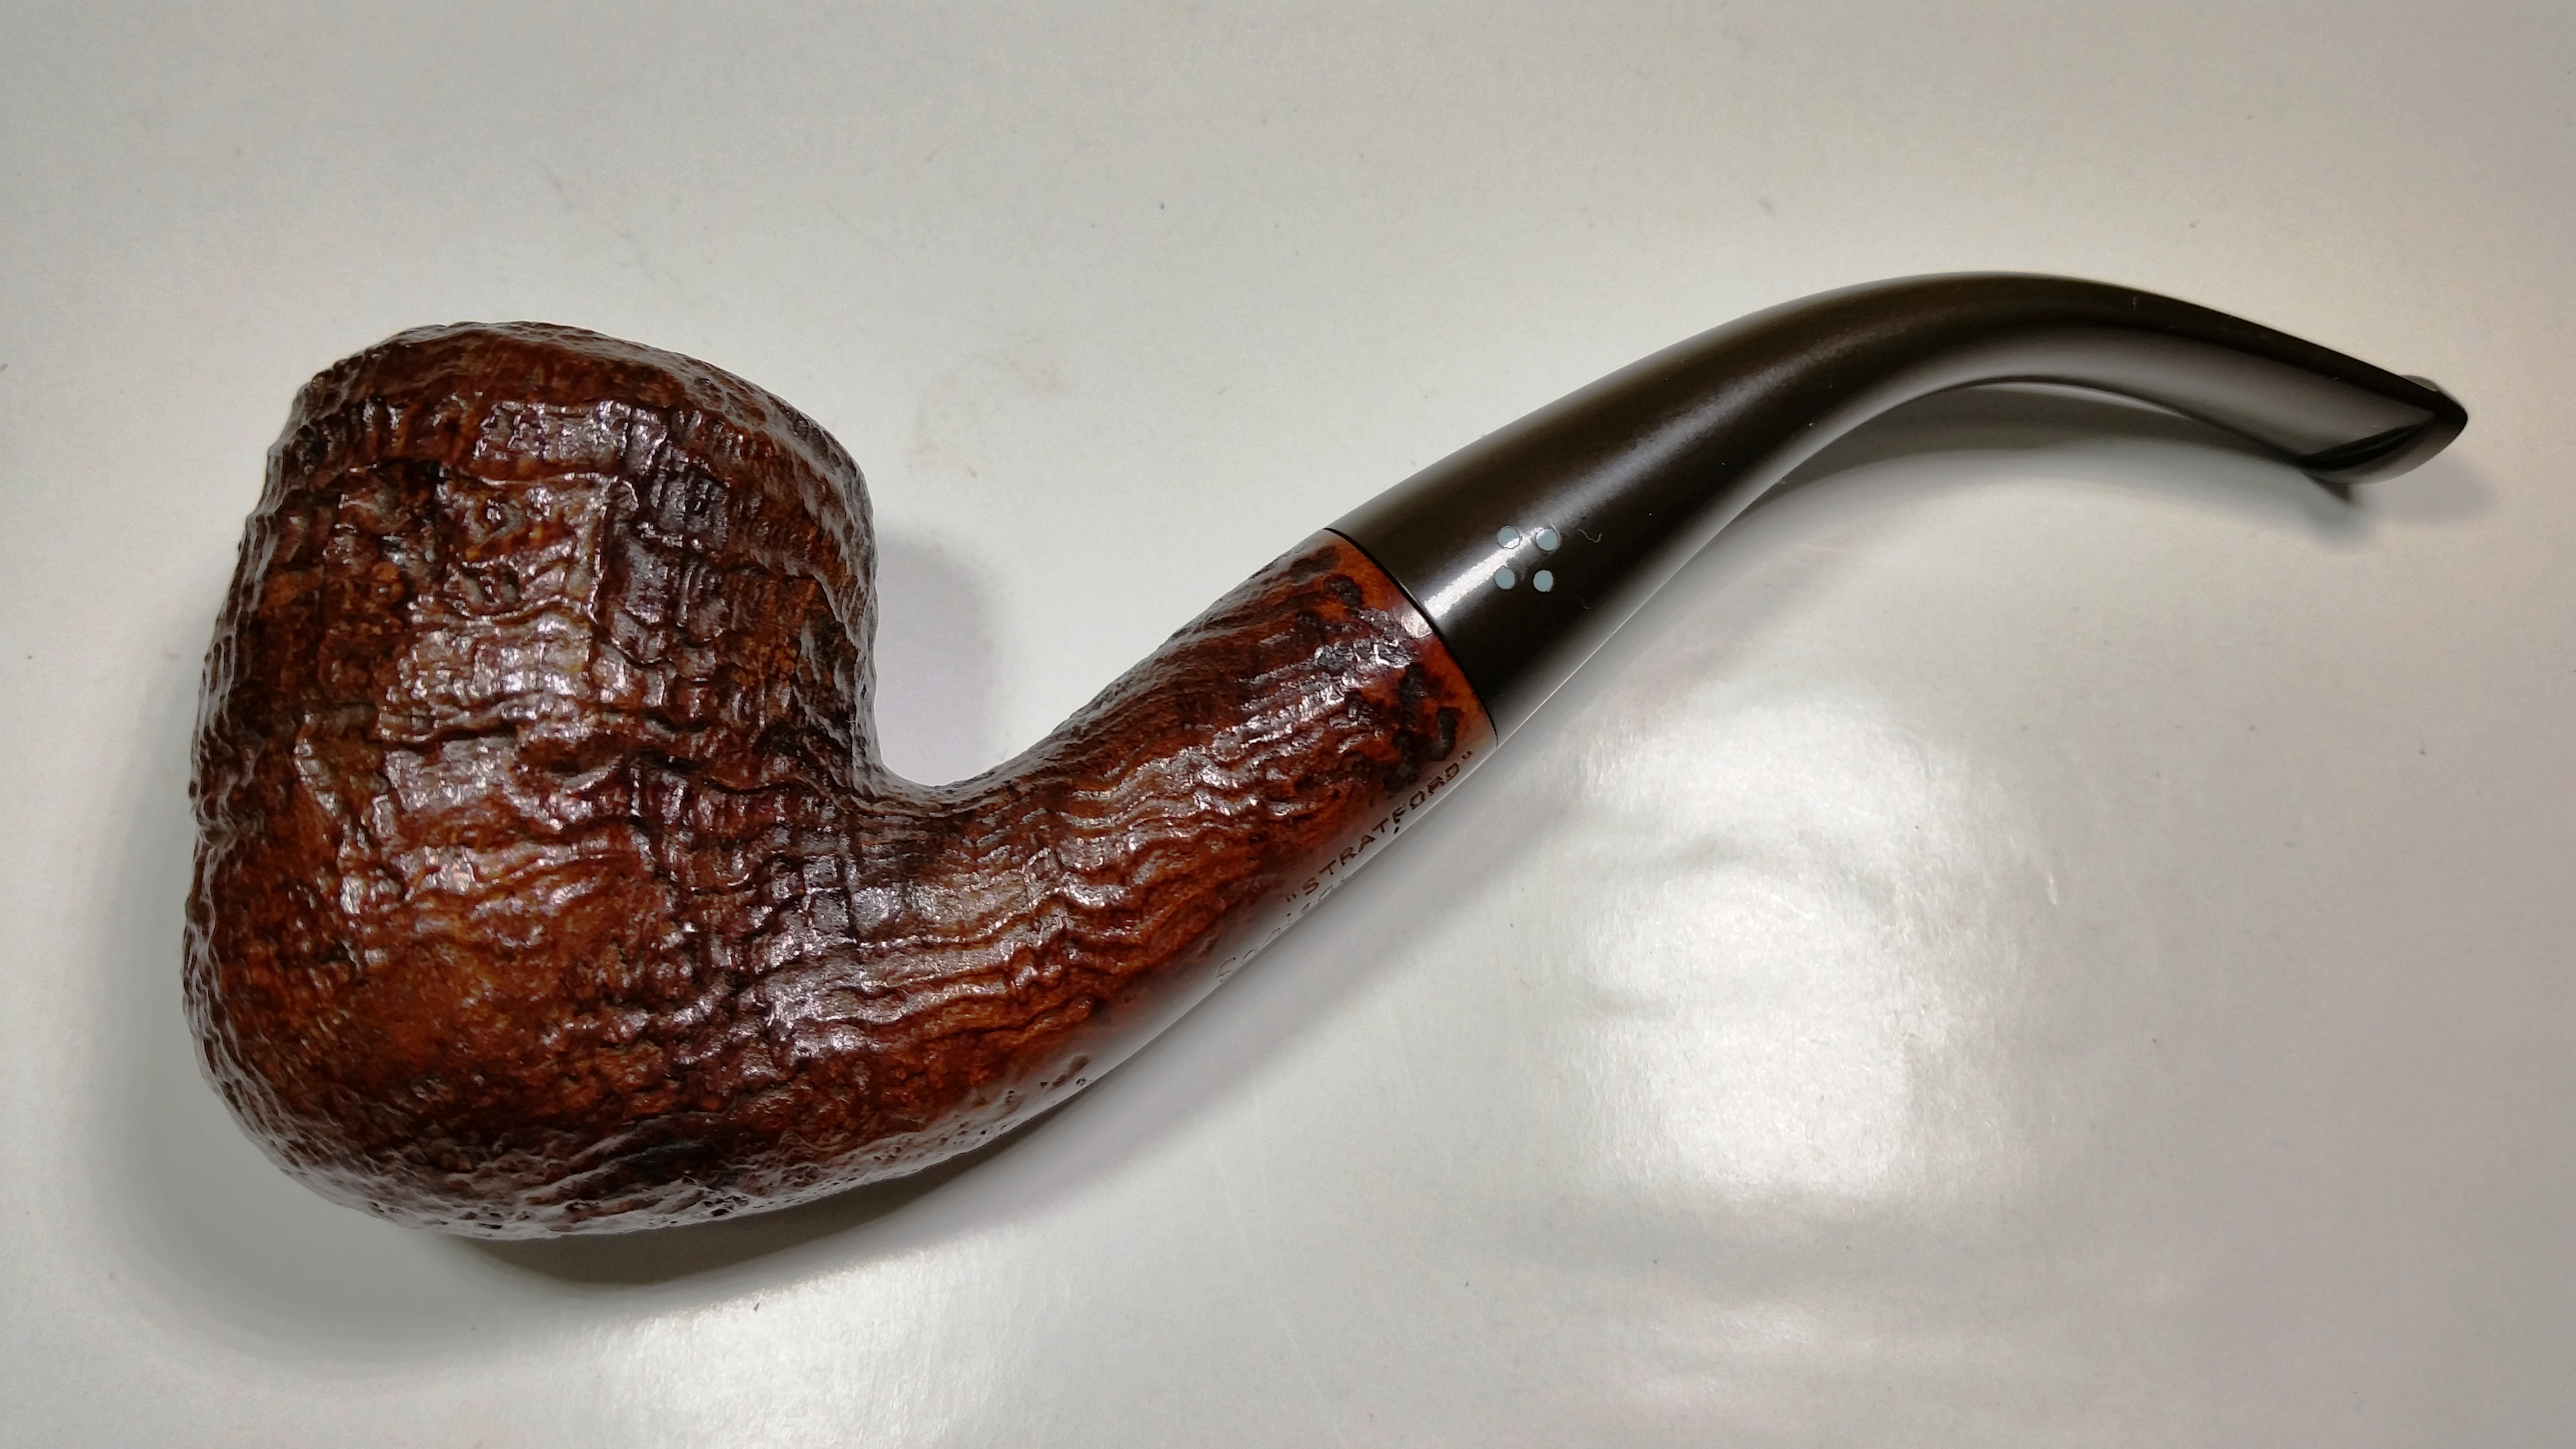
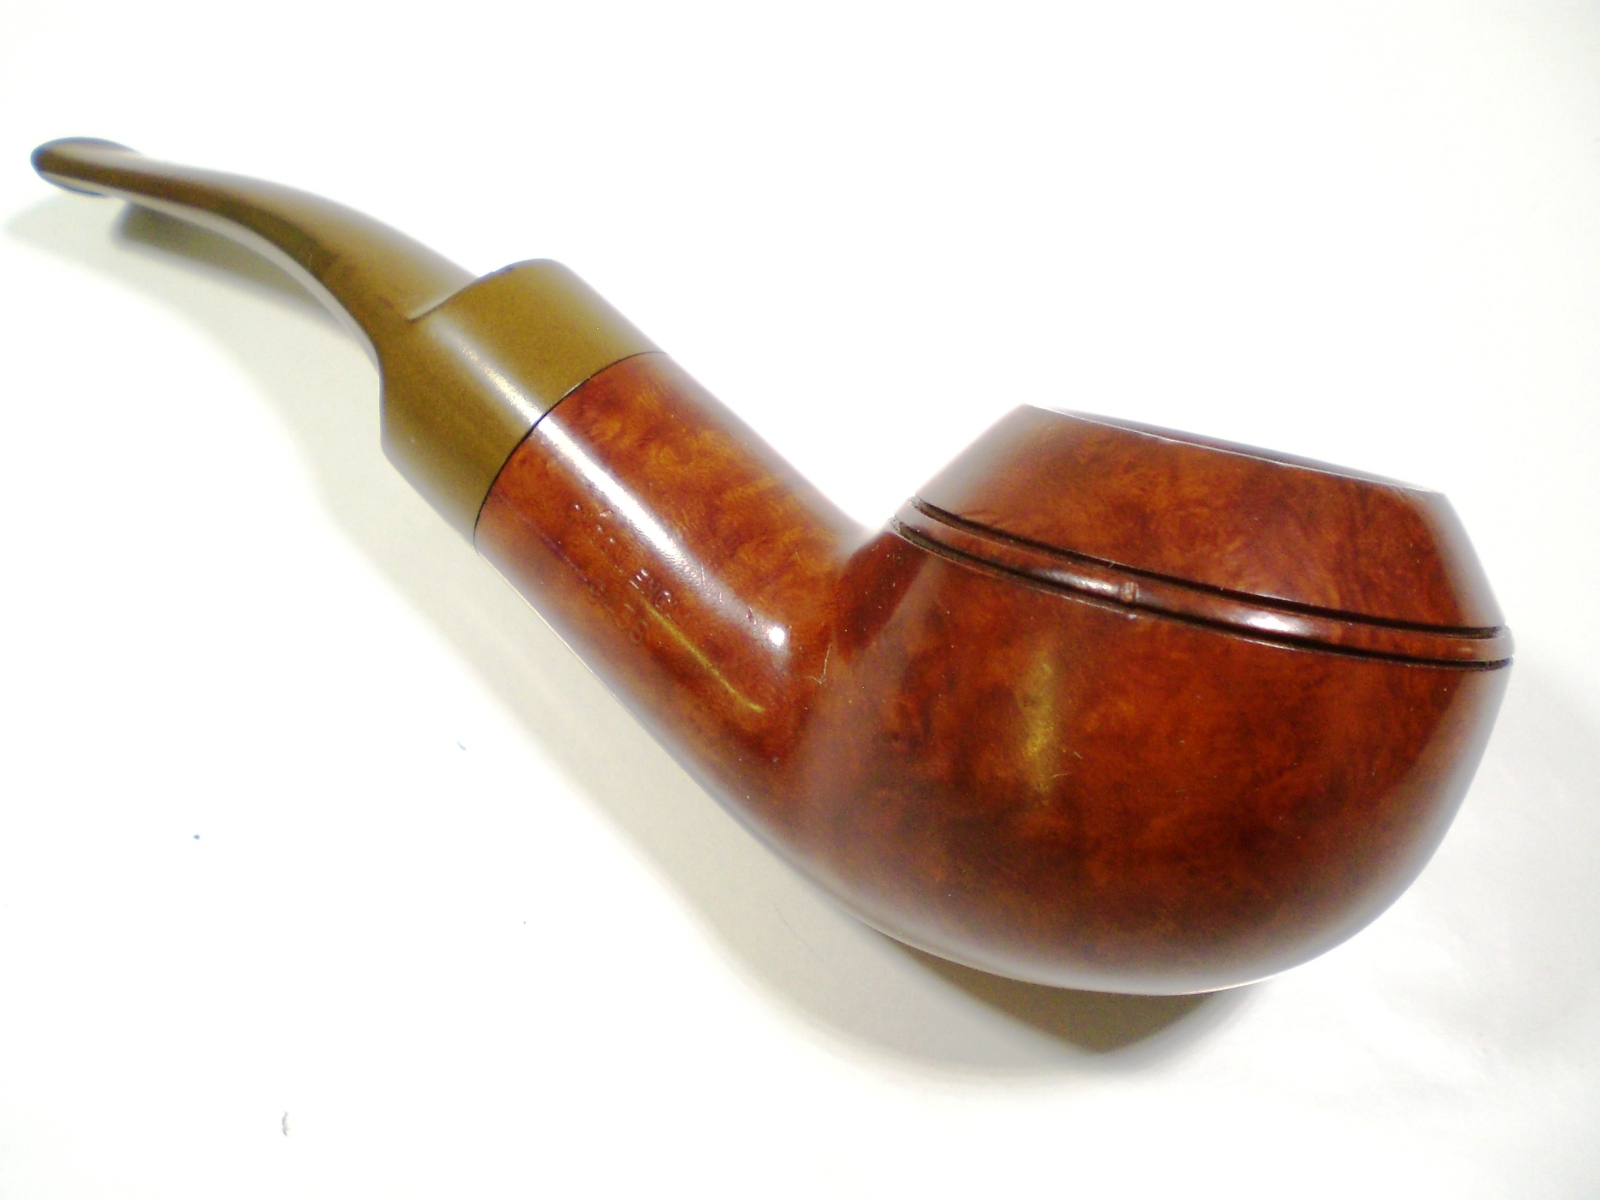
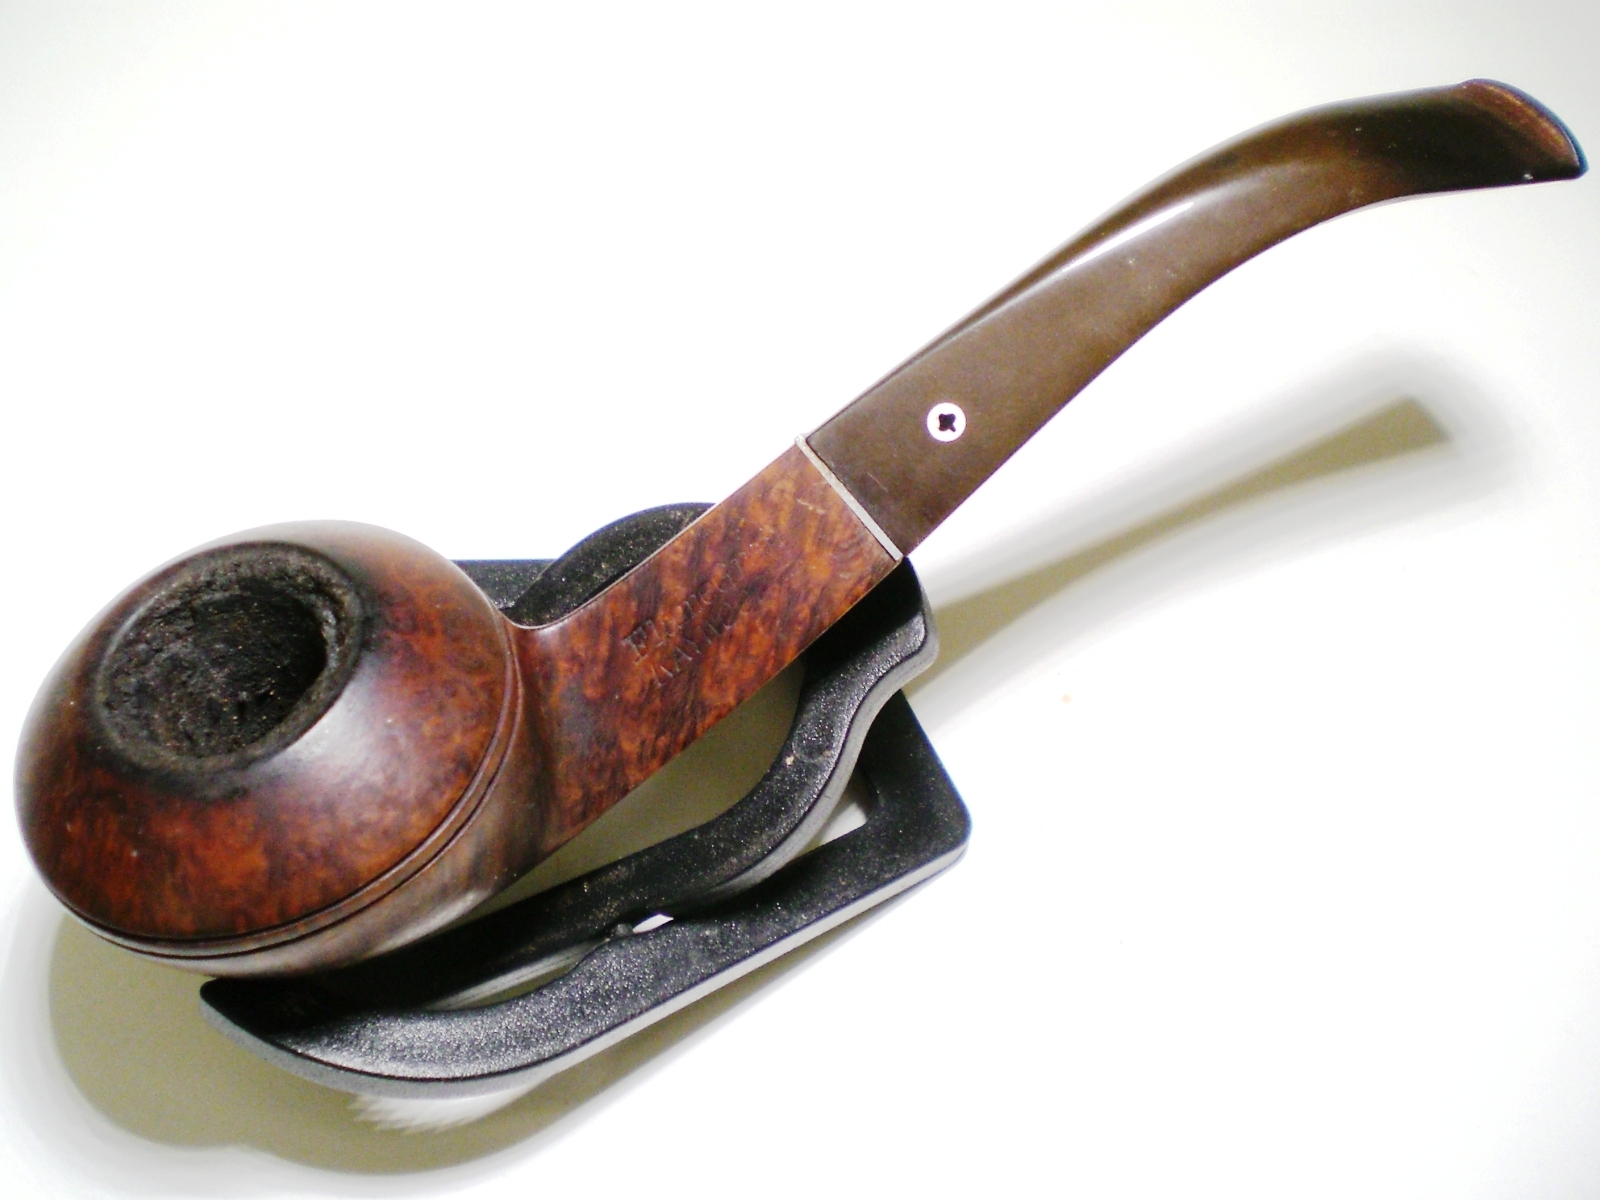
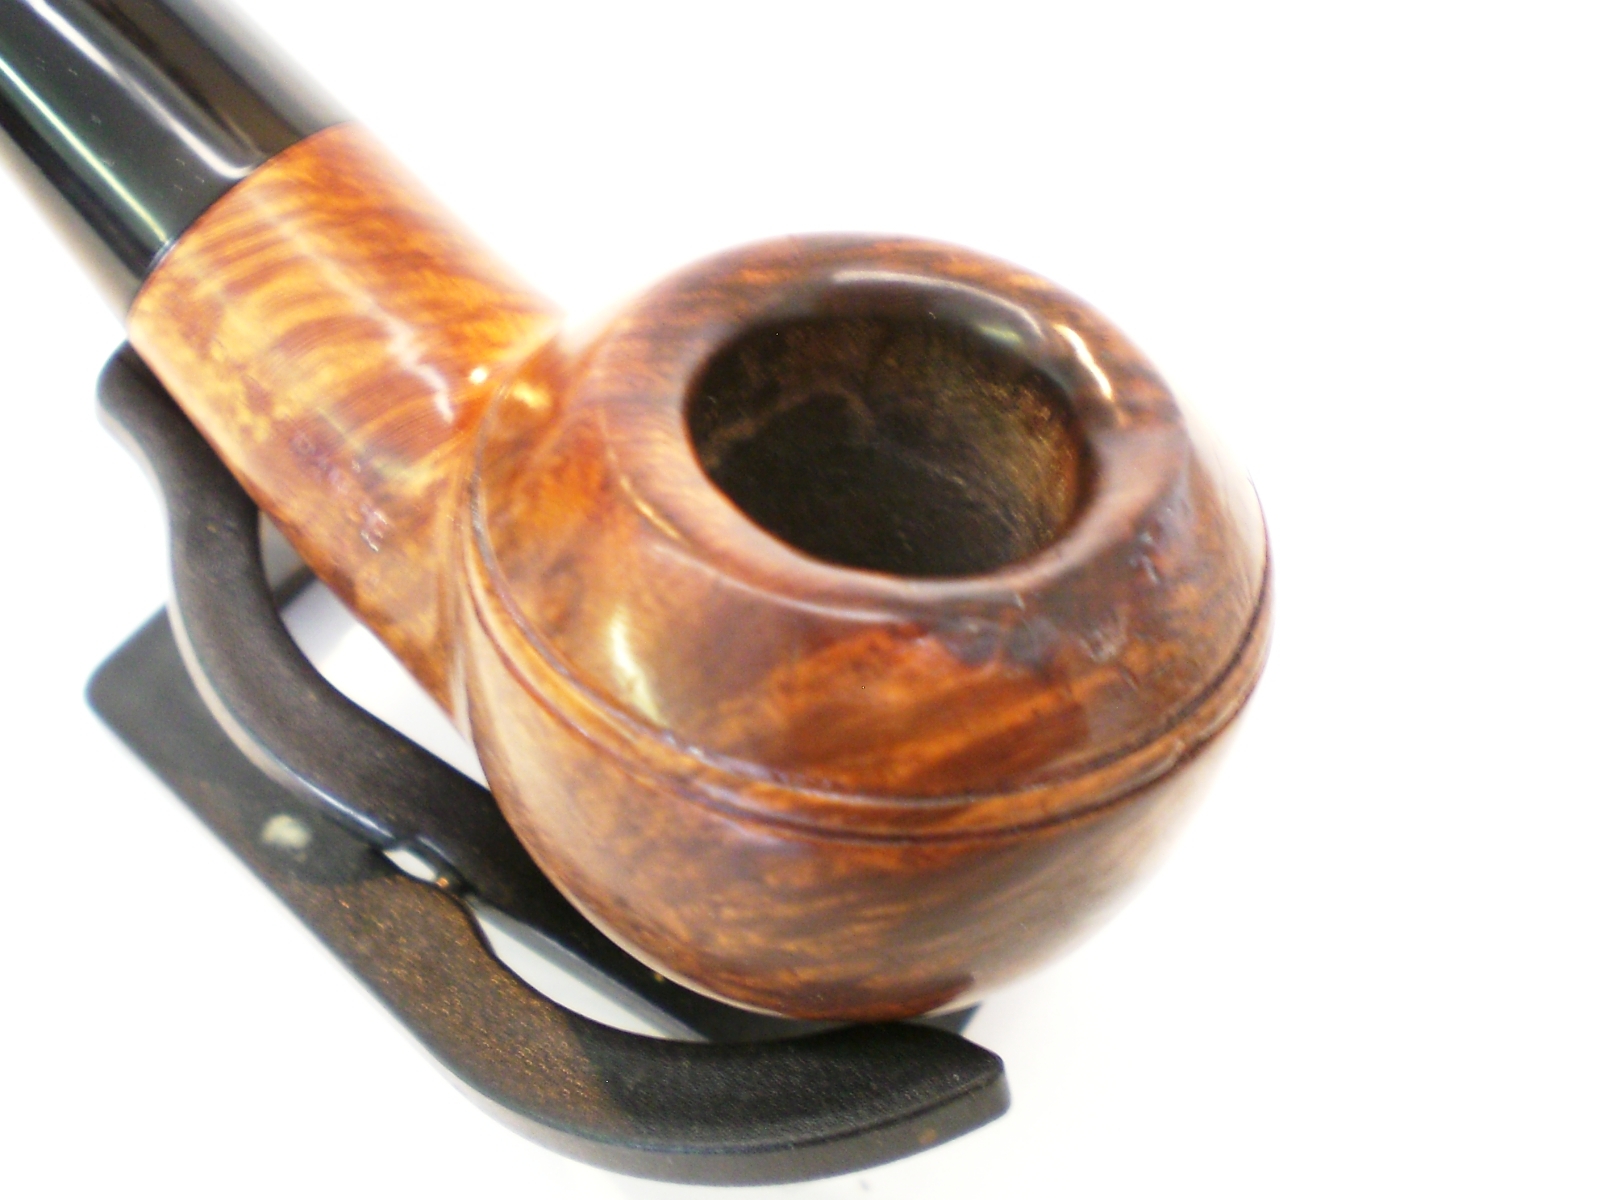
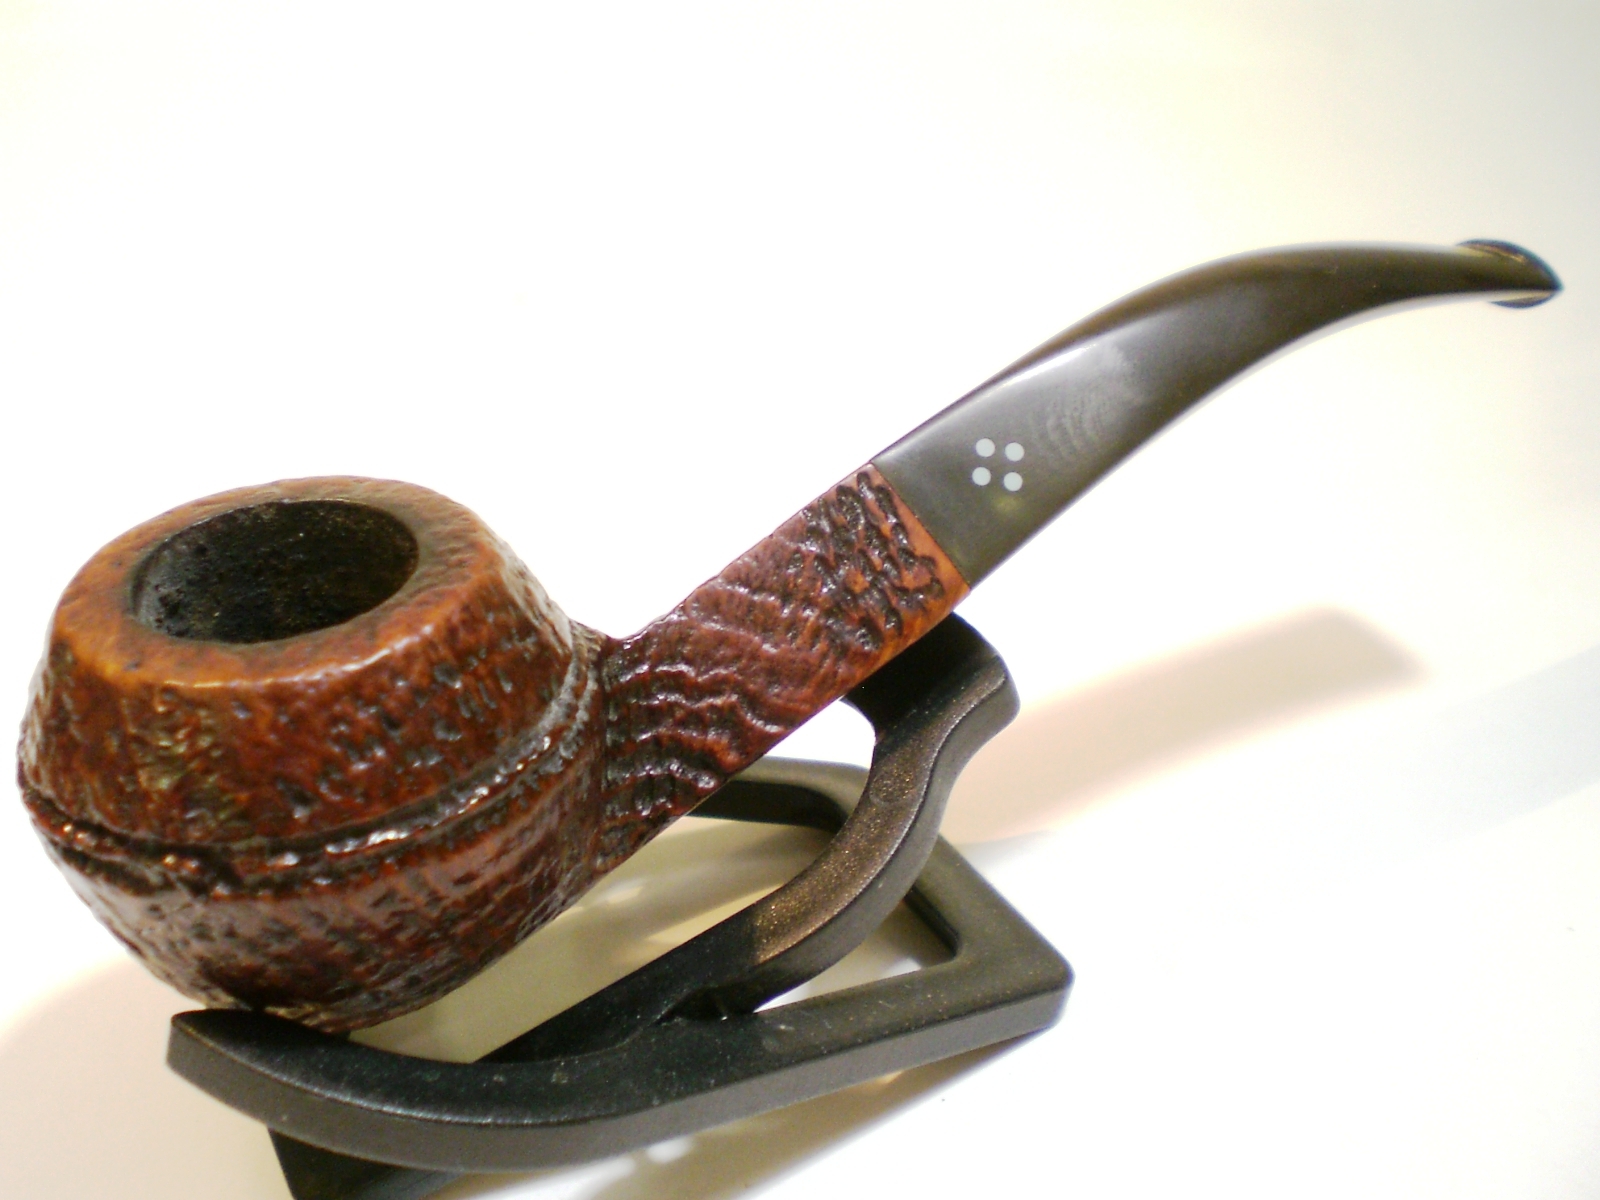
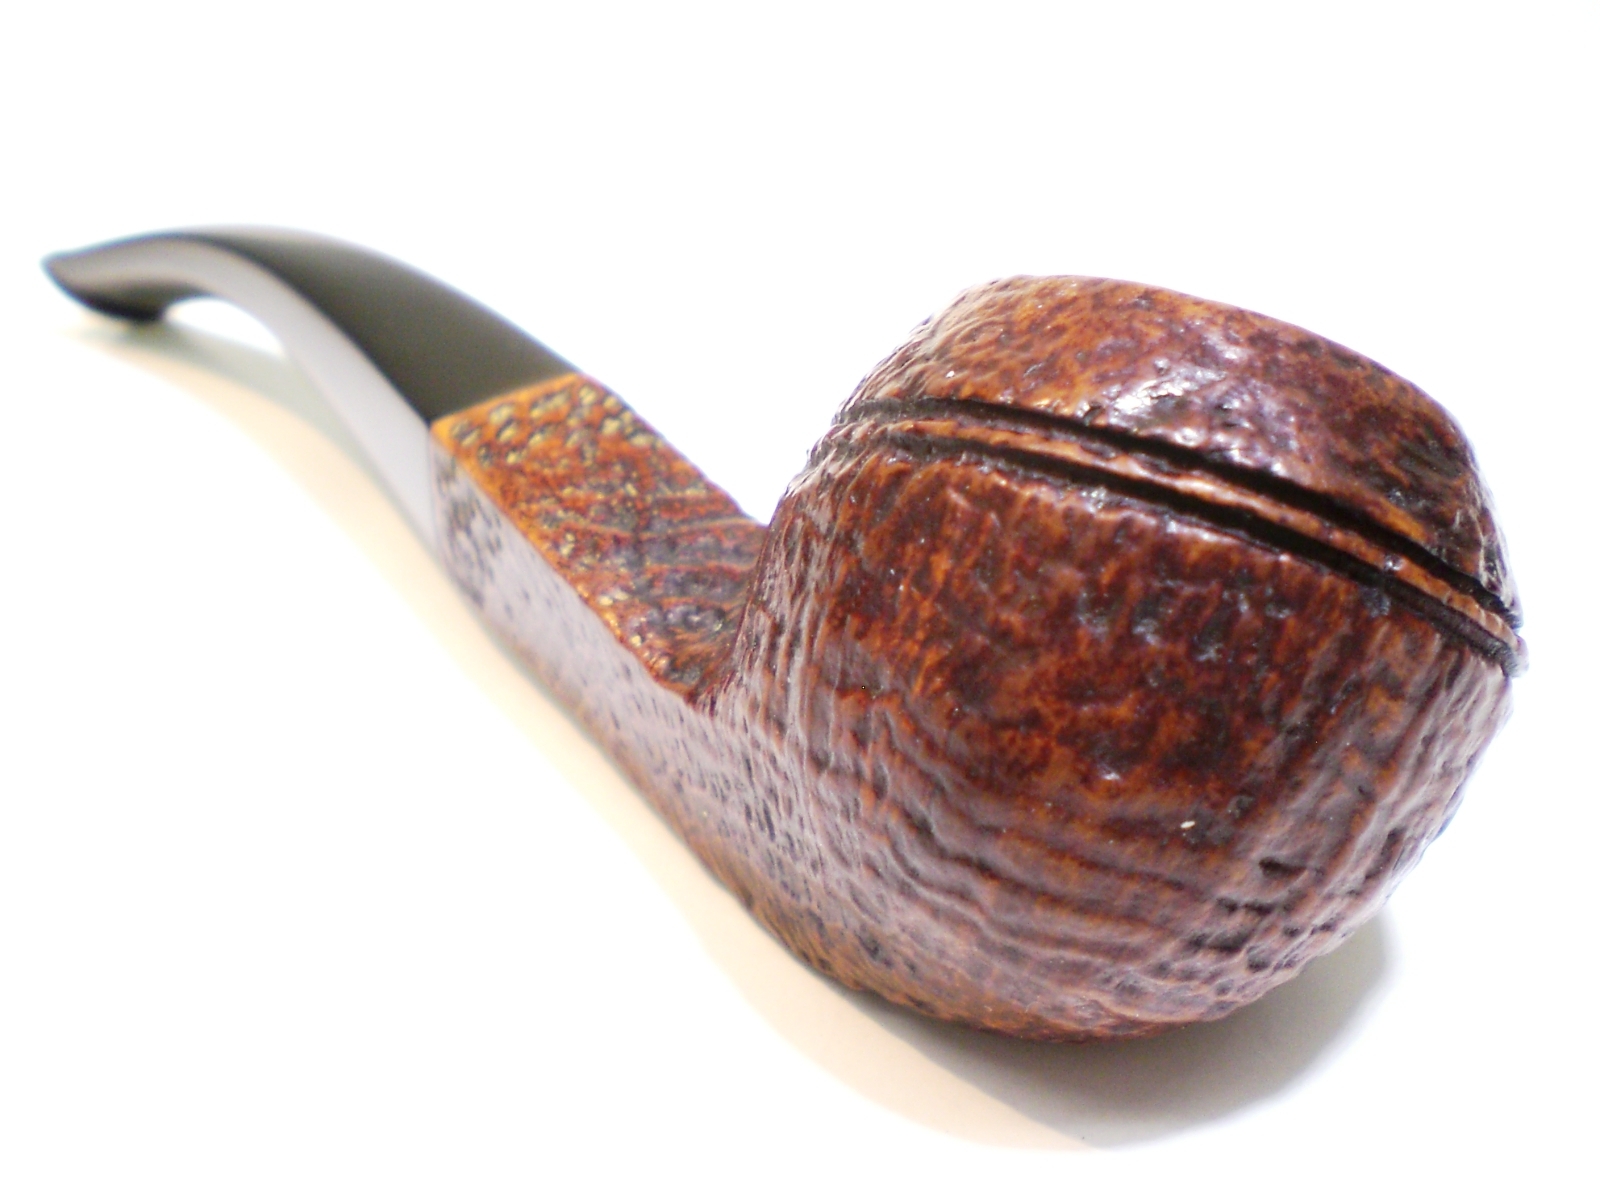
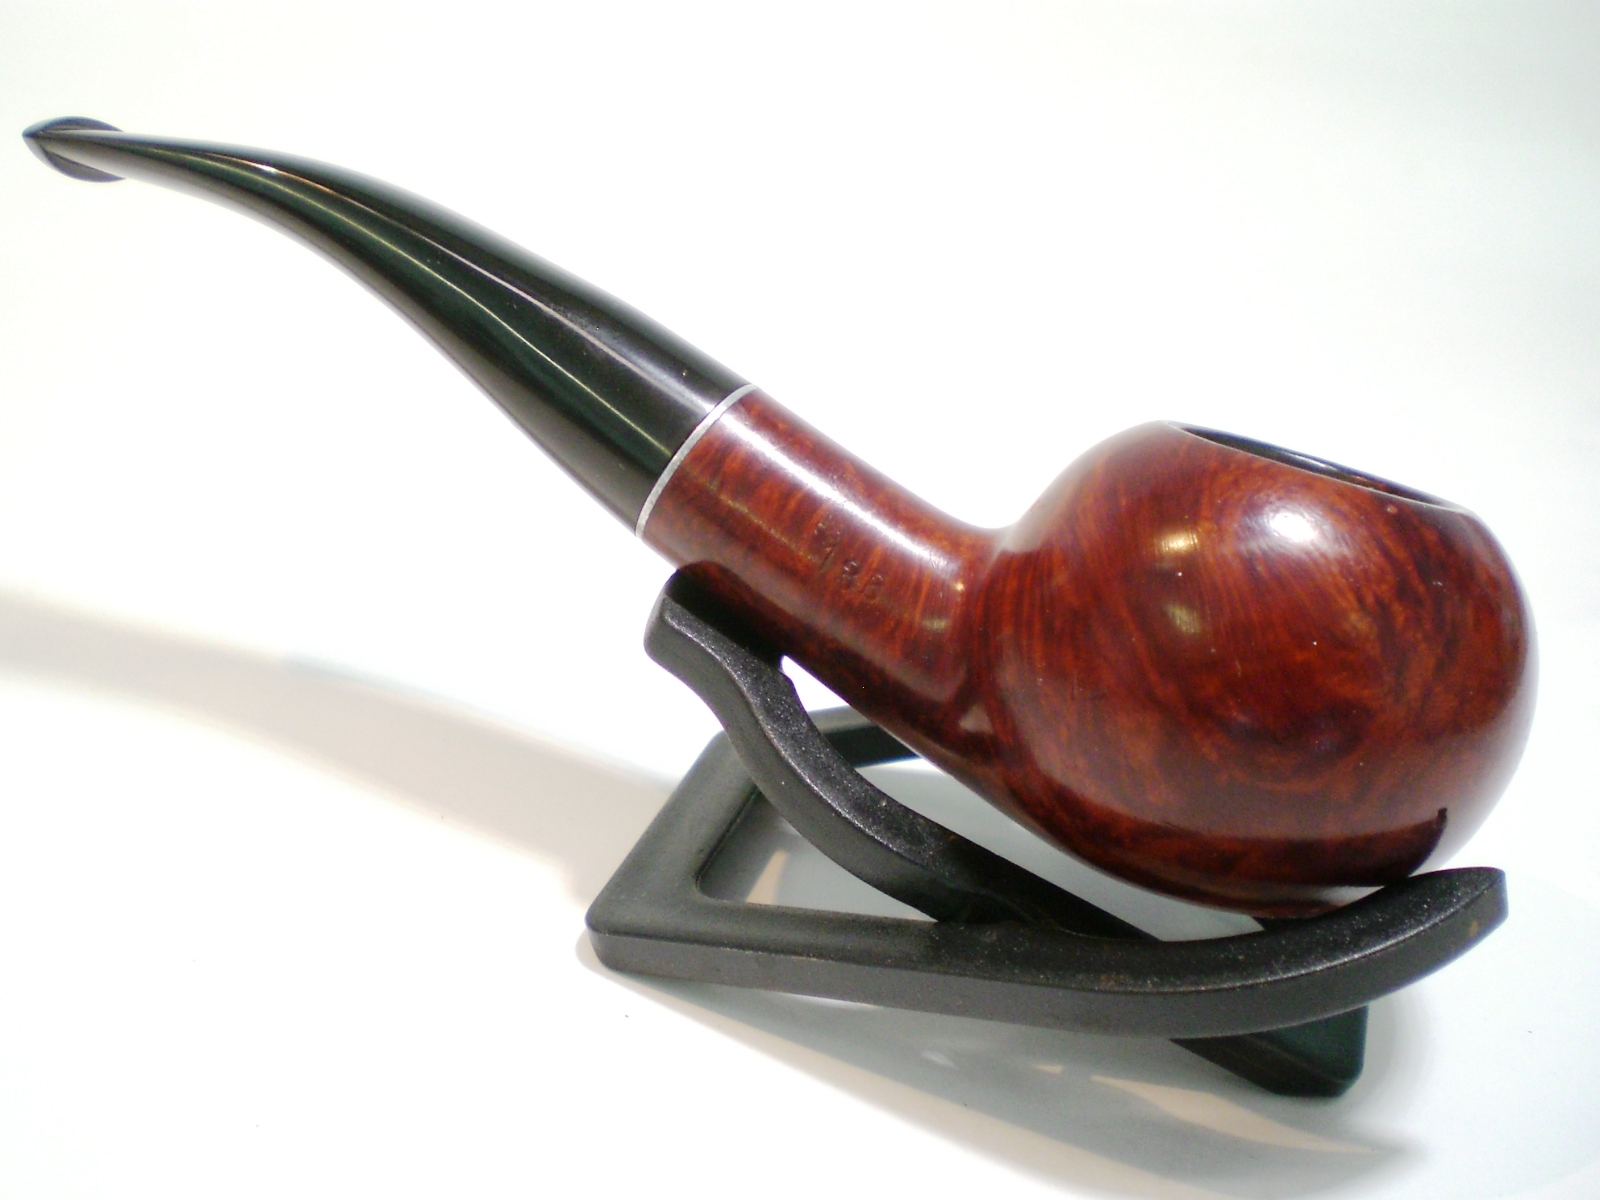
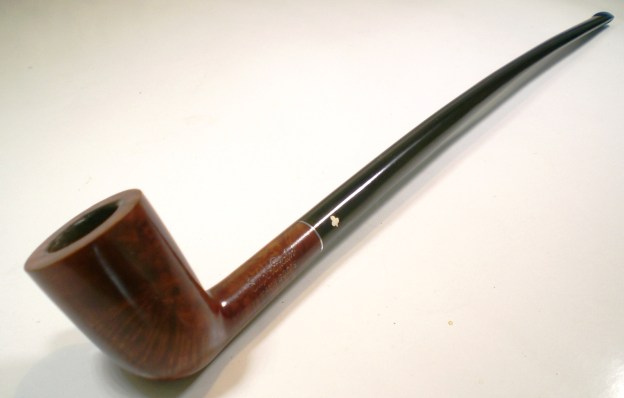
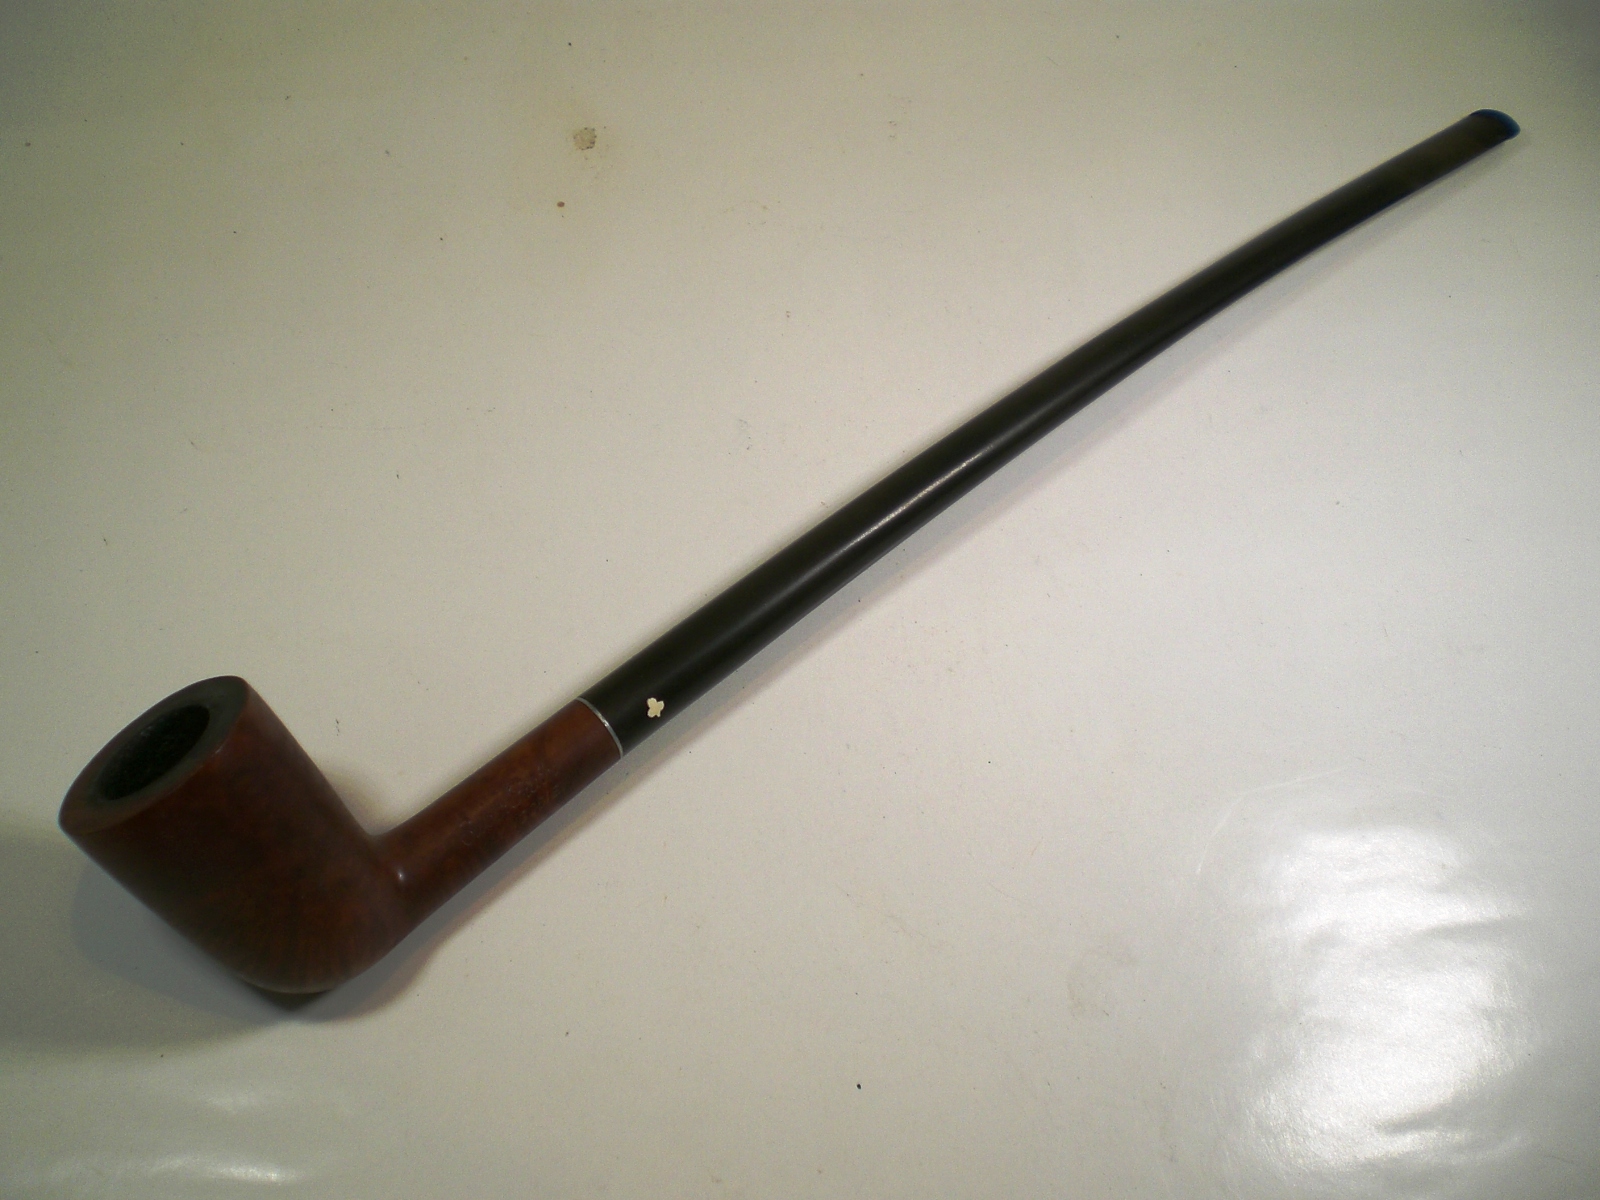
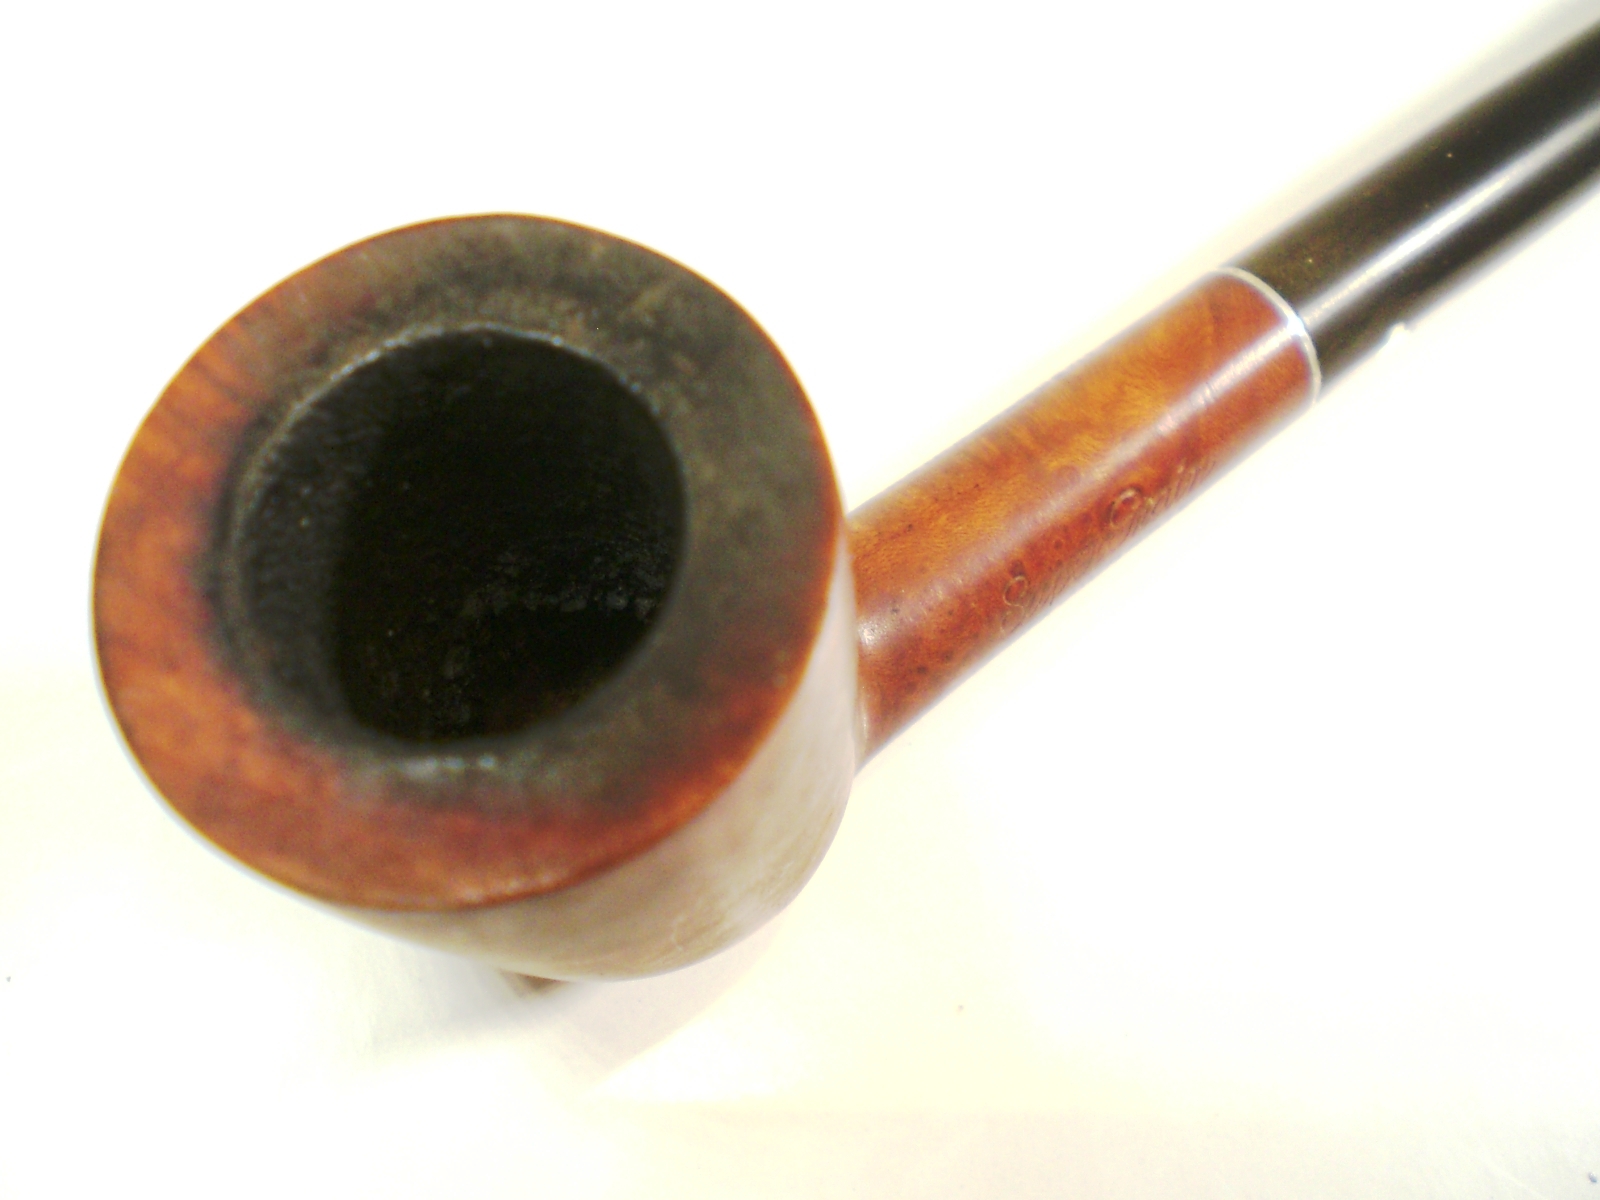
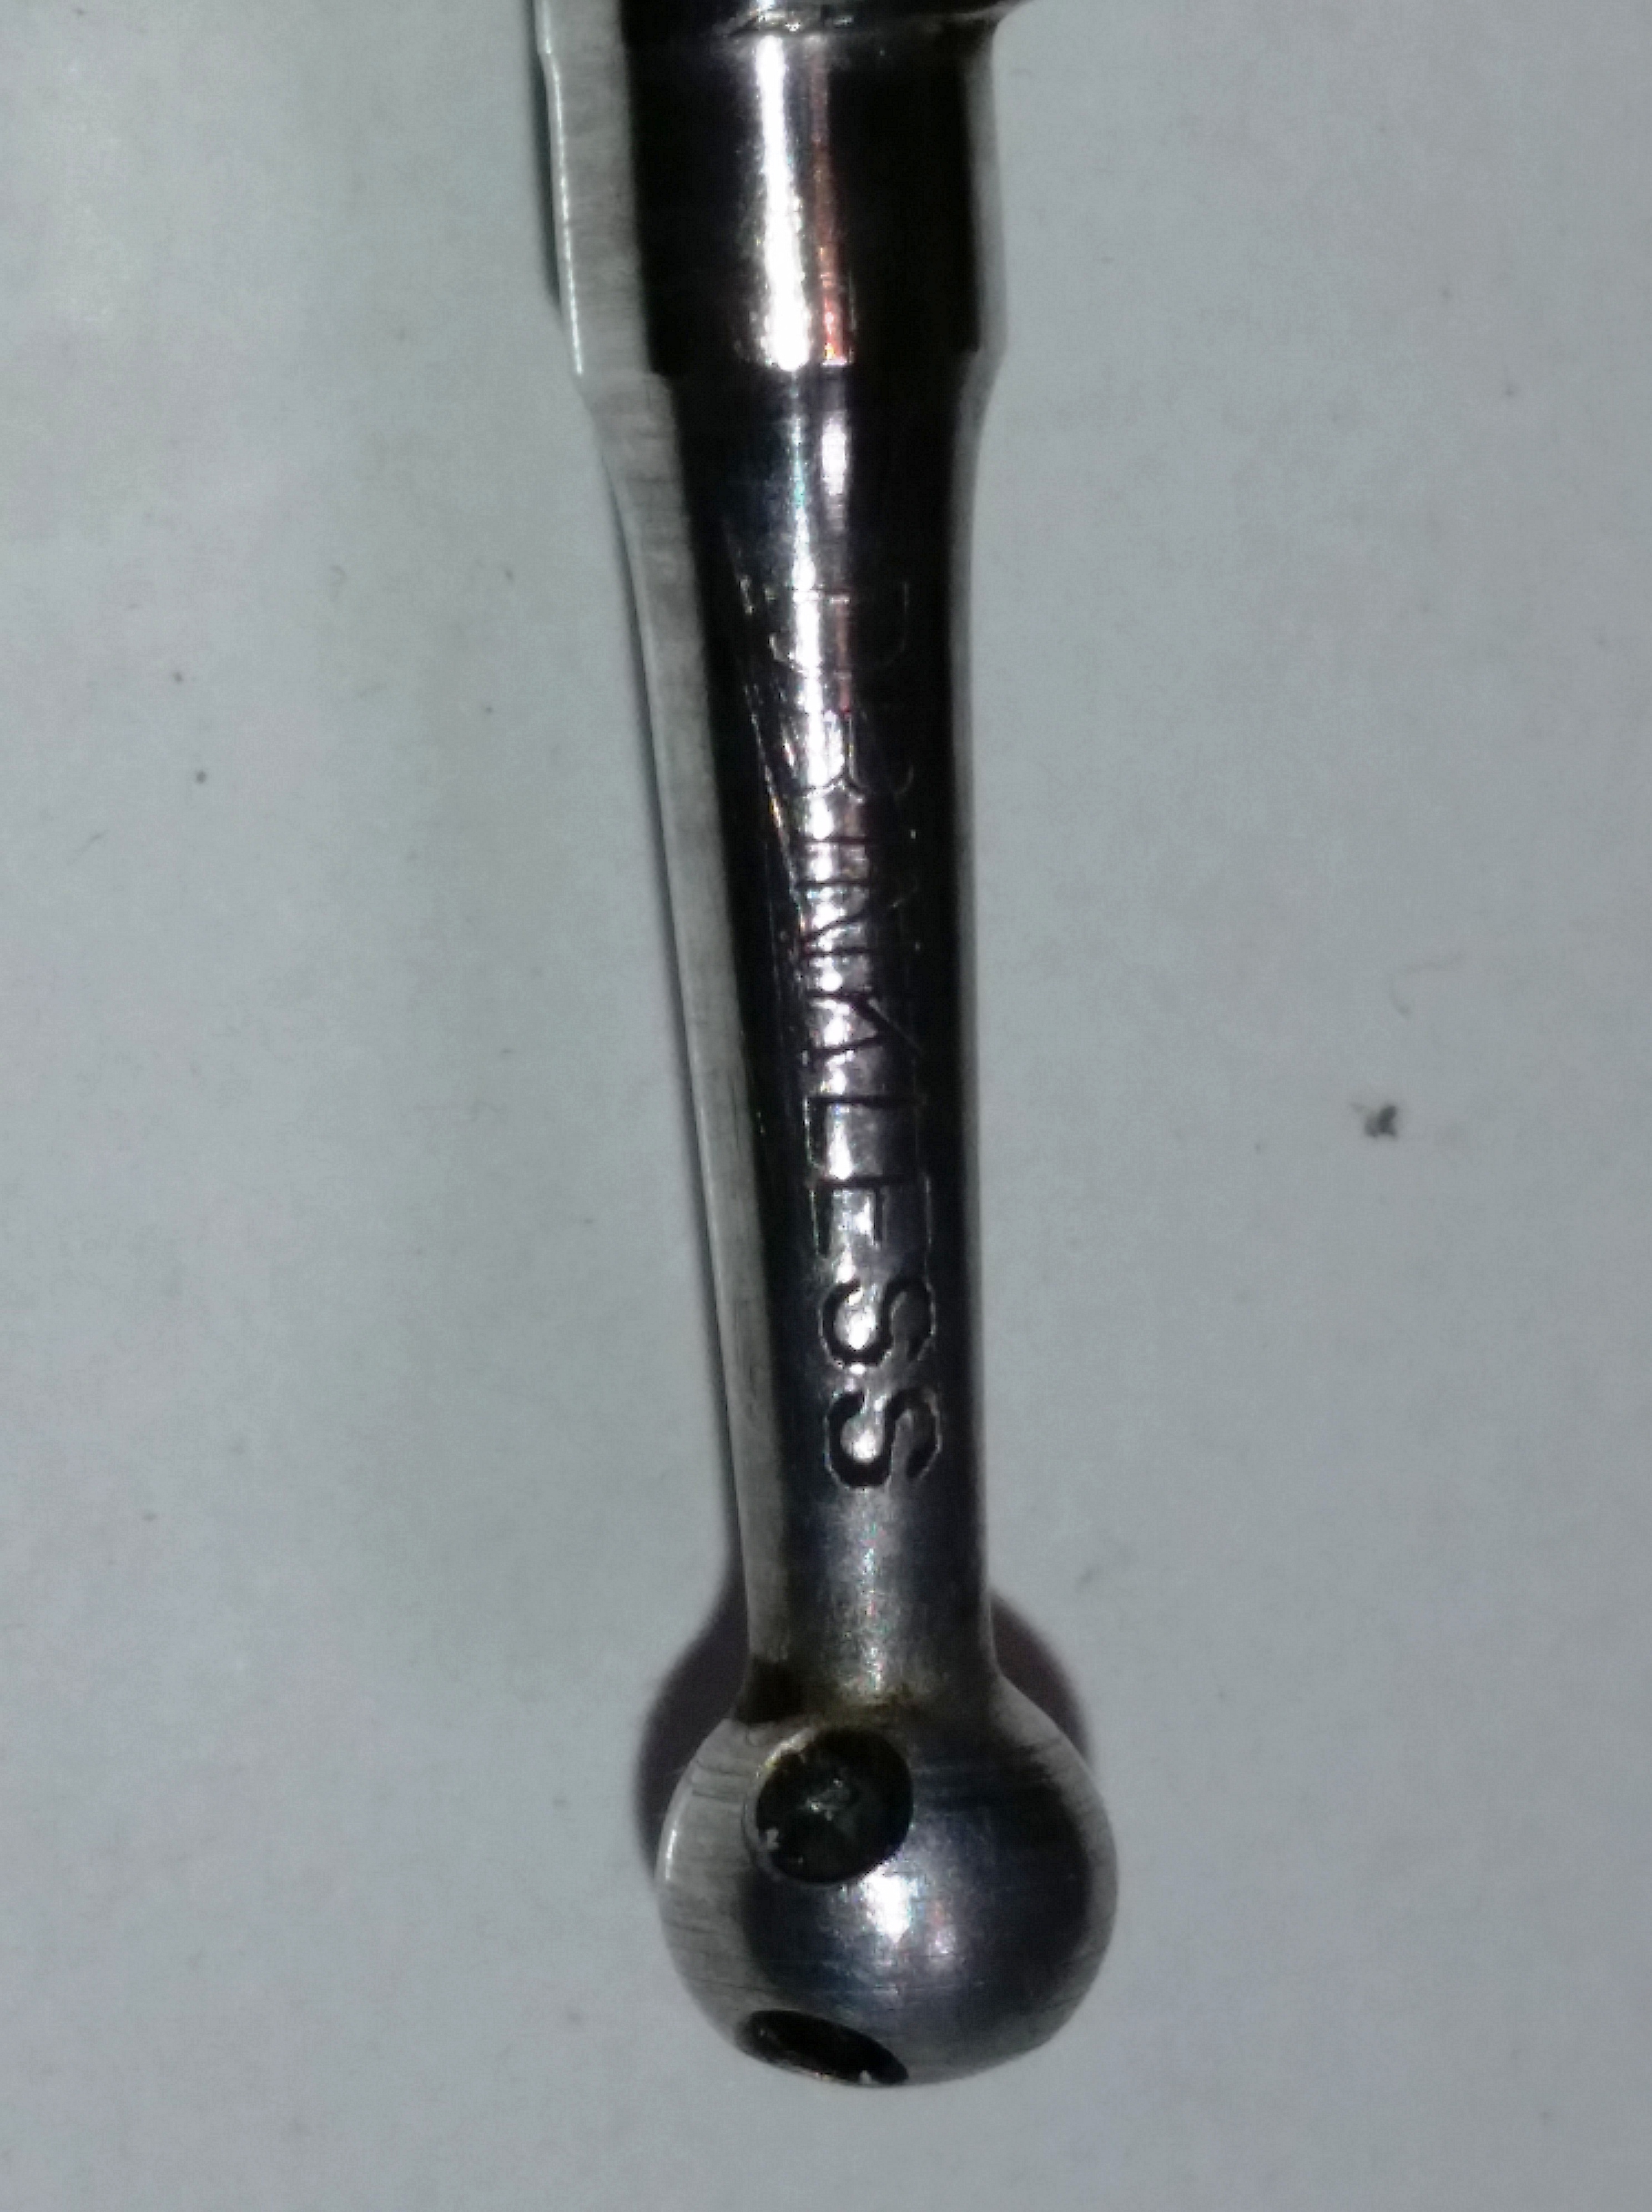
The pictures show some promise, but the bowl top had seen some abuse.  I didn’t know at the time if the pipe had the stinger intact.  I won the auction and waited in anticipation for the pipe.  When it was delivered, I was pleasantly surprised as the stem and briar looked to be in terrific condition.  And the icing on the cake was an intact 4-hole “Drinkless” stamped sting with a small ball.    The pipe is just under 12 inches long and weighs a svelte 32 grams.   Cleaning the briar and stem was a little nerve wracking as I didn’t want to damage the fragile looking pieces.

After the pipe was delivered, I exchanged some communication with the seller.  I learned that original owner was the Great uncle of the sellers wife.  His name was Harvey Shue and he was from Spring Grove Pennsylvania. Harvey worked for the PH Gladfelter Paper Mill. He passed in 1971 at the age of 64. His wife Florence held on to the pipes. Florence passed away in 1996 and the family found 50 pipes in a dresser drawer from their home.  It’s pretty rare to find out the history of a pipe.  Now I know a little bit about this one.  Harvey lived pretty close to where my brother currently lives in Pennsylvania.

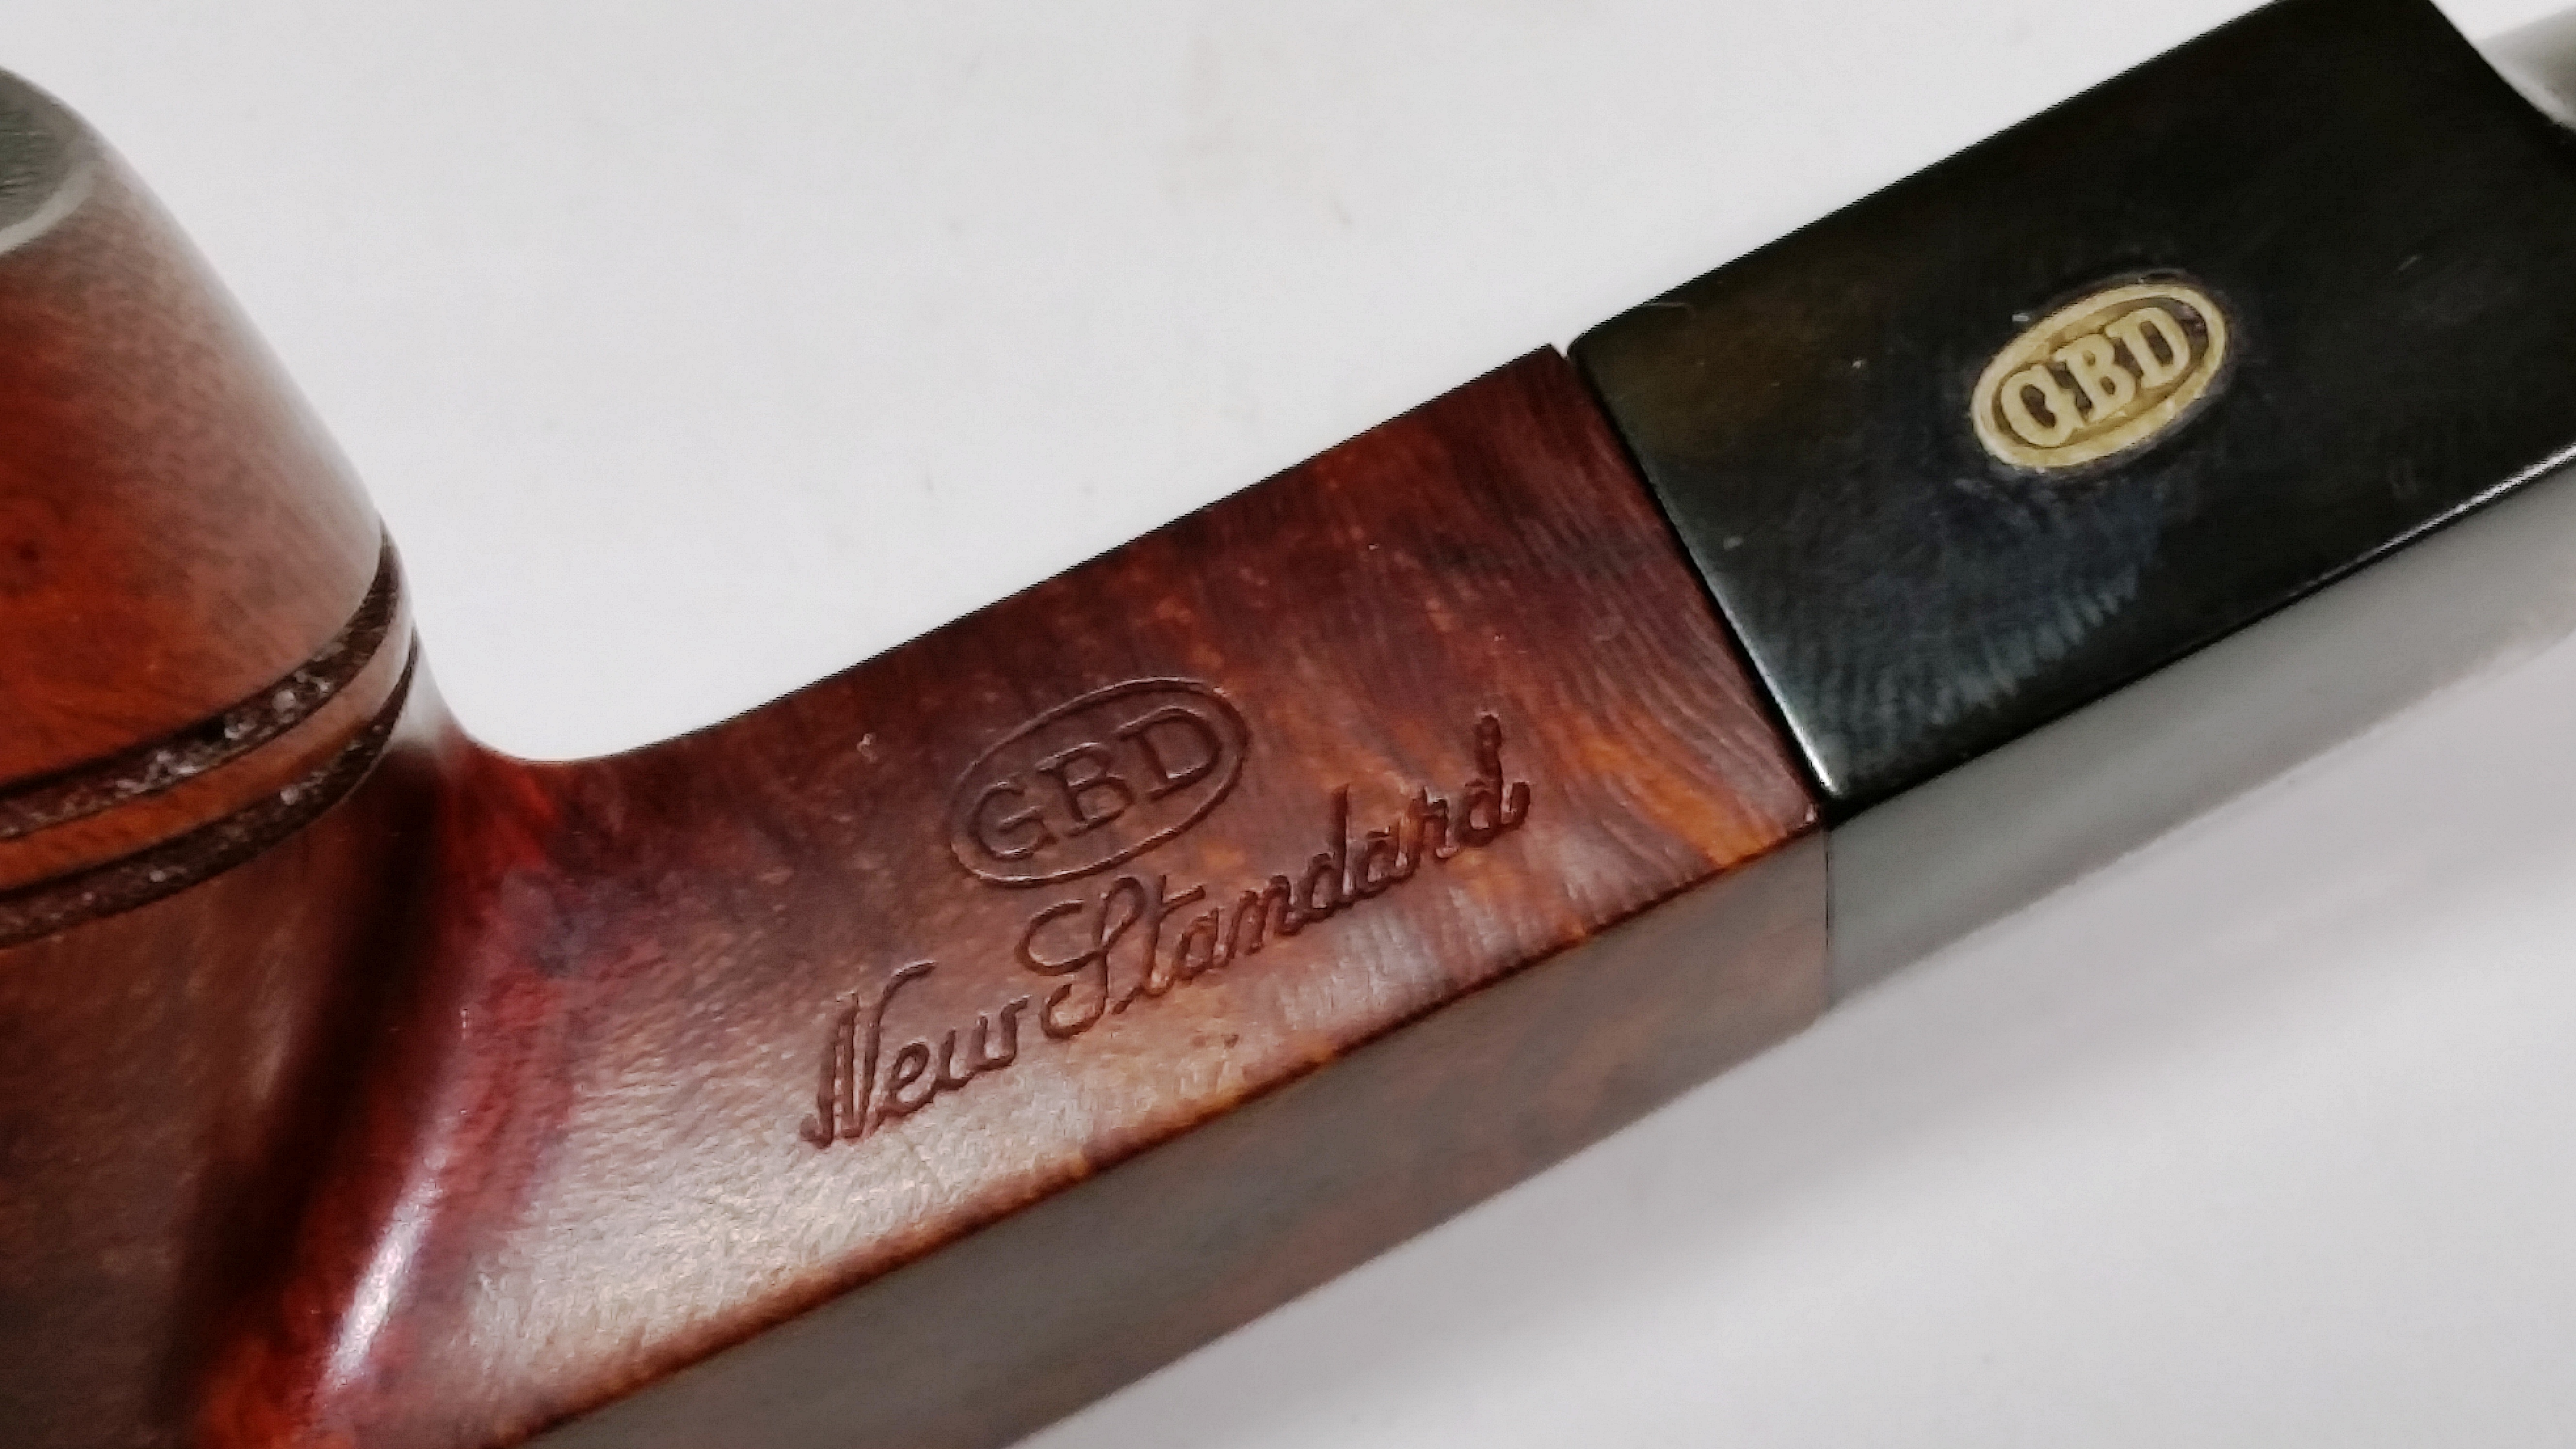
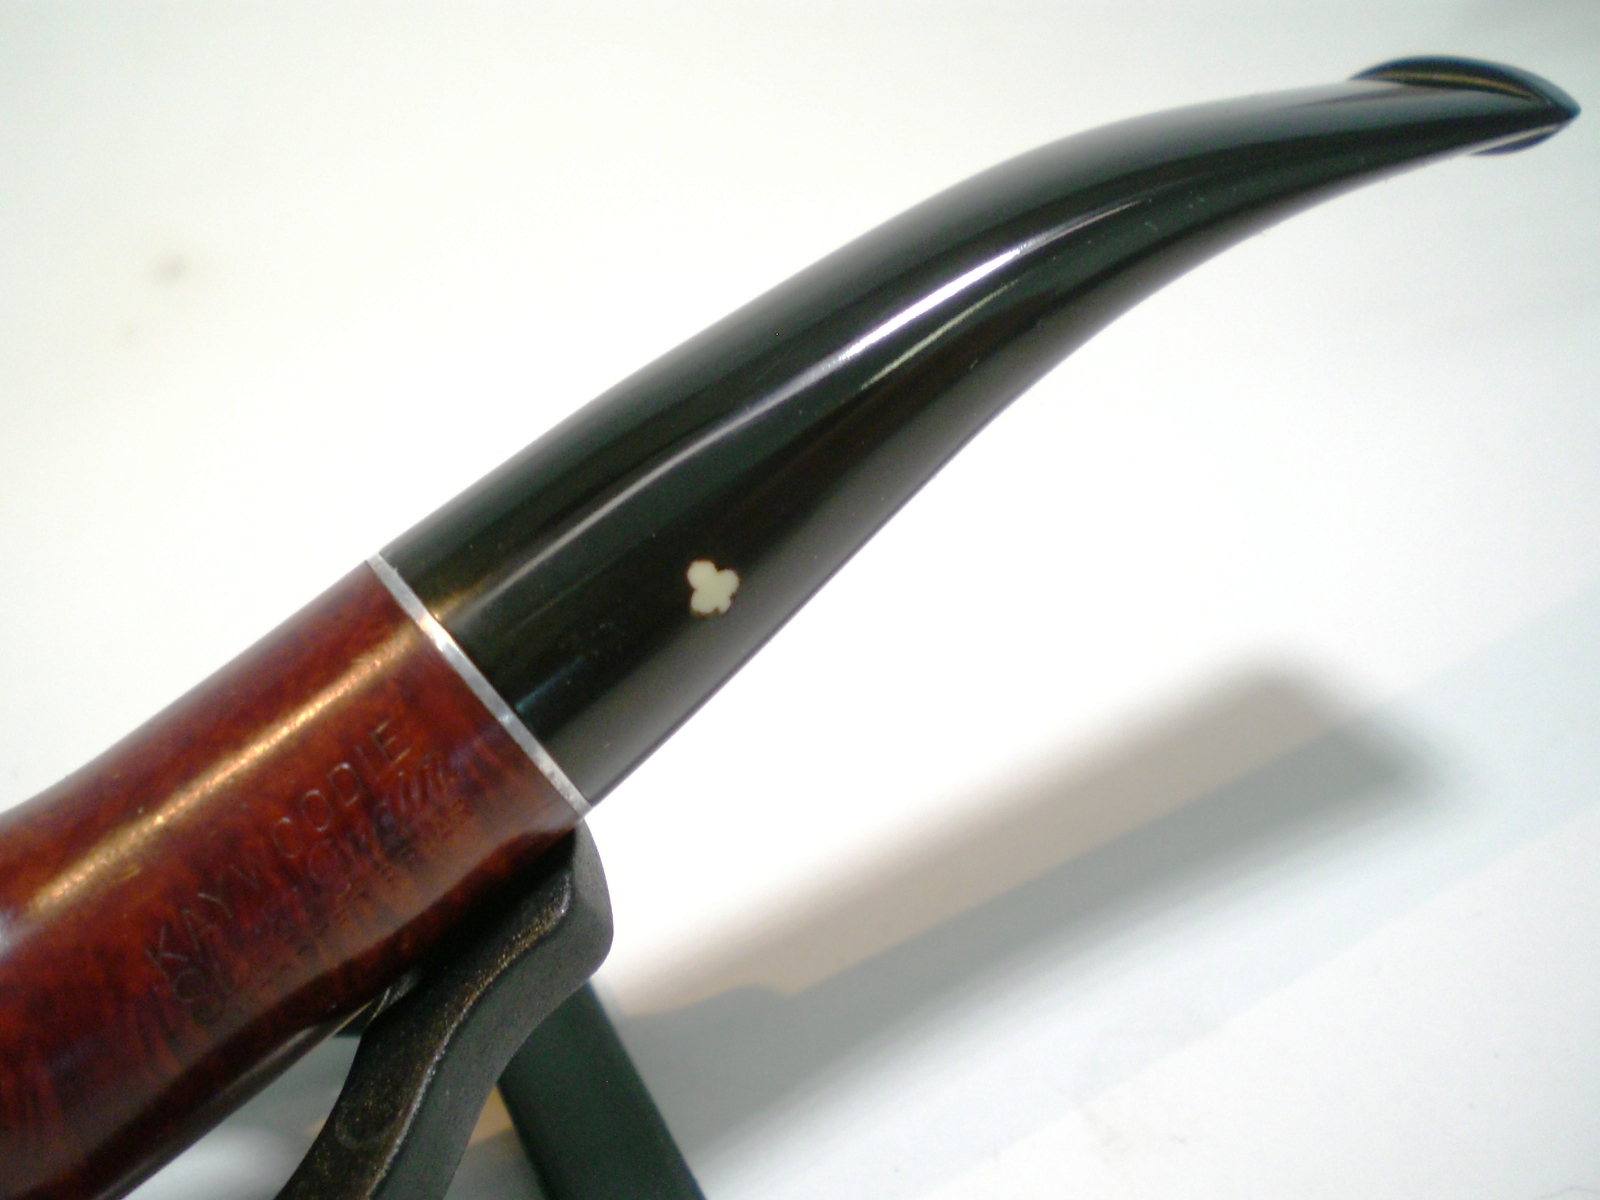
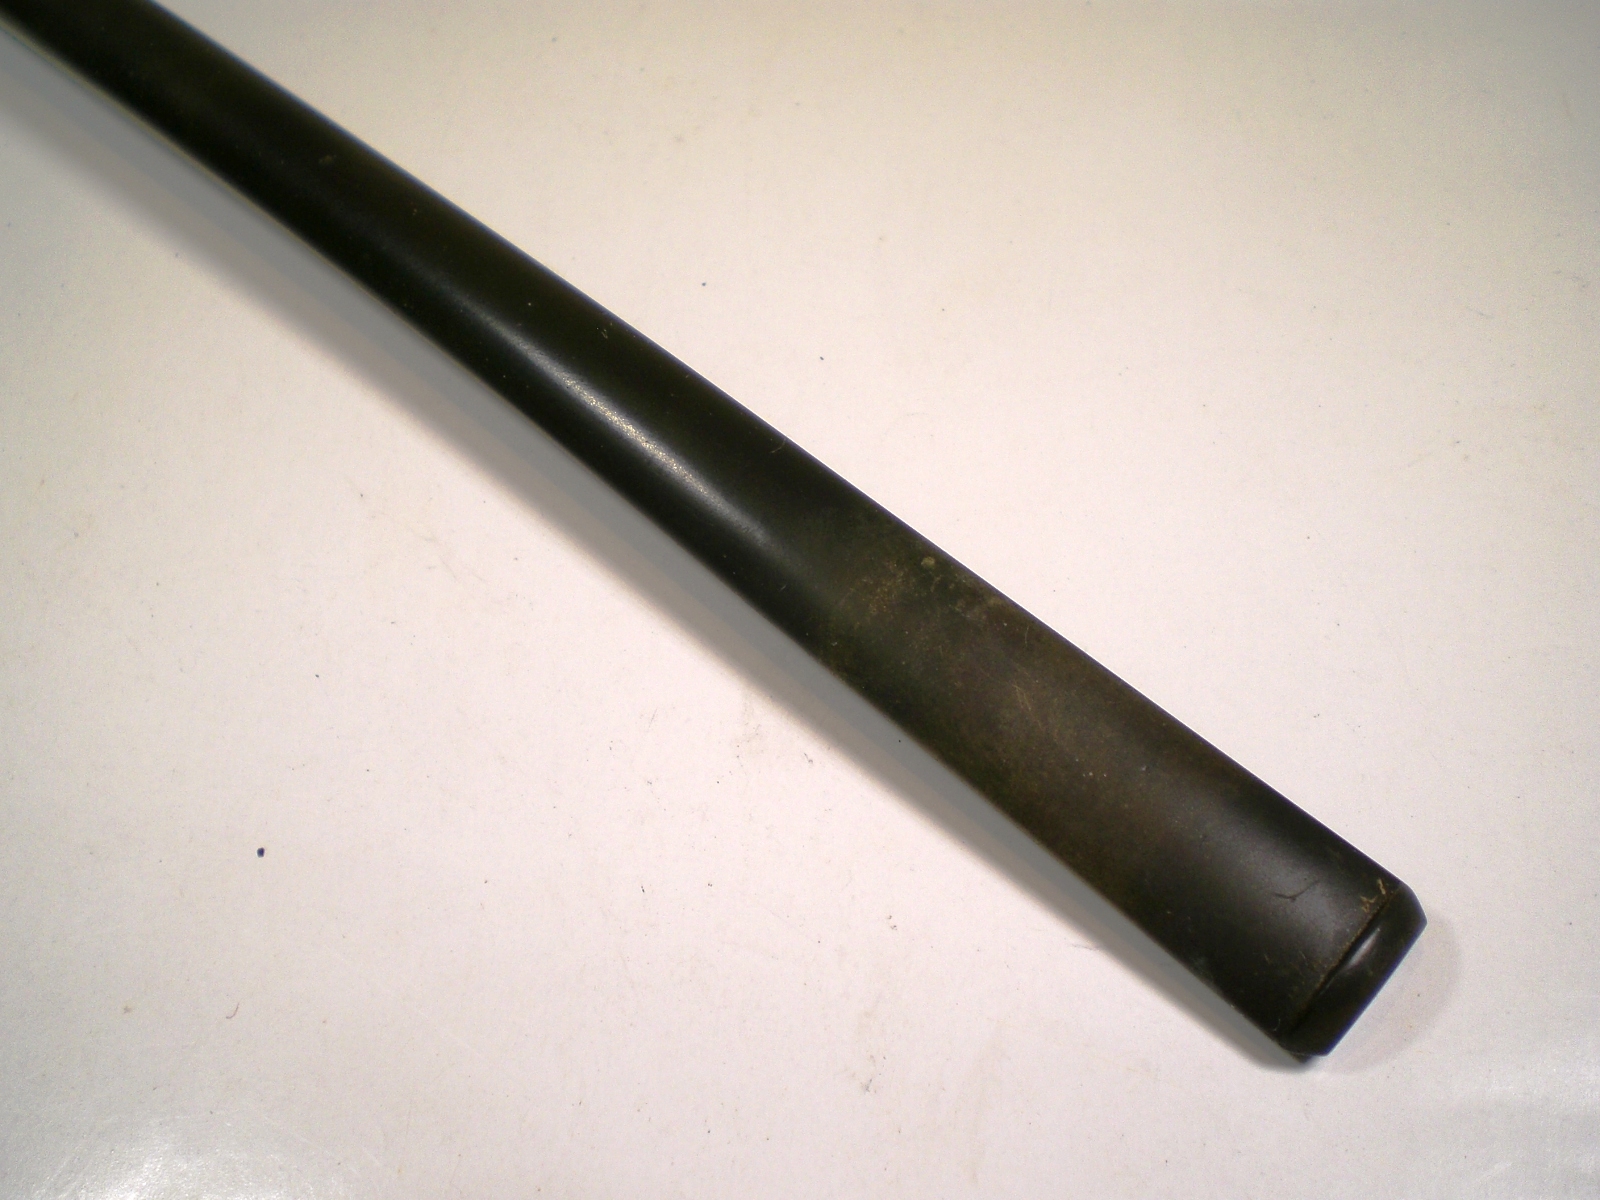
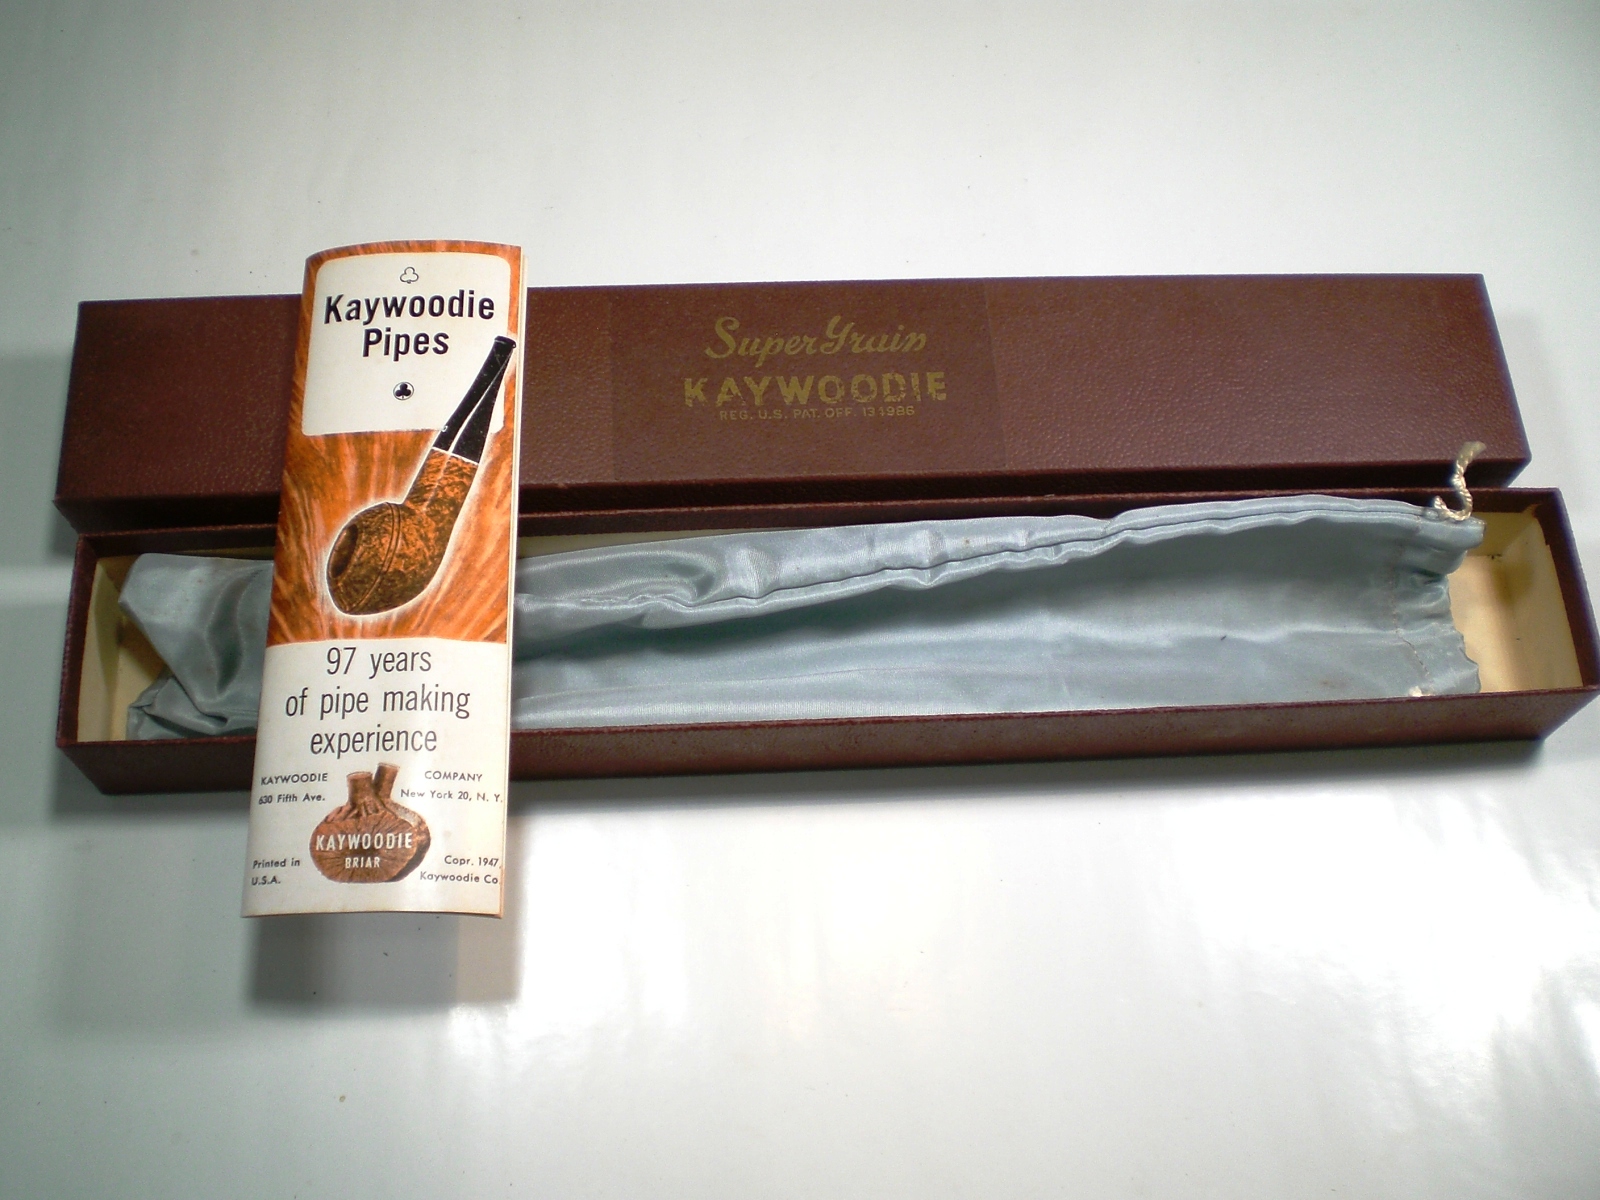
This is the pipe as it was delivered.  The box is in great shape and a literature piece was also included.  The stem only had light oxidation and the nomenclature was like new.

Kaywoodie_Supergrain_95_Before Kaywoodie_Supergrain_95_Before (1) Kaywoodie_Supergrain_95_Before (2) Kaywoodie_Supergrain_95_Before (4) Kaywoodie_95_Supergrain_4-Stinger (1) Kaywoodie_Supergrain_95_Before (3) Kaywoodie_Supergrain_95_Before (7)

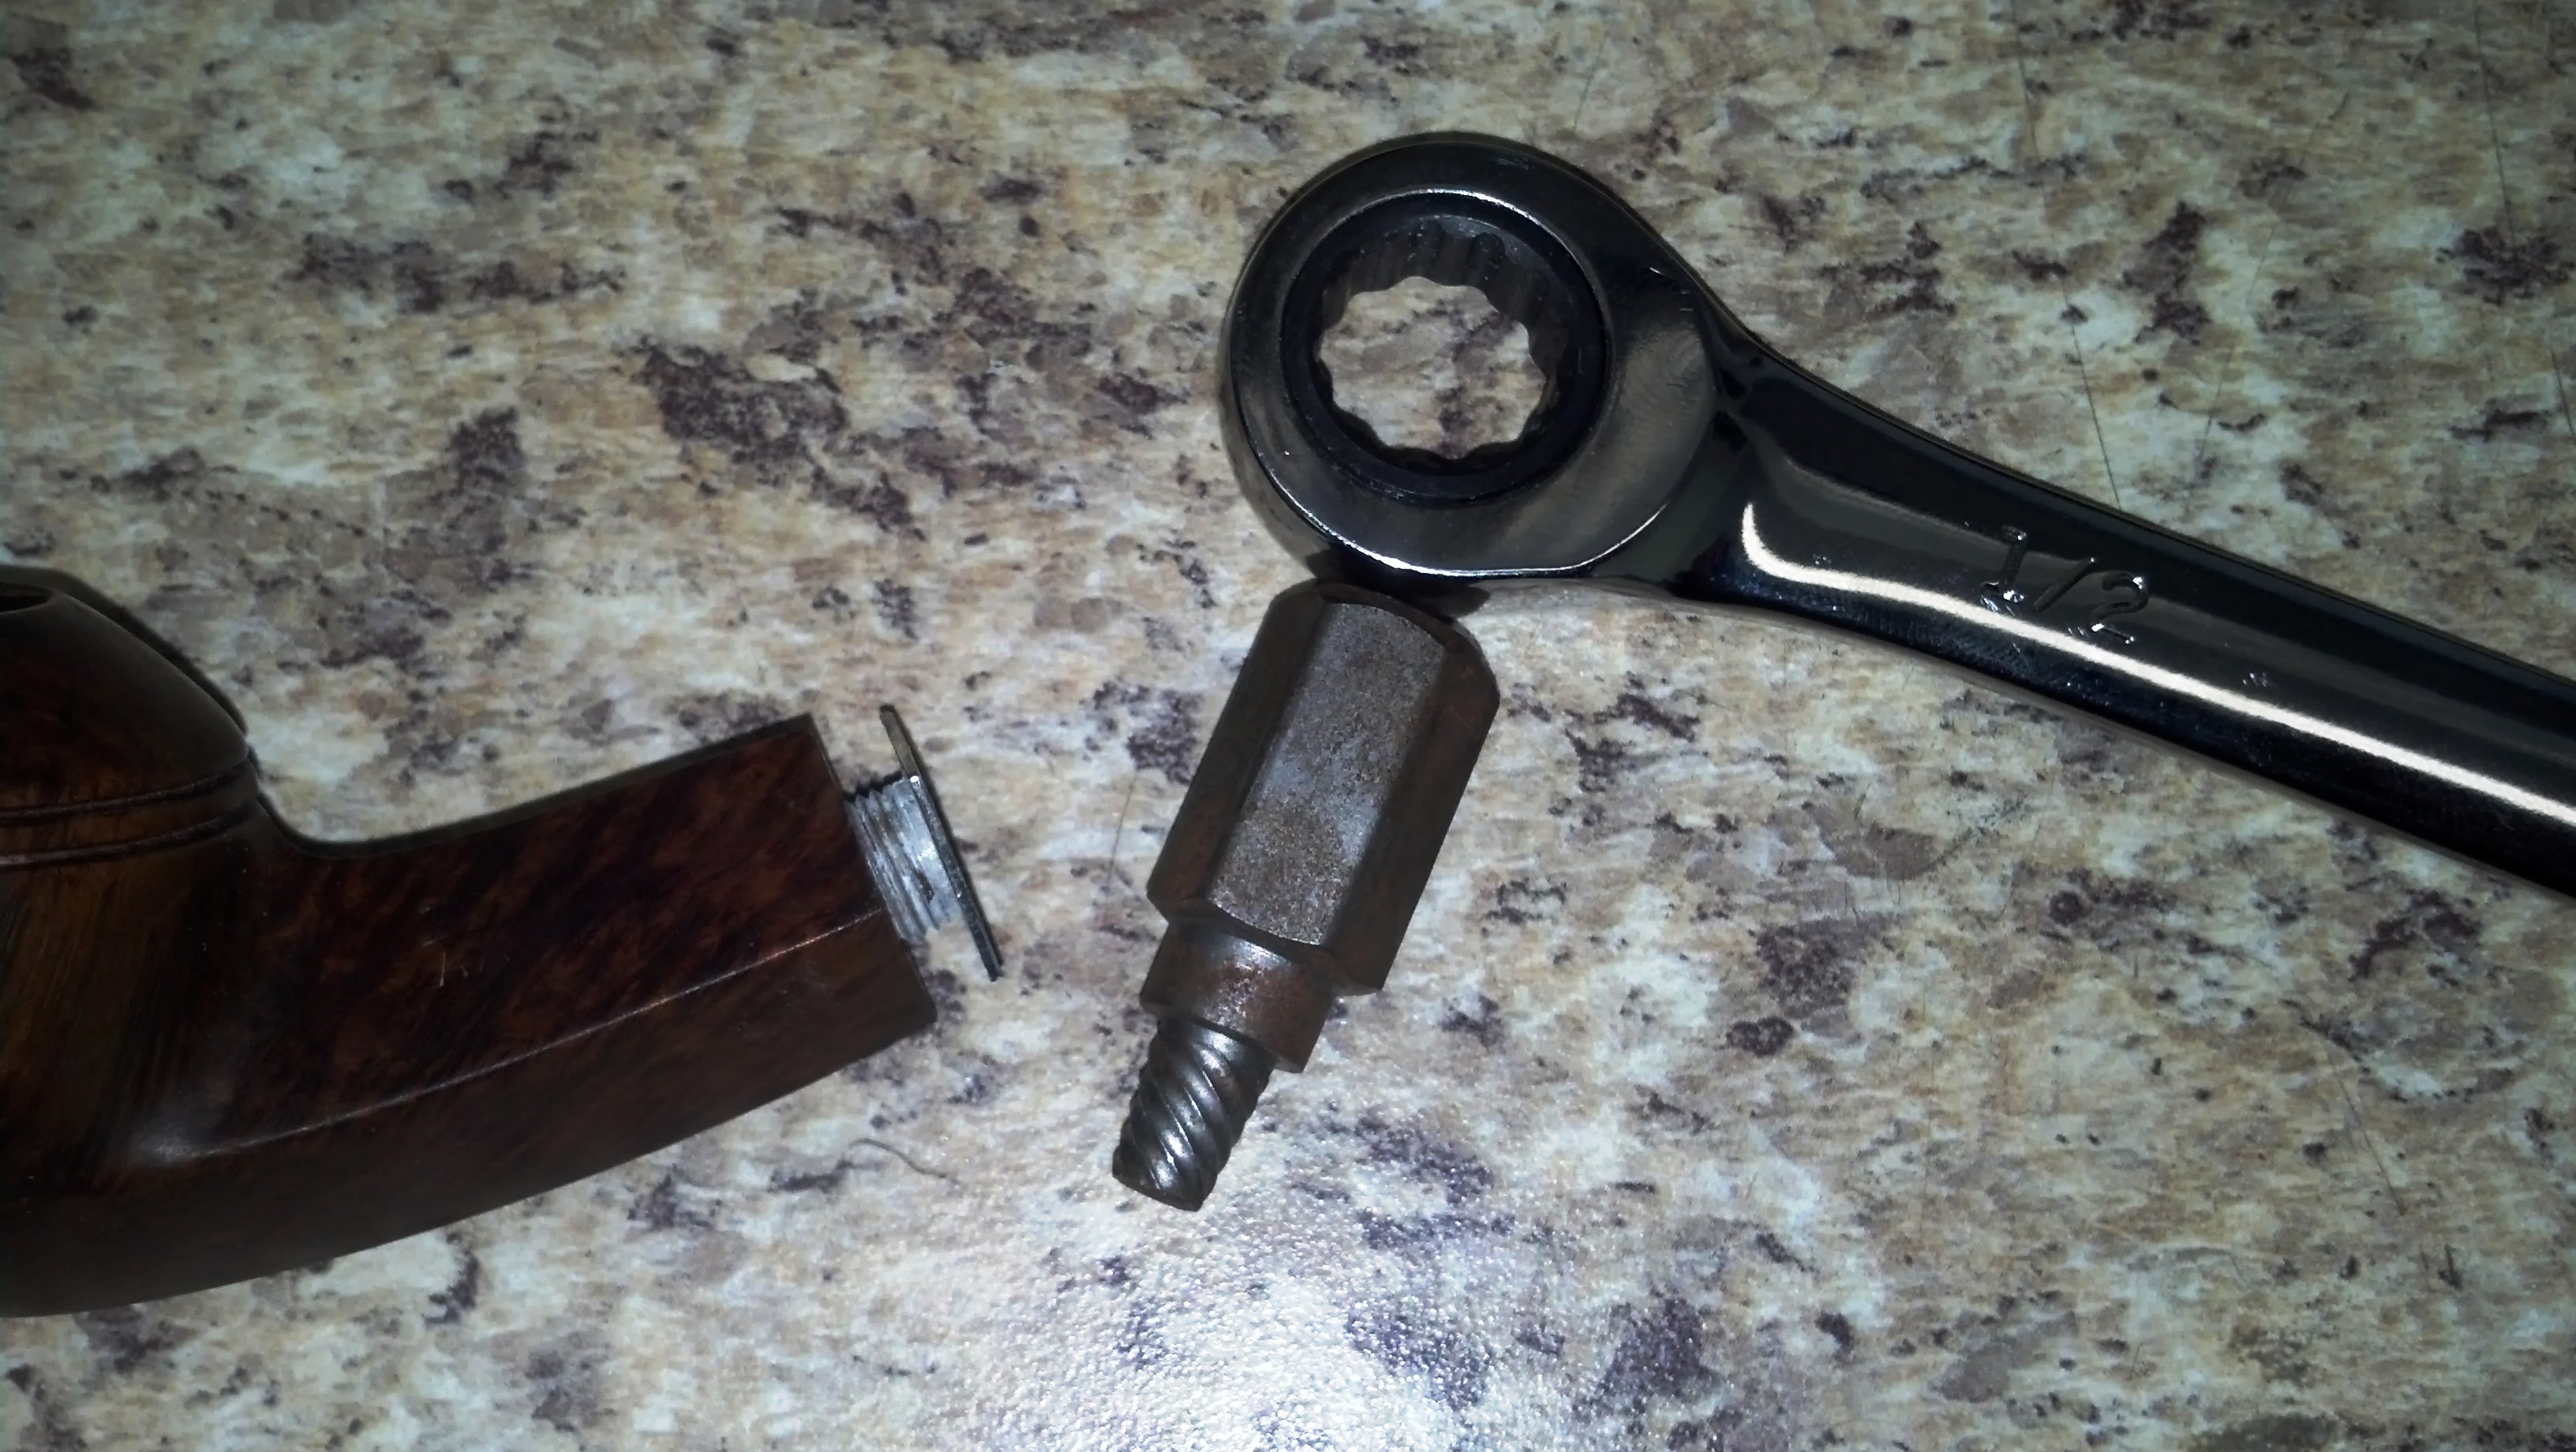
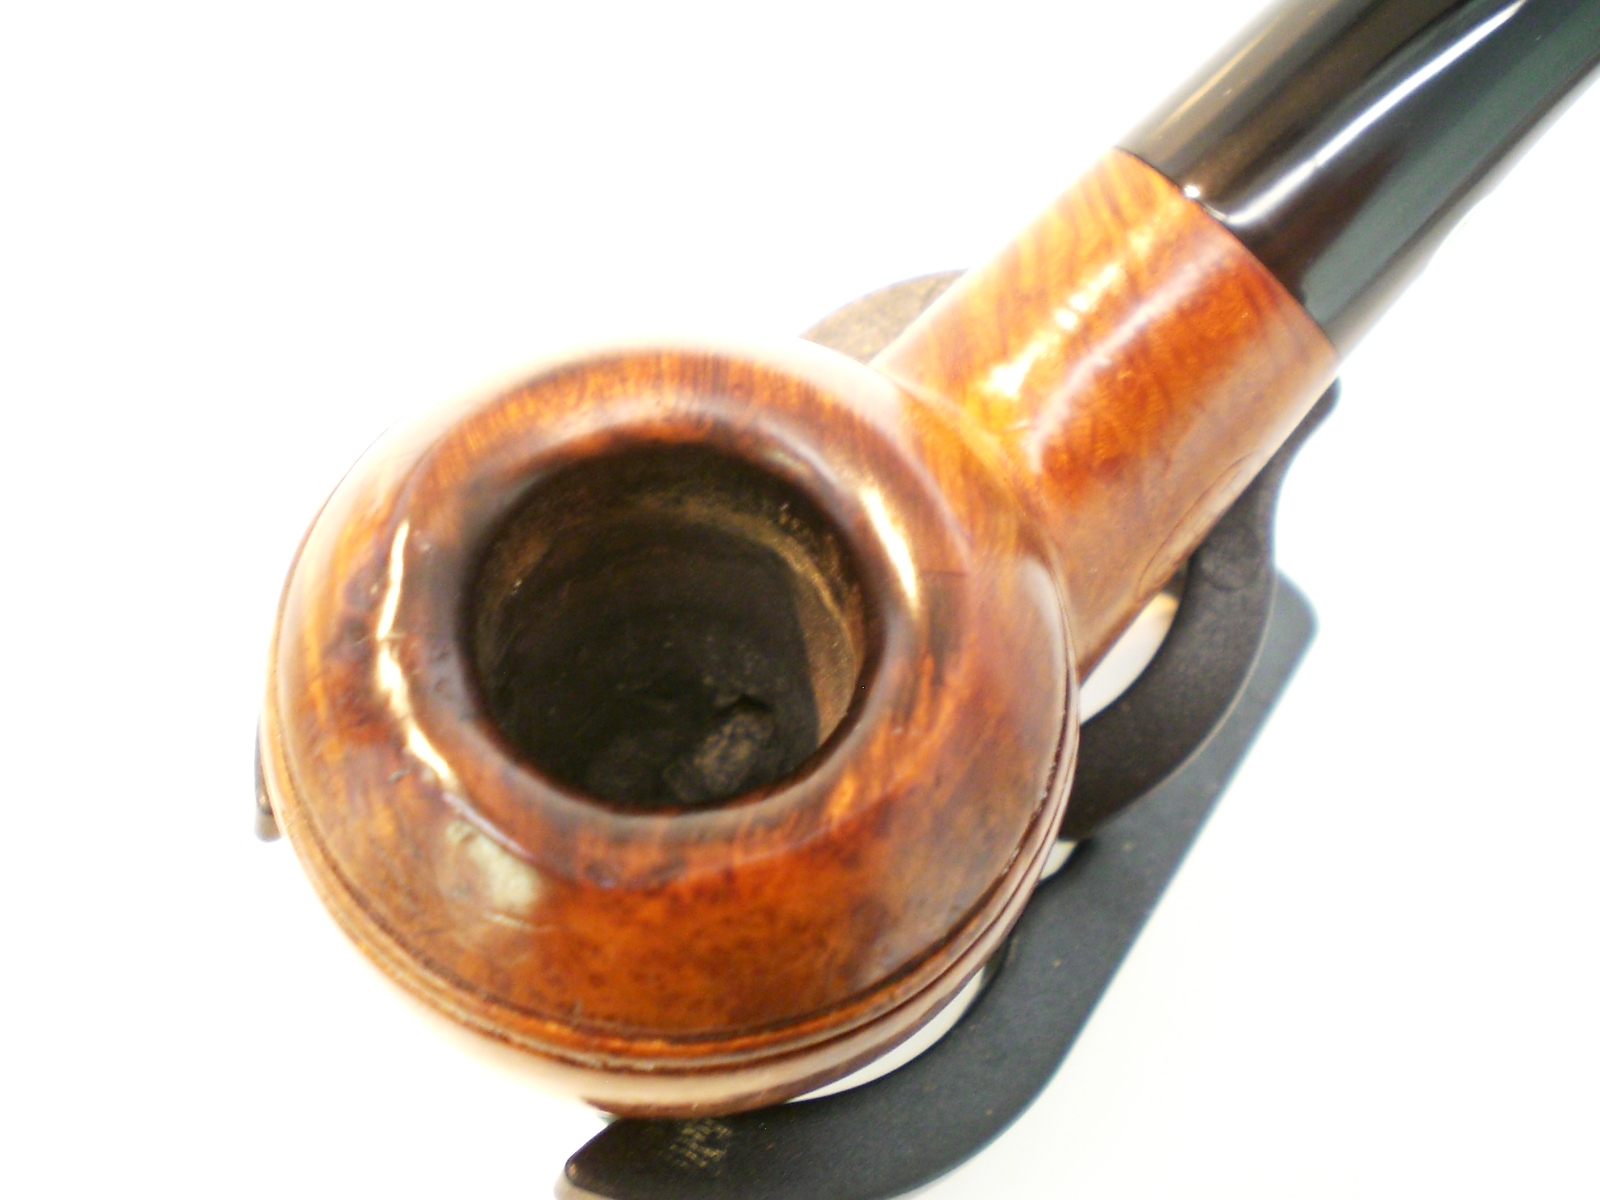
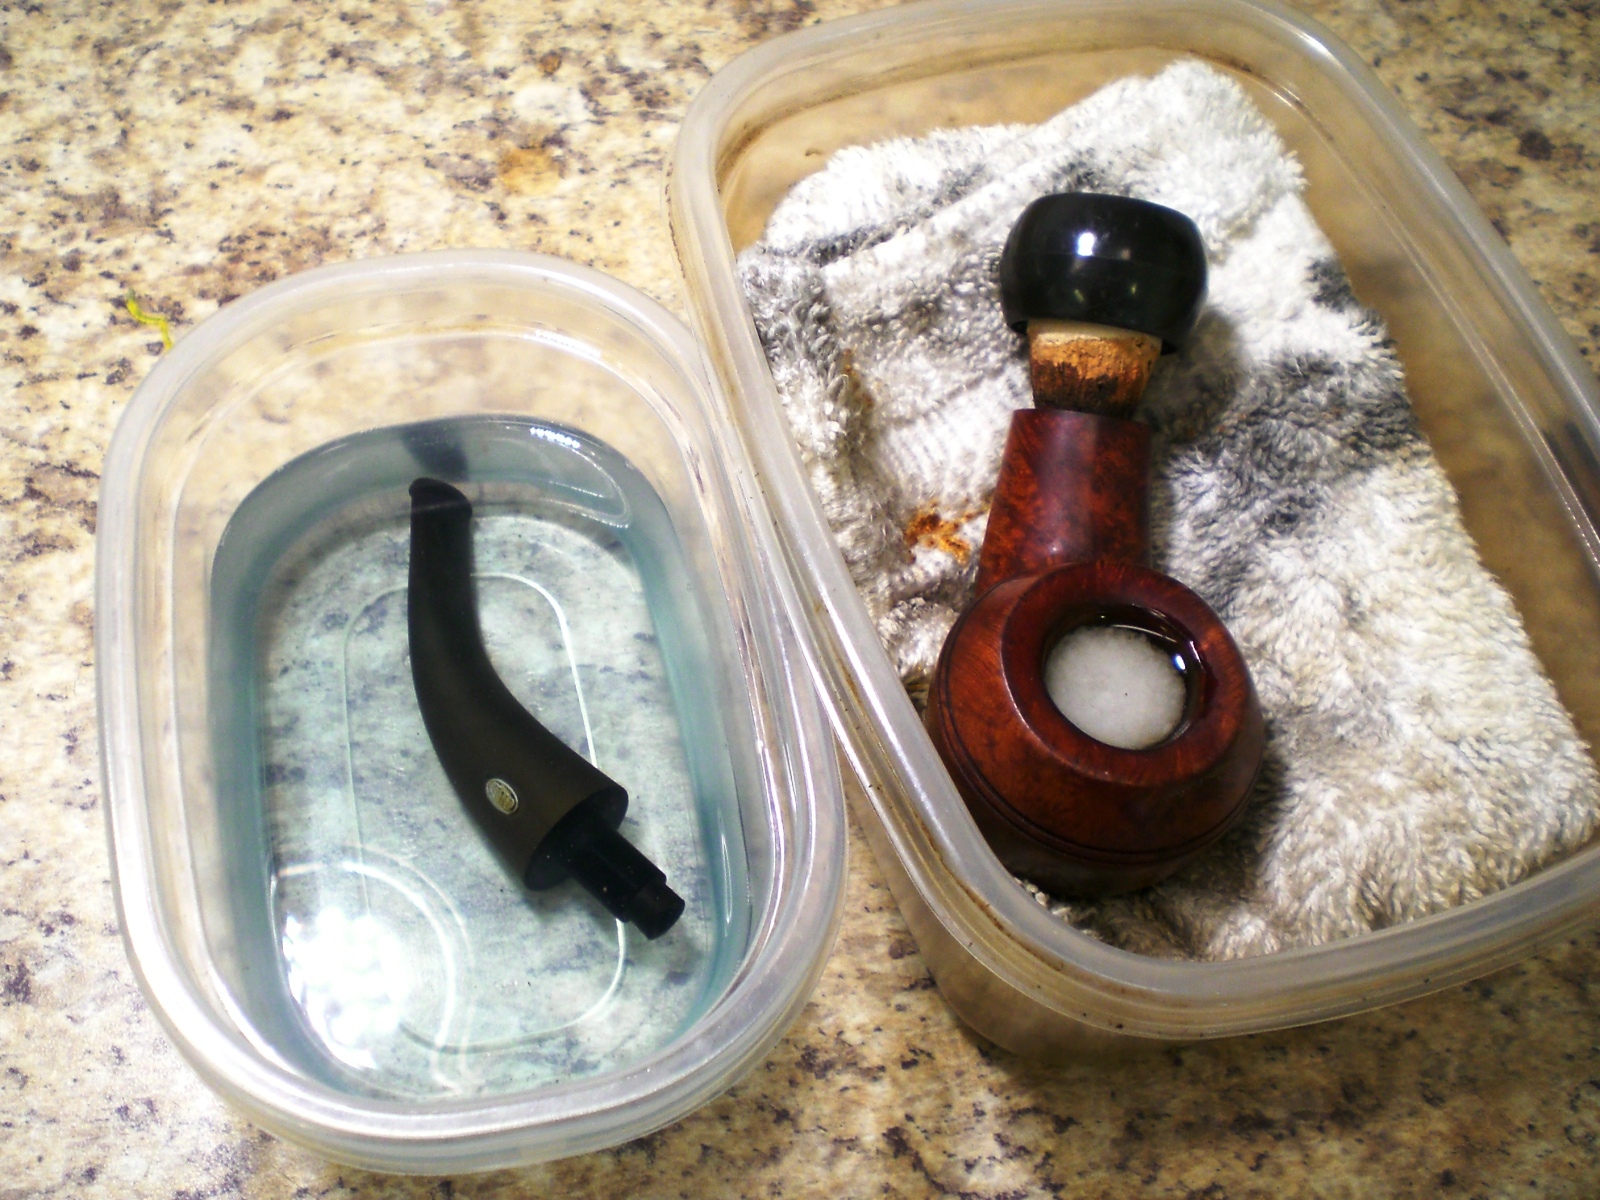
I used some alcohol to remove the build up from the threads on the stem fitment.  This allowed the stem to fully seat in the correct position.  I reamed the bowl, which still had some remnants of tobacco inside.  The bowl was then soaked with some alcohol and sea salt.  A little Mag & Aluminum auto metal polish took the rest of the oxidation off the stinger.  This one has the smaller ball and no Registration number, a style used by Kaywoodie after WWII.

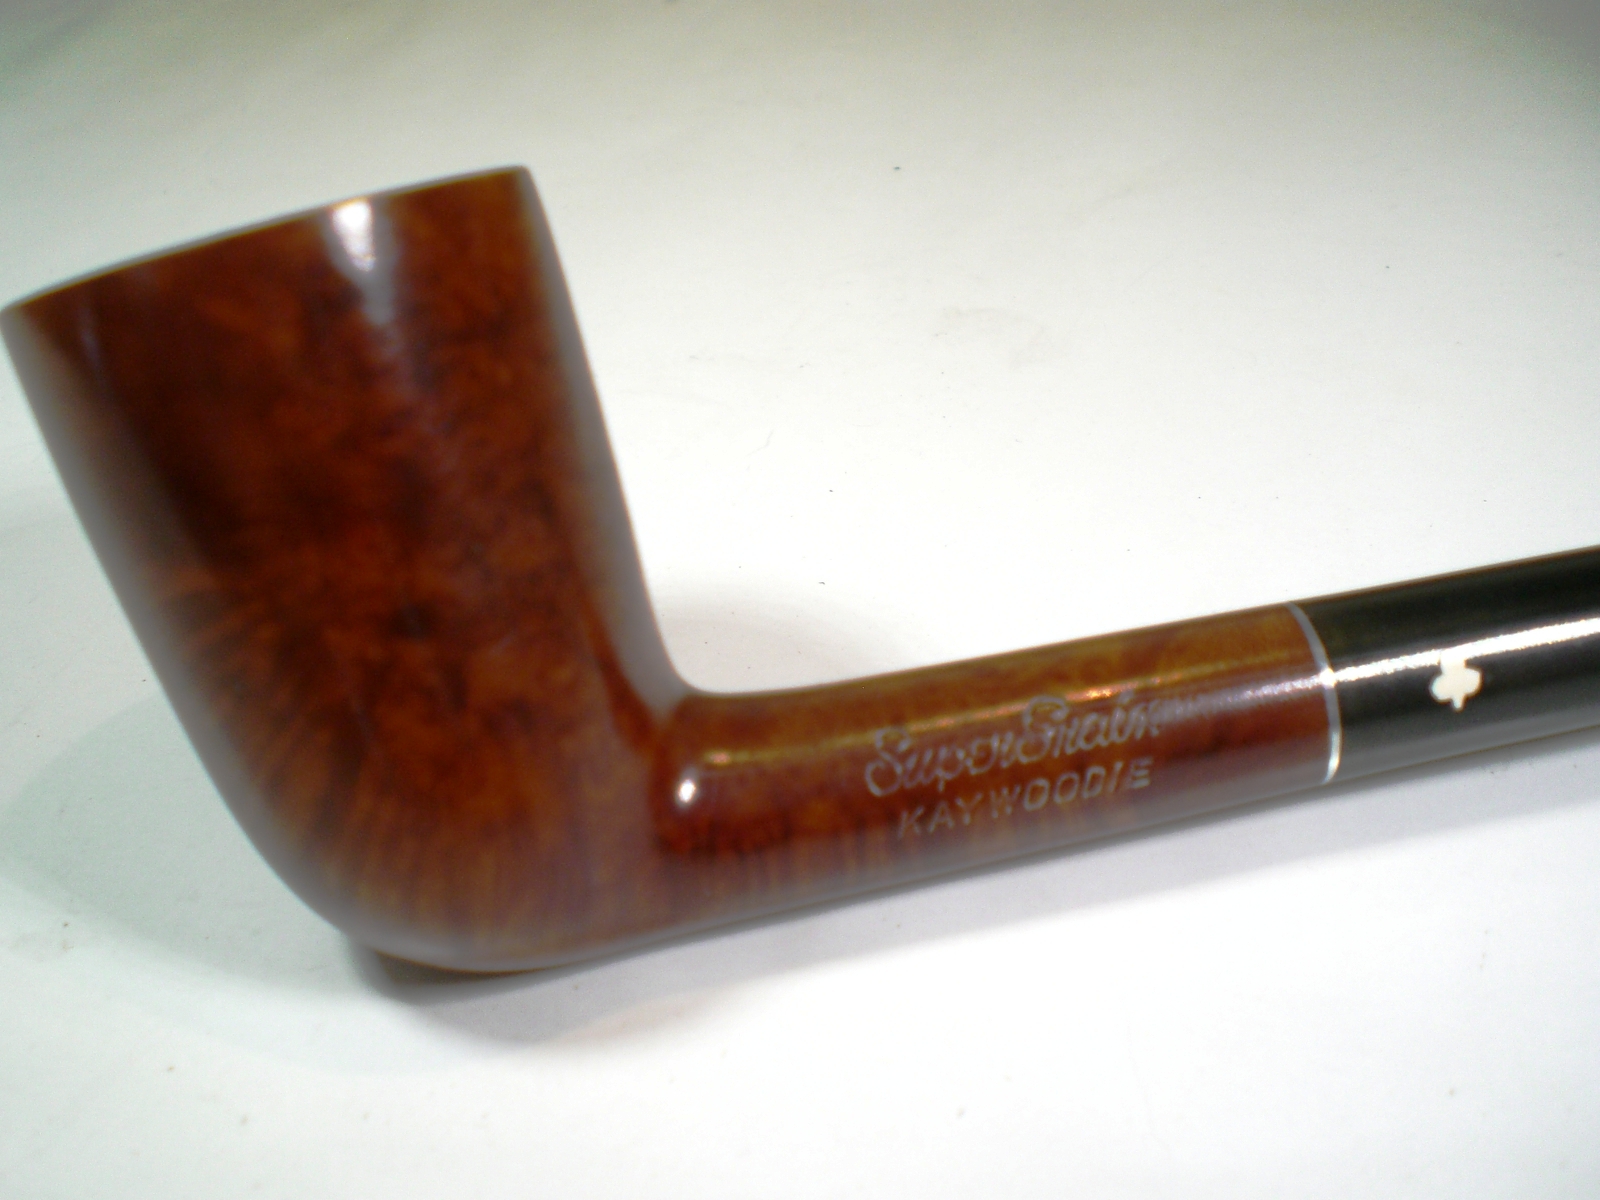
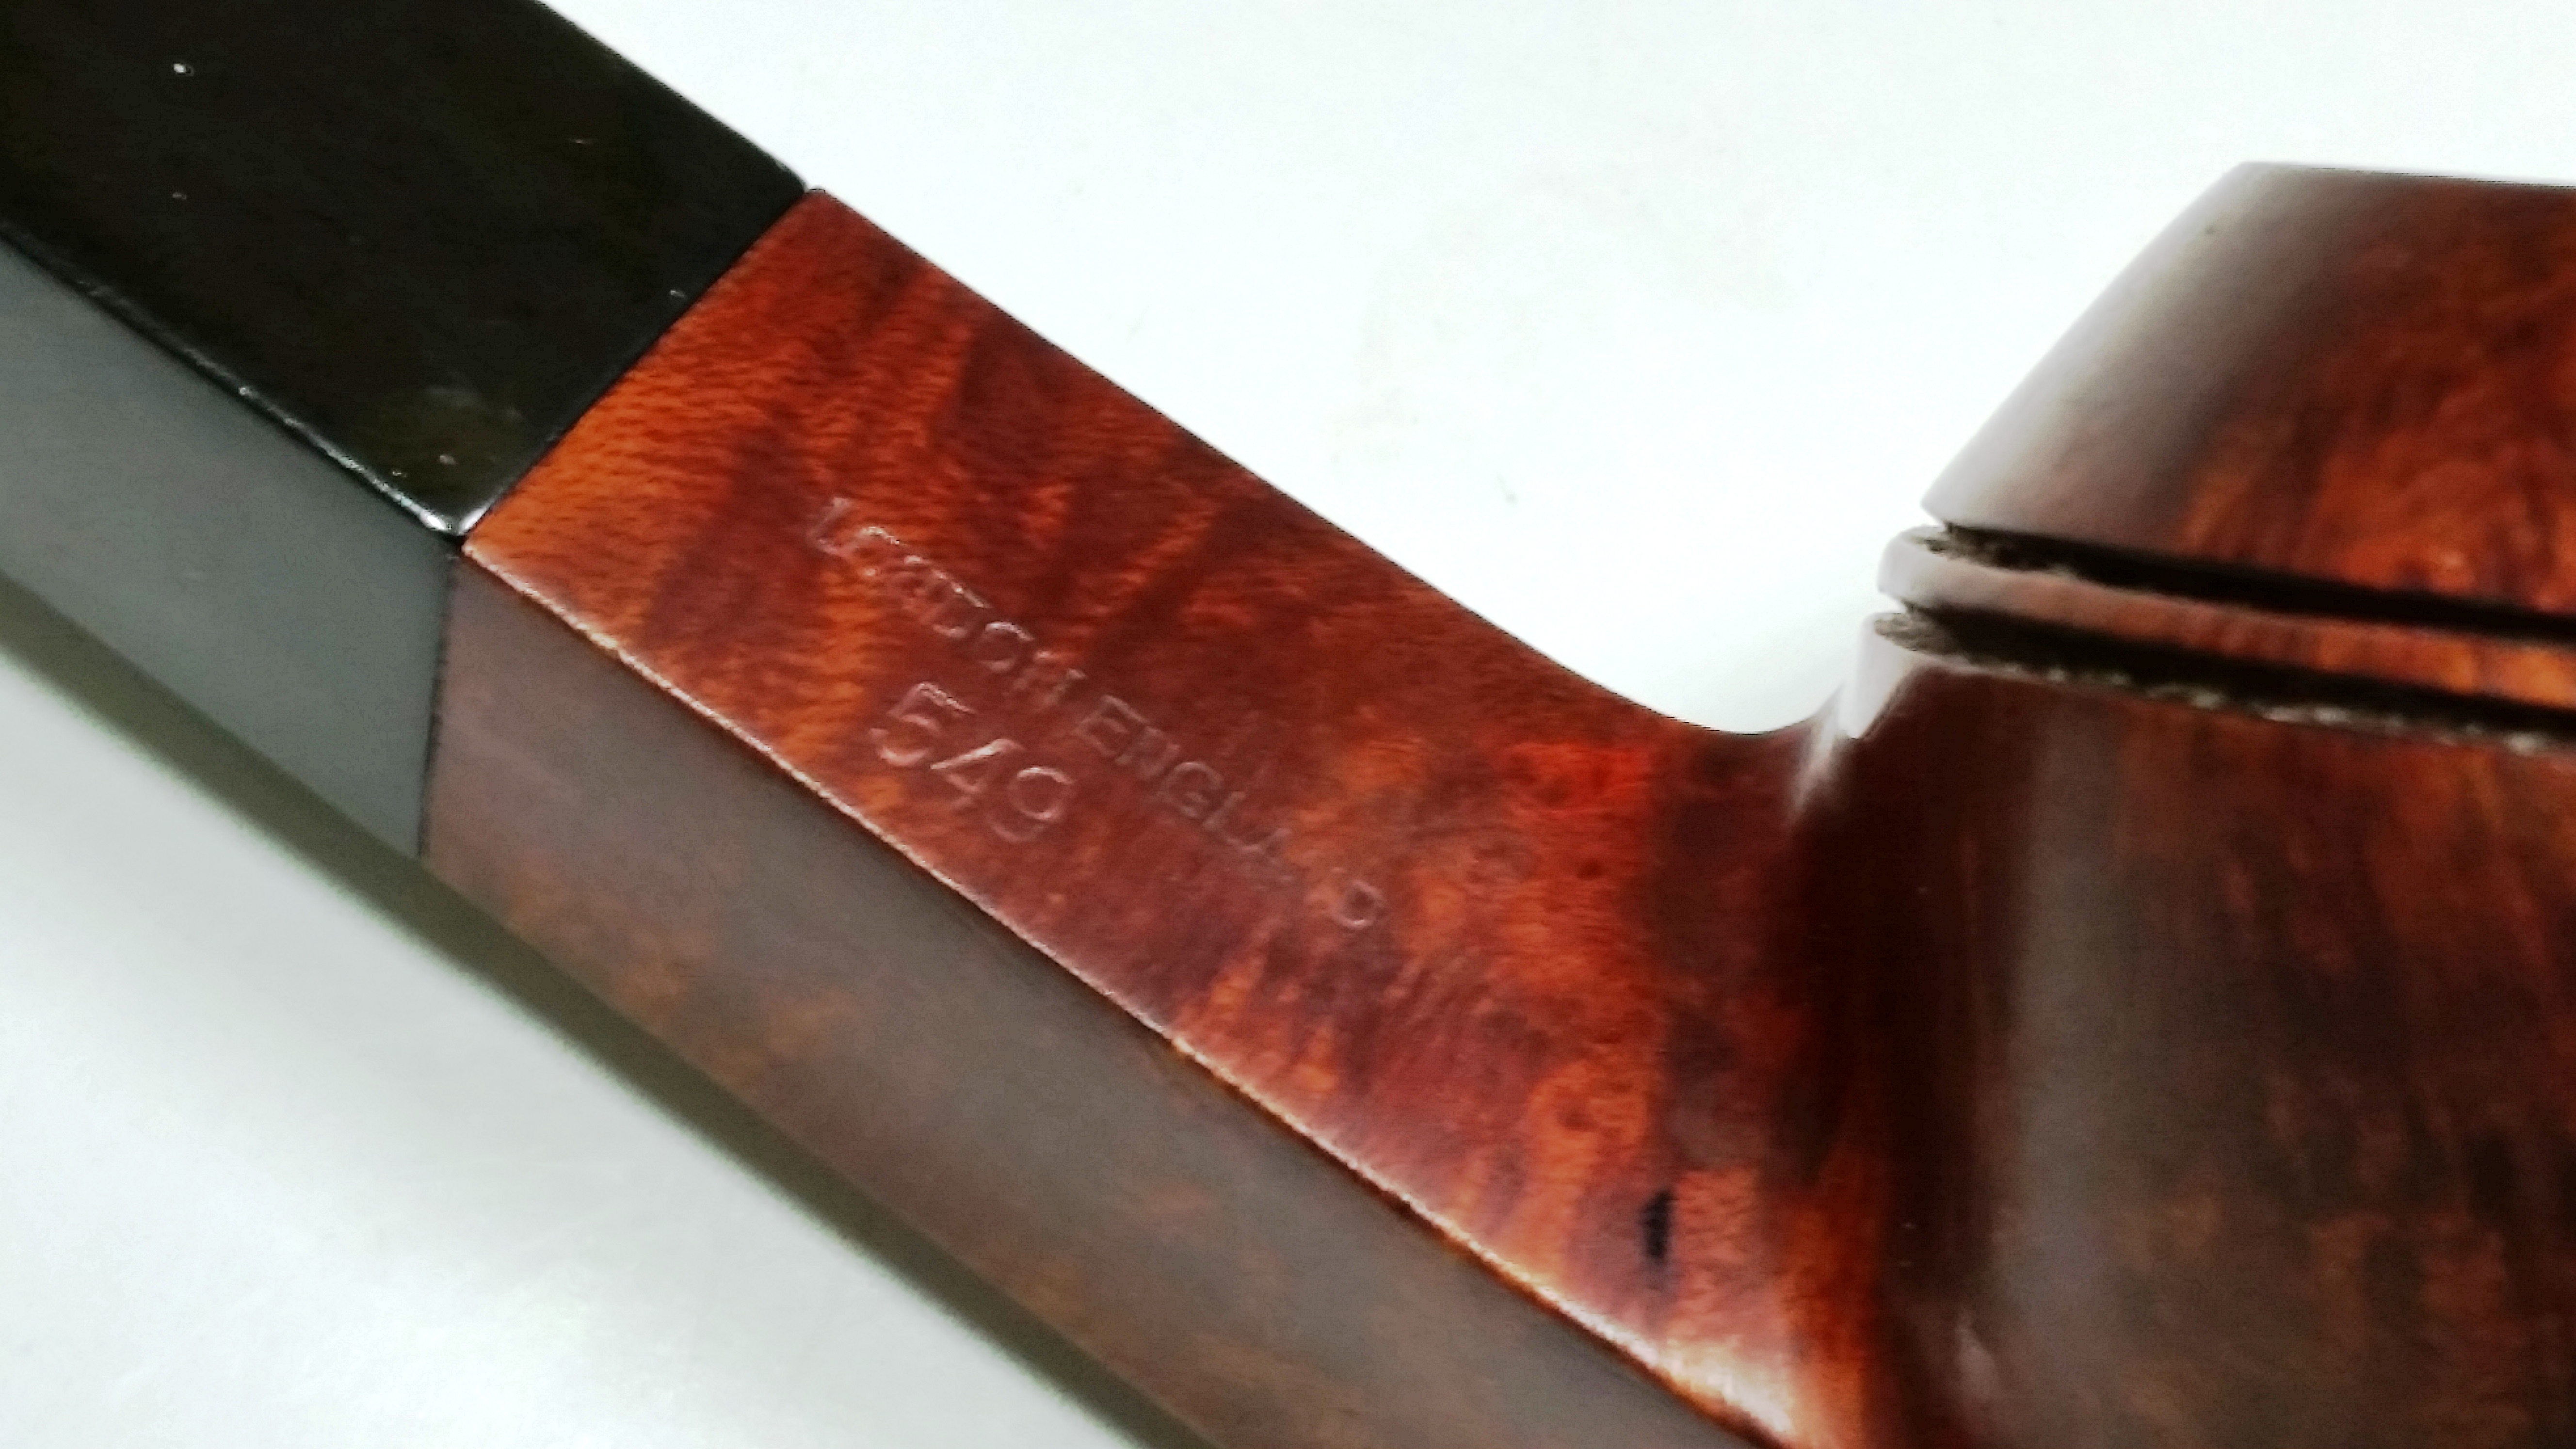
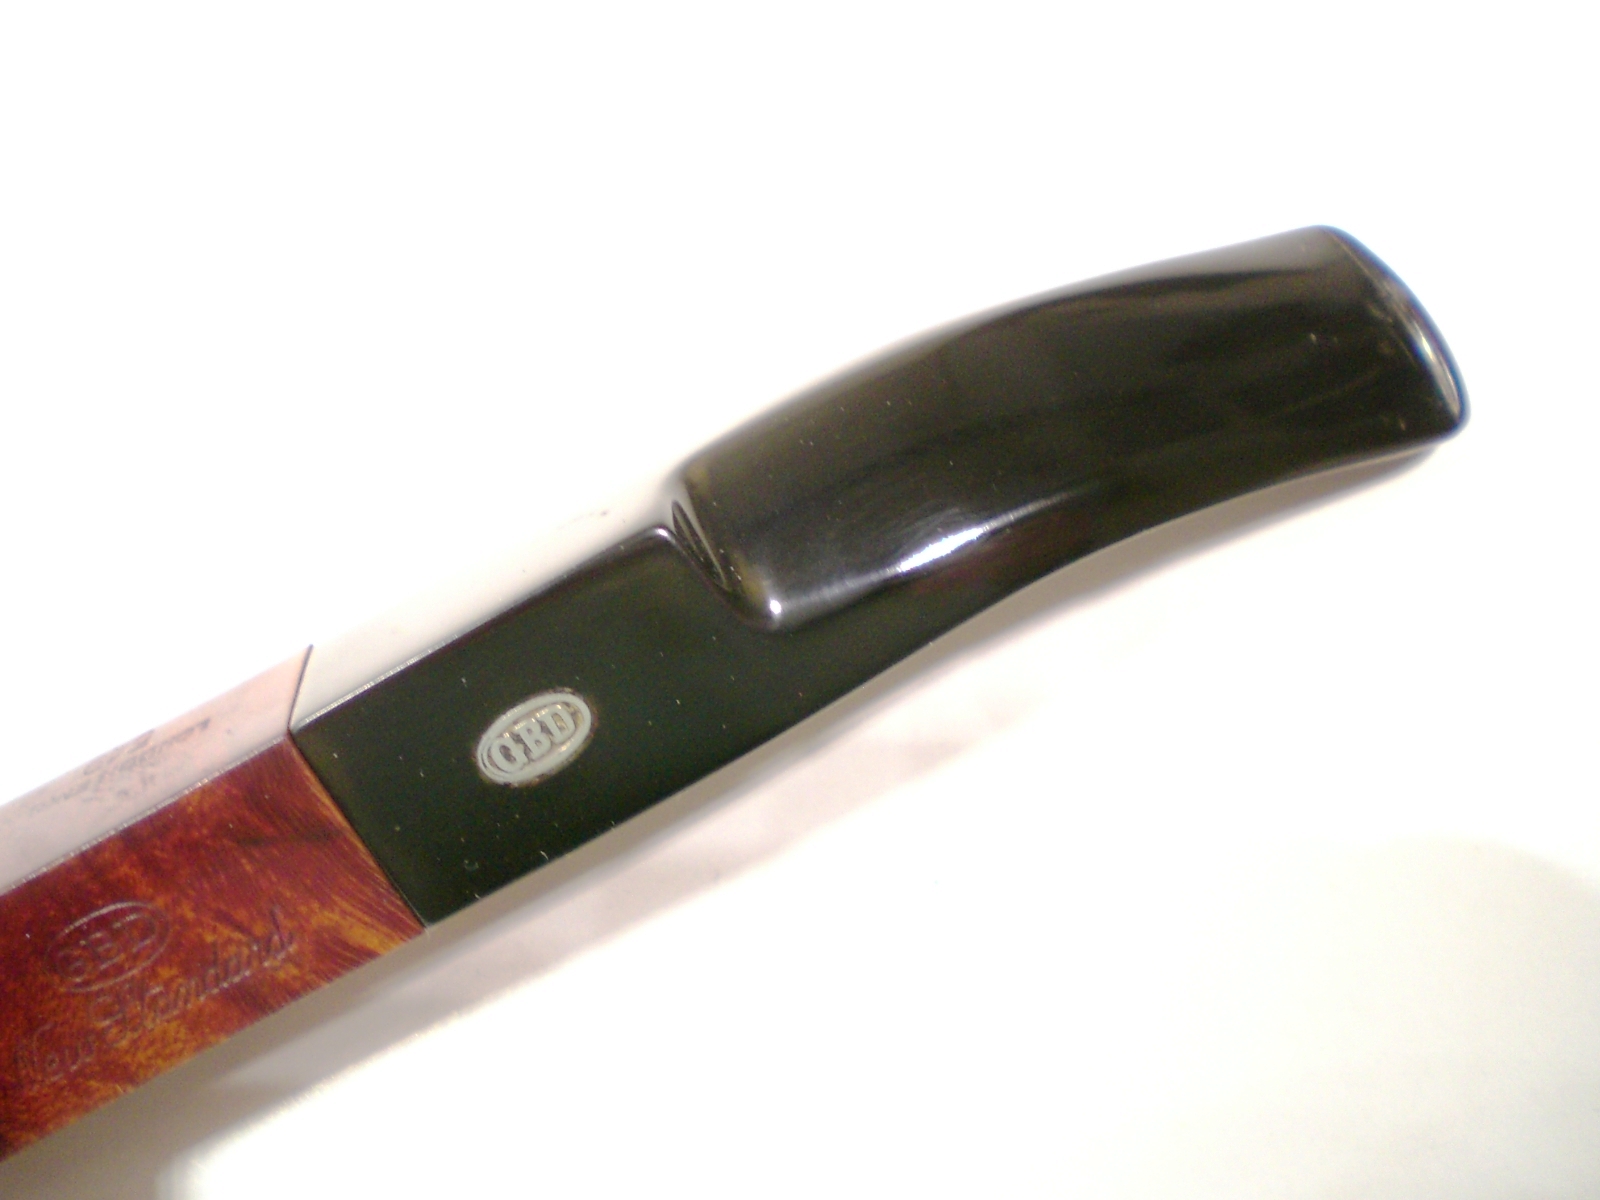
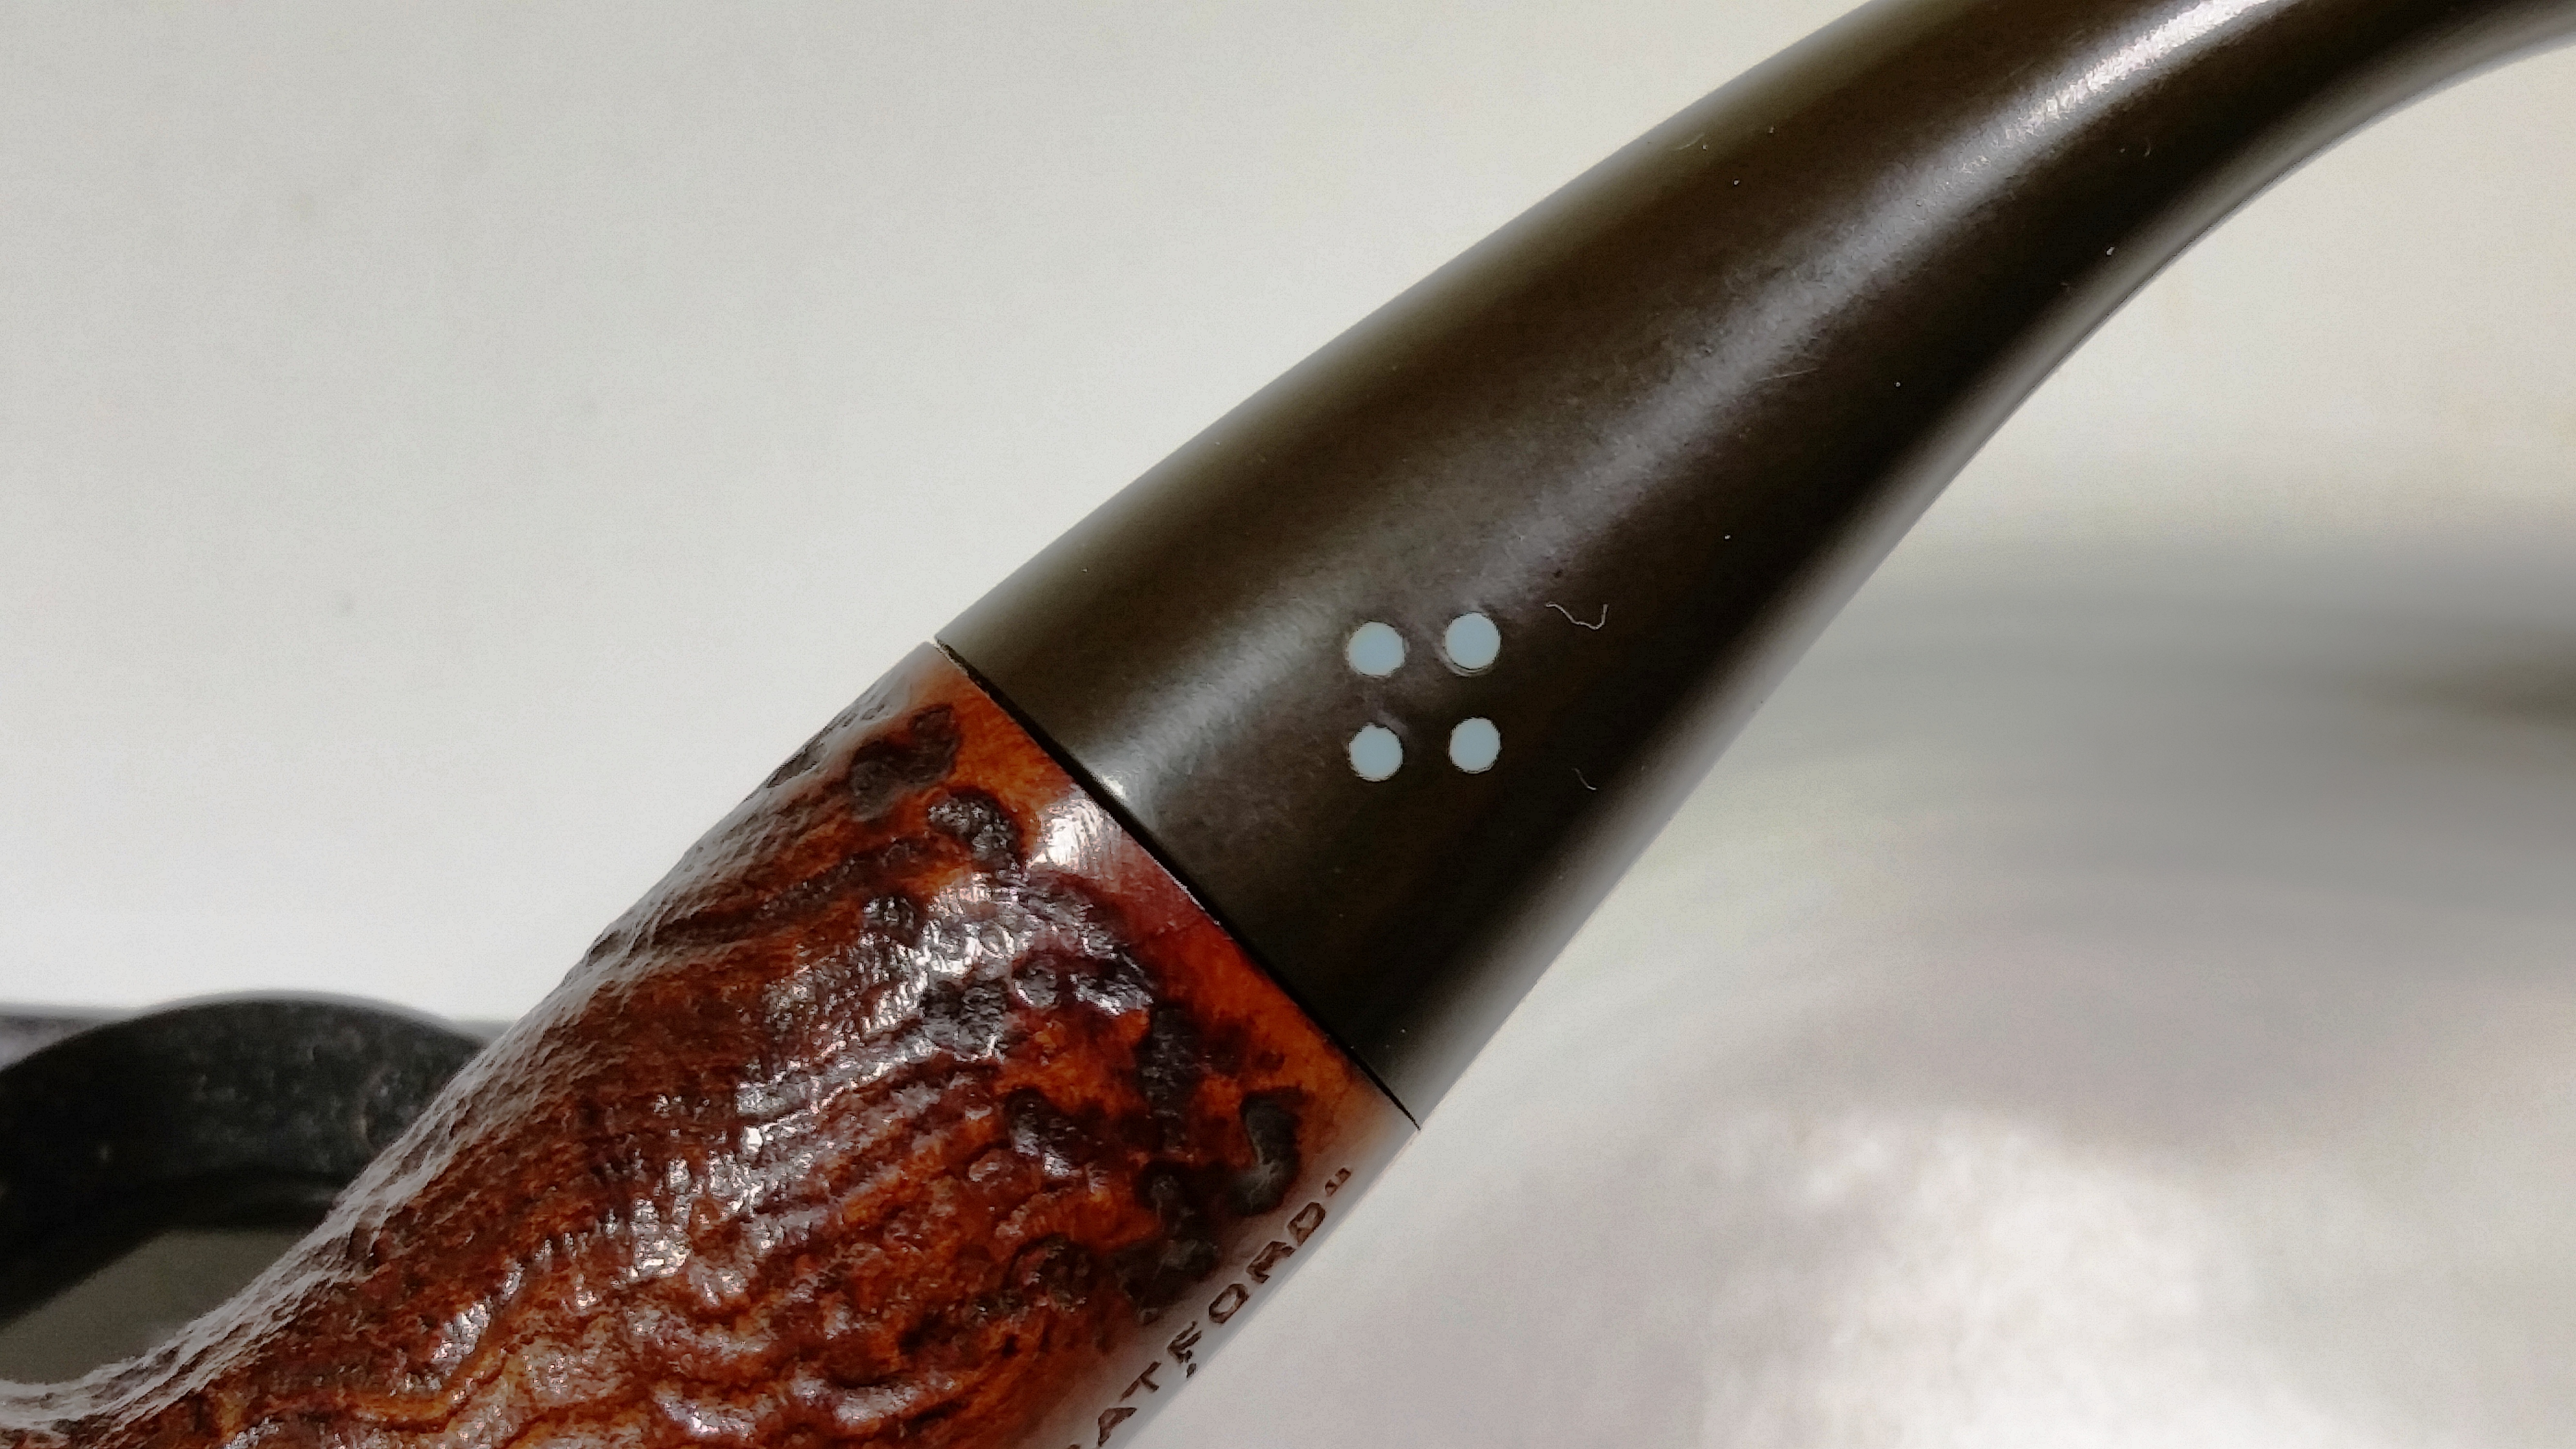
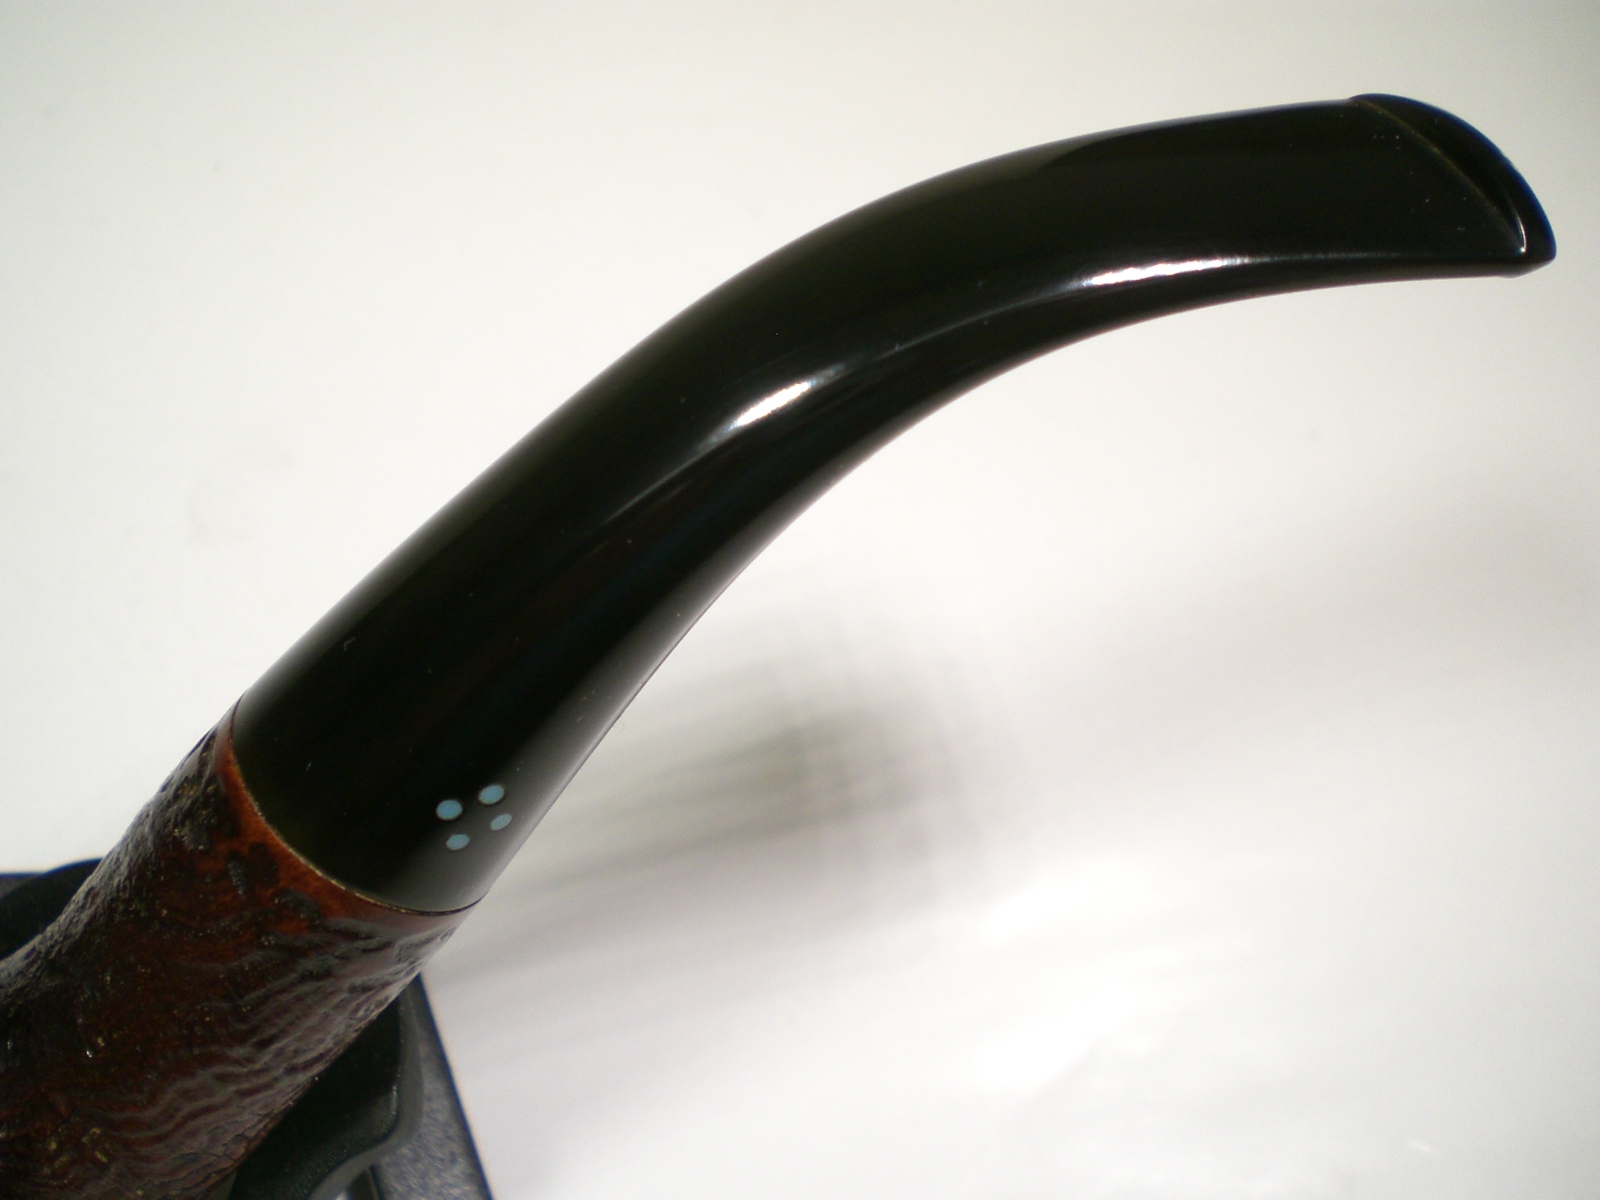
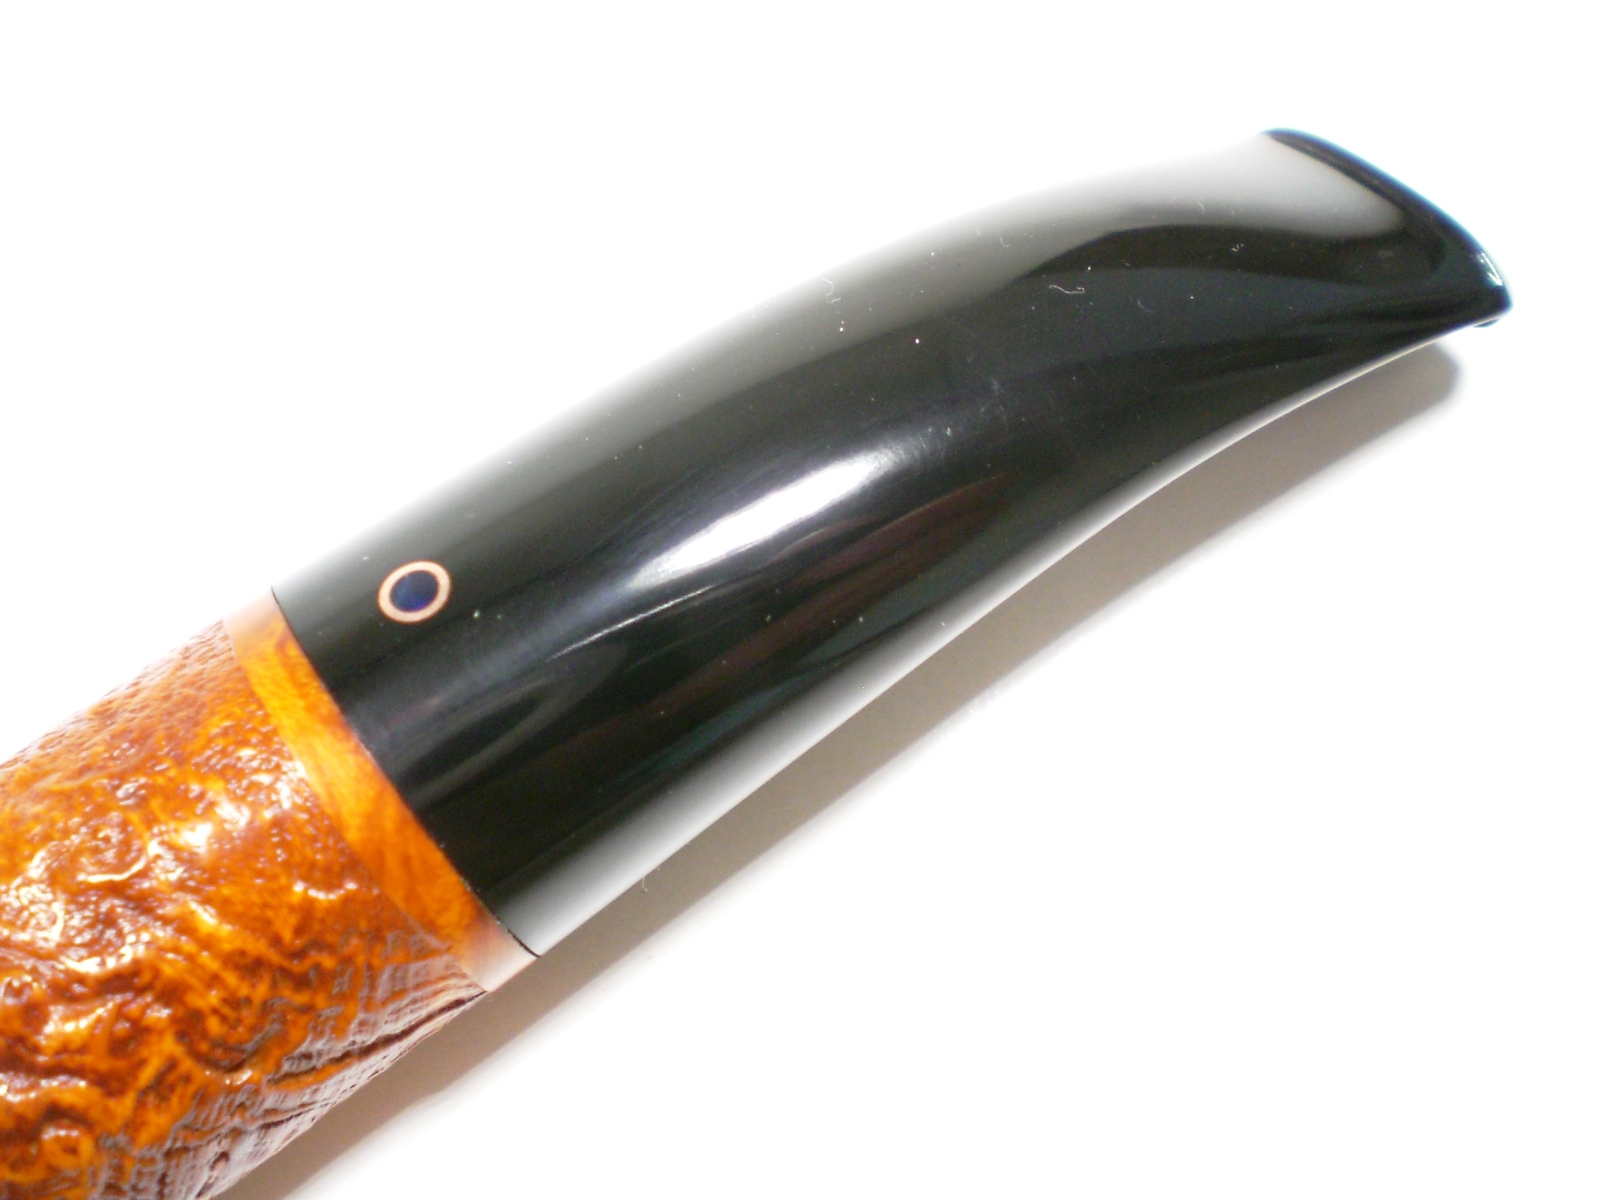
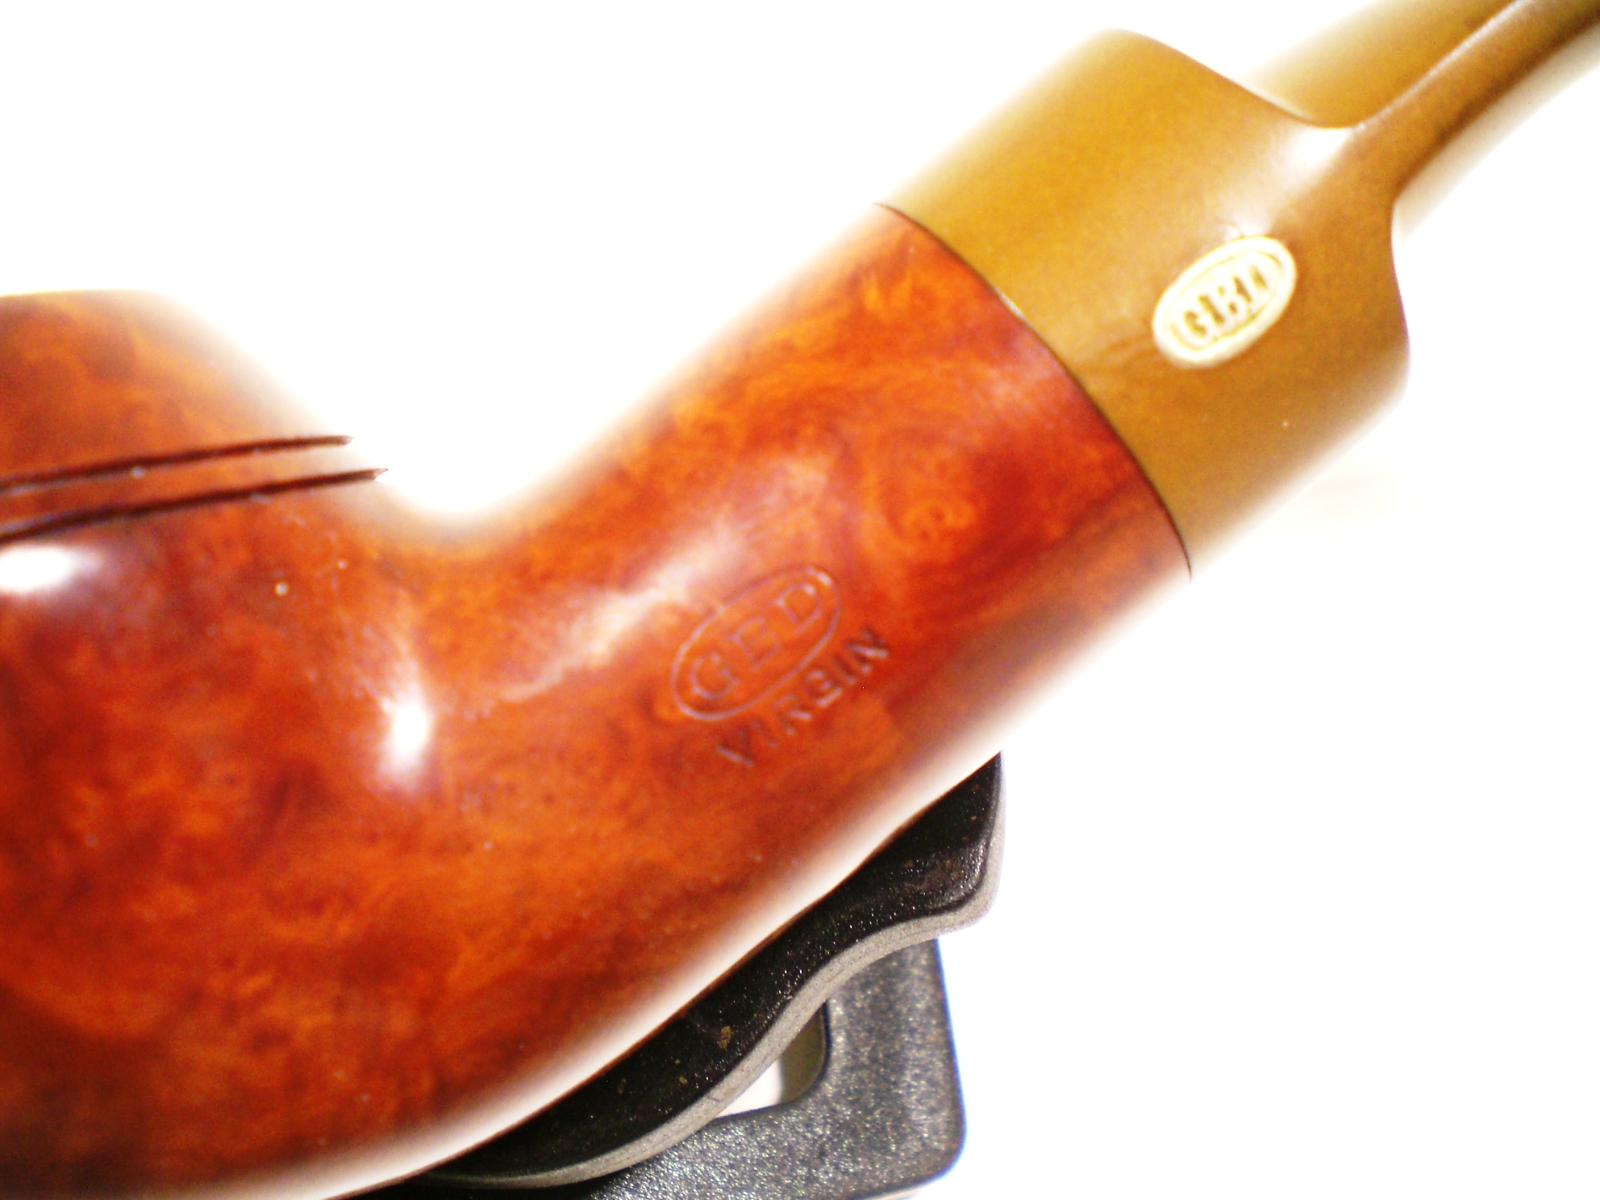
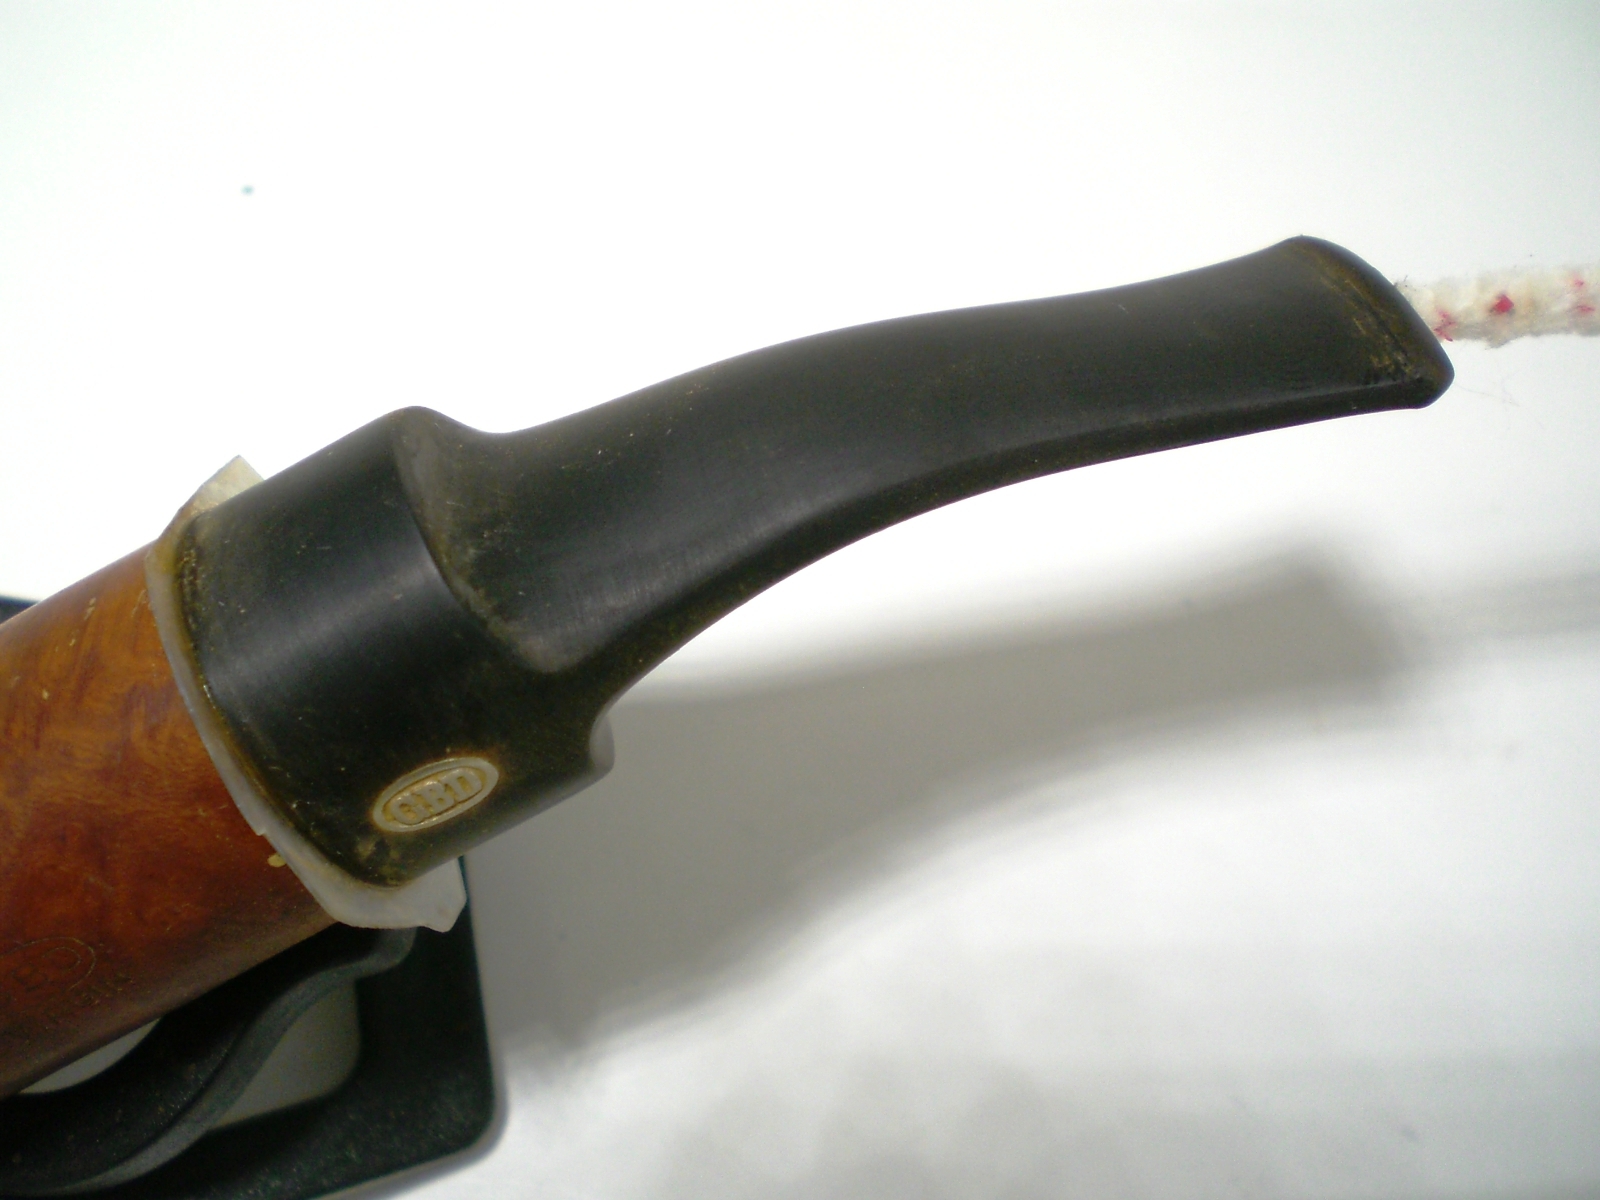
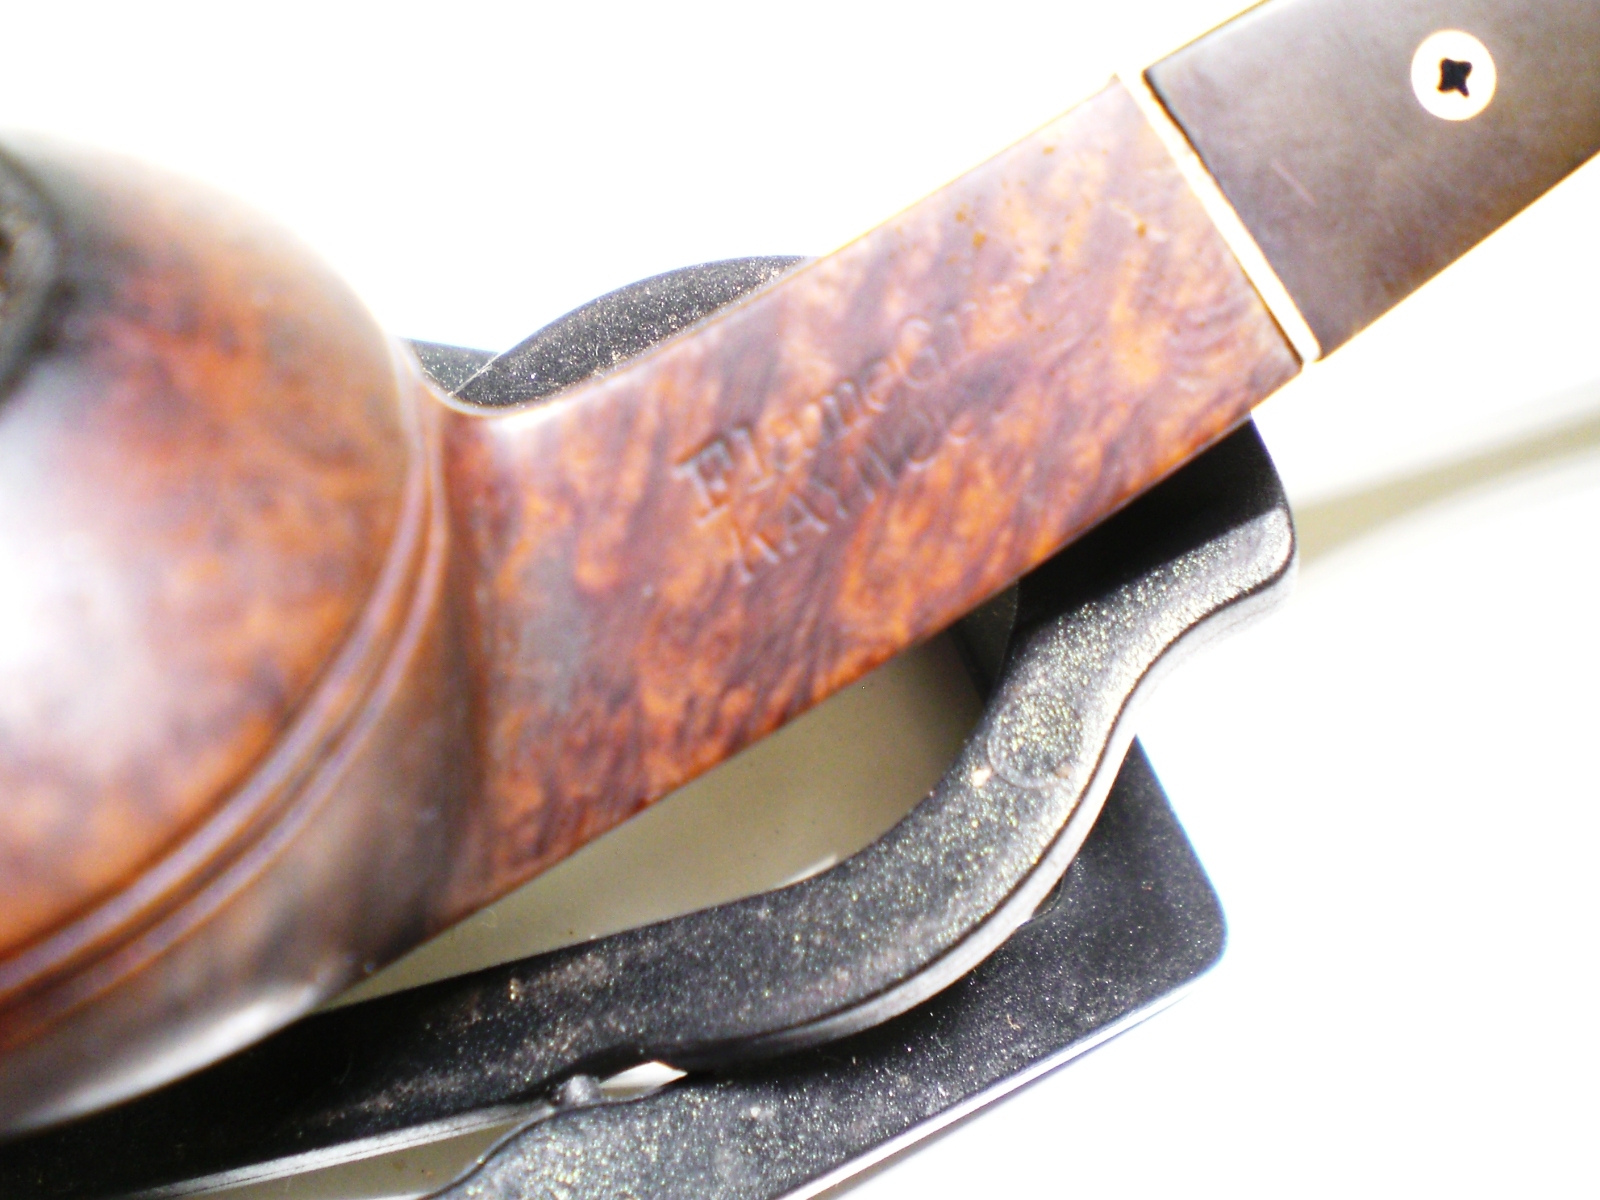
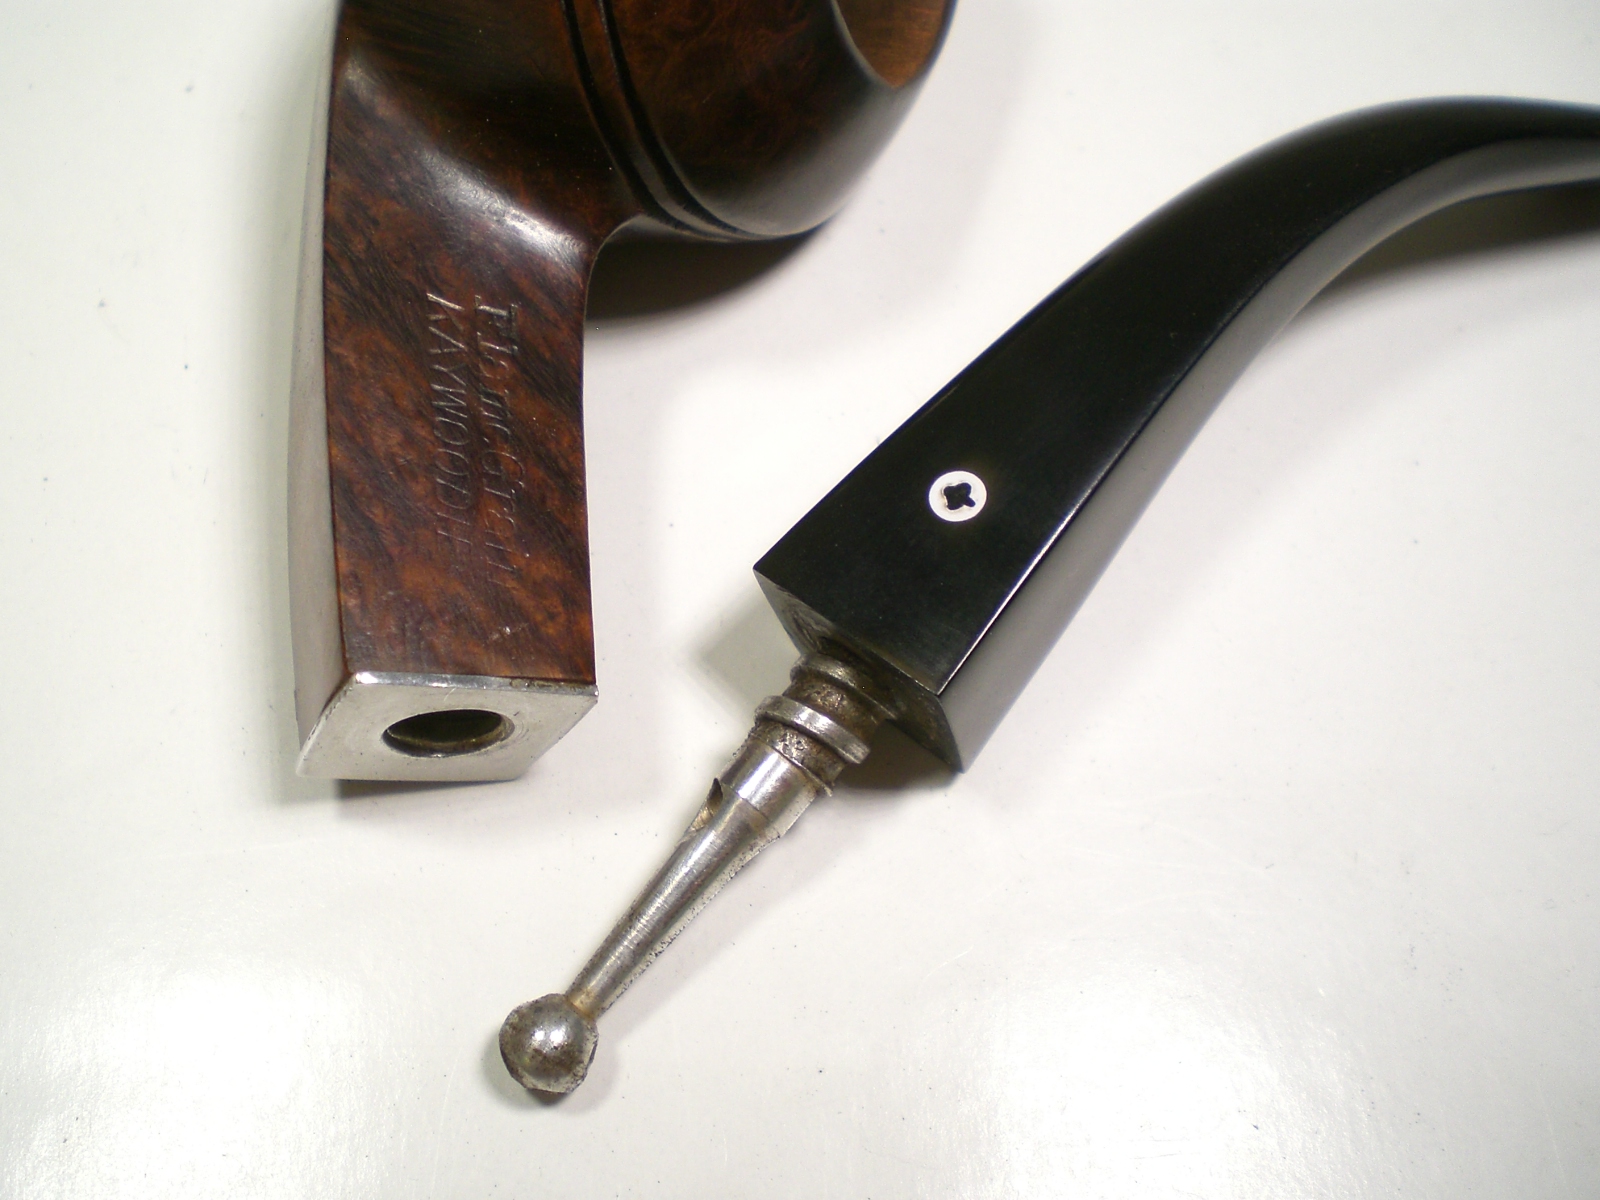
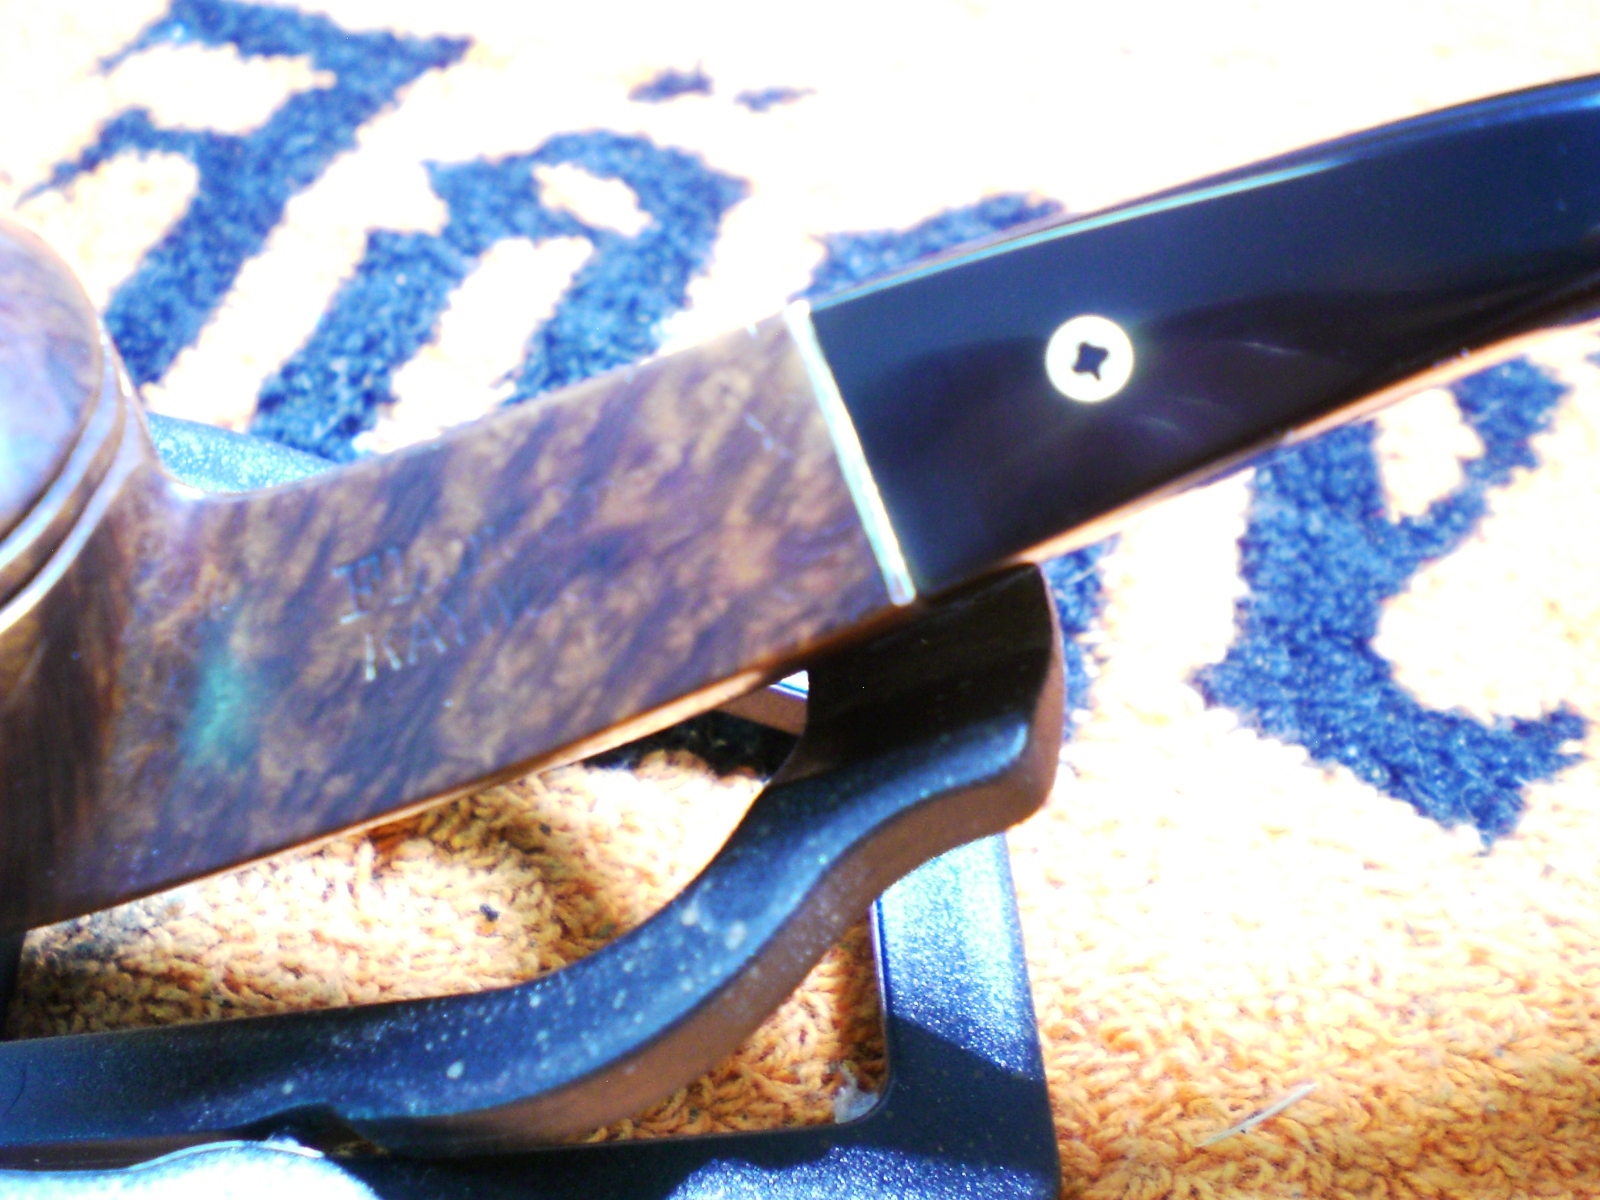
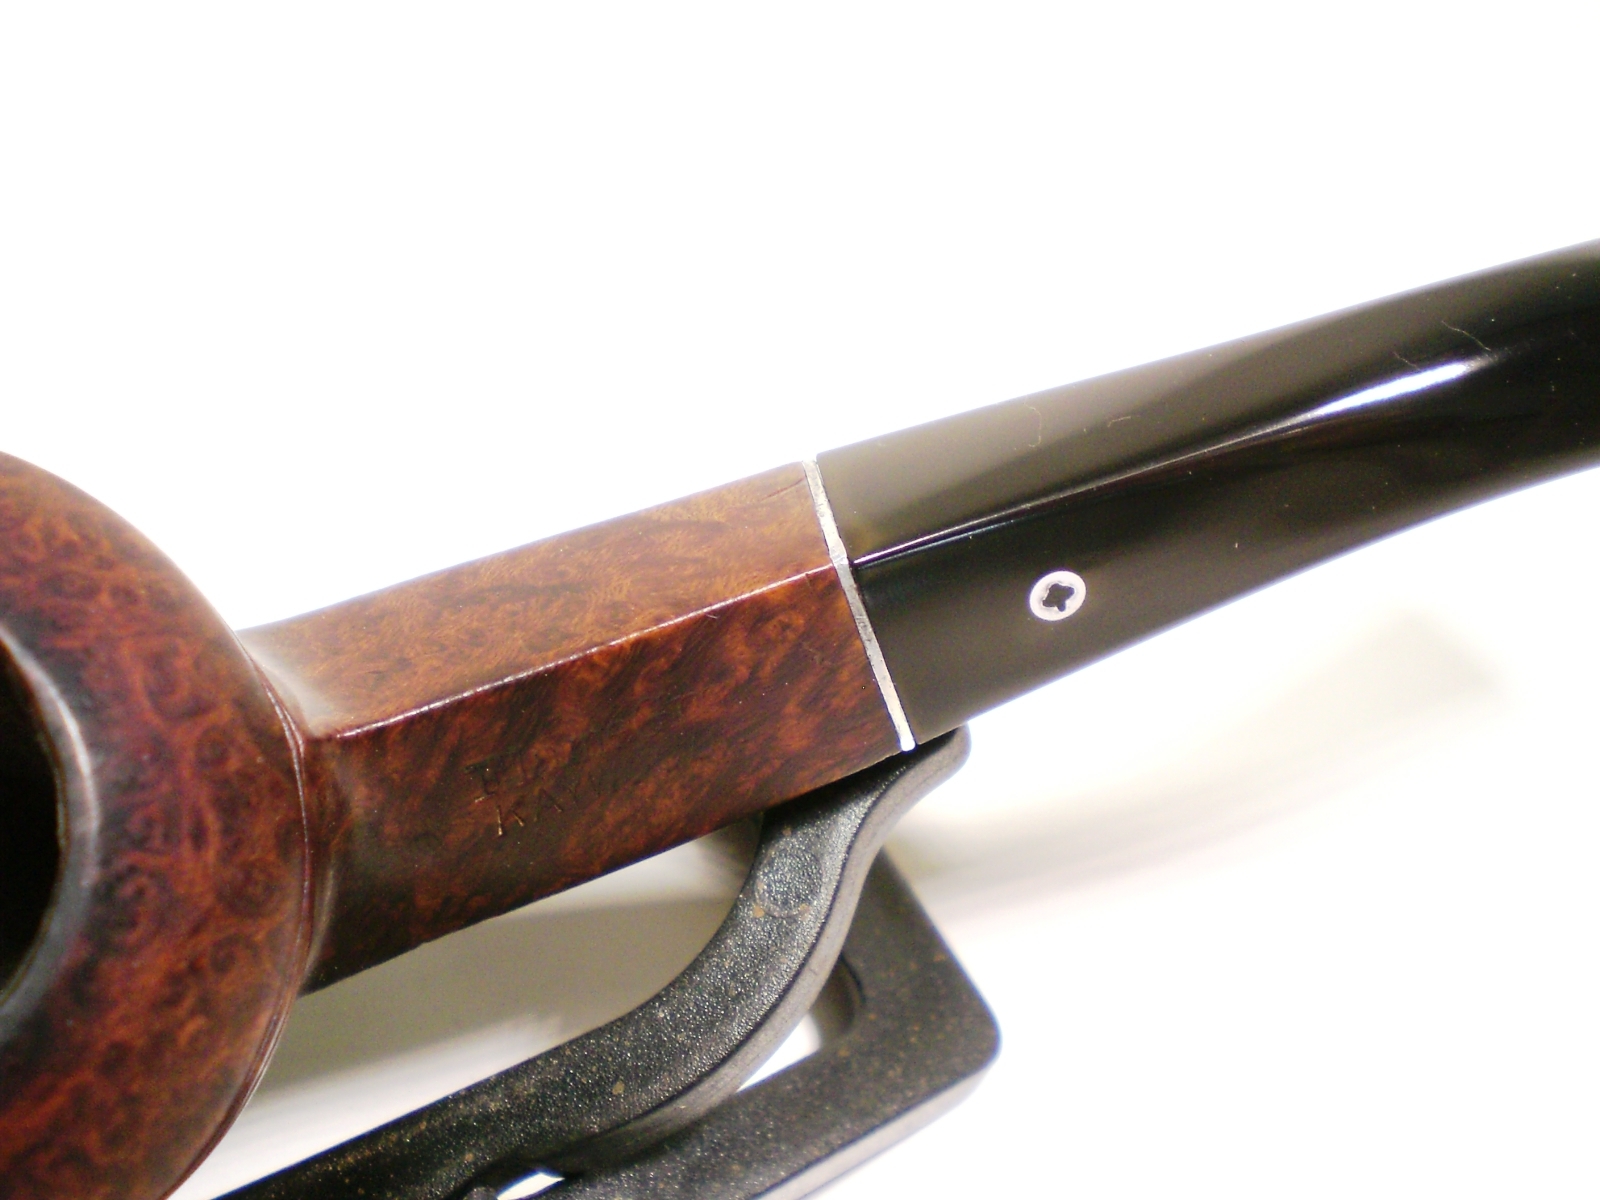
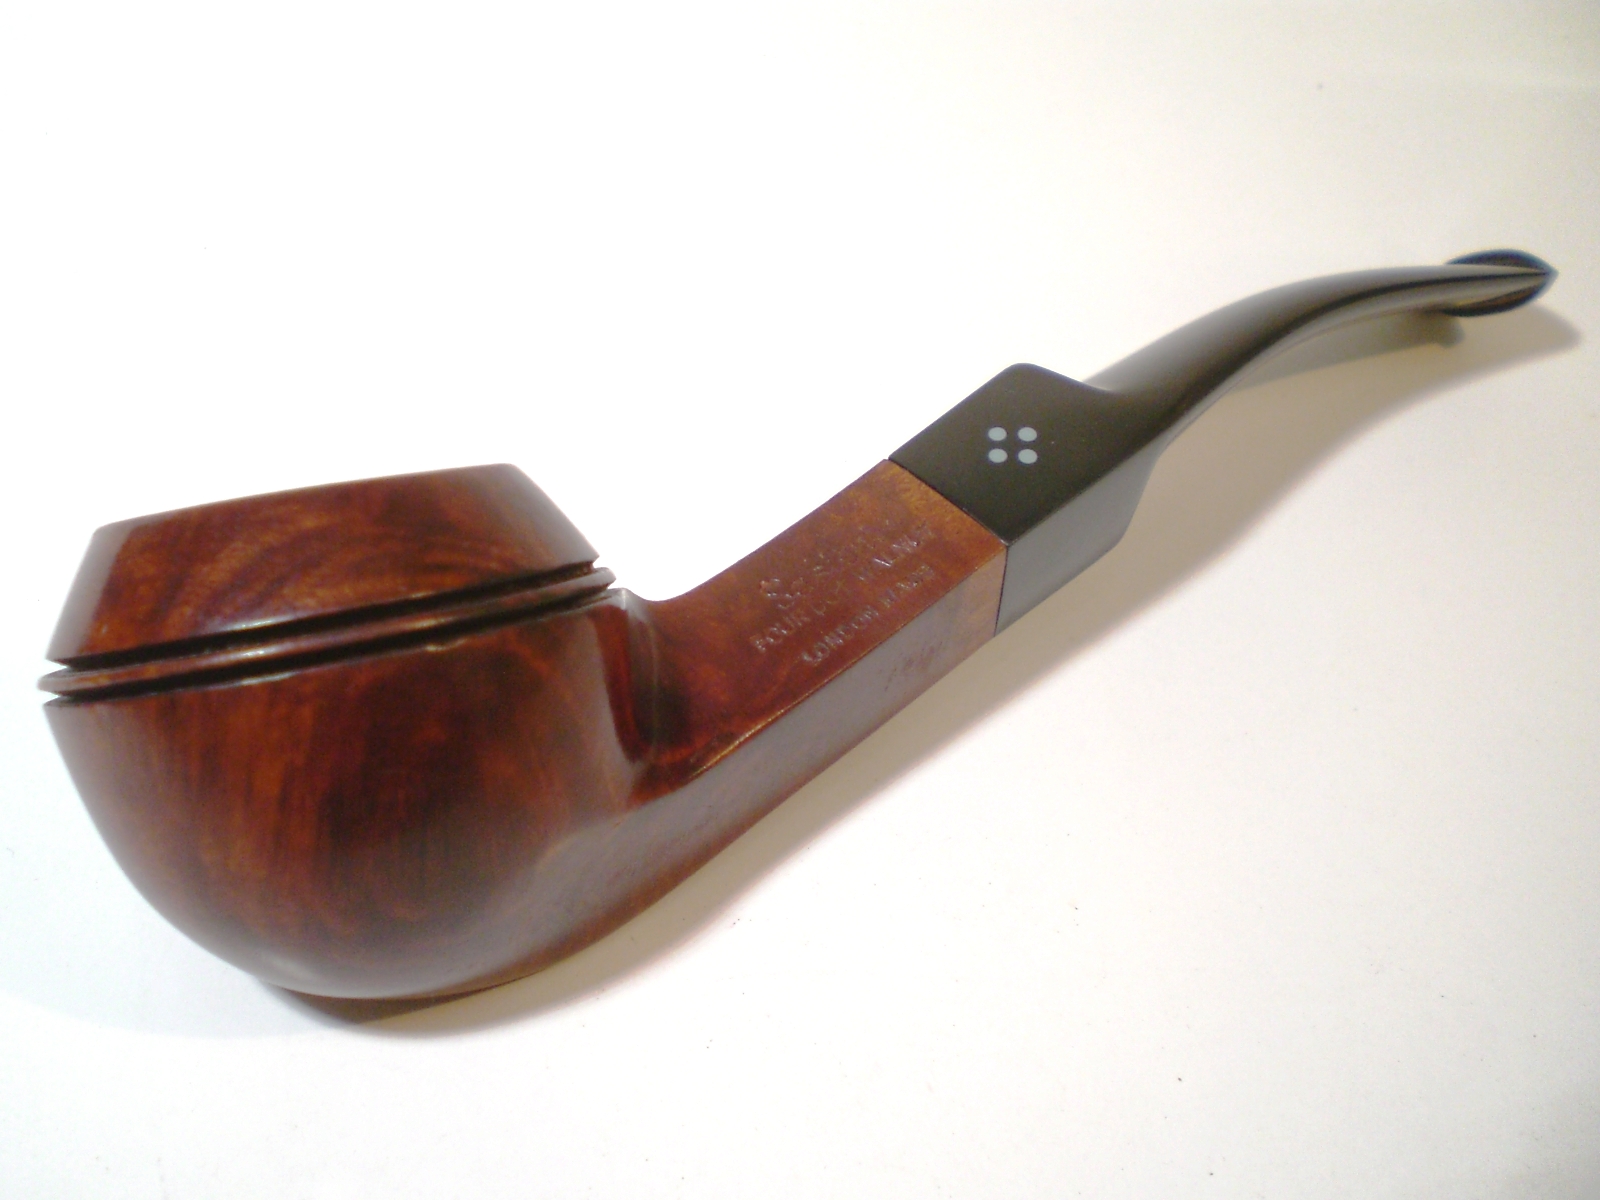
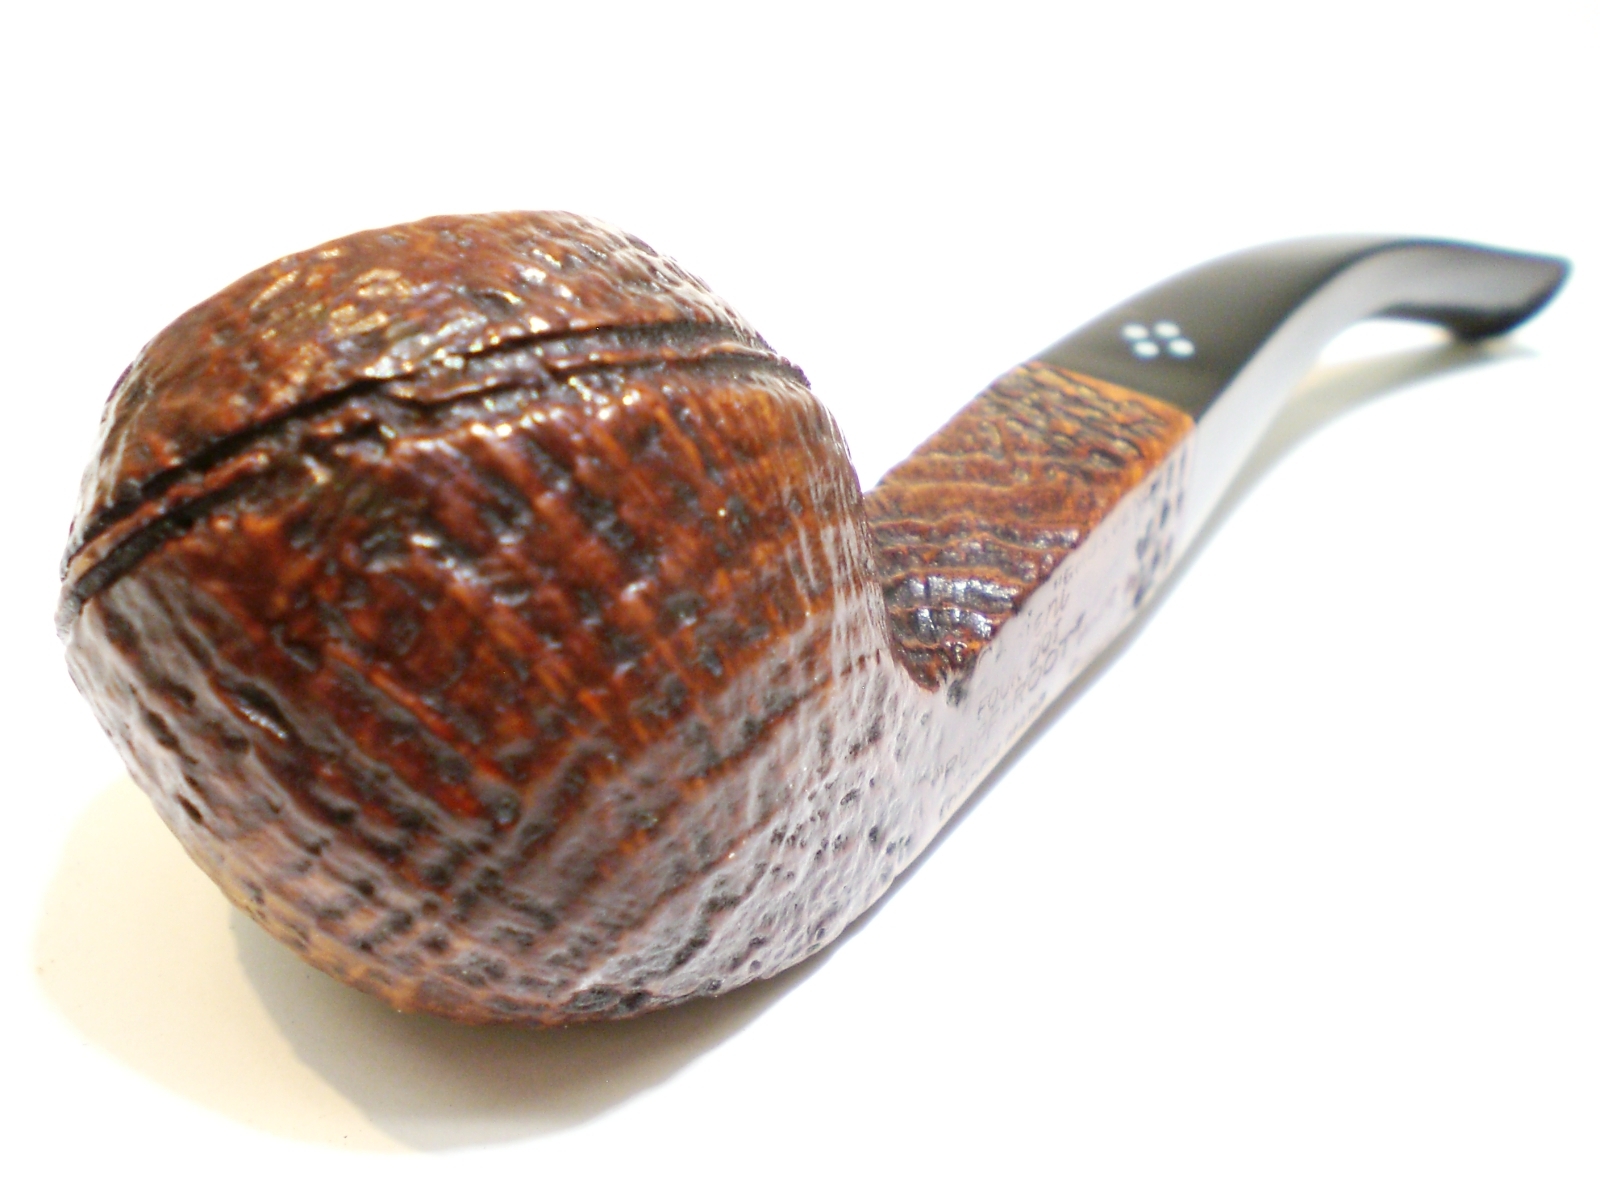
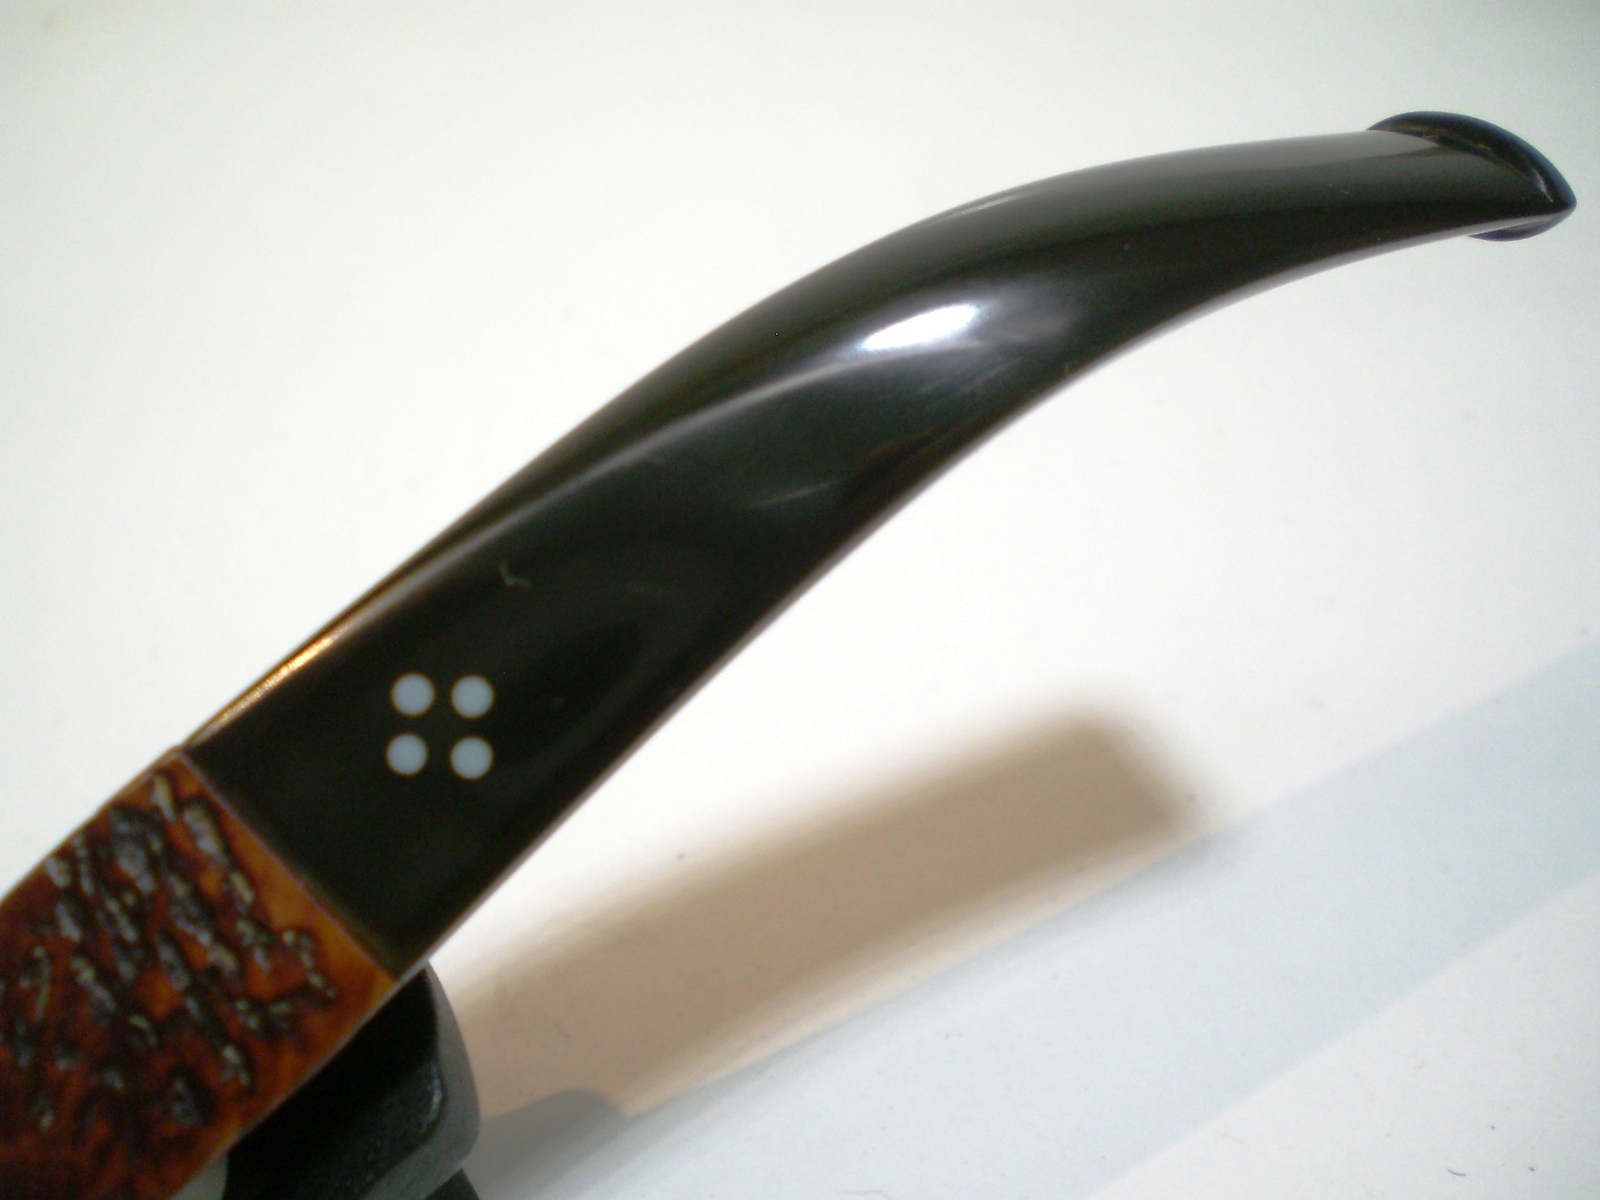
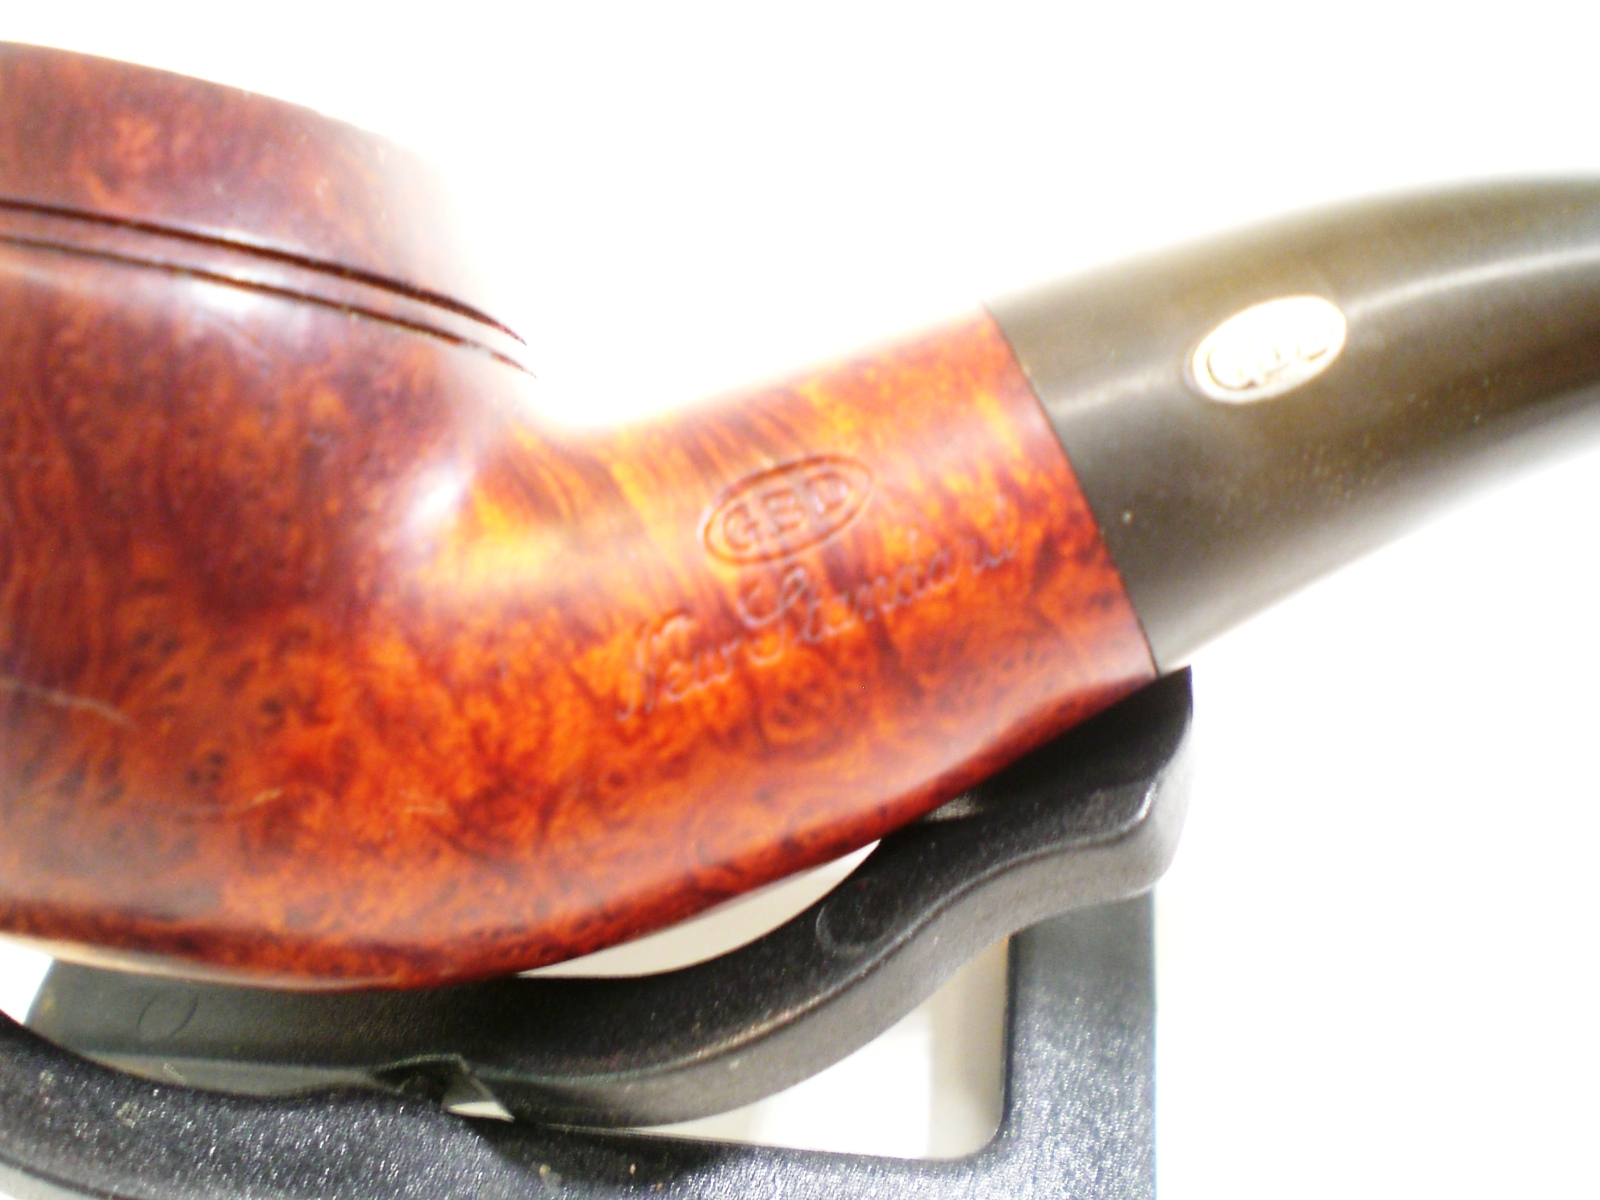
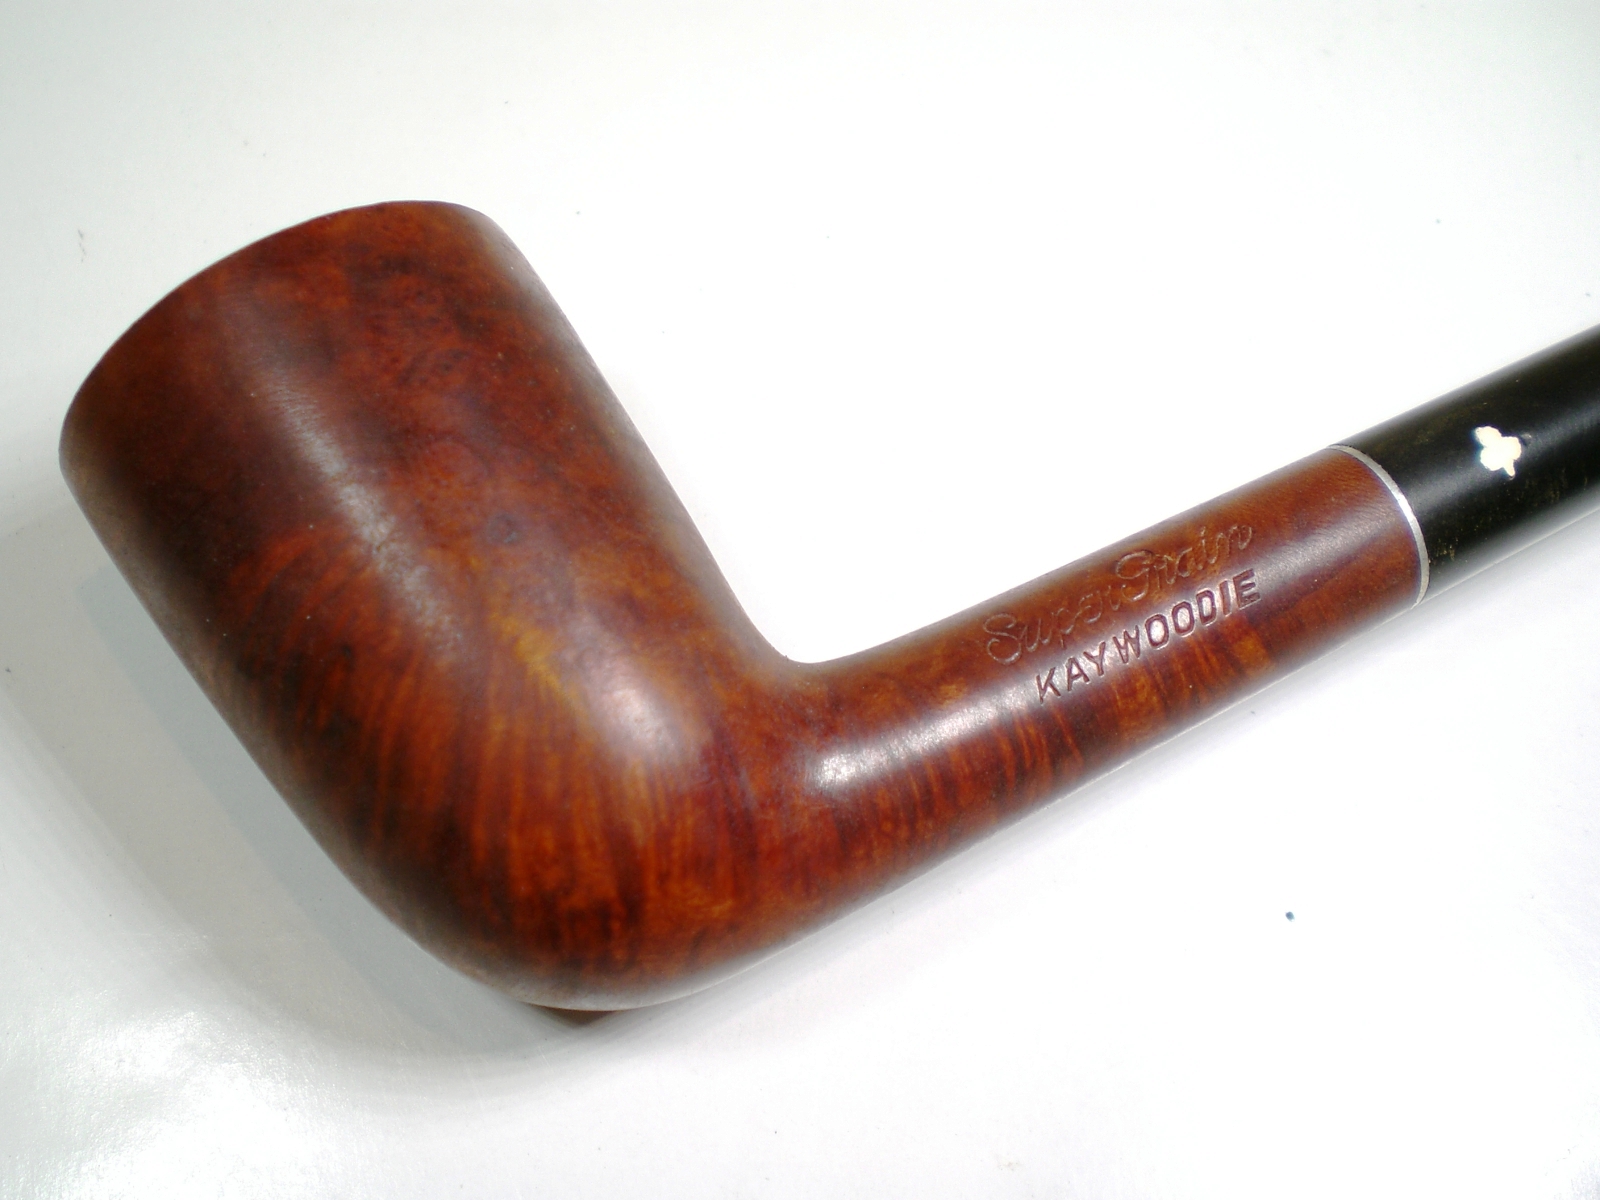
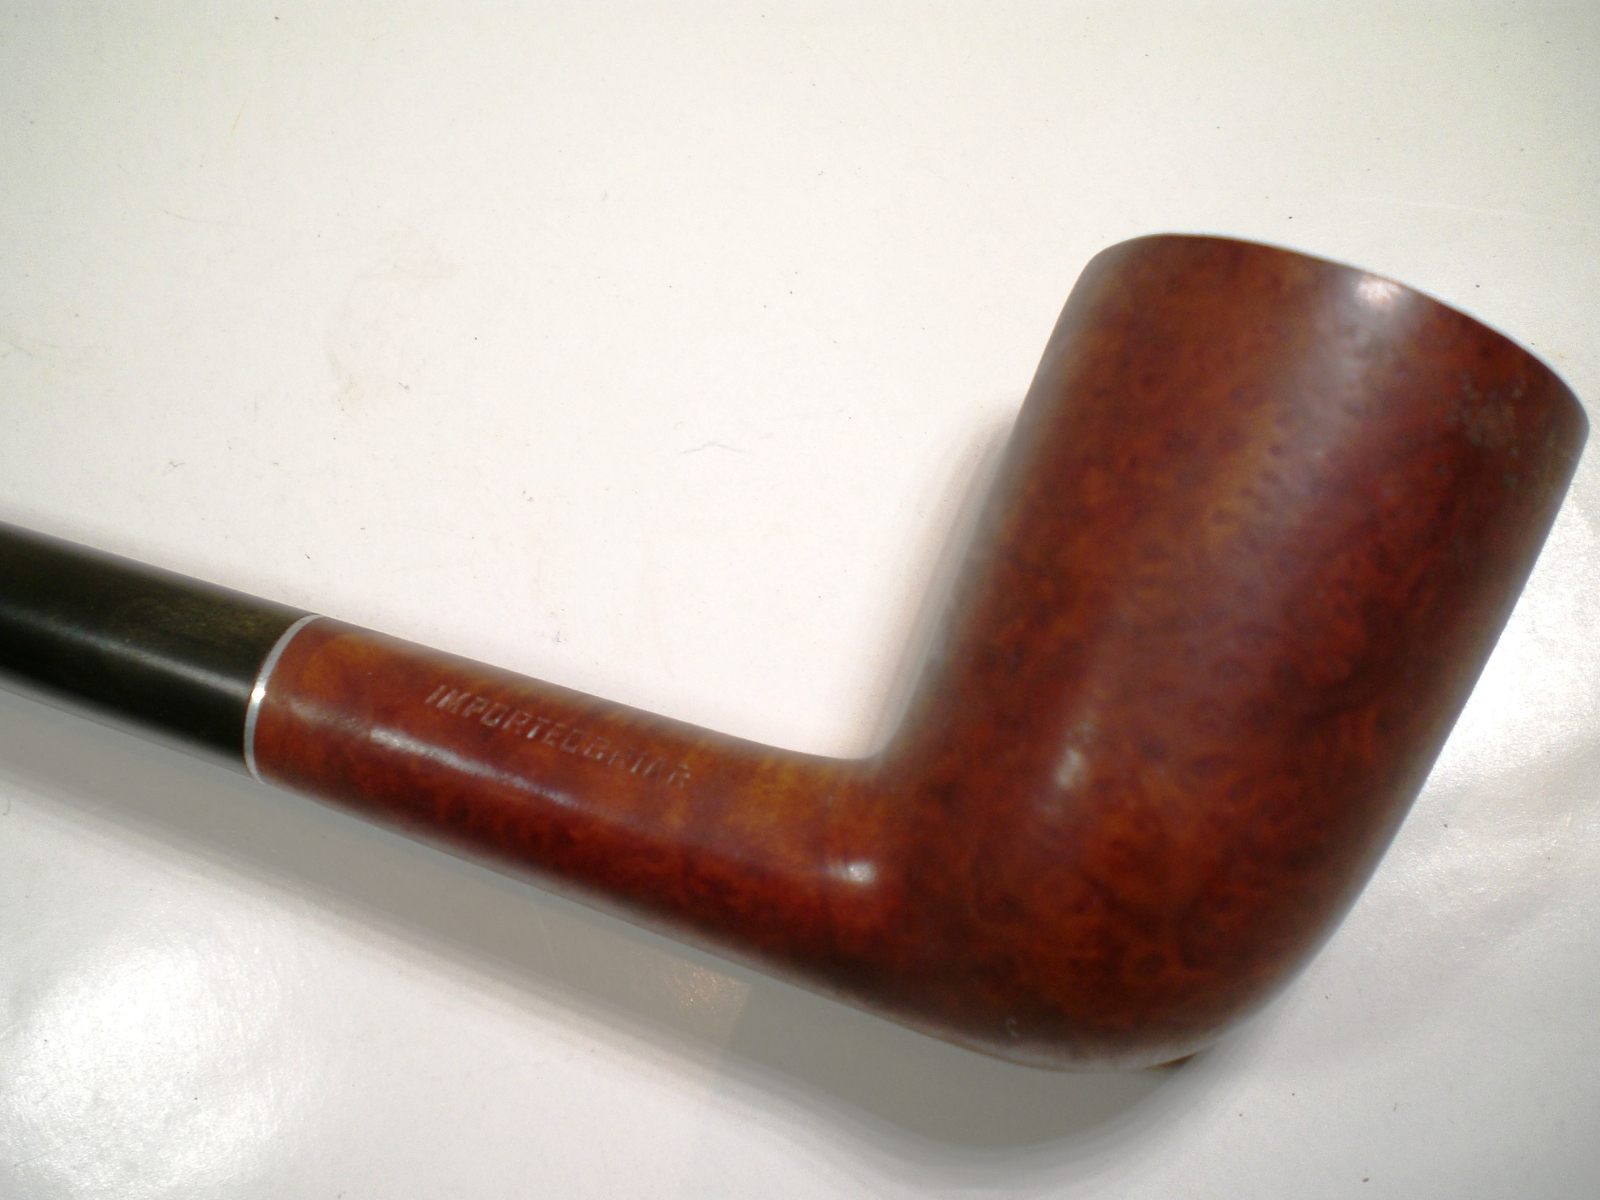
I learned thru the Kaywoodie Forums that the side placement of the stem logo was used in the late 1940’s.  The brochure included with the pipe advertises “97 Years of Pipemaking” Kaywoodie was founded in 1851, which would place the brochure as being used in 1948.  Kaywoodie also placed the grade of the pipe (Supergrain) above Kaywoodie until 1955.   Thanks to the forum feedback, an educated guess is that the pipe was made sometime in the late 1940’s to early 1950’s.  I haven’t yet learned why this one does not have the Shape number stamped on the pipe.    Below is a page from the 1947 Kaywoodie catalog, showing the Shape 95.

1947_Kaywoodie_Catalog_Shape-95

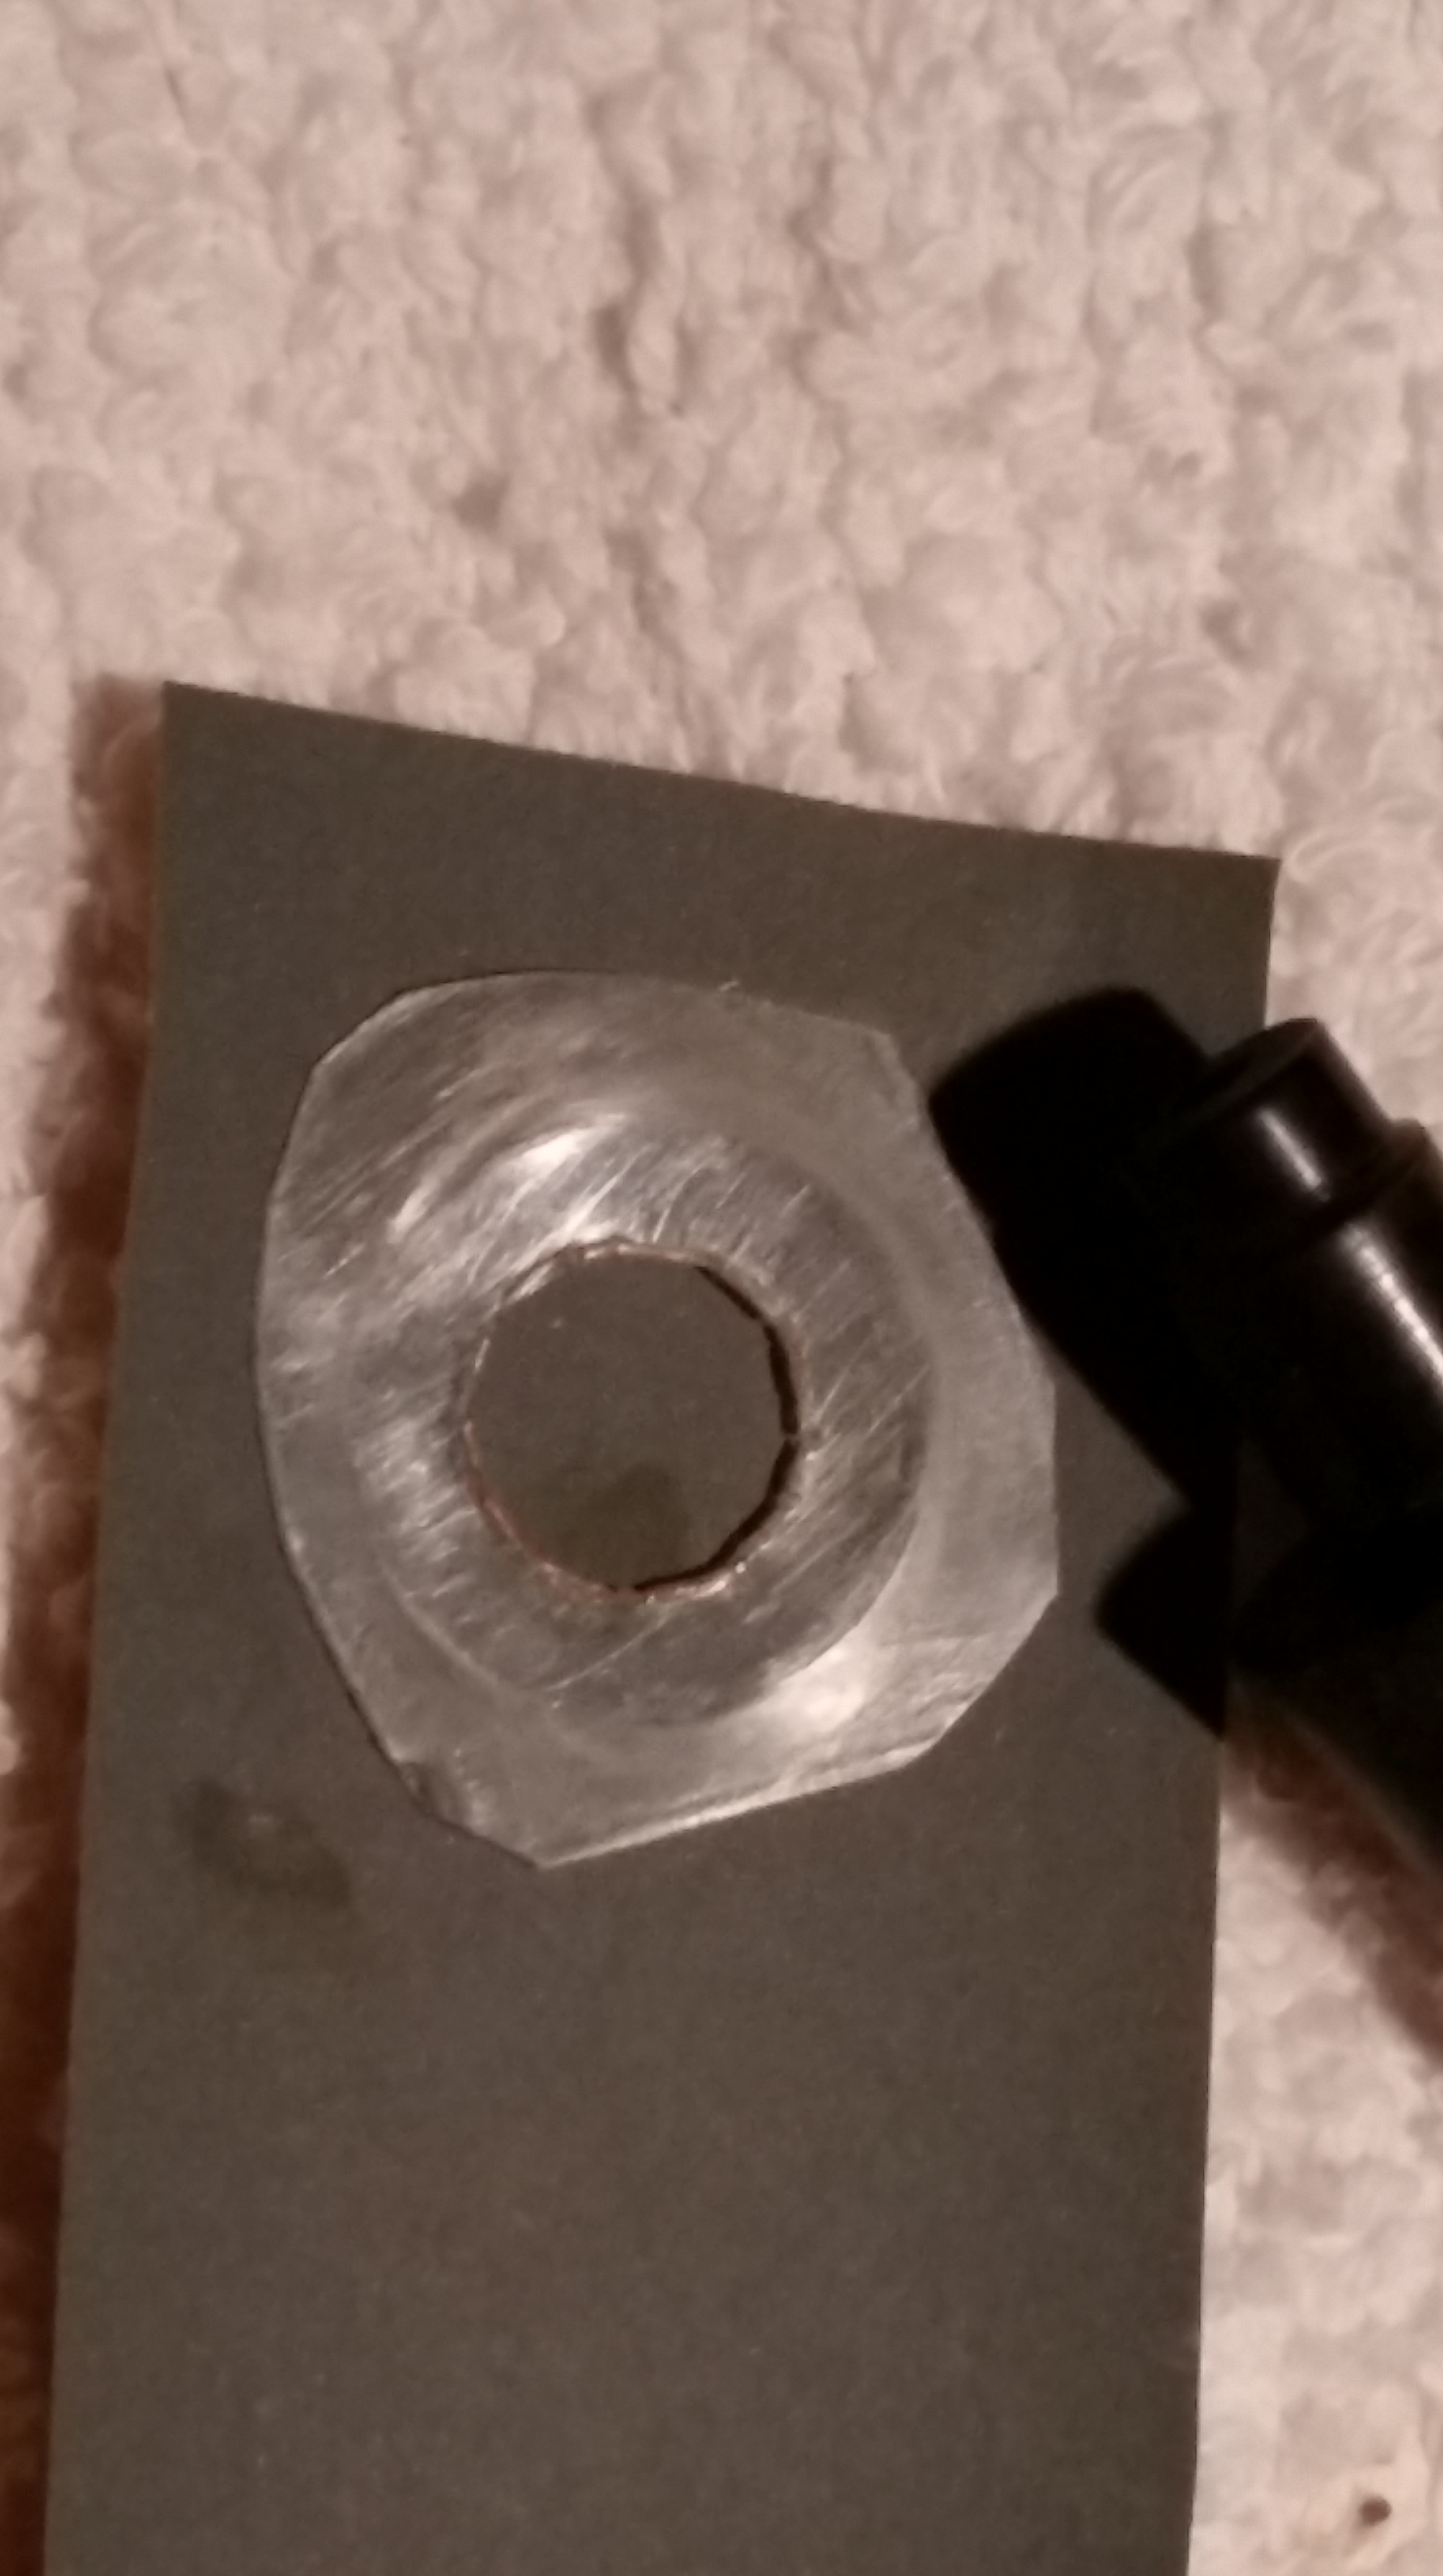
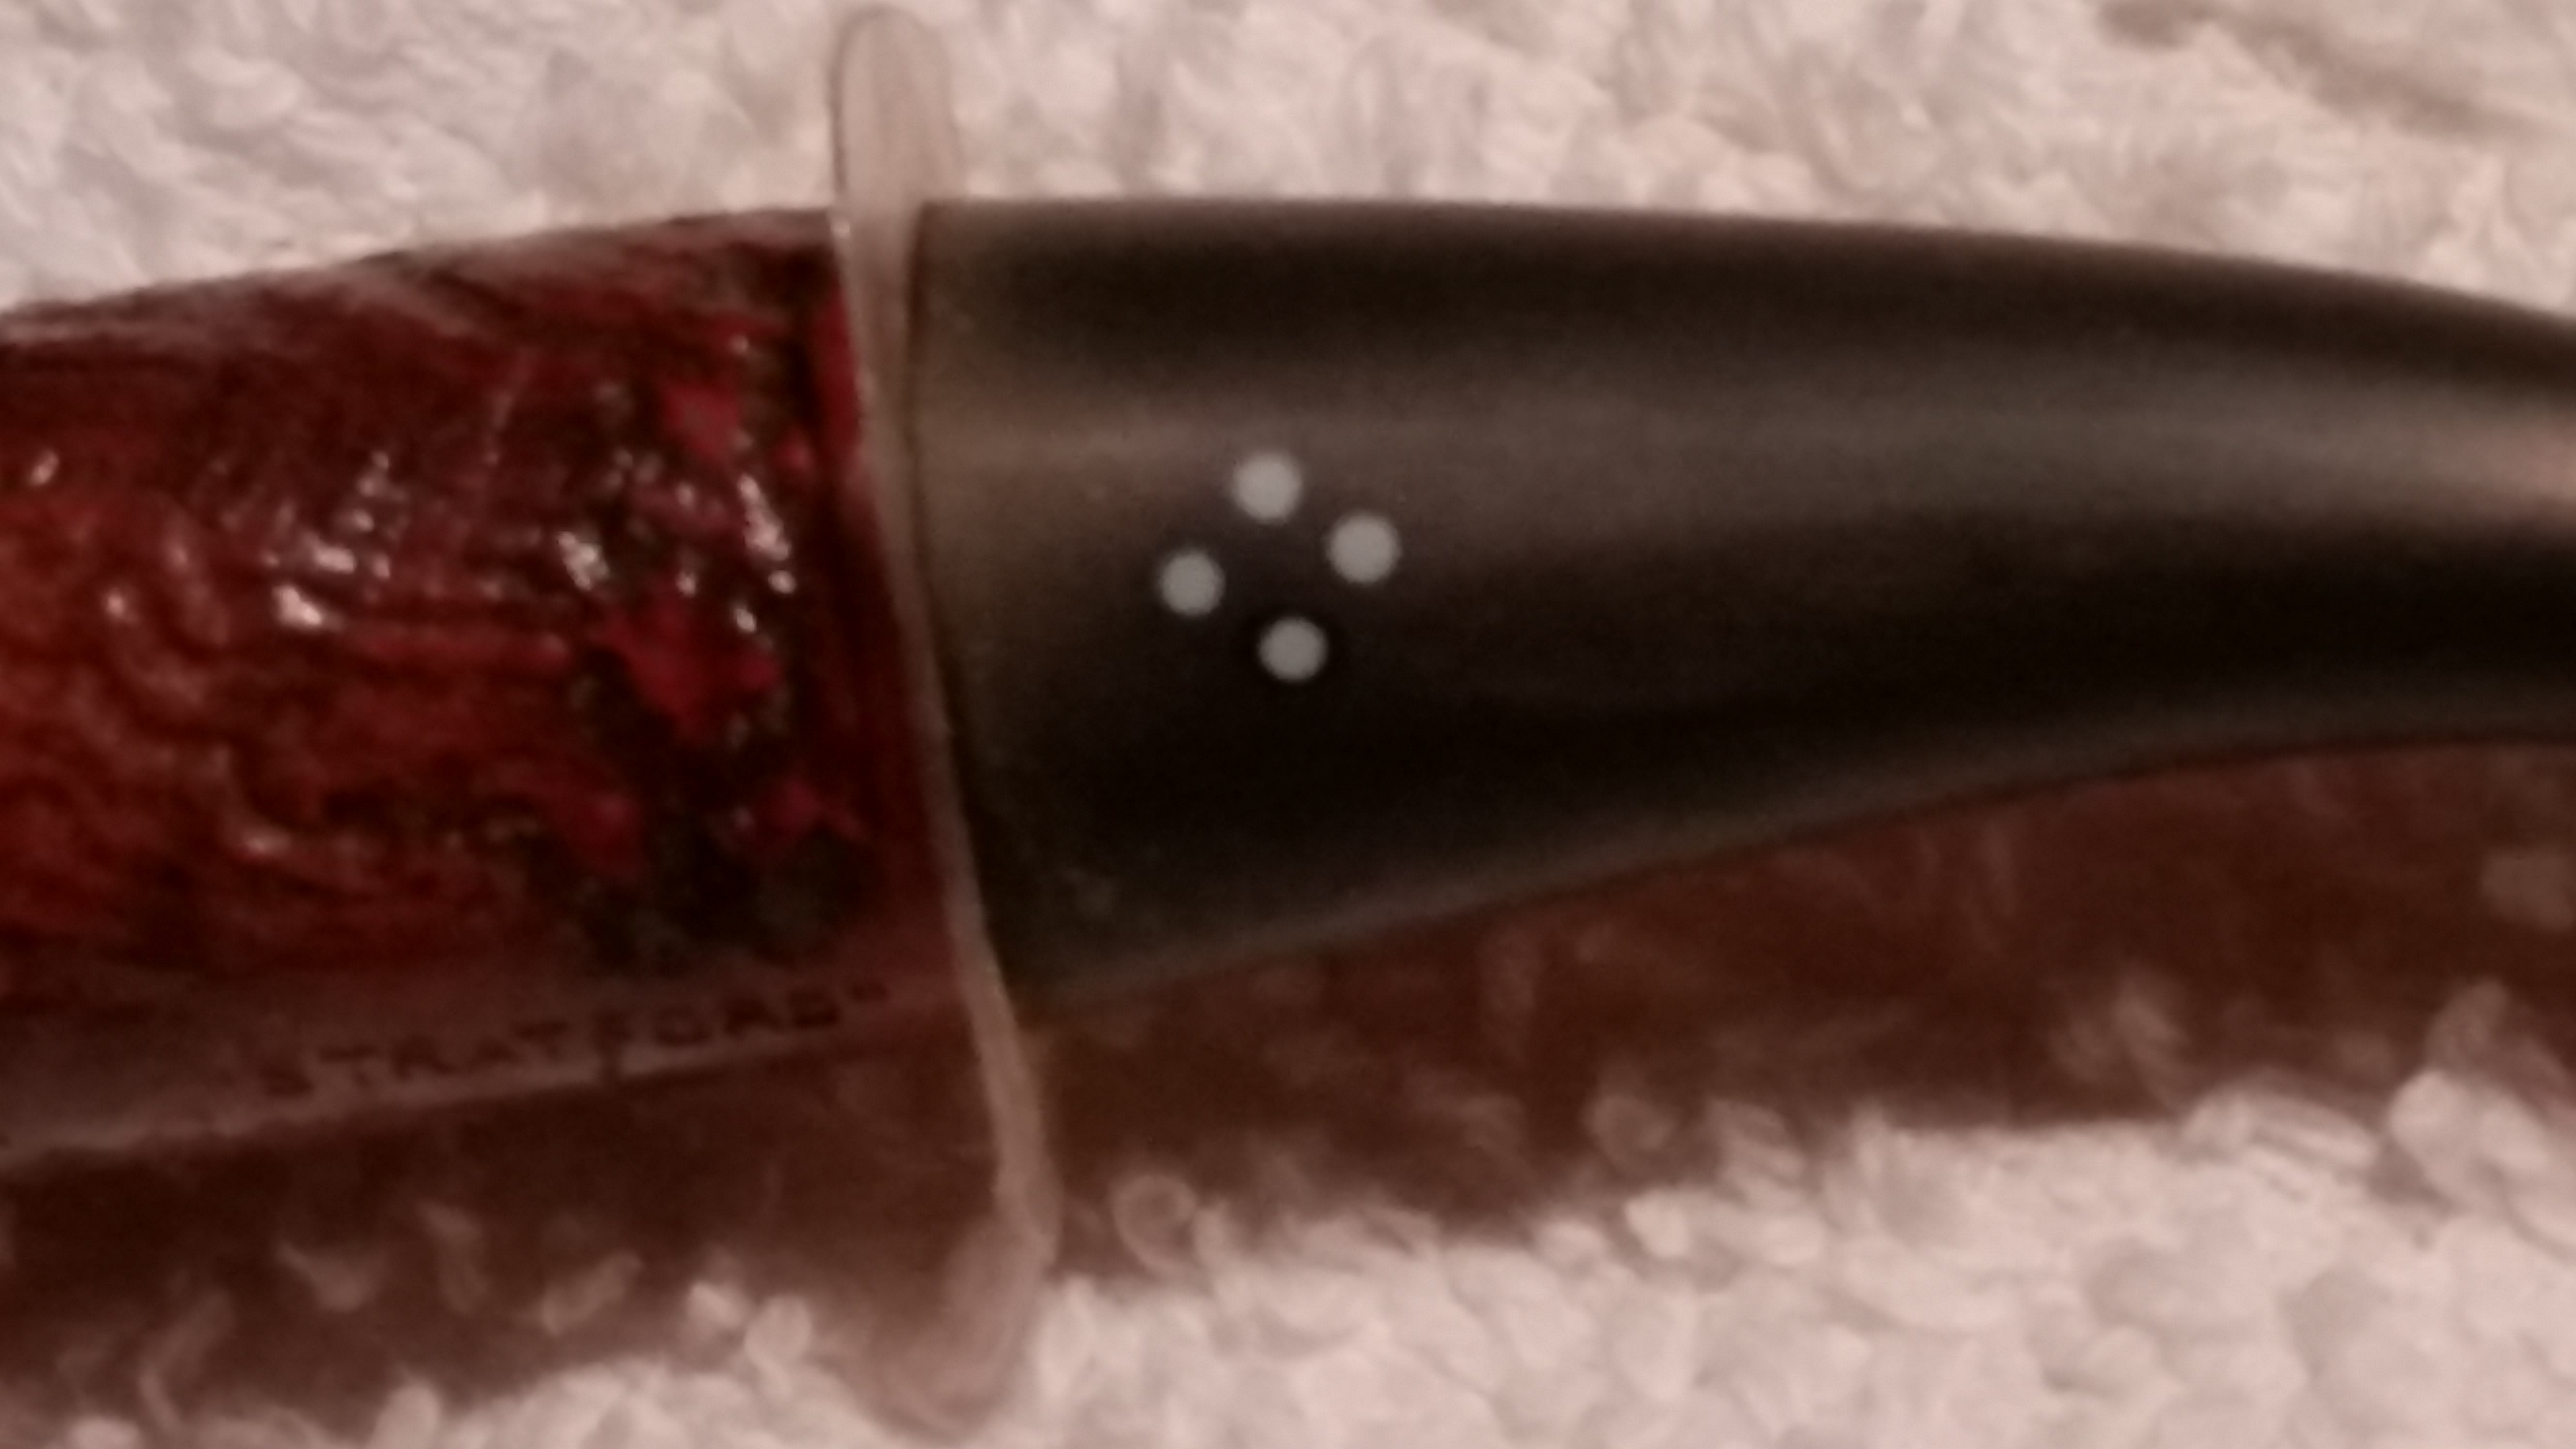
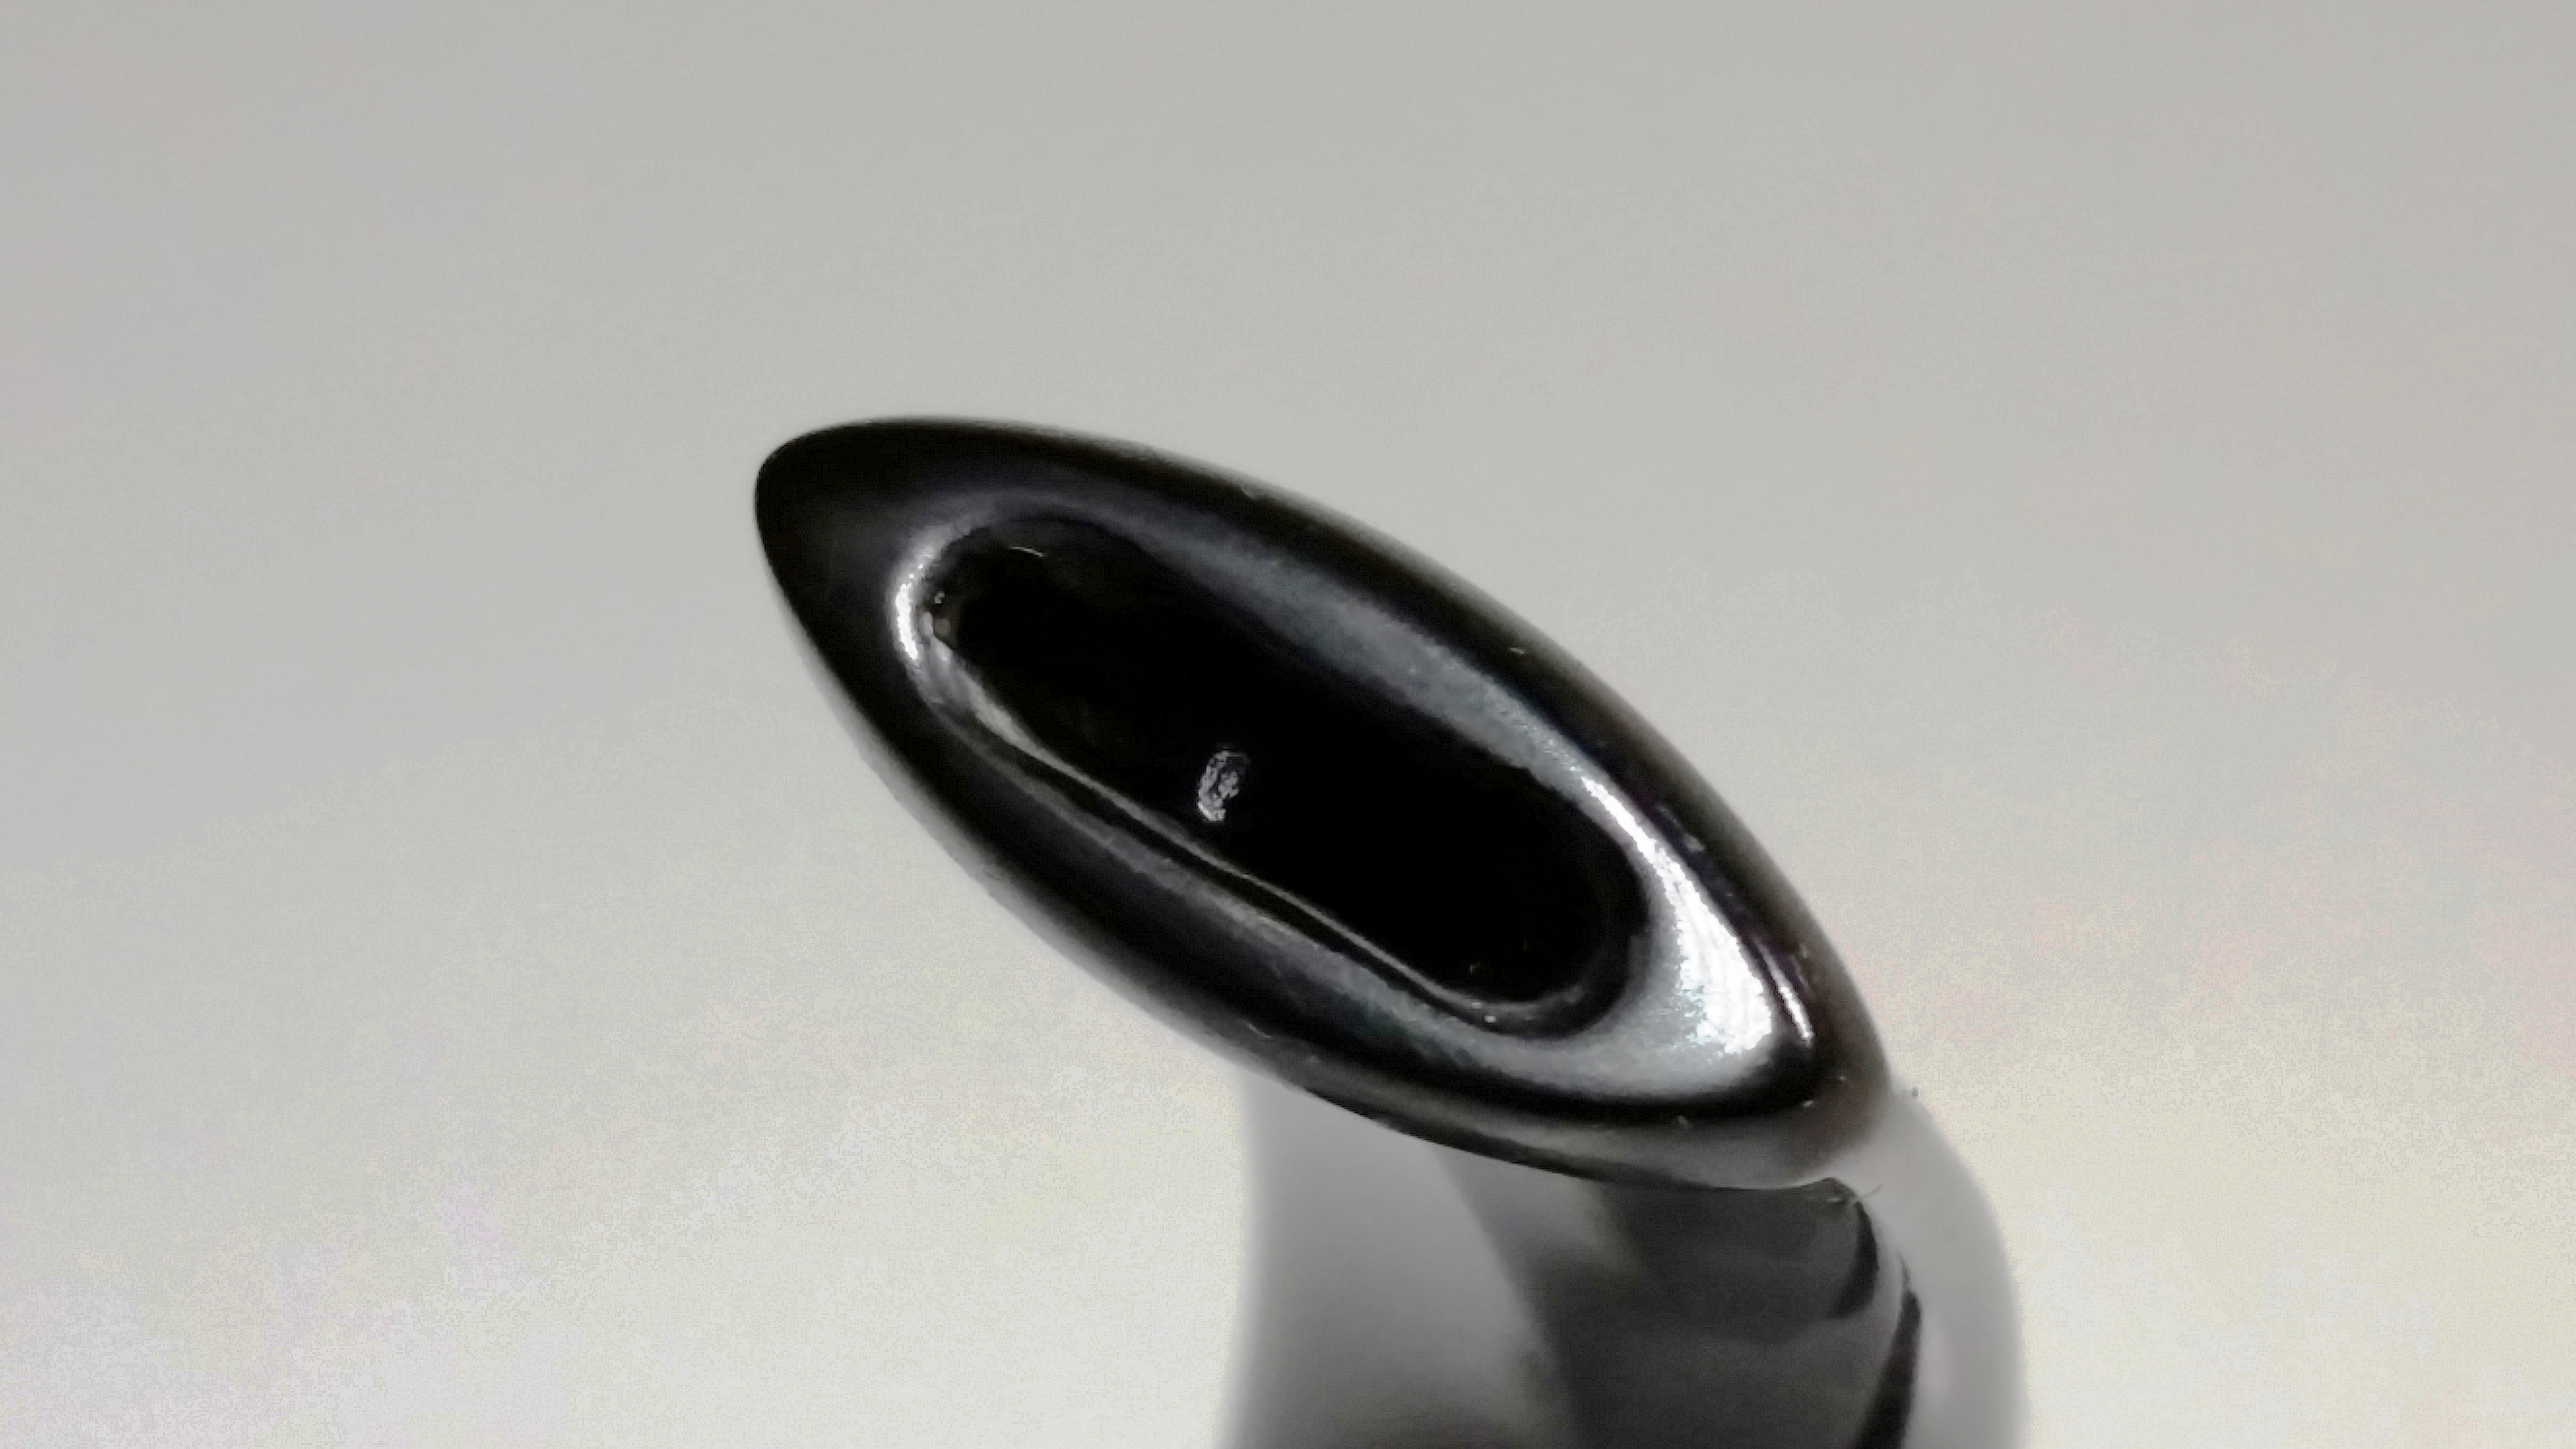
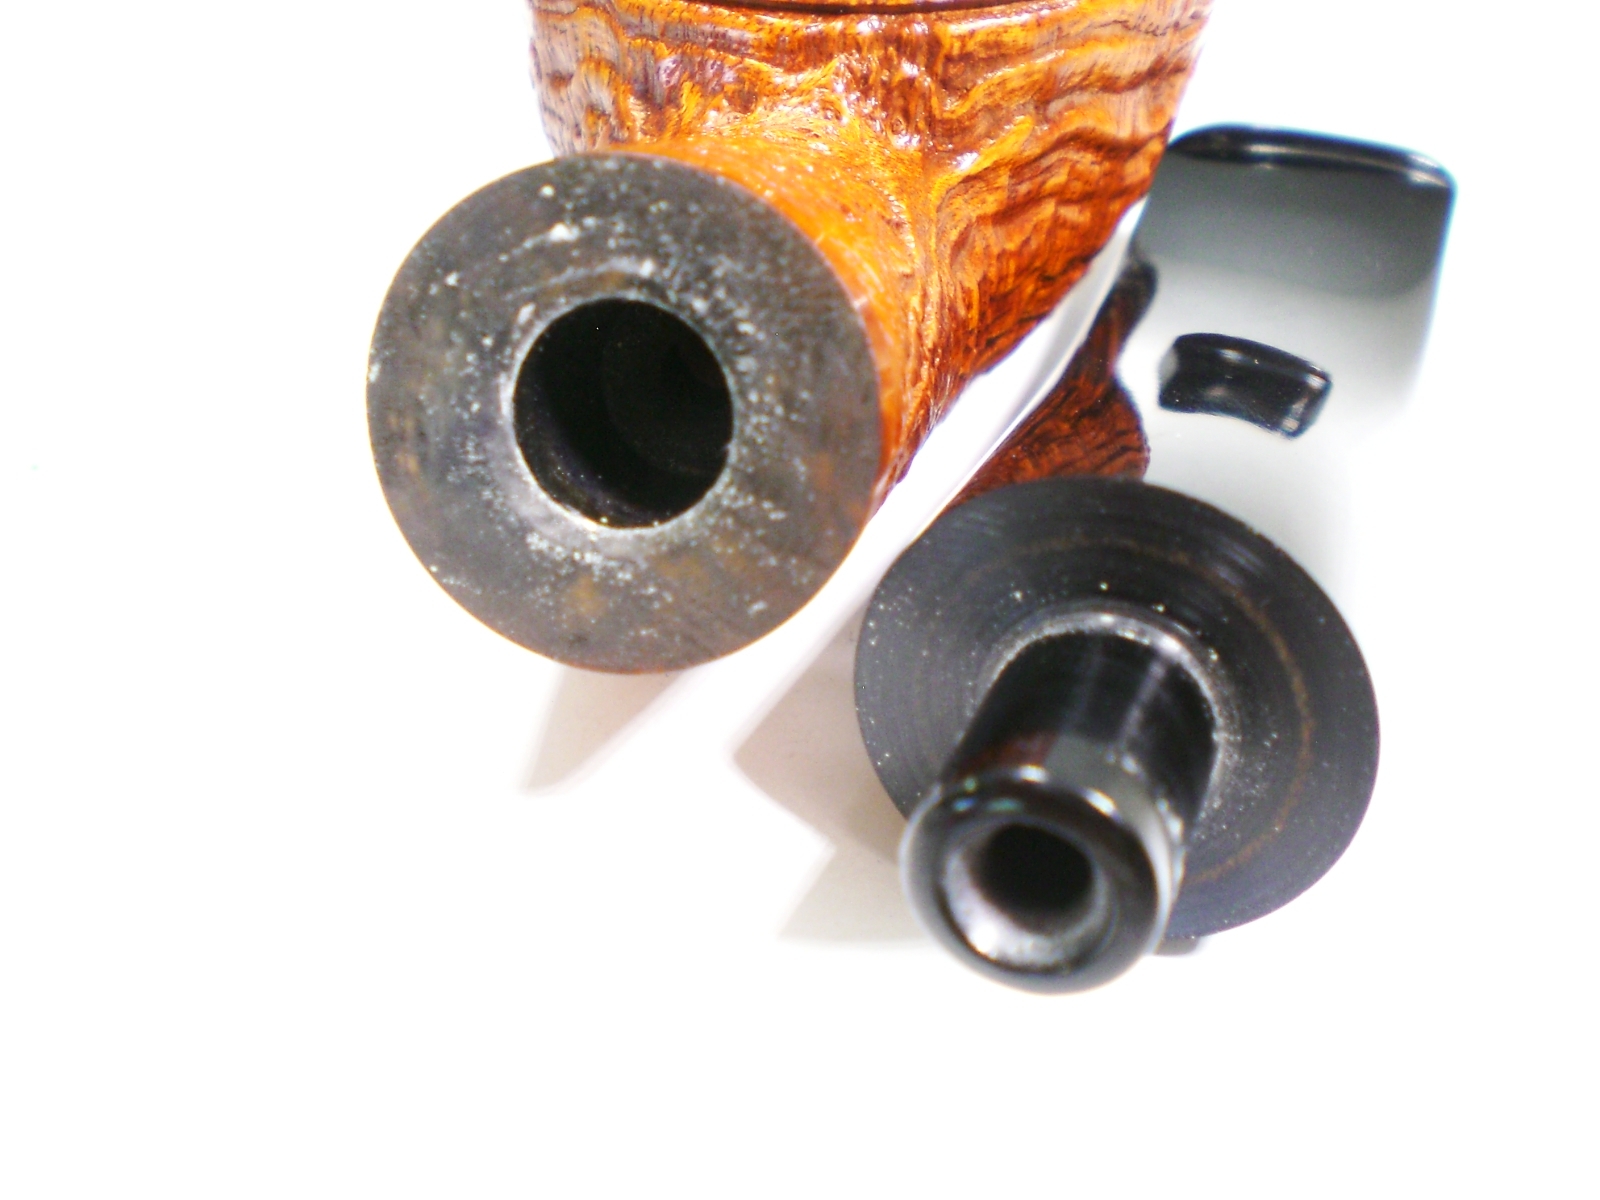
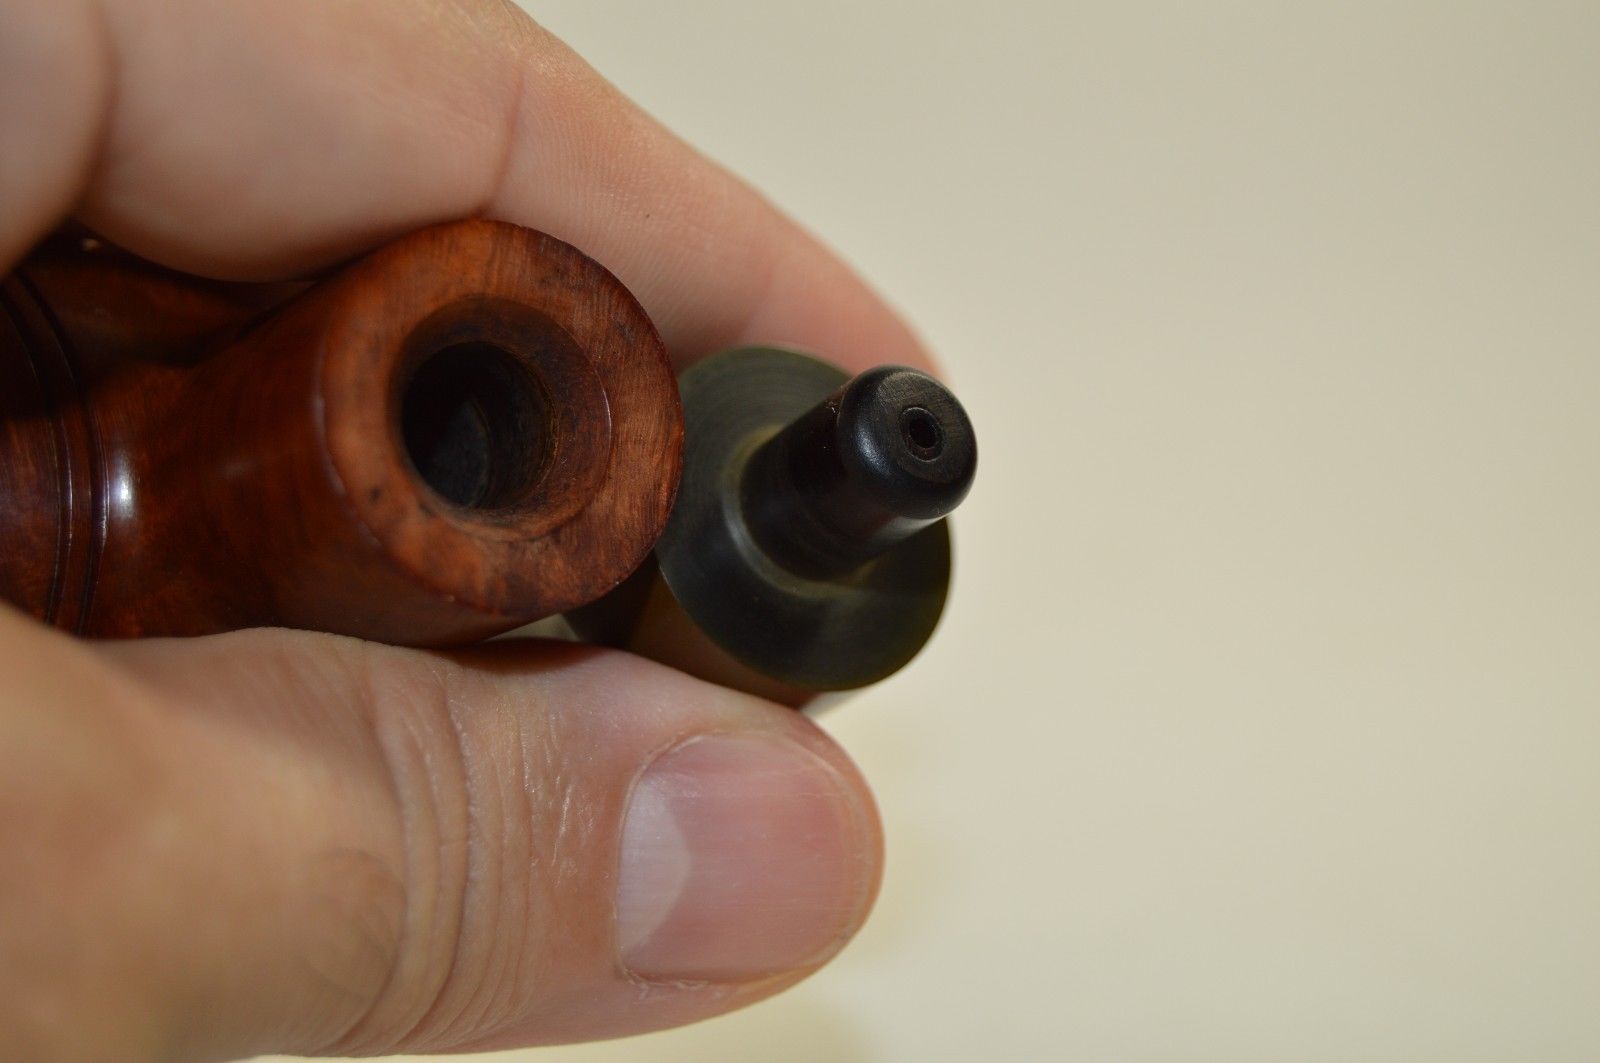
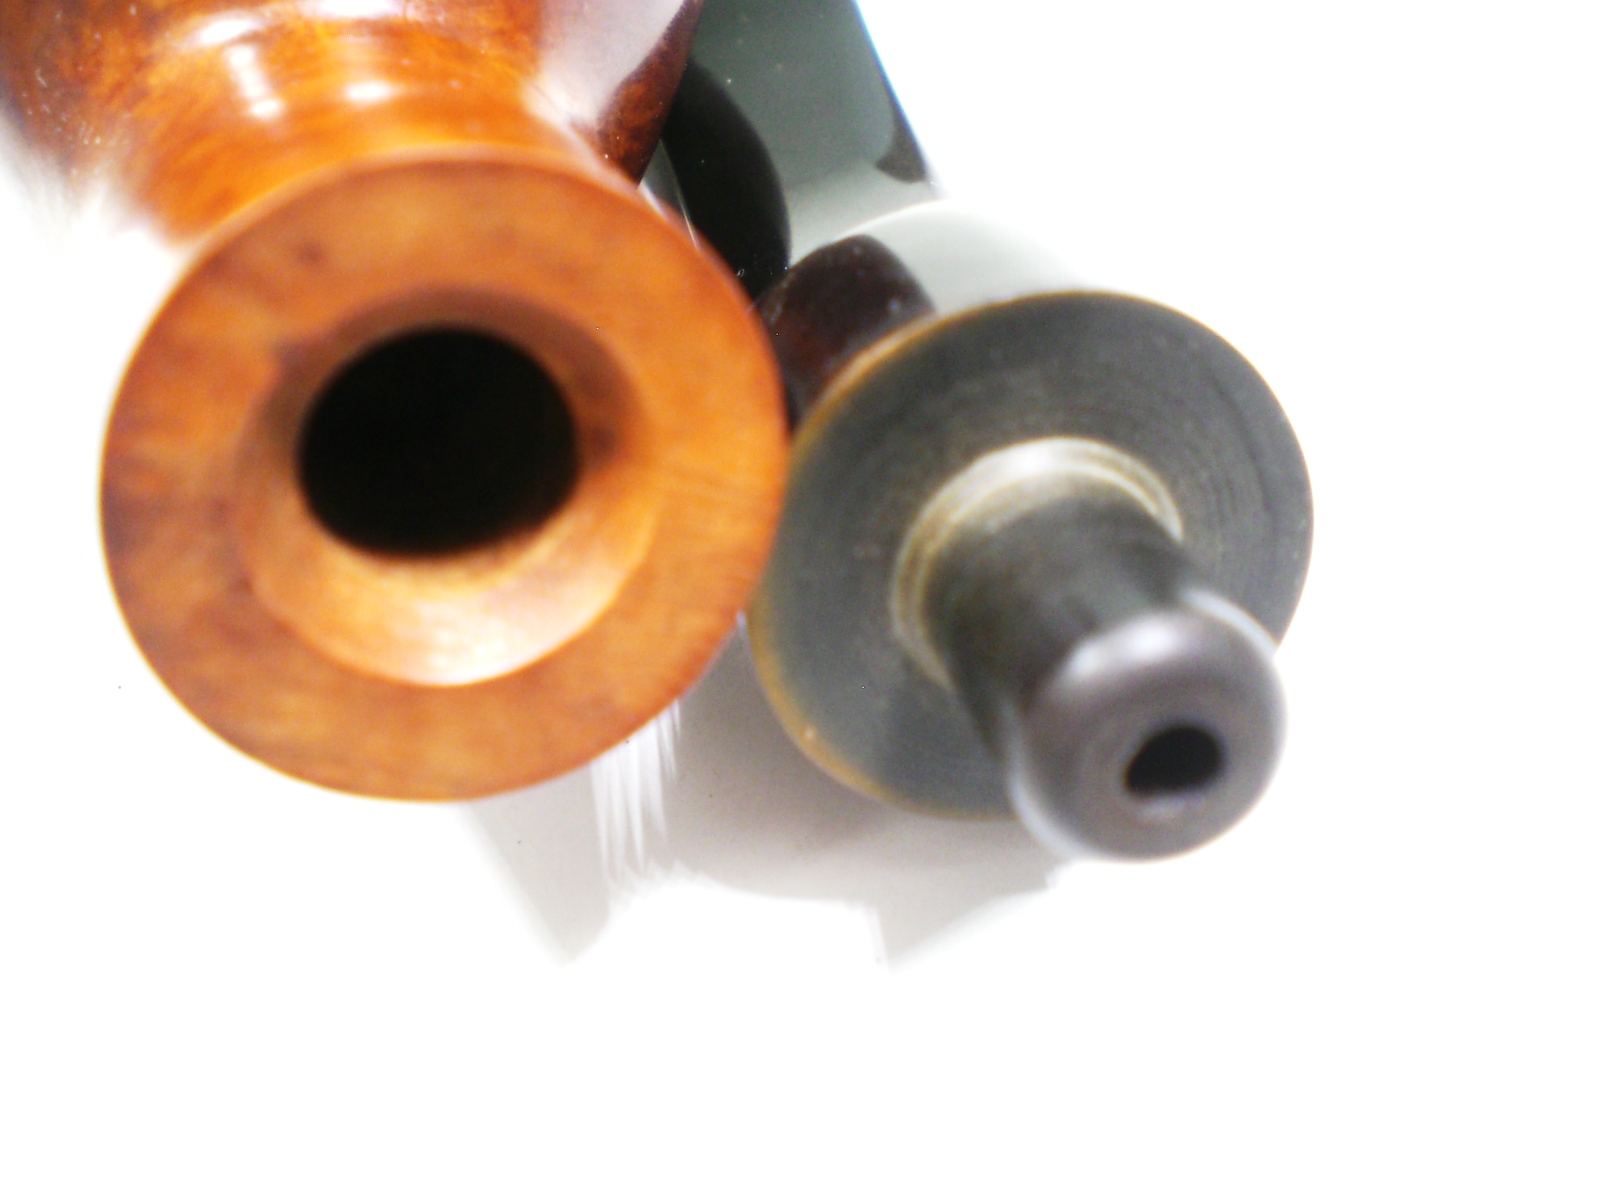
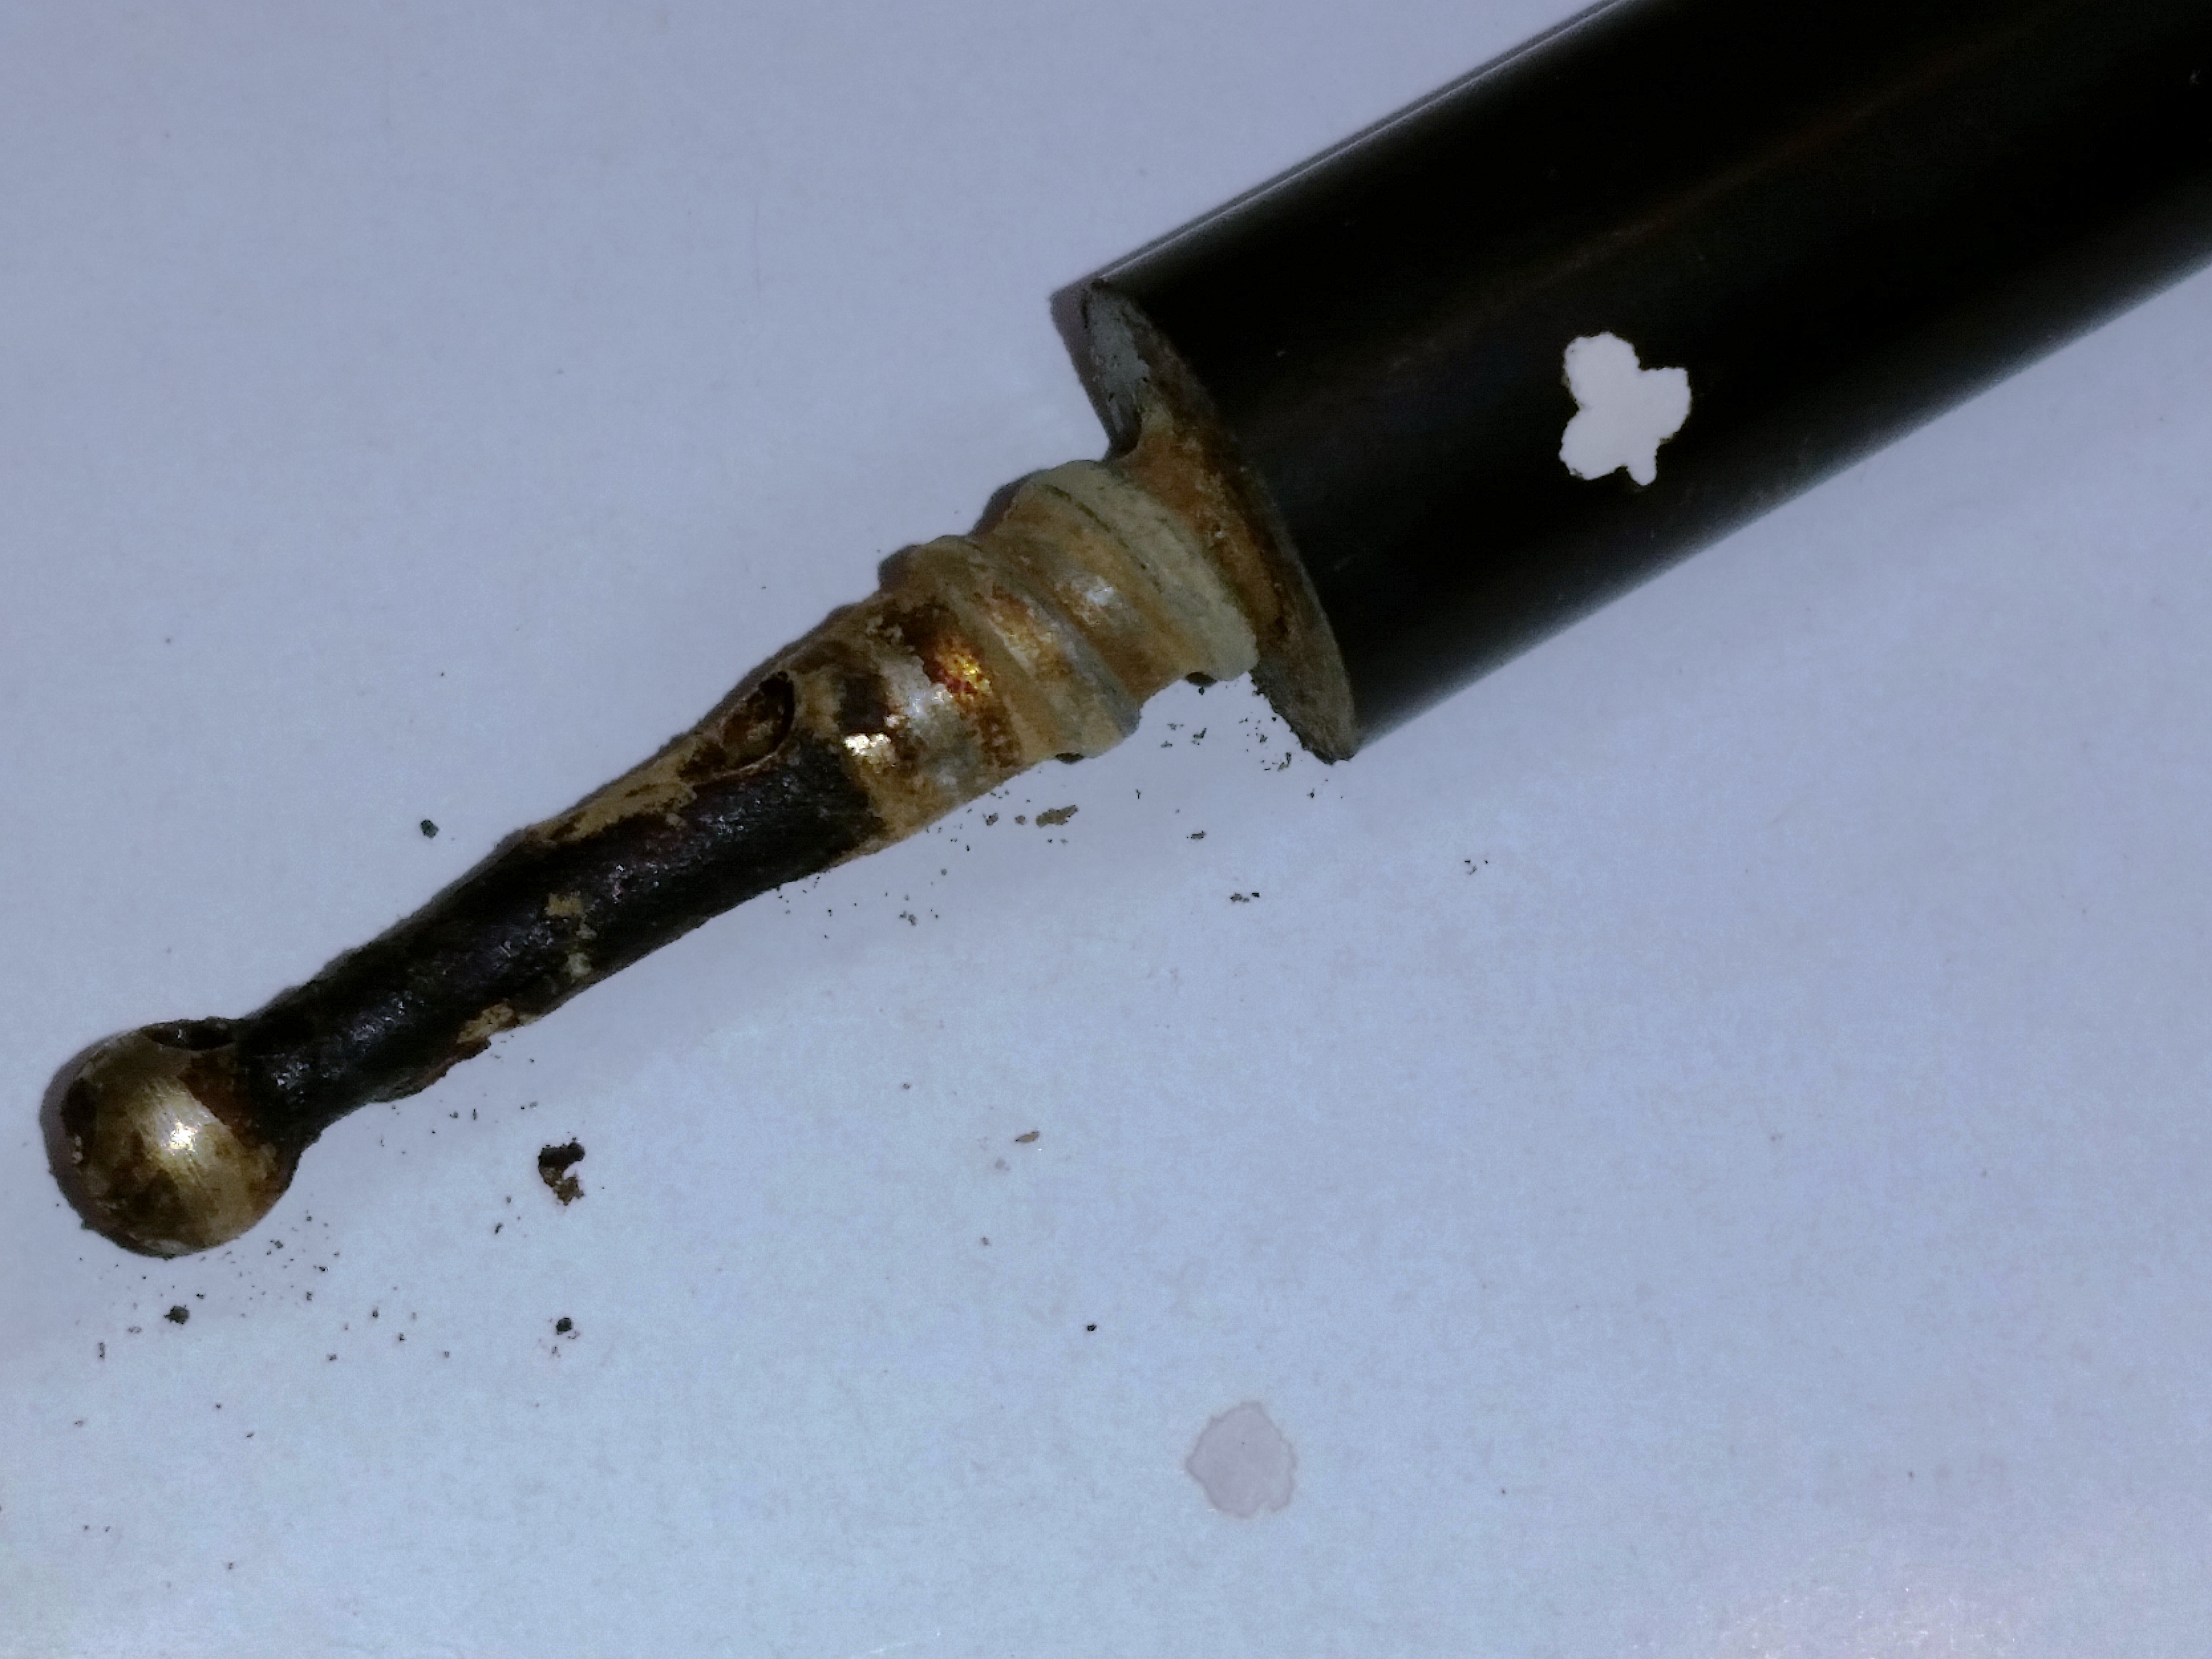
This picture shows the detail of the “Drinkless” 4-hole stinger.  Earlier 4-hole stingers used a larger ball.

Kaywoodie_95_Supergrain_4-Stinger

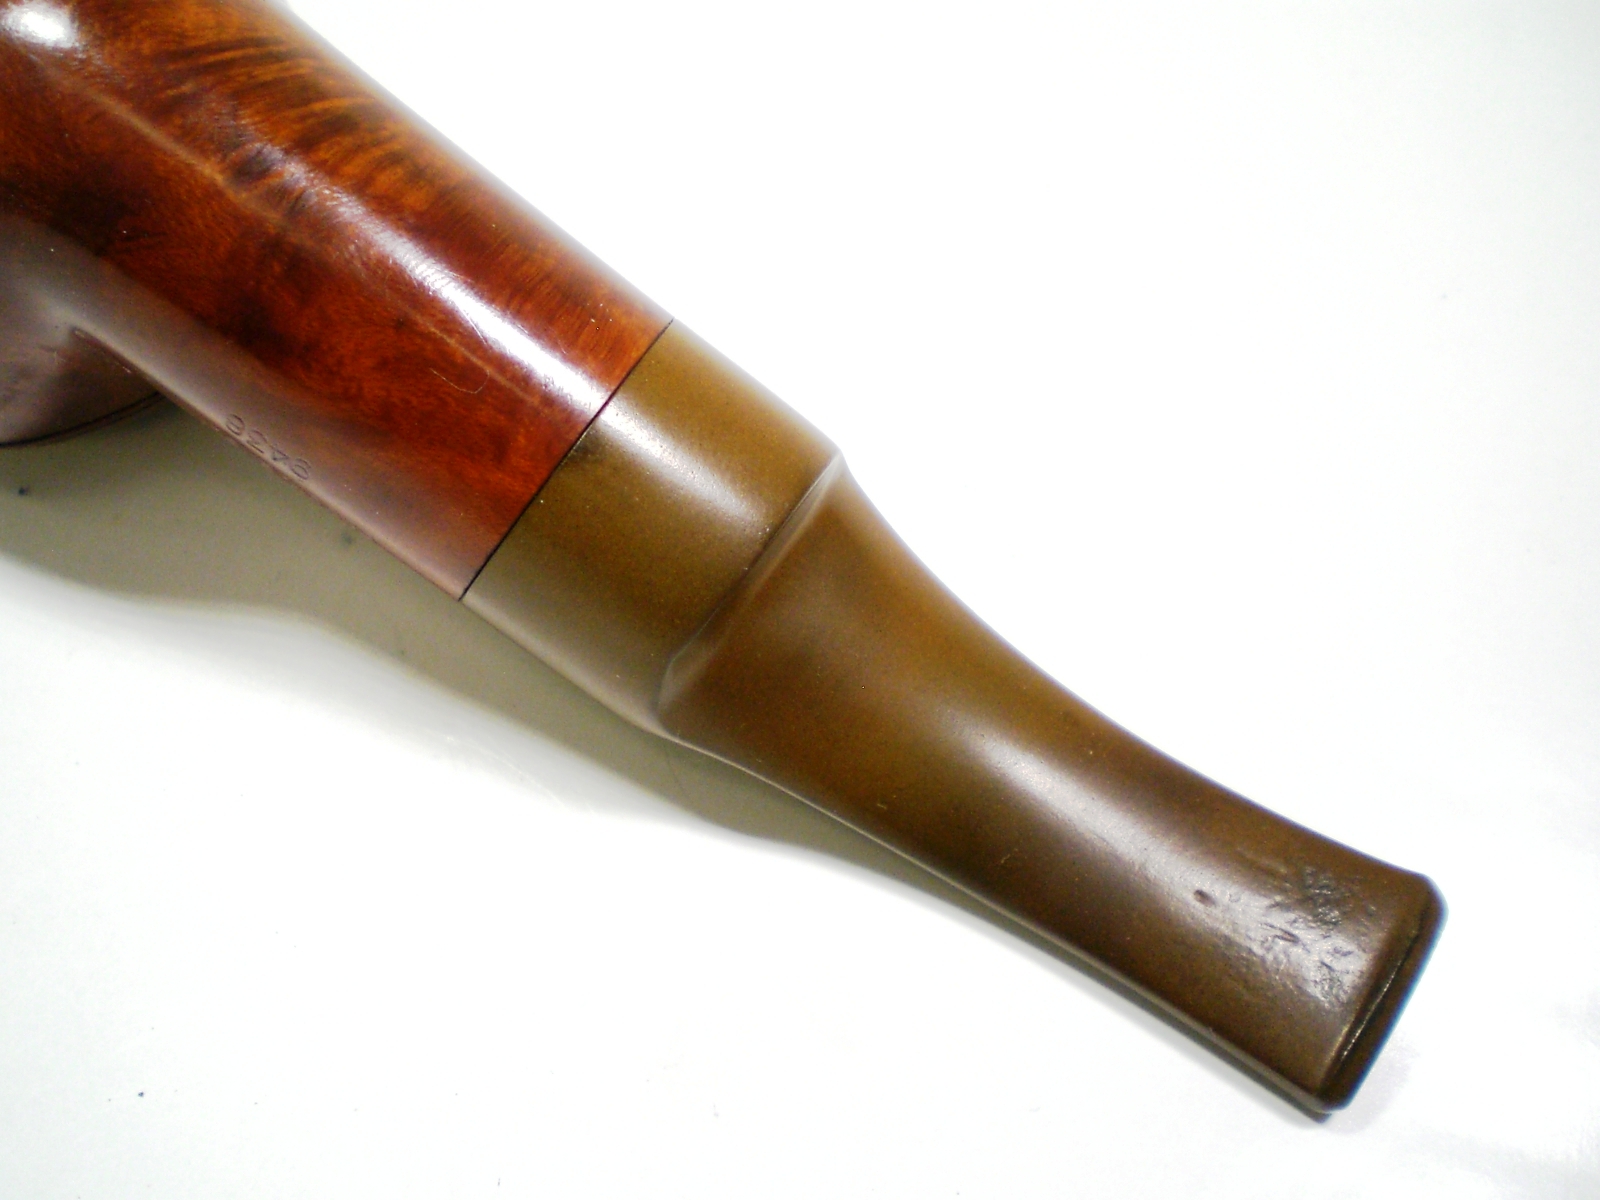
After the bowl soak was complete, I scrubbed the inside of the slender shank with some bristle cleaners soaked in alcohol.  I also ran some cleaners with alcohol thru the long stem and stinger.

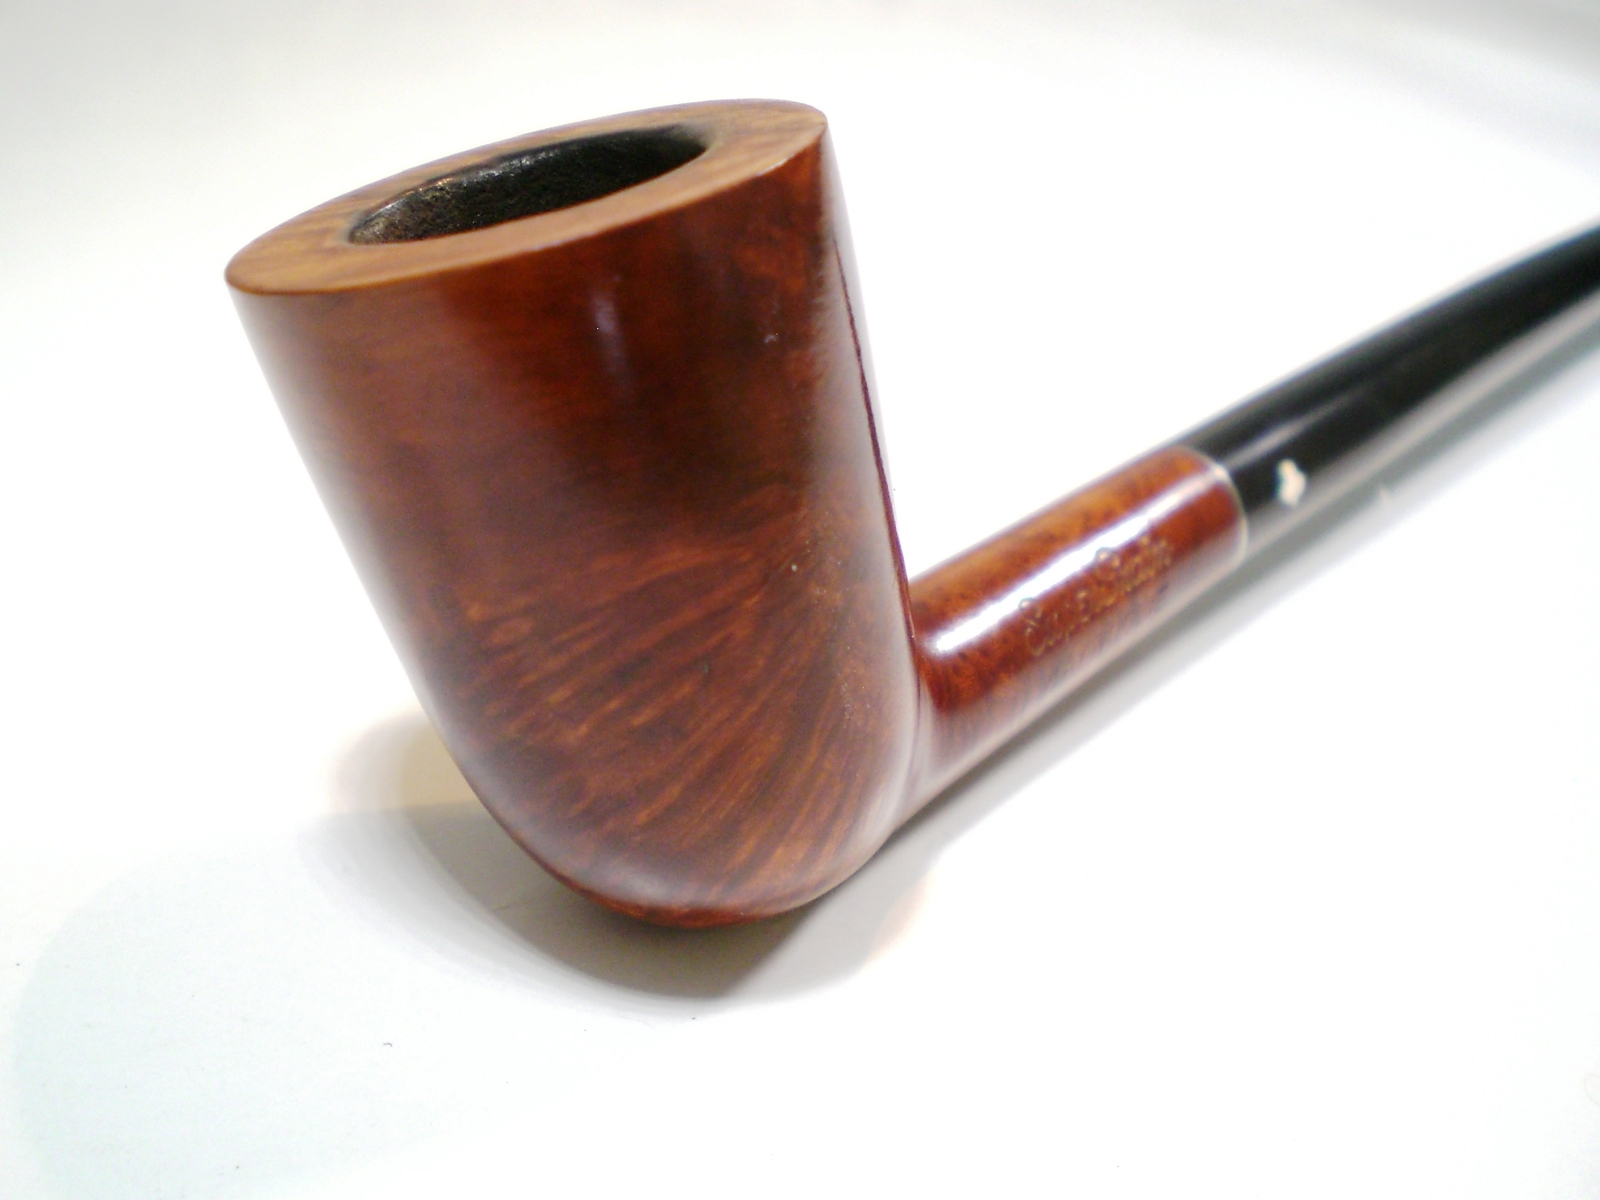
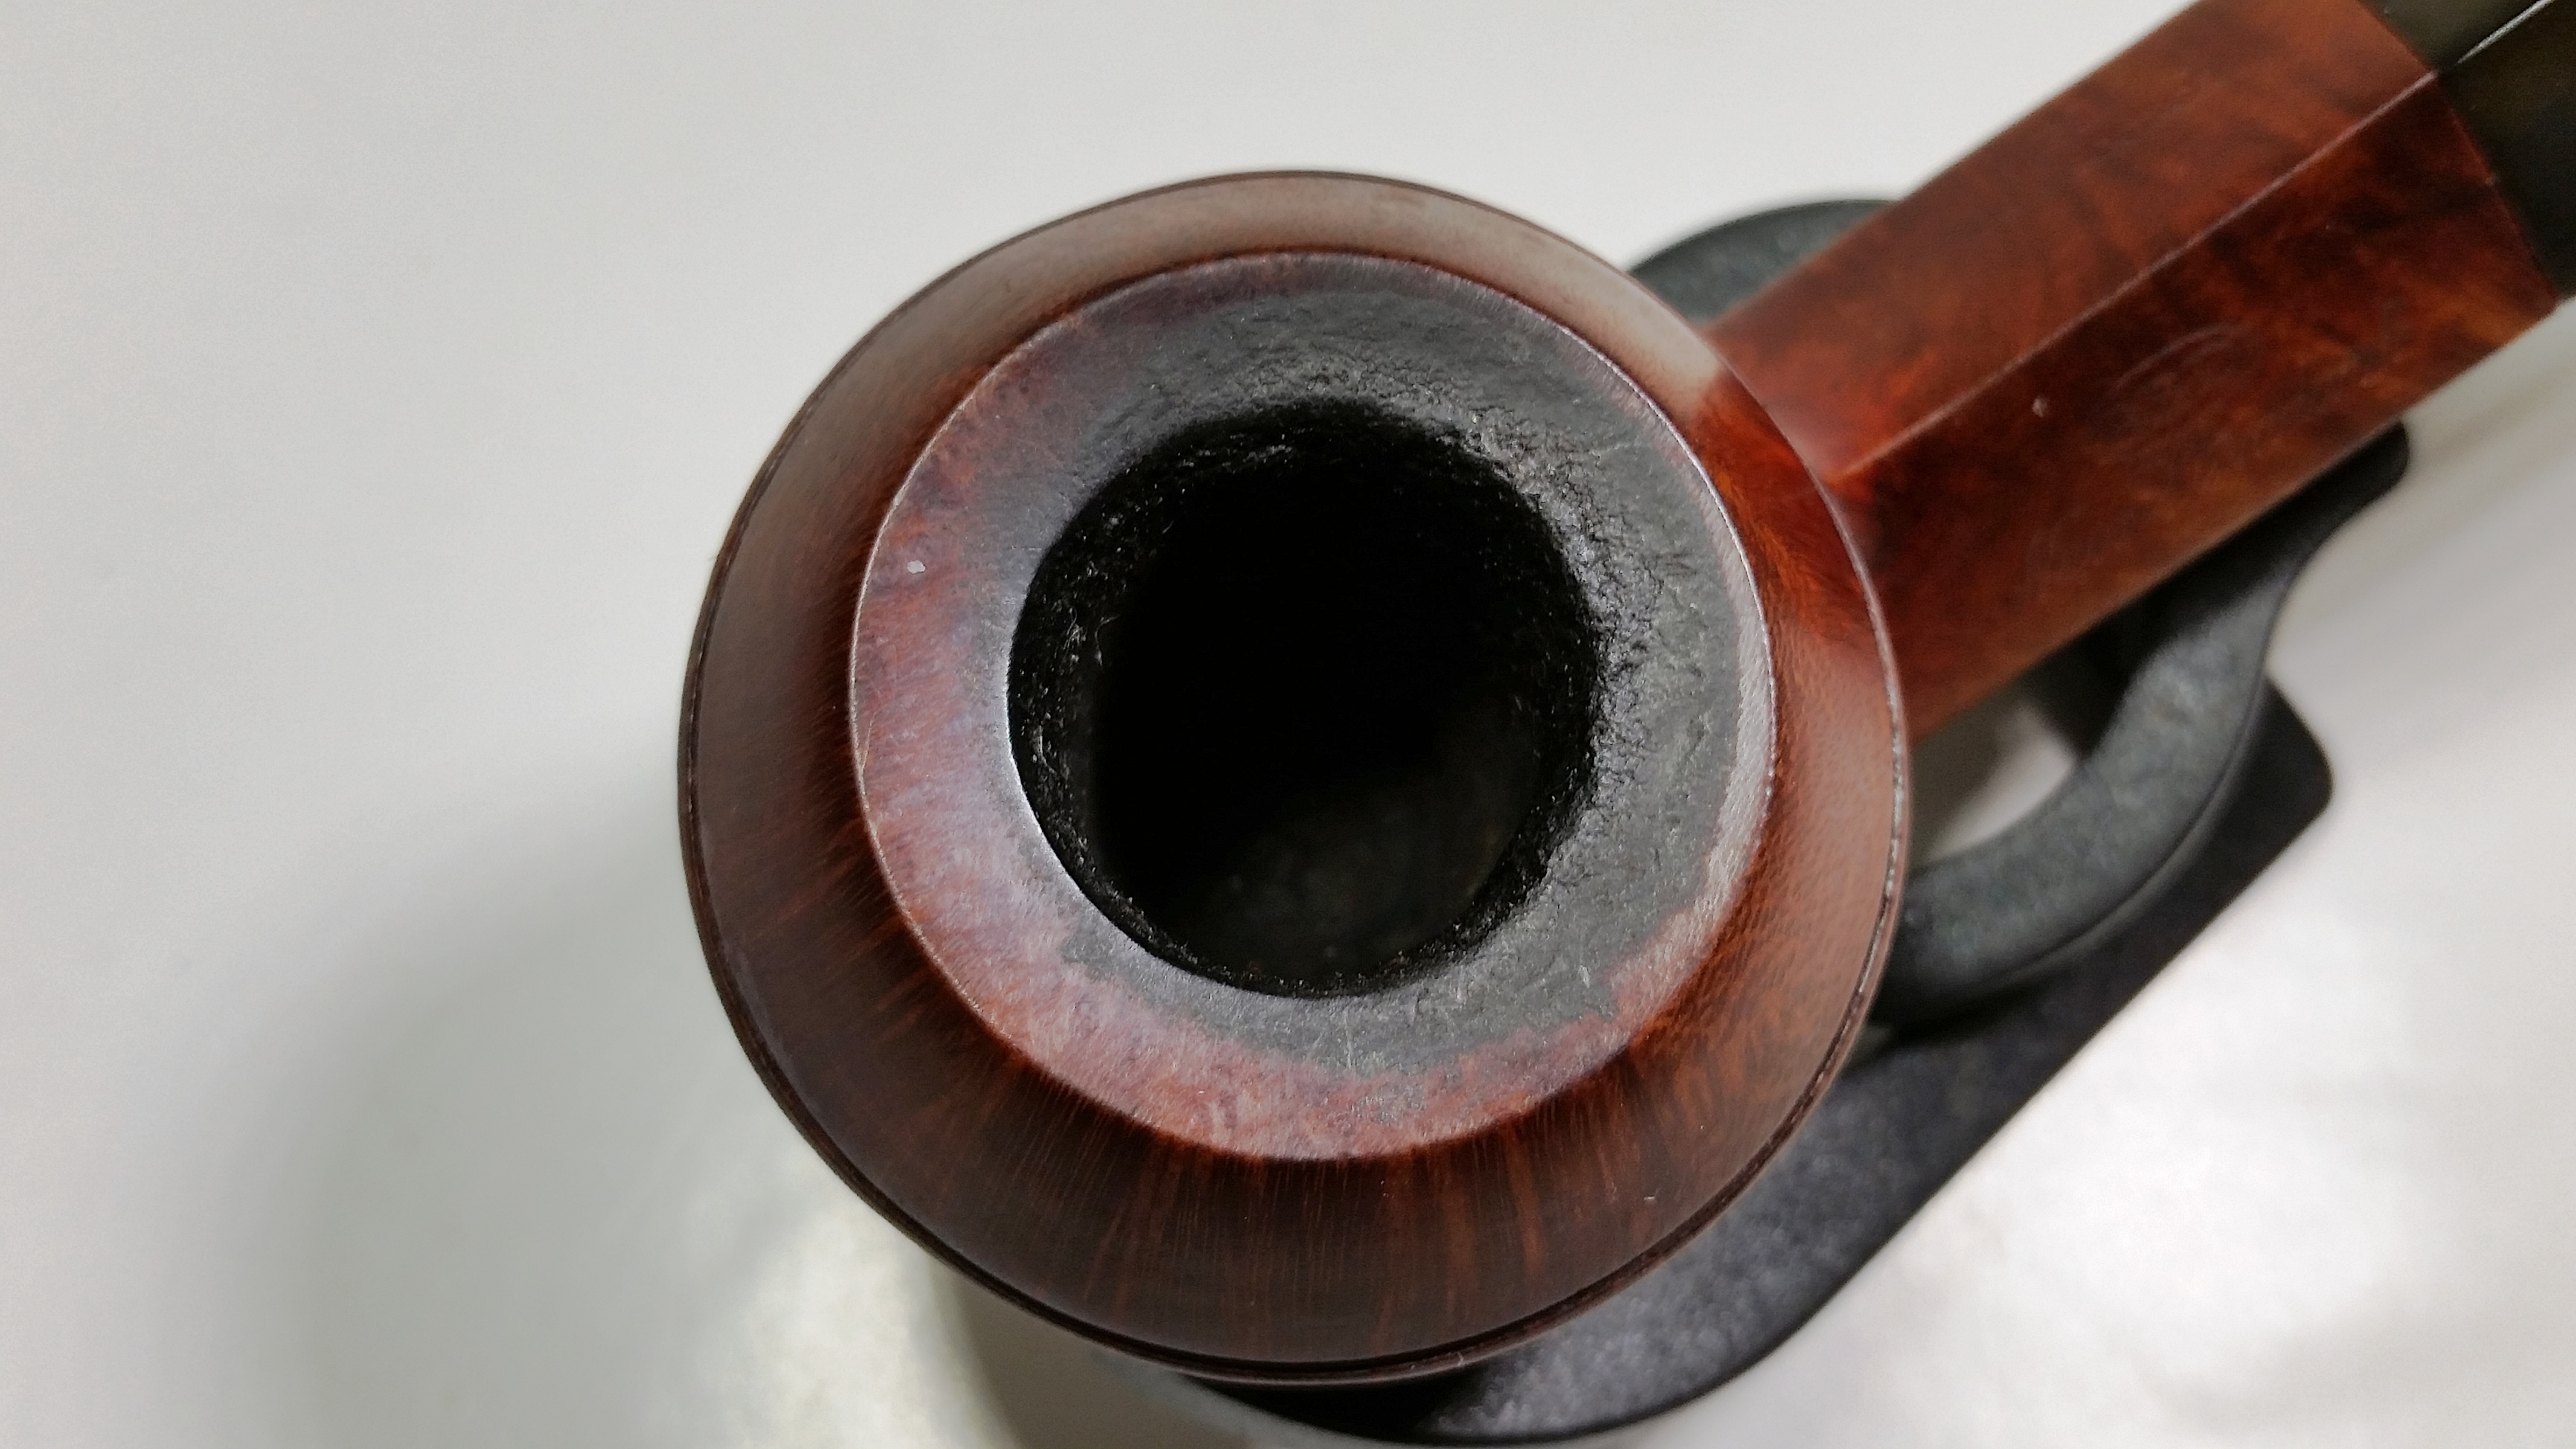
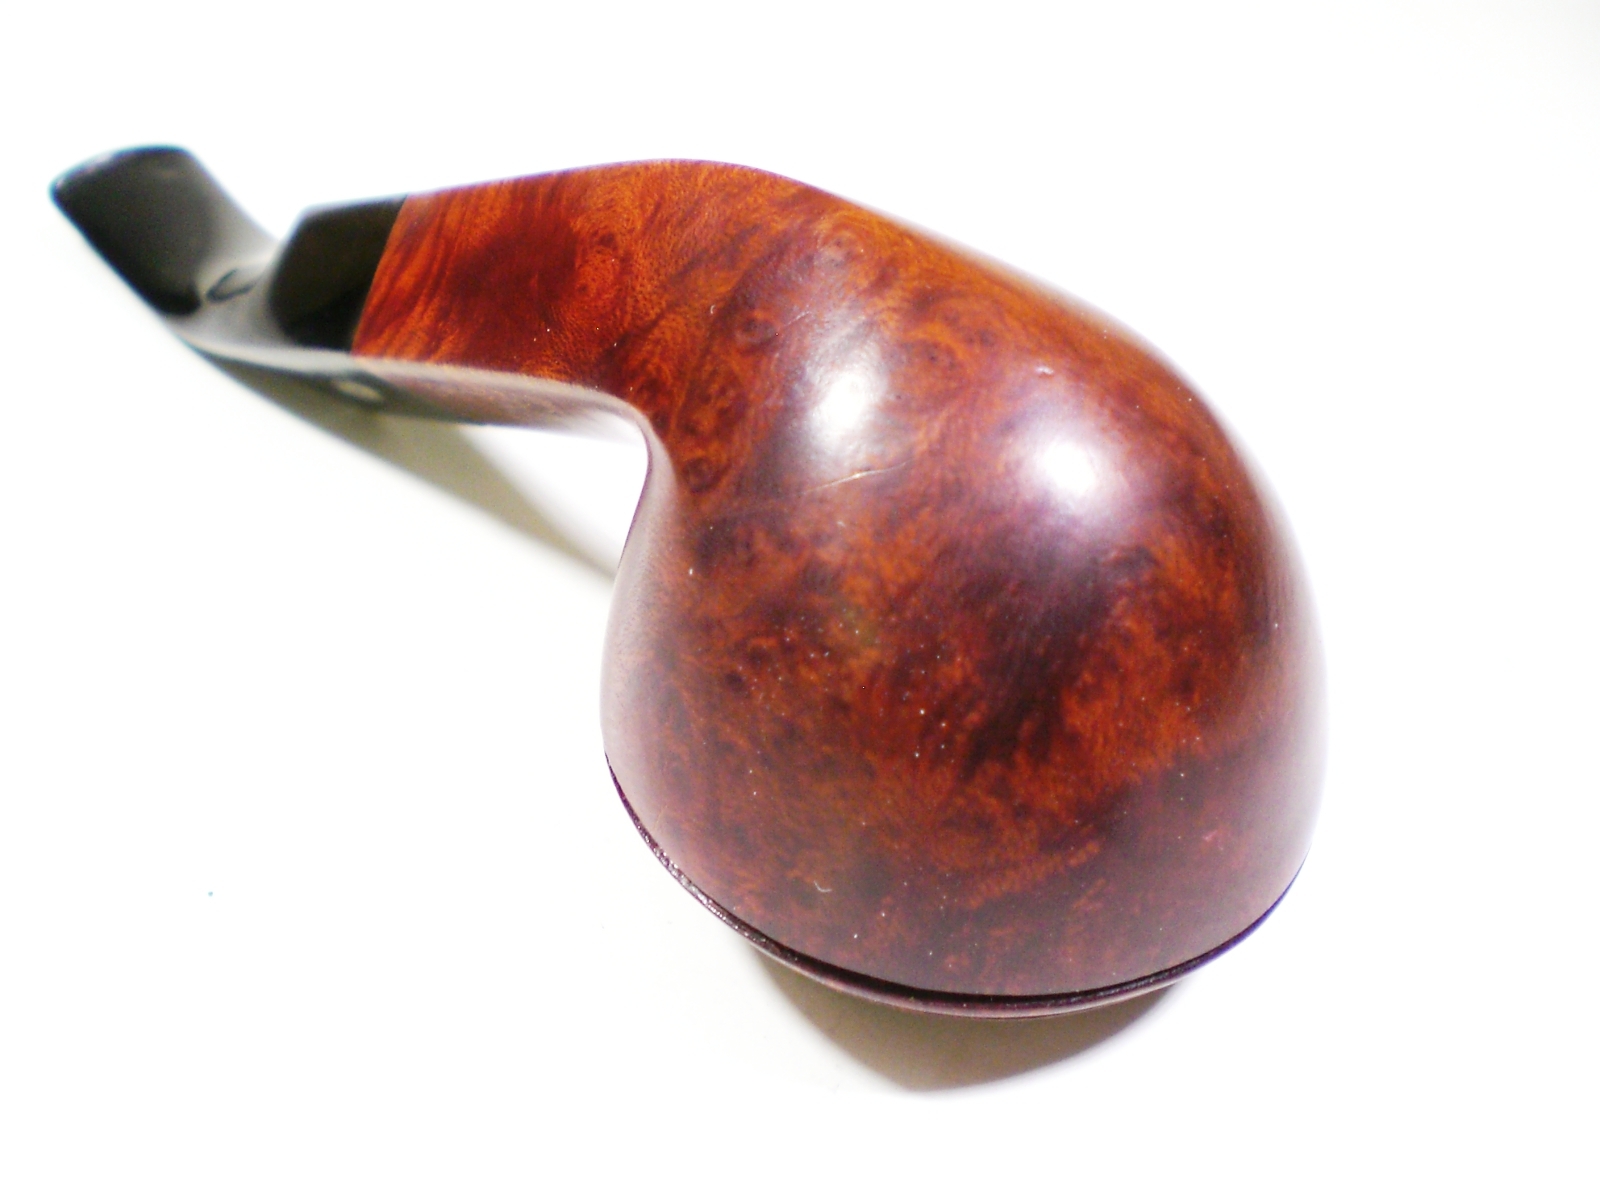
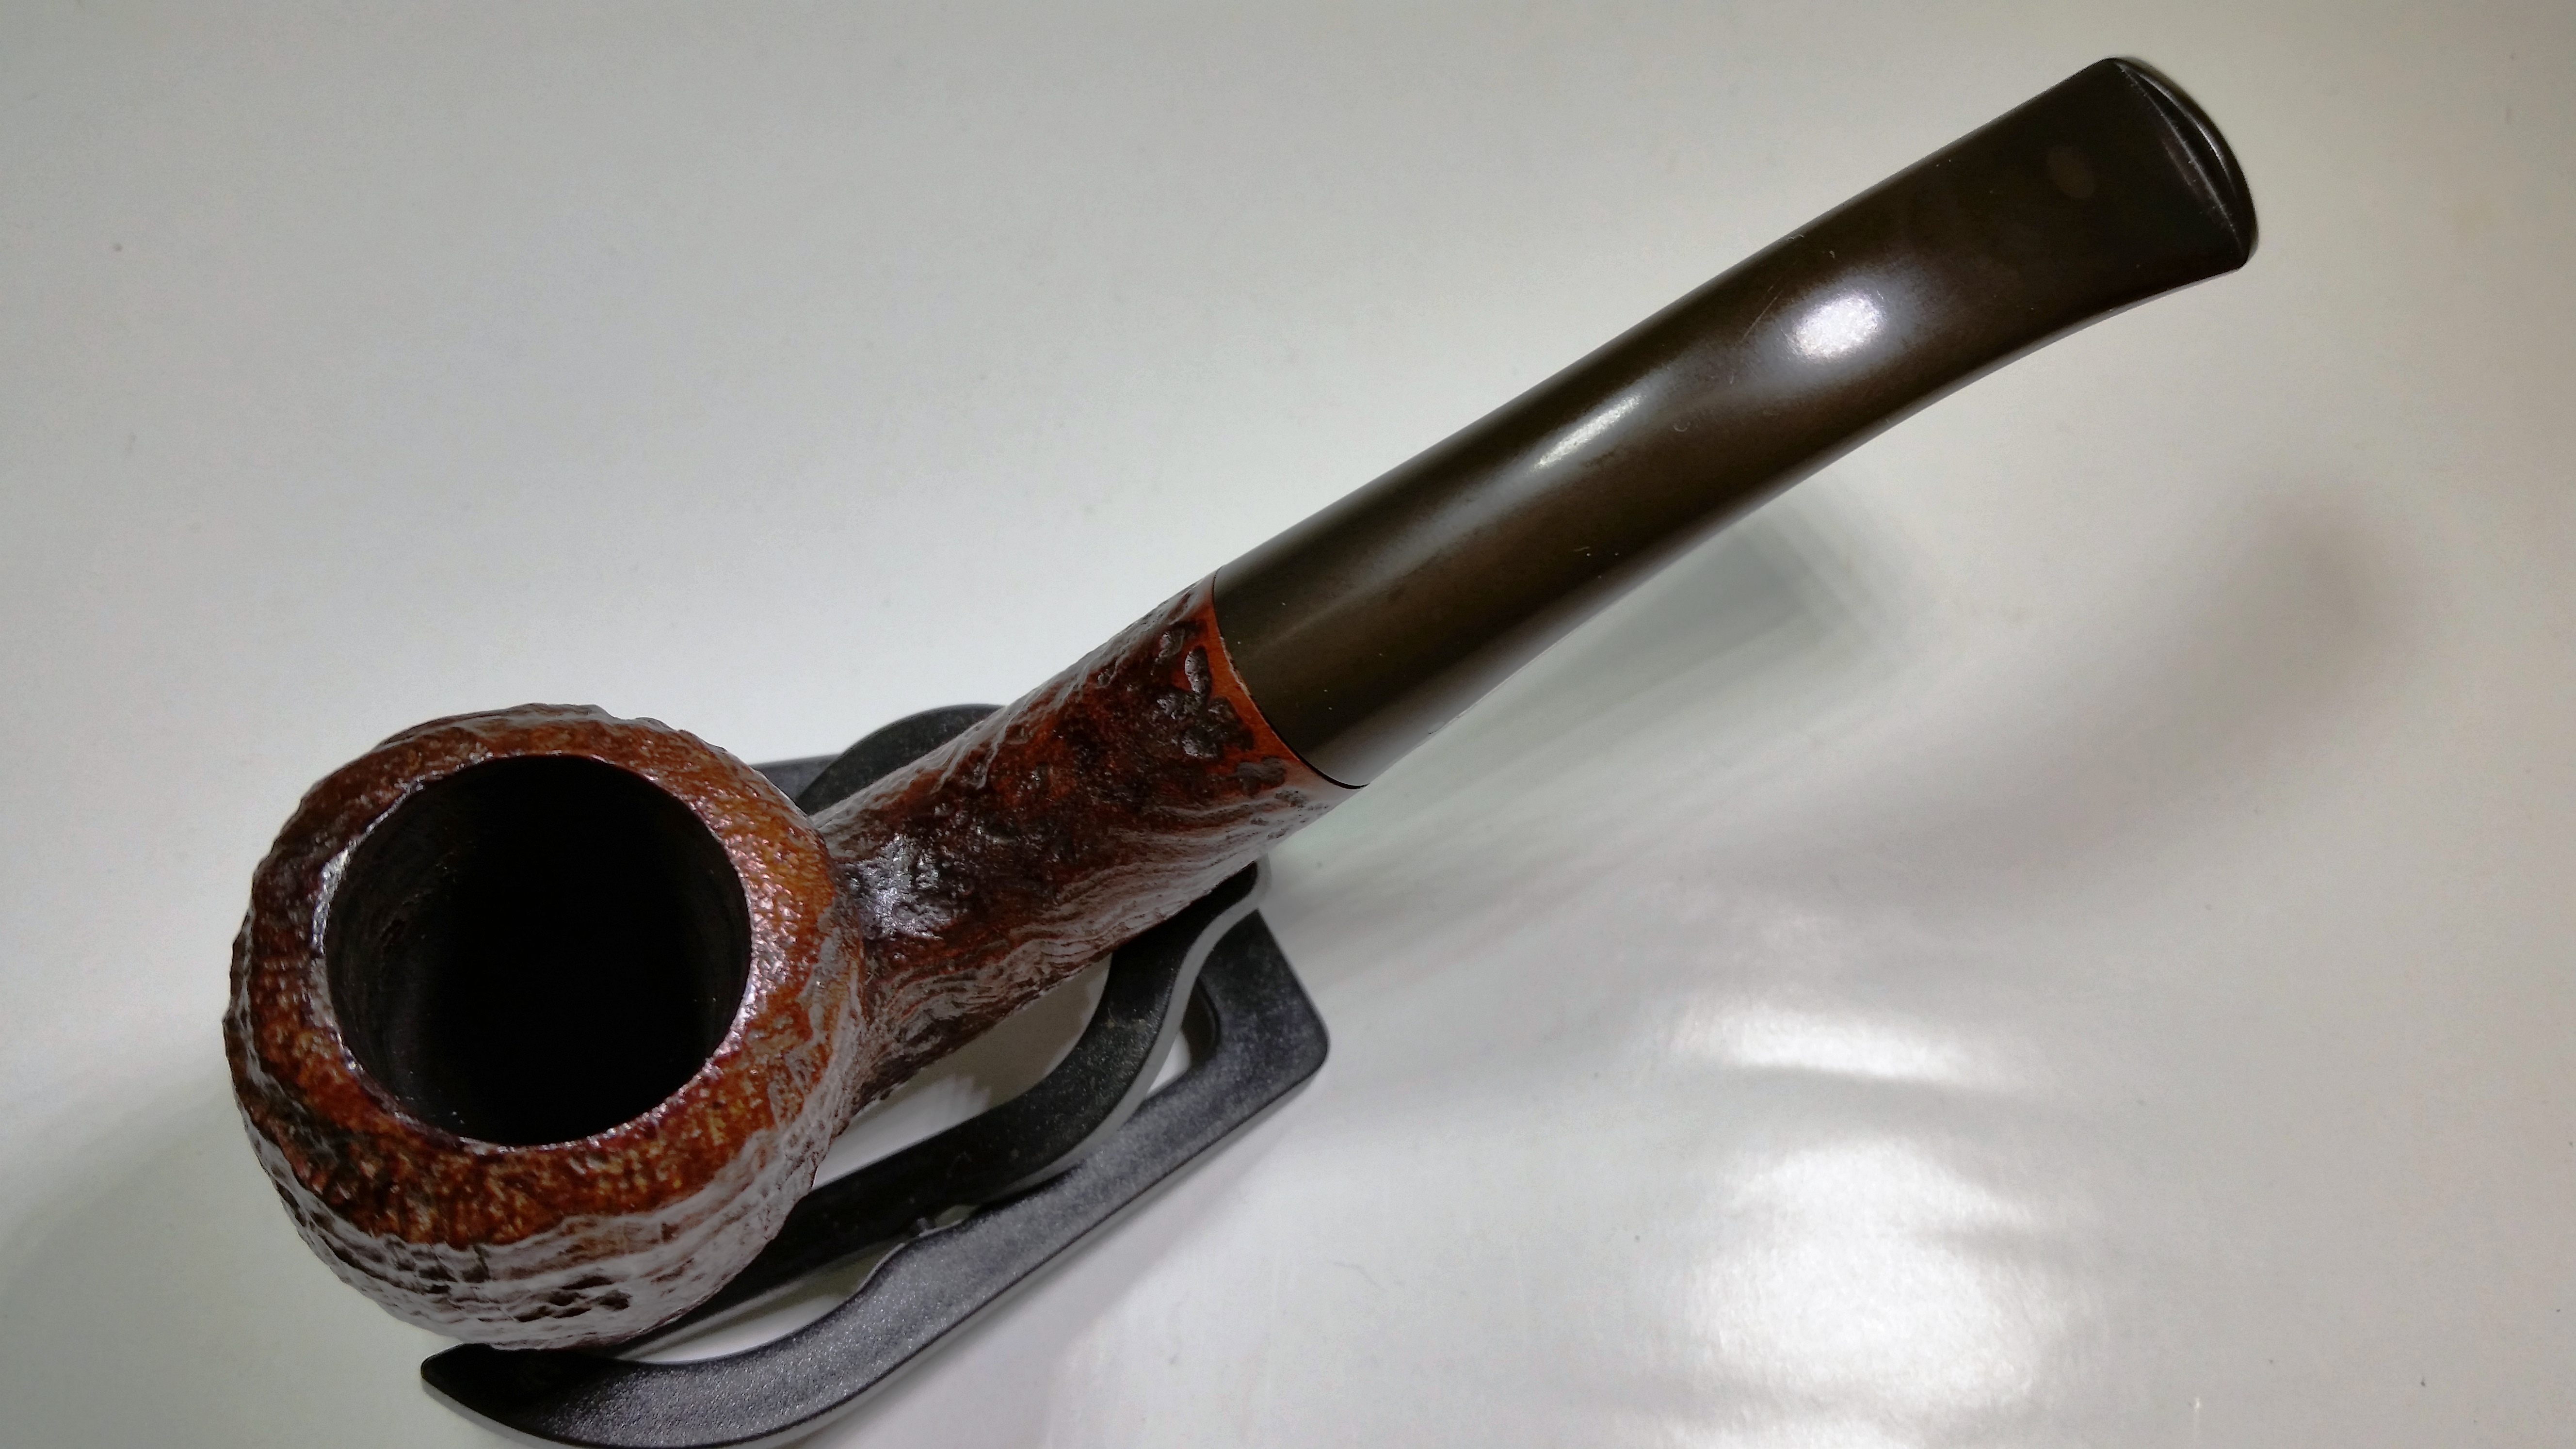
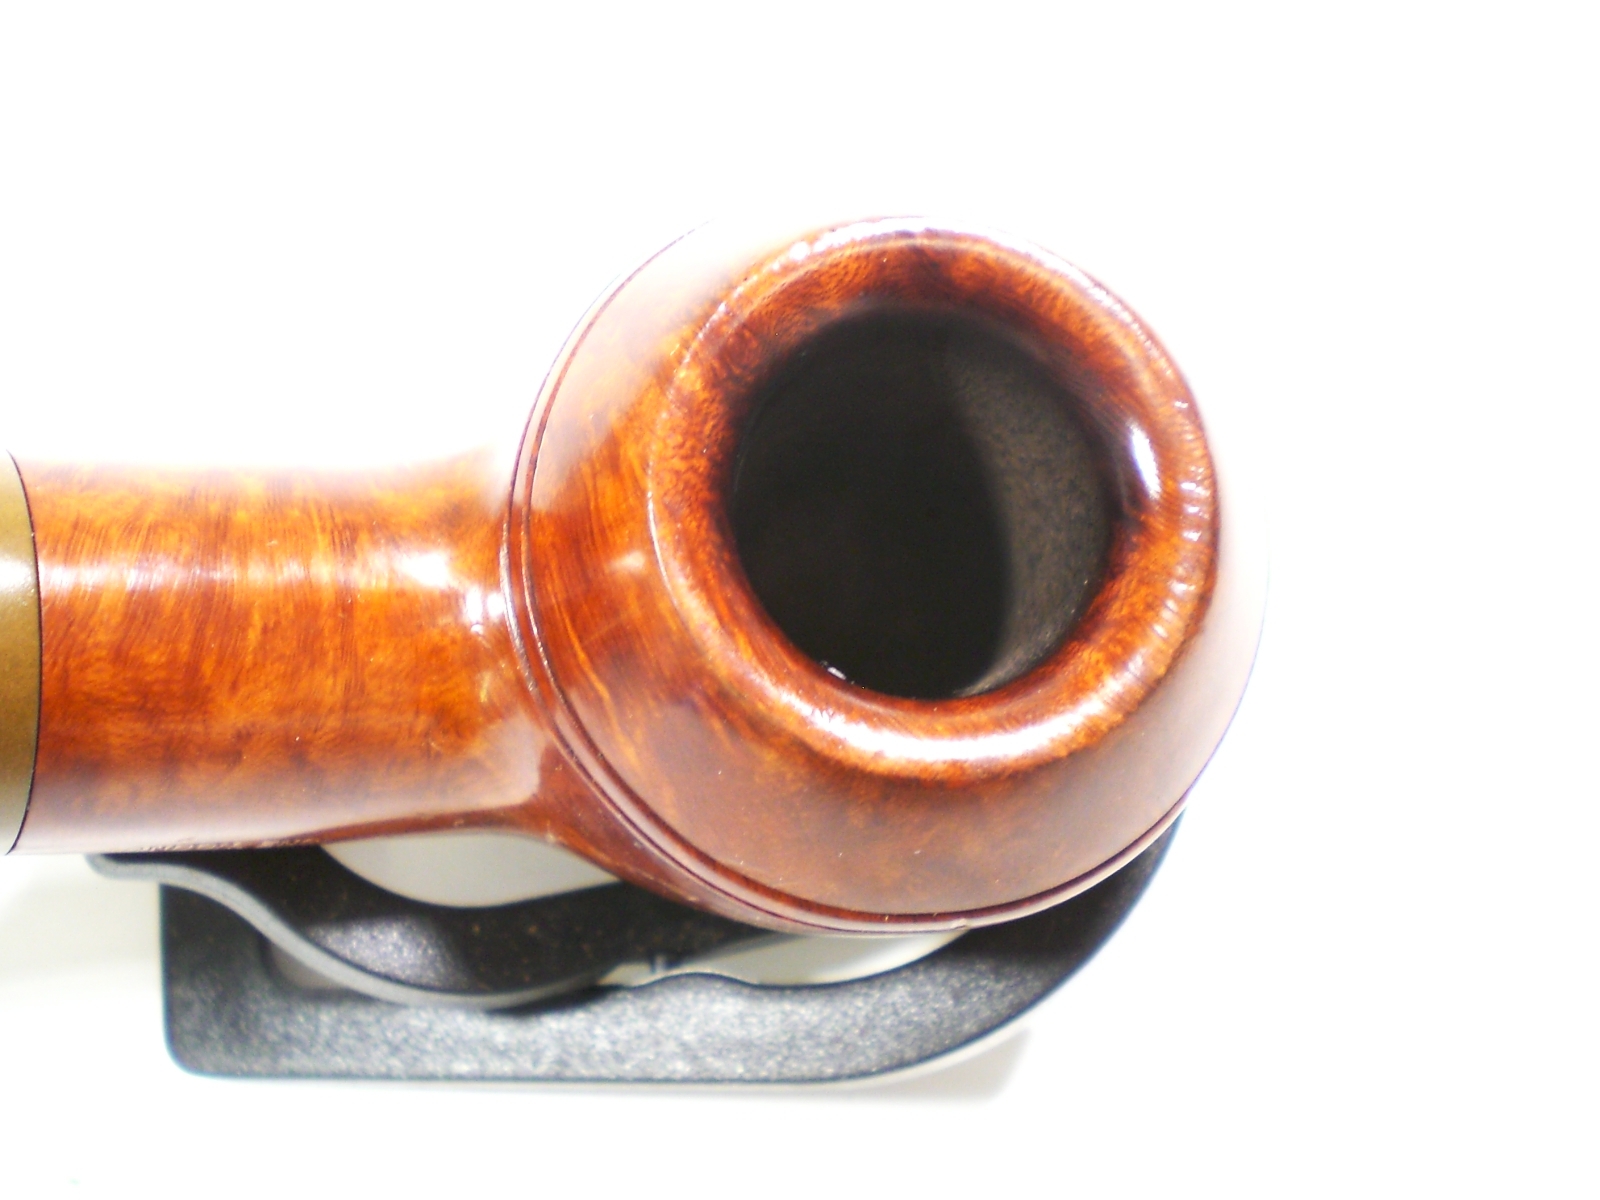
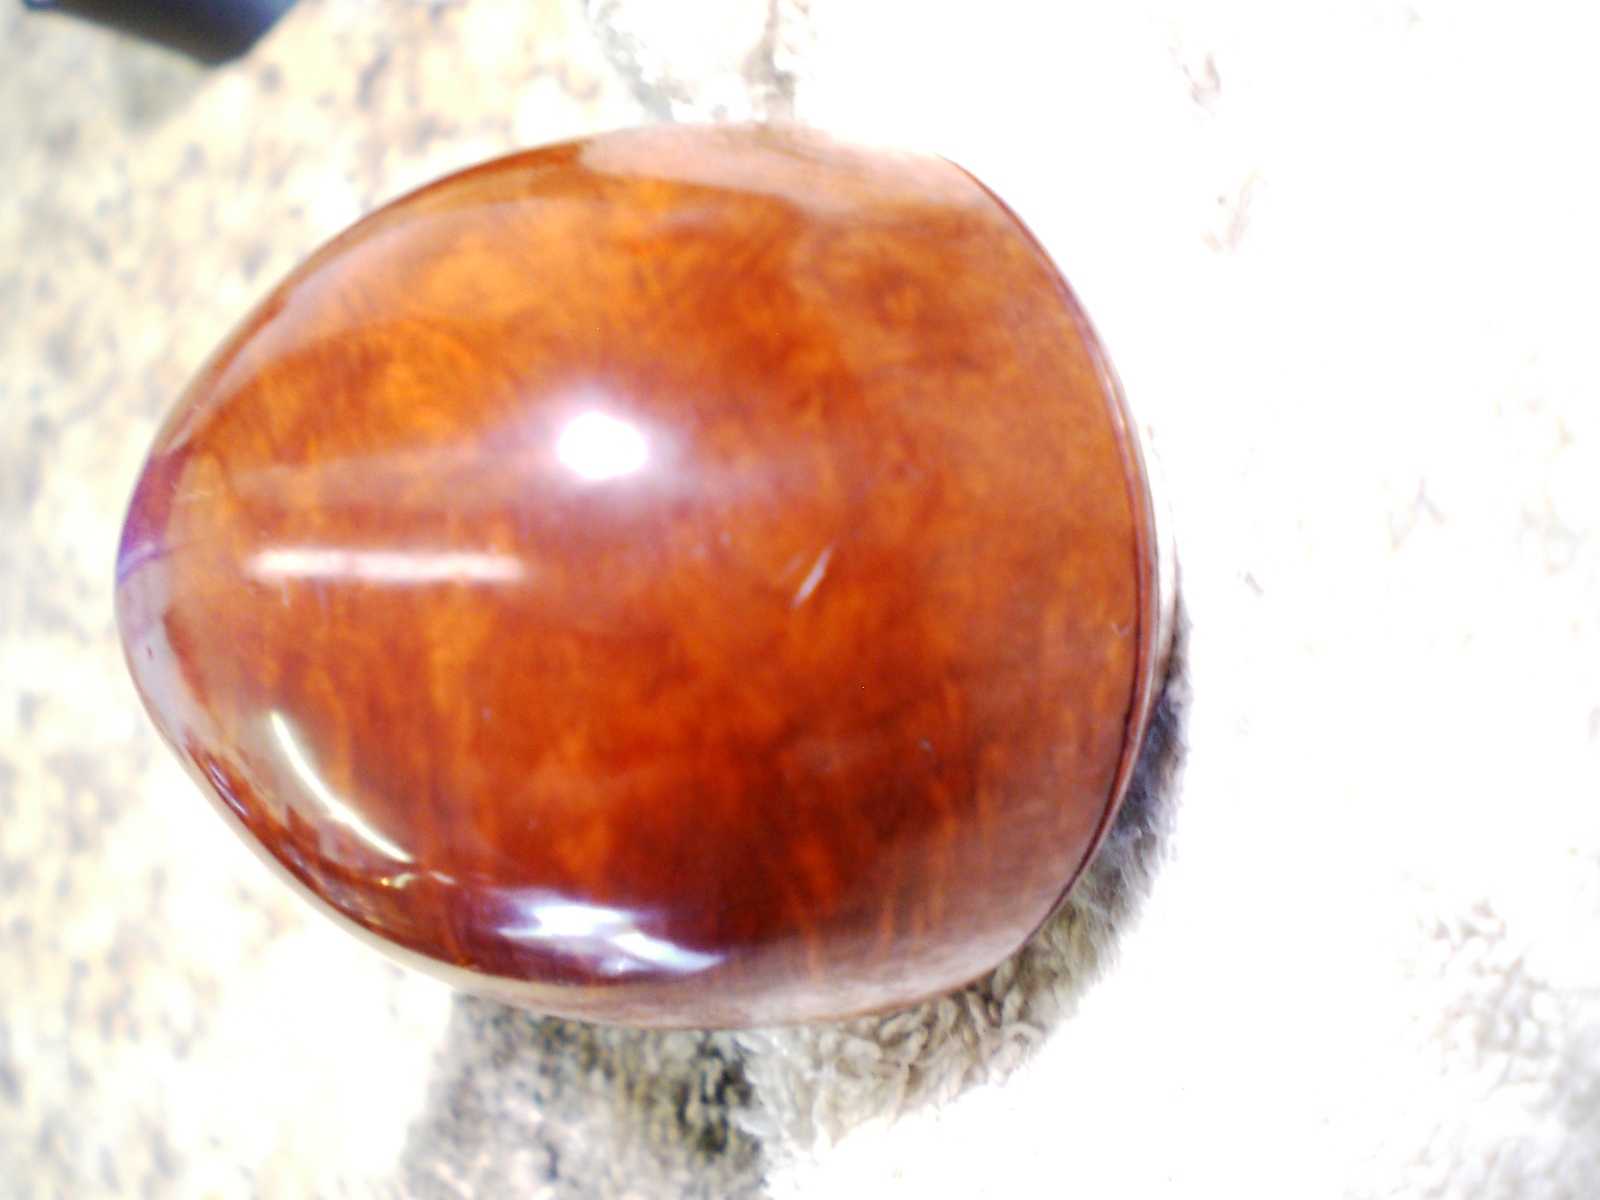
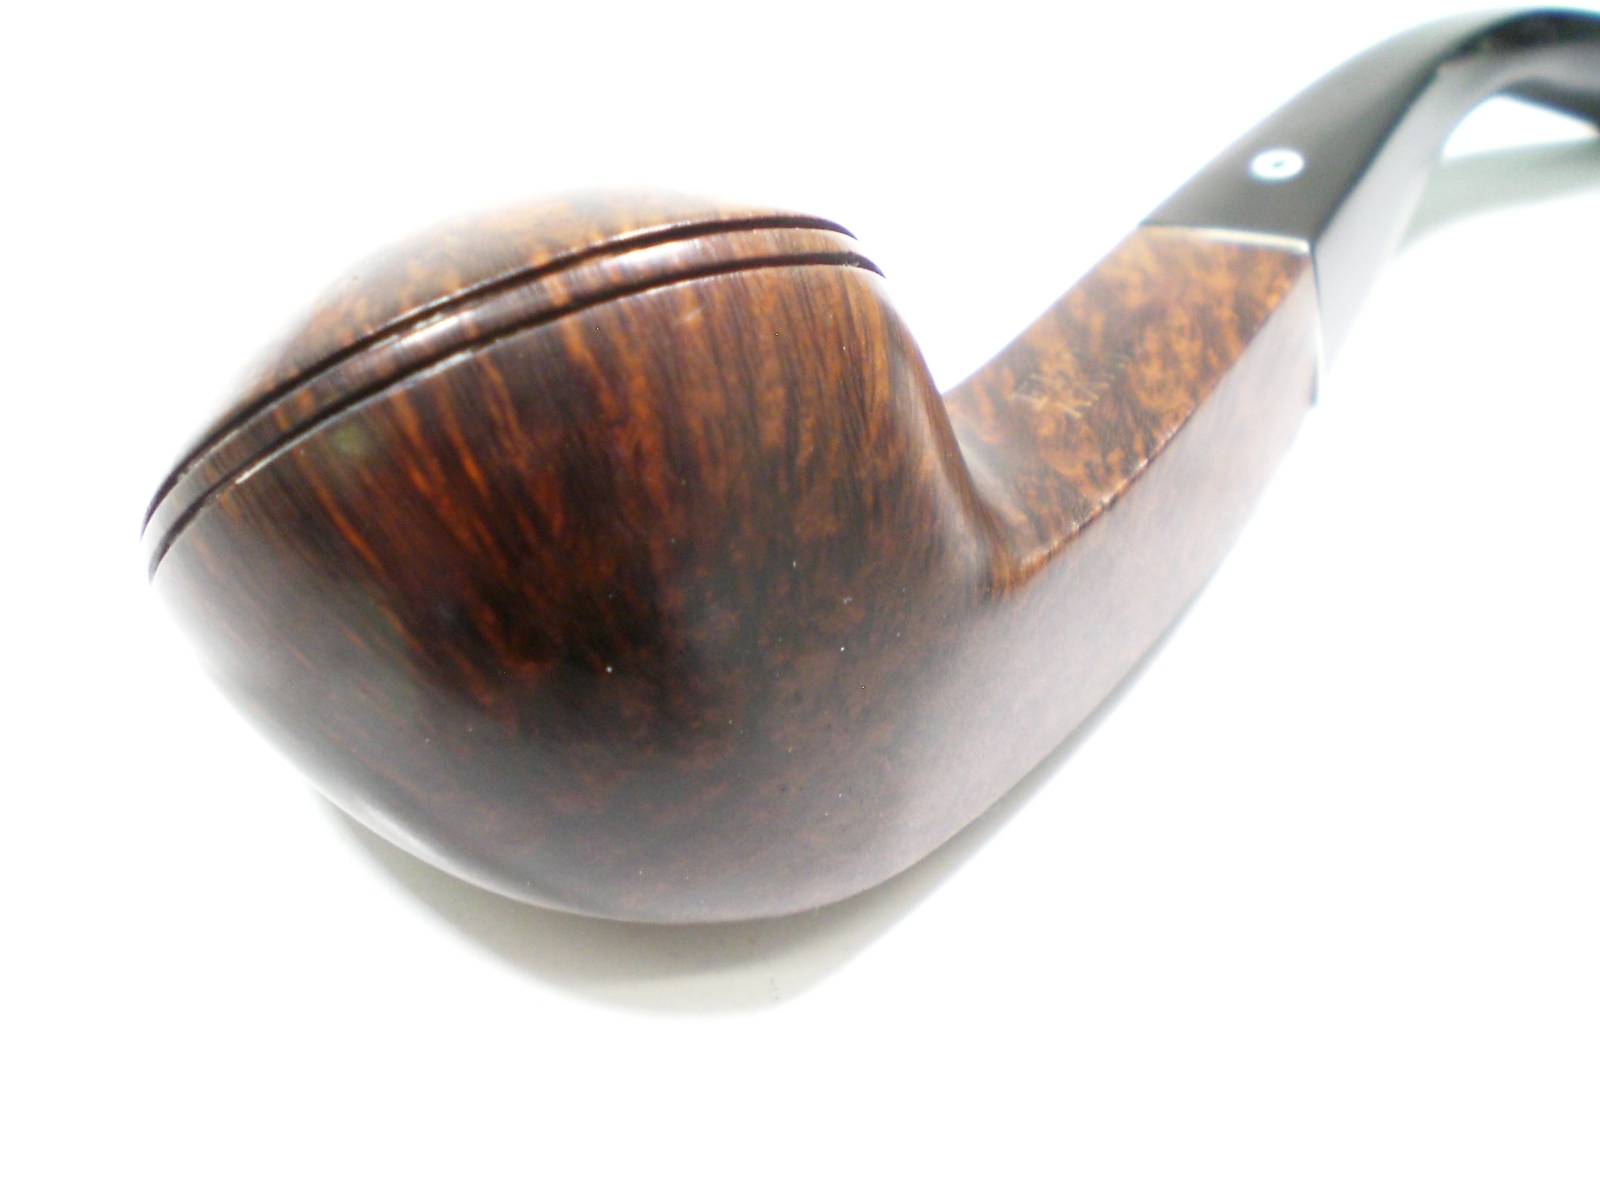
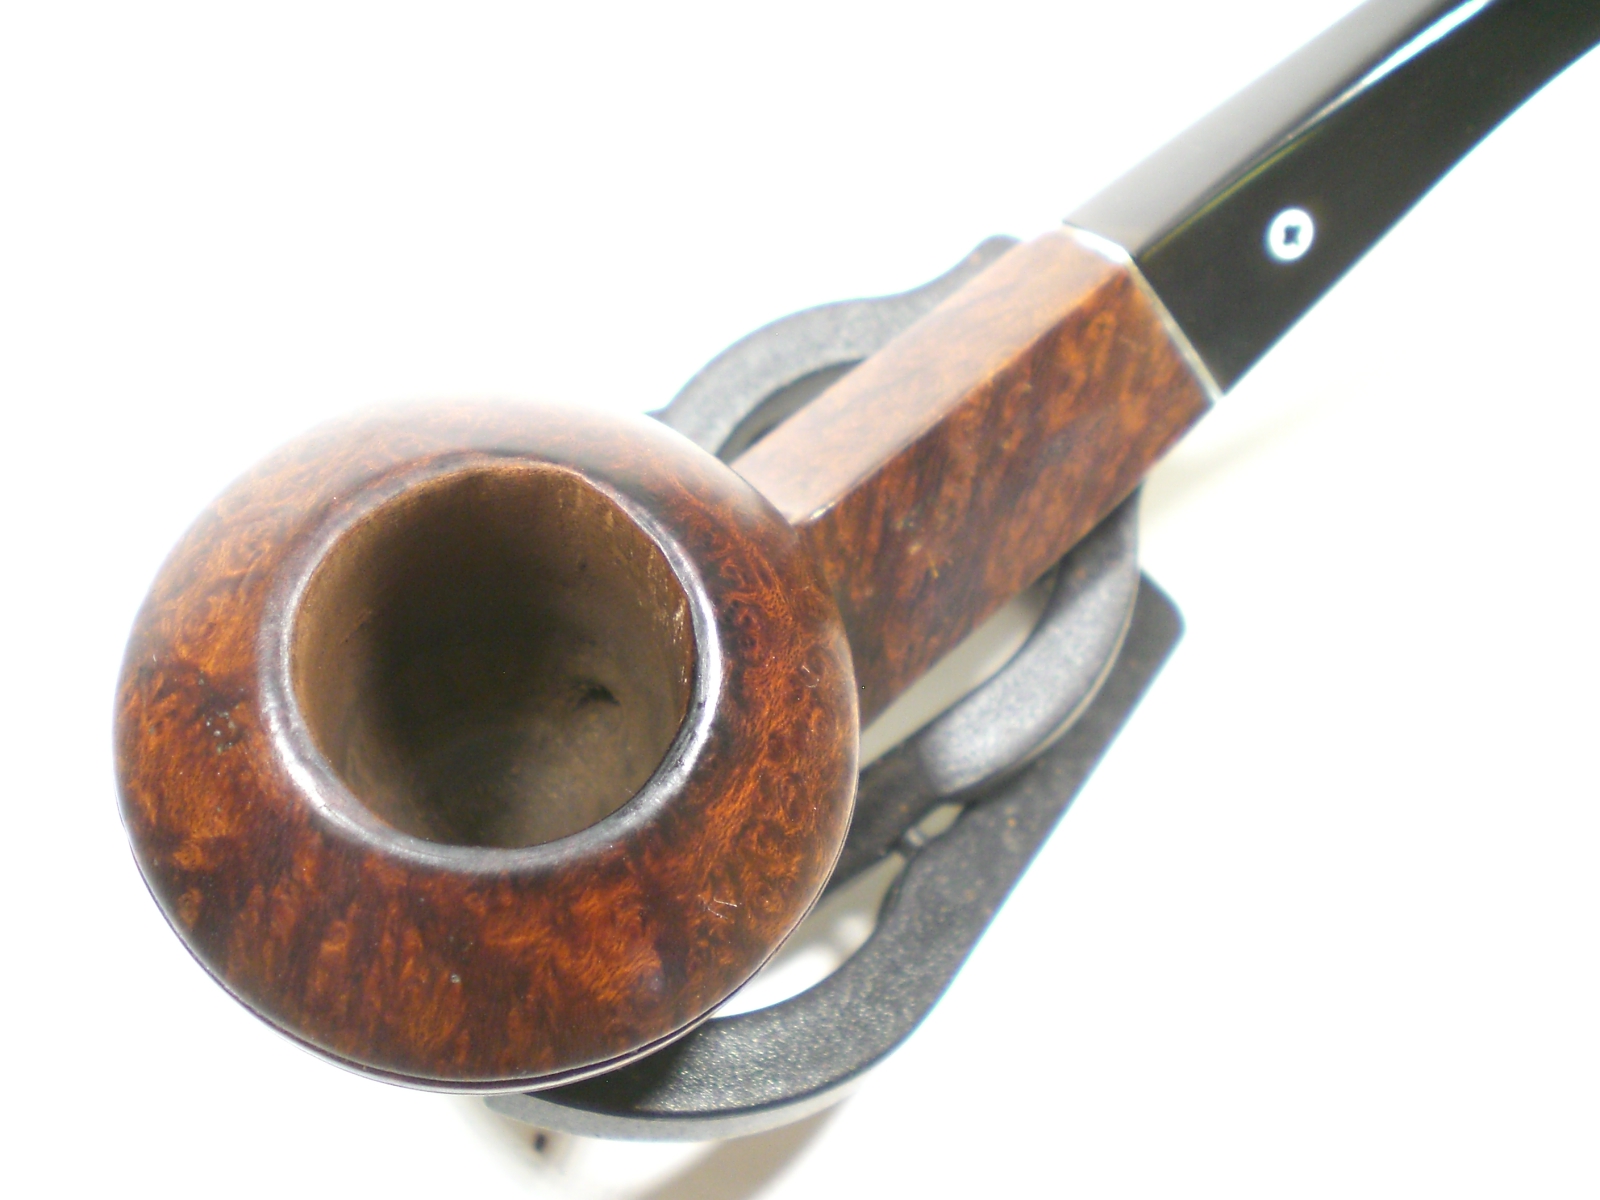
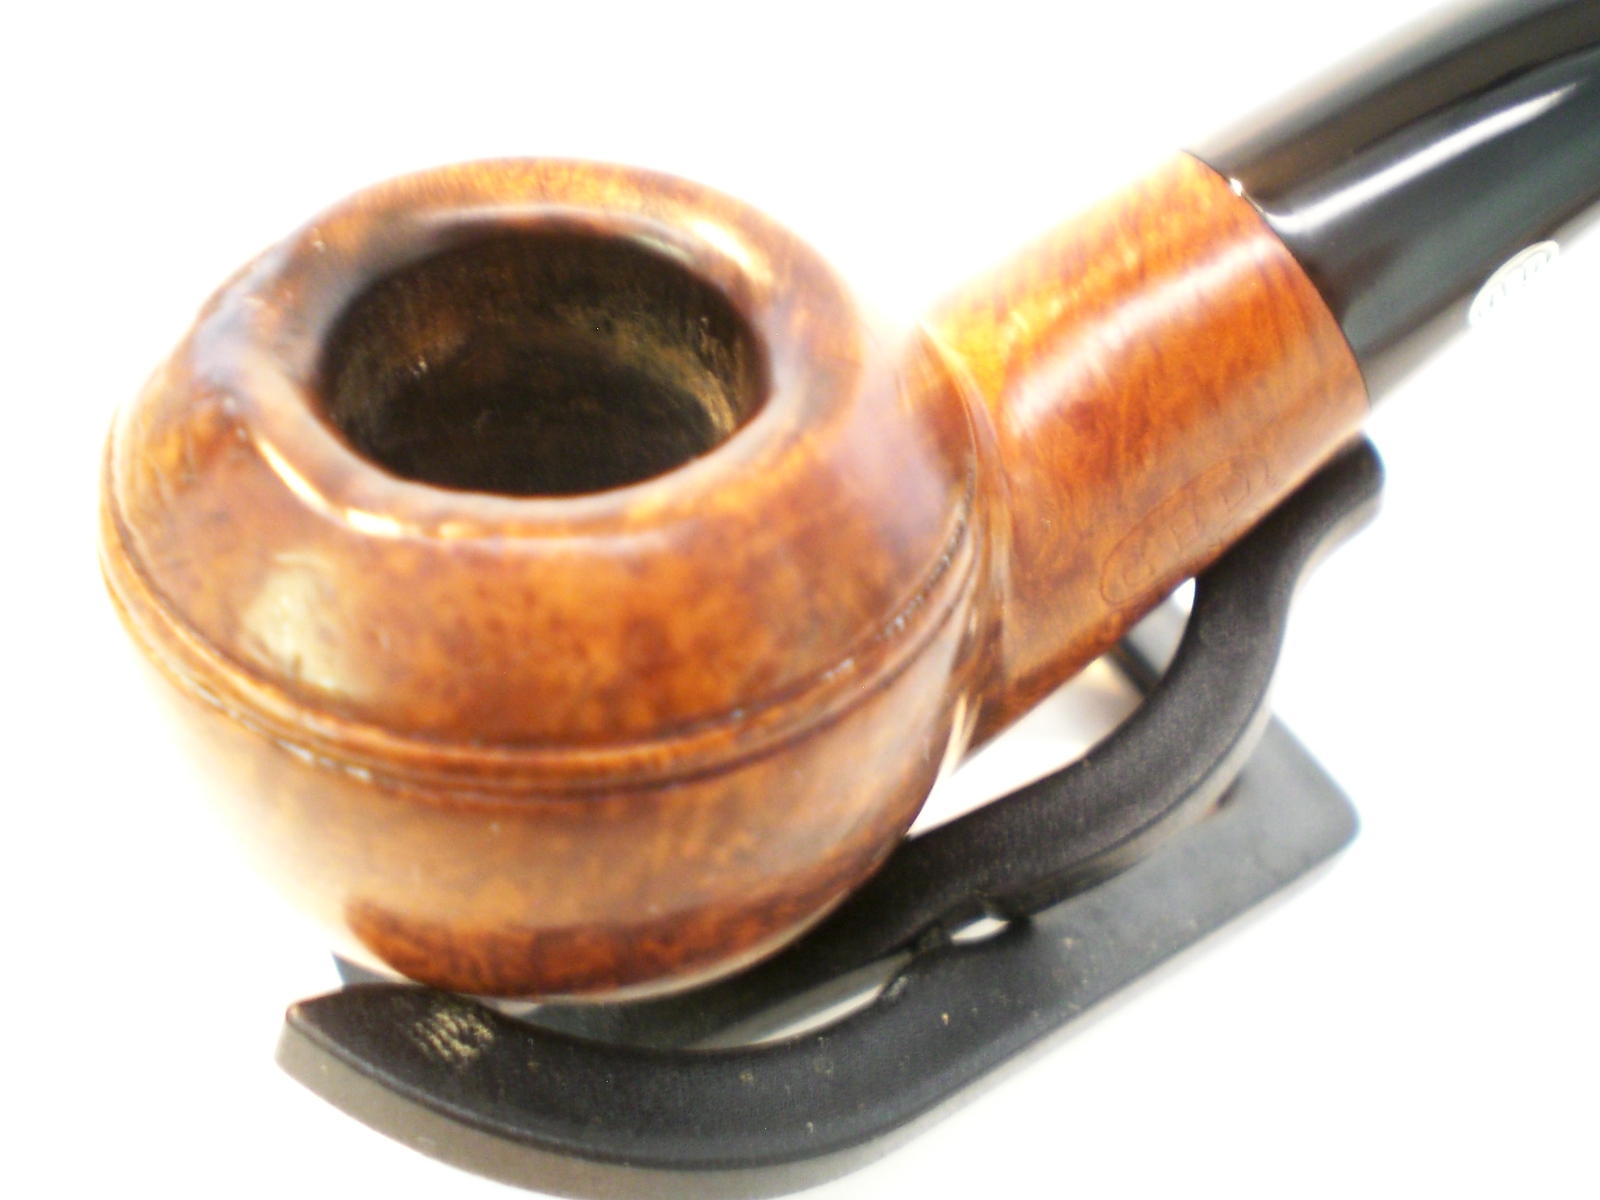
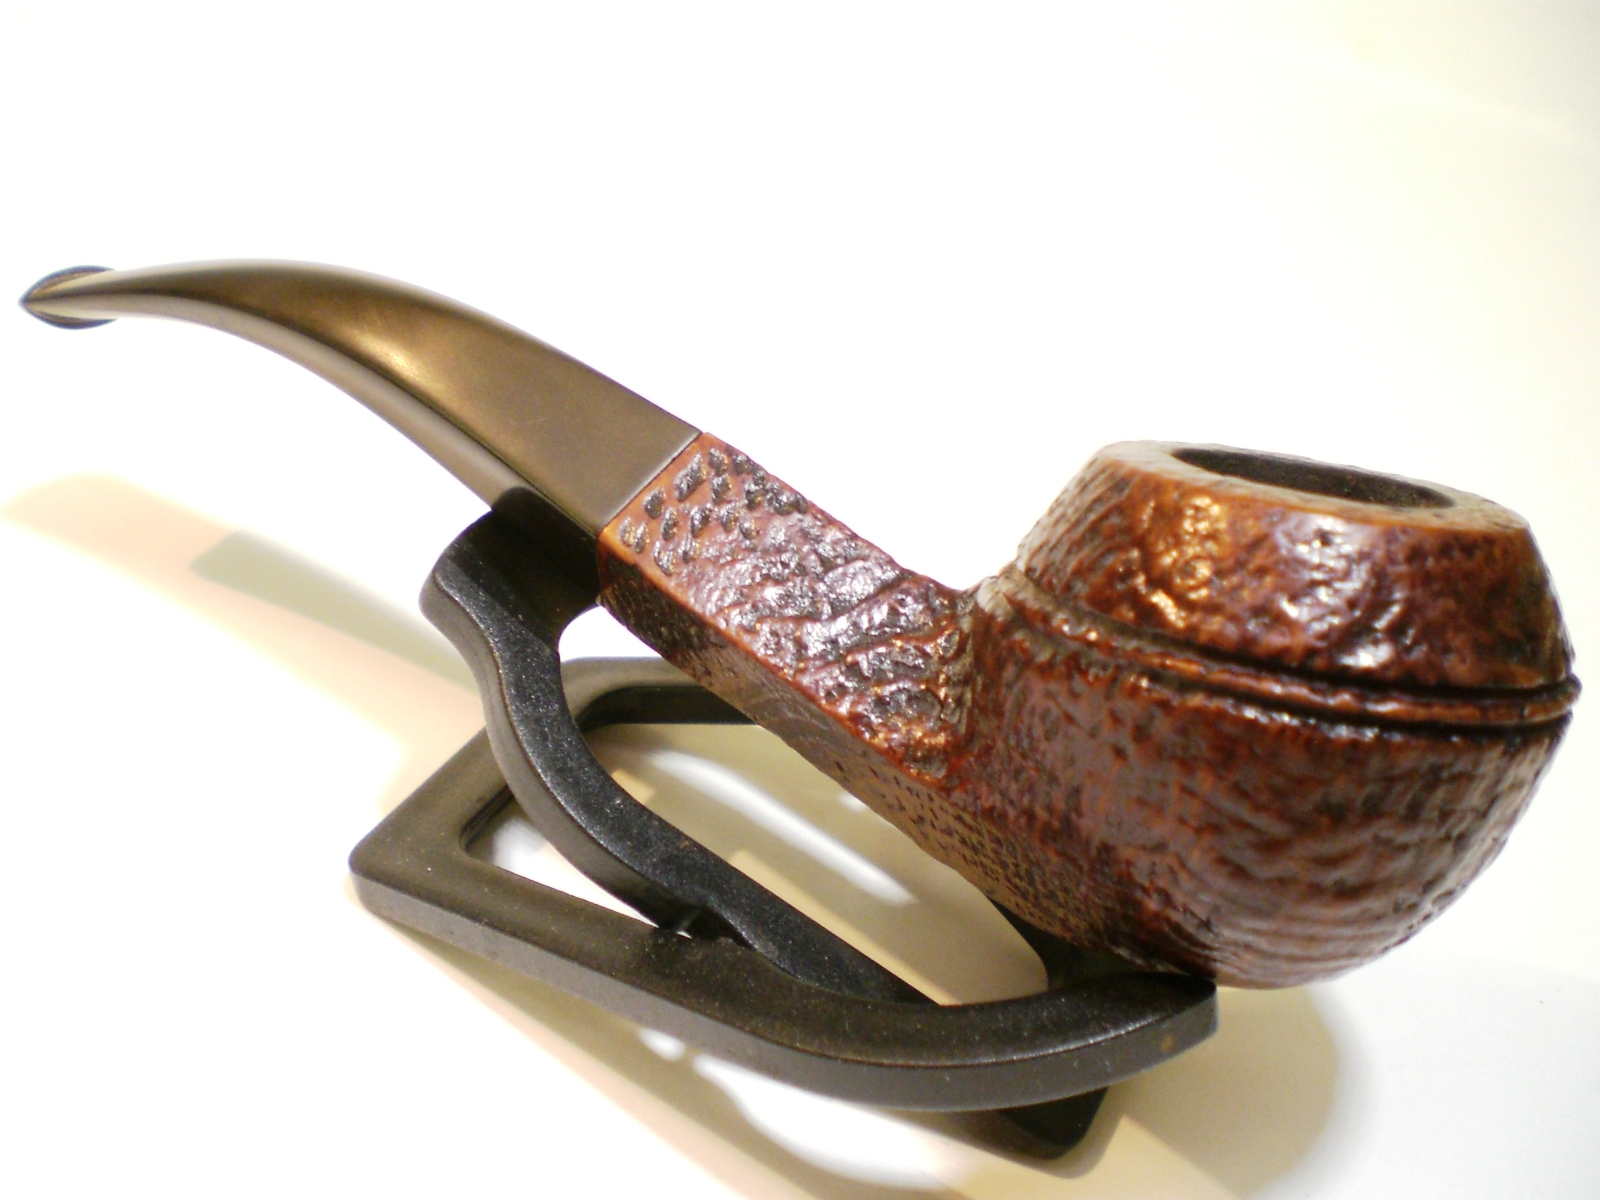
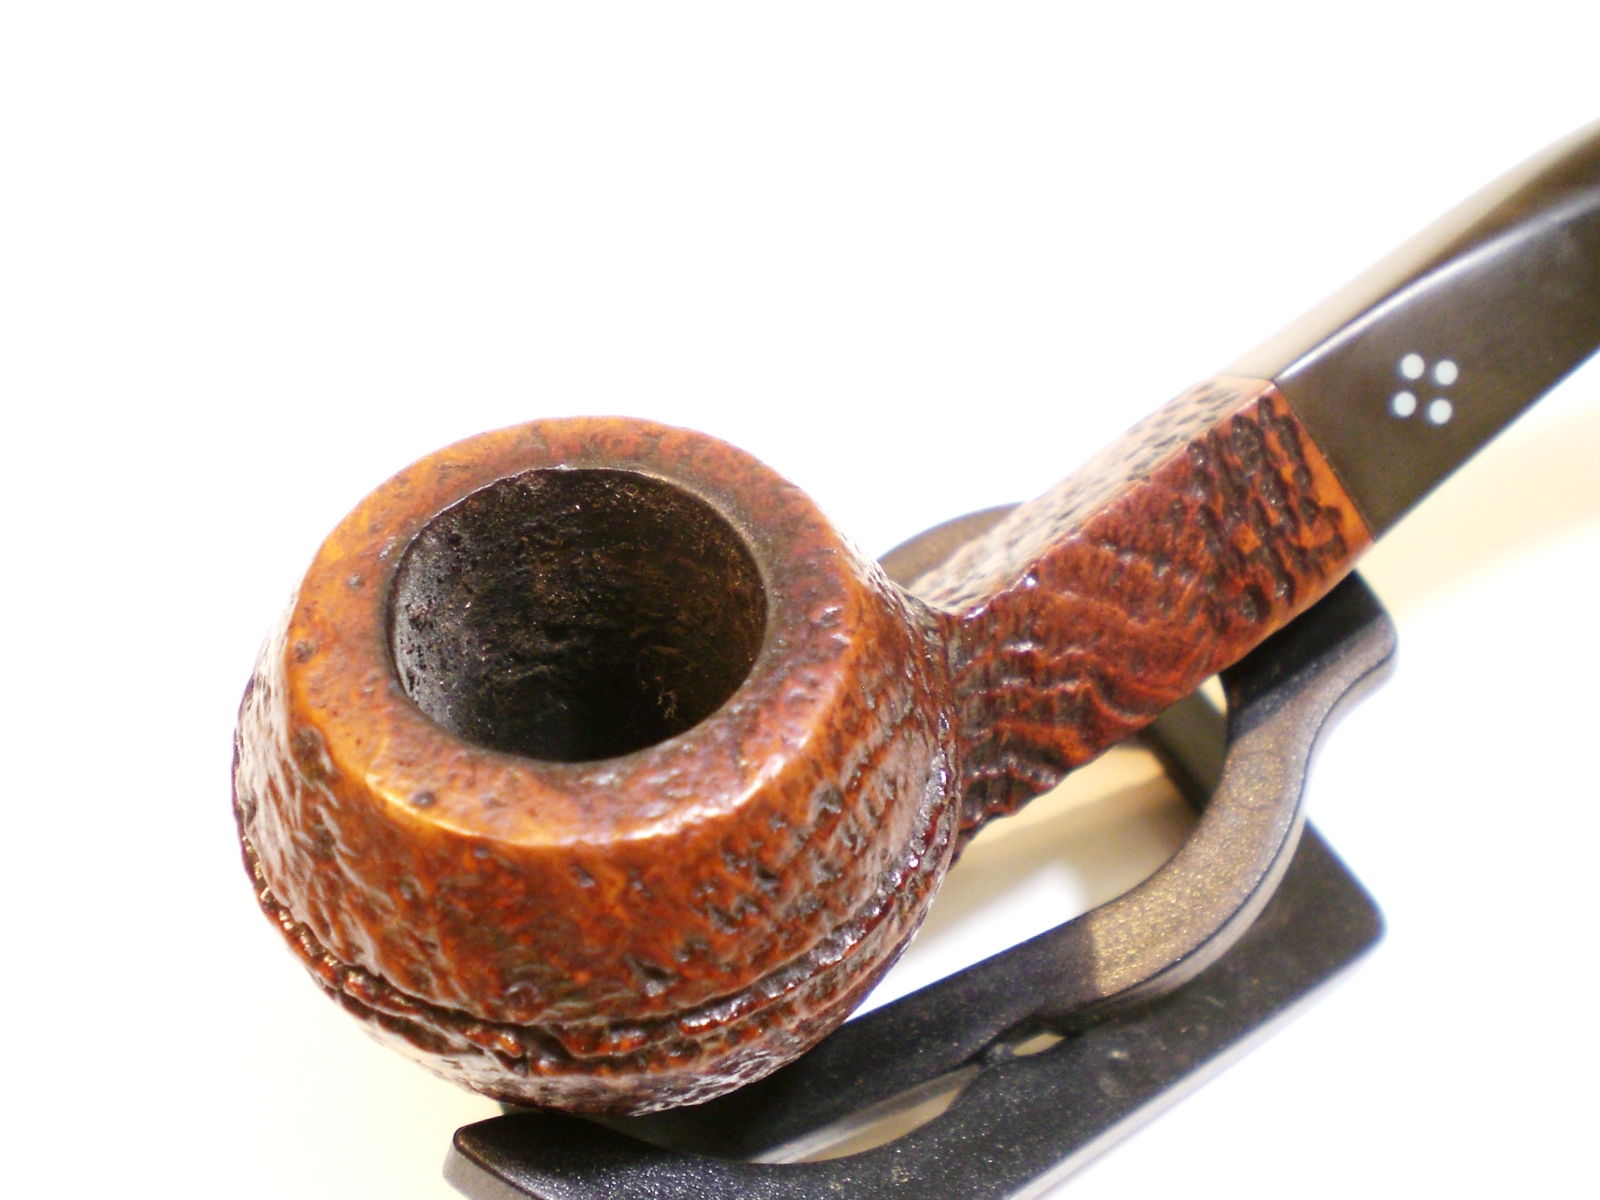
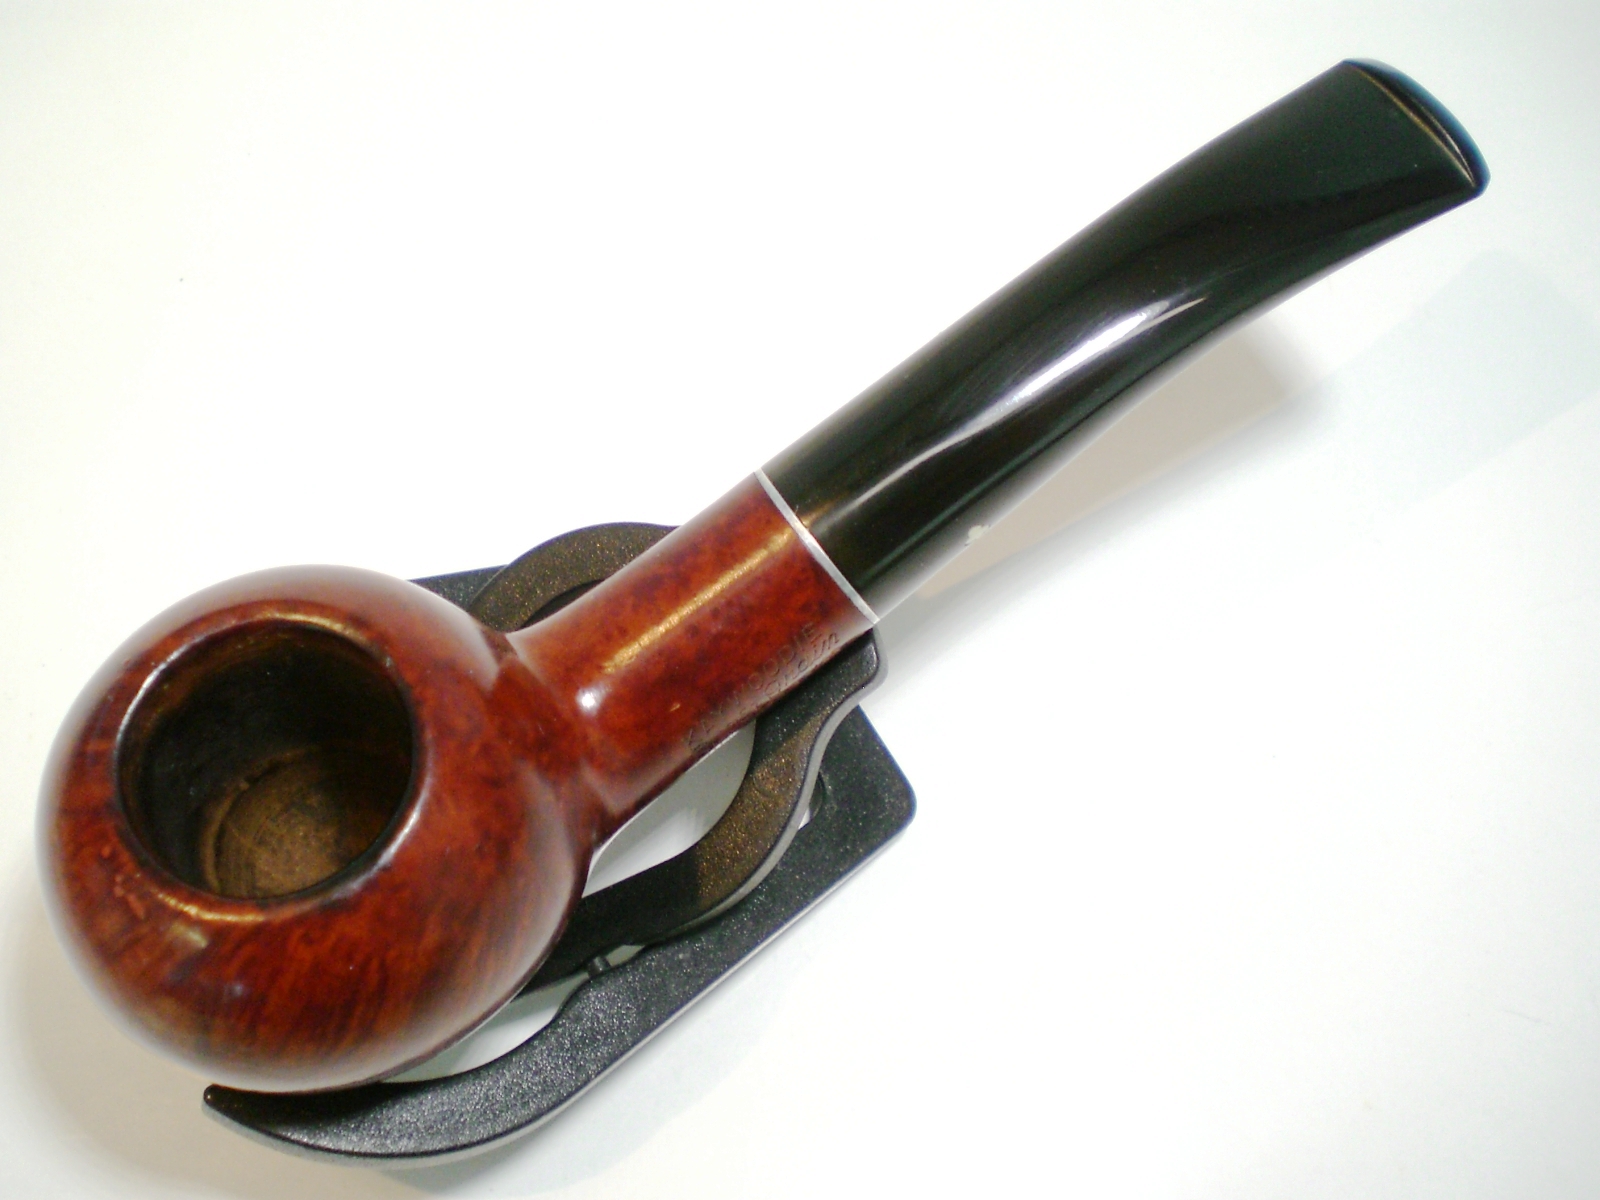
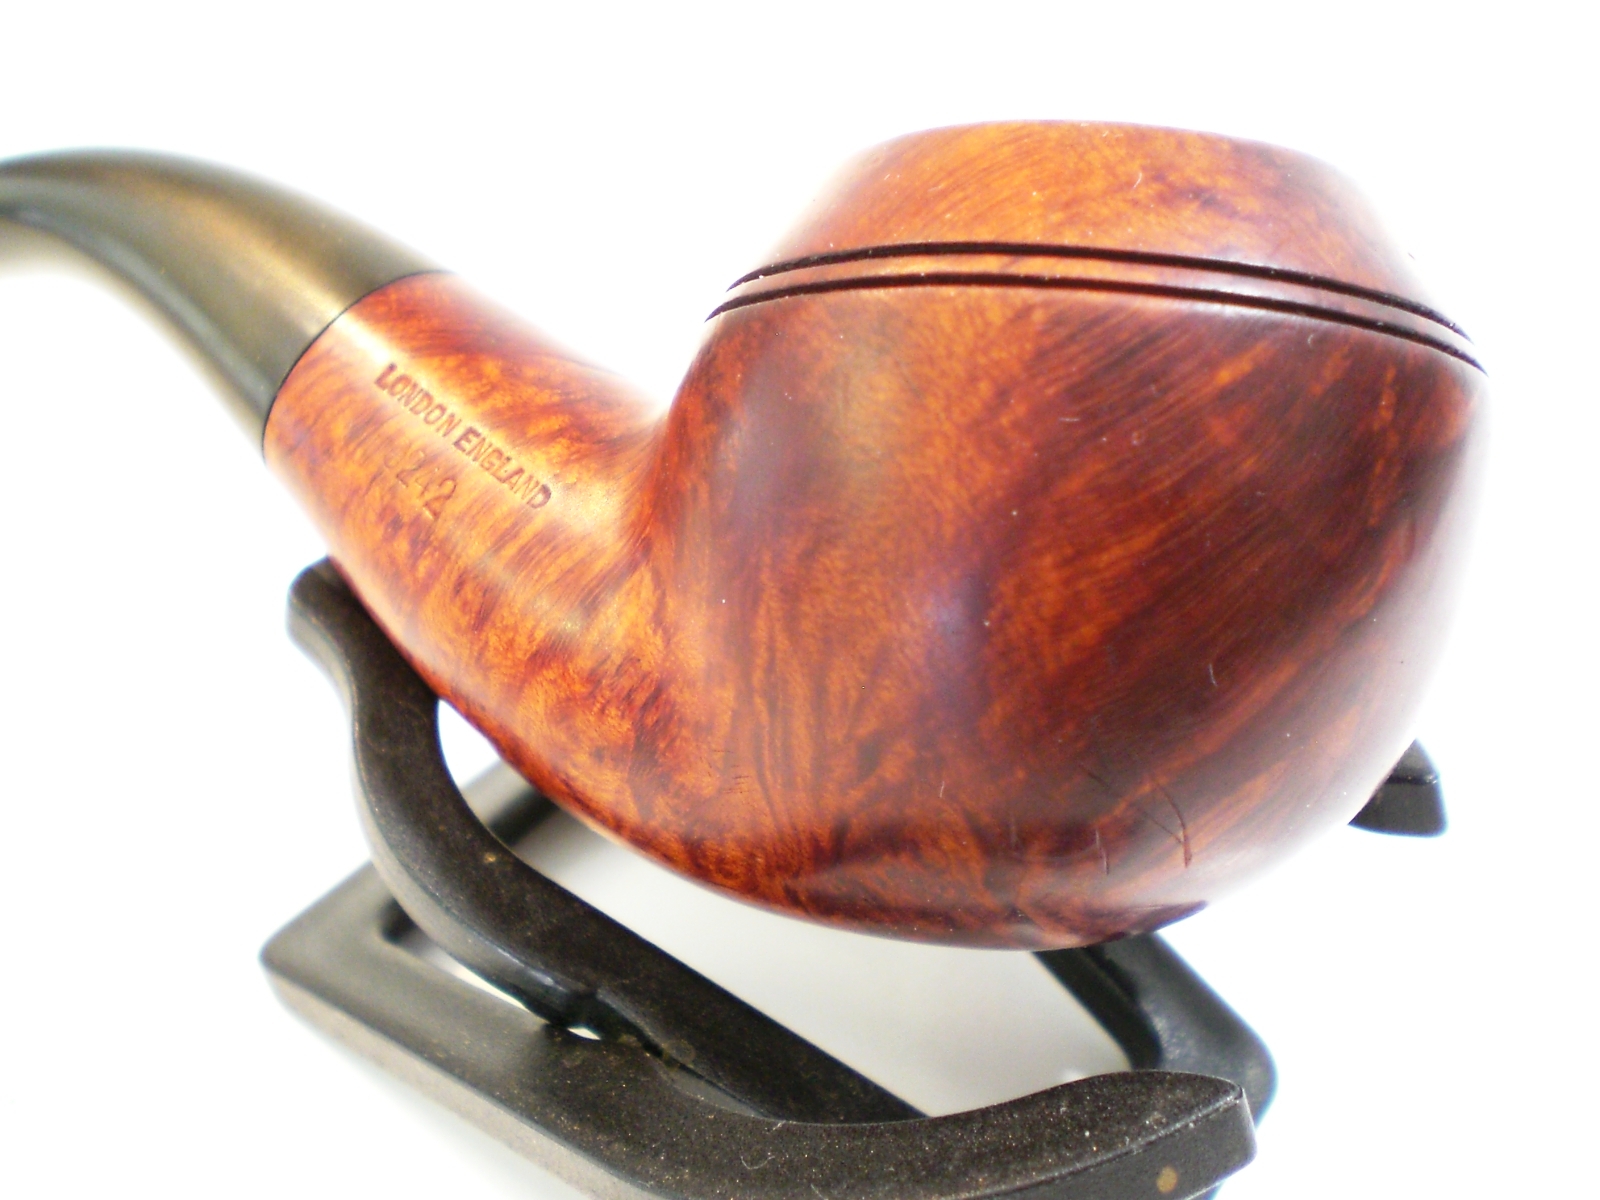
The scorched material on the bowl top was removed with a mild solution of Oxyclean and distilled water.  The lighter used had damaged the inner portion of the bowl but a worn sheet of 8000 grit Micromesh removed most of the scorch marks without removing the stain.   The rest of the bowl only required a light buff with White Diamond (staying away from the nomenclature) and some Carnuba wax.

Kaywoodie_Supergrain_95_Finished (3)

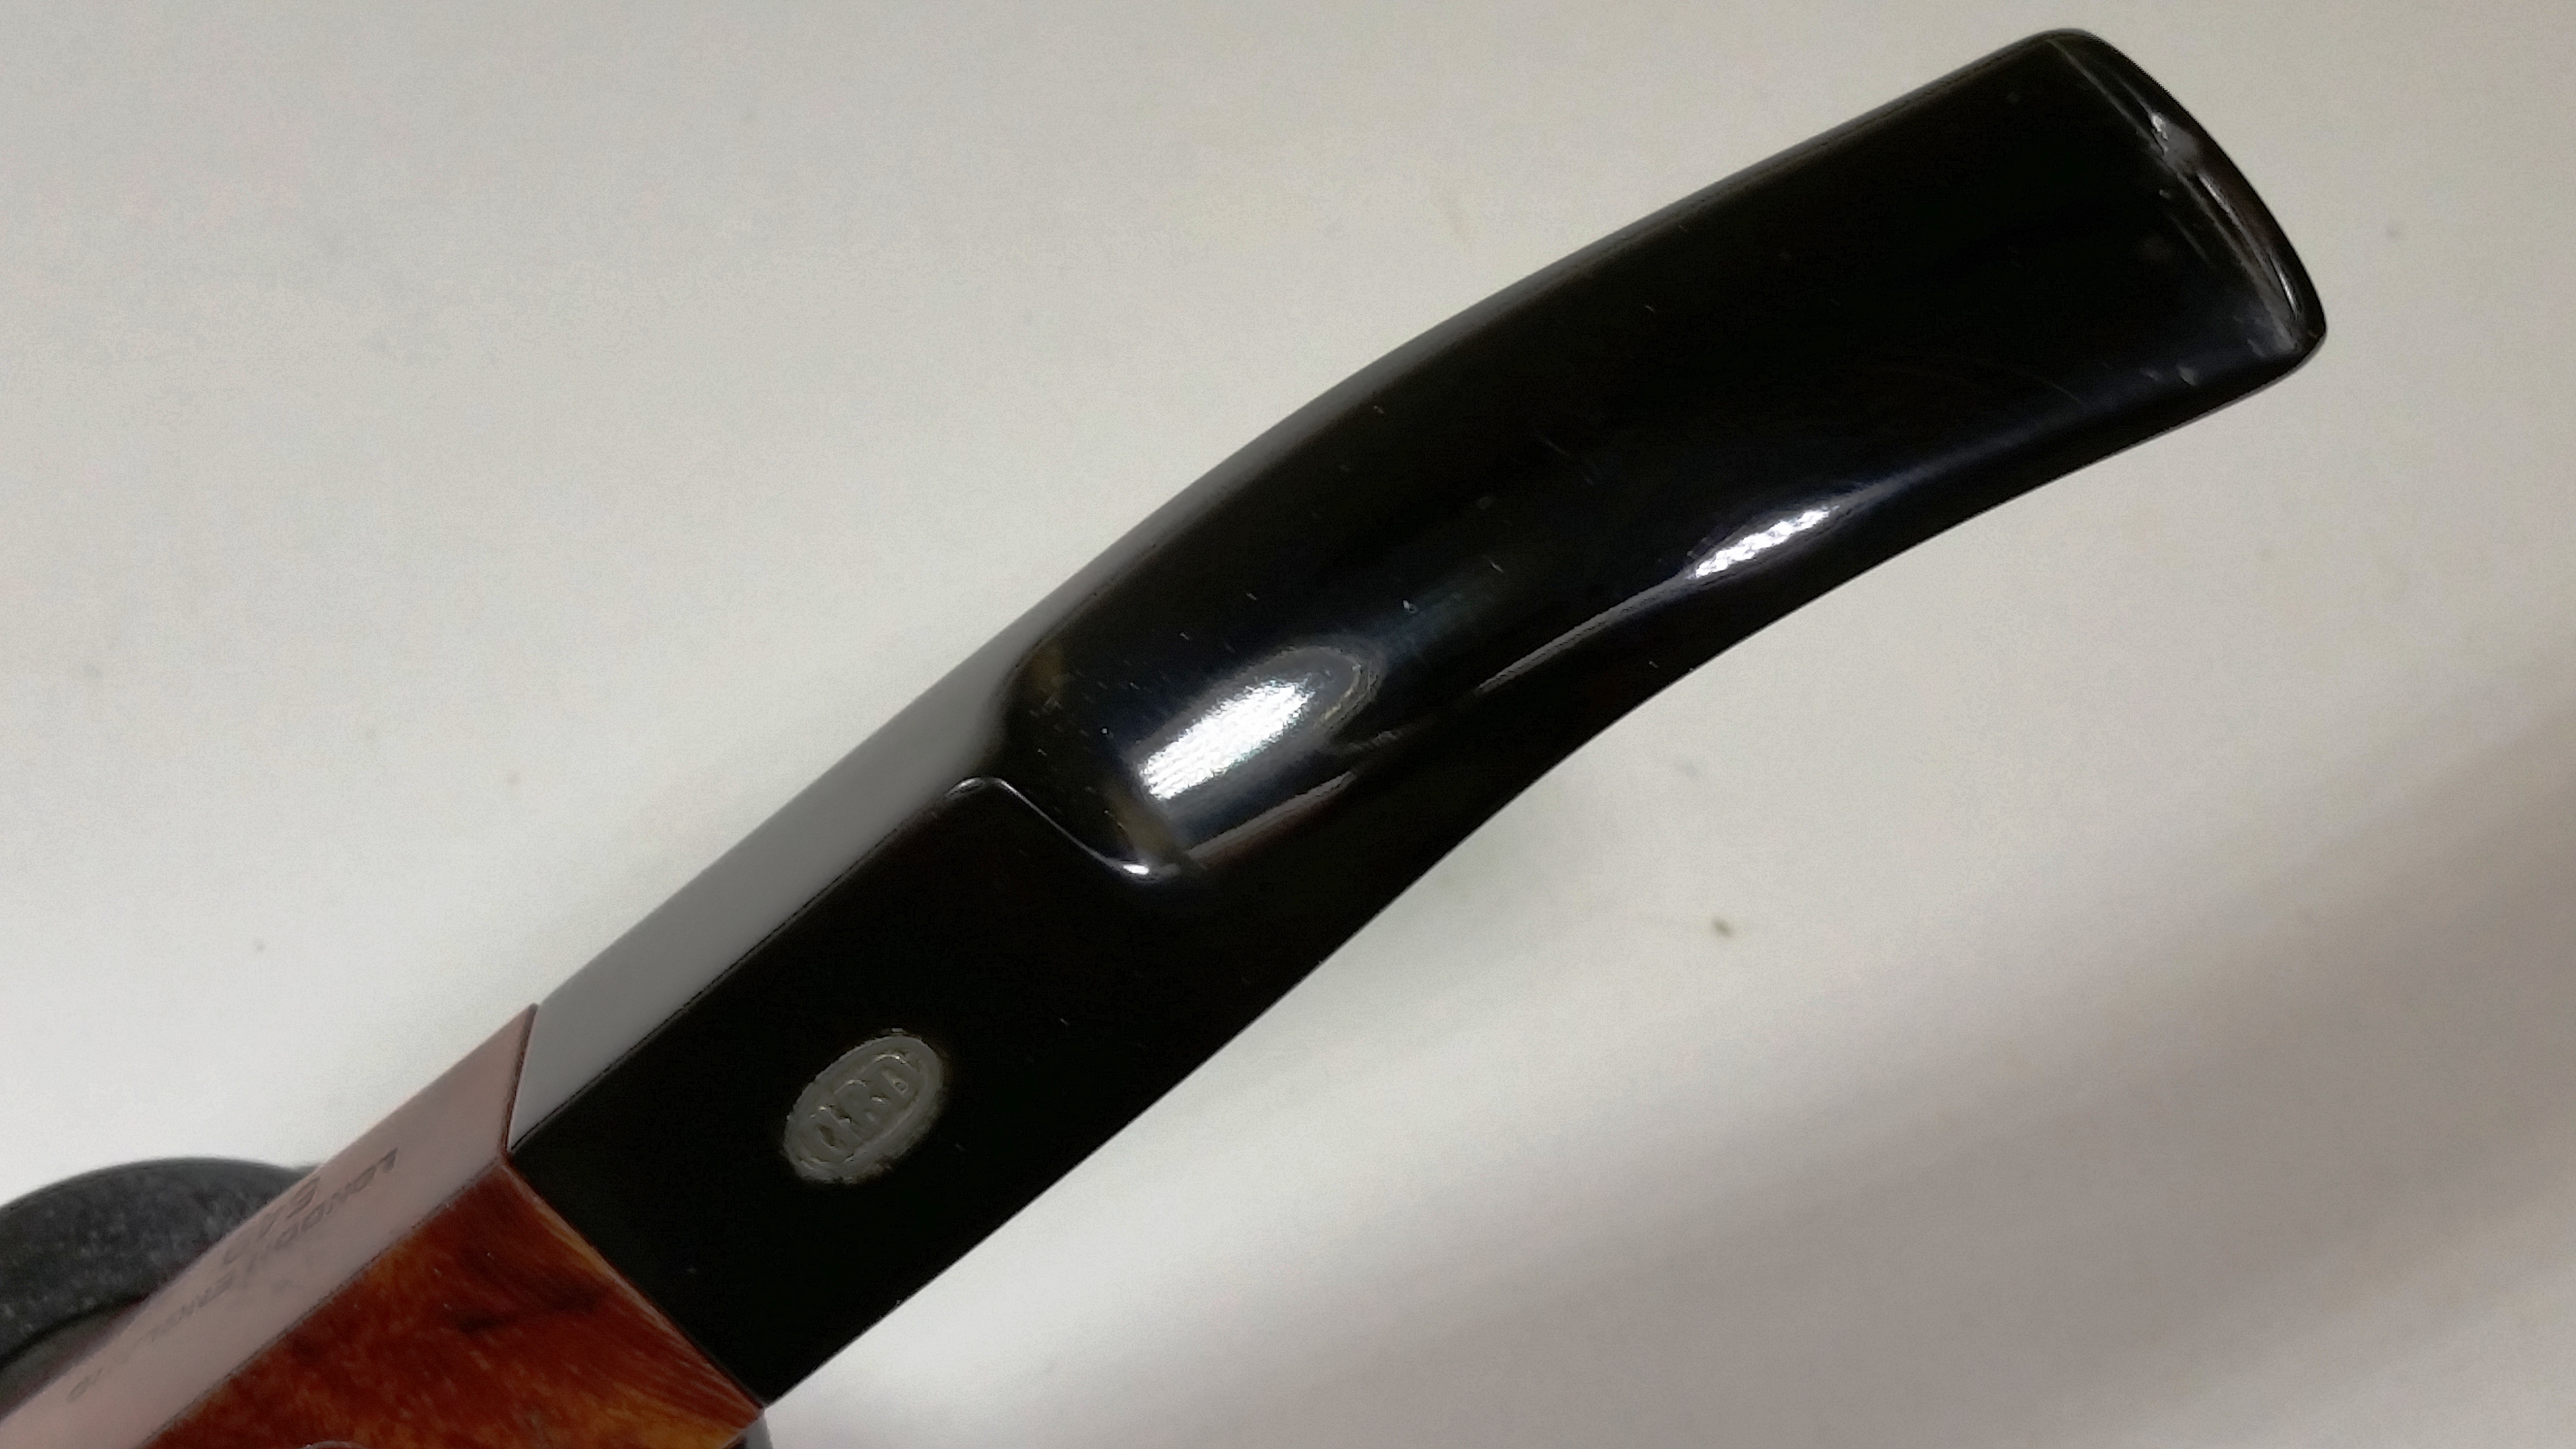
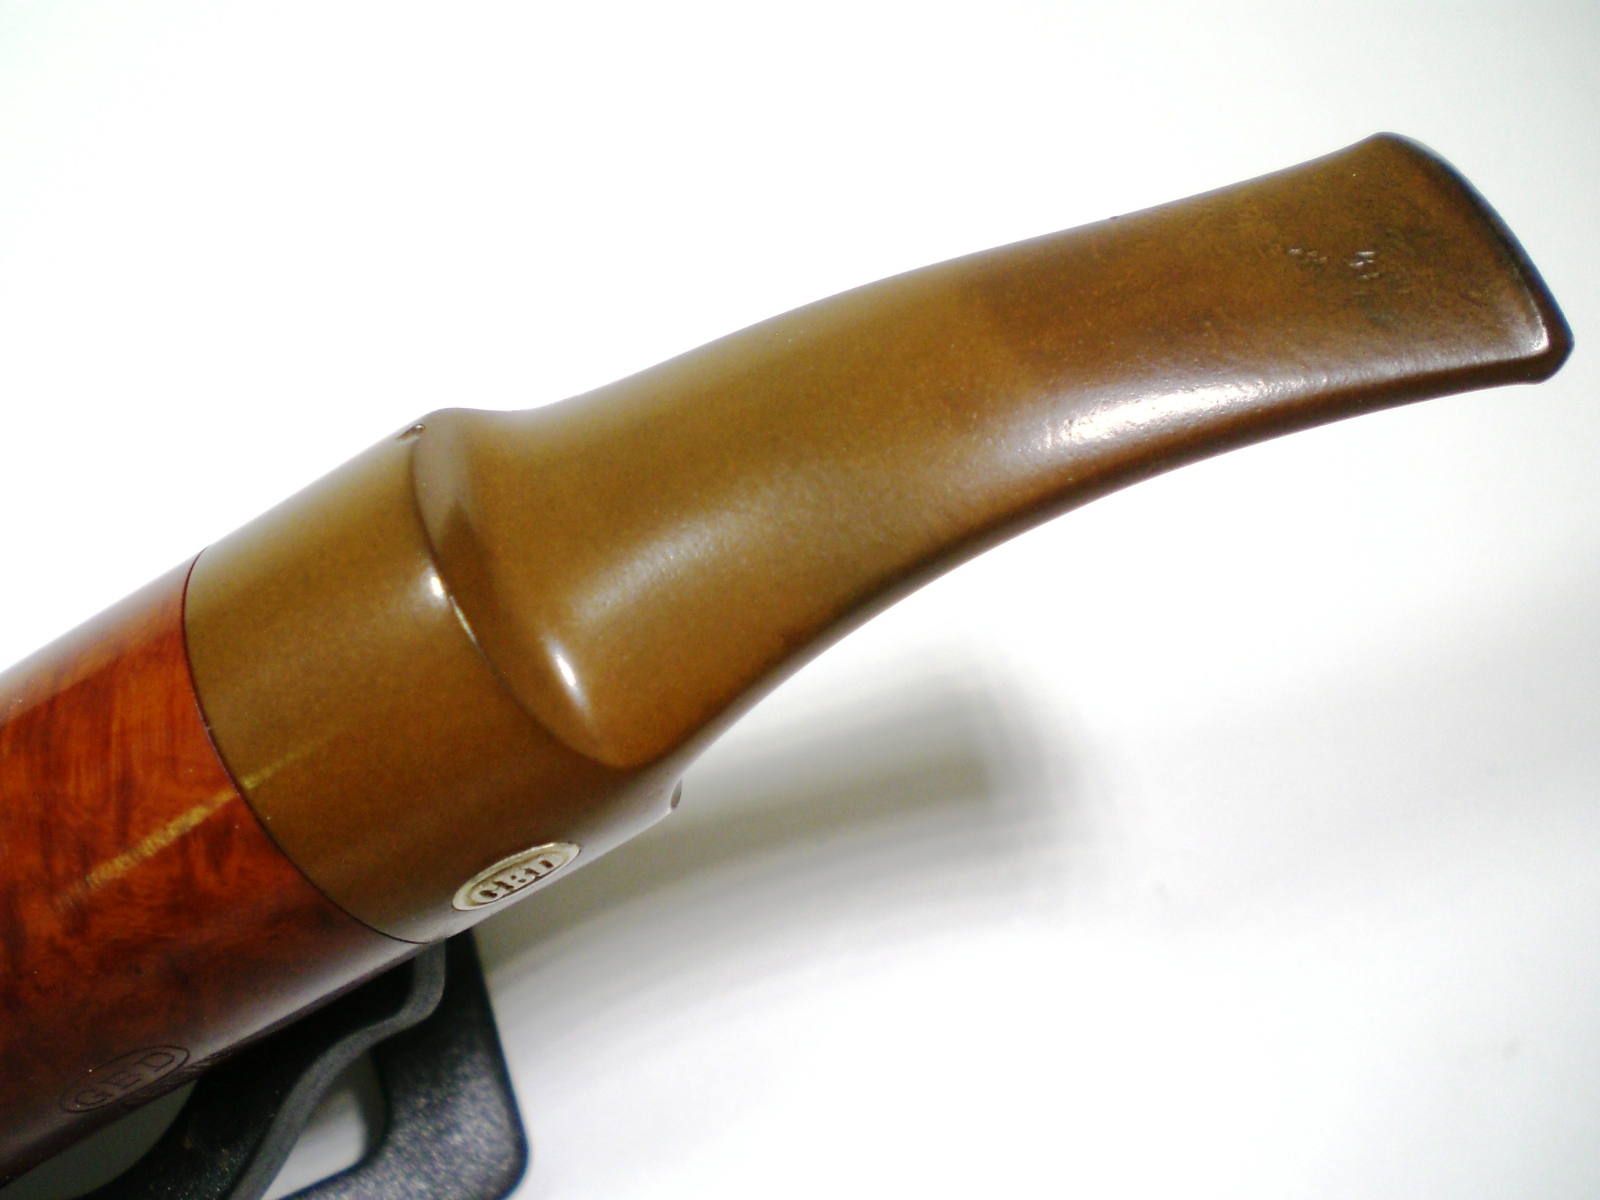
I mounted the stem onto the shank and stared with a sheet of 800 grit wet paper to remove the oxidation.  I proceeded thru 1000, 1500 and then 2000 grit paper to bring back the shine.  The button was amazing like new.  Finally, I used 8000 and 12000 grit sheets of Micromesh.  The stem was then buffed lightly with White Diamond rouge.

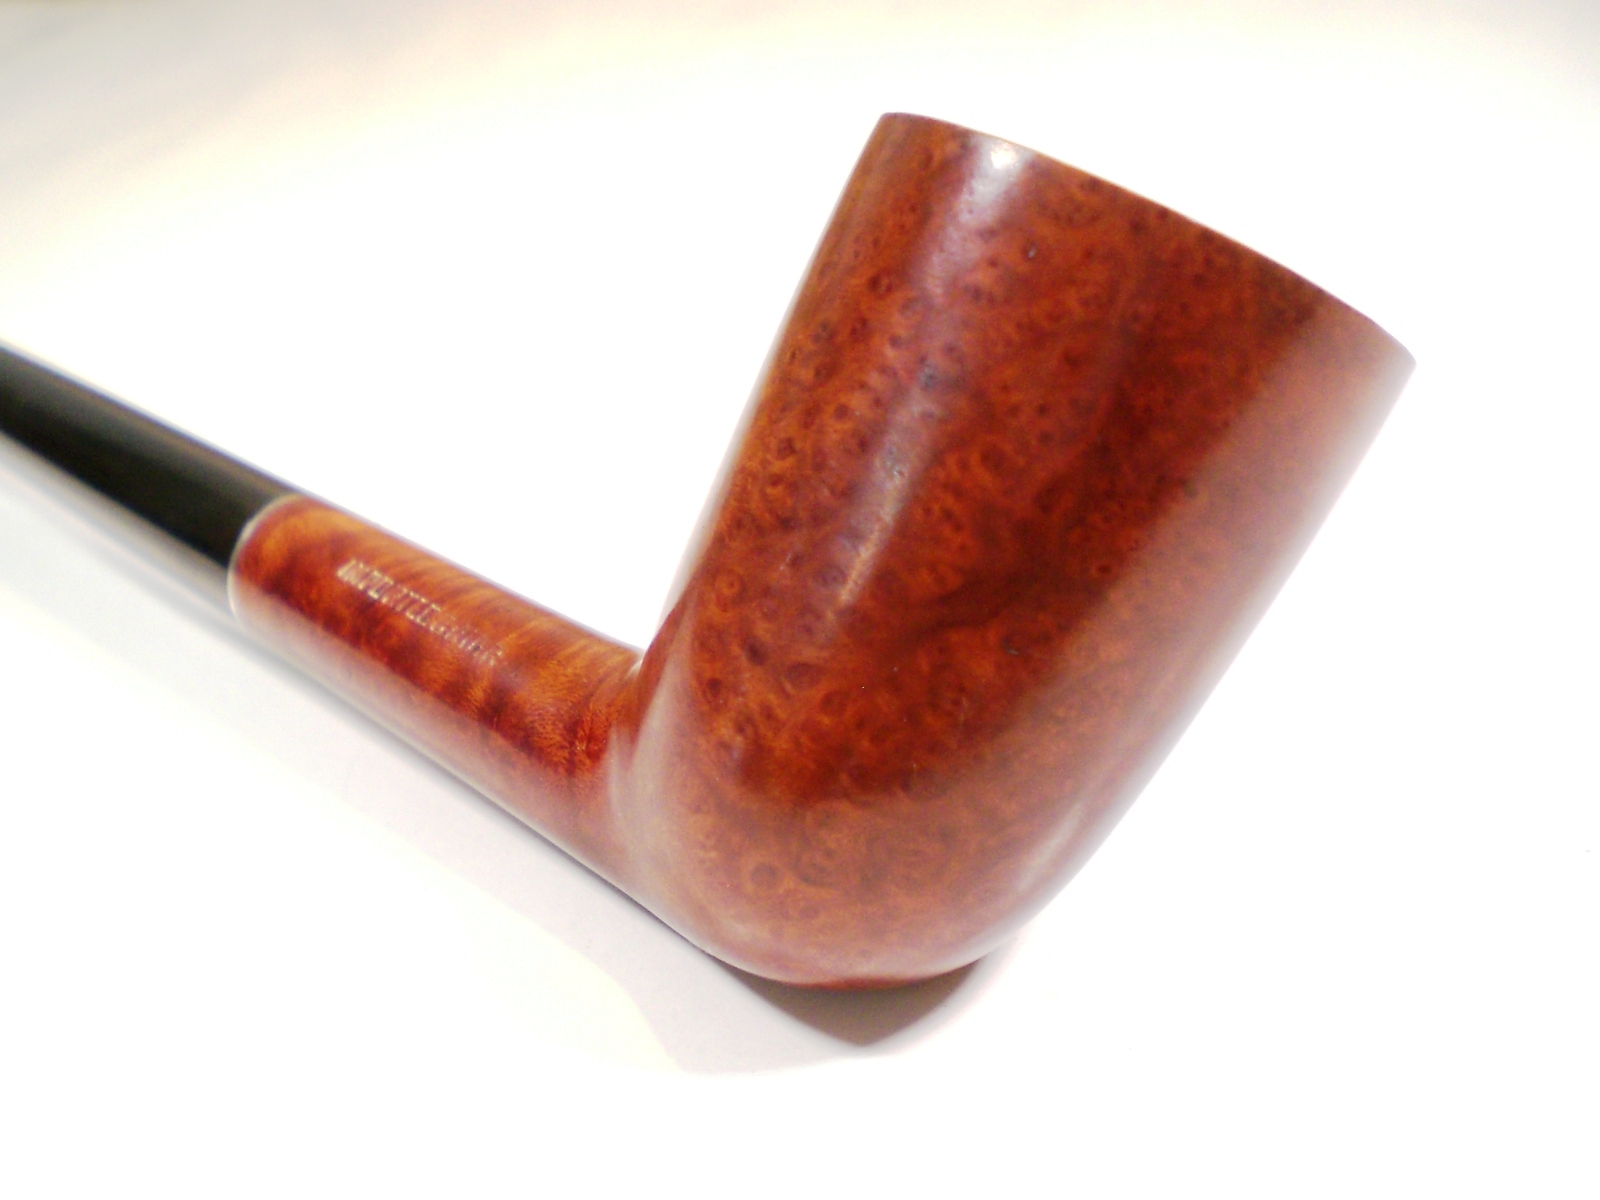
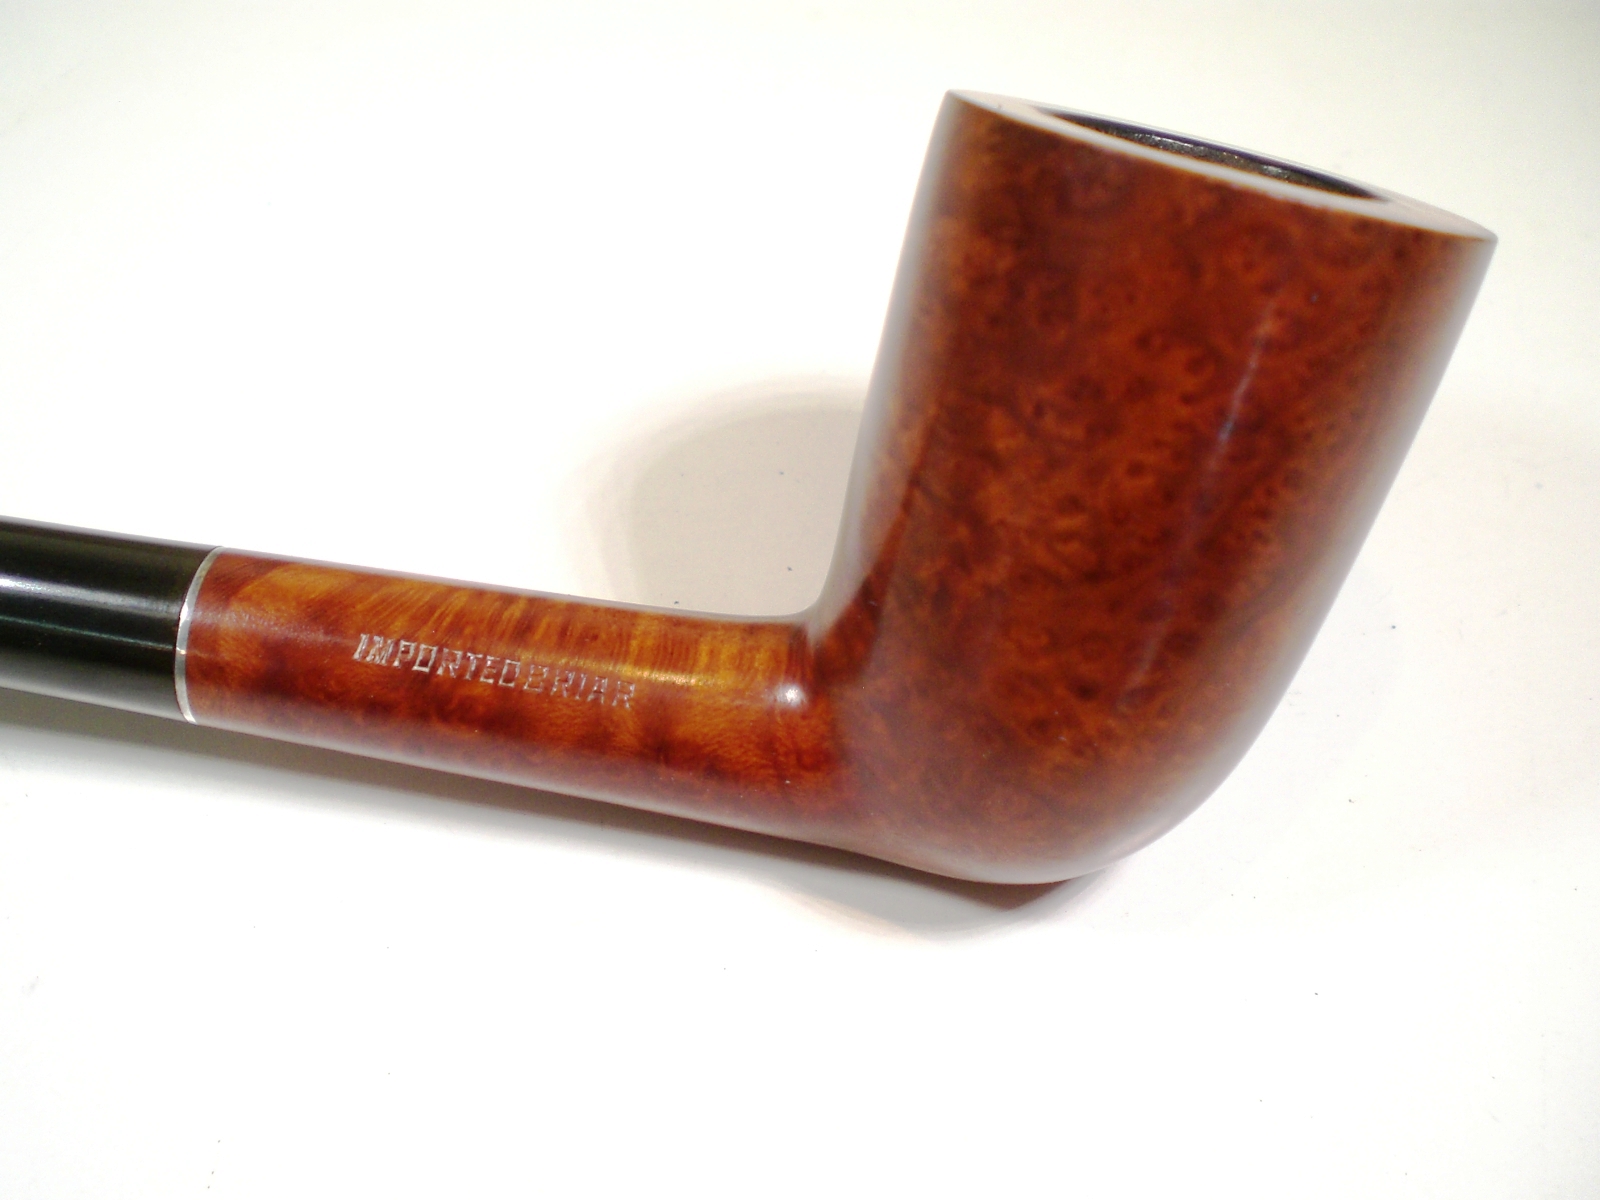
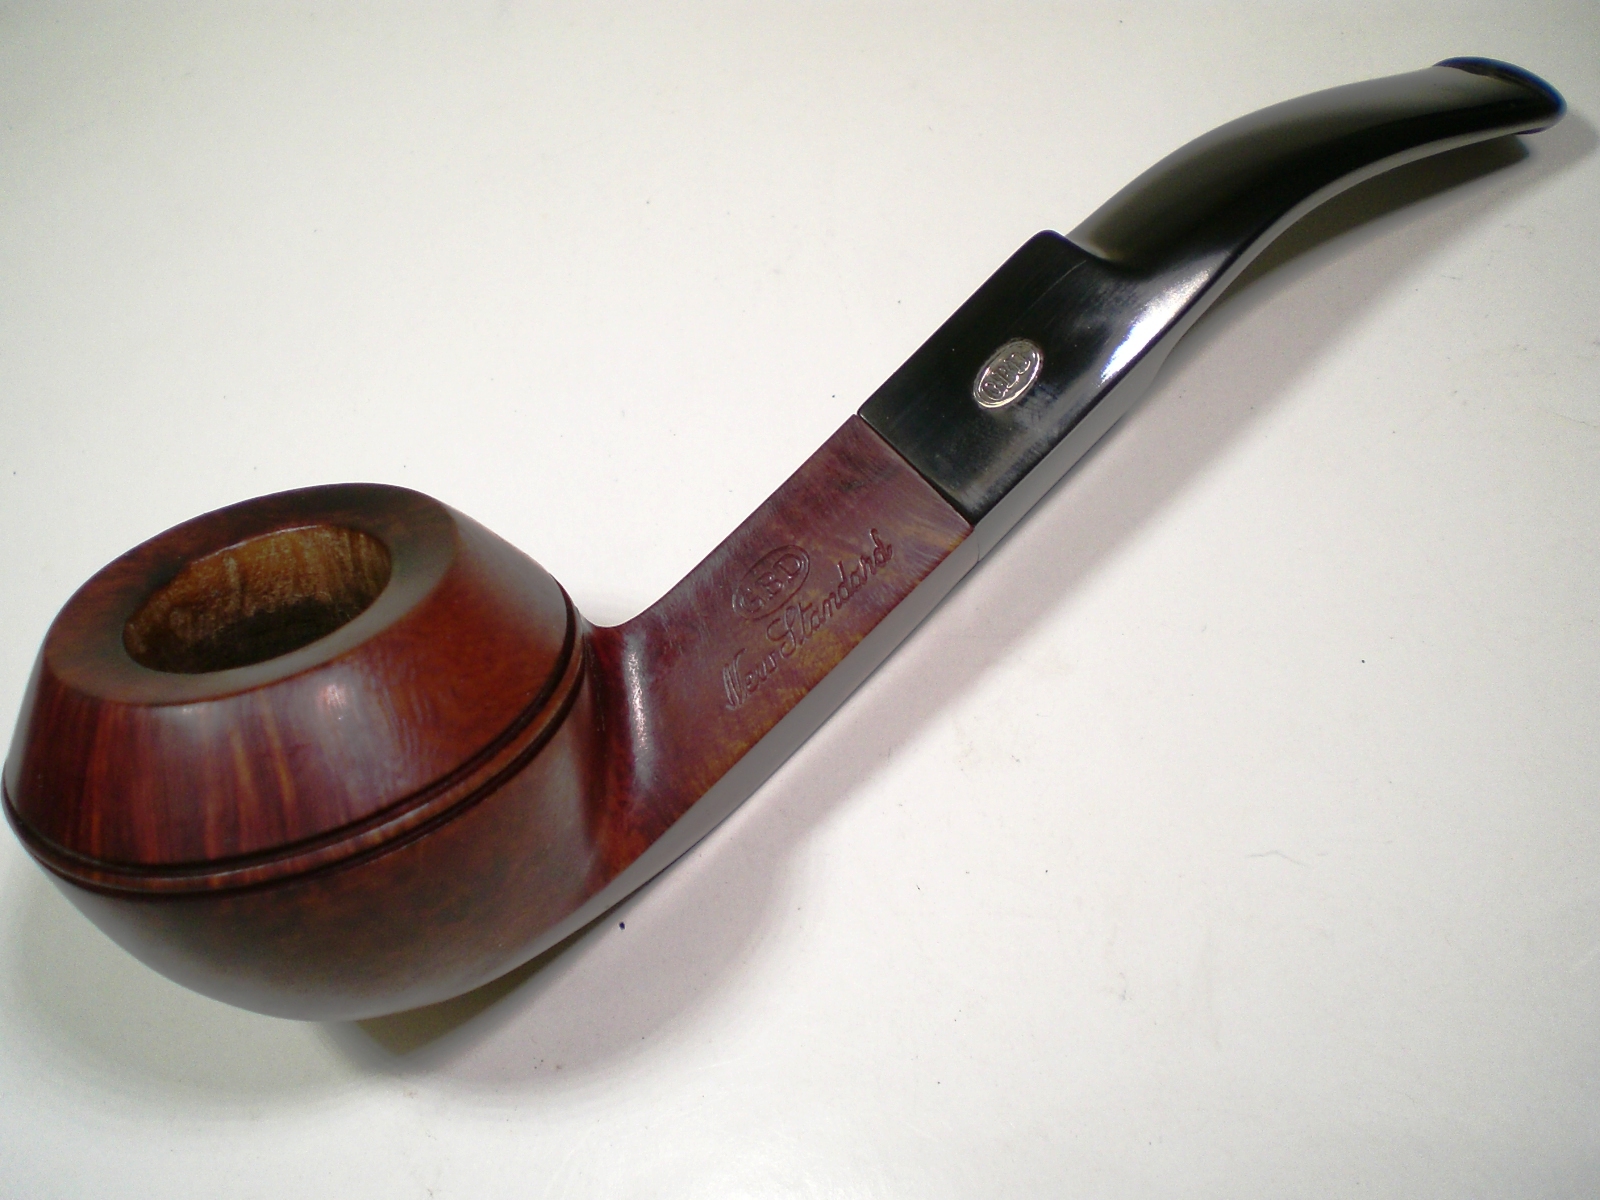
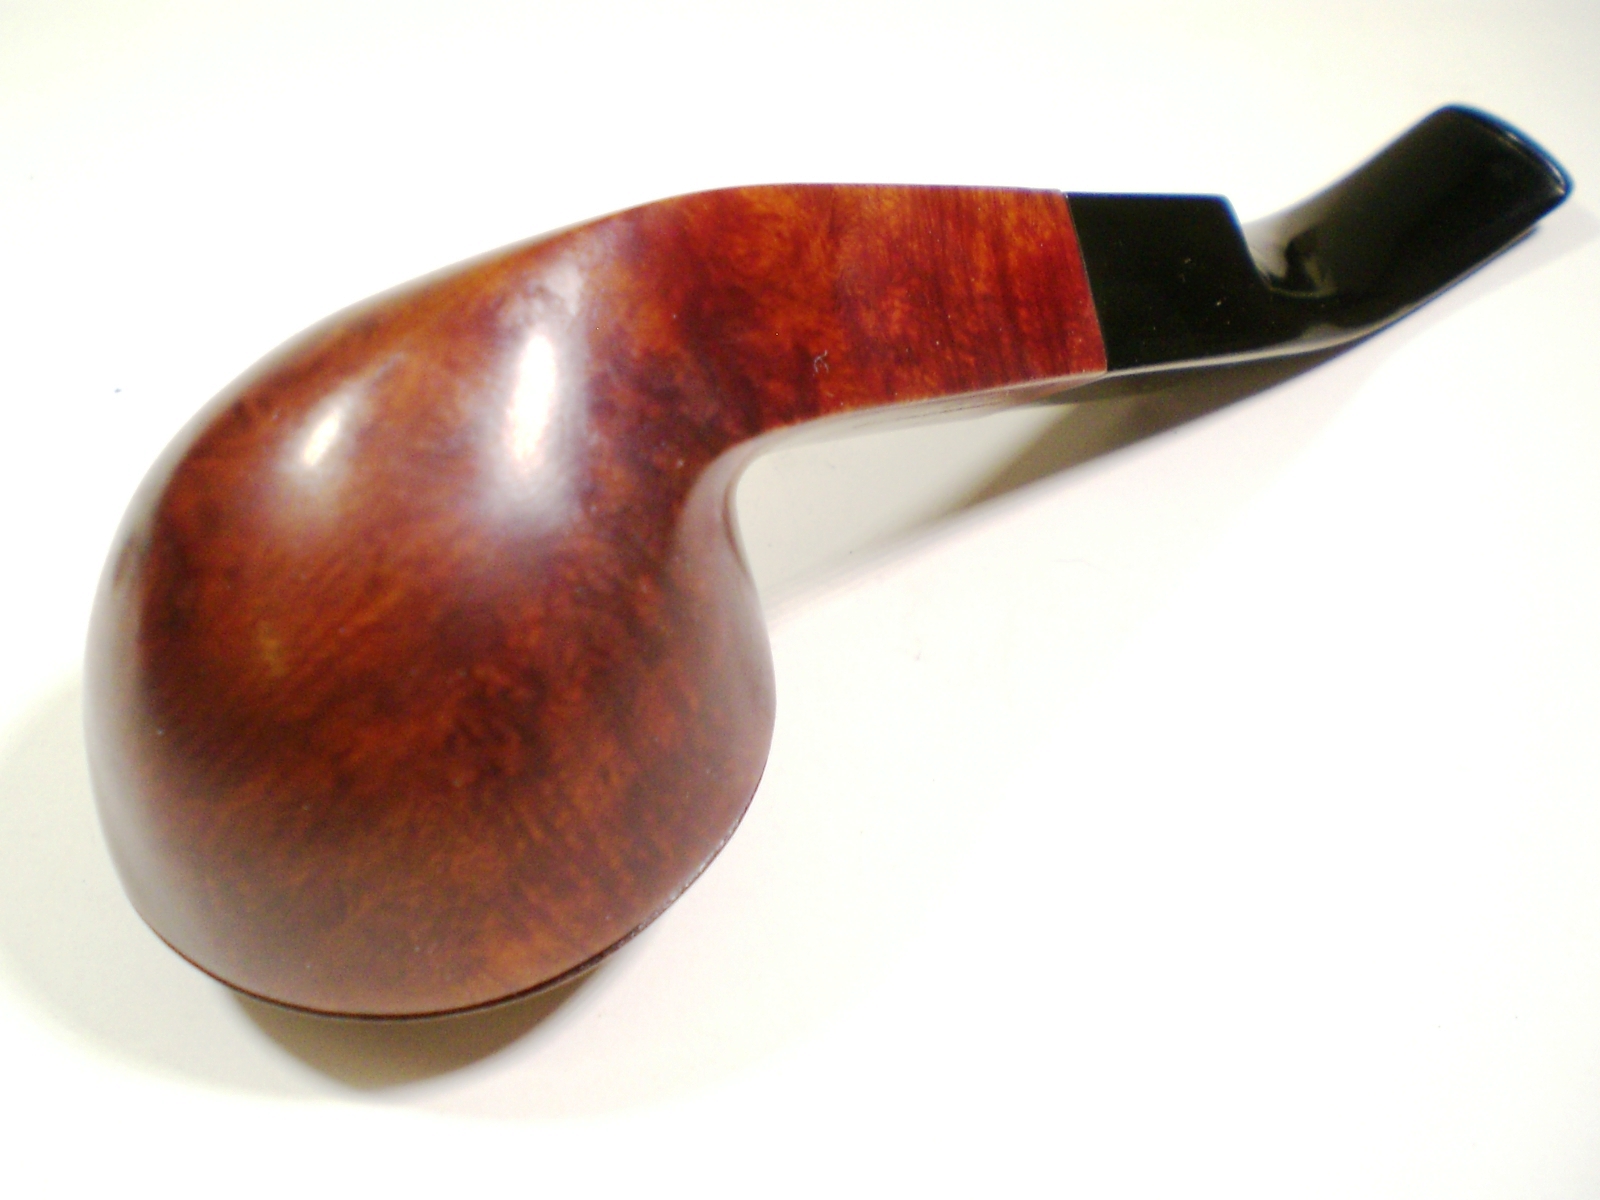
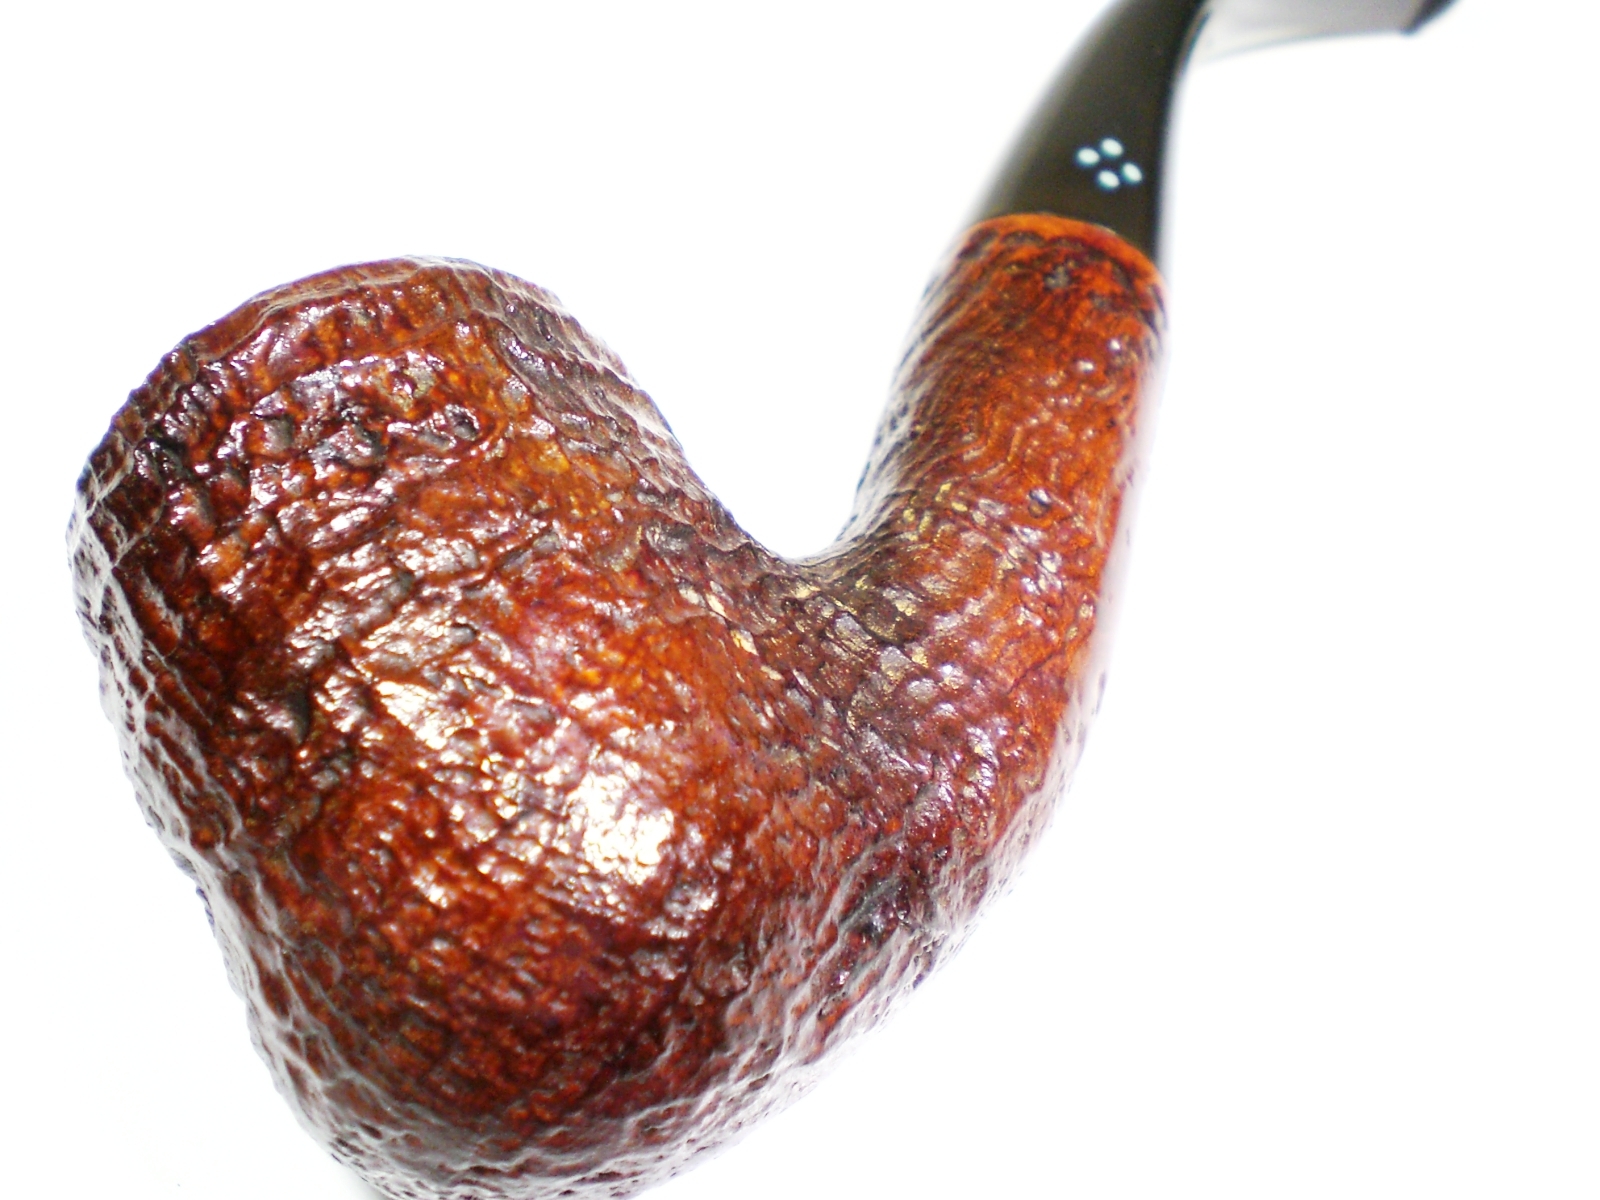
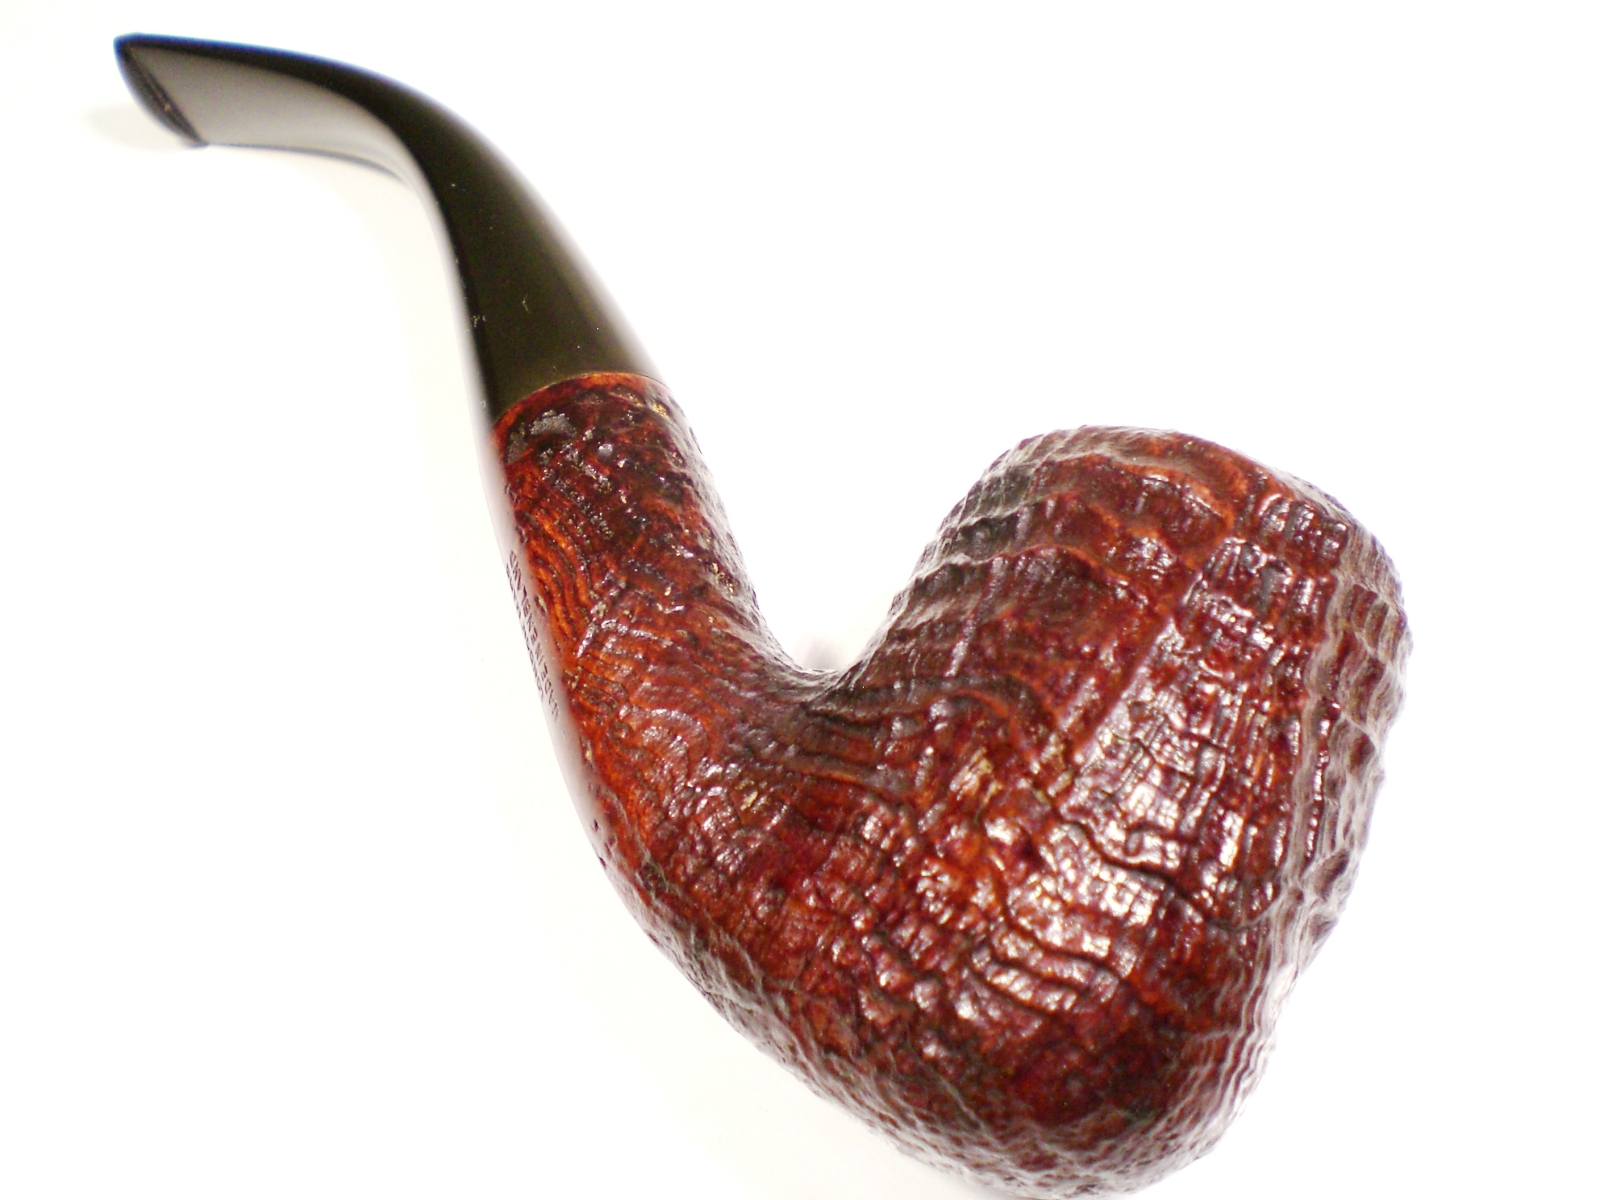
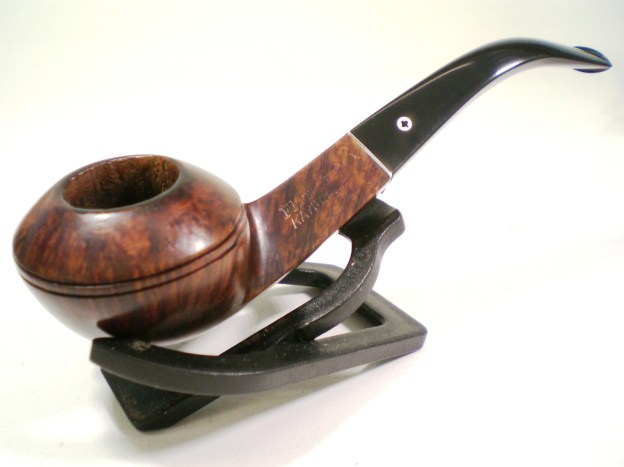
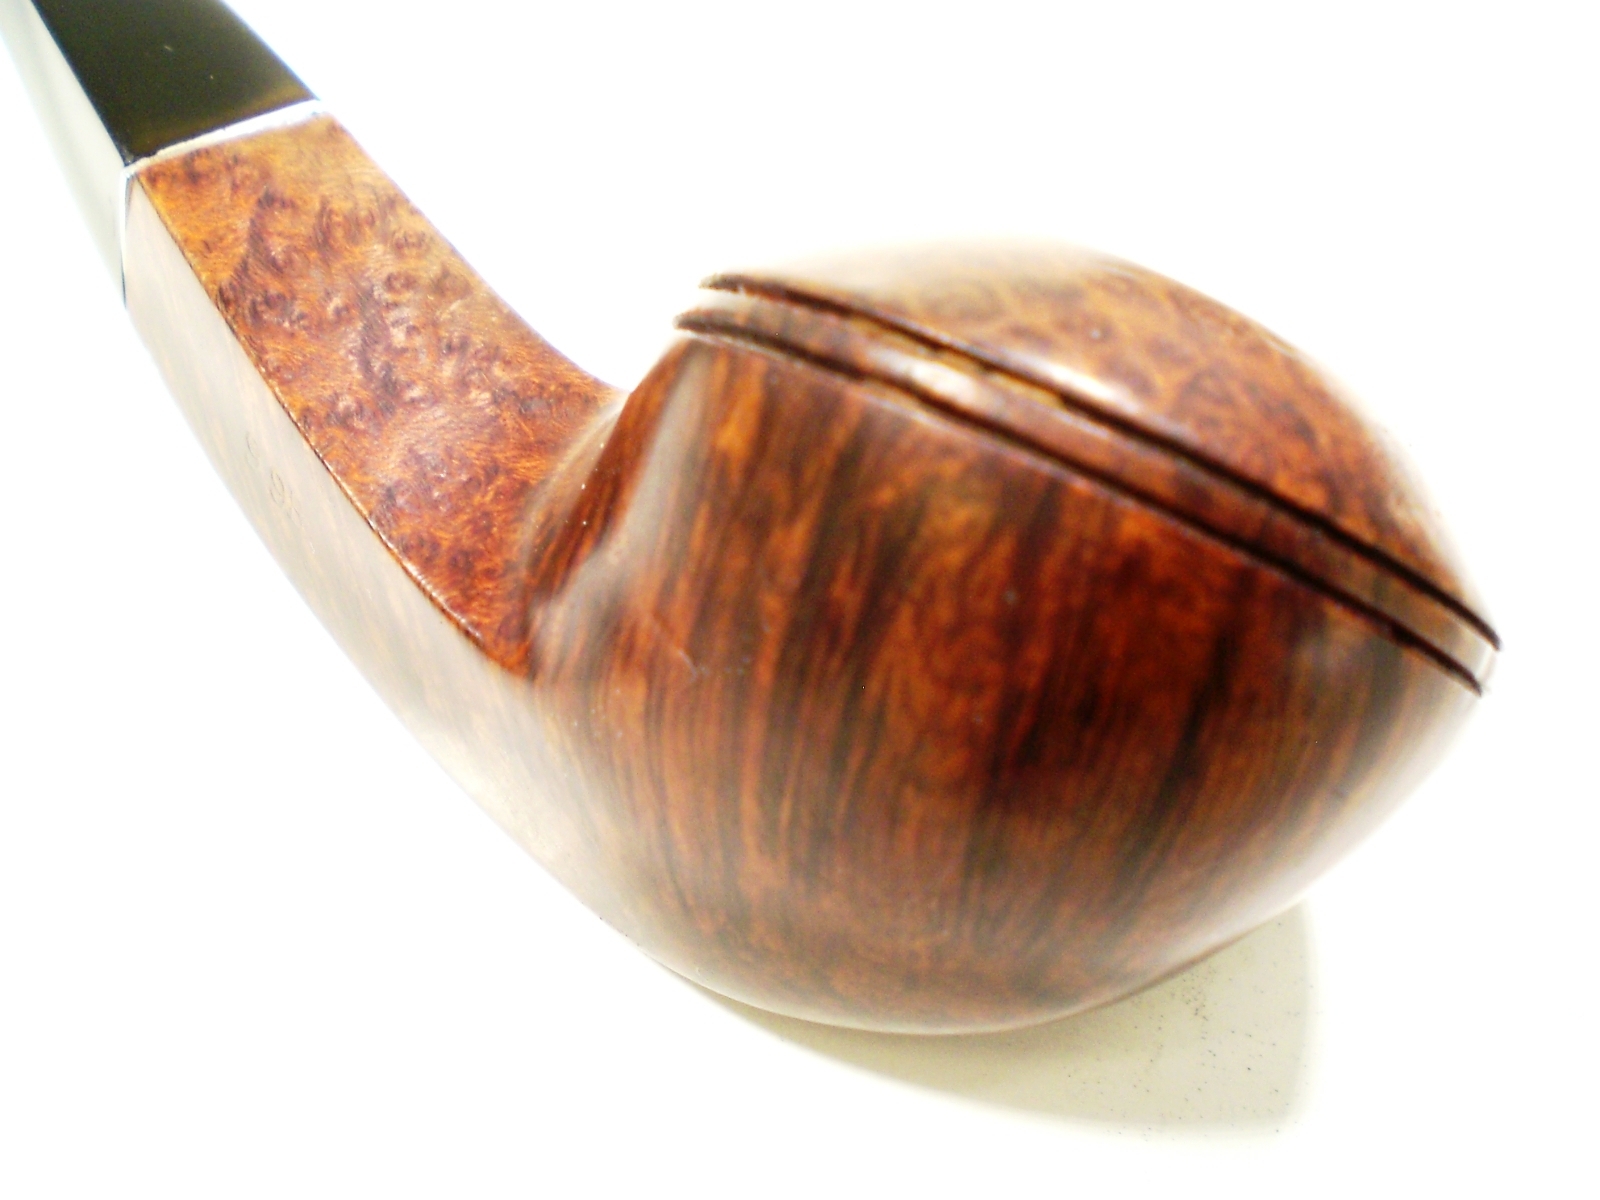
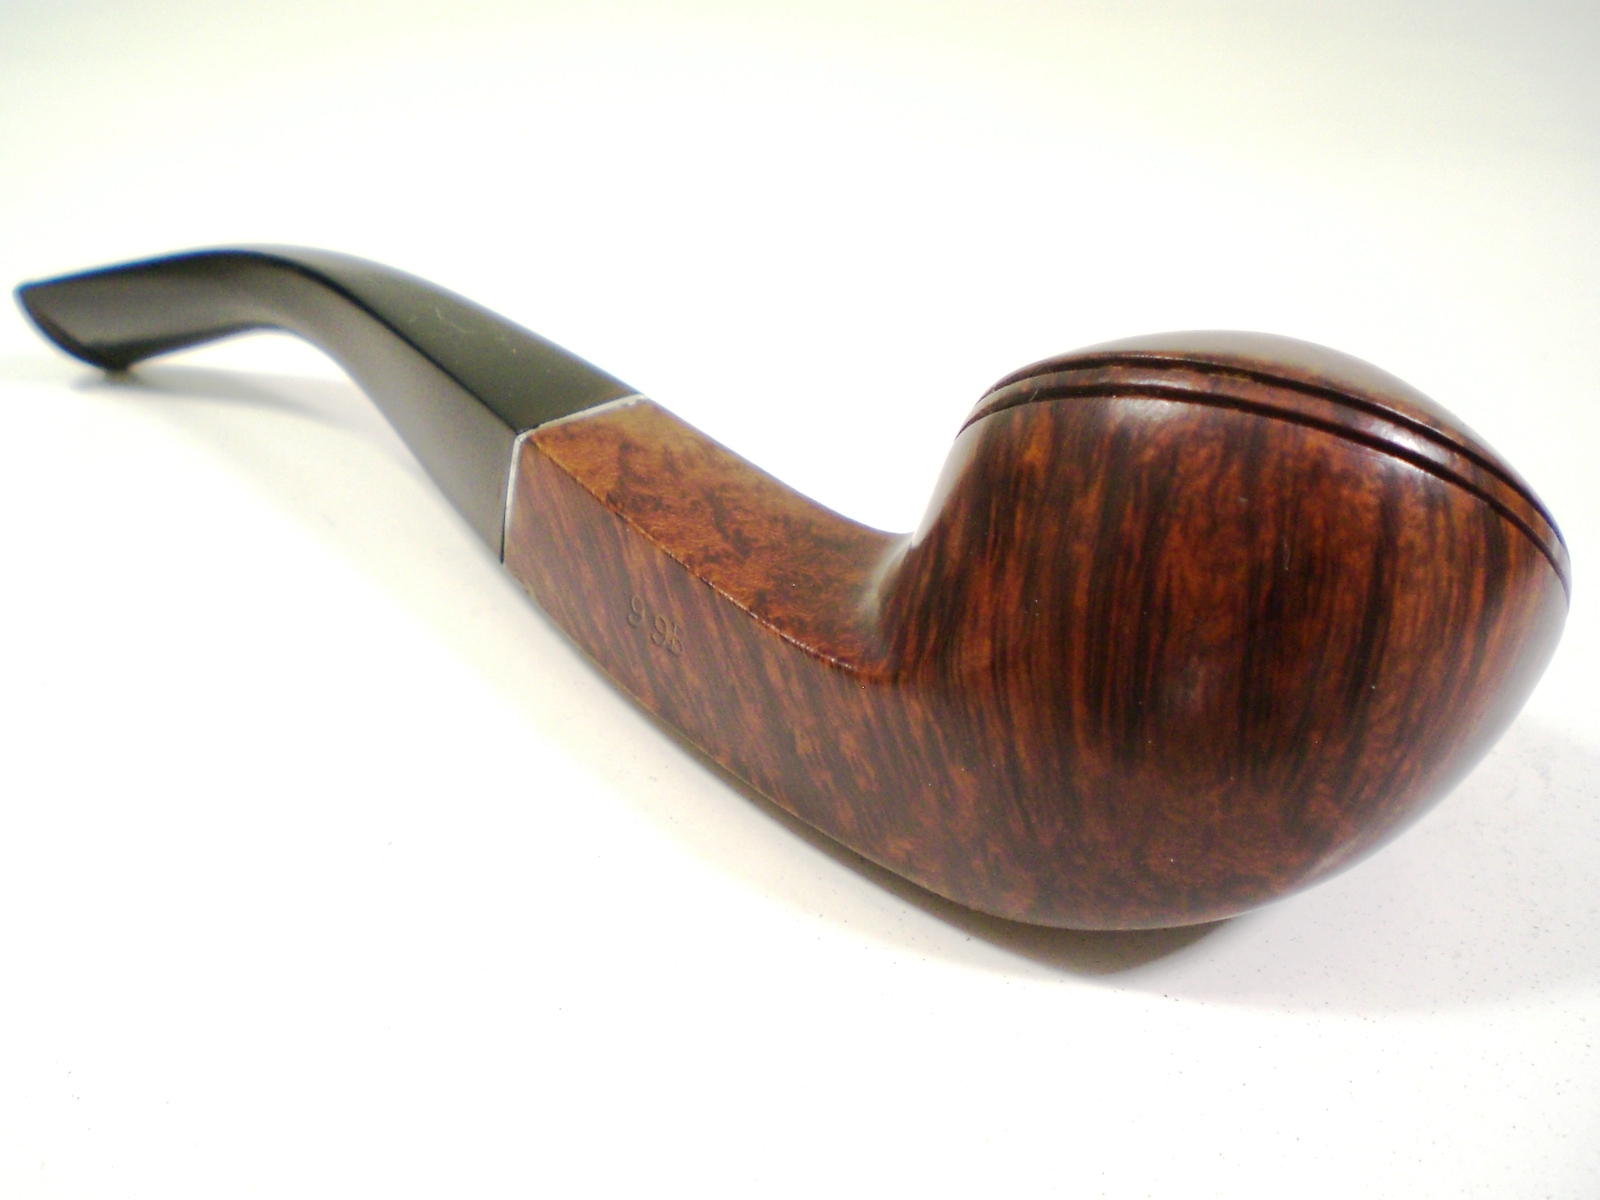
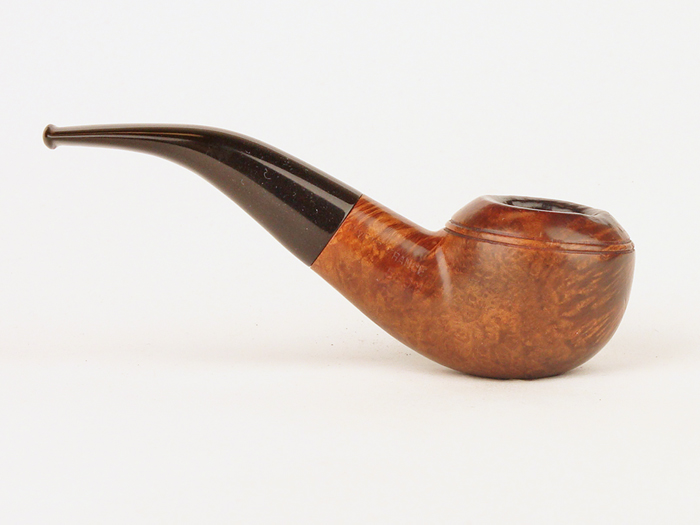
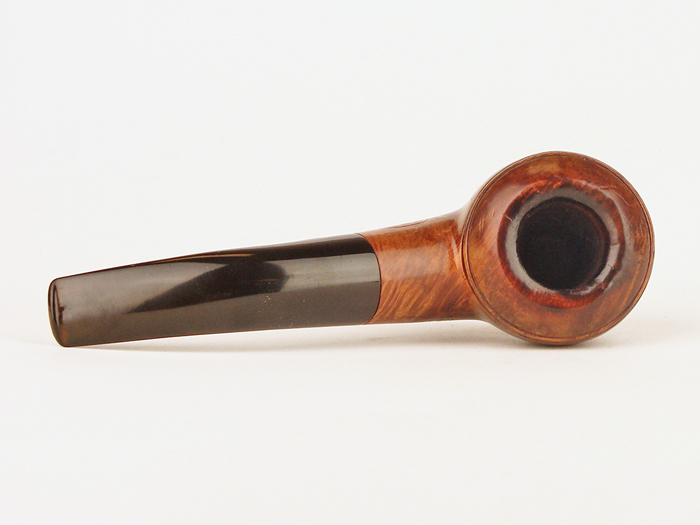
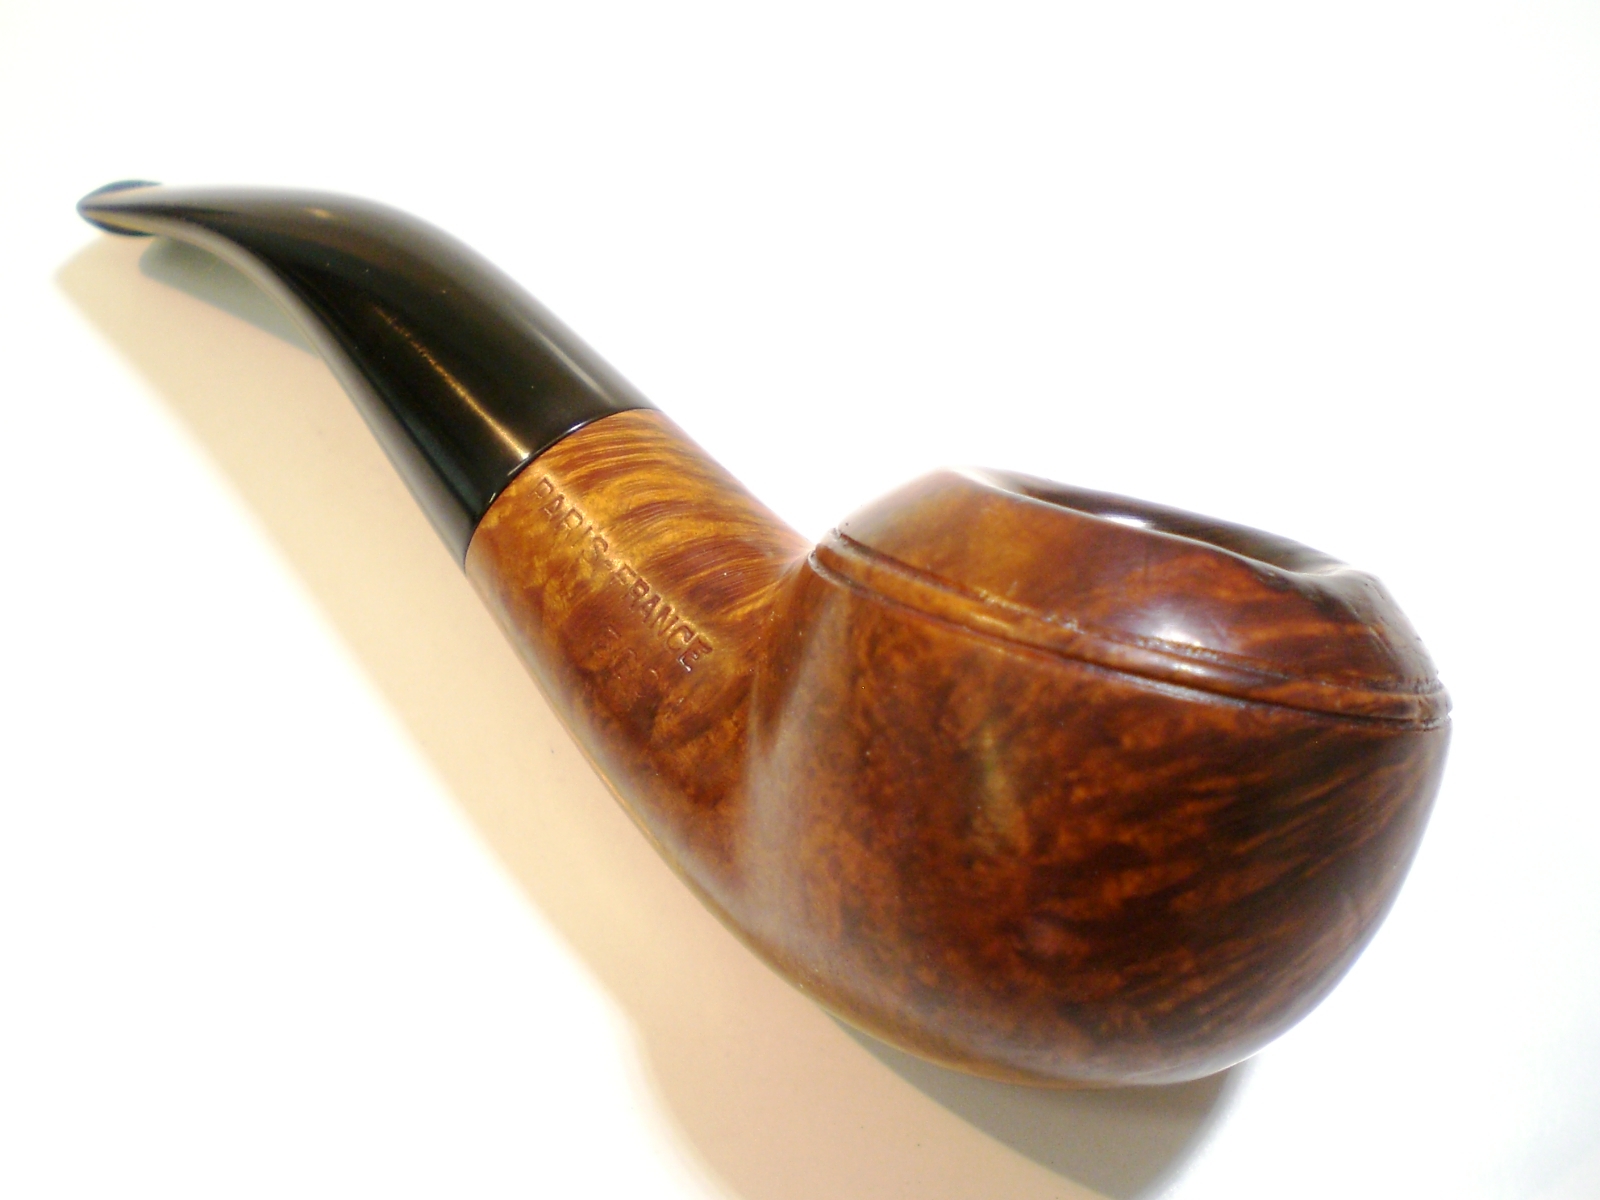
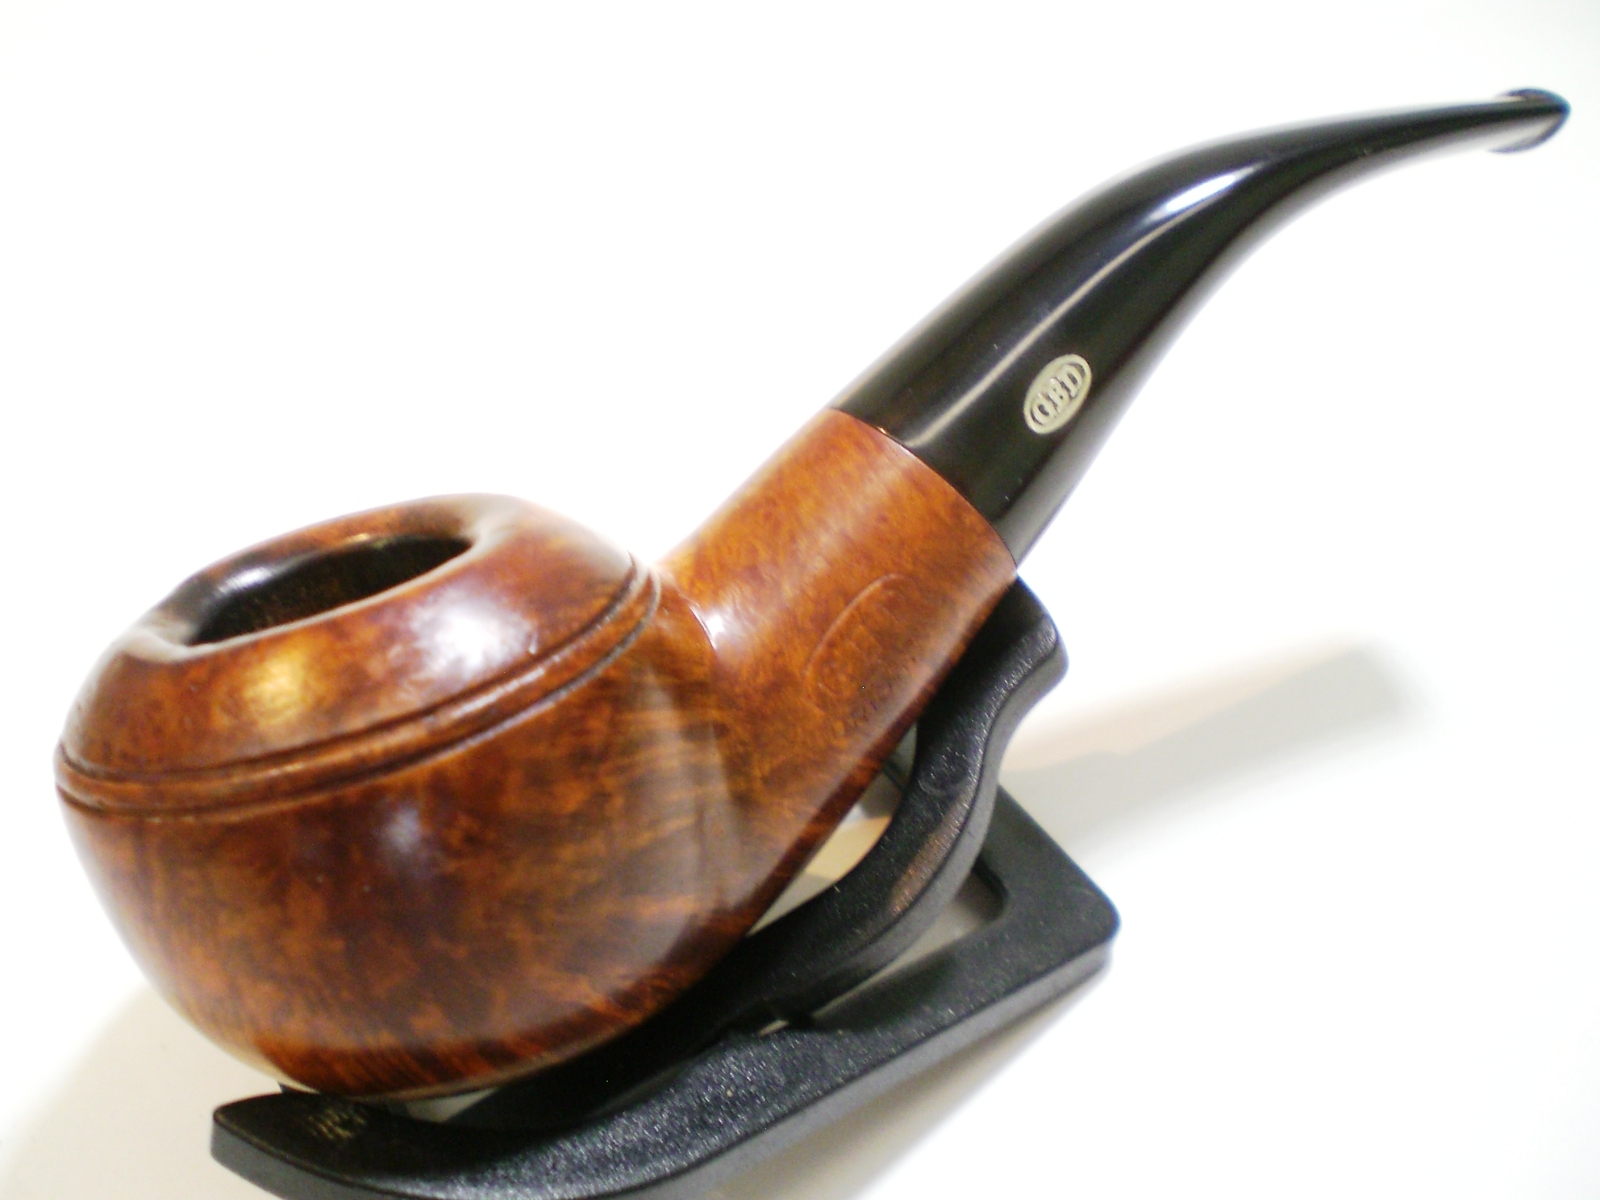
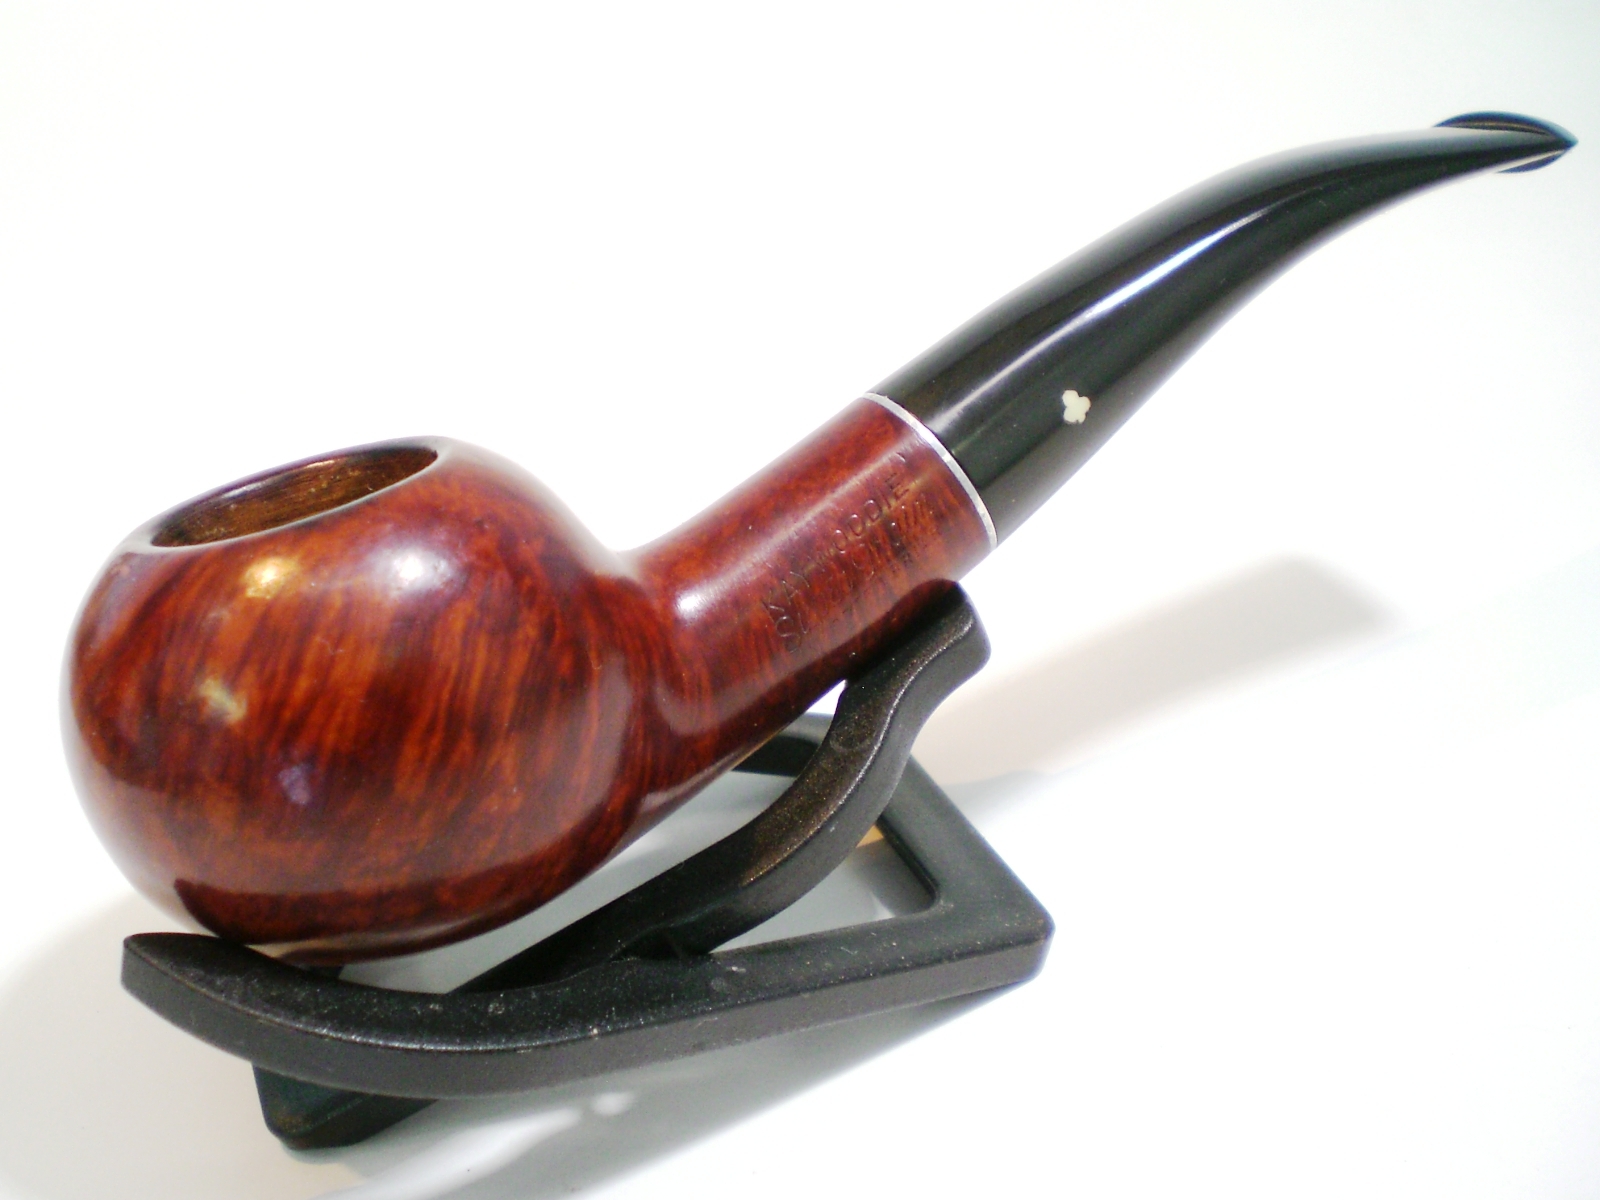
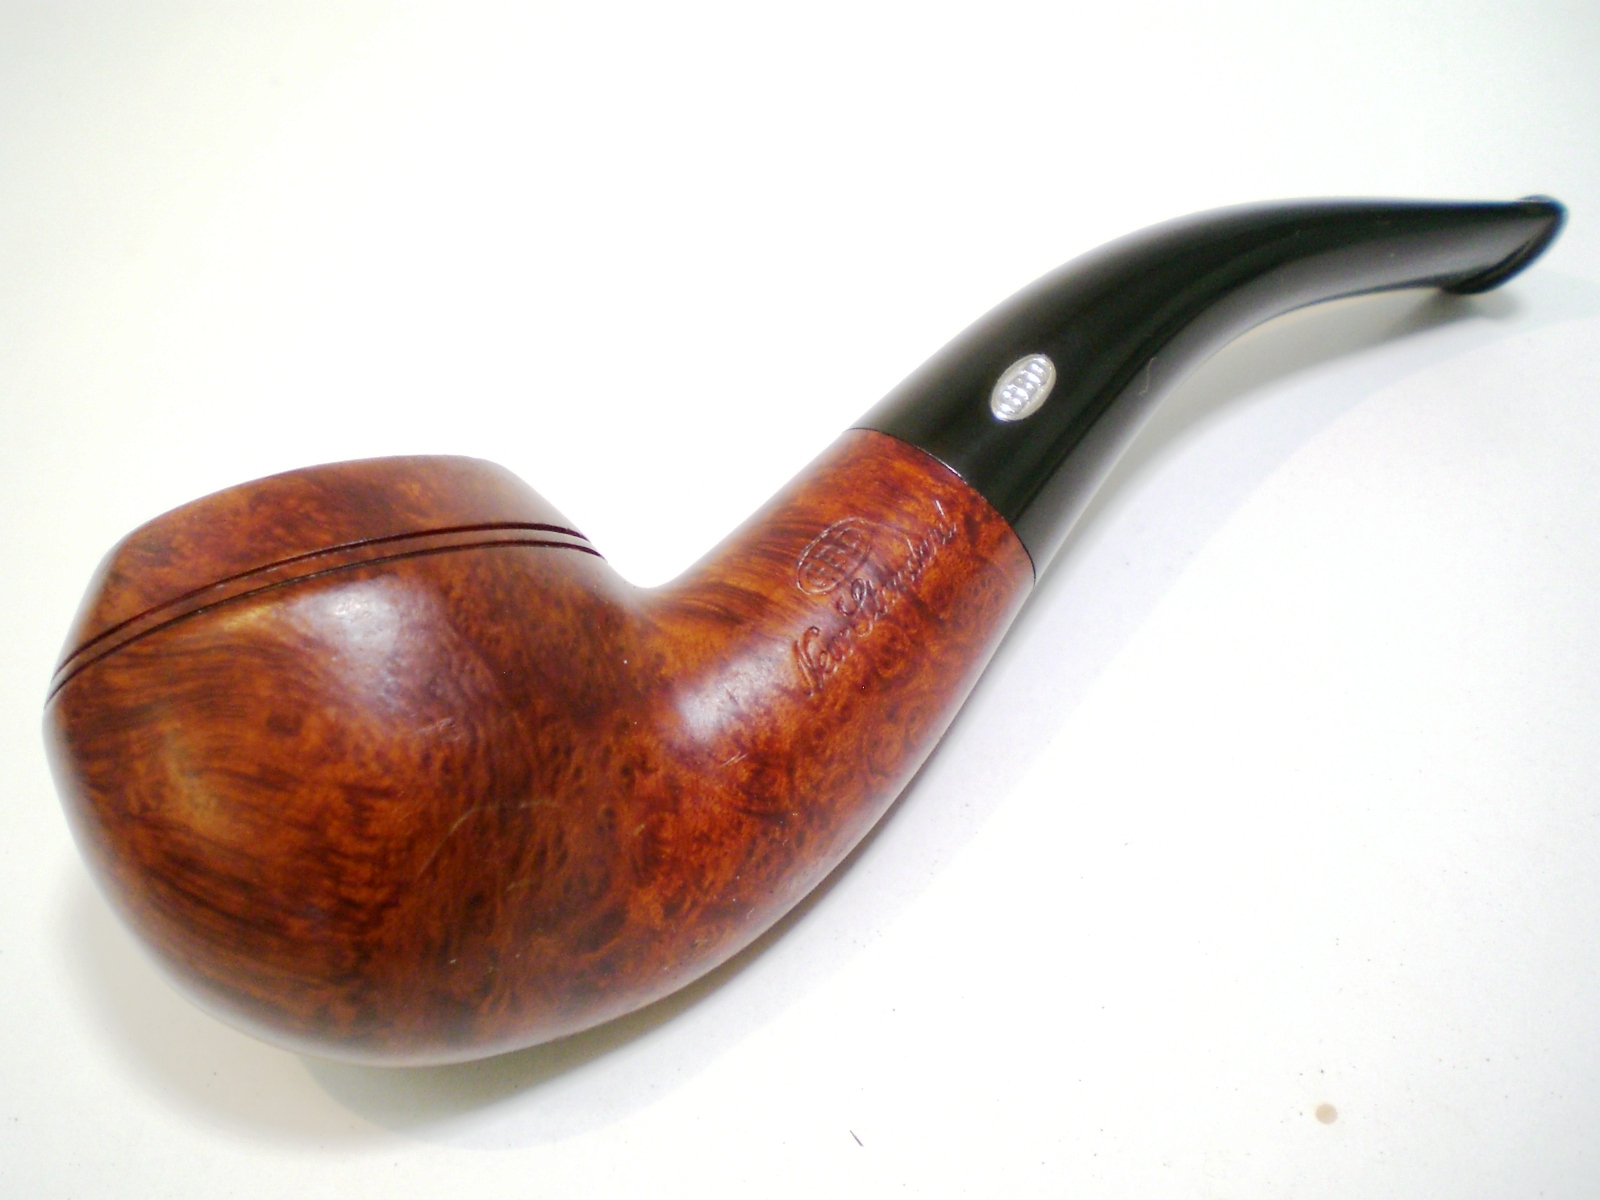
I always chose a unique pipe to smoke on Christmas Eve and I’ll save this one until that special night.  Here’s the finished pipe.

Kaywoodie_Supergrain_95_Gallery

Kaywoodie_Supergrain_95_Finished (10) Kaywoodie_Supergrain_95_Finished (9) Kaywoodie_Supergrain_95_Finished (4) Kaywoodie_Supergrain_95_Finished (2)

Kaywoodie_Supergrain_95_Finished (5) Kaywoodie_Supergrain_95_Finished (6)


GBD 549 New Standard Restoration


Blog by Al Jones

This pipe came from the table at the recent Richmond CORPS show.  The seller, Ned Baylor, is a member of the club.  I always try and make at least one purchase from a club members table.  Ned’s daughter was helping him at the show and he was pretty enthusiastic about making his first sale.  He included a Savinelli box and a nice Mark Tinsky sock, which I needed.  One of the Christopher Morley club members grabbed the box for a Savinelli he purchased.  I already had this GBD shape but thought the pipe would make a fun restoration project.

CORPS_2014_Ned_Baylor

As I mentioned the pipe was in pretty decent overall condition and this was not a challenging restoration, but with pleasing results.  The nomenclature was in very good shape as well.  The brass rondell and straight line “London,England” stamping indicate that the pipe was made before the merger in approximately 1981.

GBD_549_New_Standard_Before GBD_549_New_Standard_Before (6) GBD_549_New_Standard_Before (1) GBD_549_New_Standard_Before (2) GBD_549_New_Standard_Before (4)

The pipe was in pretty good condition, with a little tar build-up in the bowl and a few teeth marks on the stem.  The stem was only mildly oxidized.

I removed the cake from the bowl with my Castleford reamer and found the bowl to be in very good condition.  The bowl was soaked with alcohol and sea salt.

GBD_549_New_Era_Before (3)

I put a dab of grease on the brass rondell and soaked it in a mild Oxy-Clean solution for several hours to loosen the oxidation.  I started with 800 grit wet sandpaper, progressing to 1000>1500 and 2000 grades.  I then used the 8000 and 12000 grade Micromesh papers to finish polishing the stem.  There were a few teeth marks on the top and bottom of the stem.  A little heat almost removed the one on the top of  the stem and minimized the dent on the bottom.  The stem was then buffed lightly with white diamond rouge, with the stem mounted in the briar.  The stem was a little loose so I put some distilled water in the shank, which made the briar swell a bit and tighten up the stem.  I felt after smoking that the stem would tighten nicely.

I removed the tars on top of the bowl with some distilled water and a cotton cloth.  The a worn piece of 8000 grit Micromesh was used to minimize the rim darkening without lifting the stain.  The stem was already getting snug due to the water used in the shank.  It was just a little bit loose and I smoked one bowl of My Mixture 965 in the pipe during which time it snugged up nicely.  I had bought this one to restore and sell, but it smoked so nice, I almost changed my mind.  It did end up going to a member of the Allentown and Philly pipe clubs who is also on the PipesMagazine.com forums.  I hope he enjoys it for many years.

Below is the finished pipe.

GBD_549_New_Standard_Finished GBD_549_New_Standard_Finished (3) GBD_549_New_Standard_Finished (8) GBD_549_New_Standard_Finished (5) GBD_549_New_Standard_Finished (6) GBD_549_New_Standard_Finished (1) GBD_549_New_Standard_Finished (2) GBD_549_New_Standard_Finished (4)


Sasieni Stratford Ruff Root Restoration


Blog by Al Jones

This pipe was an acquisition from the recent CORPS Show in Richmond, VA.  The gentleman who sold it to me is a fellow member of the SmokersForums.uk.  I really wasn’t looking to add any more pipes at the show, but I can’t resist Sasieni pipes from the Family Era, which were made prior to 1979.  I think they offer a great value in an English estate and my others smoke wonderfully.  The stem and button work I feel is slightly better than Comoys pipes of that era.  “Ruff Root” pipes in particular are quite light, even in a large pipe such as this “Stratford” model.  While not as graceful in appearance as my Viscount Lascelles, it’s angular jaw has a sort of rugged appeal that grew on me as work progressed.   The oval bowl top is also a unique feature.

The pipe was in excellent condition and I knew it would only require a minor clean-up effort.   To my eye, the robins-egg blue four dot stem logo is one of the most appealing of any British maker.  Some dots fade over time but the one on this stem were perfect, as is the button.

Sasieni_Stratford_Ruff-Root_Before Sasieni_Stratford_Ruff-Root_Before (1) Sasieni_Stratford_Ruff-Root_Before (2) Sasieni_Stratford_Ruff-Root_Before (3)

There was a very slight cake in the pipe, which I carefully removed.  The bowl was soaked with Sea Salt and alcohol.  While the bowl was soaking, I dabbed some grease on the stem logo and soaked it in a mildy Oxyclean solution.  Nestled with the Sasieni is a GBD New Standard 549 that was also a CORPS show purchase.

GBD_549_New_Era_Before (3)

After soaking in the Oxyclean solution, I removed the oxidation from the stem starting with 800 grit wet paper, then progressing thru 1000, 1500 and 2000 grades.  I followed those with 8000 and 12000 grades of Micromesh paper.  The stem was free of any bite marks.

I make a collar to use between the briar and vulcanite stem out of light grade plastic.  Small boxes that hold auto fasteners or product blister packs work well. I cut out small circles then punch a hole for tenon using an office punch.  The collar allows me to remove the oxidation near the stem and briar junction without taking the edge off the stem.

20141012_221609 20141012_221526 20141012_221452

The stem was buffed lightly with White Diamond.  The briar only required hand polishing with Halycon II wax.  The nomenclature was in outstanding condition.

Below is the completed pipe.  Ruff Root pipes are light for their size and this one only weighs 51 grams.

Sasieni_Stratford_RR_Gallery Sasieni_Stratford_RR_Finished (2) Sasieni_Stratford_RR_Finished (1) Sasieni_Stratford_RR_Finished (5) Sasieni_Stratford_RR_Finished (3) Sasieni_Stratford_RR_Finished (4)


Royal Oak Briars “Huntsman” Review


Blog by Al Jones

I completed my first pipe commission this week with, working with  James Aydlott, who makes “Royal Oak Briars”.  James has been showing his creations on the Bulldog Lovers Facebook page for several months.  I was very impressed with his shaping and stems, particularly with the classic shapes.   Initially I didn’t realize his pipes were branded “Royal Oak Briars”, which I had seen advertised on Micheal Lindners site, “The Pipe Rack”.  Micheal Lindners pipes are very highly regard and I met him last year in at the NYC show.  James has been working in Micheal’s shop, and in the past two years started his own line.    The connection to Micheal Lindner gave him was definitely a factor in the project, as to that point, I had not yet seen a Royal Oak pipe in person.  Thru Facebook and several pipe forums, I was able to communicate with folks who owned Royal Oak Briars and all were quite pleased and encouraged me to proceed.  James was very upfront with me and he was clear that if I didn’t care for the final product, I was under no obligation to complete the purchase.  As you will read, I was completely thrilled with the finished pipe.

James had made and shown a Comoys 498 Extraordinaire recreation (straight Chubby Rhodesian) that was sold thru The PIpe Rack.  I complimented James on his shaping and thru subsequent messages, I learned he was starting on a pipe that would be an homage to the Comoys 499 Extraordinaire.  Since I am fortunate to own that model Comoys, that immediately piqued my interest.  I let James know that I was interested and I was able to see the pipe unfold and offer some personalization along the way.   The pipe would be blasted and I requested a polished bowl top.  The last decision was the golden tan stain, which I thought turned out magnificently.

One very important detail to me on any pipe purchase is the weight of the pipe.  My 499 Extraordinaire weighs 68 grams.  I asked James if he could create the shape under 60 grams.  James nailed that request and the pipe weighs 59 grams, which coincidentally is exactly what most of my GBD 9438’s weigh, one of my benchmark shapes.

Below are some pictures of the pipe in the early and latter stages.

Royal_Oak_Briars_Rhodiesian-1 Royal_Oak_Briars_Rhodiesian-2 Royal_Oak_Briars_Rhodiesian-3 Royal_Oak_Briars_Rhodiesian - 4 Royal_Oak_Briars_Rhodesian-5

The pipe is drilled perfectly with an open draw. James tells me that the draft hole is drilled with a 5/32″ bit and tapering to 1/8″ in the stem.  The pipe smokes wonderfully, with an excellent draft and no moisture.  It also packs easily, not something I always find with a pipe with an open draw.  I am very impressed with the stem work, it seems James has learned his lessons well from Micheal Lindner. The button end is beautifully funneled and the tenon also has a concave detail that I like.  James feels the funneling on the tenon helps minimize moisture buildup in the pipe.  On the button end, the height is just right for holding without being uncomfortable.  I also like how the button has a concave feature.   James uses briar from a variety of sources.  For this pipe he used briar from Mimmo that had been aged for four years.  James feels this briar made it possible for him to achieve my weight goal.  The blast is nice and craggy, which is also my preference.  We mulled over several stain choices before deciding on the golden tan.  I think it gives the pipe a wonderful glow.

James uses a bowl-coat on his pipes, made from a gelatin/activated charcoal substance.  As someone who primarily purchases estate pipes, I hate breaking in new pipes. This is my second pipe with a bowl coating of this nature, and I’m now a big fan of this process. James assured me the product was neutral and in use, I agree completely.  Smoking the new pipe, it felt like an old friend from the get-go.

Another unique aspect of a Royal Oak Briar is the stem logo, which is a blue acrylic dot in a copper ring. As an Ashton fan, I love that detail. Many artisan pipes lack a stem logo.  To me, that was another appealing aspect of the Royal Oaks Briars line.  A member of the PipesMagazine forum commented on the stem logo that “it was like the cherry on top of a sundae”.

James work combines classic shaping, solid mechanicals along with quality briar and ebonite materials.  He was easy to communicate and work with and I enjoyed our conversations.  Hopefully, we’ll meet some day at a pipe show.  I’m looking forward to having this one in a solid rotation and I can highly recommend Royal Oak Briars.

Royal_Oak_Briars_Huntsman_Gallery Royal_Oak_Briars_Huntsman_2014 (2) Royal_Oak_Briars_Huntsman_2014 (1) Royal_Oak_Briars_Huntsman_2014 (3) Royal_Oak_Briars_Huntsman_2014 (4) Royal_Oak_Briars_Huntsman_2014 (5) Royal_Oak_Briars_Huntsman_2014 (6) Royal_Oak_Briars_Huntsman_2014 (7)

Royal_Oak_Briars_Huntsman_2014 (8)

Below is a comparison picture with my 1930’s Comoys 499 Extraordinaire, the inspiration for this pipe.

Royal_Oak_Briars_Huntsman_2014 (9)


Holy Grail Upgrade – GBD 9438 Virgin


Blog by Al Jones

The GBD 9438 in Virgin grade was near the top of my “Holy Grail” list. two years ago, I found and restored one with a Perspex stem (that article is in the archives here). I prefer a Vulcanite stem and finally won an Ebay auction for a suitable example. My collecting strategy is that once a pipe from my list is acquired, to keep an eye out for a pipe in better condition. The pipe arrived in very good condition, with a few bumps in the briar and an oxidized stem. This restoration required two repairs I had not yet completed.

The pipe as received, show a lot of potential.

GBD_9438_Virgin_Vul_Before

GBD_9438_Virgin_Vul_Before (1)

GBD_9438_Virgin_Vul_Before (2)

GBD_9438_Virgin_Vul_Before (3)

GBD_9438_Virgin_Vul_Before (6)

GBD_9438_Virgin_Vul_Before (5)

The tenon had a “bullet” shaped head, which is similar to another GBD in my collection, a Virgin 28D with a “Hand Cut” stamp on the stem. Unfortunately the stem on the 9438 does not have this stamp. The draft hole in the tenon was curiously very small, not like any GBD I had ever encountered. The opening was so small, a pipe cleaner could barely pass through. Testing the draft, there was no way that this would smoke well. It appeared as if something was in the standard hole. I explored carefully with a drill bit and discovered that the material was made of wood. It appeared that someone had inserted a wooden plug into the tenon and then drilled it. Fortunately, the wood piece came out easily and the pipe now passes a stem straight into the bowl. Here you can see the plug. I have no idea why someone would think that this was a good idea and I can’t imagine the pipe smoked well.

GBD_9438_Virgin_Vul_Draft Hole

And the tenon with the plug removed.

GBD_9438_Vul_Finished (9)

There were two creases in the otherwise unmarked briar. I thought they would come out with some steam. Using a heated kitchen knife and a piece of wet cloth, folded over four times, the creases came out nicely. Here you can see the before and after pictures. The steam lightens the briar somewhat, but buffed and waxed it comes right back.

GBD_9438_Virgin_Vul_Dents

GBD_9438_Virgin_Vul_Dents (1)

GBD_9438_Virgin_Vul_Dents (3)

GBD_9438_Virgin_Vul_Dents (2)

The bowl had only a very light cake, I’m guessing the pipe was put aside before much use. I soaked the bowl in some sea salt and alcohol. The stem was also soaked in a mild solution of Oxyclean with a dab of grease on the brass rondell. I buffed the bowl lightly with White Diamond and then several coats of Carnuba wax, carefully working away from the stamped nomenclature, which was in very good condition.

The stem had a very heavy coat of oxidation. I started with 800 grit wet paper, than worked up to 1000, 1500 and 2000. I then used the 8000 and 12000 grades of Micromesh. The stem was then buffed lightly with White Diamond rouge. Here is the pipe after using the 800 grit paper.

GBD_9438_Virgin_Vul_800 Stem

The few teeth scratches came out but the stem had an odd kink and not the standard graceful curve. I inserted a cleaner into the stem and warmed the vulcanite with heat from the flame of a propane torch. There is probably a less risky way to heat the vulcanite, but that is what I had in my shop. The stem was slowly moved back into it’s original position. I was tempted to let well enough alone, but I think the pipe looks much better with the correct stem bend.

GBD_9438_Virgin_Vul_800 Stem (1)

Below is the finished pipe. I’m very pleased with this Virgin 9438.  The wood is flawless and or a GBD, it has decent grain.

GBD_9438_Vul_Gallery

GBD_9438_Vul_Finished (2)

GBD_9438_Vul_Finished (8)

GBD_9438_Vul_Finished (3)

GBD_9438_Vul_Finished (4)

GBD_9438_Vul_Finished (5)

GBD_9438_Vul_Finished (6)

GBD_9438_Vul_Finished (7)

Kaywoodie Flame Grain 99B Restored (pre-1955)


I love older Kaywoodies, with the four-hole stinger and have several Super Grain models. This is my first Flame Grain, in the tapered stem bulldog shape, 99B.

This is one of the older Flame Grains as that stamping is over Kaywoodie. The stinger is a four-hole and the Flame Grain stingers were not stamped “Drinkless”. The four hole stinger was dropped in the early 1950’s. Kaywoodie collector Tony Soderman recently posted a similarly stamped pipe on Ebay and the ad said this about the age.

“This Flame Grain dates from the LATE 1940’s. It has a 2-Digit Shape Number so it is made after 1937 but “Flame Grain” is OVER “KAYWOODIE” in the Nomenclature, and it has a LARGE BALL, 4-HOLE “STINGER” (without the word “DRINKLESS” on the shaft of the “Stinger”)!!! These features come together after World War II and prior to 1950. So it is easily dated to the LATE 1940’s!!! (Tony Soderman ad)

The bowl had a heavy cake and there was even some old tobacco in the bottom of the bowl. Somehow, the stem was in terrific shape, only oxidized with nary a tooth mark. Flame Grain pipes had the reverse cloverleaf logo.

Kaywoodie_Flame_Grain_99B_Before

Kaywoodie_Flame_Grain_99B_Before (5)

Kaywoodie_Flame_Grain_99B_Before (2)

I reamed the bowl and discovered the previous owner had at some point reamed the pipe and apparently used a penknife as there were some irregular gouges inside the bowl. The rim was sightly out of round. I soaked the bowl in sea salt and alcohol. The shank was very difficult to clean and took nearly an hour with an assortment of brushes and alcohol. The four holes on the stinger ball were completely caked with build-up.

I remove the oxidation on the stem first with some 800 wet paper, than 1000, 1500 and 2000 grades. I then used the 8000 and 12000 grades of micromesh. The stem was mounted and then lightly buffed with white diamond rouge.

The grime revealed a very nice grain pattern and some birdseye on the bowl top. I’ll look forward to adding this one to my rack of older Kaywoodies.

Kaywoodie_Flame_Grain_99B_Finished

Kaywoodie_Flame_Grain_99B_Finished (10)

Kaywoodie_Flame_Grain_99B_Finished (1)

Kaywoodie_Flame_Grain_99B_Finished (3)

Kaywoodie_Flame_Grain_99B_Finished (9)

Kaywoodie_Flame_Grain_99B_Finished (11)

Kaywoodie_Flame_Grain_99B_Finished (12)

Update:
This pipe had an issue with the stem fitment that I had not yet encountered on a screw-stem Kaywoodie. The stem insert was off by a few degrees. Steve suggested trying to tweak the insert using a pair of needle-nosed pliars, but I couldn’t budge it and getting a grip without damaging the briar was just about impossible. I was ready to give up, but wondered if one of the bits in a Matco screw-extractor set would remove the stem completely. I thought perhaps then I could screw it back to the correct orientation. The screw-extractor is a reverse thread so it grips and I did successfully remove the insert. Here you can see the insert partially removed and the extractor.

Kaywoodie_Flame_Grain_99B_Stem-Fix

When I screwed the fine threaded insert back into the briar, it would not screw in all the way and the alignment was way off on the other side. I removed it again and cleaned the threads on the insert and in the briar (just blew out some debris). I added a little lithium grease to the first couple of threads. This allowed the insert to fully and squarely seat against the briar. This was truly nerve-wracking work but a good result.

Kaywoodie_Flame_Grain_99B_Stem-Fix (1)

Kaywoodie_Flame_Grain_99B_Stem-Fix (2)

GBD Originale 569M Restoration


This was one of two GBD’s I recently acquired thru the Smokers Haven in Ohio. Back in the day, that shop sold quite a few GBD’s. I normally collect only GBD’s made in England, but I made an exception for this Originale which is stamped “Paris, France”. I knew only a few tidbits about the Original line, from a GL Pease comment in a pipe forum thread on a $500 GBD Originale. I wondered what made that one so special and GLP commented:

“The Originale is an uncommon grade of GBD, sought after by more than a few collectors. I’ve seen very few of them, and in my years of collecting GBDs”.

I also found a reference to the Originale series on Jack Thompkins home page and attributed to John Tolle. The briar definitely has an unusual sheen and depth to it, similar to an older Comoys

The GBD Originals came out in the 60s and were made in Paris Fr.
All were rather small in size and came from older briar dating
to pre/during WWII. Not many were made and very few shapes.
Thanks John Tolle

This pipe was already restored by the shop, but I thought some of the bowl top dents and scorch marks might come out.

GBD_569M_Originale

GBD_569M_Originale (1)

GBD_569M_Originale (2)

Using a propane torch, a wet rag and an old kitchen knife, I was able to work out many of the dents on the bowl top and one seam on the side of the bowl. The scorch marks still remained, so using some worn micromesh sheets, I was able to get down to the briar without disturbing the stain. I was tempted to let well enough alone, but I’m very pleased with these results and it was worth the additional effort.

GBD_569M_Originale_Finish (3)

GBD_569M_Originale_Finish (4)

GBD_569M_Originale_Finish (2)

The oxidiation had already been removed, so the stem only required a polish with 8000 and 12000 grit micromesh and a light buff with White Diamond rouge. Under magnification, it looked like there was a small crack near the button. I added a few layers of black superglue to strengthen the area.

I’m very pleased to add this one to my collection of GBD Rhodesians.

GBD_569M_Originale_Finish (1)

GBD_569M_Originale_Finish (6)

GBD_569M_Originale_Gallery

Sasieni Four Dot Grosvenor Ruff Root Restoration


Blog by Al Jones

I’m a big fan of the pre-transition era Sasieni “Four Dot” pipes. This era was from 1946 to 1979 and while that makes a precise dating impossible, I’ve found them to be very well made and excellent smoking pipes. This Grosvenor Ruff Root Bulldog showed up on Ebay last week, complete with small and somewhat fuzzy photographs. From what I could see, the pipe looked solid and it pretty much flew under the radar. When the pipe arrived, it was easy to see that I had made a wise choice. The stem was only slightly oxidized with no teeth marks or other damage. The nomenclature was very clear and complete. The first picture was from the eBay ad.

Sasieni_Grosvenor_Ruff_Root5

Sasieni_Grosvenor_Ruff_Root_Before

Sasieni_Grosvenor_Ruff_Root_Before (3)

Sasieni_Grosvenor_Ruff_Root_Before (1)

Sasieni_Grosvenor_Ruff_Root_Before (2)

I own a Sasieni Grosvenor Walnut, an “S” model, which indicates the tapered stem. But, my favorite pipes are Bulldog or Rhodesians with a tapered stem.

Sasieni_Grosvenor-S_Gallery

The bowl had only a slight cake and the shank was very clean. I carefully reamed the cake out and soaked the bowl with some alcohol and sea salt.

I polished the stem with 800 grit paper, then 1500 and 2000 grade wet paper. Then I moved to the 8000 and 12000 grade micromesh paper, also wet. The stem was lightly buffed with white diamond. I’ve learned that the light blue Sasieni stem dots can fade over time, but the color of these dots was perfect.

I polished the bowl by hand with some Halycon wax and the pipe was complete, a very easy restoration.

Sasieni_Grosvenor_Ruff-Root_Gallery

Sasieni_Grosvenor_Ruff-Root_Finished (8)

Sasieni_Grosvenor_Ruff-Root_Finished (9)

Sasieni_Grosvenor_Ruff-Root_Finished (3)

Sasieni_Grosvenor_Ruff-Root_Finished (1)

Kaywoodie Supergrain 13B (3 Hole Stinger)


Blog by Al Jones

This pipe was a wonderful gift from member “irish: on the PipesMagazine forums. He has an impressive collection of Kaywoodies that spans the decades. His collection can be viewed here:
http://pipesmagazine.com/forums/topic/kaywoodie-collection-pictures

It wasn’t much of a restoration, as the pipe was in immaculate condition. I soaked the bowl in alcohol and sea salt, but really didn’t need that effort. I touched up the stem a bit with 1000>1500>2000 grit paper, than the 8000 and 12000 grades of micromesh. I gave the bowl a light buff with White Diamond and then a few coats of carnuba wax.

The pipe is a 3-hole stinger pipe and it smokes equally well as my older 4-hole stinger Supergrain. I enjoy flakes in these pipes as the stinger makes me sip a little slower than usual. Kaywoodie switched to the three hole stinger sometime in the 1950’s, but I don’t know how long they were used. I did learn that the small groove in the base of the stinger is for a rubber o-ring. The pipe seems to smoke quite well without it, but I’ll pick one up at my local hardware store.

The 13B is a beautiful streamlined shape and perhaps one of the most beautiful Author shapes made.

Kaywoodie_13B_Gallery

Kaywoodie_13B_Gallery (2)

Kaywoodie_13B_Gallery (3)

Kaywoodie_13B_Gallery (1)

GBD 9242 #1 Holy Grail – Restored


If you follow my restorations on Steve’s blog, you already know I love the Rhodesian shapes made by classic British pipe makers. I have a “Holy Grail” list of desired shapes and marques. The GBD 9242 has been at the top of that list for three years. In the past few years, this shape has been hotly contested and infrequently sold. I had resigned to myself that the probability of finding one, within my means, was slim. This week, a somewhat tired New Standard grade 9242 was listed and I was surprised to win the auction at a modest price. The pictures were fuzzy and showed it would need a lot of work. The stem did look quite promising and I hoped the tars and cake build-up on the bowl top would come off. The nomenclature, button, rondell and bowl beading all looked to be in very good condition.

GBD_9242_NS_Before

GBD_9242_NS_Before (4)

GBD_9242_NS_Before (5)

GBD_9242_NS_Before (2)

GBD_9242_NS_Before (1)

GBD_9242_NS_Before (7)

GBD_9242_NS_Before (3)

GBD_9242_NS_Before (6)

I used some distilled water and a rag to remove the tars from the bowl top, which did come off. That revealed a few dents and dings. I then removed the cake with my Castleford reamer and was pleased to find some very solid wood inside the bowl and a nicely drilled pipe. The shank was filthy inside and required a lot of cleaning with brushes and alcohol.

I worked on removing or minimizing some of the dings and marks on the briar. I used a kitchen knife, heated with a propane torch and a wet rag to steam out the dents. Some of the crease could not be removed, but I was able to minimize them.

The bowl and shank were then packed with sea salt and alcohol to soak. The bowl and shank came out very clean inside, which should help reduce any ghosts. The stem was soaked in a mild Oxyclean solution, with a dab of grease on the rondell.

GBD_9242_NS_Work (1)

GBD_9242_NS_Work (2)

After the bowl soak was complete, I started to work on the stem. It had a pretty rough layer of oxidation near the button and I used 600 grit wet paper on that area. Then, progressively, I used 1000>1500 and finally 2000 grade wet paper on the rest of the stem, button and crease. Miraculously, the stem only had some mild teeth chatter under that oxidation. I then moved to Micromesh sheets in 8000 and 12000 grades. The stem was then polished, mounted on the pipe, with White diamond rouge (lightly!). The briar was also polished with White Diamond, but I was careful to stay away from the all important (to me) nomenclature.

GBD_9242_NS_Gallery

GBD_9242_NS_Finished (6)

GBD_9242_NS_Finished (7)

GBD_9242_NS_Finished (5)

GBD_9242_NS_Finished (8)

GBD_9242_NS_Finished (9)

GBD_9242_NS_Finished (10)

GBD_9242_NS_Finished (11)

Below is a comparison shot with a GBD 9438 New Standard. The 9438 weighs 55 grams and my scale shows the 9242 comes in at 45 grams. Now I can see why this shape was so appealing to me, and others. That tapered shank and stem really make the pipe.

GBD_9242_NS_Finished (1)

GBD_9242_NS_Finished (2)

The pipe still has a few “character marks”, but I’m quite pleased to add this one to my collection. A piece I thought was almost unattainable.