Blog by Steve Laug
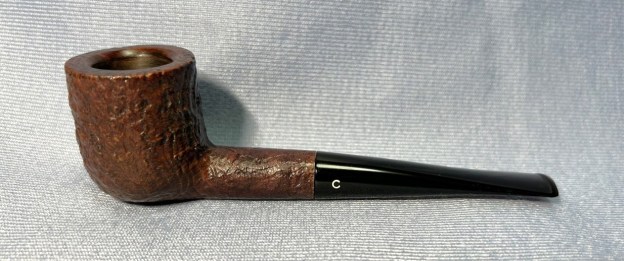
This interesting sandblast Bulldog pipe was purchased from an estate in Nampa, Idaho, USA on 11/09/2023. It is a natural sandblast briar with great grain around the bowl and shank. The stem is an acrylic taper stem. The sandblast finish had some oils and grime on the surface and in the grooves. It had begun to darken in spots around the bowl sides. The bowl was lightly smoked with raw briar on the lower half of the bowl. The rim top was quite clean and the inner and outer edge looked very good. The pipe is stamped on the left side of the shank and has crossed bone and rabbit ears [over] BONES. The acrylic stem had no stamping on the sides. It had scratches, light tooth marks and chatter on both sides ahead of the button. It was really an interesting sandblast with twists and turns in the briar. Jeff took photos of it before he worked his magic in the cleanup process.
 The exterior of the pipe was soiled with oils and dust but still looked very good. The rim top was in very good condition. The bowl itself had a was quite clean but there was a light cake on the sides of the top half. The lower half of the bowl was raw briar. The acrylic taper stem surface had some light scratches and marks on both sides.

 Jeff took photos of the sides of the bowl and shank to give a better feel for the condition of the bowl. You can see the interesting grain on the bowl side and front.
 He took a photo of the stamping on the left side of the shank. It is clear and reads as noted above.
 I took a few moments before working on the pipe to do a bit of research on the Bones pipes line. I knew they were made by Morgan Pipes so I started there. I looked up the Morgan Pipes site (https://morganpipes.com/collections/bones) and quote from there:
Bones Pipes are pipes – Thats it – No fancy stuff… If you want a pipe to start with or just build your collection, Bones are the pipes for you. Toss it in a tackle box or a backpack and go. These pipes are, simply put, the absolute least expensive honest briar pipe on the market. A simple smoking machine.
I Googled and found a great link to Cupojoes tobacco shop (https://www.cupojoes.com/tobacco-pipes/morgan-bones/). They had a great description of the line from the perspective of the seller. I have included that below.
Chris Morgan began making pipes in 2006, and has since become renowned name within the pipe smoking community. The reason being: the world famous Bones Pipe. The Bones pipe is exactly what it sounds like, the bare naked skeleton of a pipe, that we often never get a chance to see. While other companies rely heavily on staining and sandblasting techniques, the Bones comes in a truly unfinished, natural beauty, making each one (even if the same shape) unique. Praised for their affordability, Bones pipes are the perfect pipe for travel & on the go, often small enough to fit into pockets. Chris offers other lines such as the impeccably built Black Jack series, and the famous patented cigar style pipe called the “Briar Cigar”.
Now it was time to do my work on the pipe. Jeff reamed it with a PipNet pipe reamer and cleaned up the remaining cake in the bowl with a Savinelli Fitsall Pipe Knife. He scrubbed out the internals with alcohol, pipe cleaners and cotton swabs until the pipe was clean. He scrubbed the exterior of the bowl with Murphy’s Oil Soap and a tooth brush to remove the grime and grit on the bowl and on the rim top. The finish looks very good with good looking grain around the bowl and shank. The finish is also a bit darker than when started. The rim top looked very good. He scrubbed the stem surface with Soft Scrub to remove the grime on the acrylic. When the pipe arrived here in Vancouver for the second stop of its restoration tour it looked a lot better. I took photos before I started my part of the work. 
 I took a photo of the bowl and rim top to show how well it had cleaned up. The top and the edges of the bowl are in very good condition. The stem had some light marks and chatter on both sides ahead of the button.
 I took a photo of the stamping on the shank and took the stem off the pipe to give a sense of the proportions of the pipe. It is a nice one.
 I started the simple cleanup work by rubbing Before & After Restoration Balm deep into the smooth finish to clean, enliven and protect the briar. The briar was in excellent condition so I hand rubbed it with my fingers and worked it into the finish with a shoe brush. I set it aside to dry for 10-15 minutes. I wiped it off with a soft cloth. I buffed the bowl with a cotton cloth to polish it. It really began to have a deep shine in the briar. I took some photos of the bowl at this point to mark the progress in the restoration. The grain on the bowl stands out with interesting lines moving across the sides of the bowl.

 I set the bowl aside and turned my attention to the stem. I polished the acrylic stem with micromesh sanding pads – dry sanding it with 1500-12000 grit pads. I wiped the stem down after each sanding pad with Obsidian Oil and set it aside to dry.
 I polished it further with Before & After Pipe Polish – using both the Fine and Extra Fine Polishes. I gave it a rubdown with Obsidian Oil one last time and set it aside.
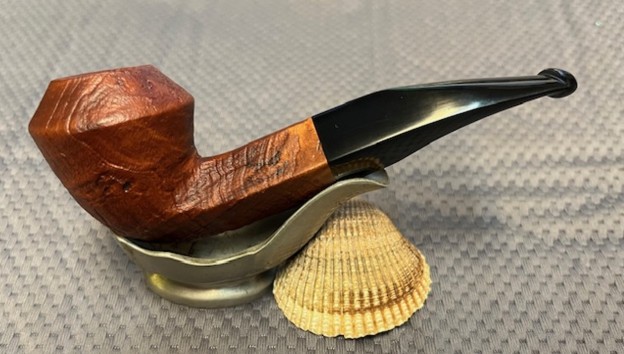
  I put the Chris Morgan made Bones ¼ Bent Bulldog back together and worked the pipe over on the buffing wheel using Blue Diamond to lightly polish the bowl and the acrylic stem. I buffed the bowl and stem to raise the gloss on the briar and the acrylic. I gave the pipe multiple coats of carnauba wax. I buffed the entire pipe with a clean buffing pad to raise the shine. I hand buffed it with a microfiber cloth to deepen the shine. The finished the Bones Bulldog is shown in the photos below. The natural sandblast finish had taken on a patina and the Bulldog shaped bowl works well with the rich black acrylic stem. It looked quite amazing! The dimensions of the pipe are: Length: 5 ½ inches, Height: 2 inches, Outside Diameter: 1 ¾ inches, Diameter of the chamber: ¾ of an inch. The weight of the pipe is 43 grams/1.48 ounces. This is an sandblast on the bowl and shank that reveals the grain underneath. I really like how the briar and the acrylic work well together. This one will soon be on the rebornpipes store in the American (US) Makers Section. If you are interested in adding this Bones pipe to your collection this may well be the one for you. Thanks for walking with me through the restoration process.