Blog by Steve Laug
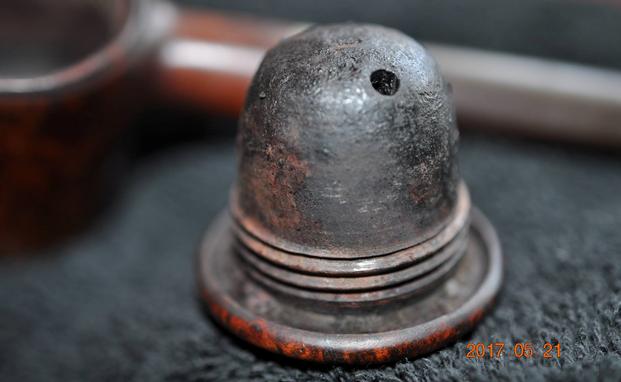
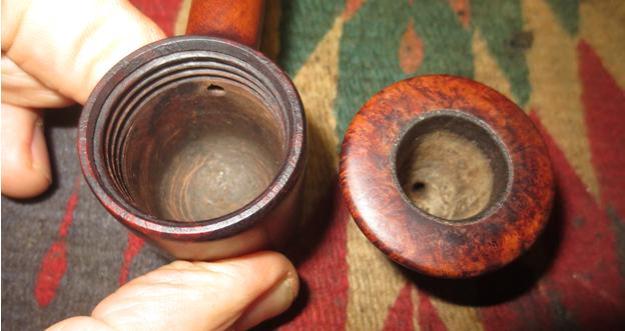
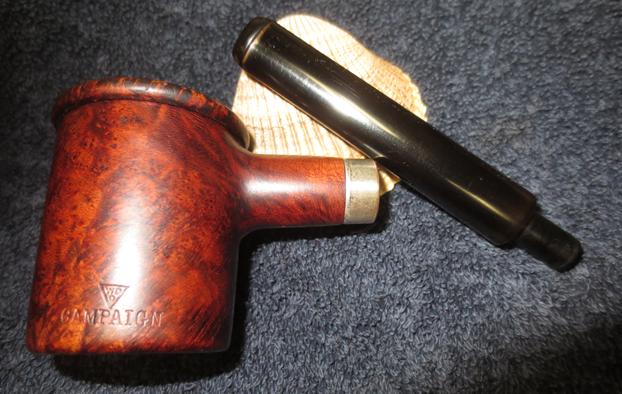
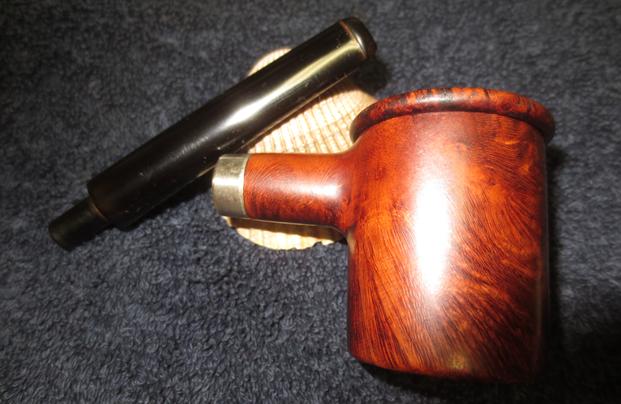
Another of the pipes found during the Virtual Pipe Hunt in Montana was one stamped on the lower left side of the out bowl with the WDC triangle logo over the word CAMPAIGN. There was no other stamping on the pipe. The bowl was like a calabash bowl and screwed into the outer bowl. The entirety was made out of briar. The grain on the bowl and rim top is quite stunning with a lot of birdseye grain on the sides and mixed grain over the rest of the bowl. There was a nickel band on the shank but there was no shank stamping. The band was stamped PLATED NICKEL. The stem was lightly oxidized and the fit against the end of the shank was not tight. There was a gap caused by what I presumed was the tars built up in the mortise area.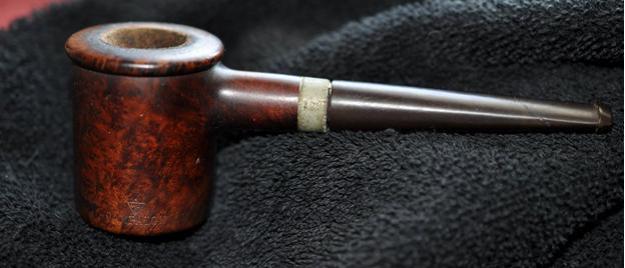 My brother, Jeff took quite a few photos of the unique old pipe because it really was a beauty. There would need to be some significant cleanup work but the grain and the shape were both unique and quite stunning. The bowl was thickly caked and a thick buildup of tars and oils had flowed over to the top of the rim. The bowl had twin airways in the bottom of the calabash cup directing airflow into the external bowl. The airway in the outer bowl enters the shank at the top of the bowl. Smoke would have been drawn from the calabash cup into the interior of the outer bowl and up the back side to the airway into the shank and through that to the stem and button into the mouth of the smoker.
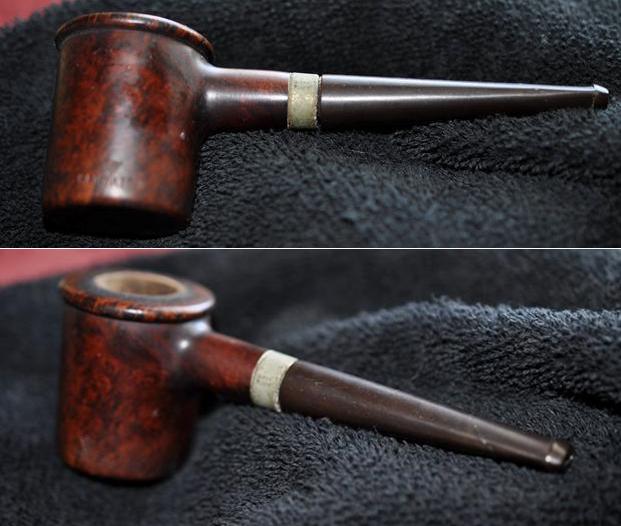
 I did a bit of digging online and found a brief interchange on a Google group. Here is the link if you would like to read it in context and in its entirety. It has some helpful information regarding the brand and the particular pipe that I wanted to know more about. https://groups.google.com/forum/#!topic/alt.smokers.pipes/kpkpd3zXoiwExcerpt from pipedia.org
To a request for information regarding the WDC Campaign pipe on the Google Group there was quite a long string of answers. I am quoting two of those in full…
Respondent 1: While I can’t say anything about this pipe specifically, I have a hazy memory of that shape listed in a book about pipes; (I may be totally misremembering this, but here goes) the shape being called the “Dawes”, named after Harding’s Vice President? Anyone else remember this? Sounds like an interesting pipe, whatever it’s called…
Respondent 2: From Weber’s Guide to Pipes: “The Dawes Pipe (more correctly named the Lyons, after its inventor, Charles Herbert Lyons) happened to be the favorite pipe of General Charles G. Dawes, Vice-President of the USA from 1925 to 1929. General Dawes smoked the curious pipe incessantly and it became popularly known as the Dawes Underslung, because the shank joined the bowl near its rim.”
I looked on Pipedia, https://pipedia.org/wiki/William_Demuth_Company and I quote in part from the article on the William Demuth Company.
The Demuth Company is probably well known for the famous trademark, WDC in an inverted equilateral triangle. William commissioned the figurative meerschaum Presidential series, 29 precision-carved likenesses of John Adams, the second president of the United States (1797-1801) to Herbert Hoover, the 30th president (1929-1933), and “Columbus Landing in America,” a 32-inch-long centennial meerschaum masterpiece that took two years to complete and was exhibited at the World’s Columbian Exposition in Chicago in 1893.
The Presidential series was the result of Demuth’s friendship with President James A. Garfield, a connoisseur of meerschaum pipes. Demuth presented two pipes to Garfield at his inauguration in 1881, one in his likeness, the other in the likeness of the President’s wife. Later, Demuth arranged for another figurative matching the others to be added to the collection as each new president acceded to the White House, terminating with President Hoover.
From the above information I learned some significant details about the Campaign pipe. It was invented by Charles Herbert Lyons and was the favourite pipe of General Charles G. Dawes who was the Vice President of the USA under President Harding from 1925-1929. It fits nicely into that period when WDC was having Presidential Pipes commissioned ending in 1933. That places this old pipe in the time period between the late 1920s and early 1930s.
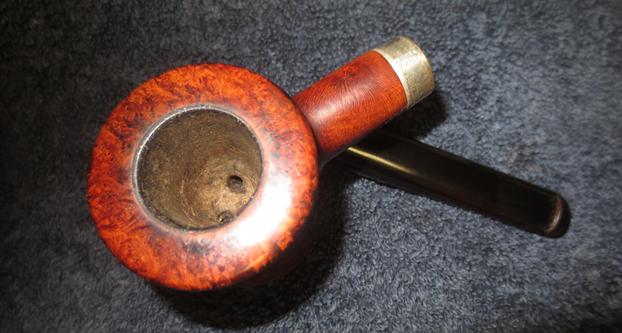
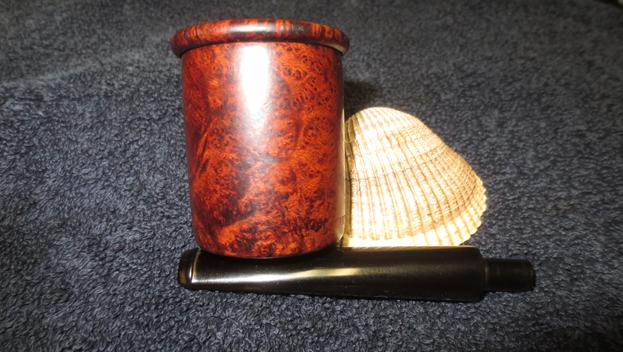
My brother took the following photos of the pipe to show what it looked like when it arrived in Idaho before he started his cleanup work. The cake in the calabash bowl was quite thick and the overflow onto the rim top was also thick. The finish while pretty decent was soiled and spotty with buildup and dirt.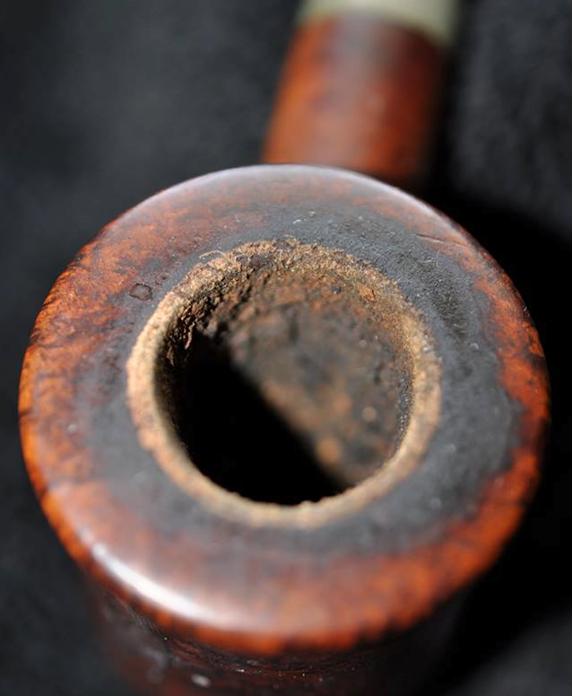
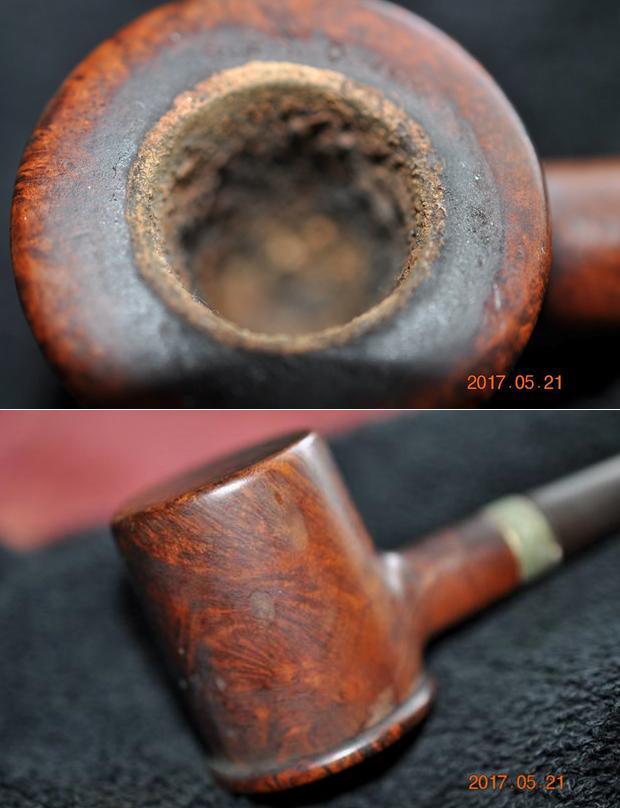 Jeff unscrewed the briar calabash bowl insert and removed it from outer bowl. The threads on both looked to be in very good condition. The out bowl was dirty and had a lot of dried tobacco oils and juices along the walls and bottom. The underside of the calabash bowl was dark and dirty with dried oils. It would need to be cleaned up.
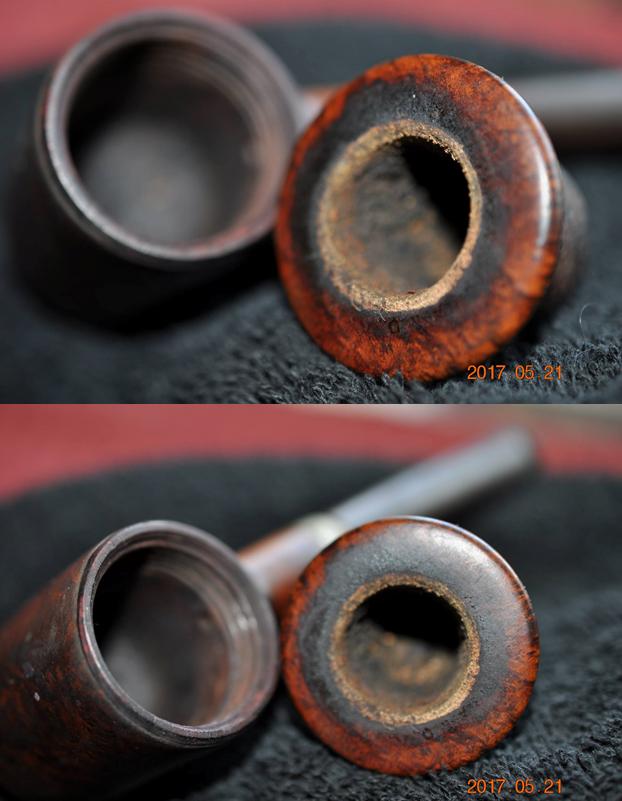
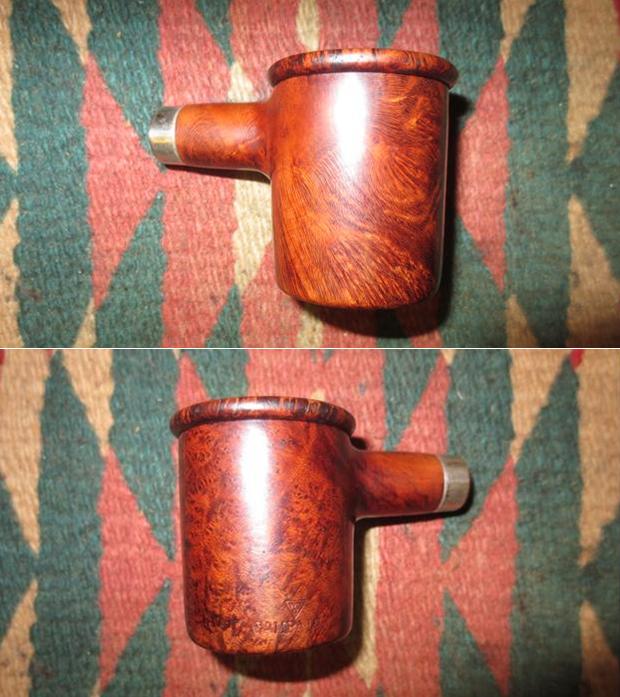
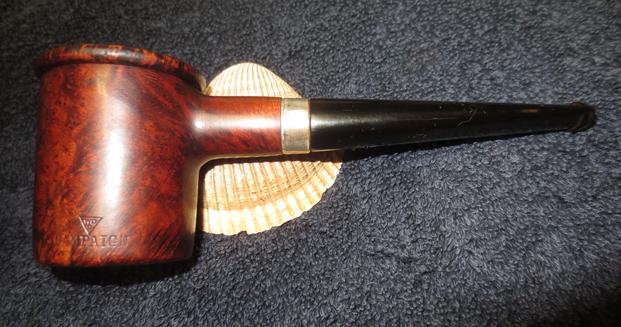
 The next two photos show the stamping on the left side of the outer bowl. It is clearly stamped with the WDC logo in the inverted triangle and under that reads CAMPAIGN. In these photos you can see the beautiful grain of the briar. Even the bottom of the outer bowl has some nice grain.
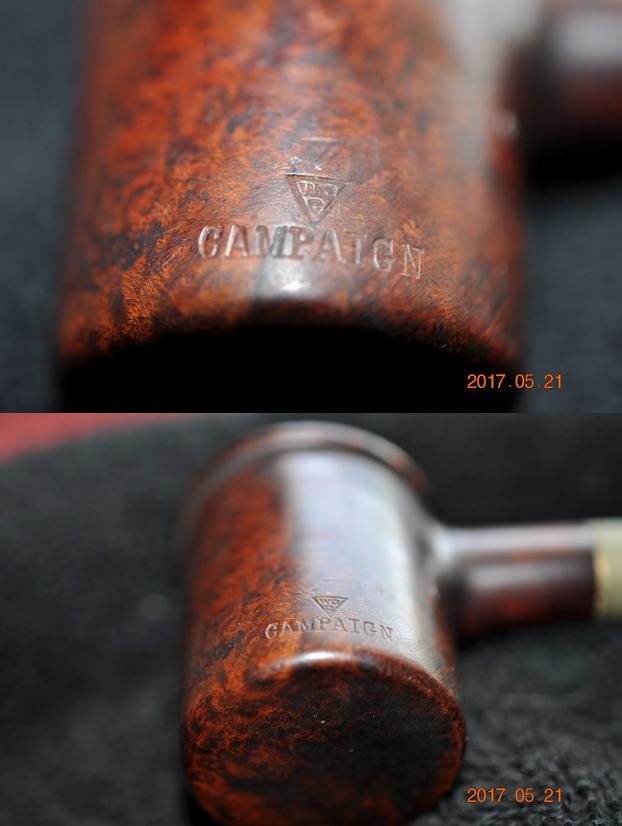
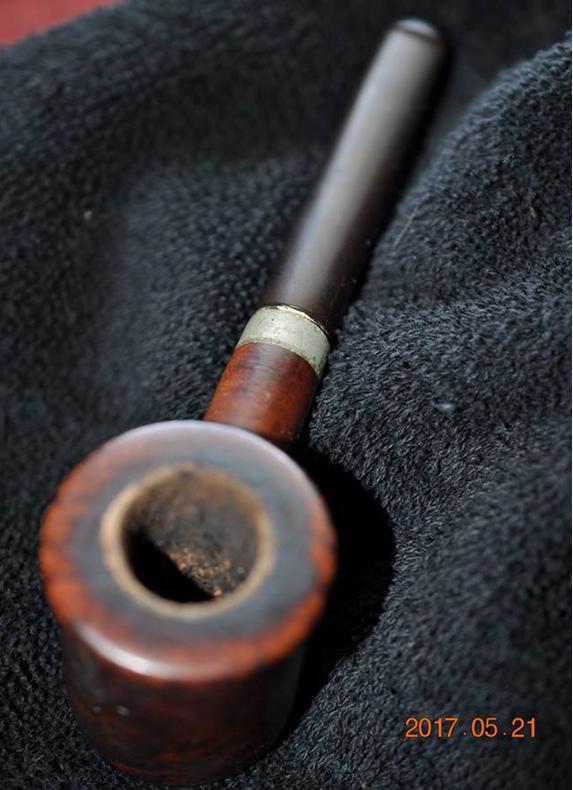
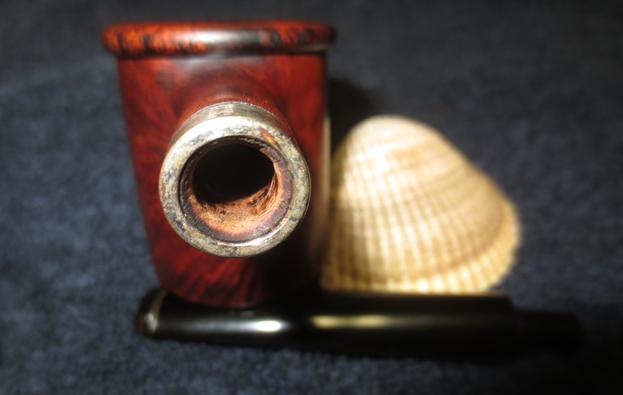
 The next two photos show the wear on the finish of the shank and the oxidation on the nickel band on the shank. The band is stamped NICKEL PLATED. The stem does not sit tight against the shank and I am assuming that there is a lot of buildup in the mortise that is keeping it from seating properly.
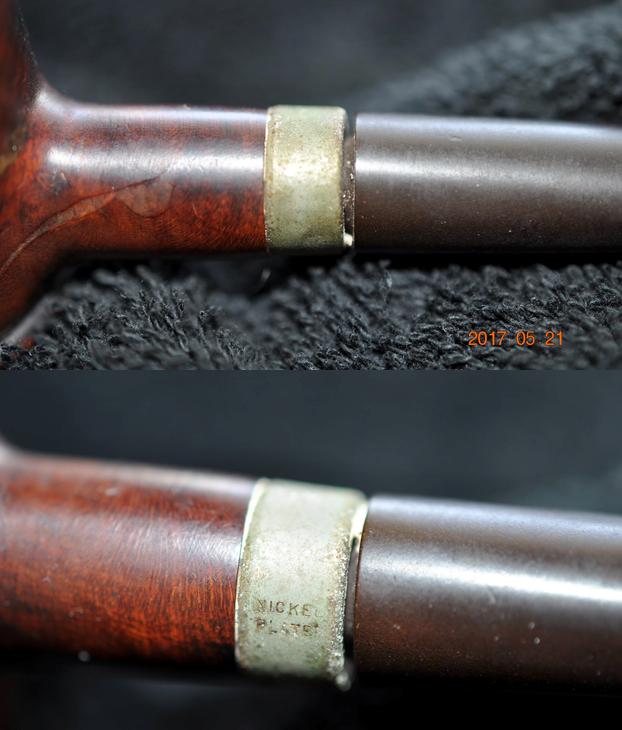 The stem was oxidized and there was some were to the sharp edge of the button. There were some light tooth marks on the surface of the button on both sides.
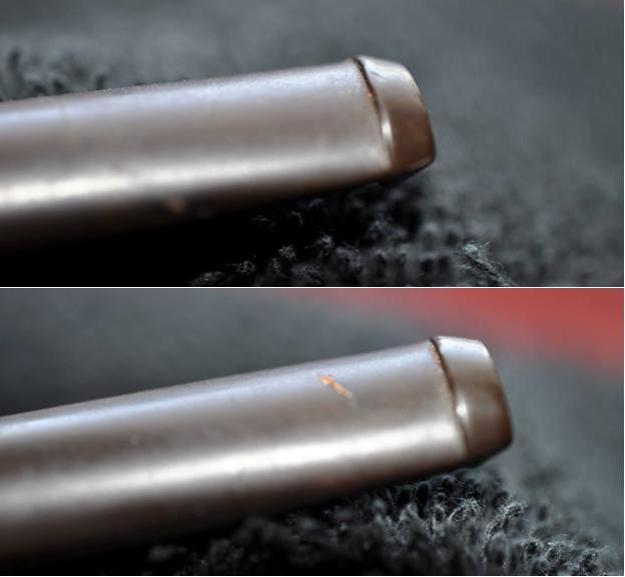 My brother did his usual masterful cleanup on the pipe. When I received it things were much cleaner than the photos above. He had reamed back the calabash bowl to bare briar. He had scrubbed the rim top off and was able to remove the lava coat. He scrubbed the internals of the outer bowl as well. The briar had been scrubbed with Murphy’s Oil Soap and rinsed to remove all of the grime. The oxidation on the band was better than in the above photos. The stem was oxidized but it now sat properly in the mortise. I took the following photos before I started my final cleanup and restoration.
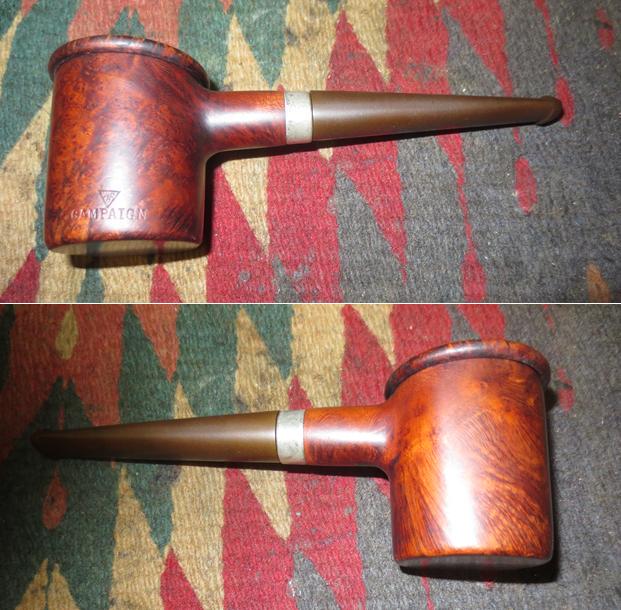
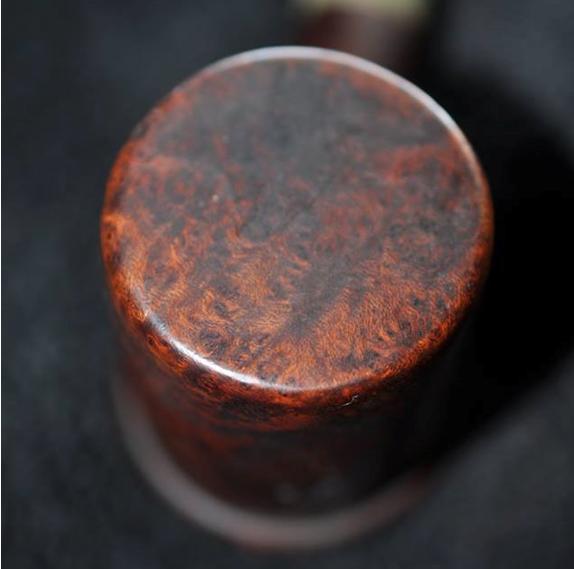
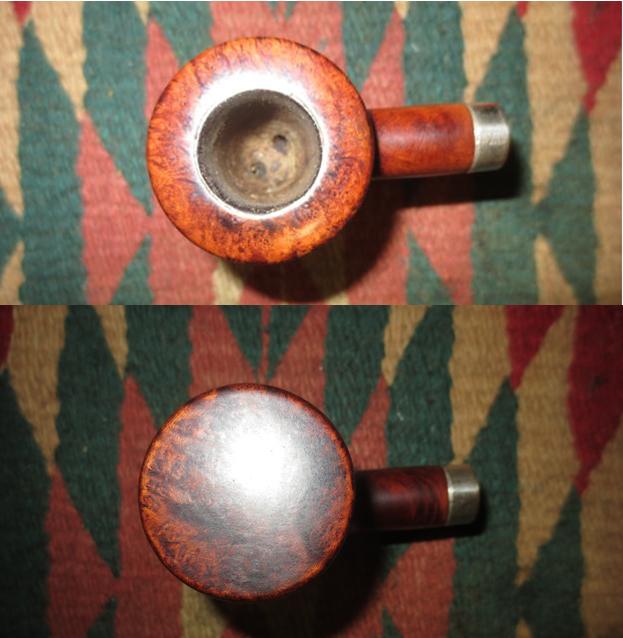
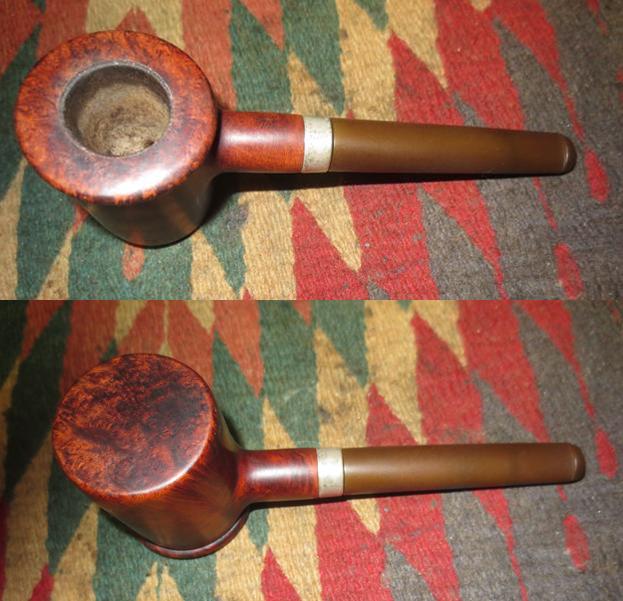 I took some close up photos of the condition of the bowl and rim top. It looked far better than before his cleanup work. The stem also looked really good other than the oxidation.
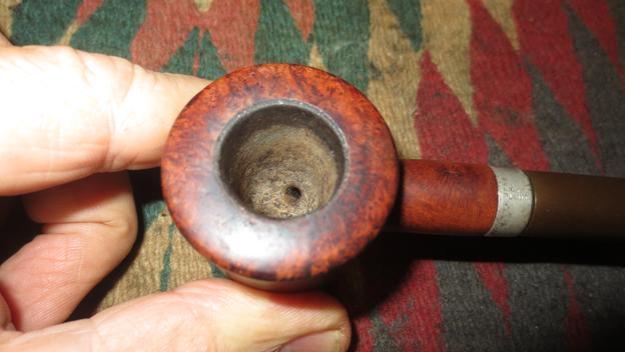
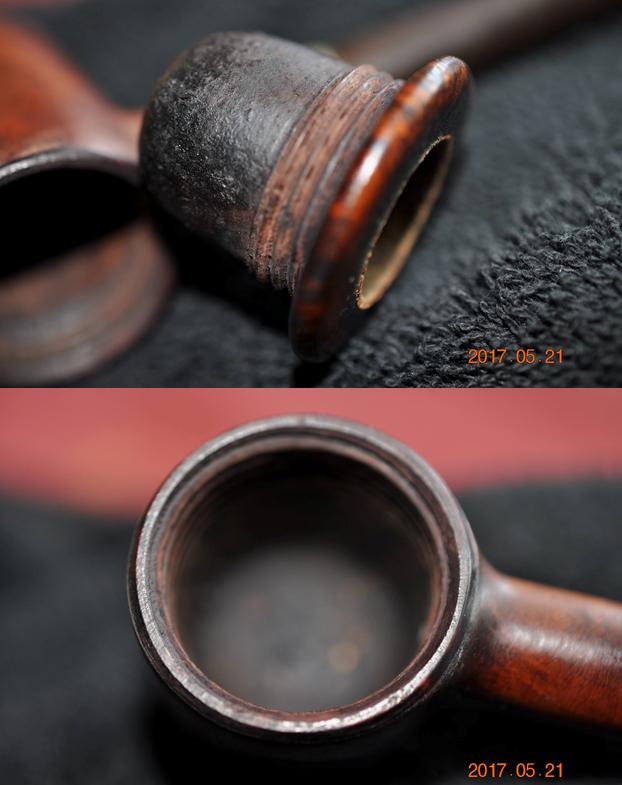
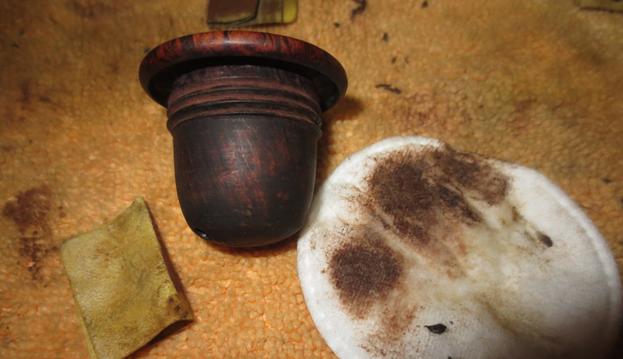
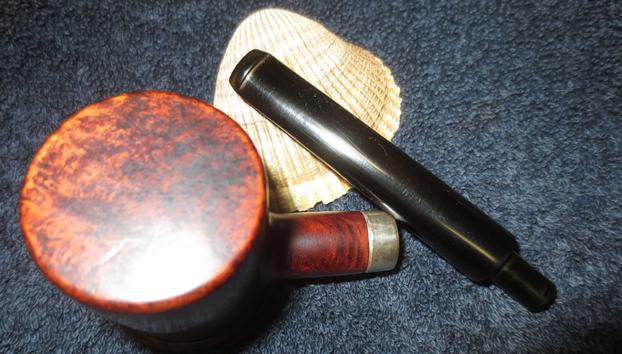
 I took the calabash bowl out of the outer bowl and took some photos of the various parts of the pipe. It is an interesting piece of pipe history and it is in excellent condition for a pipe of its age.
 I did a bit more scrubbing of the internals to remove any remaining oils and tars. I used pipe cleaners, cotton swabs and alcohol to clean out the mortise and the airway in the shank and the stem. I scrubbed out the inside of the outer bowl and the inner bowl with alcohol and cotton swabs. I pushed pipe cleaners through the two airholes in the bottom of the calabash bowl. I sanded the bottom of the internal bowl to remove the last of the buildup and wiped it down with alcohol on a cotton pad.
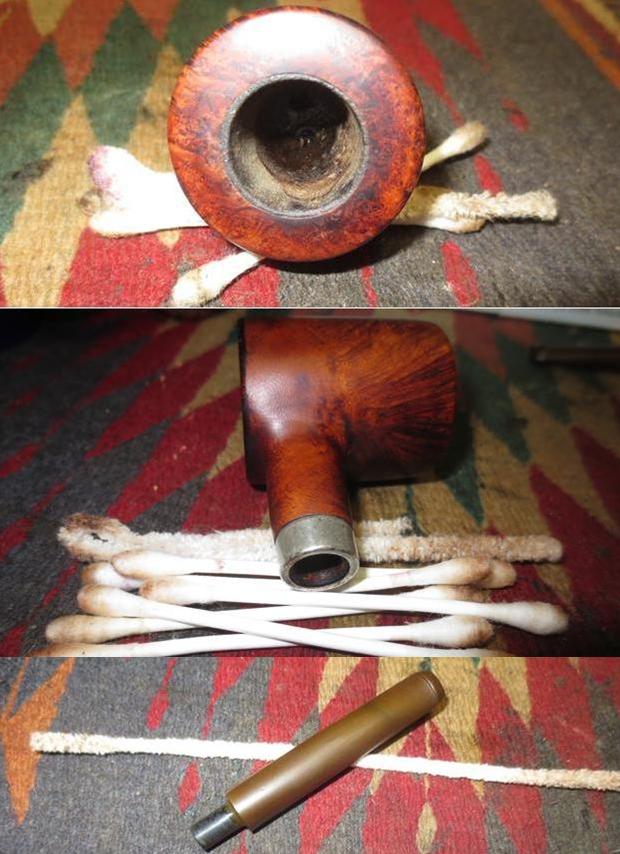
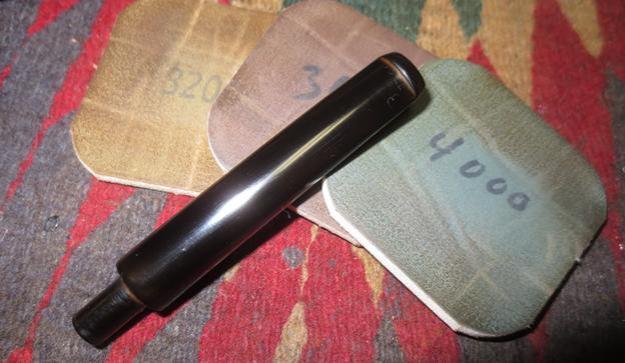
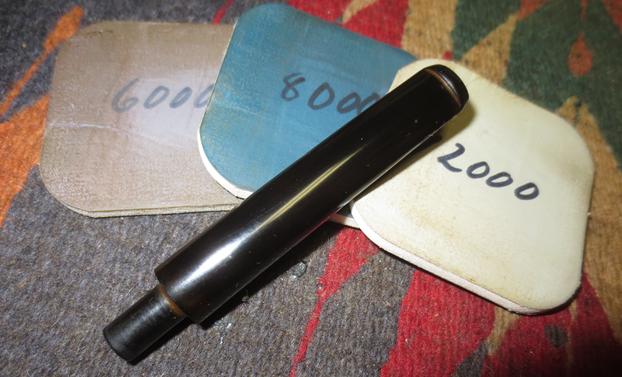
 I sanded the oxidized stem and reshaped the edge of the button with 220 grit sandpaper to clean things up and bring it back to the original black vulcanite. I scrubbed it with some Before & After Stem Deoxidizer to remove the loosened oxidation. I wiped off the scrub and resanded the stem to remove the remaining oxidation. The photos below show the progress of the stem cleanup.
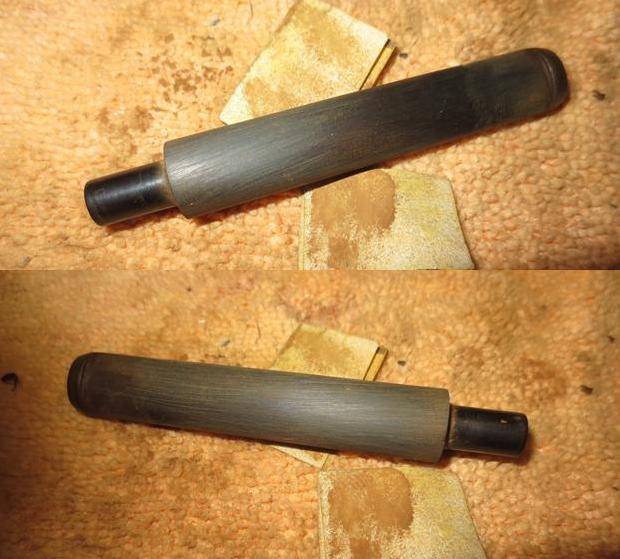
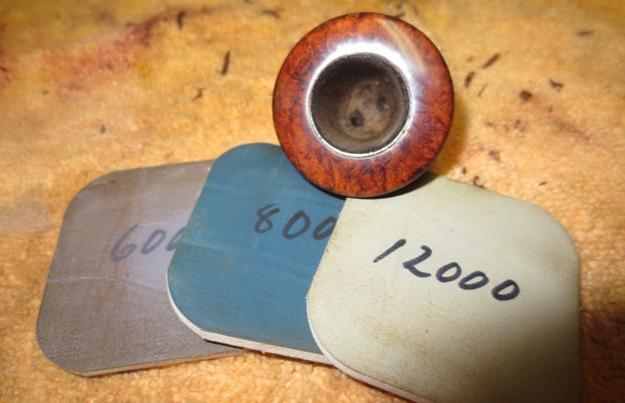
 I used a folded piece of 220 sandpaper to smooth out the inner edge of the calabash bowl and remove the remaining debris along the edge. I sanded the inside of the bowl to clean it up as well. I polished the rim top with micromesh sanding pads – wet sanding with 1500-2400 grit pads and dry sanding it with 3200-12000 grit pads. I wiped the rim top down with a damp cloth to remove the sanding debris. The photos show the progress of the polishing.
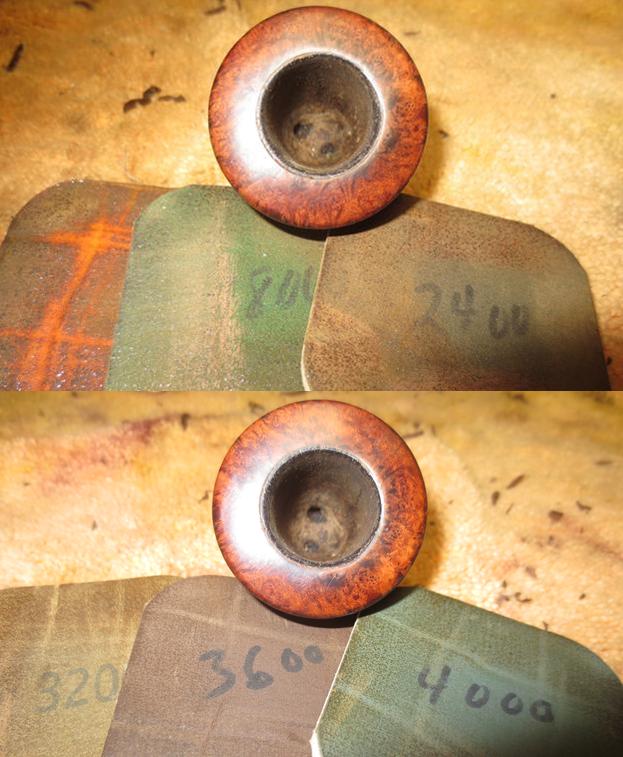
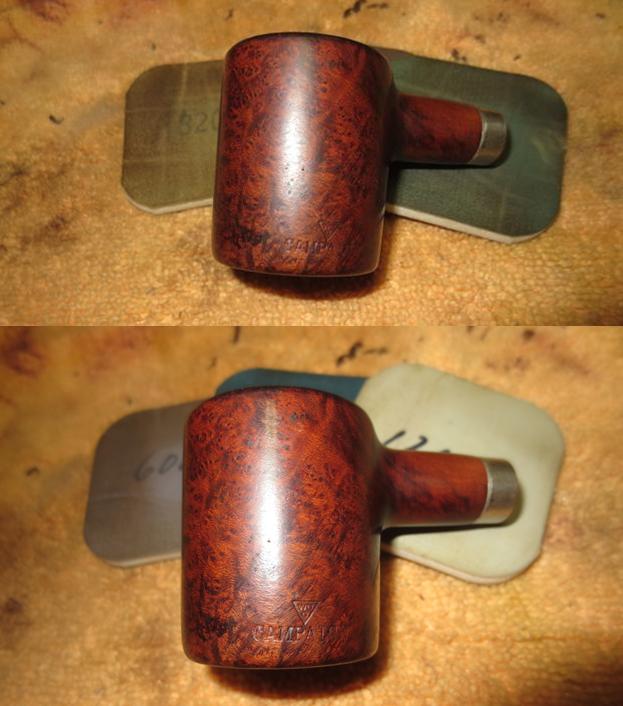
 I polished the outer bowl with micromesh sanding pads – wet sanding with 1500-2400 grit pads and dry sanding it with 3200-12000 grit pads. I wiped the bowl with a damp cloth to remove the sanding debris. The photos show the progress of the polishing.
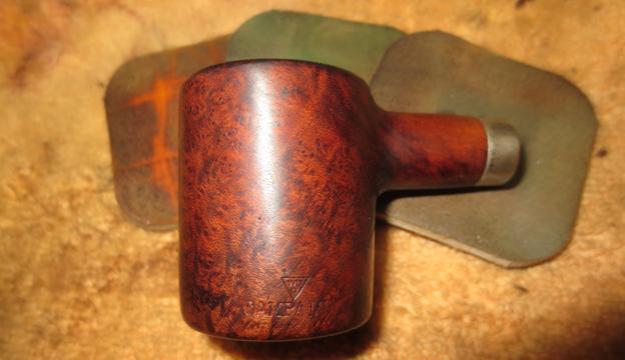
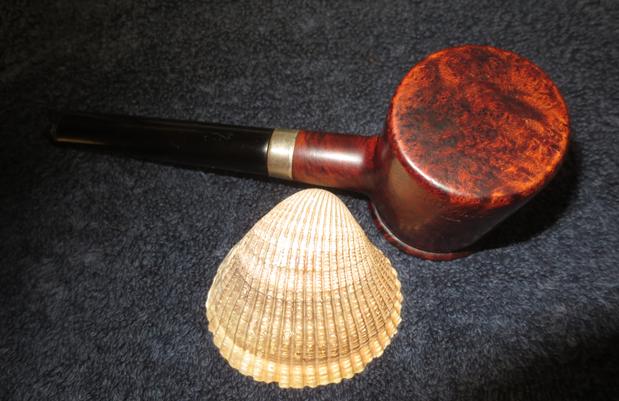
 To preserve the threads on the calabash bowl and the outer bowl I use a small dab of Vaseline to lubricate both. I rub it into the threads by hand and wipe it down lightly with a cotton pad. I screw the two parts together and find that it removes friction and makes the cap turn easily into the outer bowl. I hand buffed the bowl with a microfibre cloth, polished the nickel band with a jeweler’s cloth and took photos of the pipe at this point in the process.
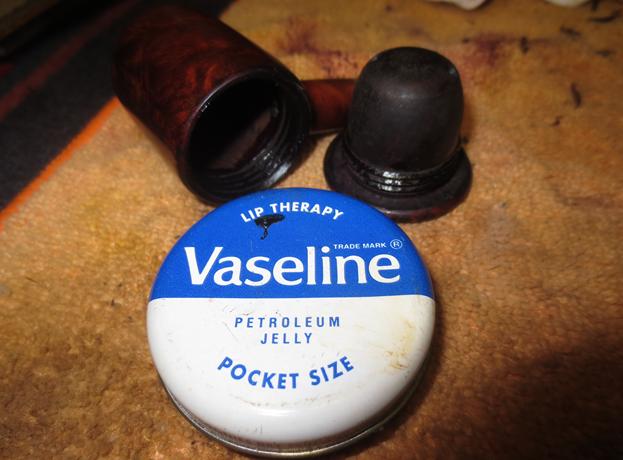
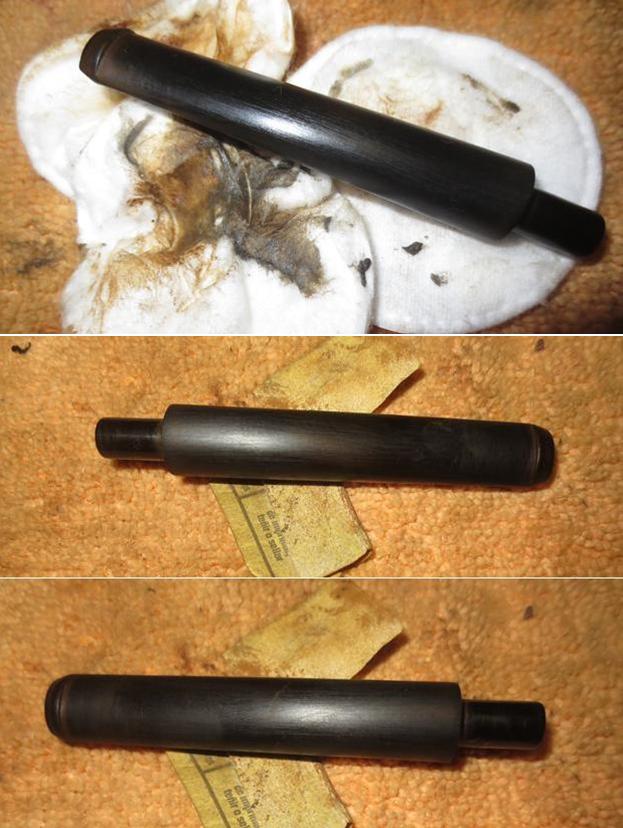
 I polished the stem with micromesh sanding pads – wet sanding with 1500-2400 grit pads and dry sanding it with 3200-12000 grit pads. I wiped the stem down with Obsidian Oil to bring life back to the vulcanite and protect it. The photos show the progress of the polishing.
 I buffed the stem with red Tripoli to polish out the last oxidation and scratching. I buffed the pipe – stem and bowl – with Blue Diamond on buffing wheel and gave it multiple coats of carnauba wax. I buffed it with a clean buffing pad to raise a shine. I hand buffed it with a microfiber cloth to deepen the shine. The finished pipe is shown in the photos below. One thing that shows through in the photos is some red along the crease of the button – I am pretty sure it is red Tripoli that is left behind from the initial buffing of the stem. After I took the photos I wiped that area down with some alcohol on a cotton pad. It removed the red Tripoli around the stem. It looks far better now that it is finished. Thanks for walking through this refurbish with me.


Pingback: Fresh Life for a Mastercraft Standard Calabash with a Bakelite Bowl | rebornpipes
These are great little pipes. I found mine in an antique shop for about $10. I guessed that the bowl was removable, but it was firmly locked in place. Thinking that perhaps a building of tar was responsible, I used monofilament from my fishing tackle box to cut through the years of gunk that head accumulated just beneath the rim on the outside of the bowl. It took a surprising amount of force to cut through the tars, but when it did, the cap/bowl was freed. What I found inside was a scene from a horror flick. More tars than could be believed, congealed into a thick plastic later both on the air chamber and the bottom of the bowl. Thankfully, alcohol worked its wonders and the pipe cleaned up beautifully. I’ve actually thought about having a modern stem made to fit this pipe, as my one complaint it’s that the stem is quite rounded, though not orific.
LikeLike
Boy, I hate autocorrect. Sorry for the many obviously incorrect words in my comment above.
LikeLike
Cool bit of pipe history! Thanks for sharing.
LikeLike