Blog by Steve Laug
I had a surprise just before my recent trip to Europe when I went to my pipe cupboard and took out my Tinsky apple. It is a pipe that has traveled with me around the world and one I love to smoke when I am traveling. It is a smoking machine. Well when I took it out I noticed that the original stem had a split on the top side and the underside that went from the bend to the button just over the airway. It was a crack that with time would grow. I took it to Europe and enjoyed it in Greece and Germany. It did not split further. When I got back I sent it off to Mark for a new Tinsky Stem. It did not take him too long to make a new one for it. I received within a week or less of his repair.
The photo below shows the pipe when I got it originally. It quickly became a favourite. I think I have probably had it over 15 years if I remember it correctly. It is just an old friend now and one that gets a lot of use. The shape in the hand feels great. The thinness of the mouthpiece and the shape hangs just right. The length is good for me. The blast and finish on the pipe is tactile and as it warms from the fire in its belly all seems right with my world. So that being said of course I would replace the stem and of course I would send it to Mark for another Tinsky stem. When the pipe came back I have to say I was a little disappointed with the new stem. Not disappointed enough to send it back for an adjustment but not at all satisfied with the new look of the pipe. It just did not work well for me. To my eye the stem was chunkier and less delicate than the original. I wrote that off to the possibility that Mark was correcting the issue with the thinness and size of the airway leading to potential for this one to crack as well. The new stem was a good ½ or ¾ inch longer than the original and the bend was not as gentle. The bend did not look right to me and seemed in my opinion to be over bent. It definitely was not a copy of the original stem it is slightly thicker all the way around, a deeper bend and not as delicate looking all made me concerned. I decided to smoke the pipe for a while and see if the difference was that big of a deal to me. All of the issues were ones that I could address so I was not too concerned.
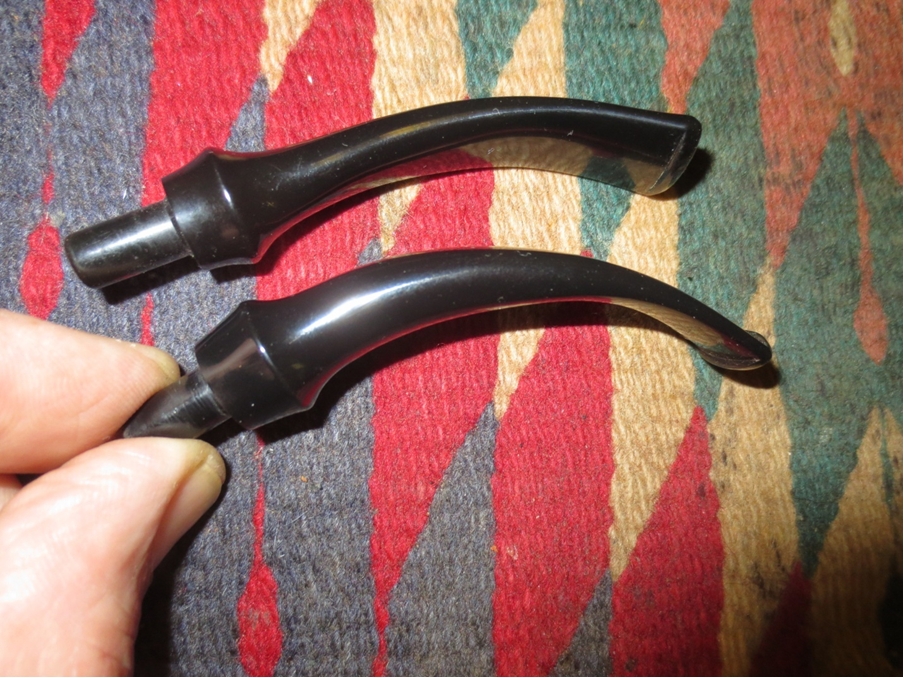
Here are some photos of the stem and pipe. The stem on the pipe is the new one. The one underneath to the pipe is the original. In each of the photos below the thicker stem is the new one regardless of the angle of the camera. The difference is very evident.


 I have been smoking it now for over a month. I think that is adequate time to adjust to the new feel of the stem. However, I did not adjust to it. It sat “wrong” in my mouth and hung with the bowl tilted toward the front too far. It was easier to light but was not nearly as easy to clench. The thickness added some weight to the pipe and was nowhere near as comfortable in the mouth. To put it in just a few words, the overall look of the new stem just bugged me.
So tonight I decided it was time to tackle the stem and do some work to remedy my concerns. I set up my heat gun and heated the acrylic stem to take out some of the bend and try to match it to the original stem. I really wanted the end of the stem to be in line with the bowl top when it was flat. In the first photo below you can see the variation in the bend. The top stem is the old one and the bottom one is the new stem. I heated it slowly above the heat gun on low heat. I have learned the hard way that if it gets too close to the gun the acrylic can bubble and burn and give me more issues to deal with. I heated it until it was pliable and then flattened it against the top of my work table until the bend was the same as the original stem. I set the bend with cool water.
 I put the stem back in the shank and took the photo below to show the modification of the bend in contrast to the original stem which sits below the pipe in the photo.
 With the bend corrected I also want to thin down the stem and remove some of the heaviness in the area above the saddle. I wanted more of a taper from the saddle to the button and give the saddle to the slope of the stem a bit more definition. I sanded the stem with 220 grit sandpaper to get the angles right to my eye. I also wanted the pinch between the saddle and the blade of the stem to be more defined.
 I sanded and sanded for about forty five minutes to clean up the flow of the stem and finally I was getting to the place that I liked the look of it.

 I sanded the top and underside of the stem to modify the thickness back toward the button. I wanted more of a flattened taper from the saddle back.
 When I got it to the place I wanted I put the stem back on the pipe to get a feel for the new look. It was definitely thinner than when I started. I did not want to take too much off the top of the stem toward the button as I wanted to leave more material over the airway than was on the original stem in that area.

 I still needed to do some more shaping with the 220 grit sandpaper so I worked on the stem with it on the pipe so that I could continue to see the effect on the overall look of the pipe.


 I was finally happy with the overall shape. It was time to work on the finish of the stem. I sanded it with a medium and a fine grit sanding sponge to remove the scratches left behind by the sandpaper.
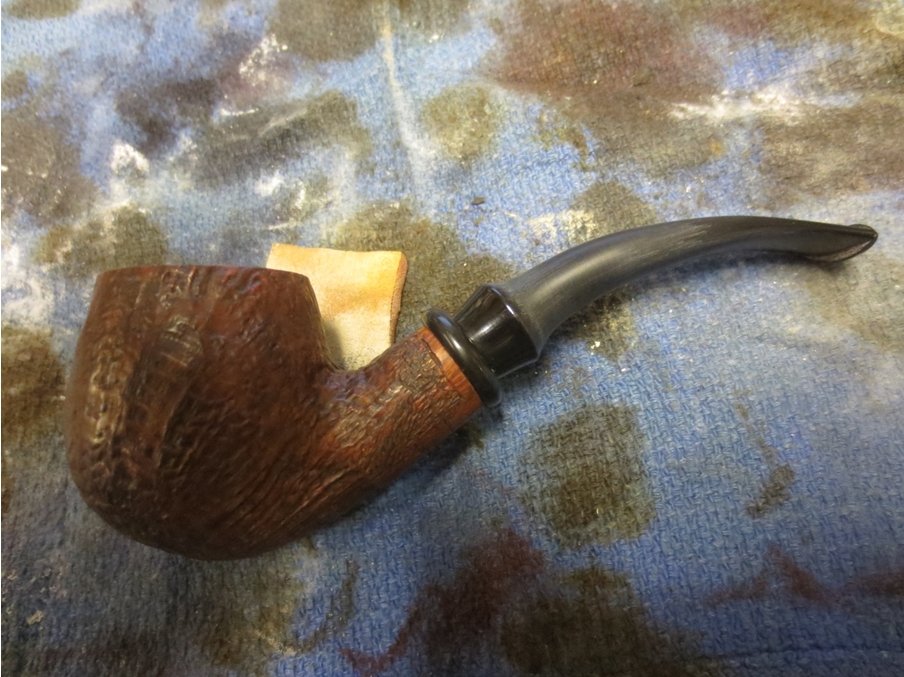

 I moved on to sand it with micromesh sanding pads. I wet sanded with 1500-2400 grit pads and dry sanded with 3200-12,000 grit pads. Between each set of three I rubbed the stem down with some Obsidian Oil as I have found that it enables the micromesh to have a better bite on the stem material.


 When I finished with the micromesh I gave it a light buff on the wheel with Blue Diamond Plastic Polish. I then buffed it with carnauba wax and finally with a clean, flannel buff to raise the shine and give it depth. I also gave the bowl several coats of wax with a light touch so it did not clog up in the blast. The finished pipe is shown below from a variety of angles to show the new shape of the stem. It is so much more comfortable to me than it was and I really like the more refined look.


 Now it is time to load up a bowl and give it a smoke. I picked up some McClellands 2035 this past weekend when I was in the US and this pipe loves flake tobacco. I am really looking forward to having this old friend back in the regular rotation.
