Blog by Steve Laug
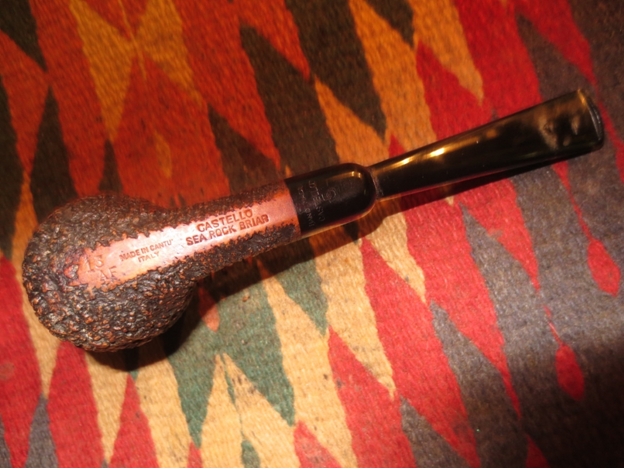
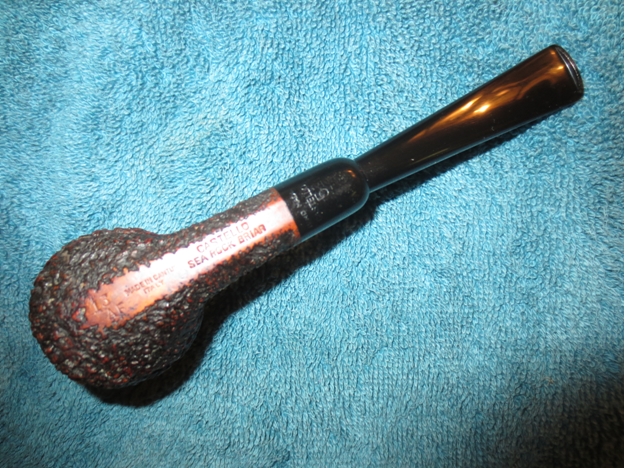
One of the surprises in the craigslist lot I purchased was a Castello Sea Rock 15FA military mount billiard. When I saw the photos in the seller’s advertisement I only saw a rusticated billiard and in the way it laid in the pipe rack it was unclear it was a military mount or a Castello. When I got it home and looked at the assortment I was surprised to see that it was indeed a Castello Sea Rock. It is shown in the photo below – the third pipe down on the right side.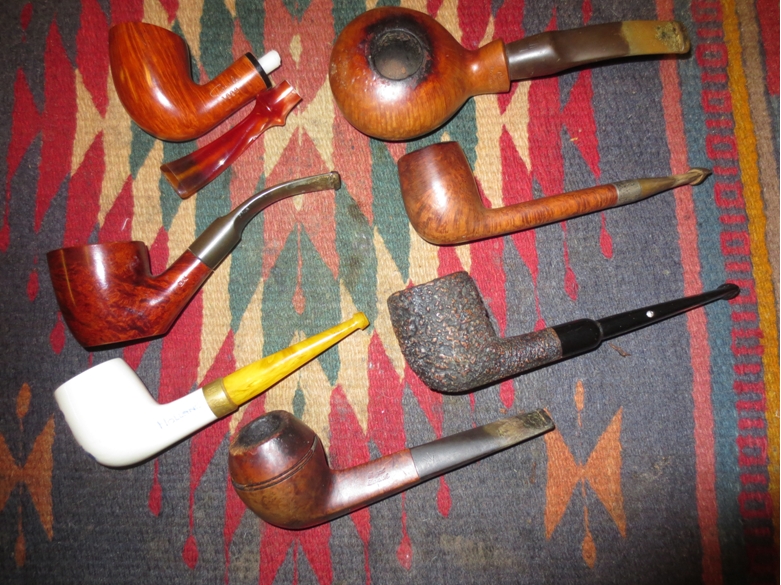 I think this must have been a pipe the seller loved as it was well smoked. There was still a bowl of tobacco unlit in the depths of the bowl. The cake was quite uneven but was thick around the top of the bowl. The rim was overflowing with tars and oils to the point that it had clogged the rustication on the top. It was higher in some places than others from the buildup. The outer edges of the rim were knocked about to the degree that it was work and there were scratches and stain missing from the edges. The stem was dirty on the end like it had sported a softie bit and had some calcification on it. There were also tooth marks on the topside and underside of the stem near the button. The button itself had some damage and scratches. The tenon end was also covered with a buildup of calcium on the end around the insert in the end cap.
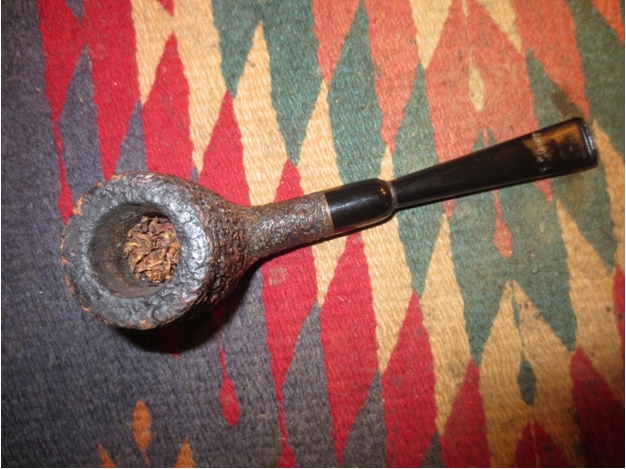 The stem had the “diamond” inset on the side that showed that it was originally made for the North American Market. I did a bit of research and found some information on the stem logo. I quote: “American logo’d Castello pipes use a small round “Diamond” (referred to and looking like, but it is NOT actually a diamond) inlaid into the mouthpiece. This was originally done so that the standard Castello white bar logo did not conflict with another brand and logo that was sold by Wally Frank called the “White Bar Pipe” (in the 1950’s).” I also found that “The SEA ROCK [Carved Black or dark brown] is the lowest grade of the Castello line and is the most common in the USA. Sea Rocks are produced by taking a smooth bowl that has not been “final finished” and surface carving the finish with tools. This “carved” finish is then evened out using a steel wire brush, stained and then waxed.” This information was found and condensed from the PCCA Castello Grade & Style Guide – by Robert C. Hamlin (c) 1988, 1992, 1994.
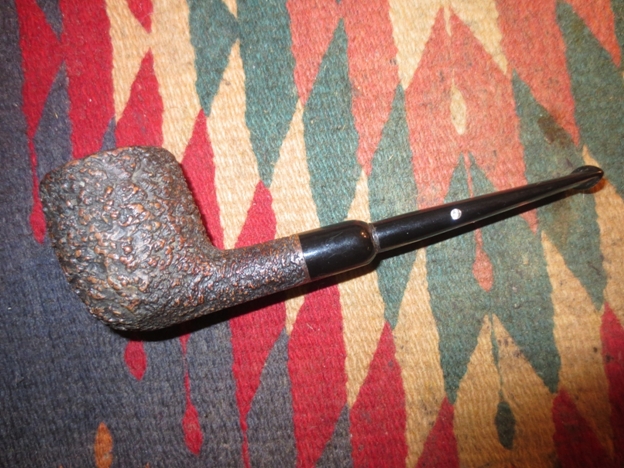
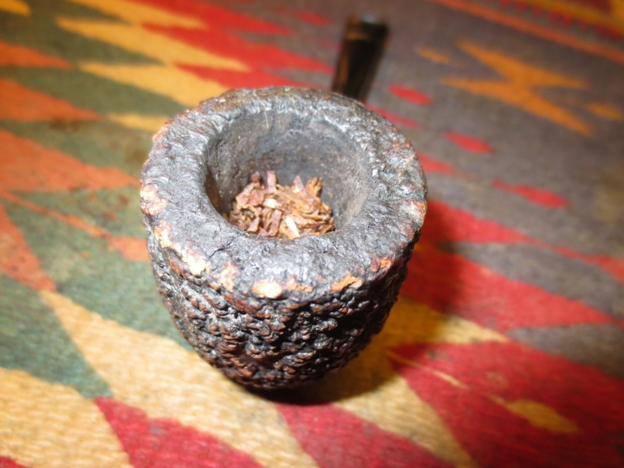
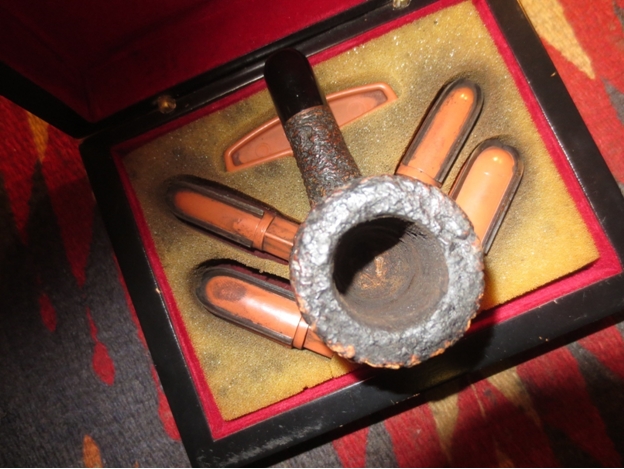
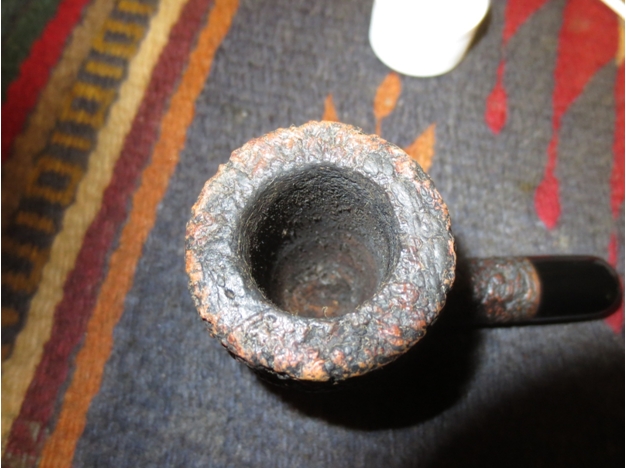
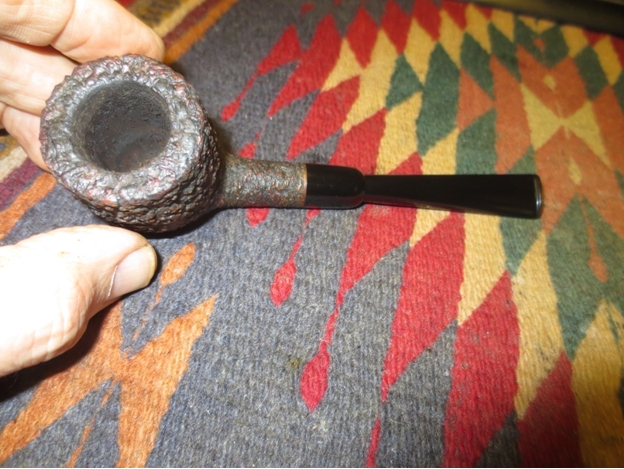
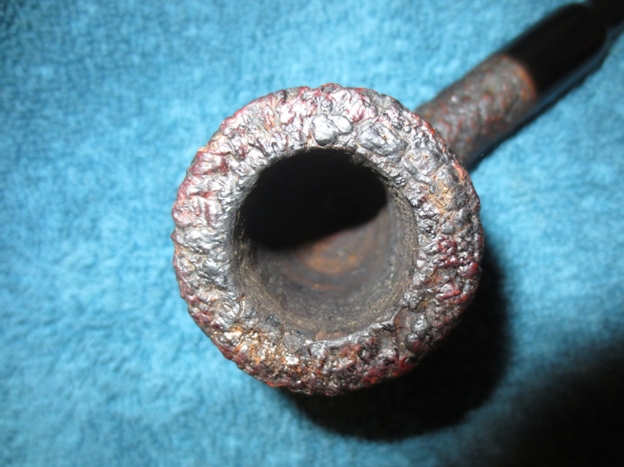
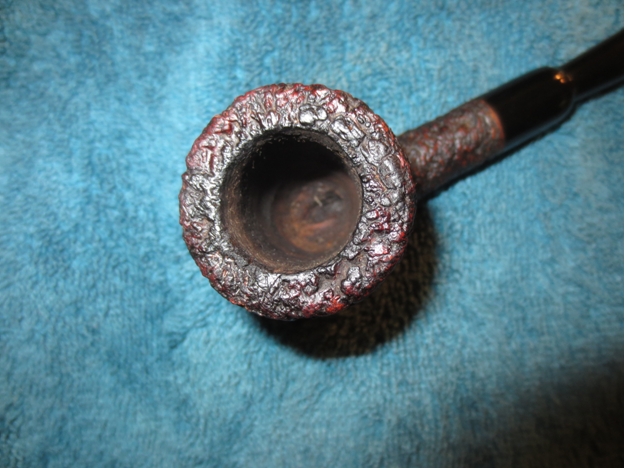
 The two photos below show the buildup on the rim more closely. The thick tars and oils over flowed on the top of the rim. You can see that the rustication is buried under the lava.
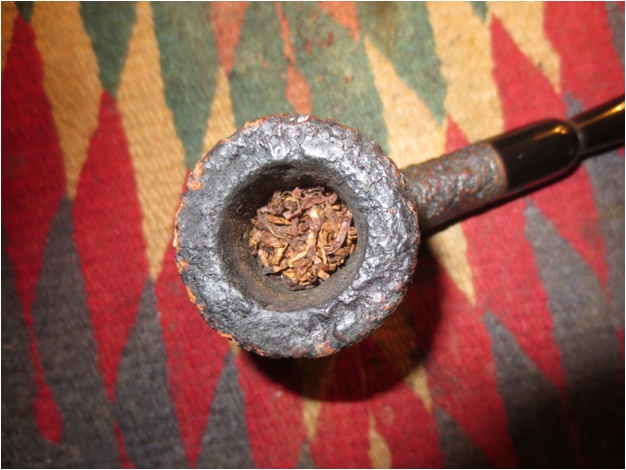
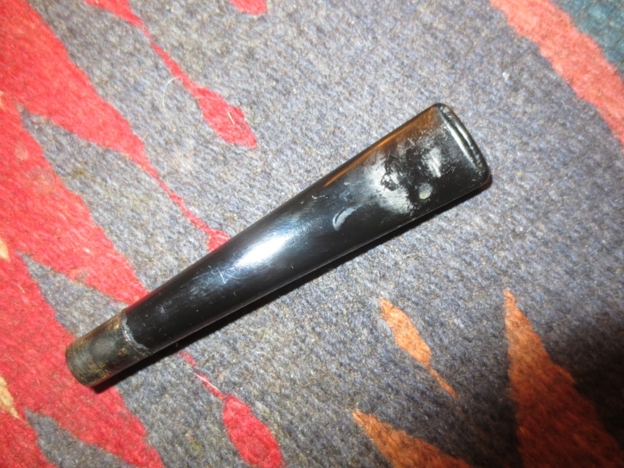
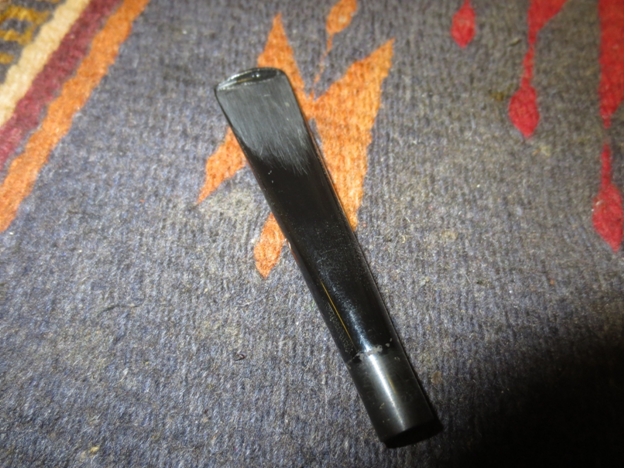
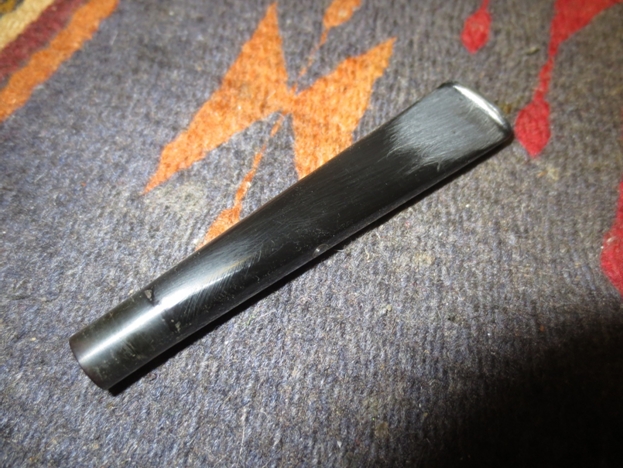
 The next two close up photos show the stem with the bite marks on the top and the bottom side and the calcification on the surface of the stem. In the second photo there is also buildup around the insert end of the stem.
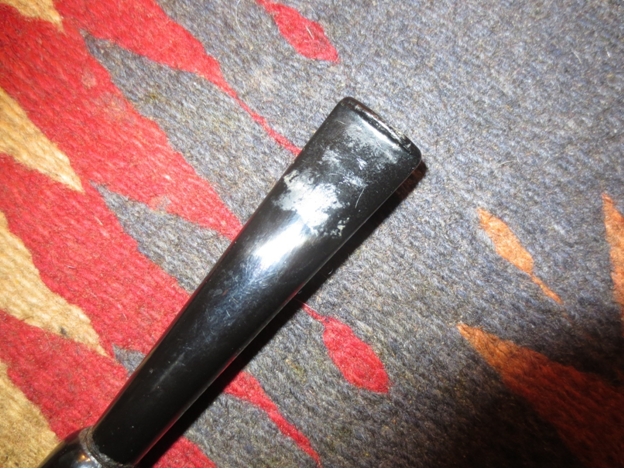
 I reamed back the cake to bare wood to remove the uneven surface with a PipNet reamer. I started with the second cutting head and finished with the third cutting head.
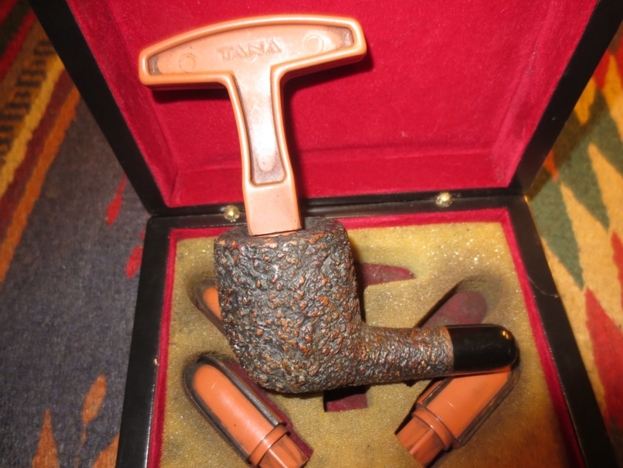
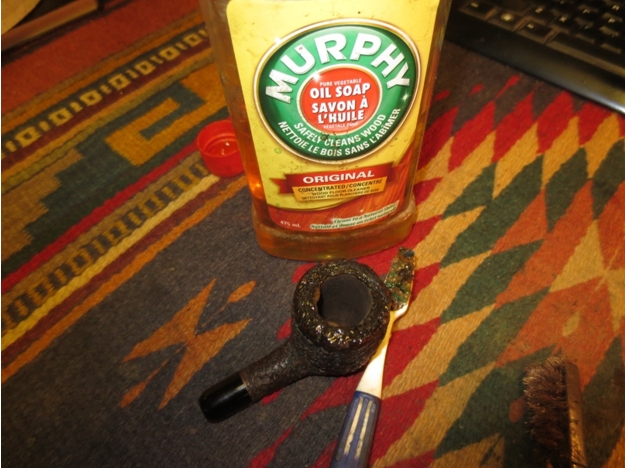
 I used a brass wire brush and a dental pick to work on the tars on the rim. I scrubbed it and then used a tooth brush to put Murphy’s Oil Soap on the rim. It softened the tars enough that I scrubbed it again with the wire brush and picked at it with the dental pick. I rinsed off the soap with running water and then dried the bowl.
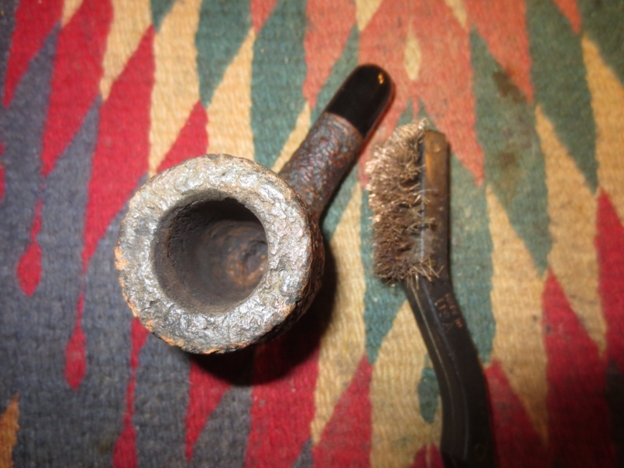
 I restained the worn areas on the top of the rim and the outer edges with a Guardsman Stain pen. I used the dark stain pen as it matched the rest of the bowl. Once I had touched up the stain I rubbed the top of the rim with a cotton cloth to blend the stain into the rest of the rim colour.
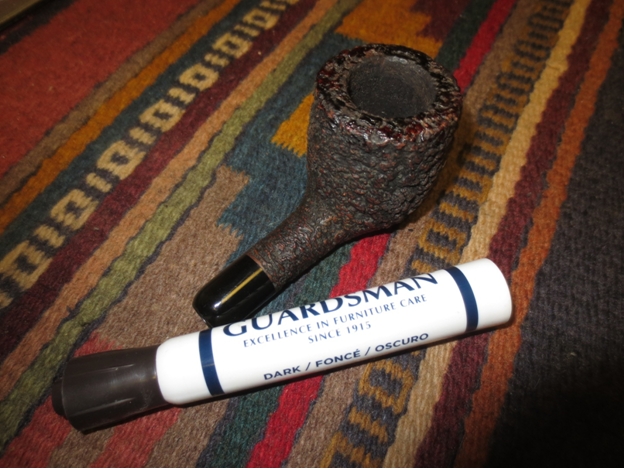
 I sanded the stem with 220 grit sandpaper to remove the tooth chatter and the tooth marks. I also sanded the stem to remove the calcification. I then sanded it with a medium and fine grit sanding sponge to reduce the scratching.
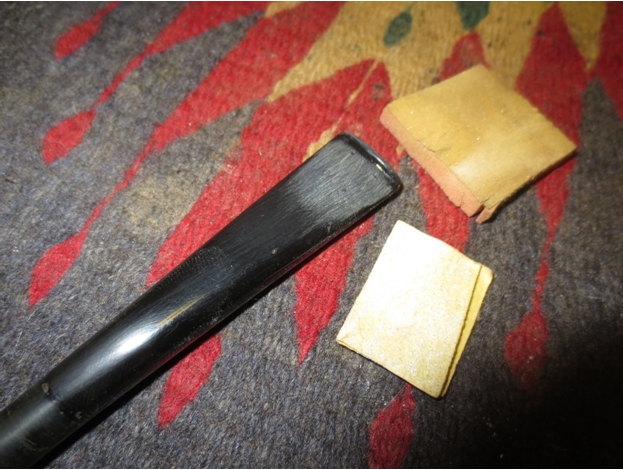
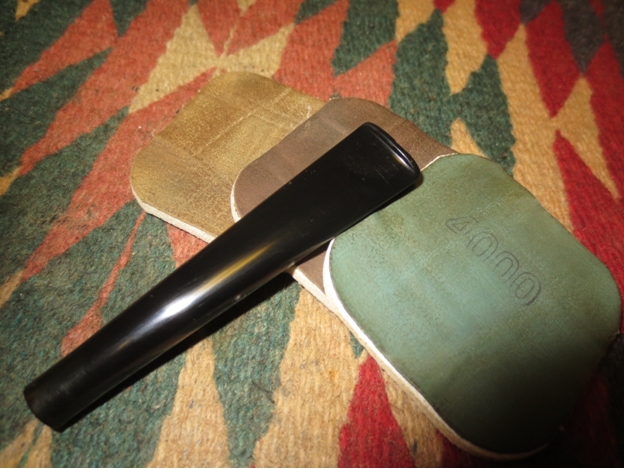
 I sanded the stem with micromesh sanding pads. I wet sanded with 1500-2400 grit pads and dry sanded with 3200-12,000 grit pads. I rubbed the stem down with Obsidian Oil between each set of three pads.
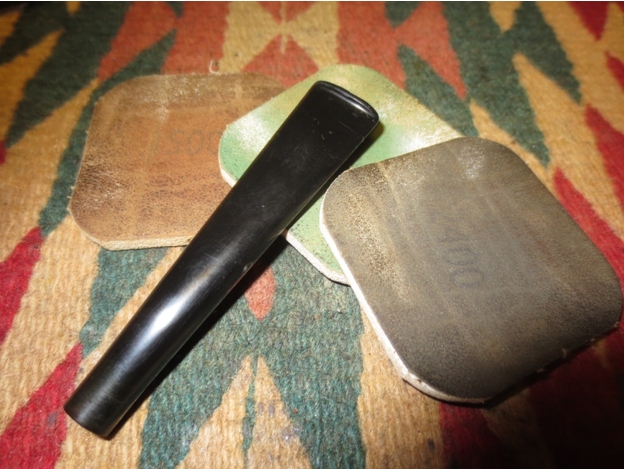
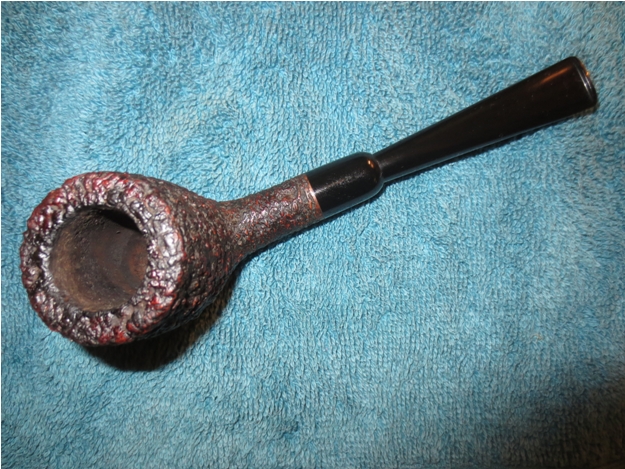
 I also polished the edges of the end cap to remove the worn areas on the surface. I fit the stem back into the shank and hand polished the stem with a cotton polishing cloth. I gave the bowl a coat of Halcyon II wax and buffed it with a shoe brush. The photos below show the pipe after the buff with the brush.
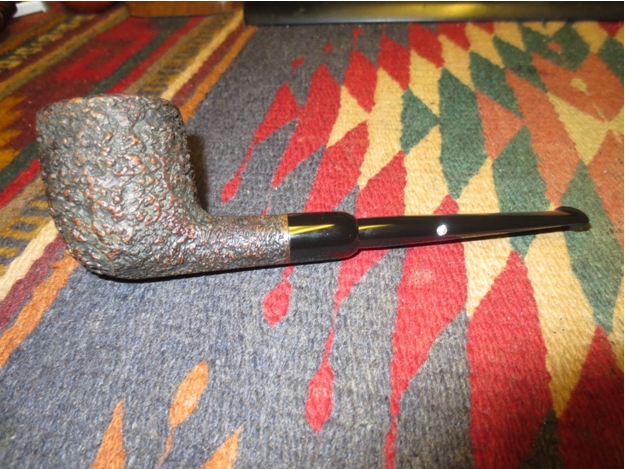
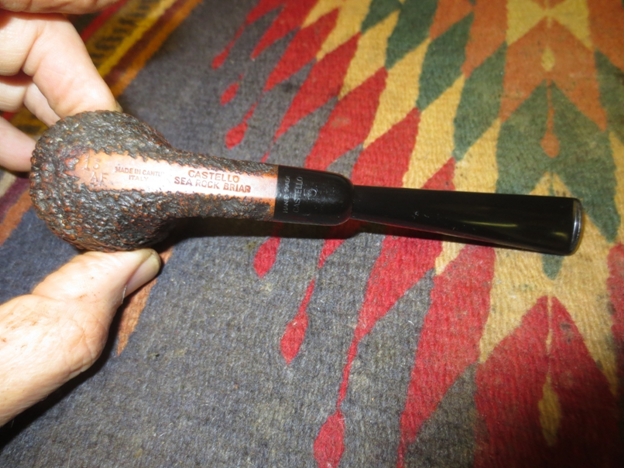 The next close up photo shows the stamping on the pipe. It is stamped CASTELLO over SEA ROCK BRIAR on the flat portion of the shank bottom. To the left of that stamping it reads MADE IN CANTU over ITALY and to the left of it is the number 15 over AF. The end cap is also stamped HAND MADE over CASTELLO over 5.
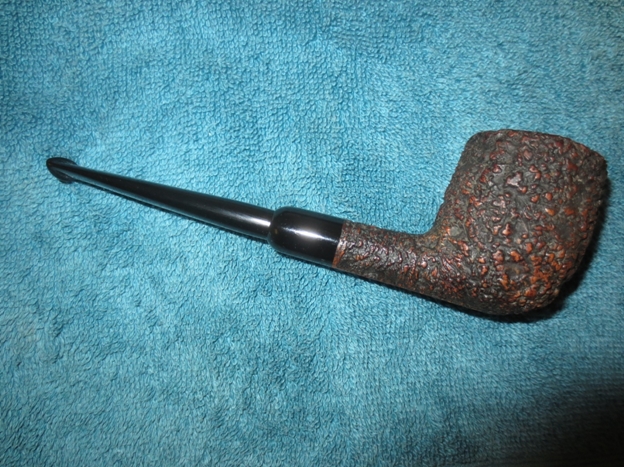
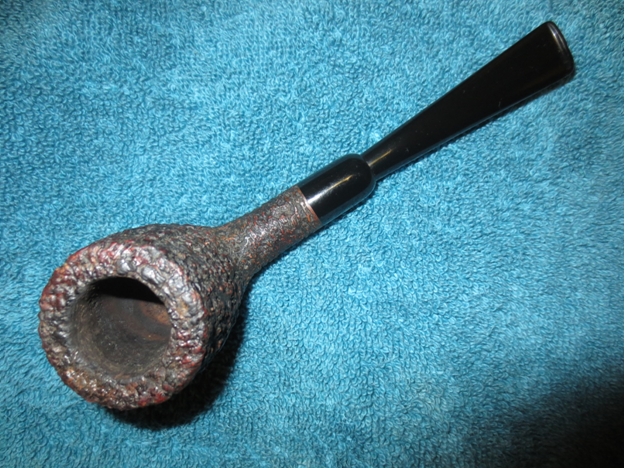
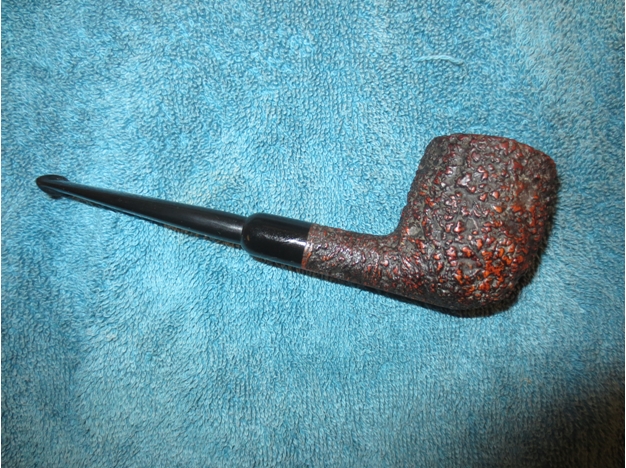
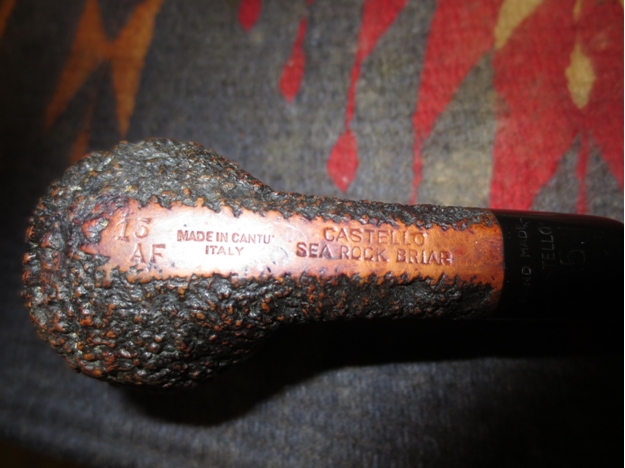 The next series of photos shows the finished pipe. I lightly buffed it with a soft flannel buffing pad. It raised the shine on the briar. I buffed the stem with Blue Diamond and then gave the stem several coats of carnauba wax. I buffed the entire pipe lightly with the clean soft buff.
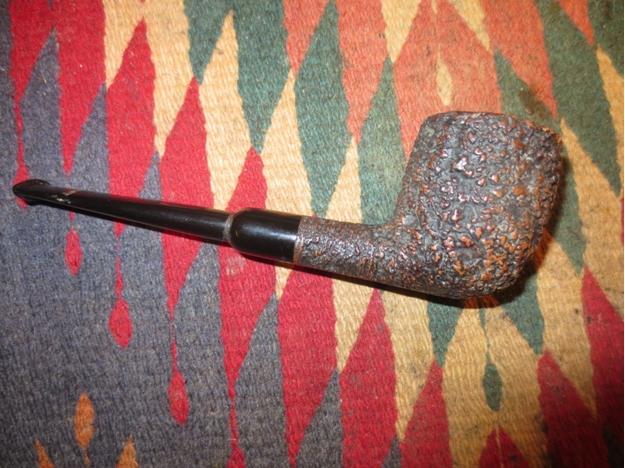
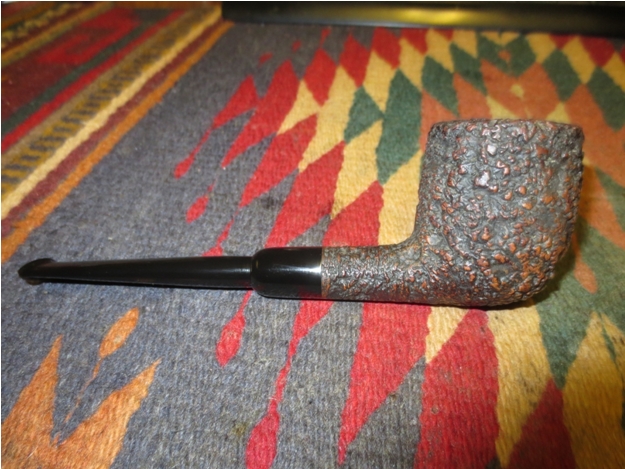
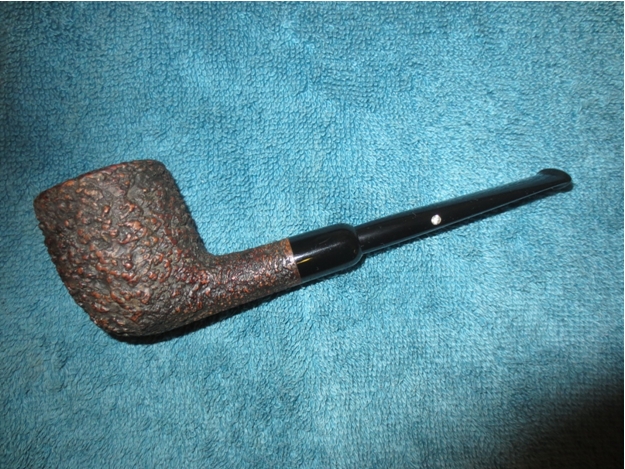

 After looking at the finished photos I decided to give it a light rubdown with olive oil. I wanted to enliven the finish and what better way than to add some Italian Olive Oil to and Italian briar.
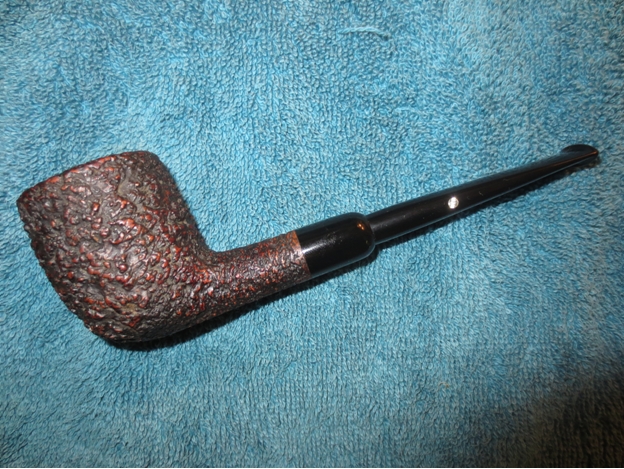
ADDENDUM: I wrote this while wondering about the 15 AF stamping. I knew that the 15 was the shape stamp but the AF threw me for a loop. I posted on both Smokers Forums and Pipe Smokers Unlimited Forum and asked for help. Many offered suggestions. Several said to write Mike Glukler of Briarblues so I did that. Mike replied fairly quickly that he had no idea about the mystery stamp but sent it on to Marco at Novelli, and Castello collector Dave Peterson. Dave replied that he believes that it stands for Army Fitment. He went on to say that the newer army fit pipes that he has have the letter (SC) size designation and have no AF suffix so he assumes the AF stamp was discontinued in the early 60’s. He also said he would check with some others. So it seems I have a tentative answer regarding the stamping.
ADDENDUM 2: Bill on Pipe Smokers Unlimited wrote to Castello and asked them what the stamping meant. He posted their response this morning:
“Steve here is the Castello response and I think you will be quite pleased and surprised.
Dear Customer,
thank you for your inquiry,
the number stands for the shape 15, the billiard. Then “A” stands for
“amici” = friends, “F” stands for flock.
That is a pipe given to friends (read “not for sale”) with a flock. I
hope it helps.”
You got to love the pipesmoking community and the wealth of information available to us if we ask.

Awesome find, that nomenclature is mint! Try some Meguiars plastic polish on the stem/military mount cap. I’ve found the acrylic stems really respond to the ultra fine plastic polish. I have a feeling you are really going to enjoy this pipe.
LikeLike
A wonderful find! No doubt you’ll have much enjoyment from that one for a long time to come.
LikeLike
I had no idea the Sea Rock’s were the lowest grade Castello, I always thought they were a very high grade pipe. Excellent job with the restoration, the only difference in methods used is I use olive oil w/ the brass brush on the rims.
LikeLike
thanks Bob, I will have to try the olive oil and brass brush on the rim next time around. That sounds like a great idea. I also just gave the bowl a rubdown with olive oil to enliven the briar a bit more as well after reading your note.
LikeLike
Since discovering olive oil used w/ a brass brush I don’t hesitate to use White Diamond compound with my buffer on rusticated or sand blasted surfaces, because I can easily remove the compound from the deeper recesses, White Diamond is the only compound I use because it’s good enough for my purposes to make a pipe look great. I then scrub w/ olive oil, dab away the foam w/ a soft cloth and a couple hours later it’s ready for some Halcyon II hand waxing.
LikeLike
Bob do you have any of your refurbs that you would like to write up and send in for the blog here? Would love to see some of your work!
LikeLike
I’ll do that the next time I have a good candidate, I’ve done hundreds and learned many things but rarely documented the steps, compared to most who post here I’m a bit of a hack because I sell pipes for collectors and have to get results very quickly. I’ve buffed as many as 63 pipes in one sitting and rarely spend over 5 minutes on each one, then come inside and remove left over compound and sort them according to which ones need the brass bristled brush and olive oil treatment. After all are cleaned up I hand apply the Halcyon II wax and this too has a learning curve, such as … if you let it dry for over 3 or 4 minutes it’s difficult to remove the haze of the wax. I just discovered another really great product, Flitz Paste can be used to quickly and easily remove oxidation from a bit which is very helpful because I have to buff outside and I don’t buff when it’s too hot, too cold, or too Windy. All conditions much be perfect so I only buff maybe 6 or 8 times a year. Doing the buffing through trial and error I have made many rules to avoid destroying pipes, I must be well rested, have no worries or distractions and ready to concentrate on nothing else. Until the last few hundred pipes, I was destroying 1% from them flying off onto the patio. My first mistake was sitting on the wrong side of my porch swing and a beautiful Savinelli DeLuxe slammed into a porch post. It fell to the ground and I watched it tumble down the 3 stone steps, I was thinking it wasn’t hurt, but when it fell from that 3rd step, I watched in horror as the shank separated from the bowl. When I destroy a pipe that doesn’t belong to me I never tell the owner what I did until after agreeing on a price for me since I love it so much. lol
LikeLike
Nice job, Steve. -bw
LikeLike
Thanks Bill. Going to smoke this one today!
LikeLike