Blog by Steve Laug
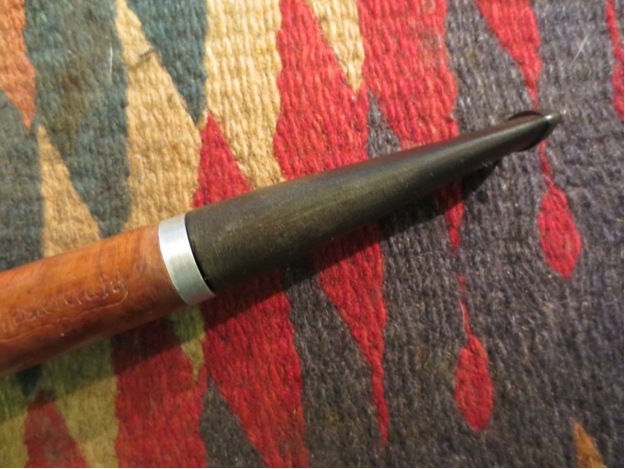
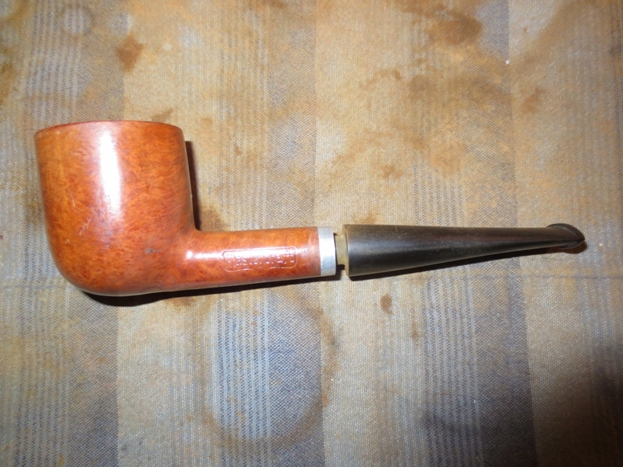
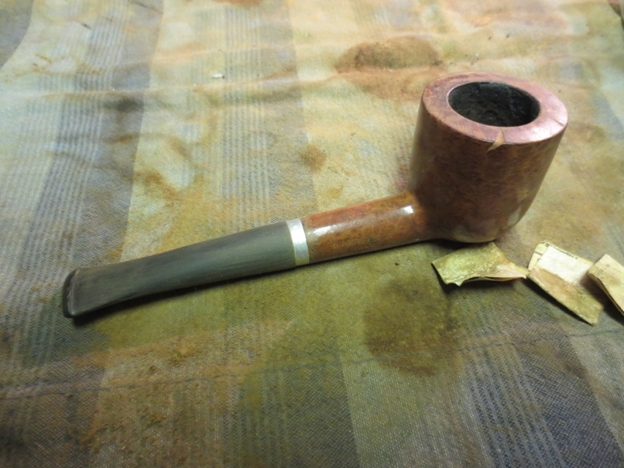
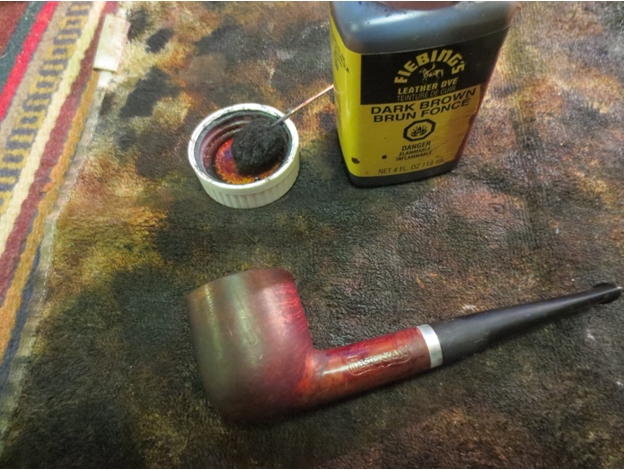
The next pipe from the gift box is a Mastercraft Pot. It is stamped Mastercraft in a shield on the left side of the shank and Imported Briar over Italy on the right side. There are no shape numbers. There are a lot of fills on the bottom of the bowl and the right side of the bowl. The finish is a thick coat of what appears to be urethane – almost plastic looking. Someone had previous started refurbishing it – to bowl had been carefully reamed and the bowl topped. There was a large fill on the rim that was loose that ran from the middle of the right side of the bowl almost all the way across the rim. This pipe would be a great one to experiment with using different stains to blend the fills and highlight the grain. The urethane coat would prove a challenge to remove completely but once gone it would prove a perfect candidate for the new staining techniques I wanted to learn. The band on the shank is aluminum and is oxidized and dull. The stem is a replacement that is poorly fit. It is loose in the shank and does not fit against the shank well. The tenon is very short and almost conical in shape. I will break the work on this pipe into two parts: Part 1: Fitting a Stem and Part 2: The Staining Experiment and a Conclusion called Finishing Touches.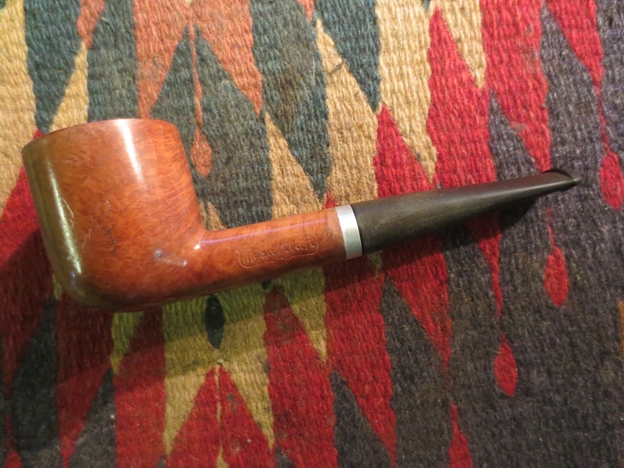
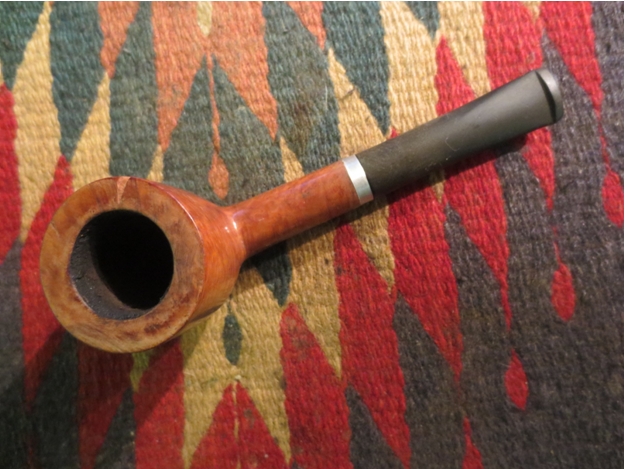

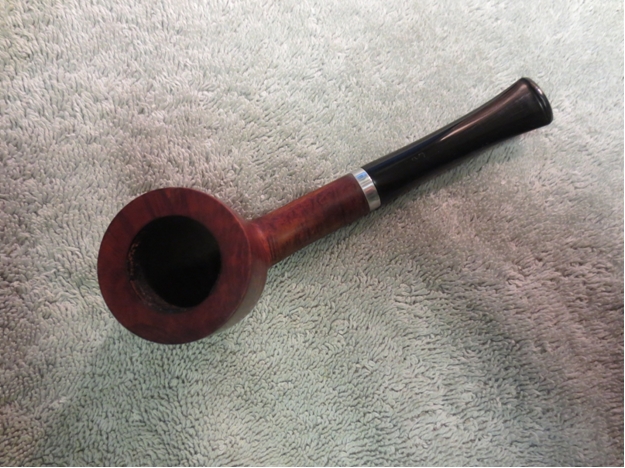
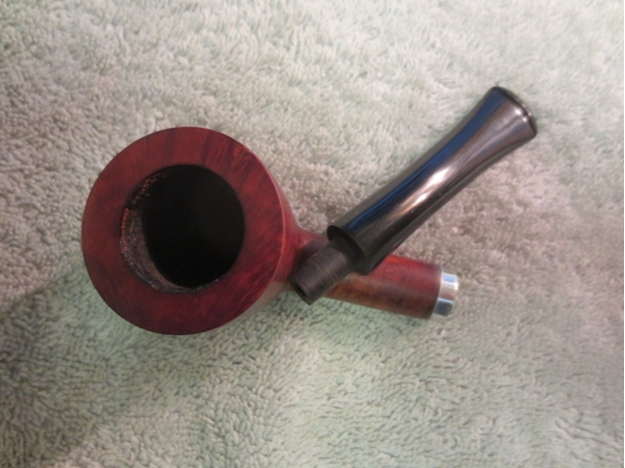
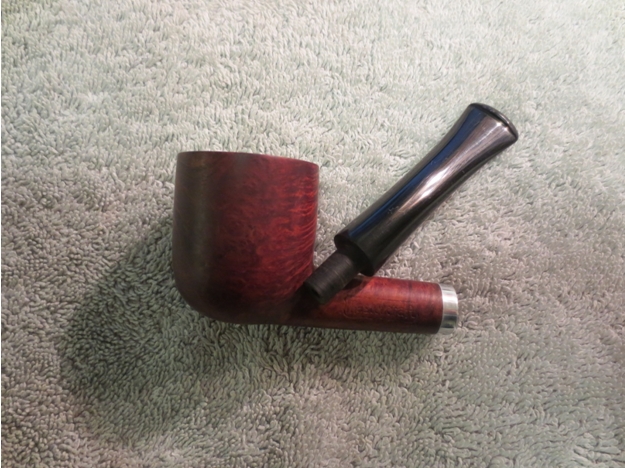
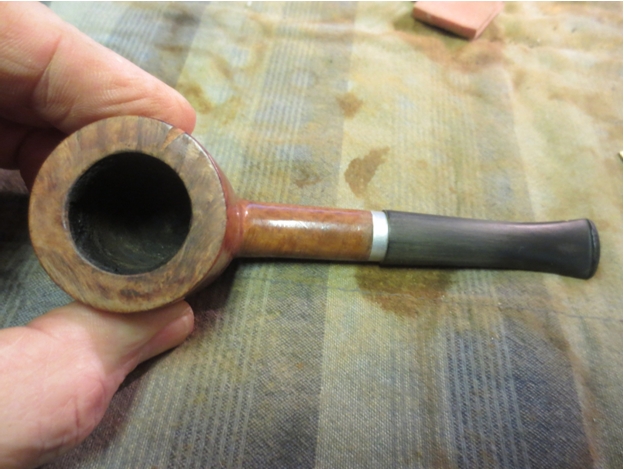
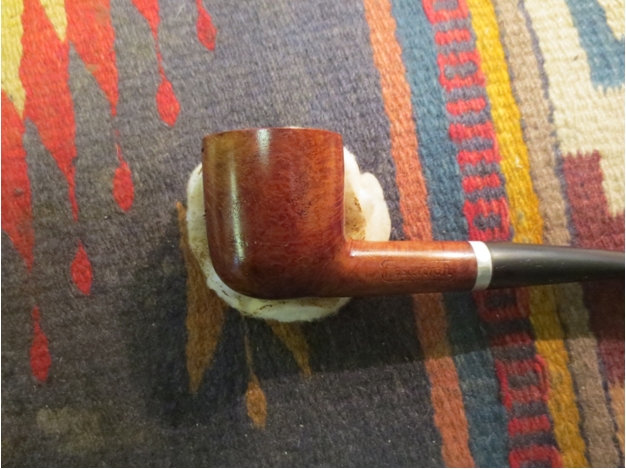
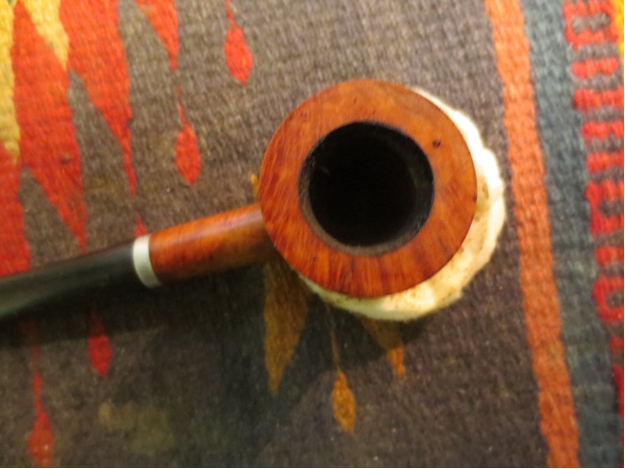
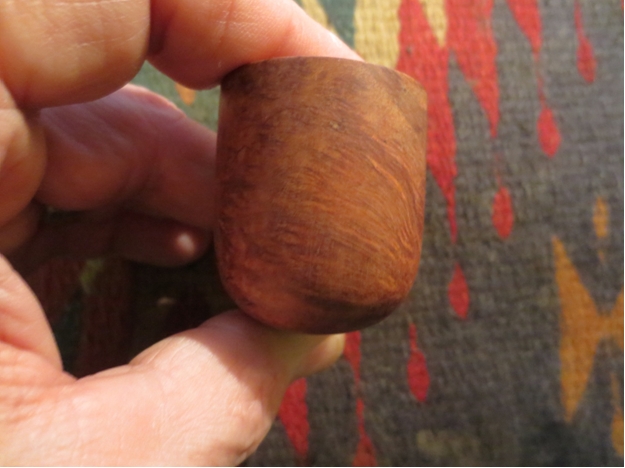
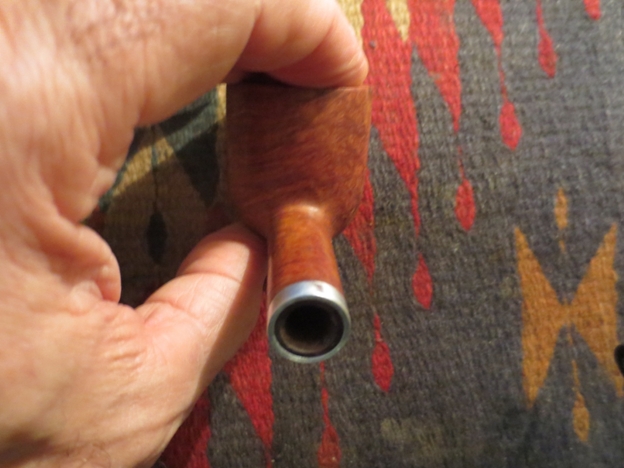
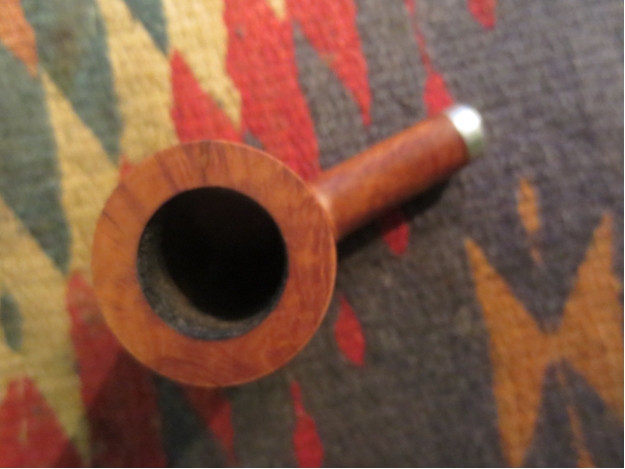
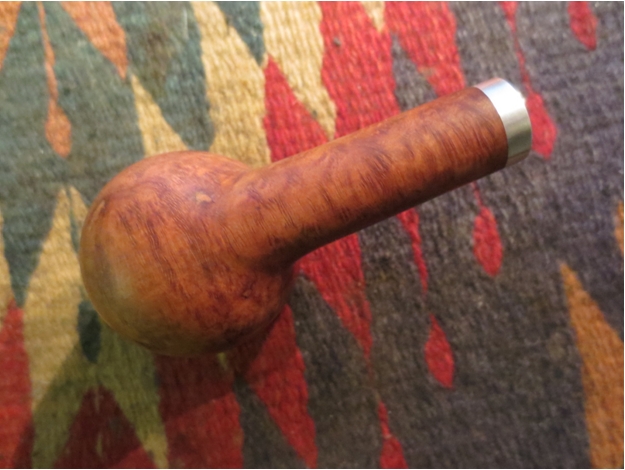
 I took a few close-up photos of the rim and the stem. These will help to give an idea of the state of affairs when I brought the pipe to the work table.

Part 1: Fitting a Stem
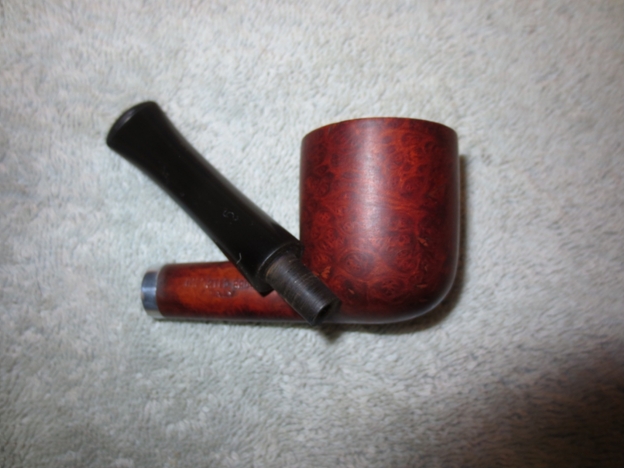
I removed the stem and found two possible replacements in my stem can. The original replace in the one at the bottom of the photo below. The two options were a longer taper and a saddle stem. Both of them worked well with the length of the shank. They looked better than the one the pipe arrived with.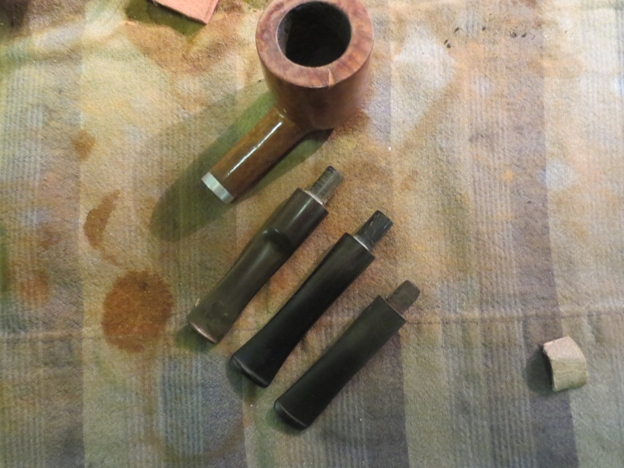 I tried the bowl with each of the stems to get an idea of the look of the pipe. I made a decision for the taper once I had seen them both in place in the shank.
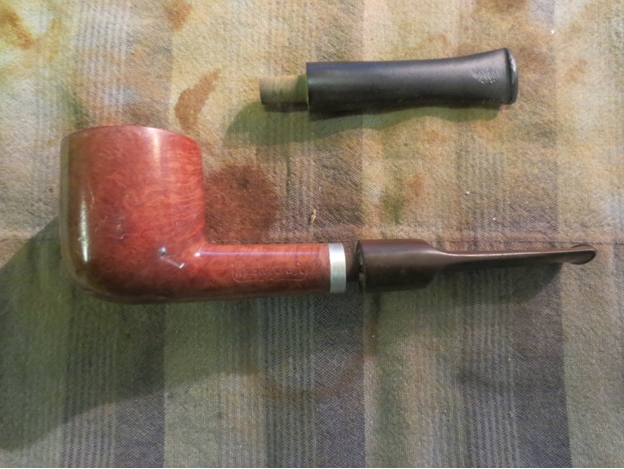
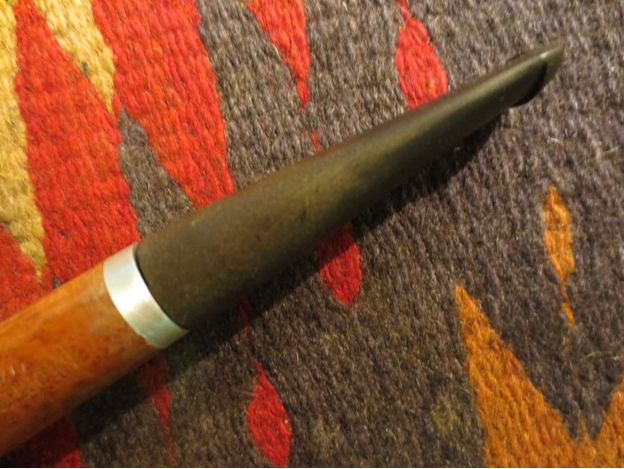
 The taper stem was slightly larger in diameter than the shank so I would need to adjust the diameter. I cleaned out the shank and the stem with pipe cleaners, cotton swabs and isopropyl alcohol to remove the tars and oils from the shank. Because someone had already started the process on this pipe it was not a long clean. It took very few cleaners before the shank was clean.
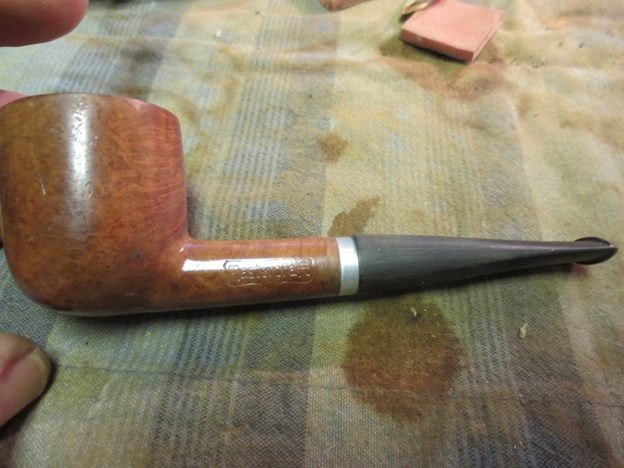
 I sanded the stem with 220 grit sandpaper to start and then decided it was taking too much time. I used the Dremel with a sanding drum and quickly removed the excess material.
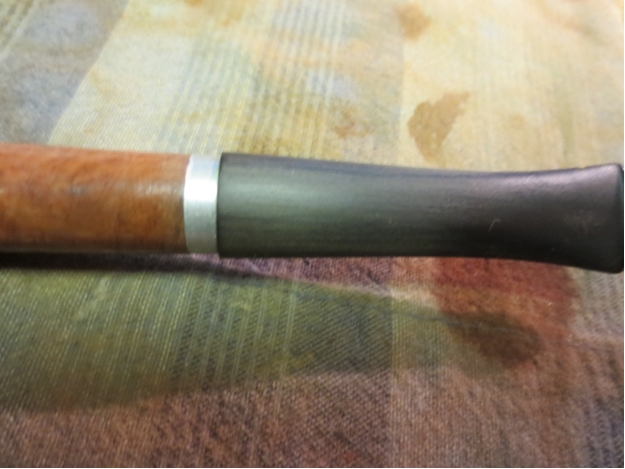
 I brought it back to the work table and sanded it with 180 and 220 grit sandpaper to smooth out the marks left by the sanding drum. I needed to fine tune the fit but it was working with the bowl.
Part 2: The Staining Experiment
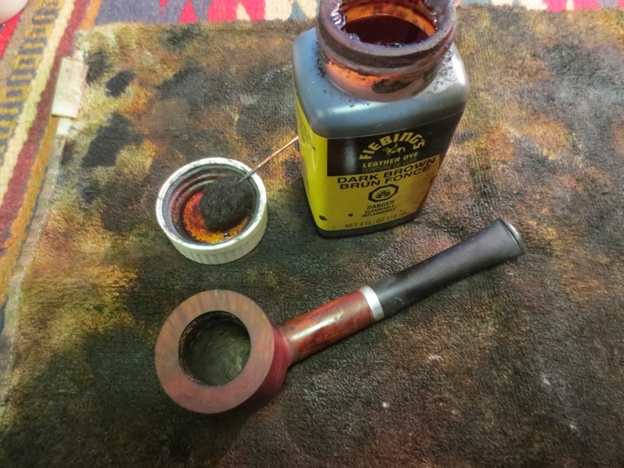
To prepare the bowl for staining I needed to do the repairs and remove the old finish. I decided to re-top the bowl to remove some of the damage and smooth out the area around the fill on the right side top and edge. I wanted to bring the top down to lessen the area that the fill intruded on.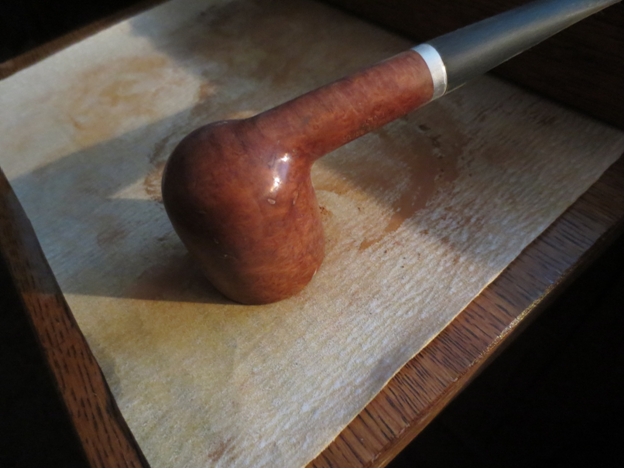 I wiped the bowl down with acetone to remove the finish only to find that it did not work to cut through the finish. Before I intruded on the finish with my next measure I decided to repair the fill on the outer edge of the rim on the right side. I used briar dust and super glue to repair the fill on the side and top of the rim. Most of the fill had been smoothed out on the top but there was some of the fill missing on the edge of the rim. I cleaned and sanded the repair to blend it into the finish. When that was smoothed out I sanded the bowl with a medium grit sanding sponge to break the gloss of the finish and then dropped it into the alcohol bath.
 When I took it out of the bath the finish was dulled but still not broken. This top coat was a real bear to remove. I needed to do quite a bit more sanding on the coating to remove the finish.
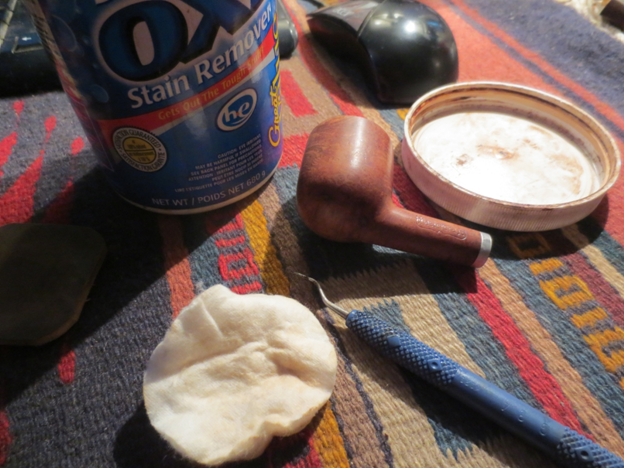 Once the finish was gone and I was at bare wood I decided I would use a three part staining process to try to hide the fills and blend them into the briar. I wanted to try something new as well with the staining of this pipe. I wiped it down a final time with acetone to clean off the dust and any remnants of finish, scrubbing hard around the stamping on the shank. I stained it with a medium walnut stain, flamed it and buffed it.
 When the stain dried I gave it a light buff with a cloth and a shoe brush and then gave it the second coat of stain. This time I gave it a coat of oxblood coloured stain. I wanted to bring out the grain on the sides and front and back of the bowl and try to blend the fills more. I stained it and flamed the stain.
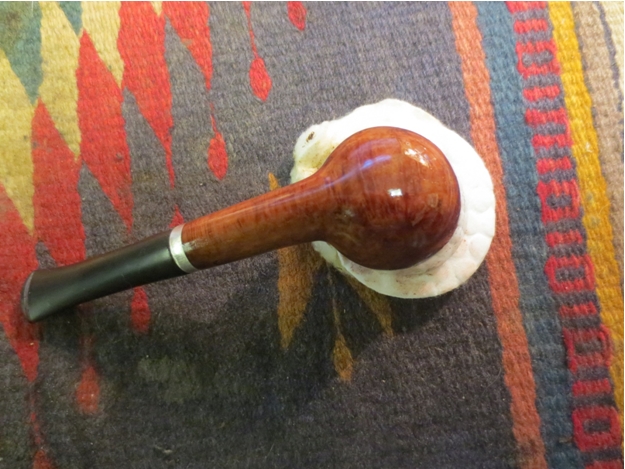
 When that stain dried I buffed the bowl with White Diamond and wiped it down with isopropyl to even out the stain coat. I hand buffed it afterwards with a soft cloth. The bowl was beginning to take on the colour I wanted from these first two coats of stain.

 Then it was time for the third coat of stain. I stained the pipe with a dark brown aniline stain. I applied it and flamed it and repeated the process until I had good coverage on the pipe. The dark brown looked opaque when first applied.
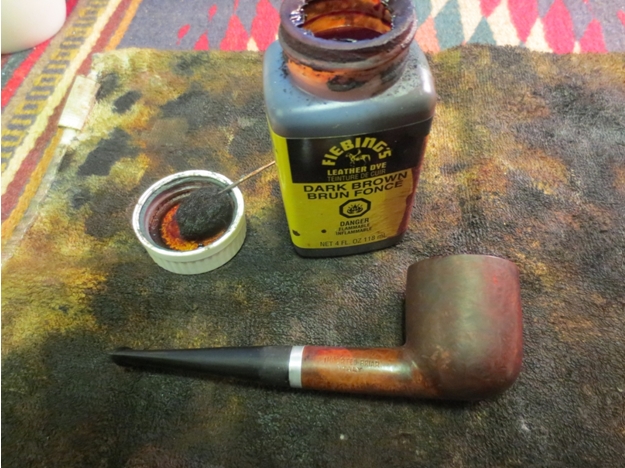
 I buffed the pipe with White Diamond on the wheel and gradually the grain began to show through the finish. The combination of stains gave the pipe precisely the colour I was wanting – a warm reddish brown with dark highlights in the grain patterns. The fills though still present, did not stick out as badly and seemed to blend into the finish.
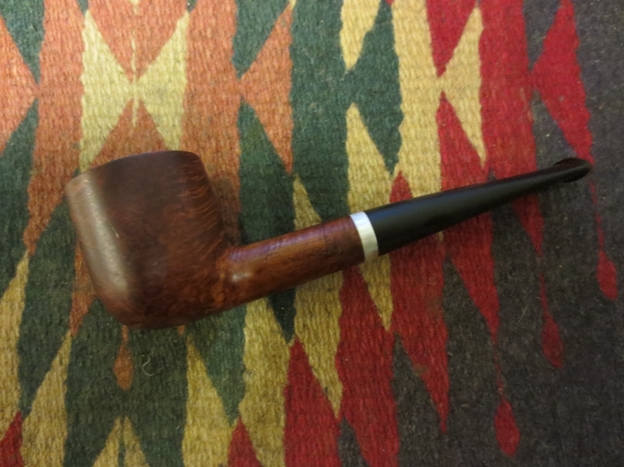


Conclusion: Finishing Touches
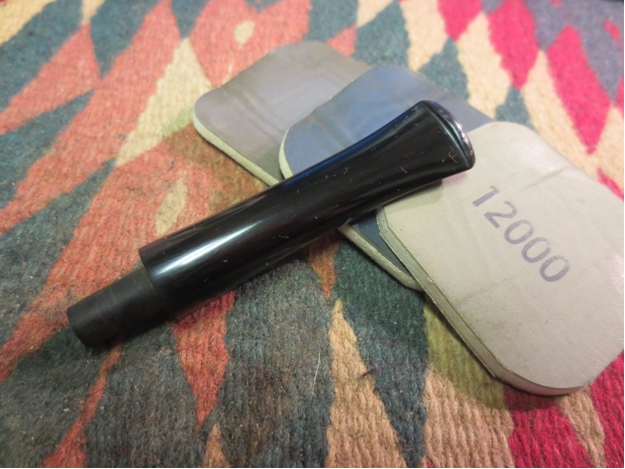
With the finish on the pipe completed I worked on the stem. I sanded it with a fine grit sanding sponge and then with micromesh sanding pads. I also sanded the band on the shank with the micromesh pads at the same time. I wet sanded with 1500-2400 grit pads and sanded the band without the stem present. You have to be careful with the pads when polishing metal as they will leave a dark stain on the briar and the vulcanite.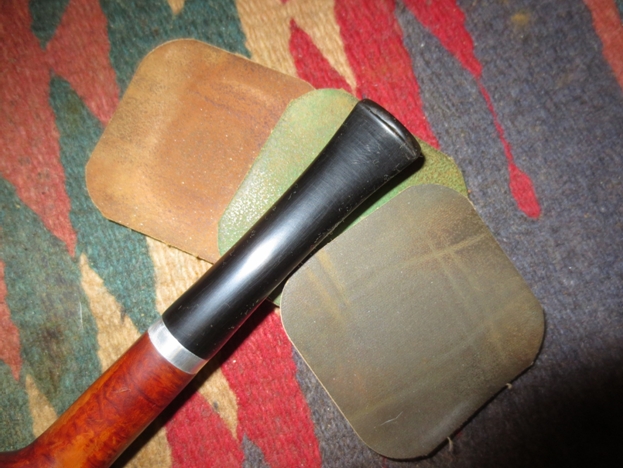 I rubbed the stem down with Obsidian Oil and dry sanded the stem with 3200-12,000 grit pads. I polished the band with the same and also with a silver polishing cloth. After each set of three pads I rubbed the stem down with the oil. When I had finished the stem I gave it a final coat of the oil and then let it dry.
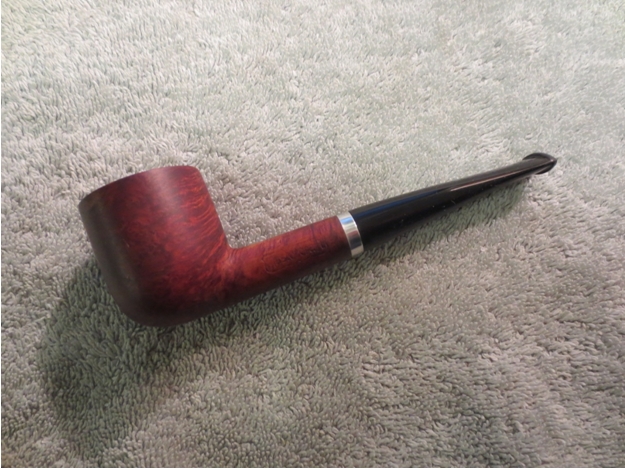
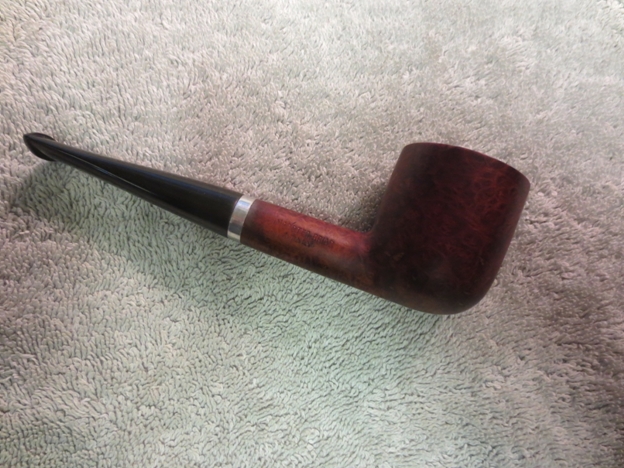
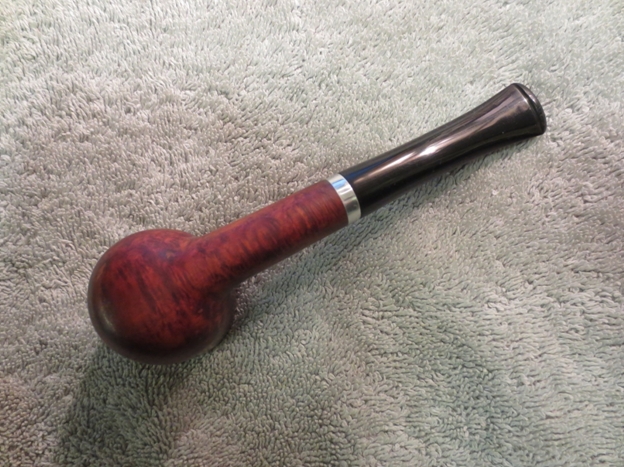
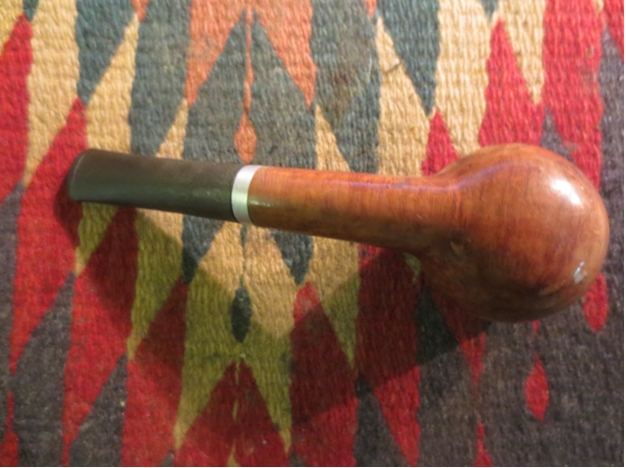
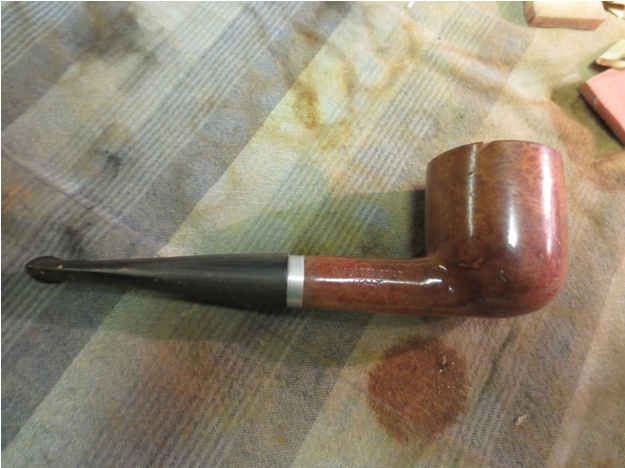
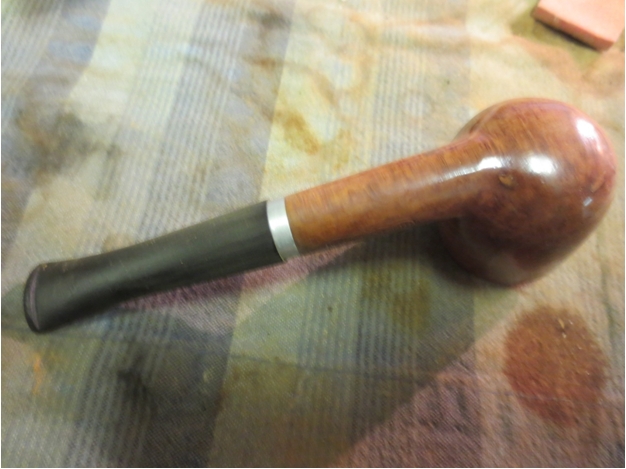
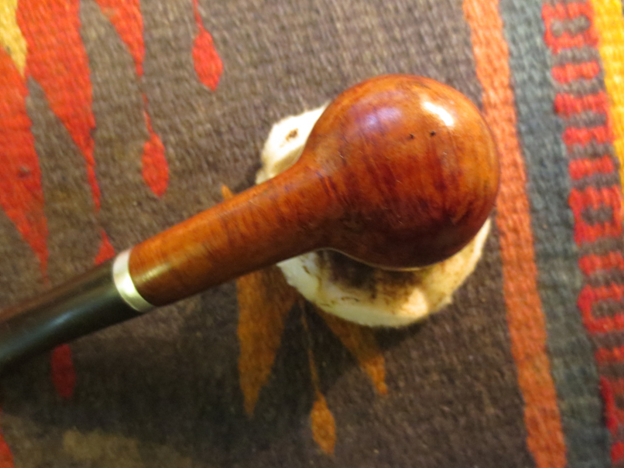
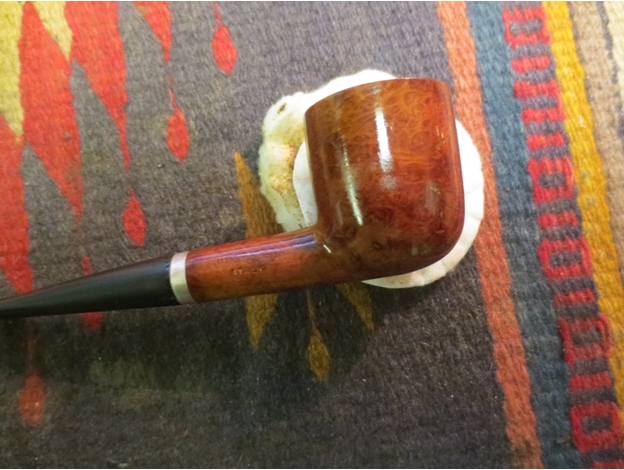
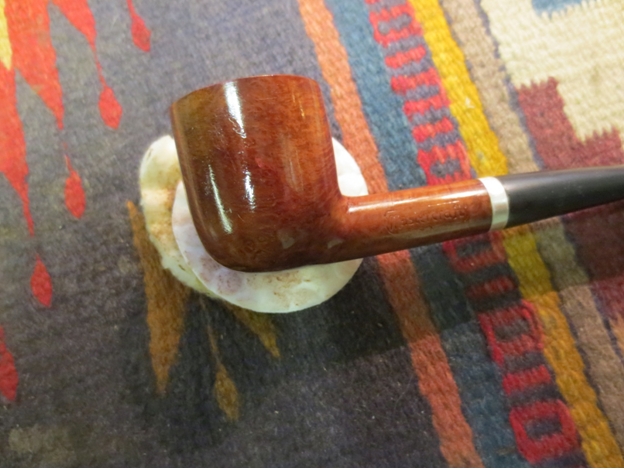
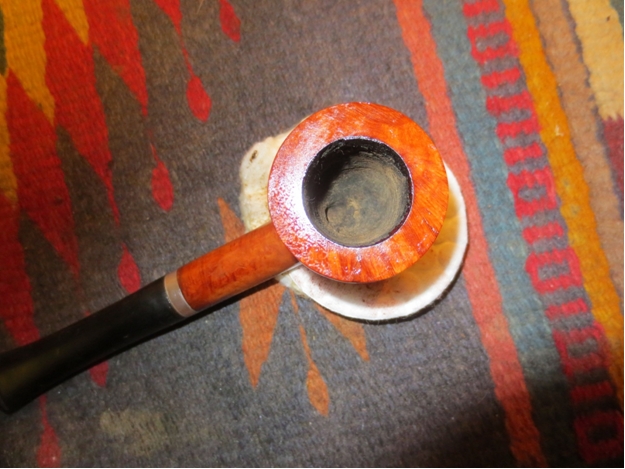
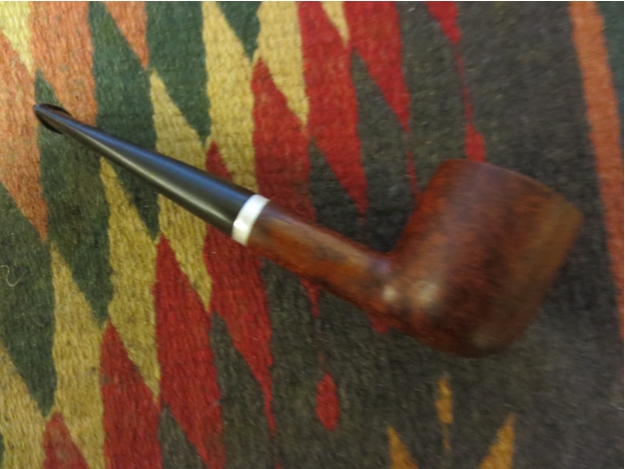
 The next photos show the finished pipe. It is a rich brown/red colour that has warmth and depth to it. The silver band and the new stem make the pipe look quite rich. I figure it is at least as nice or nicer than when it left the Mastercraft warehouse.