I have spent a bit of time on this old Croydon Bent (Peterson Line of seconds I believe). In fact I probably spent more time than I should have done, judging by other refurbishers throw away buckets. Sometimes I just have to see what I can make of an old tired ugly looking pipe. It is a challenge more than it is a labour of restoration. In fact it could probably be argued that when I am done with this one it really no longer should be considered a Croydon at all. I suppose it is a matter of how far one goes in the process of restoration before it becomes a totally new work of briar. In my mind this one would probably qualify for the removal of the name – or at least a hyphenated name CROYDON-REBORN.
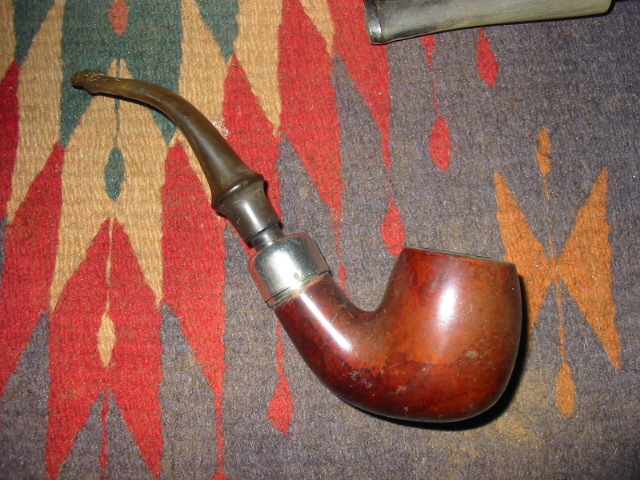
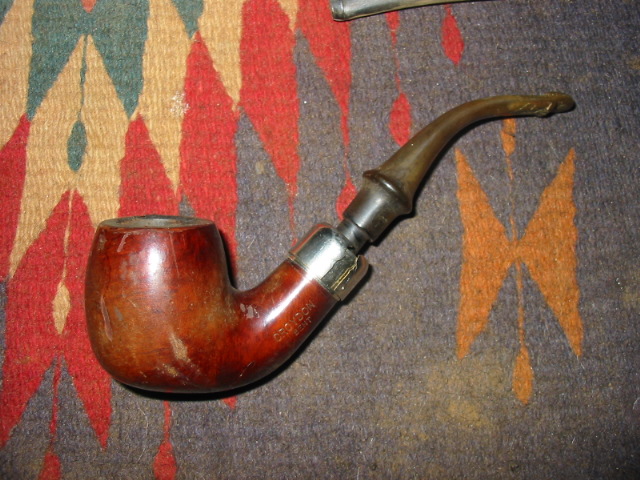
When I received this one it was in pretty rough shape. In the pictures below you can see the state of the finish on the bowl. There were places where pieces of the lacquer finish were peeling away and falling off. The stain on the bowl was spotted and variegated. Even the many fills all over the bowl had shrunken significantly and what remained were dips and divots in the surface. The rim was one part of the pipe that was in pretty good shape. It had some tar build up and a bit of blackening but no nicks and dents. That is actually remarkable given the condition of the rest of the pipe. The silver shank cap was split in half and torn from the stem being jammed in and out of the bowl. The P-lip stem was also marked with tooth chatter, was oxidized and dented.

I did not have any end caps in my collection of pipe odds and ends so I decided to put a regular nickel band on the shank as it was thin and weakened from the broken shank cap. I cleaned the shank end with alcohol and dried it out. I heated a band and pressure fit it on the shank. There was a small gap at the edge that I filled with wood glue to give stability to the shank. I probably should have waited to apply the band but the shank seemed fragile and I wanted to stabilize it before further work on the bowl.
I have never liked the thin Peterson type stems so I decided to restem it with a saddle fish tail stem. I used my PIMO tenon turner and turned the tenon close and sanded it to a good tight fit. I used my Dremel to take down the excess diameter of the stem and worked on the ridges and seams with the Dremel. I sanded the roughness of the new stem until it was smooth with 240 grit sandpaper followed by 400 and 600 grit wet dry sandpaper and a bit of water. It was finished with the regular regimen of micromesh pads – 1500, 1800, 2400, 3200, 4000 and 6000 grit. The final polish was done on the buffer with White Diamond and carnauba wax.
The bowl was a major problem. I tried to strip the bowl using acetone and 99% Isopropyl alcohol and could not break through the finish – don’t what they coated it with but it would not let go. I resorted to sanding the bowl to try and remove the finish and sanded, sanded and re-treated it with acetone and alcohol. The finish was finally gone and I had a raw briar bowl with so many fills in it that it looked like it had freckles. I decided to try staining it with a dark brown stain to hide the fills and give it a good deep colour that was a bit opaque. Once it was dry I buffed it and polished it with wax. It looked really awful and I hated it!!! Soooo… I decided to rusticate it. I used my fist full of nails (pipe with nails inserted in it) to do the rustication that appears in the photos below. The previous coat of stain that I had applied helped with the process of rustication and I could clearly see where I needed to do a bit more work. This is when I wished that the band was not present as it would have been a bit easier to avoid contact with the band and the rusticator.
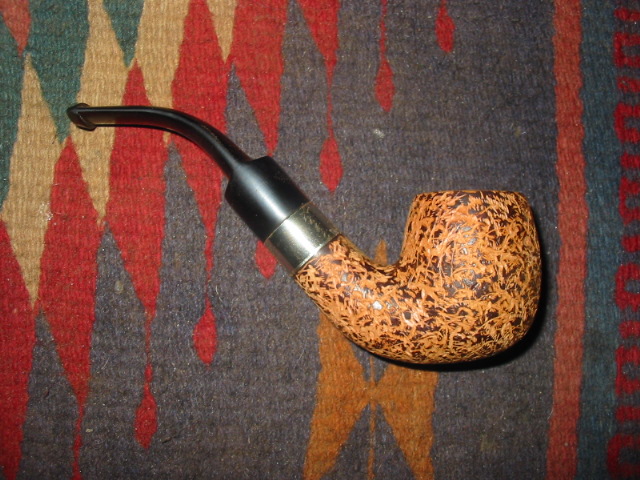
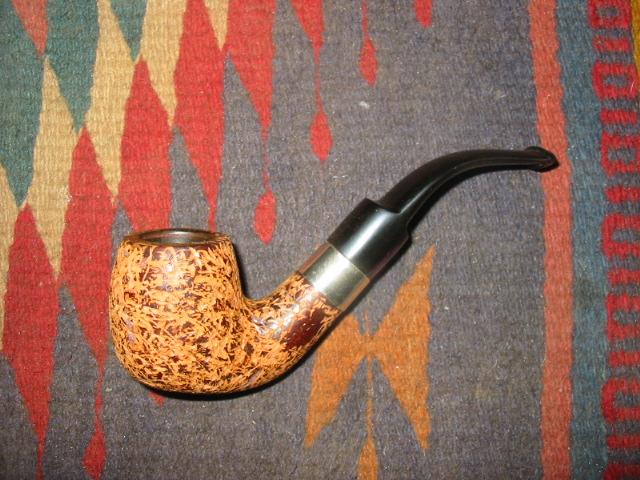

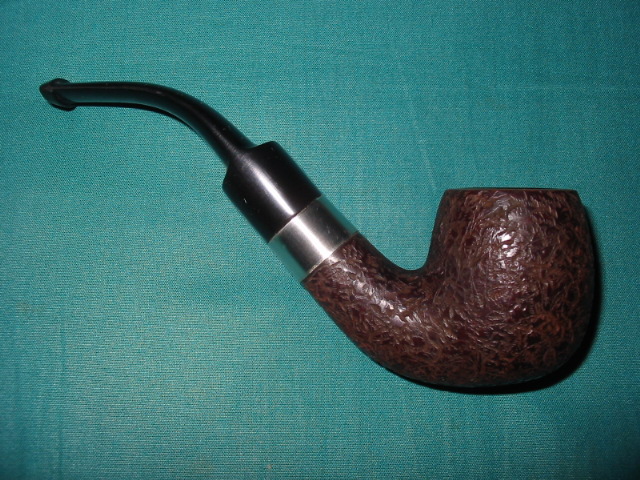
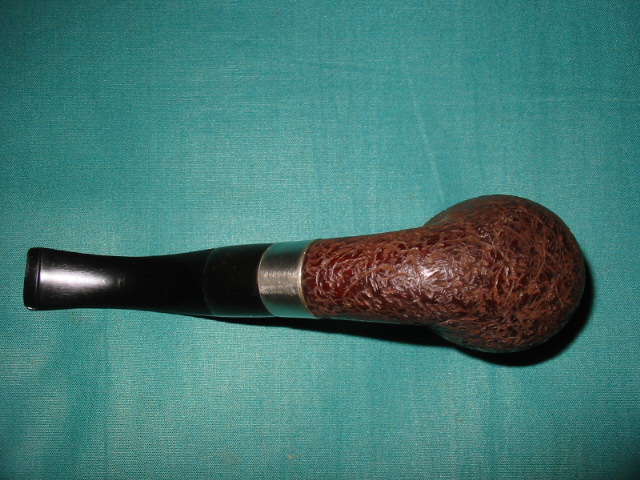
Once the rustication was acceptable to me, and the pipe felt good in the hand I prepared it for staining. On this one that involved using the floral frog to knock off any loose chips of briar and to smooth out the surface before I wiped it down with a damp alcohol cloth. I also sanded the rim smooth and used the micromesh to get rid of any scratches. A smooth rim and a smooth spot around the Croydon stamping would look good on the finished pipe. I decided to go for an aged leather like finish on this pipe as it seemed to fit the shape and the look. I gave the pipe a coat of black stain as an undercoat and then buffed it off the high spots. I gave the entirety a coating of Fiebing’s Medium Brown for the top coat. I flamed it and after drying took it to the buffer for a light buff. I waxed it with Halcyon II and buffed it with a soft cloth to give it the final look. Below are pictures of the finished pipe. In my book it is a significant improvement over the original!


Wondering the approximate age of this pipe I have it’s a croydon and made it Italy thanks
LikeLike
Josh I wish I could get definitive information on the Croydon’s pipes but I have nothing to add to the mix… they are a bit of a mystery to me.
LikeLike
Pingback: A Possible Peterson Croydon That Could Be the Twin of another Reborn Pipe; or, Two Minds with Almost a Single Thought | rebornpipes
Steve, I just came across this in my search for the origin of Croydon, a rusticated version of which I obtained in a lot last November and have restored. I was amazed to see that you took the battered old smooth Croydon and rusticated it, then gave it what you call a leather look (and I agree) using black stain before buffing that down and adding a final medium brown. Very clever. But what really horrified me is that yours is almost the twin of mine, which I stripped of the original black stain (for no particular reason except that I’m a little sick of that choice by makers and wanted to see what challenges might lay beneath) and re-stained with Lincoln Marine Cordovan. But you’ll soon see it all in my blog!
Robert
LikeLike
Thanks Robert. I look forward to giving it a read and seeing what you did with it. That one I did had so many fills that it was just ugly. The metal cap was split and was barely clinging to the shank end.
LikeLike
Wow, this turned out like a piece of art Steve, what a fabulous transformation, very well done, love the new stem, suits it perfectly. 🙂
LikeLike
The stem indeed is a pefect match! I just restored another Croydon that came with the original identical stem.
LikeLike