by Steve Laug
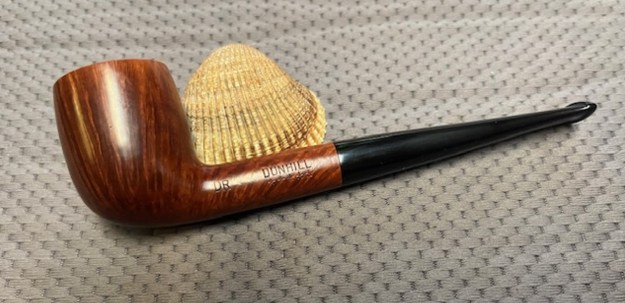
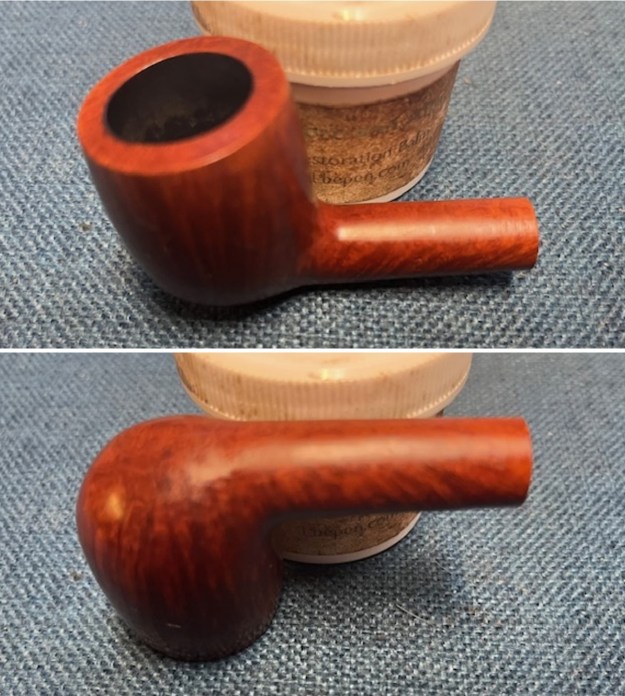
I was recently contacted by a fellow here in Vancouver about some pipes he had. He was referred to me by a local pipe shop. I was unclear if he wanted them cleaned or exactly what. When he came on the weekend he brought six pipes in two pipe boxes for me to have a look at. I spoke with him about the cost of restoring them. It finally became clear to me (I guess I am slow) that he wanted to sell the pipes. He was tasked with the job by his sister in law as the pipes were from her late husband’s collection. As I unpacked them it was clear that they were some nice pipes and some were higher grade. All but one was smoked and had the heavy smell of fruity aromatics to them. Some had cake in the bowl and lava on the rim. Of the six, four of them had significant rim damage – bowls out of round, burn marks, cut marks. The saddest part is that the damage was most significant on the higher end pipes. Most of them had tooth marks in the stems. Obviously, they had been his late brother in laws favourites and he had enjoyed them. He left them with me and I went over them, researched the brands and wrote up an offer for him to present to his sister in law. By the end of the day we had a deal. The six pipes now have a new home and the fruity smell needs to be exorcised! I set aside the long queue of pipes I am working on here to work on the first of these pipes. I bumped it ahead of the queue as it would probably be one that I held onto to smoke. It is a beautiful looking Dunhill Straight Billiard. It is stamped on the left side of the shank and reads DR next to the bowl/shank junction followed by DUNHILL [over] ***** (five stars). On the right side it is stamped Made In [over] London England with the superscript number 22 which will give me the date of the pipe. The DR stamp and the stars were new to me. I would need to do some digging on the details. The bowl and shank had beautiful straight grain around sides. The finish was shiny but there were a lot of dents, scratches and wavy portions on the shank top and underside. It was going to take some work. The bowl and rim top were clean or cake and lava but a very prevalent smell of aromatic, fruity tobacco surround he bowl. The stem was clean but also had the same wavy spots on both sides of the stem. I wonder if the marks were caused by over zealous buffing somewhere along the way. They were just too consistent from the bowl shank junction to the button on both sides. Other than that, there were no tooth marks or chatter on the stem surface and it was very shiny. The slot in the button and internals were dirty.
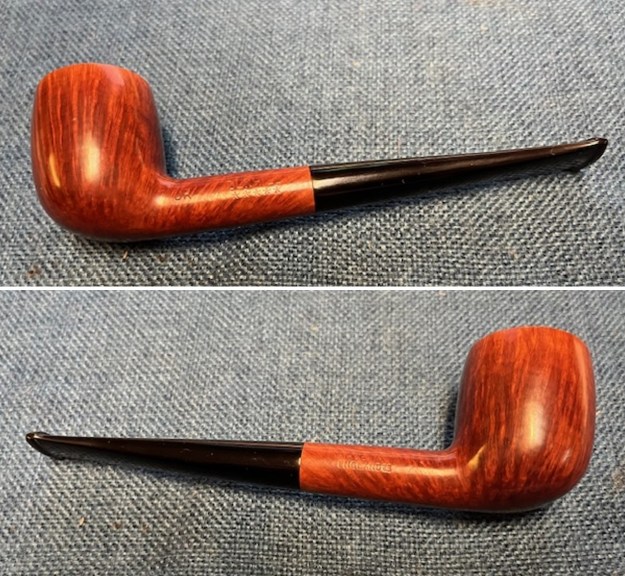
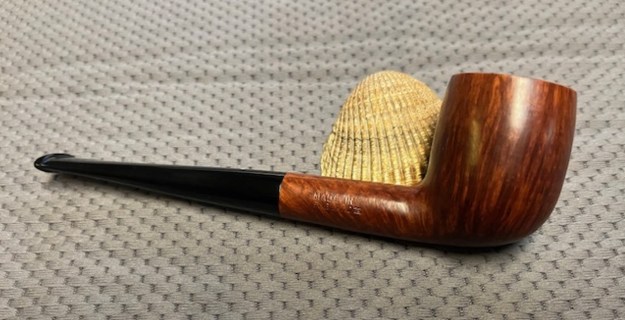
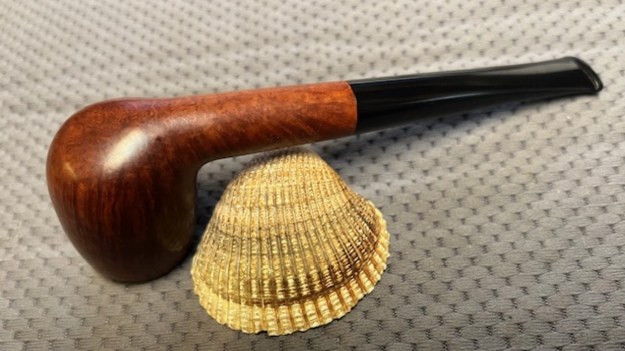
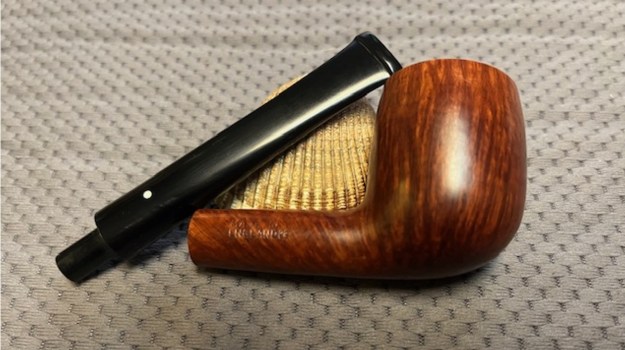
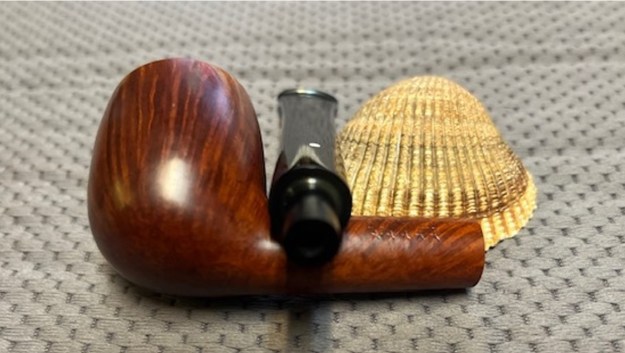
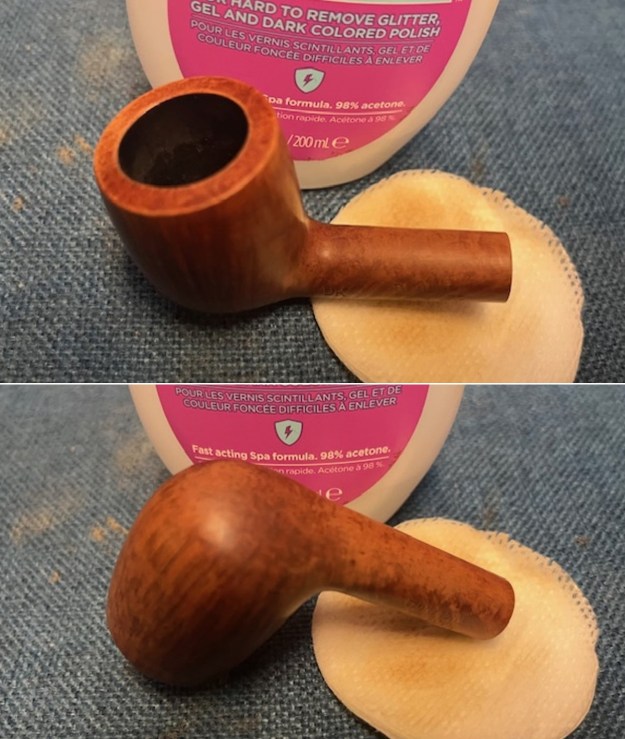
 I took photos of the bowl and rim top to give you and idea of what I see. It is too bad that Word does now allow for the inclusion of smells because this is filling my work area. I have a candle going to mask the smell a bit. I also tried to capture the waviness in the stem surface and shank but was not all that successful in the photos. It is very present to the touch – a ripple from button to bowl…
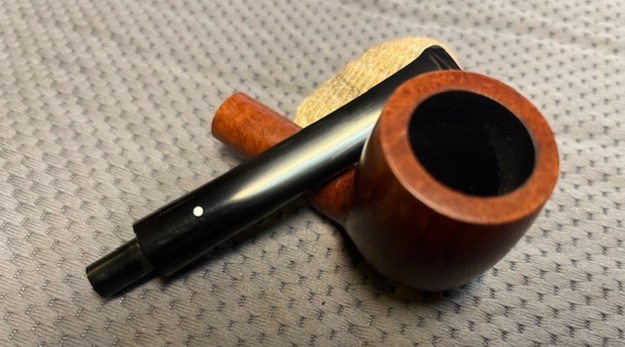
 I took photos of the stamping on the sides of the shank. It is clear and readable as noted above. Unique stamping for sure that I will need to unpack later.
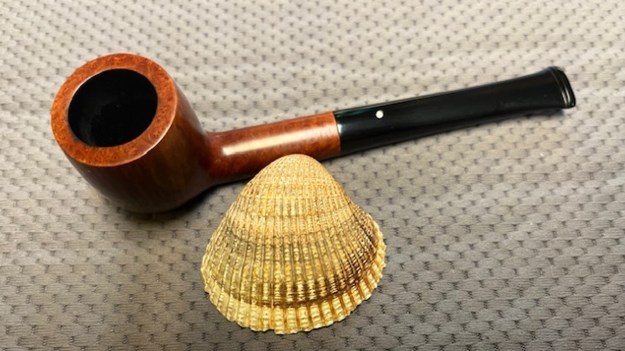
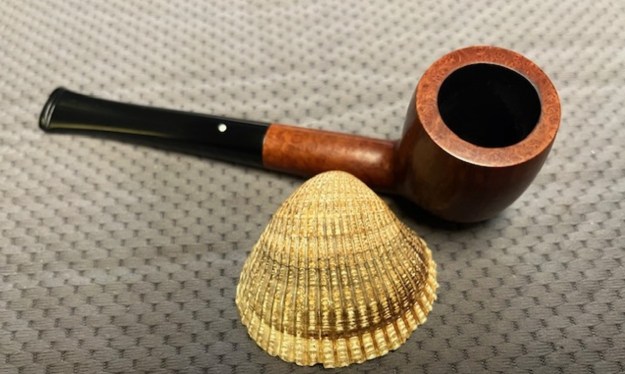
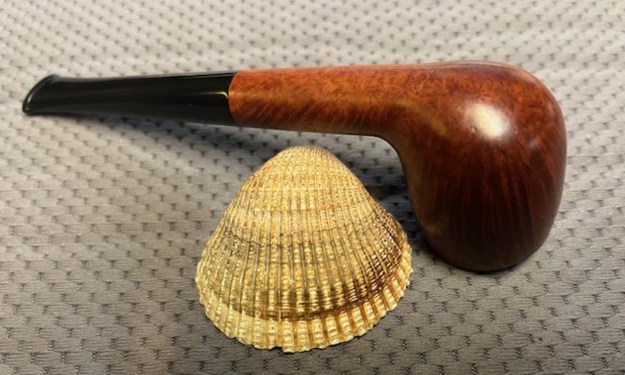
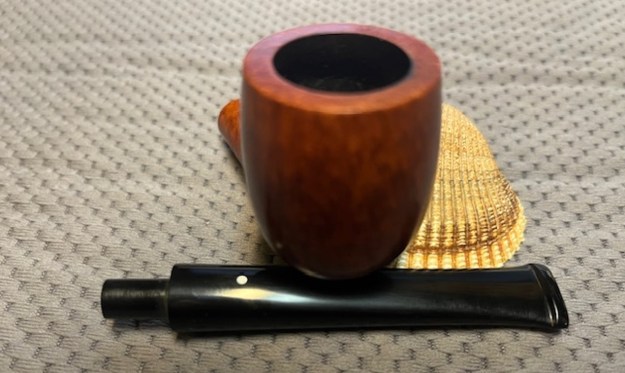
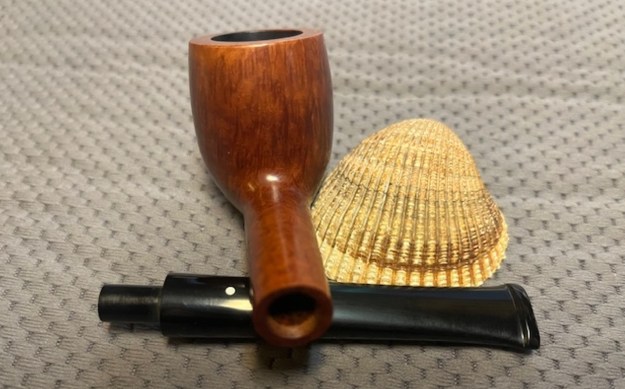
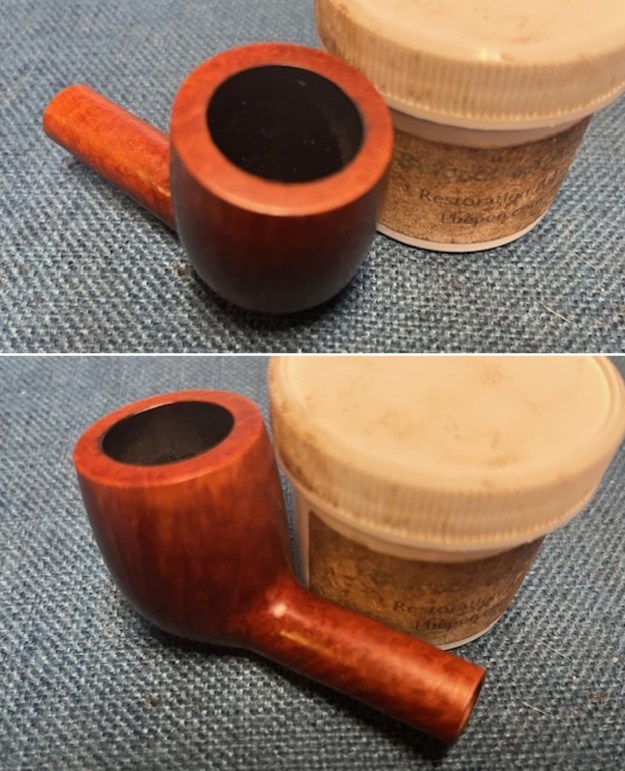
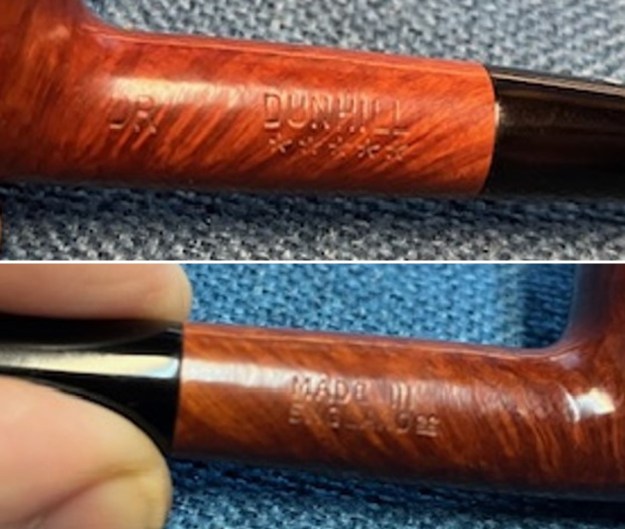 I took photos of the bowl with the stem removed to give a sense of the proportion and appearance of the pipe.
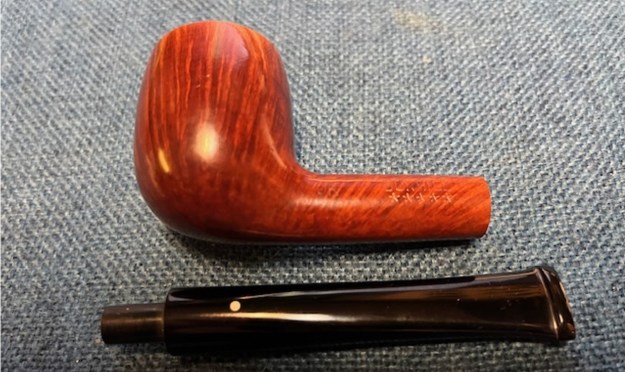 I decided to take a few moments to date the pipe with the superscript date number 22 following the D in England. I turned to the date key on Pipephil’s site to clarify the date on this particular pipe (http://www.pipephil.eu/logos/en/dunhill/cledat-en1a.html). There were no patent numbers so that took me to the Part 2 of the Dunhill Dating Key. I selected the 22 suffix that took me to the second column which I have marked with a red box. It gives the simple formula of adding the 22 to the year 1960 for the year of manufacture. That gave me the date of 1982. The pipe I was working on was made in 1982 so I had a start in identifying the stamping on the pipe.
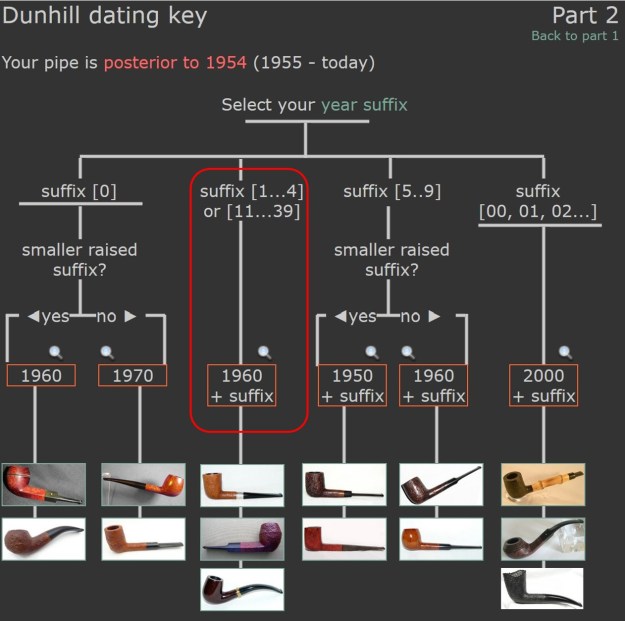
Now it was time to work on the rest of the stamping and pin down the parts of that unusual to me stamping. I searched Google for the Dunhill DR stamp and found info on Pipephil’s site that gave information on the DR line(http://www.pipephil.eu/logos/en/infos/dunhill2.html). I quote the information in part from that section.
The “DR” (Dead Root) stamping on the left side of a Dunhill pipe corresponds to a straight grain.
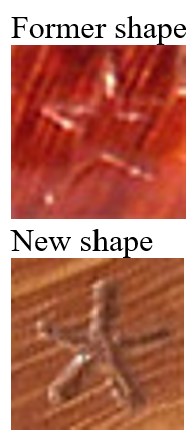
“Dead Root” is a commercial label and doesn’t mean the root was extracted when the tree was already dead…The first stars appeared mid 1970’s and were a brief attempt to grade the pipe both as to grain (the letter) and to size (the stars). 1979: the DR are graded with 1 to 6 (or 7?) stars. The shape of the stars has been modified.
 Stars grading may coexist on the same pipe with letter grading.
Stars and letter grading equivalency after 1979:
| A | B | C | D | E | F | G | H | I | J | |||||||||
| * | ** | *** | **** | ***** | ****** | (7*) |
This information tells me that the DR I was working on would have been stamped as a DRE. After 1979 the E was replaced with five stars *****. That dating works along with the 1982 date that I have worked out on the number stamp following the D in England.
From there I turned to Pipedia where there was also an article on the DR line stamping (https://pipedia.org/wiki/About_Dunhill_Dead_Root). I have included a screen capture of an advertisement for the DR line from the article and then I quote pertinent sections below.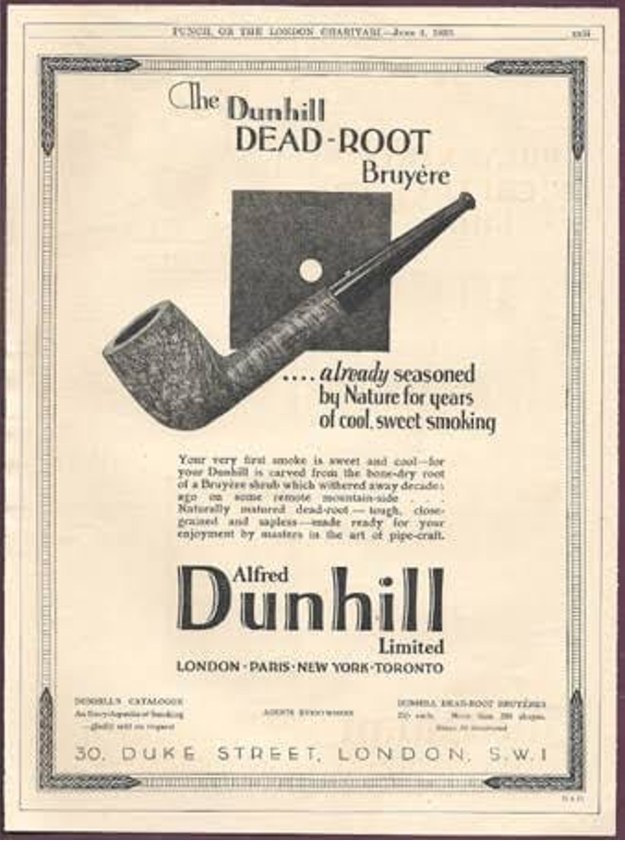
Dunhill’s most prestigious line, the “Dead-Root”, is filled with many controversies, but certainly has its place in the sun. Among the connoisseurs of the brand, this is a very desired series. In addition to the pieces that were made under the management of Alfred Dunhill (until mid-1928) and limited in number, the D.R. has a special place in the heart and collections of nearly all Dunhill collectors.
“Beginning by at least 1915 if not earlier (perhaps as early as 1910) Dunhill stamped straight-grained Bruyeres, and later straight-grained Roots, “DR” on brand side of the bowl at the place where one would normally find an “A” or “R”. “DR” stood for dead root a term used to refer both to that part of the briar from which most quality pipes, including Dunhills, are made and to a briar burl that was dead before it was harvested. Initially, however, there was an additional distinction conveyed in the “DR” stamping beyond graining since prior to 1920 DR’s were hand-cut in London from burls while most Bruyere’s were only finished in London from French turned bowls.
While to some extent the straight-grained DRs may be the result of spotting the grain in the course of the early production process, the common statement that ‘DR’s are rare because they supposedly occur by accident in the course of standard shape production is incorrect. In fact, most “DR”s are derived from inspecting raw briar for straight grain prior to production or specifically purchasing the same and when so found or purchased selecting or specially designing a pipe shape to best fit the grain.
As the Bruyere was Dunhill’s only smooth finish prior to 1931 all early DR’s are necessarily Bruyeres,” The Root finish was put in production in 1931 specifically because the company desired to have a better grained naturally finished pipe in the line and in 1932 DRs became associated with that finish. Prior to 1932 DRs were stamped simply “DR” but with their introduction, Root DRs were stamped “DRR”. Presumably, the second “R” signifies the Root finish. Since I have seen no examples I do not know if Bruyere DRs after 1931, if any, were stamped “DRA” but I suspect that at least for a brief time there may have been such and if so, were so stamped since otherwise the second “R” in the Root DR stamping would have been unnecessary.
As discussed in connection with the “A” stamping, prior to the war, if not after, up ticking in DR pricing was apparently signified by square subscript stops. In addition, it appears that early DRs dating from the 1910s to the early 1920s were stamped with a one or low two-digit number on the shank next to the bowl (where the shape number normally appears) which appears to be some sort of category (as opposed to shape) number, either price or shape related. (I suspect it was the latter, perhaps the forerunner of the initial Shell stampings in that regard.) The Dunhill catalogs of the 1920s through 1931 consistently show four DR price categories but the precise stamping code to indicate the different price levels is presently unknown. Presumably, there were differing price groupings of the Root DRs in the 1930s but number of such and stampings indicative of the same is presently unknown. In the 1950s Dunhill began grading DR’s “A” through “J”, “J” being the finest. I have seen a 1957 DR stamped “DRR” followed by a horizontal “H” presumably signifying the “H” grade but I do not know the significance, if any, of the horizontal manner of the stamping. In 1979 Dunhill changed it’s DR letter grading system to stars running from one to seven stars underneath the “DRR” stamping with seven being the highest grade and also introduced a DR over XL stamp, presumably to denote larger pipes.” Loring, J. C., The Dunhill Briar Pipe, The Patent Years and After (self-published, Chicago, 1998).
“Straight Grain pipes are stamped with DR (“Dead Root”) followed by additional markings, shown below and listed in rising order. They can today be distinguished between Root Briar Straight Grain pipes (now 8 categories in use DR ★ – DRH) and Amber Flame Straight Grain pipes (3 categories).” Hener, K. S., Product Line Director – The White Spot Smoker’s Accessory Division and Walthamstow site.
I have also included a chart of the stamping currently on the DR pipes today versus the stamping on DR pipes between 1950 until June 10, 1974. I have drawn a red box around the stamping on the pipe I am working on.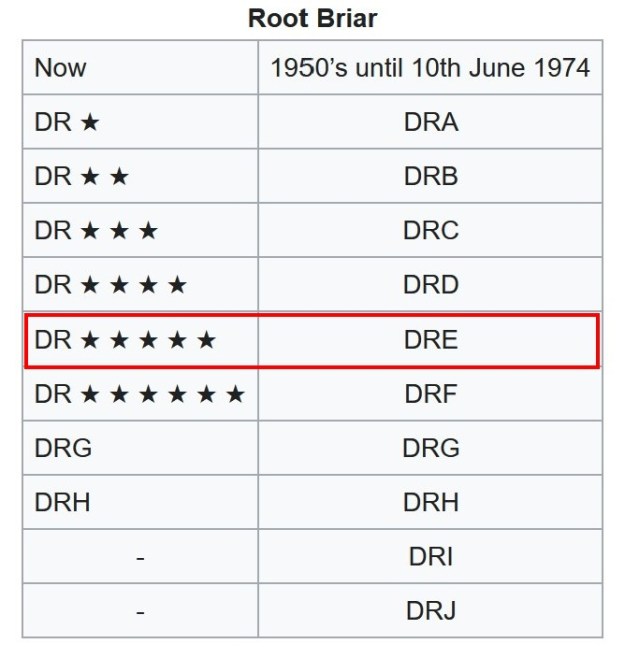 With that information I started working on the pipe. I cleaned out the stinky, fruity smelling tobacco oils and tars in the shank and the airway in the stem. I used 99% isopropyl alcohol, cotton swabs and pipe cleaners and was able to remove the debris and the stench. The pipe actually smelled clean. I may need to deghost it but I will let it dry first and see what remains.
 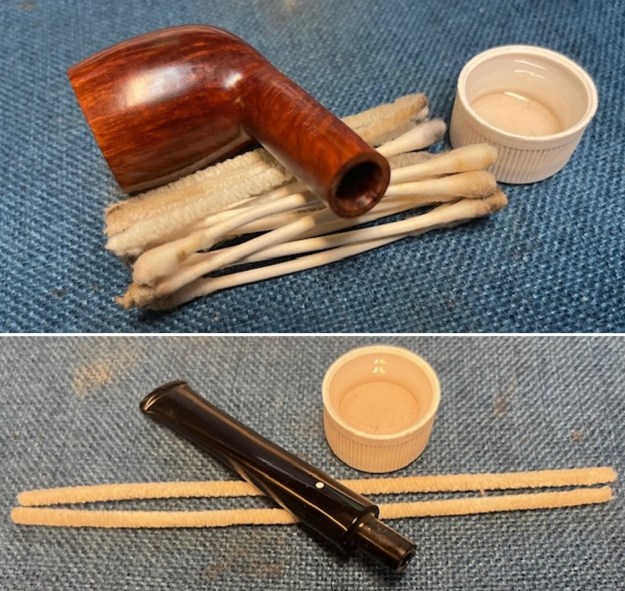 I set the bowl aside and worked on the ripples in the vulcanite on the top and underside from the button edge up to the white spot. I needed to smooth out the heights in the ripples and make the stem surface smooth once again. I sanded the rippled areas on the stem with 320-3500 grit sanding pads. I wiped the stem down after each sanding pad with an Obsidian Oil impregnated cloth to remove the debris and dust. The sanding did the trick and the stem was smooth once more. I still needed to polish it but the bumps and ripples were gone.
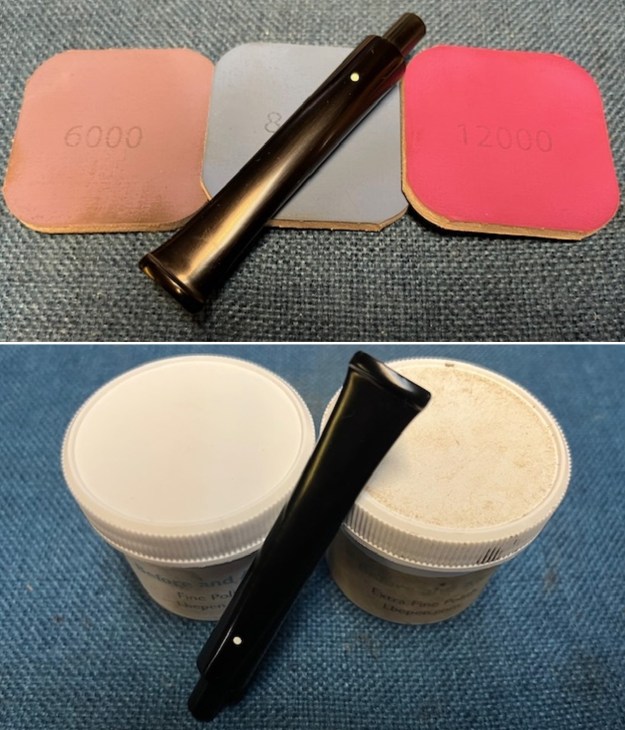
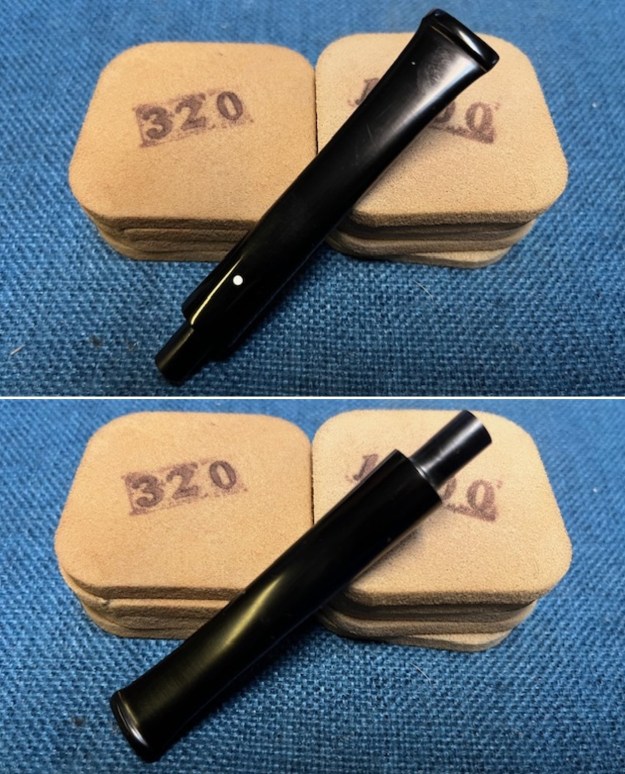 I polished the stem with micromesh sanding pads – dry sanding with 1500-12000 grit sanding pads. I wiped the stem down after each pad with Obsidian Oil. I used some Before & After Pipe Stem Polish, both Fine and Extra Fine to further polish the stem surface. I gave it a final coat of Obsidian Oil and set it aside to dry.
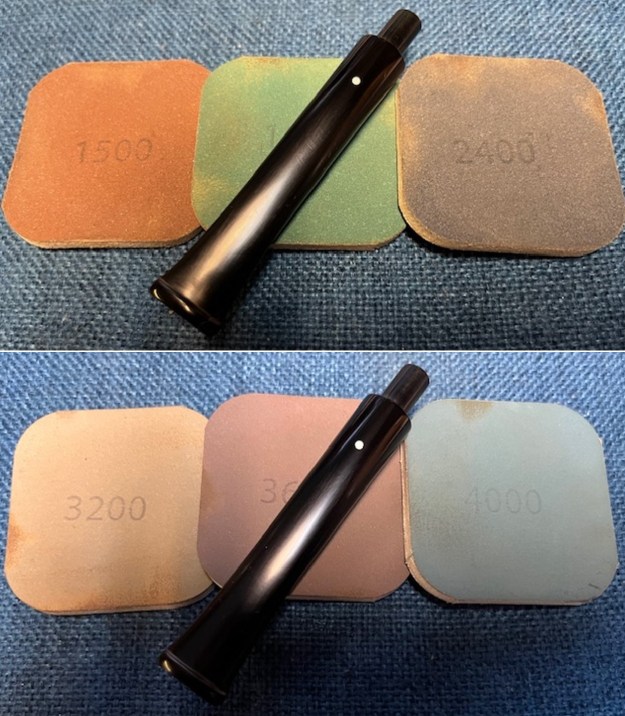
 With the ripples on the stem smoothed out and now smooth to touch it was time to work on the ripples on the top and underside of the shank. The first photo of each pair of photos (the top side and the underside) shows the ripples in the surface of the briar. The second photo of each pair shows the shank after I ran a 320 grit sanding pad over the surface to make the ripples very visible.
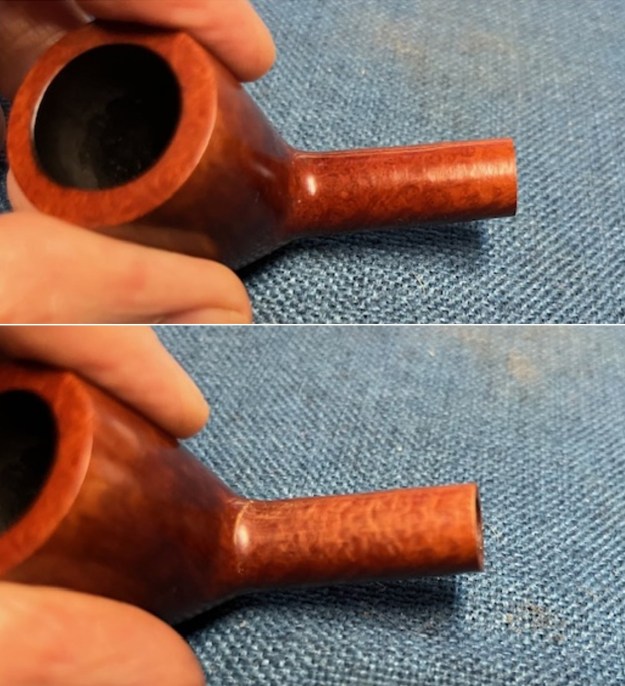
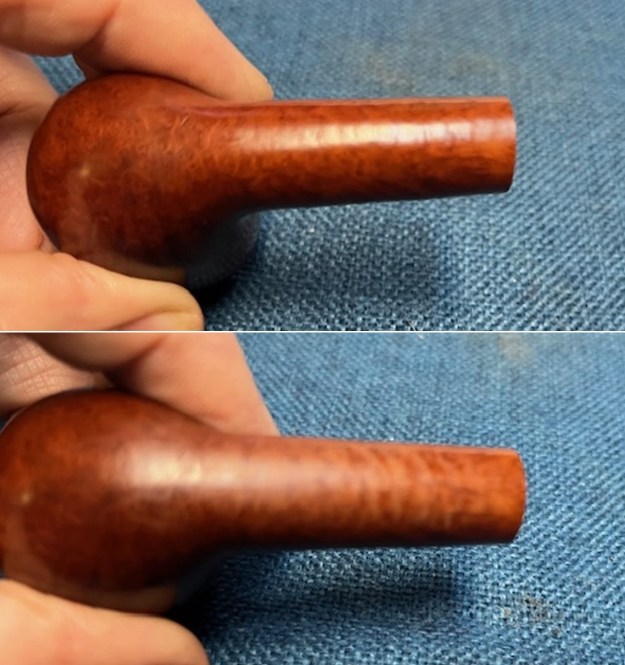 I sanded the ripples on the top and underside smooth with a 320 grit sanding pad. They smoothed out very well and to touch there were no ridges. Even to look at it there were no more ripples and I was happy with the look of it.
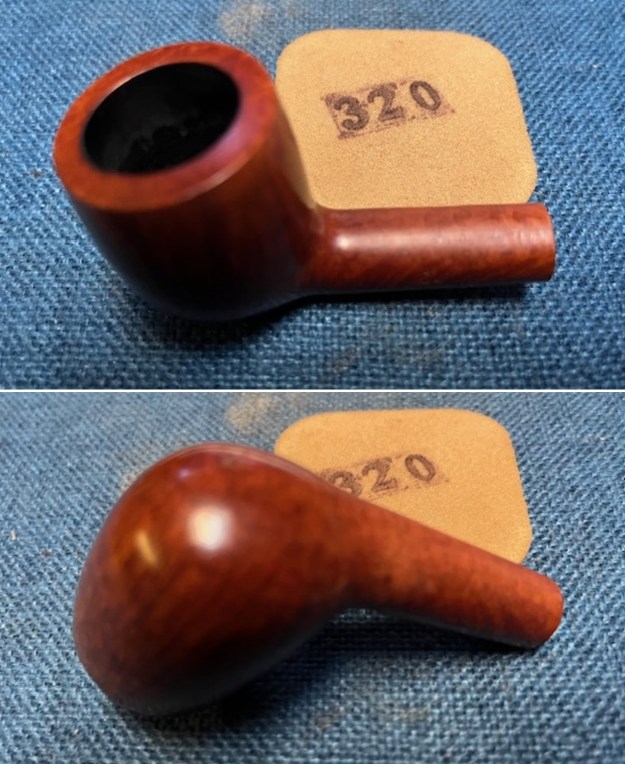 There were also ripples in the finish on the sides and heel of the bowl. To me these were different ripples than on the shank. These were actually in the varnish/shellac coat on the bowl giving it a shine. I wiped the bowl and shank down with acetone to remove the rippling varnish coat on the bowl. It was dull now but it was smooth to touch.
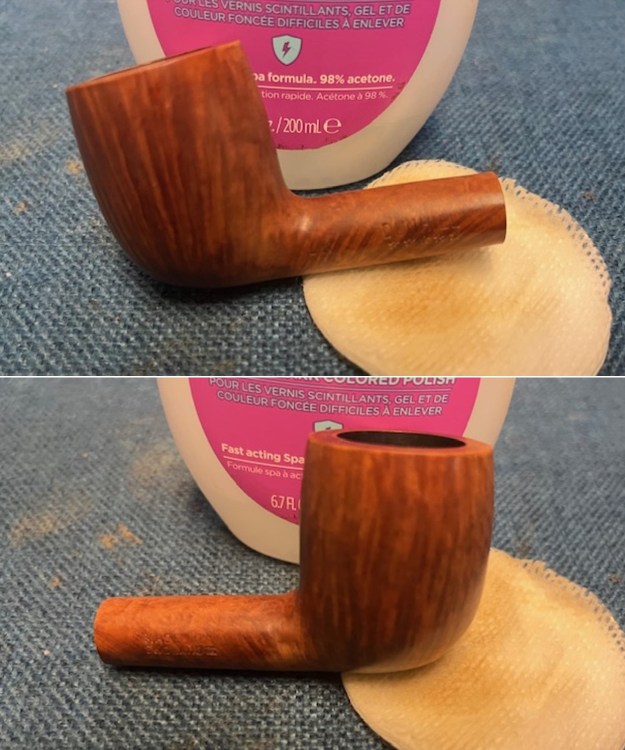
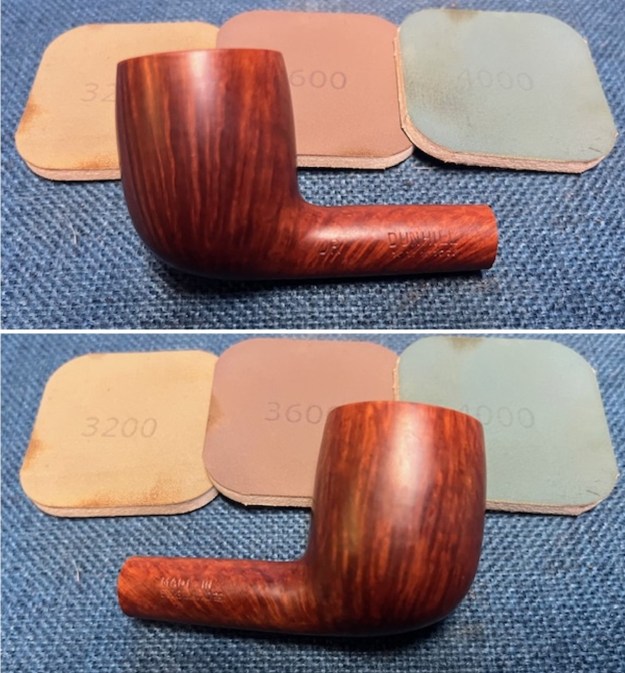
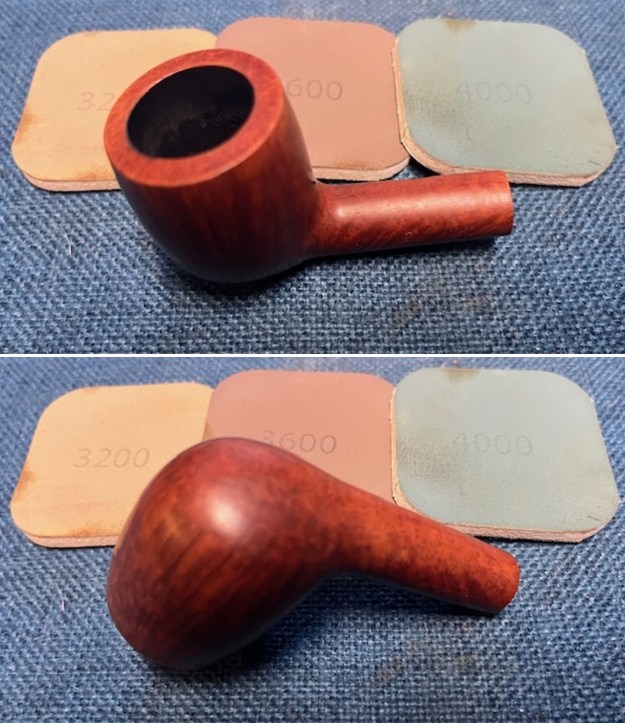
 I used 320-3500 grit sanding pads to smooth out the scratches and nicks in the surface of the briar. There we many small scratches most of them in the varnish coat and lightly in the briar. I wiped the bowl down after each sanding pad with a damp cloth to remove the sanding dust and debris.
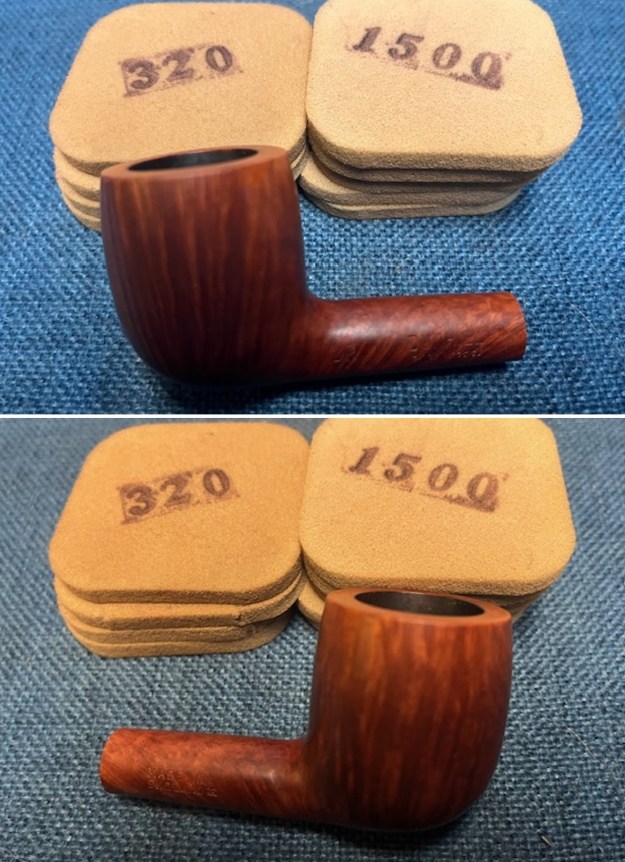
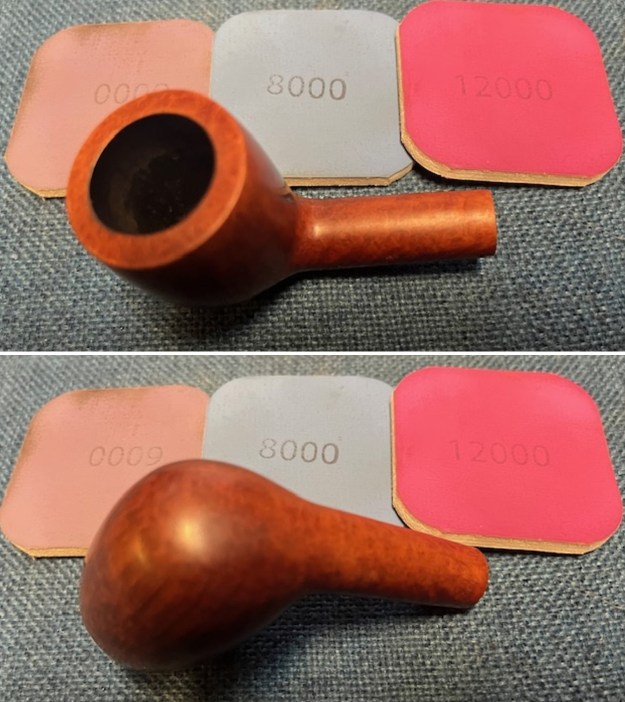
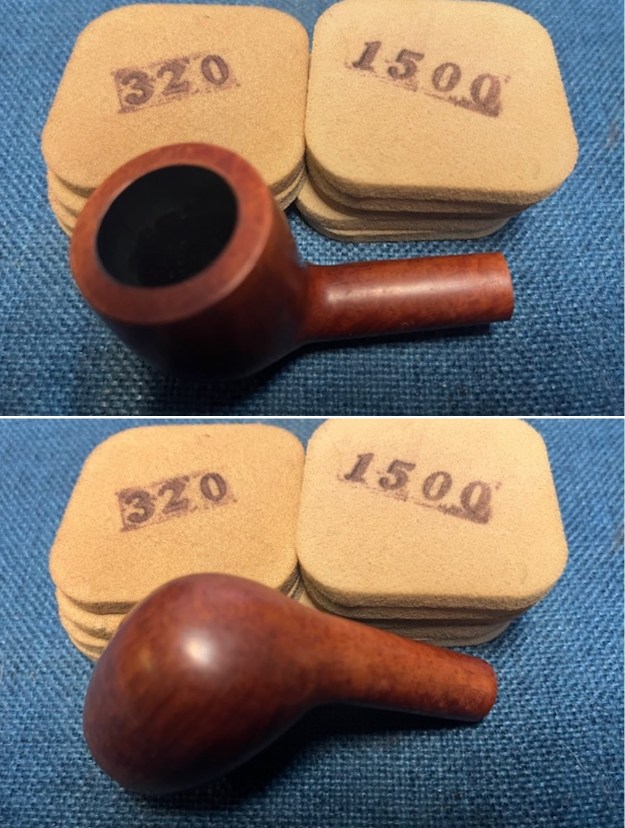 I polished the briar with micromesh sanding pads – dry sanding with 1500-12000 grit pads and wiping down the bowl after each sanding pad.
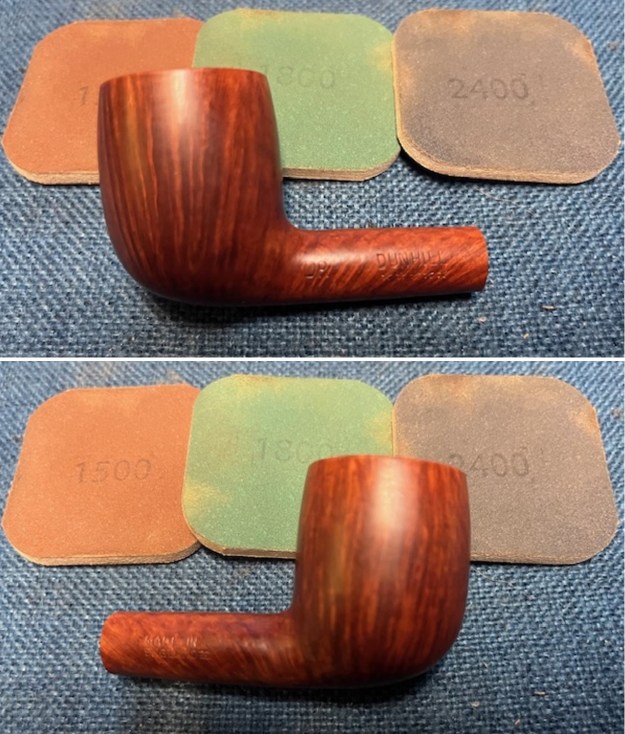


 Before giving the bowl a coat of Before & After Restoration Balm I decided to “deghost” the bowl with cotton bolls and alcohol. I stuff the bowl with cotton bolls and rolled one to fit the shank end. I used an ear syringe to fill the bowl with alcohol. I let it stand overnight to wick out the horrid smell of the previous tobacco. This morning I removed the pads and the ghost was significantly less.
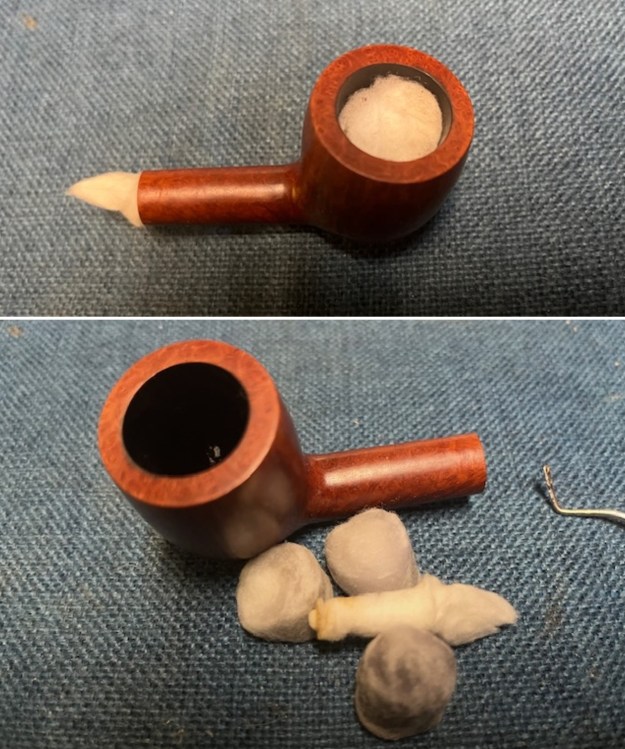 I rubbed the bowl and shank down with Before & After Restoration Balm. I worked it into the surface of the bowl sides and shank with my fingertips to clean, enliven and protect the briar. I let the balm sit for a little while and then buffed with a cotton cloth to raise the shine. The Balm did its magic and the grain stood out.
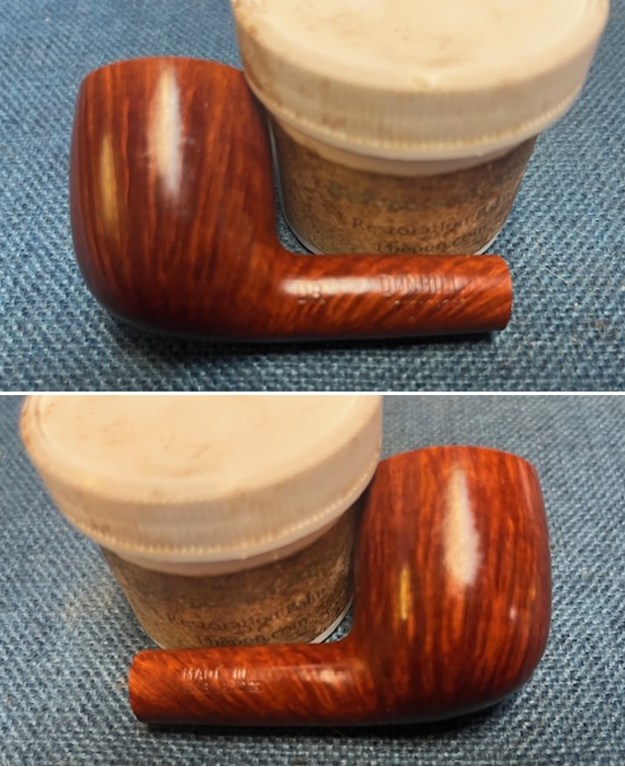
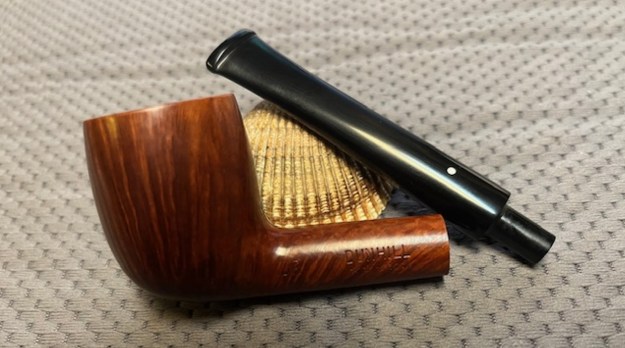
 With the repairs finished and the pipe cleaned I was ready to put the 1982 Dunhill DR***** Billiard back together again. The combination of straight grain briar with a vulcanite taper stem makes for a classically beautiful pipe. The briar around the bowl is clean and really came alive. The rich brown stains of the finish brought the grain to the surface after buffing and gave it depth. I buffed the pipe with Blue Diamond on the buffing wheel using a light touch on the briar. I gave the bowl and the stem multiple coats of carnauba wax on the buffing wheel. I buffed the pipe with a clean buffing pad to raise the shine. I hand buffed the pipe with a microfiber cloth to deepen the shine. The finished 1982 Dunhill DR***** Billiard is a lightweight beauty and feels great in the hand. Give the finished pipe a look in the photos below. The dimensions of the pipe are Length: 5 ½ inches, Height: 1 ½ inches, Outside diameter of the bowl: 1 ¼ inches, Chamber diameter: ¾ of an inch. The weight of the pipe is .99 ounces/28 grams. I will be adding this one to my own collection as it is a rare one that I have not seen and probably will not see again any time soon. I am looking forward to enjoying a great smoke in it very soon. Thanks for reading this blog and my reflections on the pipe while I worked on it.