by Steve Laug
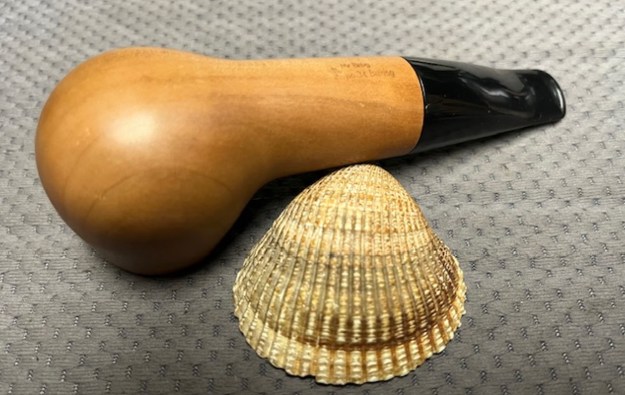
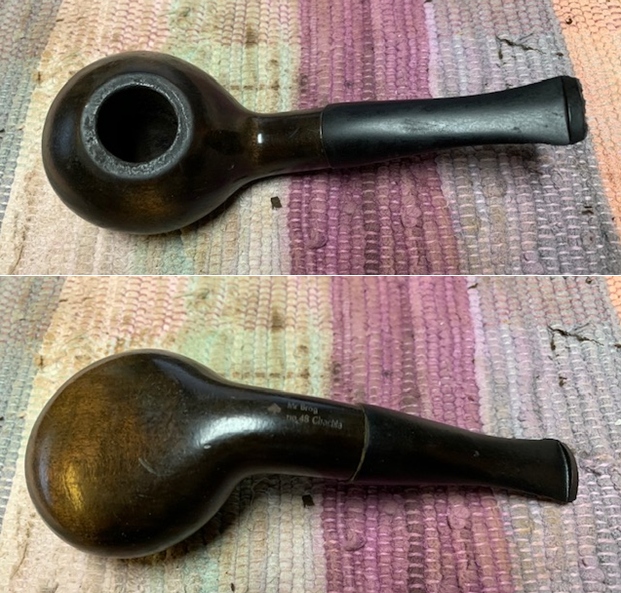
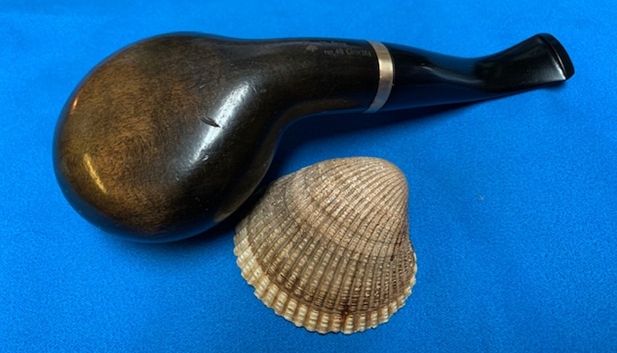
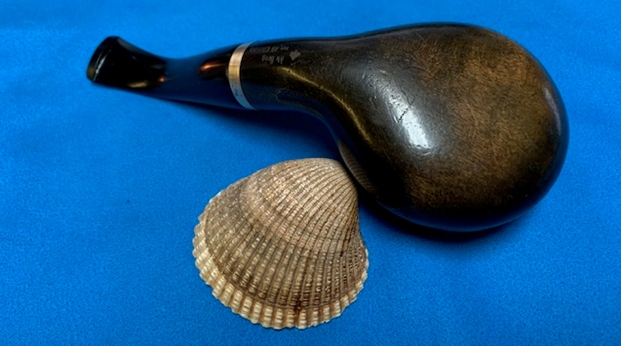
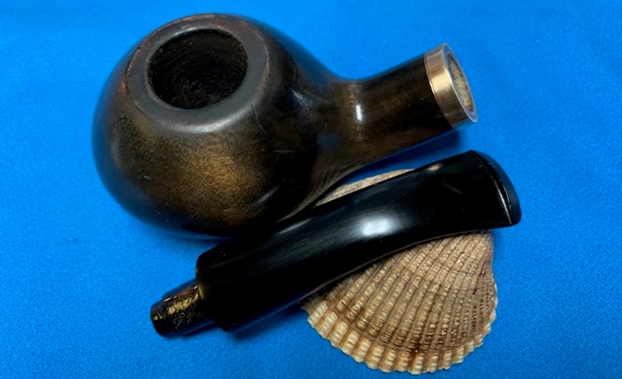
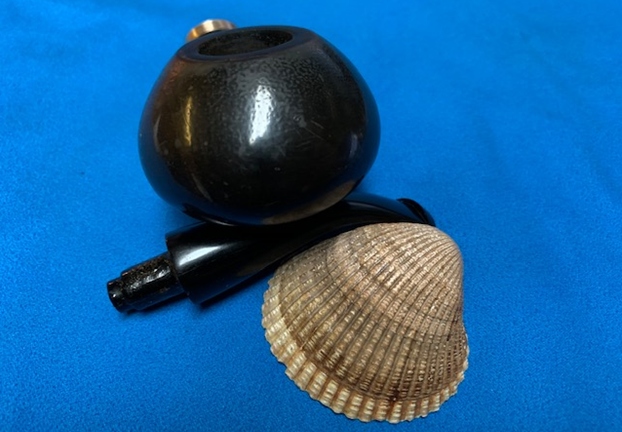
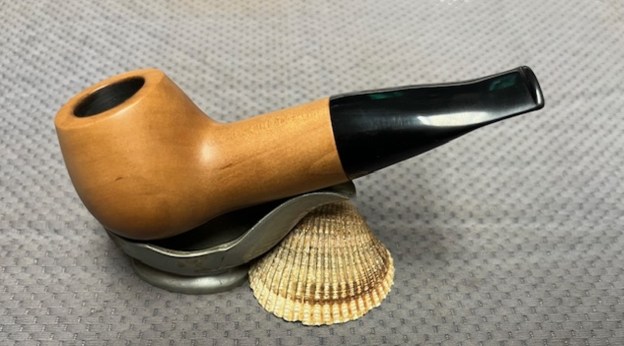
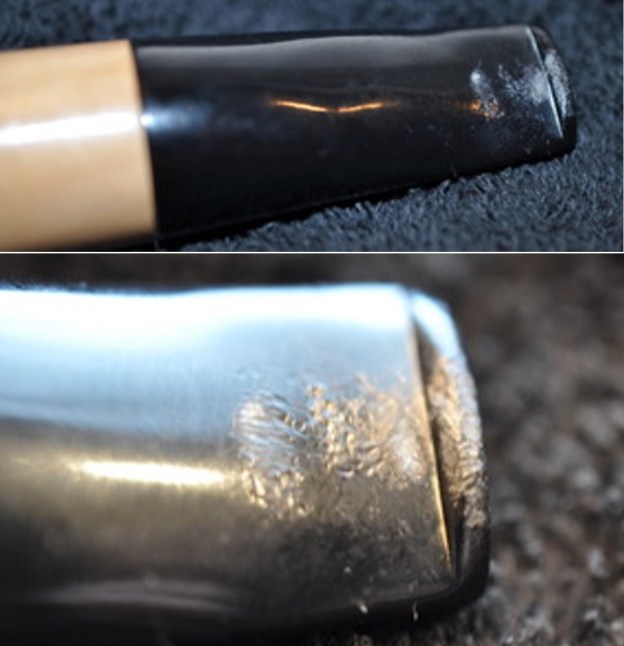
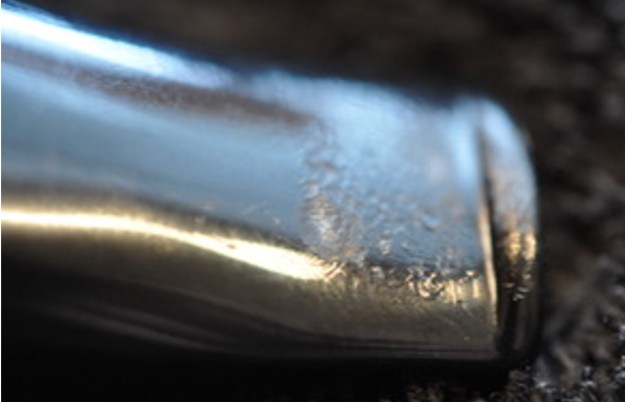
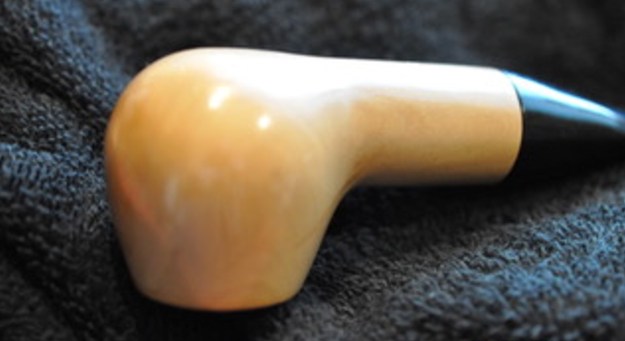
 The next pipe that I am working on came from a friend in Naples, Florida, USA on 07/17/2024. It was very dirty and had a heavy varnish coat around the Pearwood bowl and shank. It was a natural finish under the varnish. It was dirty and had hand oils ground into the finish. The bowl had a thick cake in the bowl and a coat of lava flowing onto the inner edge and the rim top. The thick taper stem was very dirty, oxidized and had tooth marks and chatter on both sides ahead of the button. There was a white spot on the topside of the stem. The fit of the stem to the shank is perfect. The pipe is stamped on the underside of the shank and read Mr Brog [over] no. 34 Bulldog. To the left of the stamping was a large stamped cloverleaf. Jeff took photos of the pipe so I could have a sense of what it looked like before he started his work on it.
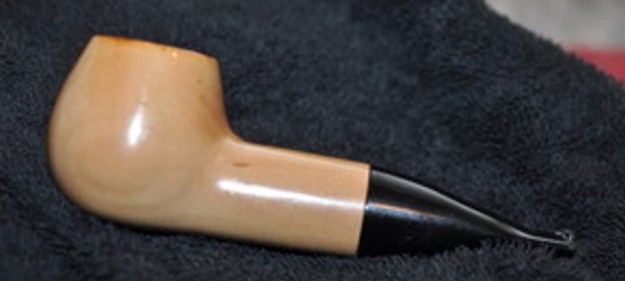
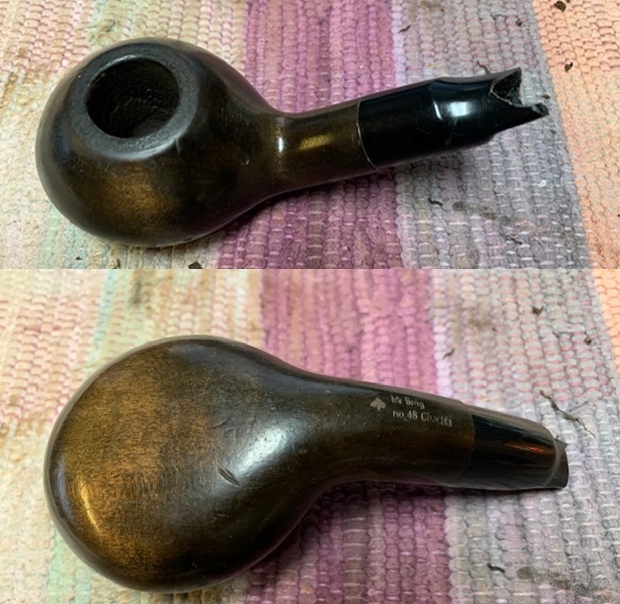
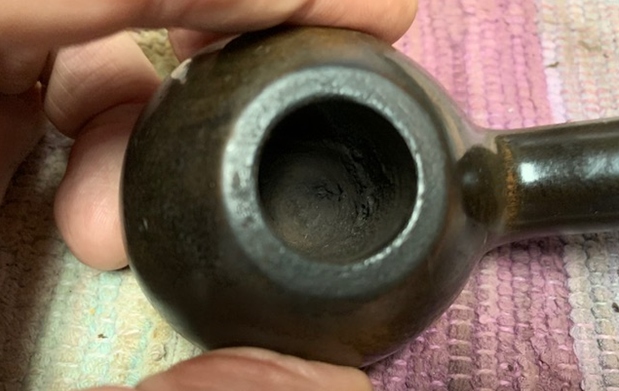
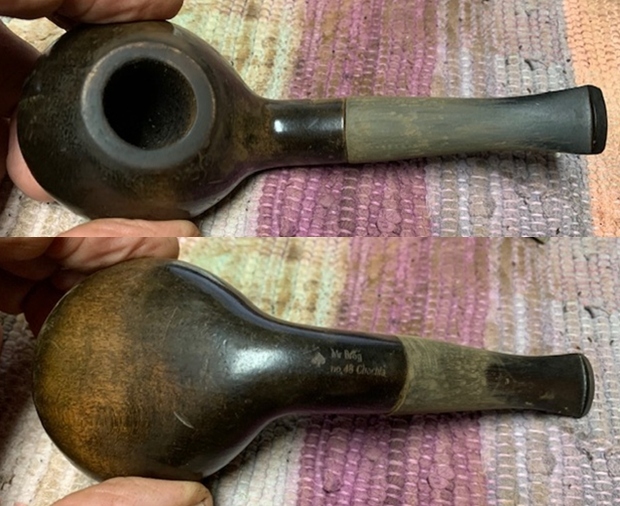
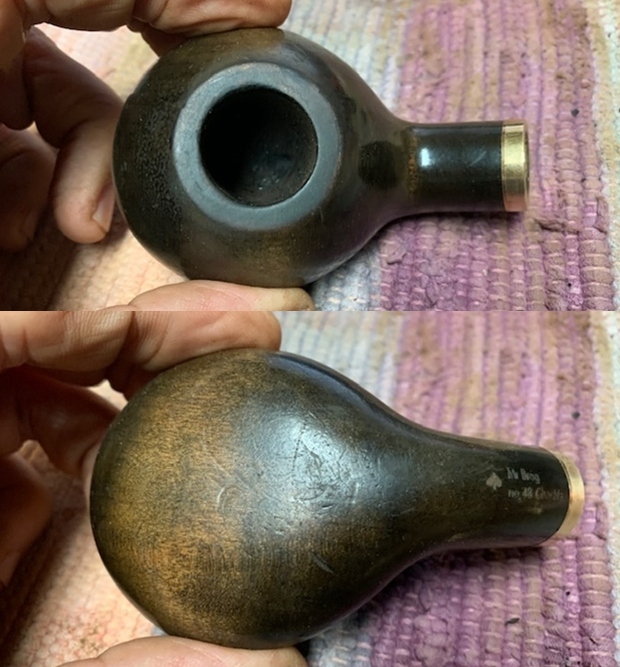
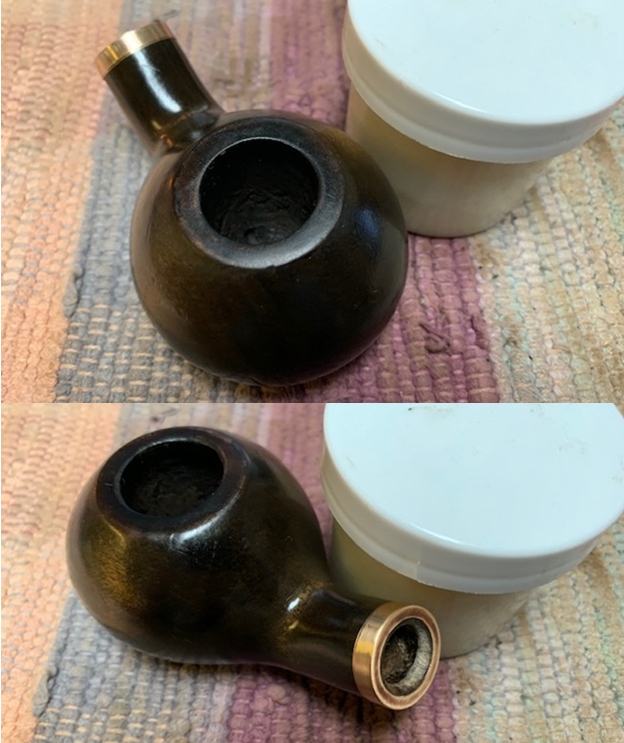
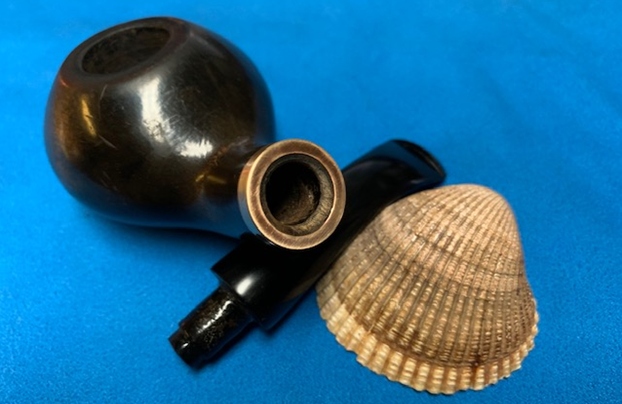
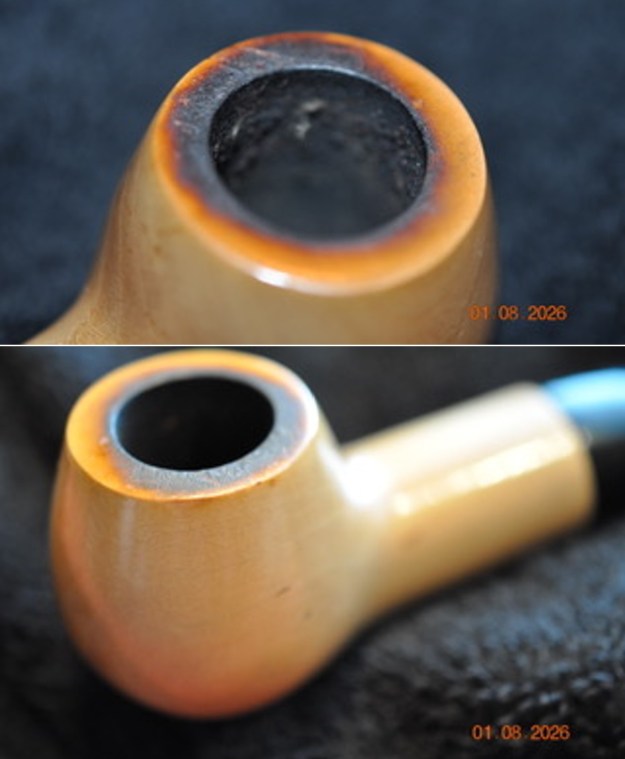
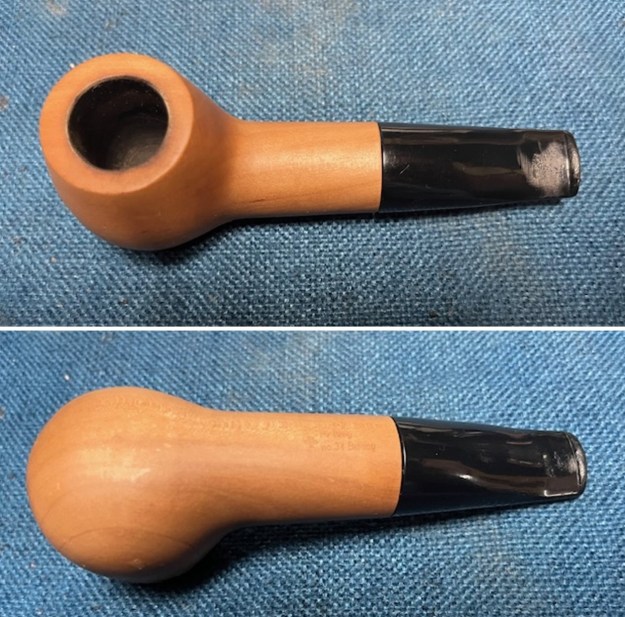
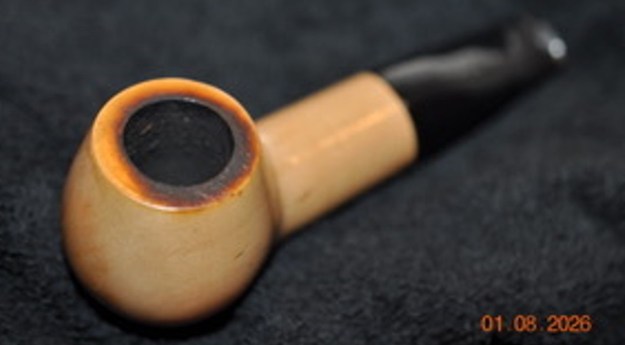 Jeff took photos of the bowl and rim top to show the cake in the bowl. There was a lava build up on the top of the rim and the inner edge of the bowl. Jeff took photos of the top and underside of the stem showing the tooth chatter and marks ahead of the button edge.
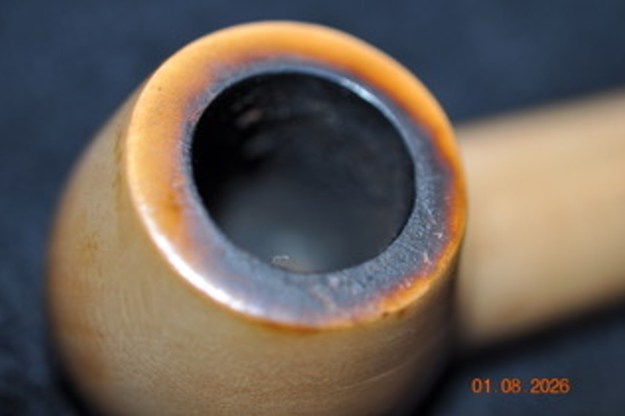
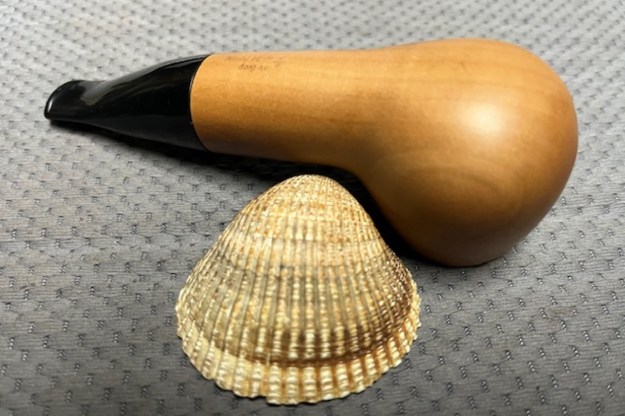
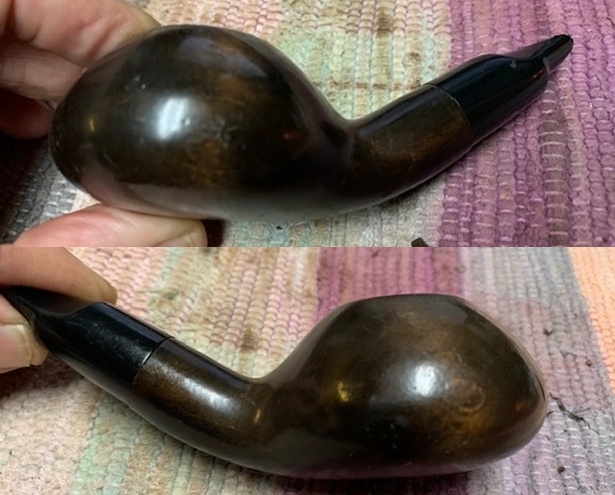
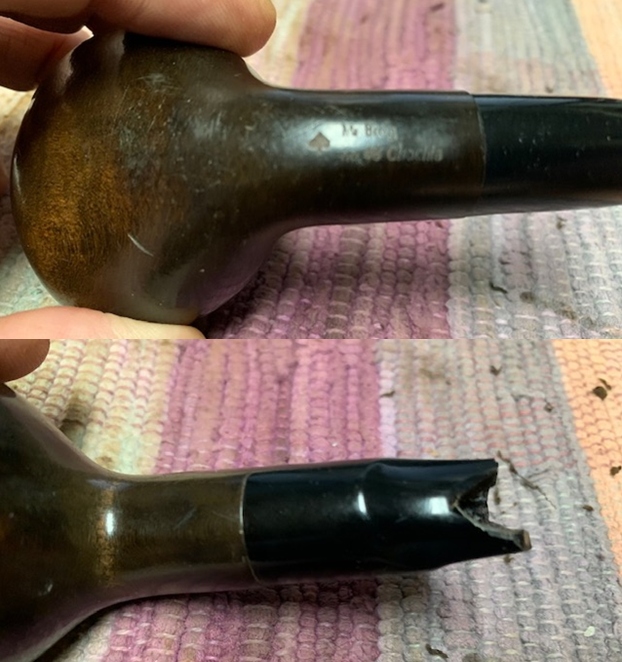
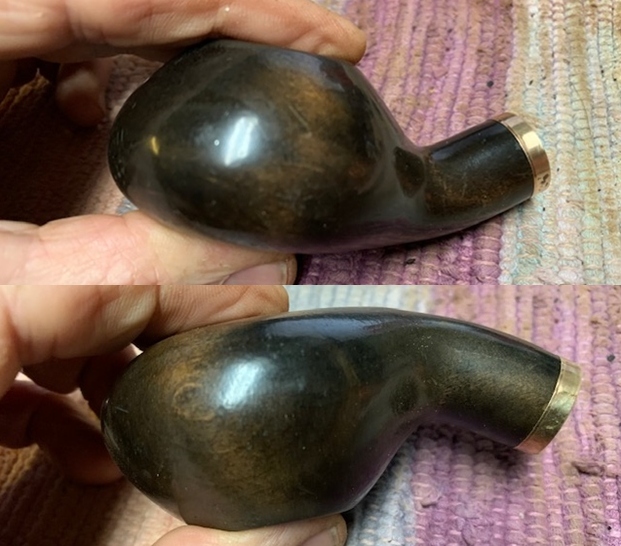
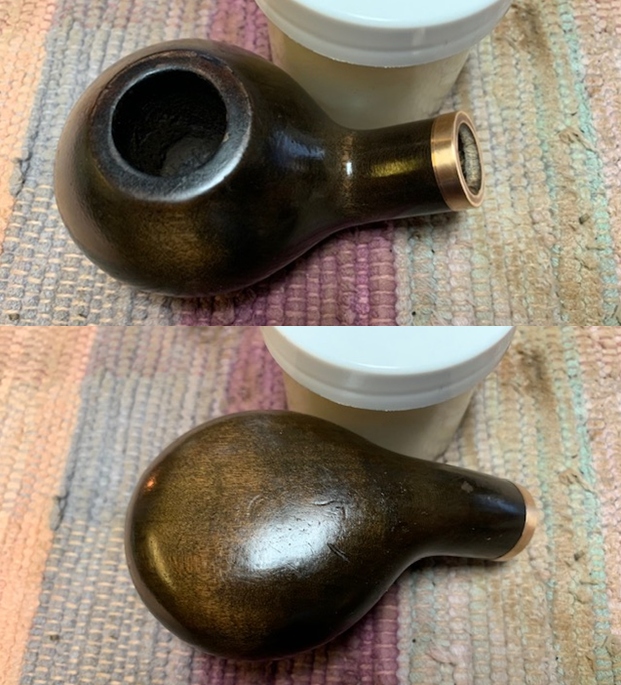
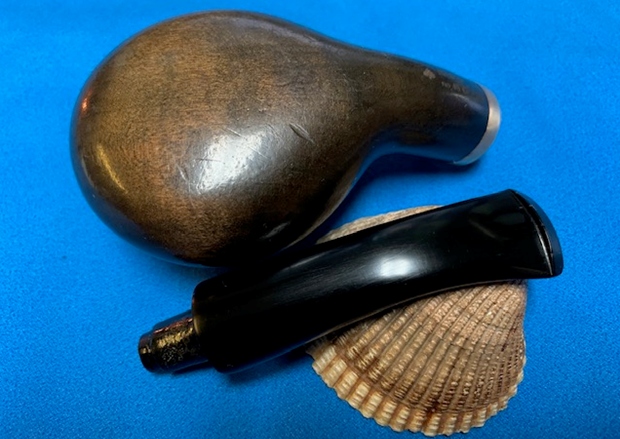
 Jeff took photos of the sides and heel of the bowl to show the condition of the finish. You can see the grime in the finish around the sides of the bowl and shank. Even under the dirt and debris of the years it looked very good.
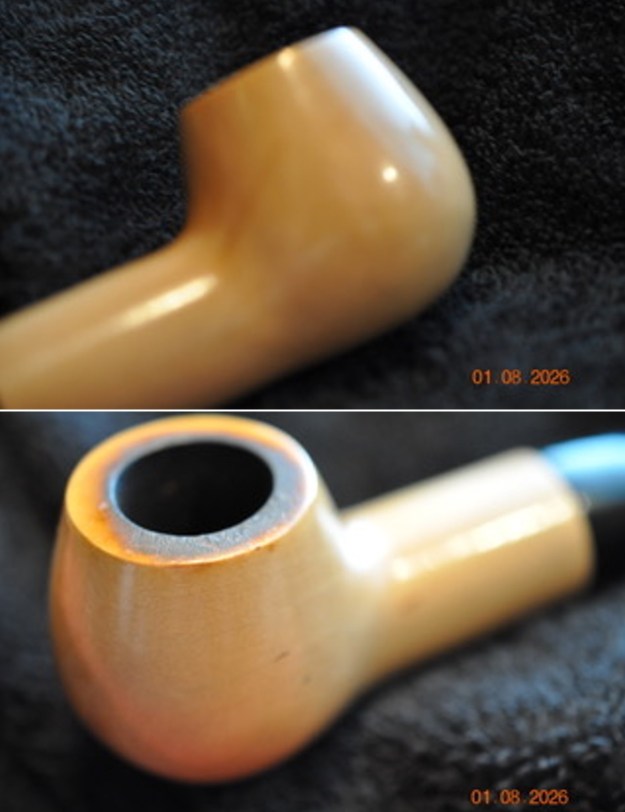
 Jeff took a photo of the stamping on the underside of the shank. The stamping was clear and readable as you can see from the photo. It read as noted above.
 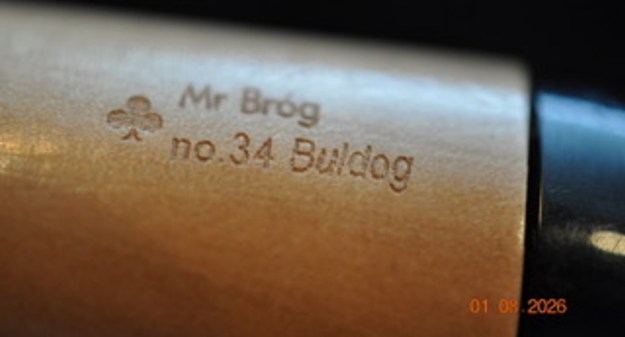 Before I started working on the pipe I wanted to see what the original stem looked like and I wanted some background information on the Pear Wood Pipes. I decided to do a bit of digging on the history of the brand. I turned first to Pipephil’s site to get a quick overview (http://www.pipephil.eu/logos/en/logo-m8.html). From there I learned that the brand started in Poland in 1991 in the area known as the “St. Claude of Poland’. It was started by Zbigniew Bednarczyk along with Kazimierz Rog. Zbigniew kept the name after Kazimierz died in 2006.
 I turned to Pipedia for a bit more detail of the history (https://pipedia.org/wiki/Br%C3%B3g).
Pracownie Fajek Bróg was founded as Mr Bróg in Przemysl, “the Saint-Claude of Poland”, in 1991. Master craftsman Kazimierz Rog, the senior partner, had been a pipemaker since 1947, starting as an apprentice and later partner of Wiktor Winiarski and Zbigniew Mazuryk, followers of legendary Ludwik Walat. Zbigniew Bednarczyk was completely new to pipemaking, but as a non-professional sculptor, painter and poet he surely had pretty enough artistic disposition.
Mr Brog started out offering 10 models of briar pipes and 10 models made of wild pear, wild cherry and other unexpected materials, available both smooth and rusticated and polished with natural waxes only. The experience of the old master and the dynamic passion of his young friend made the brand soon well-known in Poland. Little by little they enlarged their program turning towards a more artistically minded way of pipemaking. This was the bedrock for success on international markets.
Kazimierz Róg, highly honored, passed away after a lengthy illness on June, 26th 2006. The firm is continued by Zbigniew Bednarczyk and his wife Renata.
I decided to check on the Mr. Brog Website (https://mrbrog.com/collections/pear-wood-pipes) to see what I could find out. The first information that I found was the following on the wood the pipe was made of. I quote
Pear wood is a great alternative to briar wood. Pear wood is very dense and a hard wood which is great for a pipe you can have for the years to come. Also, pear wood gives off a very pleasant smell and taste while smoking.
I then turned to the catalogue of pipes and shapes that were available in pear wood and looked specifically for the Bulldog No. 34. The shape and the shape number are shown in the photo on the site (https://brogshop.pl/en_US/p/Pipe-no.-34-Buldog-9-mm-Mr-Brog/290). I have included a picture from the website.  As I scrolled through the photos on the site on this shape I found a photo of the various finishes on the pipe. The particular pipe I am working on is the first one at the top of the photo. It is labelled as Naturalny.
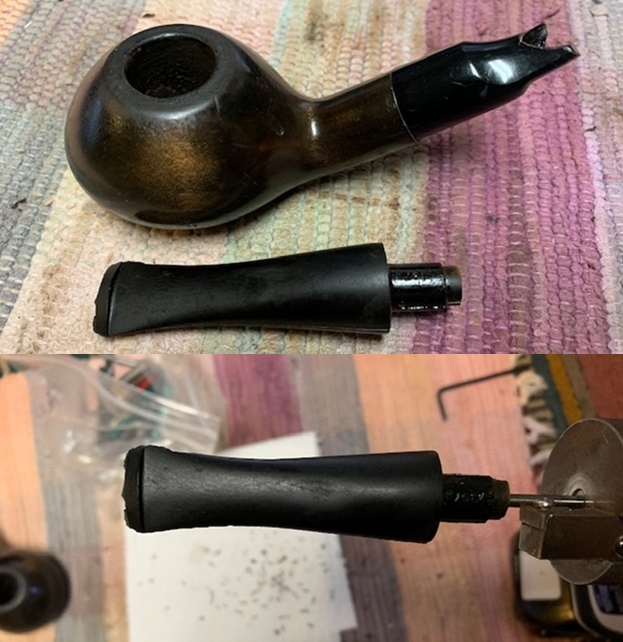
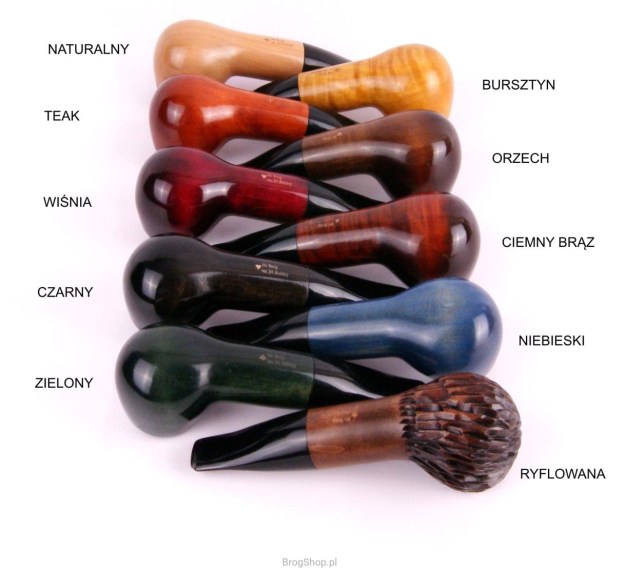 Armed with that information I turned to work on the pipe itself. Jeff had done a great job cleaning up the pipe as usual. He cleaned up the inside of the bowl with a PipNet reamer and a Savinelli Fitsall Pipe Knife. The rim top shows some damage on the top and the inner edge of the bowl. The bowl walls looked very good. He scrubbed the interior of the bowl and shank with pipe cleaners, cotton swabs and alcohol to remove the tars and oils. He scrubbed the exterior of the pipe with Murphy’s Oil Soap and a tooth brush to remove the grime from the finish. He worked on the rim top lava and darkening with the soap and tooth brush. He scrubbed the inside of the stem with alcohol and pipe cleaners. He scrubbed the exterior with Soft Scrub and then soaked it in Briarville’s Pipe Stem Deoxidizer. He washed it off with warm water to remove the deoxidizer. Now the damage to the stem was very clear. Overall, the pipe looked far better. I took photos of the pipe when I received it before I started working on it.
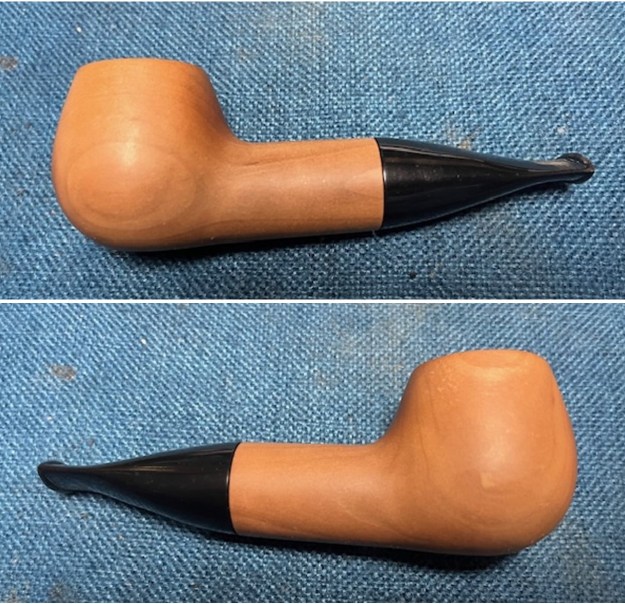
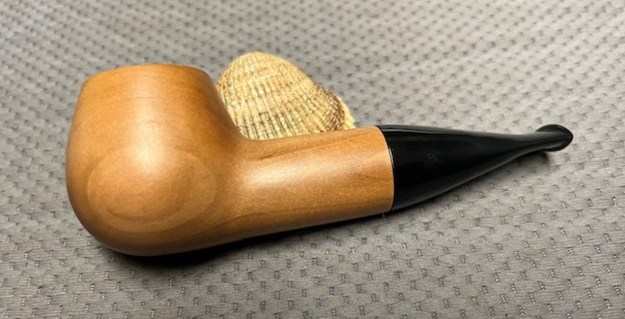
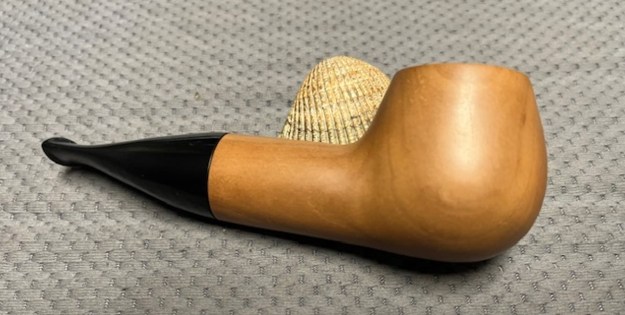
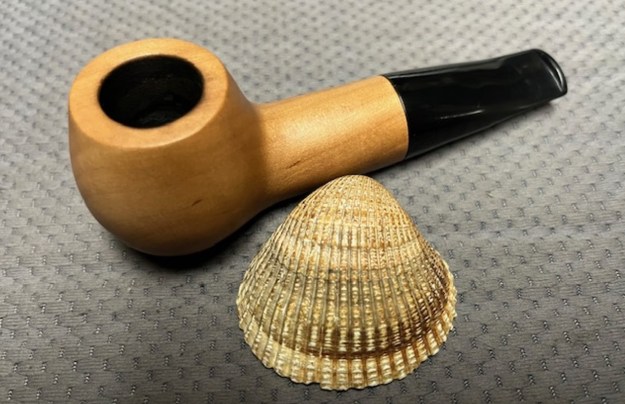
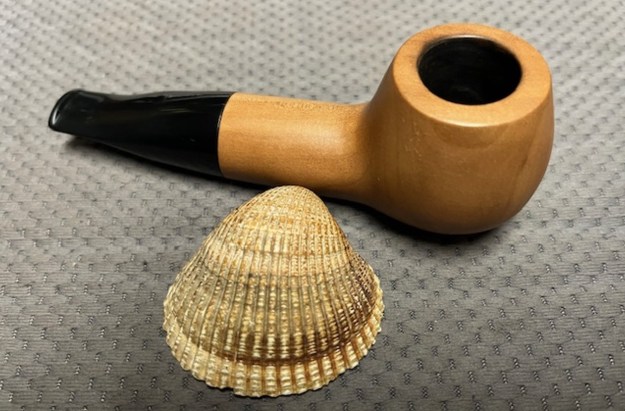
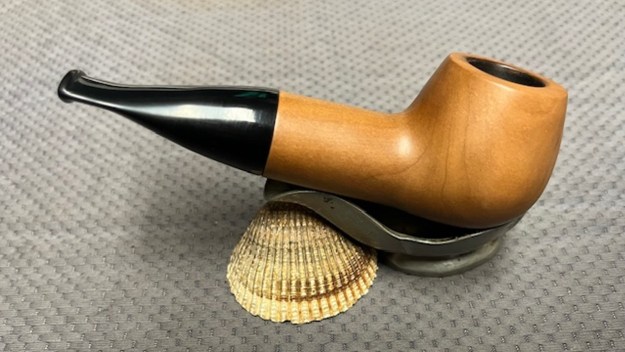
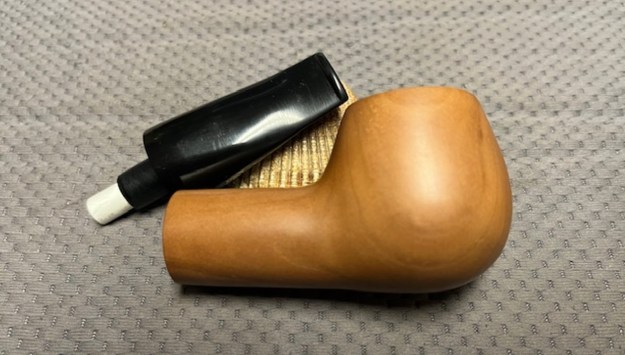
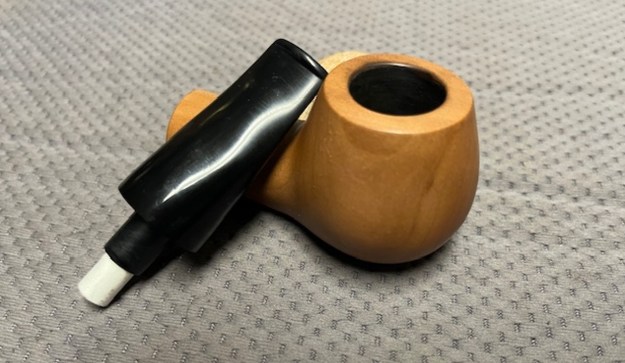
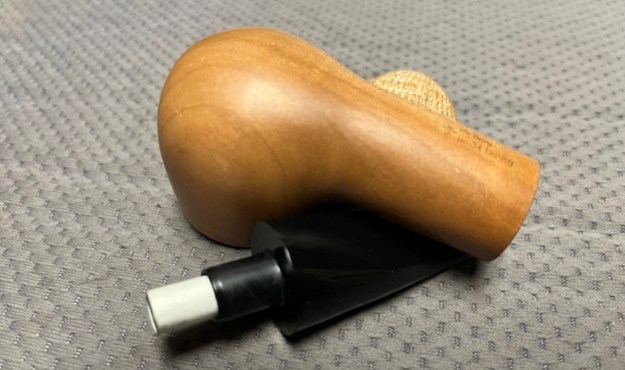
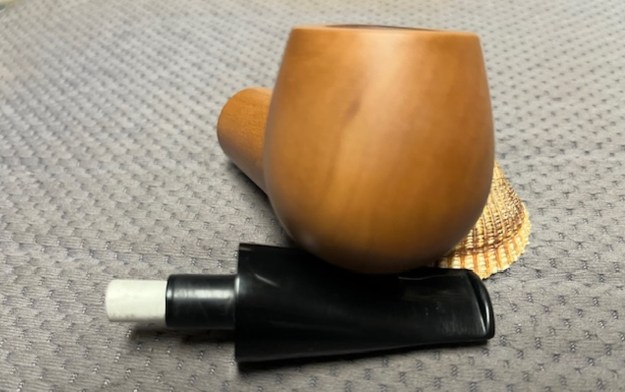
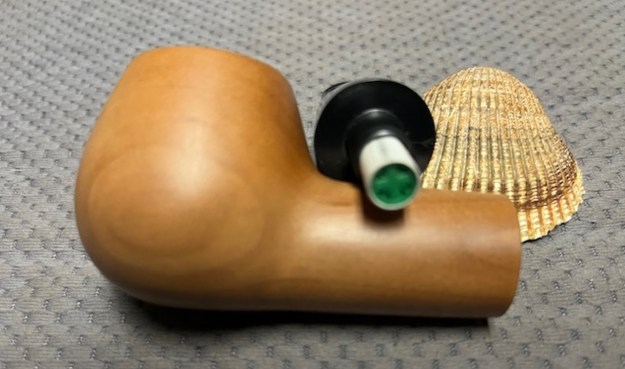
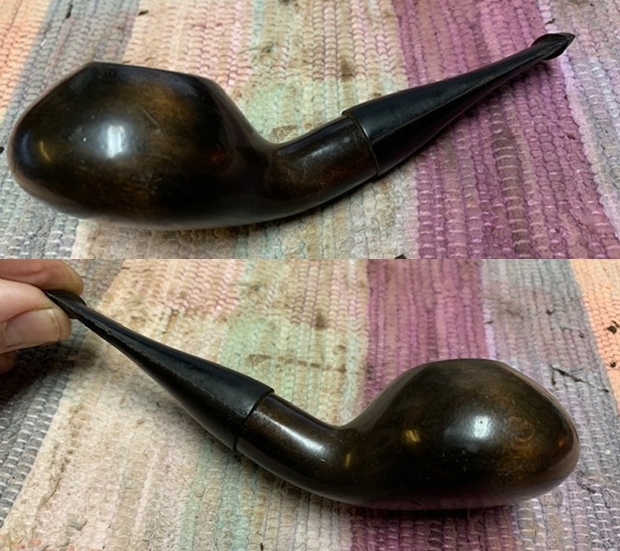
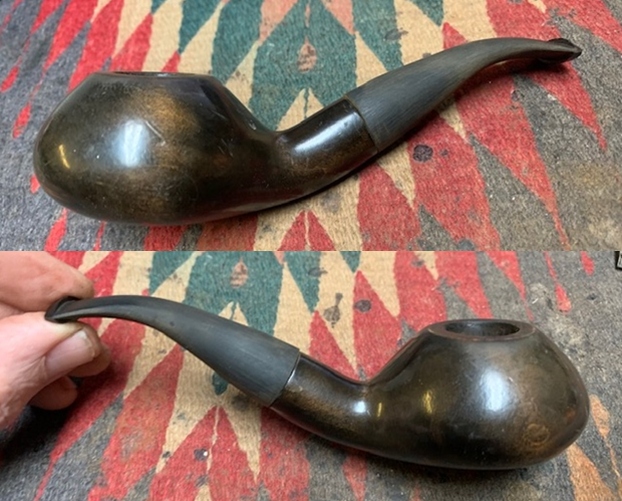
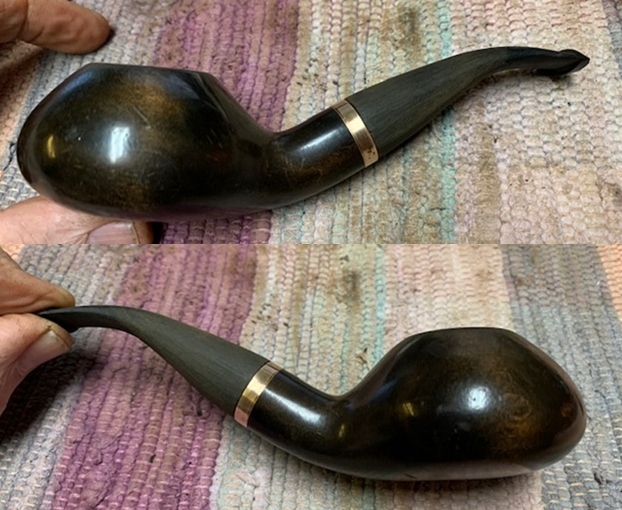
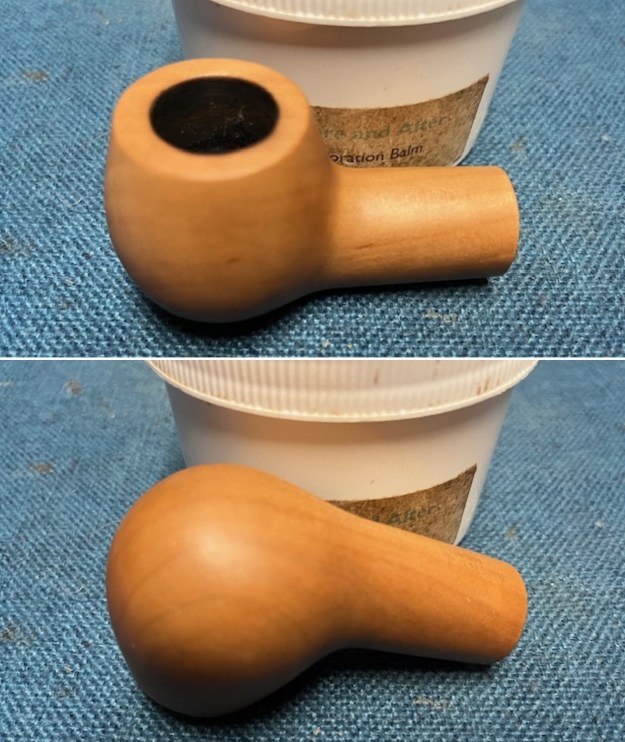
 I took close up photos of the bowl, rim top and stem to show how clean the pipe was. The bowl was clean and the darkening to the rim top and the inner edge is very visible in the photo below. The stem was clean and the tooth marks and chatter can be seen in the photos.
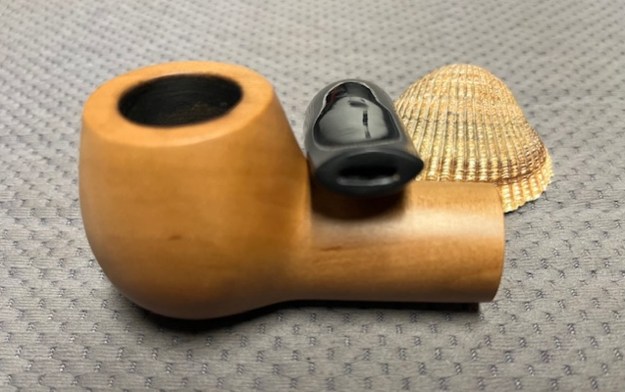
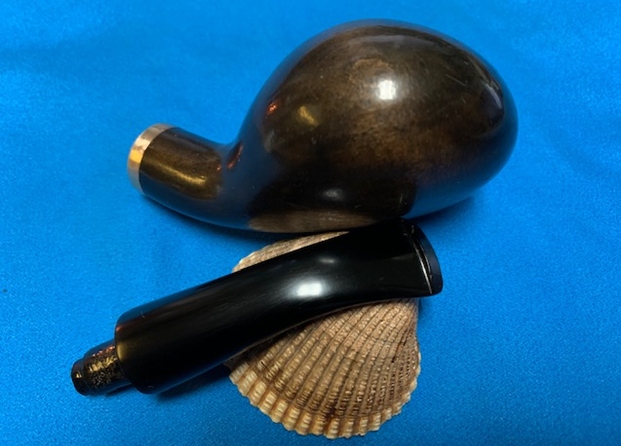
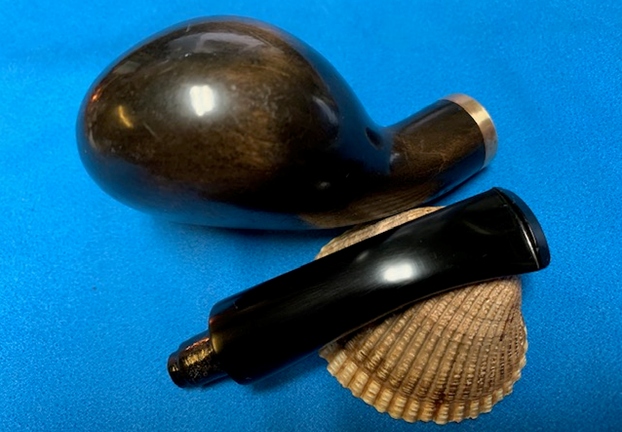
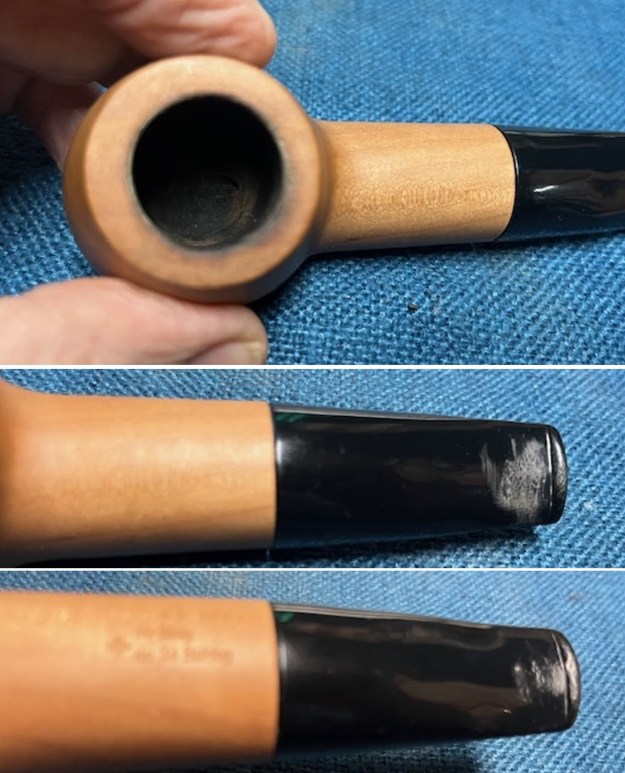 I took a photo of the stamping on the underside of the shank. It is very clear and readable and read as noted above. I also removed the stem from the shank and took photos of the pipe to show the look of the parts.
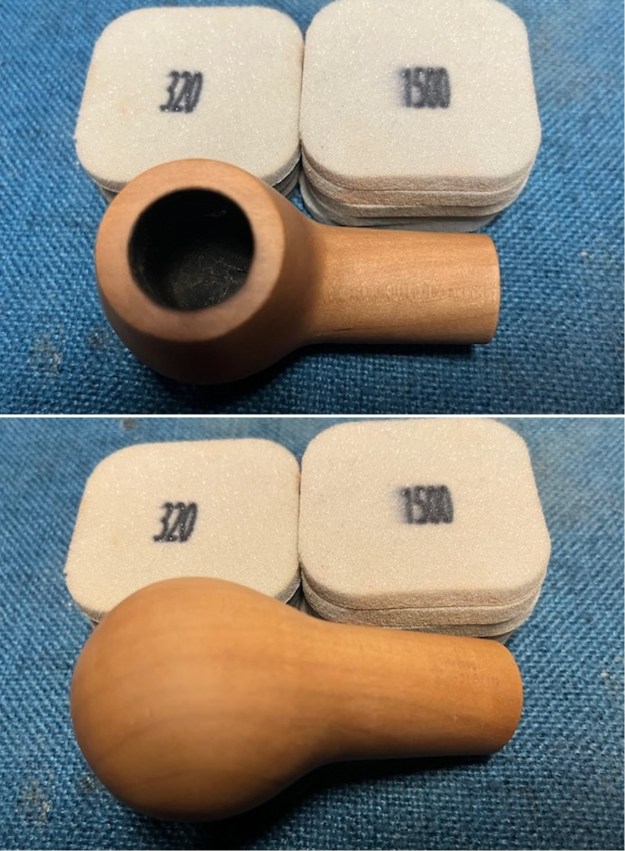
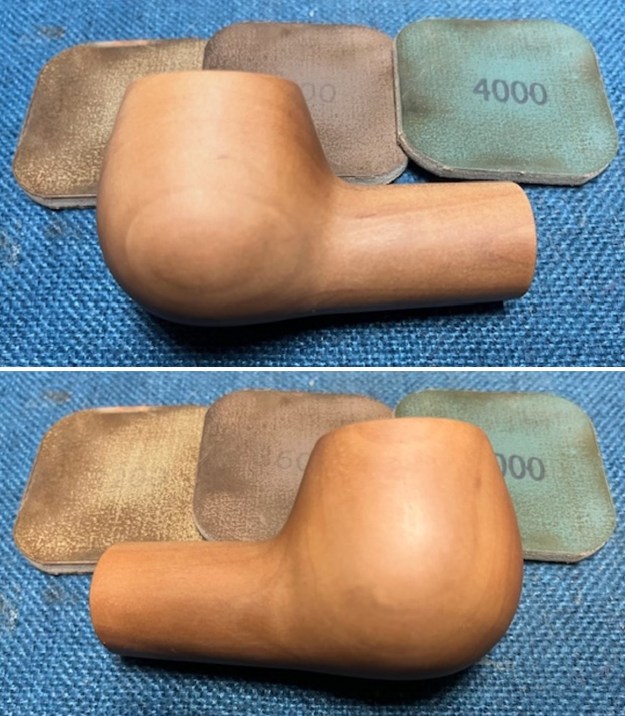
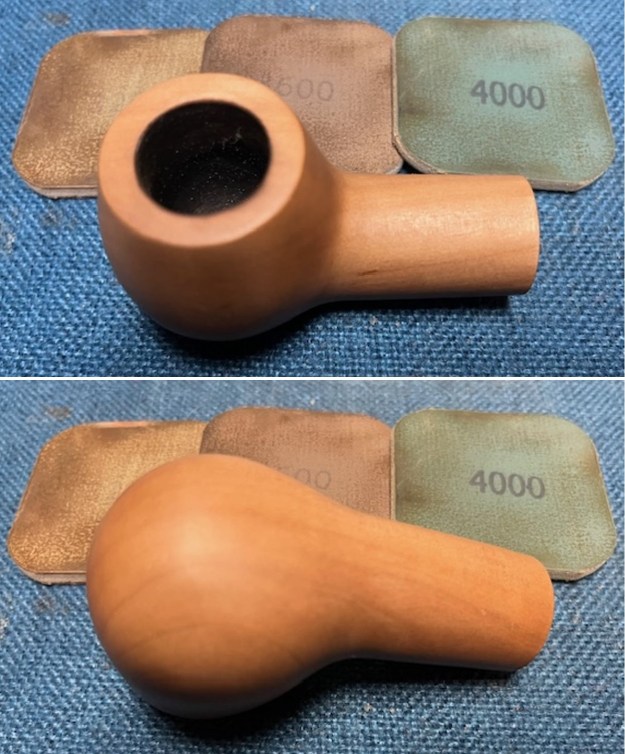
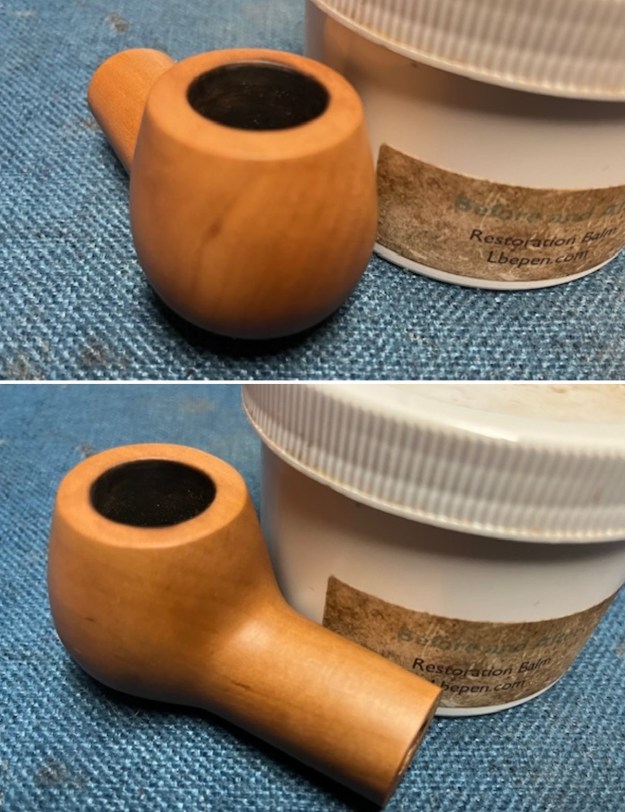
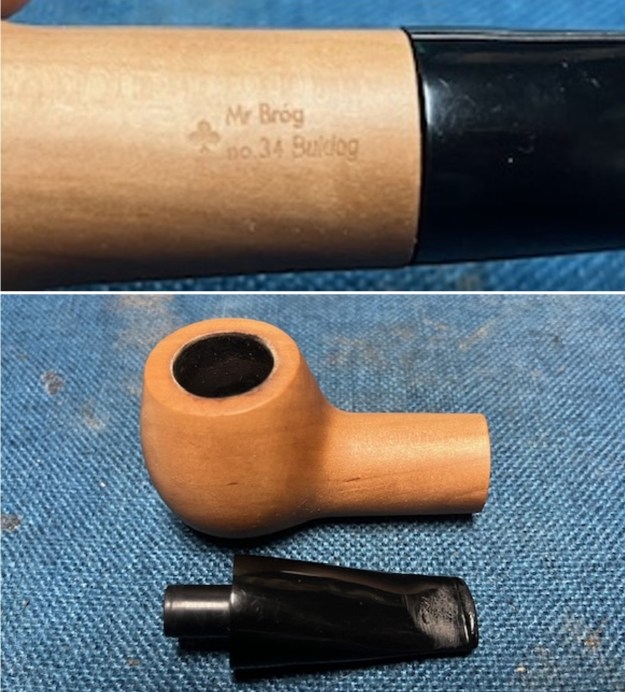 I started my work on the pipe by addressing the darkening to the rim top and sanding the bowl and shank. I used 320-3500 grit 2×2 inch sanding pads to remove the darkening on the rim top and the inner edge as well as clean up the bowl. It looked much better once finished.
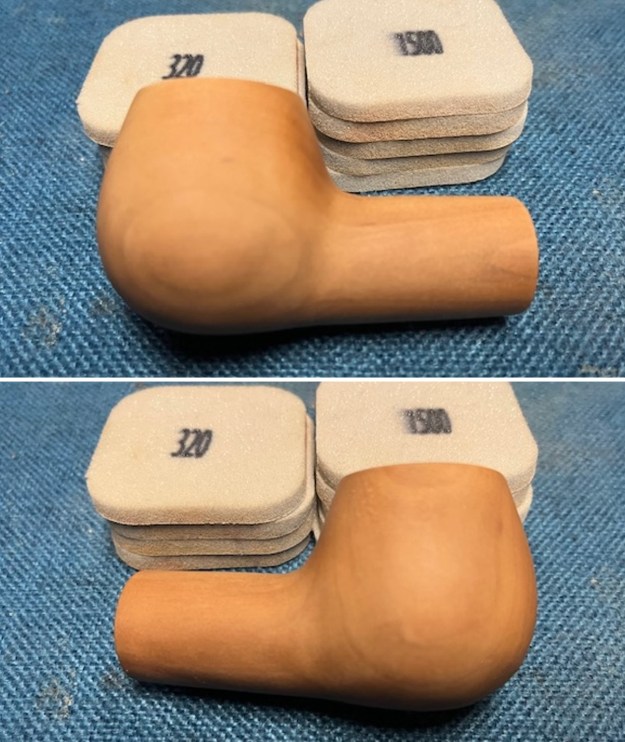
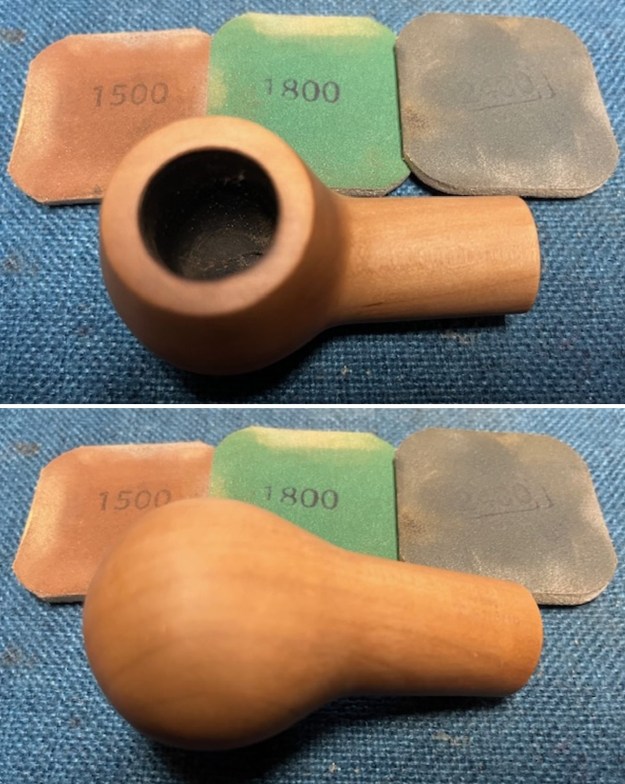
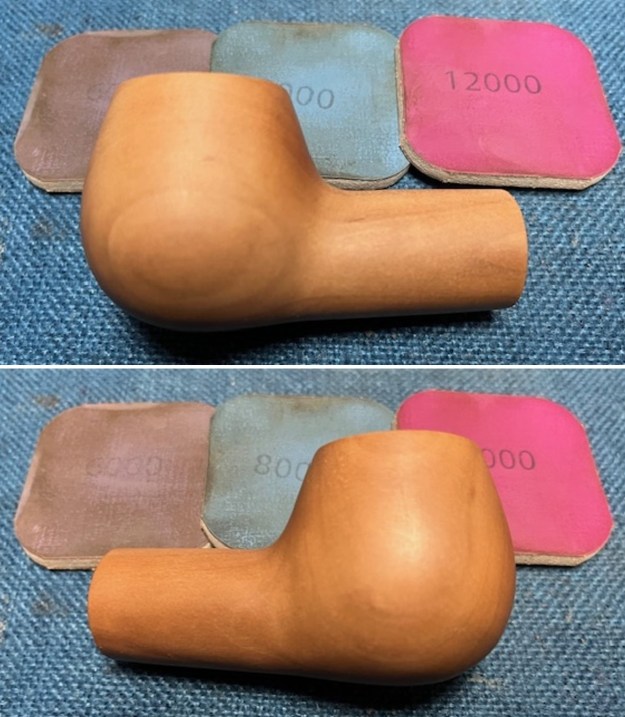
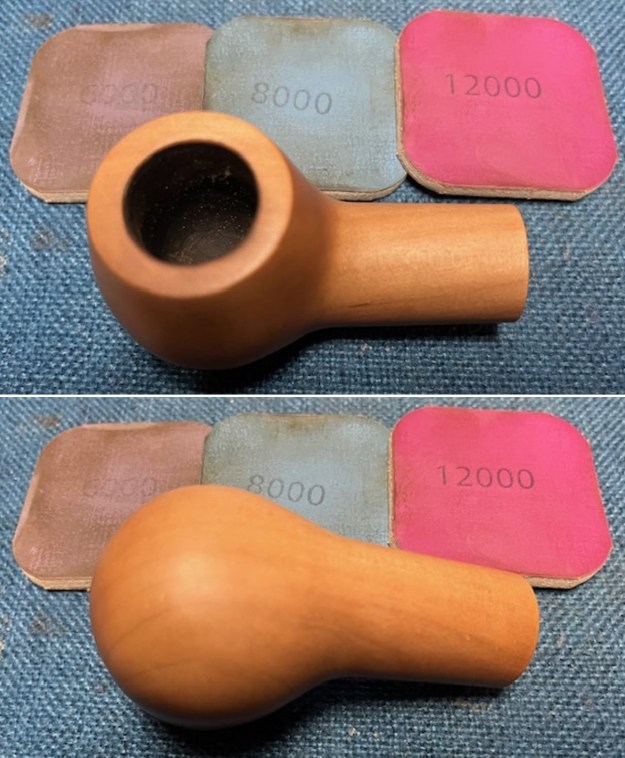
 I polished the rim top with 1500-12000 grit micromesh sanding pads and wiped it down with a damp cloth to remove the sanding dust. It took on a rich shine.
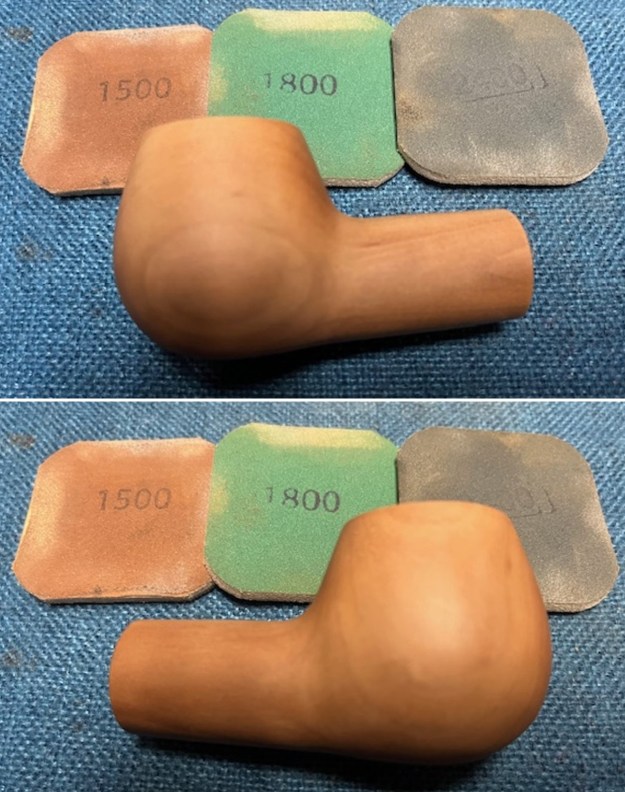
 I rubbed the bowl down with Before & After Restoration Balm and worked it into the surface of the pear wood with my finger tips. I let it sit on the bowl for 10 minutes and buffed it off with a soft cotton cloth to raise a shine.
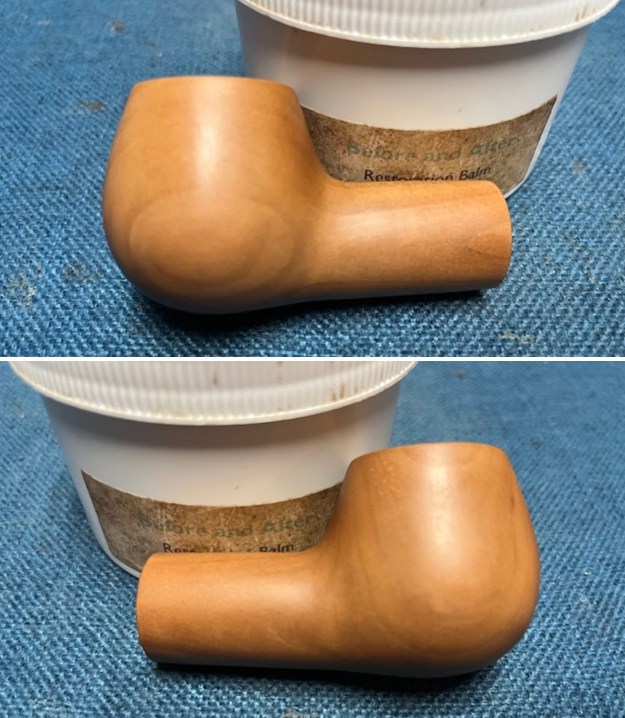
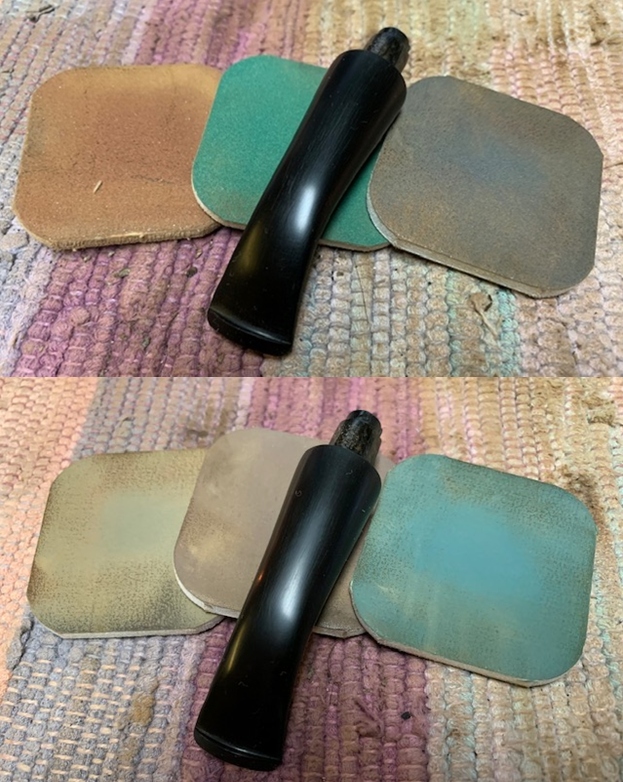
 I set the bowl aside and turned my attention to the stem. I sanded the stem surface with a folded piece of 220 grit sandpaper to remove the tooth marks and chatter. I smoothed it out but since it is acrylic it still shows the scratch marks in the surface.
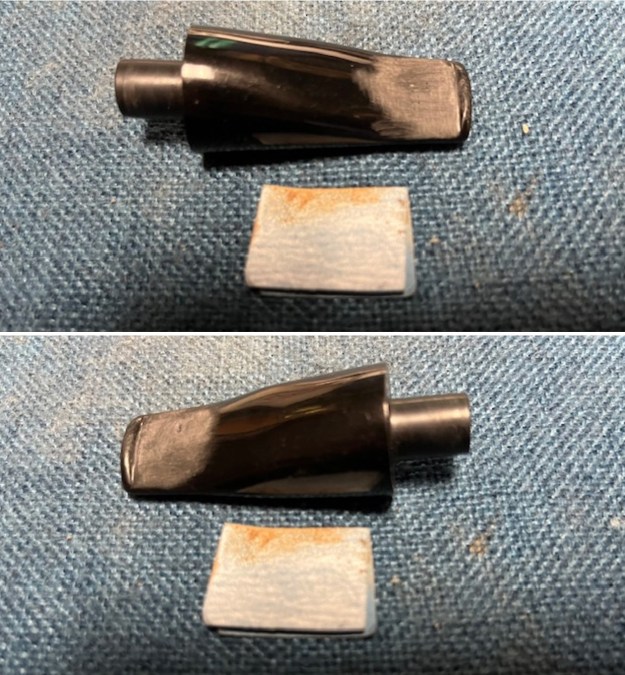 I sanded the scratches on the stem sides with 320-3500 grit sanding pads. I wiped it down after each pad with an Obsidian Oil cloth. But the end it was beginning to shine.
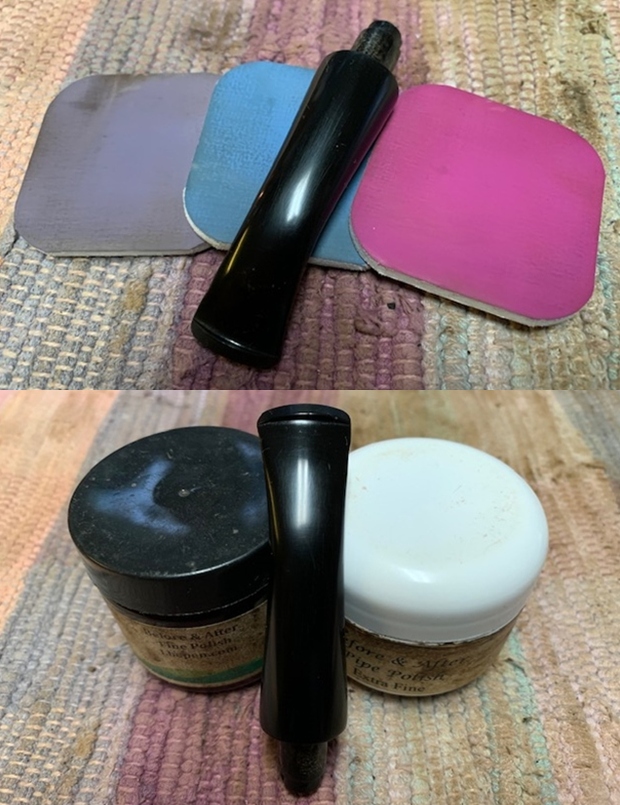
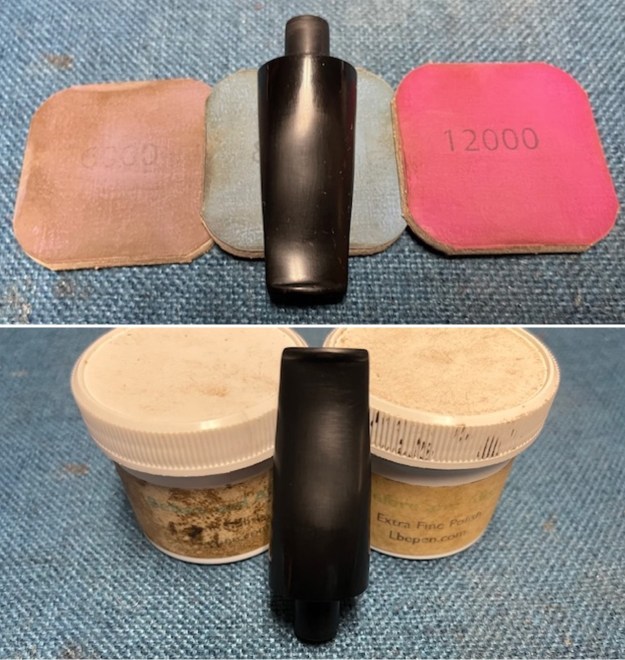
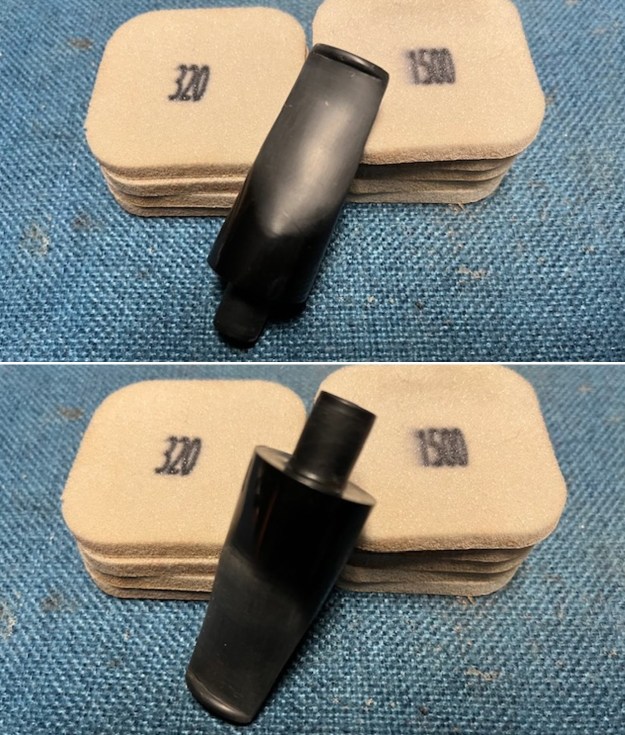 I polished the stem with micromesh sanding pads – dry sanding with 1500-12000 grit pads – the stem began to take on a shine. I wiped the stem down after each sanding pad with Obsidian Oil. I finished the stem with Before & After Fine and Extra Fine Polish. I buffed the stem with a soft cloth to raise the shine.
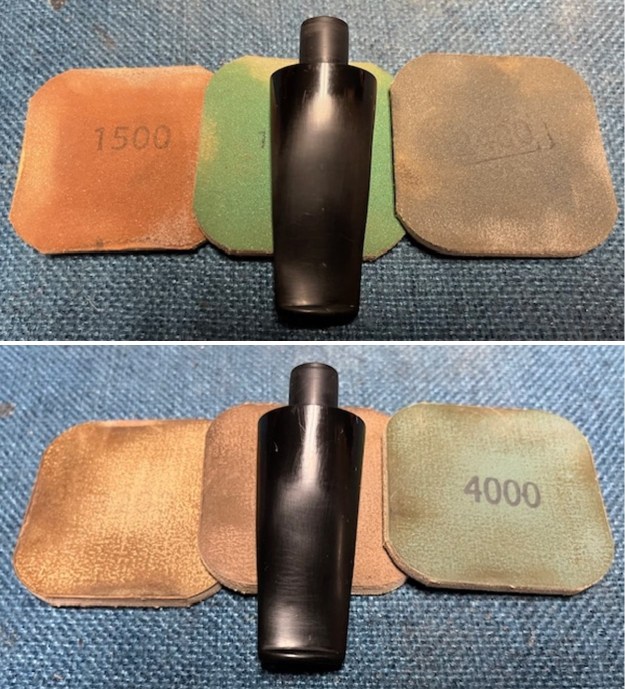
 I fit the 9MM tenon with a Dr. Perl Junior 9MM filter. It slipped in with no obstruction and fit in the shank perfectly.
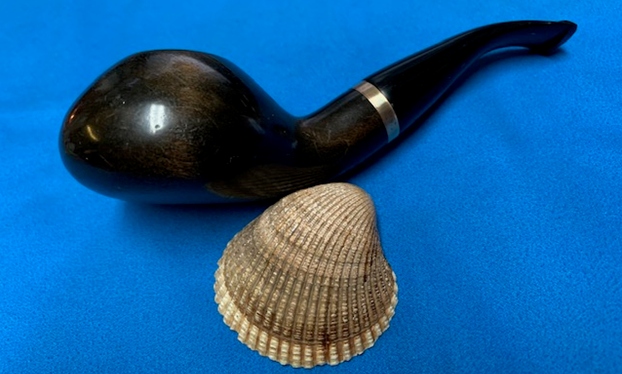
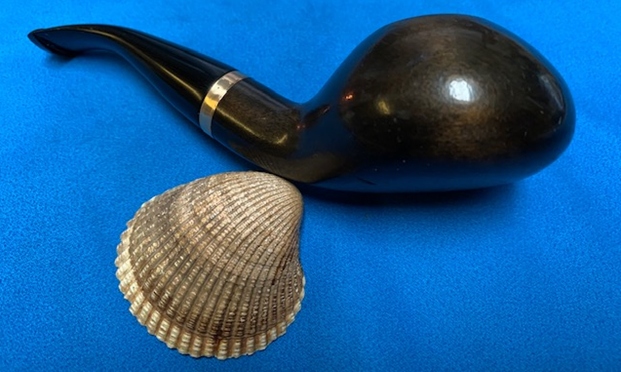
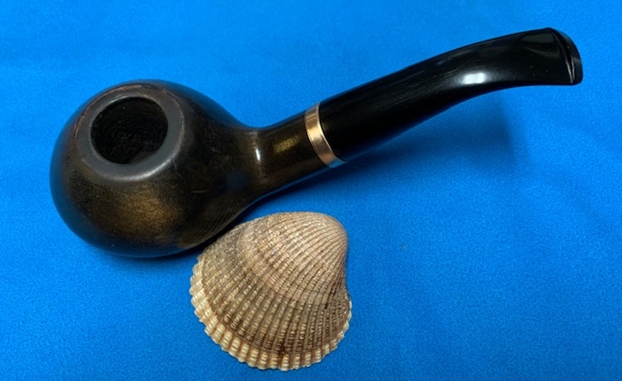
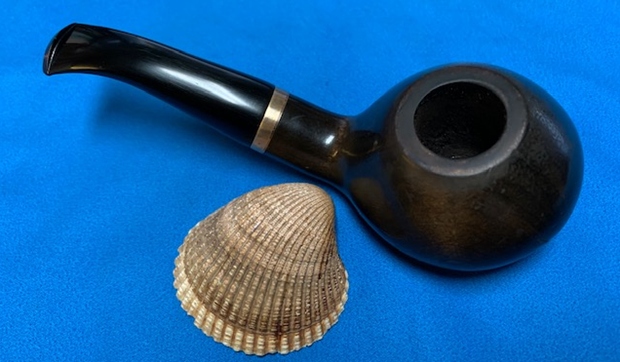
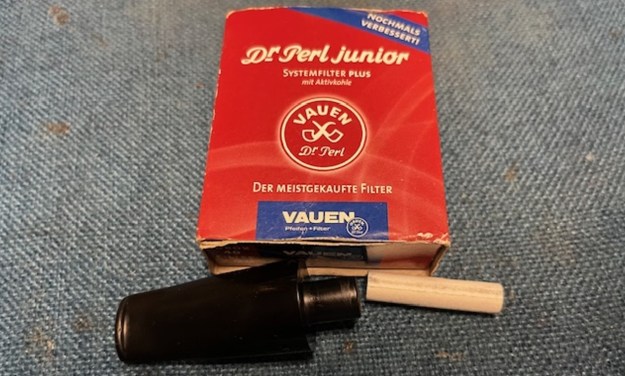 The Mr. Brog Pear Wood Bulldog no 34 turned out really well. I put the 9MM stem back on the shank and buffed it lightly with Blue Diamond to raise the shine. I gave the bowl and stem multiple coats of carnauba wax and buffed it with a clean buffing pad. I hand buffed the bowl with a soft cloth to deepen the shine. This chubby Pear Wood shape that Mr. Brog calls Bulldog no 34 is quite nice. The dimensions of the pipe are Length: 5 inches, Height: 1 ½ inches, Outside diameter of the bowl: 1 ¼ inches, Diameter of the Chamber: ¾ of an inch. The weight of the pipe is 1.87 ounces/53 grams. I will be putting it on the rebornpipes store in the Pipes from Various Makers section. If you are interested in adding this pipe to your collection let me know. Thanks for reading through my thoughts and reflections as I worked on this pear wood pipe.