Blog by Joe Mansueto
Joe sent me an email thinking that the methodology covered in this post would be helpful to other readers of rebornpipes. I read it and have to agree. Though many of you may use similar methods to those shared in this blog I felt that the clarity of description and the simple photos make the process very clear. The article is in two parts– the first covering the insertion of a stem logo on a new stem (in this case a Dr. Grabow Spade logo, the second covering the repair to a rim that was damaged and missing a piece of briar. It originally was posted on the Dr. Grabow Collectors Forum. Here is the direct link to the conversation around these repairs. – Steve http://drgrabows.myfreeforum.org/about6302.html
This is not so much to show the Duke partial wire-carved billiard as it is to share the process for a couple of repairs.
Part 1.
First…I’ve been asked a time or two recently about inserting spades, so I thought I’d share the process – learned it long ago from Ozark.
Here’s the vulcanite stem needing a spade. It’s registered to the Duke perfectly, I’m sure Grabow fit it.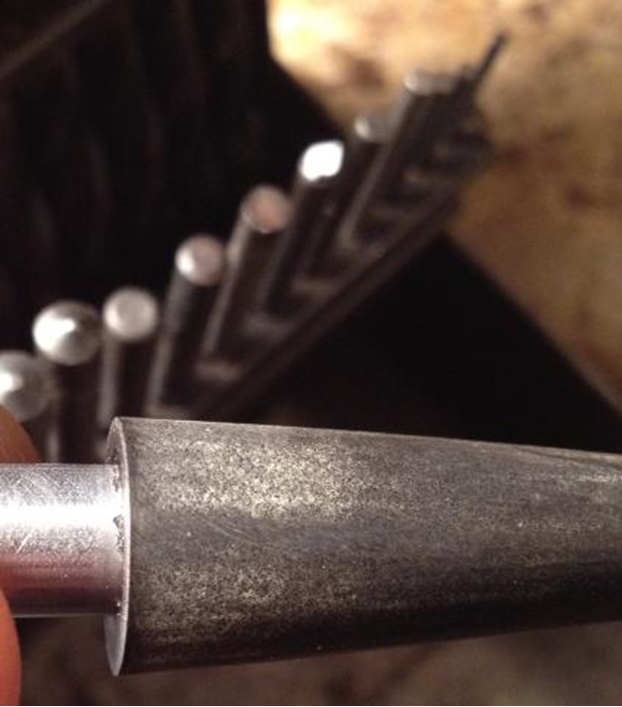 First step is to pick the necessary drill bit…the smallest possible where the spade barely fits on the flat end. If you’re using a current day spade from the factory, the bit size is 9/64″.
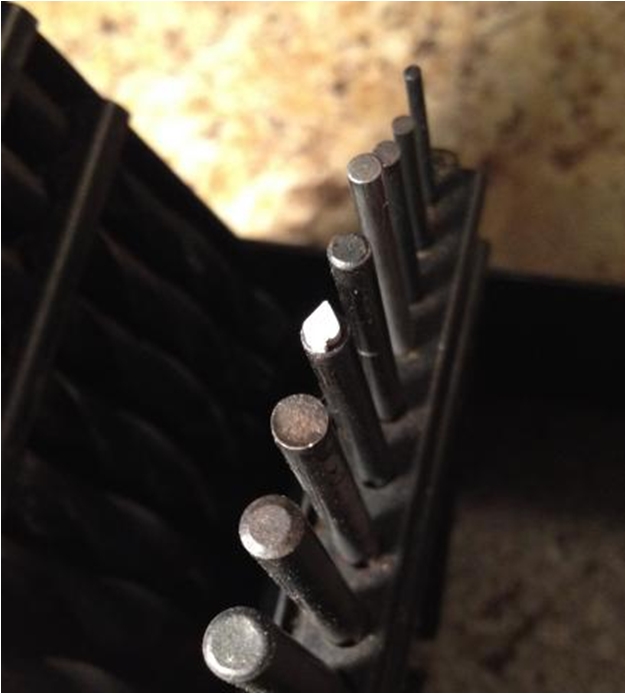 I pick the spade location and pilot a smaller hole, about half the size of the intended hole.
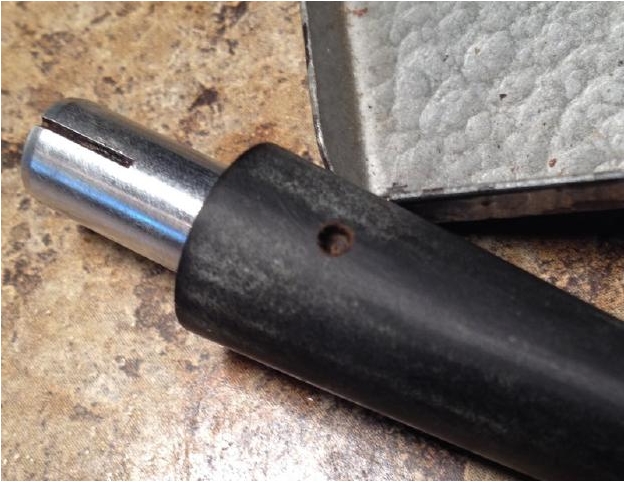 I drill the hole just deep enough so that the spade barely fits in, while also being shallow enough to leave maybe 1/4 or more of the thickness of the spade sticking out. Reason why in next step.
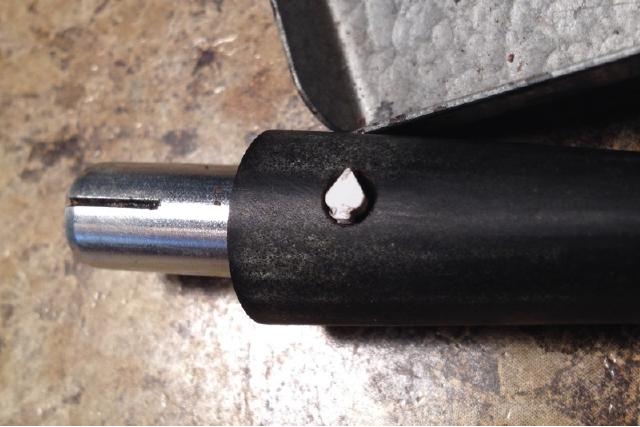 I mix activated charcoal and Gorilla brand CA (Cyanoacrylate) super glue to a consistency just thicker than honey. Fill the hole with the glue/charcoal mixture, and then carefully press the spade in. The reason I leave some of the spade sticking out in the previous step is so that when I insert it into the glue, I can still see at least part of the surface of the spade so that I can make sure it’s oriented right, and also, to assure it won’t be in too deep. If the hole is too deep, it’ll be difficult to keep the spade from sinking into the glue…it will get covered up, may become incorrectly oriented (without you knowing), and at least some of the spade may end up lower than the surface of the stem when you’re done. Take it from me after messing up on a couple. Also…both sides of a spade are flat when they’re made. So…at least the corners of the spade need to be higher than the surface of the stem, so that when you file and sand it, it will be rounded with the contour of the stem, with none of the spade concave.
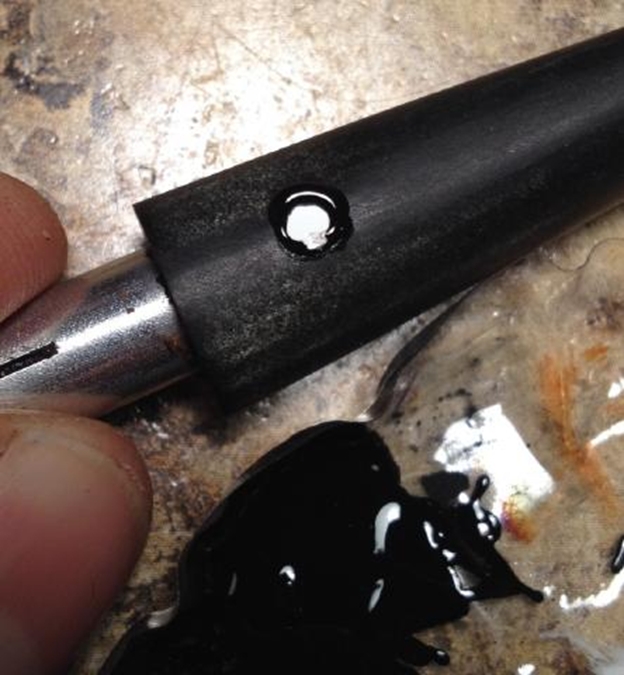 I take a toothpick and press the glue carefully, all the way around the spade in an attempt to eliminate any pockets of air. It ends up covering the edge of the spade.
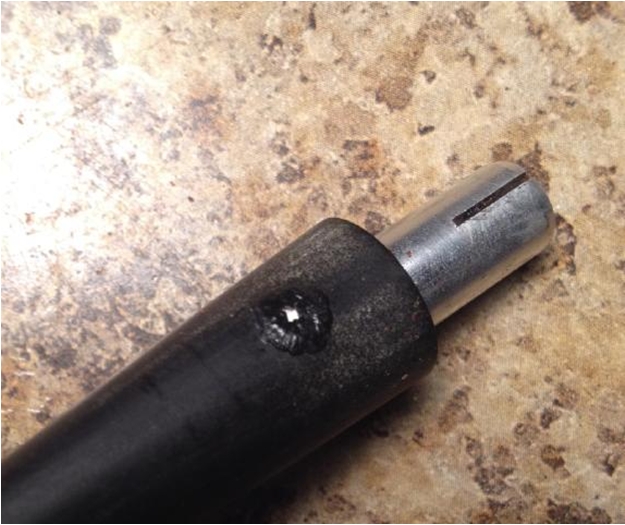 Once it dries hard (maybe an hour), I use a small smooth file to shape the hardened glue and the surface of the spade down to the surface of the stem.
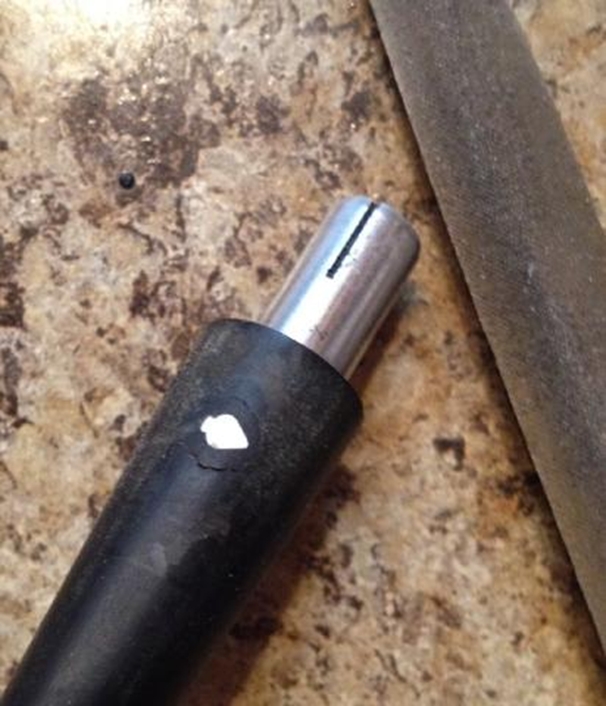 Here it is after filing and sanding, pre-buff.
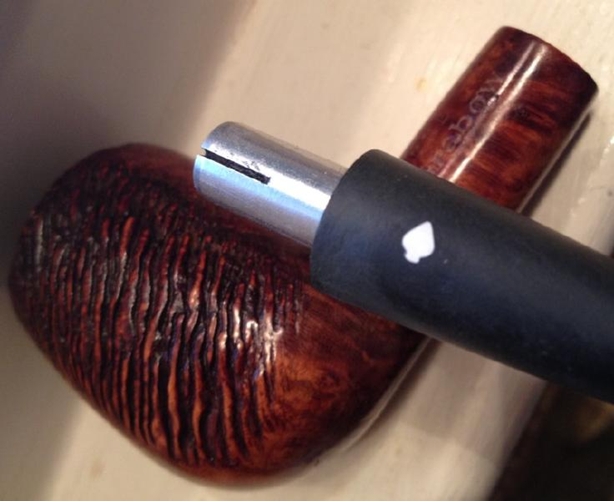
Part 2.
This is a repair I came up with after some trial runs. I’ve shown a couple previous examples, but not in detail, and with lesser results.
Here’s the Duke – nice chunk missing from the rim. Here is the material – briar dust (not super fine) and Gorilla CA.
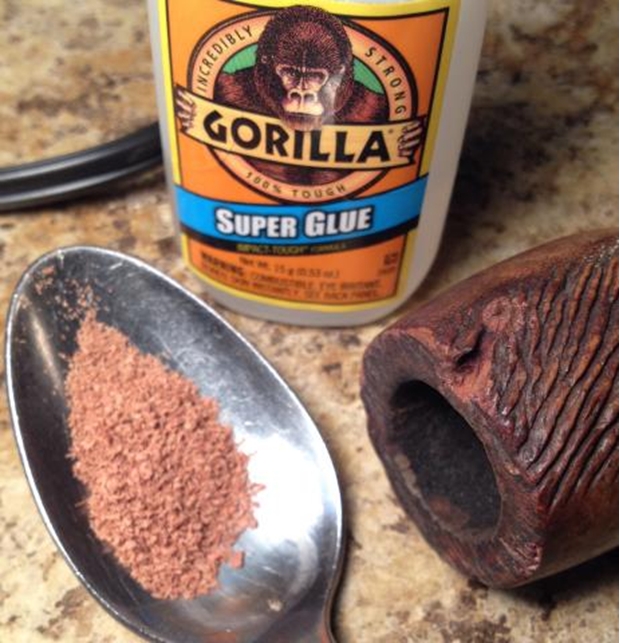 Cover the surface of the hole to be filled with glue. If it’s a pocket, I fill the pocket…because I’ll be essentially pressing the briar shavings into the glue, and it will then dry rather quickly.
 I sprinkle briar into the glue, and I carefully push the shavings into the glue using a toothpick…being careful to not simply push the glue out of the cavity.
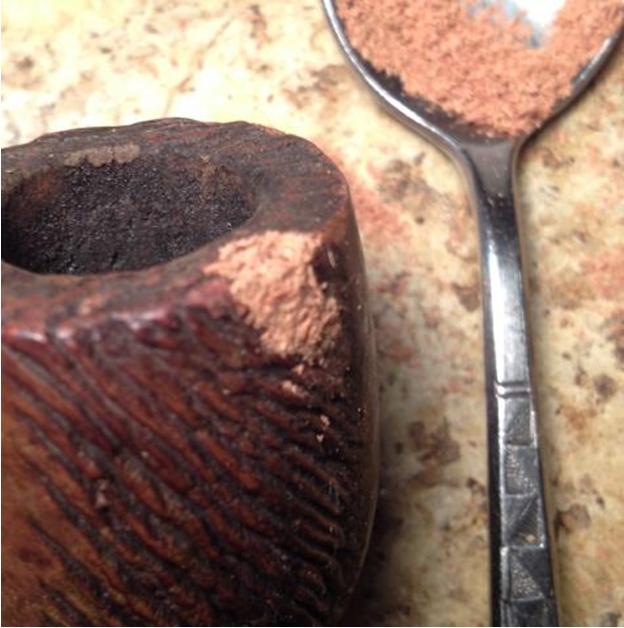 I then lay another coat of glue on top of the repair, then sprinkle more briar on top. This time, I use my fingers to press in on the dry layer of shavings…pressing gently into the repair, shaping it. As needed, I drop more shavings on top, so as to not glue my fingers to the repair. The repairs I’ve done have been taking 2 to 3 layers like this…with the last layer being pressed in more firmly. You can feel the glue hardening up. Once it’s hard, I wait just a few minutes, then it’s time for the filing – to shape the repair to the proper height and contour.
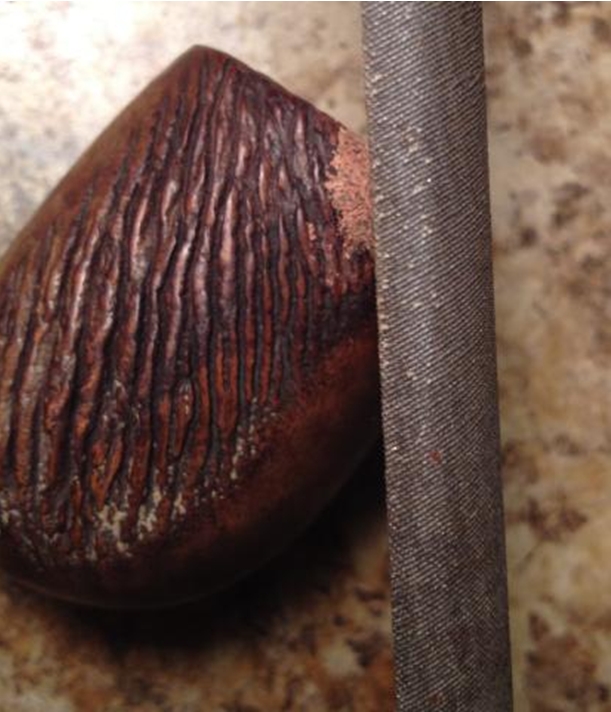 Once filed to shape, time for some ‘fake’ wire carving…done with a Dremel and a dental bur I got from Ozark.
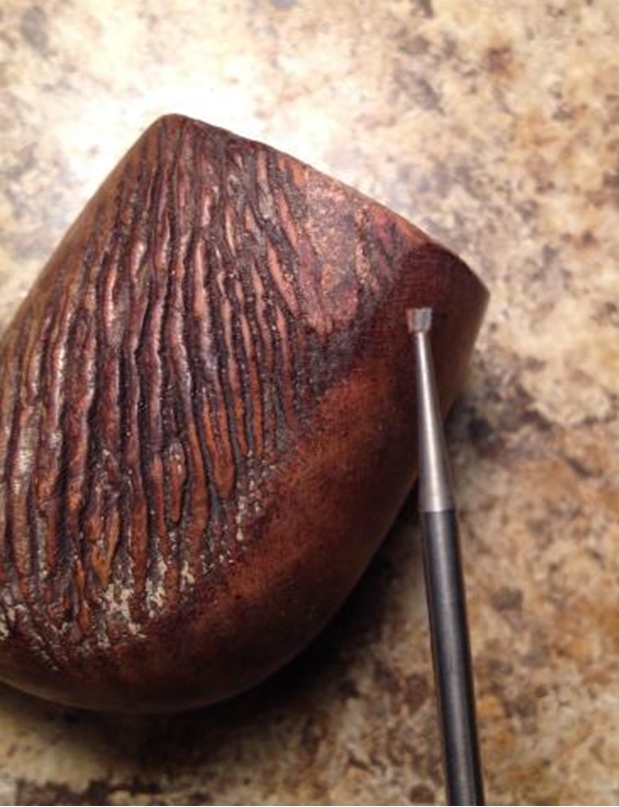 Here it is after Dremel effect and some light sanding.
 Here it is after some dark brown stain in the wire carving, drying, then more light sanding to remove the stain from the higher parts of the wire carving.
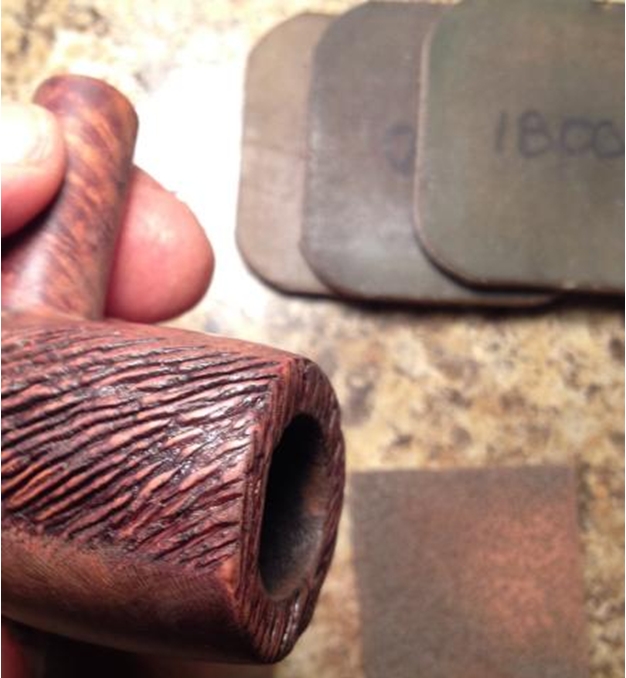 Followed by higher grit dry sanding, then micromesh sanding 1500 – 3200. Already had a decent finish, but then buffed with Carnauba.
 This is a straight billiard pipe. I like a slight curve in the stem, so I added that.
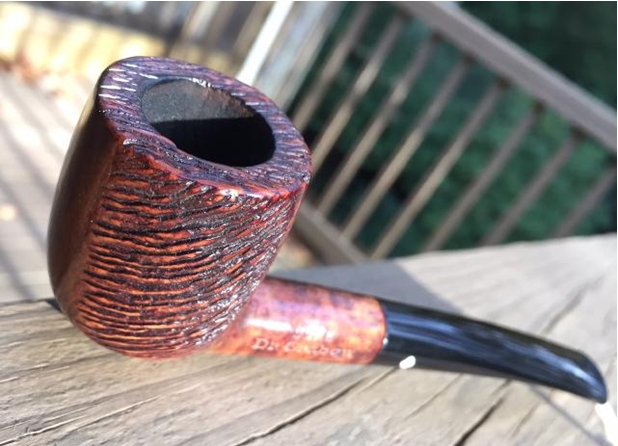
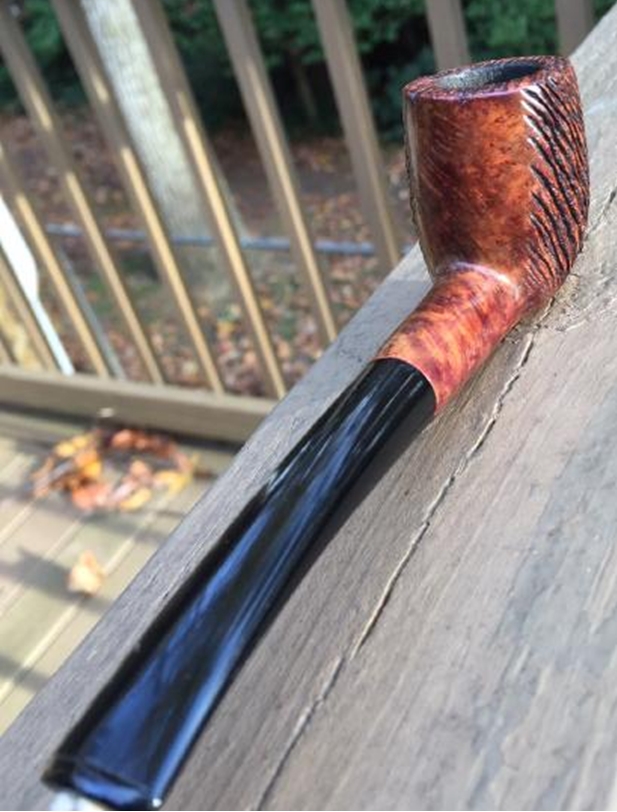
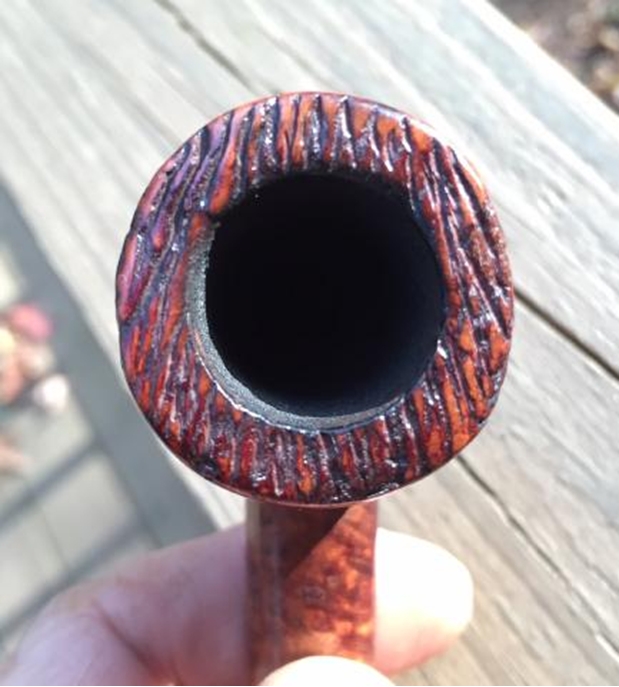 The upper right corner in this pic is where the missing chunk was.
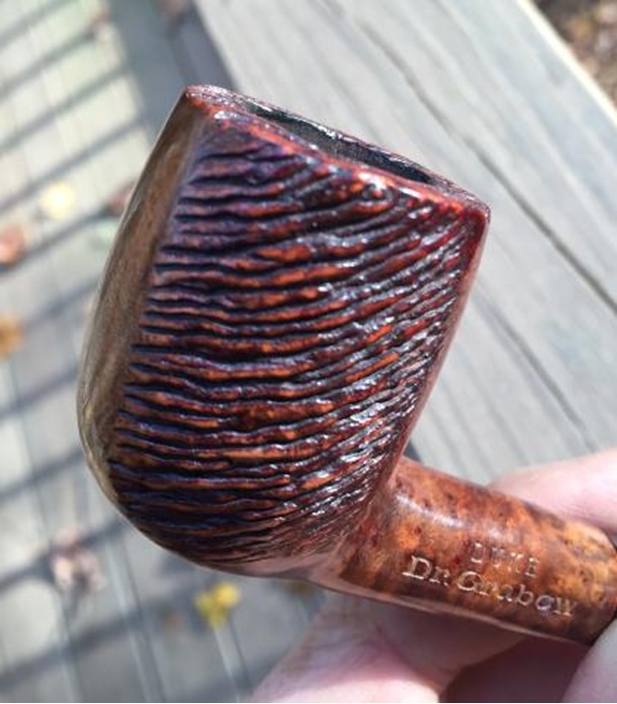
 One last detail. One or two of these partially wire carved pipes have surfaced, and someone asked earlier if the wire carving was done, and then parts of the bowl sanded down. Nope. You can see that the smooth parts of the bowl are at the same level as the highest parts of the wire carving…so the wire carving was done here on 2 sides and then just the rim.
