Blog by Steve Laug
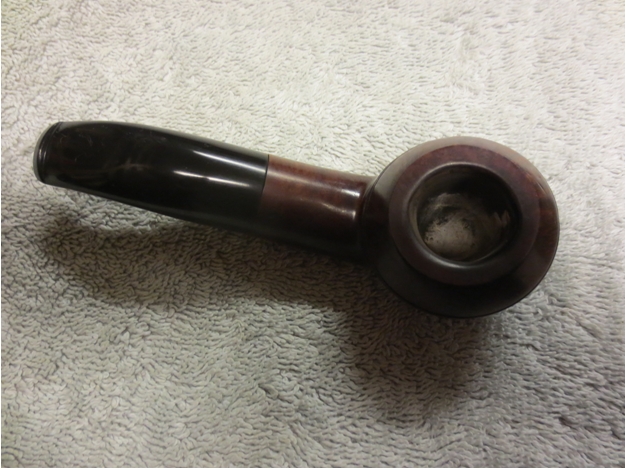
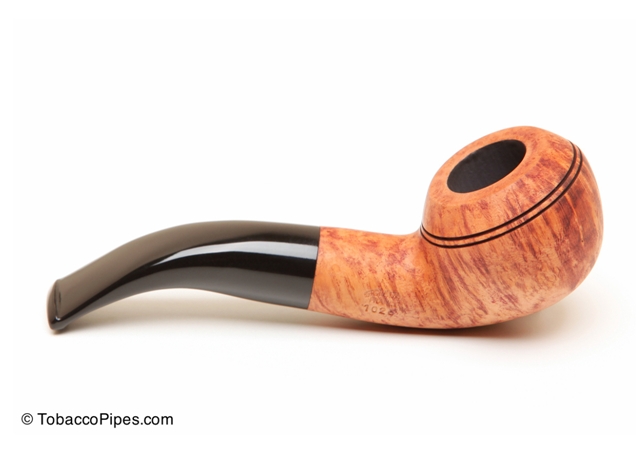
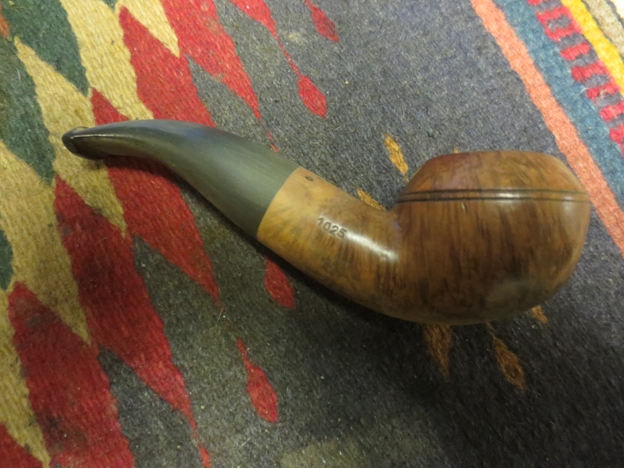
I saw the Everton Big-Boy pipe on a website and the shape hooked me. In the photos the bowl seemed squat and wide and the shank was thick. The bend in the stem appeared similar to an earlier Sina pipe that I picked up; in fact the entire shape was similar. I searched and could find nothing on the brand. There was nothing in any of the books that I usually check out and nothing on the various websites that I use when researching a brand. The brand was a mystery to me and that made me want the pipe even more. I could find Everton Tobacco which is a Danish pipe tobacco. I could find the Everton Football Club (Everton is a District of Liverpool) but no Everton tobacco pipes. I figured that when it arrived I might be able to see why the seller had labeled it an English made pipe.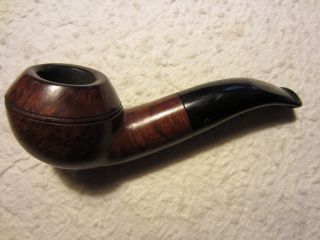 When the pipe arrived I checked the stamping and it was stamped Everton over Big-Boy on the left side of the shank. On the right side of the shank it was stamped 1025. The shape in hand is not as wide and squat at the above photo led me to believe it would be. It is actually very close to a GBD 9438 though I had never seen a GBD stamped with this number. This sent me on a hunt for potential English makers that had a similarly shaped Rhodesian. I looked through many of the Comoy’s charts and again could not find any reference to the number. On a lark I just typed in the shape number in a Google search and immediately had a hit for a 1025 shaped pipe made by the French pipe making company, Butz Choquin (BC). I opened the link from Google to find that it was indeed the pipe I was looking for. BC still makes the 1025 shape in several of their lines. The stamping is slightly different in terms of the name on the left side of the shank. All of them have the BC name and the Line underneath. The right side has the 1025 stamp and also a Made in France. I have included the next two photos from Tobacco Pipes.com. The first is the Bistro line 1025 Rhodesian, while it has the thick shank the stem shape is slightly thinner that the one I have. The second one is from the Manoir line. It has the same thick stubby stem as the one I have. From this exploration I can see that the pipe is an older BC pipe. I have no idea what the Everton stamping is – though it may well be a Liverpool tobacconist.
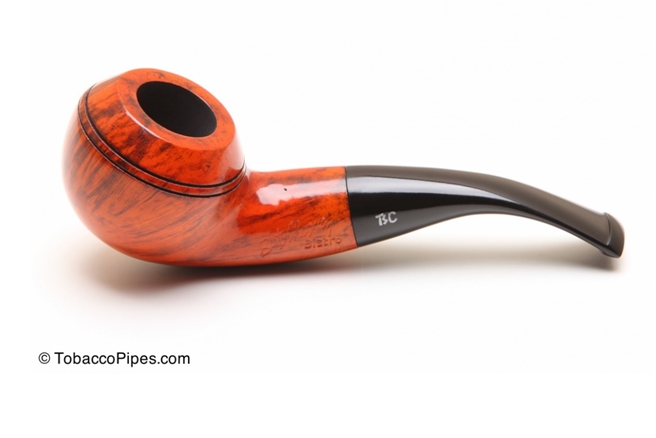
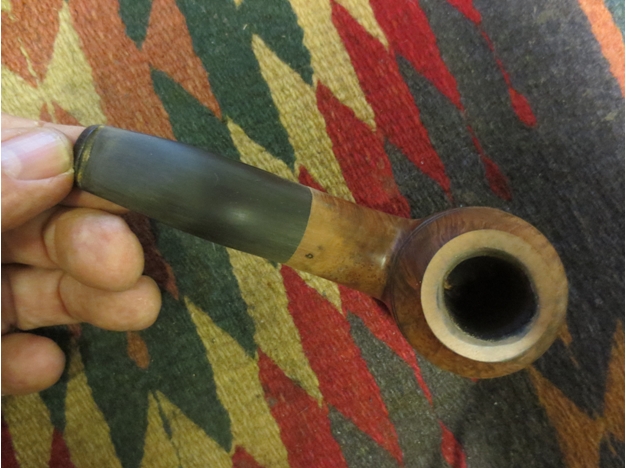
 As I examined the pipe upon taking it out of the box I was troubled by the state of the pipe. There were no noted issues with the pipe either on his site or in email exchanges regarding billing and shipping. The trouble was that there were many issues with the pipe. All together they add up to a question mark for me regarding this pipe. The bowl was over reamed and out of round. There appears to be a sandpit in the inner edge of the bowl toward the front. There is a small crack on the underside of the bowl (the heel) directly below the over reaming. The top of the shank near the stem has a large pit that appears to have small spider web cracks that radiate from it. They are not deep but they are present. The stem is a mess. Evidently the previous owner found the stem to thick to his liking and had performed a butcher job trying to remedy that. It had been hacked with a knife blade on the underside from about mid stem to the button leaving the surface corrugated looking with a lot of file and knife marks. The top of the stem had also been hacked and filed in an attempt to thin it down. It is wavy and rippled. I think that most of the damages to the stem can be fixed as the stem is beefy and I should be able to smooth them out. In terms of the over reaming and the crack – time will tell what I can do with it. Needless to say I was disappointed when I opened the package from the seller.
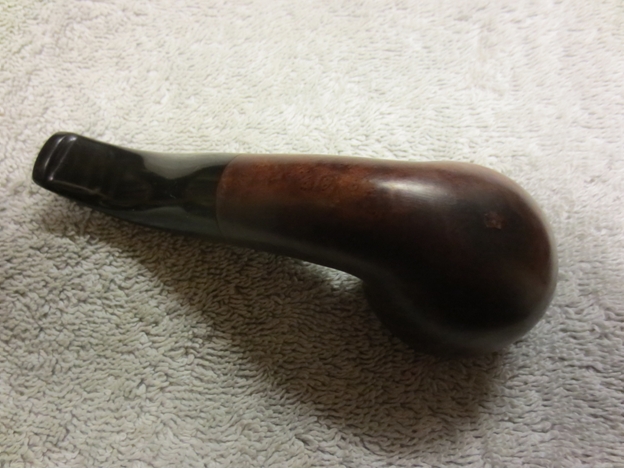
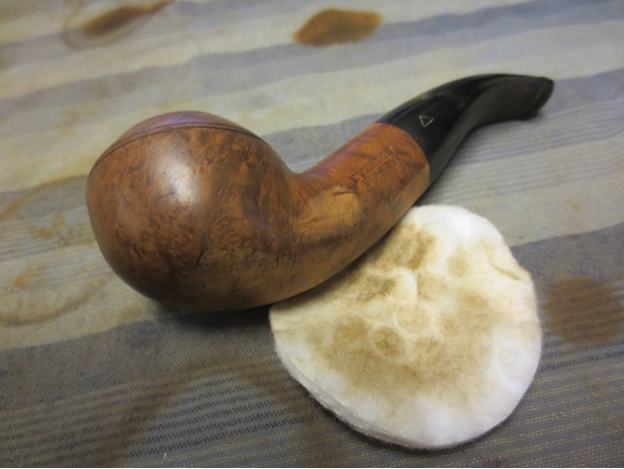
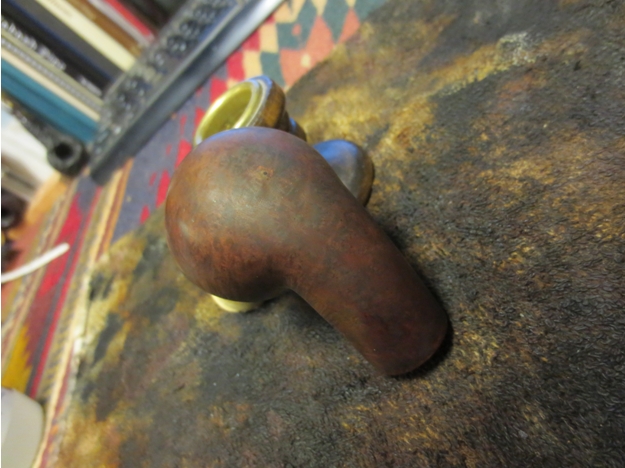
From first appearance the pipe does not appear all that deficient. It seems like it is in pretty good nick. You can see the similarity in shape to the GBD 9438 Rhodesian in the photos below.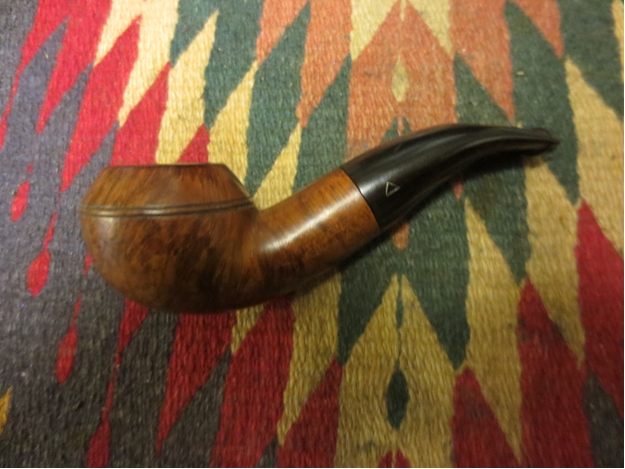
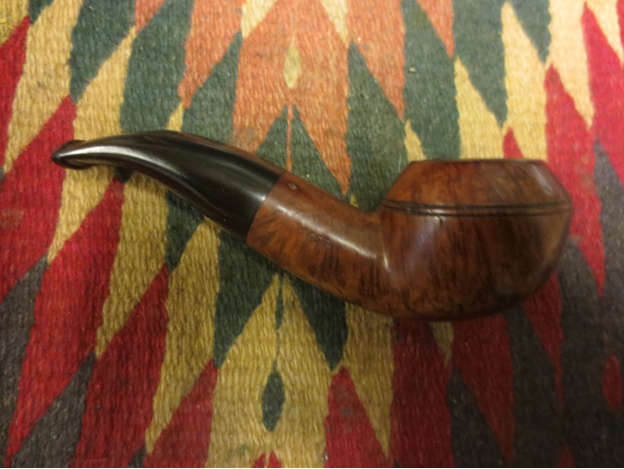
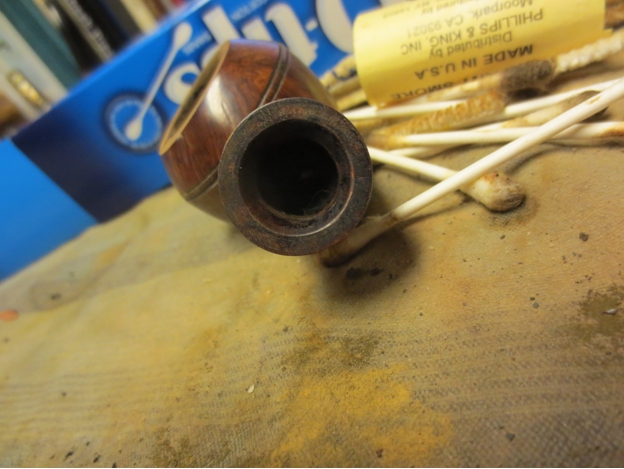
 It is only when the pipe is viewed more closely that the problems become obvious. The first photo below shows the crack in the bottom of the bowl and the dents and scratches around that crack.
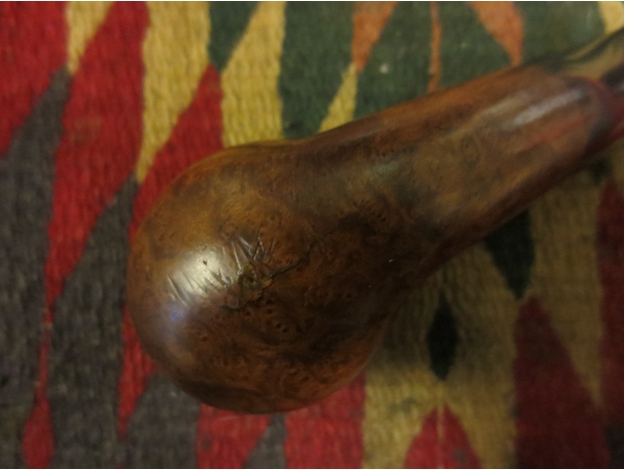 The next photo shows the underside of the stem. The underside had been carved with a knife and with files and left maimed and decimated. The gouges were deep and crossed each other leaving a corrugated surface.
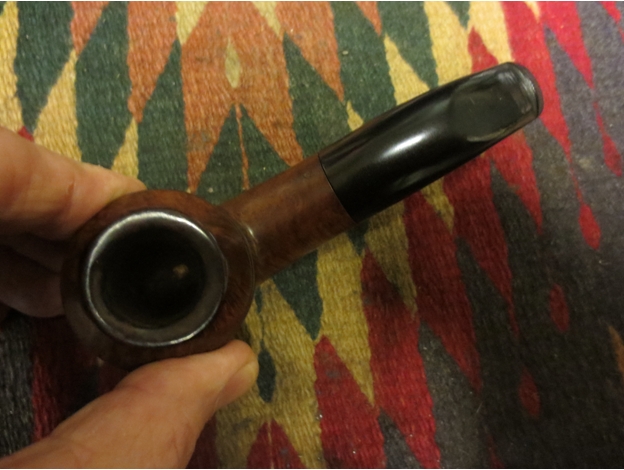
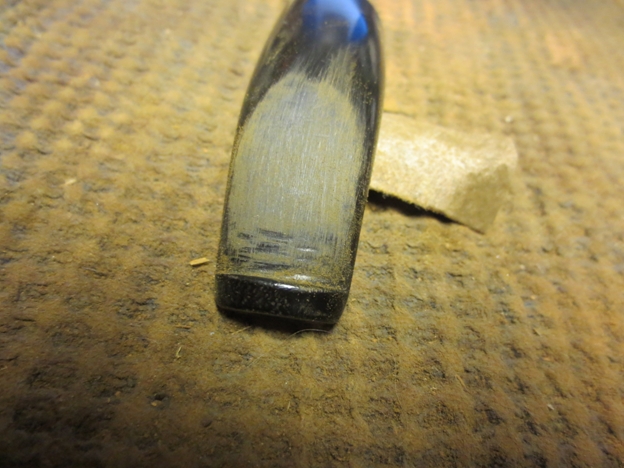
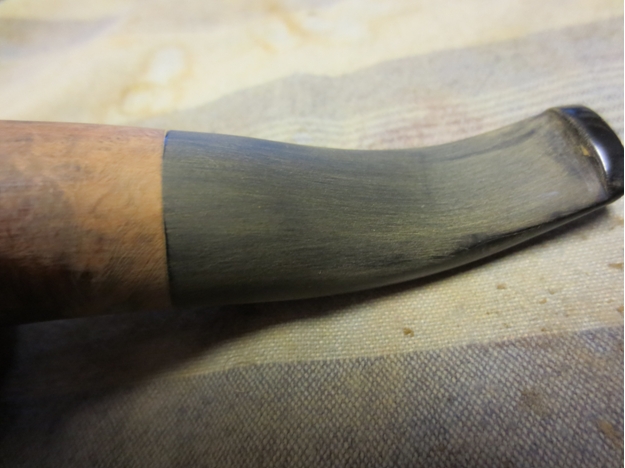
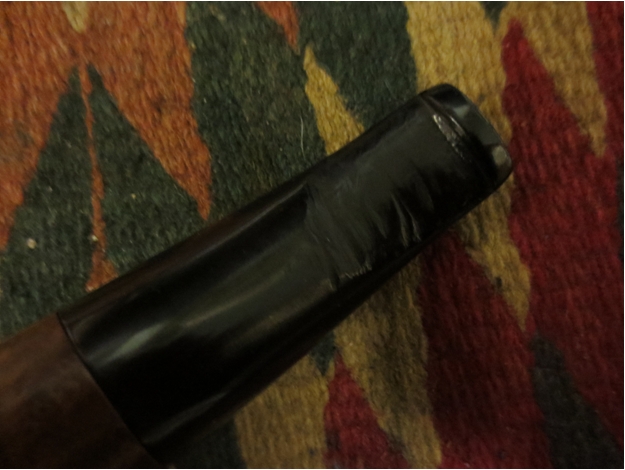 The next photo shows the topside of the stem. It had much the same issues as the underside but was nearly as drastic. It had grooves, scratches and flattening. There were ripples in the surface of the vulcanite that left it marked. The filing had left grooves and damage and had been done at angles that destroyed the flow of the stem.
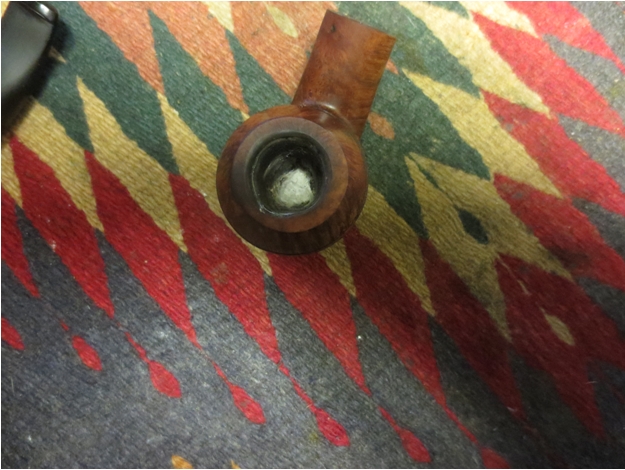
 The bowl was out of round and the rim had damage to the inner front edge of the bowl. There was a pit in the edge that had opened up. There was burn damage to the bowl edge and rim top.
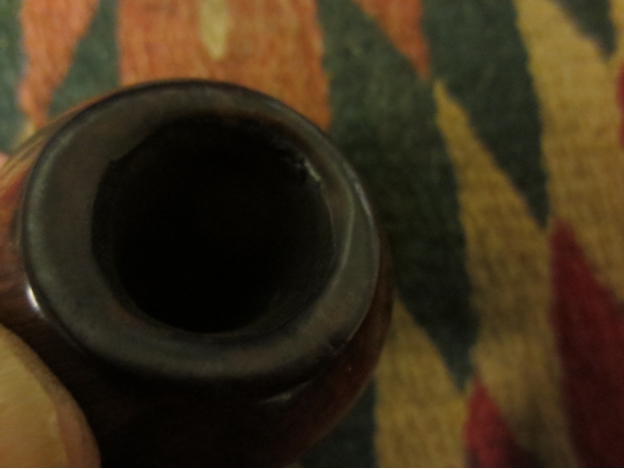 I started working on the stem to smooth out the ridges and corrugations on the top and underside. I used 180 grit sandpaper to begin the process and reduce the ridges. The next series of photos show the stem after this initial sanding.
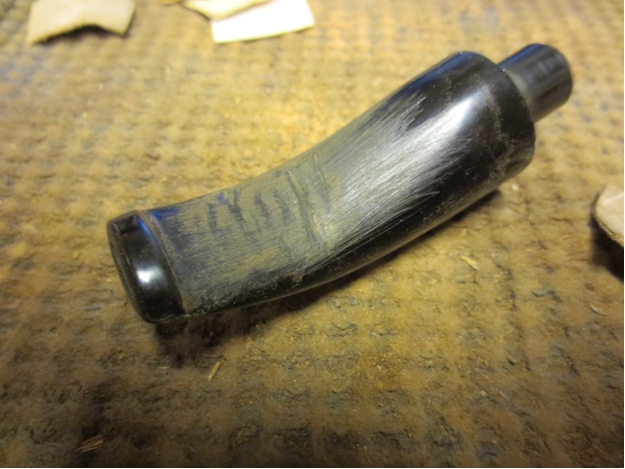
 I continued to sand with 220 grit sandpaper to reduce the scratches and smooth out the surface. I followed that by sanding with a medium and a fine grit sanding sponge. The next two photos show the progress in the shaping of the stem. The top side worked quite well. The underside still had one horizontal groove that would take more work but the overall look was getting better.
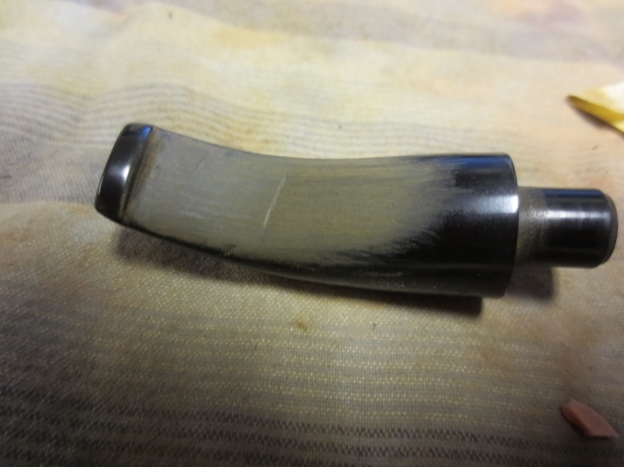
 I continued to sand the underside with the 220 grit sandpaper to remove the groove and reshape the edges of the stem.
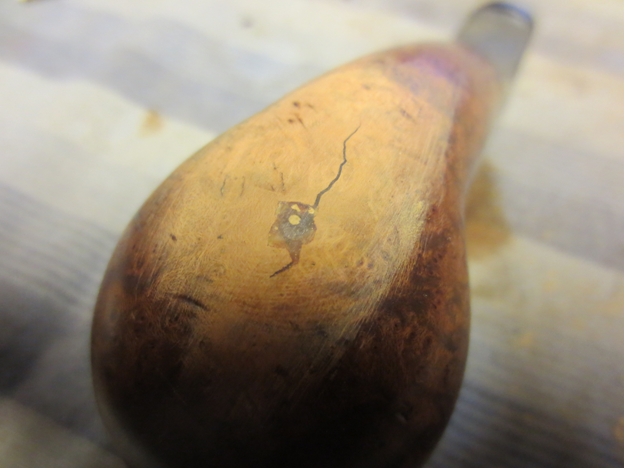
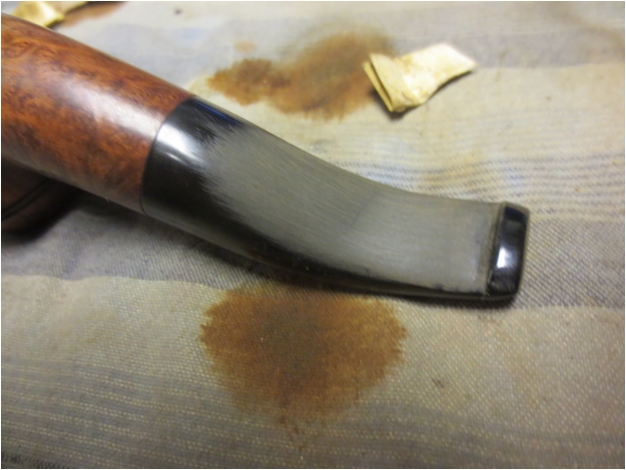 Once I had the stem shaped and smoothed out I sanded the bottom of the bowl to clean up the glue and bumps on the bottom of the bowl. I sanded with 220 grit sandpaper to smooth out the surface. Once I had removed the glue I could see that the damaged area, the crack had been repaired with epoxy mixed with briar dust. I was glad to see that the crack had been repaired and that the repair while rough, nonetheless was solid and had stopped the crack. The round area in the center of the crack made me wonder if there was potential burnout that had been cleaned out and repaired. Examining the bowl interior I could not see evidence of a burnout though it was severely over reamed.
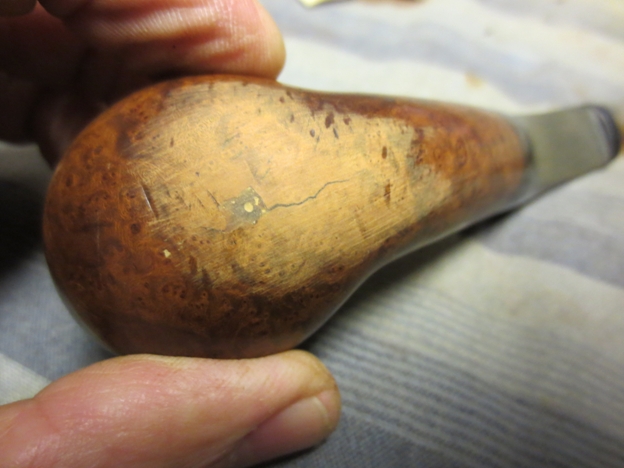
 I topped the bowl to remove the sandpit in the surface and smooth out some of the out of round shape of the bowl. The rim was damage so a light topping would take care of the problems.
 I used a folded piece of sandpaper to smooth out the inner rim of the bowl. I cleaned the shank with cotton swabs, pipe cleaners and isopropyl alcohol.
 On the top of the shank there was a sandpit at the shank/stem junction that had spidering cracks around it. I sanded it smooth and refilled it with super glue and briar dust. I sanded the junction with 220 grit sandpaper to smooth out the flow of the stem and shank.
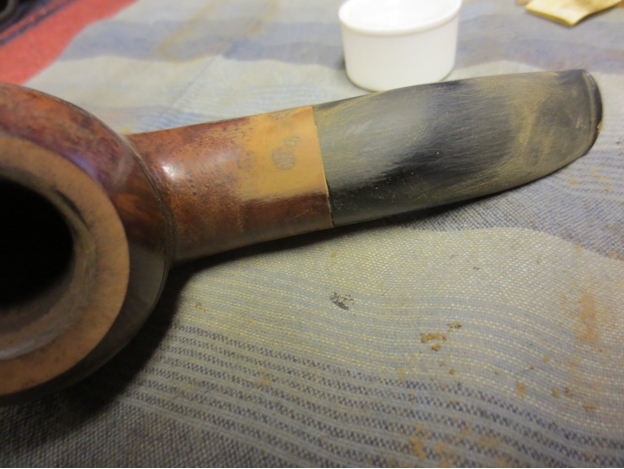
 I sanded the stem and shank with a medium and a fine grit sanding sponge and wiped the bowl and stem down with a cotton pad.
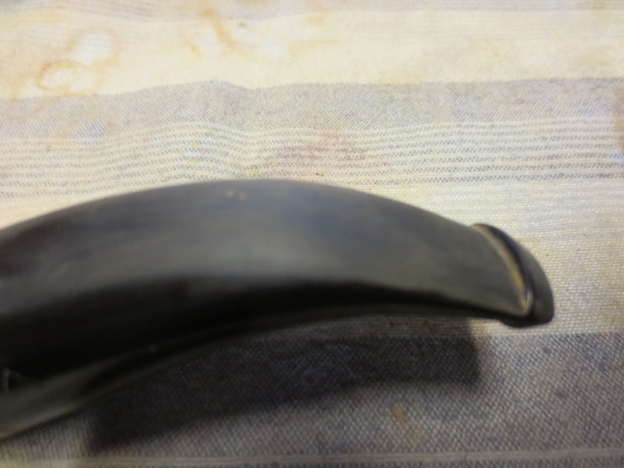 I wiped the bowl down with acetone and cotton pads to remove the finish from the bowl and prepare it for staining.
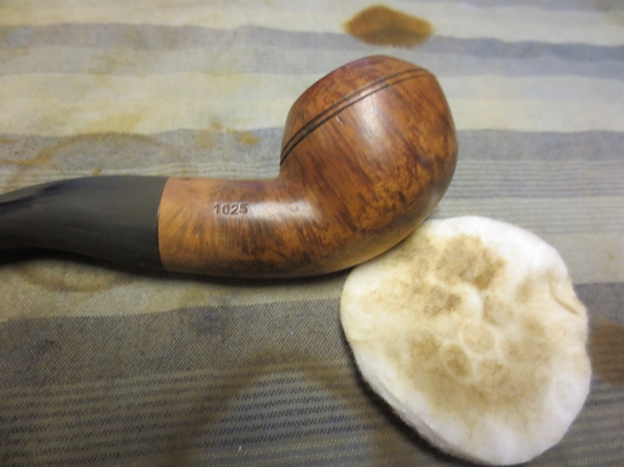

 I sanded the bowl and stem with a fine grit sanding sponge to smooth out the finish and remove the wear and tear that had come with the bowl.
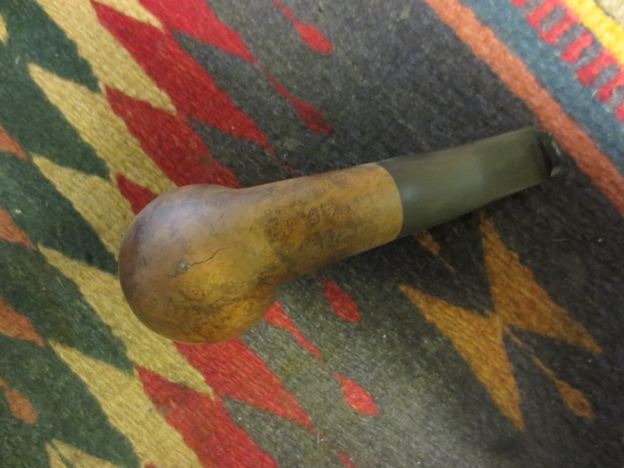
 I mixed a small batch of plaster of Paris to repair the over reamed bowl. I inserted a pipe cleaner in the shank and then pressed the plaster into the bowl bottom under and around the pipe cleaner. I raised the bottom of the bowl to the bottom of the airway.
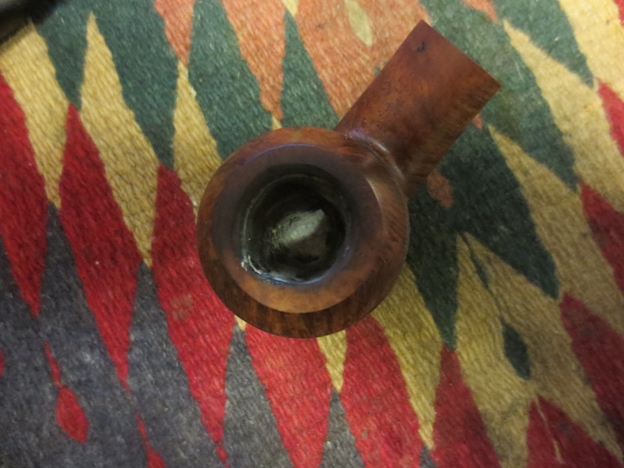
 I sanded the inner edge of the rim some more to bevel it inward and try to work in more into round. I finished that shaping and then prepped the bowl to restain. I stained it with a dark brown aniline stain and flamed it. I restained and reflamed it until I had an even coverage on the bowl.
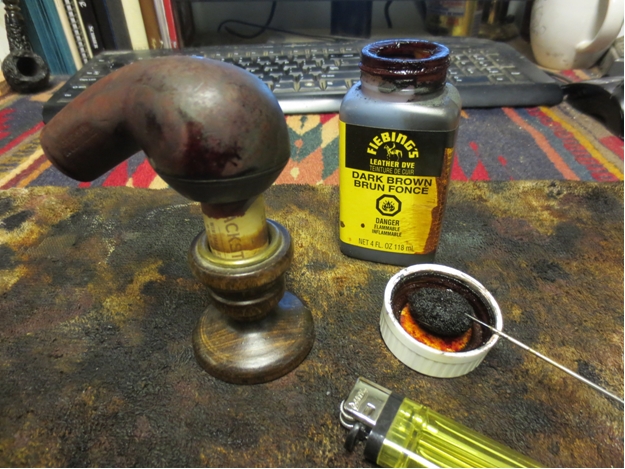 I wiped the newly stained bowl down with alcohol on a cotton pad to lighten the bowl and make it more transparent. I wanted the grain to show through once the bowl was polished.
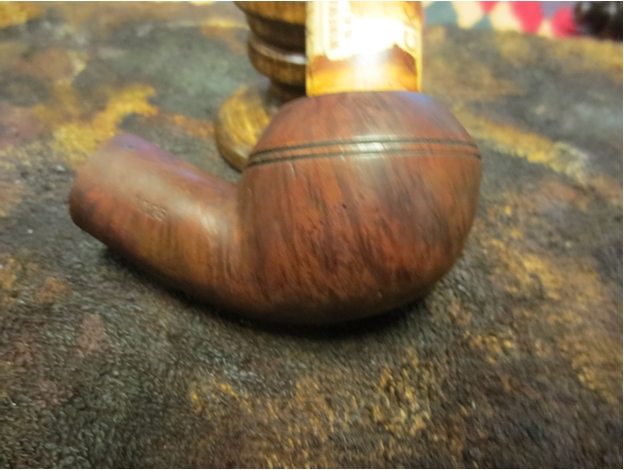
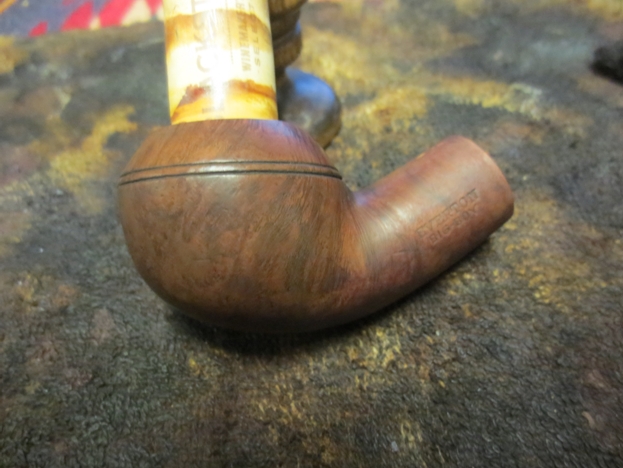
 I sanded the stem with my usual pattern of micromesh sanding pads – wet sanding with 1500-2400 grit pads and dry sanding with 3200-12,000 grit pads. I rubbed it down with Obsidian Oil between each set of three pads. Once the final rub had dried I buffed the stem with White Diamond.
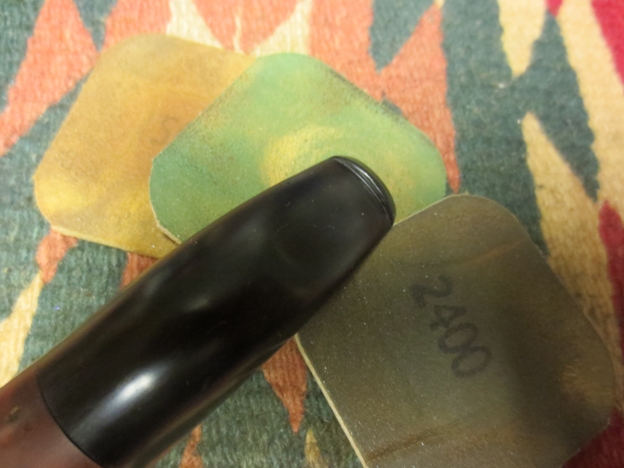
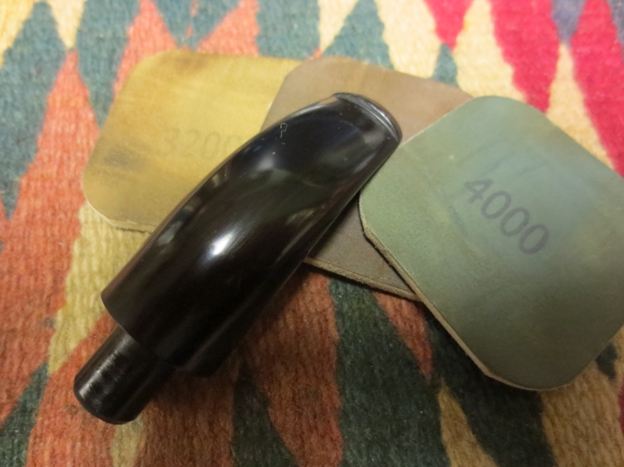
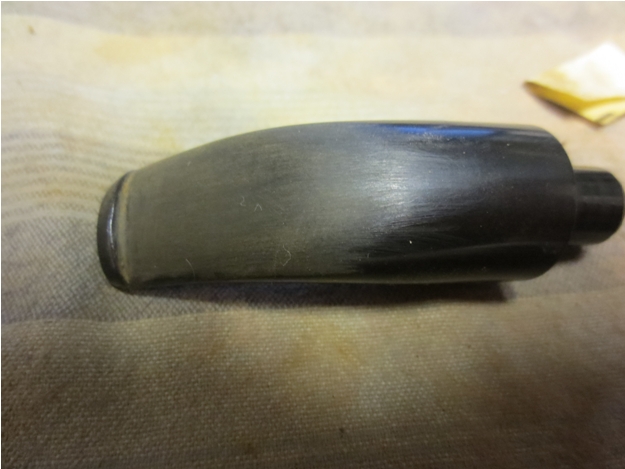
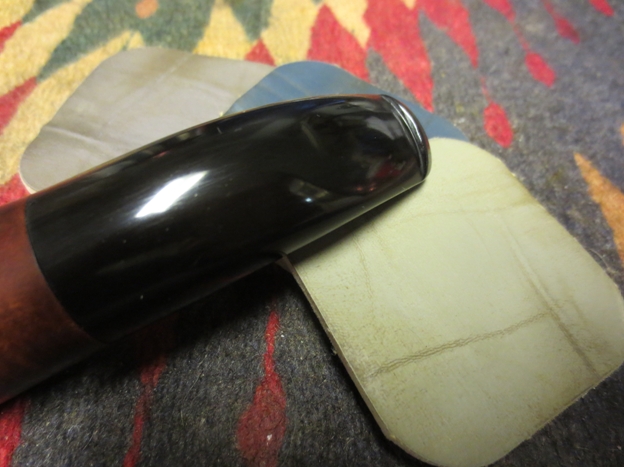 The newly shaped stem is shown in the next two photos. The shine and polish came out well and the reshape of the stem took care of the ridges and cuts on the surface. The sanding had taken care of the issues with the stem.
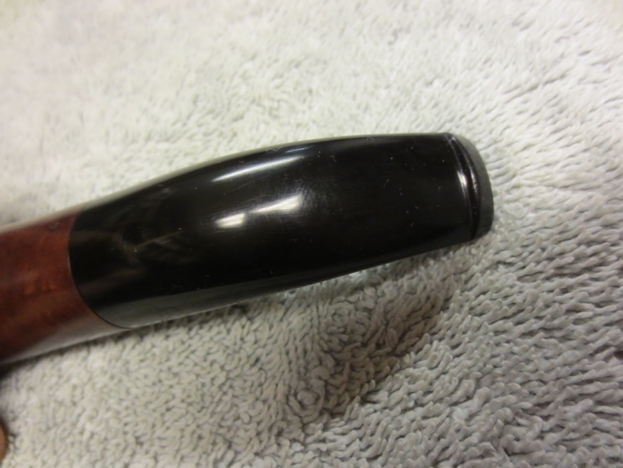
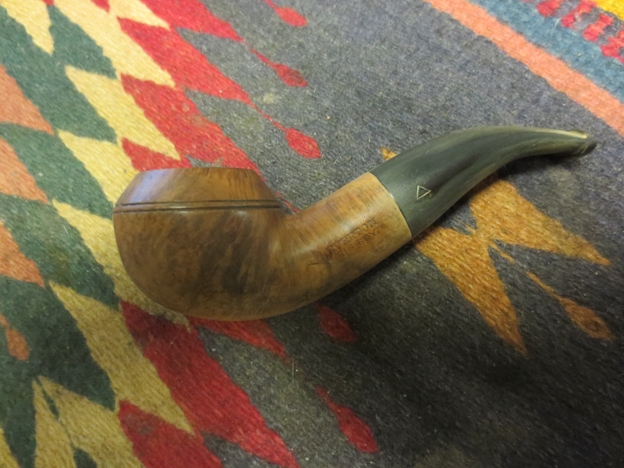
 After I put the stem on the pipe I buffed the entirety with White Diamond and then gave it multiple coats of carnauba wax. I buffed with a soft flannel buffing pad. The finished pipe is shown below. Once I shed this chest cold I intend to christen this one with a bowl of Black Parrot. I am looking forward to giving this old timer a re-entry into pipedom.