A Chairleg Style Stem on a Clubhouse Apple by GBD


Blog by Steve Laug

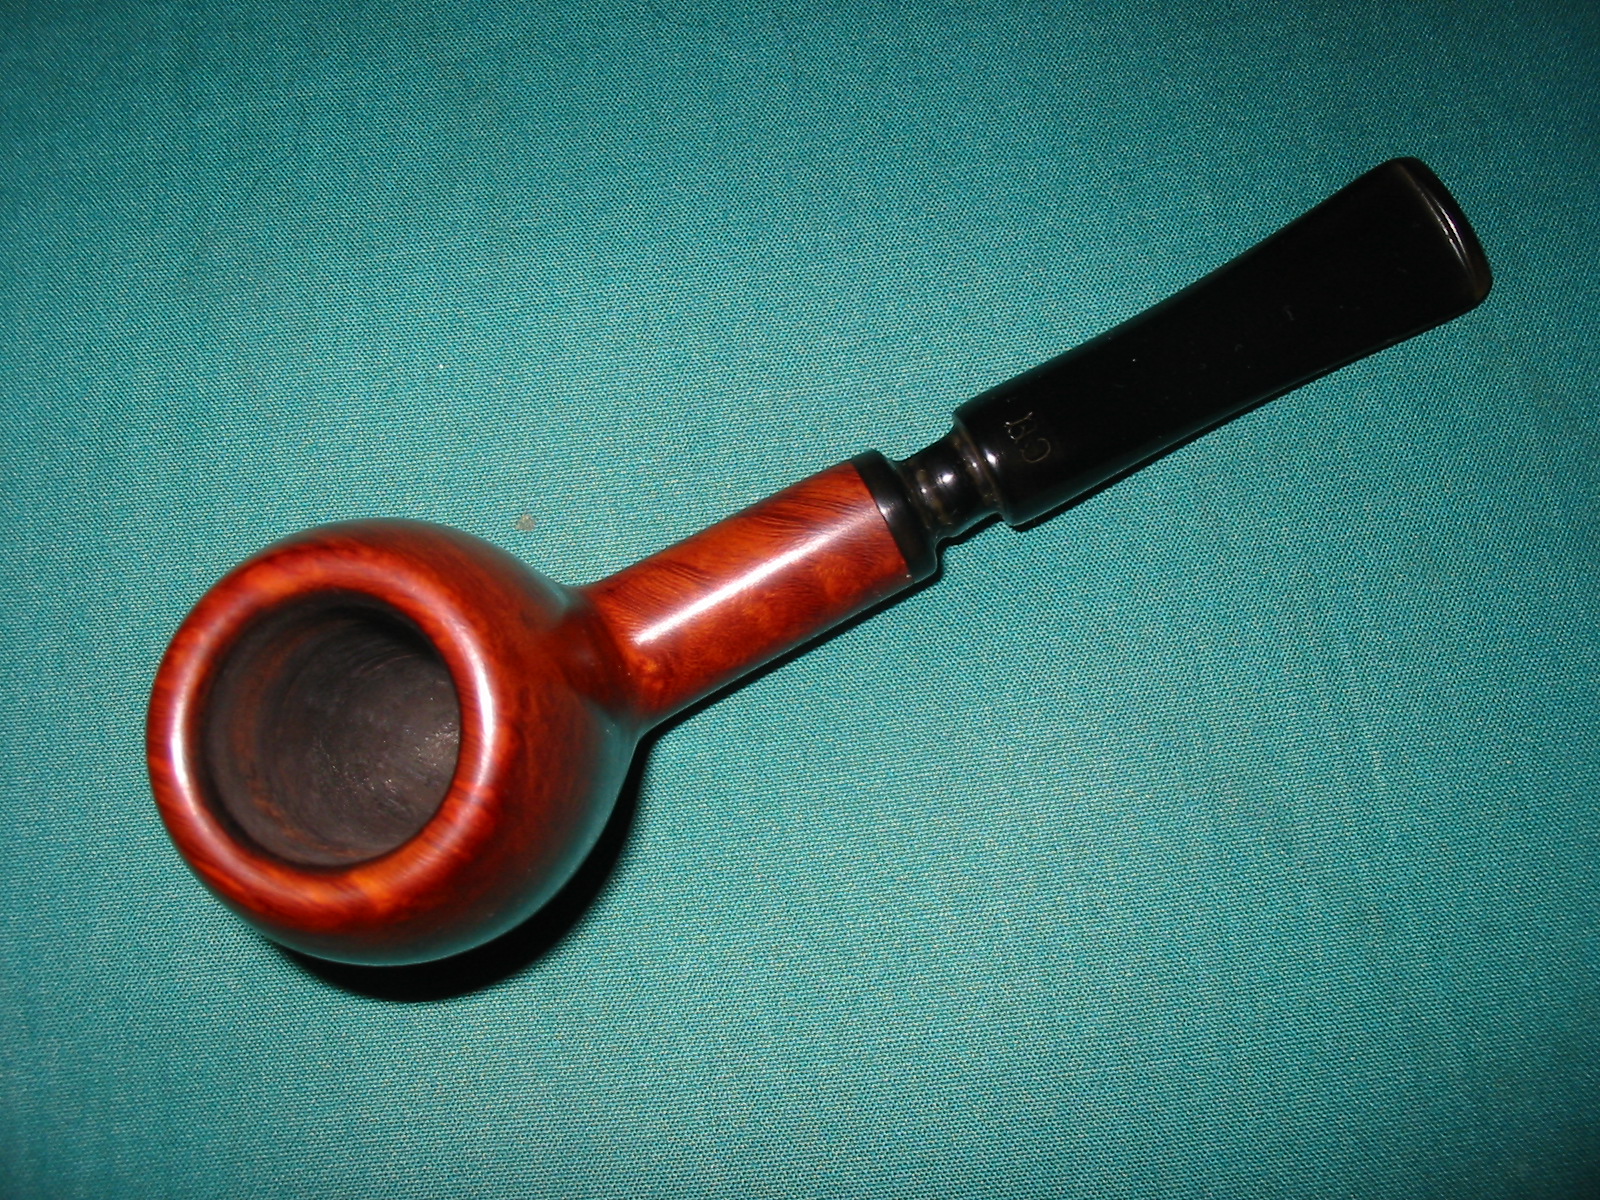
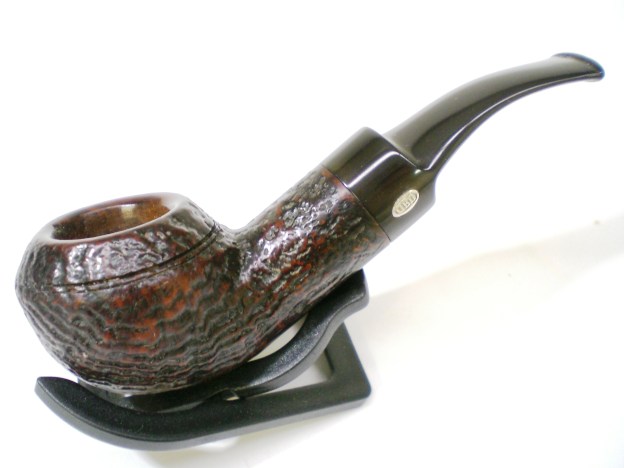
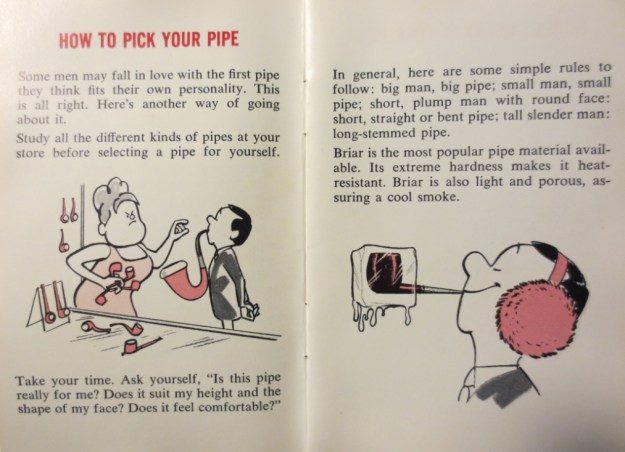
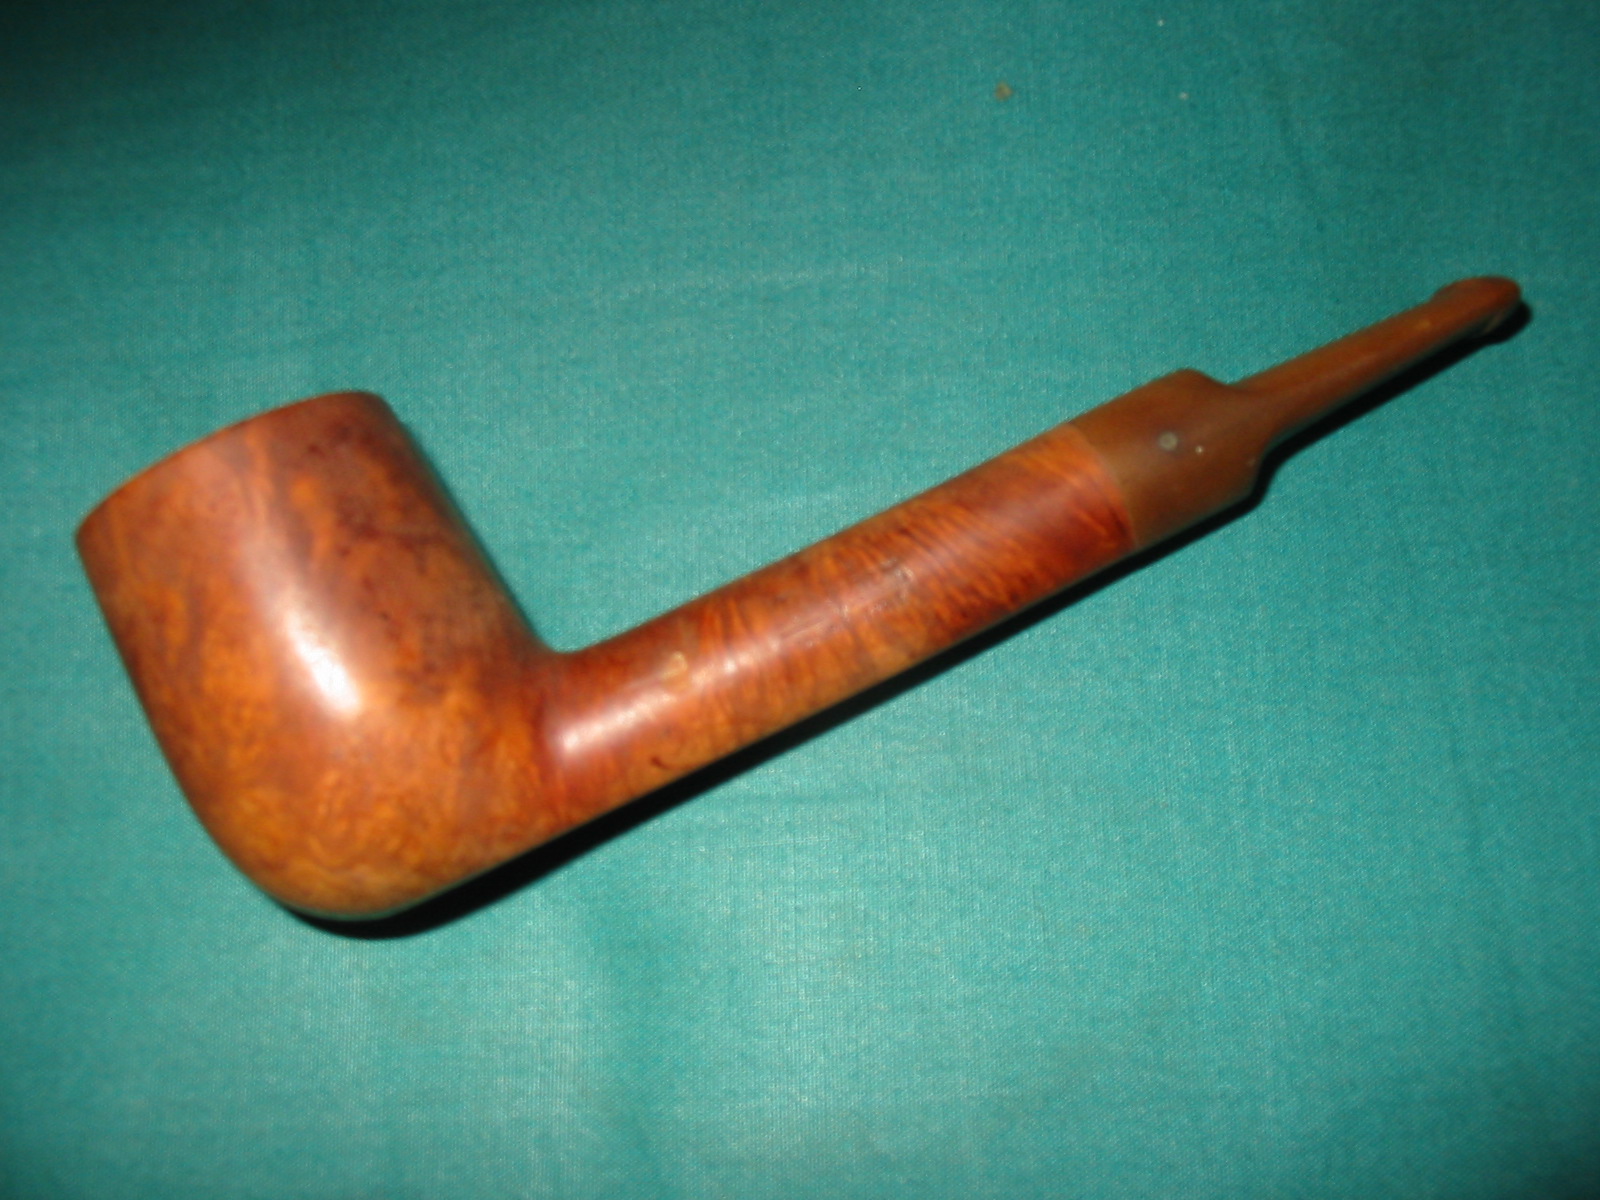
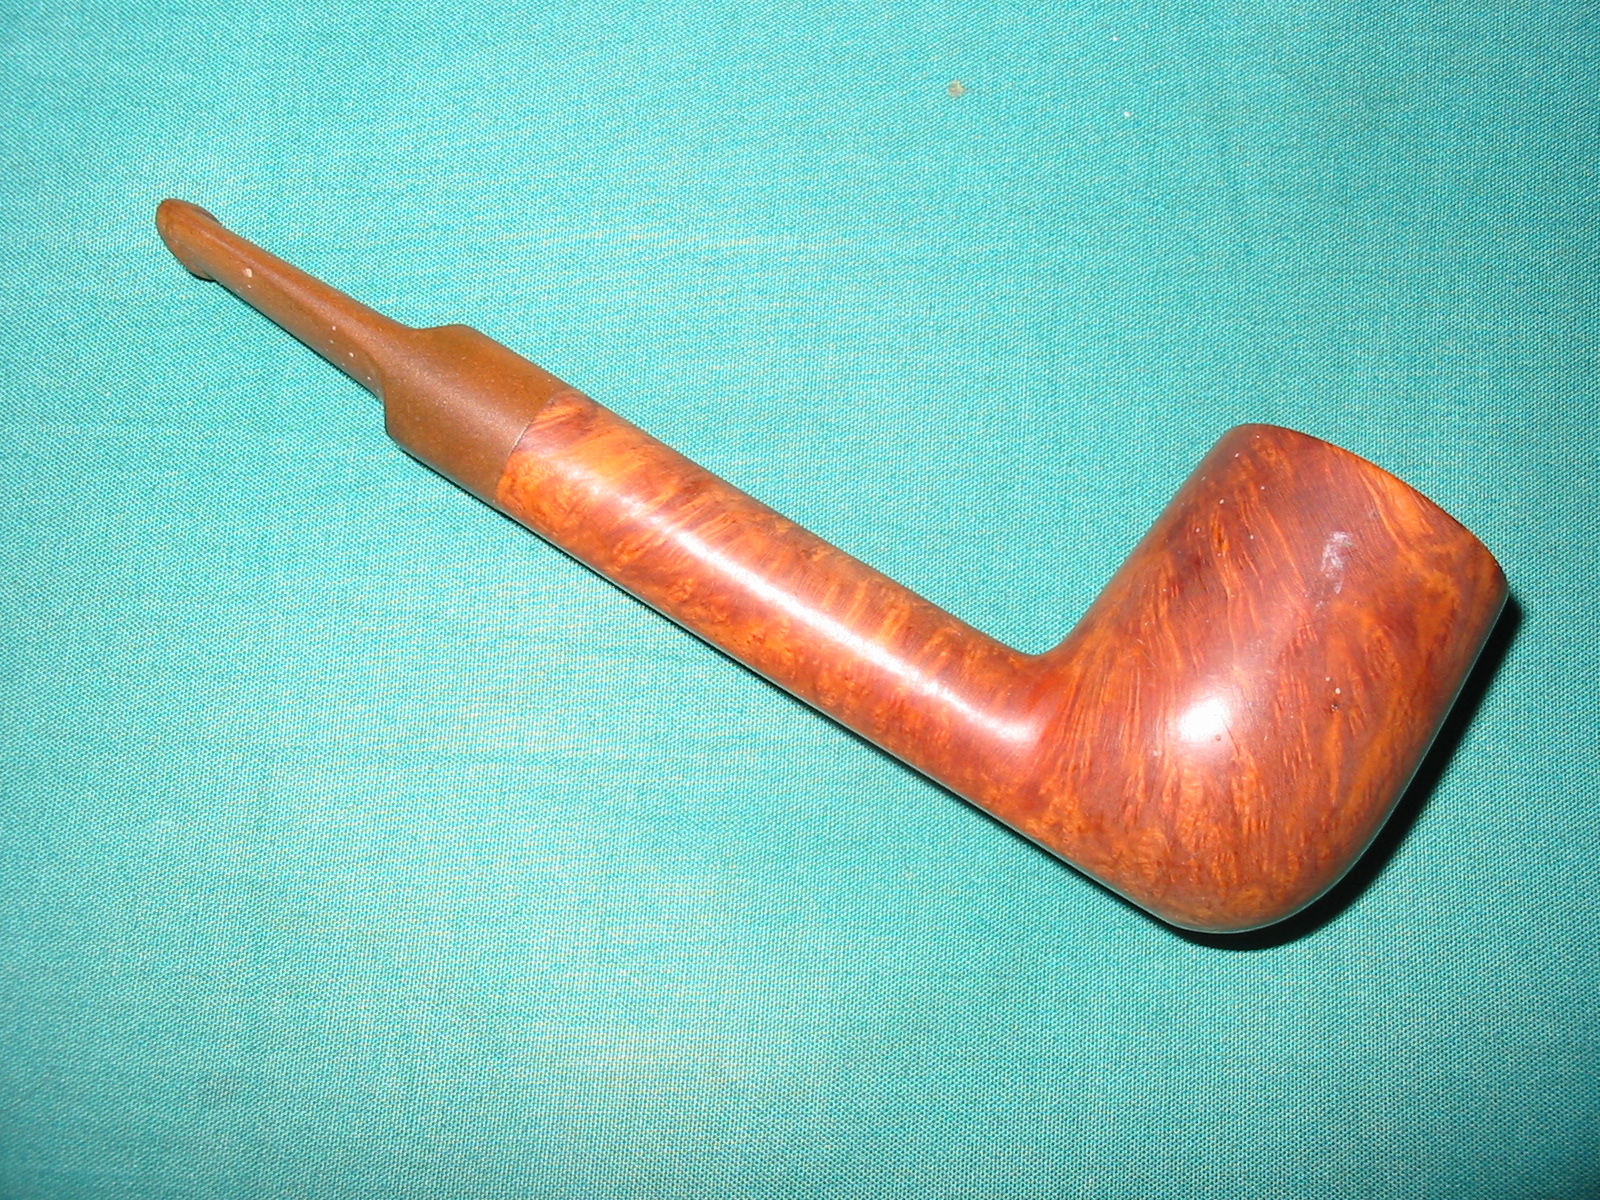
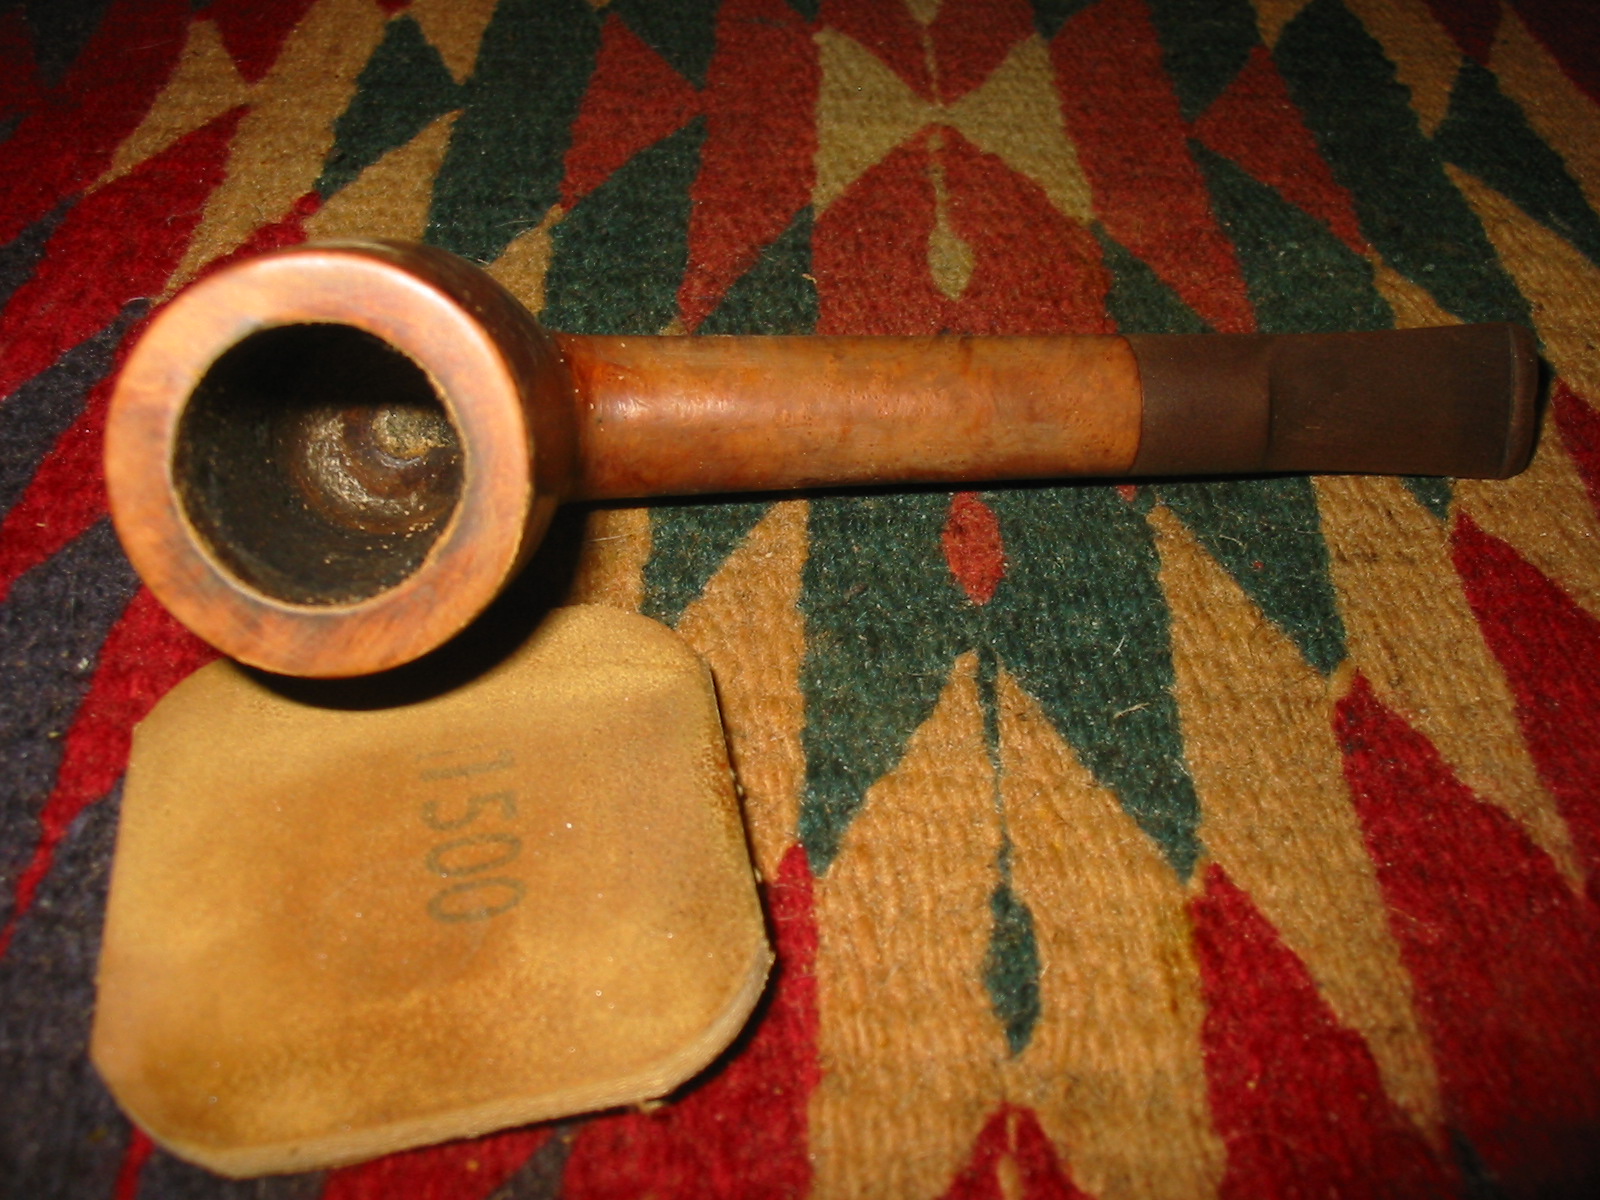
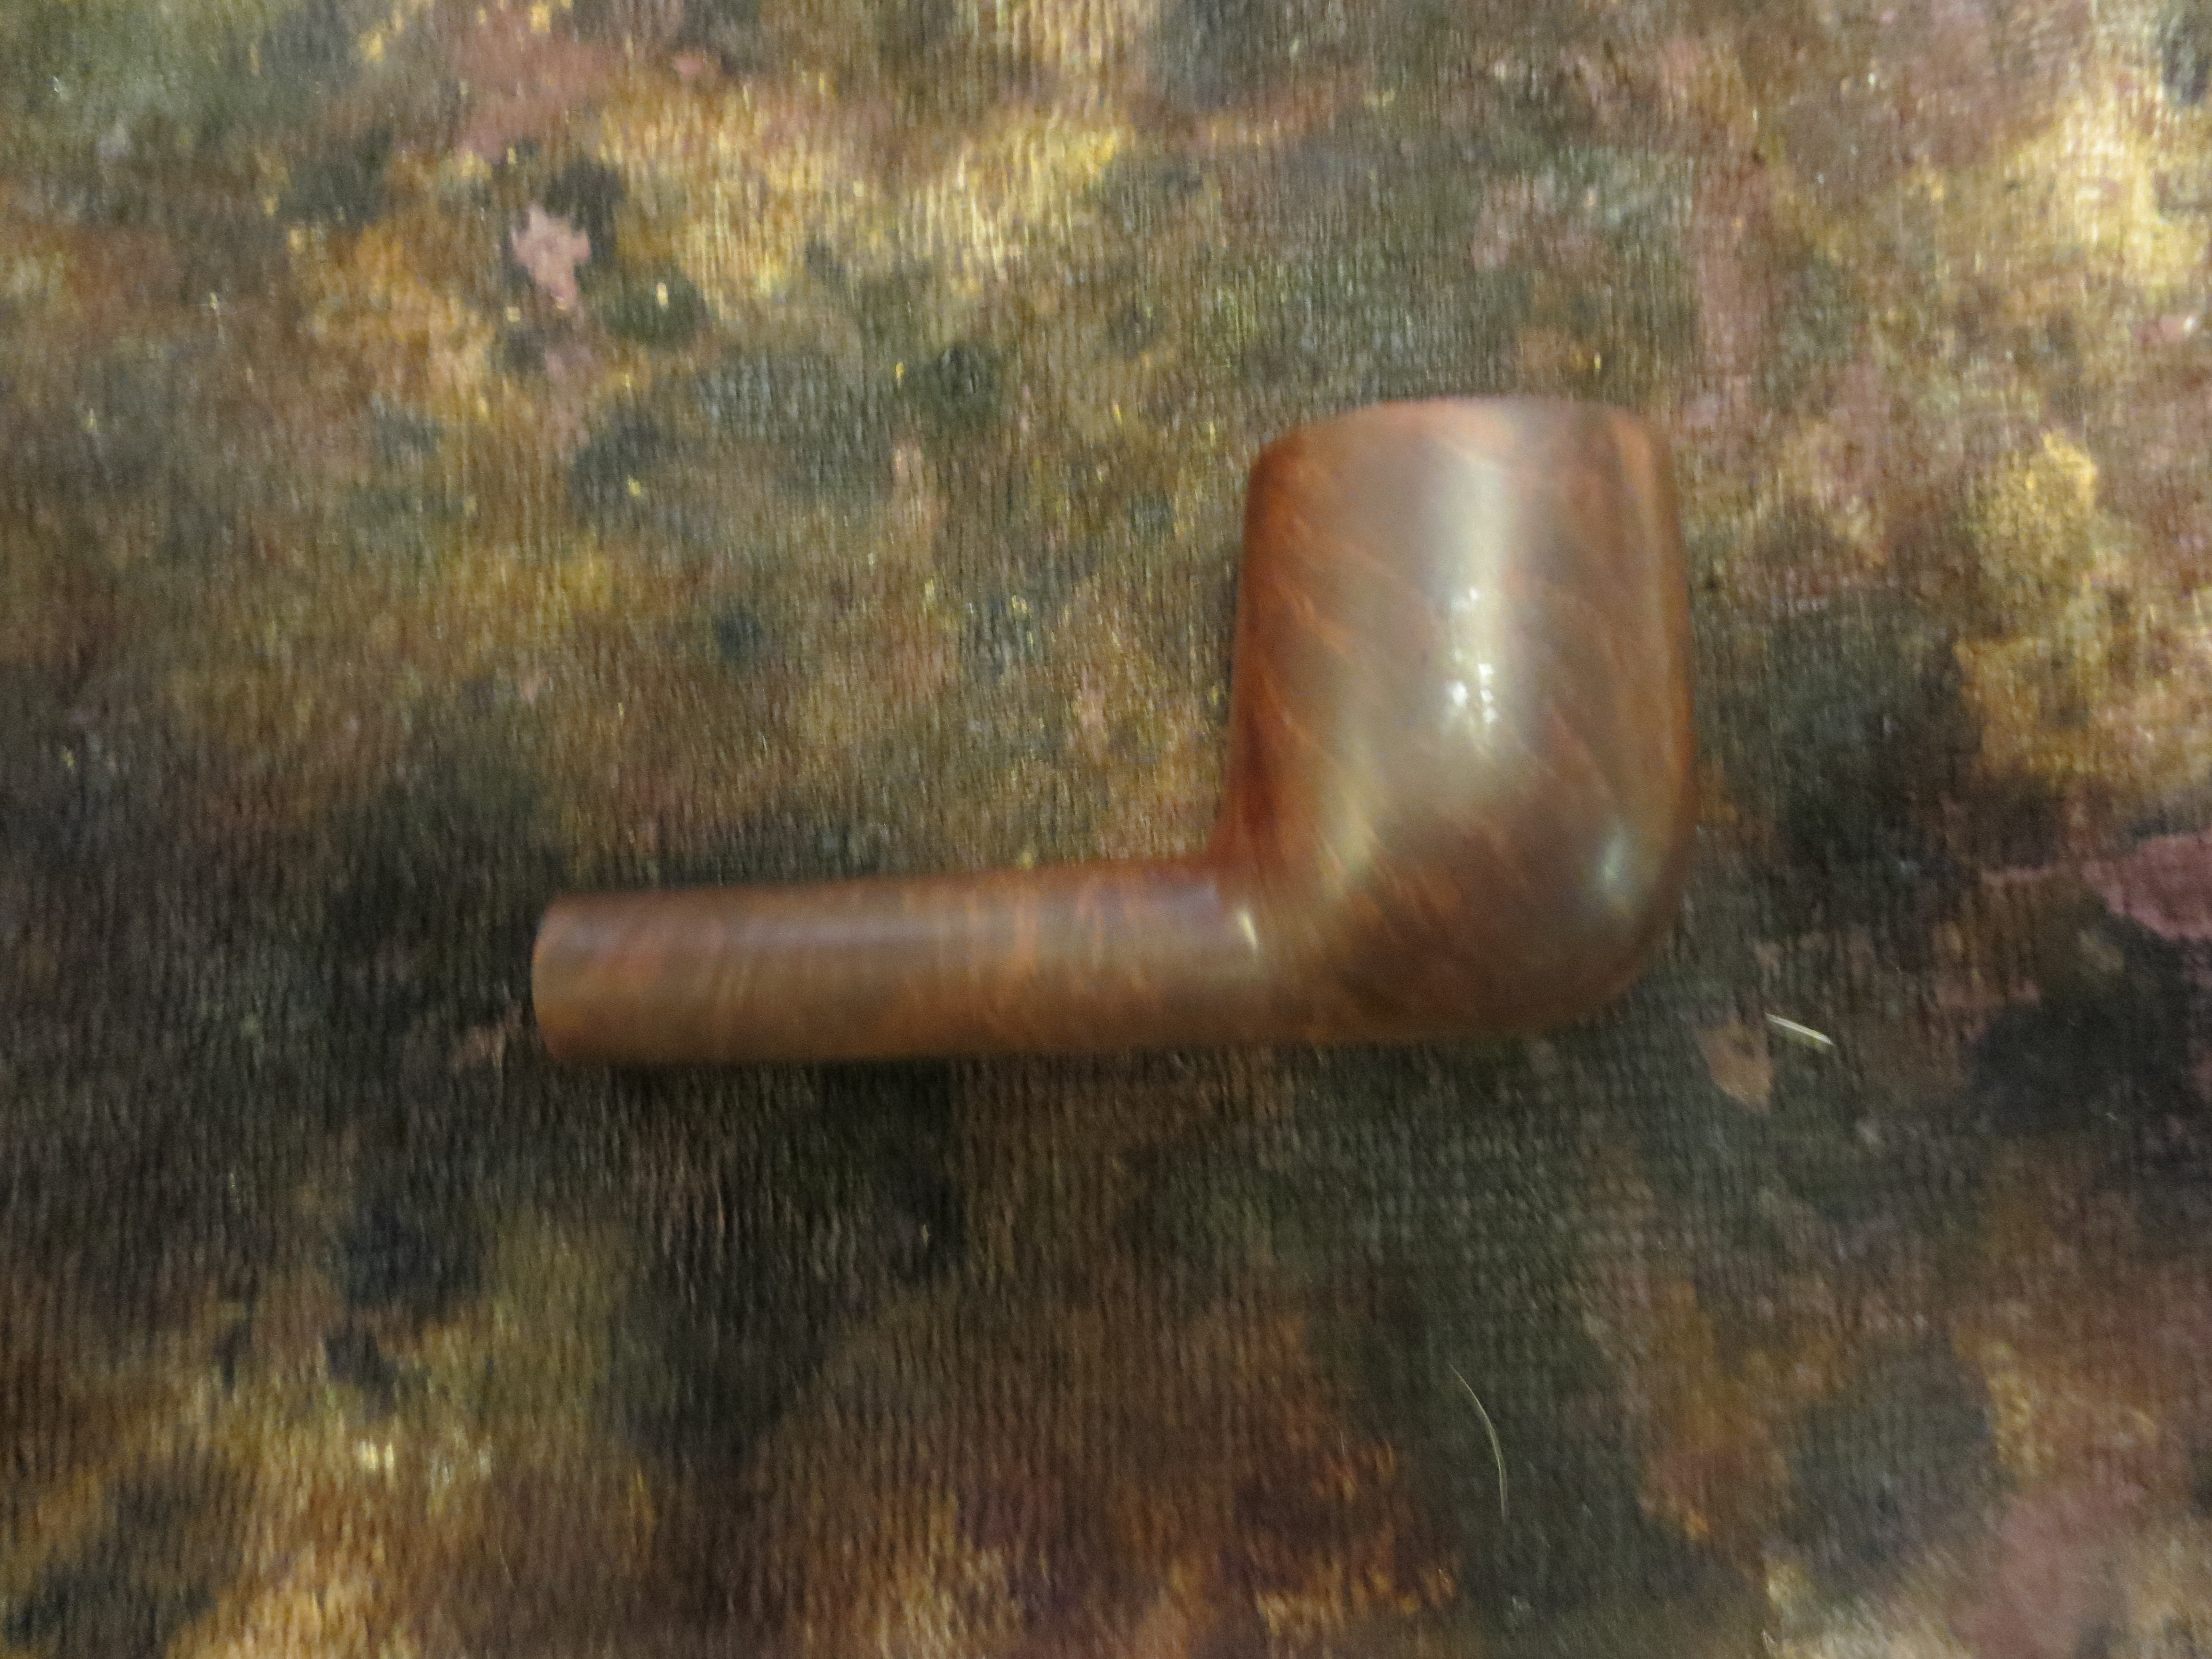
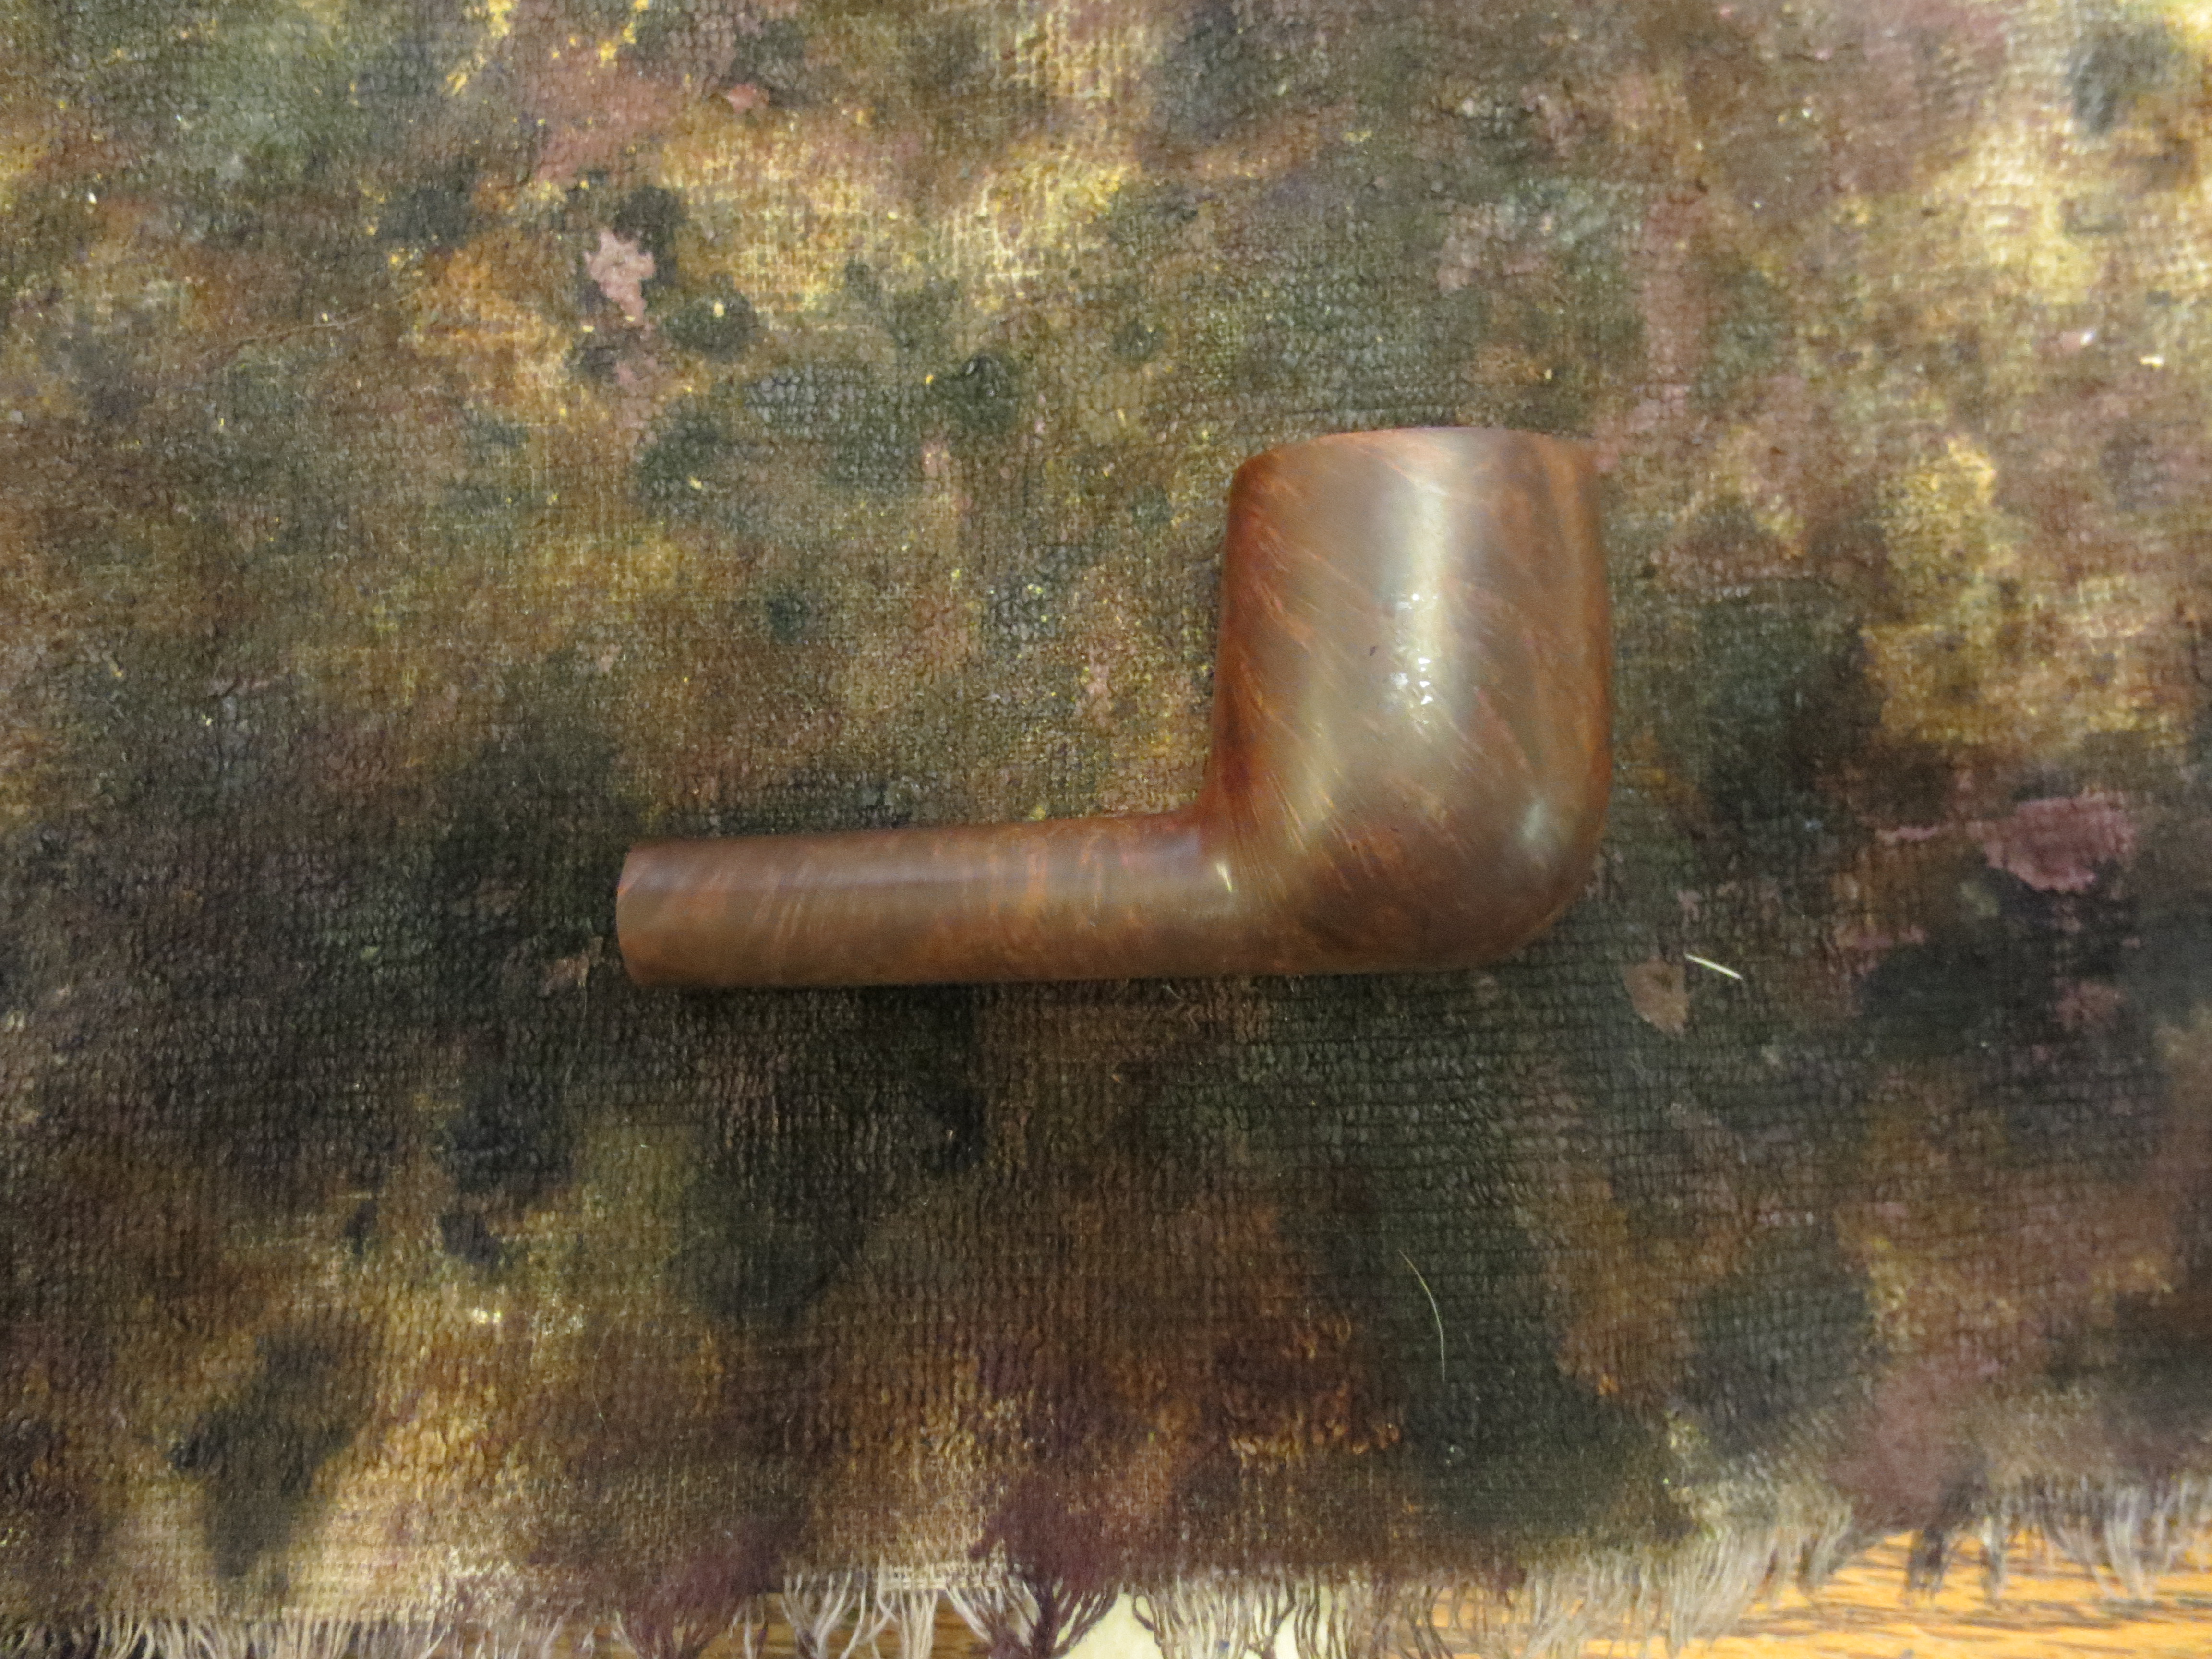
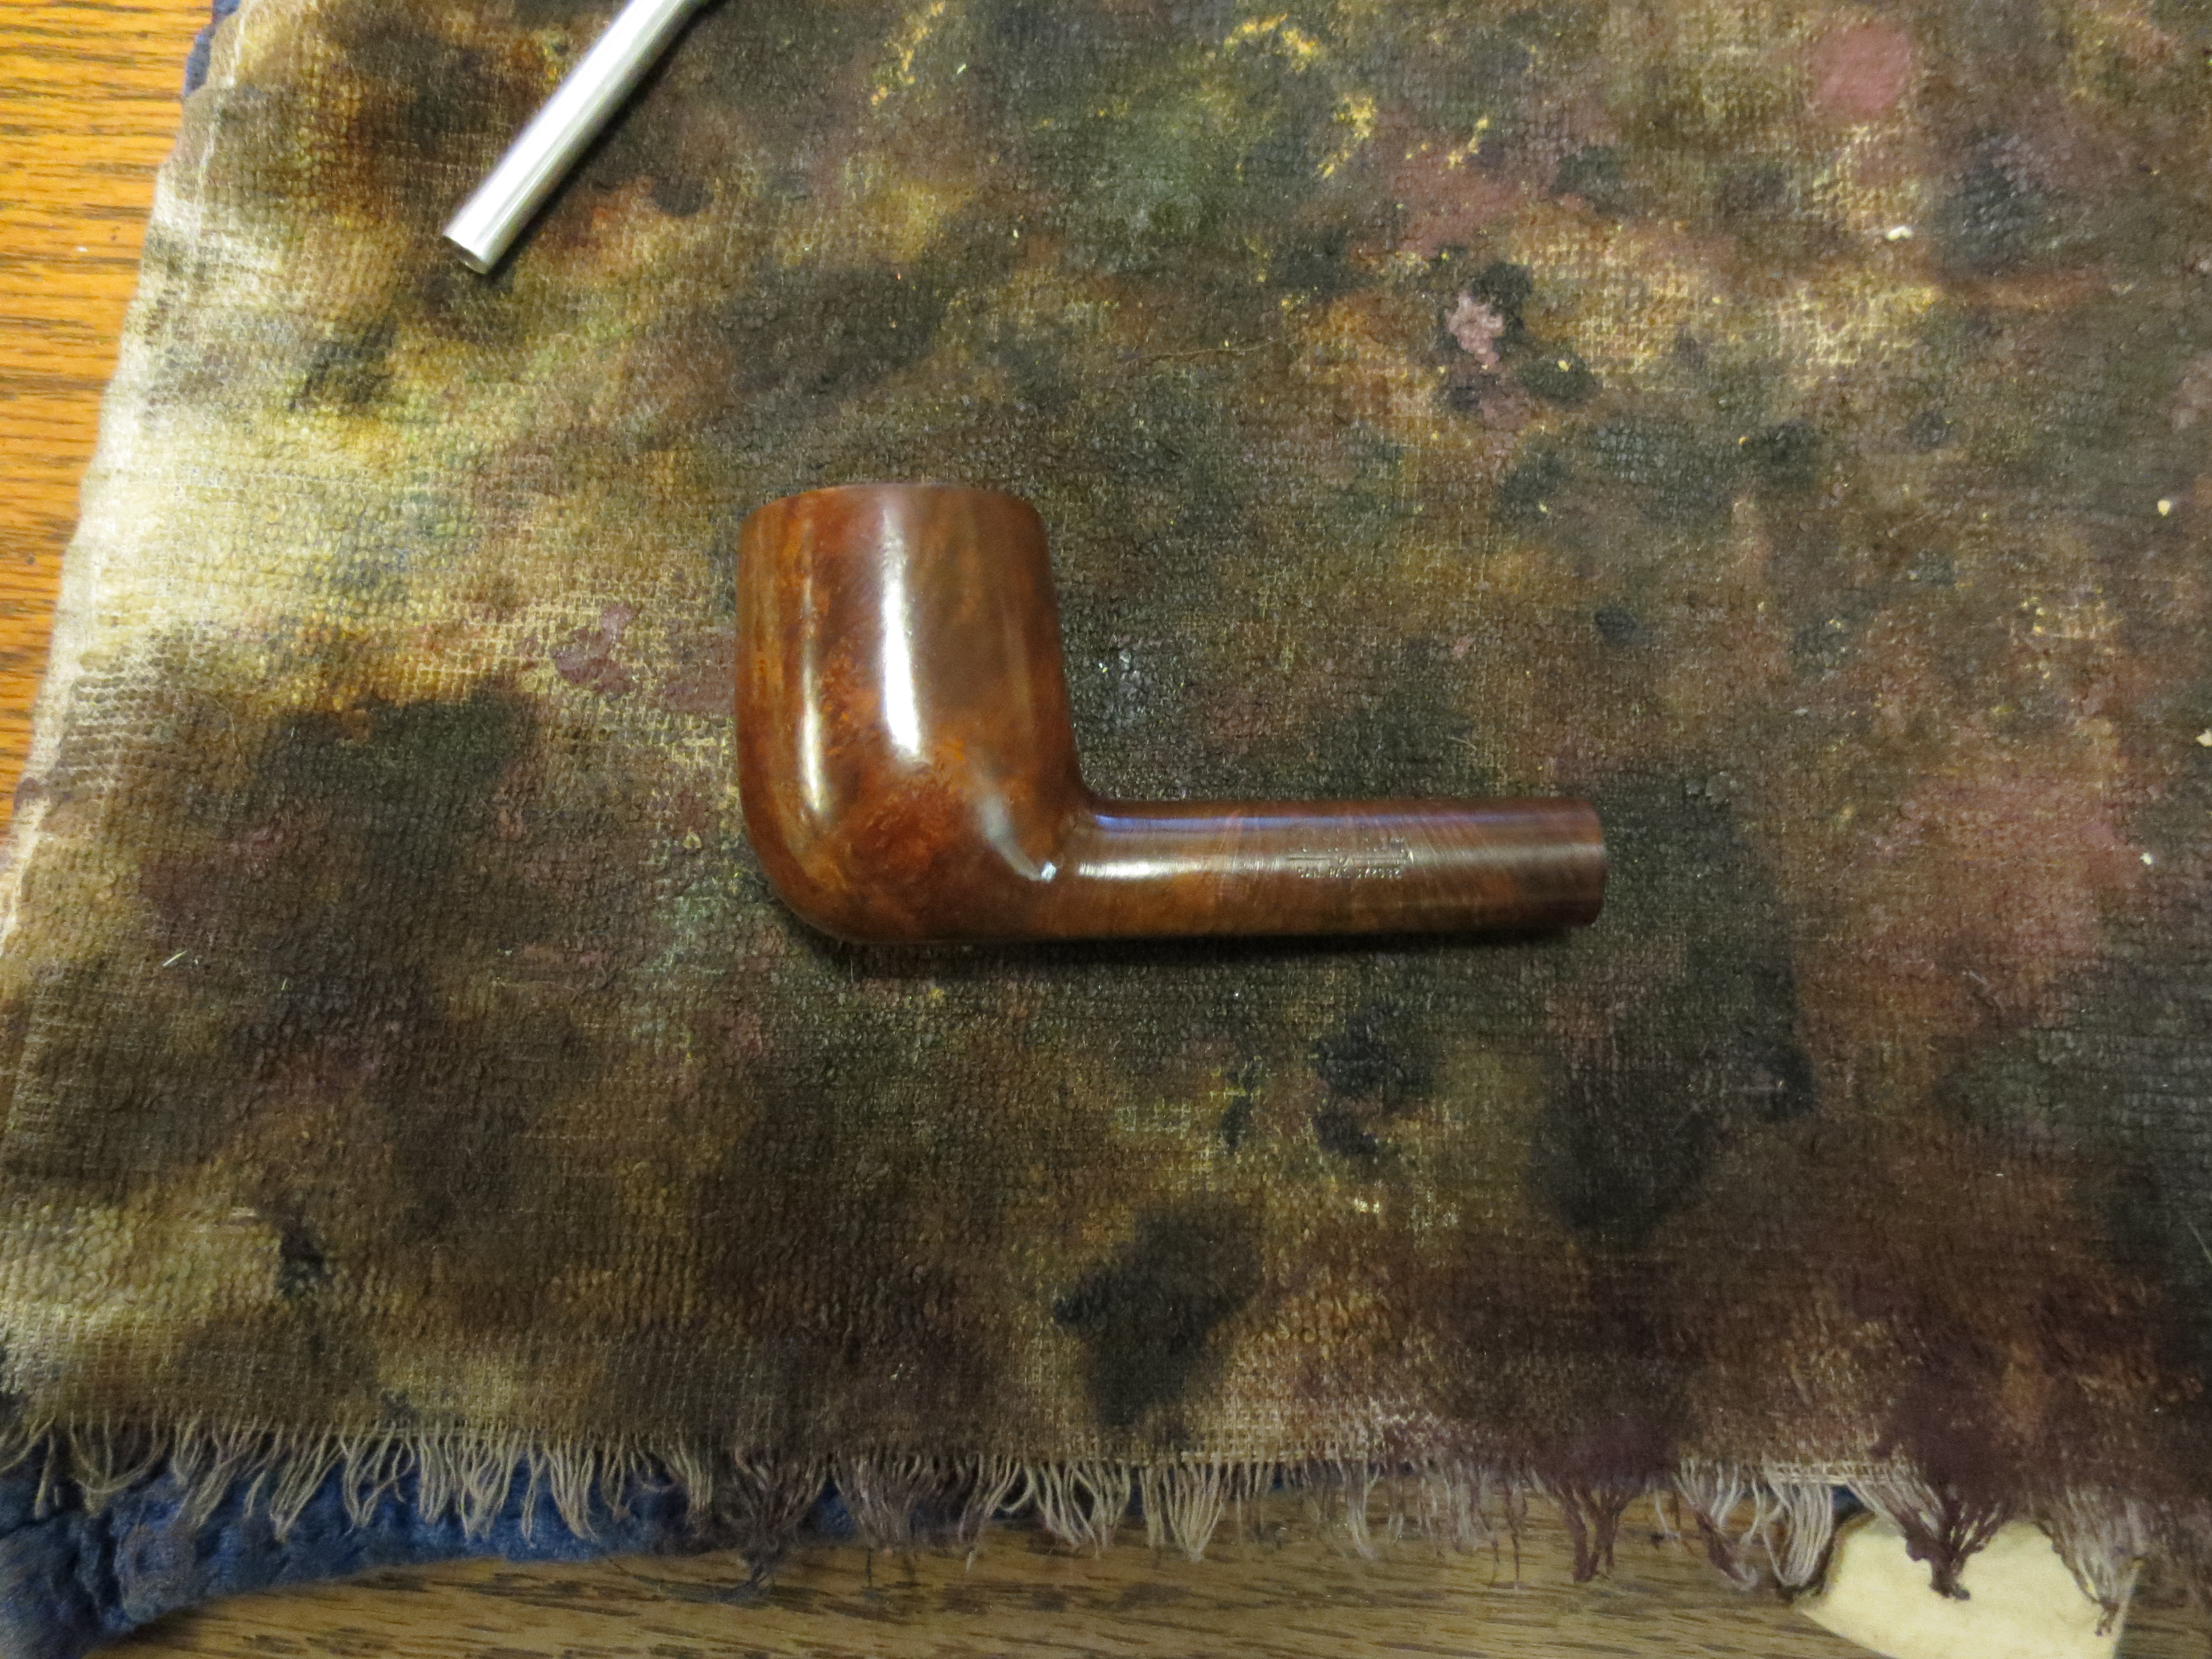
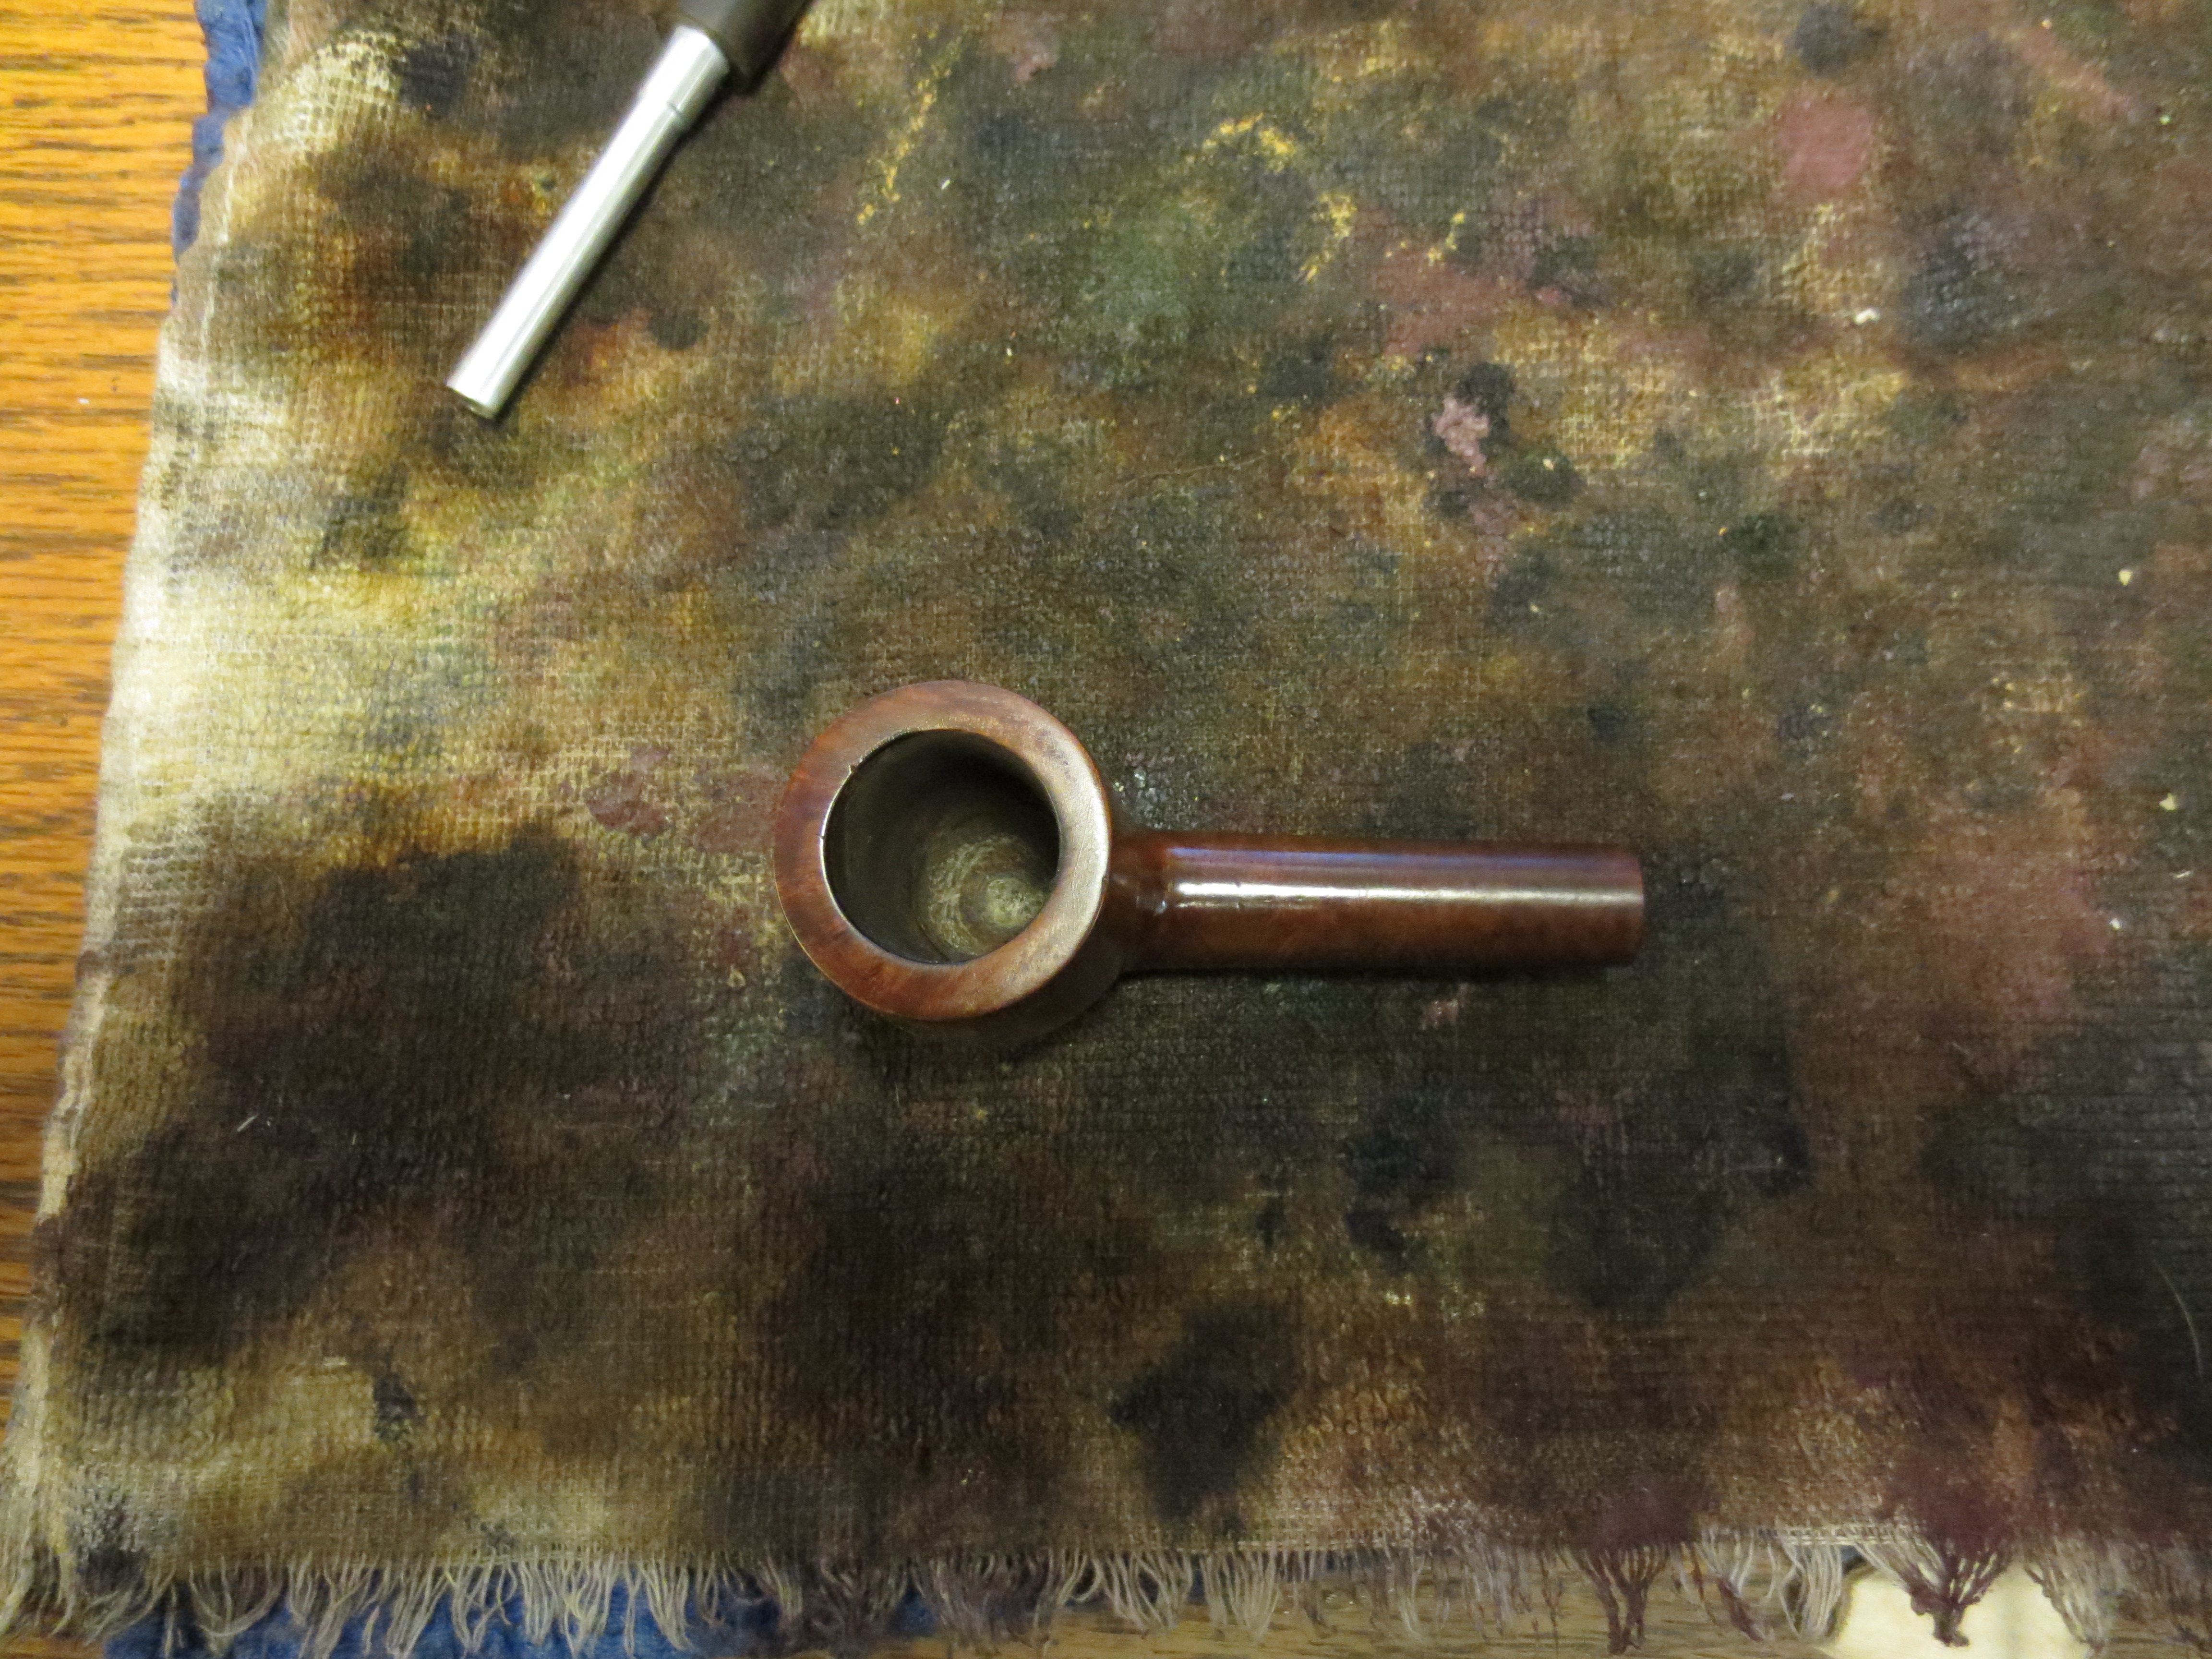
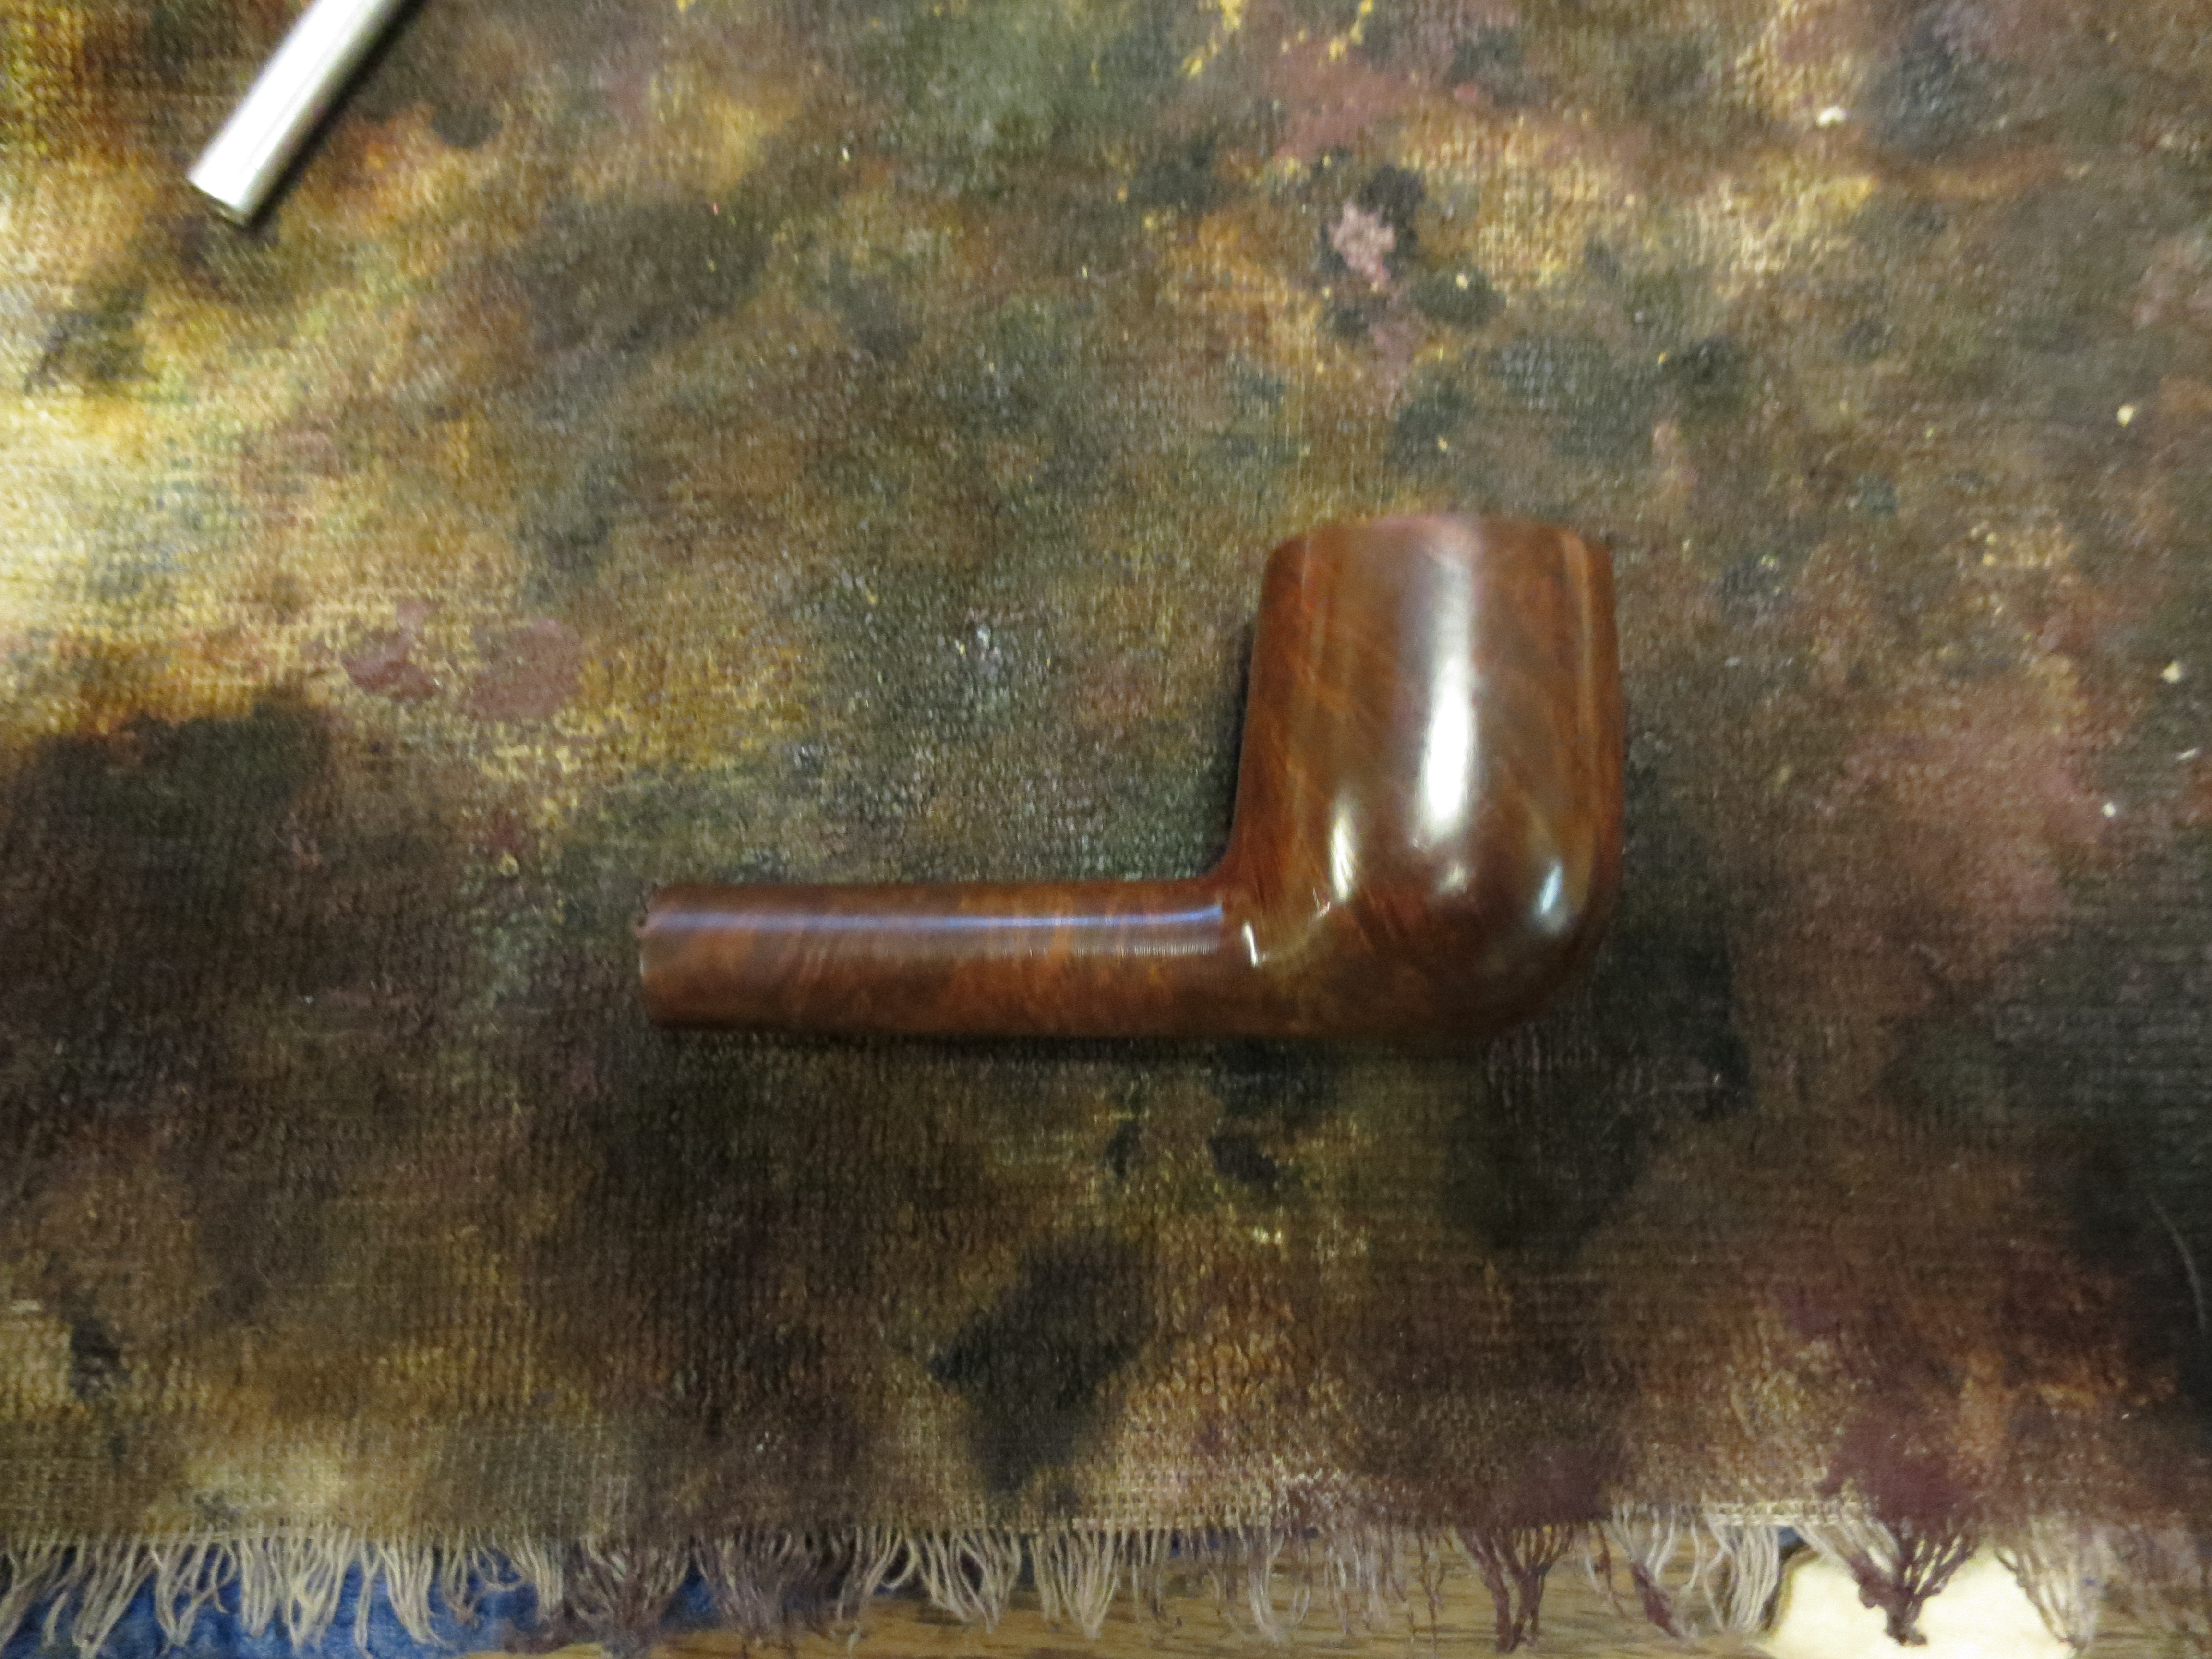
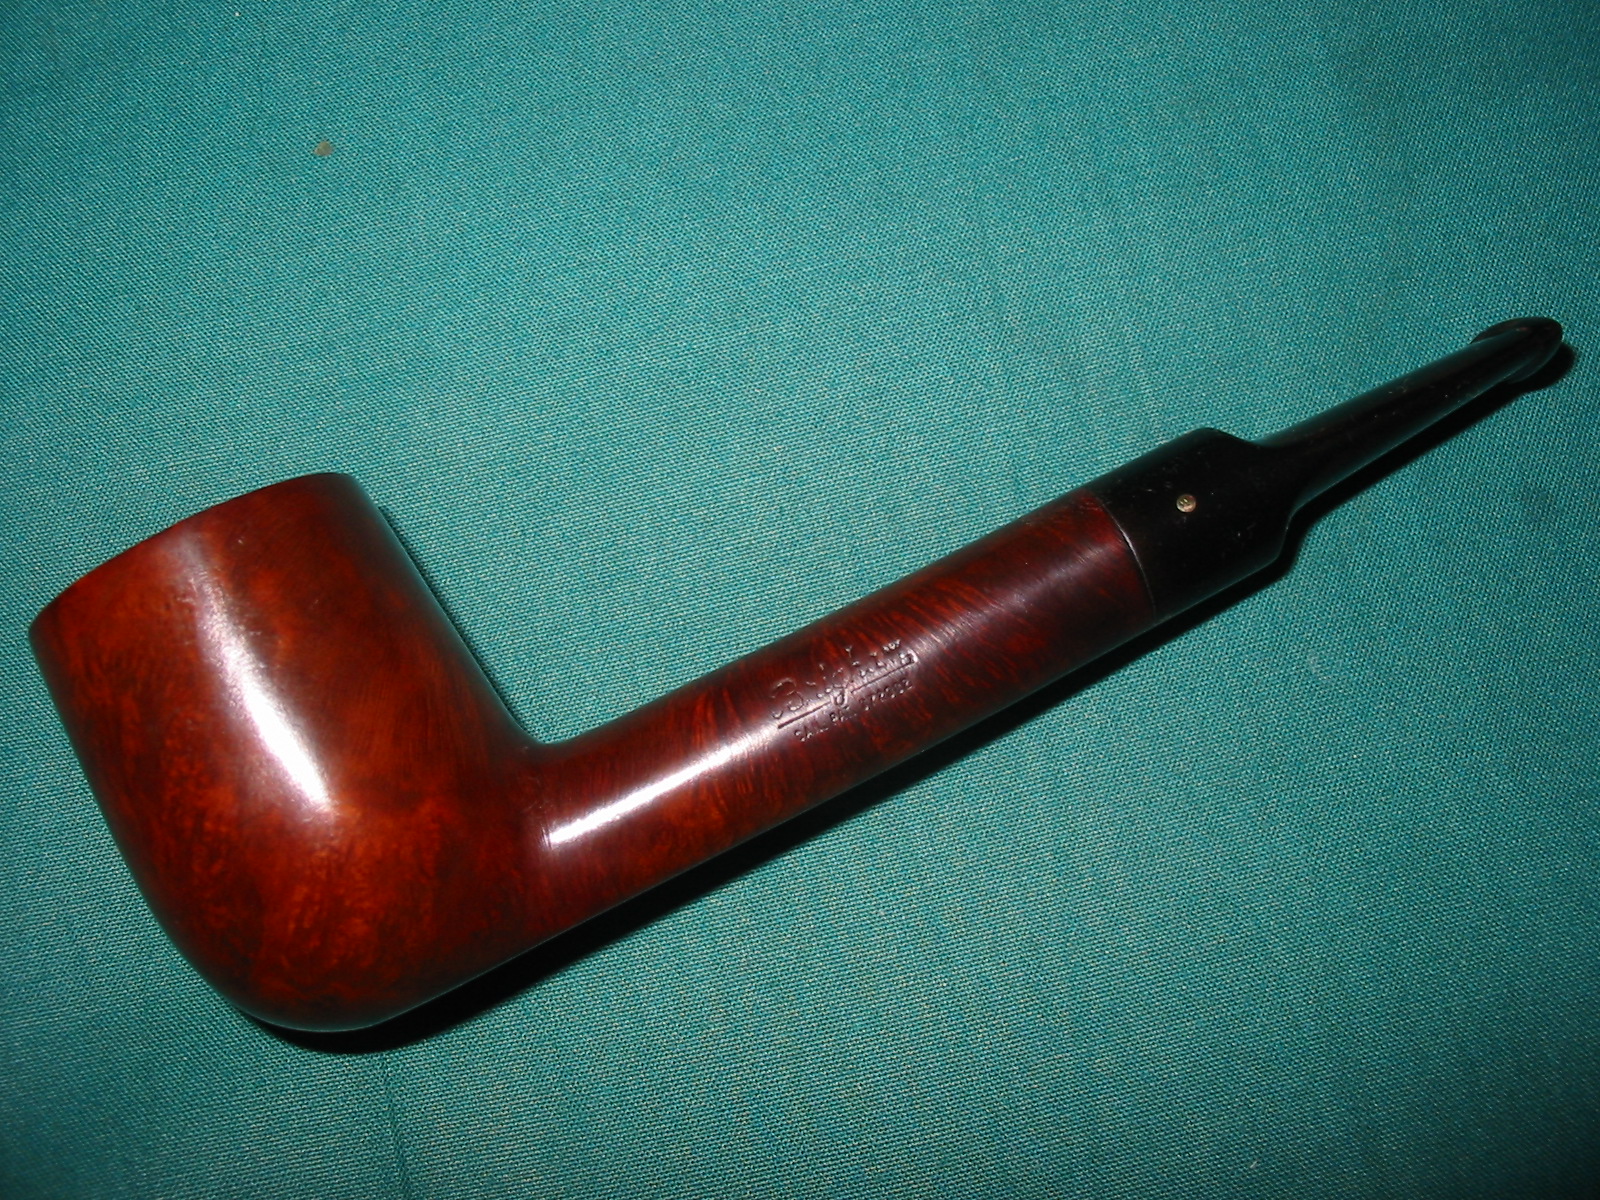
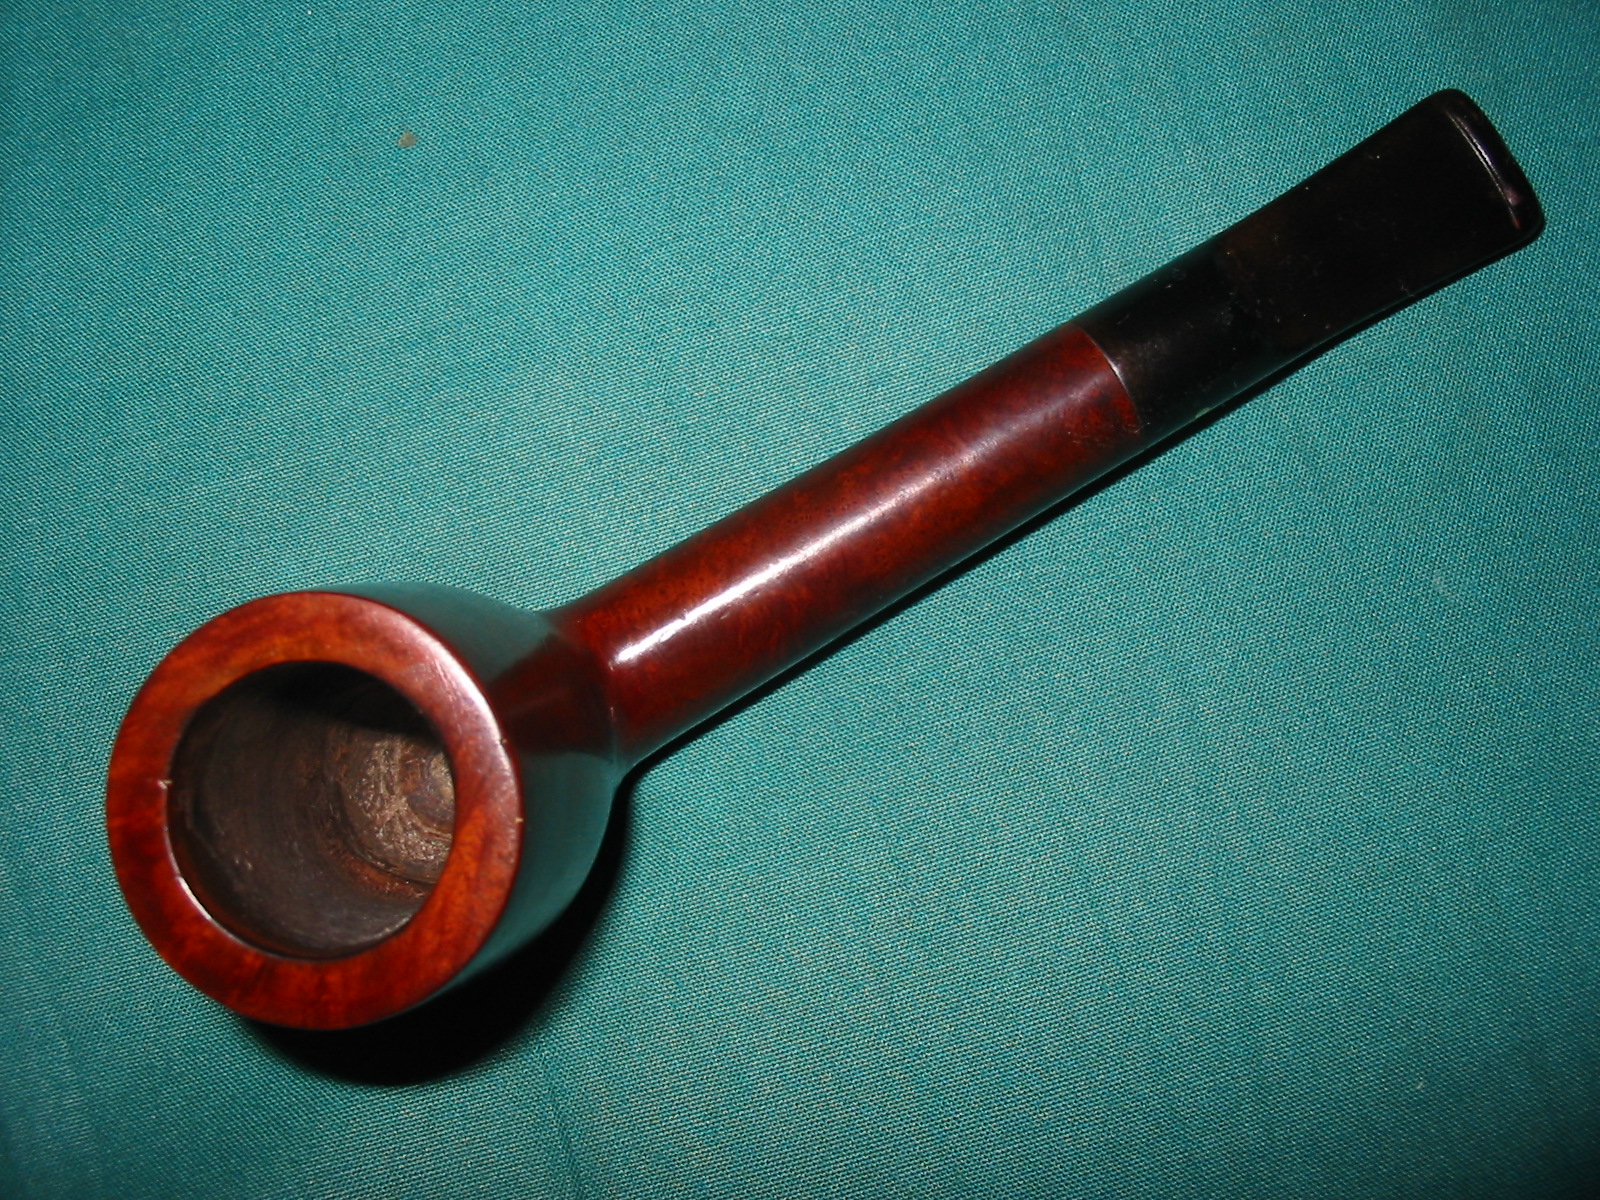
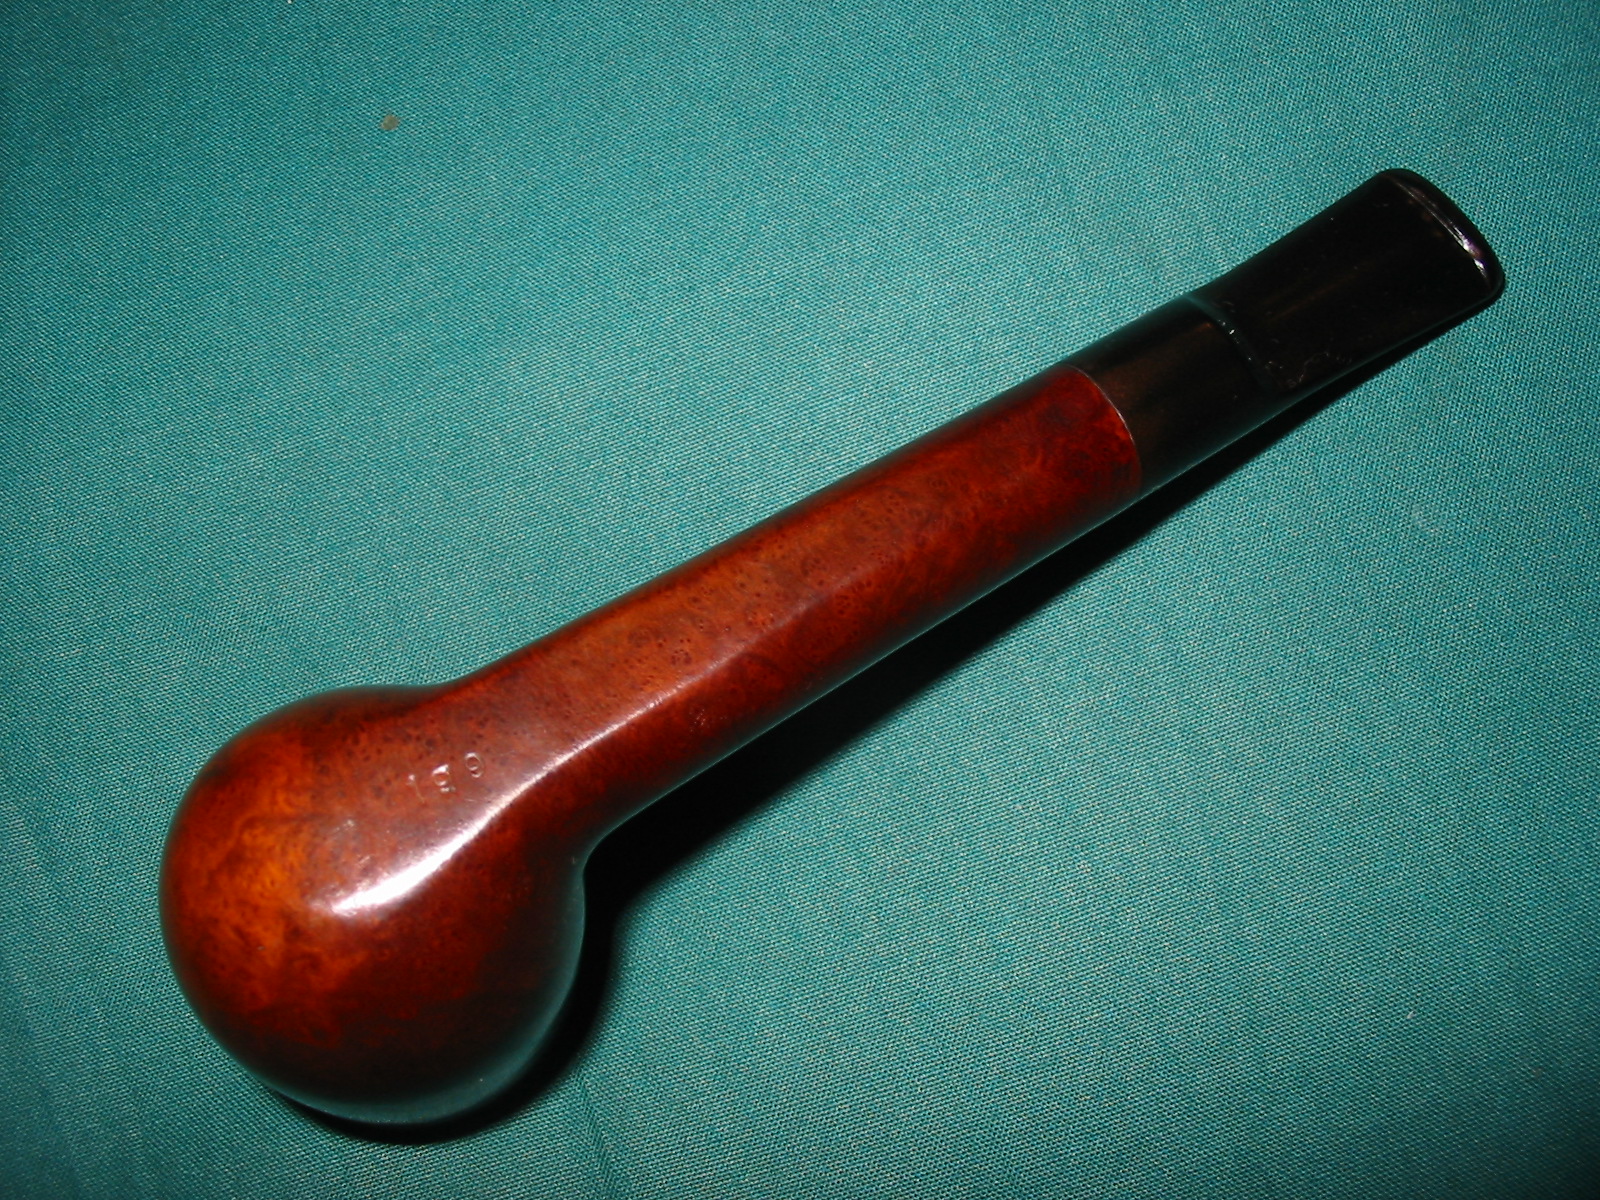
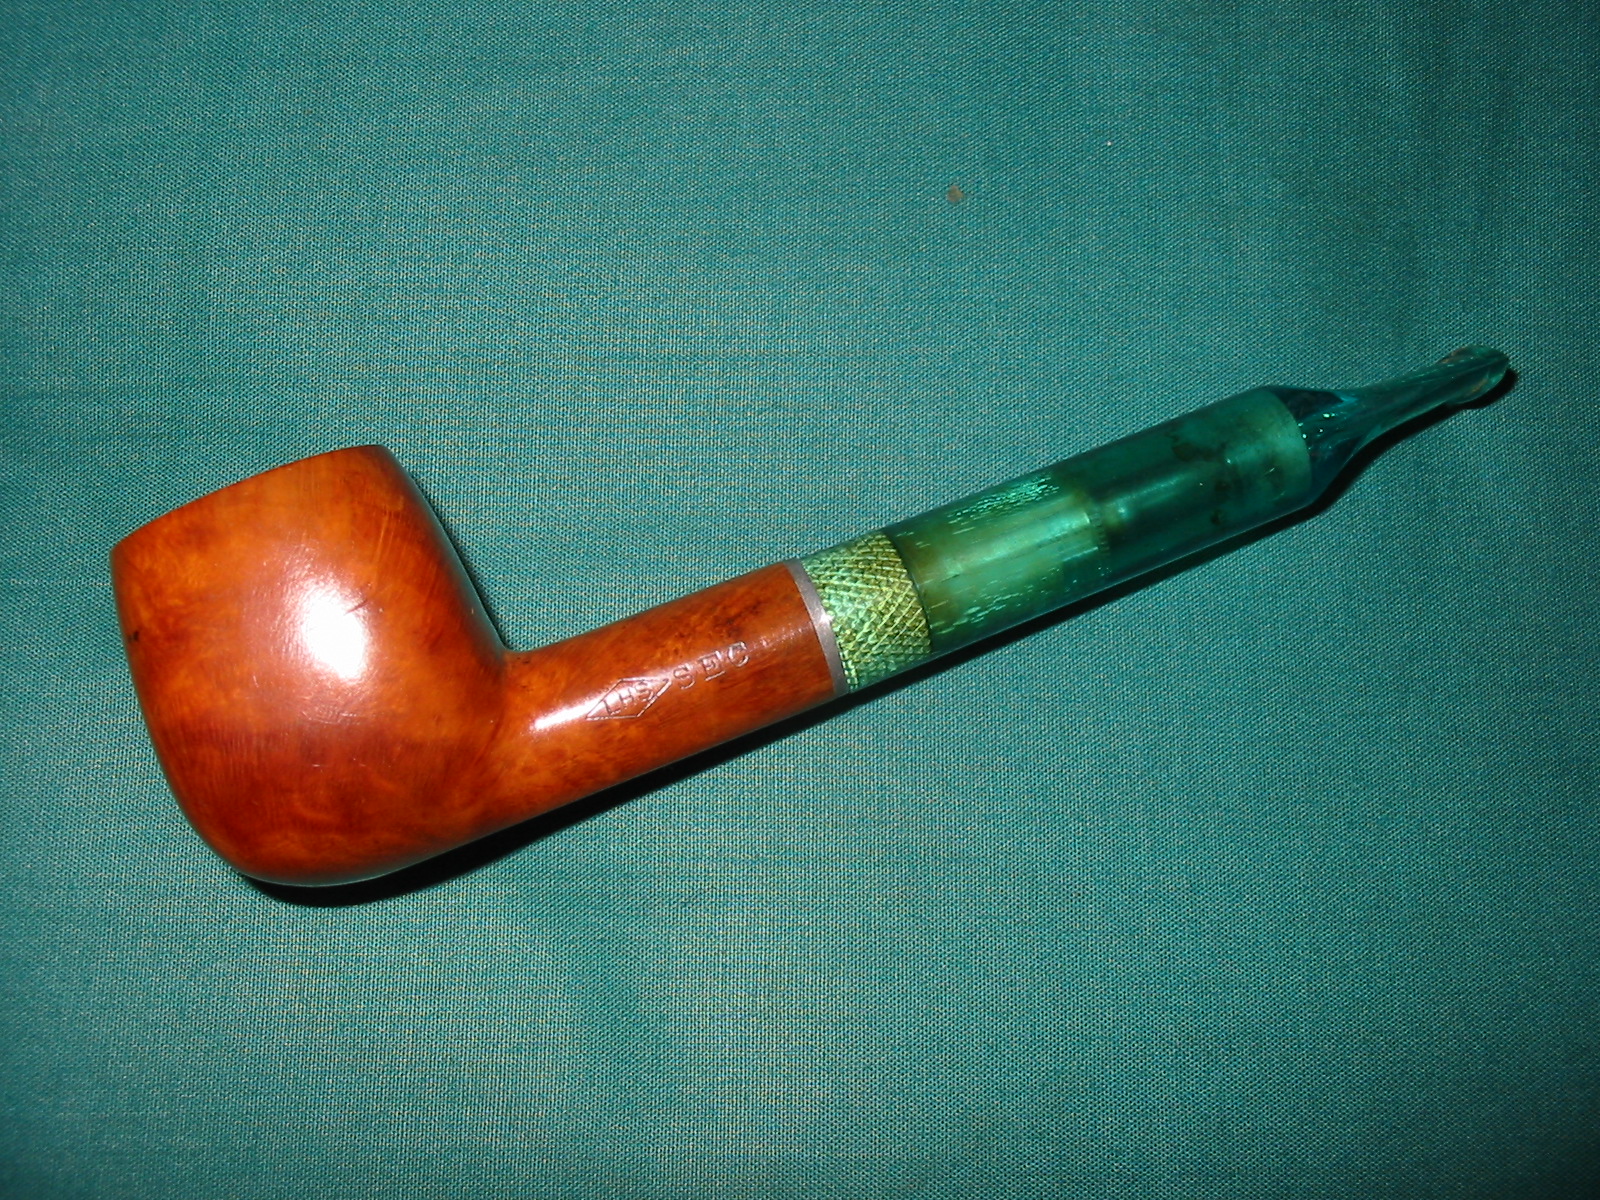
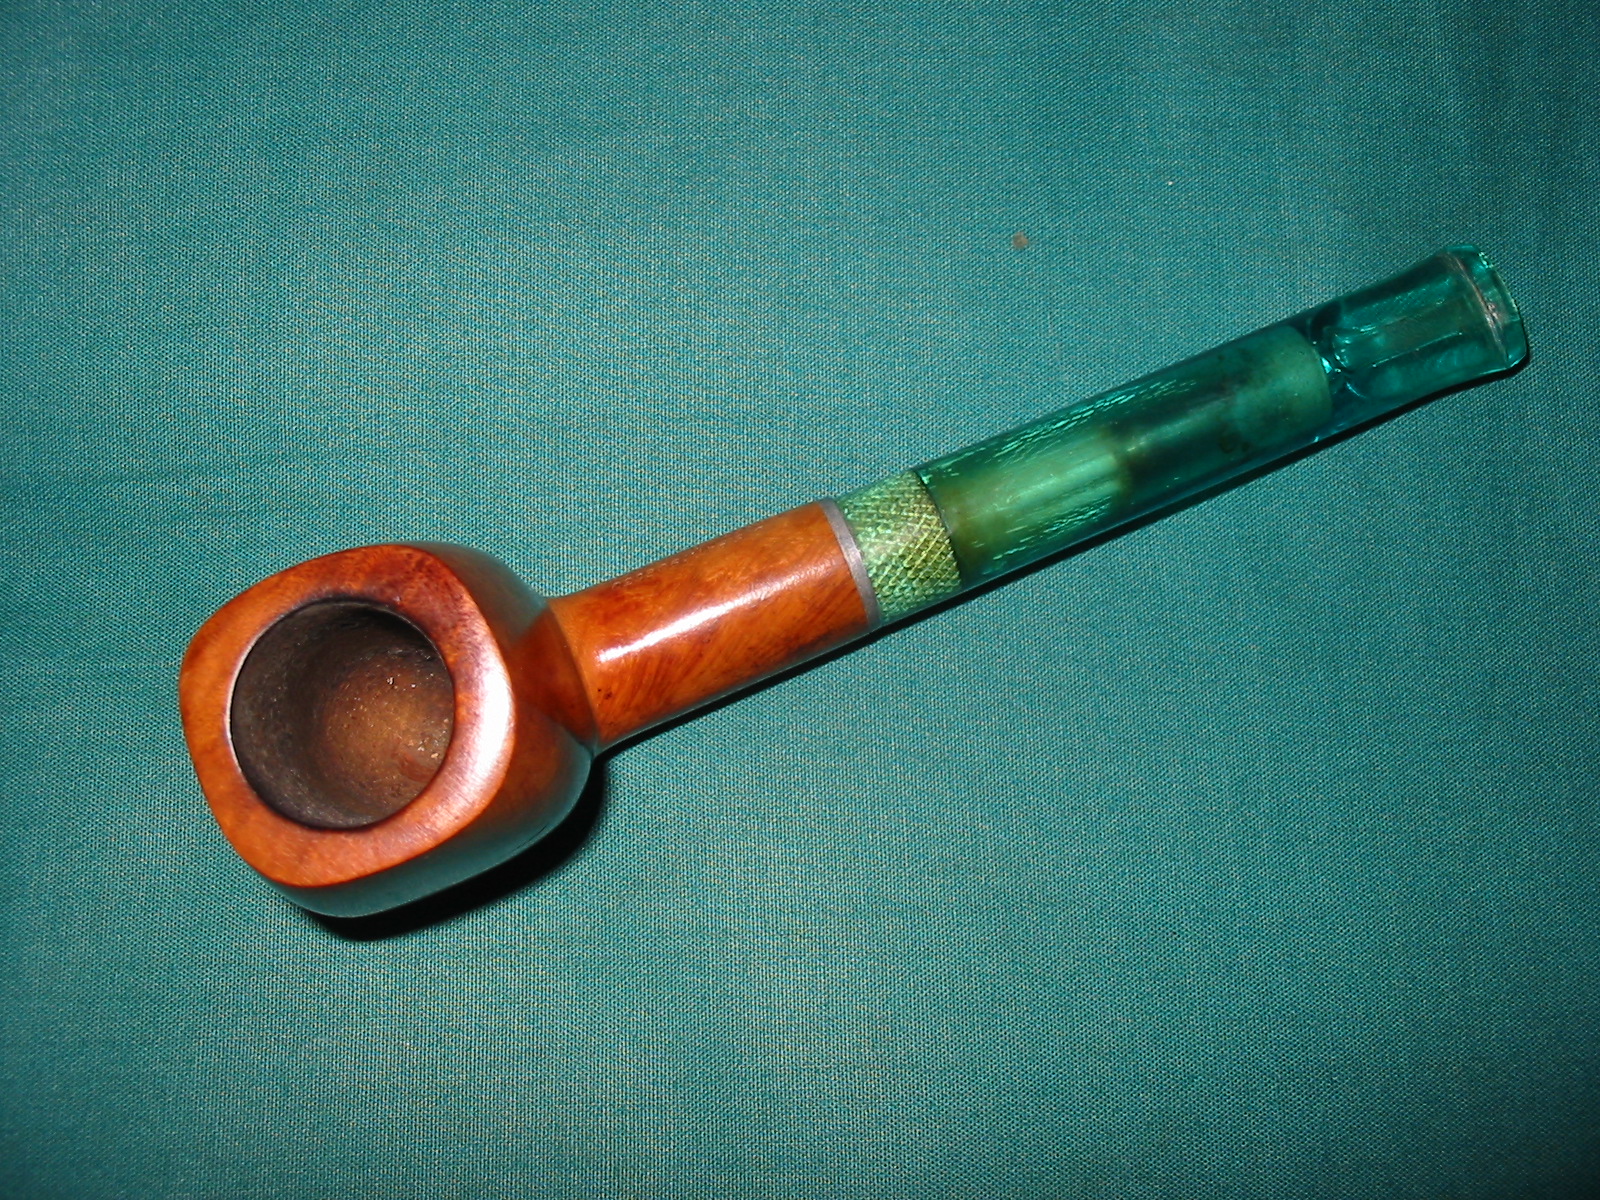
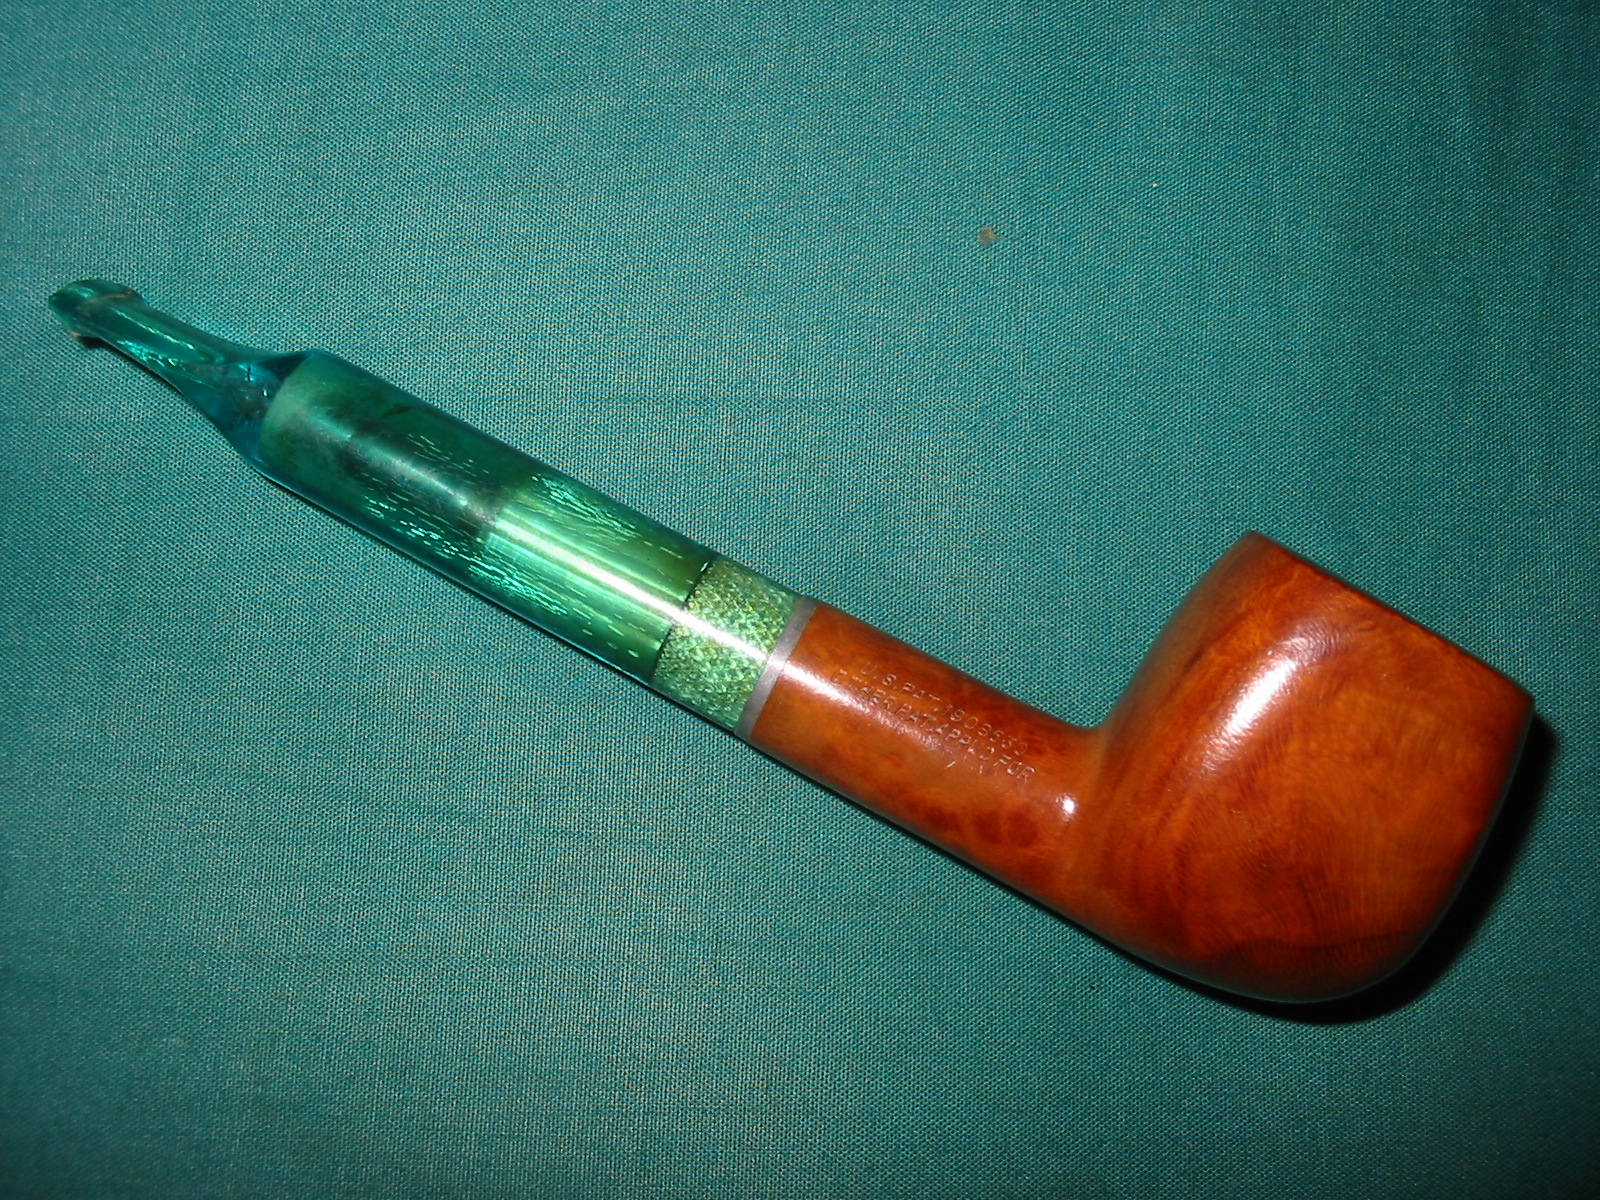
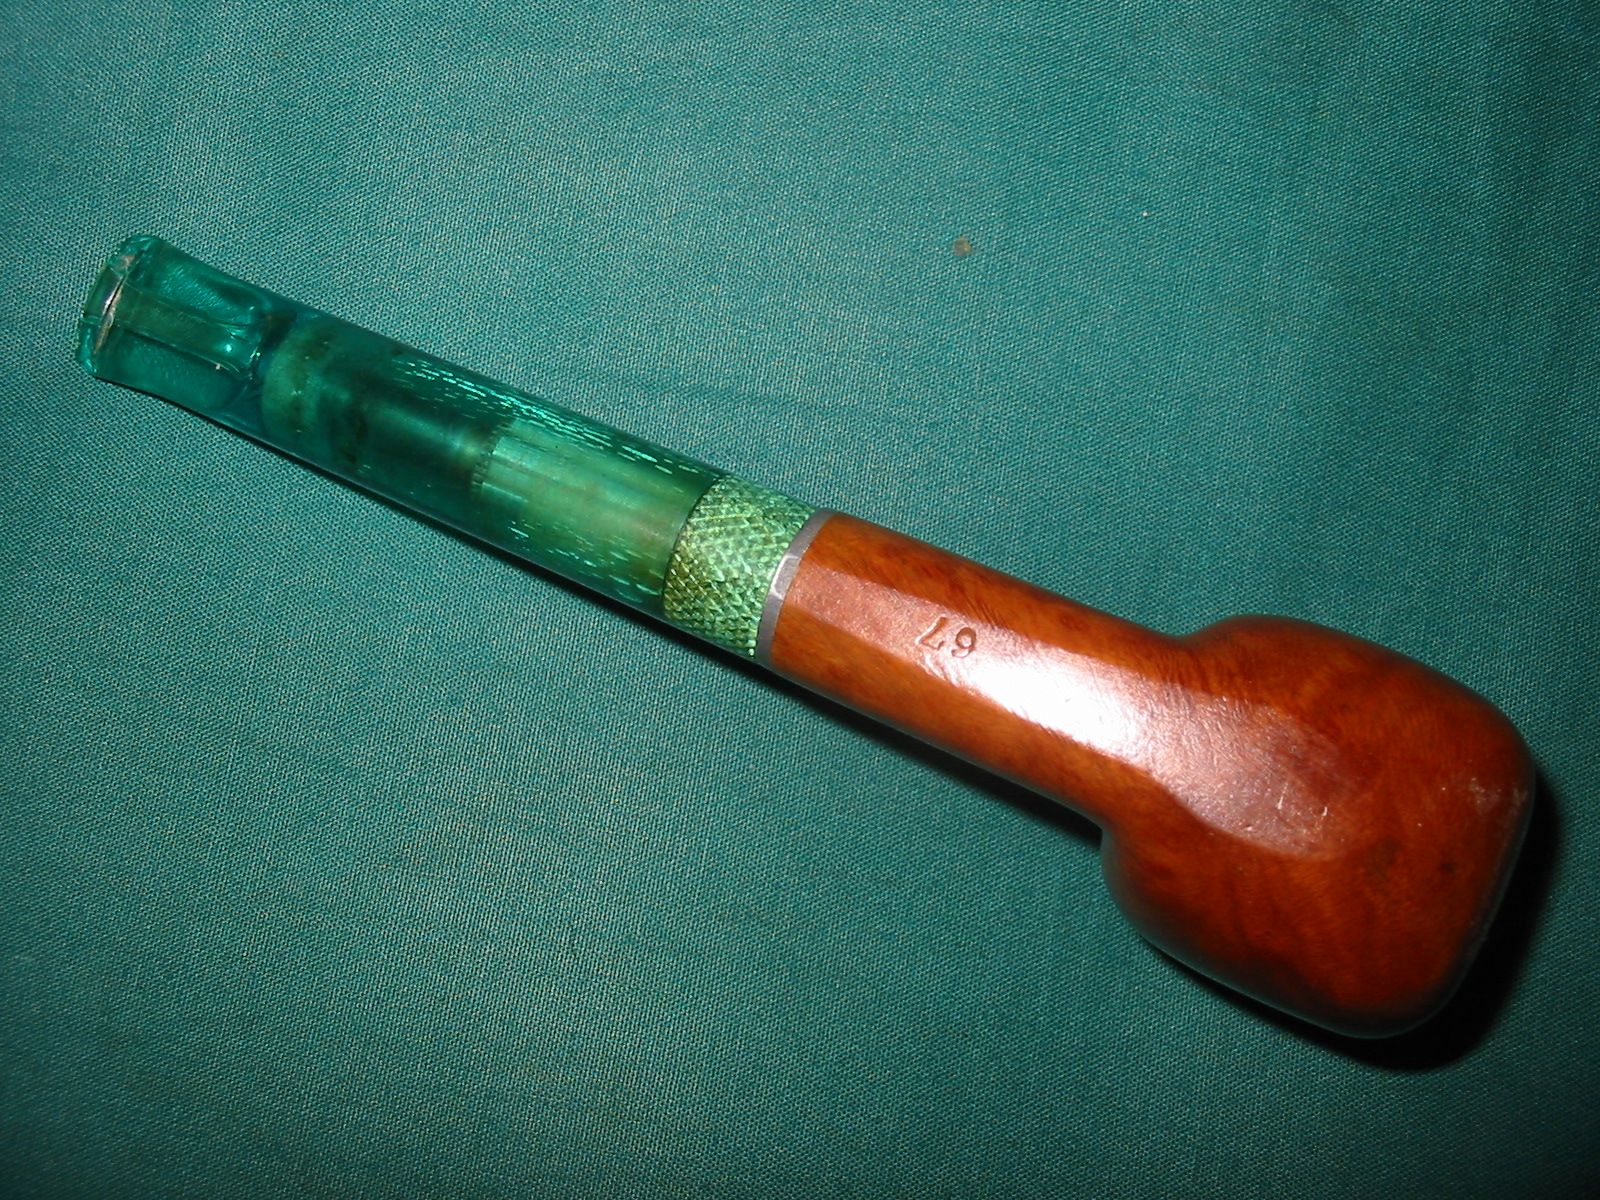
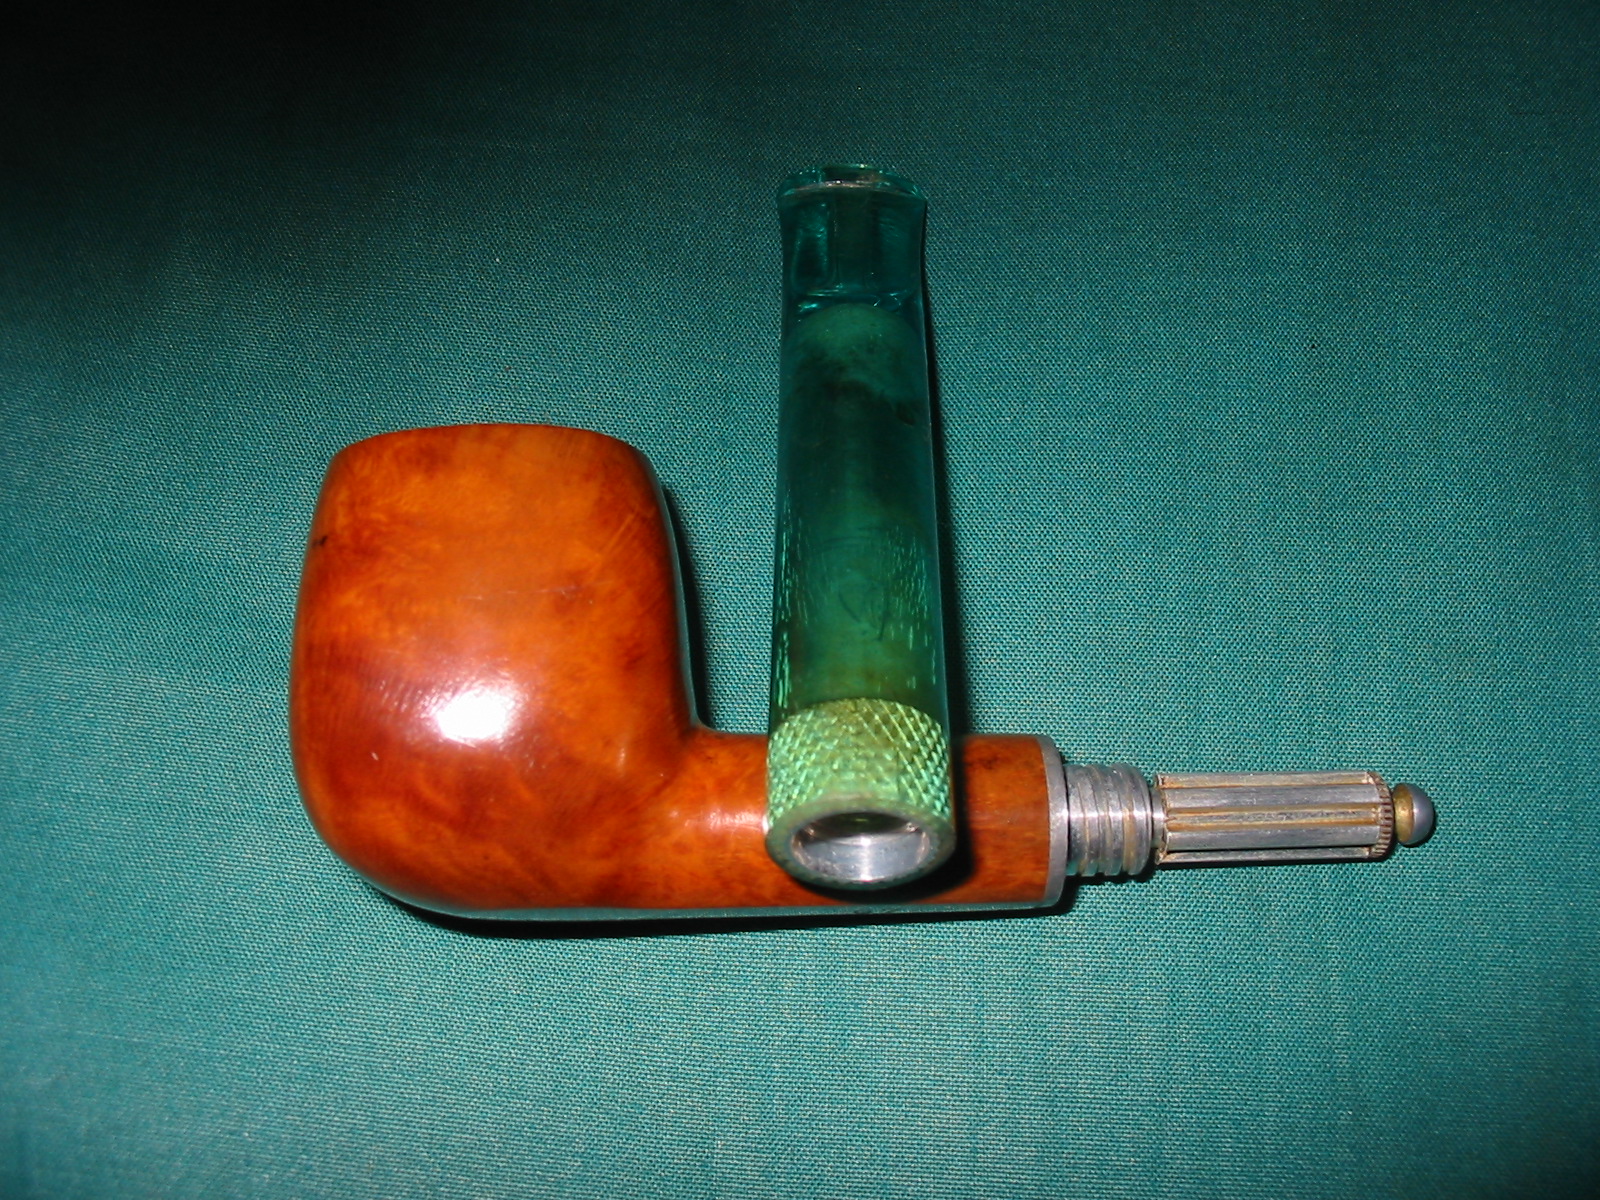
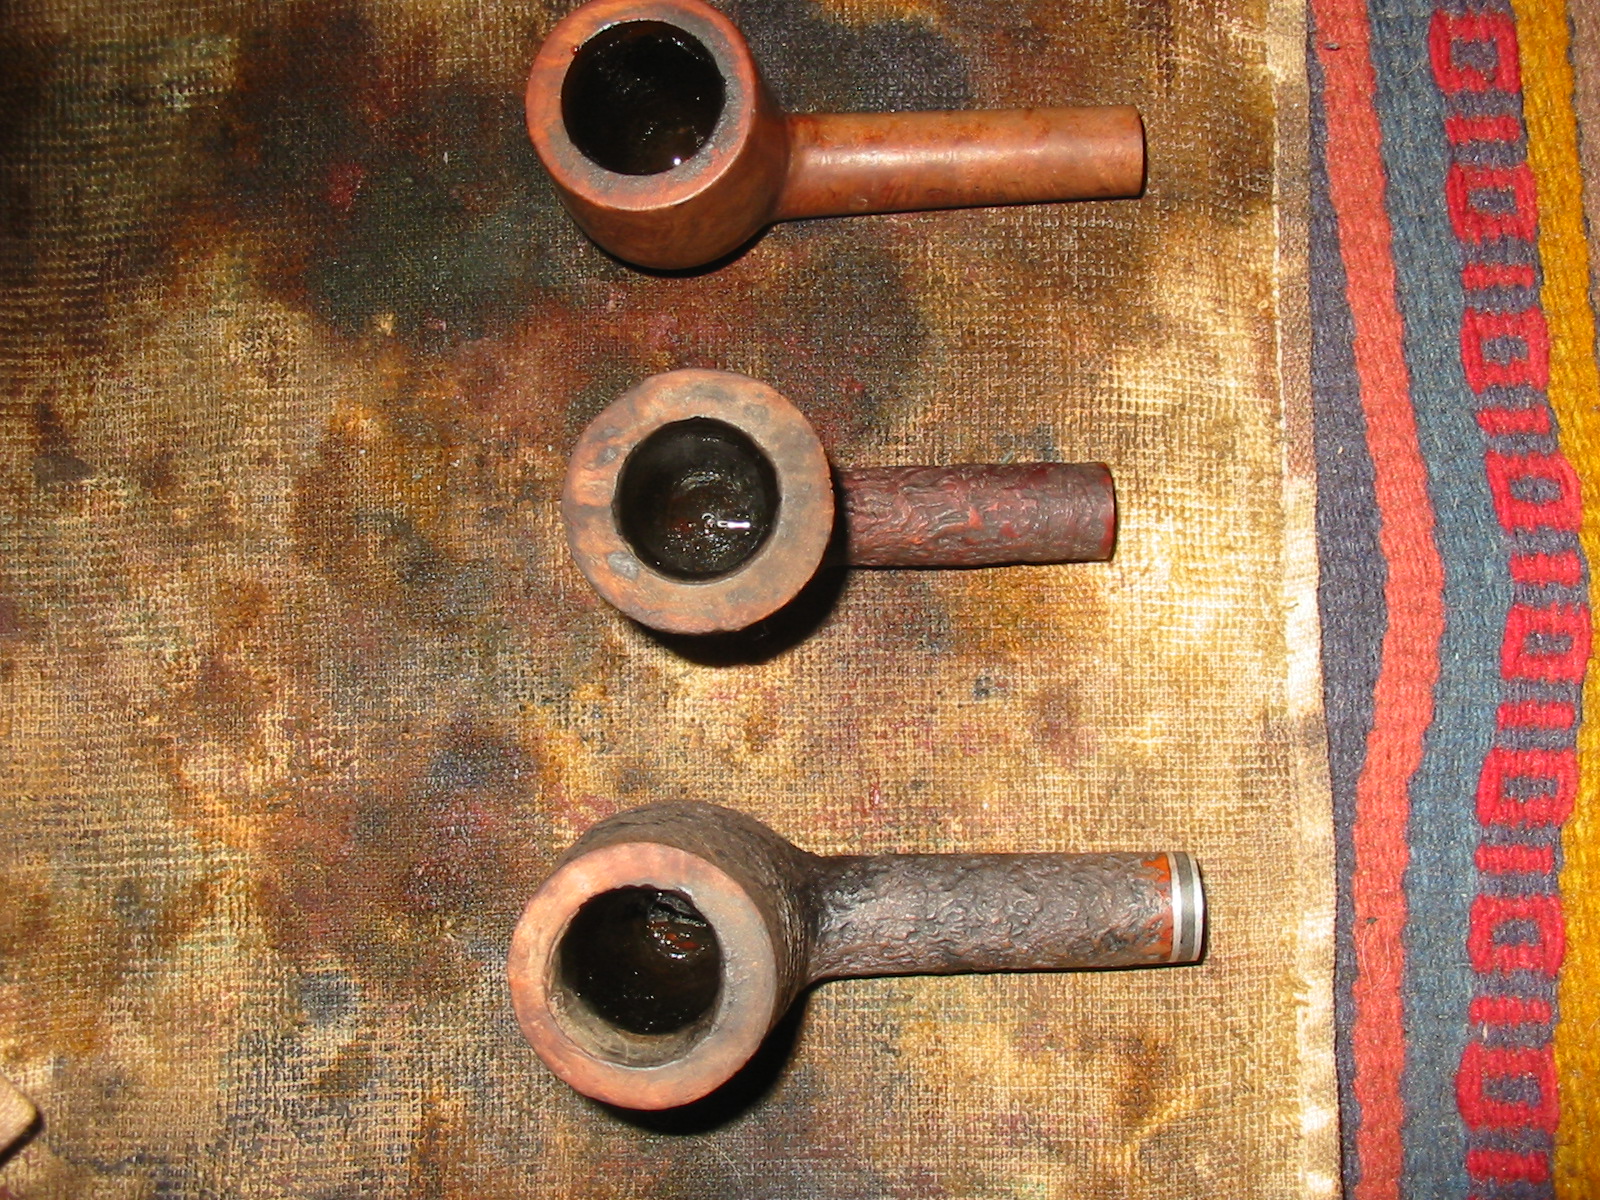
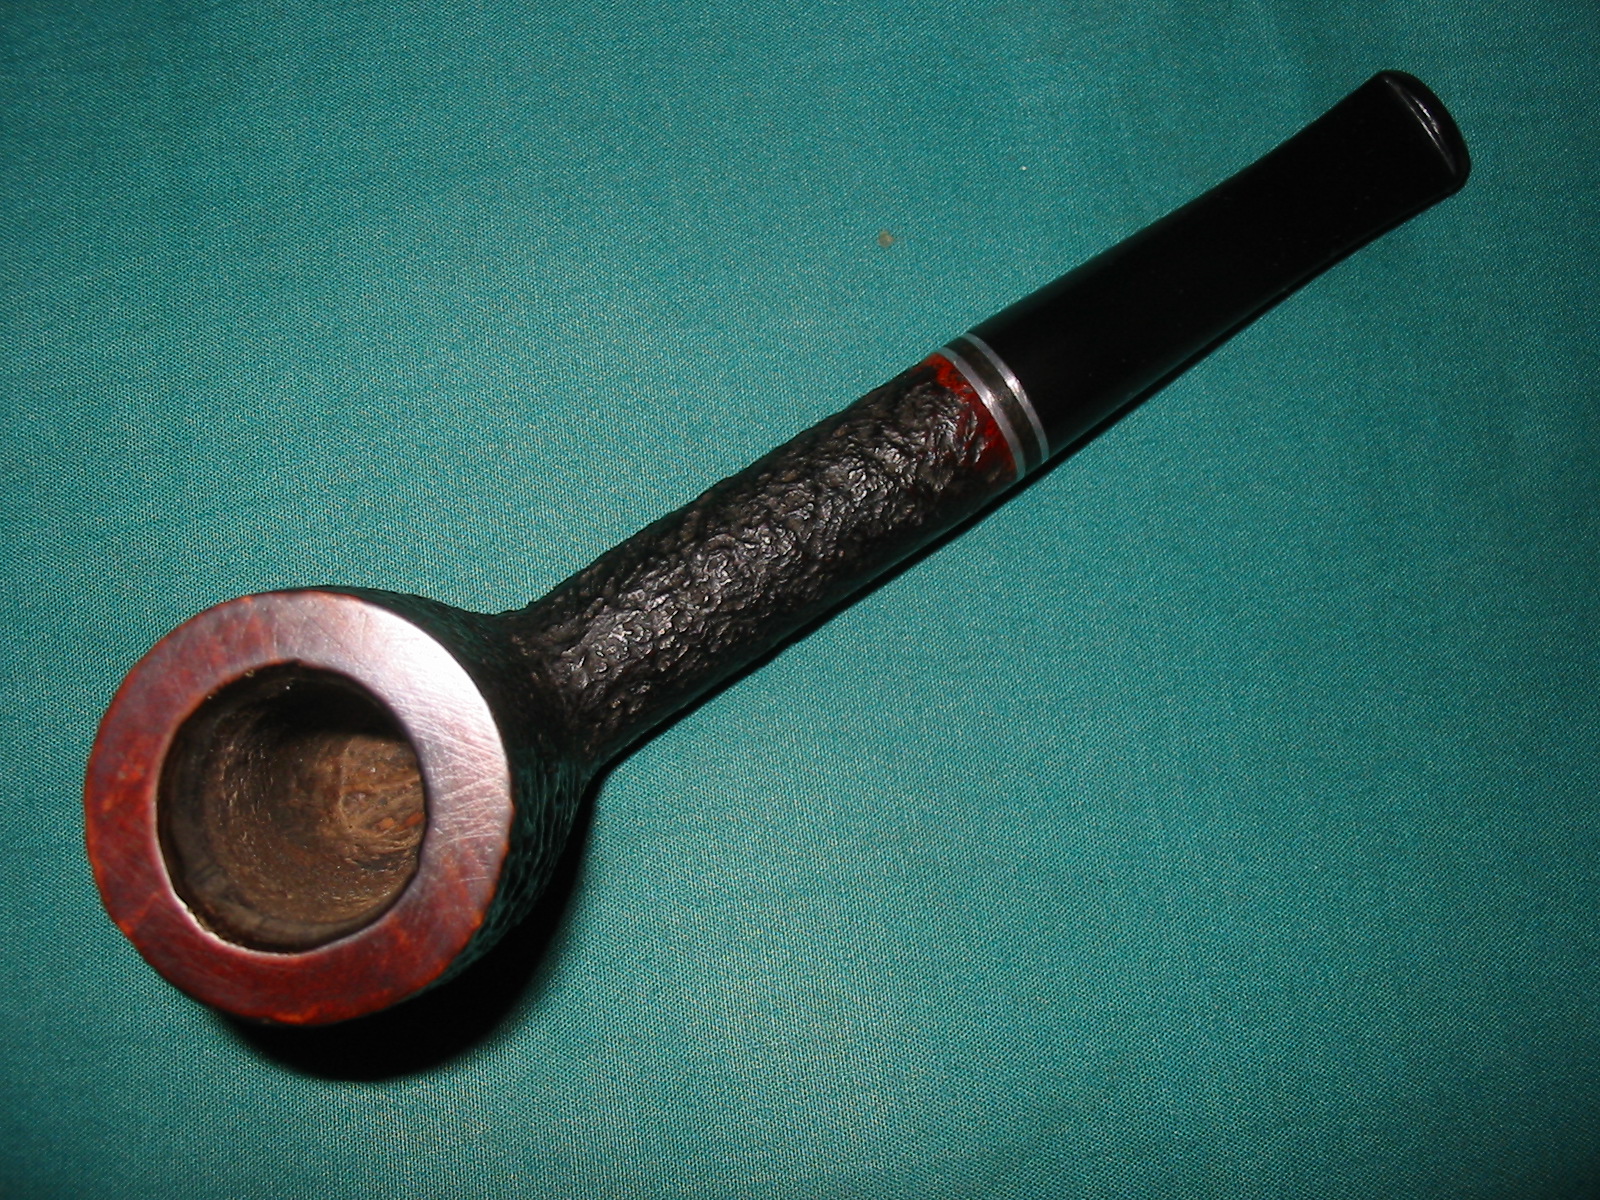
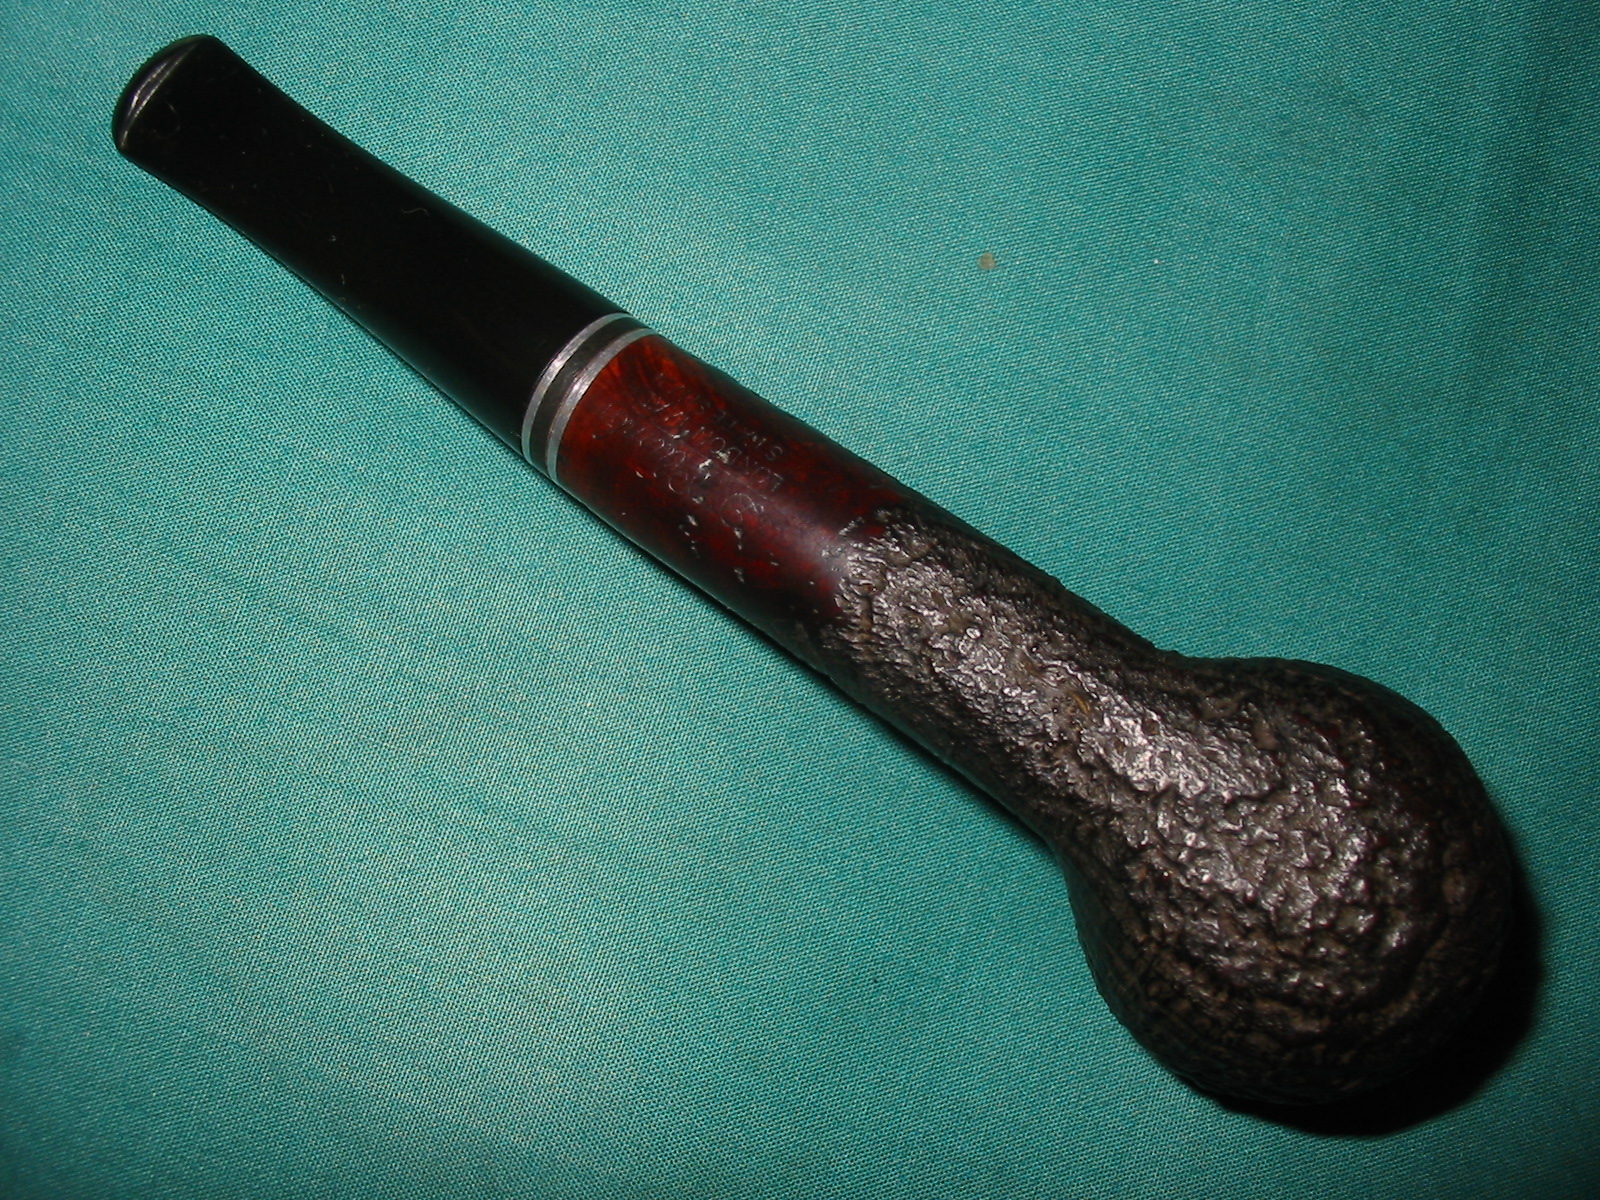
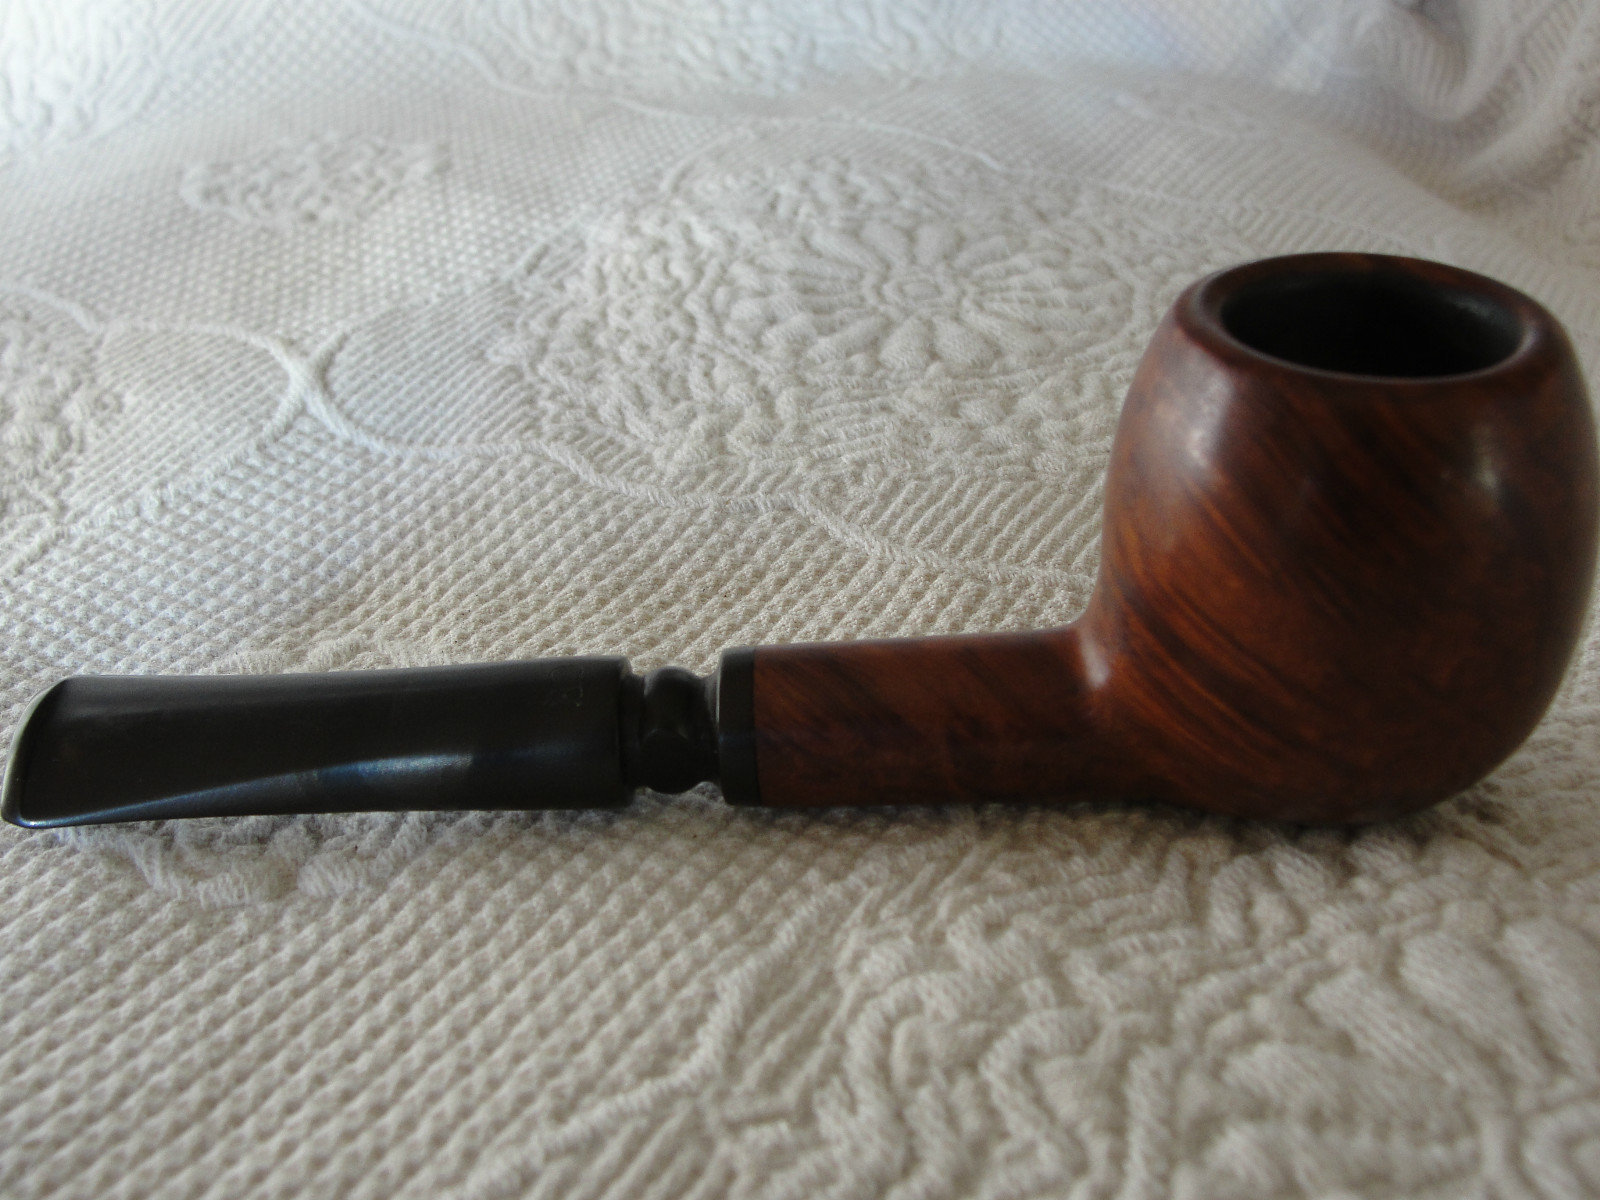
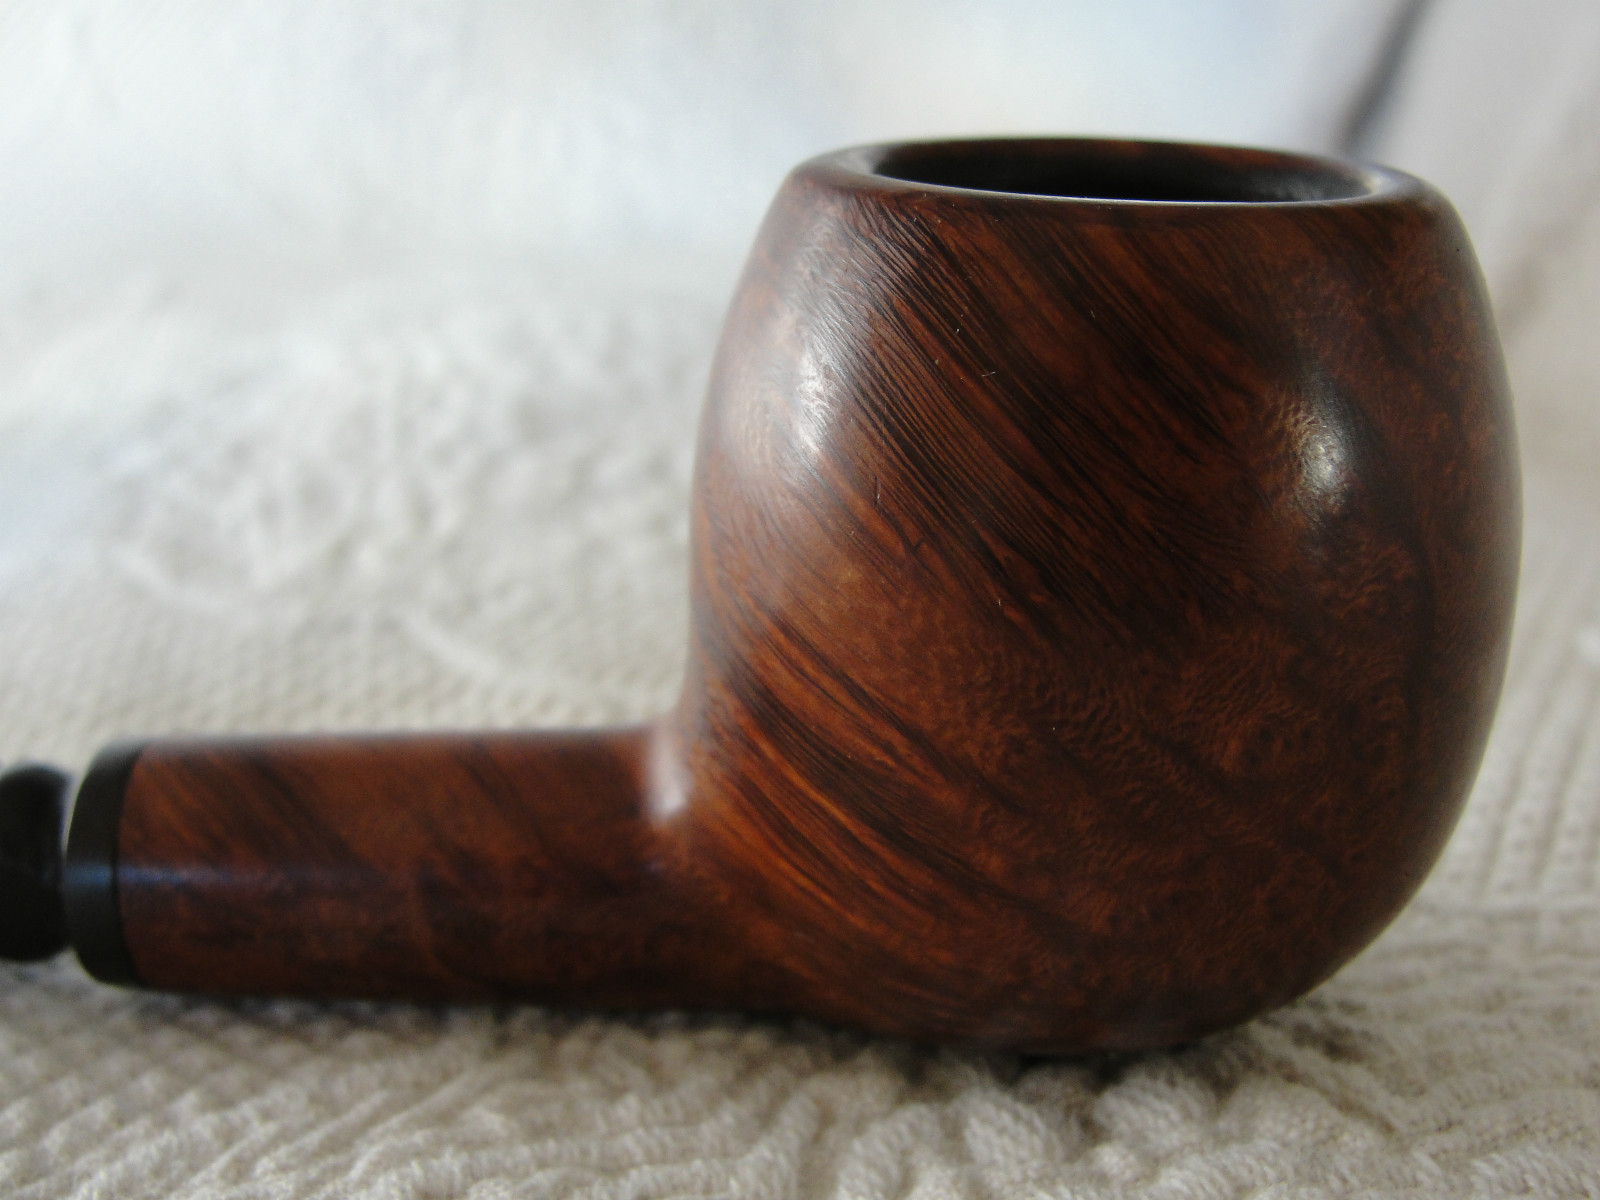
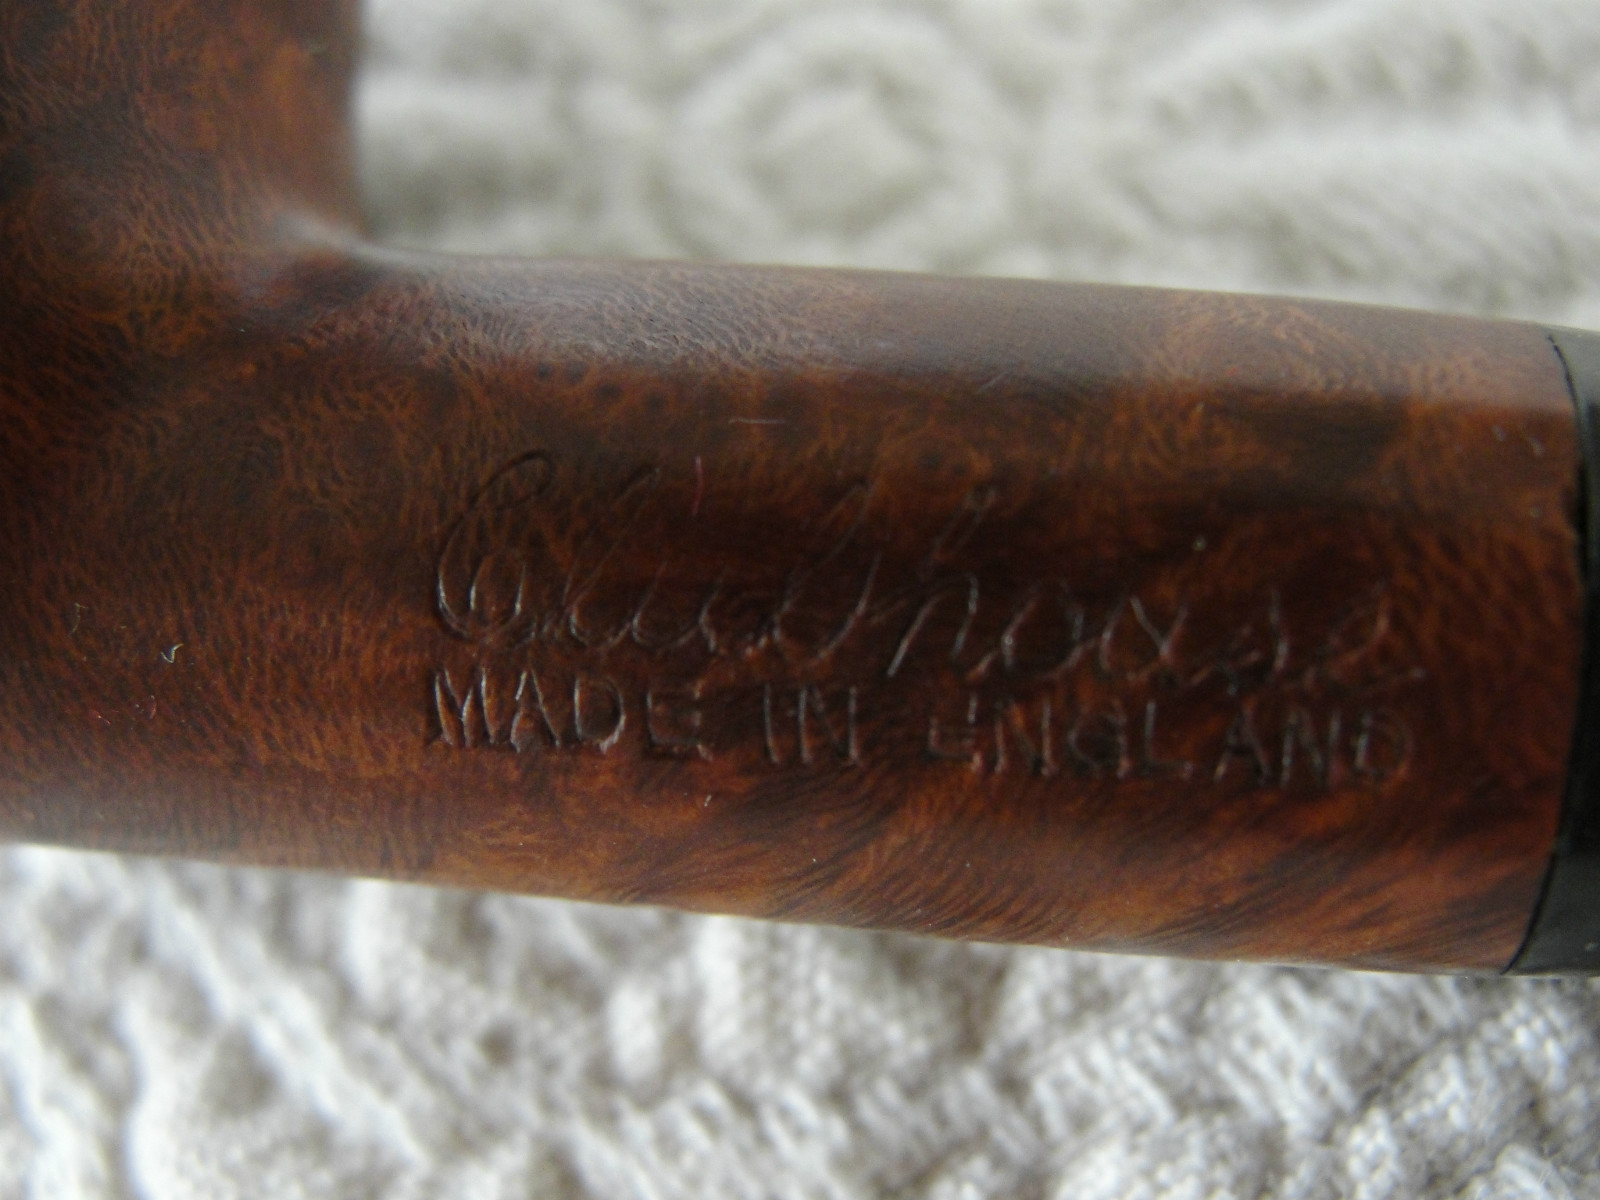
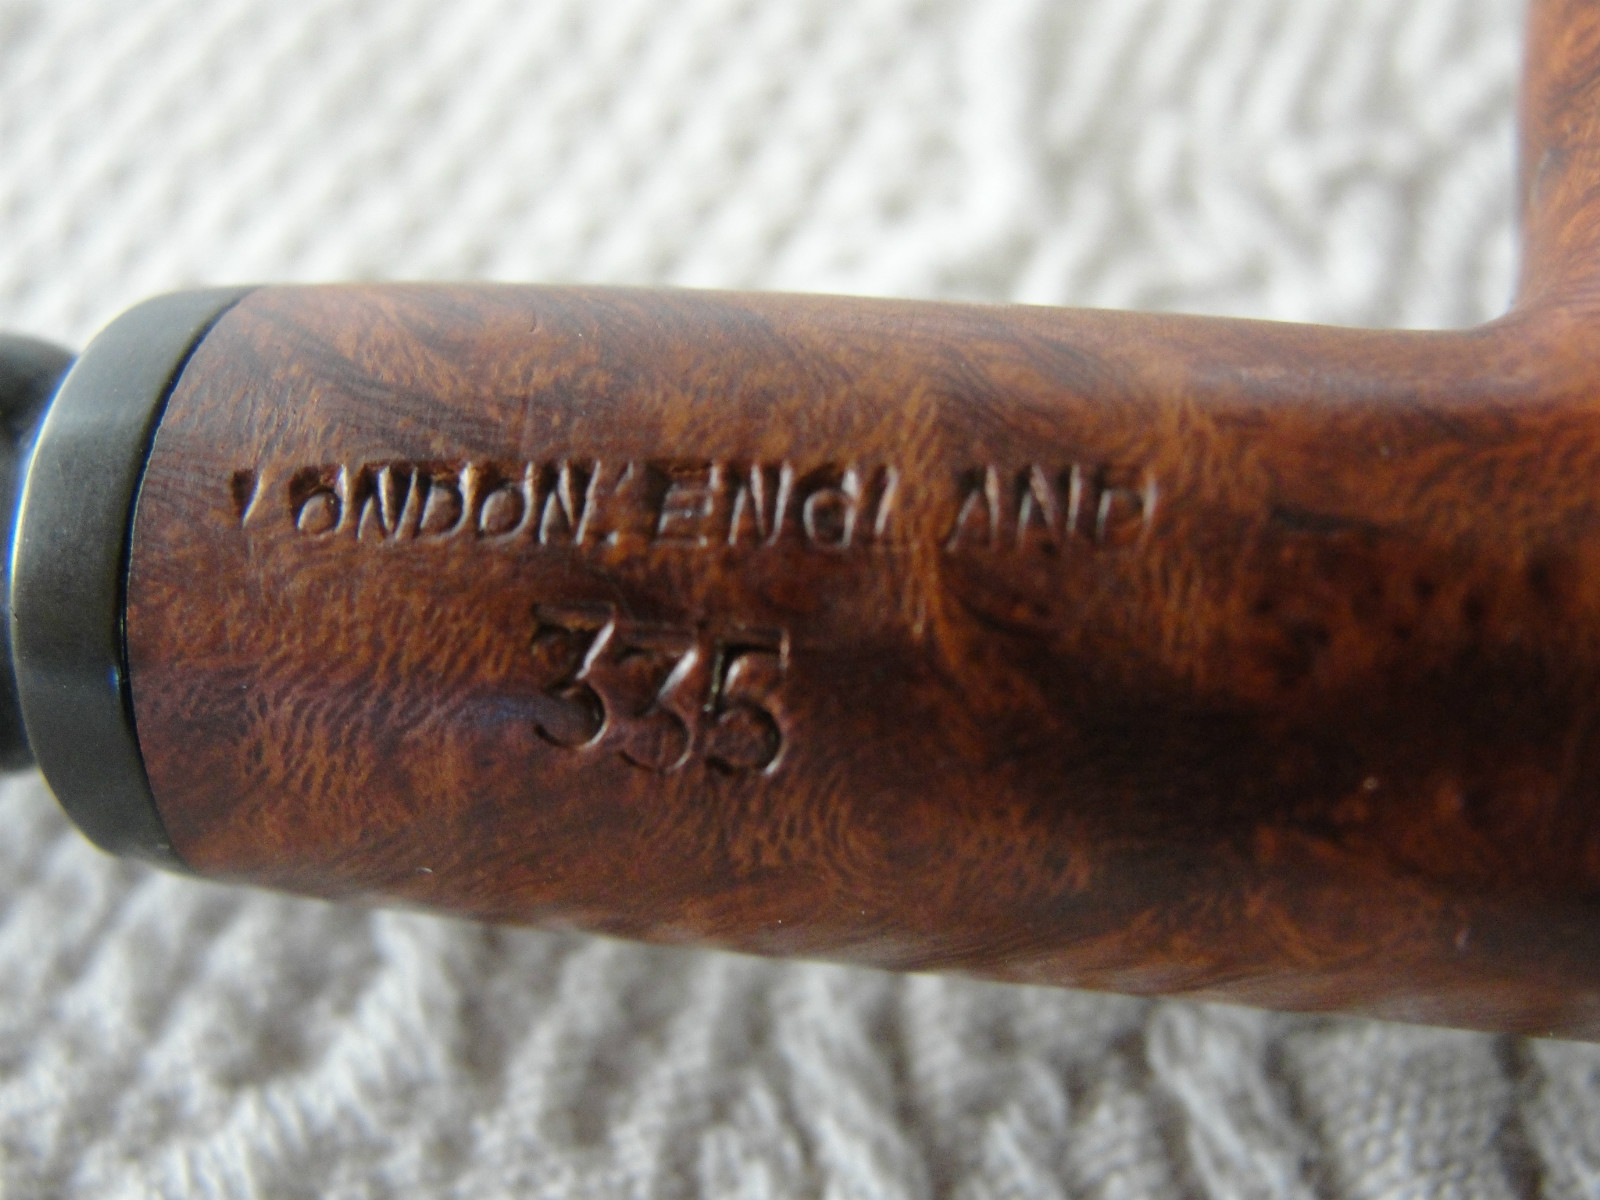
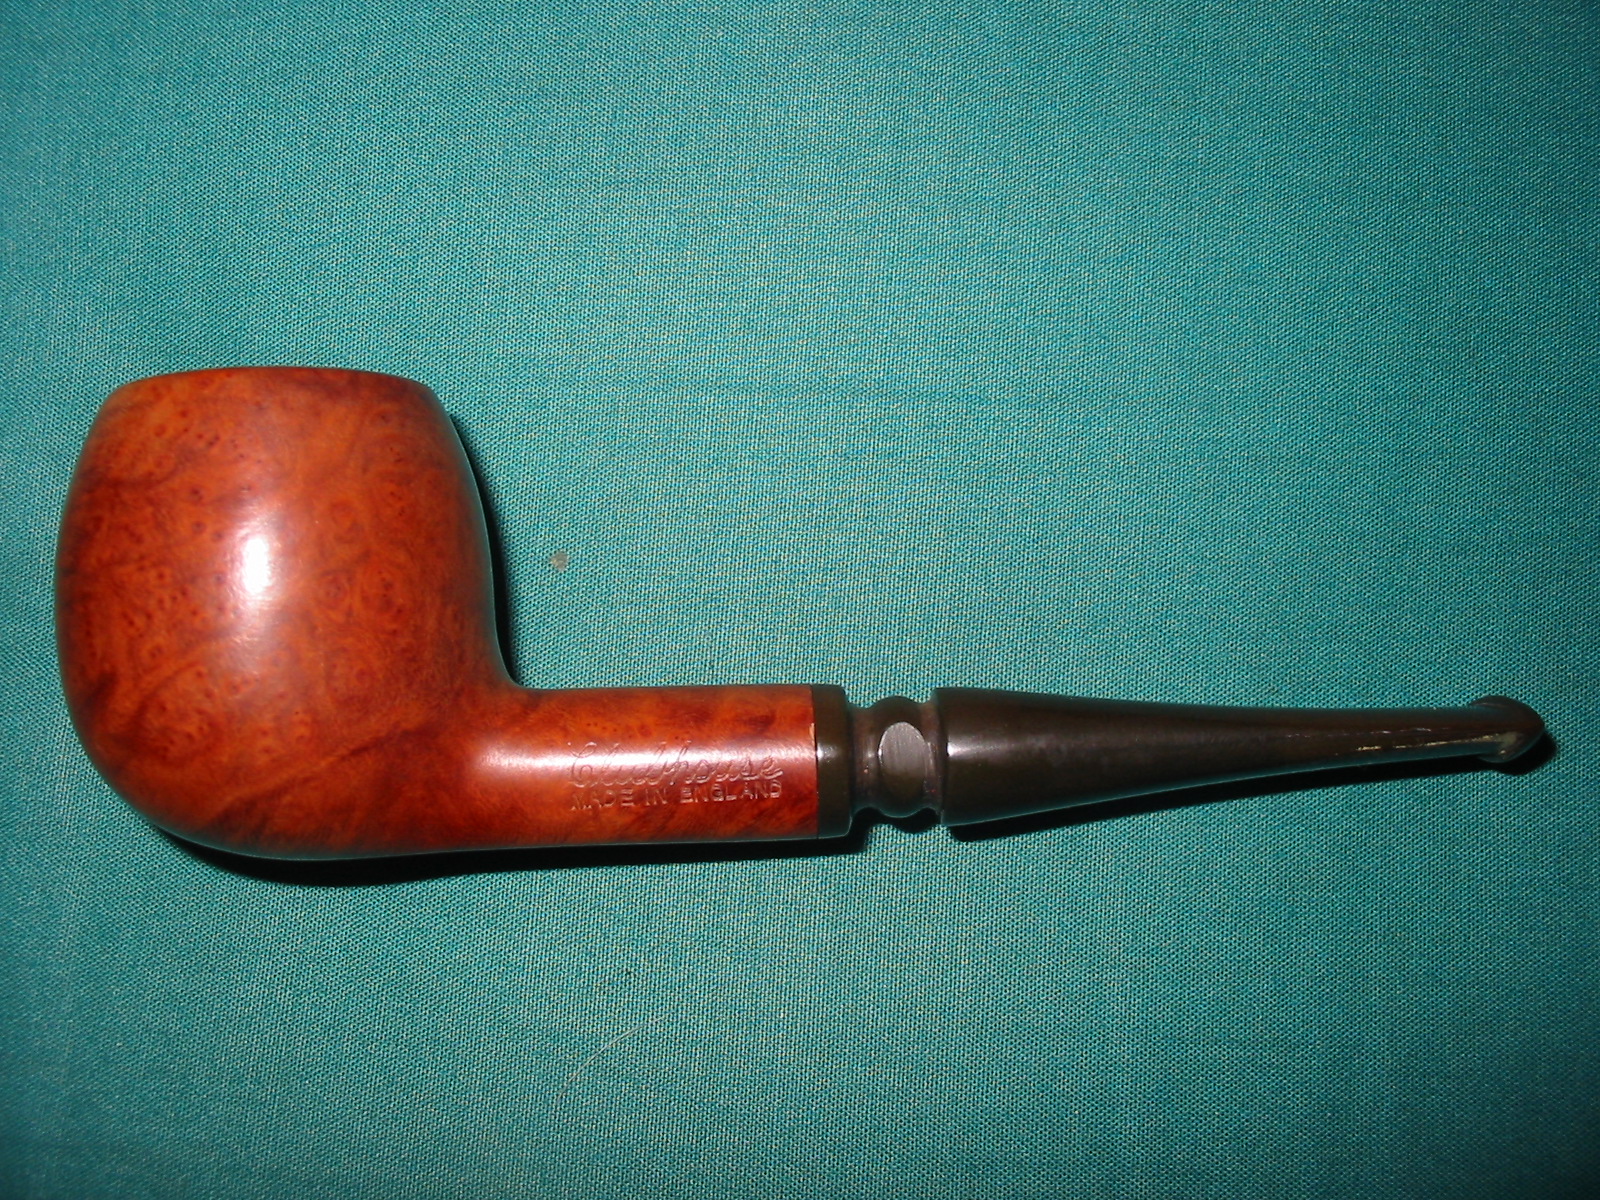
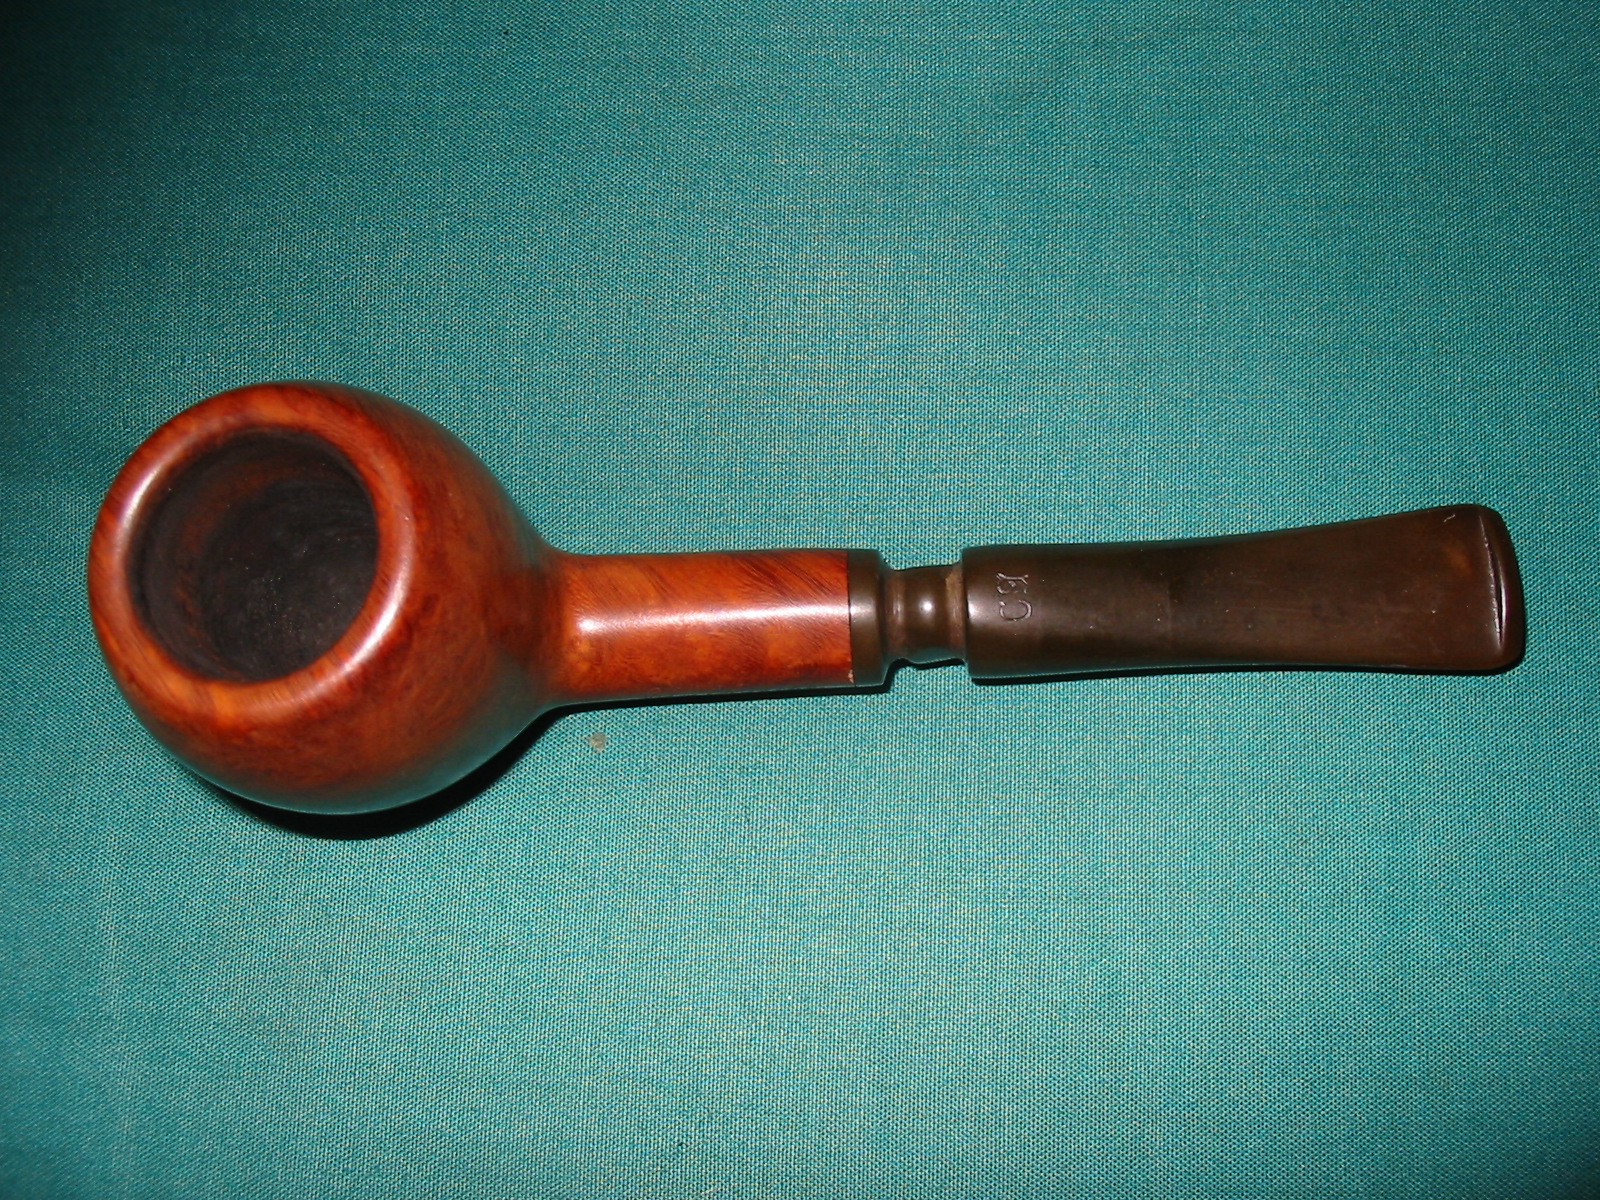
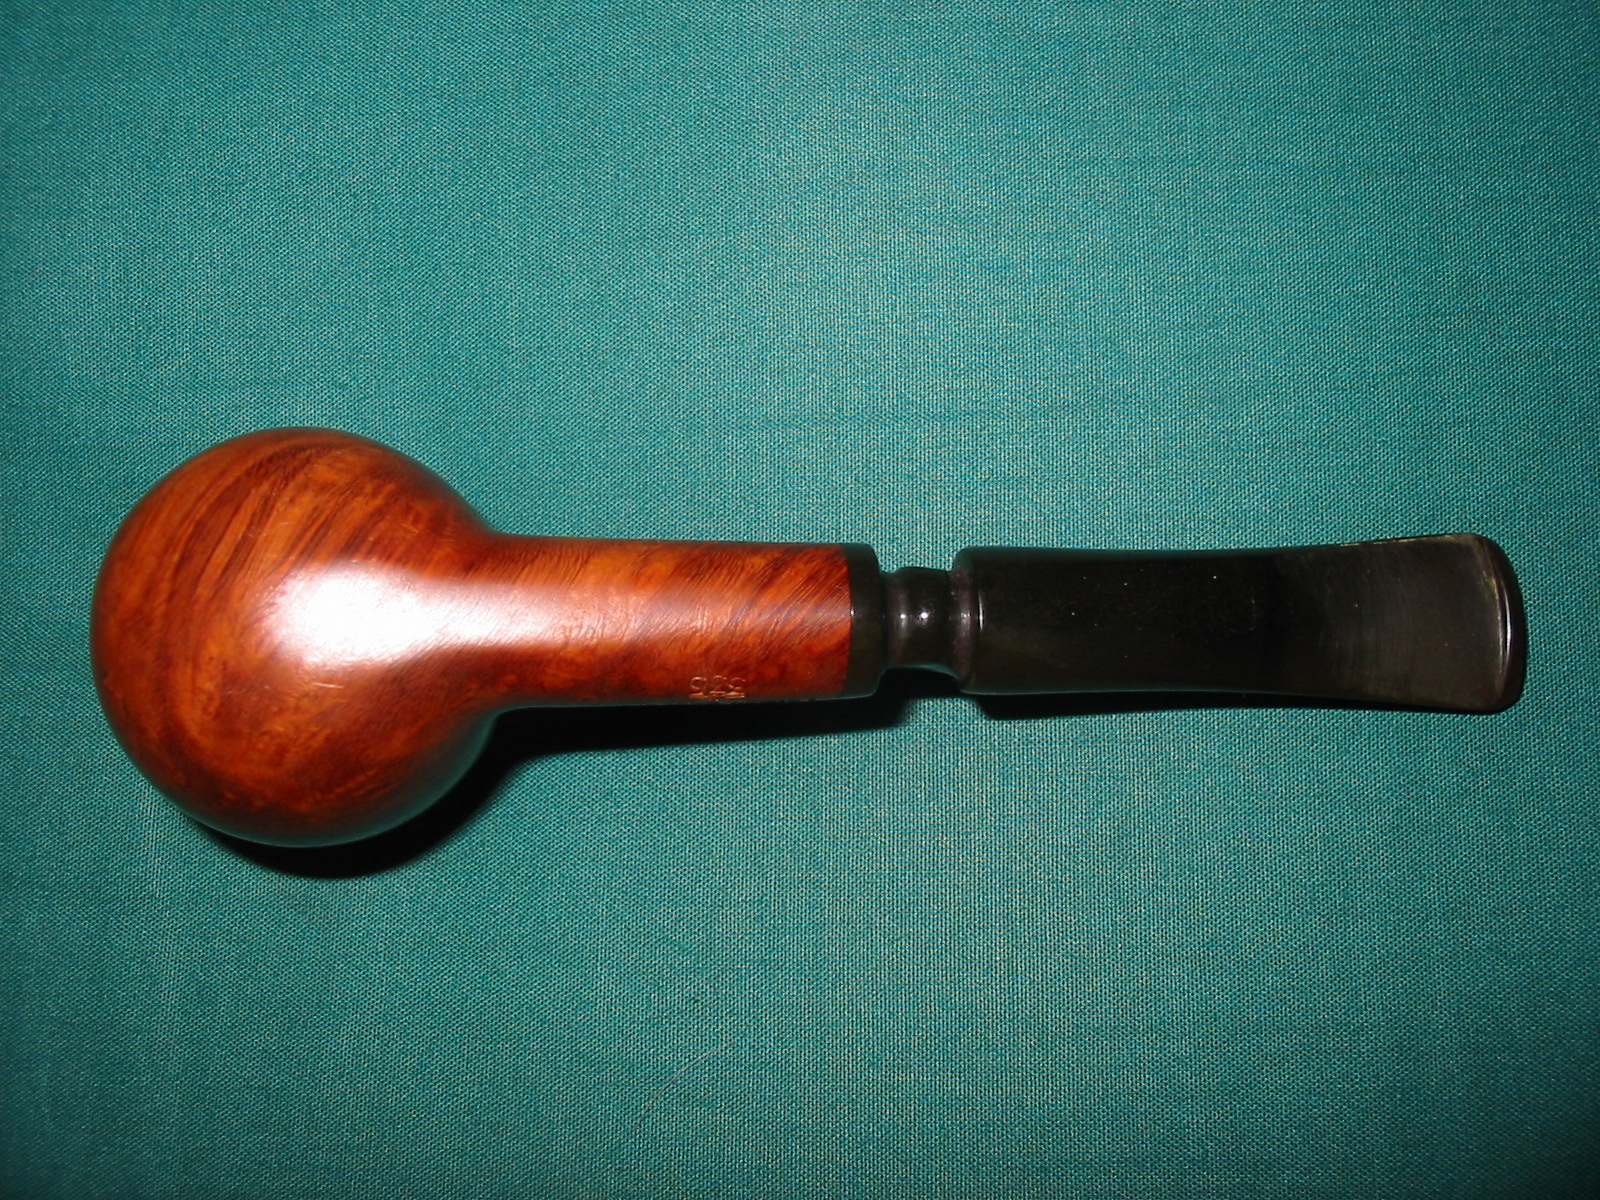
I was giving EBay my usual morning once over and came across this pipe. What interested me about it was that I have a pipe very similar to it but stamped Penthouse rather than Clubhouse. A bit of research showed that both were made by GBD and were a part of their chairleg stem pipes. Looking at them in comparison to other GBD chairleg pipes that I have I can see that these may have been a seconds line of their pipes (though I am not certain of that). The ball on the chairleg of both the Penthouse and the Clubhouse is not consistently the same size around the edges. It also had some finishing scratches that never were sanded out. I liked the look of this one from the photos so I went for it and won the auction. It is stamped Clubhouse over Made in England on the left side of the shank. On the right side it is stamped London England over 335. The pictures below were the ones posted by the seller. The pipe looked to be in excellent shape. The grain is quite nice. It looked like one that would not take a lot of work to get it in shape.

ImageImageImageImageImageImage

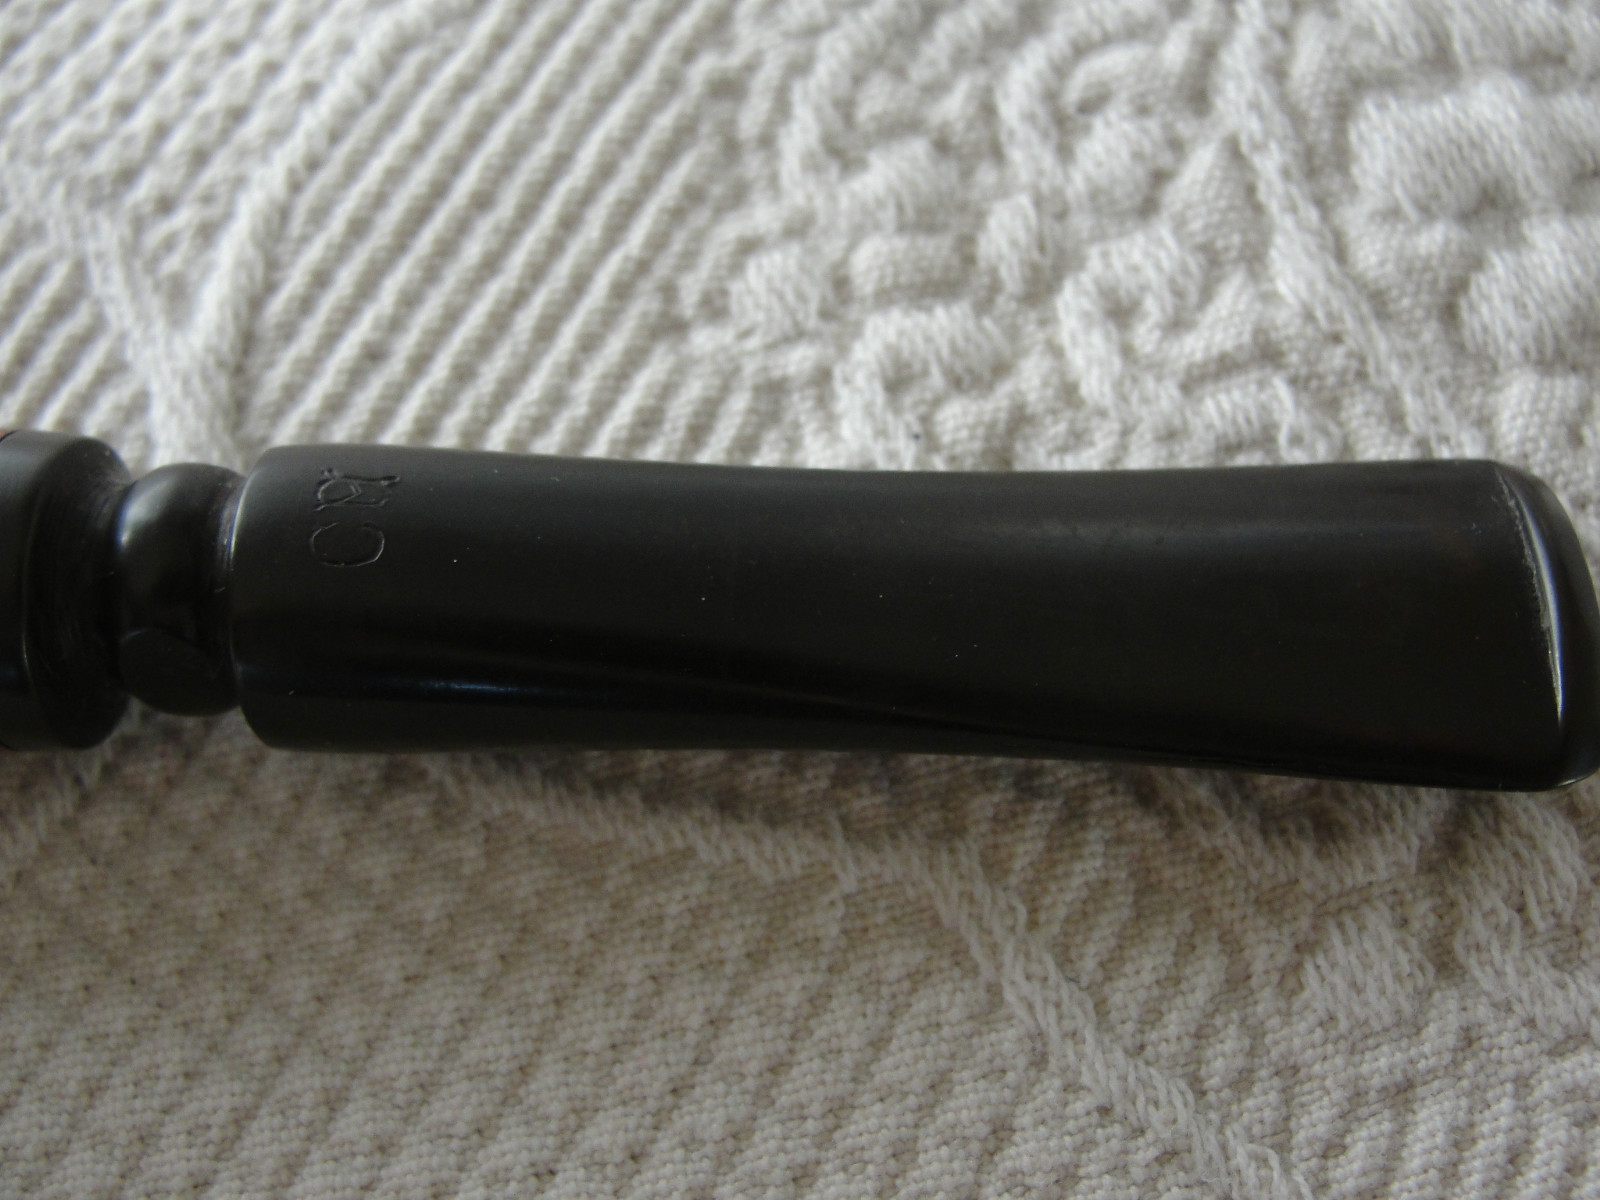
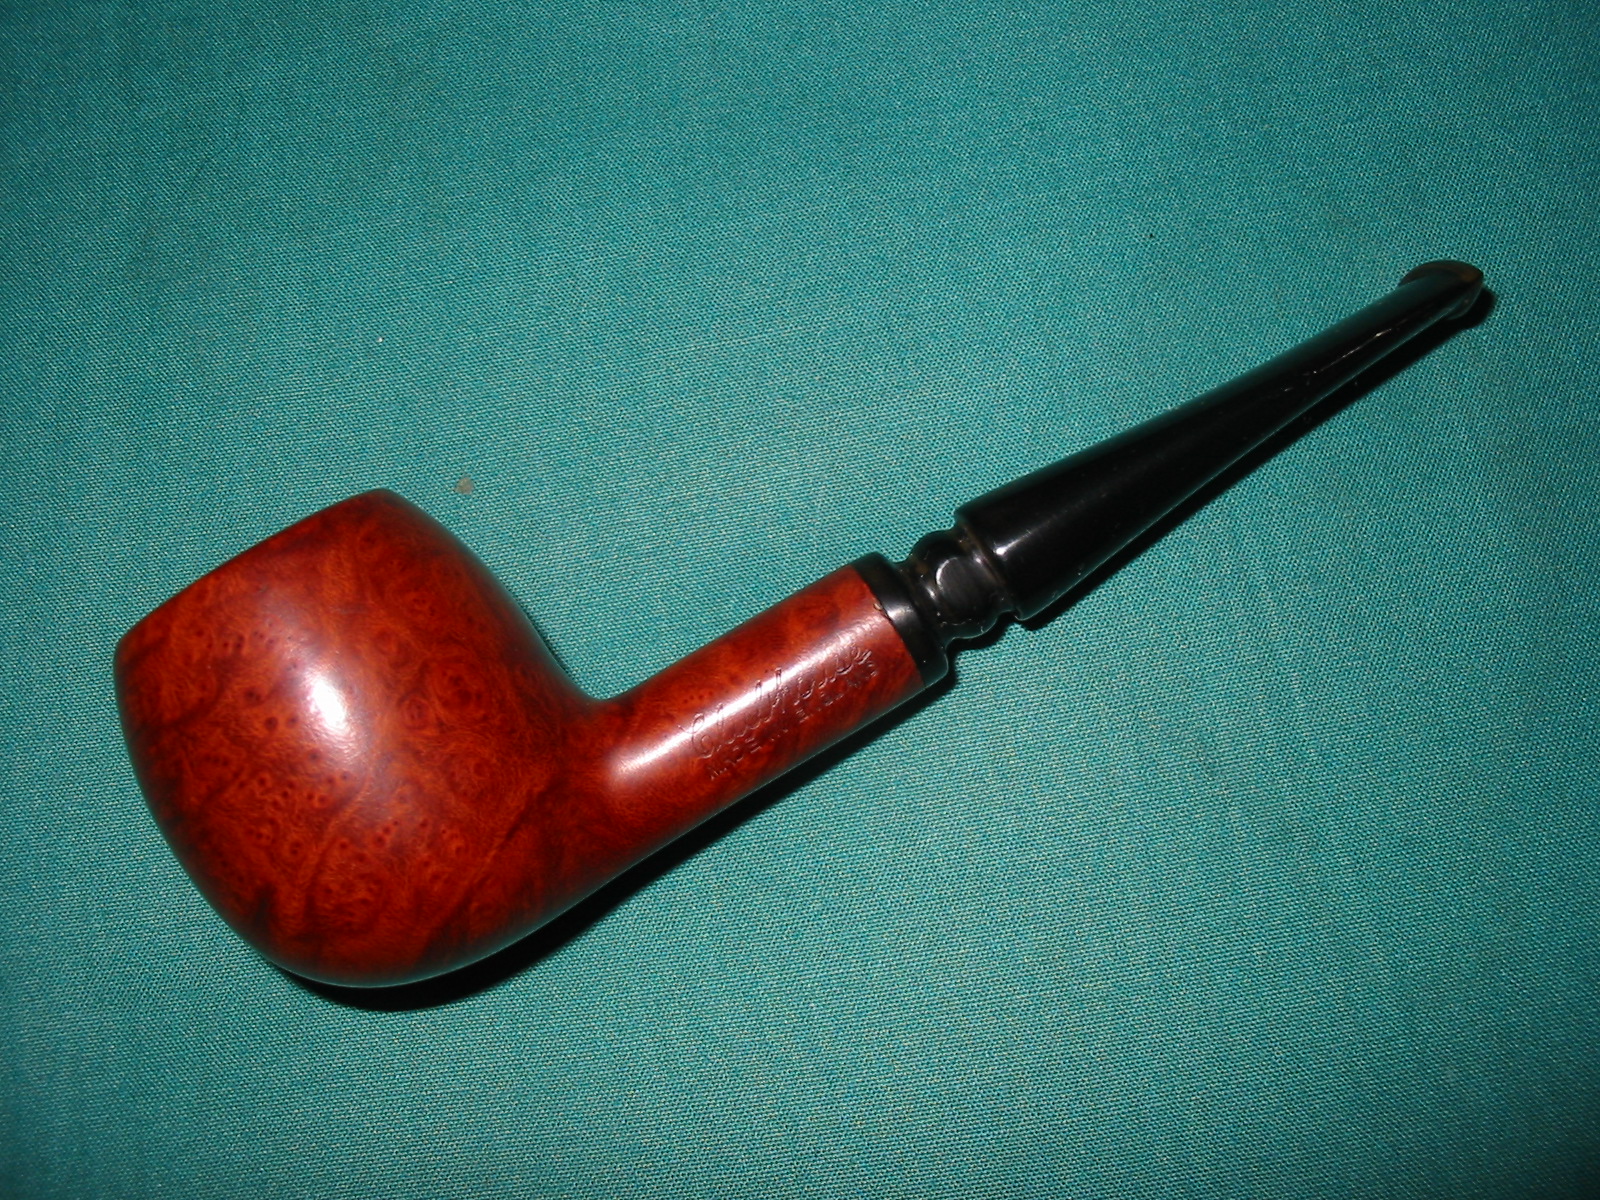
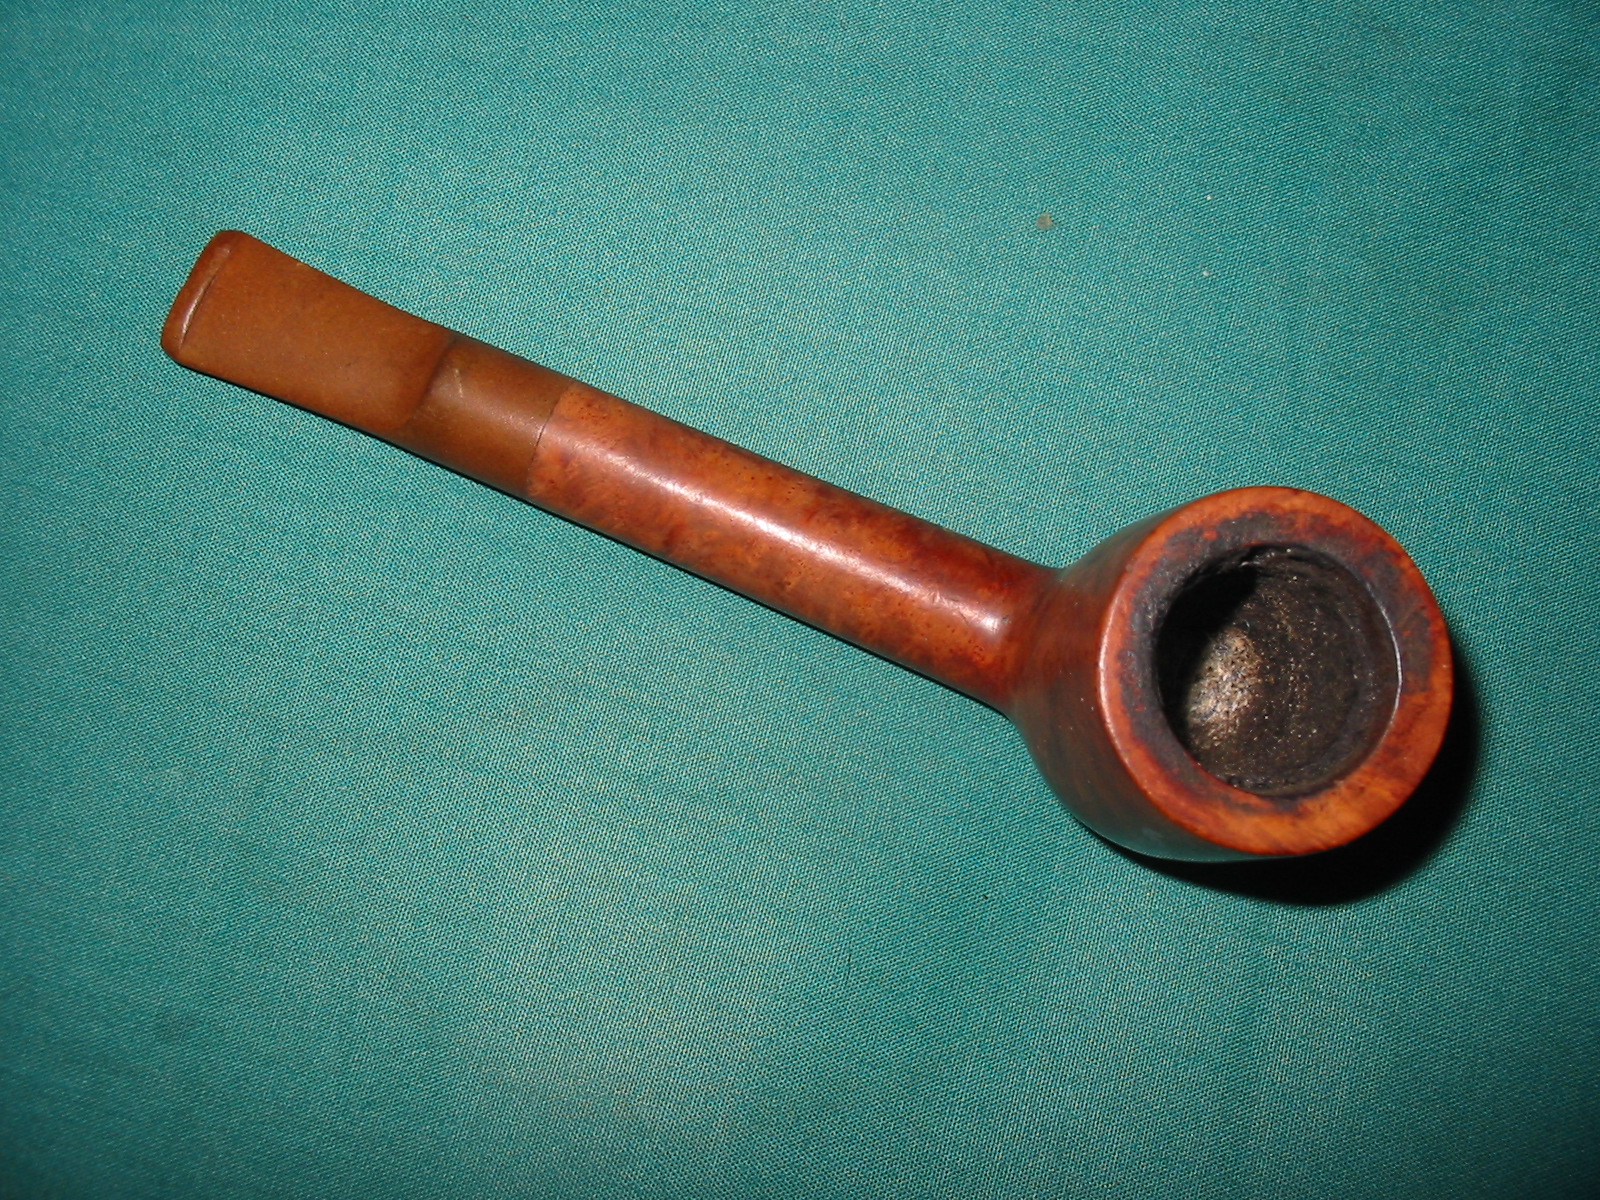
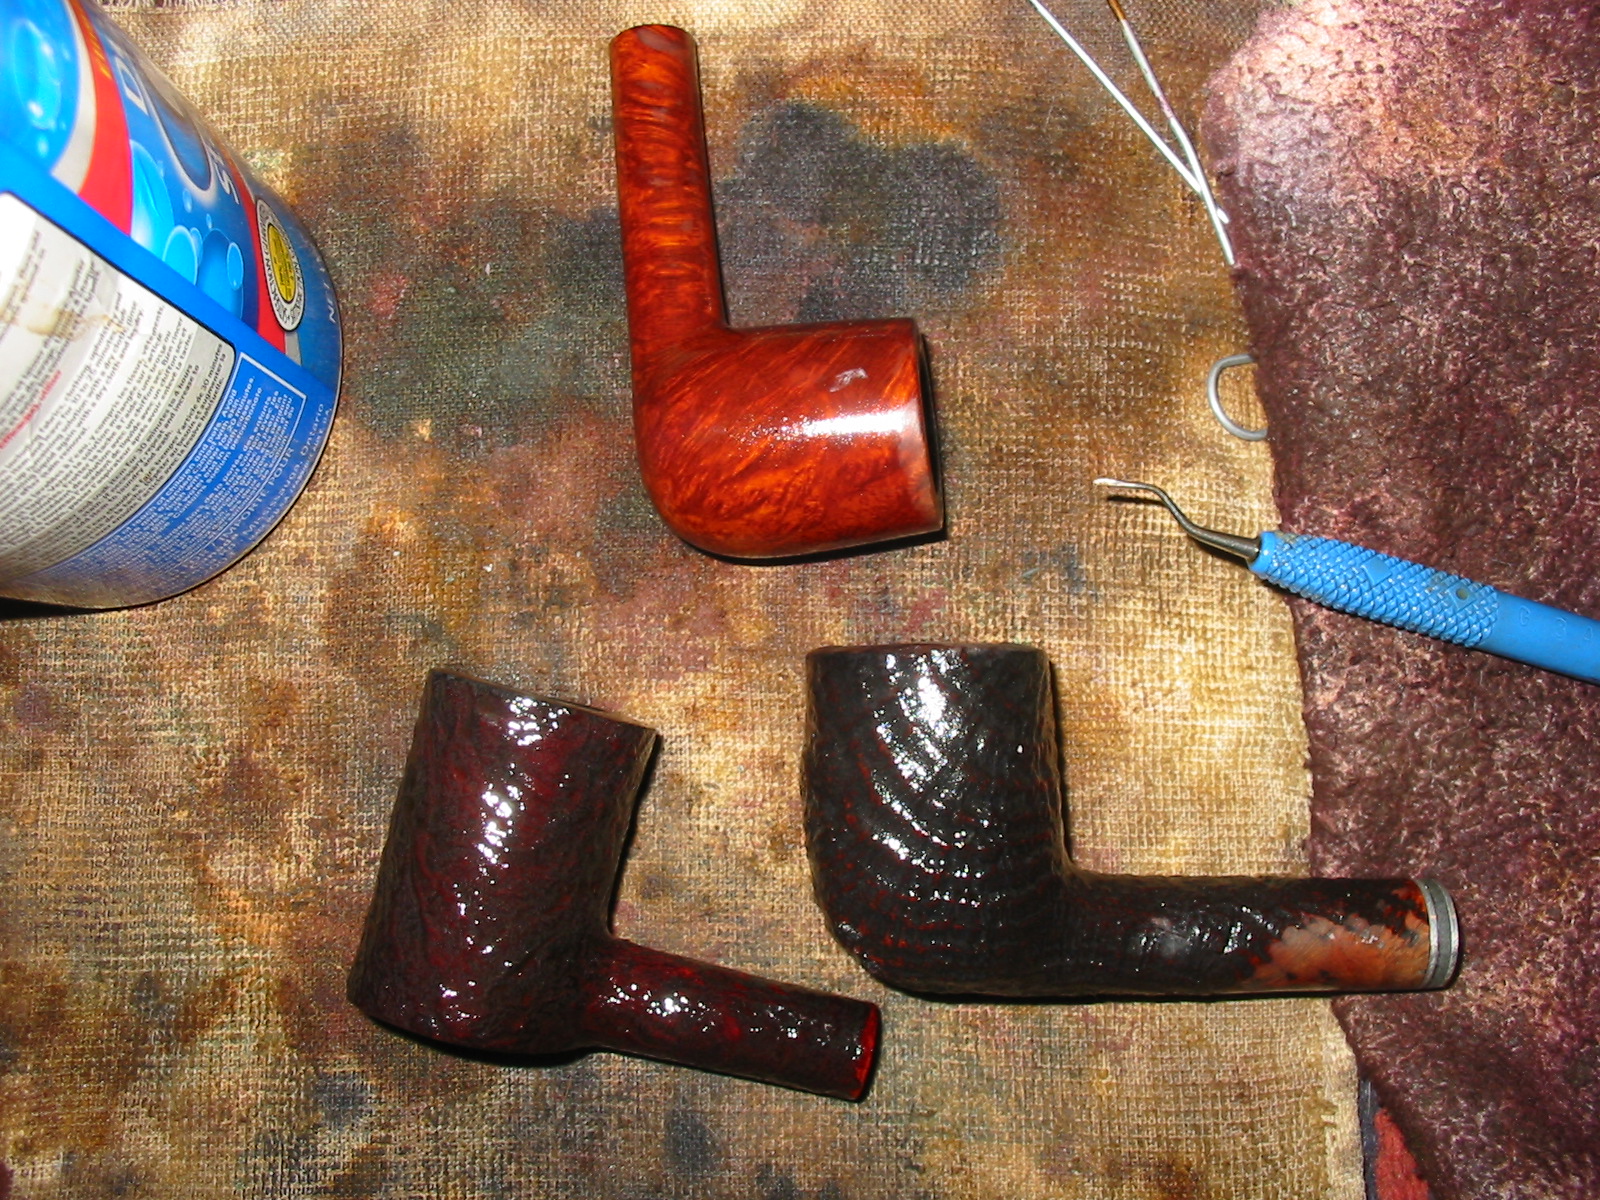
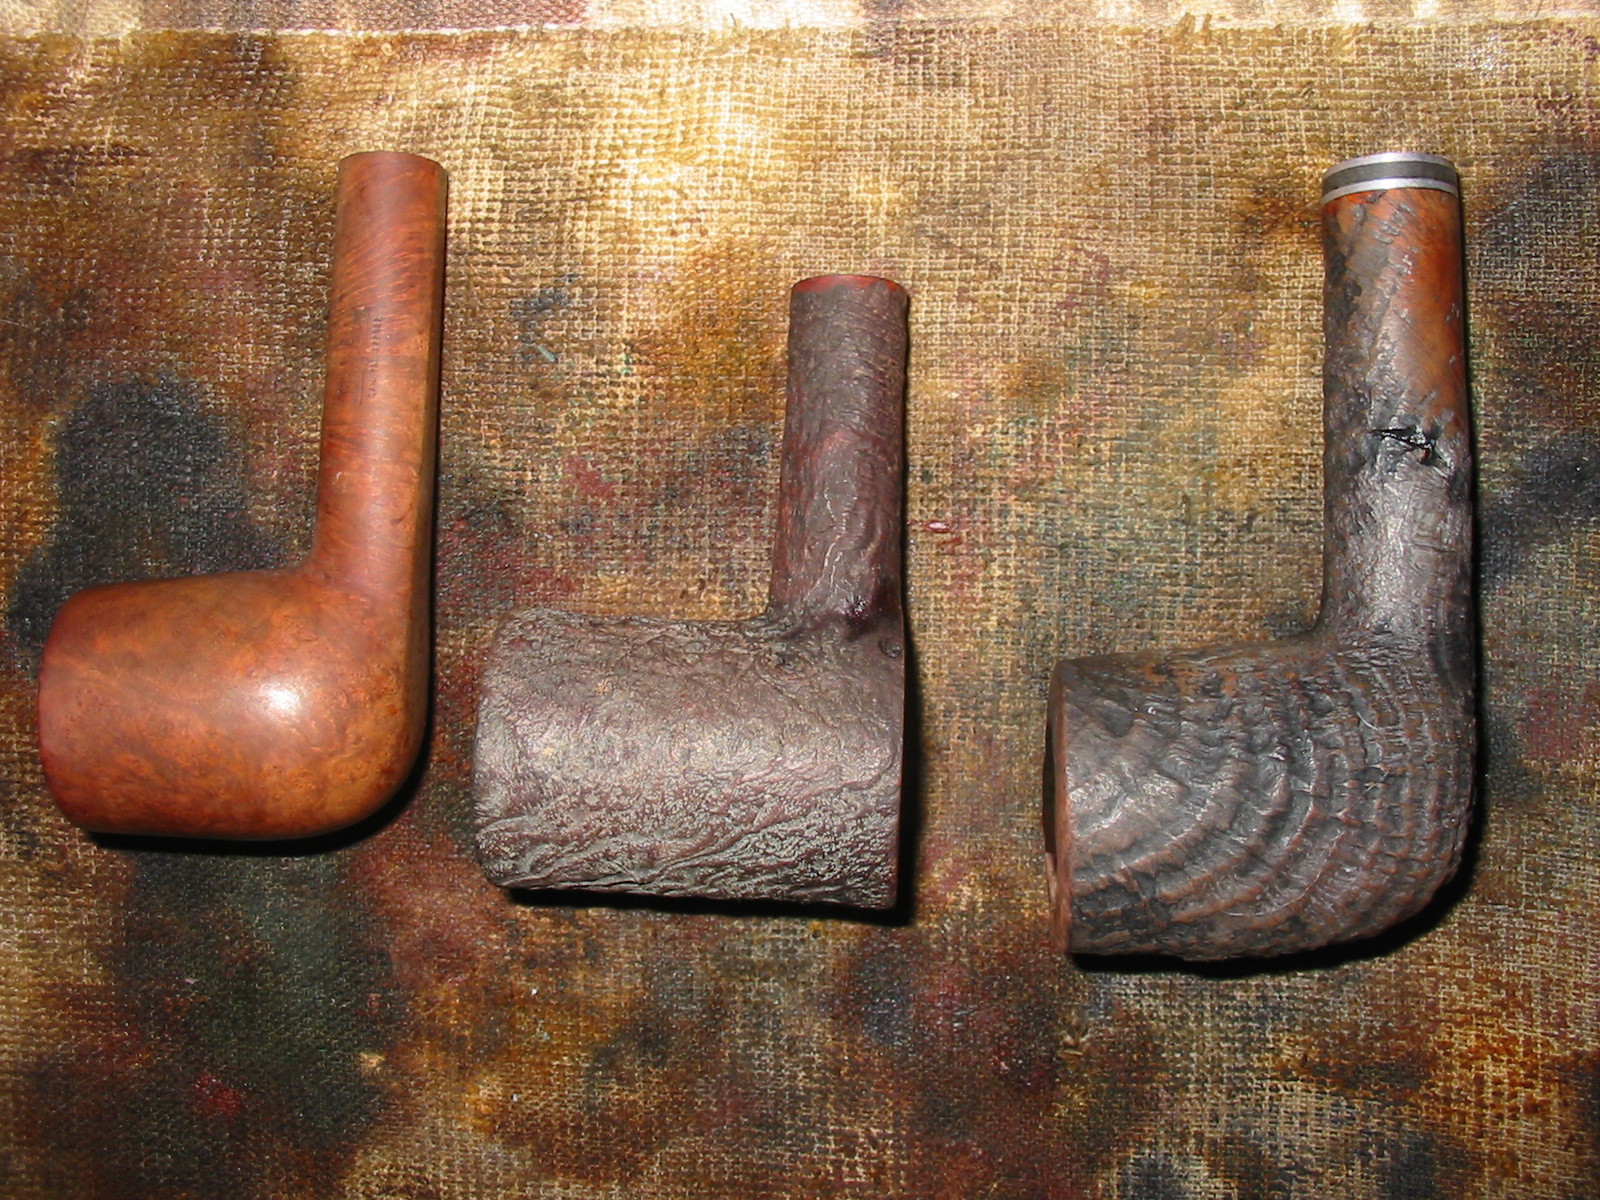
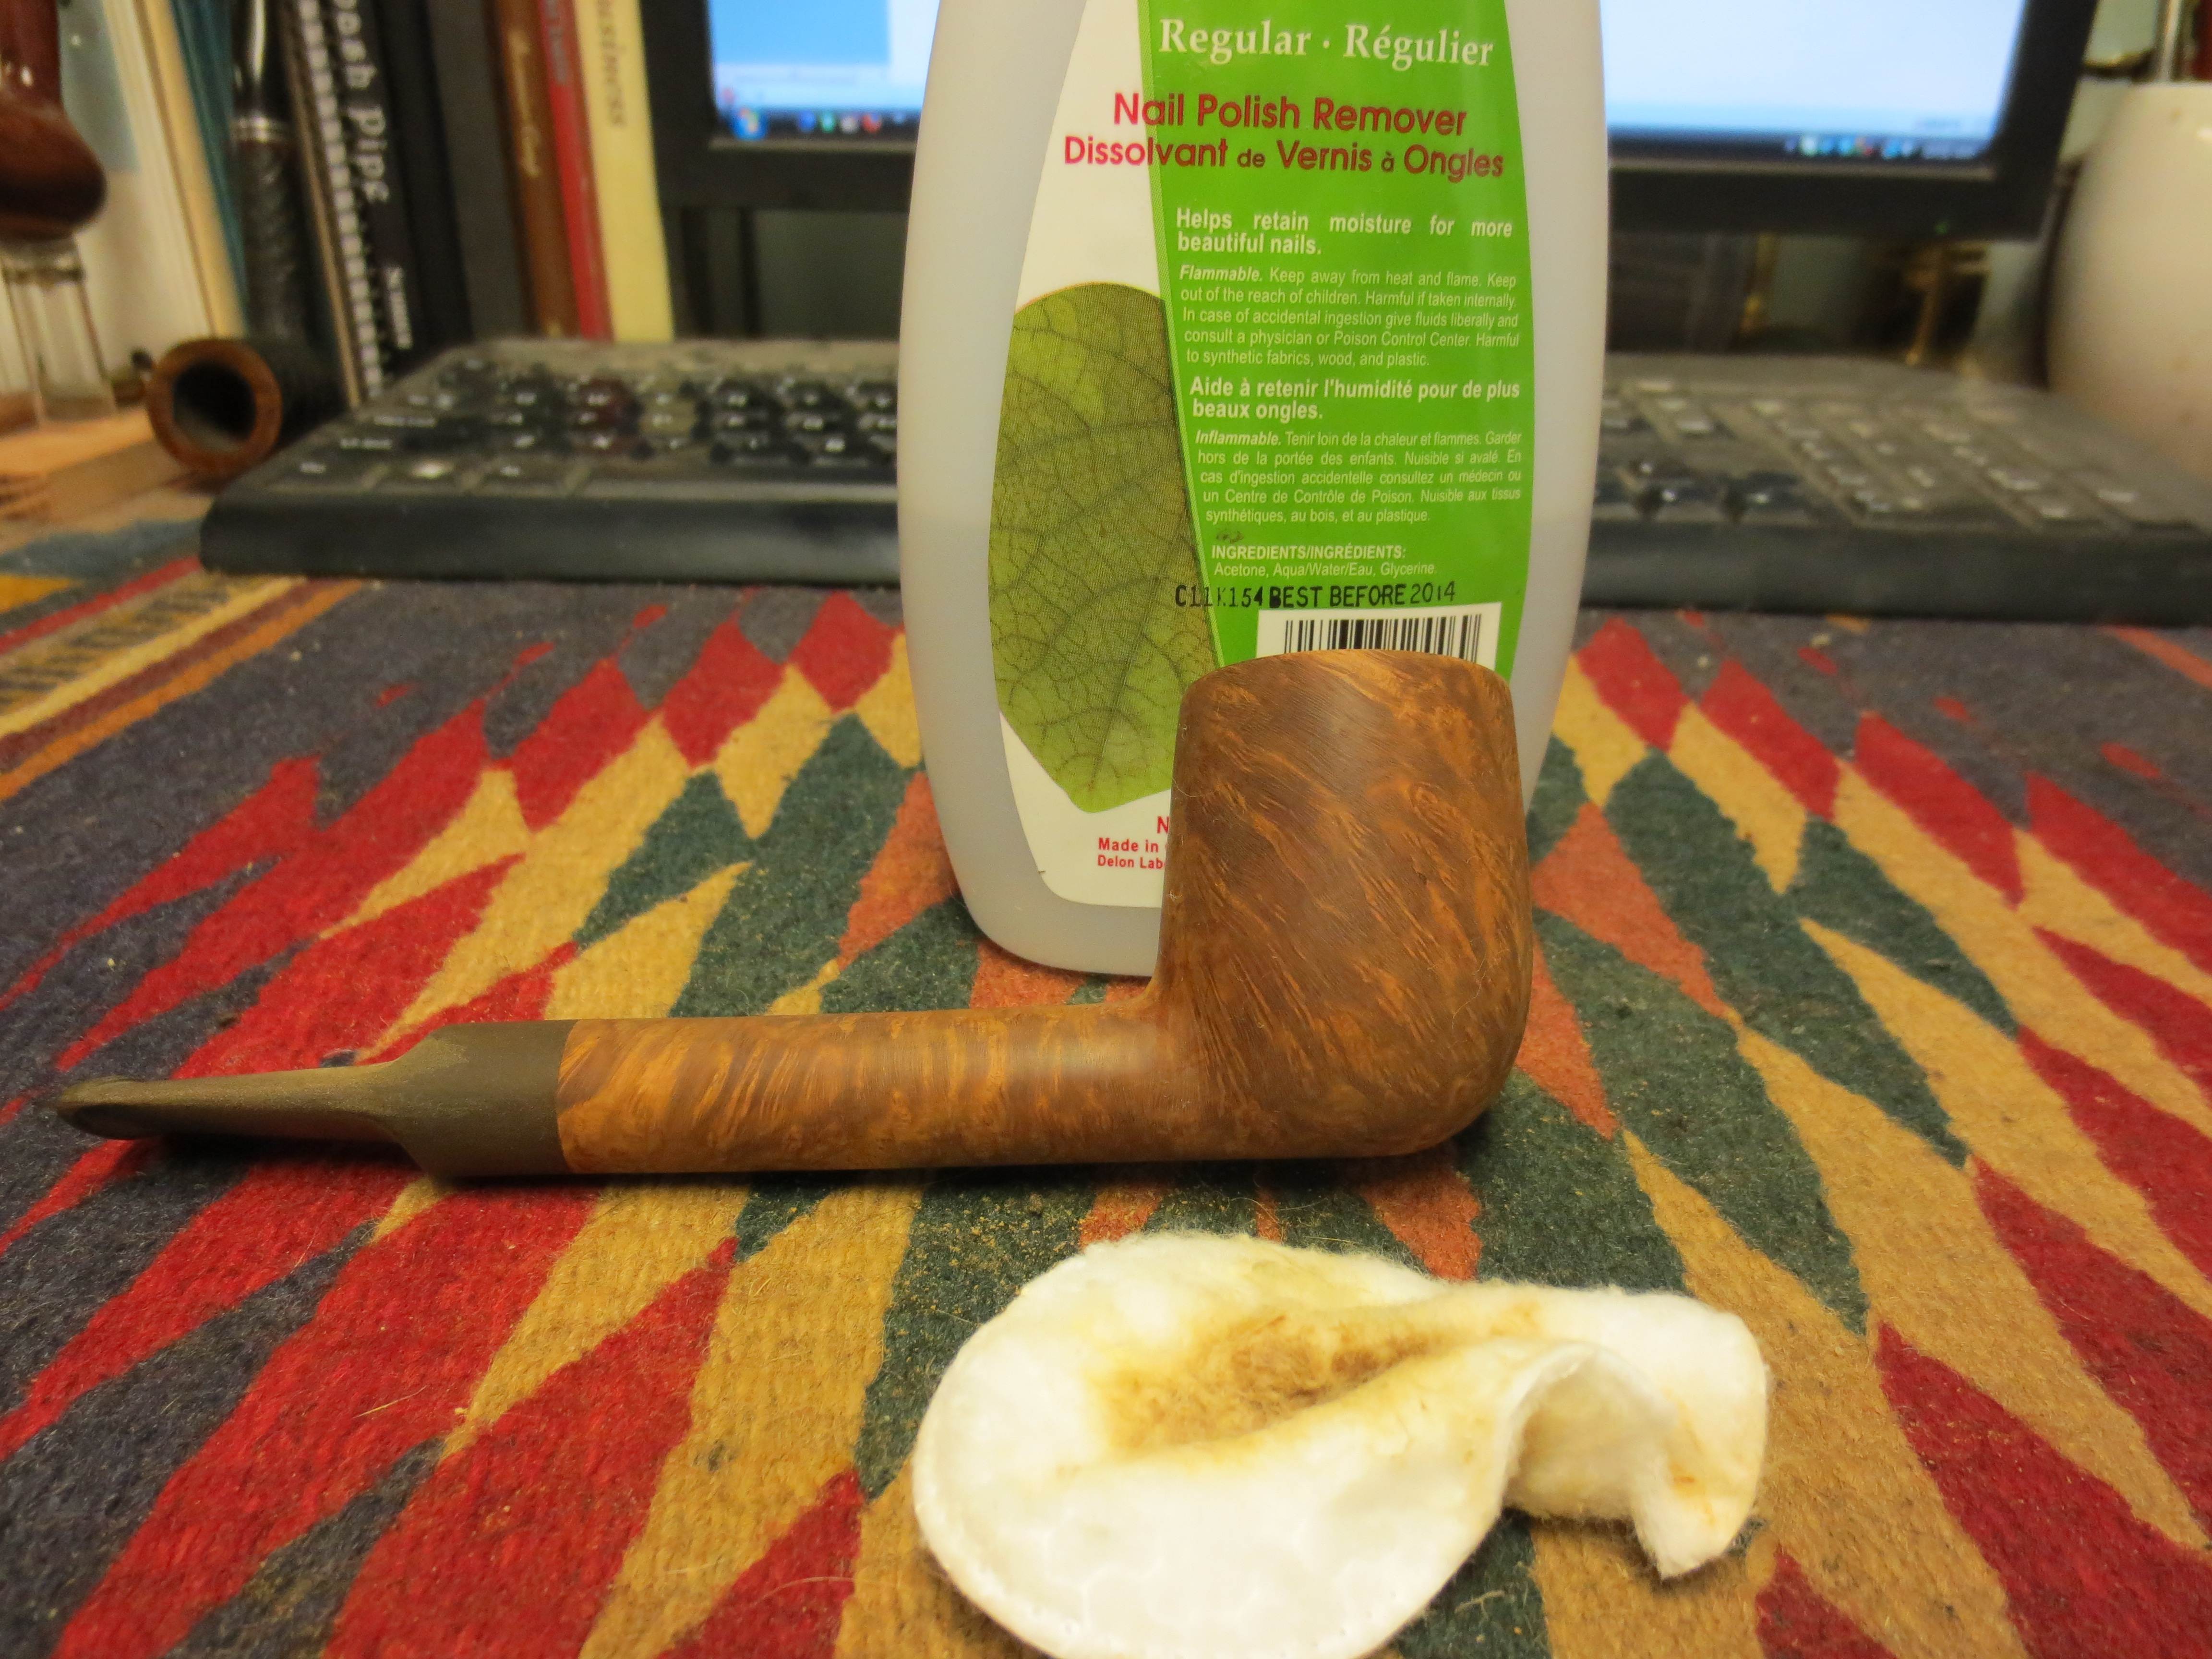
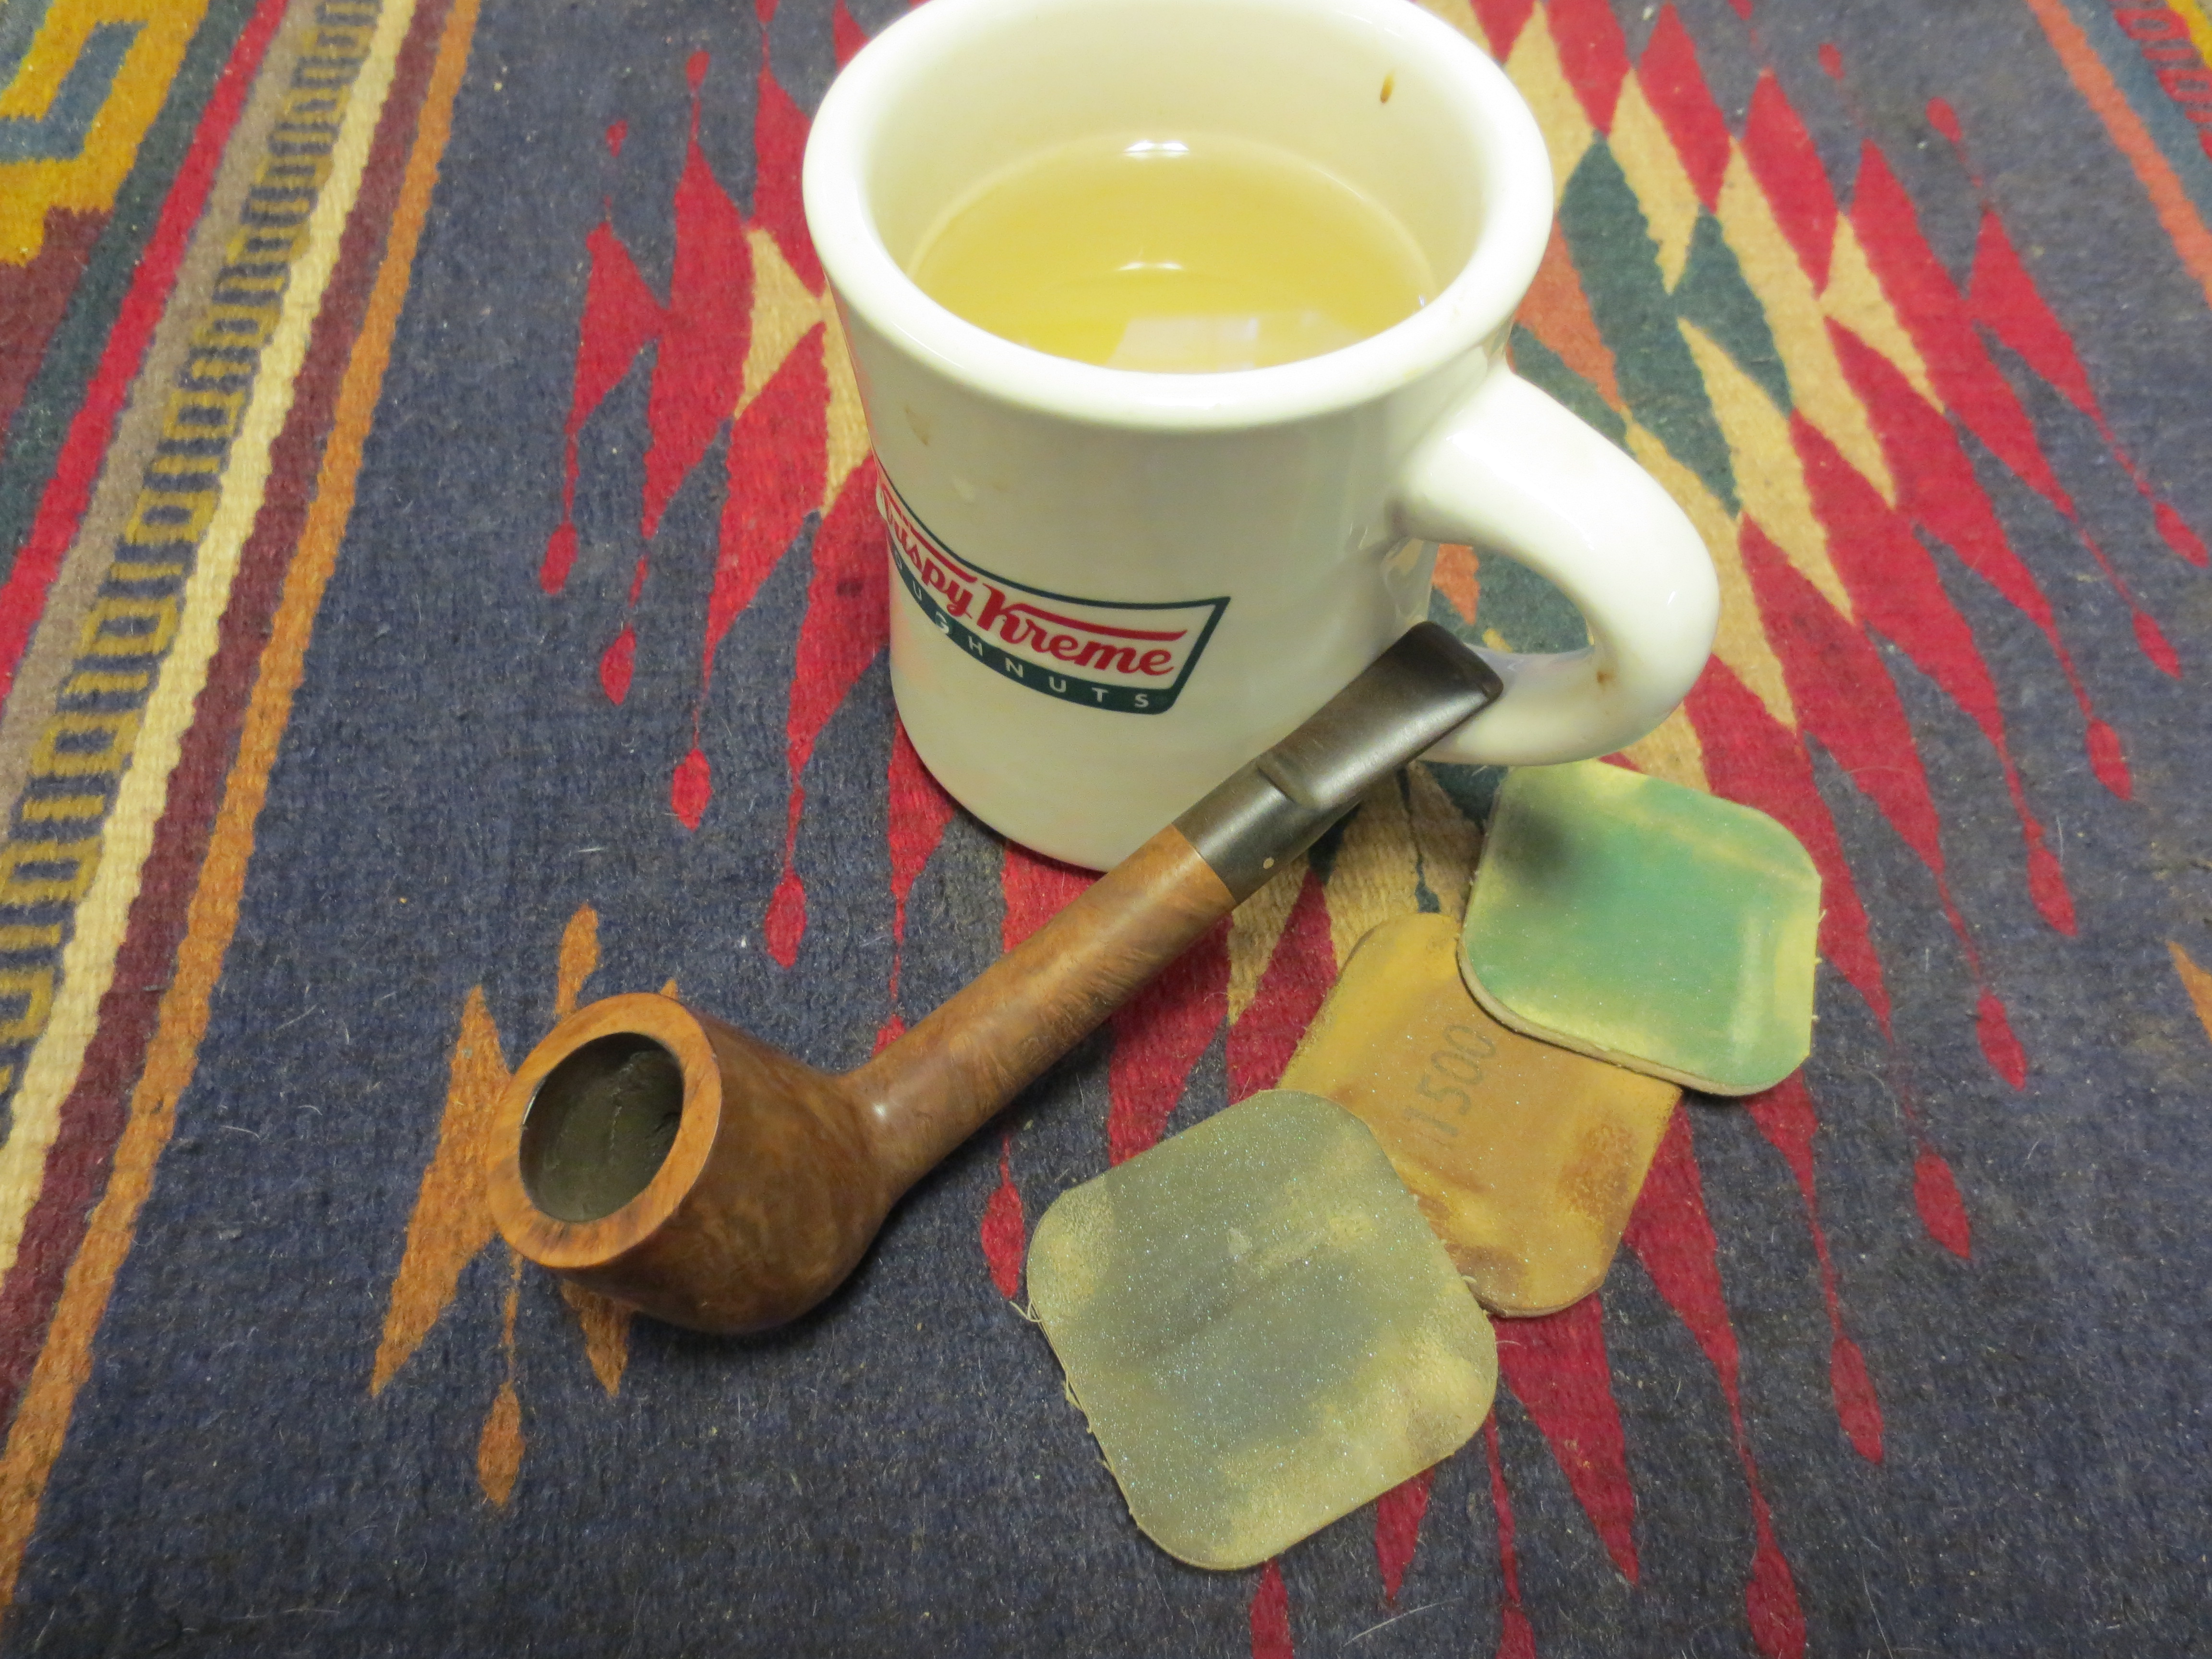
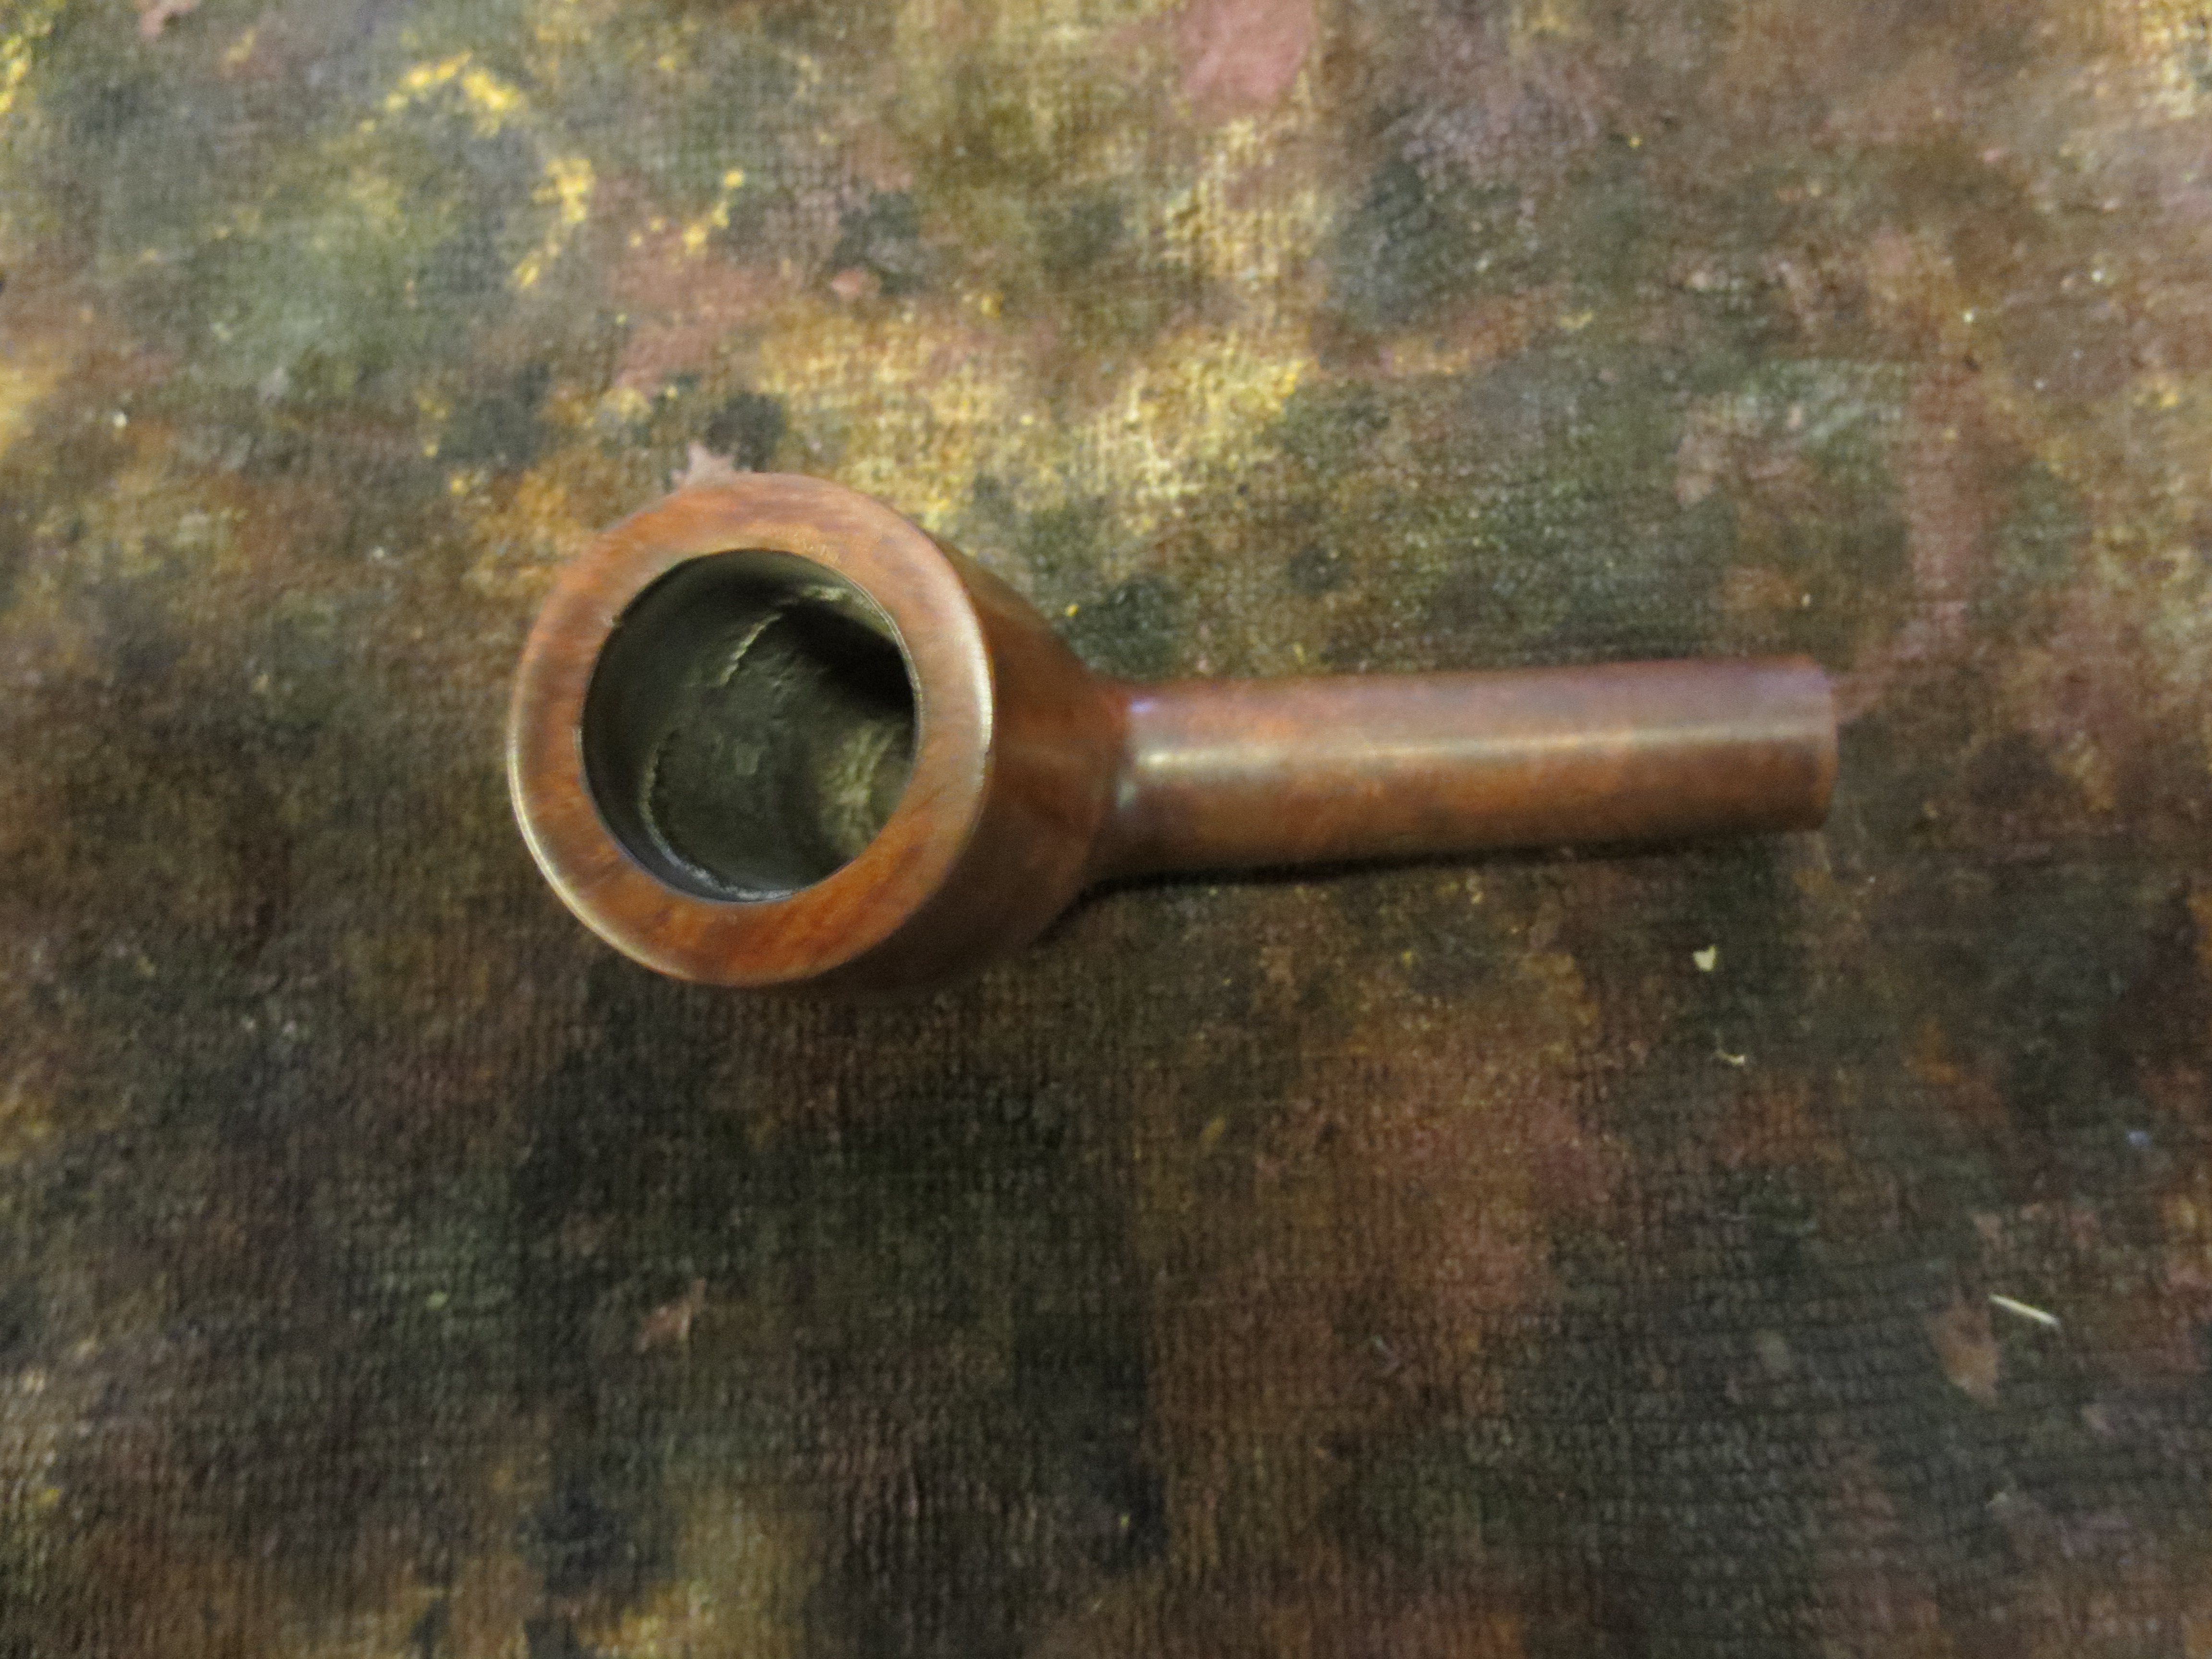
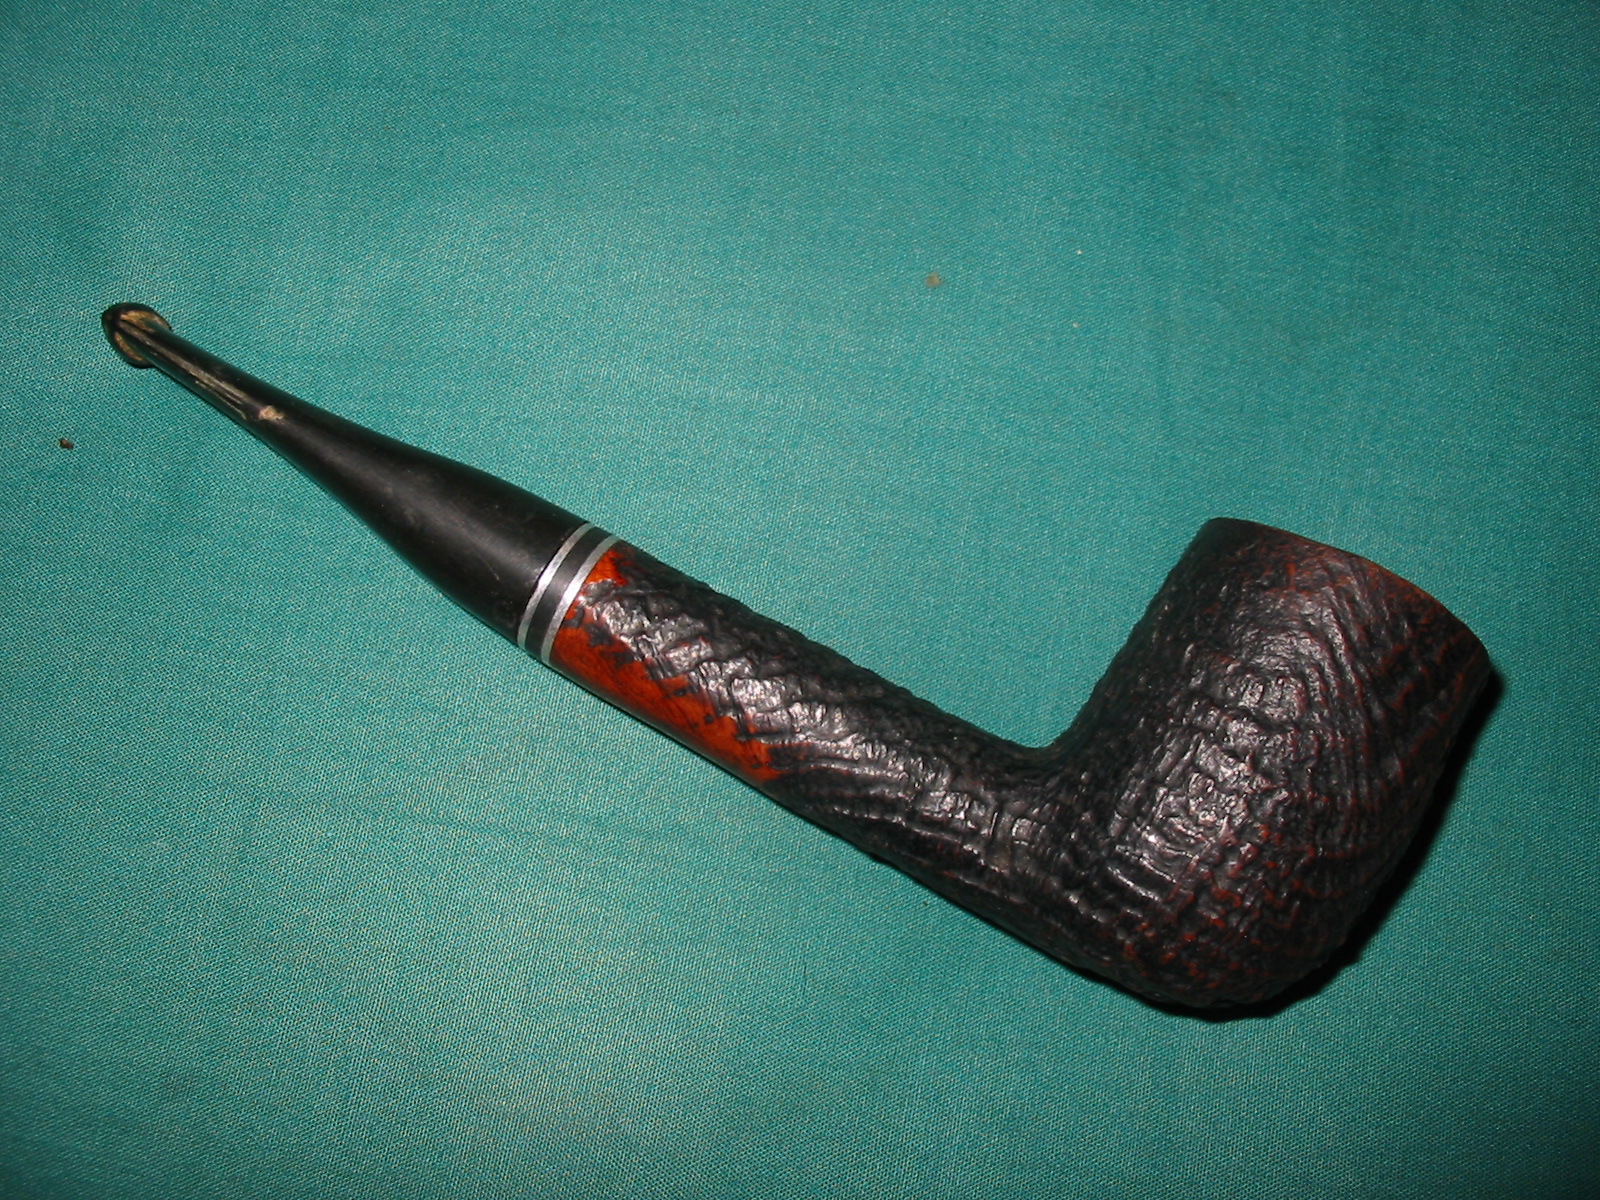
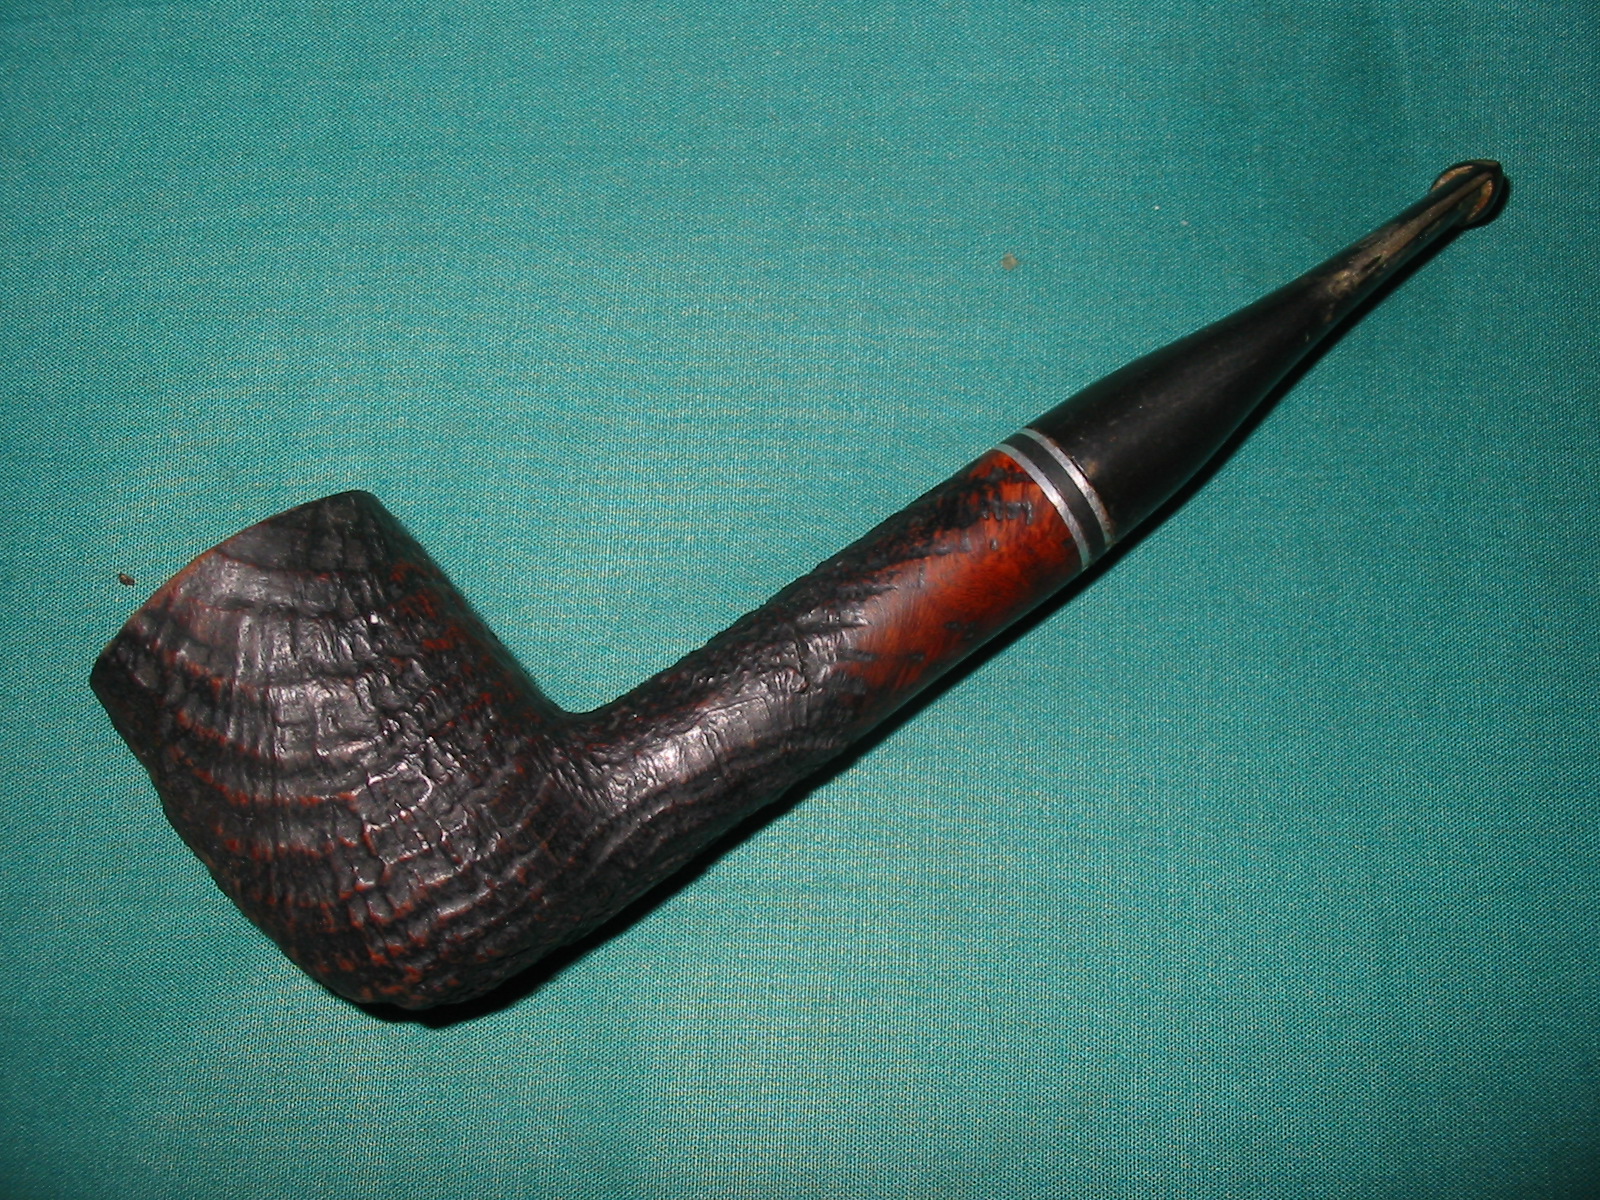
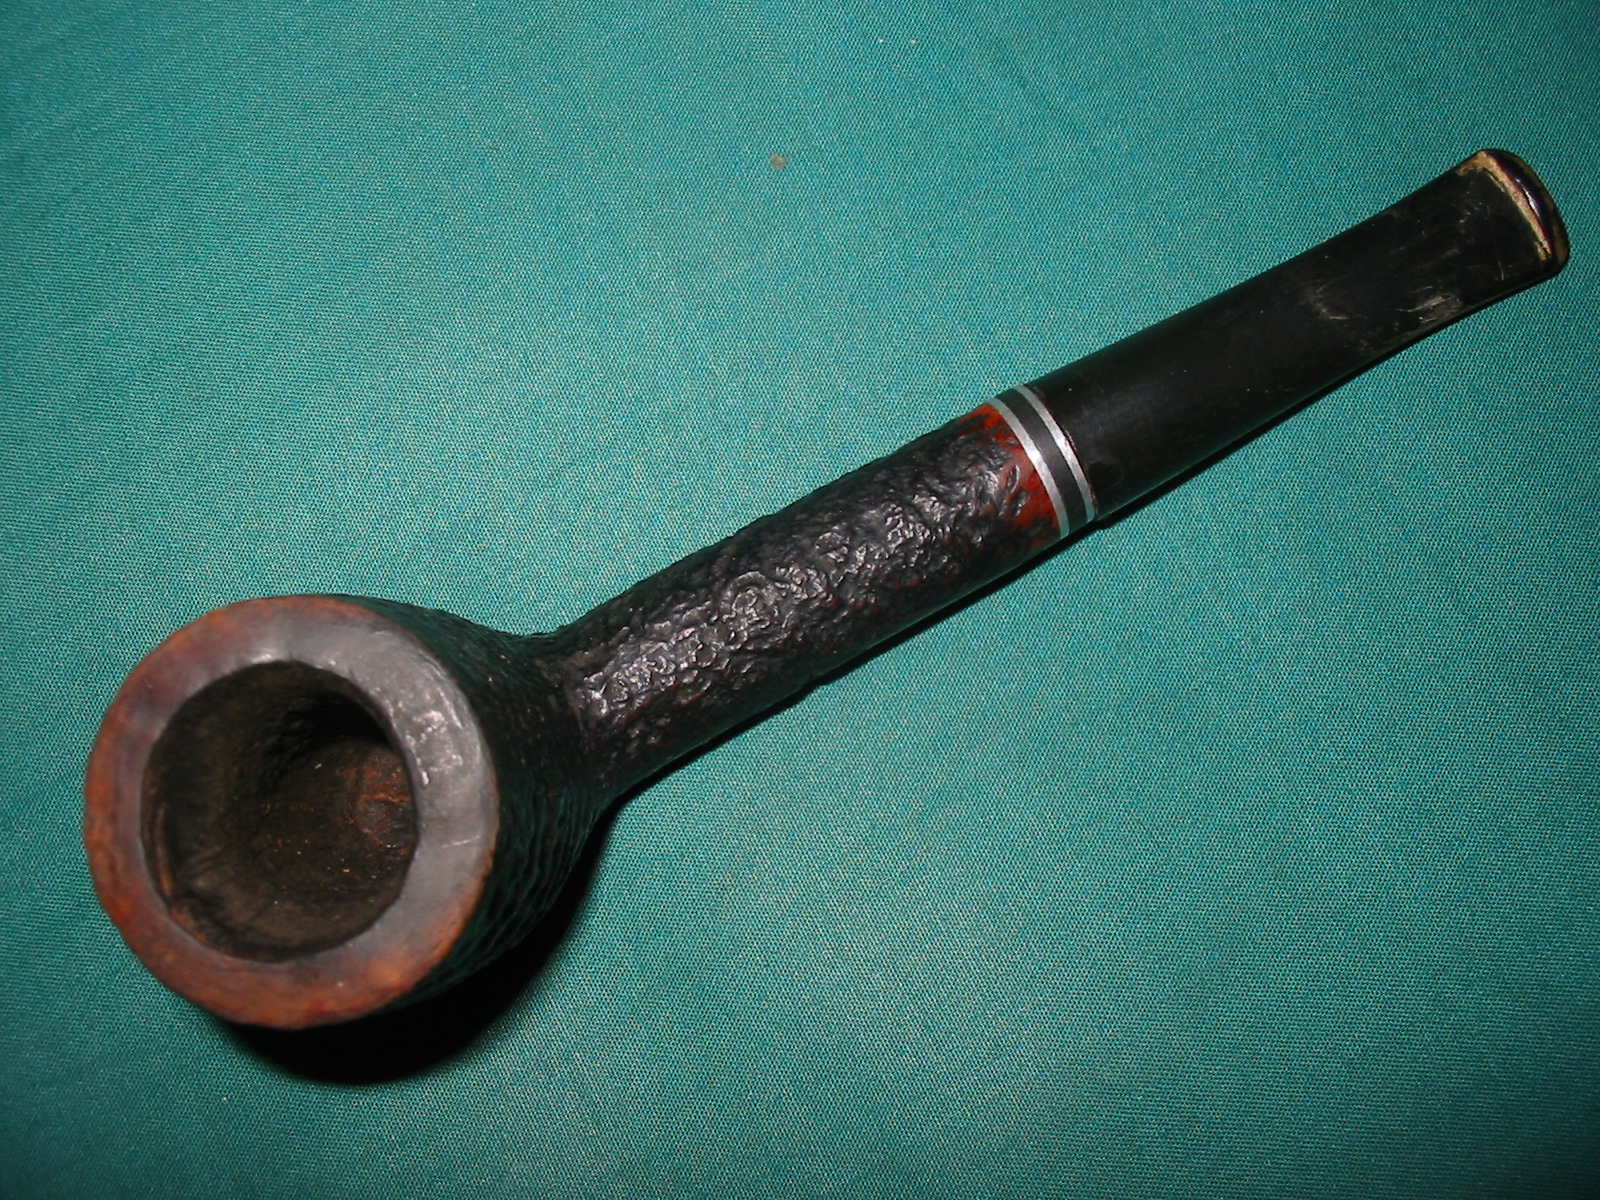
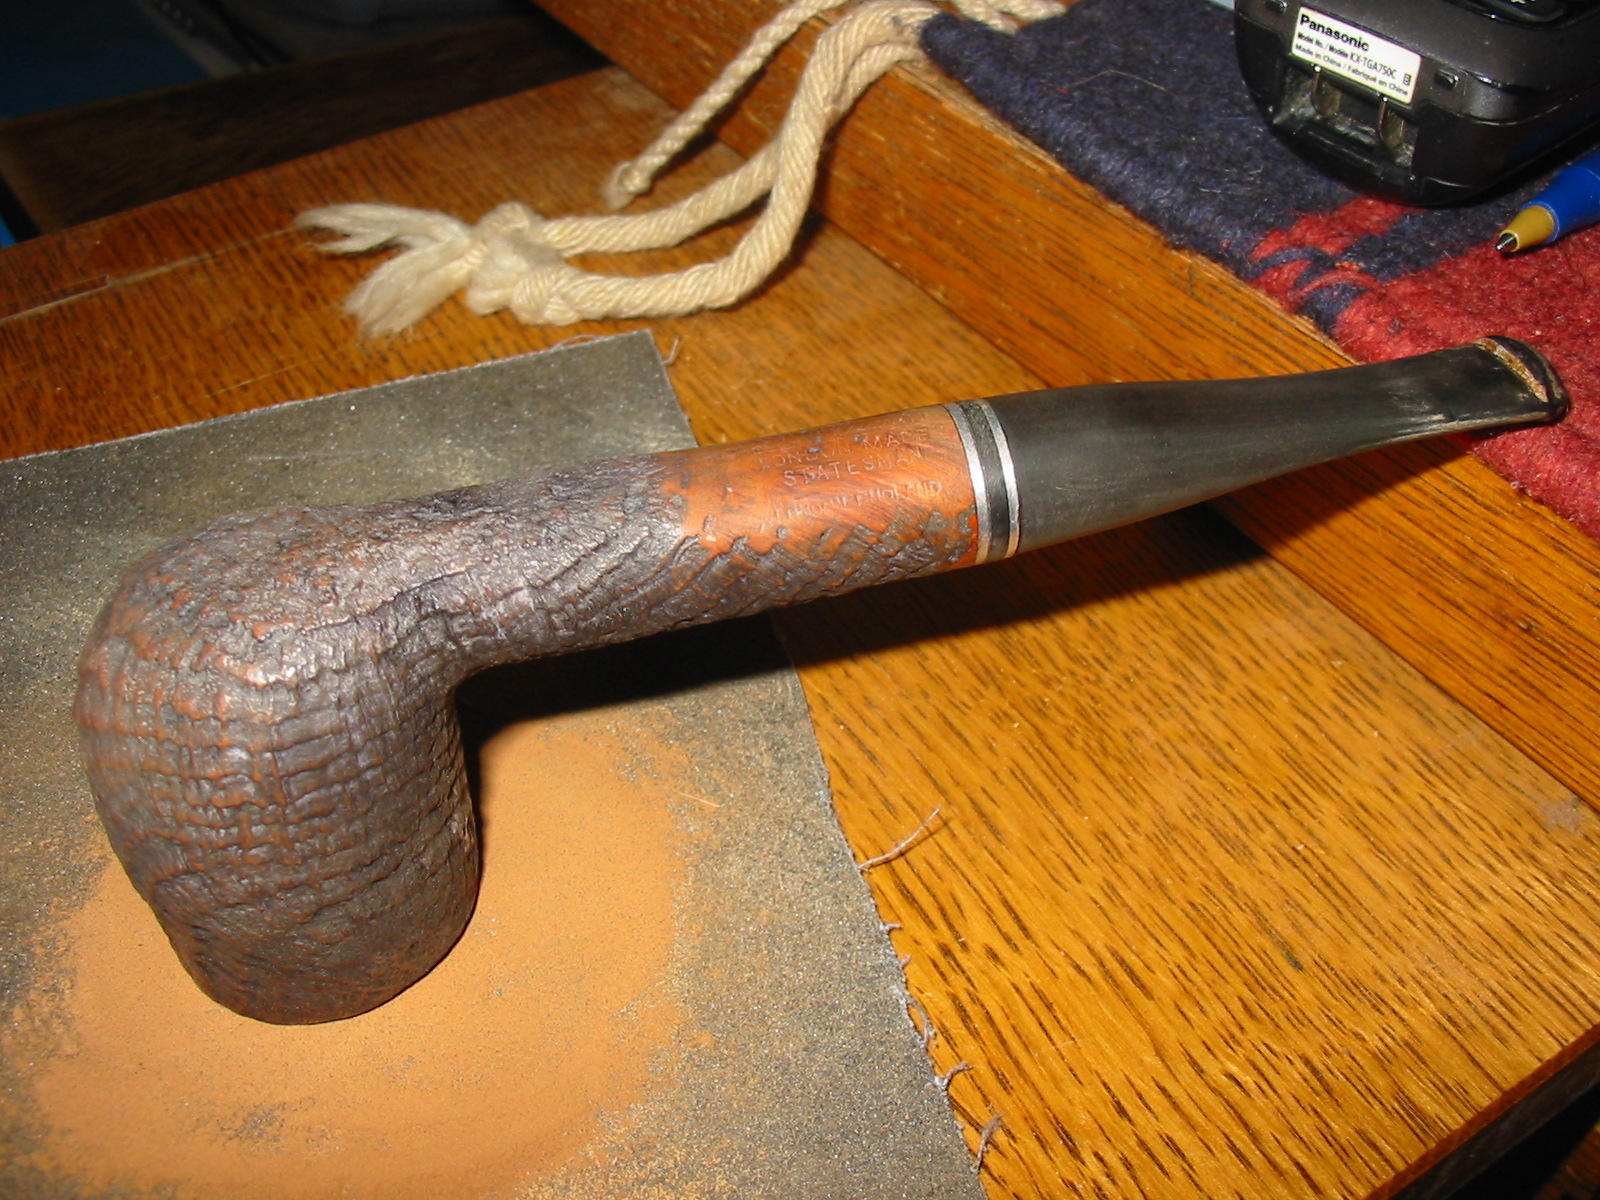
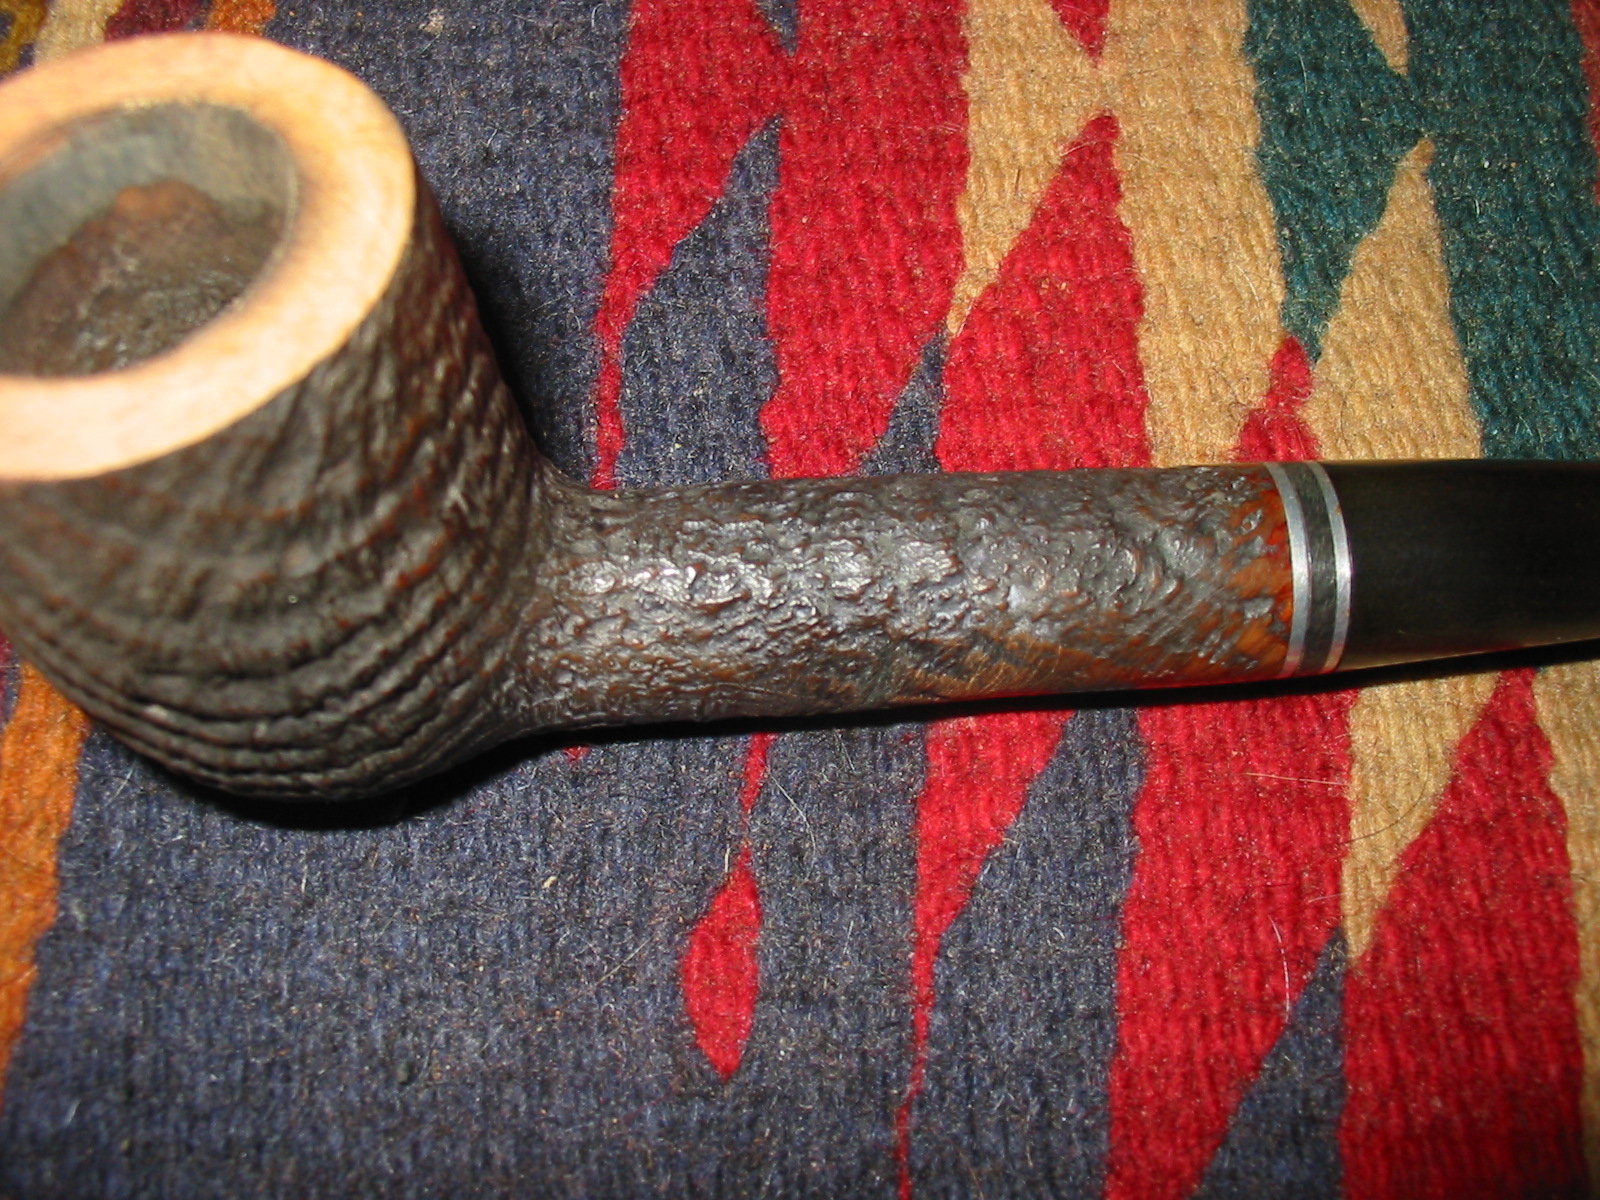
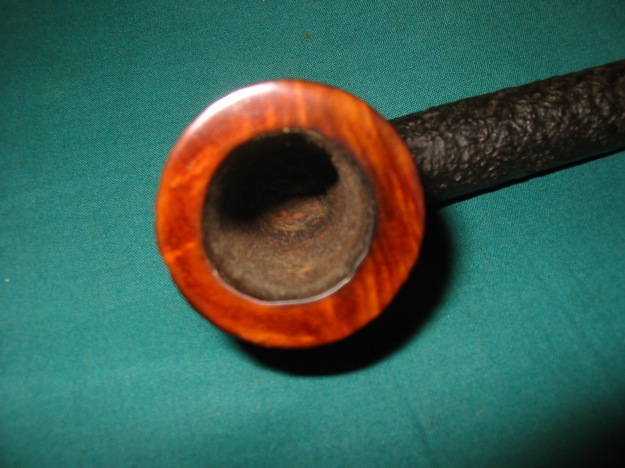
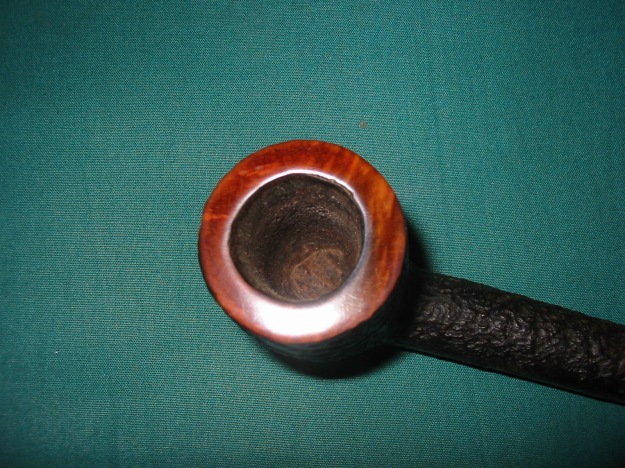
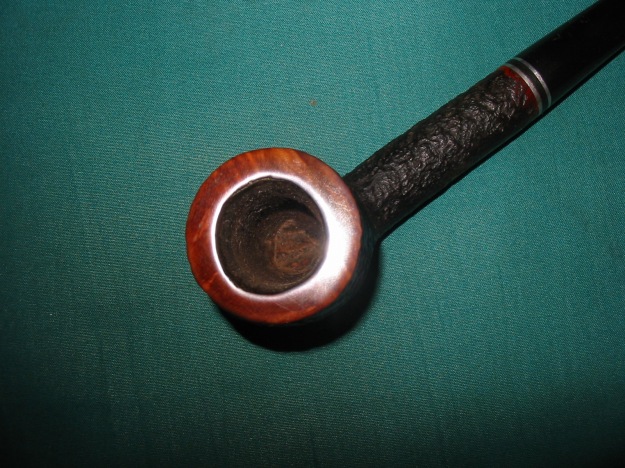
When the pipe arrived here in Canada the bowl was in great shape. The bowl only needed a light ream and clean. The shank was clean and the stem was clean inside. This would be an easy cleanup in terms of the briar. The stem was another story altogether. It was far more oxidized than the EBay pictures showed. The next four pictures show what the pipe looked like when I took it out of the box. These chairleg stems are a pain to clean up and get the oxidation out of all of the grooves. I knew that this one would prove to be a challenge.

Image

ImageImageImage

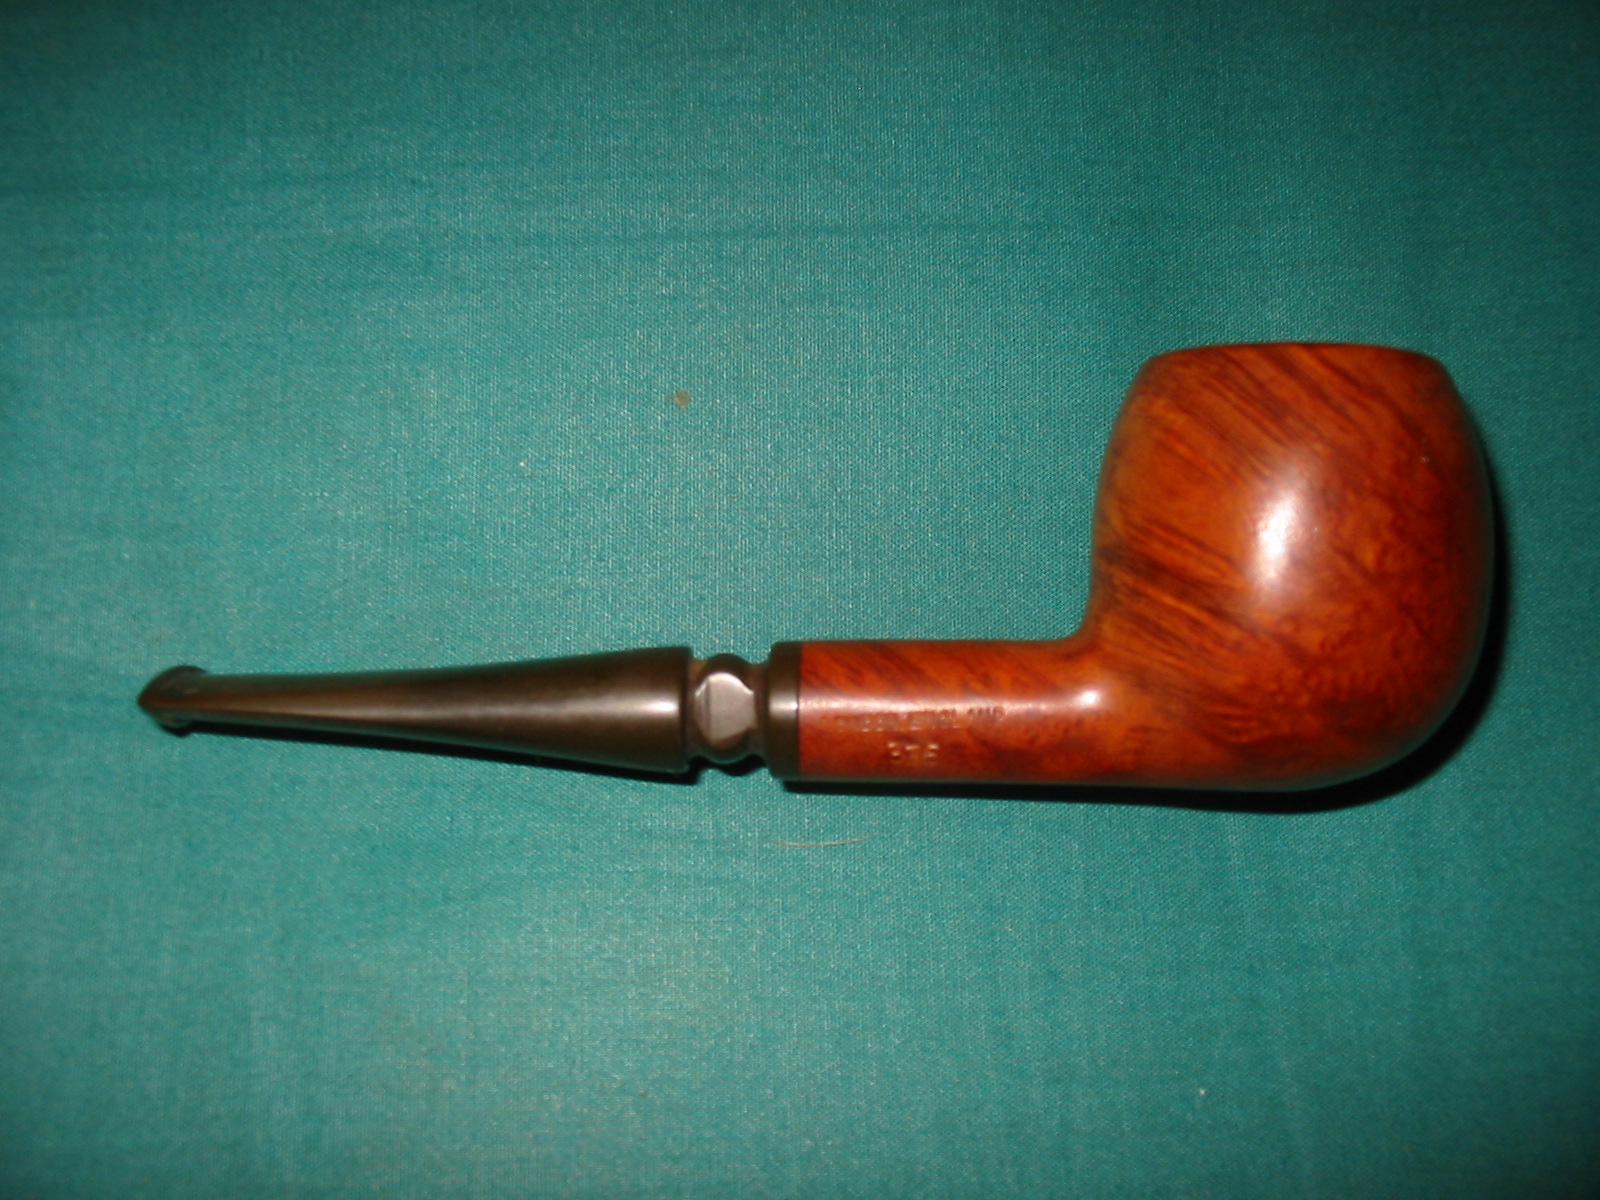
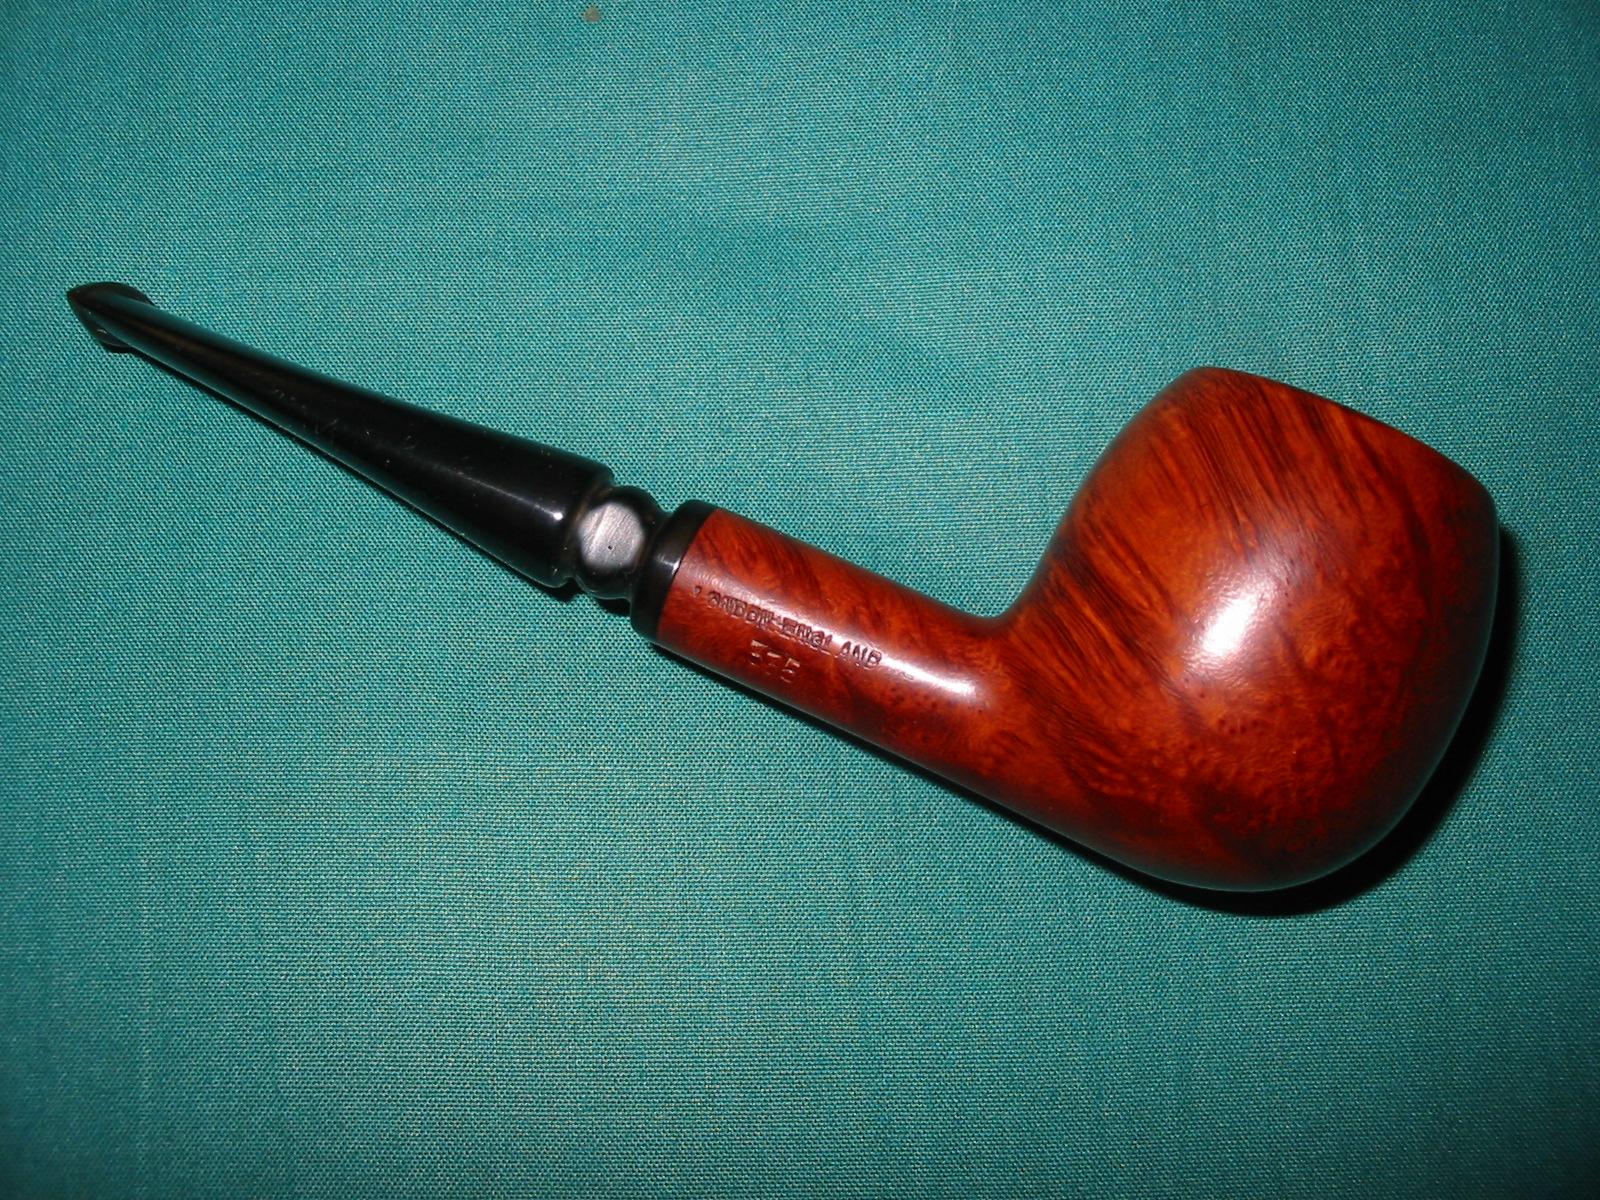
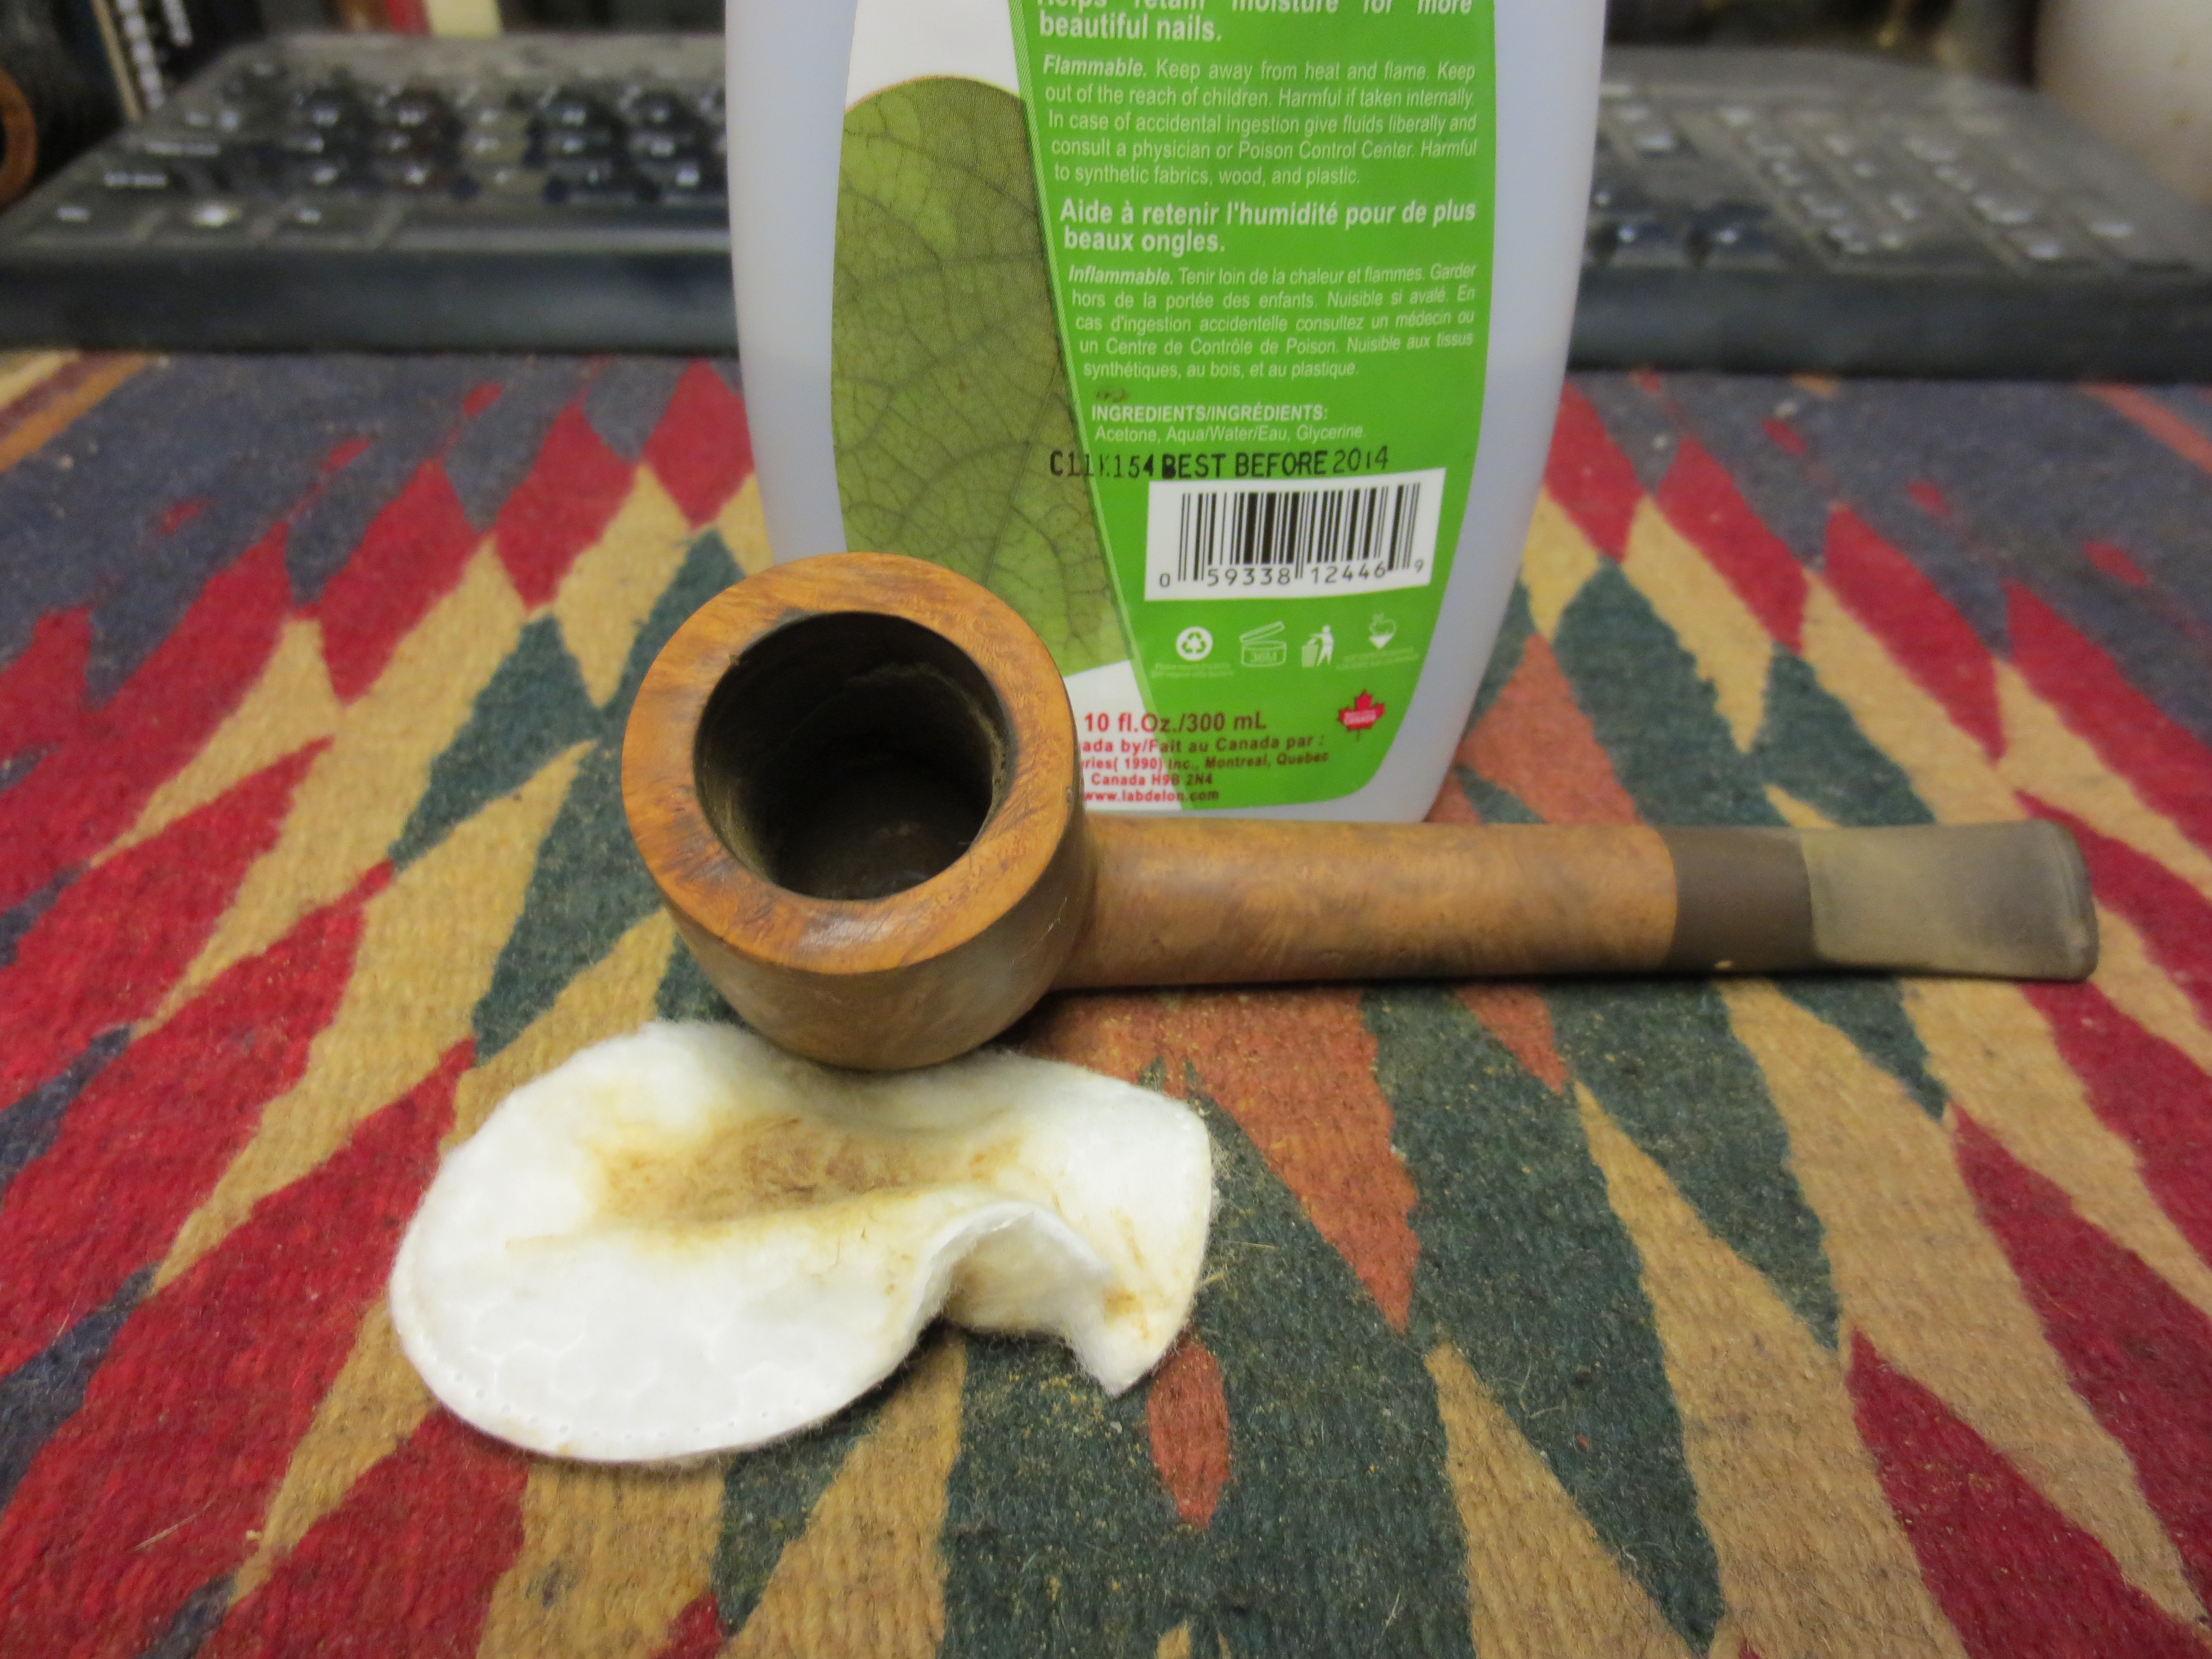
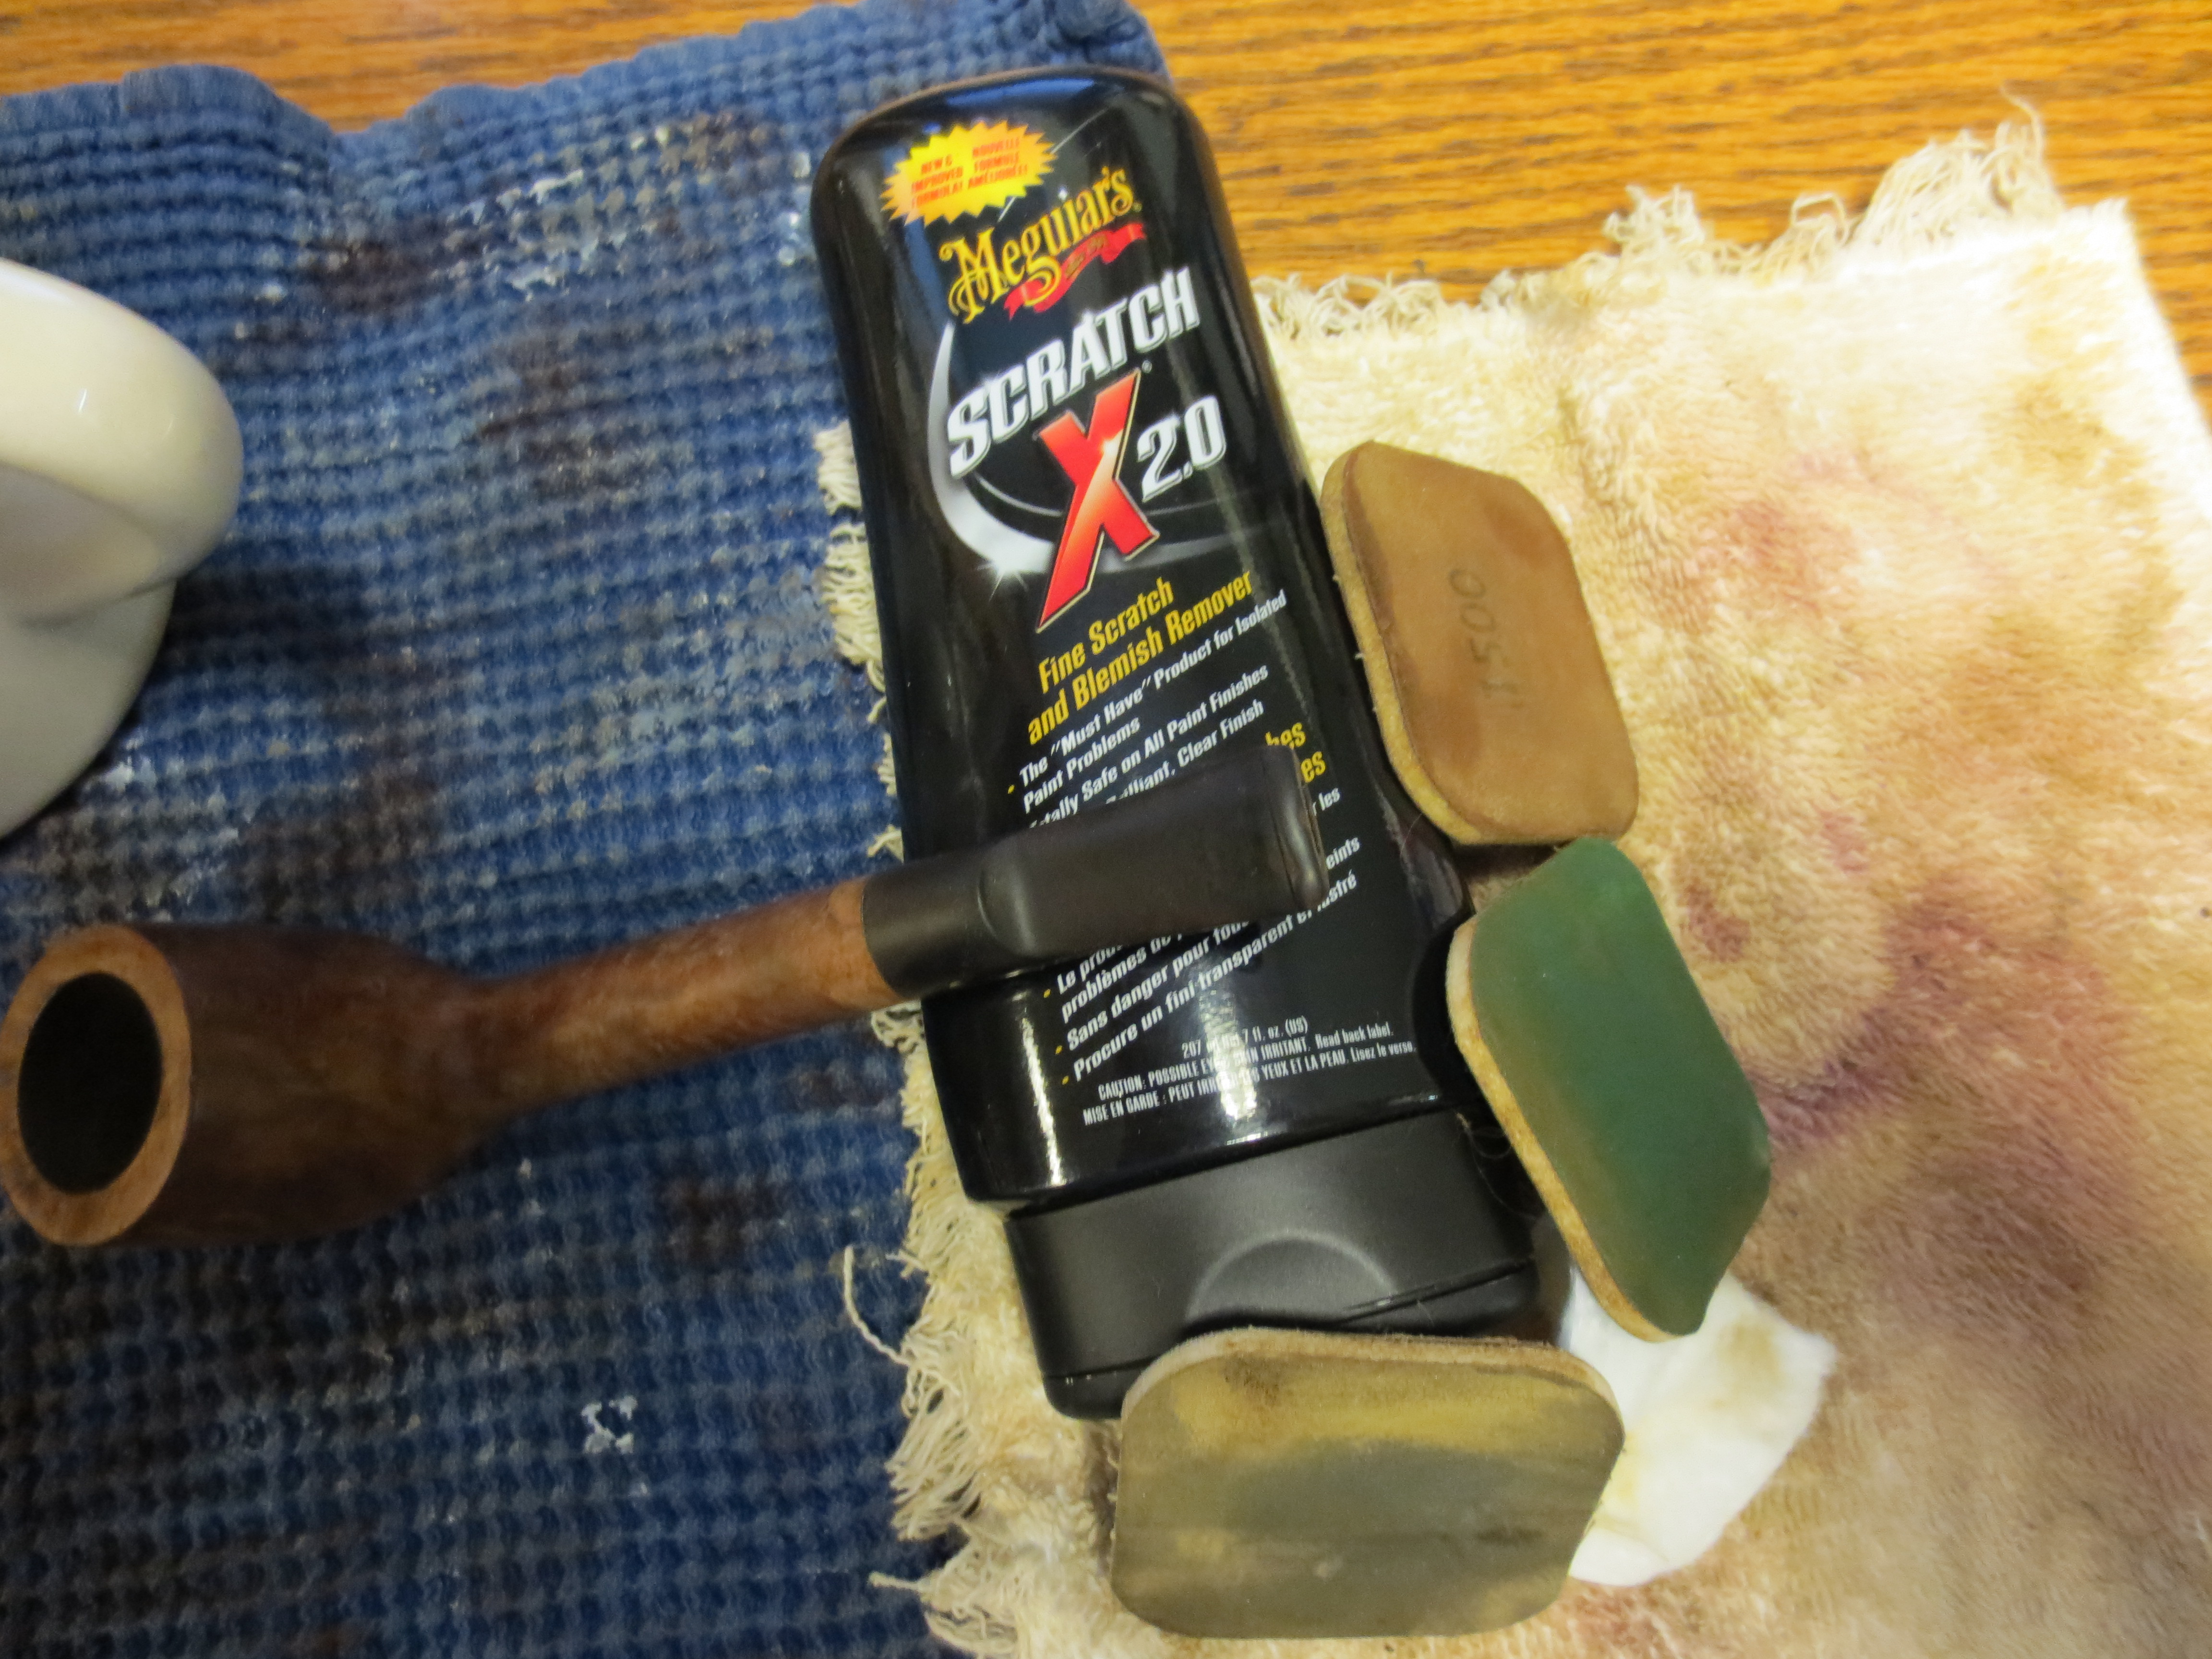
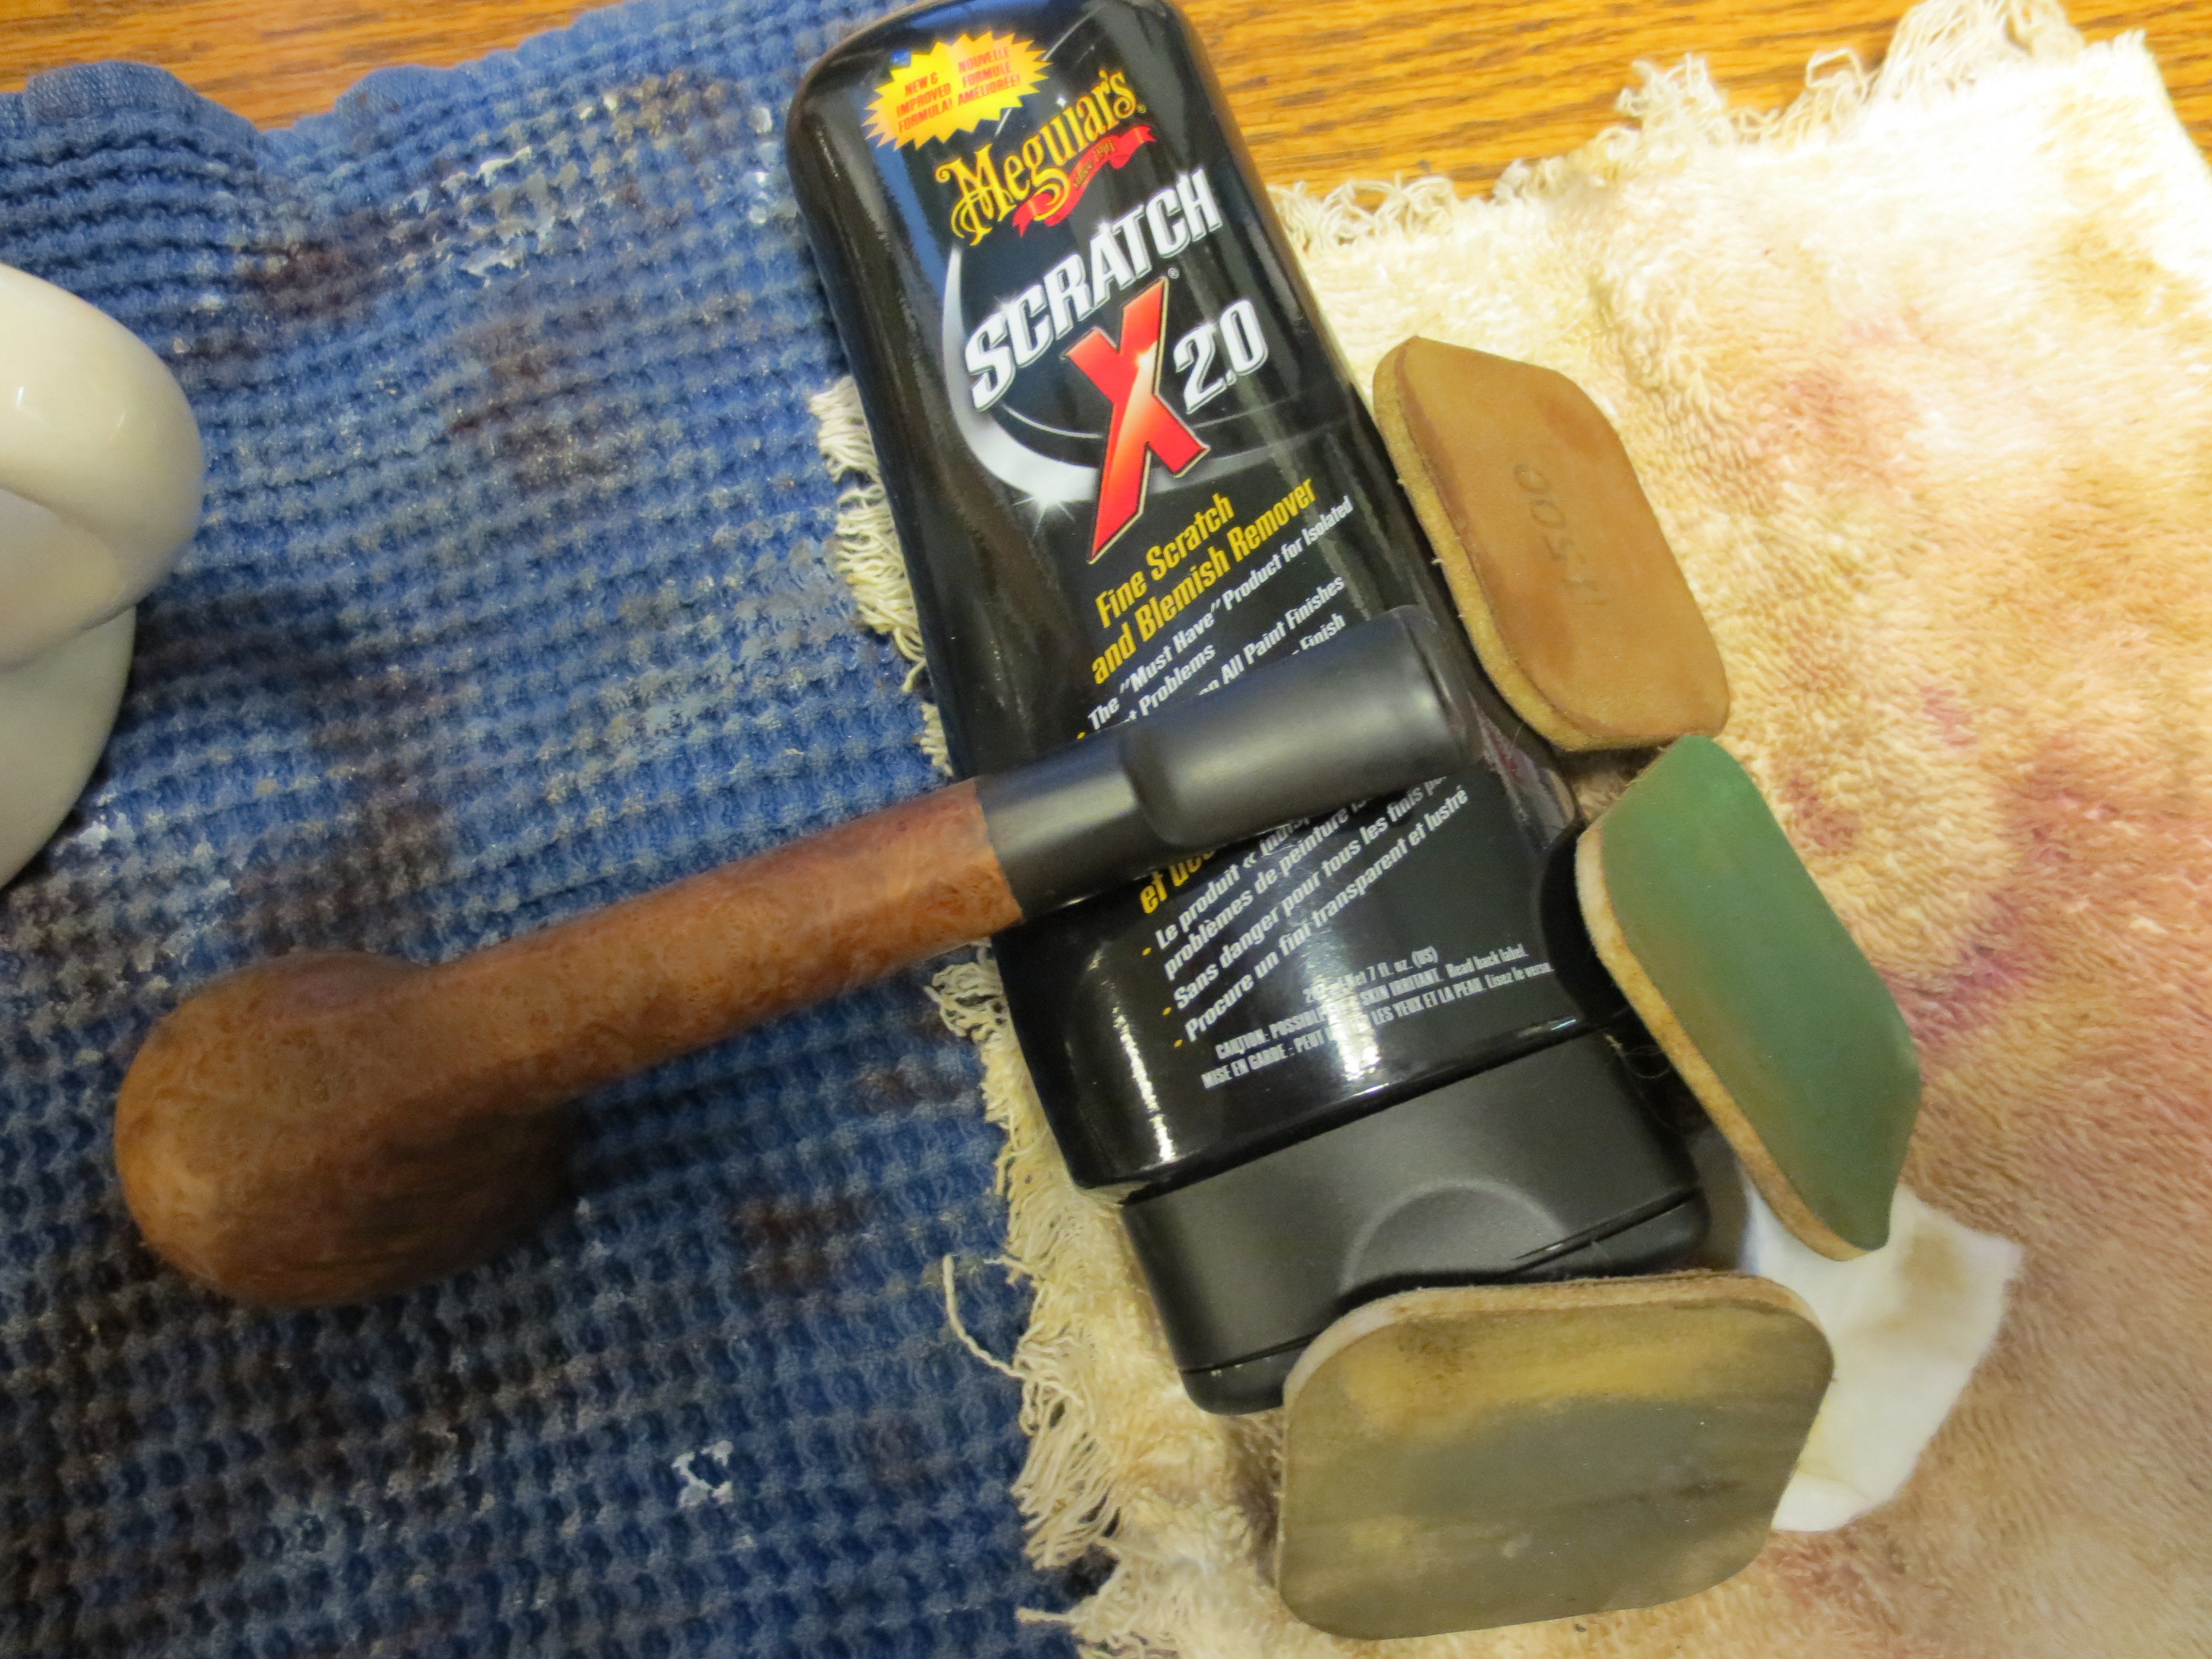
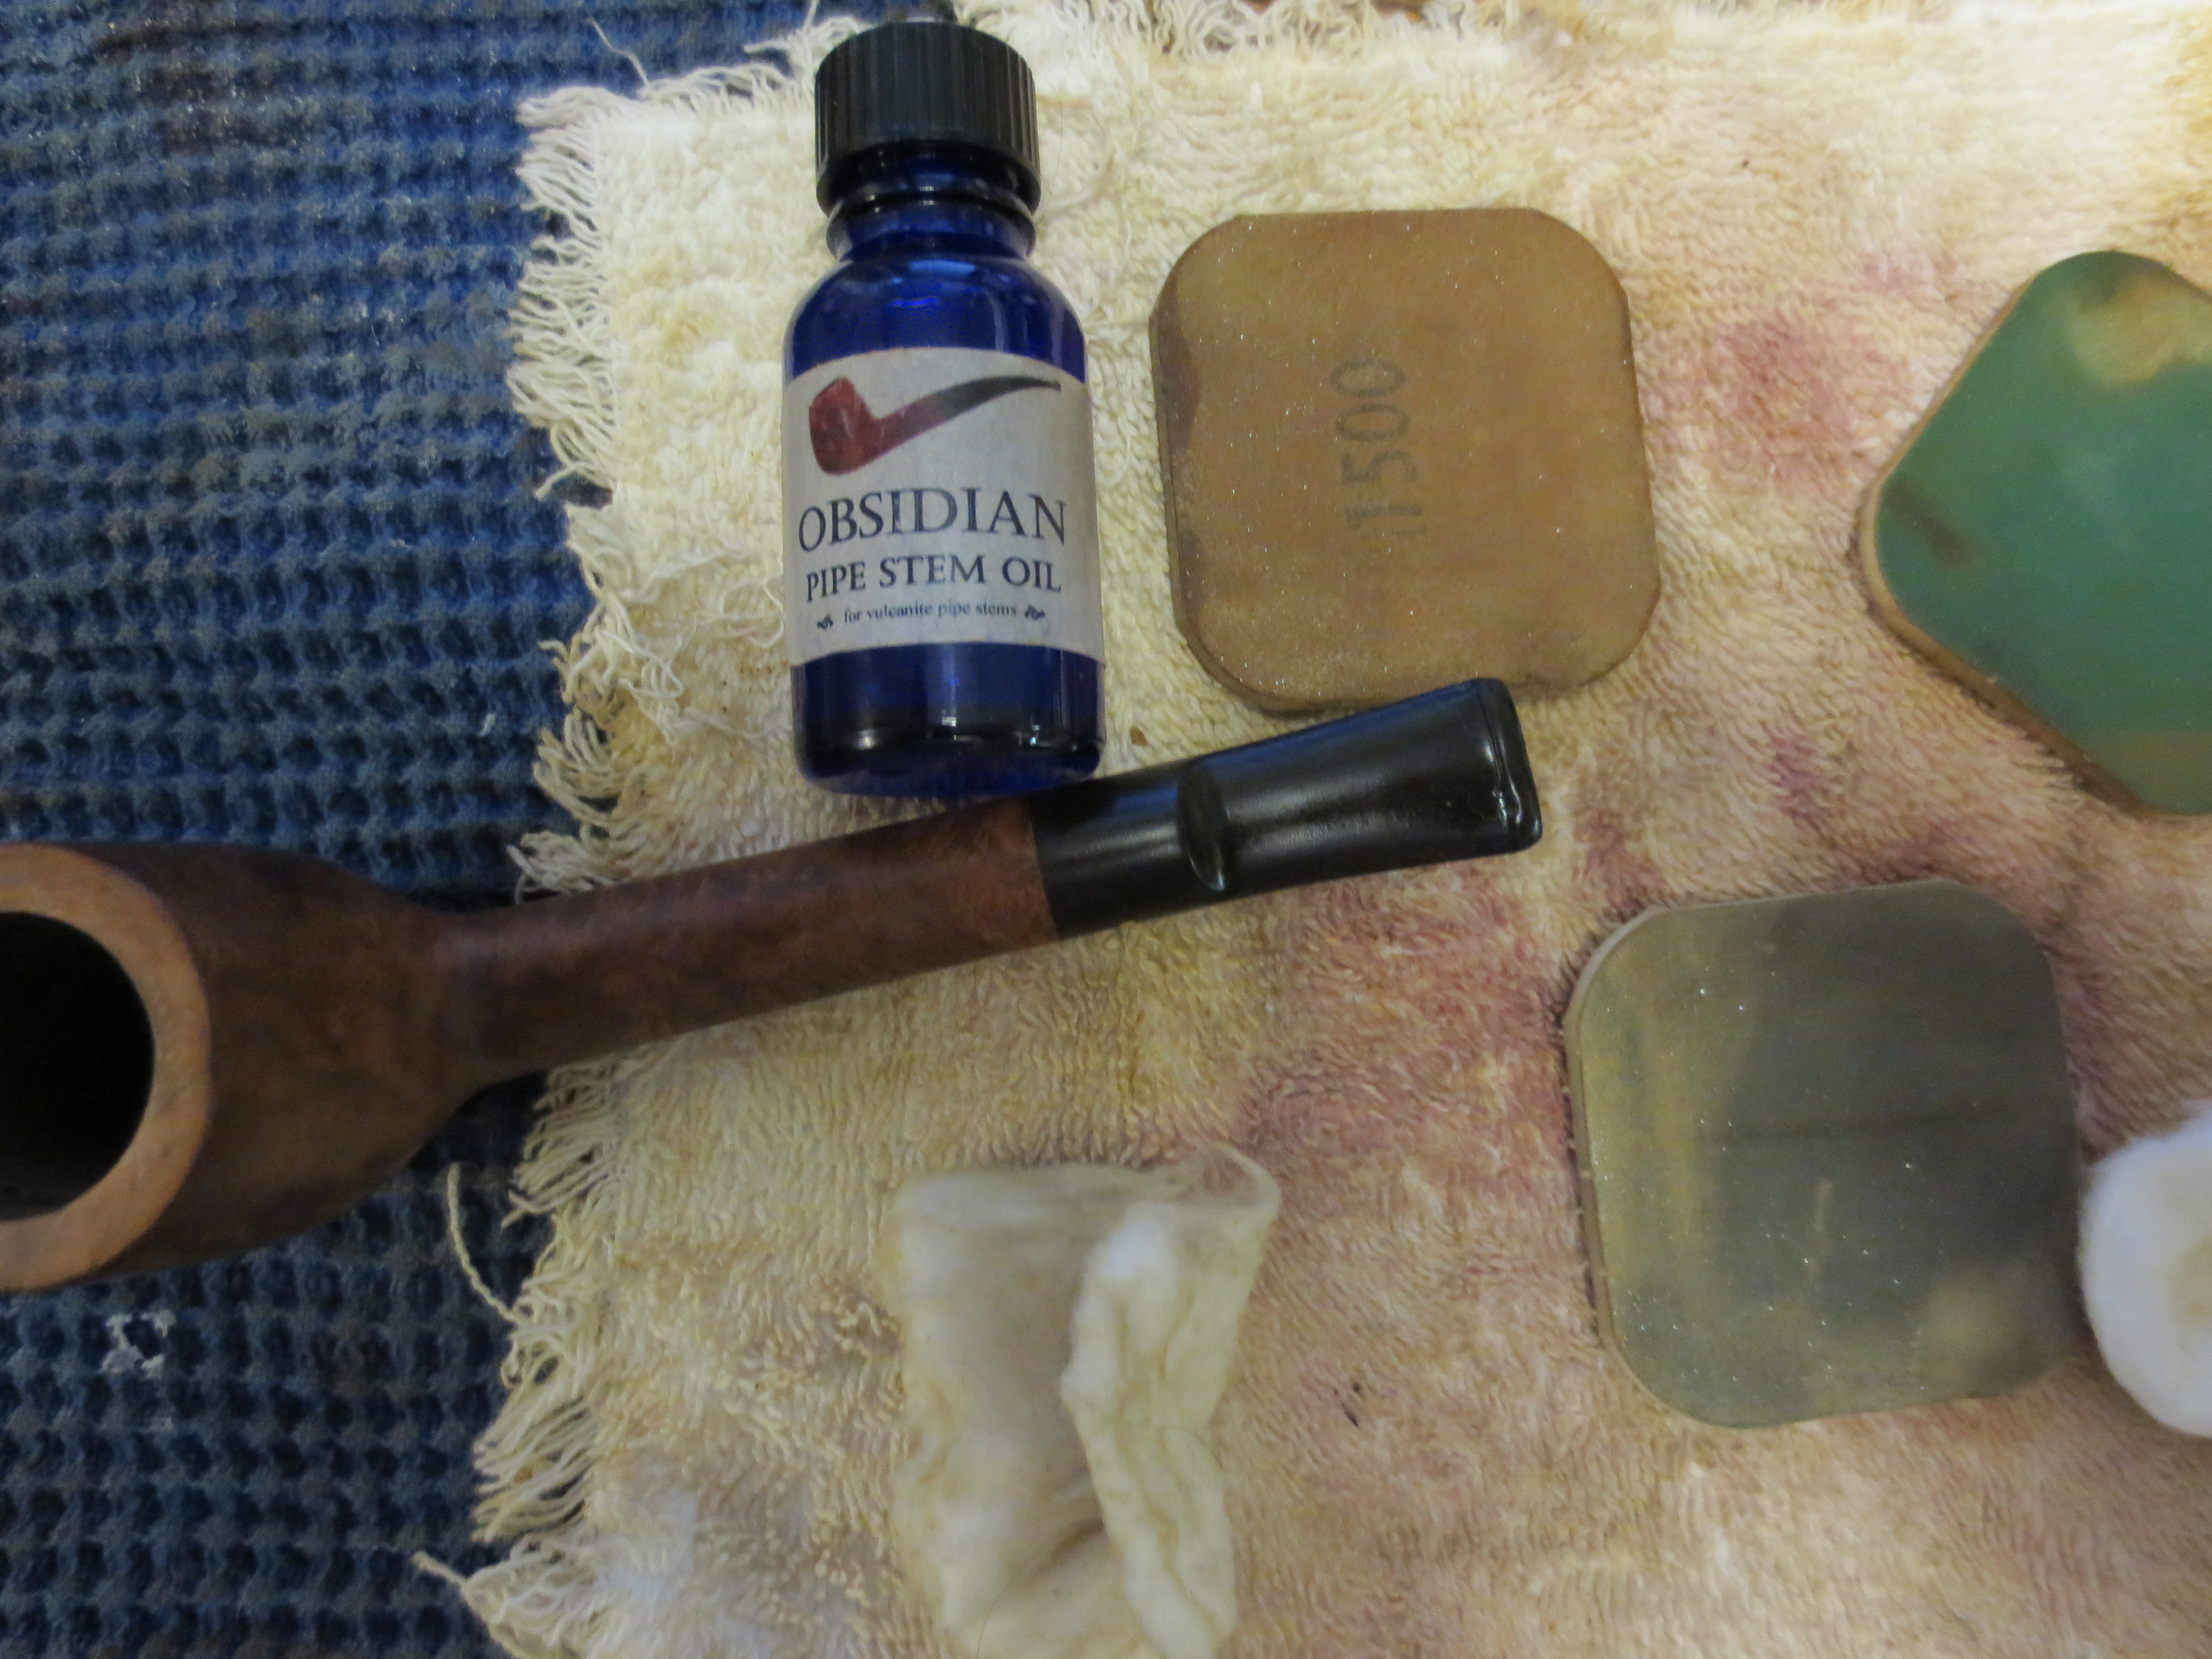
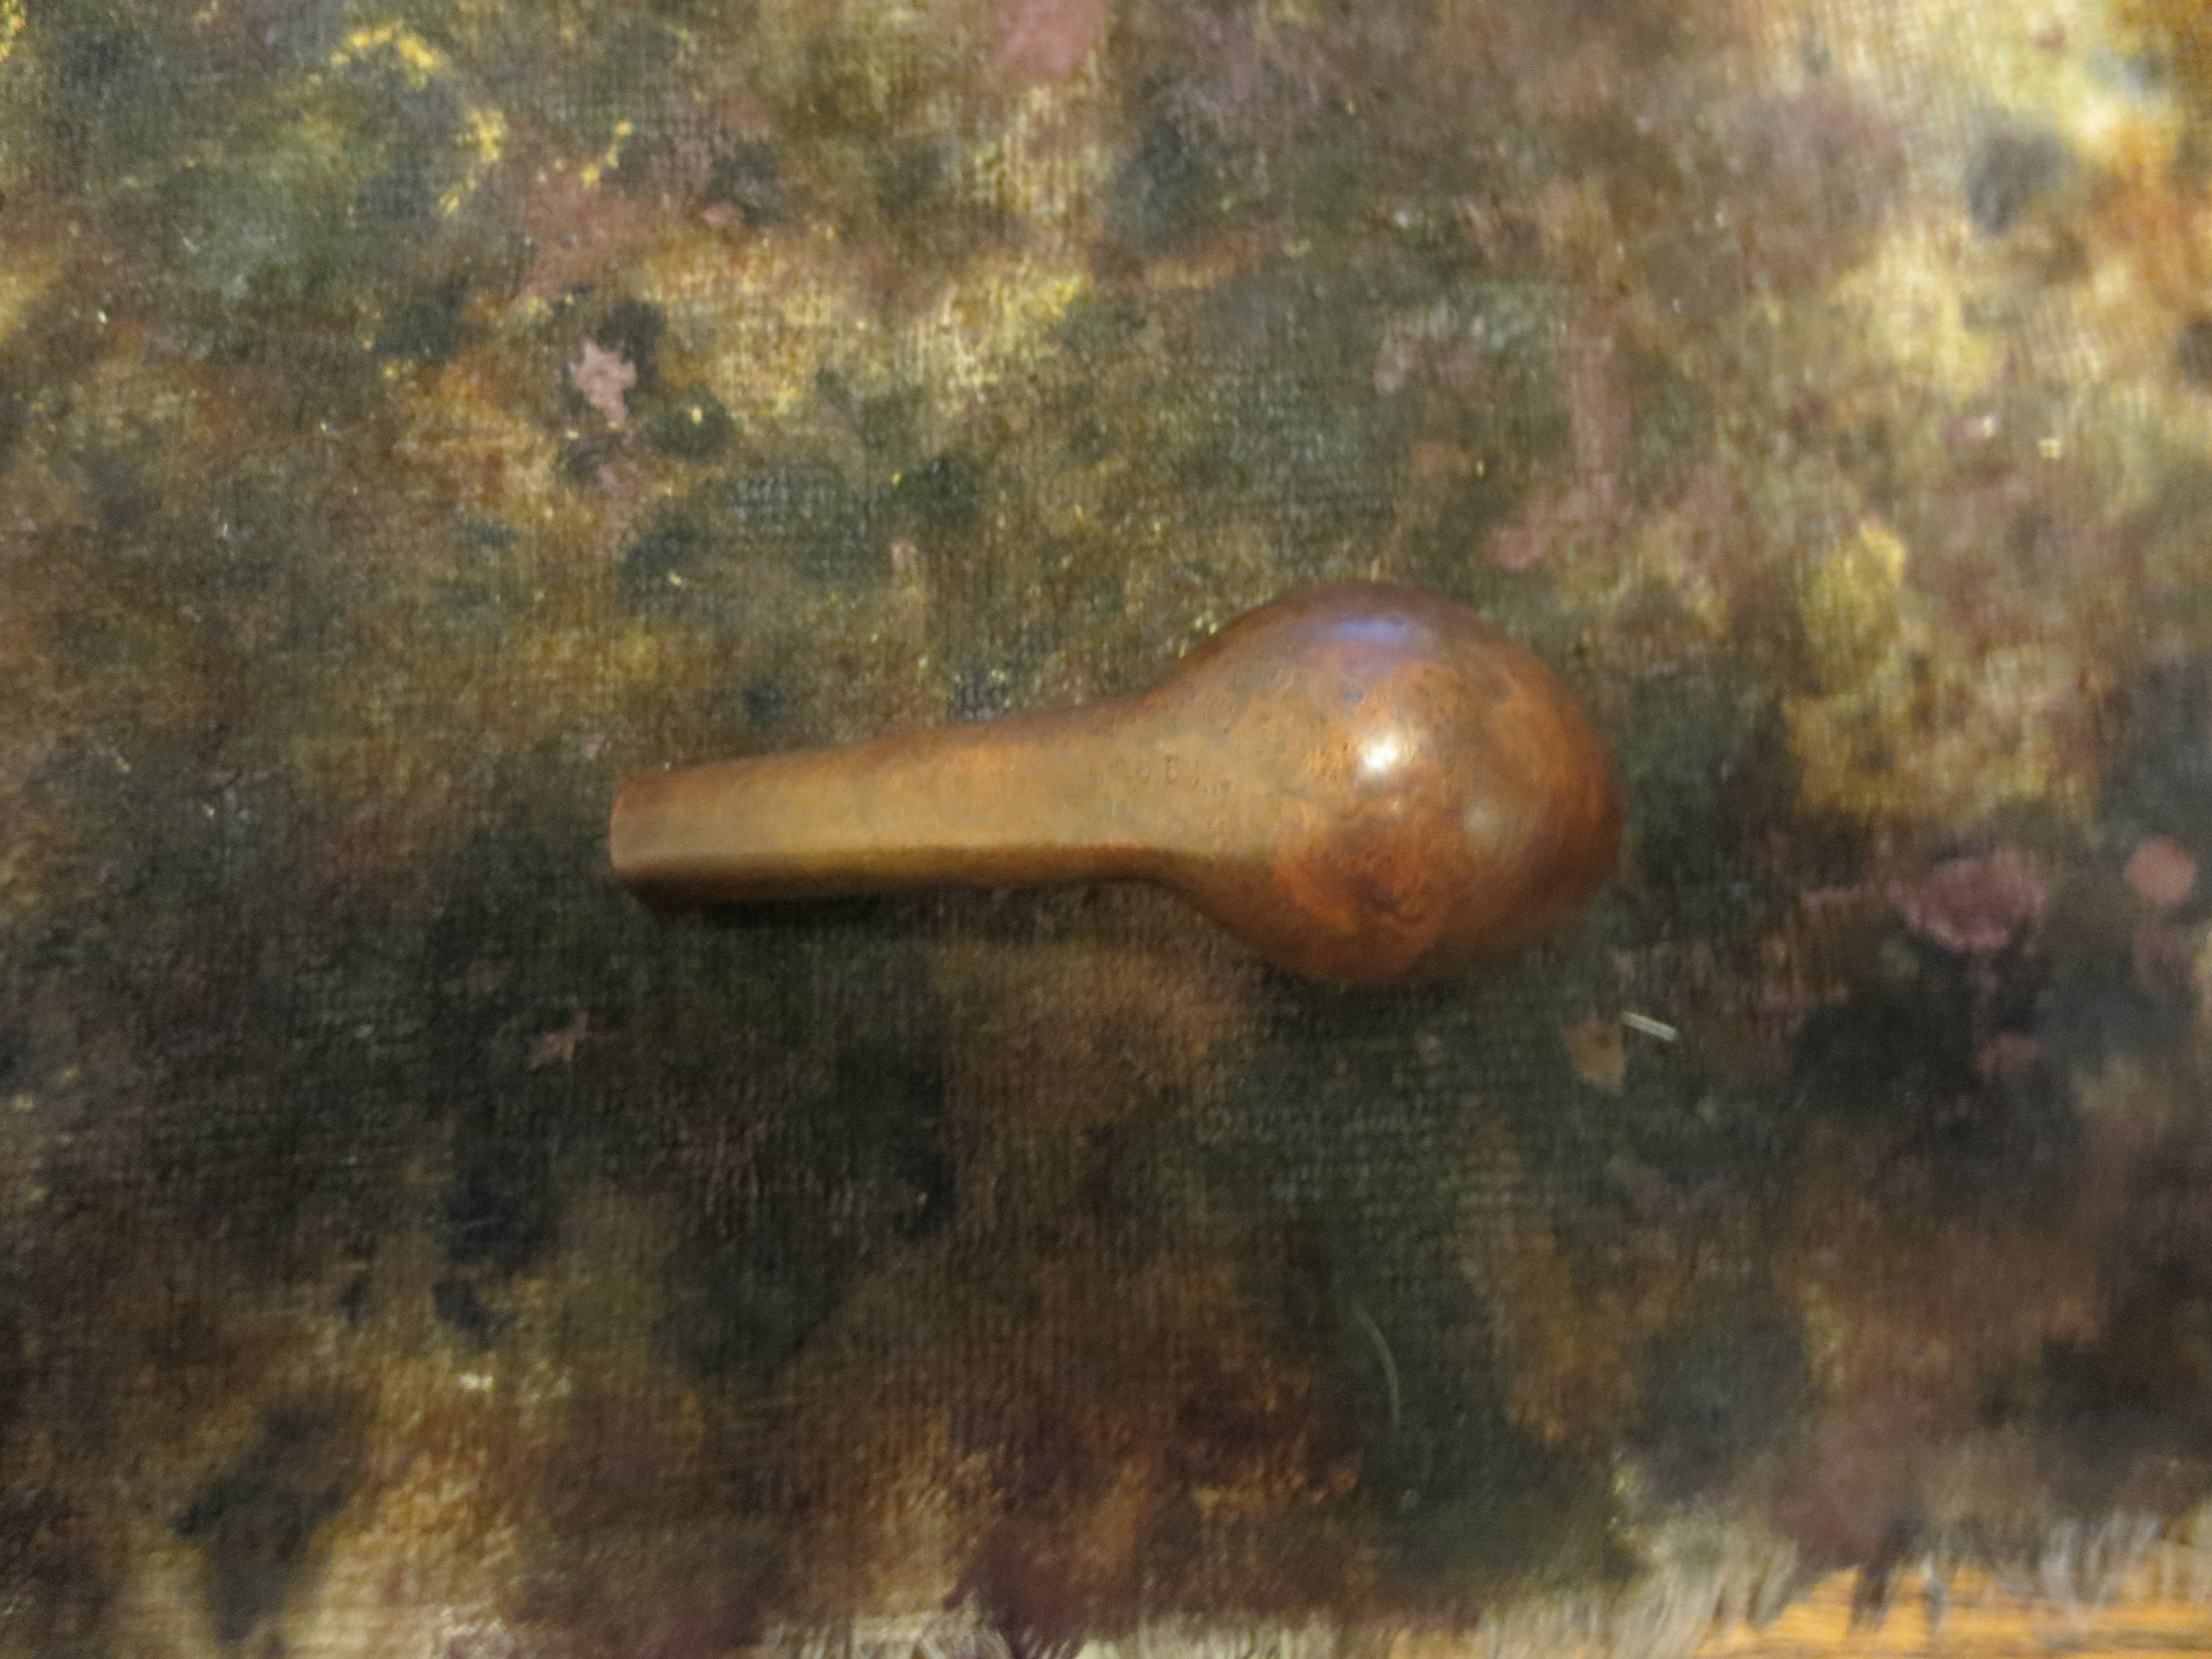
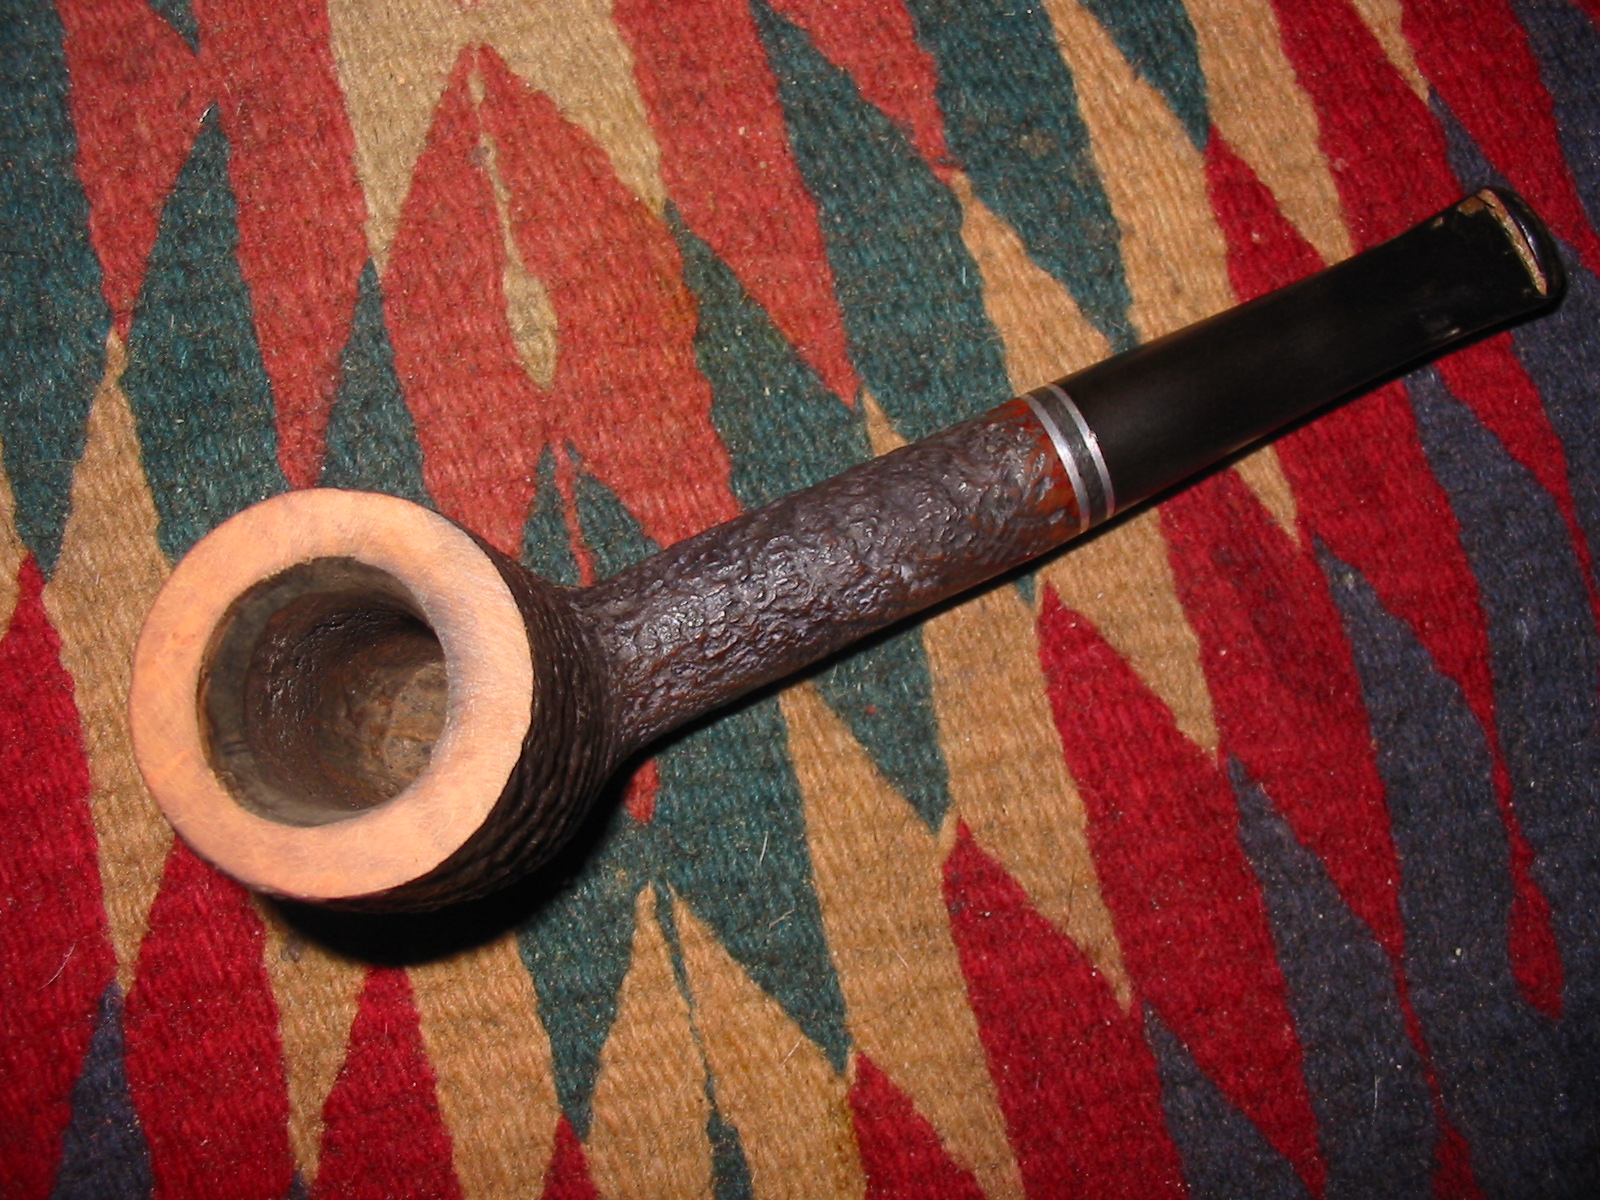
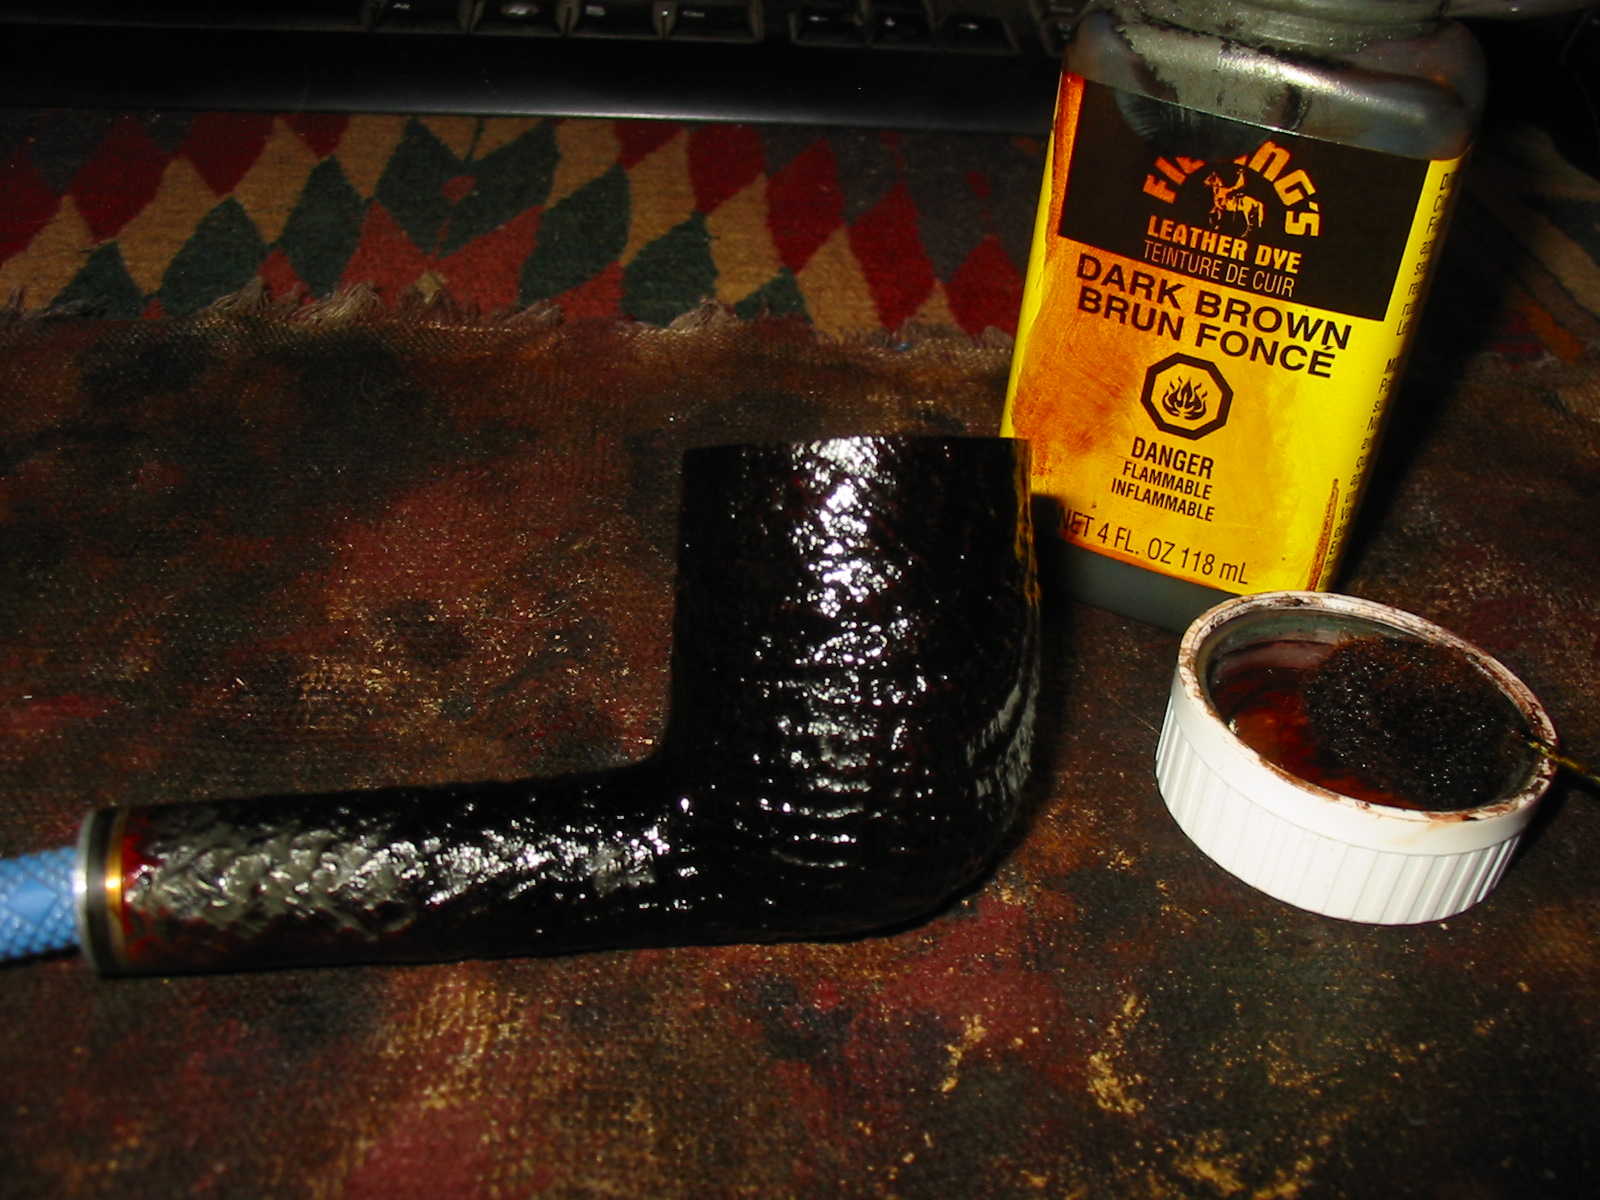
I lightly reamed the bowl and wiped it down with a soft cloth and oil soap. It cleaned up nicely. I coated it with some carnauba wax and then put it aside. I dropped the stem in a soak of Oxyclean to soften the oxidation. I would need all the help I could muster to get the oxidation off of this one. Once I took it out of the soak the stem needed to be sanded. I used medium grit sandpaper on a foam pad to allow me to get into the grooves and the sharp edges. Once I had the initial sanding down I wiped the stem down with a soft cotton cloth dampened with alcohol. I then continued the sanding process with 1500-2400 grit micromesh sanding pads. I finished with the pads and then scrubbed the stem with Maguiar’s Scratch polish. I gave it several repeated rub downs with the scratch polish and then progressed through the remaining micromesh pads from 3200-12,000 grits. The finished stem is pictured in the four pictures below. I rubbed the stem down with Obsidian Oil and let it sit. After it dried you can see the areas that still need to be worked over on the stem.

ImageImageImageImage

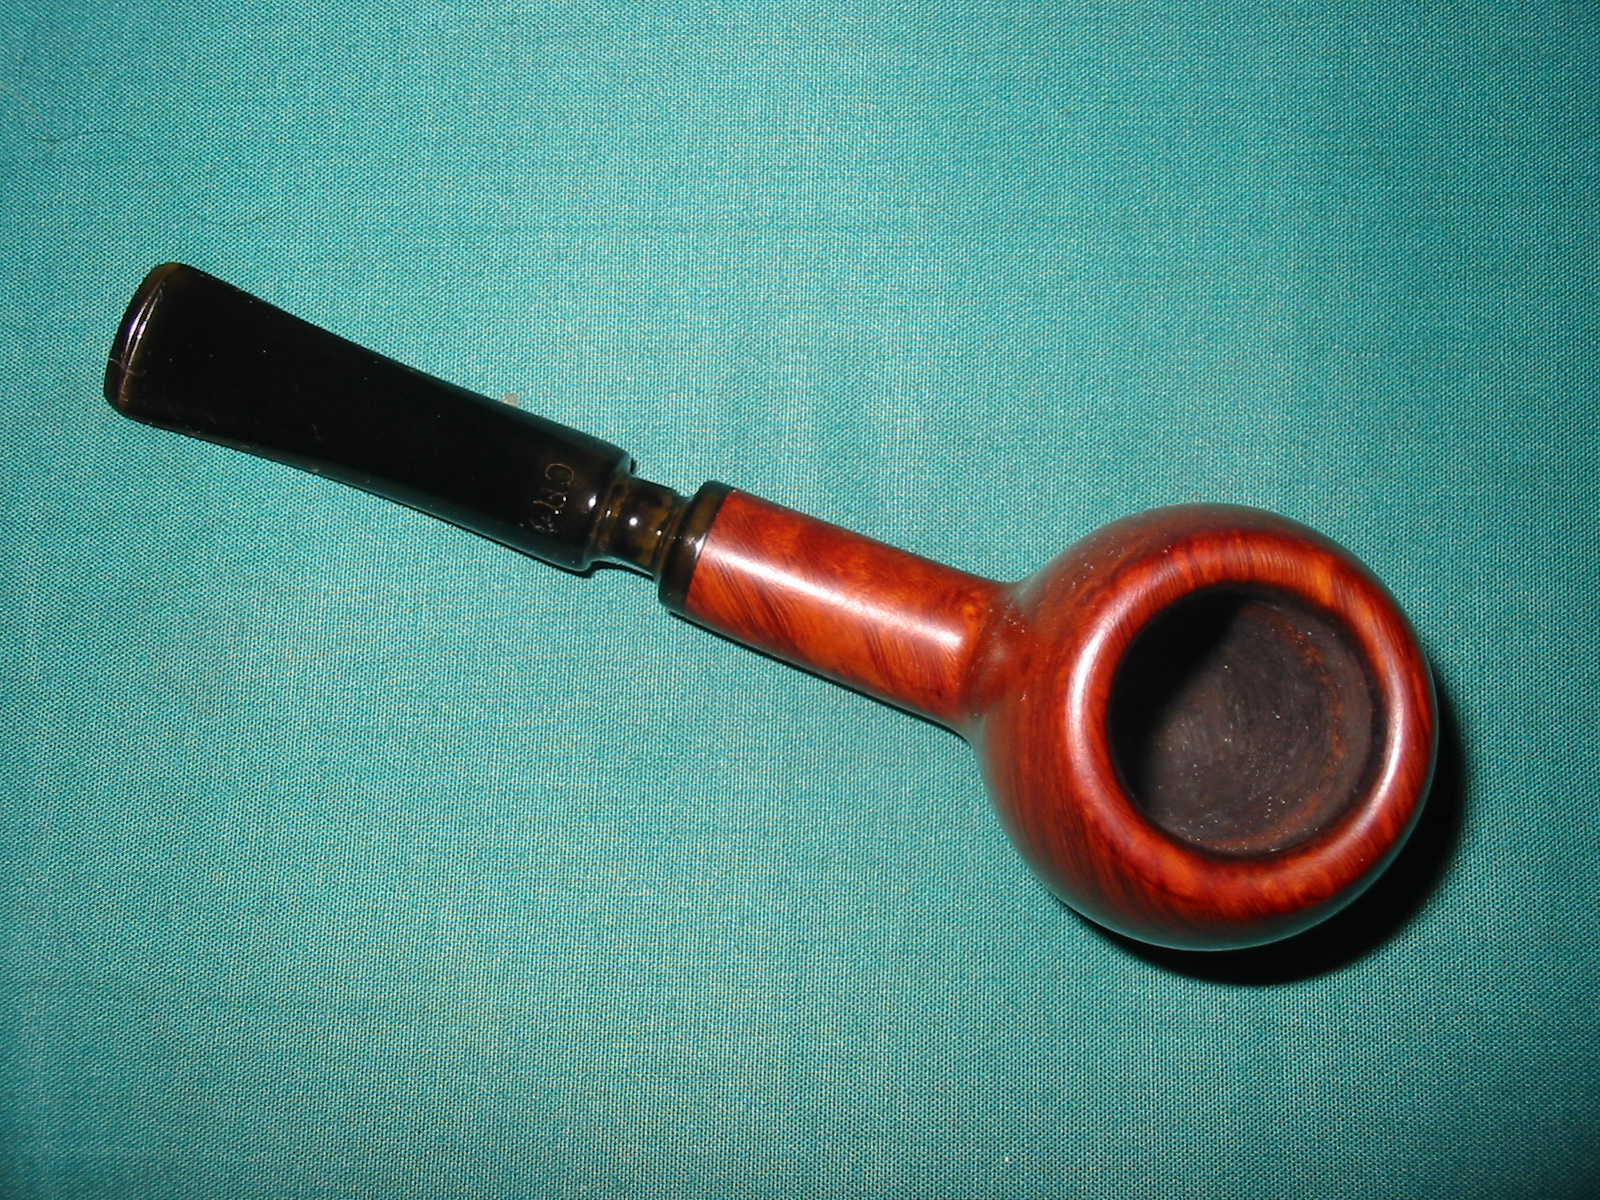
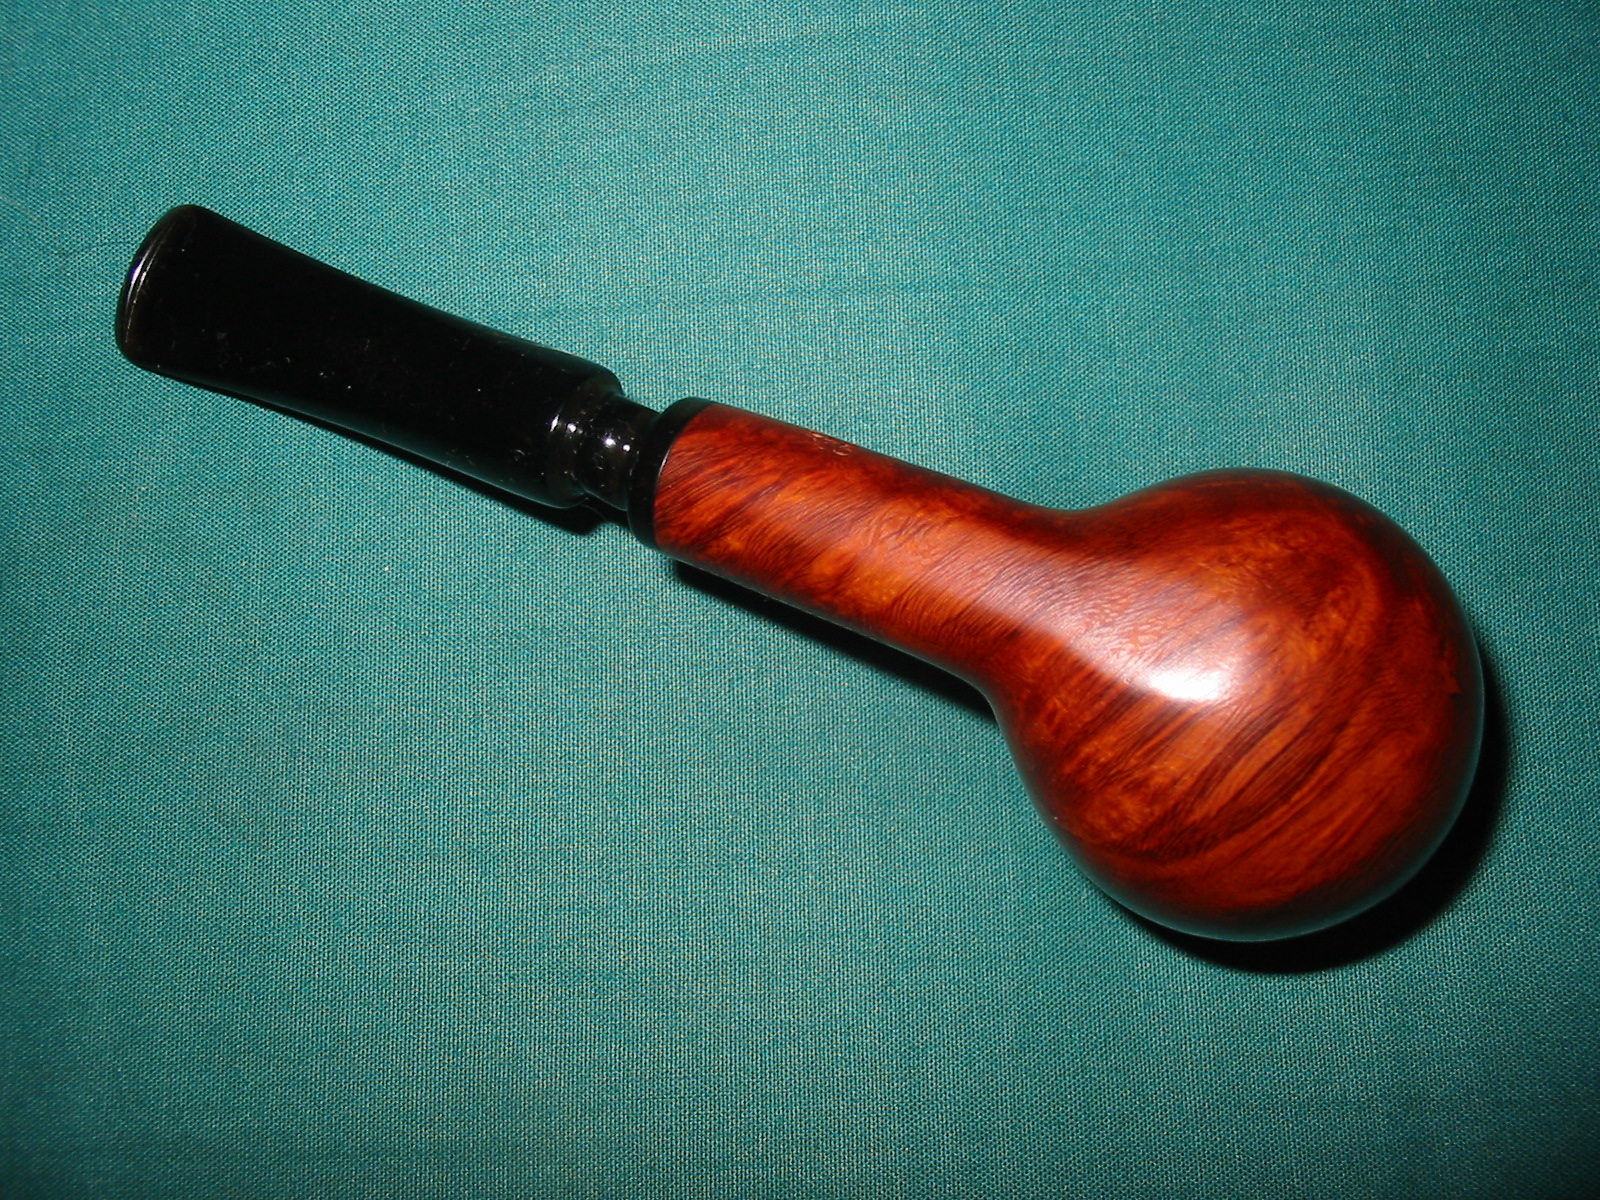
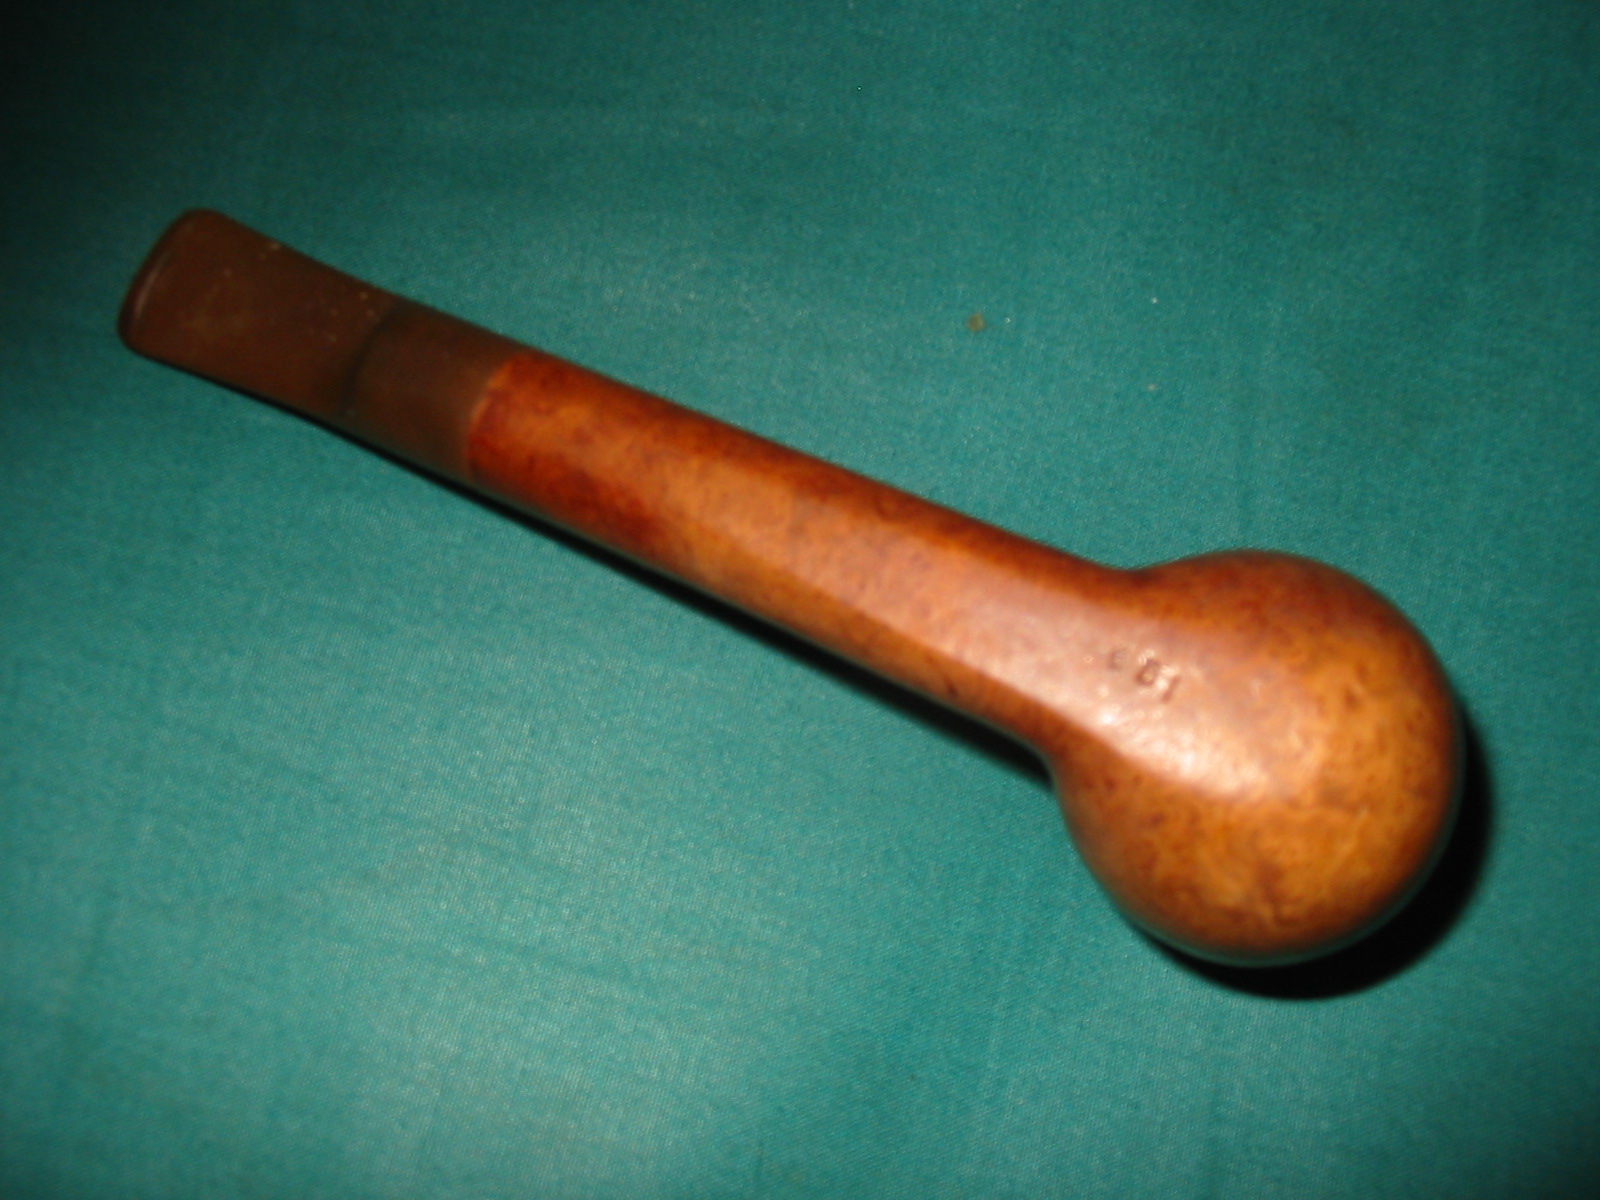
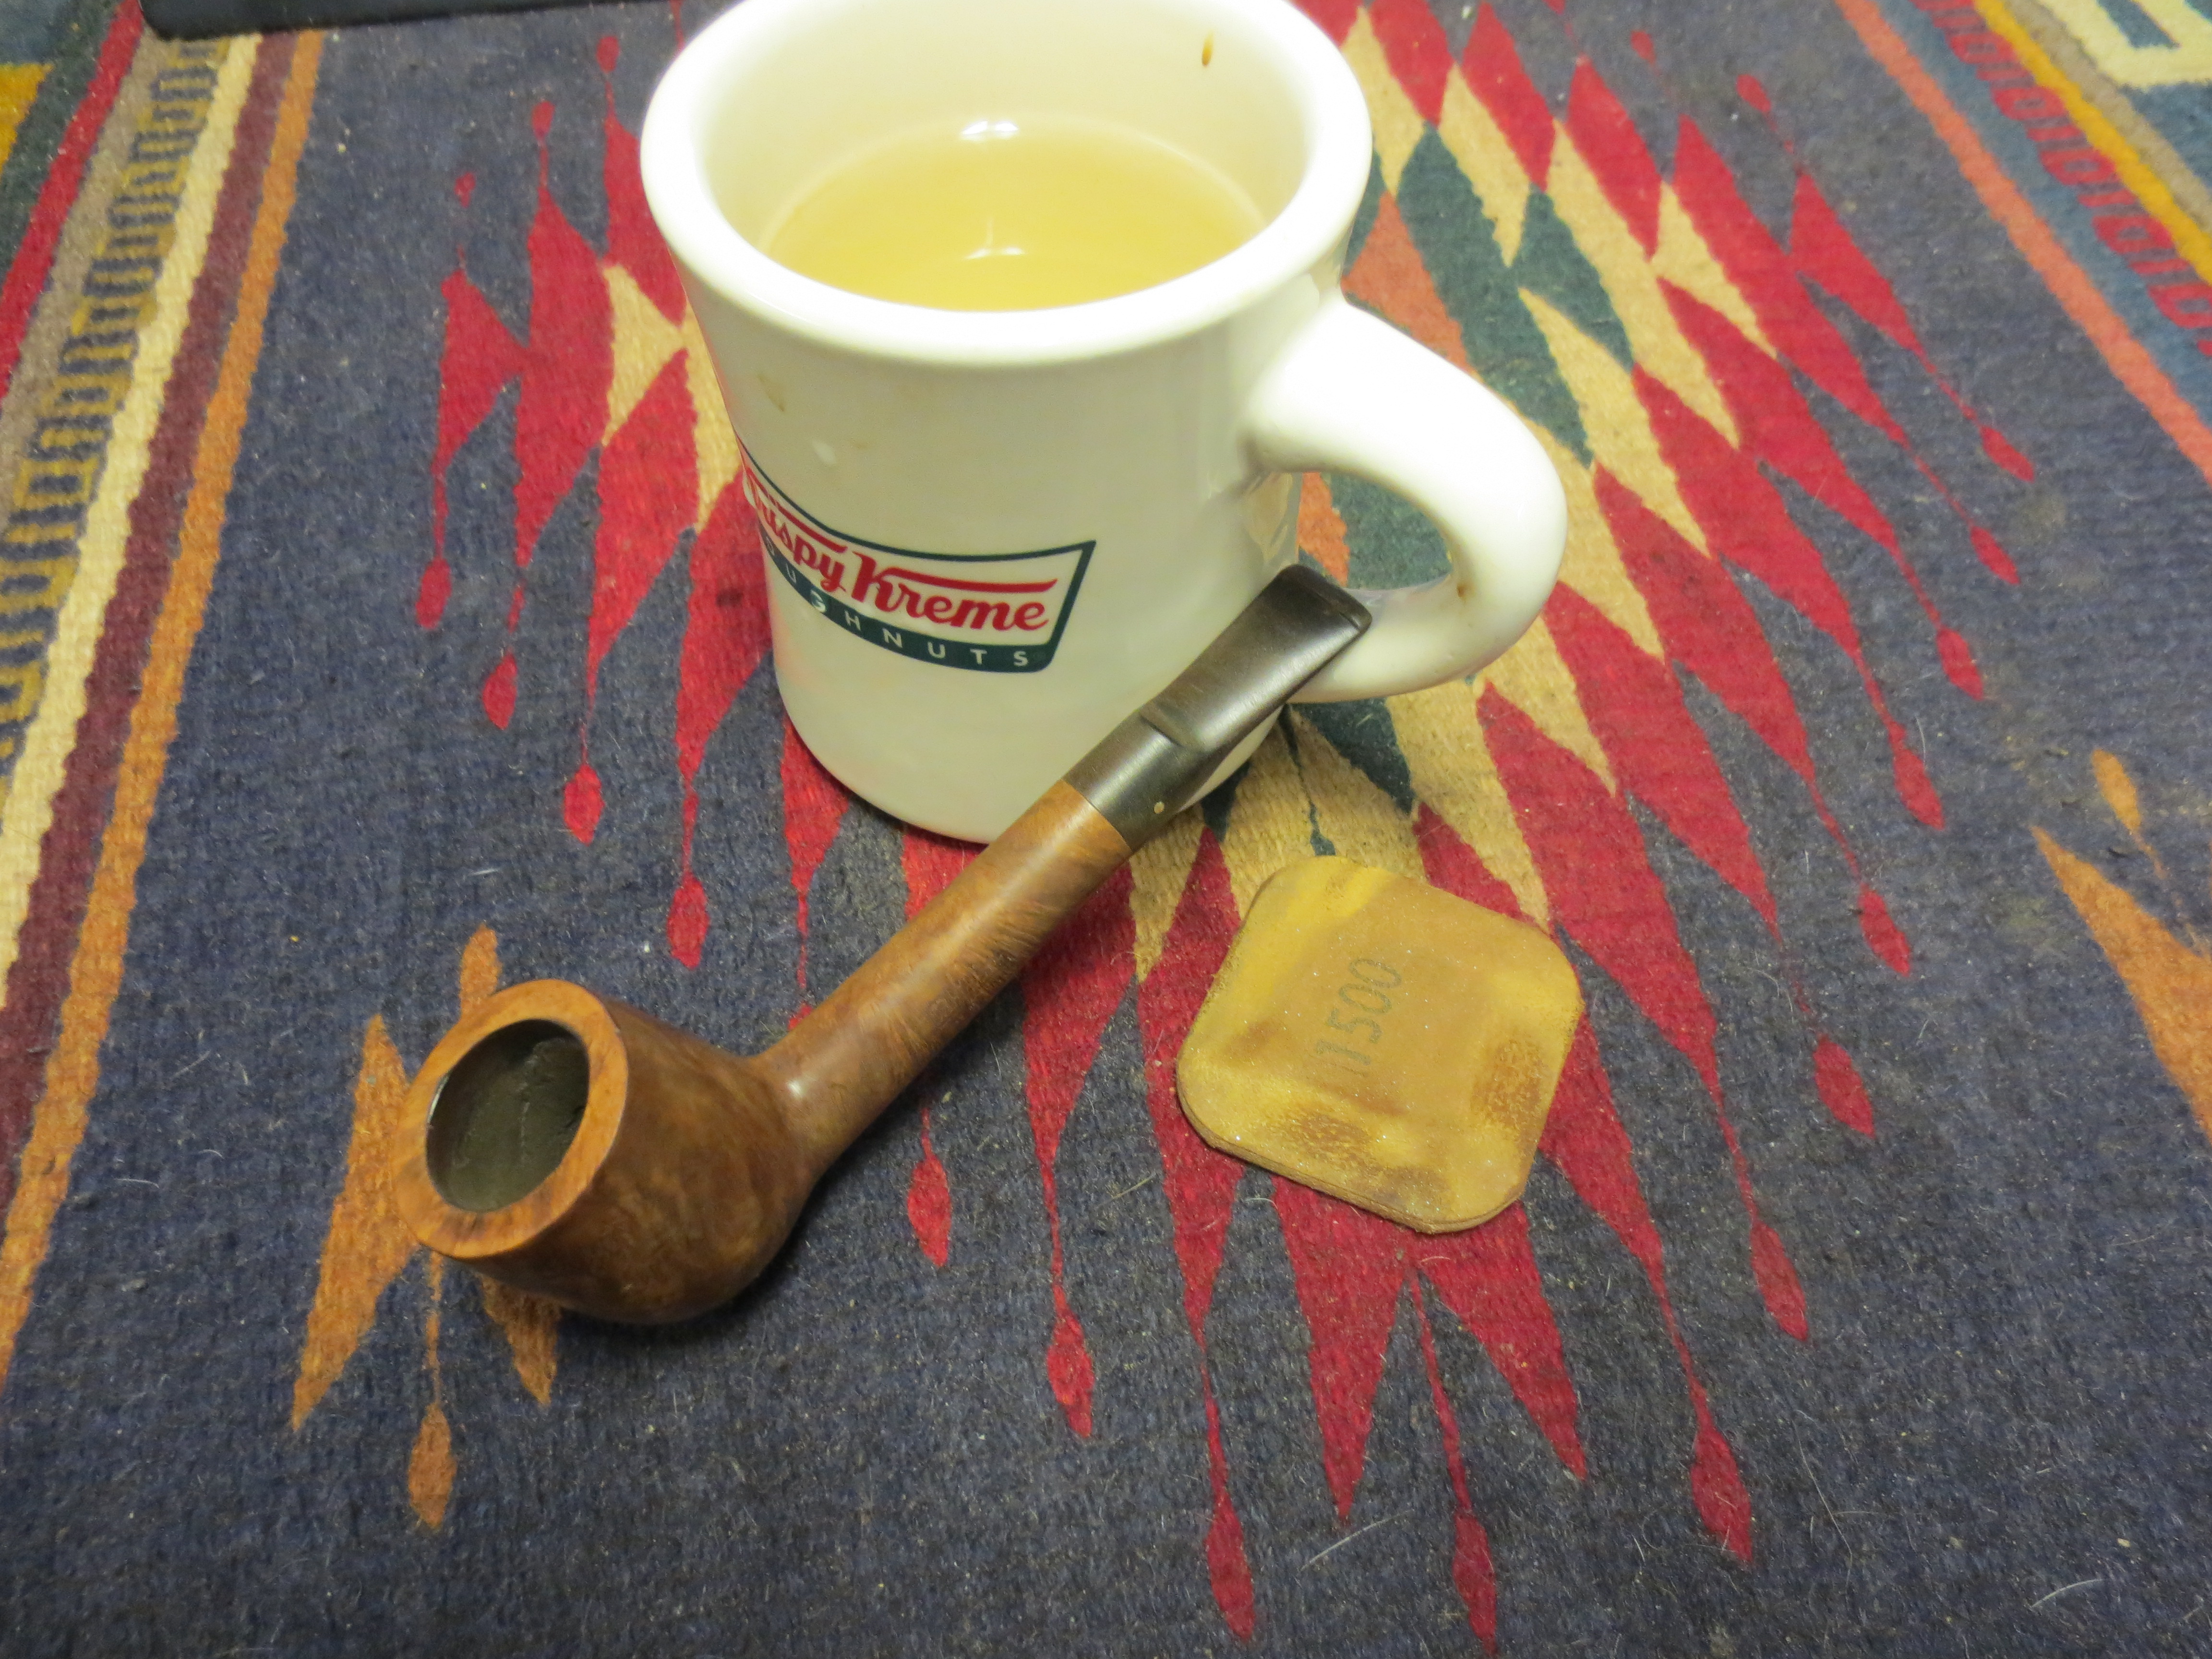
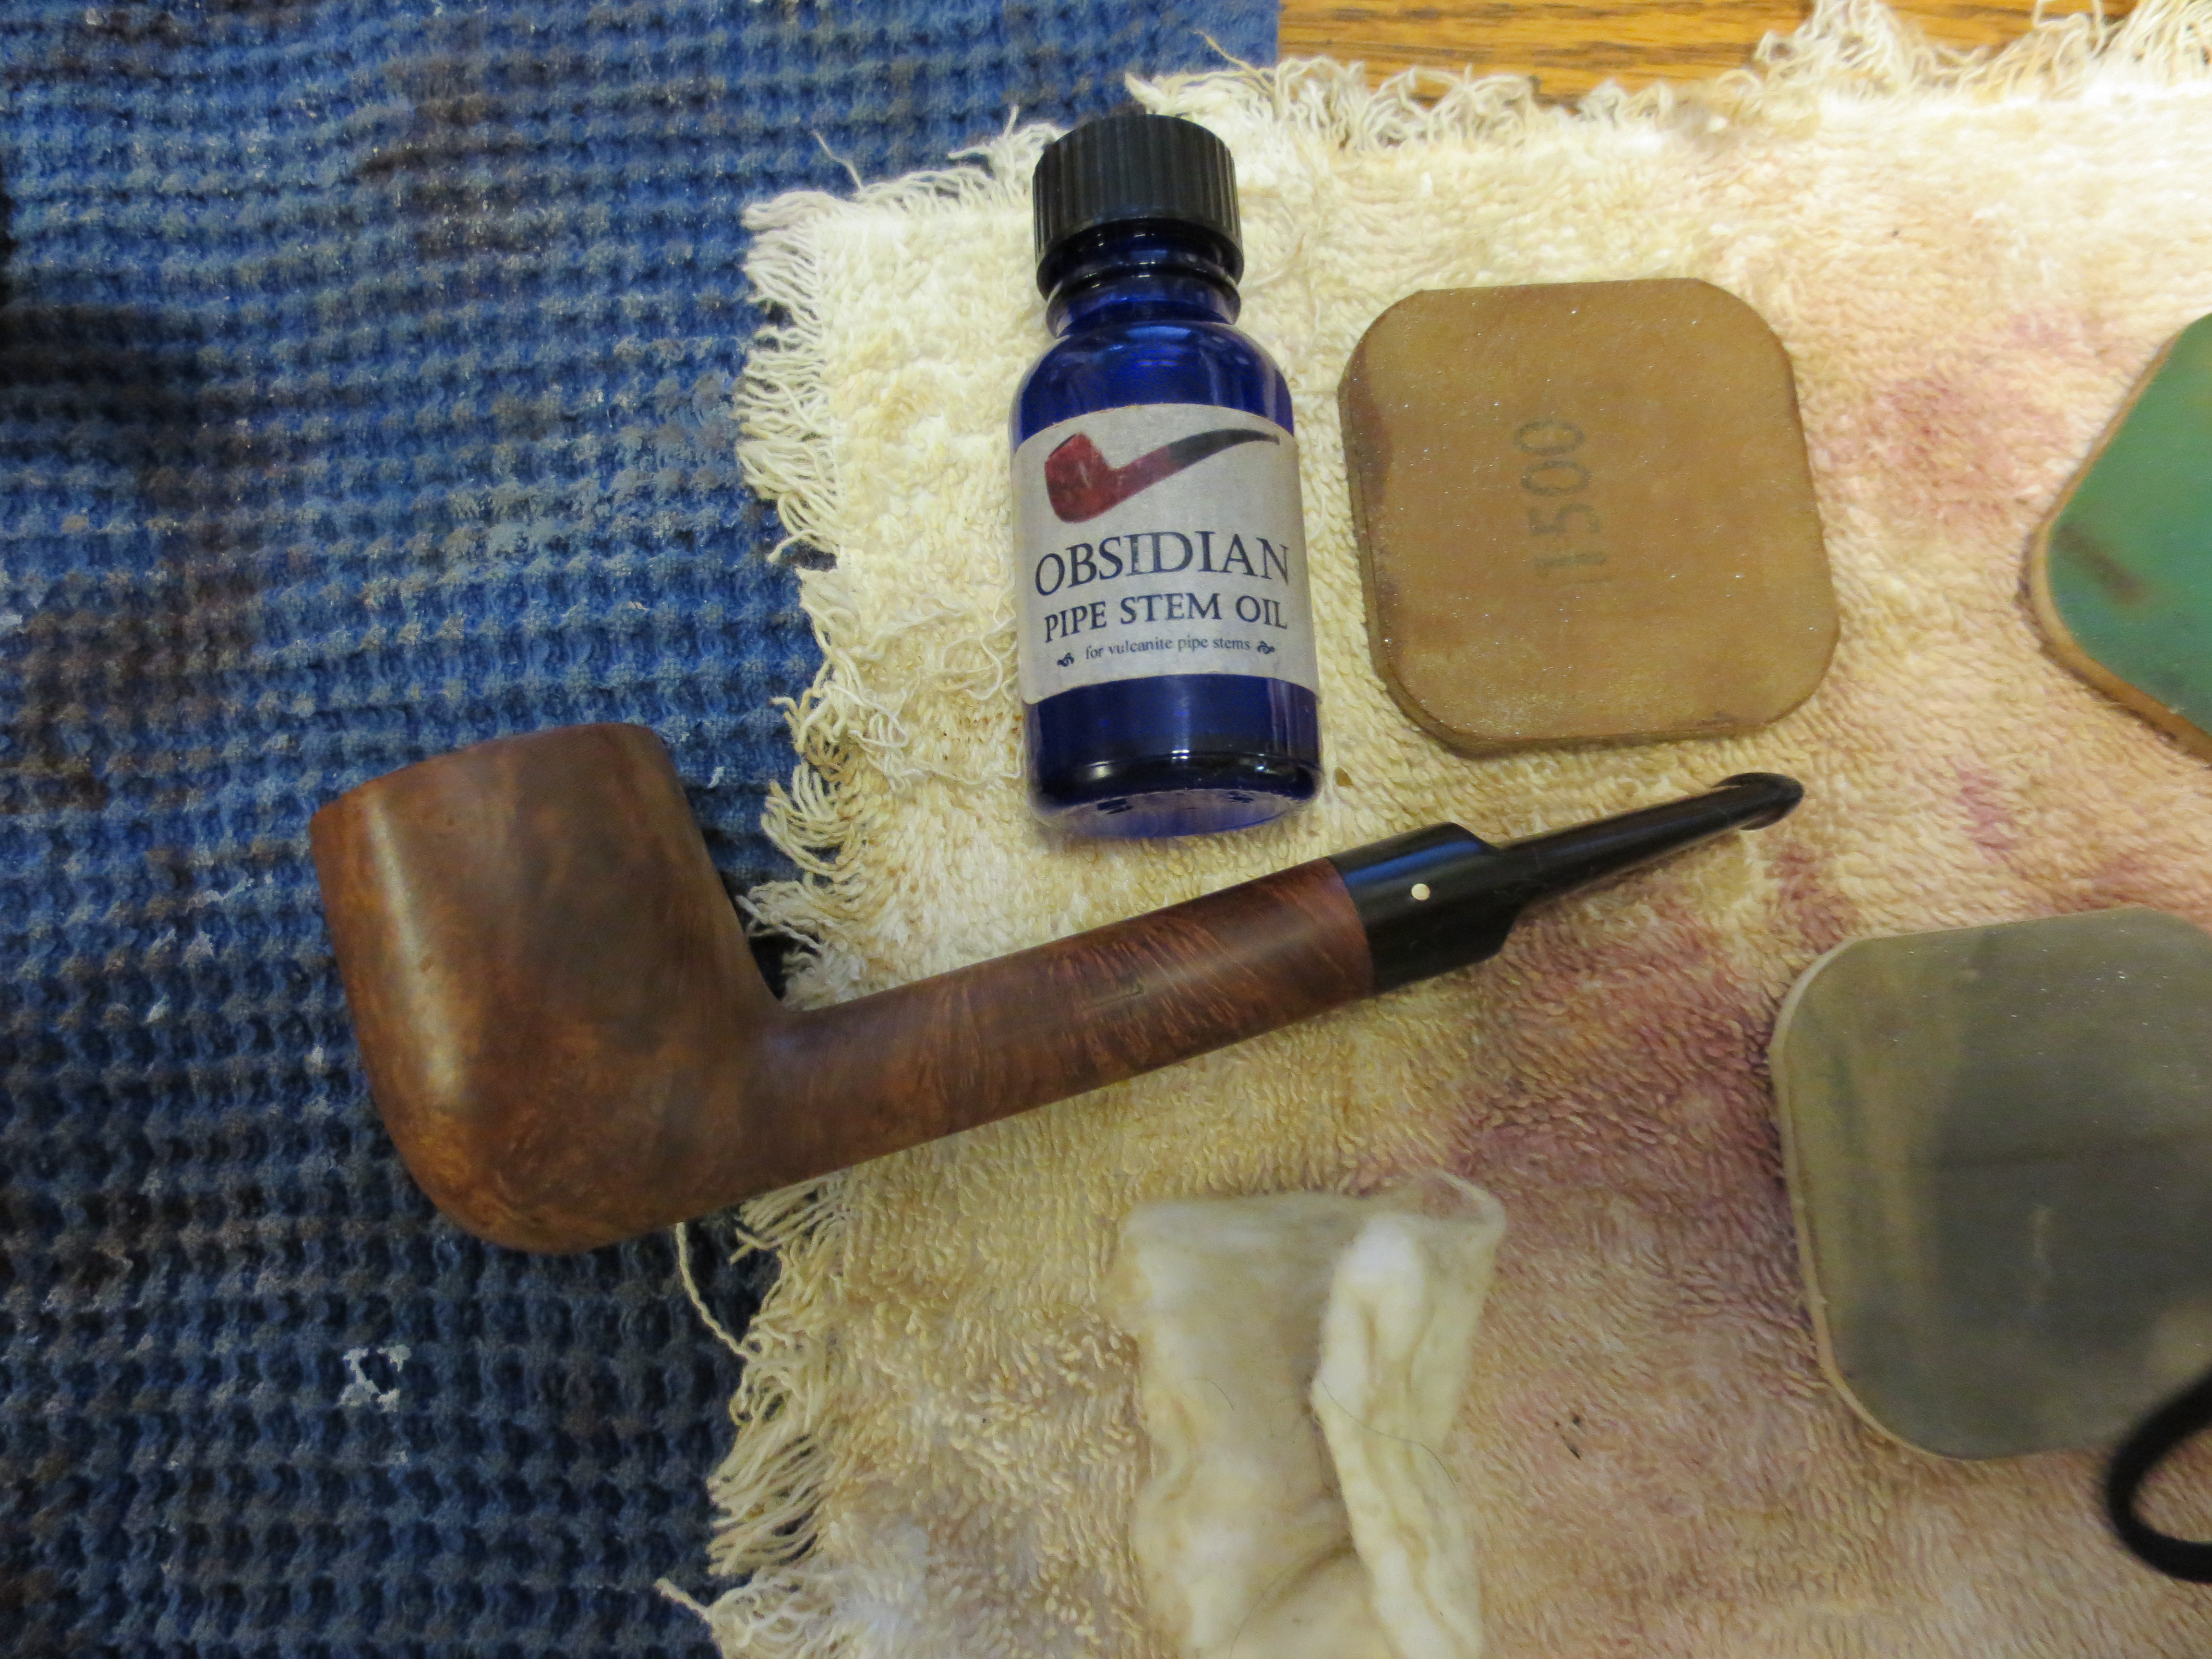
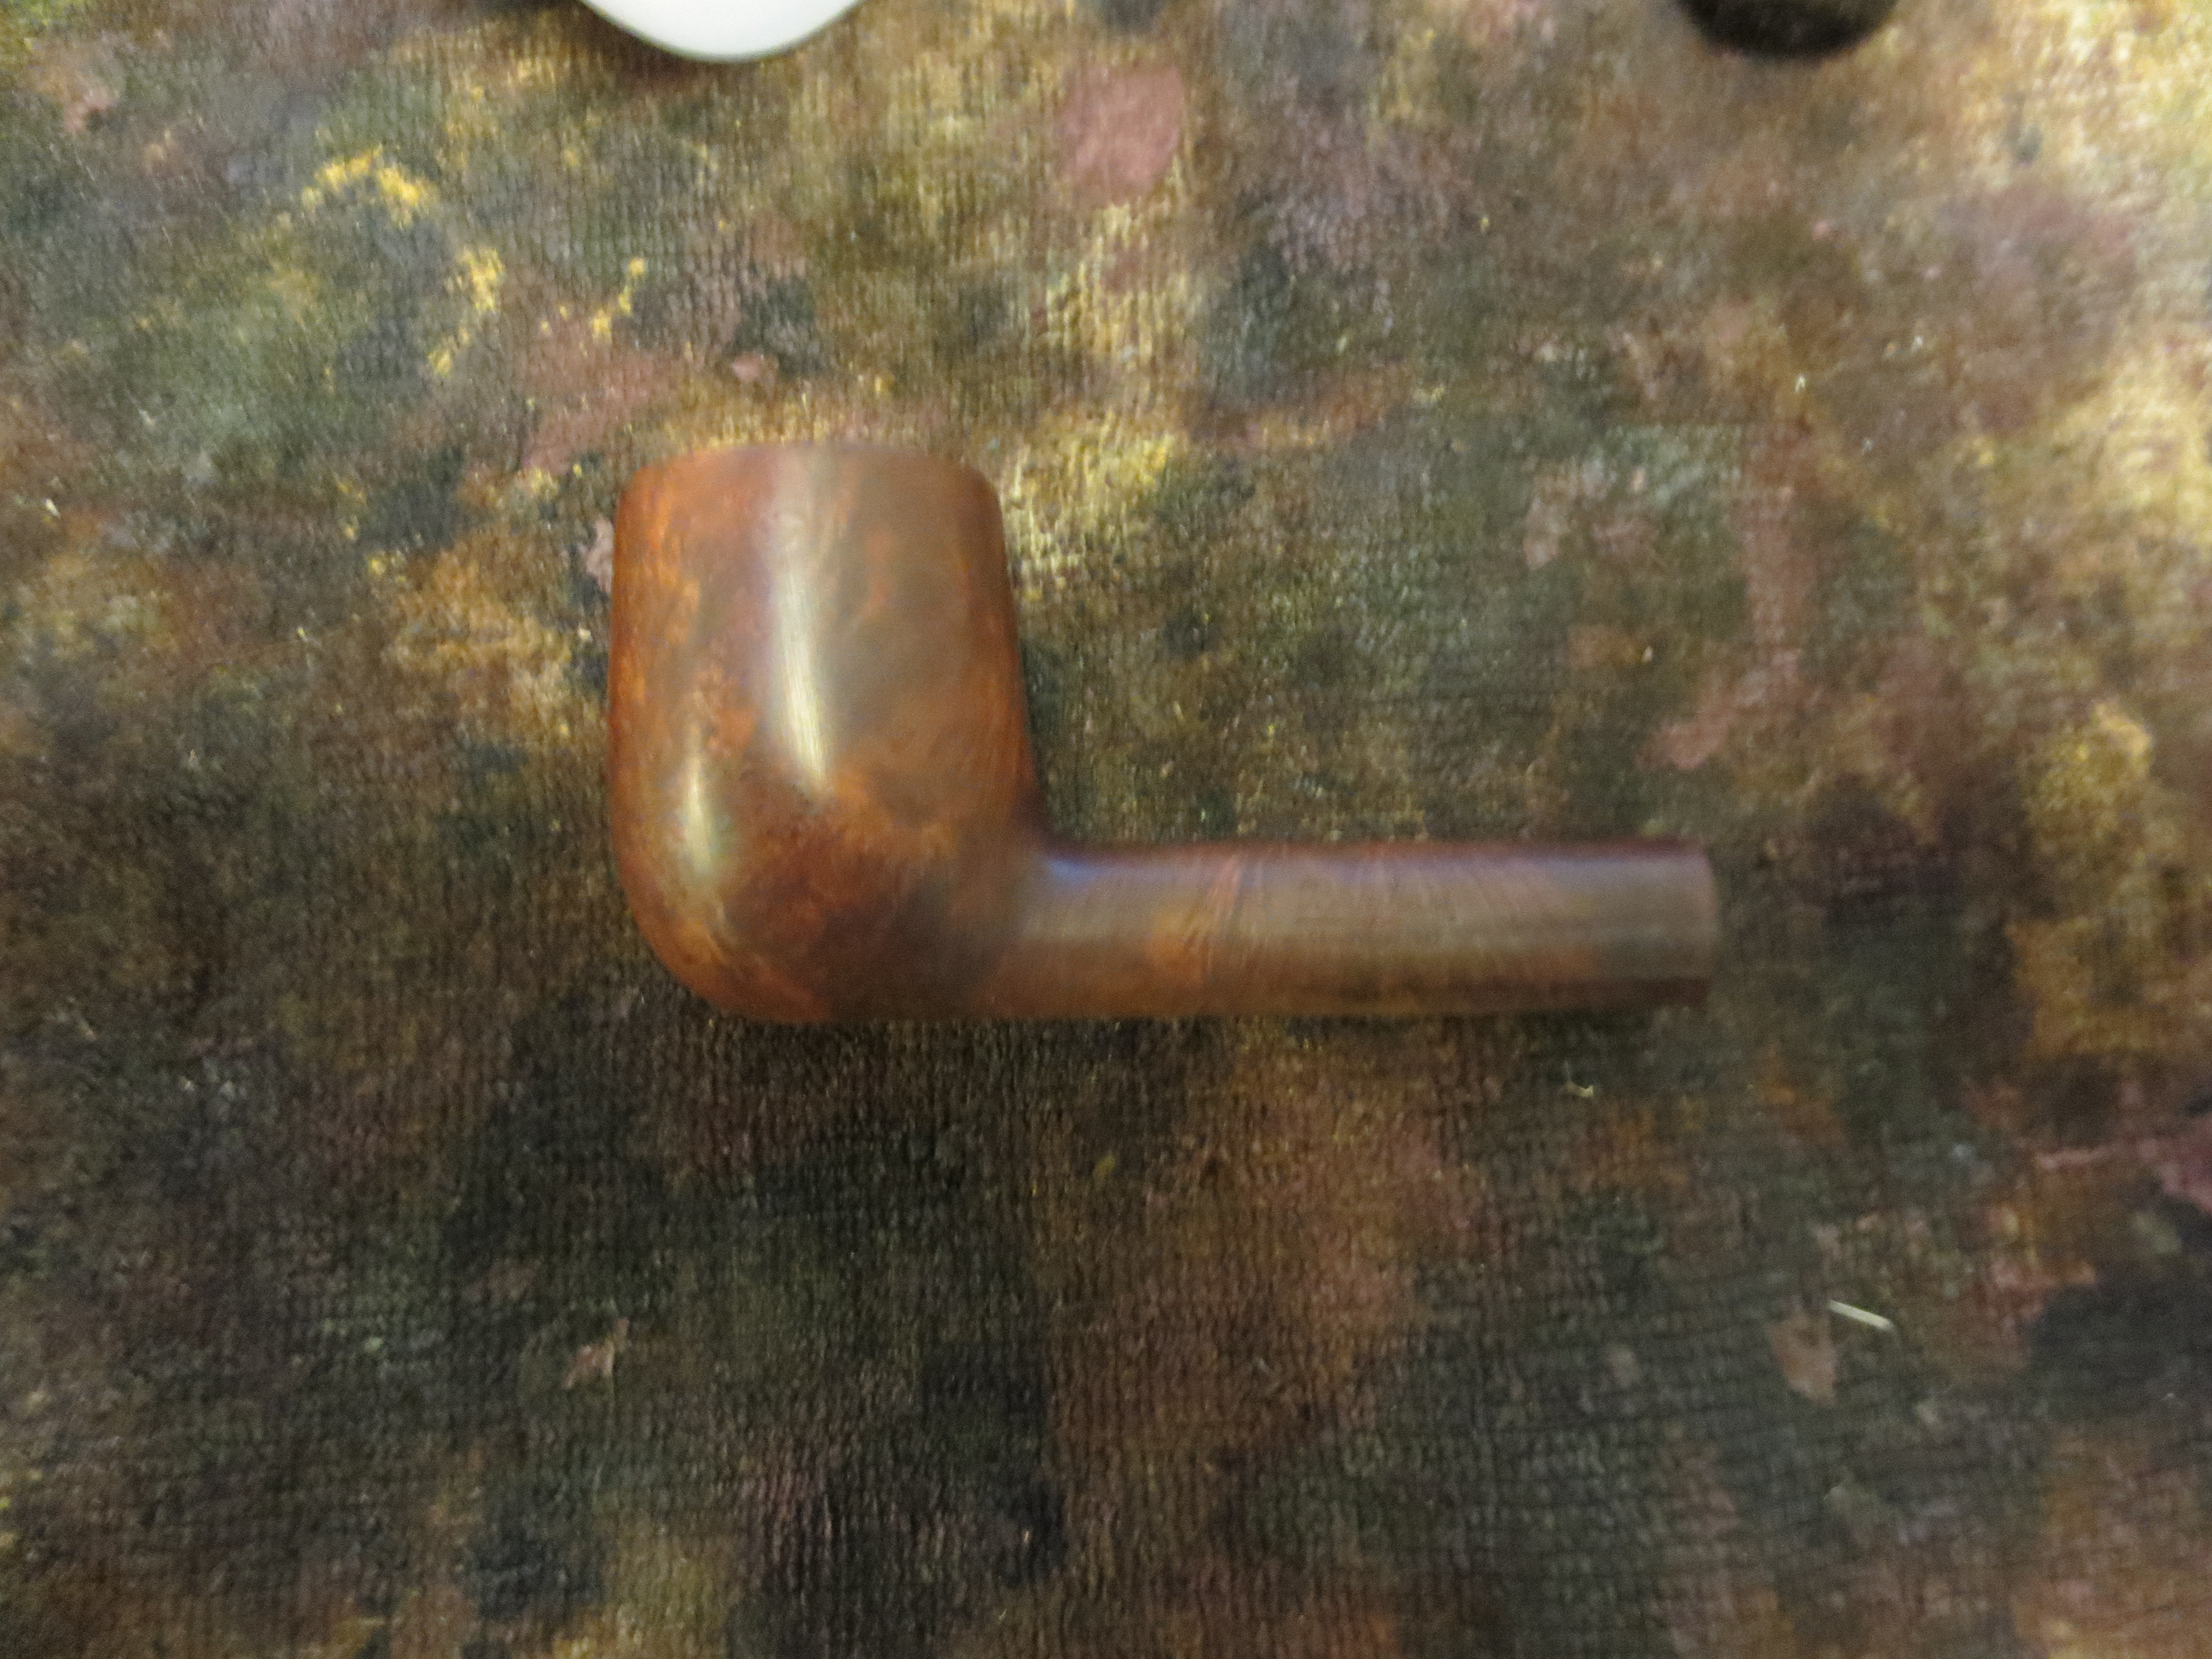
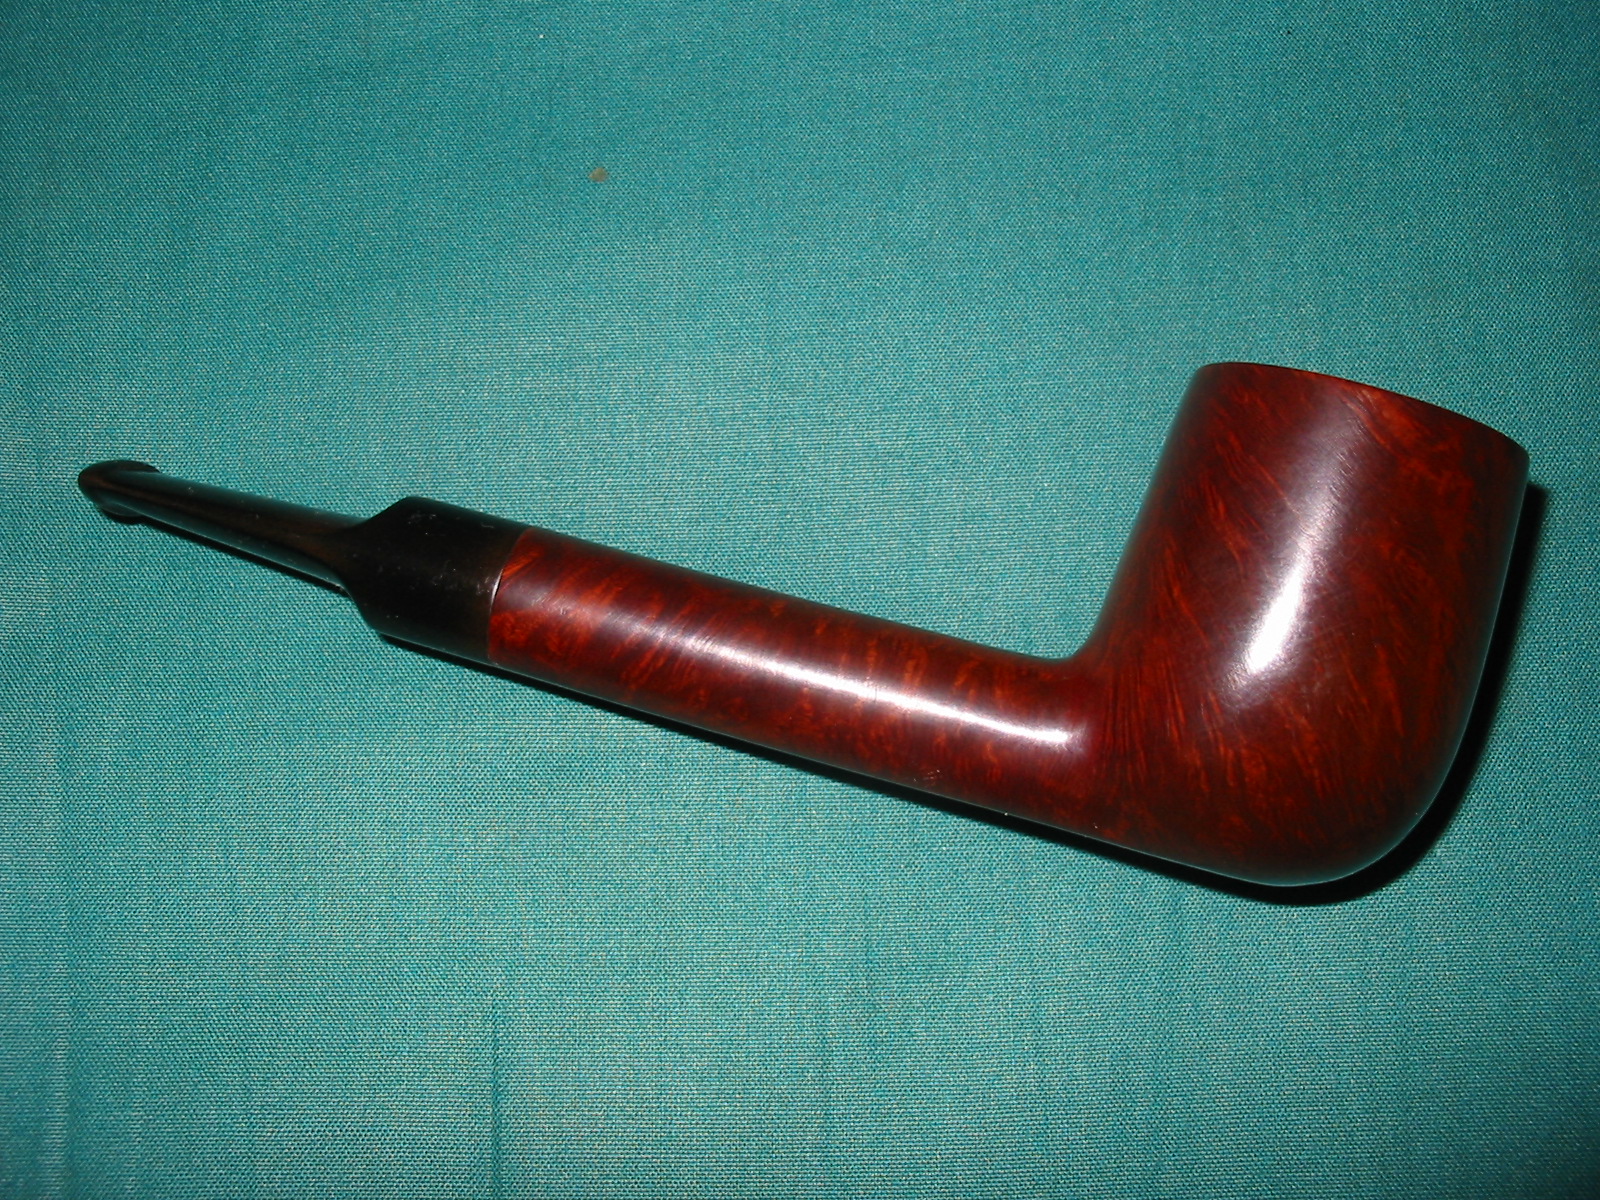
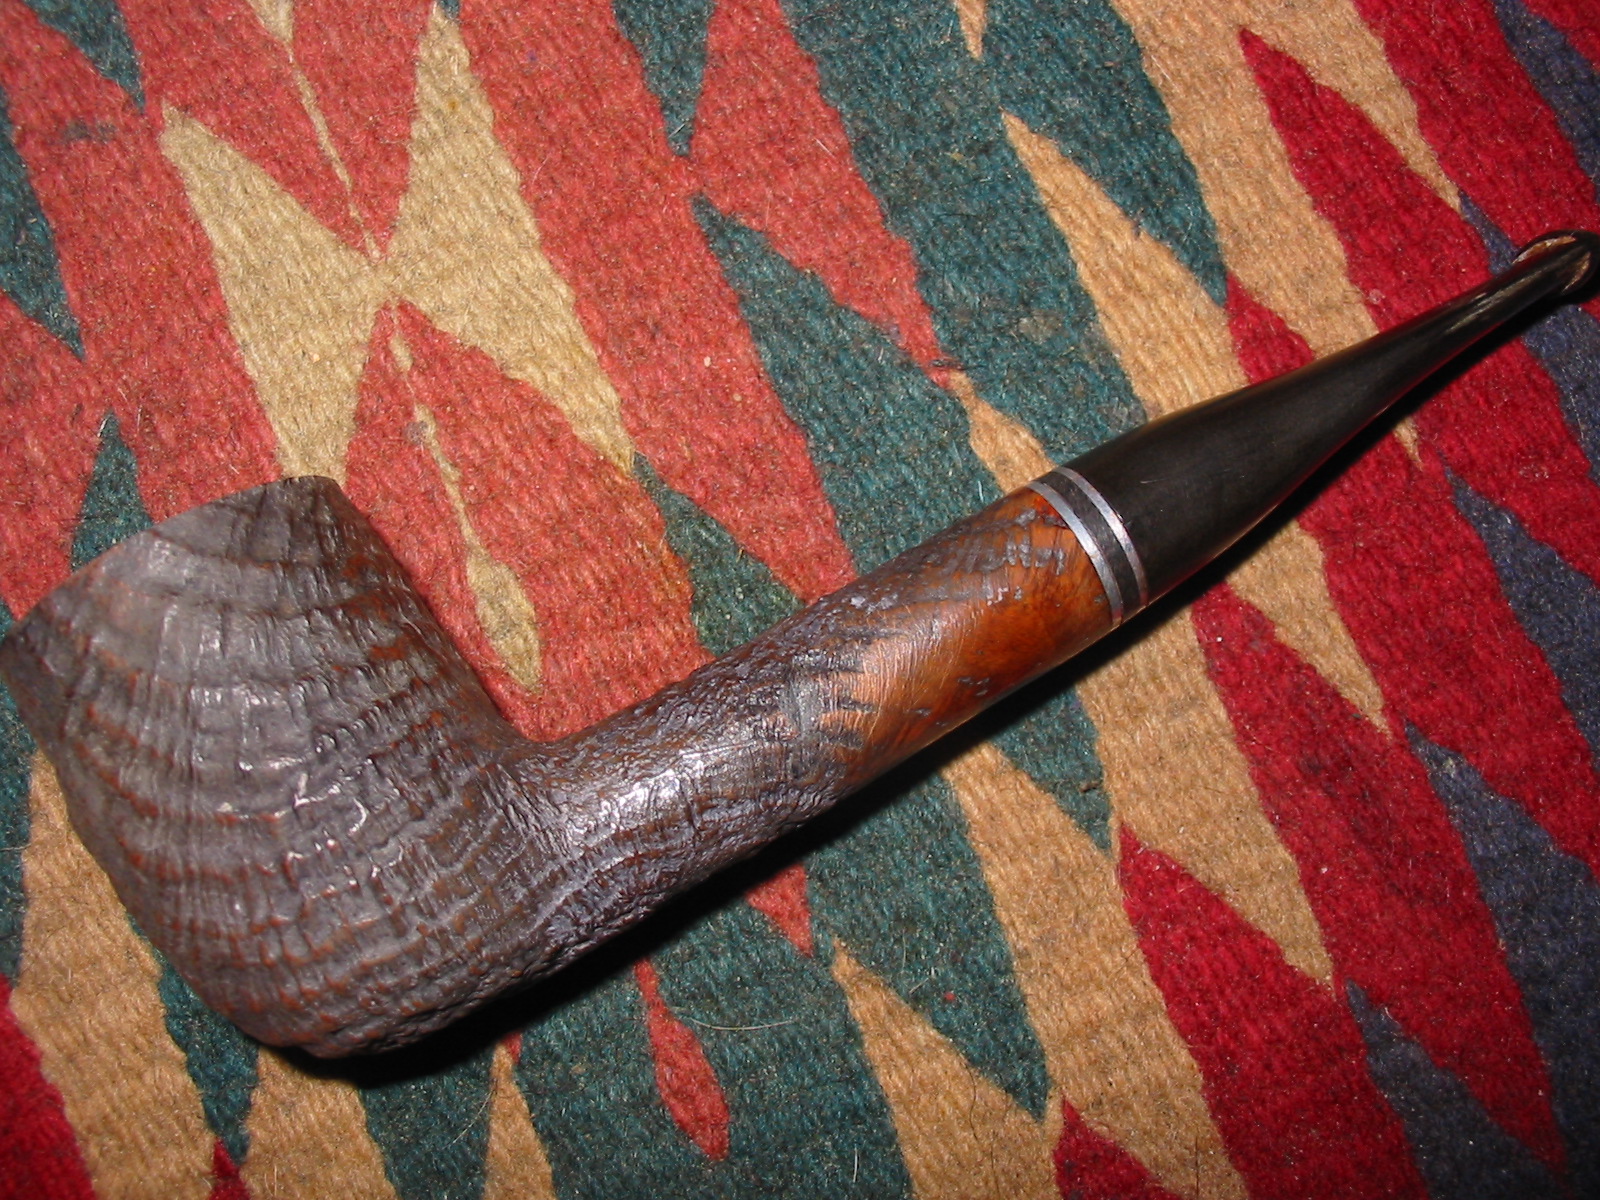
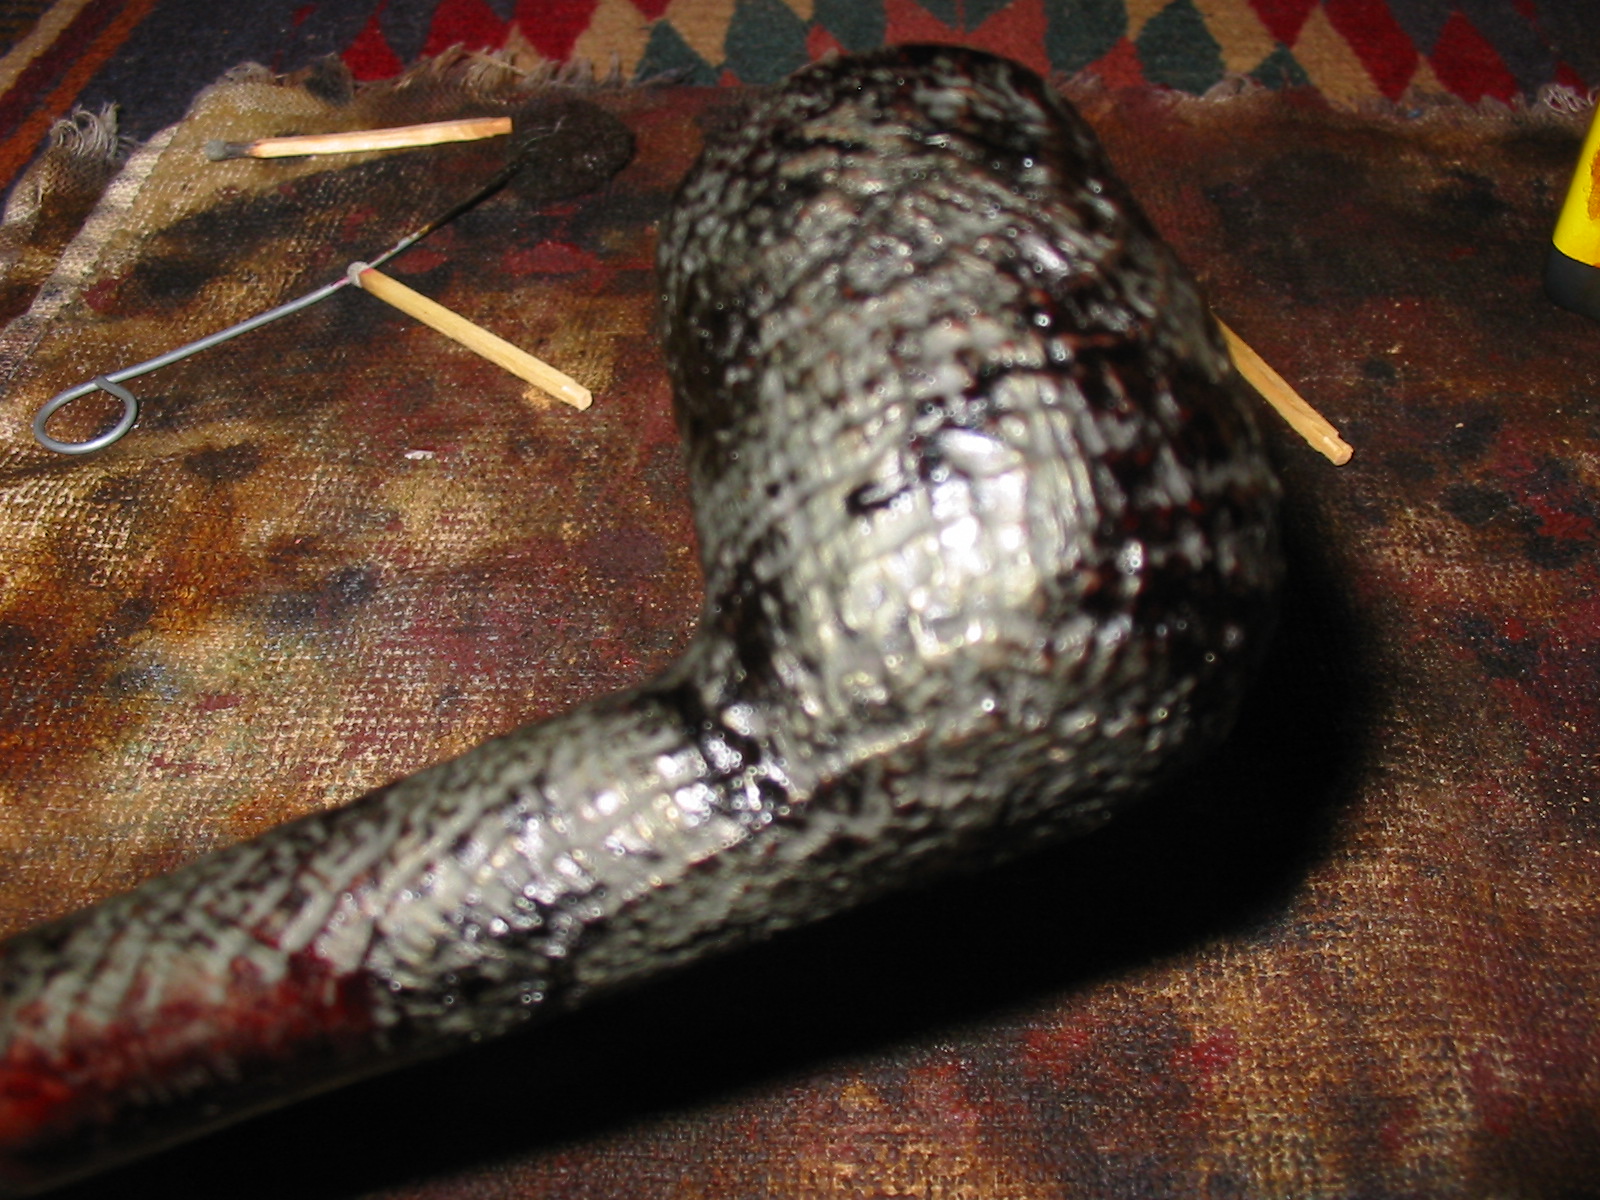
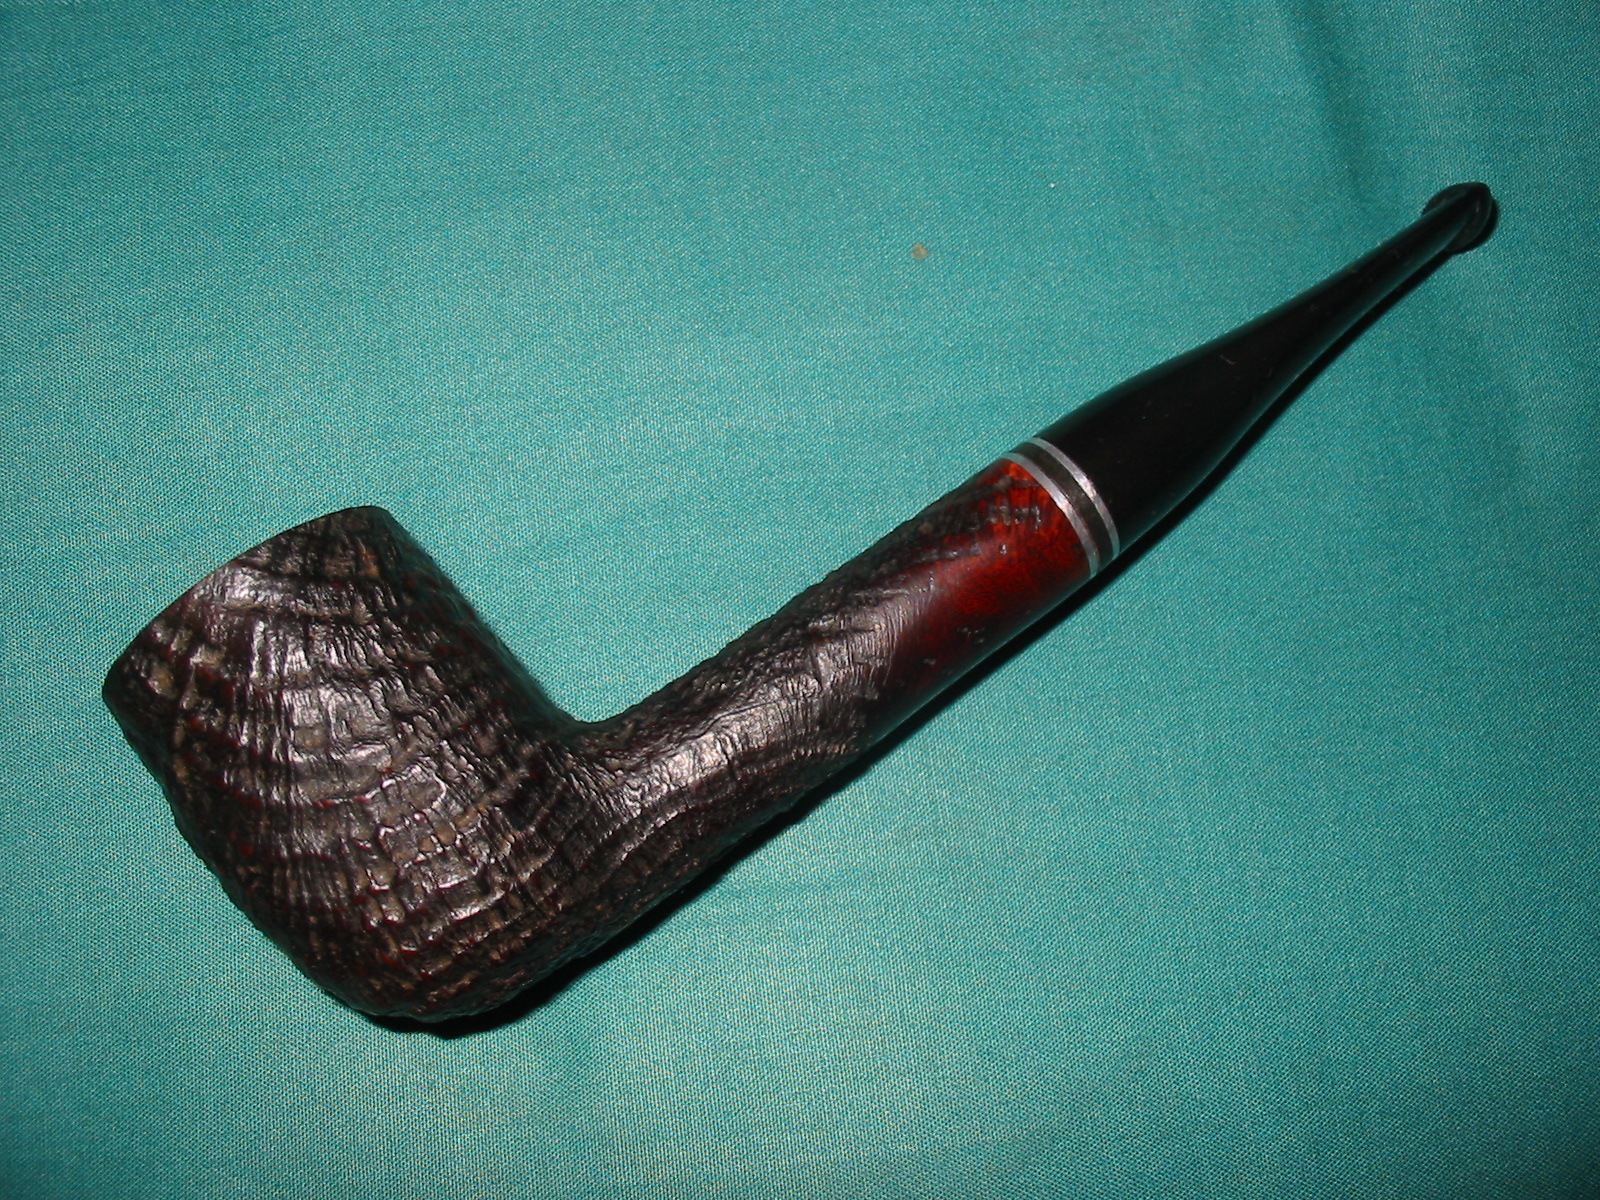
The stem top and bottom are clean and fresh. The underside of the chairleg portion of the stem is quite clean and free of oxidation. The sides and the top of the chairleg portion still need more work. I then sanded these once again with the sponge backed medium grit sandpaper. I worked through the grits of micromesh from 1500-12,000 again. I coated the stem with another coat of Obsidian Oil. Once it dried I rubbed it down and then buffed it with White Diamond. It was significantly better so I took it back to the work table and scrubbed it down with Maguiar’s another time. Each time I do this I can see how much oxidation come off by the brown on the cotton scrubbing pad. This time the pad was relatively white when I finished the polishing. I gave the whole pipe a buff with White Diamond for a final time and then coated it with several coats of carnauba wax. Here is the finished pipe.

ImageImageImageImage

GBD 9438 Prehistoric Restoration


I love the GBD 9438 shape and have this model in several finished.  This Prehistoric finish pipe was found on Ebay.  I thought this was going to be a simple buff and clean, but the pipes took a little more effort due to a self-inflicted stem issue, or an issue that was hidden by the oxidation.

Some “Before” shots of the pipe:

GBD_9438_Prehistoric_Before GBD_9438_Prehistoric_Before (3) GBD_9438_Prehistoric_Before (2)

I cleaned the bowl with my new retort, which worked well and really scoured the bowl.  This was the first time I’ve used a retort.  I cleaned the tars off the bowl rim which revealed a nicely polished rim edge that I love on Prehistoric grade GBD’s.  The rest of the bowl was buffed lightly with tripoli, white diamond and then several coats of carnuba wax.

While I worked in the bowl, the stem was soaked in a mild Oxy-clean solution (the brass GBD rondell was covered with some grease).  I removed the outer layer of oxidation with 1500 and then 2000 grit paper.  There were several light tooth indention’s on the top of the stem and they popped out nicely with some heat.  The nicks/cuts on the middle of the stem (handling?)took some effort with 800 grit paper but came out as well.  After the 2000 grit paper, I used 8000 and then 12000 grades of micromesh.  The stem was then polished on the buffer with white diamond and then plastic polish.

GBD_9438_Prehistoric_Finished (1)

When I went to photograph what I thought was the finished pipe, I was disappointed to see a crack on the underside of the stem, near and through the button.  I’m not sure if the heat used to remove the teeth marks or retort caused this issue but I’m 99% sure it wasn’t there when I started. To fix that, I greased a cleaner, inserting into the stem.  I then dribbled some superglue down into the crack.  When it was dry, I sanded it smooth with 800 then 1500 and 2000 grade paper, then the micromesh and buffing wheel.  The crack looks and feels solid now and I don’t think it will cause me any issues.

After:

GBD_9438_Prehistoric_Finished

GBD_9438_Prehistoric_Finished (6)

GBD_9438_Prehistoric_Finished (4)

Crack Repair (with some hair/fuzz…):

GBD_9438_Prehistoric_Finished (5)

A Bill Boyle Chubby Apple – A Review


I have been smoking this Bill Boyle chubby apple that I picked up from him for quite a while now and thought it was time to write up a review. This is the second pipe that I have purchased from Bill and I have found both of them to be consistently good smokers. Bill moved from pipe refurbishing and cobbery (crafting handmade cob uniques) to pipe making a few years back and his craftsmanship is progressing quickly. The first pipe I bought from Bill several years back smoked incredibly well, as the internal mechanics were perfect. But it had a thick stem and button that I found uncomfortable. In this pipe he has progressed on the shaping of stems and buttons to the point that it is very comfortable. I think one of the things I appreciate about Bill is that he is always learning and improving.

The latest pipe I purchased from Bill was a Chubby Apple.

Image

The dimensions for this pipe are as follows:

Length: 5 inches

Height of the bowl:  1.75 inches

Size of the chamber:  .75 inch diameter and 1.5 inches in depth

Drilling through the shank:  5/32inches

Drilling in the stem:  5/32″ to tapered toward the button and funnelled at the button

Weight: 2.0 ounces

The mechanics of this pipe are well done – as are those of my previous Bill Boyle pipe. He has really mastered the drilling and internal design for his pipes. The bowl interior is clean and smooth when it arrived. He uses no bowl coating so the interior of the briar is visible. This one is a clean piece of briar with no surprises (at least on the surface). The airway is centered in the bottom of the bowl as it should be. There are no ragged edges or pieces left behind by the drill bit. The airway is smooth when examined with a light. It is smooth throughout the shank with no ragged edges. The transition from the airway to the mortise is also smooth and clean. The airway in the stem tapers toward the button and ends in a smooth funnel at the button. The button on Bill’s pipes used to be too thick for me and I would file them down to the size I like when they arrived. I mentioned that once to Bill and he made this button to exactly the specs that I spelled out over the phone. The slot in the airway is also smooth and clean with no ragged edges. It is also centred in the button – something that I used to take for granted but have learned to pay attention to on the pipes I buy and the ones I restem.

Image

The externals – shaping, finish, stem and feel of the pipe are excellent. I like the compactness of Bill’s apple shape. My other pipe is also an apple – ¼ bent. He did a great job cutting it to maximize the grain and highlight the beauty of the piece of briar. The feel in the hand is perfect for me as I find the apple shape a very comfortable shape to smoke. The finish is nicely done. His staining of the pipe is even and smooth with no fading or light spots on the pipe. The contrast of the undercoat with the brown finish coat makes a nice looking pipe. The stain on the undercoat makes the grain really stand out and the overcoat sets it off very nicely. There is one flaw in the bowl on the front of the pipe. It is visible but does not affect the smoking ability of the pipe (see the picture below). The flaw is not terribly deep but Bill chose to stop sanding so that he could maintain the shape that he had chosen for this pipe.

ImageImageImage

The saddle stem is hand cut German ebonite and is comfortable in the mouth. For me some of Bill’s earlier pipes had a more drastic slope on them and thus were not as comfortable in my mouth. I found them hard to hold in my jaw. The slope on this one is more gradual. The flat blade of the stem is cut well and is also a good thickness for the look of the chubby bowl and shank. Bill has tapered the edges to meet and create a midline on both sides of the stem. Nicely done! The finish on the stem is also very good. There are no file marks or scratches in the finish. It is a smooth finish and he has polished it a glassy shine. The fit of the saddle to the shank is also well done. There is no gap between the stem and the shank of the pipe. The thin saddle is a feature that I really like on this pipe – it gives is a unique look. The fit in the tenon is snug and smooth.

ImageImage

I have been smoking the pipe now for long enough to know that it is a smoking machine. It was not terribly hard to break in and after a few bowls the bowl had begun to form a thin cake. I smoke primarily Virginias and Virginia Perique tobaccos in this pipe and it delivers a clean full bodied taste each smoke. The draught on the pipe is quite effortless as it is an open drilling. The briar warms nicely in the hand but does not get hot. If you have not worked with Bill to have him make a pipe for you or have not picked one up on his website http://billboylepipes.weebly.com/ you should give them a try. If your experience is anything like mine you will not stop with one pipe.

You Are About To Experience – A Comoy’s Pamphlet


Another old pamphlet I picked up at an antique store with an old Brigham pipe I found. It had the previous Love That Pipe Booklet and this one in the box with the pipe. The Comoy’s pamphlet has a copy of the guarantee, the shape chart, a guide pipe lines within Comoy’s, the Comoy’s Briar Story, Comoy’s Pipe Care and some of the pouches that used to be available through Comoy’s. Hopefully these photos are clear enough for you to get the idea of the interesting content of the brochure.

Comoys Comoys4 Comoys3   Comoys2 Comoys1

Love That Pipe – RJ Reynolds Tobacco Company


This little booklet “Love That Pipe” is subtitled A Fun Guide To Pipe Smoking. It is full of of helpful information for the long time pipe smoker and new comer to the hobby. It covers lots of topics from choosing a pipe to how to feed and care for it. Kind of an interesting blast from the past.
ImageLove2 Love3 Love4 Love5 Love6 Love7 Love8

Alpha Abrasives – Micromesh Alternative


Blog by Al Jones

Yesterday I reluctantly escorted Mrs. Jones into our new “Hobby Lobby” store. After overcoming the fright of a giant floral area near the entrance, I have to admit there was some interesting items for sale.

I made my way to the model making section and found some products made by Alpha Abrasives that appear to be identical in design and grade sizes as Micromesh. But, these products were significantly cheaper. Later, I found their entire line on their website. Hobby Lobby carried the sheet and pad sets detailed below at the online pricing.

Micro Cloth Finishing Products
http://www.alphaabrasives.com/alpha/micro-cloth-finishing-products.php
– 2″ x 2″ pads @ $8.99/set
– 3″ x 4″ cloths @ $14.99/set (my preference)
– Foam block for holding the cloth (I bought one of these)

Sanding Files
http://www.alphaabrasives.com/alpha/sanding-files.php

Plastic Sanding Needles
http://www.alphaabrasives.com/alpha/plastic-sanding-needles.php

Sanding Pads & Sanding Foam Blocks
http://www.alphaabrasives.com/alpha/sanding-pads-foam-blocks.php

I find that I don’t use the full line of the micromesh and typically only use the last four grades. Alpha does not sell individual grades, but I will inquire about that option

1937 Patent Era Brigham Lovat


Blog by Steve Laug

I picked this little Lovat up in a trio of pipes from EBay. I refurbished the first two – the no name Sandblasted Poker and the Dr. Plumb Statesman already. I have written about them earlier on the blog. Today I worked on the Brigham Lovat. It is stamped Brigham over Can. Pat. 372982. The shape stamp in on the flattened bowl bottom and is stamped 199. The finish was pretty well worn off but there was some nice looking grain on the bowl and shank. The briar actually is flawless with no fills or sandpits. The rim was black and covered with what appeared to be a thin coat of hard tar. The stem was badly oxidized and the brass one dot logo was obscured. Once the stem was removed the Brigham patented filter system was a little hard to remove. The hard rock maple filter was clean but there was a white cobweb like substance in the bowl and in the shank and filter.

ImageImageImageImage

I did a patent search on the Canadian Patent site and found documentation filed with the number stamped on the pipe. I have copied that documentation in the following three pictures. The first picture is a drawing of the Brigham filter system signed by the designer Roy Brigham when it was filed. The next two pictures are the descriptive text of the patent. It is always fascinating to me to discover these pieces of history when I am working on a pipe. This old timer had a story to tell that is for sure. I am not sure when Brigham stopped stamping their pipes with the patent number but in the many that have crossed my desk I have not seen one with the numbers.

ImageImageImage

I put the bowl to soak in the Isopropyl alcohol bath with the other bowls while the stem soaked in an Oxyclean bath. Once I took the bowls out I wiped them down and went to work on them. The Brigham is the bowl at the top of the photo below. You can see the grain on it is actually quite beautiful.

Image

The bowl when dried off is pictured below is quite clean. It has no fills or sand flaws in the briar. It is going to stain nicely and be a great looking pipe when finished.ImageImage

In the picture above you can see the tars on the rim of the pipe. I dried it off and sanded the rim with a 1500 grit micromesh sanding pad to remove the tar build up on the rim. The next two photos below show the rim with the tars removed and the surface smooth. The beauty of this old pipe was that the rim was flawless. There were no dings or dents in it. The outer and inner rim edges were still quite sharp.

ImageImage

After sanding the rim I sanded the entire bowl of the pipe and also the first sanding on the stem. The picture below shows the sanded bowl. I used 1500-2400 grit micromesh sanding pads, carefully sanding around the Brigham Patent Stamping.

Image

When I finished sanding I wiped the bowl down with acetone on a cotton pad. I use nail polish remover which is a solution of acetone and that is readily available at our local dollar store. It works well to lift any remaining stain in the briar and clean the surface of any leftover debris from the sanding process. The grain is really standing out nicely in the three photos below and will make a great looking finished pipe. I also continued to sand the stem with a medium and a fine grit sanding pad to cut through the heavy oxidation.

ImageImageImage

After sanding with the sanding pads I moved on to wet sanding with 1500-2400 grit micromesh sanding pads. I have a cup of water at hand to dip the sanding pad into and then sand the stem to remove the oxidation. These first three grits of micromesh do a great job in removing the remaining oxidation on the stem. The water begins to turn a brownish yellow as I dip the sanding pad and squeeze out the grit from the sanding. The stem begins to come back to black by the 2400 grit pad.

ImageImage

At this point in the process I have started to use Meguiar’s Scratch X2.0 before going onto the higher grits of micromesh. I rub on the Mequiar’s with my finger and scrub it into the finish of the stem. Once it is applied I let it dry for a few moments and then scrub the stem with a cotton pad. The next three photos below show the stem after the rub down with the Mequiar’s and a hand buff with the cotton pad.

ImageImageImage

After polishing the stem I rub it down with Obsidian Pipe Stem Oil. I find that it penetrates the vulcanite and the remaining oxidation seems to lift to the surface. Once it is dry I continue to sand the stem with the micromesh sanding pads from 3200-12,000 grit.

ImageImage

After the stem really begins to shine I remove it from the shank and place a dental pick into the mortise to provide a handle for me when I am staining the pipe. This allows me control as I turn it over in my hands. I stained this pipe with Dark Brown aniline stain (Feibing’s Leather Dye). The first photo below shows the pipe ready to be stained and the second is with its first coat of stain. While it is still wet I flame it by lighting it with a match and setting the stain.The flame sets the alcohol in the stain on fire and burns it off.

ImageImage

Once it is flamed I rub down the bowl with a piece of cotton terry cloth. It removes the surface stain and leaves the stain set in the softer grain. The next series of photos show the pipe after it has been wiped down but not buffed.

ImageImageImageImageImage

Once I have wiped it down I take it to the buffer to remove any more of the stain and to give it a shine. With this particular pipe the stain obscured the grain a bit so I decided to wipe it down with the acetone to lighten the stain. I wiped it until I got the effect that I desired. I then buffed it repeatedly to get a shine.

ImageImageImage

The stain was still a little dark to me and I wanted a bit more contrast in the stain. I wiped the bowl a final time with Isopropyl and then buffed it a final time. I also buffed the stem. I scrubbed the metal tenon with 0000 steel wool to polish the oxidation on the aluminum. It shined as well. I inserted a new Brigham Hard Rock Maple filter and put the pipe back together. I gave the stem a final coat of Obsidian Oil and then when it had dried I gave the bowl and stem multiple coats of carnauba wax on my buffing wheel. I finished with a quick buff with a soft flannel buffing wheel. The finished pipe can be seen in the pictures below.

ImageImageImageImage

Positives and Negatives of the PME Tenon Expander


After reading about it online, I picked up a tenon expander from the Pipe Makers Emporium several years ago. It can be ordered online at http://www.pipemakers.org/tools02.html The website describes it as follows: Tenon Expander: (Three sizes-in-one: 1/25, 1/50, 1/60) “An absolute must for pipe repair! One tool that will do 99 percent of all loose tenons. Throw away that ice pick because this will do a much better job. Heat the Tenon with an alcohol lamp until it is soft. Insert the Expander to the next size. Place Tenon and Expander into cold water to set the Tenon to its new size. Remove the Expander and your Tenon will maintain its new size. .” The sell for $29.00 each

The concept of the tool is actually quite simple – heat the tenon with a heat gun/ hot water or heat the tenon expander tool with a flame or heat source. Once it is heated, push the expander into the tenon and twist it until the tenon expands. Cool the tenon under clean or cool water to set the expansion and then remove the tool. You will notice in the picture below that the tip is tapered and gets larger in diameter the farther you move up the tip toward the handle. By pushing the tool into the tenon you can expand it for a tighter fit in the shank. In my use of the tool I would heat and expand, then cool the tenon in water, remove the tool and try the stem on the pipe for a fit. If it needed more expansion I repeated the process until the fit was snug. The gradated slope on the tenon expander gives you a broad range of possibilities in accomplishing that task. After I had used it for a while I decided to evaluate the tool in terms of its positives and negatives. What about the tool did I like and what were its deficiencies?

Image

The positives

In thinking through the positives the obvious ones were those advertised on the PME website.

  1. The ease of use is the first thing that stood out with the tenon expander. It is very simple to use even though it came with no instructions. It was not hard to figure out how to use it correctly.
  2. The tapered end is also billed as a positive feature of at first glance as it works to open the tenon to varying degrees and you can repeat the fit until the stem is snug. I will explain in the negatives why I have come to believe that the tapered end is not as great a feature as it initially appears to be when you begin.
  3. The grooves on the handle of the tool are cut to make it easy to hold on to as you work with it.

The negatives

Over time and experience working with the tool I have found some of the features that I first thought were helpful have grown to irritate me and work as limitations of the tool.

  1. The first thing I have learned is that the taper on the end of the expander, while being helpful, is also a negative feature. The expander does not expand the entire tenon but rather the end of the tenon. With use the tenon thus is no longer cylindrical but can flare at the end. The snug fit is thus only for the first 1/8 inch of the tenon. The rest of the tenon is not touching the walls of the mortise.
  2. Heating the tenon to insert the expander makes the tenon very pliable and if you are not careful the tenon can be bent at an angle thus ruining the fit at the shank. I have found that if I heat the expander instead then the tenon does not soften as much and I avoid the potential of tilting the tenon.
  3. A final negative for me is the handle of the expander. I use a pair of heat mitts to hold it as I heat it but if I were going to continue to use it regularly I would make a wooden handle and epoxy the expander into it. In my opinion it would make it more usable.

Other options: As I pushed the limitations of the tenon expander that I purchased I decided to look and see if I could find other tools that would address the negatives that I have spelled out above. I have been experimenting with various sizes of ice picks and awls to use for tenon expansion as they have a longer shank and less taper. This allows me to expand the tenon the entire length of the tenon rather than just the tip. So far they have worked very well. I can easily heat the shaft of the awl or ice pick while holding the wooden handle. They slide into the tenon and are easily twisted slowly to expand the tenon. The final verdict is still out on them as I continue to look for picks and awls with a variety of diameter shafts.

A Unique Attempt at a Cooler Smoker – An LHS System Pipe


I picked this old pipe up in a lot of pipes that was given to me. The pipe is stamped LHS in a Diamond and next to that SEC on the left side of the shank. The right side of the shank is stamped US Patent 1908630 over Other Patent Applied For. I have hunted through the patent information site and could find the original LHS patent under the number above but the descriptions and diagram do not match the system in this pipe. The stem is Perspex I believe, and has the cross hatched metal end on it. That is threaded and connects to a threaded tenon that is connected to the bowl. When I got the pipe out of the box of pipes it was dirty and the rim had a lot of tar. The bowl was not badly caked but had remnants of tobacco left in it. The stem was dirty and opaque. The internal filtering system was black with tars. The stem also had some crazing in it – this happens when alcohol is used on Perspex stems.

I reamed and cleaned the bowl of the pipe and the rim and then scrubbed the exterior of the bowl with Murphy’s Oil Soap undiluted. I wanted to leave the original light finish without removing any of the stain so I carefully rubbed on the soap and wiped it off. The rim actually came clean very easily and the bowl was ready to go. I took apart the internal contraption and cleaned that with Isopropyl alcohol and also cleaned the shank with pipe cleaners, shank brush and Isopropyl. One the internals were clean I worked on the stem and cleaned it out with soapy water, pipe cleaners and cotton swabs. The finished pipe was then waxed with multiple coats of carnauba wax on my buffer and then polished with a soft flannel buff.

Anyone have any information on this pipe? It is an unusual piece of pipe history and I continue to hunt down information. Thanks for your help and thanks for looking.

ImageImageImageImage

ImageImage

Reworking a Dr. Plumb Statesman


The second pipe in the lot of three pipes I picked up on EBay was this long shanked billiard. The first one I refurbished and posted about was the no name poker that I wrote about here. This one was stamped Dr. Plumb over London Made over Statesman on the underside of the shank. The sand blast was very nice on it. In fact I like the deep grooves and flow of the blast on the briar. The rim was shot. It had been sanded smooth (may have been smooth originally to match the smooth portions of the bowl). It was also no longer flat. When the pipe was laid down on the rim it rocked in every direction. It was rough and pitted from tapping the pipe out. The bowl was a bit out of round and the previous owner had reamed the inner rim with a knife at an angle that really damaged the inside rim and the roundness of the bowl. The stem had the same white calcification on it as the poker. This one also had teeth marks and dents in it. The slot on the stem was closed with the white calcified material and there was no open airway in the stem. The shank was dirty and clogged and the bowl needed to be reamed in the lower portion. The first four picture show the pipe as it was when it came to me.

ImageImageImageImage

It had the same alcohol bath as the poker and I am including the same photos of that process I included in the previous post. It soaked for two hours and then I took it out and dried the bowls off with a soft cloth. I also soaked the stem in Oxyclean to soften the calcification on the button area.

Image

In the photo below you can clearly see the flaw in the briar of the Dr. Plumb (the pipe on the right side of the photo). The alcohol bath softened the fill and it fell out of the crevice. It was quite large but not deep. It appears to me that it opened up larger as the pipe was blasted. You can also see in the second photo below the shape of the bowl and rim of the pipe.

ImageImage

The first thing that I decided to address with regard to this pipe was the rim. I set up my board for sanding the top. I anchored the sandpaper to it. I used a pretty heavy grit for this one because I needed to remove quite a bit of the top to smooth it out and remove the rockiness of the pipe. I used a medium grit emery paper. I hold the pipe flat against the board and sandpaper and sand it in a circular fashion clockwise. I don’t know what the point is of that but that has been my practice for as long as I remember. The next two photos show that process. Once I had the top level once again I sanded it in the same manner using 240 grit sandpaper and then 400 and 600 wet dry sandpaper and water. I finished sanding the top with the micromesh sanding pads from 1500 – 12,000 grit.

ImageImage

The next photo shows the finished topping of the bowl. The grain is quite nice and will stain well in contrast to the roughness of the blast. The second and third photo below show the repaired fill in the shank. I used briar dust from the topping of the bowl and packed it into the crevice with a dental pick. When it was full I dripped super glue into the dust. Once it was dry I used a wire brush on the shank rather than sandpaper. I wanted to remove the signs of my repair without sanding the fill. The shank looked really good when that job was done. The pipe was basically ready for a coat of brown aniline stain.

ImageImageImage

I used my dental pick for a handle by inserting it into the mortise and then used Fiebing’s Dark Brown Leather Dye. I diluted it 2 to 1 with Isopropyl alcohol to get the colour I was aiming for. Once I coated it with the stain I flamed the stain to set it in the grain. I repeated this several times to make certain I had stained all the crevices and blast. The first picture below is of the wet pipe. The second is of the bowl after flaming the stain. I light wooden matches and ignite the stain. The alcohol burns off and the pipe then is dry to touch.

ImageImage

At this point in my refurbishing process I took the bowl to the buffer and buffed the bowl lightly with Tripoli and the repeated it with White Diamond. My goal was to buff of the high areas and make a bit of contrast. I also wanted to buff the rim to make it a bit lighter than the blast and have it match the smooth patch on the bottom of the shank.

I then went to work on the stem. I heated the dents to raise them as much as possible and then sanded the stem with 220 grit sandpaper to remove the remaining tooth chatter and also to remove the calcified area around the button. I cleaned out the stem with pipe cleaners and a shank brush to remove the tars and oils and to open the stem. I used the dental pick to clean out the slot in the button. Once that was done I sanded the stem with a fine grit sanding pad and then progressed through 1500, 1600, and 2400 grit micromesh before scrubbing the stem with Maguiar’s X2.0 scratch polish. I rub it on with a cotton pad and let it dry a bit before rubbing it off. I finished sanding the stem with 3200 – 12,000 grit micromesh pads and then buffed the stem with White Diamond. I coated it with Obsidian Oil and then when it dried I coated it with multiple coats of carnauba wax. I waxed the rim and the smooth part with carnauba and then used Halcyon II wax on the sandblast. I buffed the pipe with a light touch on the cotton buffing wheel to polish and then hand buffed it with a shoe brush. Here is the final product – ready to fire up!

ImageImageImageImage

Once I had posted the pictures of the pipe above when I blew them up to see them more clearly the top of the rim was full of scratches and obviously to me needed more work so I just finished reworking the rim and restaining it. IMG_9265IMG_9264

IMG_9263