by Steve Laug
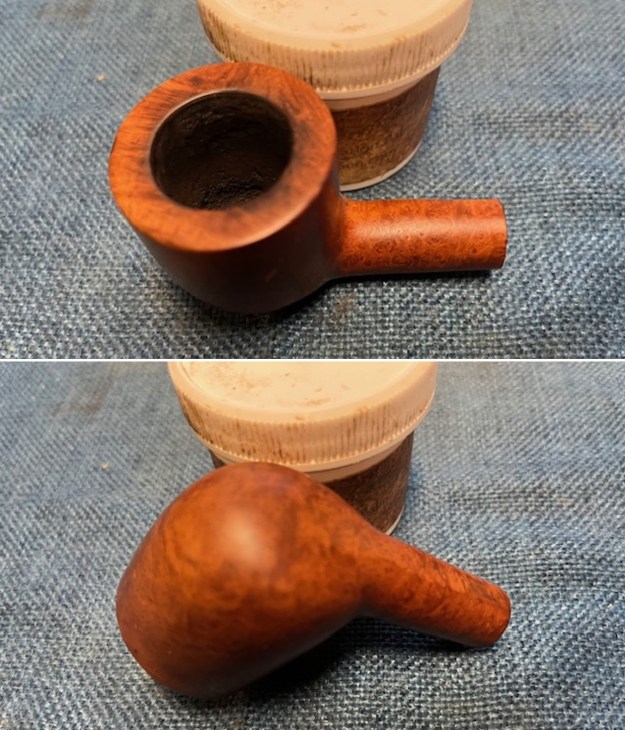
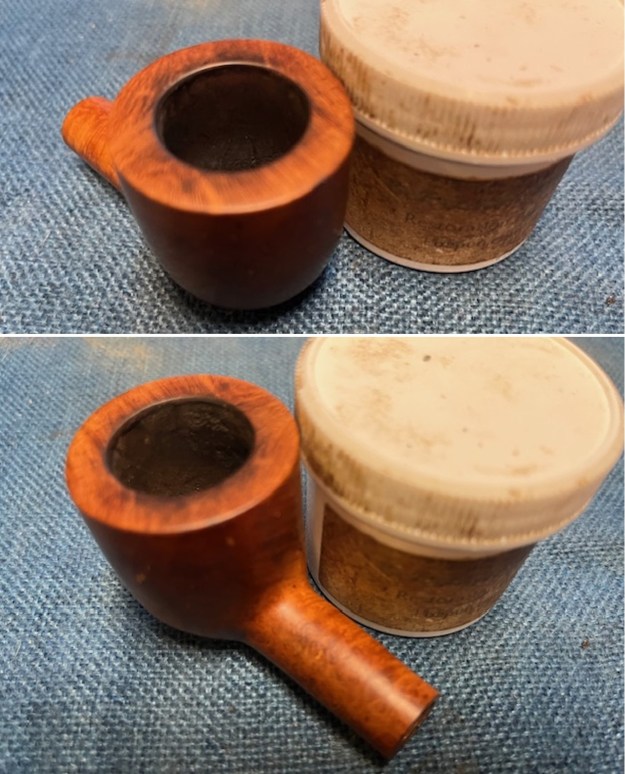
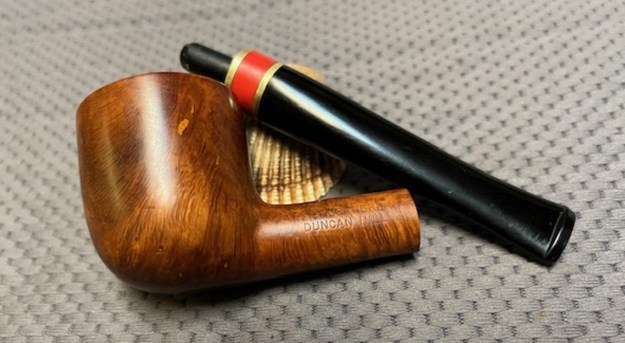
Back in January I received an email from Robert with a group 12 pipes that needed to be restored in various ways from cleanup to restemming. I chose to work on the Duncan Hill Aerosphere bowl next. It is a nice-looking smooth bowled Pot. The bowl and shank were in good condition. The bowl had been reamed at some time so there was no cake in it. The rim top was clean but had some darkening around the top and the inner edge. The finish on the bowl was dirty with some visible fills on the left side of the bowl. The pipe was stamped on the left side of the shank and read Duncan Hill [over] Aerosphere. There was a tenon in the shank and three rings on mortise end of the tenon. There was an orange acrylic ring sandwiched between two brass rings. The bowl came without a stem and I would need to either find an Aerosphere stem or fit the tenon on an existing stem. I took some photos of the pipe to show its condition before I started my work on it.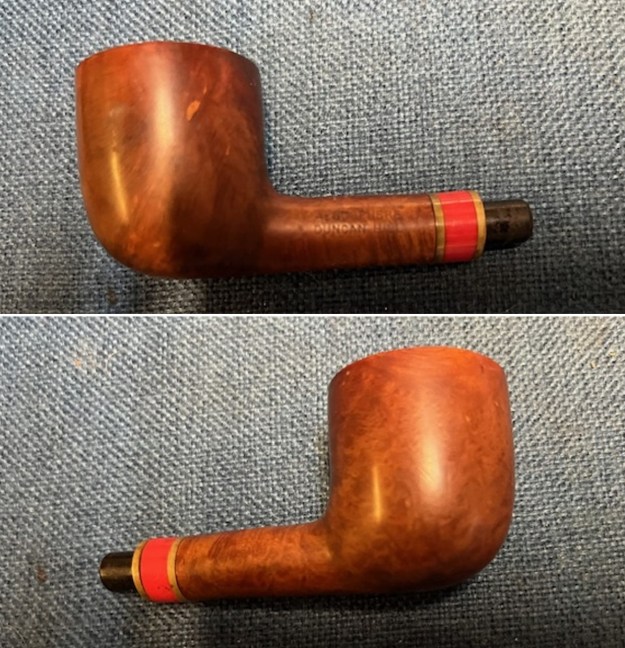
 The tenon was removable and I turned it out of the bowl. The sandwiched triple ring fitting on the tenon was also removable.
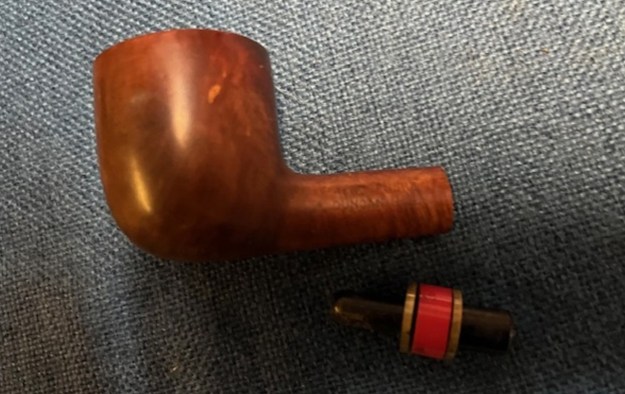 Before I started work on fitting a new stem to the shank I did a bit of work on the brand itself. I Googled Duncan Hill Aerosphere and the first bit I found was from a Google group for ASP. There I found the following quote. I have the reference link placed at the end of the quote if you want to follow up on the information:
“The Duncan Hill Aerosphere smoking system (U.S. patent #4,275,747) utilizes the same principle of physics as the manometer. The Aerosphere, visible as the brass pin on the side of the mouthpiece, brings a scientifically measured amount of air into the stem with each puff. The control of the amount of air and the velocity of the air produces two effects that result in superior smoking pipe performance.” https://groups.google.com/forum/#!topic/alt.smokers.pipes/GUxdN5Dus4Q
I also found a link to an advertisement for the brand featuring the designer in Popular Mechanics Magazine, February 1980, pg. 31 on Google books. Here is the link:
https://books.google.ca/books?id=m9UDAAAAMBAJ&pg=PA31&lpg=PA31&dq=Duncan+Hill+Aerosphere+Pipes&source=bl&ots=tR4egGI0ig&sig=XeACE0-Vh19-1JNcA0kAgS87kRI&hl=en&sa=X&ei=p1QbVbPTEpLvoATEpoLoCQ&ved=0CBwQ6AEwADgU#v=onepage&q=Duncan%20Hill%20Aerosphere%20Pipes&f=false 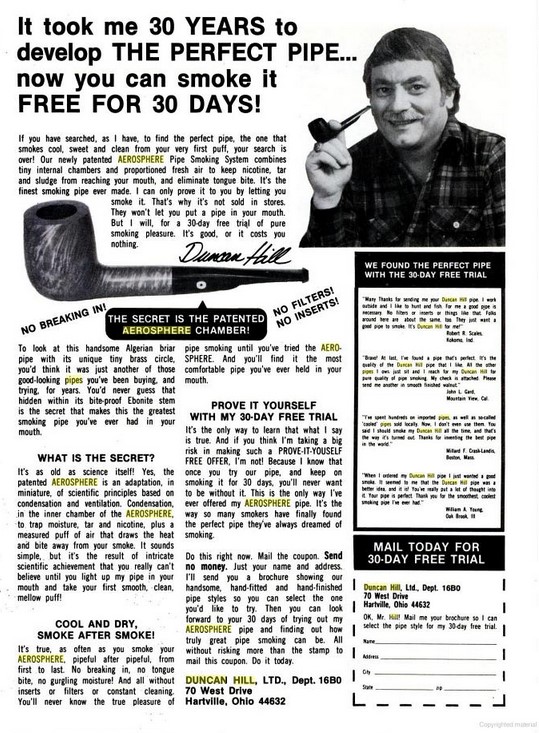 Next is an advertisement from Popular Mechanics Magazine, September 1982, pg. 216 on google books. Here is the link. https://books.google.ca/books?id=f9kDAAAAMBAJ&pg=PA216&lpg=PA216&dq=Duncan+Hill+Aerosphere+Pipes&source=bl&ots=fsZtVqD0z9&sig=Kl3wI-76NJqpFxAg8SPndnnWyqM&hl=en&sa=X&ei=owEcVdGGKdj9oQSD_4L4Bw&ved=0CCgQ6AEwAjgo#v=onepage&q=Duncan%20Hill%20Aerosphere%20Pipes&f=false
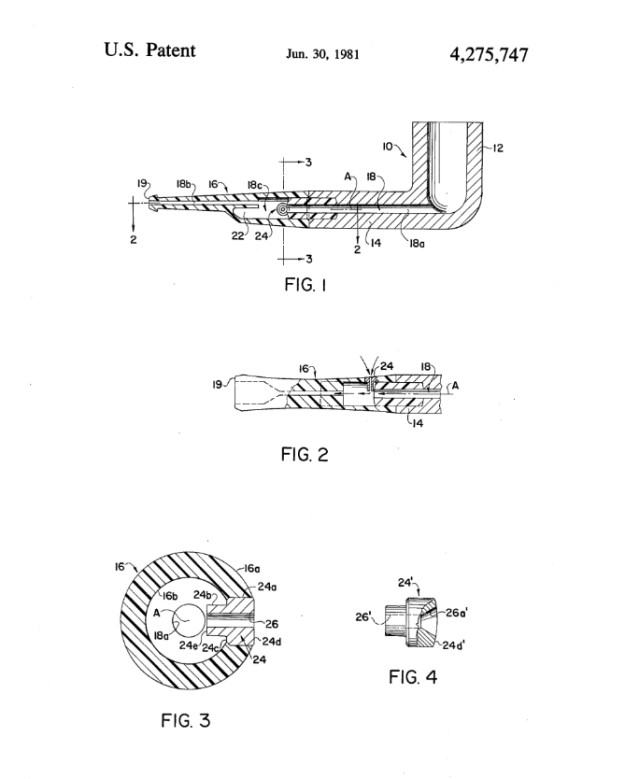
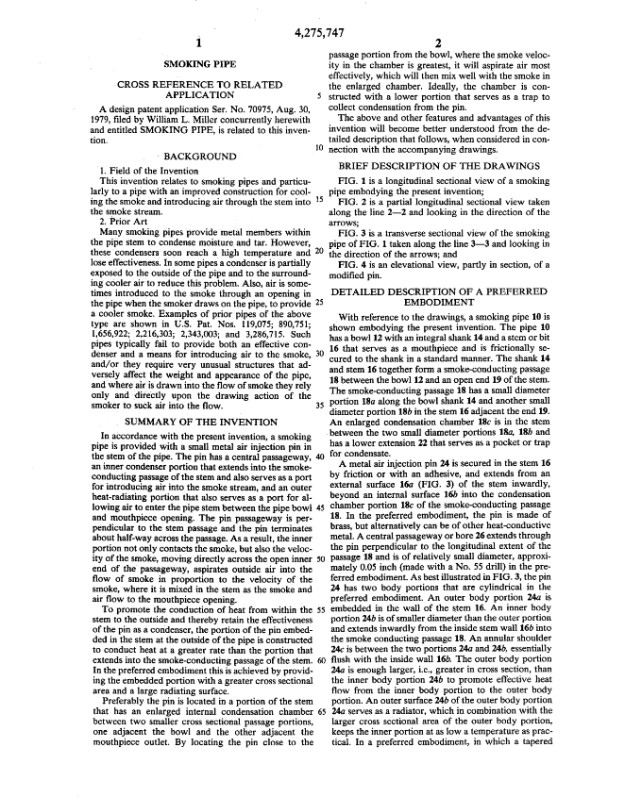
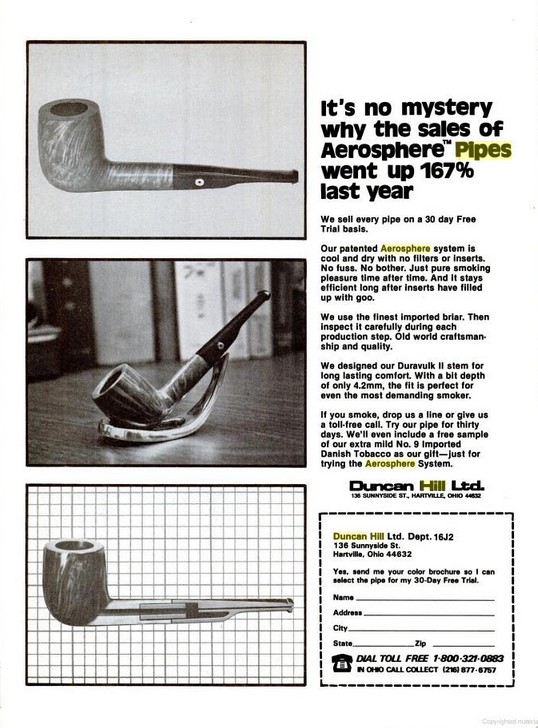 Finally using the patent number in the ASP quote I was able to find the patent documents for the pipe on the US Patent Office site. I have included the documents from the US Patent Office here. There are four pages – 2 of drawings and two of description.
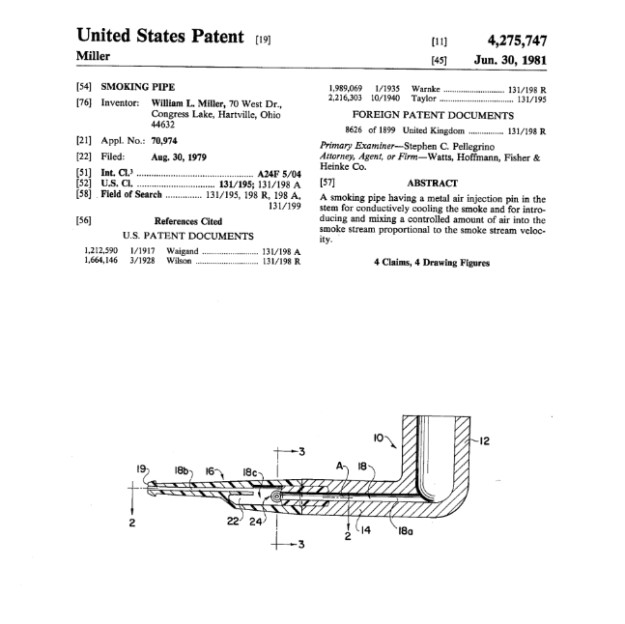
 I love finding this old information and reading about the persistent search for the dryer cooler smoking pipe that has led to many creative solutions. It lends some colour to the work of my refurbishing to be able to read about the design ideas and the inventors themselves as I work on the pipes. Armed with new information it was time to work out a new stem for the pipe. I went through my collection of stems and did not have an Aerosphere stem to replace it with. I did find a nice looking acrylic black stem that would work very well. It did not have a tenon and would need to be drilled out to receive the Duncan Hill tenon I had. The beauty was that the diameter of the shank was very close to the diameter of the stem.
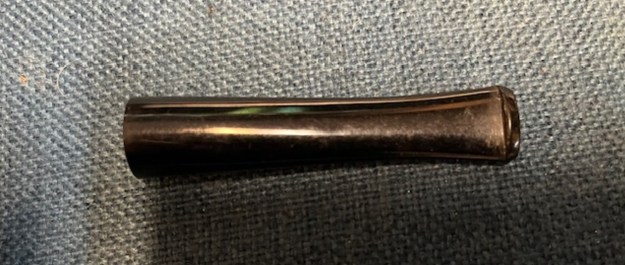 I drilled out the airway in the stem with increasingly larger drill bits until I had it open enough to fit the tenon.
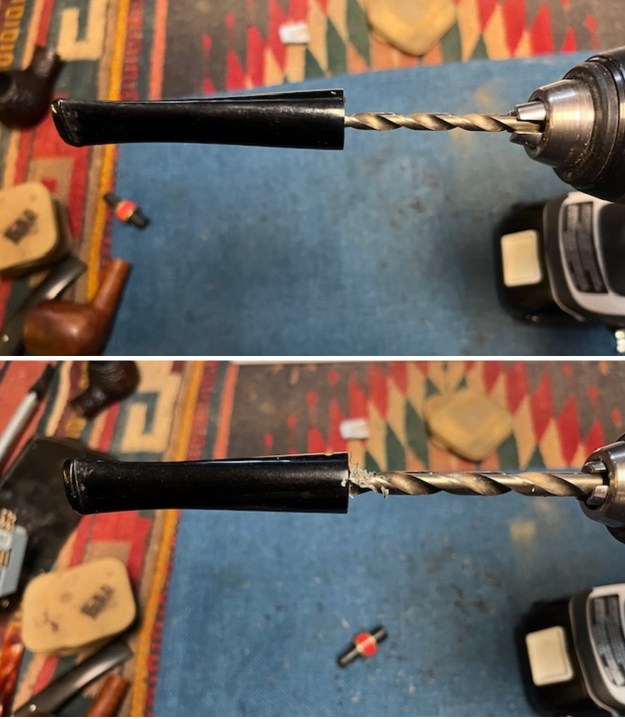
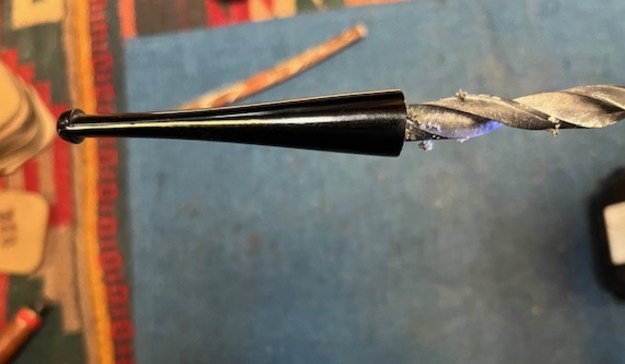 Once I had it drilled out I checked the fit of the tenon in the shank and in the newly drilled out stem. The fit was perfect in the stem. I painted the tenon end that fit in the stem with black rubberized CA glue. I pressed it in place in the stem and set it aside until the glue cured and the new tenon was solid.
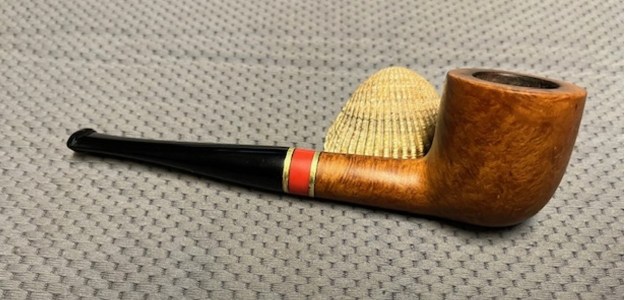
 With the tenon cured I put the stem on the shank and took a photo of the new stem. Though it did not have the Duncan Hill carburettor on the left side of the stem the fit was good and airflow was perfect. With a few adjustments of the diameter of the stem to match the bands the look was very good and it would provide a great smoke.
 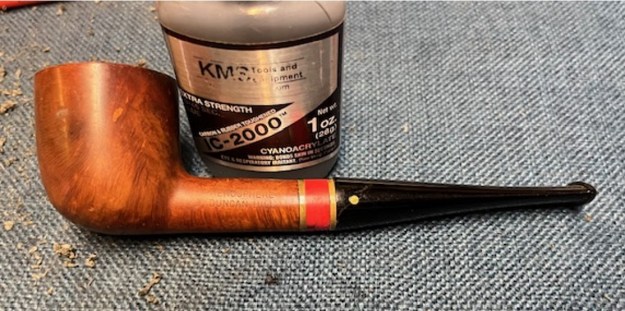 I started the adjustments to the diameter with a folded piece of 220 grit sandpaper. It took a lot of sanding to get the flow of the stem and band correct but it was starting to look very good.
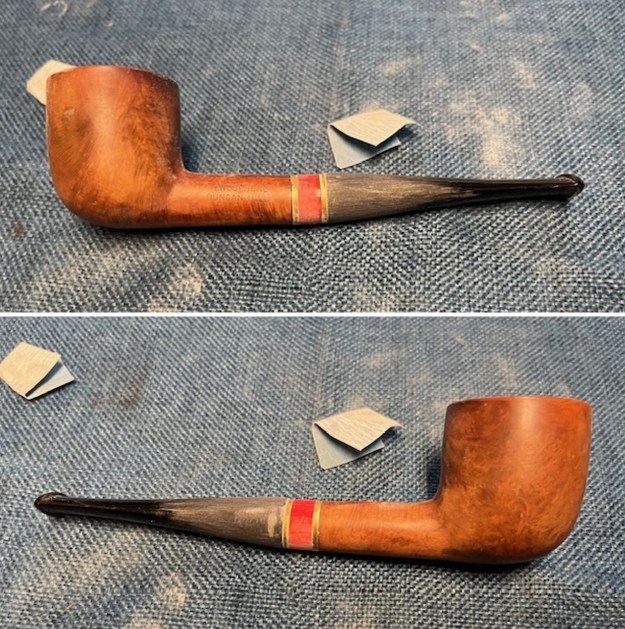
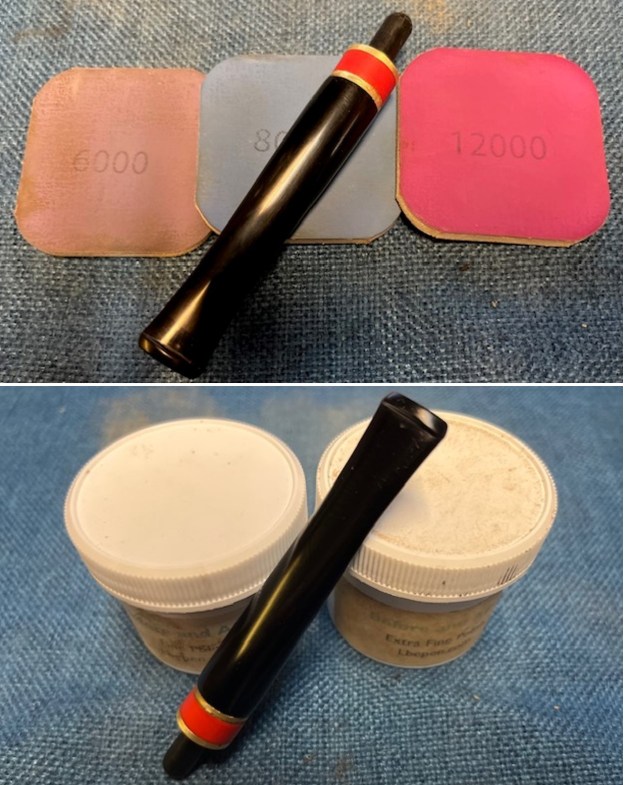
 I removed the stem and fine tuned the flow of the decorative band on the stem with 220 grit sandpaper. It was really beginning to look very good at this point.
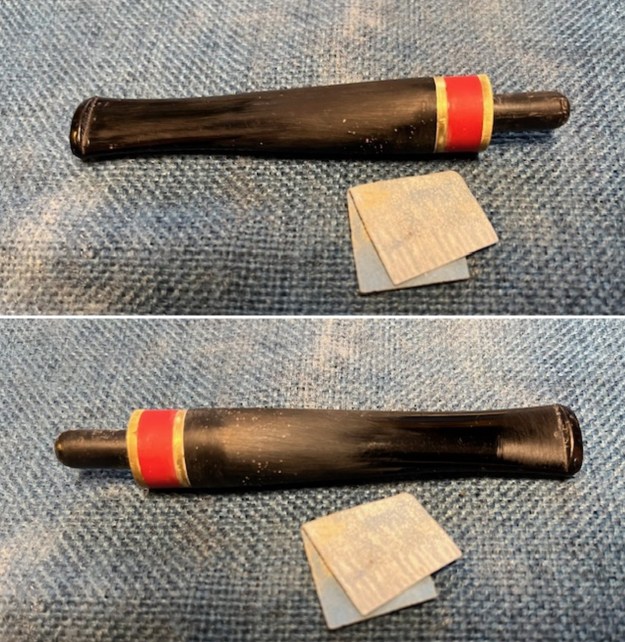 I sanded the stem with 320-3500 grit sanding pads. I wiped the stem down after each sanding pad with a damp cloth to remove the sanding debris. The stem began to take on a rich shine.
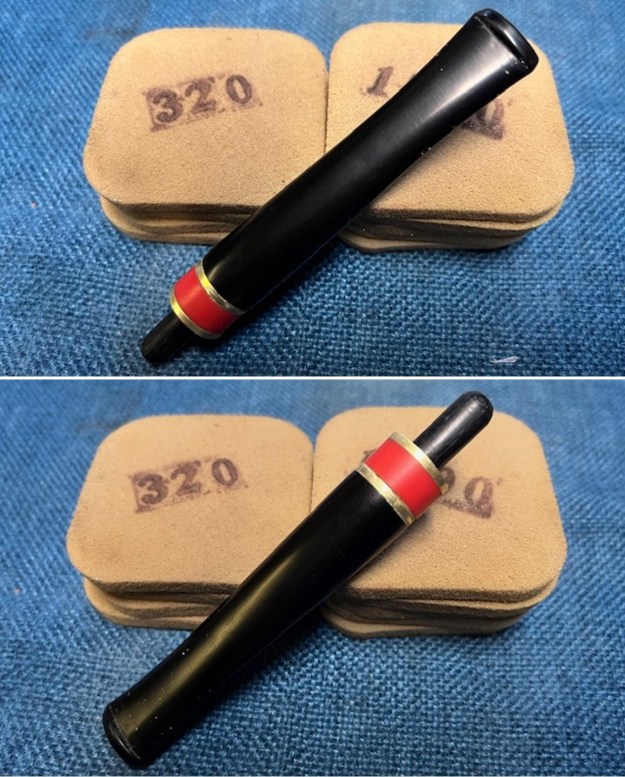 I polished the stem with micromesh sanding pads – dry sanding it with 1500-12000 grit pads. I wiped it down after each sanding pad with a cloth impregnated with Obsidian Oil. The stem looked very good.
 Before I turned to work on the bowl as a whole I took time to clean out the shank, mortise and the airway in both the shank and the new stem. The shank was very dirty and the airway was clogged. I used a straightened paper clip to poke through the clog and break it up. The airflow is great now.
 I now turned my attention to the bowl. I wiped down the bowl with acetone to remove the shine varnish coat from the surface. It looked much better and with sanding and polishing would look very good.
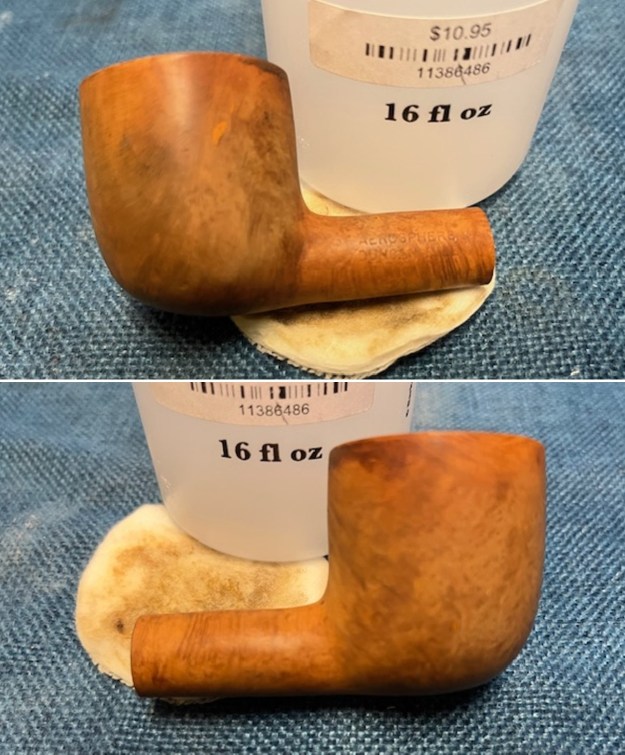
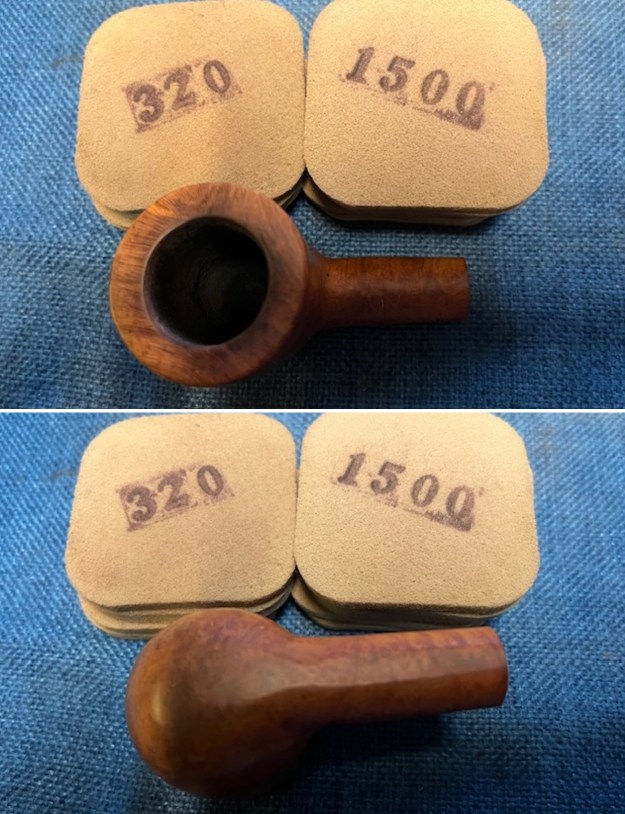
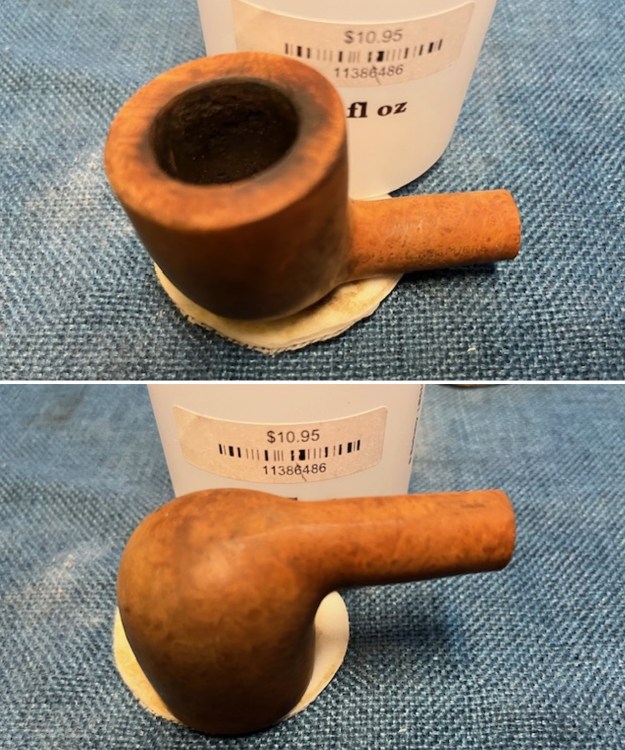 I used a folded piece of 220 grit sandpaper to clean up the inner edge of the rim and to sand out the darkening on the rim top. It looked better but there was more to be done.
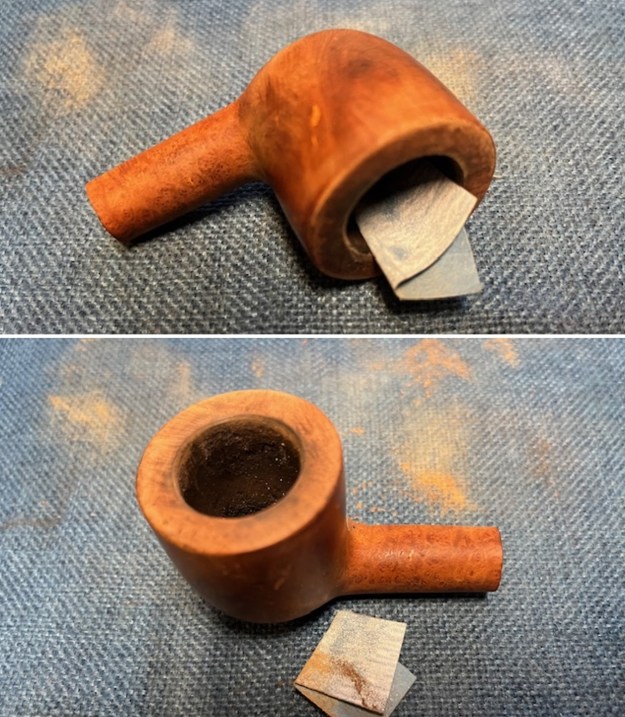 I sanded the bowl with 320-3500 grit sanding pads to further smooth it out and remove the nicks and scratches in the briar. The bowl was progressing in smoothness and beauty.
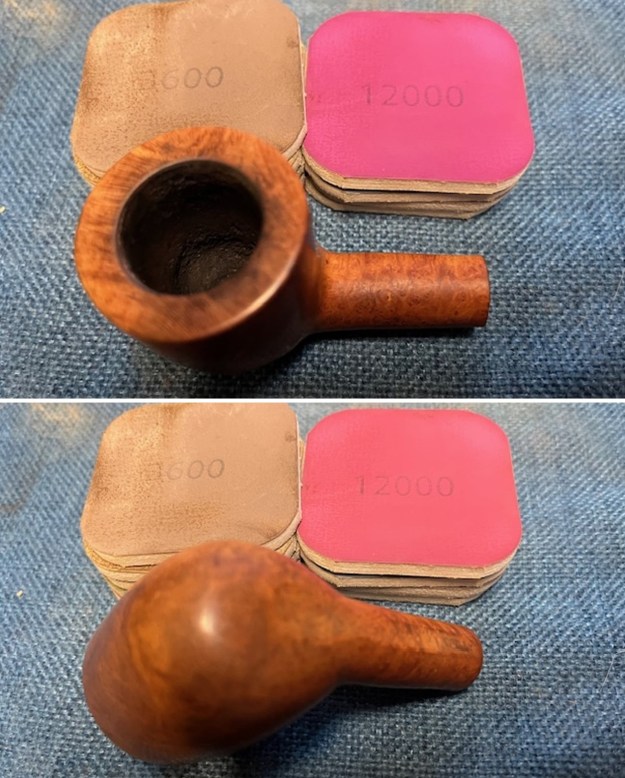
 I polished the briar with the nine micromesh sanding pads – dry sanding with 1500-12000 grit pads. I wiped the bowl down with a damp cloth after each pad. The bowl took on a rich shine.
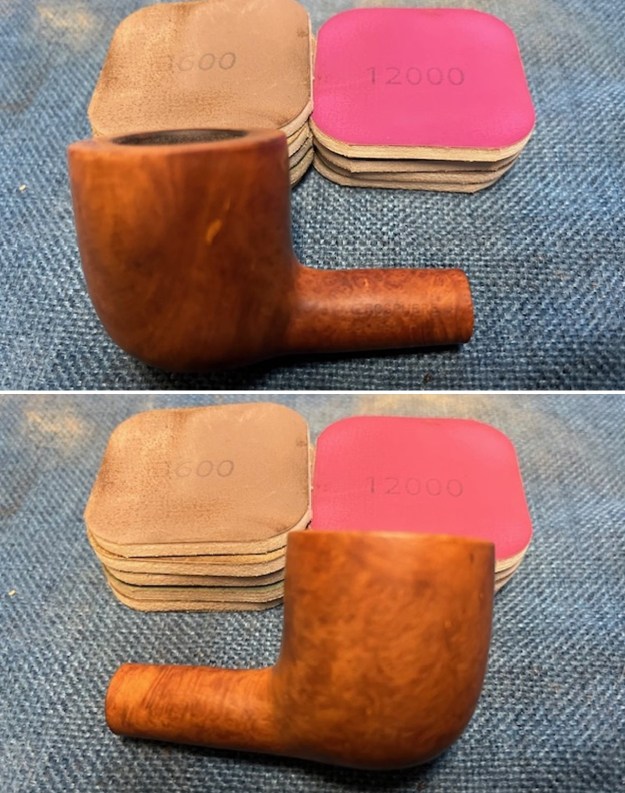
 I rubbed the bowl down with Before & After Restoration Balm. It is a paste/balm that works to deep clean the finish, enliven and protect the briar. I worked it into the briar with my finger tips to make sure that it covered every square inch of the pipe. I set it aside for 10 minutes to let it do its work. I buffed it with a cotton cloth. The briar really began to have a deep shine. The photos I took of the bowl at this point mark the progress in the restoration.
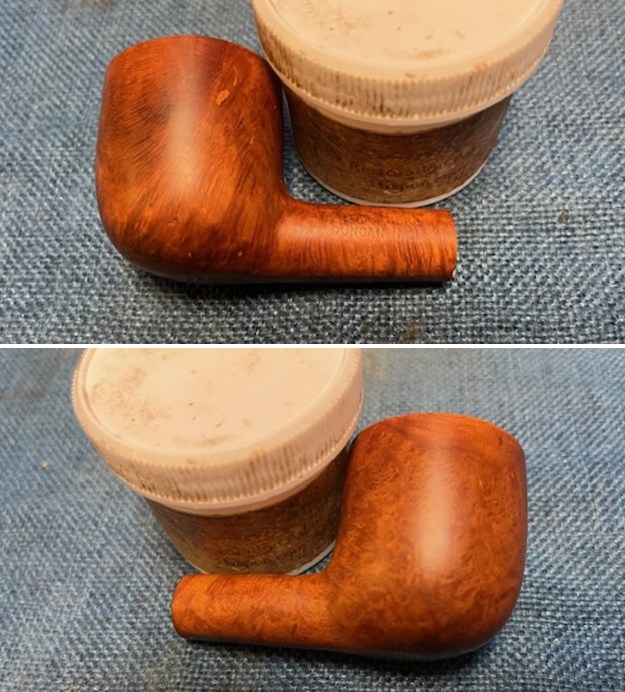
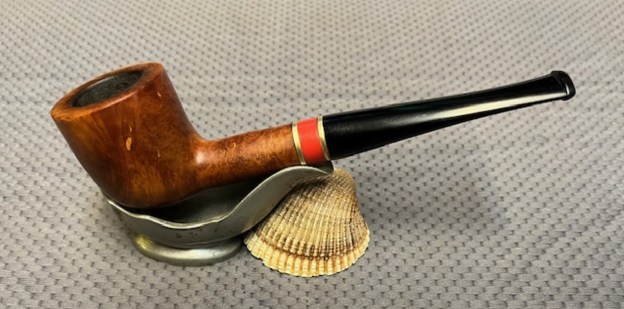
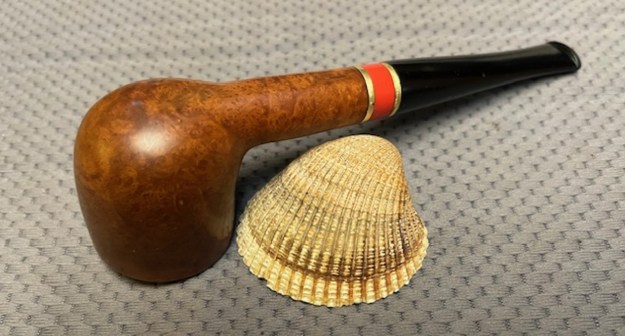
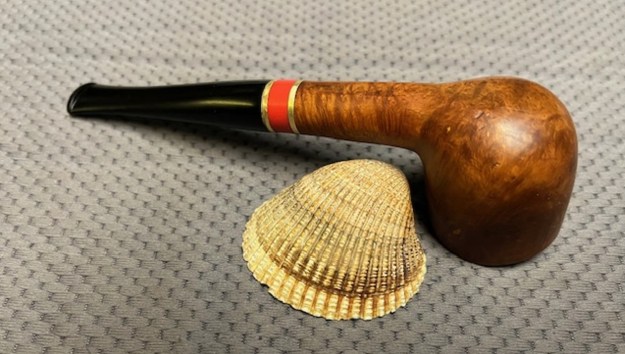
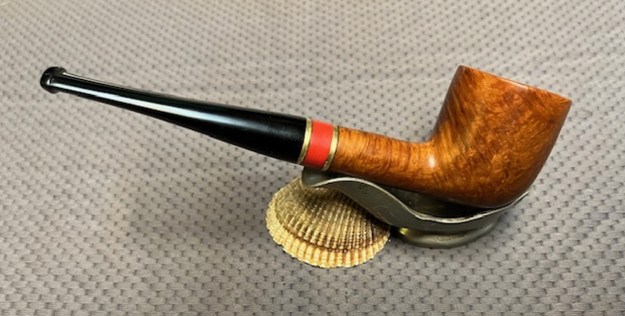
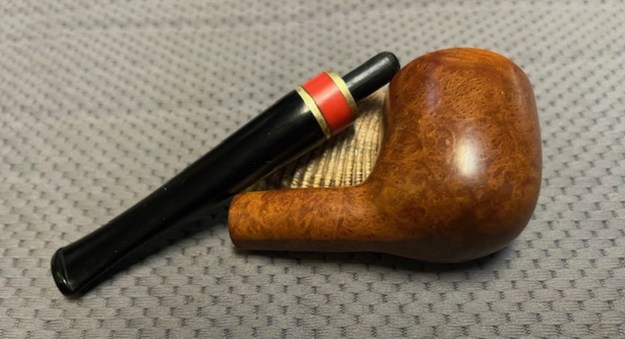
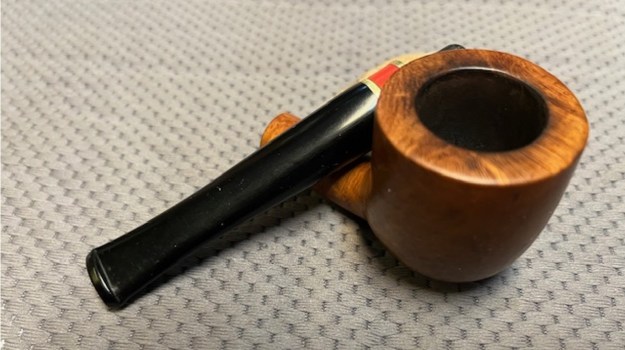
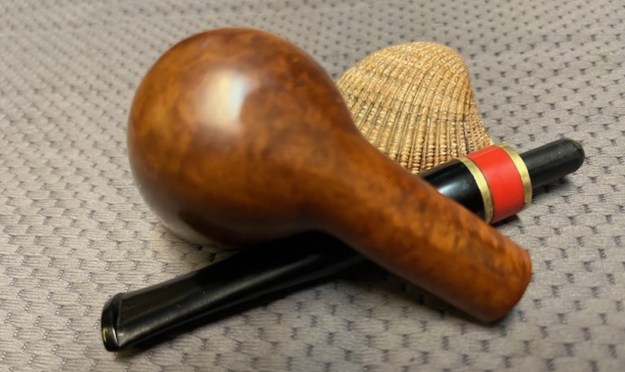
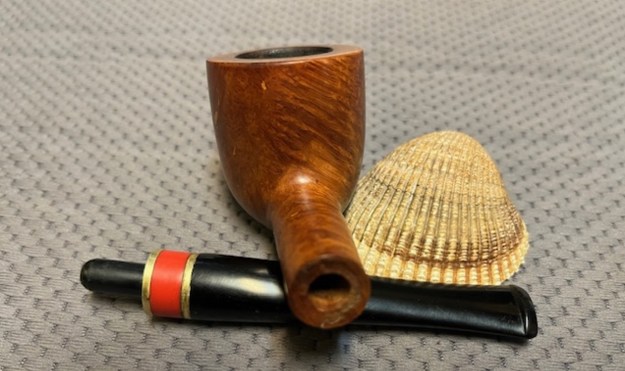
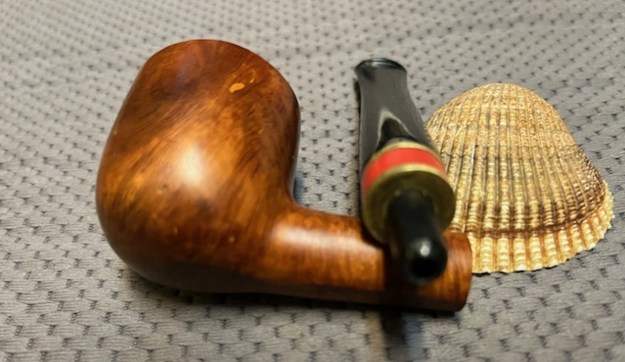
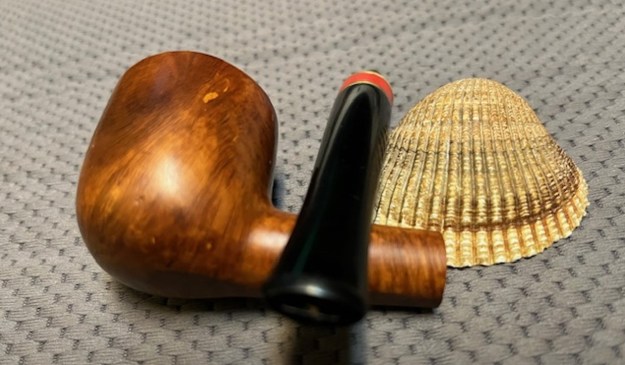
 I put the Duncan Hill Aerosphere Pot Bowl and the new stem together. I polished the bowl and stem with Blue Diamond to polish the briar and the vulcanite. I gave the bowl multiple coats of Conservator’s Wax and the stem multiple coats of carnauba wax. I buffed the pipe with a clean buffing pad to raise the shine. I hand buffed it with a microfiber cloth to deepen the shine. The pipe polished up pretty nicely. The original brown stains worked amazingly well with the polished vulcanite taper stem. The grain around the bowl and shank and looks quite remarkable. This is truly a beautiful Duncan Hill Aerosphere. The finished pipe is shown in the photos below. The dimensions of the pipe are Length: 6 inches, Height: 1 ½ inches, Outside diameter of the bowl: 1 ½ inches, Chamber diameter: 7/8 of an inch. The weight of the pipe is 1.52 ounces/42 grams. This is such a unique shape that I am going to enjoy it for awhile before deciding what to do with it. Thanks for walking through the restoration with me. Cheers.
As always, I encourage your questions and comments as you read the blog. Thanks to each of you who are reading this blog. Remember we are not pipe owners; we are pipe men and women who hold our pipes in trust until they pass on into the trust of those who follow us.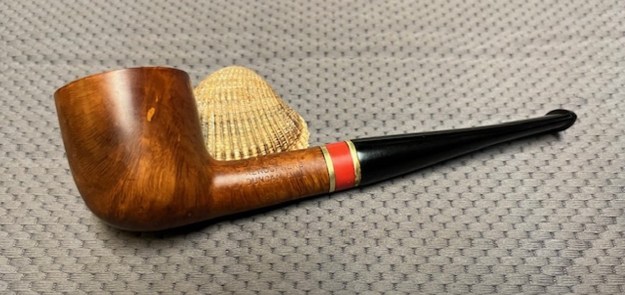


I Wasn’t finished and some how hit send.
I really appreciate the effort you put into this restoration. I was wondering if it would be a lost cause without its stem. I search and find these pipes and feel as though I am rescuing them. They are works of art and deserve whatever gallery we can provide. I feel as though these estate pipes have a history worth saving even if sometimes we are not privey to that story. I enjoy passing them along to younger folks that will appreciate them and pass them to someone in their future. With your description and analysis of these pipes they now have new start with a story. For that sir i am truly greatful. I collect some other things that I feel the same way about.
Thank you,
Rob Connolly
LikeLike
Steve, I am so pleased with the results from your efforts with the Aerosphere. The pipe looks like it was born with that stem.
LikeLike
Thanks Rob. It looks good in person
LikeLike
Masterful work Sir!
Sent from Gmail Mobile
LikeLike