Blog by Steve Laug
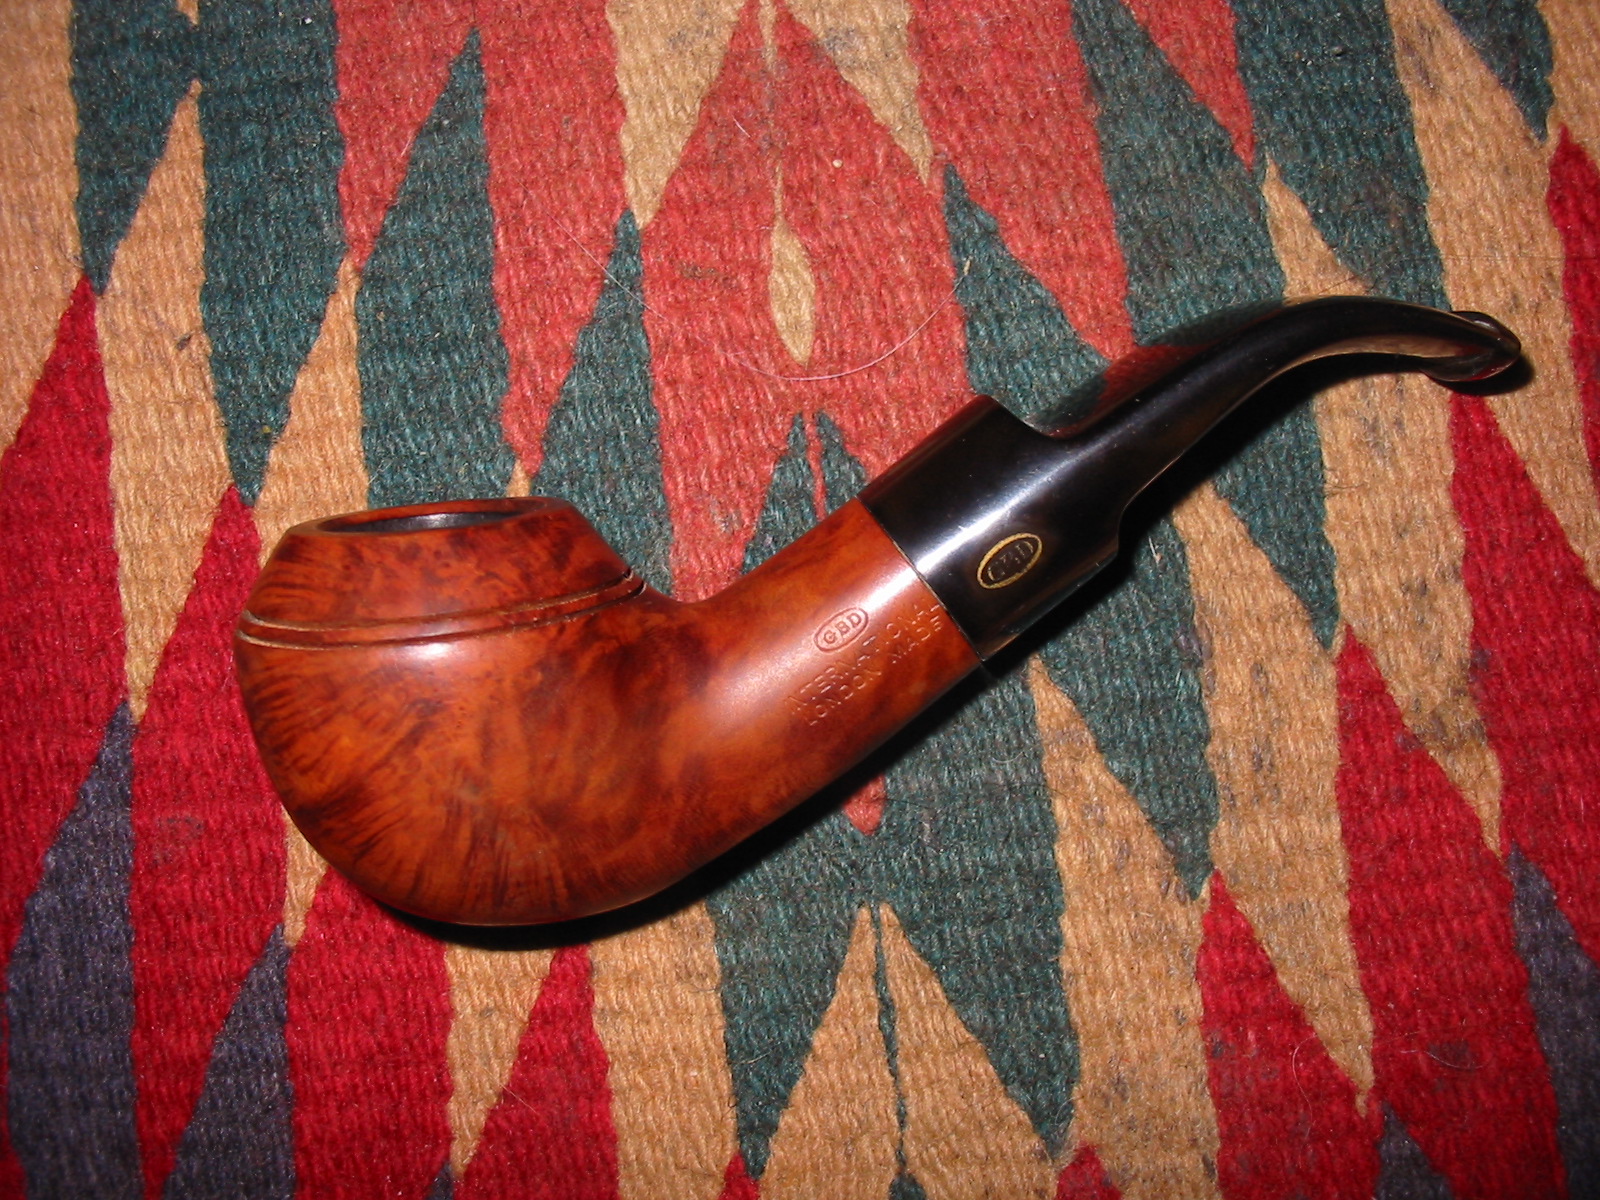
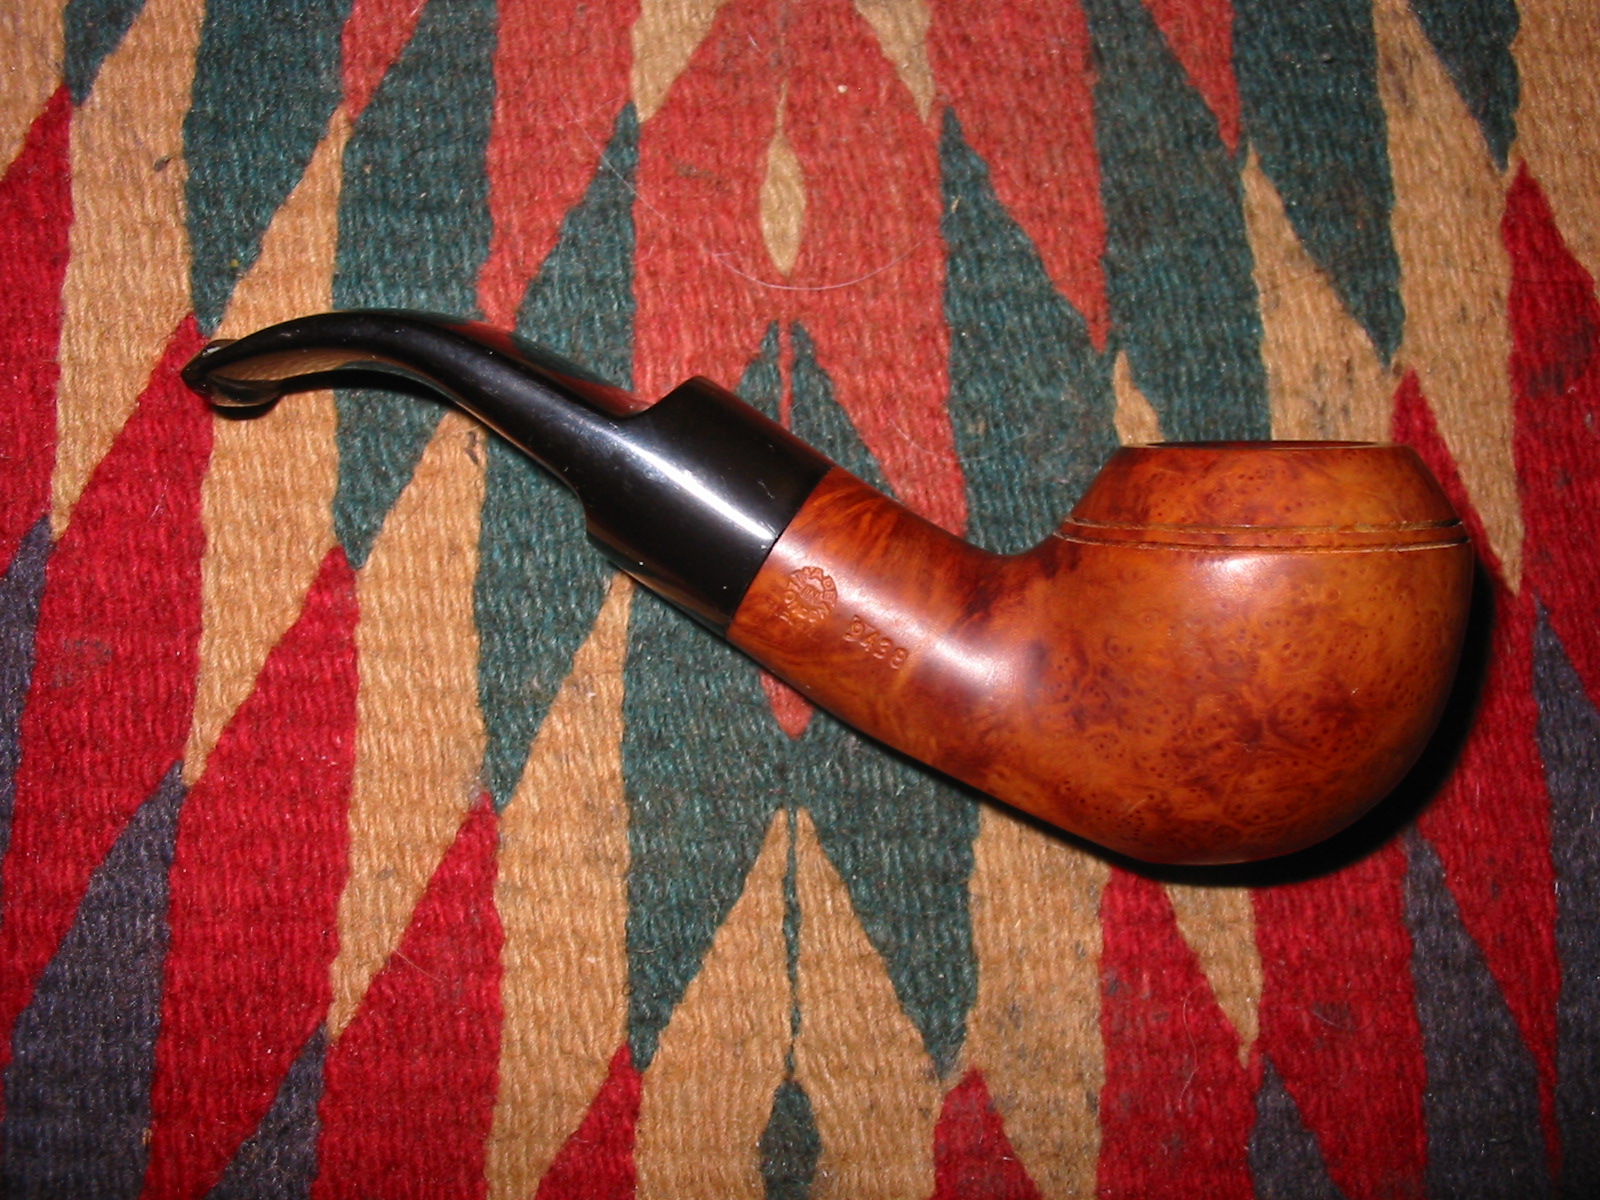
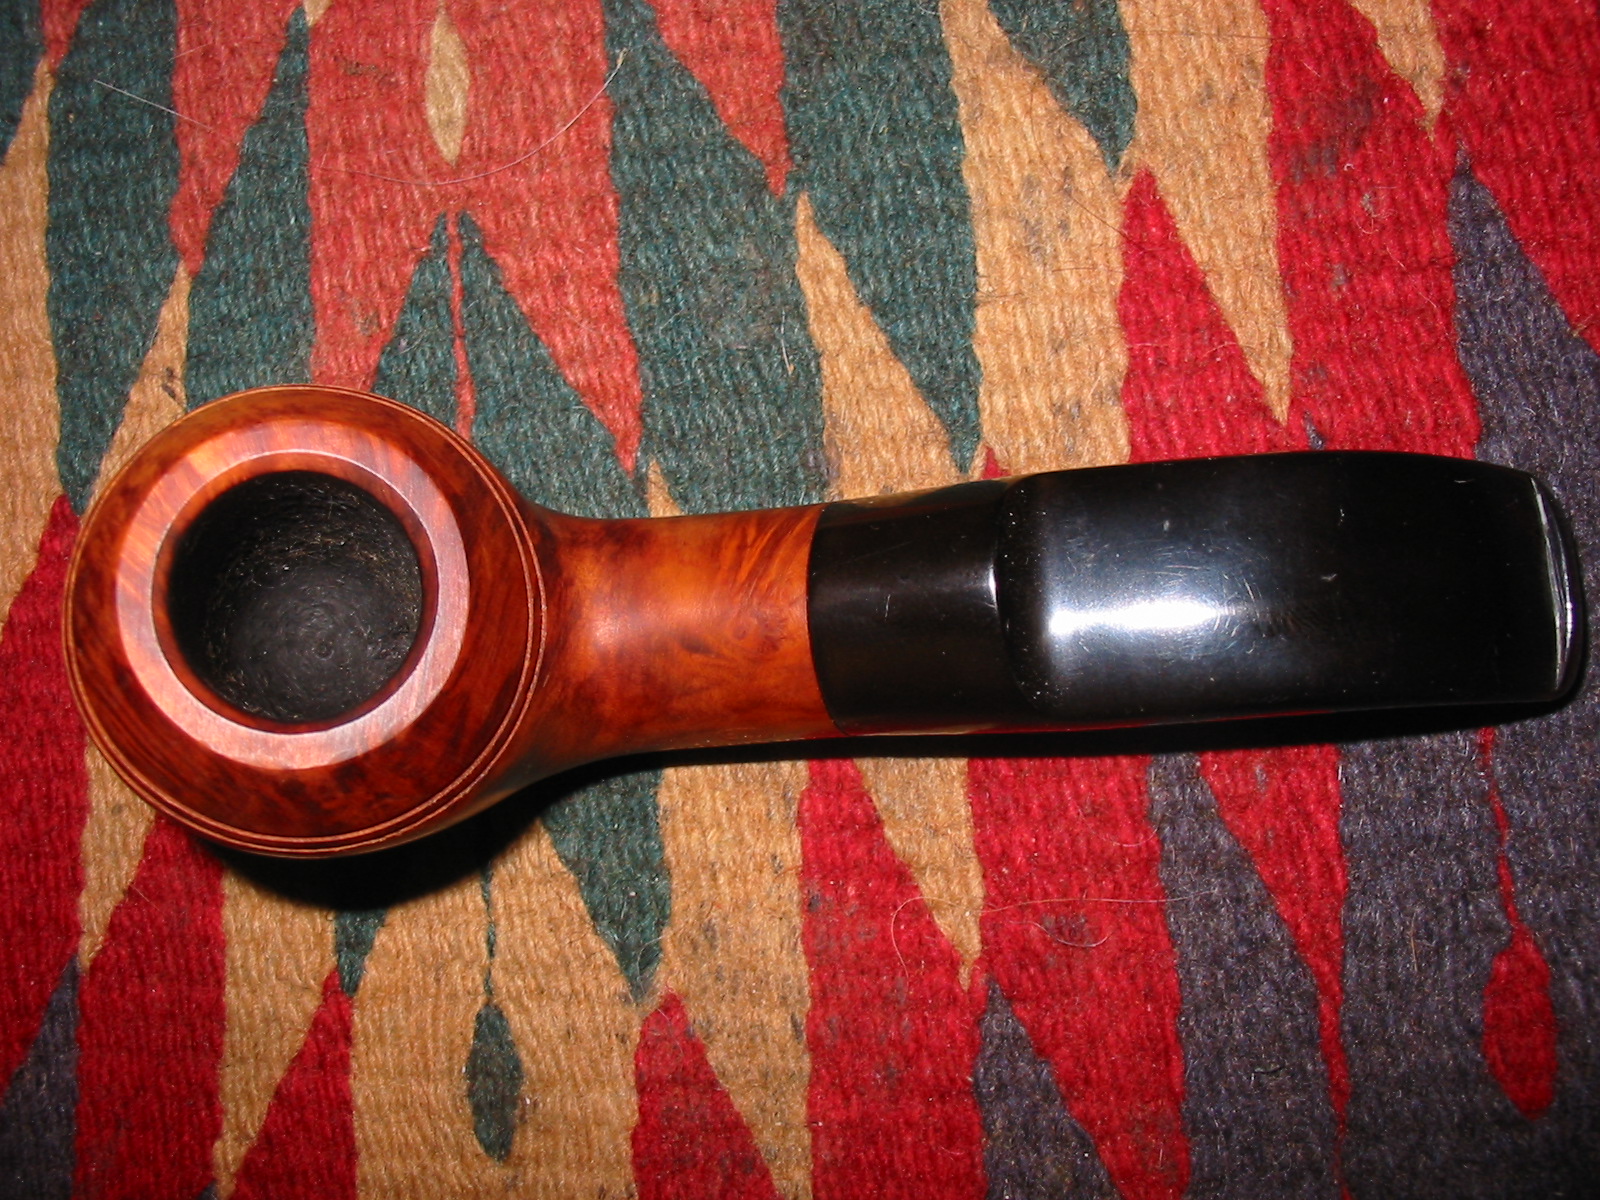
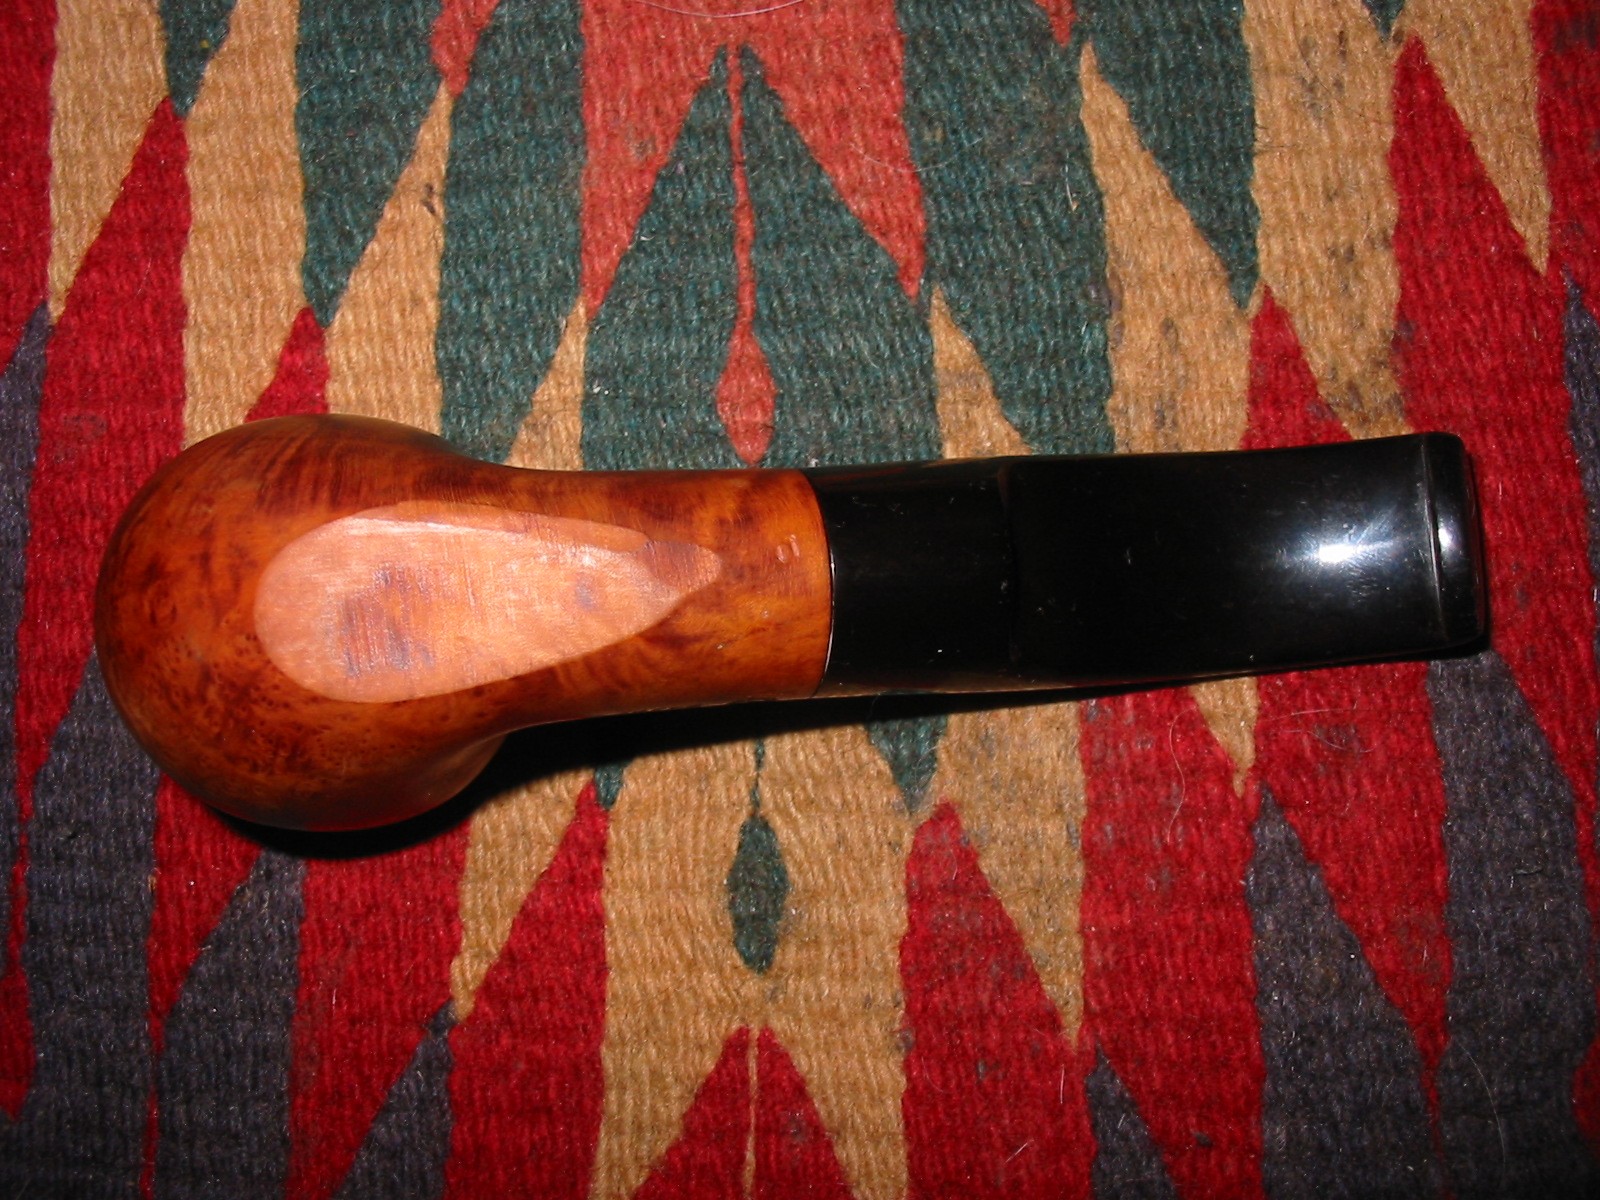
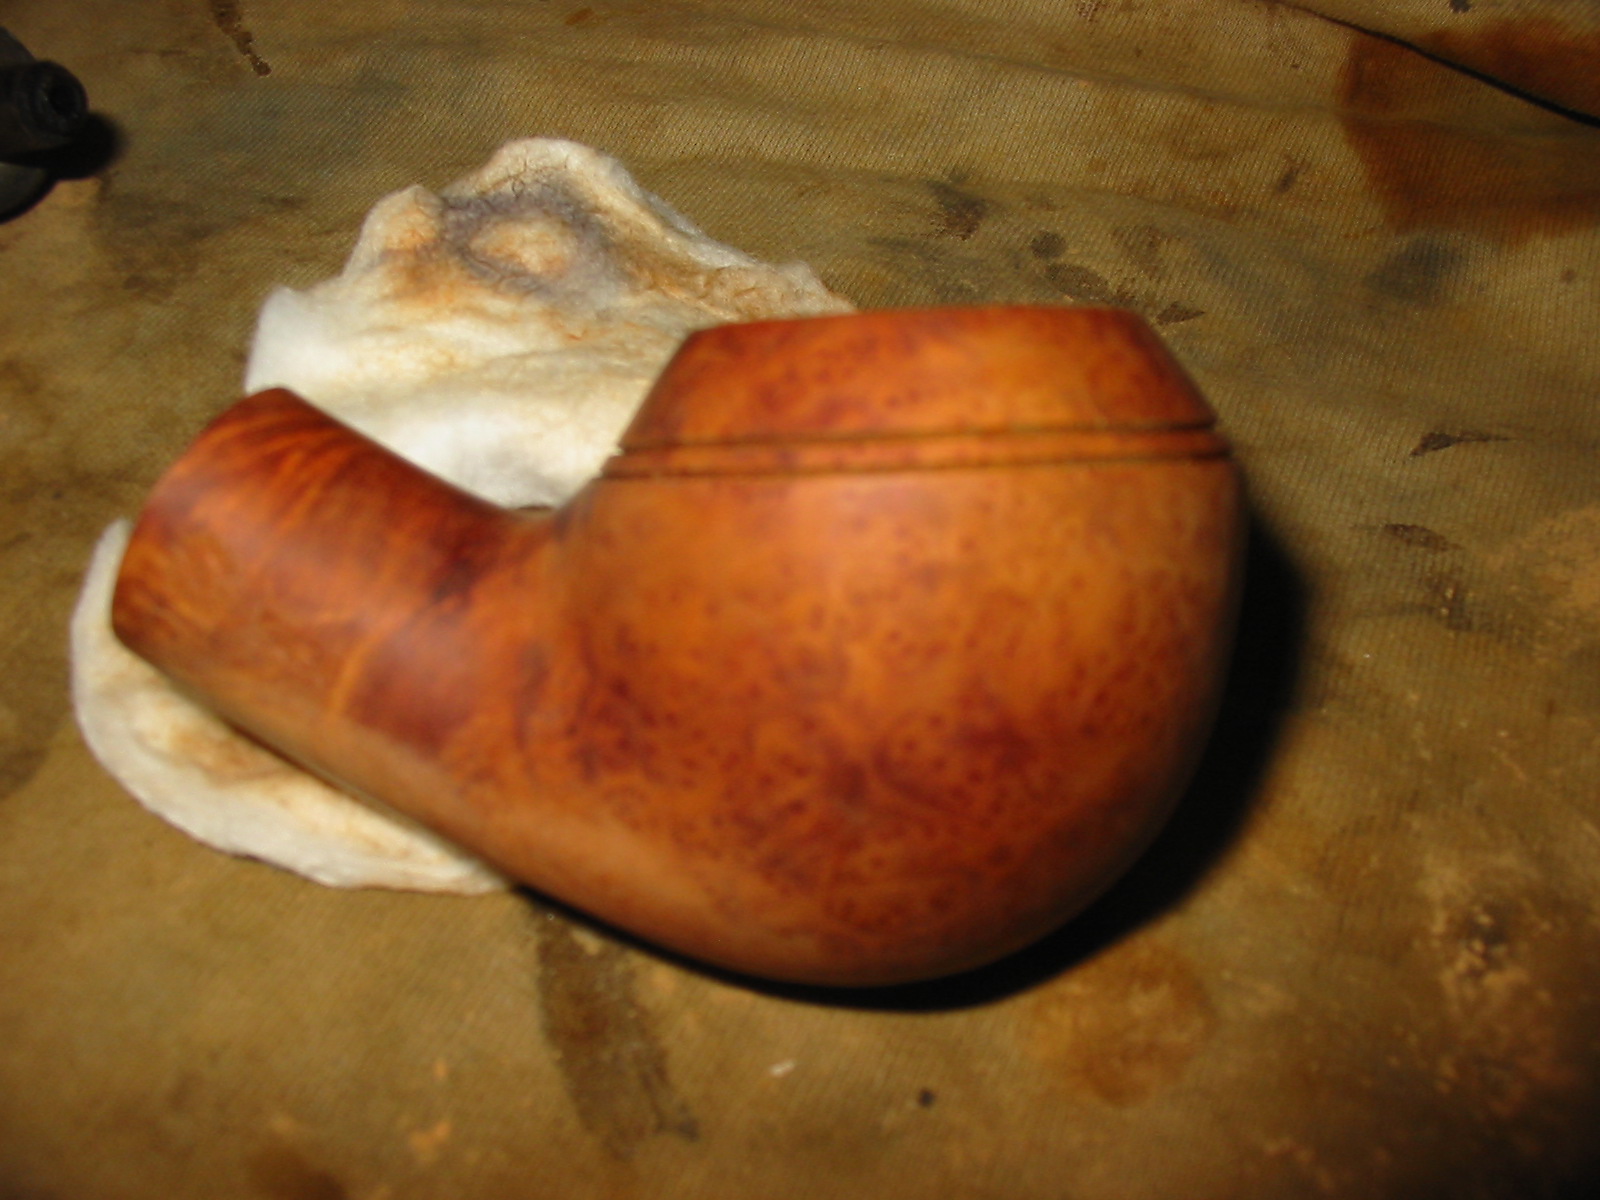
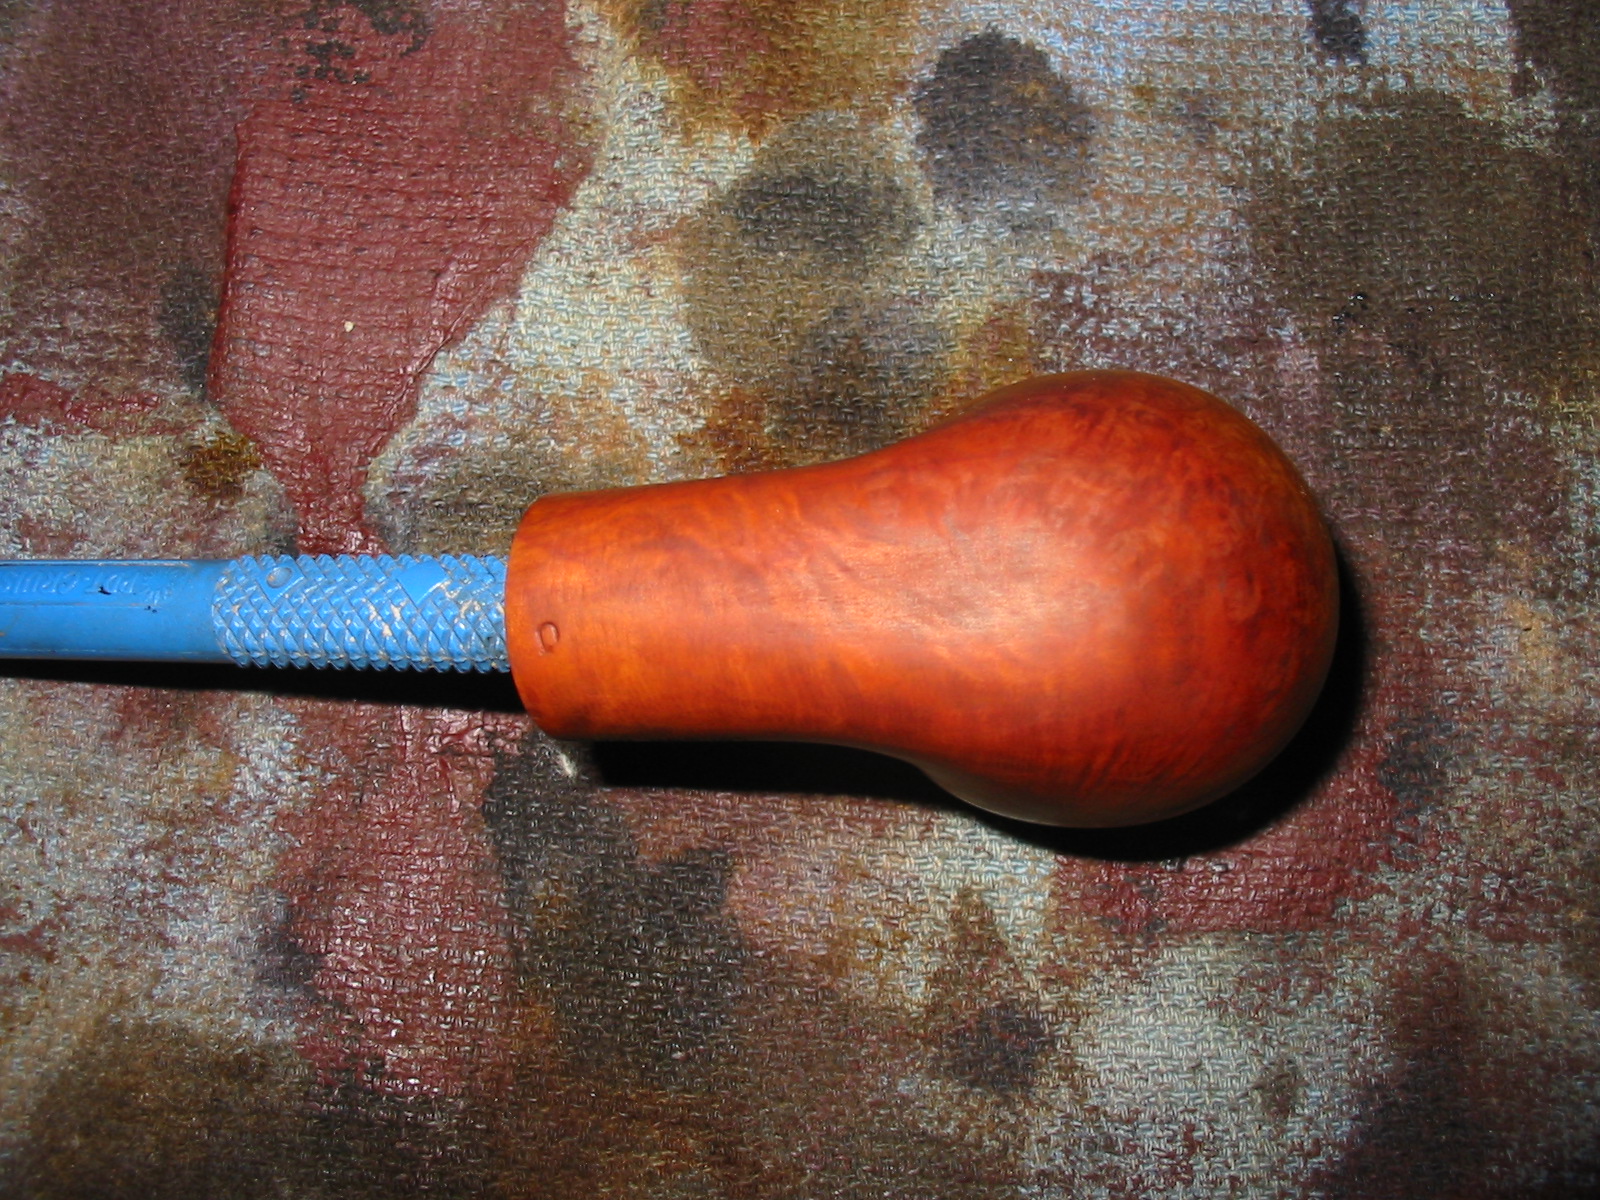
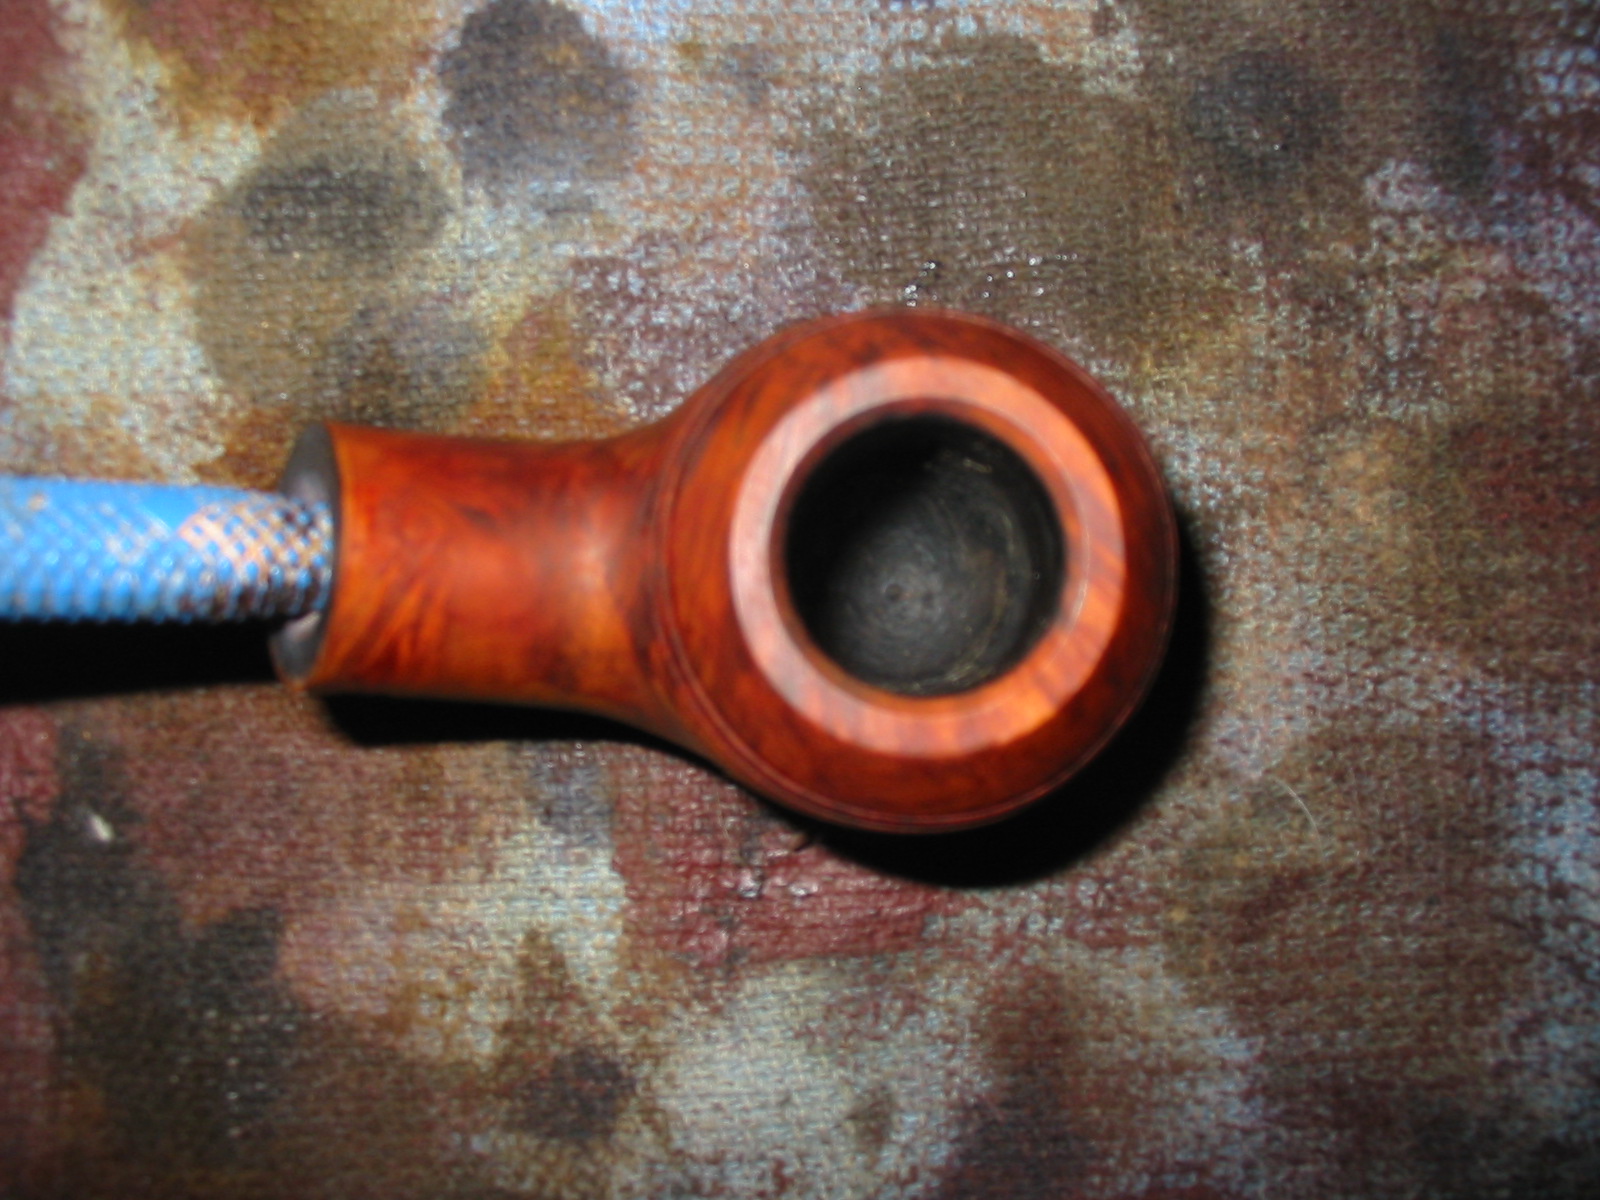
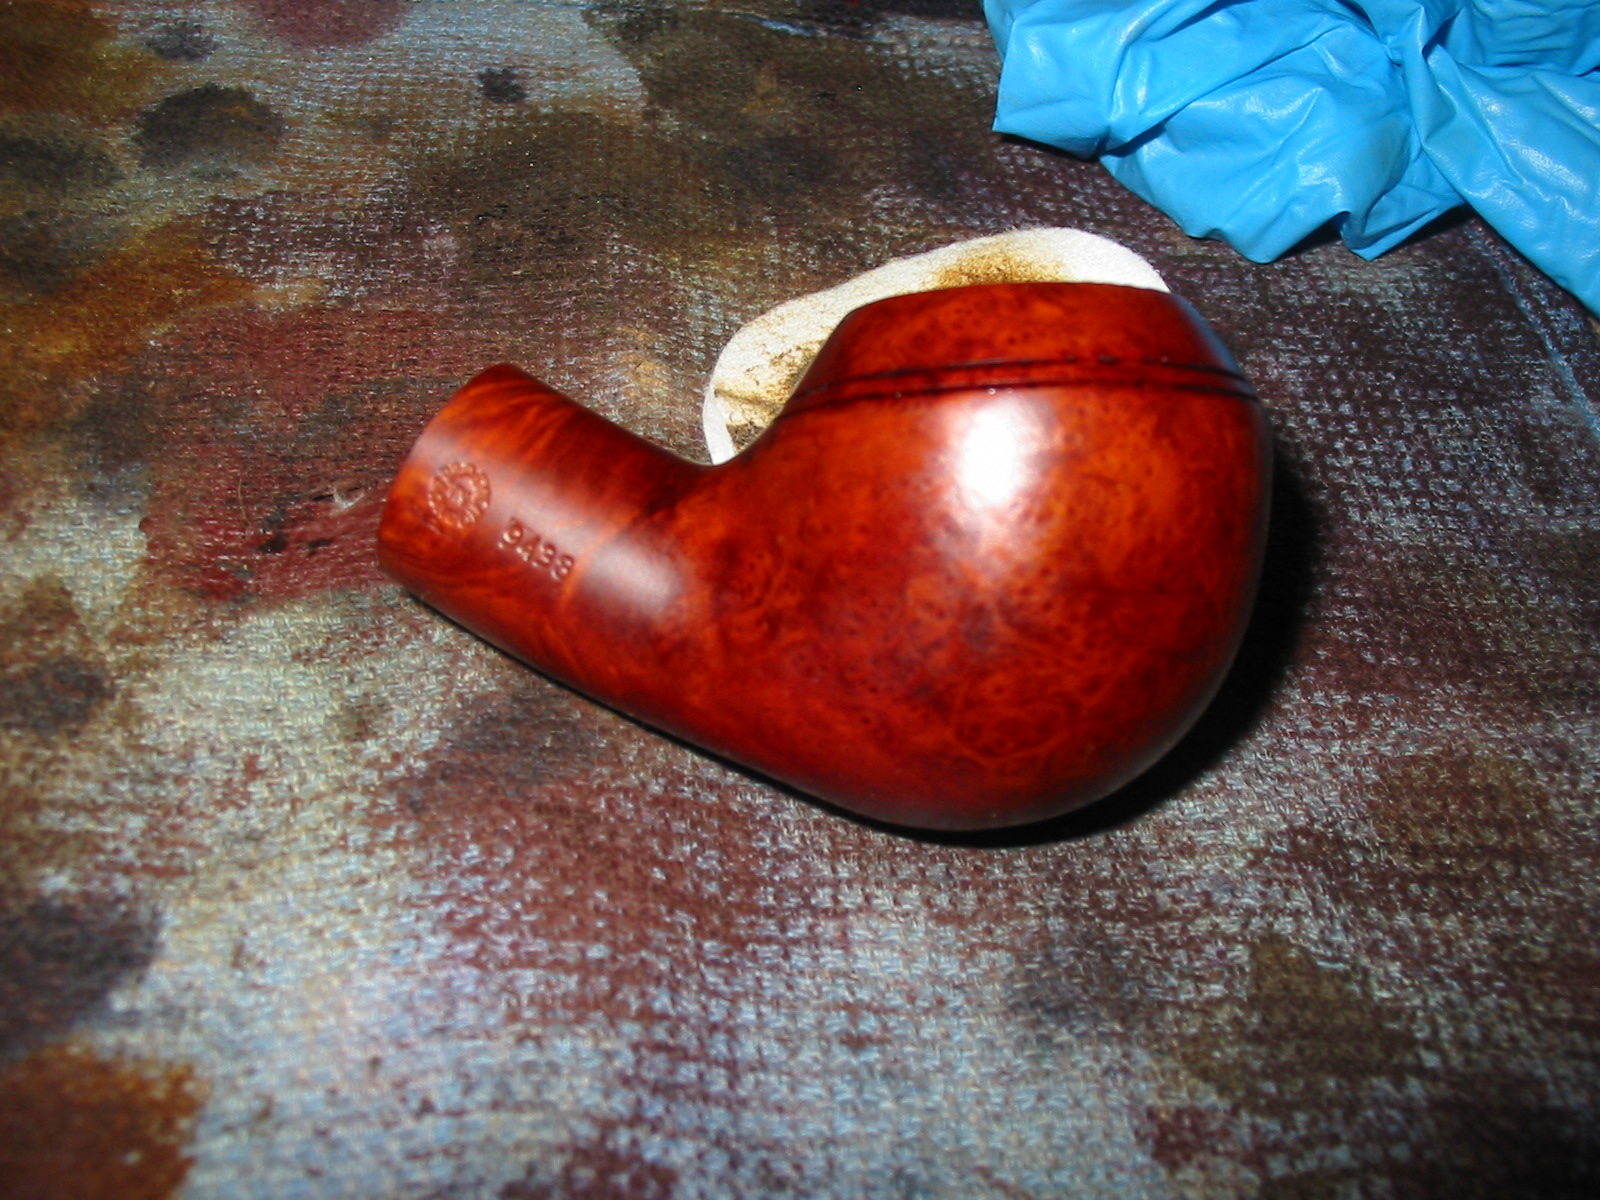
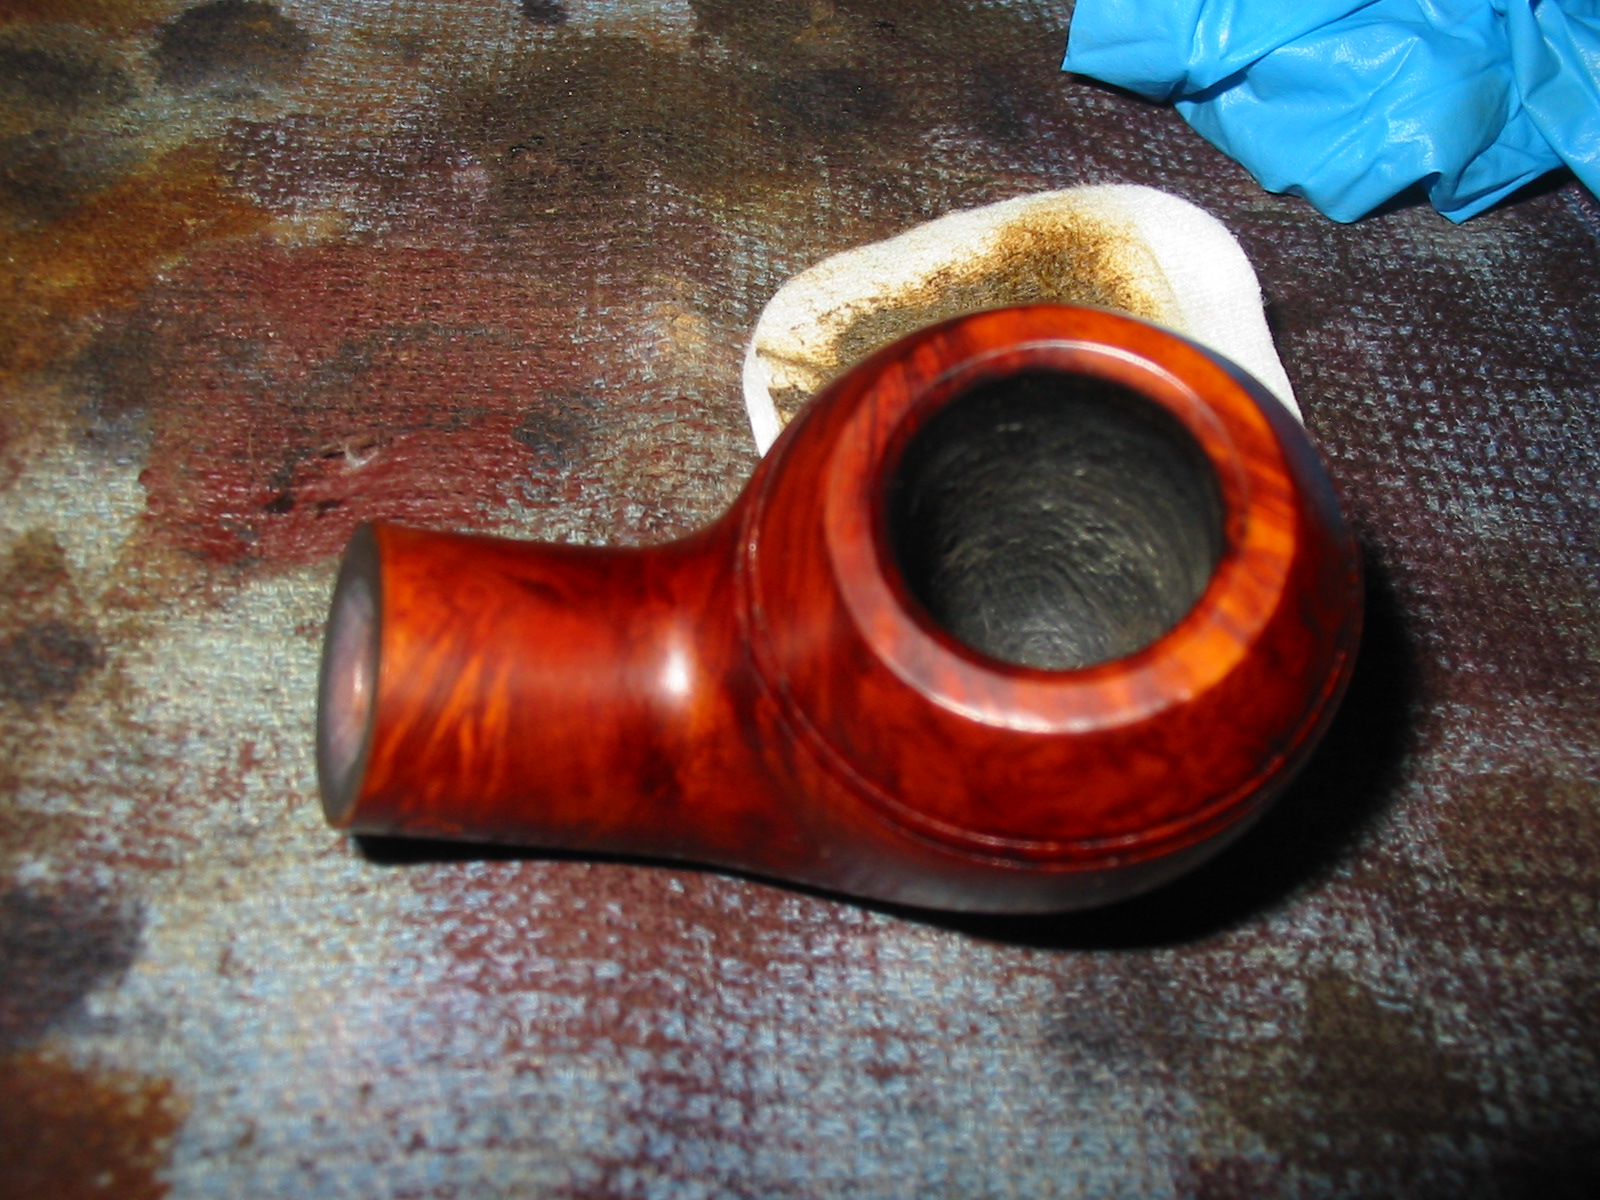
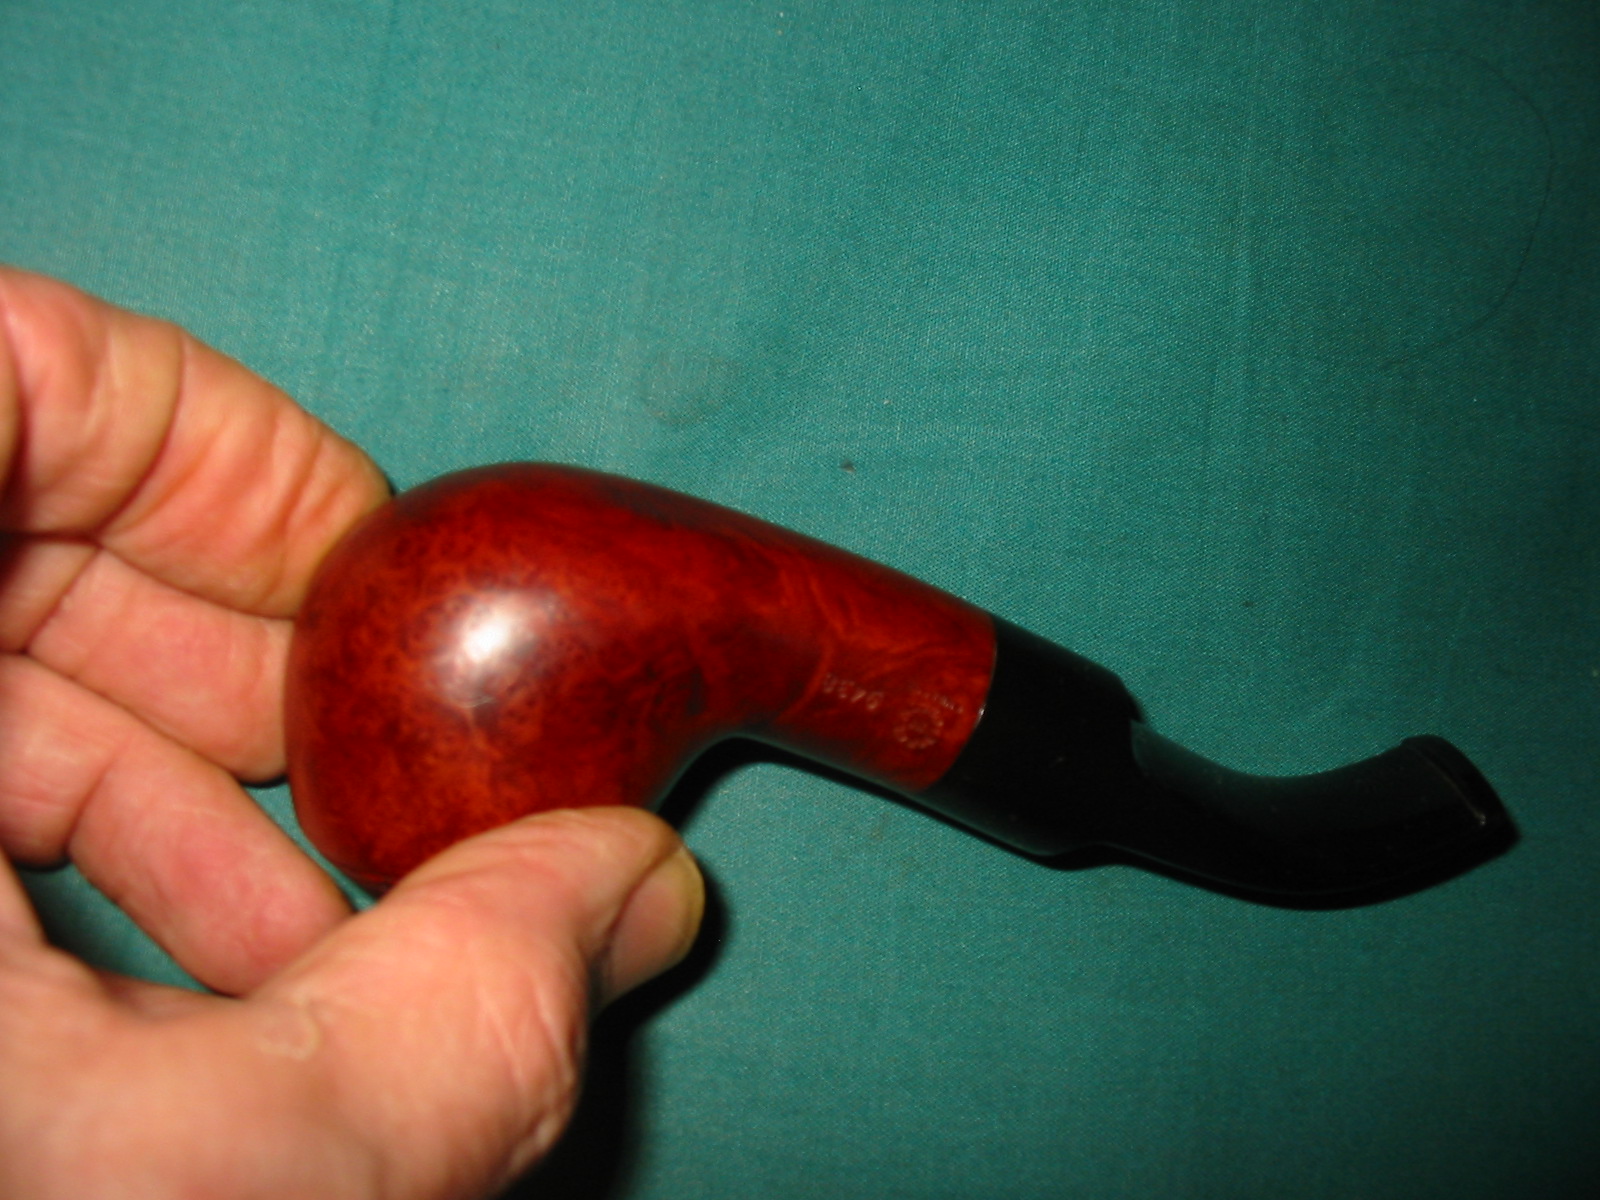
I am working on a pipe for Mark and in exchange he sent me a GBD 9438 pipe – one of my all time favourite shapes. It is stamped on the left side of the shank GBD in an oval over International over London Made. On the right side of the shank it is stamped with the Made in London Circle (with in centered in the circle) over England in a straight line. Next to that it is stamped 9438. The stamping makes it clear that this is a newer GBD pipe from the Cadogan era. The stem has a gold decal on it – an oval with GBD in the center. It is not a roundel just a decal that is applied to the surface of the stem. The shape of the stem is slightly wider and flared as it moves away from the saddle area. It is slightly different in shape from my other 9438 pipes. It was in very good shape and the bowl was also clean and undamaged. The rim was unmarked on both the top and outer edges as well as the inner bevel. There was no rim darkening or damage. The only issue was that someone had decided to make it a sitter and flattened the bottom of the shank so that it would sit on a table without tipping. The finish was virtually gone and the flattened area was heavily scratched with little or no sanding to smooth out the work. It appeared to be a quick job of pressing the pipe against a sanding disk or orbital sander.
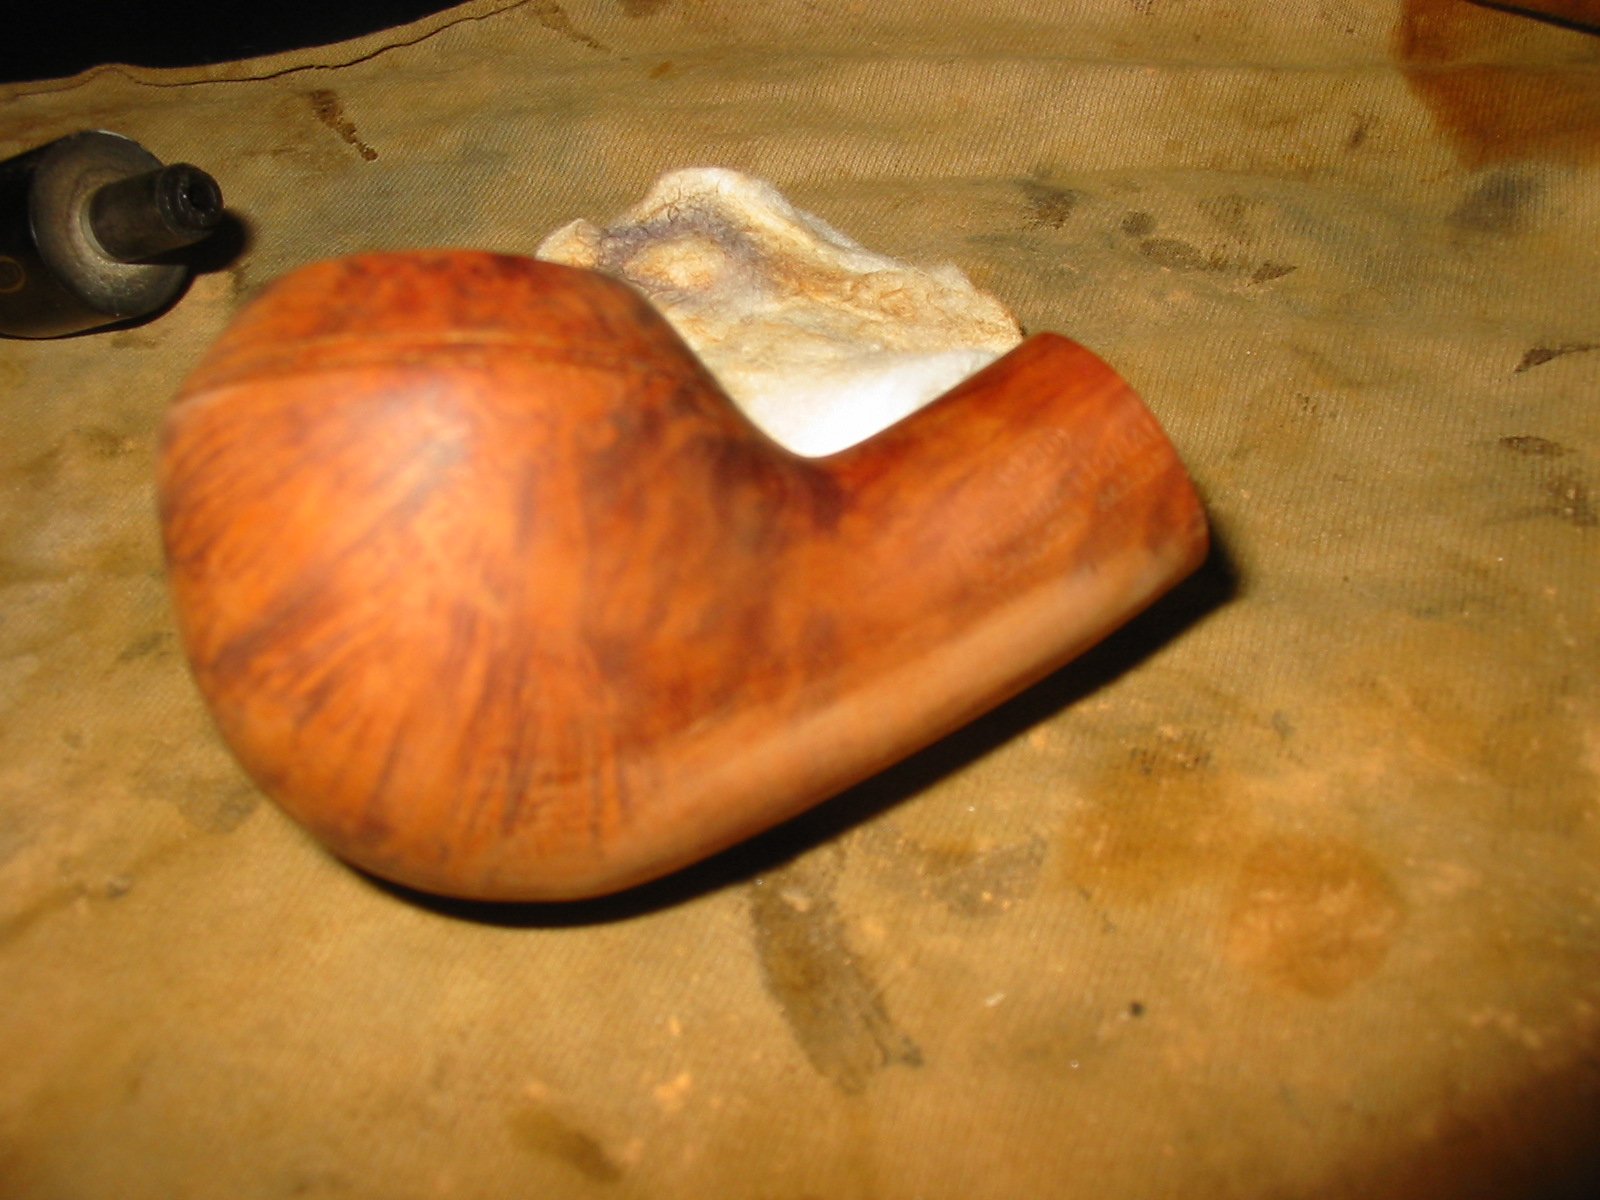
I removed the stem and began to reshape the flattened portion of the bowl and shank. Fortunately the sanding was done behind the drilling of the bowl so it did not thin the bottom of the bowl at all. The person who did the sanding had carefully sanded only the thickest part of the bowl and shank. I sanded the briar with a sanding drum on a Dremel to smooth out the sharp edges of the bottom and then used a folded one inch pieces of 220 grit sandpaper to further smooth out the abrupt edges of the flattened area. I used a medium grit sanding sponge to continue to remove the scratches left behind by the sandpaper.
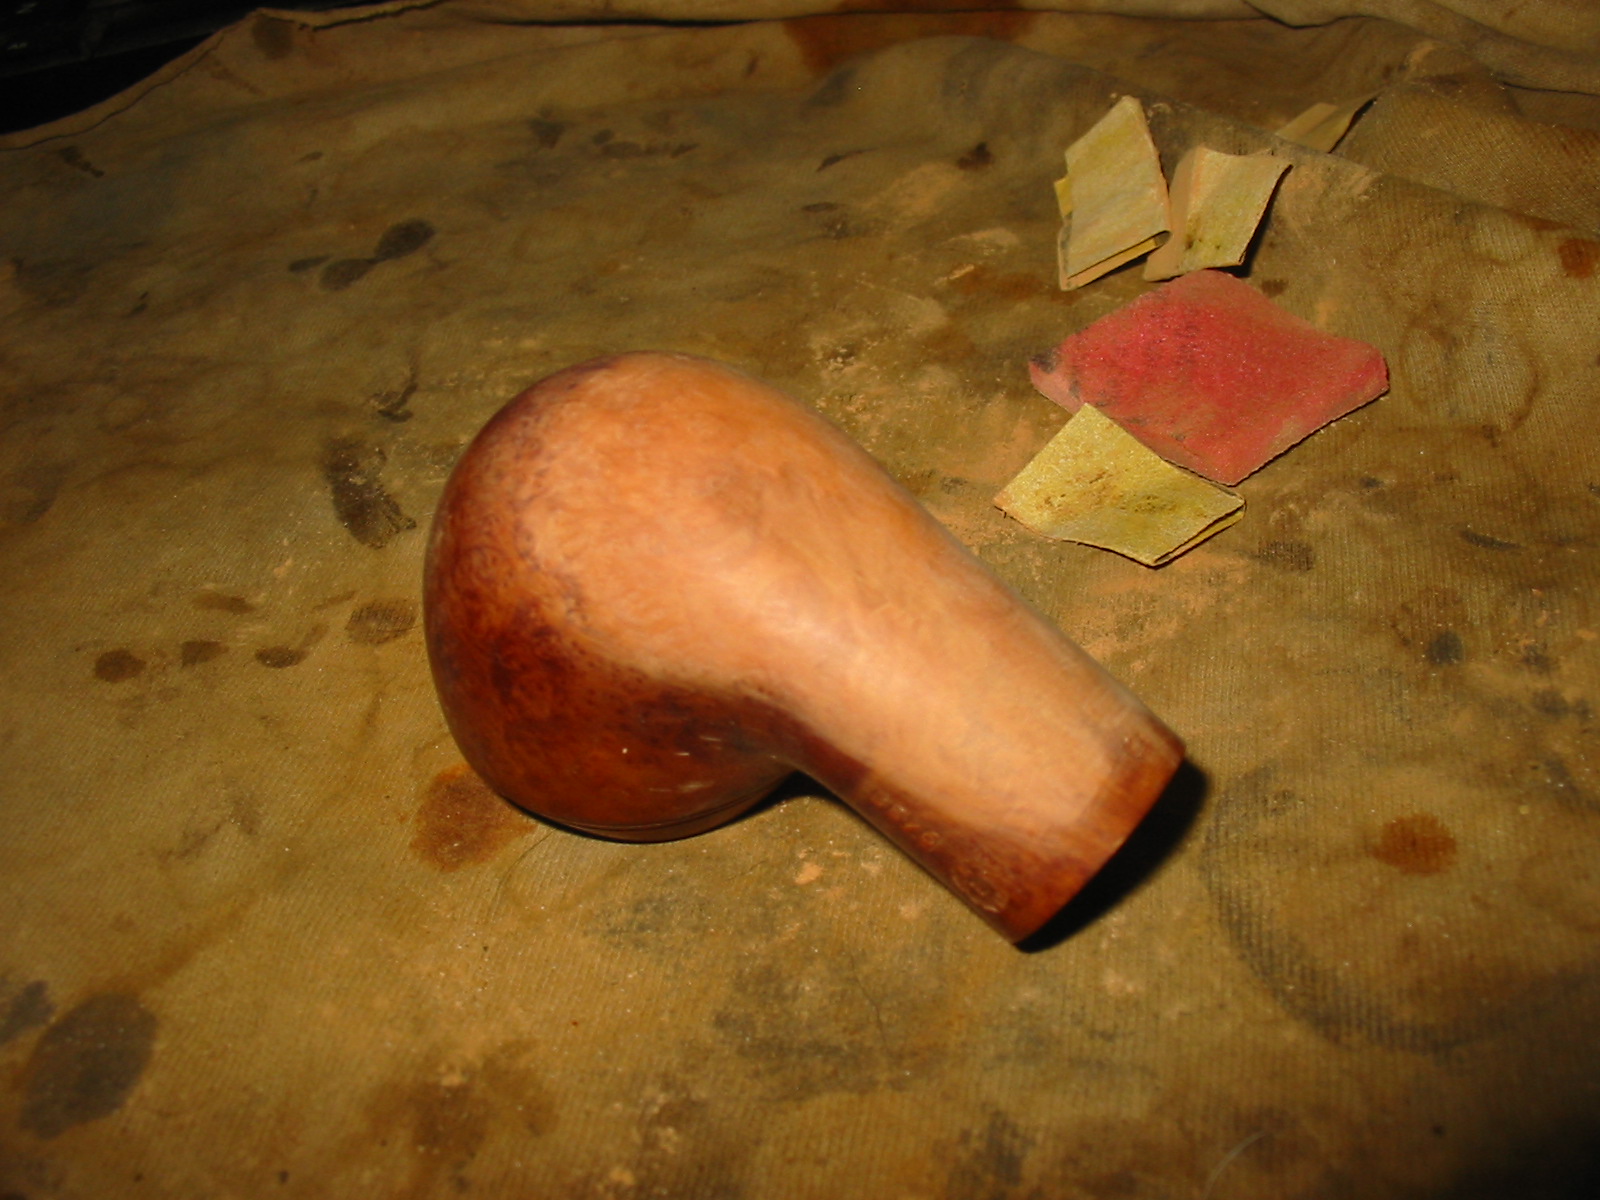

I wiped the bowl down with acetone on cotton pads to remove the finish so that I could more easily blend in the stain with the newly sanded bottom of the shank and bowl.

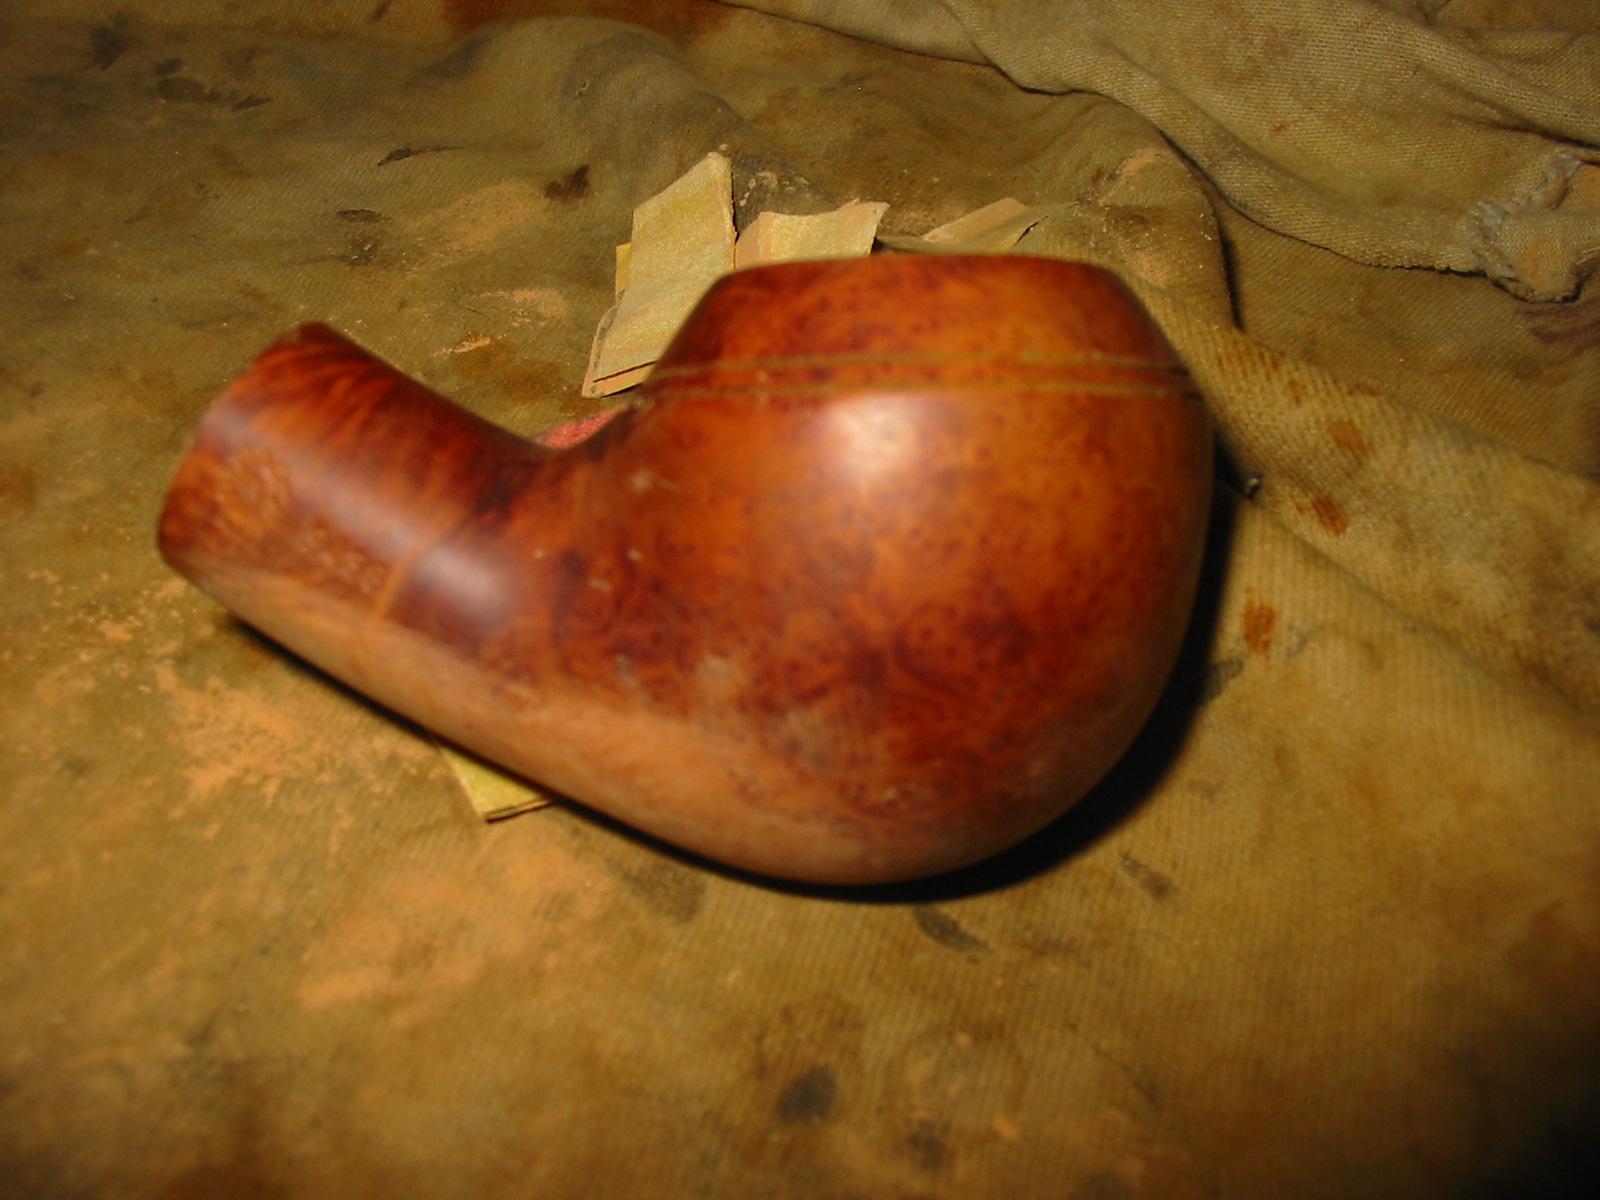
I sanded the reshaped shank and bottom of the bowl with 1500 and 1800 grit micromesh sanding pads. I wiped it down a final time with acetone.
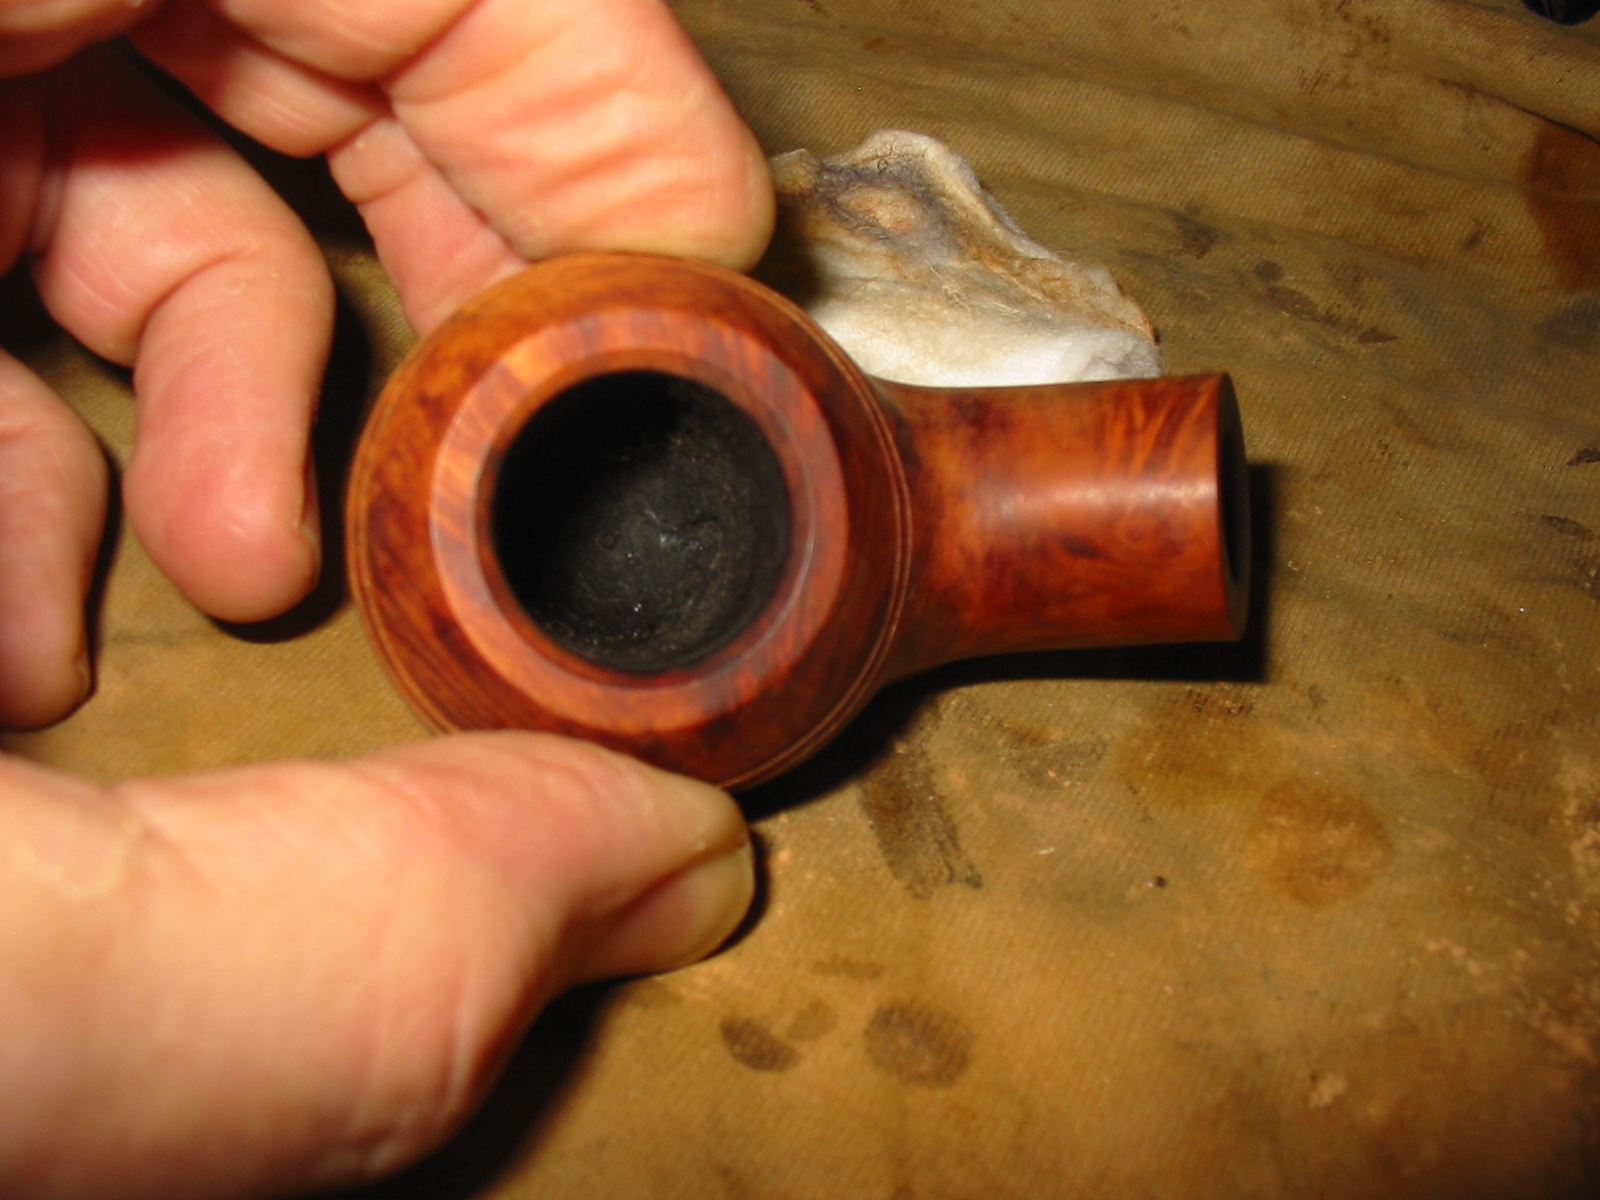
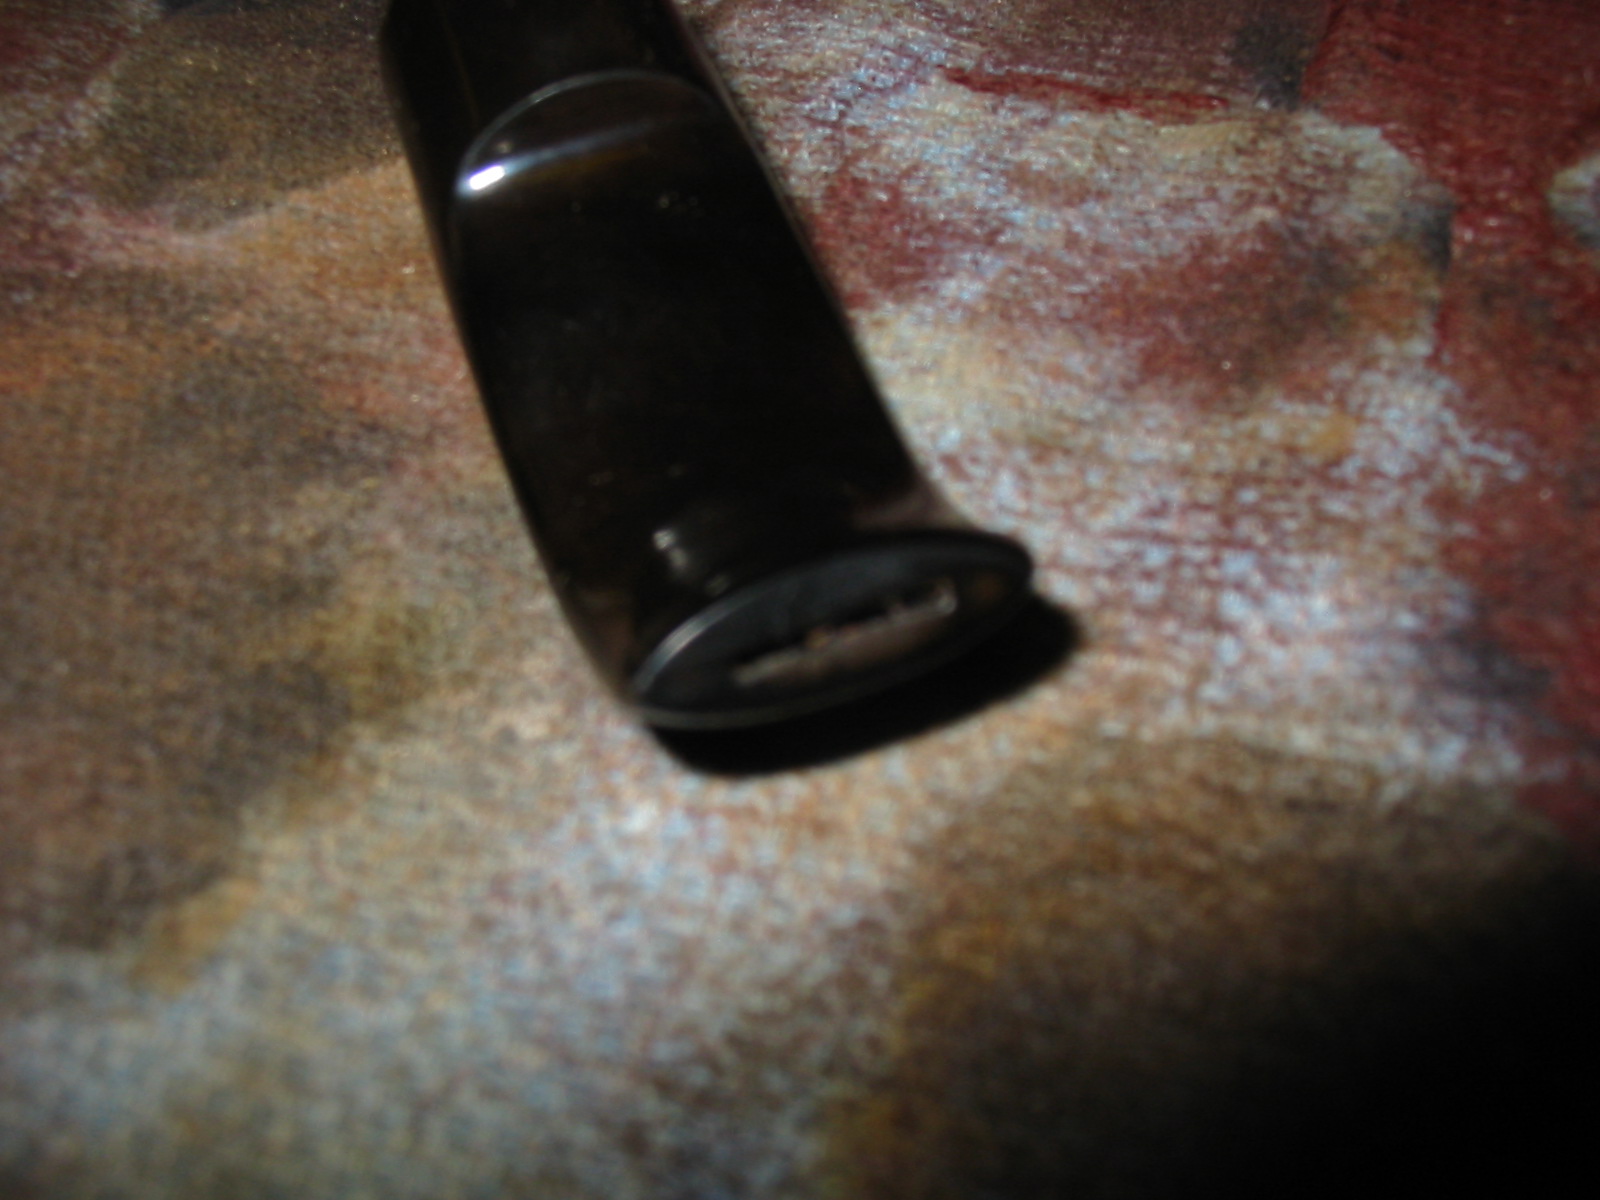
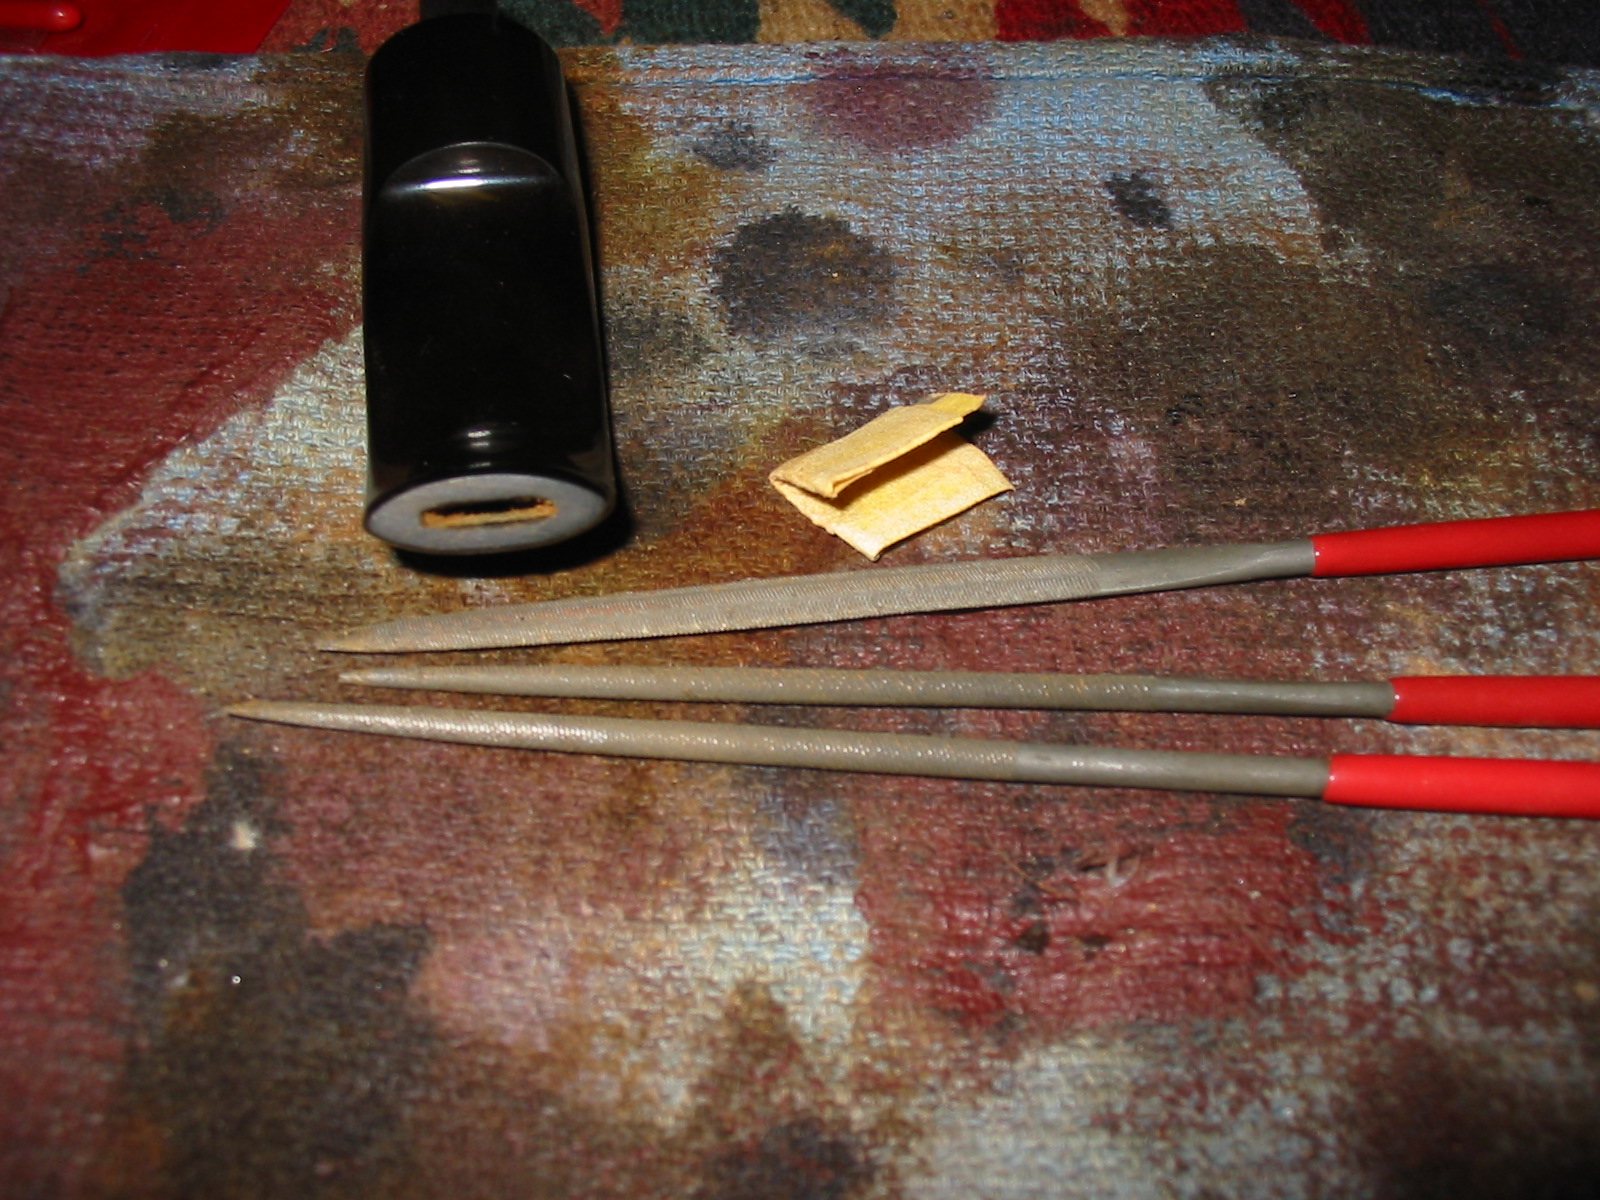
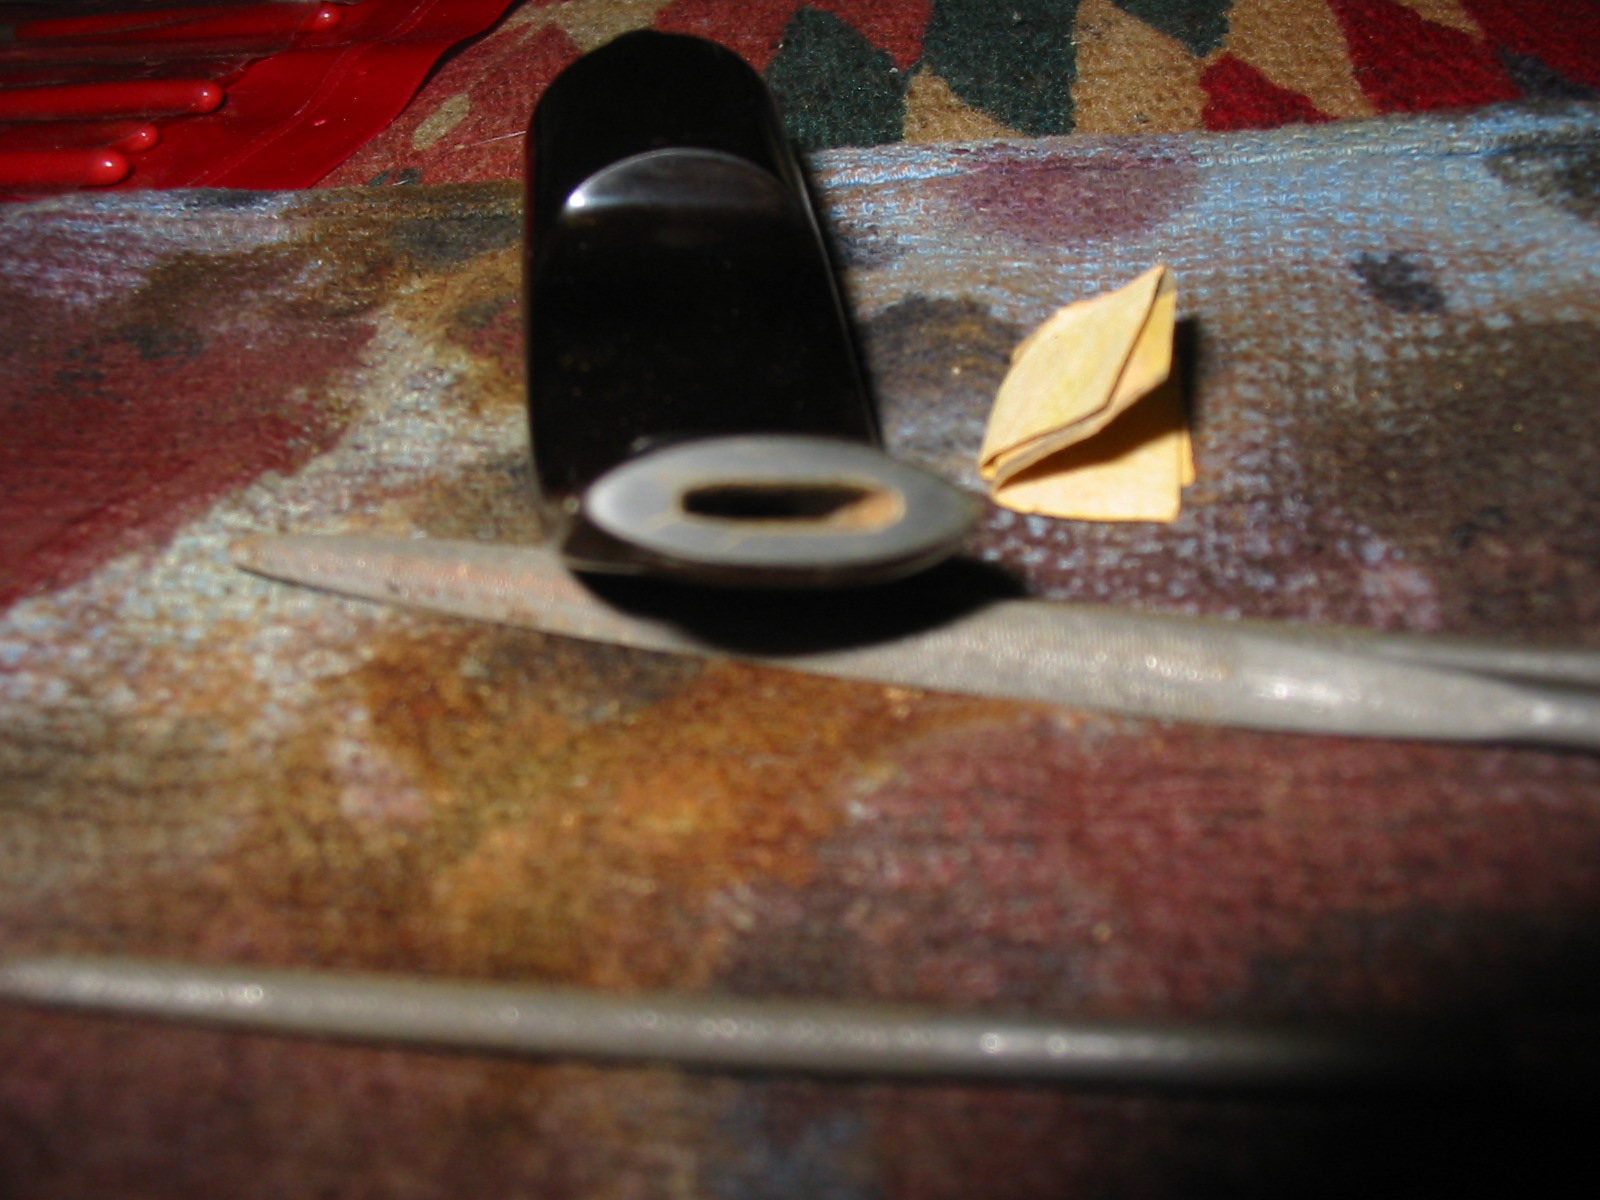
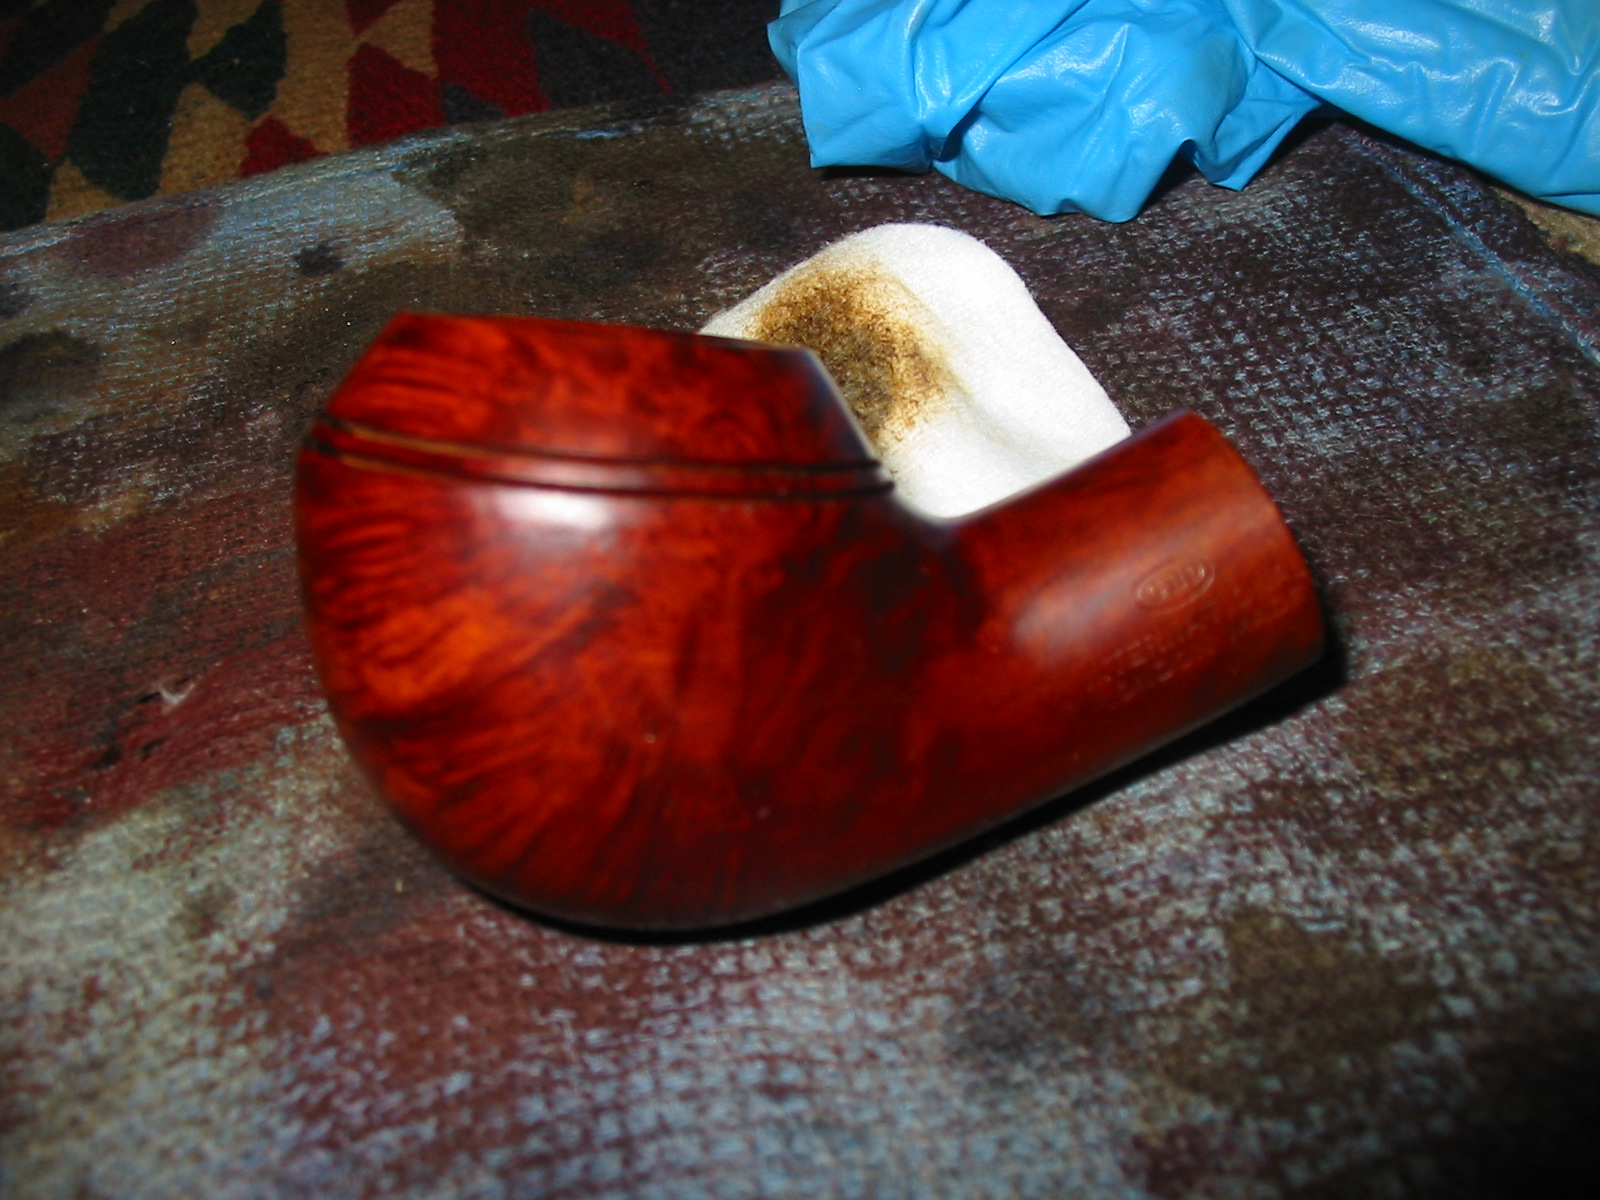
I cleaned out the shank and the bowl with Everclear and cotton swabs. I also used a pipe cleaner to clean out the stem. The slot in the button was very tight and would not allow even a thin pipe cleaner to pass through so I used needle files to open the slot. Once it was open and allowed a pipe cleaner to slide in with ease I used a folded piece of 220 grit sandpaper to sand the inside edges of the slot and smooth it out from the files. The first photo below shows the slot before my work with the files. The remaining three photos show the progressive opening of the slot with the files and sandpaper.

I decided to give the bowl two coats of stain for contrast. For the first coat I used a dark brown aniline stain and applied it to the bowl and flamed it to set it in the grain. I hand buffed it with a soft cotton cloth and then gave it a buff on the buffer with red Tripoli.
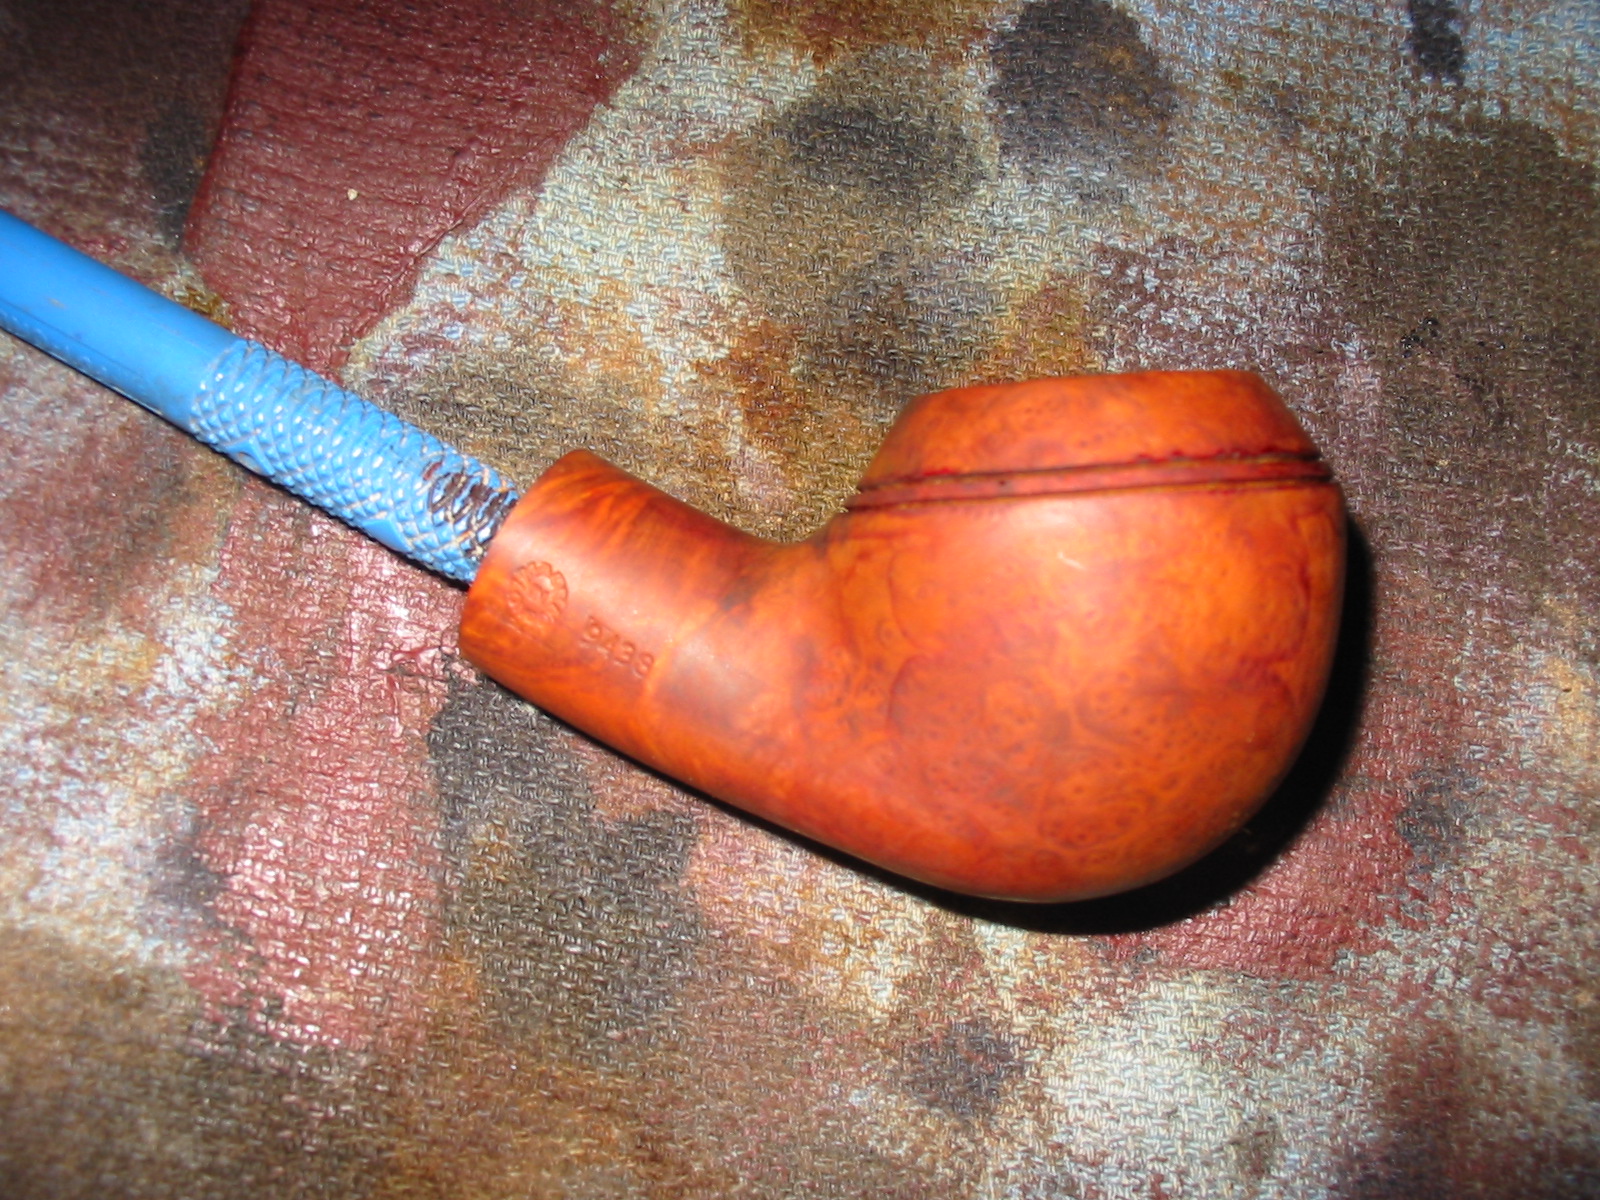
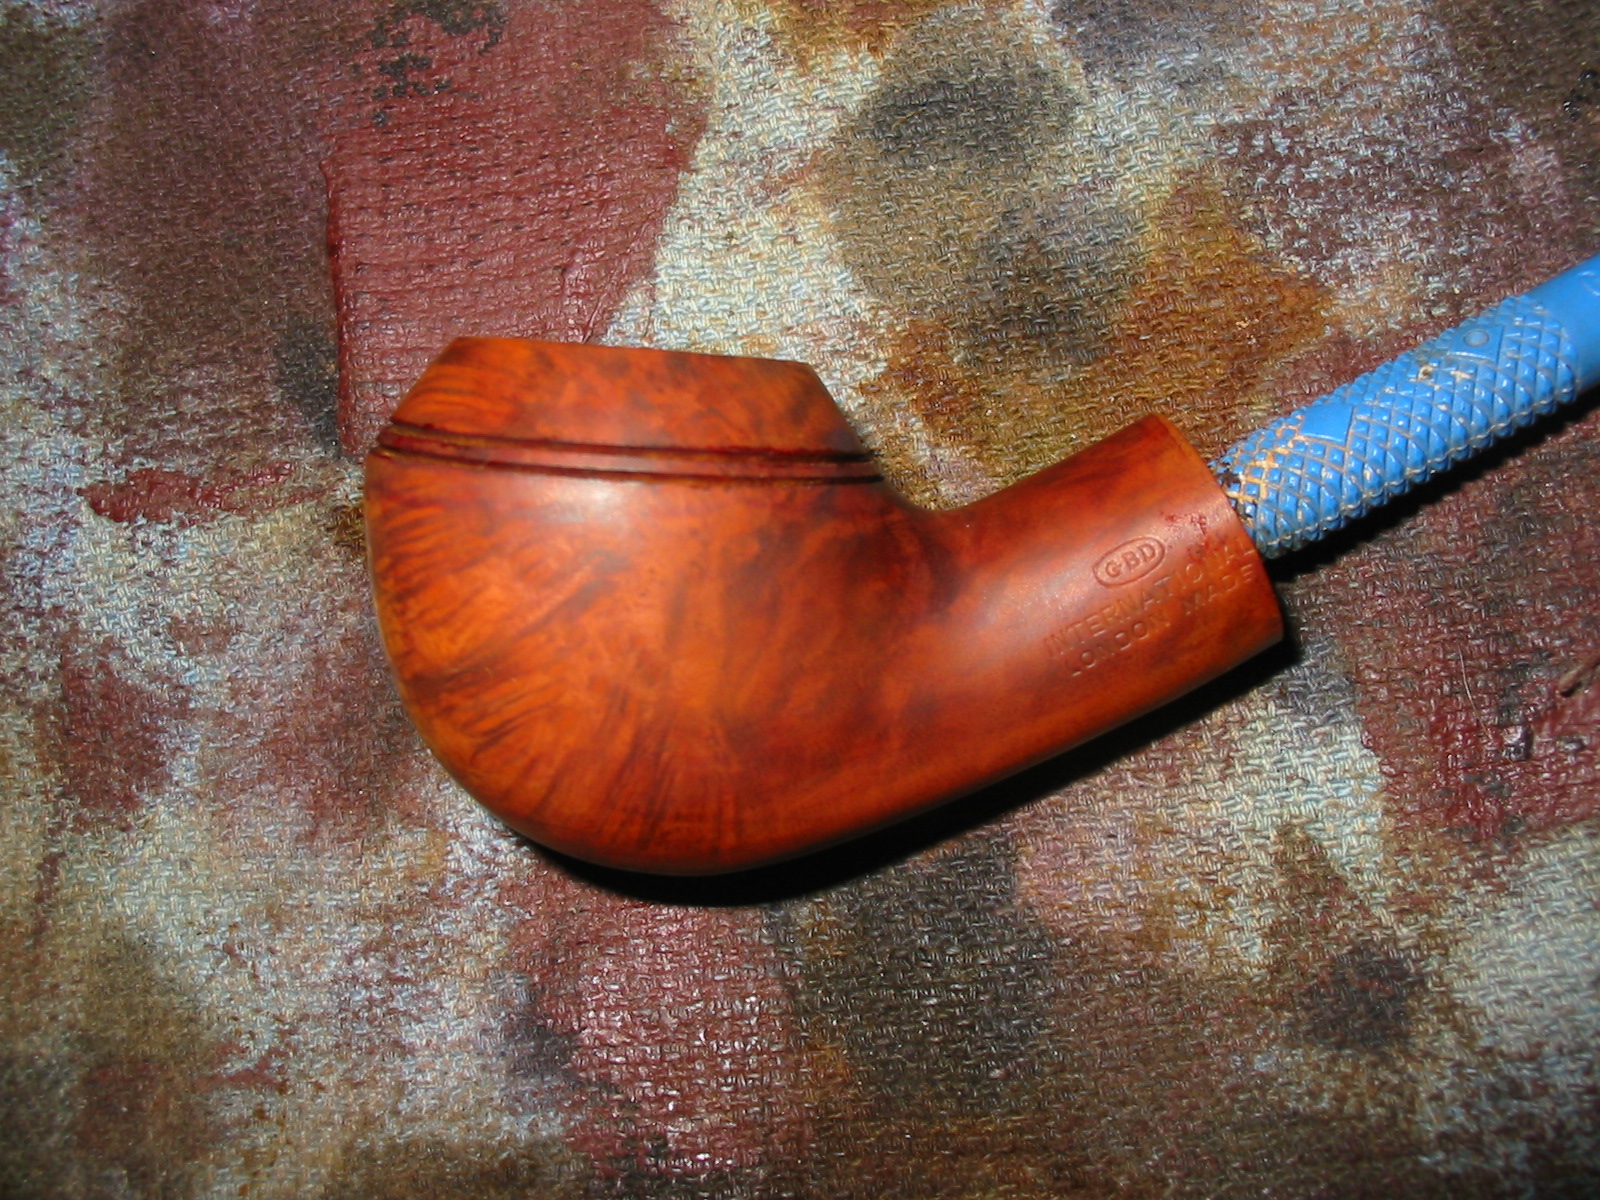
I then gave it the second/top coat of stain. I used a medium walnut MinWax stain to highlight the grain further on this pipe. I applied it with a cotton pad and rubbed it off with a soft cotton cloth. The contrasting stain gave depth to the finish on the pipe and made the grain and stamping stand out clearly.
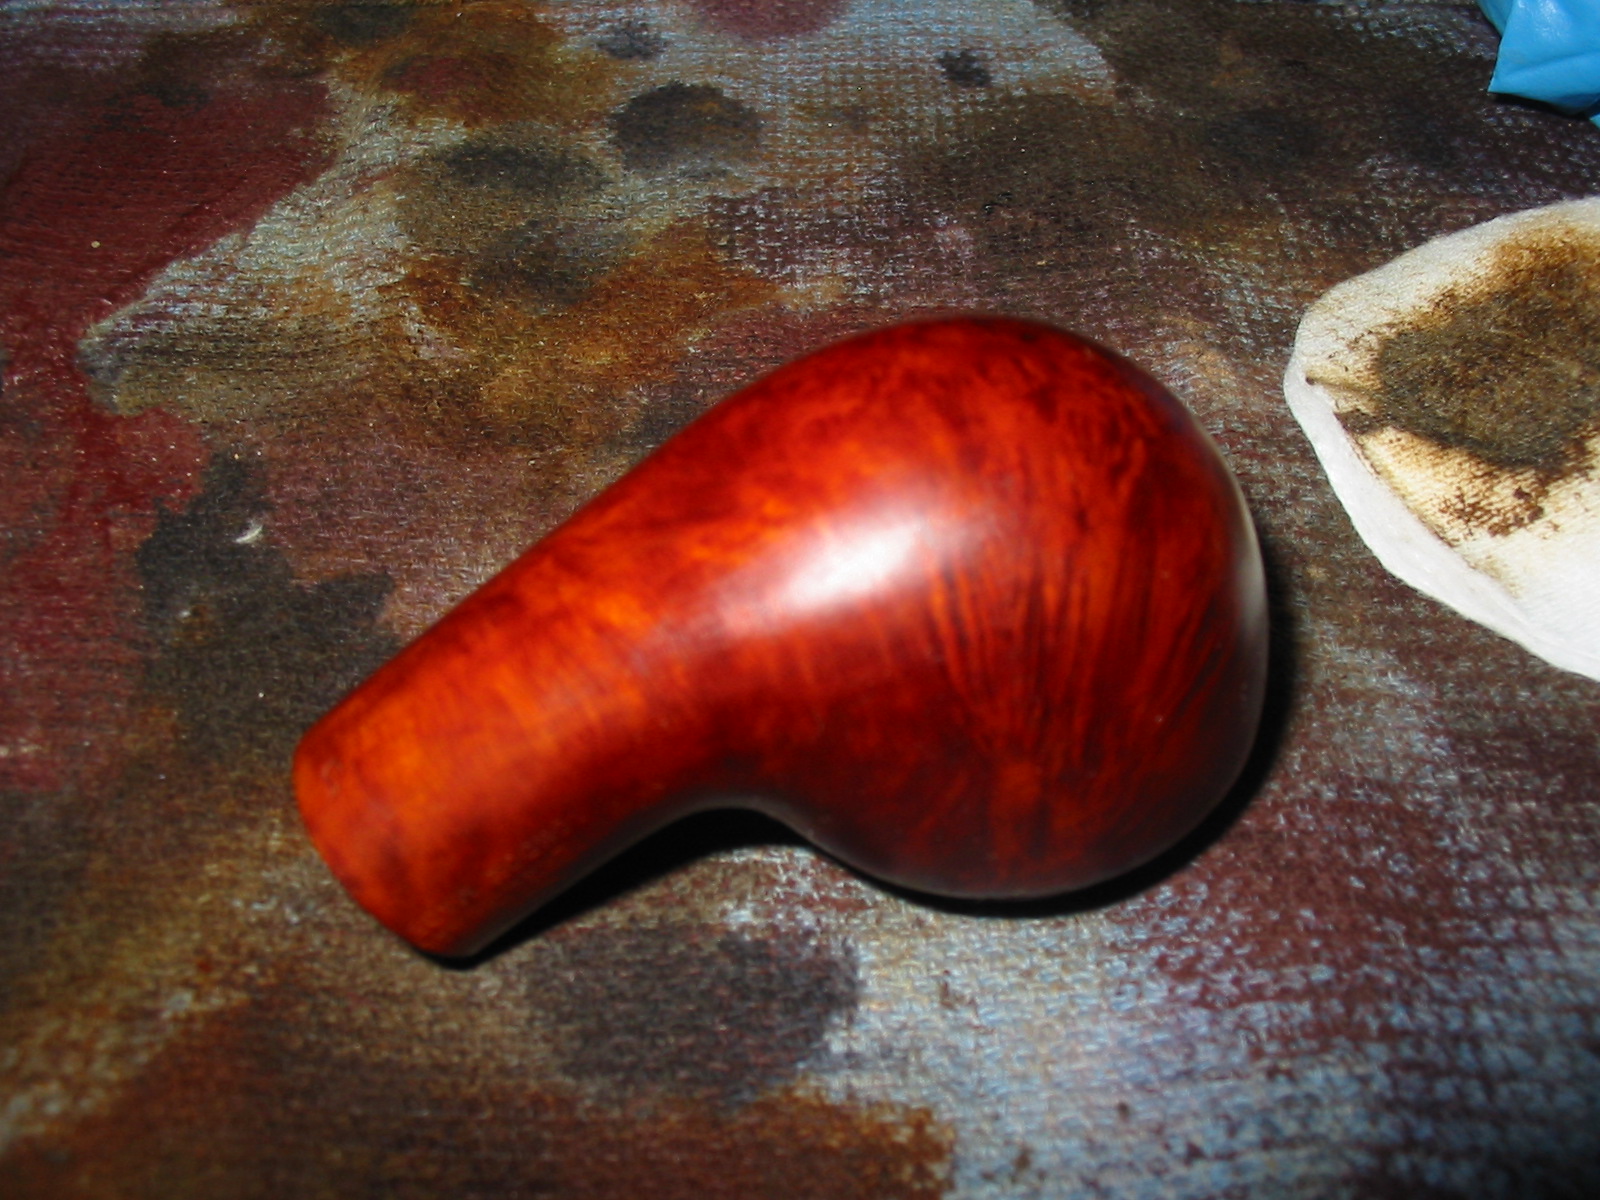
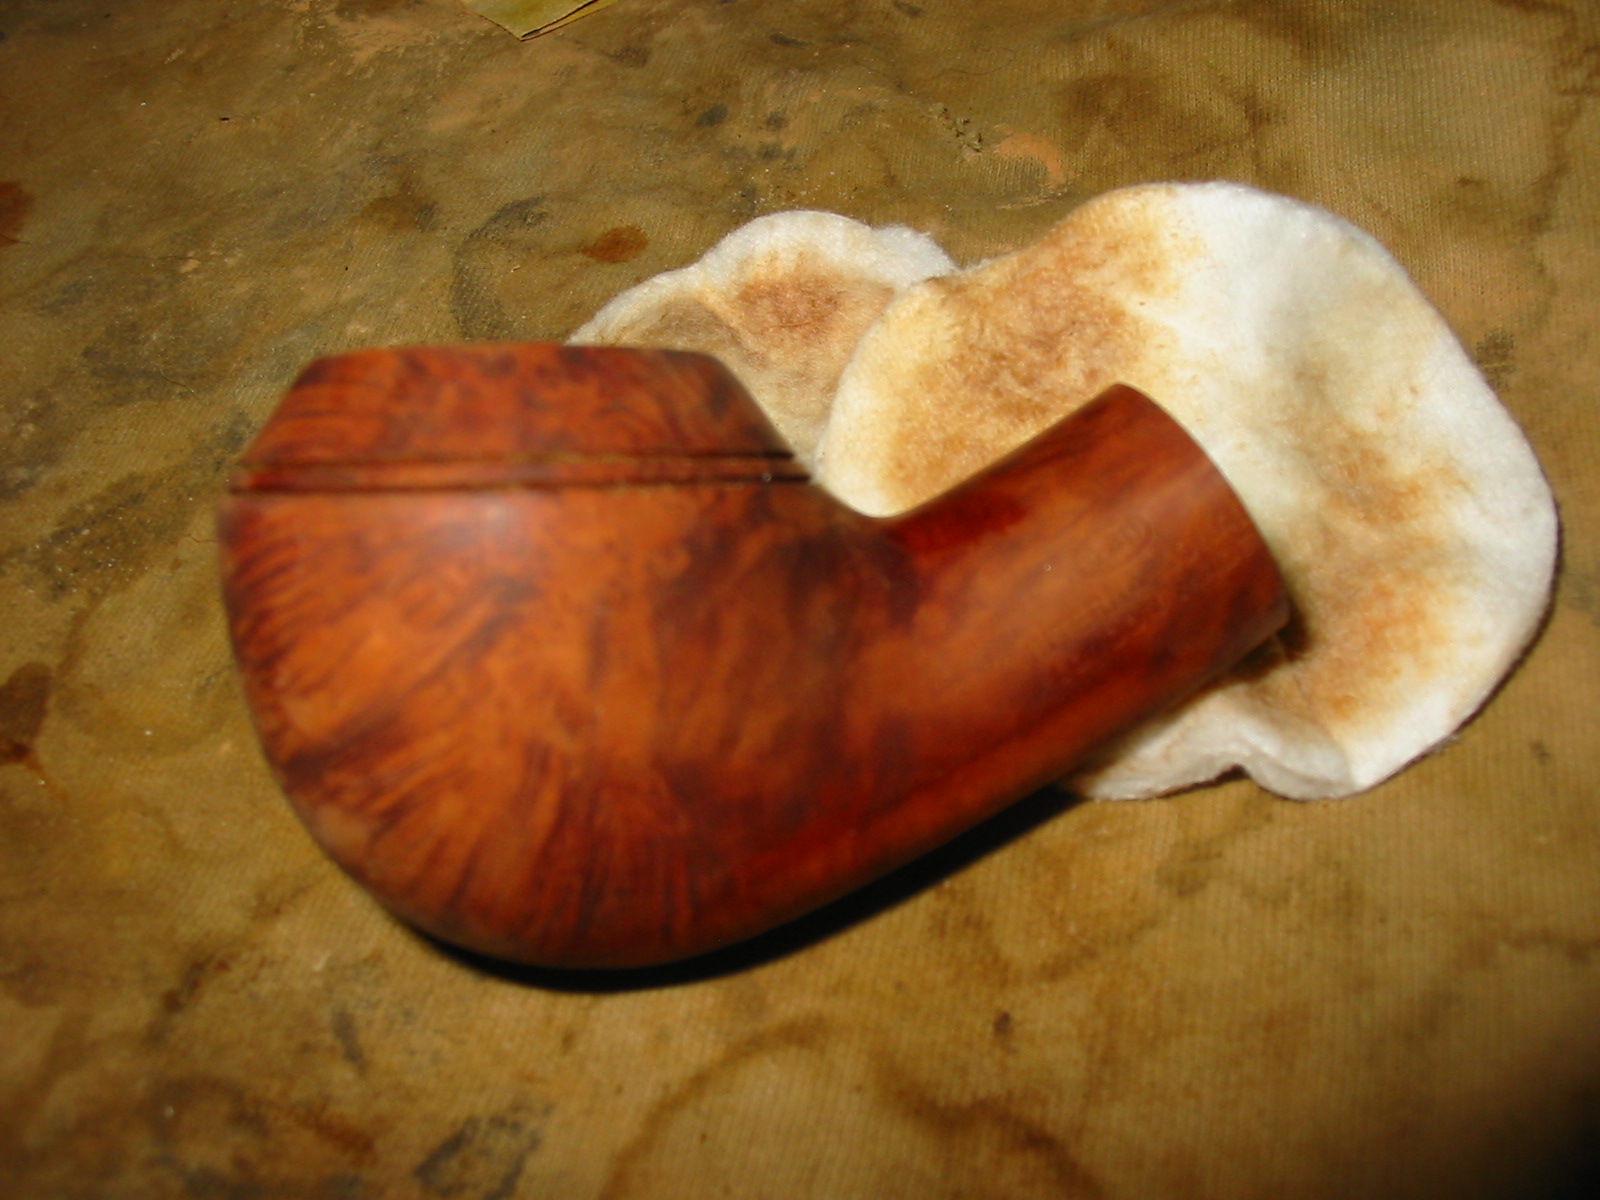
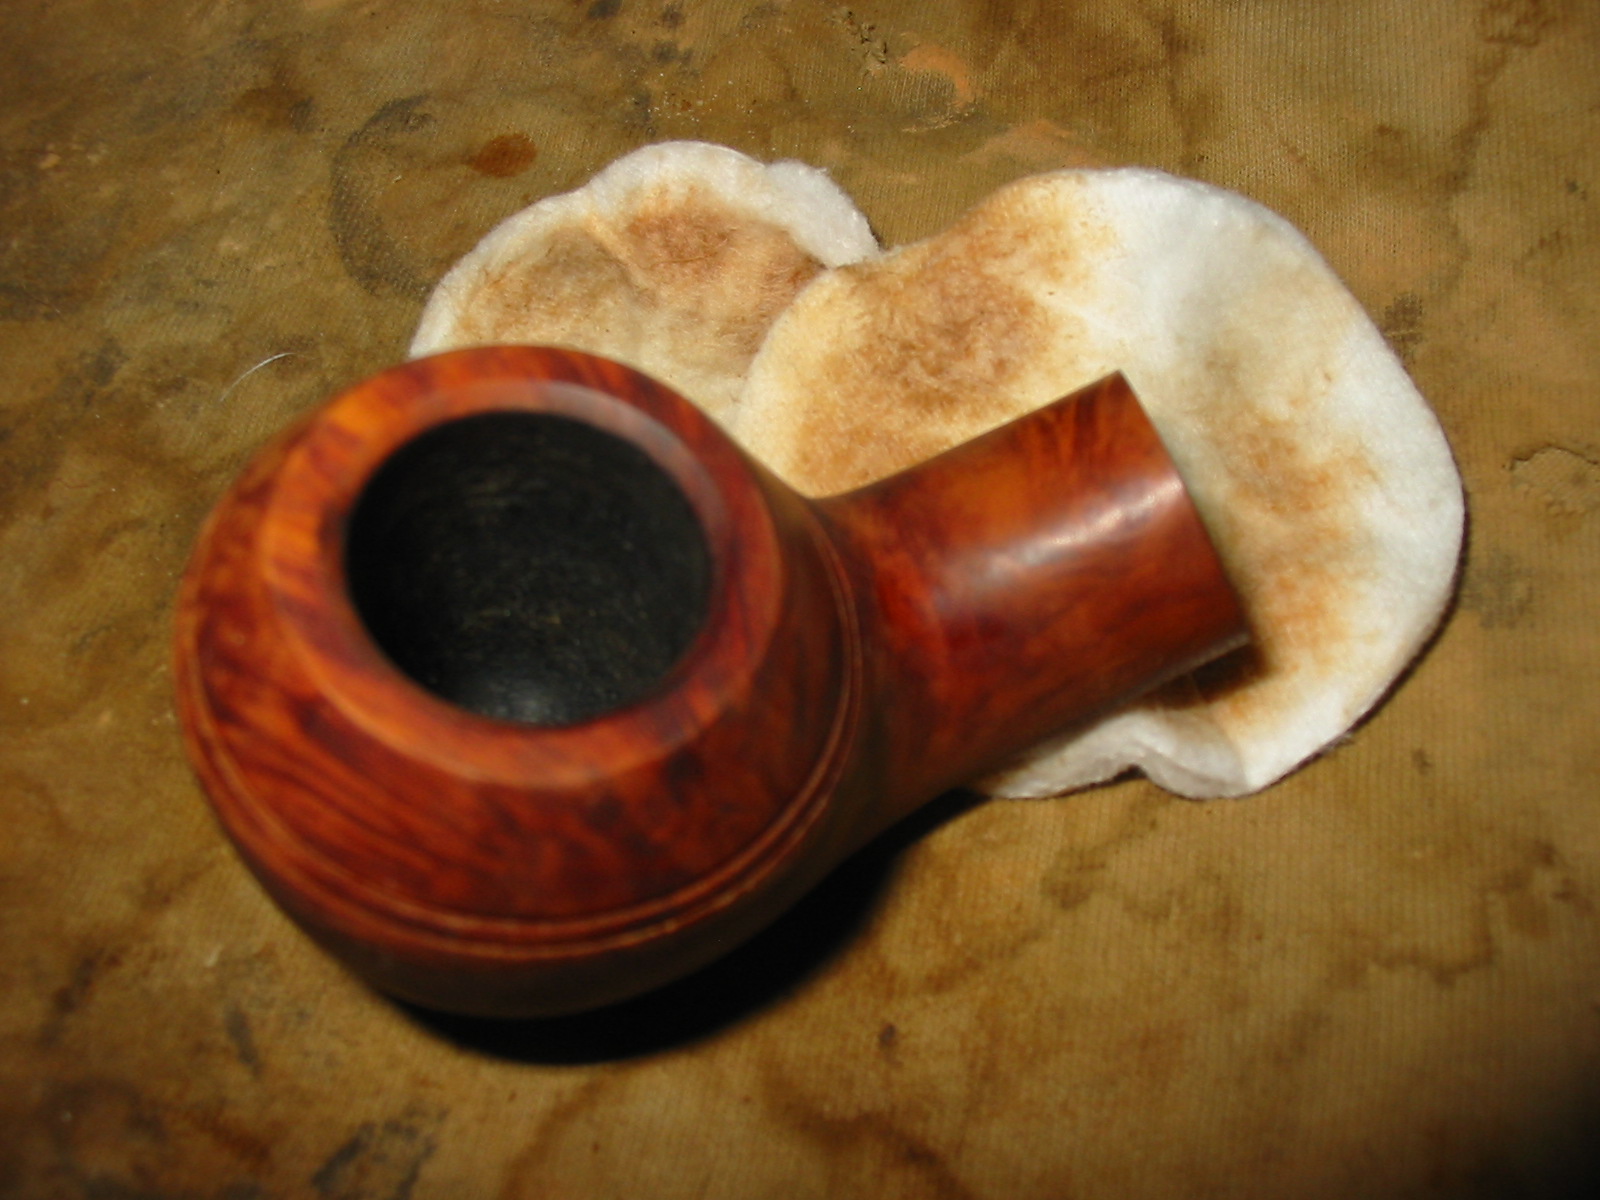
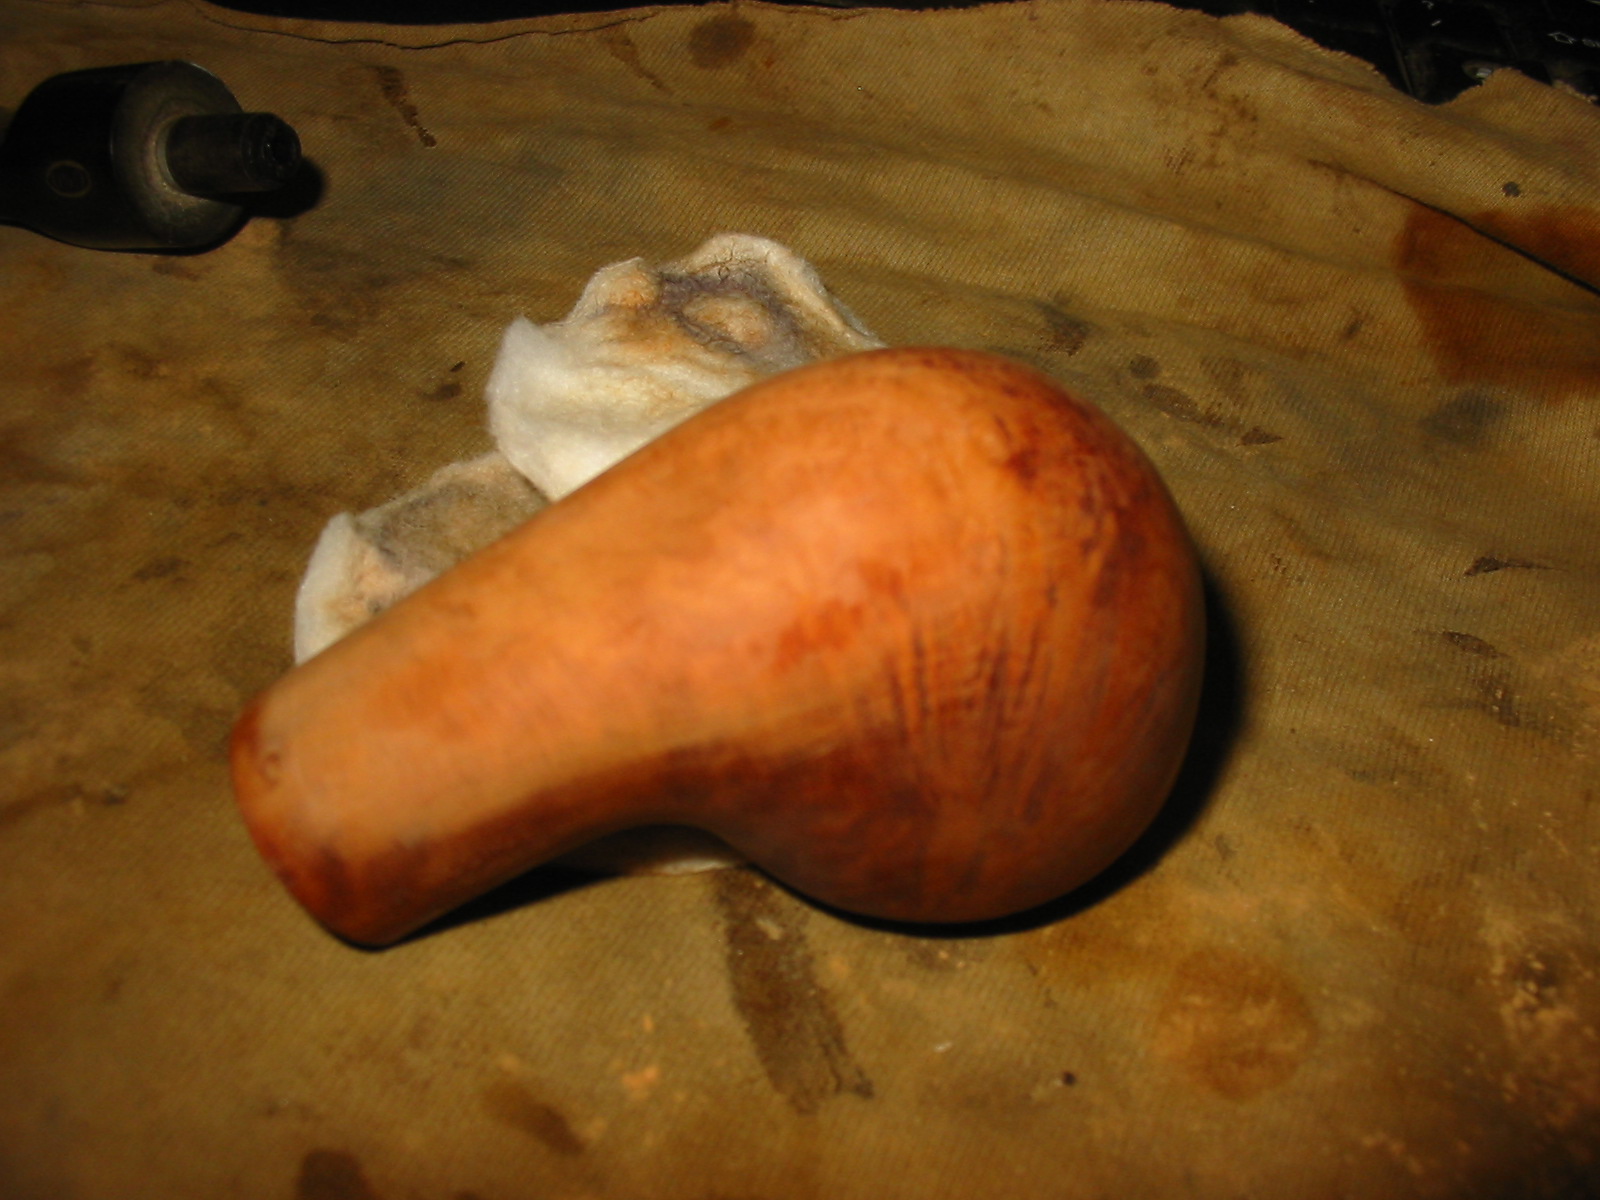
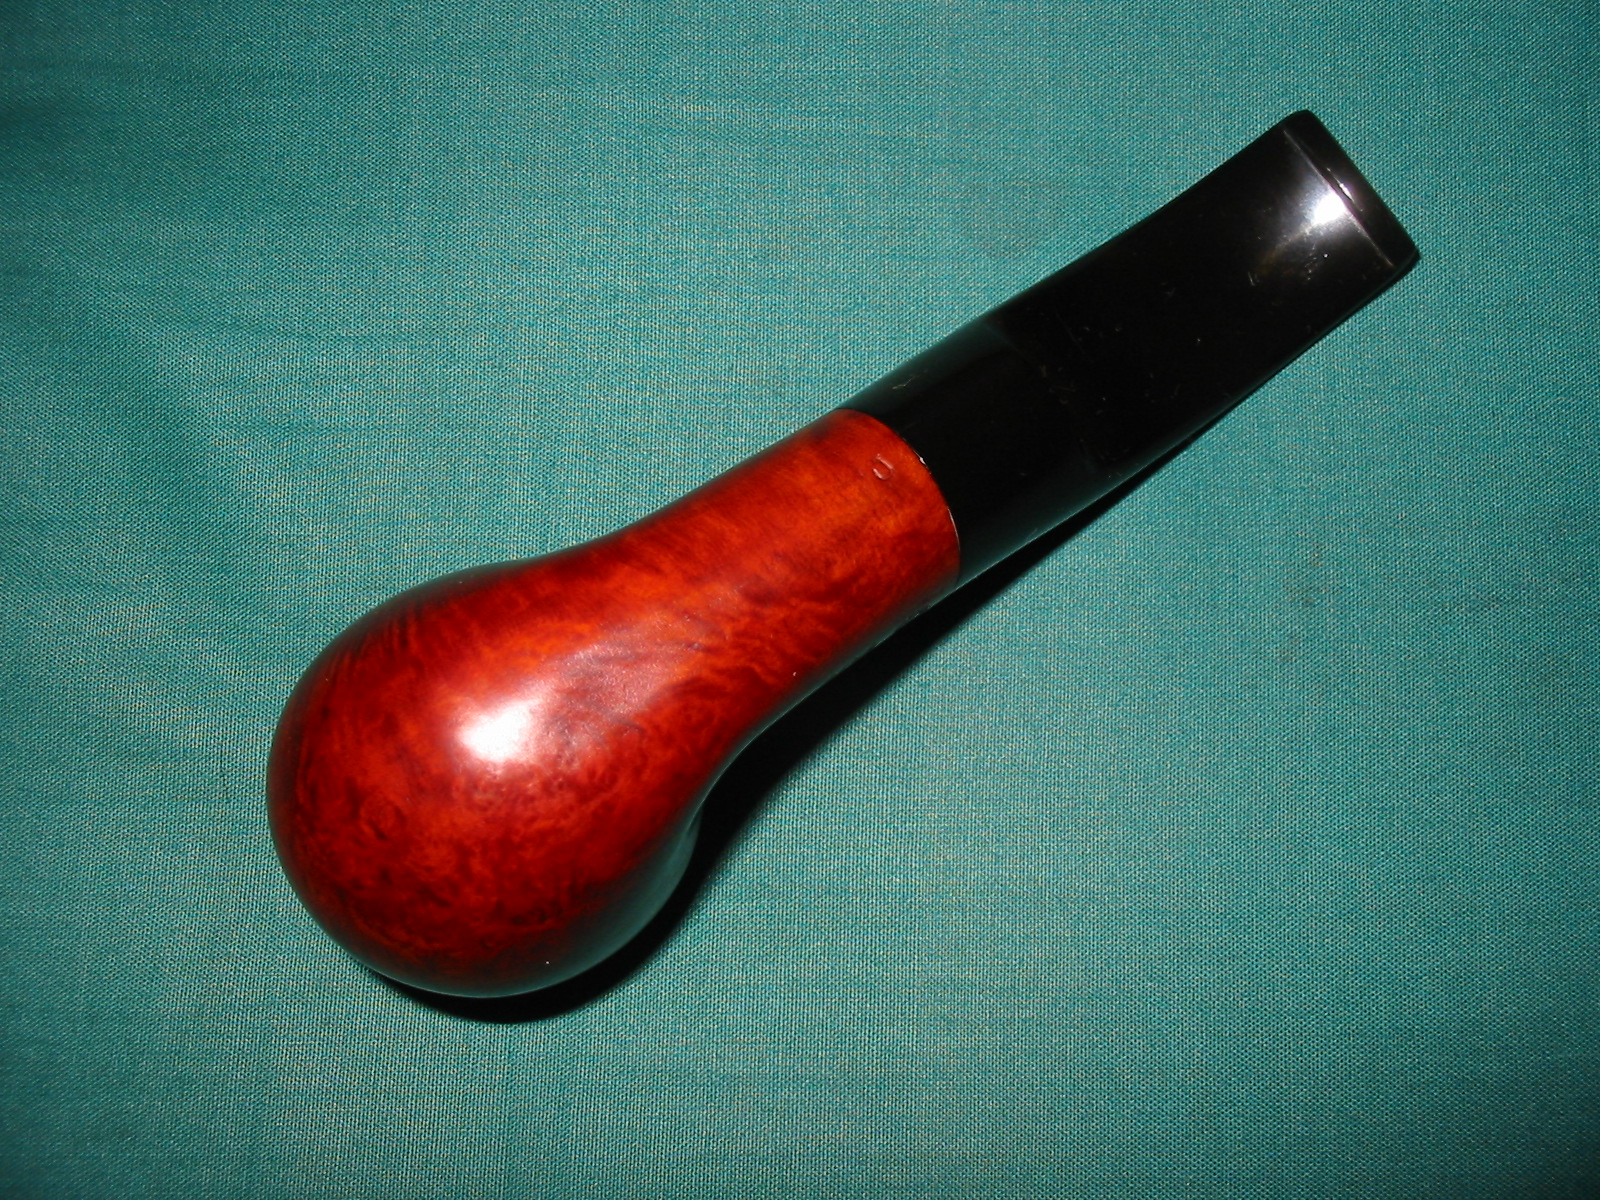
The next three photos show close up views of the reworked bottom of the bowl. My goal was to round out the edges of the flattened area and shape the bottom of the shank and bowl back as close as possible to the original shape before the previous owner flattened them.
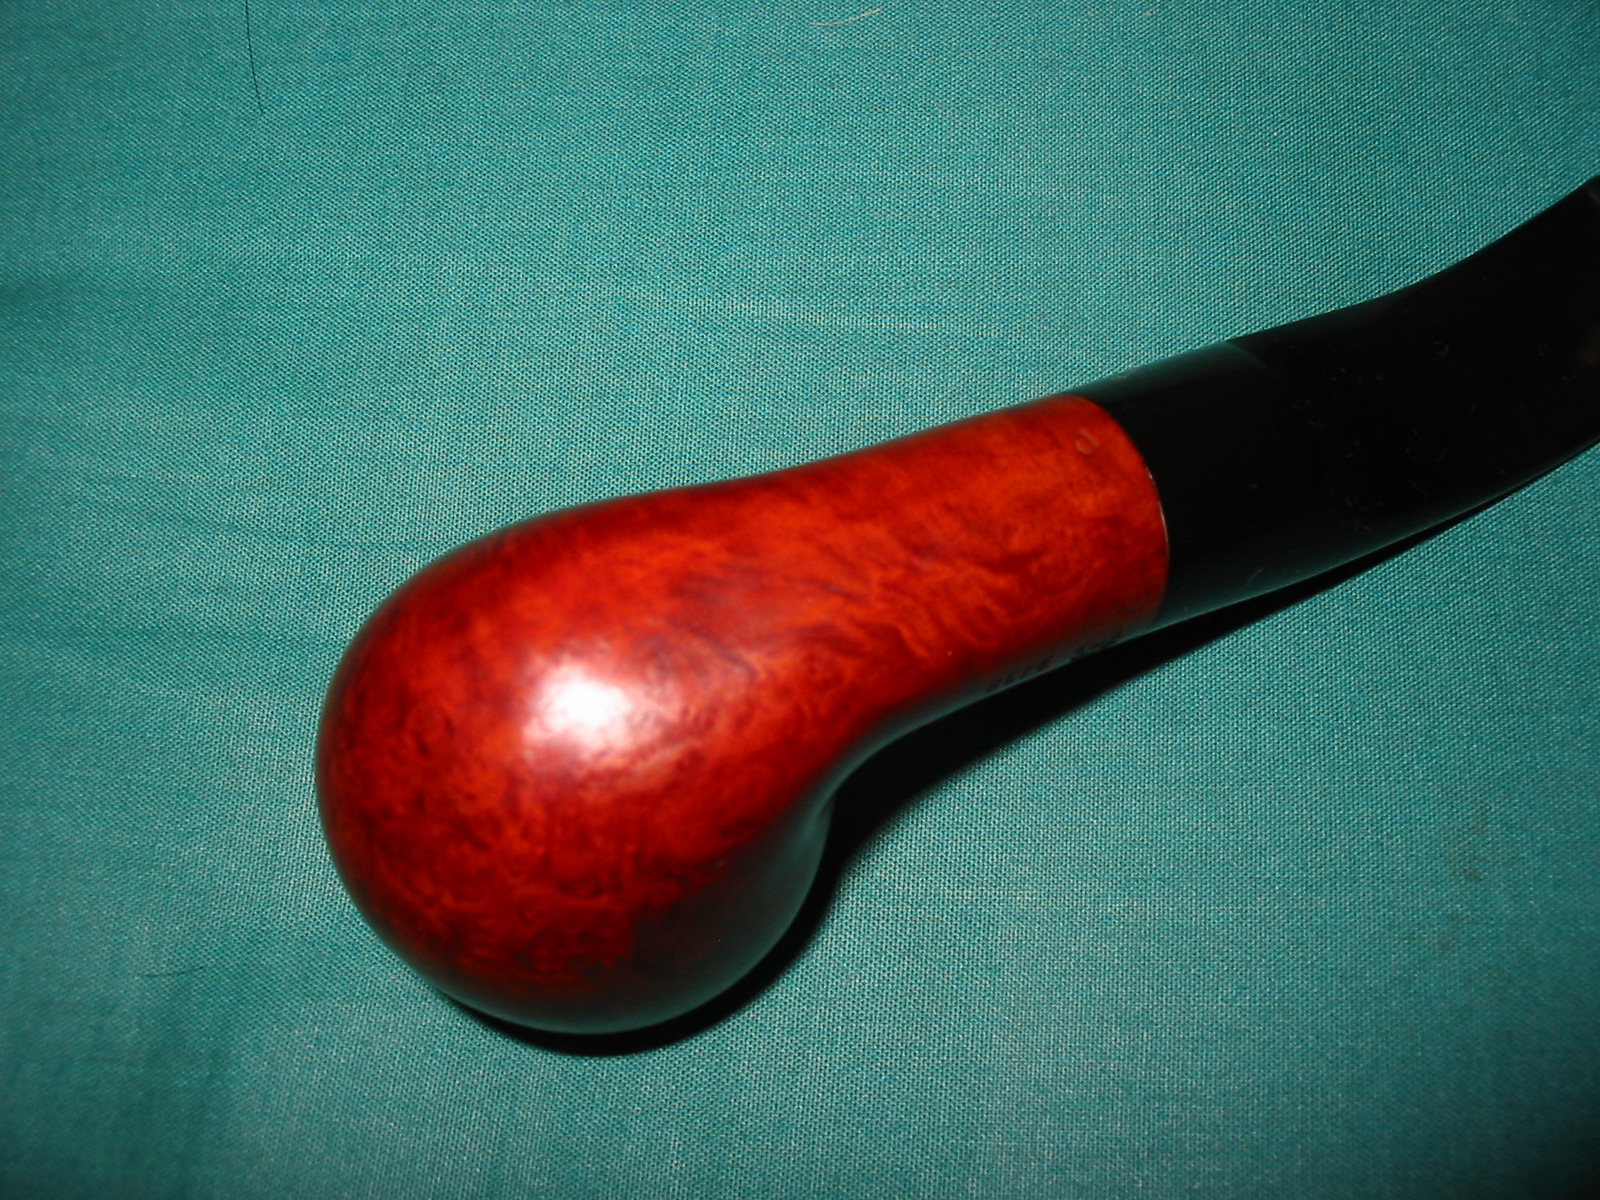

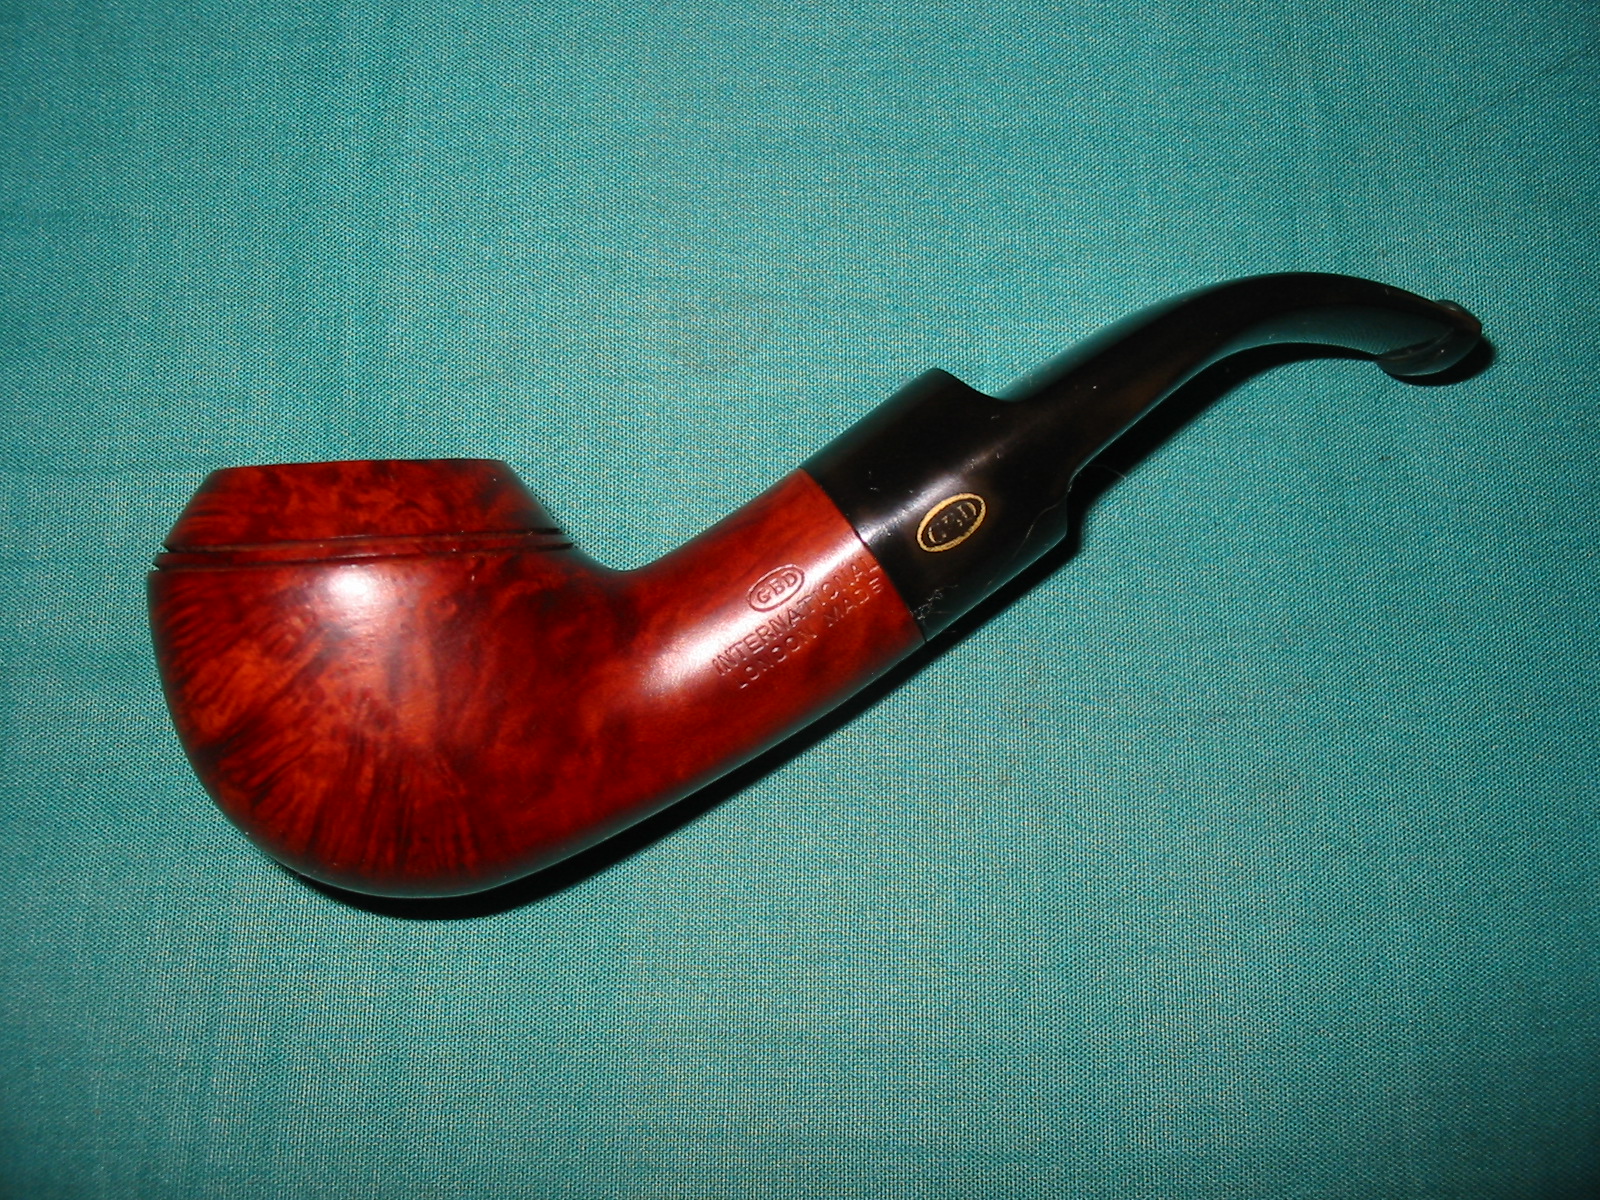
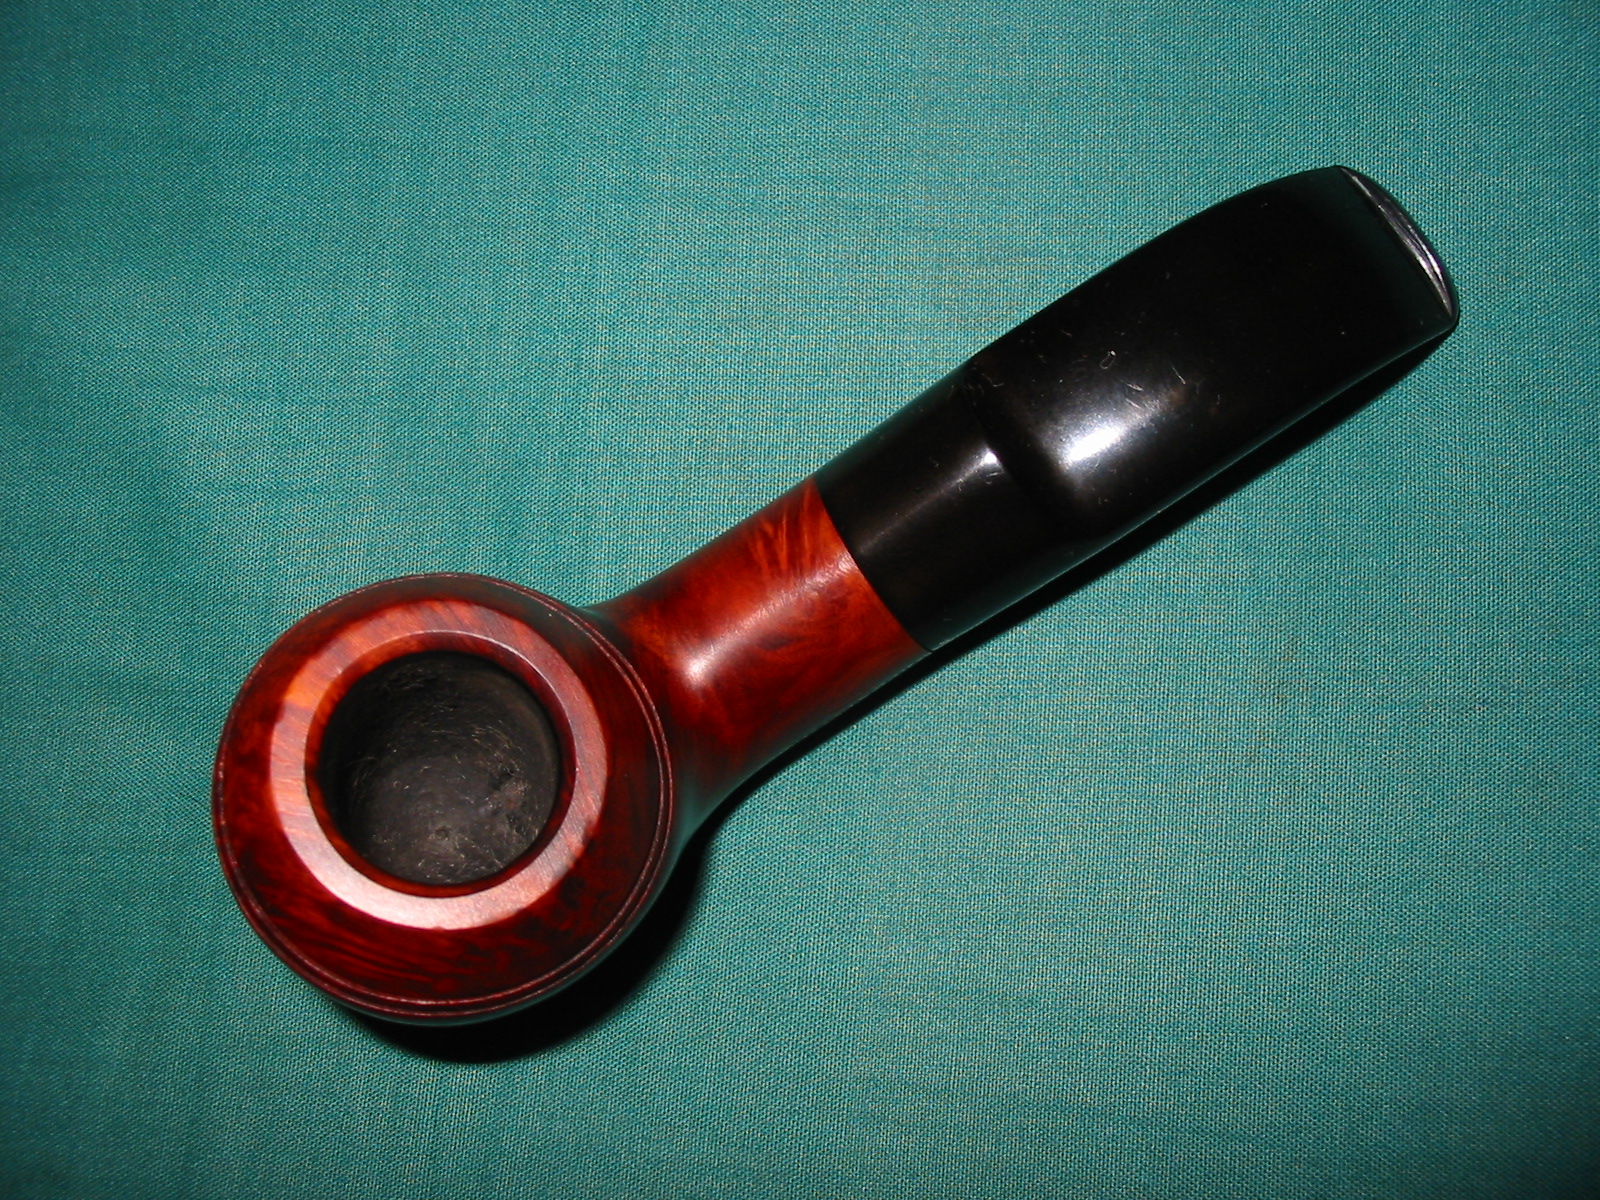
I rubbed on Obsidian Oil on the stem and carefully worked on the area around the decal on the stem. Some oxidation remains in that area but I would have to sacrifice the decal to remove the oxidation and I chose to leave it. I buffed the pipe with White Diamond and then gave the finished pipe multiple coats of carnauba wax. I buffed it with a clean flannel buffing pad to give it a finished shine. The reworked pipe is picture in the next series of four photos. It is ready for its place in my collection of GBD 9438 pipes.


Beautiful pipe. I have a GBD virgin Rhodesian which has been a favorite for about 40 years. The shape is pleasing to the eye and in the hand, and a great smoker to boot.
LikeLike
As a fan and collector of the 9438, you saved that one! The new finish looks quite handsome too.
LikeLike
I agree, that is a beautiful shape, and a great job.
LikeLike
Great save! I favor Petersons 999 shape with a tapered stem over the 9438, but its a classic for sure! Enjoy!!
LikeLike
Great save Steve. I would never have thought that this Rhodesian could be saved. I believe it would take a side by side comparison to tell the difference. Your stain treatment looks fantastic. You should be proud of your “leaned down” little beauty. By the way GBD 9438 is my all time favorite shape.
LikeLike