Daily Archives: May 17, 2013

Its a Tamper, No its a Pen – No Actually it is a Pipe Pen Tamper – Robert Hudspeth & Steve Laug


This article originally appeared in Pipesmoker Unleashed EMagazine http://www.pipesmokerunleashed.com/magazine/may2012.html Since that time I have edited it and also added my own reflections on the Pen Tamper that I also purchased from Eric Archer. My additions to Bob’s original article are inserted in italics so that it is clear what was in the original article.

Eric Archer of CEA Pipes came up with a winner when he designed and crafted a new item, the Pipe Pen Tamper. It combines two of the tools that I use all the time into a single handy and beautiful piece – it combines both a pen and a tamper in a hand turned barrel. He calls them Pipe Pen Tampers. They are custom made out of briar, vulcanite and brass. I think if these were readily available they would be instant sellers in any pipe shop where pipemen gather to enjoy a bowl and the fellowship of the briar. They are available for special order on the PSU Storefront ( http://www.pipesmokerunleashed.com/forum/forum.php ). Click on the link and it will take you to The Pipesmokers Unleashed Website. Once there you can click on the online store on the left side of the home page. You can contact Eric through his listings or through the contact information is available in the members list or through a private message (PM).

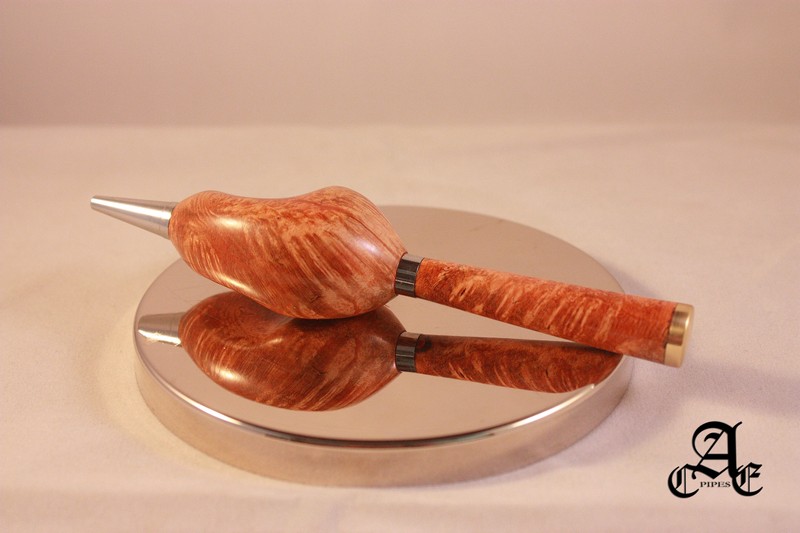
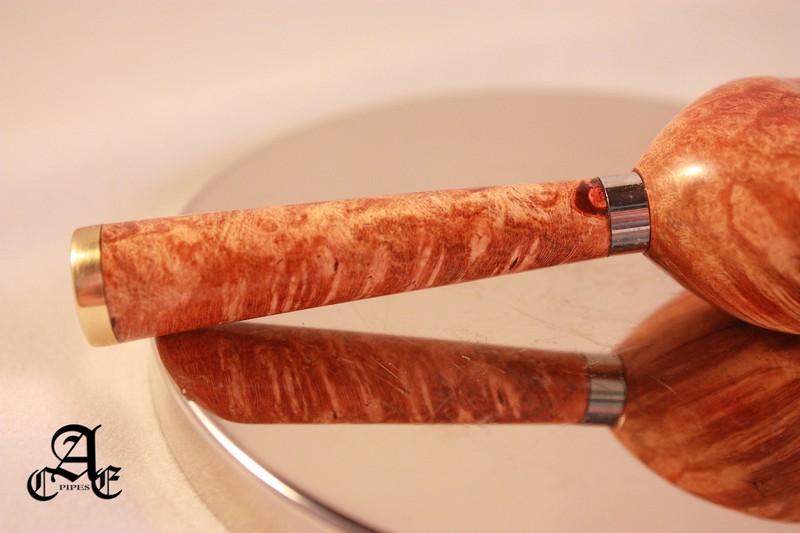
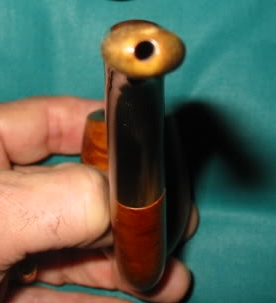
When Eric posted his first edition Pipe Pen Tamper on one of the threads on Pipe Smoker Unleashed (PSU) internet forums “wow!” was all that I could say. I immediately knew that I had to have one. The problem was that I was not alone; it seemed that many of the other members also wanted them. Soon there was a list of folks waiting for their unique and custom Pipe Pen Tamper. I decided that I wanted mine to be a bit different from the others that Eric had made before so he used vulcanite as a band at the middle and in the lower portion of the barrel as pictured in the pictures below to make that happen.

Pentamp1

Pentamp2

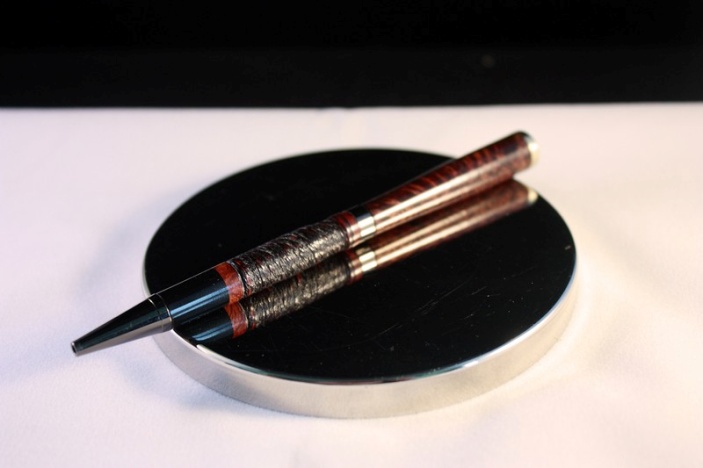
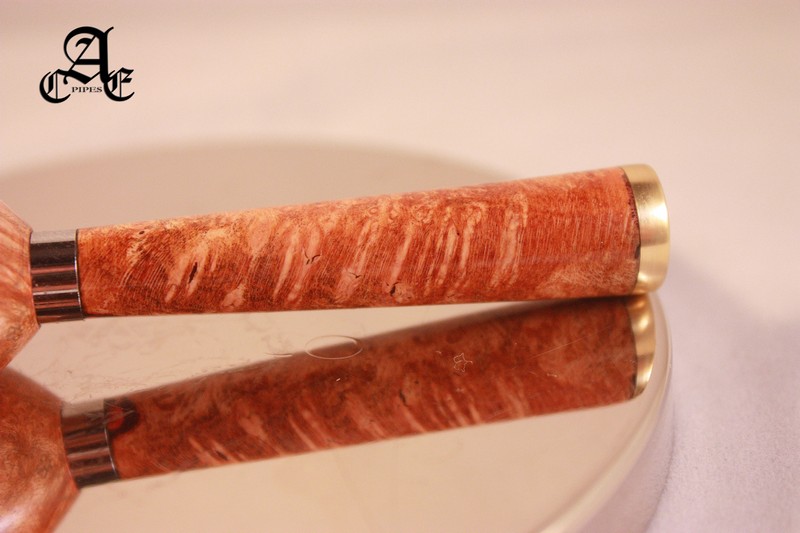
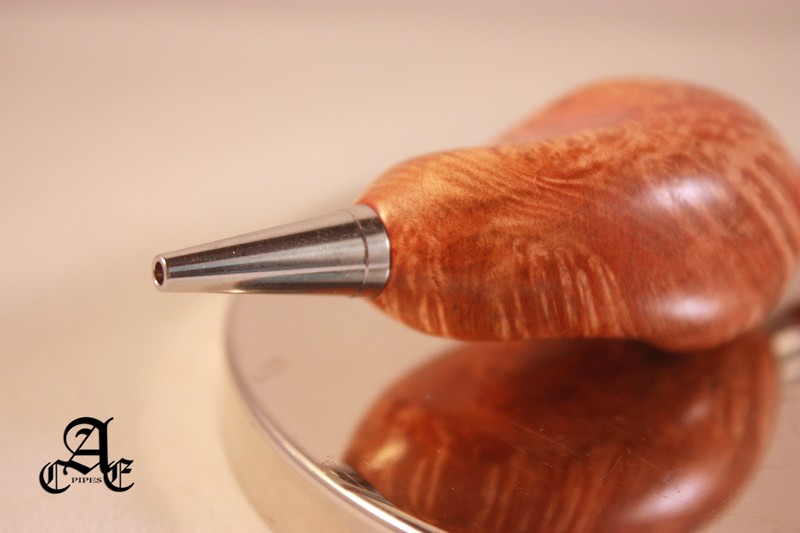
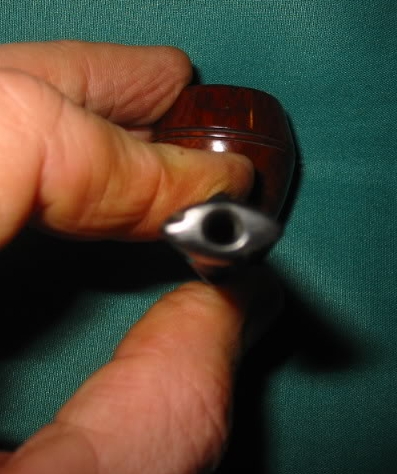
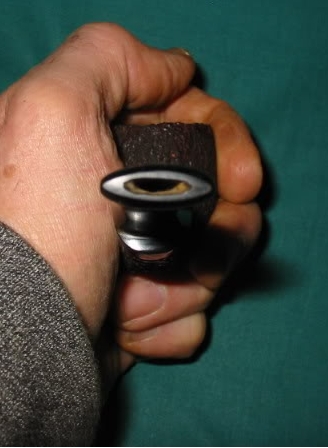
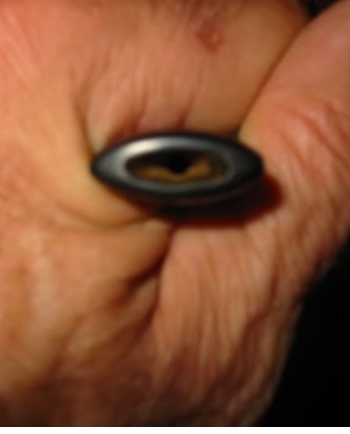
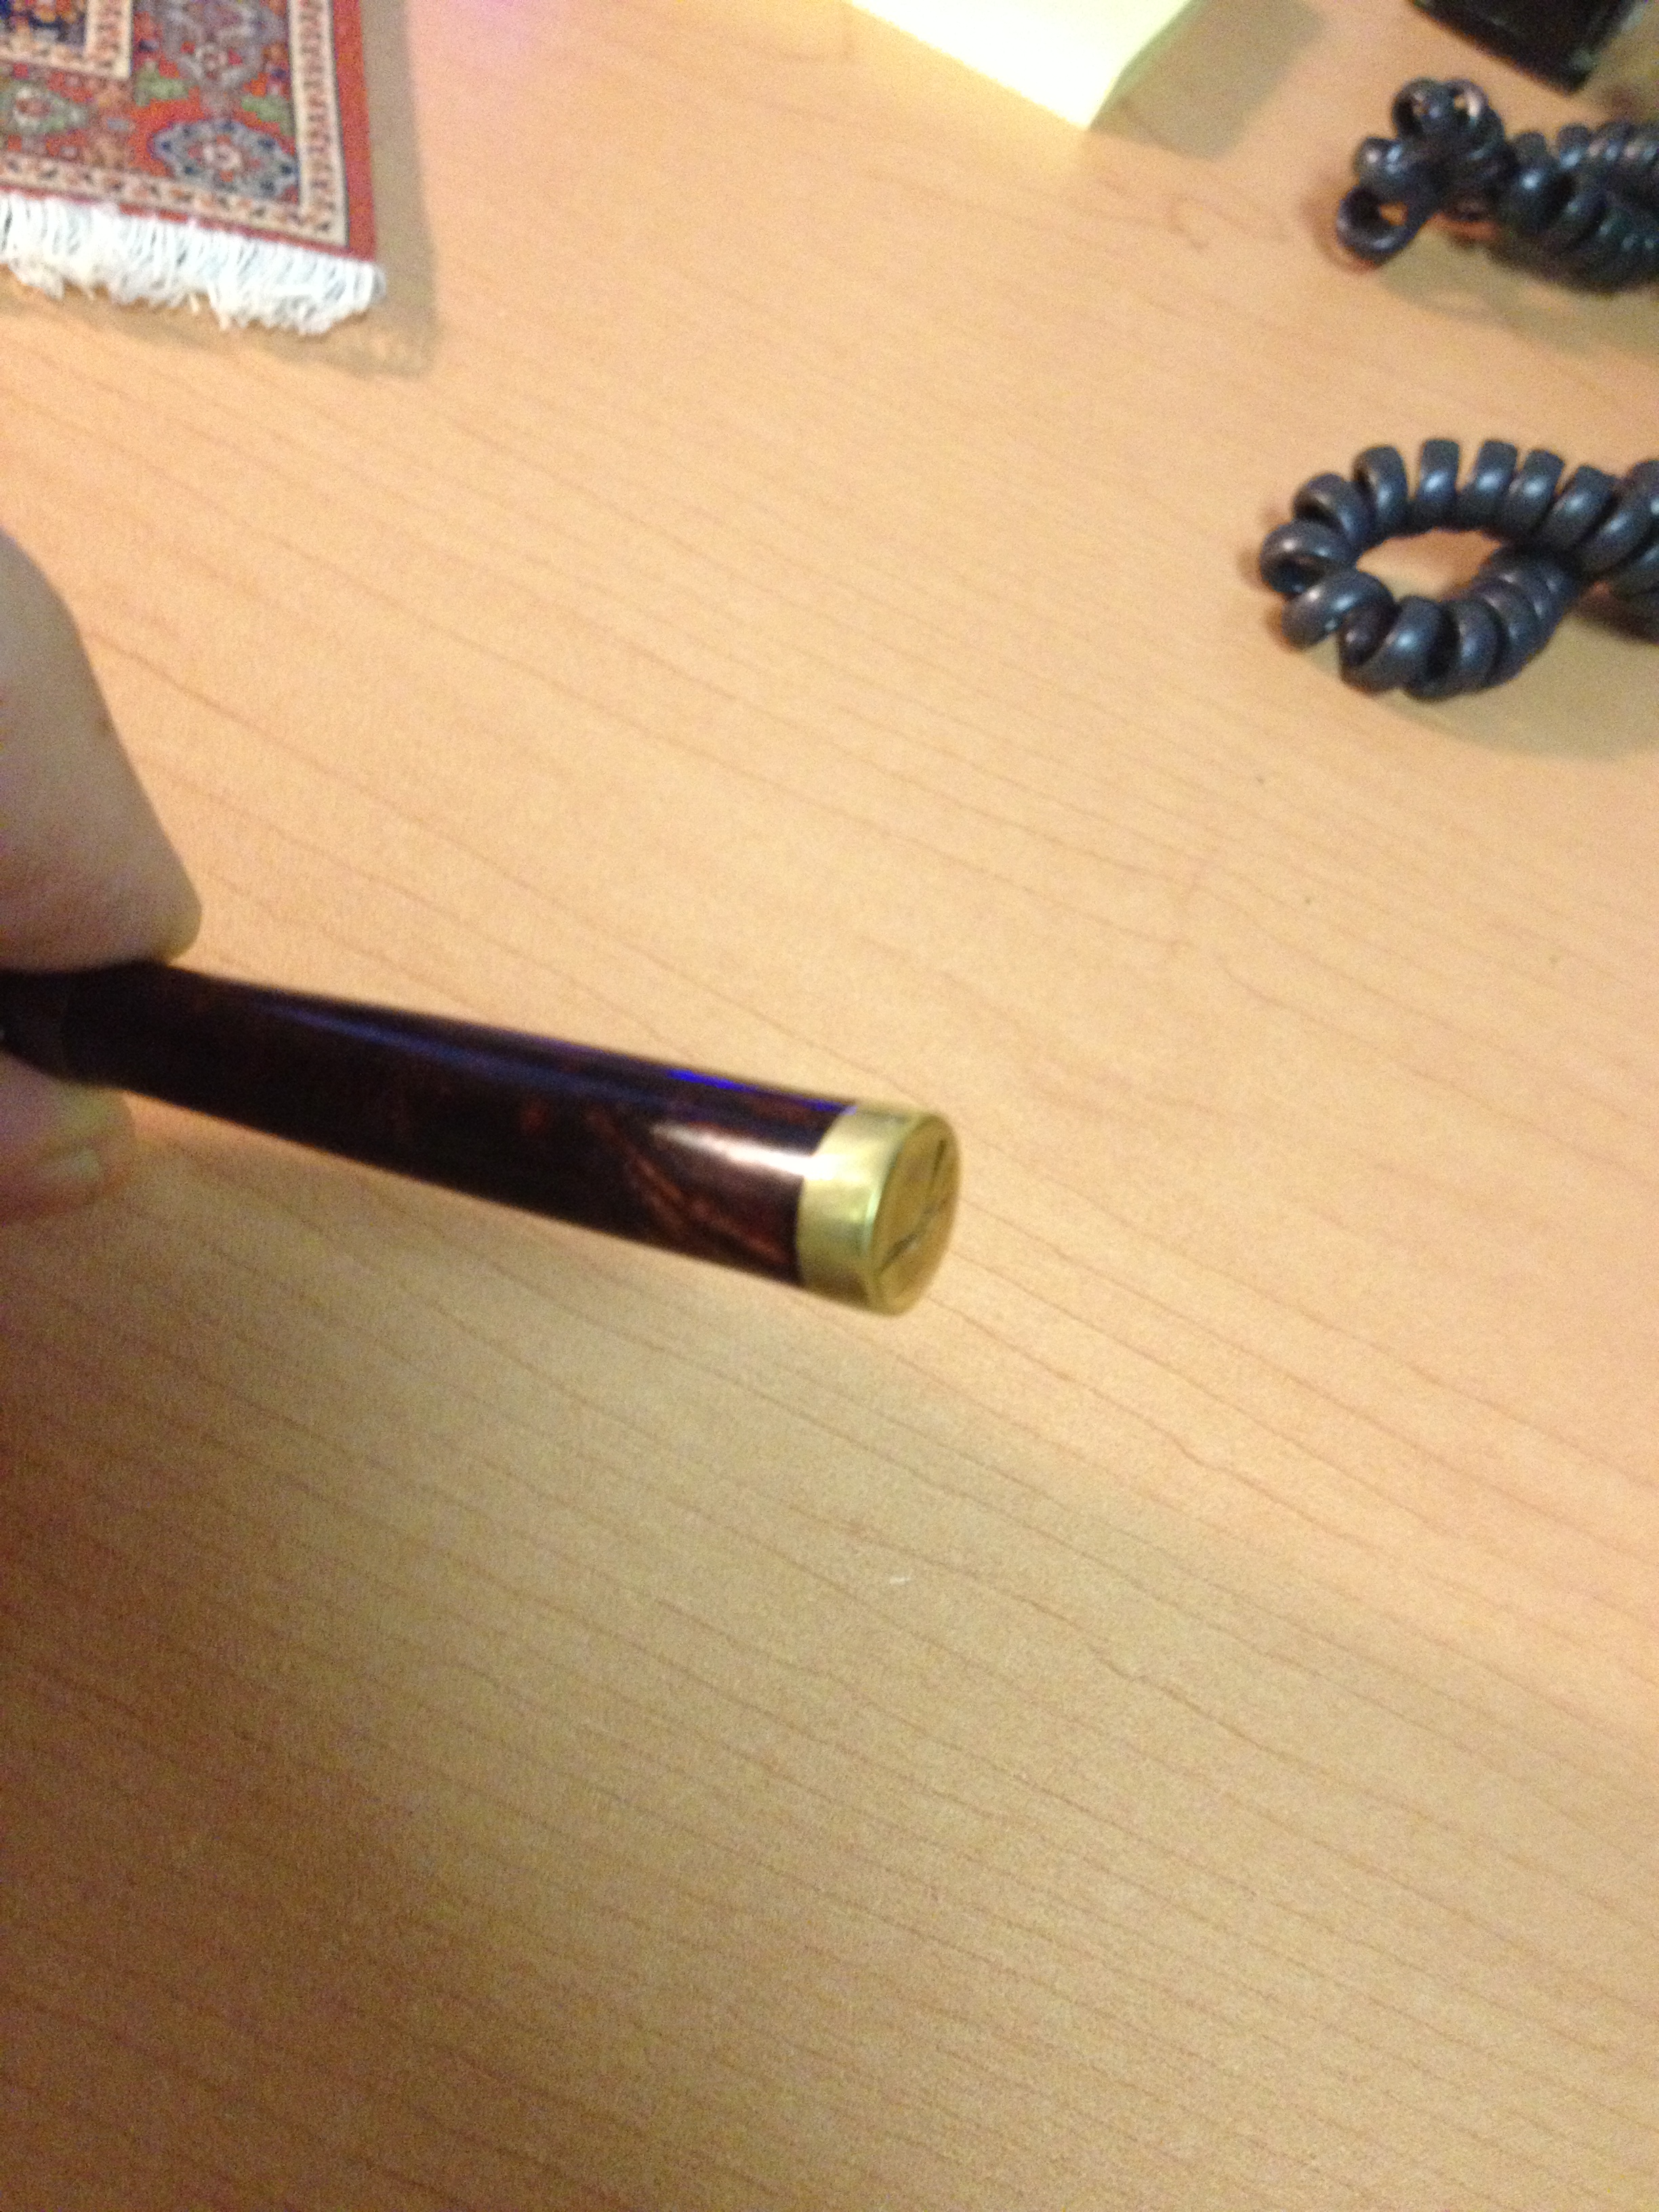
I too had to have one so I contacted Eric and asked him to make one for me that was slightly varied from the one that Bob pictures below. I have attached pictures of my pen tamper below for comparison. Mine also has a smooth upper portion on the barrel with a metal band separating the upper portion from the lower portion of the barrel. The silver/metal band matches the tip of the pen. The lower portion of the barrel has a slightly different rustication pattern and the smooth band at the top and bottom of the rustication sets it off nicely. The bottom of the lower portion is vulcanite against which the silver tip of the pen stands out nicely.

Pentamp3

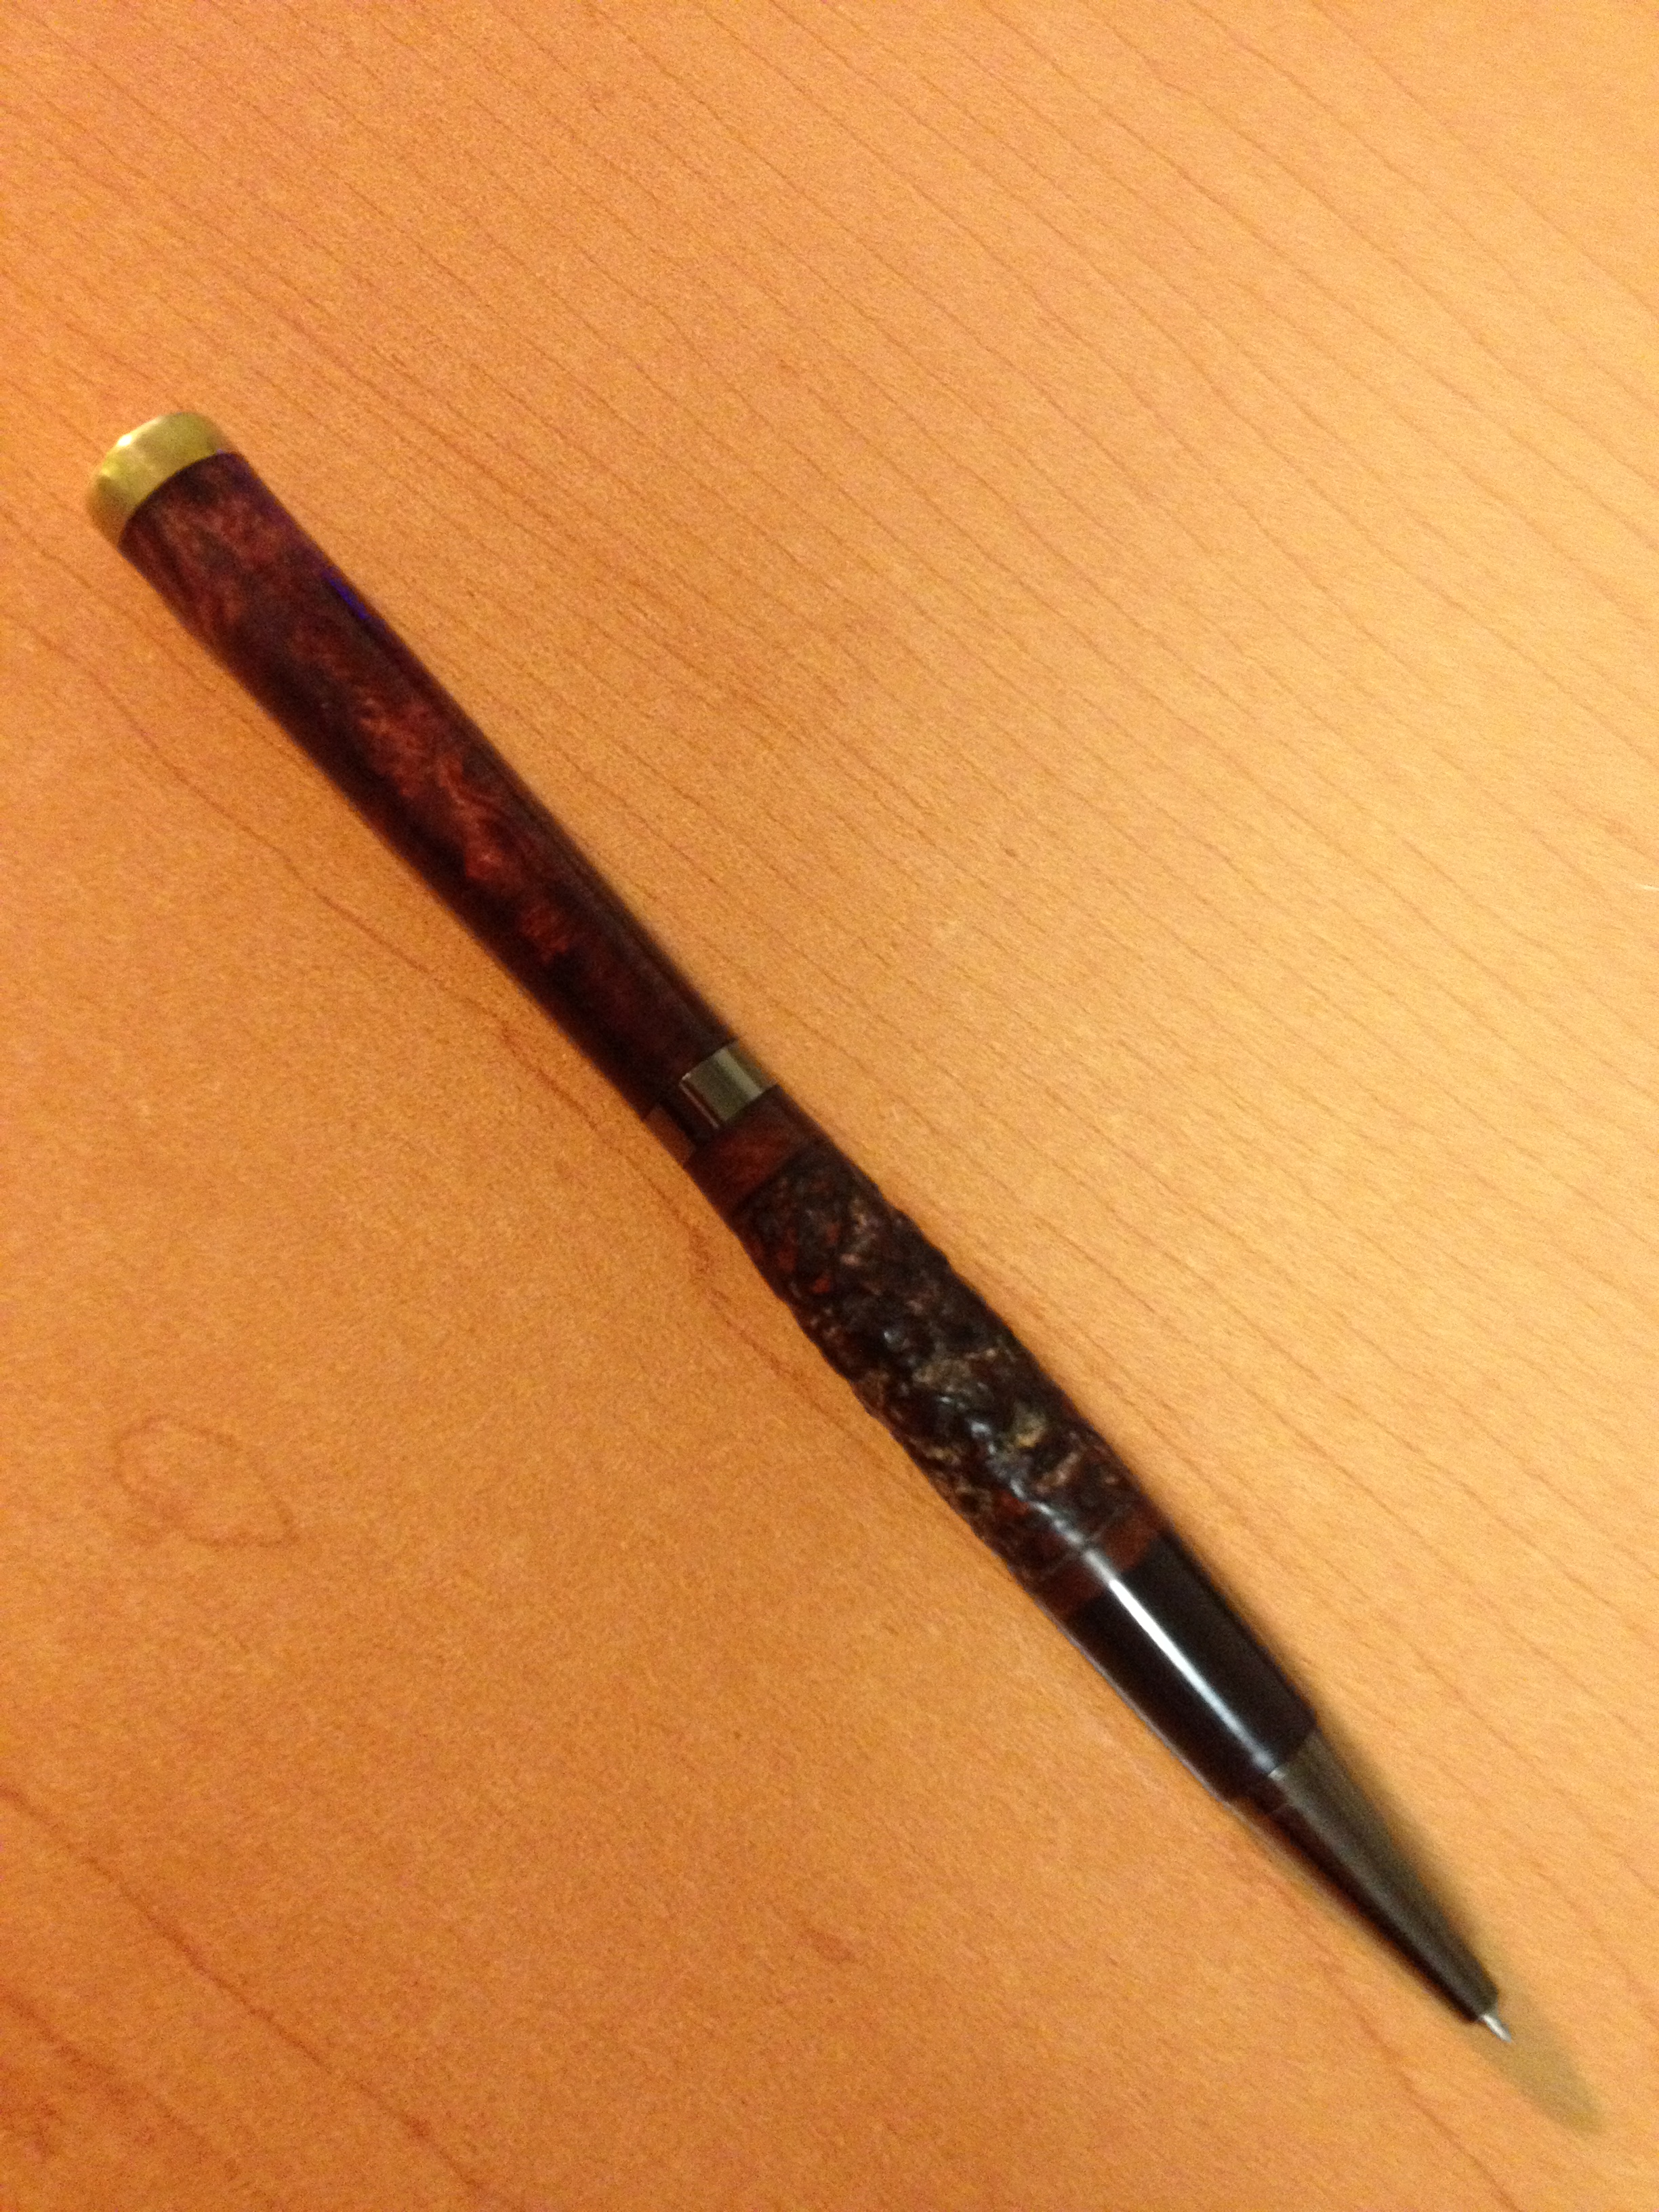
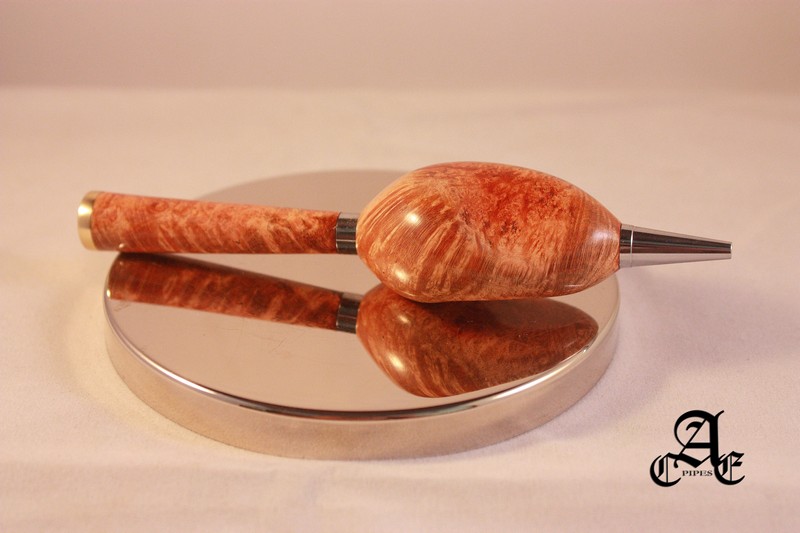
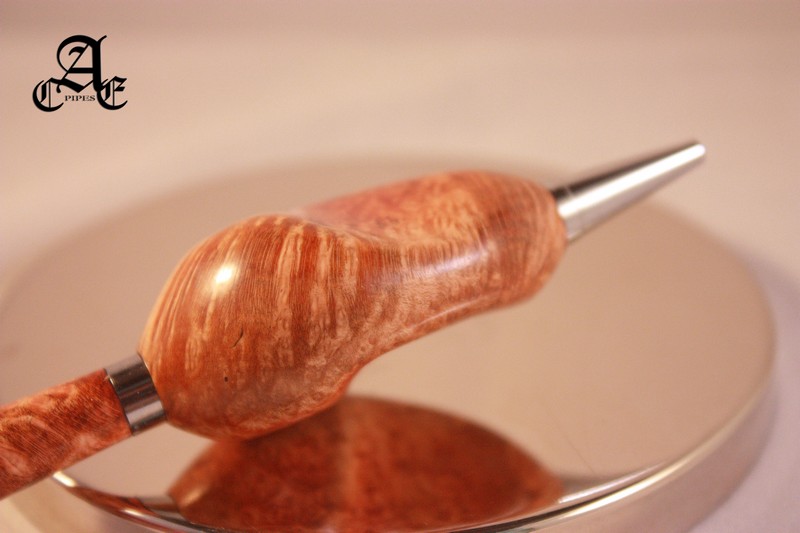
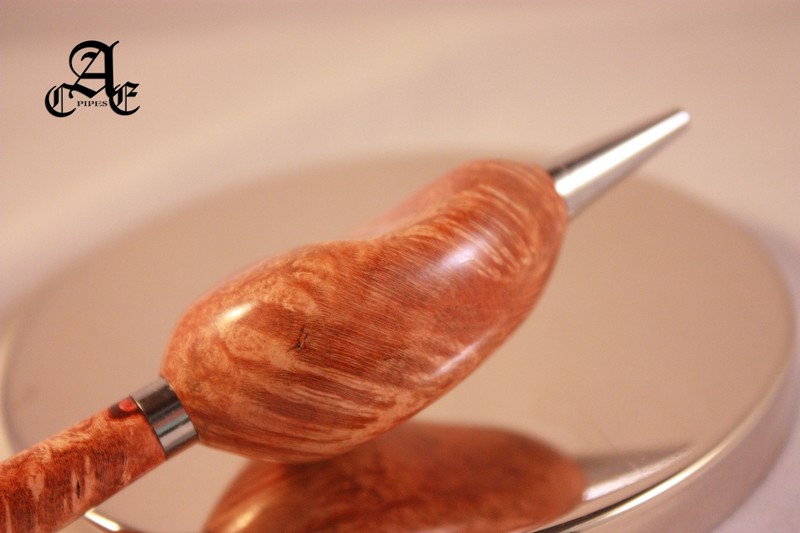
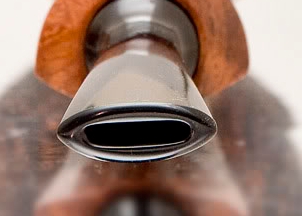
It is constructed of a stunning piece of briar. There are no visible flaws in the briar and the craftsmanship is excellent. The vulcanite is used in a band on the top portion of the pen barrel and also on the lower end of the barrel. The tip is a silver metal that looks very good with the briar and vulcanite. He mounted a flattened and polished brass tamper head on the top of the upper barrel. The lower part of the briar pen barrel has been nicely rusticated with an interesting rustication pattern leaving a band of smooth briar between the rustication and the vulcanite and between the upper band and briar as well. The rustication is stained with a darker stain than the smooth parts. It works to highlight that part of the piece. The upper portion of the barrel is sanded and polished to smooth finish; then it was stained to accentuate the natural grain of the briar. The two distinct styles of working the briar combined with the vulcanite and the brass at the top make this Pen Tamper a functional piece of pipeman’s art. It seems almost too nice to use but I won’t let that stop me!

Pentamp4

Pentamp5

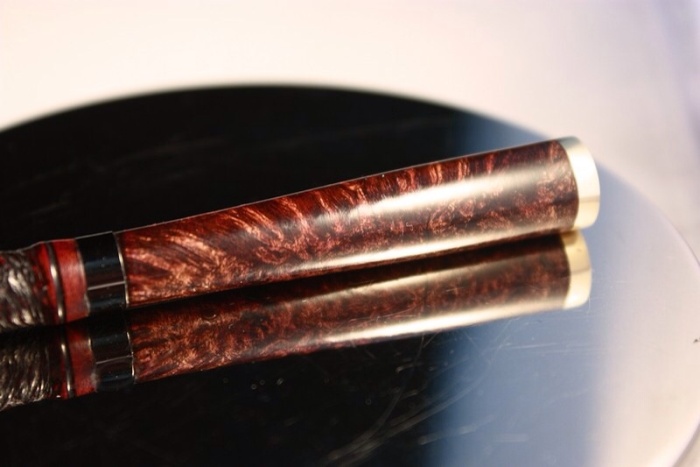
Mine is also constructed from a nice piece of briar. As in Bob’s tamper, there are no visible flaws in the briar. Eric’s craftsmanship is consistently excellent. The tip is a silver metal that rests agaisnt a wide vulcanite band. For the tamper portion he mounted a flattened and polished brass head on the top of the upper barrel. The upper portion is stained with a reddish brown/medium brown stain while the rustication is stained with a darker stain. The combination looks well designed. Bob was very correct in calling Eric’s Pen Tampers functional pieces of pipeman’s art. And like Bob, once I had it in my hands it seemed too nice to use. But I have continued to use it since I received mine.

Pentamp6

Pentamp7

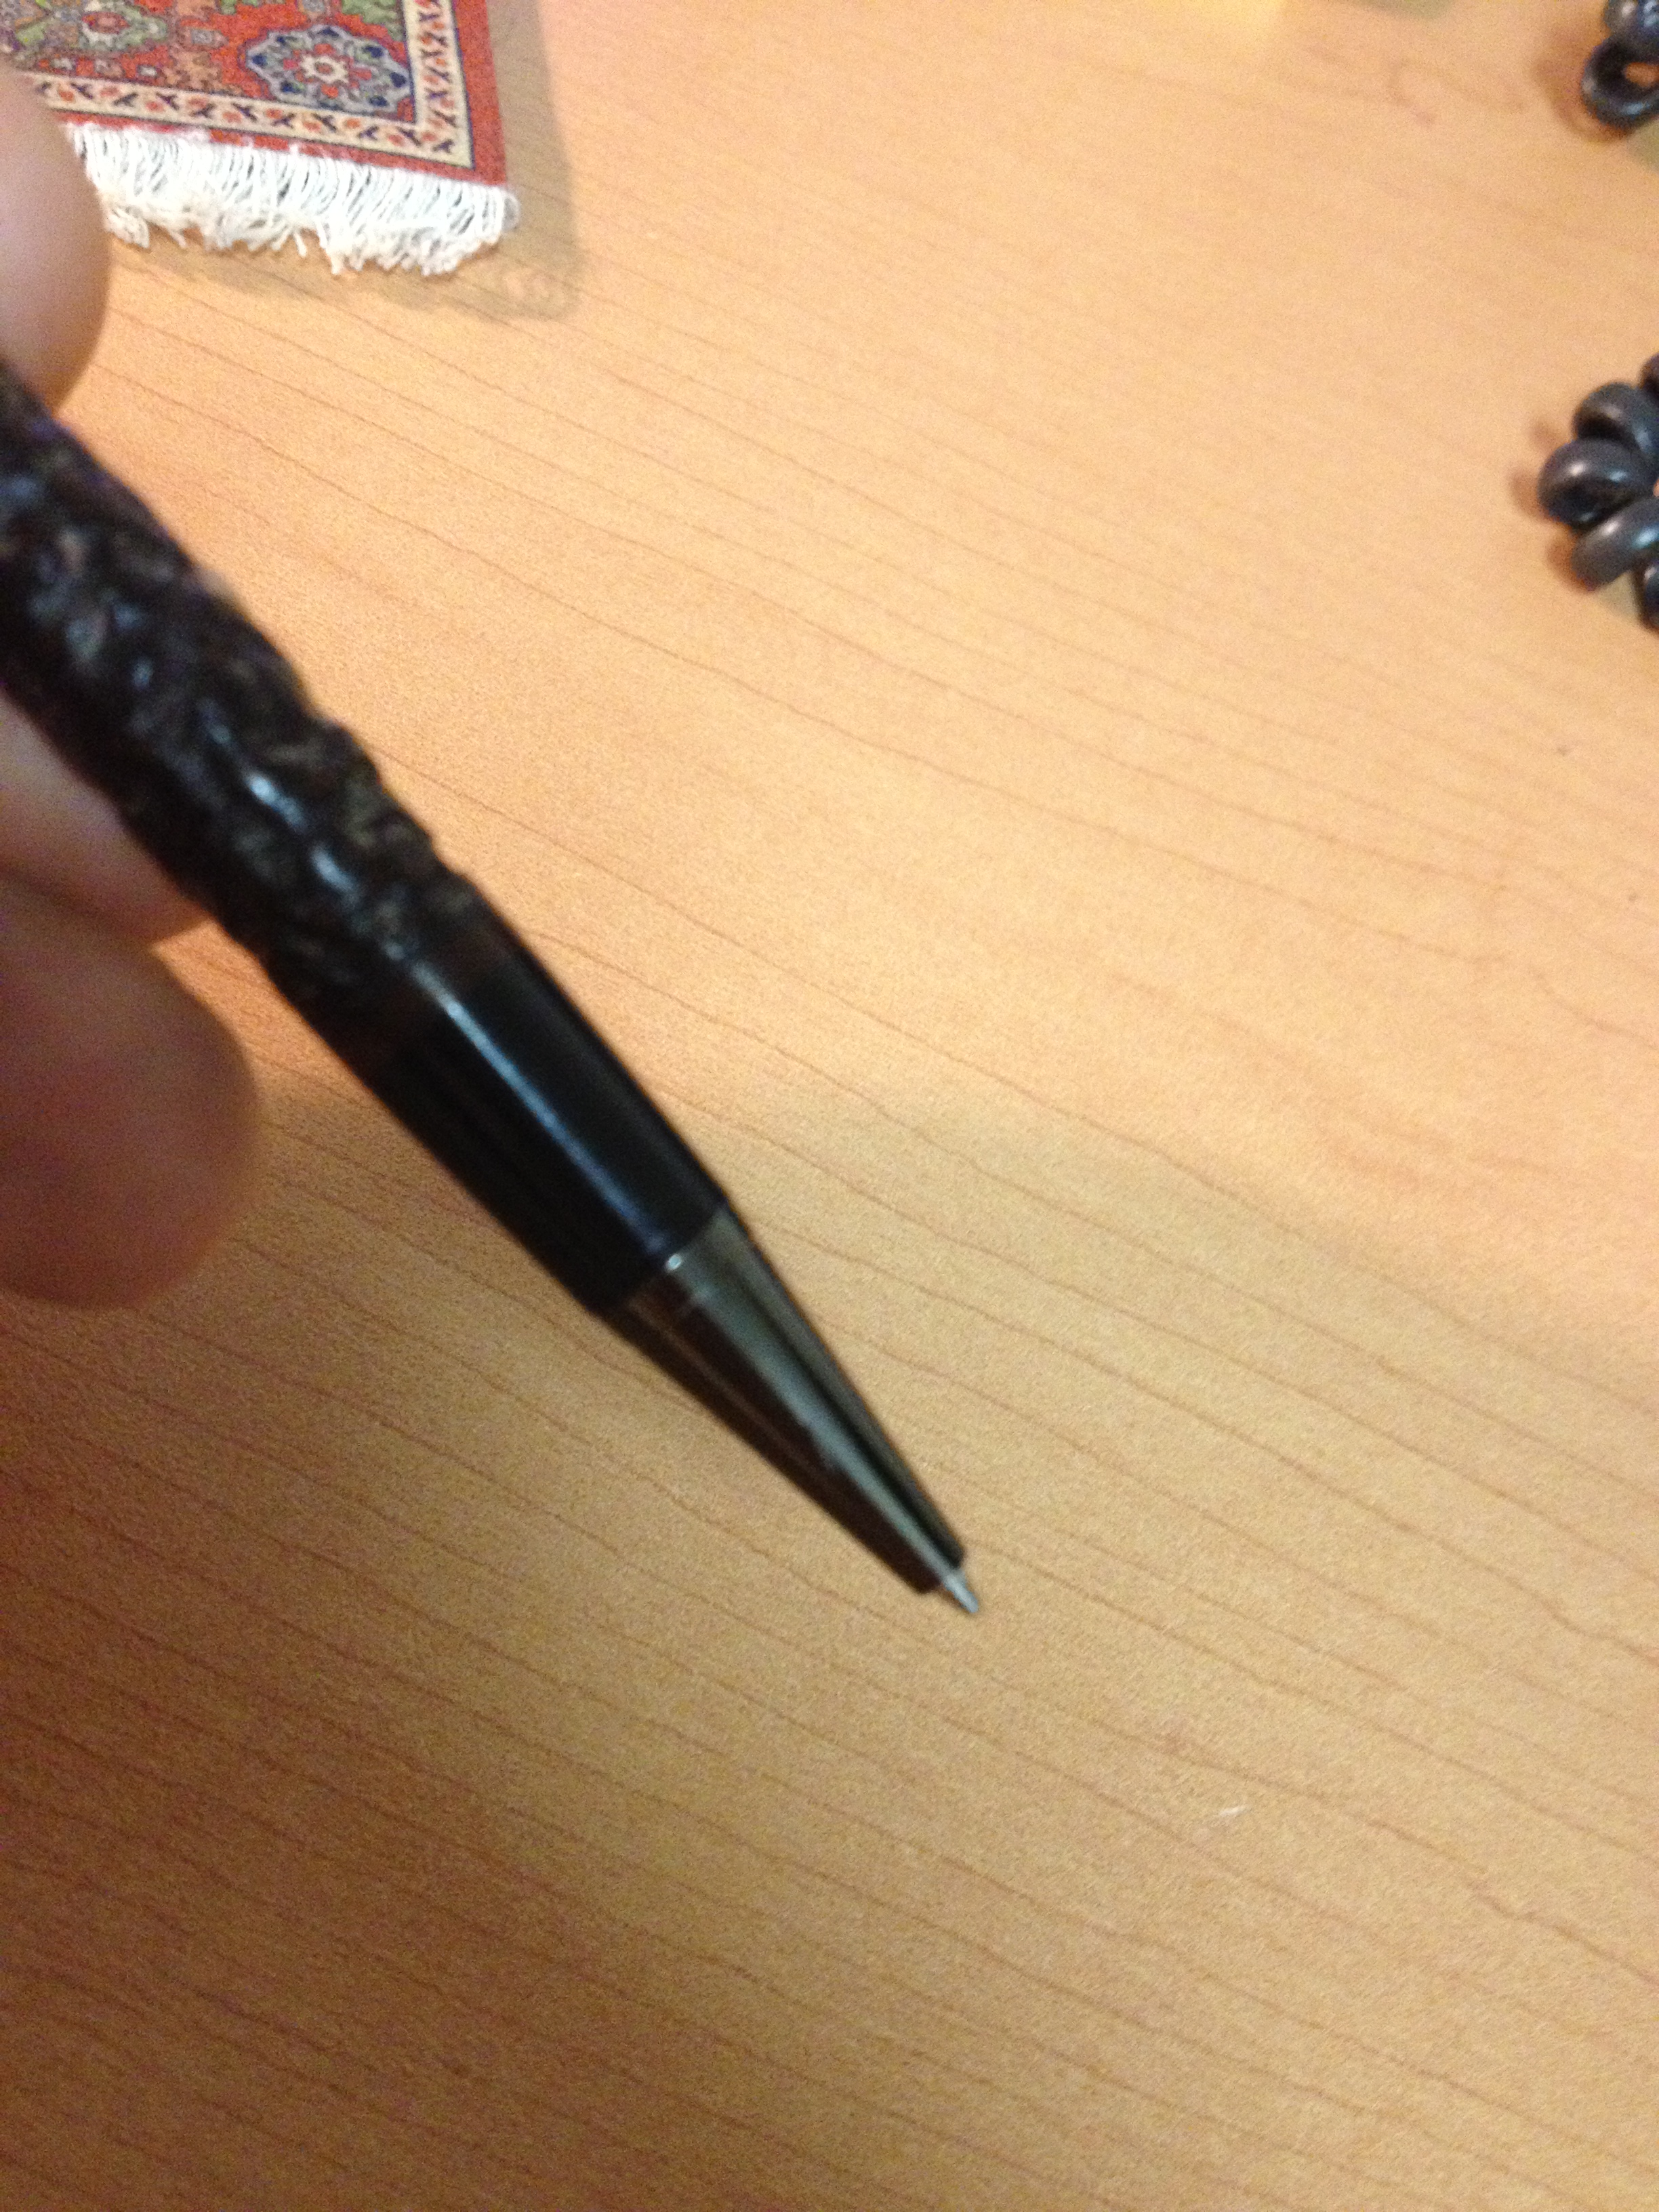
The PenTamp feels great in the hand. In Eric’s design the centre point of the pen is squeezed to make it fit nicely between the fingers when tamping. The rounded flair on the lower barrel makes it fit well between the fingers and thumb when writing. The rustication gives the barrel a grip so that it does not roll in the fingers when writing. It is a stable writing instrument as well as a well-built tamper. It is surprisingly much lighter in weight than it appears; both tampers tip the scale at .635 ounces or 18 grams. They both have a length of 5 1/8th inches or 13.0175 centimeters which is the standard length of most pens. The PenTamp works great as both a tamper and a pen and obviously we both are already using both ways. As a pen it writes with a fine line and flows smoothly. As a tamper it fits most bowls and is weighted enough to lightly tamp a bowl as you smoke it. We cannot recommend Eric’s workmanship highly enough. Contact Eric Archer through PSU to order one of your own.

I received an email from a friend and reader of this blog after posting this and he sent me pictures of a special pentamper Eric made for him as well. It is designed specifically for those with arthritis in their hands and fingers. This is a great piece of work. Dallas says that it is comfortable in his hands and easily gripped. Thanks Dallas for the additions. I had totally forgotten that you had this one.
Pipe Pen Tamper 1

Pipe Pen Tamper 2

Pipe Pen Tamper 3

Pipe Pen Tamper 4

Pipe Pen Tamper 5

Pipe Pen Tamper 6

Pipe Pen Tamper 7

Behold the Lowly Stinger


Blog by Steve Laug

Not too long ago I laid out the various stingers I have removed from the pipes that have passed over my refurbishing work table. I don’t know why I have kept them all, but I have. Most of them came from pipes that are no longer in my collection. I was reminded of this photo that I had taken in the past because of a stinger I removed from a Comoy’s the Guildhall pipe. The shapes and sizes of stingers and the size the mortise in the pipe to accommodate them is as varied as the inventors who came up with the “brilliant” idea in the first place. Fundamentally it is designed to act as a condenser to draw out and trap the moisture in the smoke of the tobacco. The burning tobacco in the bowl creates moisture as it burns. As it is drawn into the mortise it either naturally condenses on the walls of the briar or metal shank by simple cooling or its condensation is enhanced by the introduction of the metal apparatus that is commonly known as a stinger.

The basic concept is that the stinger provides multiple surfaces on which the moisture is condensed and collected. Theoretically, the smoker is to clean the stinger after each smoke and thus remove the debris of the condensation before the next smoke. Doing this would provide a clean surface for each smoke. The built in stingers that are a part of the screw in tenon were made to encourage taking the pipe apart while it was warm and the cleanup would be relatively simple. However, judging from the many pipes I have cleaned over the years this theoretical assumption of cleaning the apparatus between smokes never happened – or at best rarely happened. The juices and moisture from the heated smoke hardened into a dark tarry substance that often welded the stinger and tenon into the mortise until the time I decided to take it apart and clean it at my table. The sheer amount of “gunk” in the shank of pipes with stingers versus those that do not have stingers seems to prove the effectiveness of the stinger. It truly seems to work in condensing the moisture from the smoke. Though that should be no surprise – the introduction of a metal tube or apparatus into the path of hot/cooling smoke drawn through the shank can only attract moisture.

All that being said I question the validity of the supposed effectiveness of the apparatus. It seems to me that the introduction of the metal stinger into the shank, no matter what unique or strange design, in fact exacerbates the problem of moisture rather than reduces it. I have smoked many pipes without a stinger and had very few issues with moisture gurgling in the shank. And those that do can be tweaked to not gurgle at all. I have also smoked pipes with the stinger in place and struggled with gurgles and moisture in the stem and shank. I still recall an old pipeman on skid row where I worked showing me how to put my thumb over the bowl and flick the pipe to get rid of the moisture. It was not a pretty sight but it was very effective. Once I removed the stinger from the tenon I found that the same pipe would smoke dry. That led me to conclude that the stinger, while certainly working to attract moisture, may actually create more moisture. In its design the stinger was also believed to calm down hot smoking tobacco and remove tongue bite. This claim assumes that the tongue bite is caused by the moisture in the smoke. While this may be true in part, I believe it is also the effect of heat on the tongue generated by too energetic a puffing cadence. The hard puffing on burning tobacco in the bowl heats up the briar so why would it not also affect the tongue? I have found that when I slow the cadence I slow the likelihood of tongue bite. So in my opinion, the stinger’s effectiveness in alleviating tongue bite may be exaggerated. Or maybe it is just the constricted draught on the pipe that makes the likelihood of tongue bite reduced, for in my experience it seems that no matter how hard you puff on the pipes with stingers the draught is the same – constricted.

In looking at the many stingers I have collected over the years I have noted both similarities and some very distinctive differences. I only took photos of the ones that are removable and to be honest over the past months I have added at least another dozen variations on the theme. The pieces pictured below can be grouped into four categories – tubes, blades, round balls, twists/spirals. When I removed them from the pipes they all were equally dirty and tarred. All of them had a brown lacquer like substance under the tar that was almost permanently bonded to the aluminum of the apparatus regardless of the shape. In the next section of this article I will give a description of the shape, structure and function of each stinger within the particular group to understand the concept behind their design.

Tubes: The first group I have collectively called Tubes. The basic design is clear from the designation – they are all open tubes. The four pictured below are all different lengths. Some of the tubes extended into the bowl of the pipe. The top left tube and the bottom right tube are a Dunhill Inner Tubes and they have an angled end that fit up against the opening in the bottom of the bowl. They are both different diameters based upon the size of the bowl and the size of the drilling in the shank. The first is from a Group 4 sized pipe and the second from a Group 2 sized pipe. The second tube down on the left side came from a no name pipe and sat in the airway pressed against the opening in the bottom of the bowl. It fit flush against the opening in the bottom of the bowl and also flush against the opening in the tenon. It thus was intended to provide a clean and direct airway into the stem. The interior of the tubes acted to cool the smoke on its way to the mouth. The first tube on the right has a hole on top of the tube where it extended into the bottom of the bowl. It thus provided a 90 degree angle for the smoke to travel from the bowl bottom into the airway. The tube extended into the tenon of the stem about a ½ inch. Once again the concept was to provide a clean airway that would not collect the moisture in the shank of the pipe and provide a cool smoke. The problem with this apparatus is that it was easily plugged by small pieces of tobacco that entered the rather large hole in the tube at the bottom of the bowl.

Blades: The second group I have called Blades because of a prominent bladelike feature included in their design. From the left of the photo, the fourth, fifth, sixth and eleventh stingers all have a variety of blades on the end of the stinger. The first three have a form like a shovel. The end is turned up like a scoop to collect moisture on the topside and the underside of the blade. Behind the blade on these three were three different ridges. The third ridge was slotted for the flow of the air to enter the stem. The fourth blade is extended and the same diameter from the front of the blade to the edge that rests against the tenon. There is a slight twist cut into the blade about 2/3 of the way down the blade that is intended to “spin” the smoke around the blade before it enters the slot at the top back edge of the blade. This “spinning” was intended to remove moisture. The fifth blade is tubular in shape. There is a portion that is scooped out of the tube with an airhole in the end of the scooped out portion. The flat surface of the tube collects moisture and also the blade does. The shape of the blade directs the air across a broad surface and into the airway of the stem.

Round balls: The third group I have called Balls because of the round ball on the end of each of them. From the left side of the photo – the first, second, seventh, tenth and twelfth as well as the first and third in the centre of the photo all are variations on the ball theme. The first, second (half ball), and seventh all remind me of trailer hitches. The ball is quite large in proportion to the stinger. The ball sometimes has holes drilled into it surface (like the Kaywoodie Stinger) and sometimes does not. Behind the ball is a flat ridge that is slightly smaller than the second ridge that rests against the tenon. There is a slot in this ridge that is aligned with a slot in the second ridge that through which the air/smoke is drawn. The interior and exterior surface of the ball collects moisture on the drilled balls and the exterior surface collects it on the undrilled ones. I find that the undrilled balls are significantly larger than the drilled ones, thus providing more surface area for condensation. The eleventh, twelfth, and the first and third in the centre all are all balls resting on top of cones with a slight ridge to no ridge below the cone. The cone is slotted to direct air/smoke into the stem. The cone/ball combination again increases the area of condensation for the smoke.

Twists/Spirals: The fourth group I have called Twists or Spirals to summarize the shape of each of them. From the left side of the photo below – numbers 8 and 9 and the second one in the centre have been grouped together in this category. These stingers are actually very unique. The 8th one is a spiral around a centre rod. The end of the spiral is flattened like a small blade, similar to a spear tip. The smoke follows the twist up to the point it enters the stem and the moisture is almost spun out of the smoke in the process. The ninth one is a more smooth and scooped spiral or twist. The tip is a flat, round disk. The smoke is dissipated around the disk and then travels down the spiral to the slot in the bottom where it joins the tenon. Again the spiral serves to spin the moisture from the smoke. The second stinger in the middle is really not a spiral in the same sense as the other two. It is two cones separated by two tire shaped rings. The moisture is given many surfaces to condense on before it moves through the slot at the end where the stinger sits against the tenon.

Stingers
The diversity of the shapes and styles of stingers that have been created seems to be endless. Each new estate pipe I purchase that has a stinger, has one that is a variation on the ones above. Those pictured are representative of the creative energy that has been invested into making a cooler, drier, cleaner smoke for the pipeman. In my humble opinion, all of them achieve the same end. All of them collect moisture and may very well increase the moisture collected from the smoke. In the long run do they achieve what they were purposed to achieve? I leave that answer up to you. But to me they are appendages that are better removed from the shank and tenon. I have found that their removal holds the key to a drier and cooler smoke.

Whatever Happened to the Orific Button?


While I was sitting at my desk, looking over my pipe cabinet the other evening, it suddenly came to me that I could divide my pipes into two distinct groups – all grouped by the shape of the airway in the end of the button or stem – either round/orific or a slot. I have often wondered about the transition between the two types of airways as they each seem to come from two different time periods. What happened to the rounded one and when did the slotted airway begin to have ascendancy? I am not sure I can answer that question with any definitiveness but I want to look at both types and surmise what may have transpired to bring about the end of the orific button.

The pipes I would place in the first group are all older pipes with stems made of a variety of materials – amber, vulcanite, Bakelite and horn. In this group there are 45-50 pipes with this type of airway. All of them come from the mid to late 1800s and the early 1900s, literally another time and place. For some of them I can identify the time period they were manufactured and for some I have only the faintest idea of the era. The earliest dateable pipe I have is from 1912 – this is knowable from the hallmarks on the silver band on the shank of the pipe. The earliest ones in my collection appear to come from the 1850s and possibly earlier as far as I can tell. They have the filigree decorations, stampings and shapes of that earlier time. The stems, regardless of the time frame within this lot, all have a round/orific opening or airway in the end of the stem. The orific opening is a hole shaped like an O and is sometimes tapered into the airway from the outside. But often it is a straight shot into the airway with no variation in size. The button is generally oval/or round in all of them and the stem coming into the button is also thicker and more oval as well. There is not one thin stem in the lot. As a rule they are thicker and more rounded on the top so they are harder to clench. The two photos below show two different pipe stems from pipes that are in my collection. The first picture shows a horn stem with the orific or “O” shaped opening. The button on this one is quite oval and rounded. The stem itself is also oval and shaped similarly to the shape of the button. The second photo shows the same orific opening on a vulcanite stem. The shape of the button on it is an oval with pointed ends, like an American football. This stem is on a bulldog with a diamond shaped shank and stem. The blade or flat portion of the stem is crowned terminating in the button. The crown on the top and bottom of the stem matches the oval shape of the button both having pointed edges on the right and the left side.

Orific button1

Orific button2
I spent some time examining all of the pipes that I have with this kind of stem to observe similarities and differences. In looking at them I have found some interesting observations. First, it can be generally stated that when I received these pipes as estates that they did not have bite marks or tooth marks in the stem itself though there were marks/dents in the button surfaces on many of them. All had tooth chatter or tooth scratches on the surface of the stem regardless of the material. A second observation I made is that in the straight stems the airway is the same size from front to back or at the most minimally tapered from the tenon to the opening in the button. Holding the stem up to light and looking down the stem the airway is uniform. I would assume that the same would be true for the bent stems that are in my collection. Third, all take a pipe cleaner very easily. Fourth, all of them are thicker than my stems with slots. Fifth, at one level all are less comfortable than the thin stems. I say at one level, in that I find them uncomfortable when I am smoking them on the go or in the car as they are hard to clench. However, if I am sitting in my office or on my porch with one I find that the thickness is no detriment as I tend to hold them in my hand.

The second group of pipes in my collection is “newer” in age as a whole. As I observe this group of pipes I can make the following generalizations. I know that they are generalizations but that is my point in this article, I want to look at broad commonalities of each group. The buttons are thinner on the pipes throughout this group. They are flattened on the top and the bottom edges, which reduces the thickness of the button. The airway on the end of the stem is either a flat slot or a flattened oval that flares inward toward the airway in the stem. This slot becomes a funnel shape from the slot to the airway in many of the pipes. The drilling is also tapered and the airway flattened in the button end of the stem so that the stem can be significantly thinner. This is true in all of the pipes in this group regardless of the material that is used for the stems. In this group of pipes the stems are made out of vulcanite, Lucite, Bakelite and acrylic. All of the tapered stems have a more flattened profile, with more gentle angles to the taper from either the saddle or the taper from the shank to the button. The higher end pipes and handmade pipes all show a customization of the button slot. The machine made pipes generally have a straight line slot. Some of the machine-made pipes have slots that are very thin/ tight and will only take a thin pipe cleaner with effort. Others are wider and accommodate pipe cleaners easily. In my handmade/artisan pipes the slots are all of various shapes and adaptations. The one overarching theme in all of them is the flare on the inside of the slot that tapers back to the internal airway. The next three photos show a customized slot on three different pipes in my collection. Both pipes have vulcanite stems and both have oval shaped buttons and slots.

Slot 1

Slot 2

Slot 3

What have I learned from this comparative observation of both kinds of buttons/stem? What generalizations can I take away as I try to understand why the orific button was replaced with the slotted button? I can say unequivocally from my observations, that it seems the quest for ever thinner stems and the advent of “new” ideas regarding internal engineering of the airway from the bowl to the tip of the stem have brought about the end of the old orific button. I don’t know if anyone ever questioned its disappearance or mourned its demise. It almost seems to me that it just disappeared slowly and like the dinosaur left behind a few “fossil” remains to remind us of its presence.